- General – Define core job settings such as prefixes, recurring jobs, job card email templates, and timelog tracking.
- Access/Permissions – Set the level of access field technicians and team leaders have for job visibility, editing, and rescheduling.
- Assignment – Control how jobs are assigned, unassigned, and managed across teams.
- Route – Configure routing options, including rescheduling and route optimization.
- Chat – Manage job channel–related configurations, including automatically adding job creators and key users (such as managers or dispatchers) to job chat channels for streamlined communication and visibility.
Navigation: Settings -> Modules -> Jobs -> General Job Settings
Job general settings
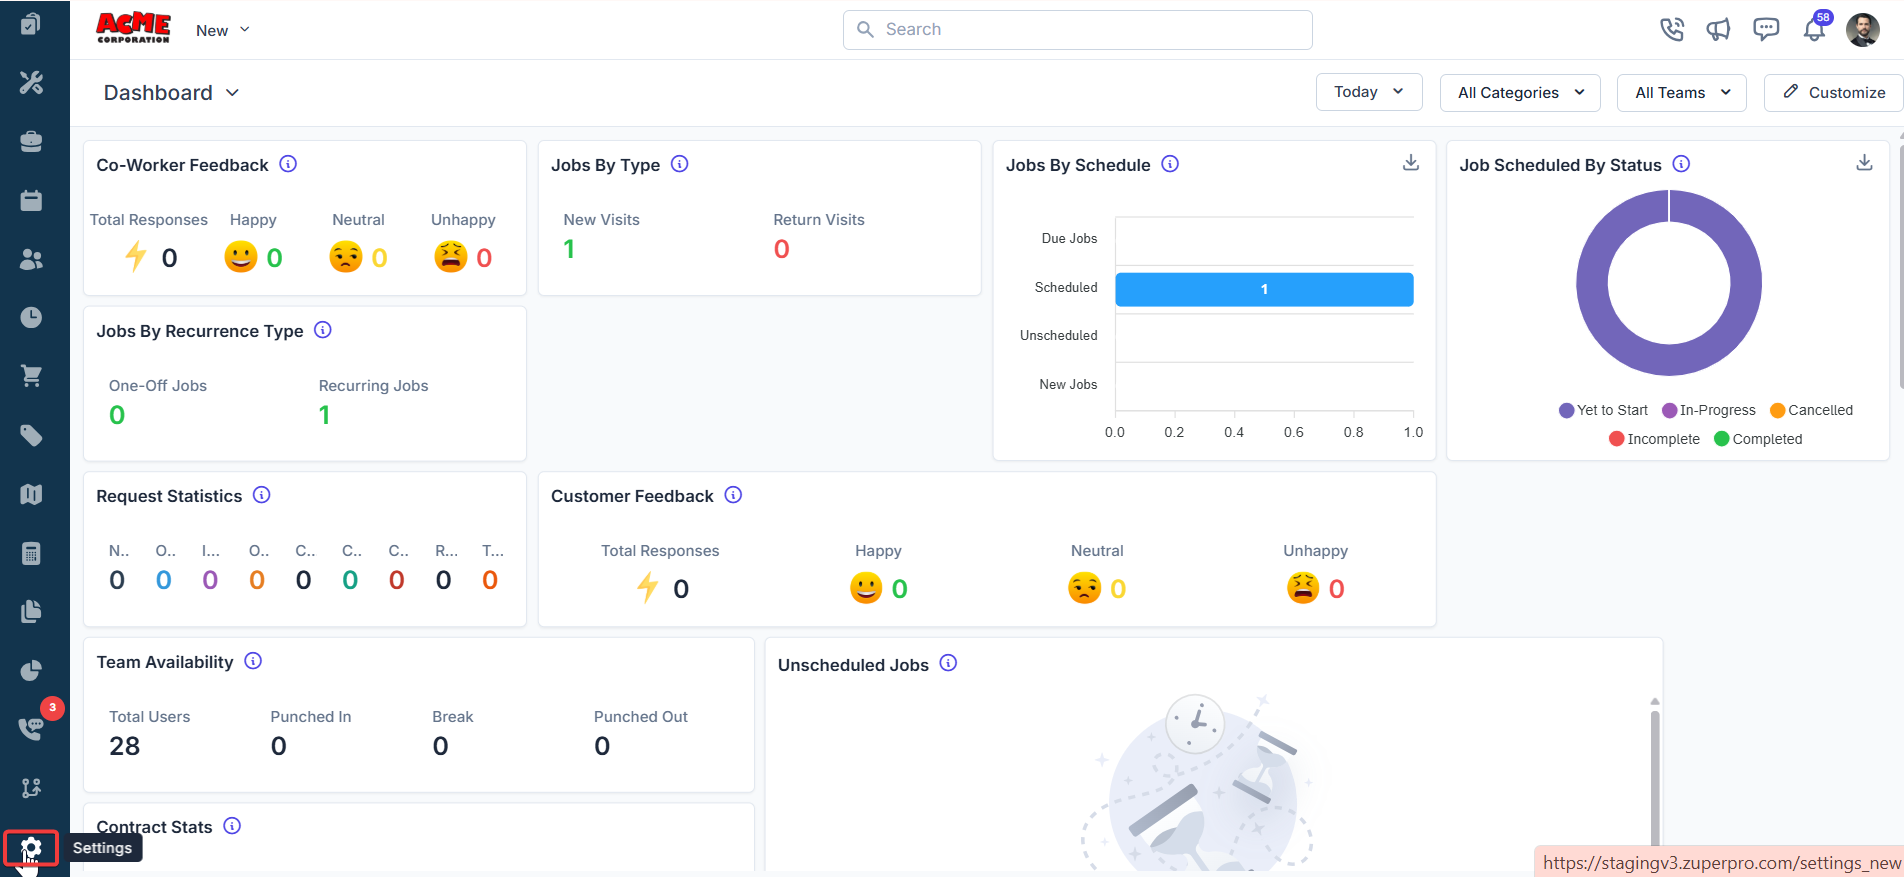
To configure general settings related to jobs:- Select the “Settings” module from the left navigation menu.
- Click “Modules” and choose “Jobs” to open the Job Settings page.
- Select “General Job Settings.” By default, you will land on the General tab.
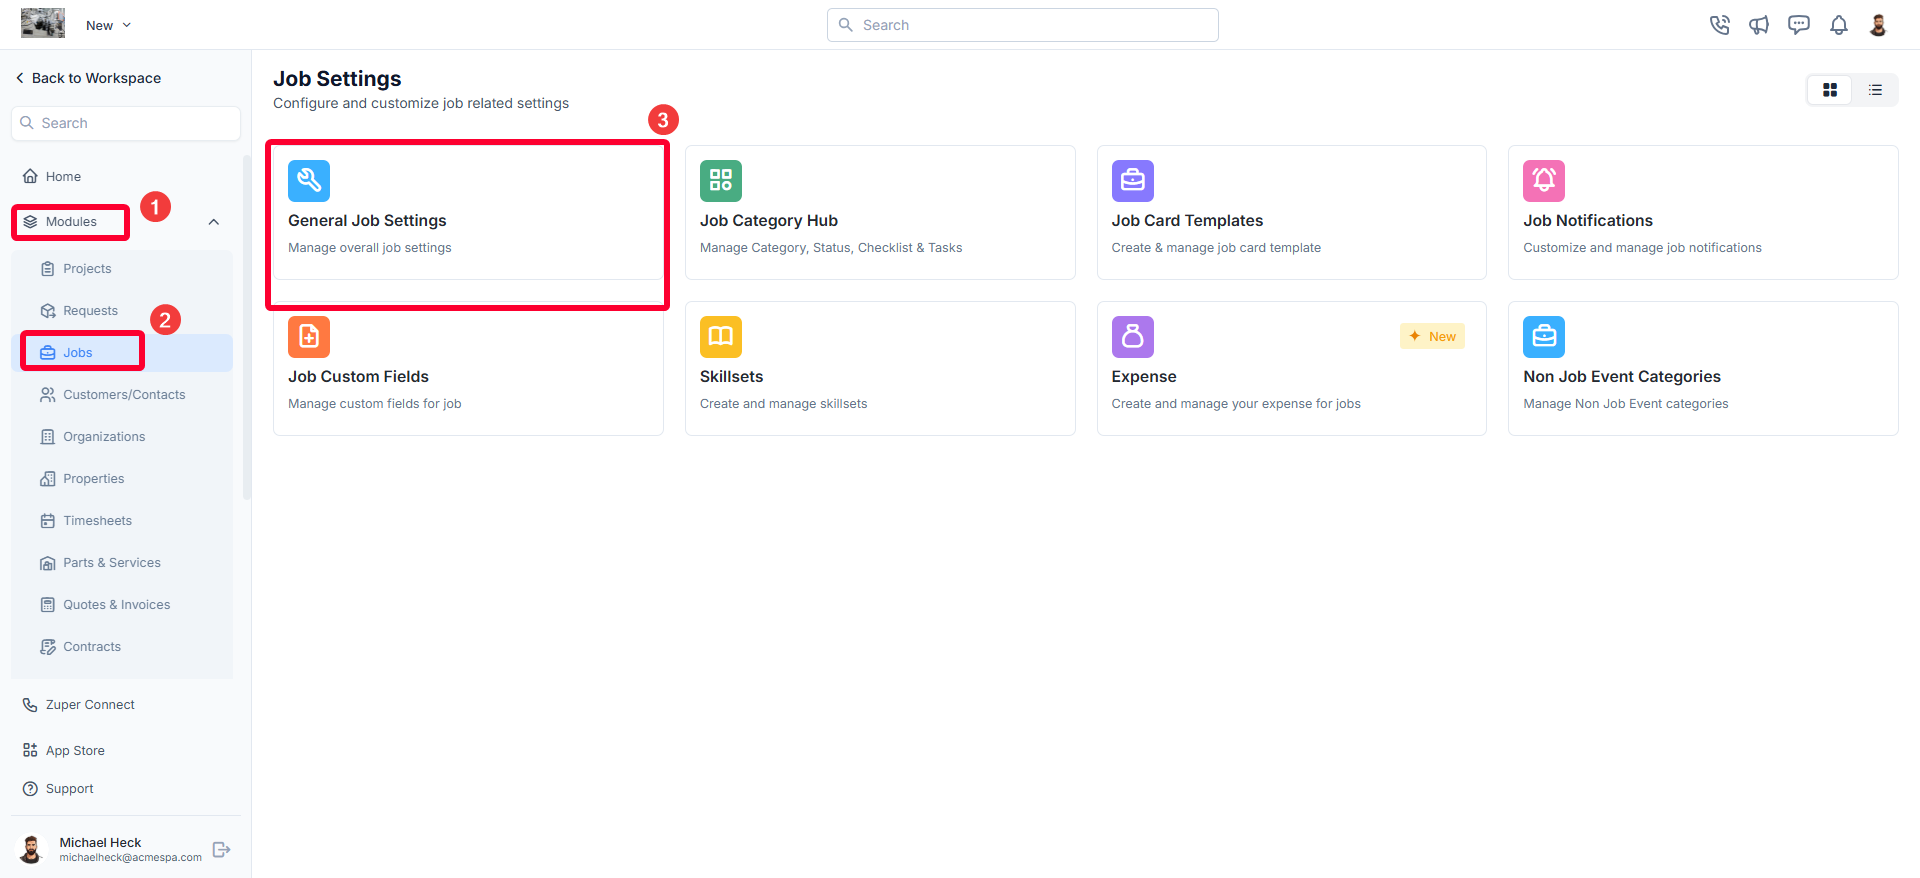
- Configure job-related preferences to streamline workflows, improve tracking, and enhance customer communication.
General settings options
- Job Prefix Define a custom identifier prefixed to all work order numbers. A job prefix helps categorize jobs systematically, making them easily identifiable.
- Enable Recurring Jobs Enabling this option allows jobs to be scheduled on a recurring basis, useful for routine maintenance tasks or service agreements requiring periodic visits.
- Enable Secondary Contacts When enabled, additional contacts can be added for a job. Secondary contacts receive job-related notifications, ensuring all relevant stakeholders stay informed.
- Allow managing tasks in completed jobs When enabled, you can create, edit, assign, and manage tasks even after a job status is marked as Completed. When disabled, the system requires all tasks to be completed before the job can be marked as Completed.
- Enable Job Gallery When enabled, users can upload and view images related to a job. The job gallery serves as a centralized visual reference, helping teams document job progress, capture on-site issues, and maintain visual records for quality assurance.
- Enable Job Total: Enabling this option displays the ‘Job Value’ field on each job. Once enabled, an option to choose the “Job’s Total Calculation Method” is available, directly below it. This controls the method Zuper uses to calculate the Job Value.
Job’s Total Calculation Methods:
• Sum of Accepted Quote Values Associated with the Job: Uses the total value of accepted quotes linked to the job as its value.
• Sum of Selling Price of Job Line Items: Uses the sum of selling price of parts, products, and services that are part of the job line-items.
Note: The above calculation method is also used to calculate the total job revenue while calculating the job profitability.

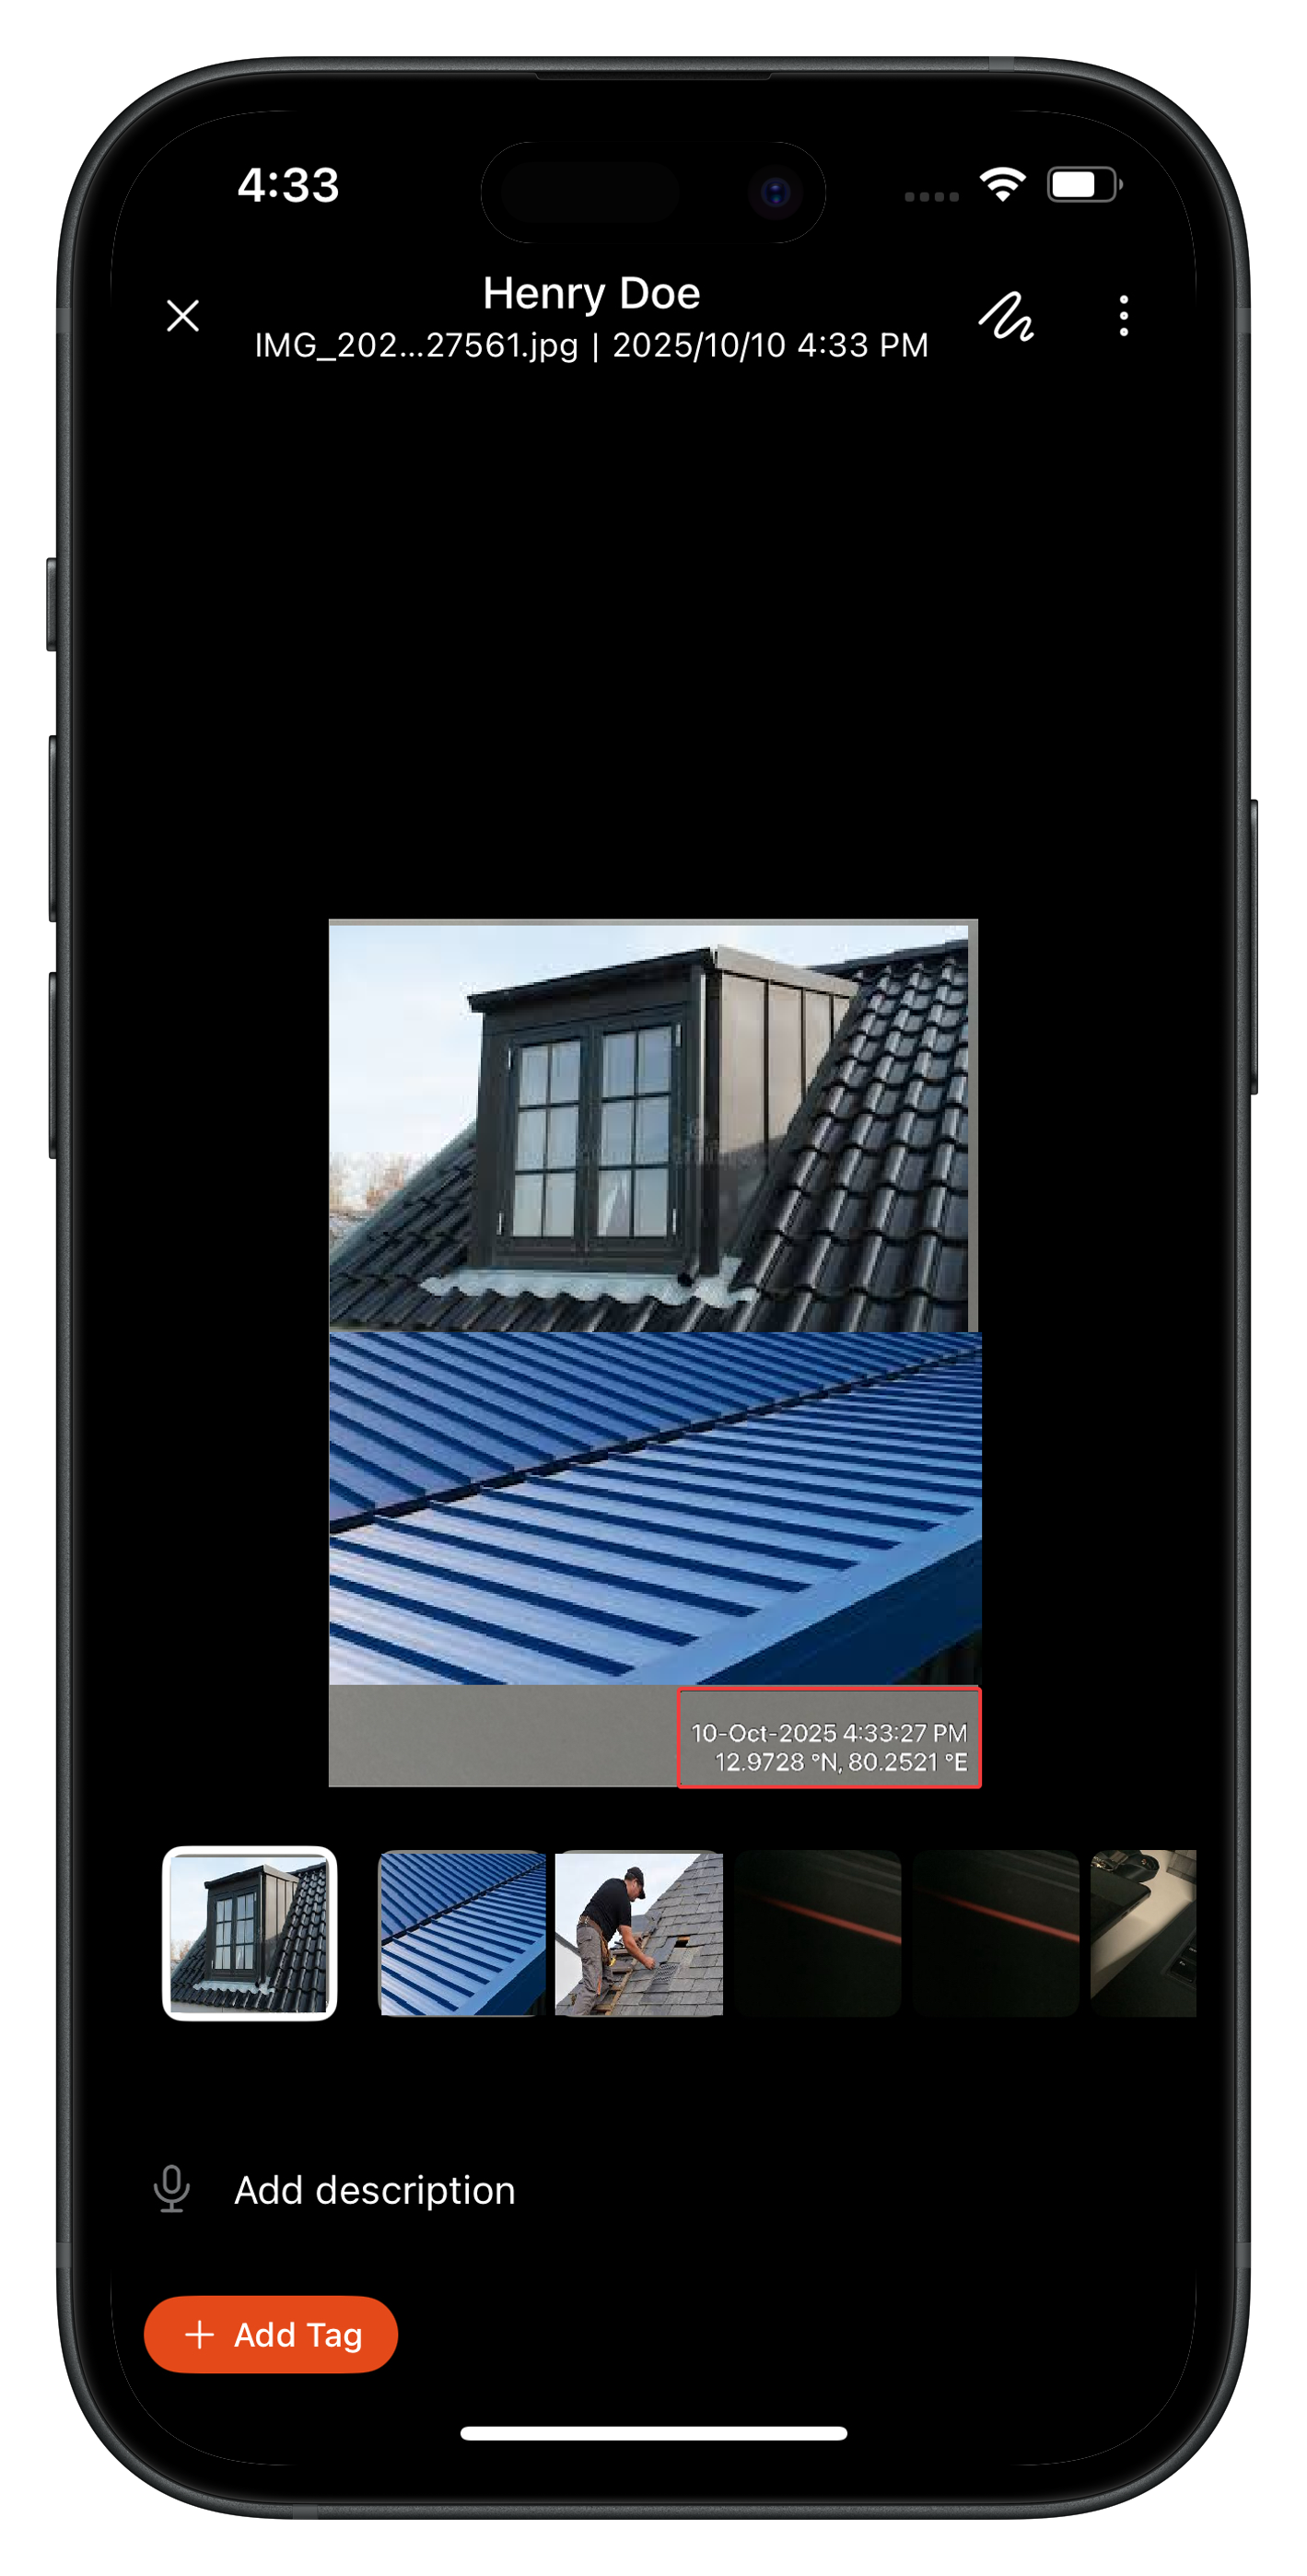
- Auto-stamp images with geo-coordinates Enabling this will automatically add GPS coordinates to images uploaded in the job gallery. This helps verify the location of work performed and improves accountability and record-keeping.
- Auto stamp images with date & time When enabled, automatically add date and time stamps to images uploaded in the job gallery. This ensures accurate documentation of job progress and timelines.
- Enable Service Territories Activating this option allows you to assign jobs based on predefined geographic territories. This helps optimize resource allocation, reduce travel time, and improve service delivery by routing jobs to technicians in the relevant area.
- Enable Switching Timezones When enabled, users can view and manage job details across different time zones. This is particularly useful for businesses operating in multiple regions, ensuring accurate scheduling and coordination regardless of location.
- Enable Job Visibility for Technicians Enabling this option ensures that technicians only see jobs assigned to them or within their access permissions, maintaining data privacy and clarity.
- Enable Kanban View Enable the Kanban view for jobs, allowing teams to visualize work progress across different stages. This improves task tracking, prioritization, and workflow management.
- Default Job Card Email Template Define a standard email template for job cards sent to customers. A predefined template ensures consistent communication and includes necessary job details.
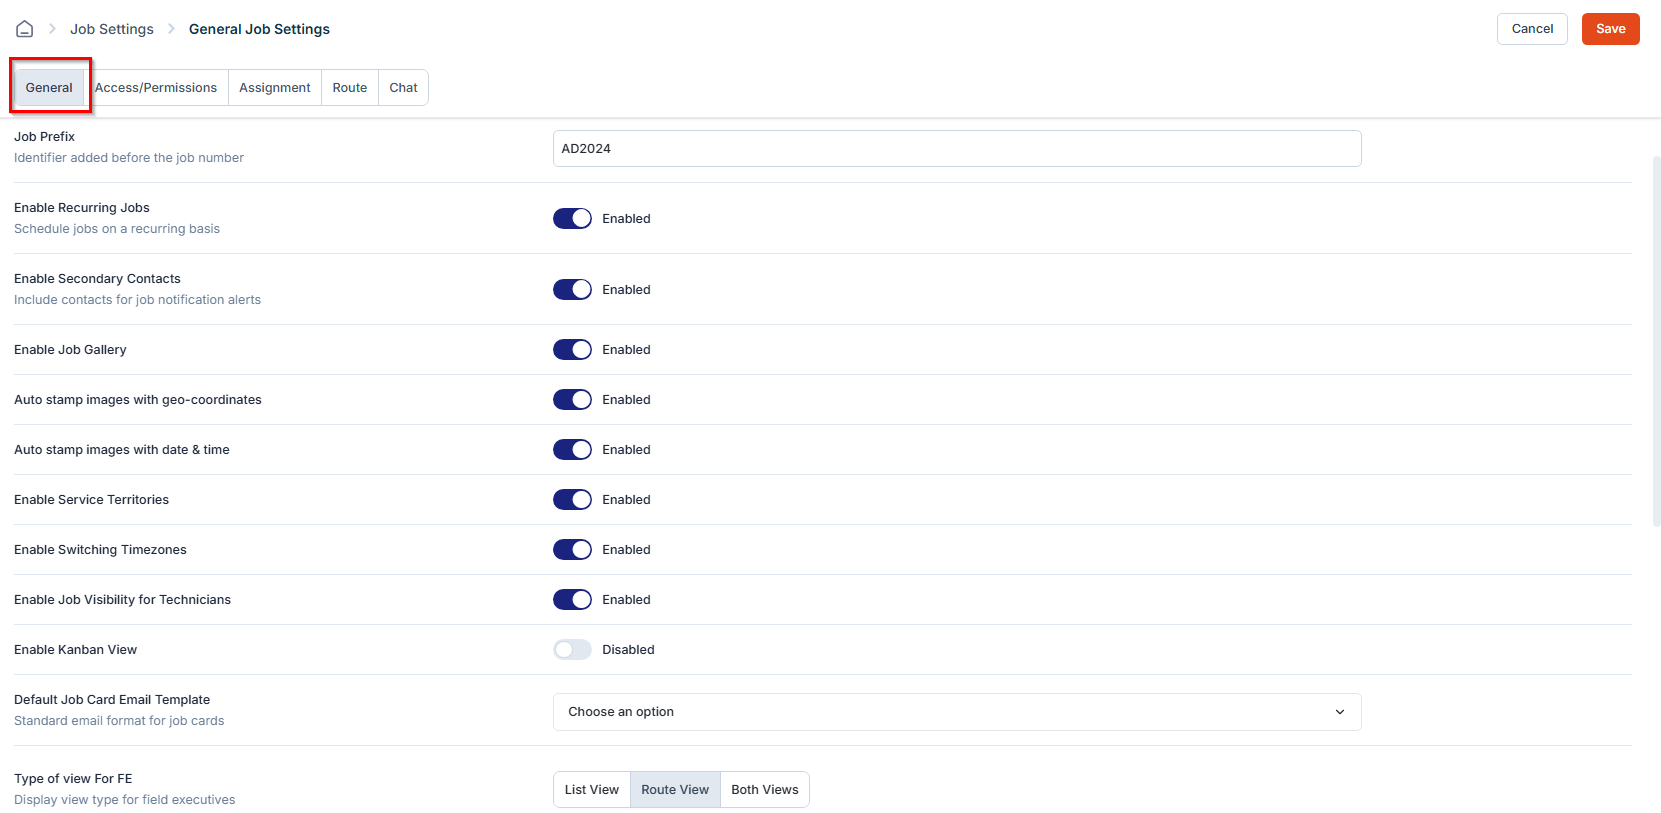
- Type of View for FE
- List View – Displays jobs in a simple list format.
- Route View – Displays jobs based on location, optimizing route planning.
- Both Views – Allows users to toggle between list and route views.
- Allow sending public link to Customer When enabled, customers receive a public link to track job details and updates, enhancing transparency and reducing manual status inquiries.
- Status for public link to be sent Select the job status at which the public link will be sent to the customer. This ensures customers are notified at the appropriate stage of job completion.
- Enable Timelog for Job When enabled, it activates timelog tracking for jobs.
- Choose Status for Automated Clock-In
- Choose Status for Automated Clock-Out
- Default Job PDF Filename
Unifying Timestamp and GPS Co-ordinates
Unifying Timestamp and GPS Co-ordinates
Zuper now allows admins to control how timestamps and geo-coordinates are applied to images across the entire platform. This unified configuration provides a single point of control for metadata stamping, ensuring consistency in image evidence across various modules.This feature simplifies management by enforcing a company-wide rule for when and how images display location and time data, helping teams maintain auditability and compliance standards.Who can use this feature: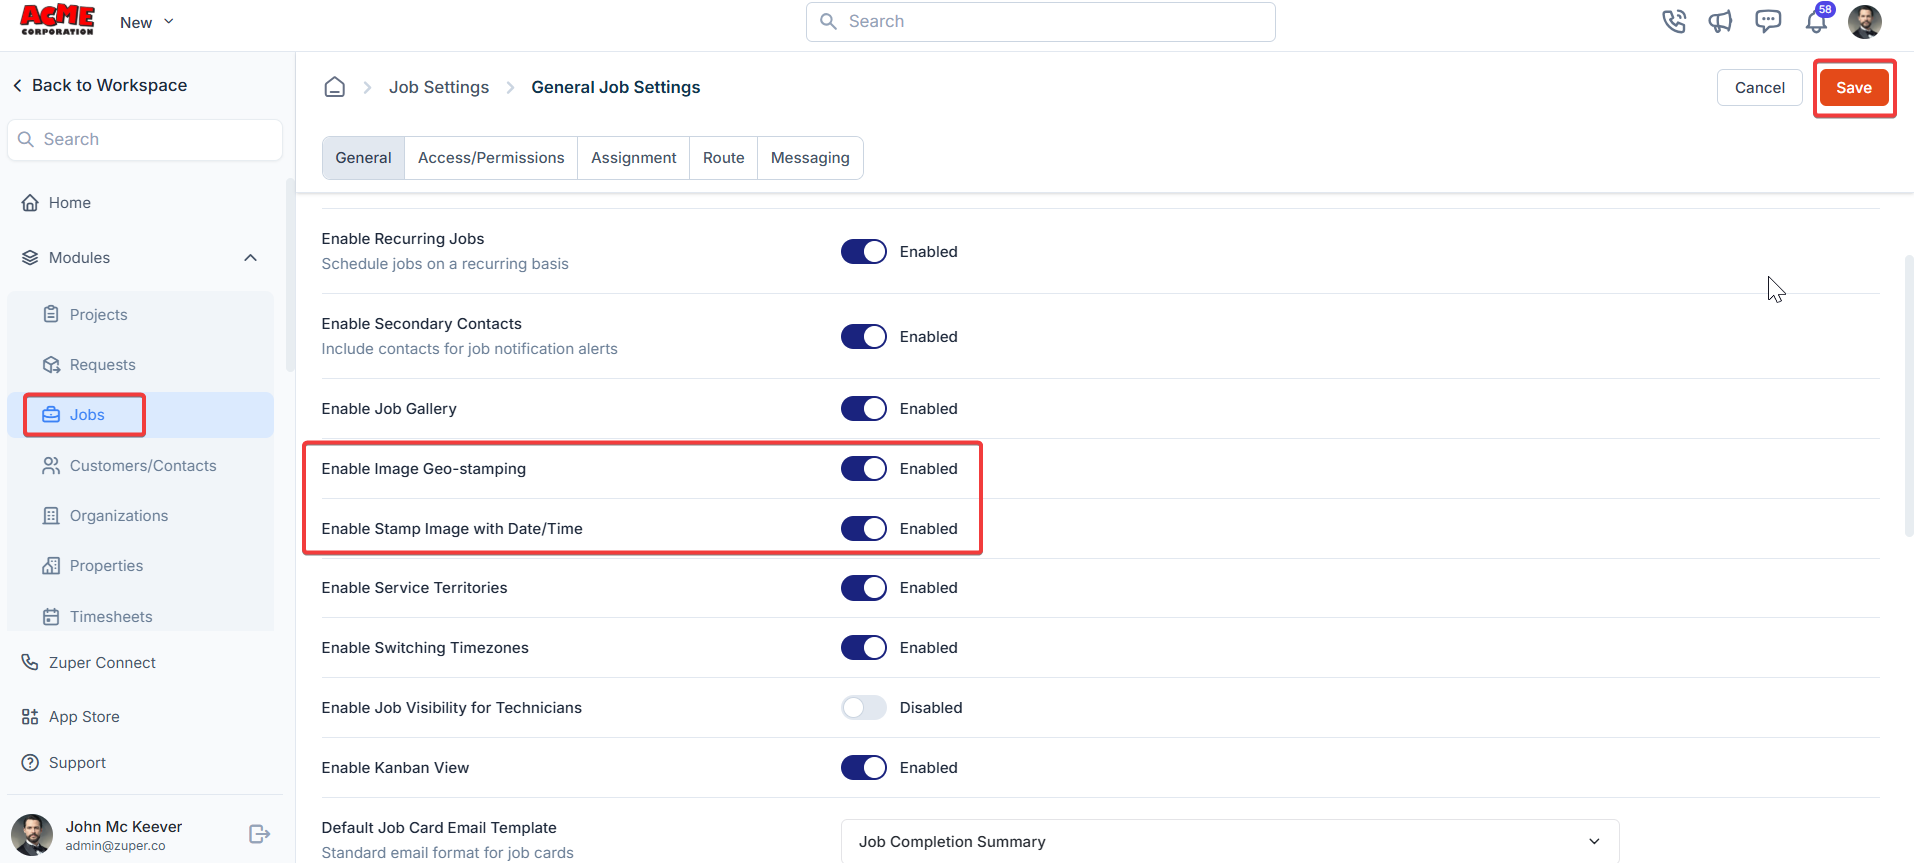
Company-level configuration always overrides checklist-level settings. Edge Cases and Behavior:
Frequently Asked Questions (FAQs)1. What does the “Enable Image Geo-Stamping” option do?
When this option is enabled, Zuper automatically captures the GPS coordinates of where an image was taken and stores them as part of the image metadata.2. What does the “Enable Stamp Image with Date/Time” option do?
This setting adds a visible overlay showing the date and time on every image captured using the Zuper Camera. It ensures that image evidence includes a precise timestamp.3. Which Zuper modules support image stamping?
Once enabled, image stamping applies to:
- Available for Admin users with access to Company Settings.
- The user’s device must have granted location permissions for GPS stamping to work.
- The Zuper Camera component must be used to capture images (Images uploaded from the device gallery are excluded from stamping).
Settings Configuration
- Go to Settings > Jobs > General > Enable Image Geo Stamping and Enable Stamp Image with Date and Time.
- Toggle the following options:
- Enable Image Geo-Stamping: Adds GPS coordinates to all captured images.
- Enable Stamp Image with Date/Time: Displays the date and time directly on the image as a visual overlay.
- Click the Save button to save the settings.
- Once enabled, image stamping applies to:
- Checklists
- Notes Attachments + Images taken in walkthrough notes
- Attachments (Job and Project)
- Inspection Forms (Job)
- Gallery Upload (camera)
Mobile App
Once enabled, these settings will automatically apply to all the image applicable areas.When you add a new image as an attachment, you can view the timestamp and geo-coordinates under the gallery.- When Company Configuration is ON:
- GPS and Date/Time are always stamped, regardless of checklist-level settings.
- Checklist-level toggles appear greyed out (disabled).
- Existing checklists automatically apply stamping.
- New checklist questions default to enabled stamping in the company settings applied.
- When Company Configuration is OFF:
- Individual checklist toggles remain available and can independently control watermarking only in the checklists.
Company-level configuration always overrides checklist-level settings. Edge Cases and Behavior:
- Retroactive Stamping: Not supported — only applies to new images captured after enabling.
- Location Permission Denied: The user will be prompted to enable location permissions before capturing an image.
- Keep both settings enabled for complete audit visibility on field data.
- Inform field users when stamping is enforced to avoid confusion about overlays.
- Encourage enabling location services on mobile devices before the job starts.
| Issue | Possible Cause | Solution |
|---|---|---|
| Image not showing GPS data | Location permission denied | Enable GPS/location access on the device and retake the photo. |
| Checklist toggle is greyed out | Company-level setting is ON | This is expected behavior; the company configuration takes precedence. |
| Timestamp missing | “Stamp Image with Date/Time” is disabled at the company level | Re-enable this toggle under Company Settings. |
When this option is enabled, Zuper automatically captures the GPS coordinates of where an image was taken and stores them as part of the image metadata.2. What does the “Enable Stamp Image with Date/Time” option do?
This setting adds a visible overlay showing the date and time on every image captured using the Zuper Camera. It ensures that image evidence includes a precise timestamp.3. Which Zuper modules support image stamping?
Once enabled, image stamping applies to:
- Checklists
- Notes Attachments + Images taken in walkthrough notes
- Attachments (Job and Project)
- Inspection Forms (Job)
- Gallery Upload (camera)
- Default From Email
Note: This setting works only with SMTP-configured emails. If you haven’t configured any outbound email addresses yet, the dropdown will show no options. Set up your SMTP addresses first, then return here to make your selection.
Configure Access/Permission settings
To configure access and permission settings:- On the General Job Settings page, go to the Access/Permissions tab.
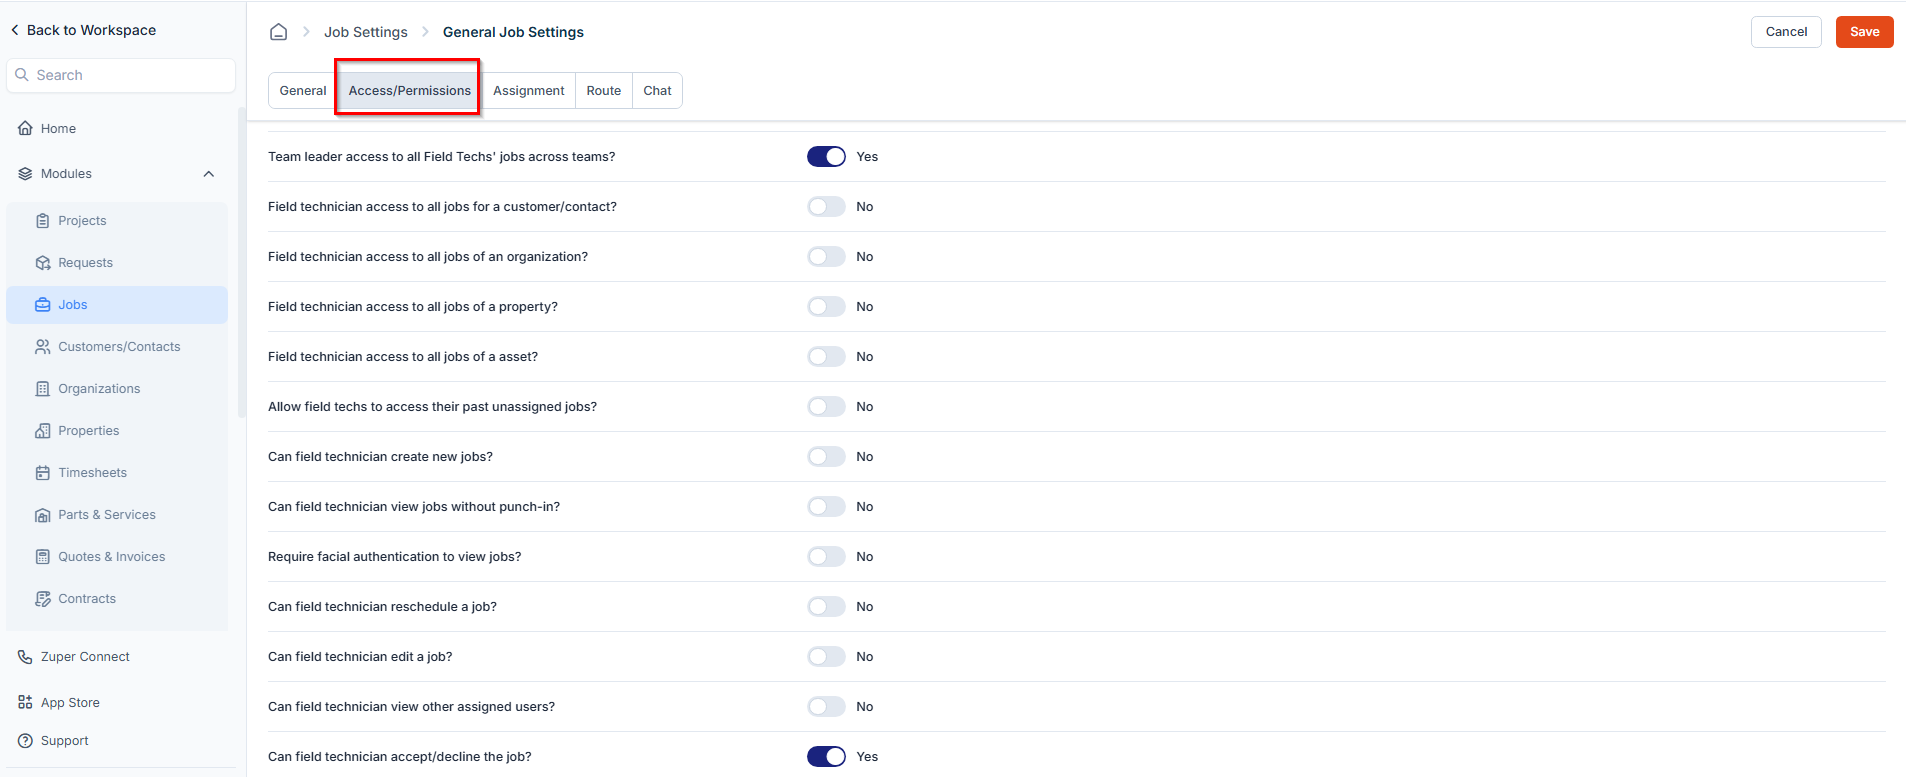
- Control the level of access field technicians and team leaders have over jobs.
Access/Permission options
- Team Leader Access to All Field Techs’ Jobs Across Teams Yes: A team leader can view and manage jobs assigned to all field technicians, including those outside their team. No: A team leader can only view jobs assigned within their own team.
- Field Technician Access to All Jobs for a Customer Yes: A field technician can view all jobs associated with a specific customer. No: The technician can only view their assigned jobs.
- Field Technician Access to All Jobs of an Organization Yes: A field technician can view all jobs linked to an organization. No: The technician is restricted to only their assigned jobs.
- Field Technician Access to All Jobs of a Property Yes: A field technician can access all jobs related to a specific property. No: Access is limited to assigned jobs only.
- Field Technician Access to All Jobs of an Asset Yes: A field technician can view all jobs performed on a specific asset. No: The technician can only view assigned jobs.
- Allow field techs to access their past unassigned jobs? Yes: A field technician can view and access their previously unassigned jobs, even if they are no longer assigned to them. No: Once a job is unassigned from the technician, they will no longer have access to it.
- Can field technician create new jobs? Yes: A field technician can create new jobs directly from the mobile app or web platform. No: Only authorized users, such as team leaders or managers, can create jobs.
- Can field technician view jobs without punch-in? Yes: A field technician can access job details even if they haven’t punched in for their shift. No: The technician must be punched in to view job details.
- Require facial authentication to view jobs? Yes: The field technician must complete facial authentication before accessing job details. No: The technician can view jobs without additional authentication.
- Can field technician reschedule a job? Yes: The technician can modify job schedules based on availability or customer requests. No: Only authorized users, such as dispatchers or team leaders, can reschedule jobs.
- Can field technician edit a job? Yes: The technician can update job details such as notes, status, or additional information. No: Job details can only be modified by a manager or team leader.
- Can field technician view other assigned users? Yes: The technician can see other team members assigned to the same job for better collaboration. No: The technician can only view their own assignments.
- Can field technician accept/decline the job? Yes: The technician has the option to accept or decline assigned jobs based on availability. No: Jobs are automatically assigned, and the technician must follow the schedule.
- Can Team Leader access jobs based on Service Territory ownership? Yes: The team leader can view and manage jobs that fall within the service territories they own or are assigned to, ensuring focused supervision and efficient territory-based management. No: The team leader can access all jobs regardless of service territory ownership, allowing broader visibility across regions.
Configure Assignment settings
To configure assignment-related settings:- On the General Job Settings page, navigate to the Assignment tab.
- Control how field technicians are assigned, unassigned, and notified when handling job allocations.

Assignment options
- Unassign Other Field Techs When One Accepts the Job? Yes: The system automatically unassigns other technicians once one accepts the job. No: All assigned technicians remain on the job.
- Unassign Field Technician Upon Rejection? Yes: The users will automatically be unassigned upon rejection. No: The job remains assigned until manually reassigned.
- Alert Job/Time-Off Conflict Upon Assignment? Yes: The system alerts managers if a job is assigned to a technician with a time-off request. No: Job assignments proceed without conflict alerts.
- Automatically add task assignees to the job (This setting is enabled by default.) Yes: Assigning a user to a task automatically adds them as an assignee on the job as well. No: The user is assigned to the task only and is not added to the job.
- Retain team when users are unassigned from the job? Yes: When users are unassigned from a job, the assigned team remains on the job without changes. The job continues with the existing team structure. No: If users are unassigned, the entire team is removed from the job, requiring reassignment if needed.
- Notify users upon assignment Yes: Automatically sends notifications to users whenever they are assigned to a job, ensuring timely awareness of new assignments. No: Users will not receive notifications upon assignment and must manually check for new jobs.
Configure Route settings
To configure route-related settings:- On the General Job Settings page, navigate to the Route tab.
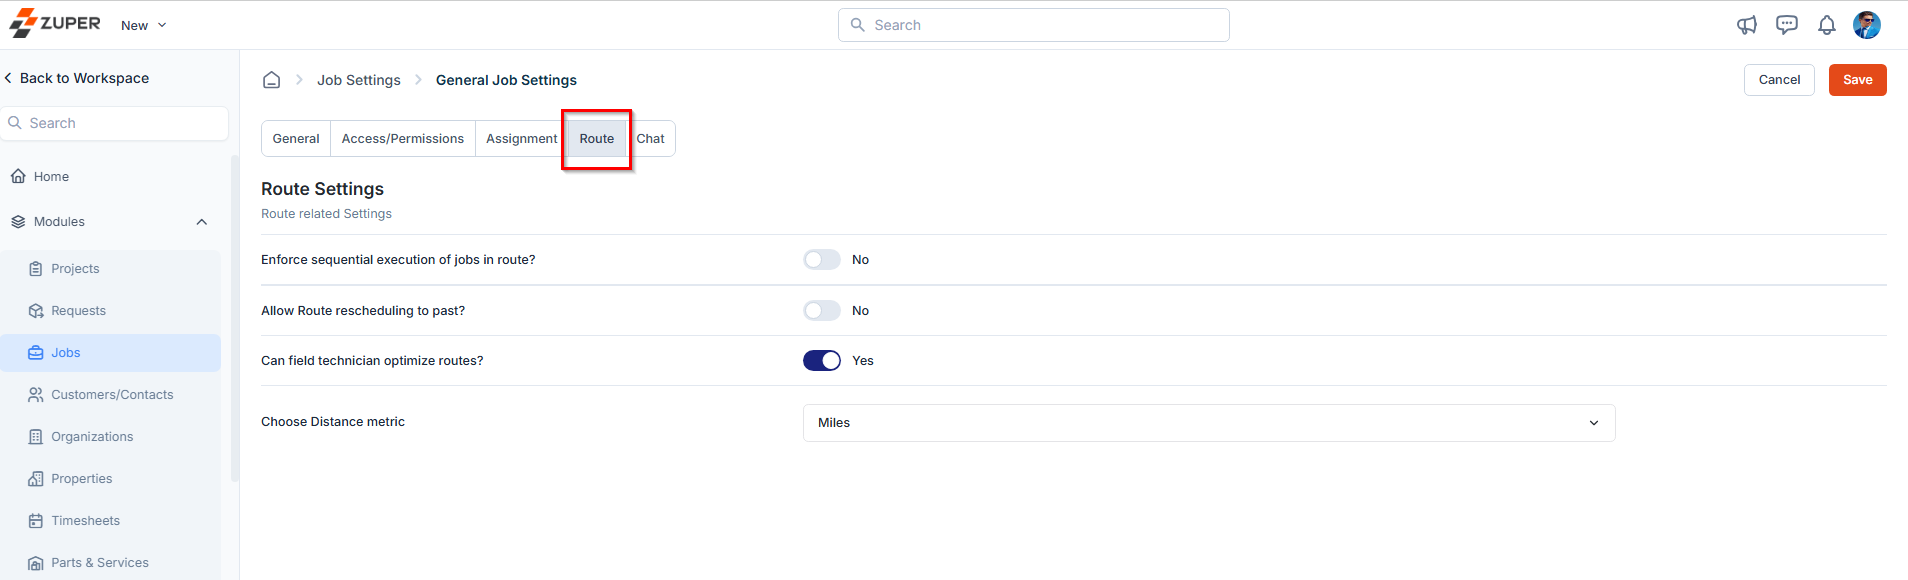
- Configure route optimization and rescheduling permissions for field technicians.
Route Settings options
- Enforce sequential execution of jobs in route?
- Allow Route Rescheduling to Past?
- Can Field Technician Optimize Routes?
- Choose Distance metric: Select the preferred unit of measurement for distance tracking—Miles or Kilometers—based on regional or organizational preferences.
Configure Chat settings
To configure chat-related settings:- On the General Job Settings page, navigate to the Chat tab.
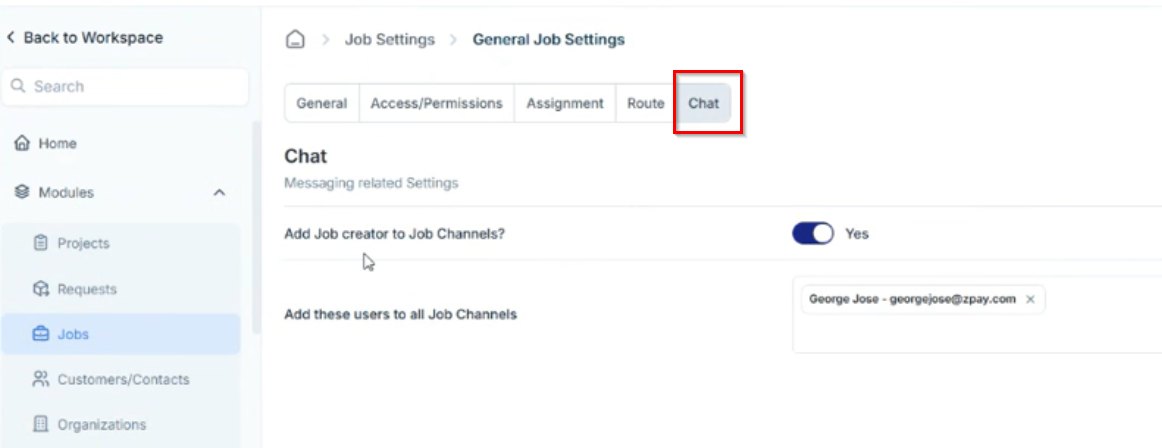
- Define how job notifications are sent to relevant users.
Chat options
- Add Job Creator to Job Channel – Toggle Yes to automatically include the job creator in the associated job chat channel.
- Add These Users to All Job Channels – Enter the names of users who should be added by default to every job channel (for example, managers or dispatchers).