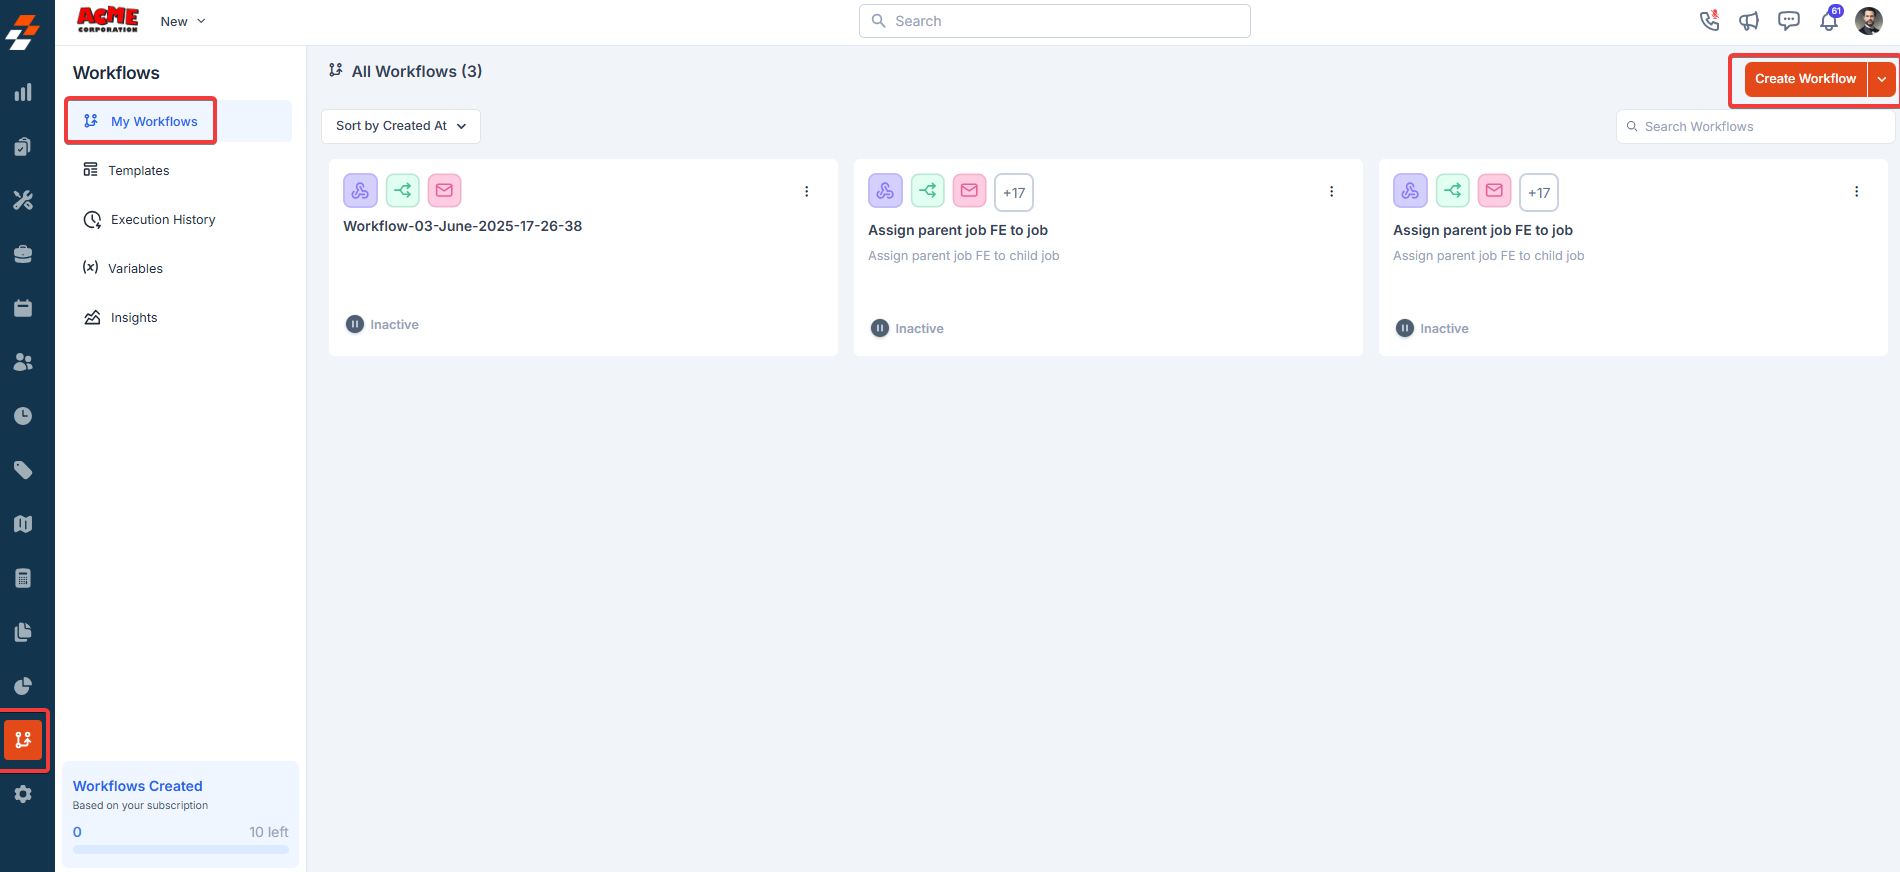
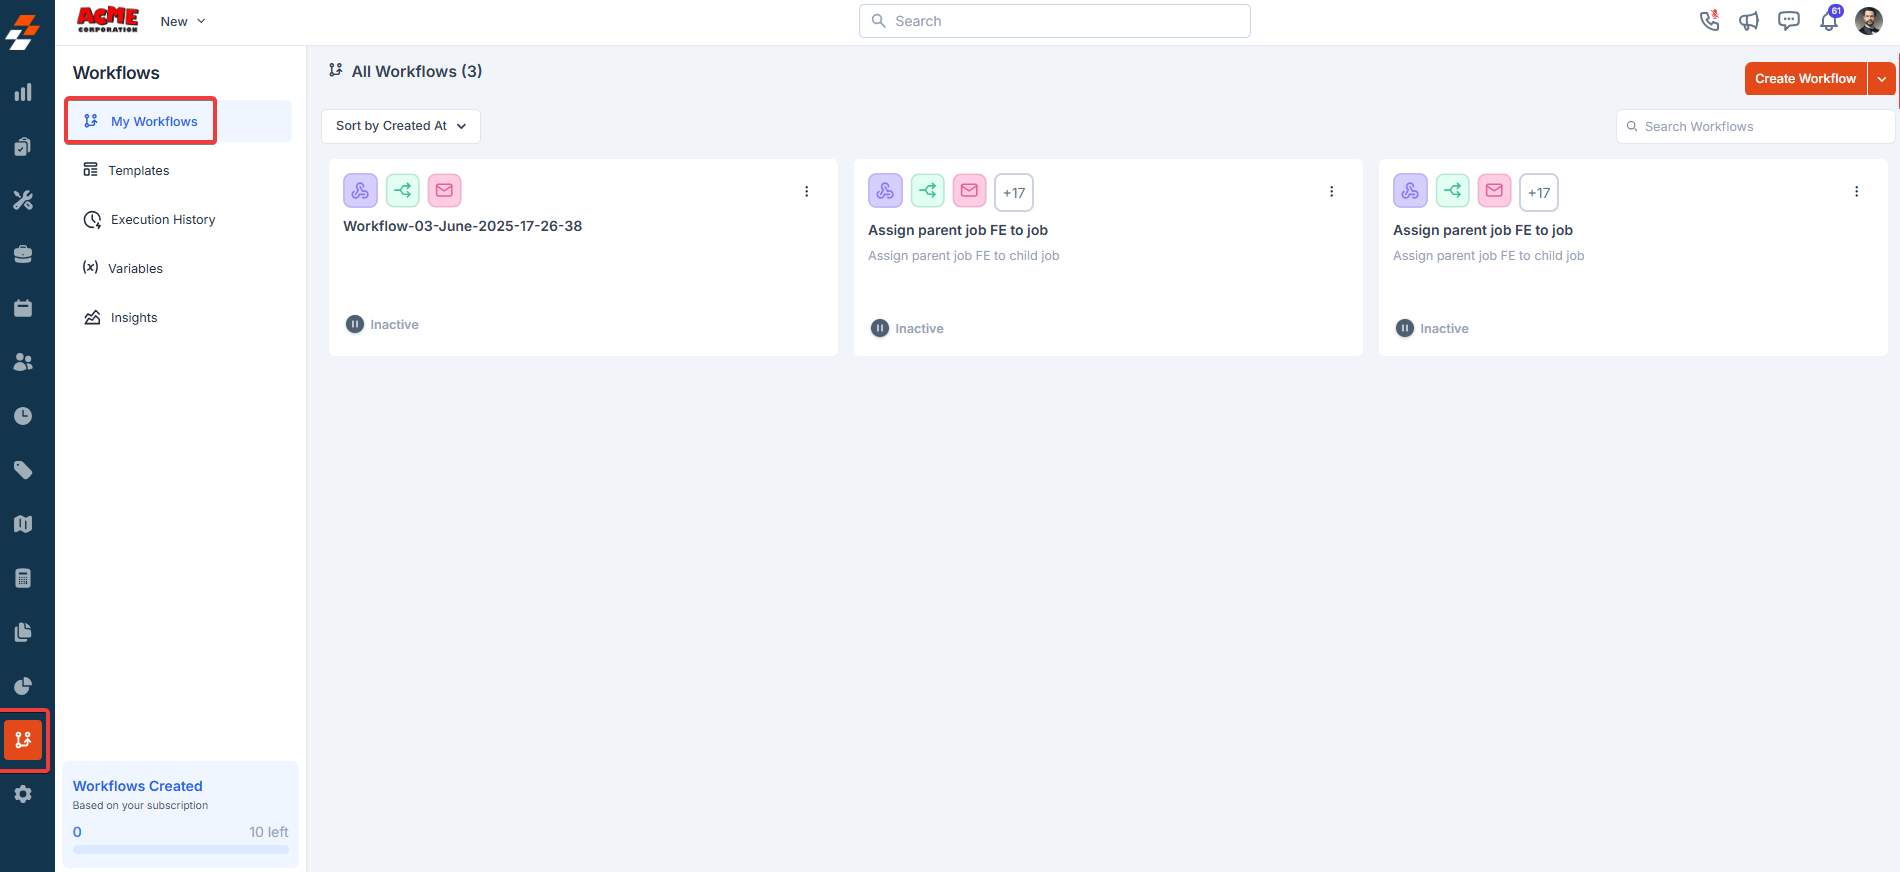
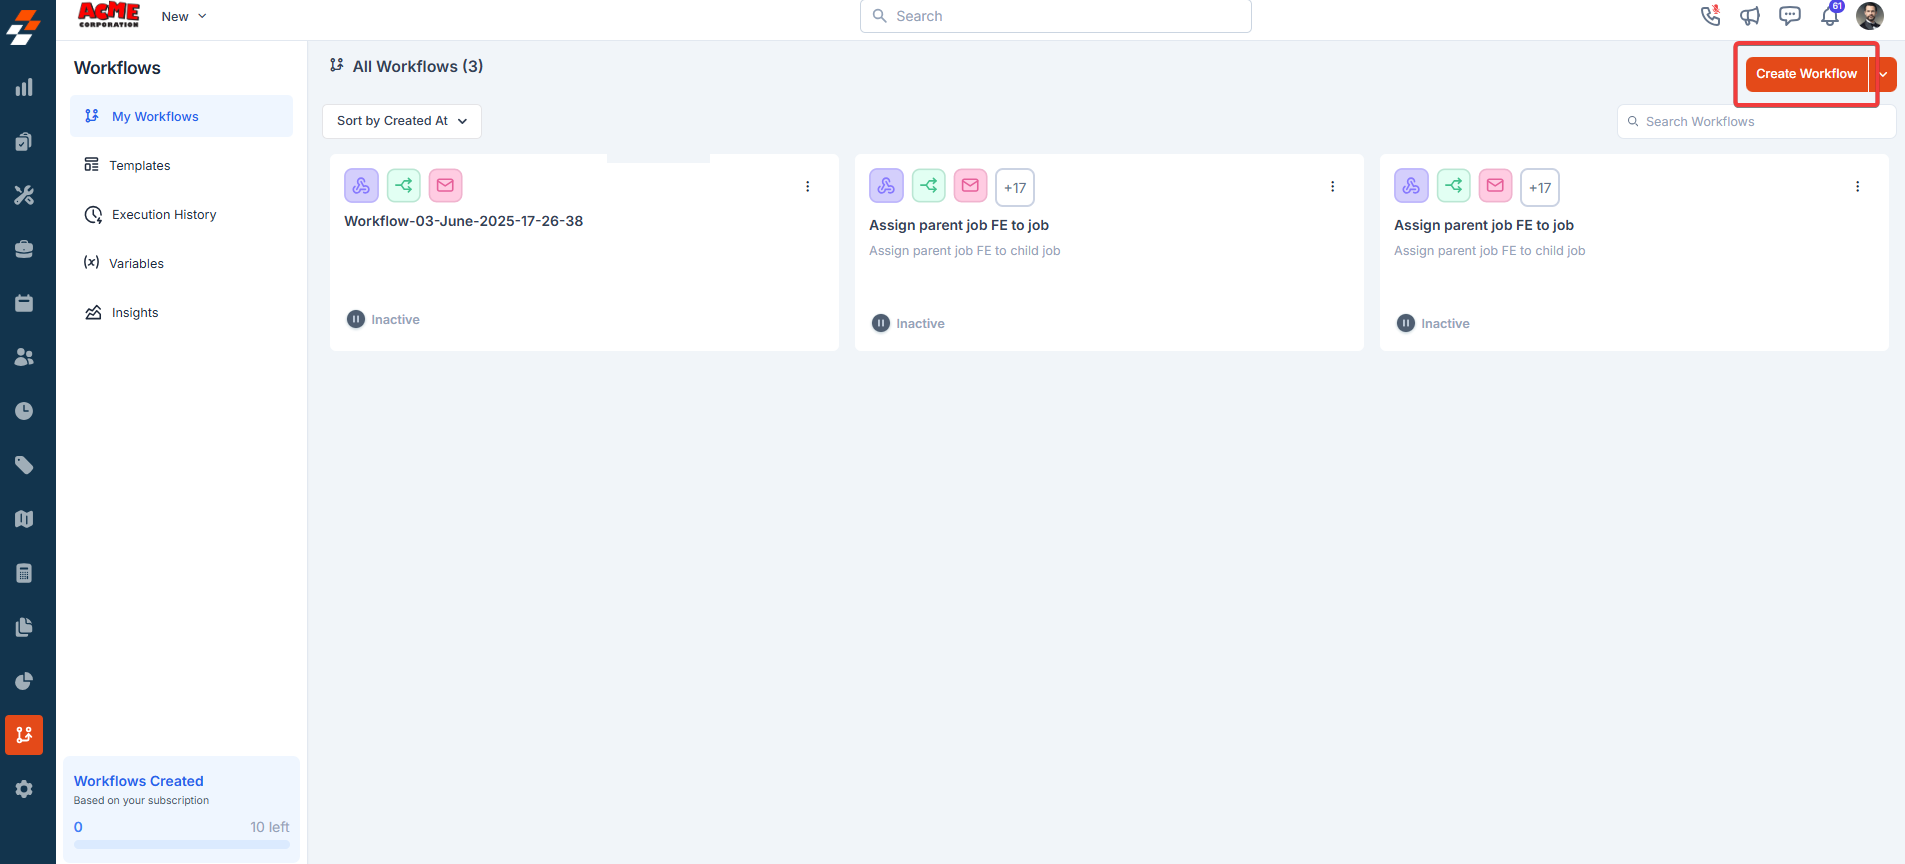
I. My Workflows
- Log in and navigate to the “Workflows” builder section from the sidebar.
- Click the”Ellipsis” icon.
- Activate/Inactivate: Toggle a workflow’s status using the activate/inactive button.
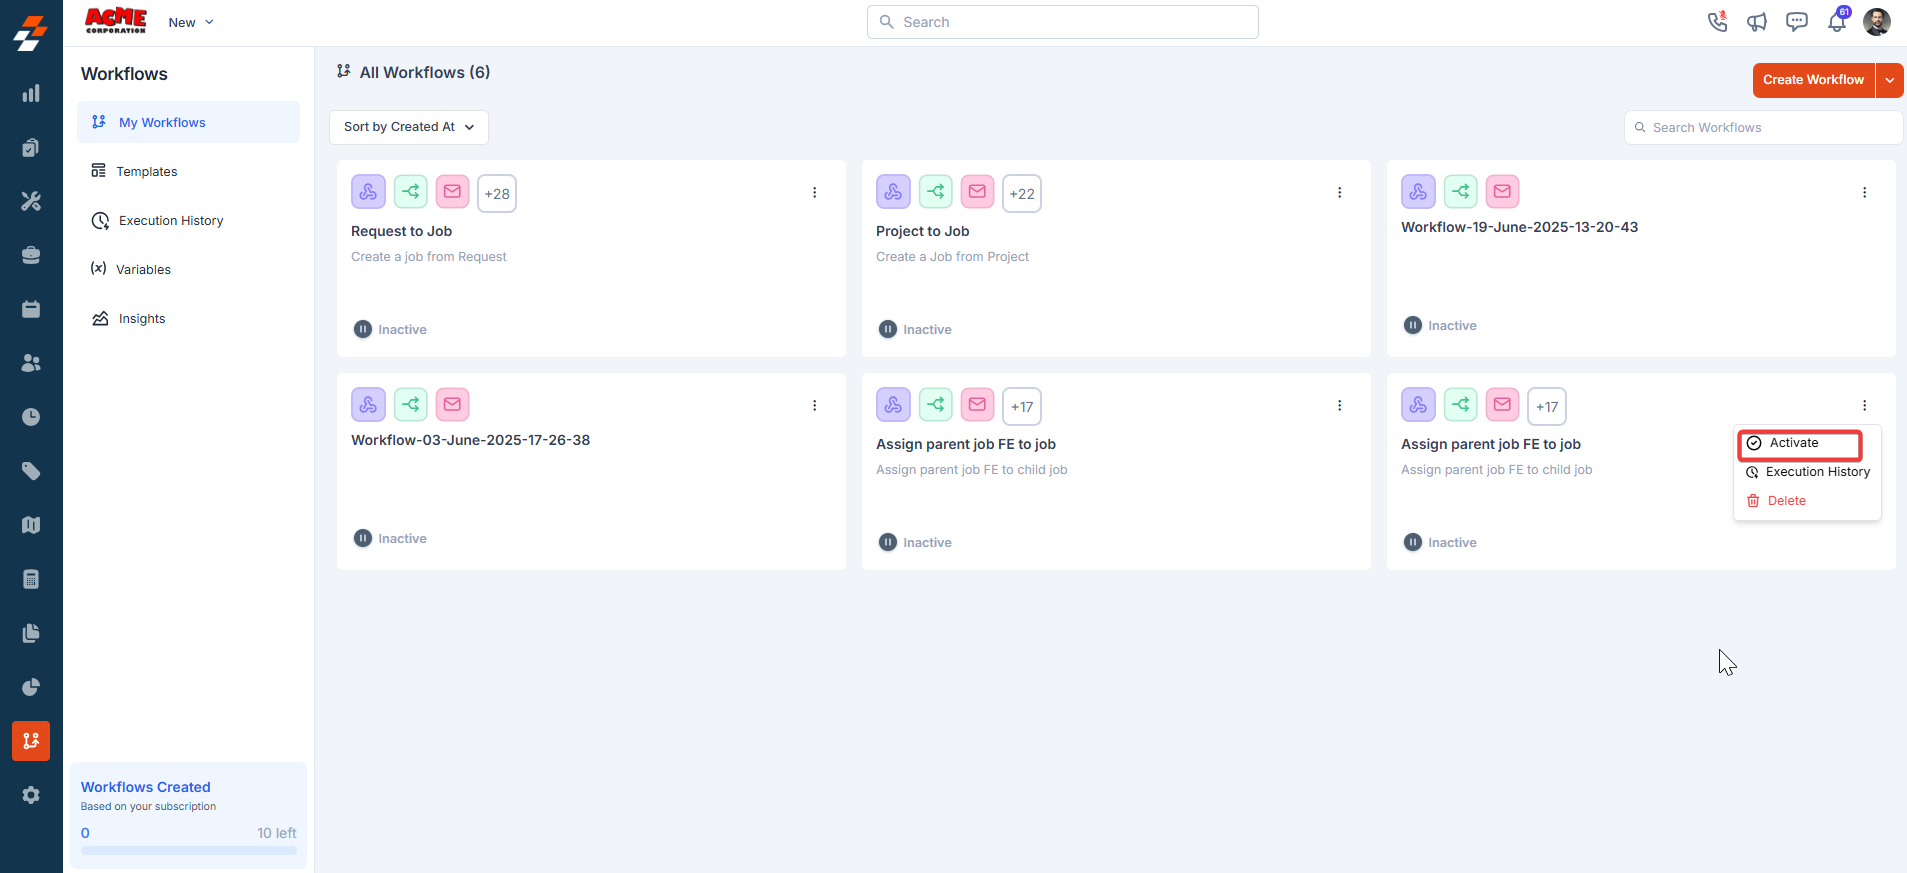
- Execution history: Click the “Execution History” button to view the workflow execution history records.
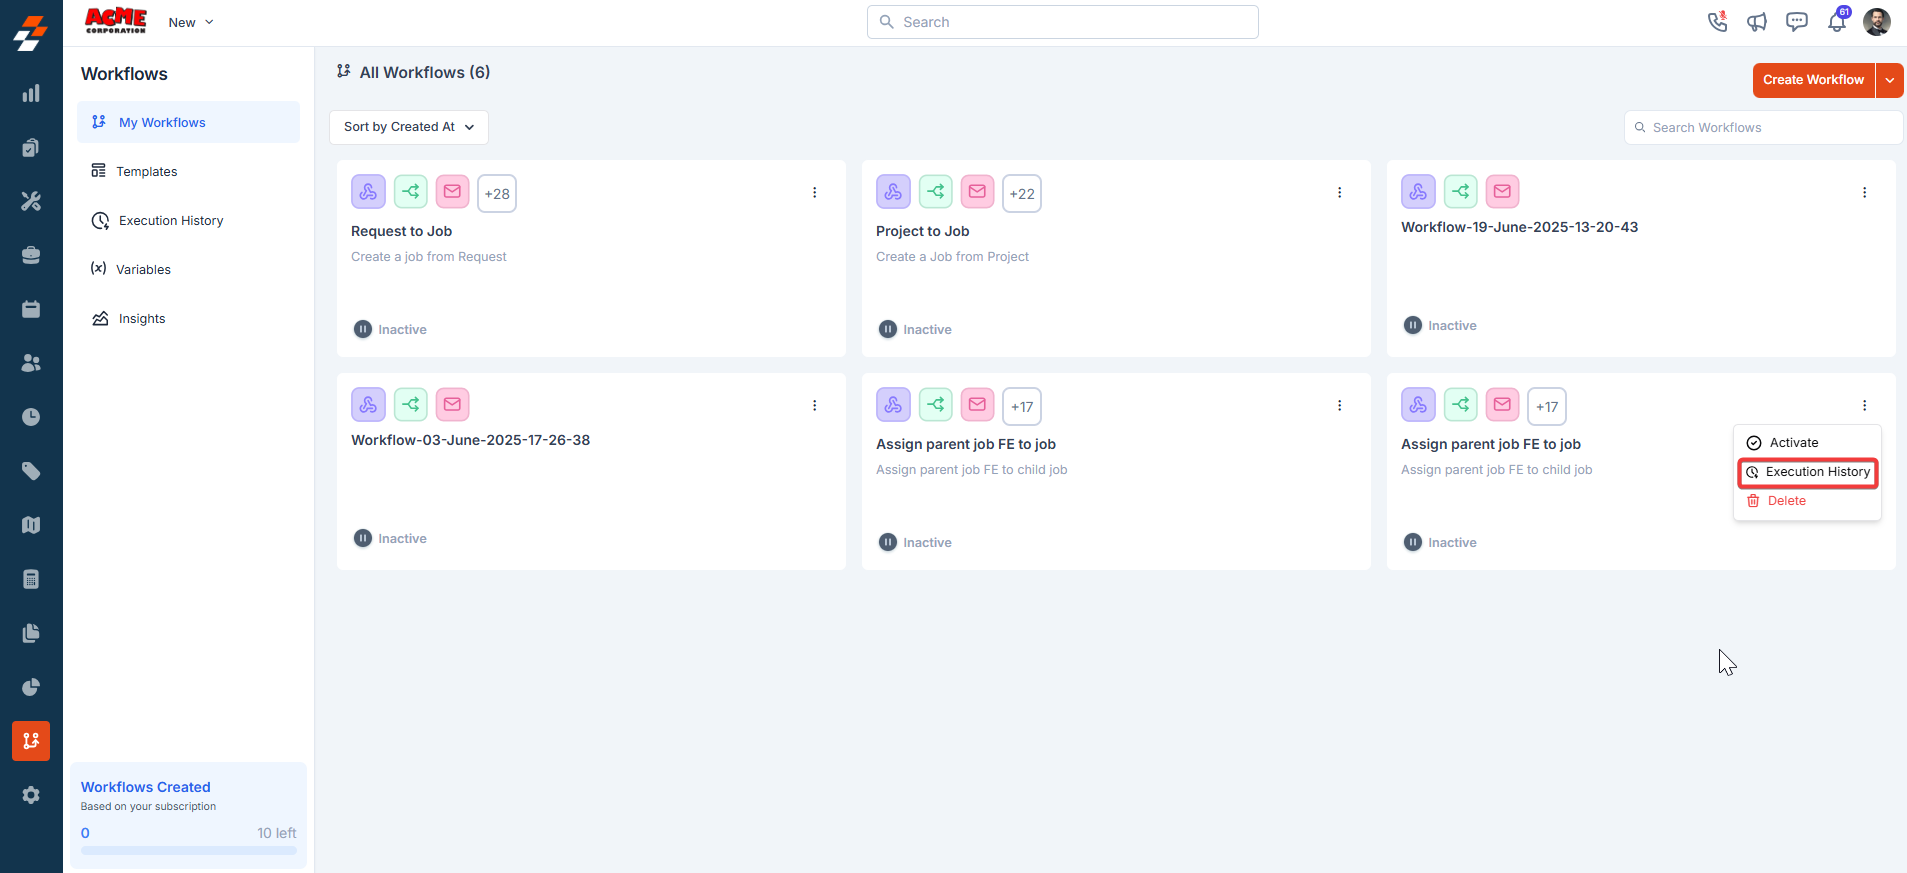
- Delete: Click the “Delete” button to delete the workflow.

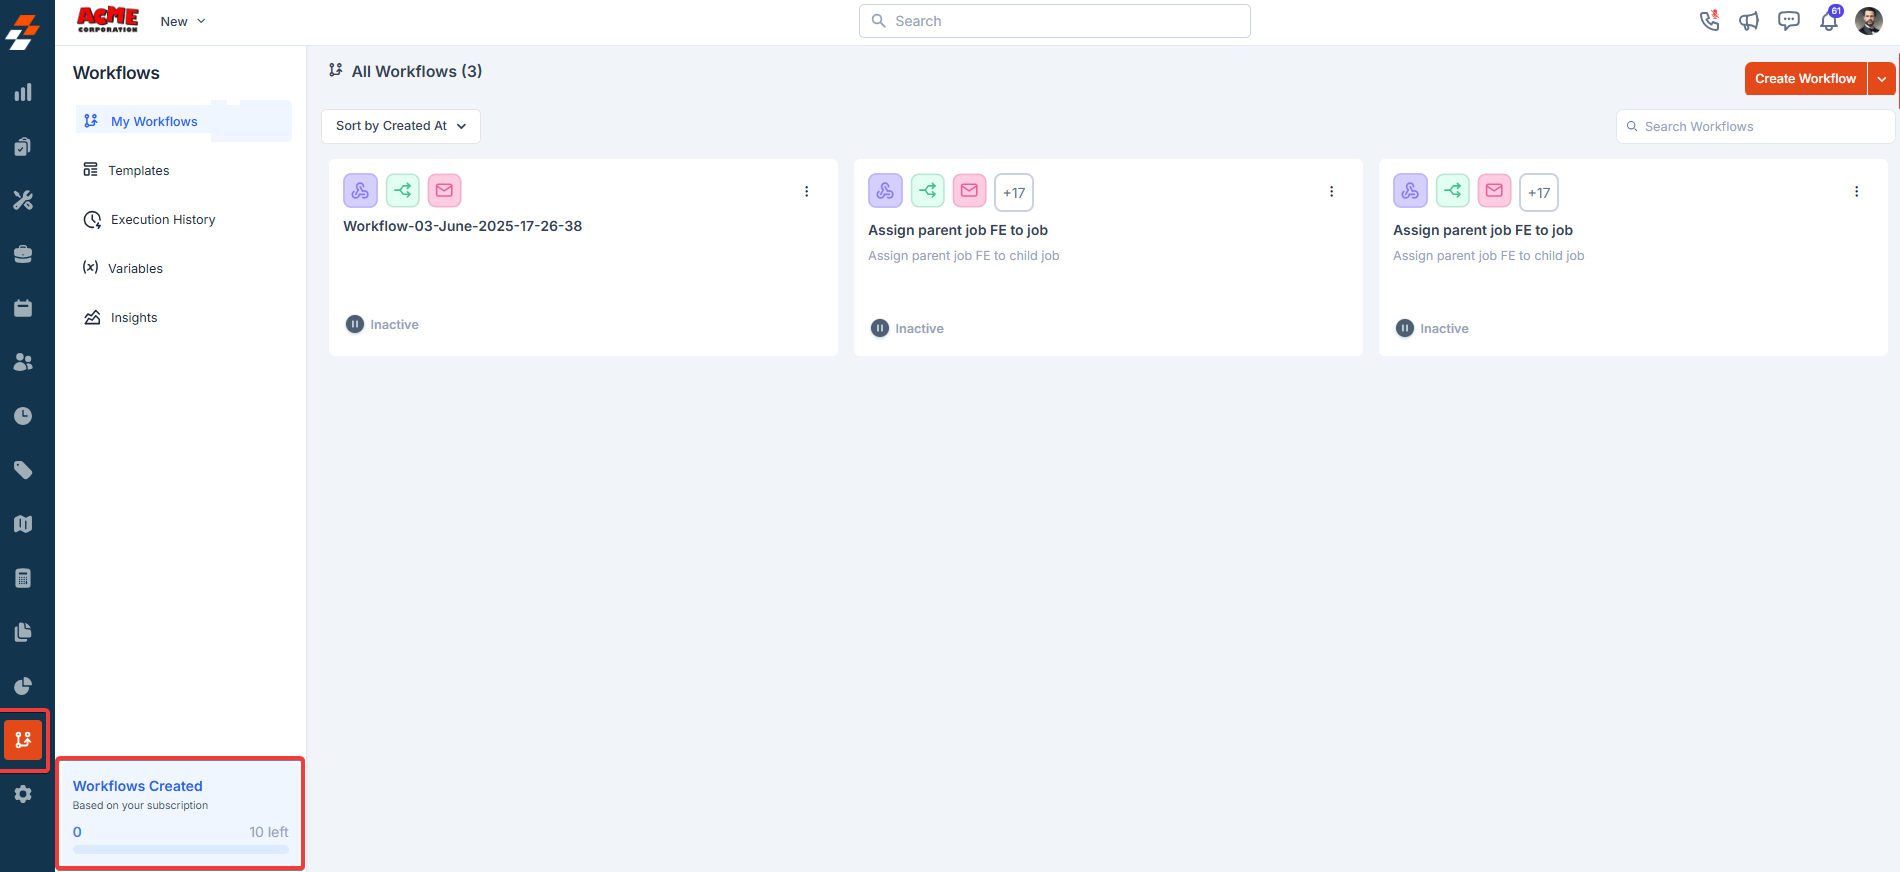
Workflow Active Limits
- The interface tracks the number of workflows created based on your subscription.
- For example, as shown here, you can have 10 workflows active at a time.
Sort:
Workflows can be sorted by “Workflow Name, Created At” date or by “Ascending or Descending order.” To organize them chronologically, use the sort option at the top of the “All Workflows” section. “Search workflows” help you find the exact workflow you are looking for.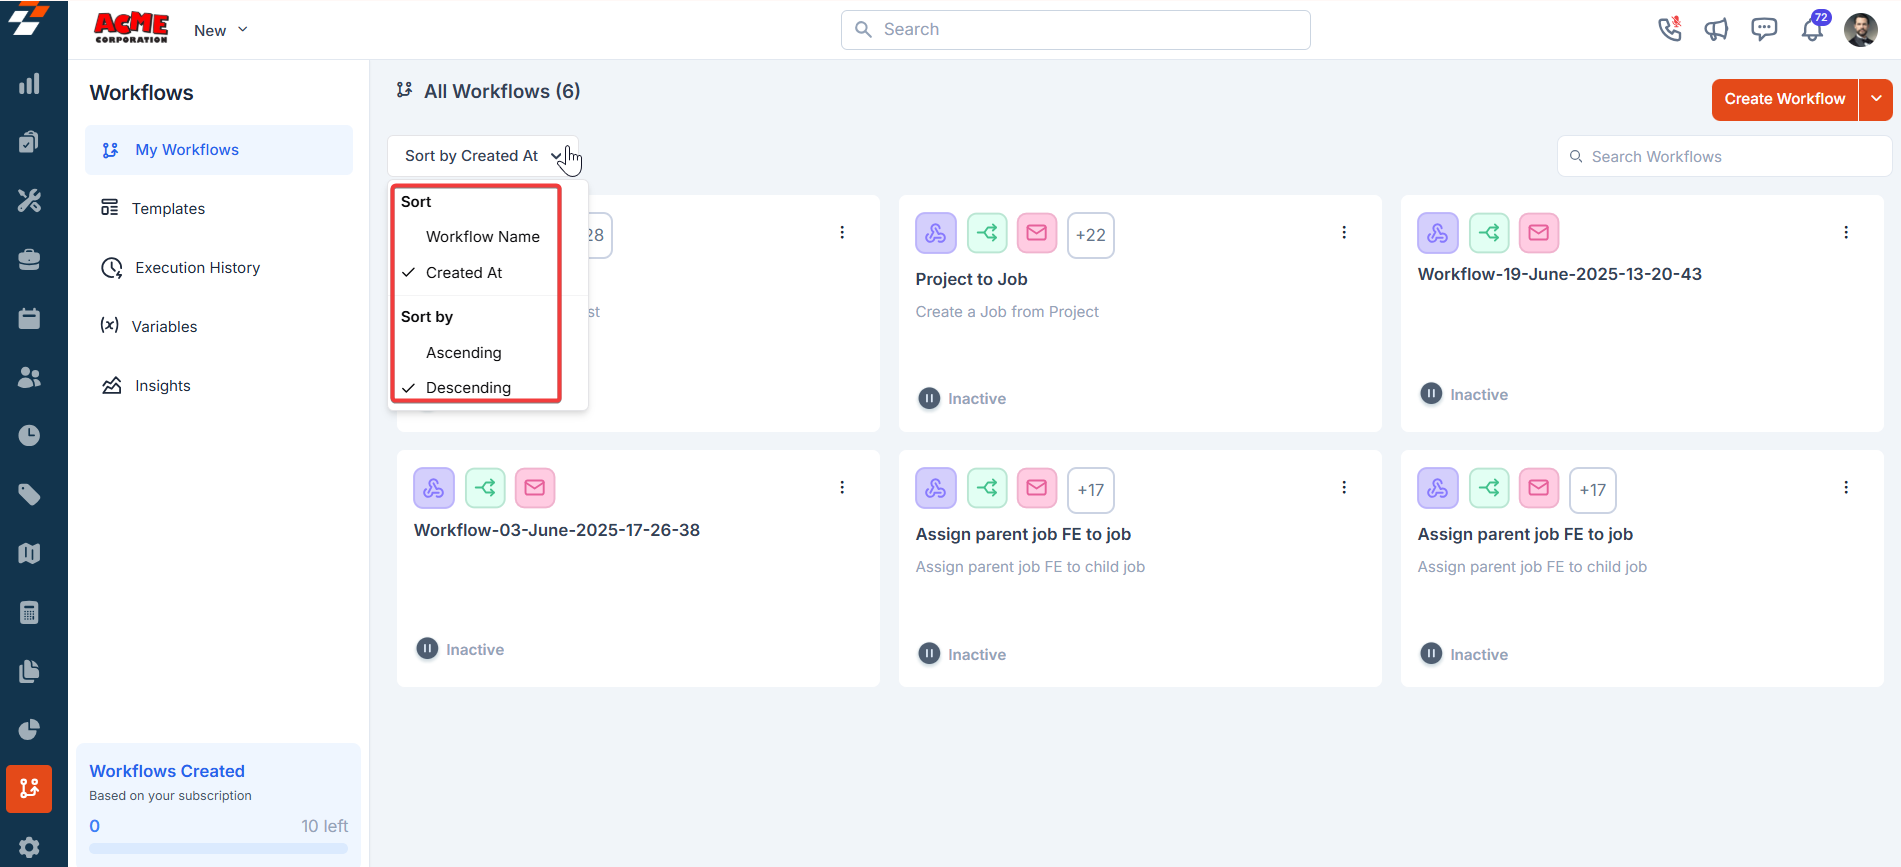
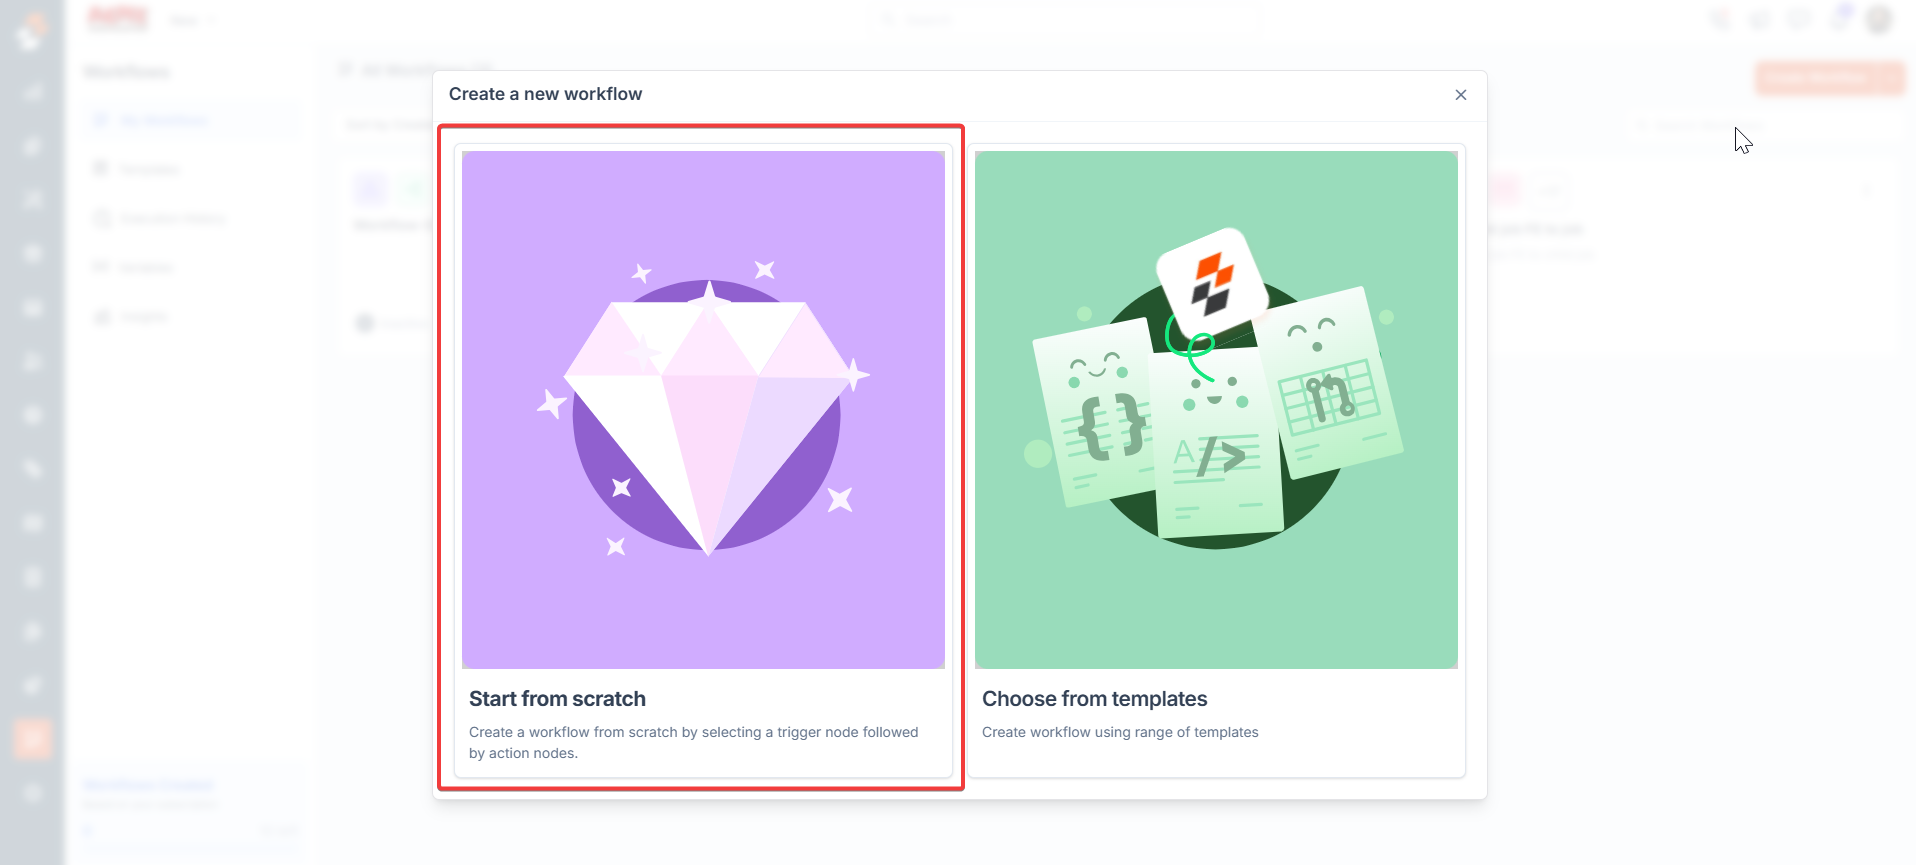
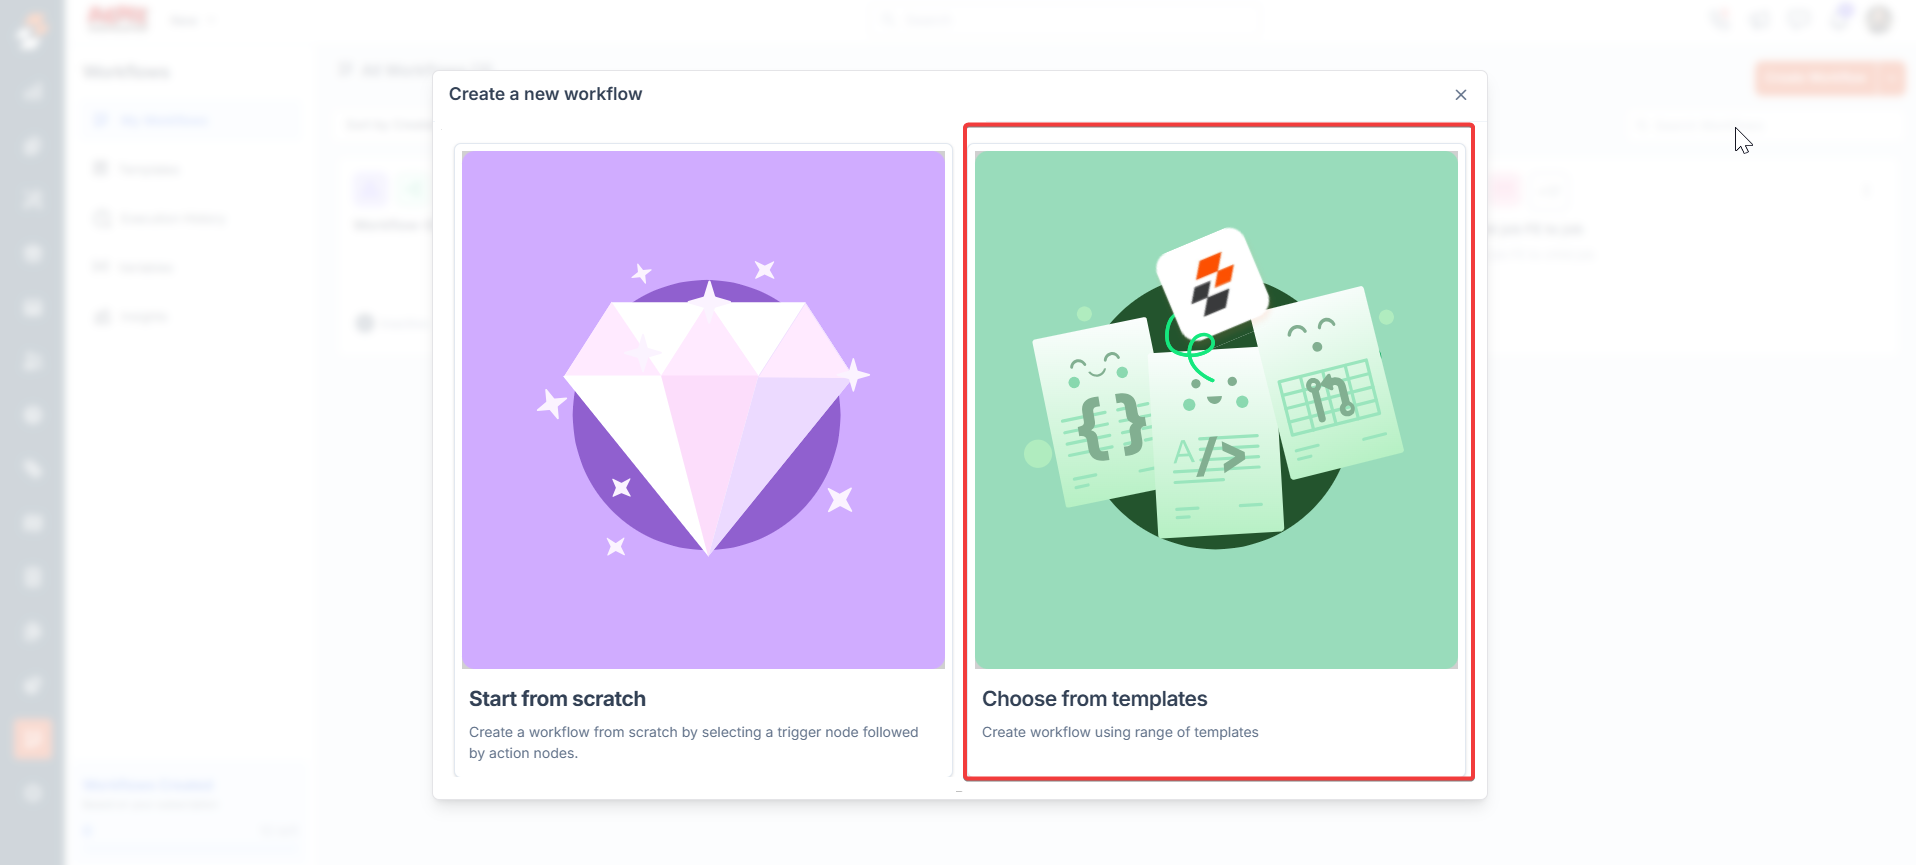
Creating Workflows
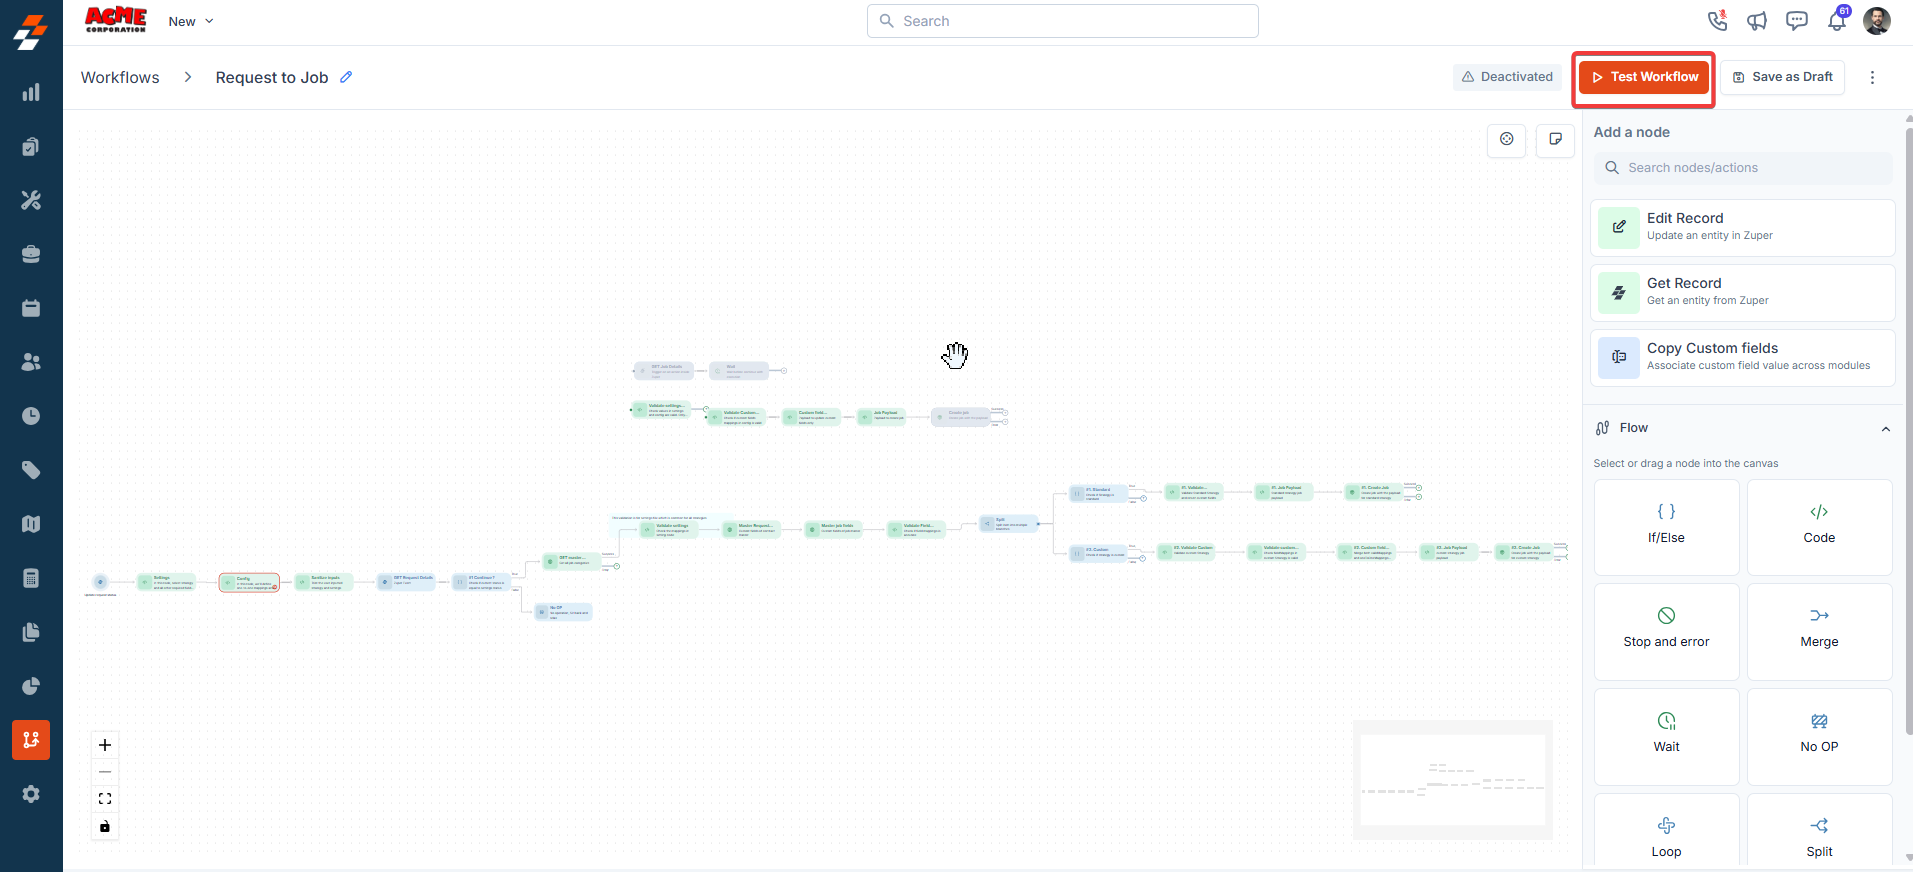
Zuper supports three creation methods: Start from Scratch, Templates, and Import Workflows.- Start from Scratch: Open the workflow canvas, click “Add a node,” and build a custom flow by dragging and connecting nodes.
- After creating the workflow, click “Test Workflow.”
- Click “Save and Publish” to create the new workflow.
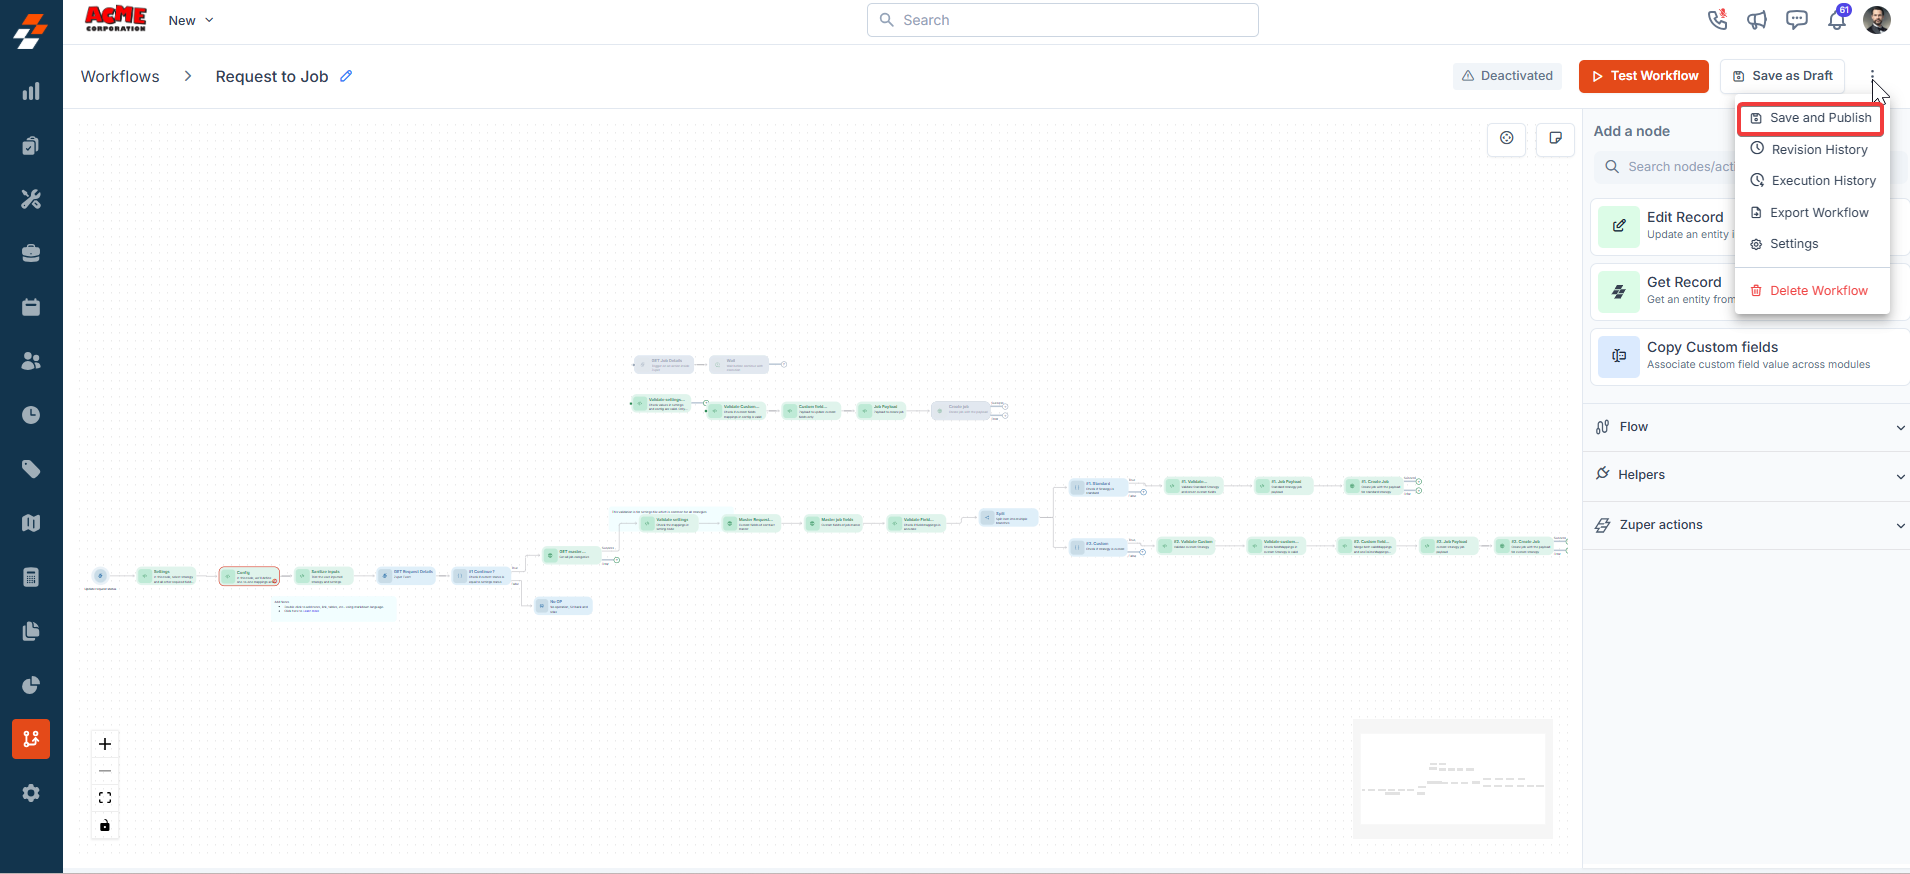
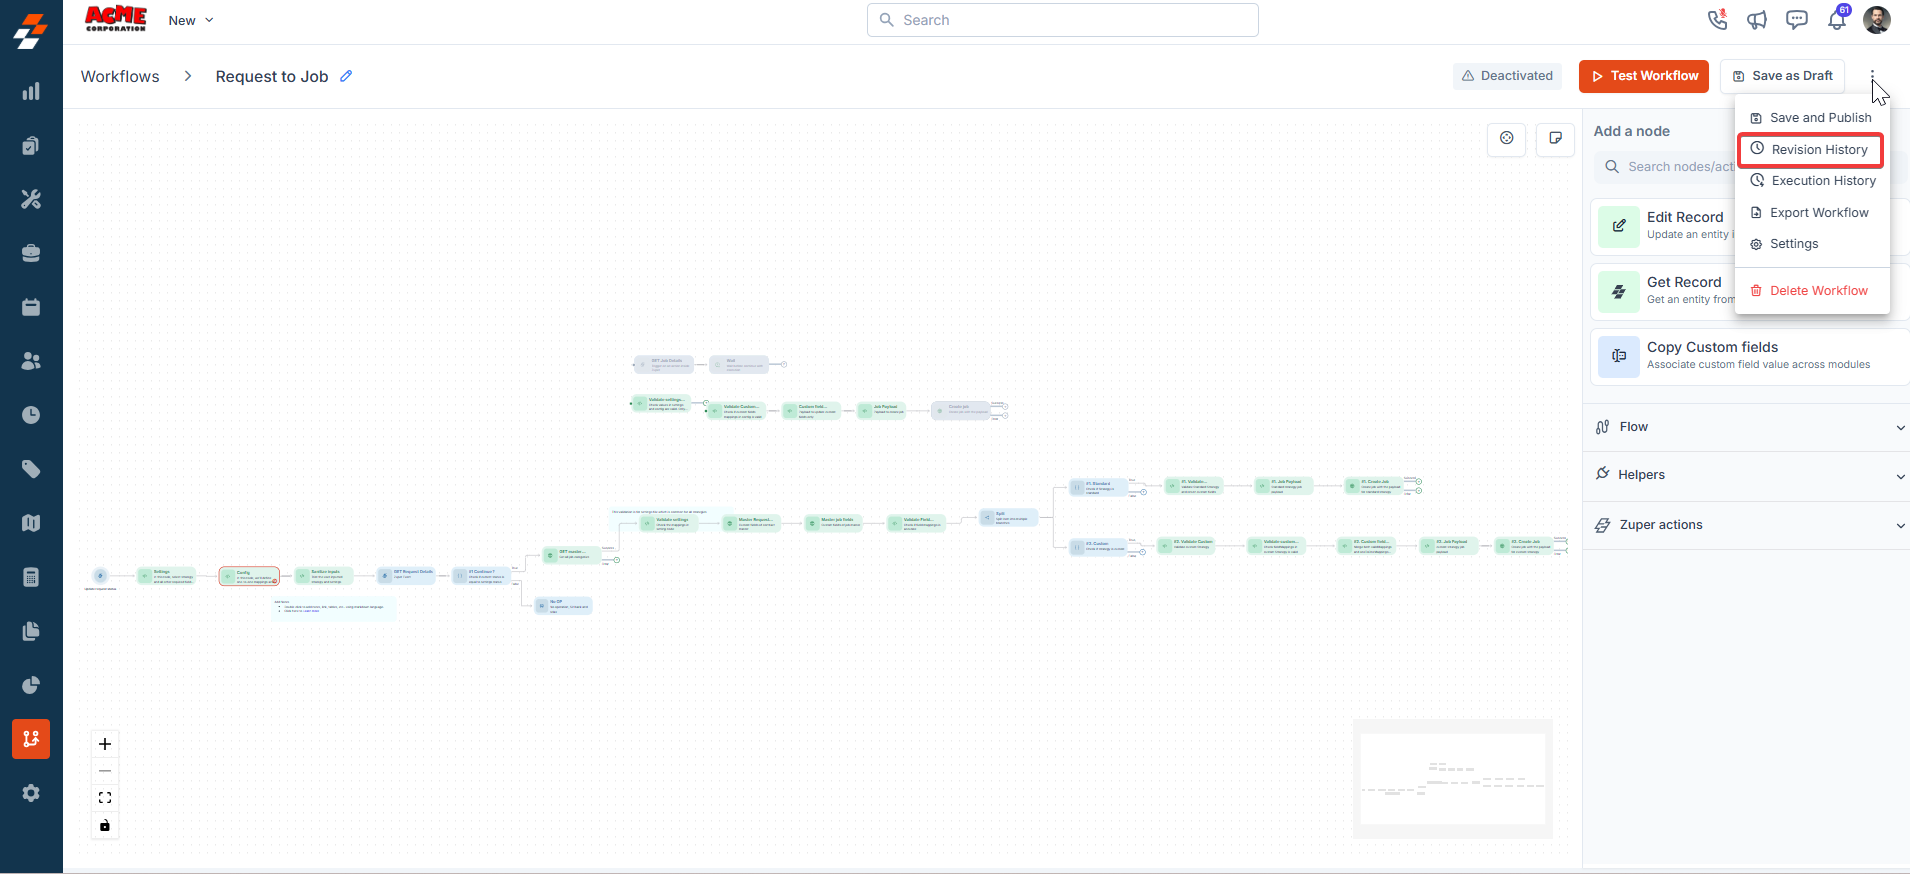
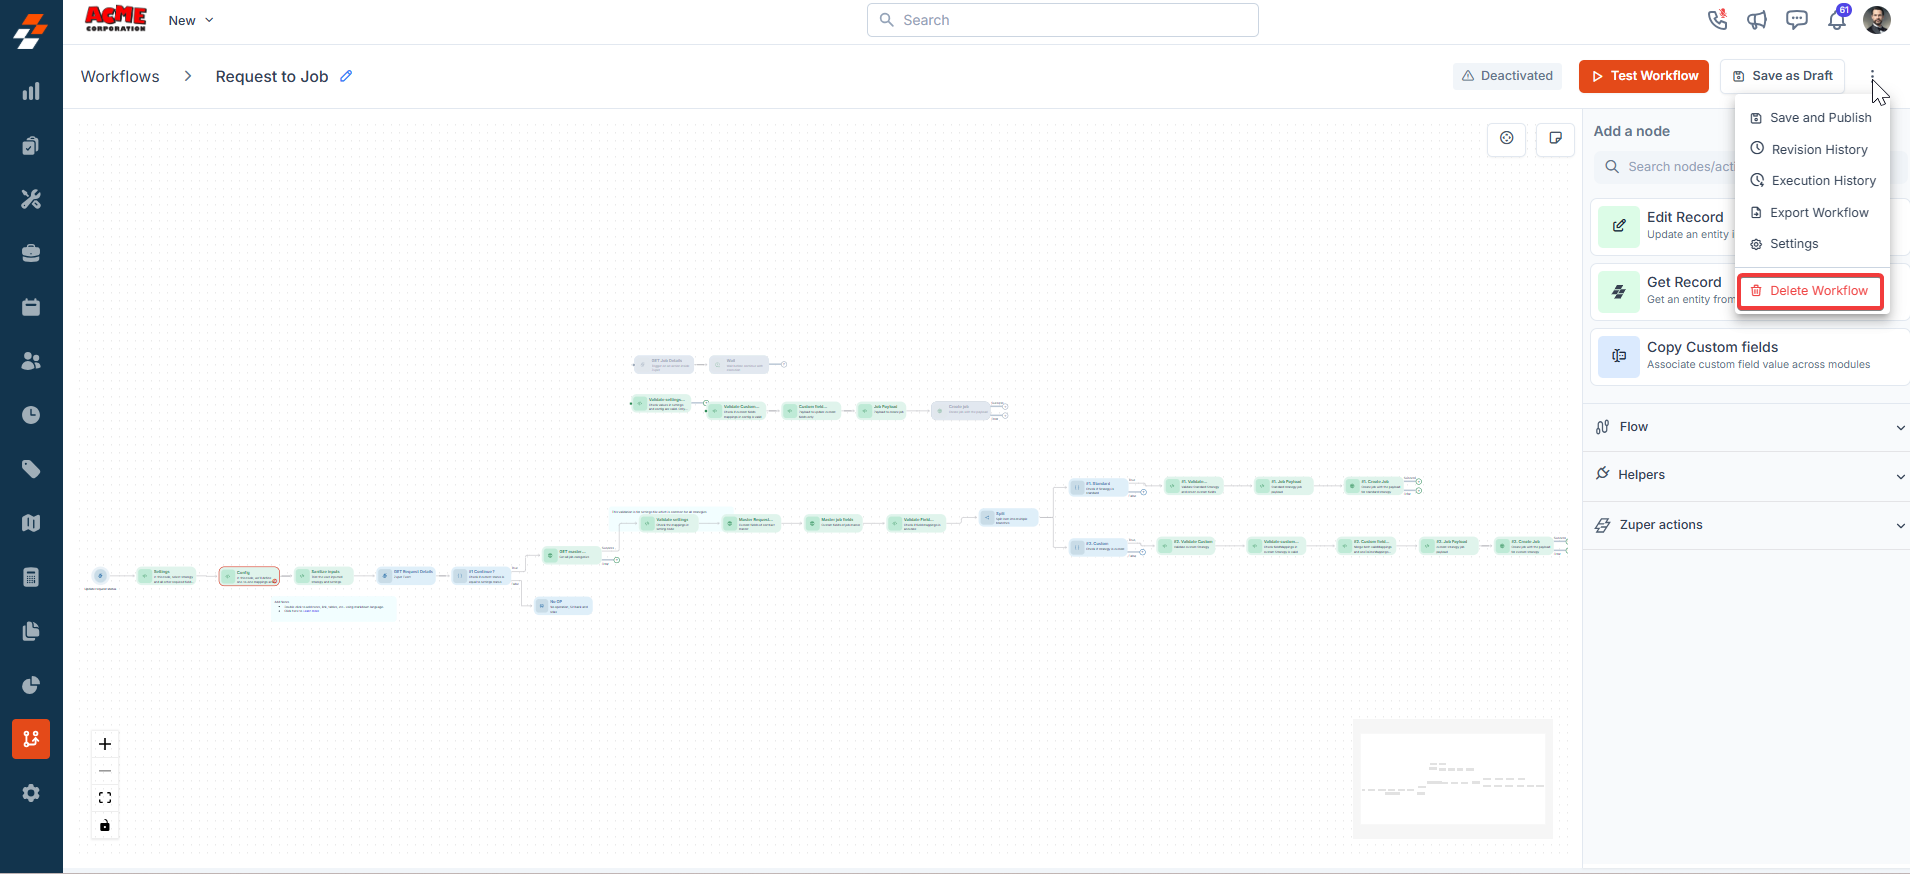
- Click the “Revision History” to view the changes in the workflow.
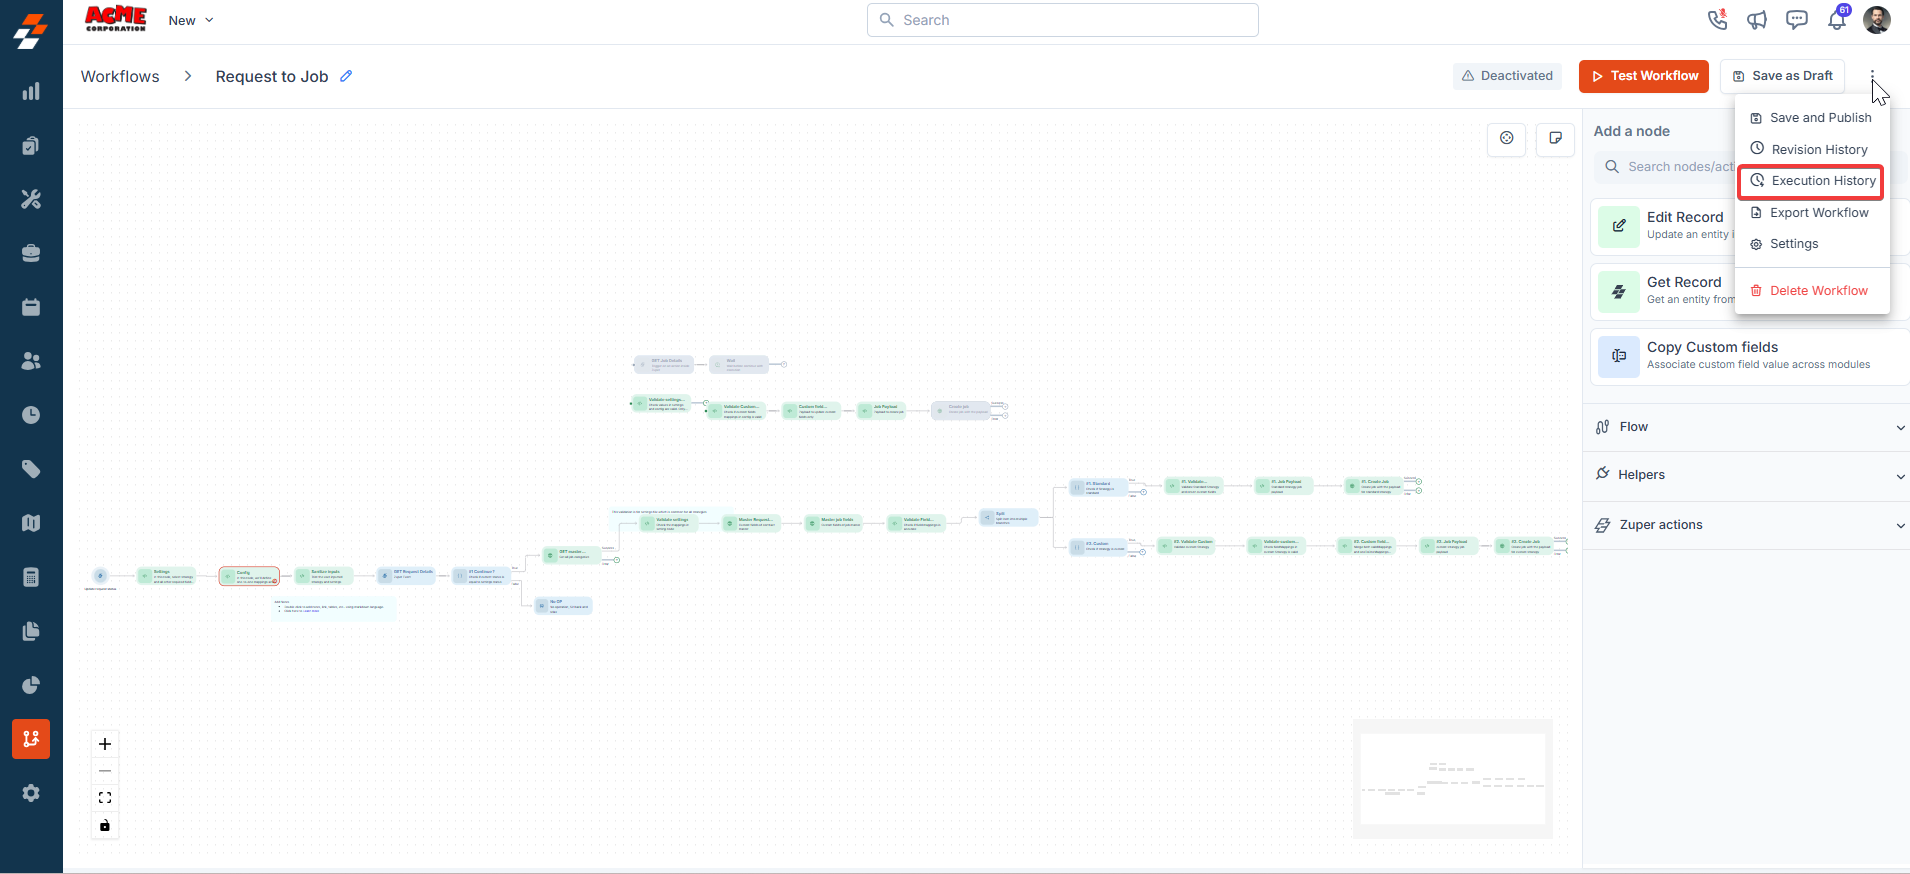
- Click the “Execution History” to view the workflow executions.
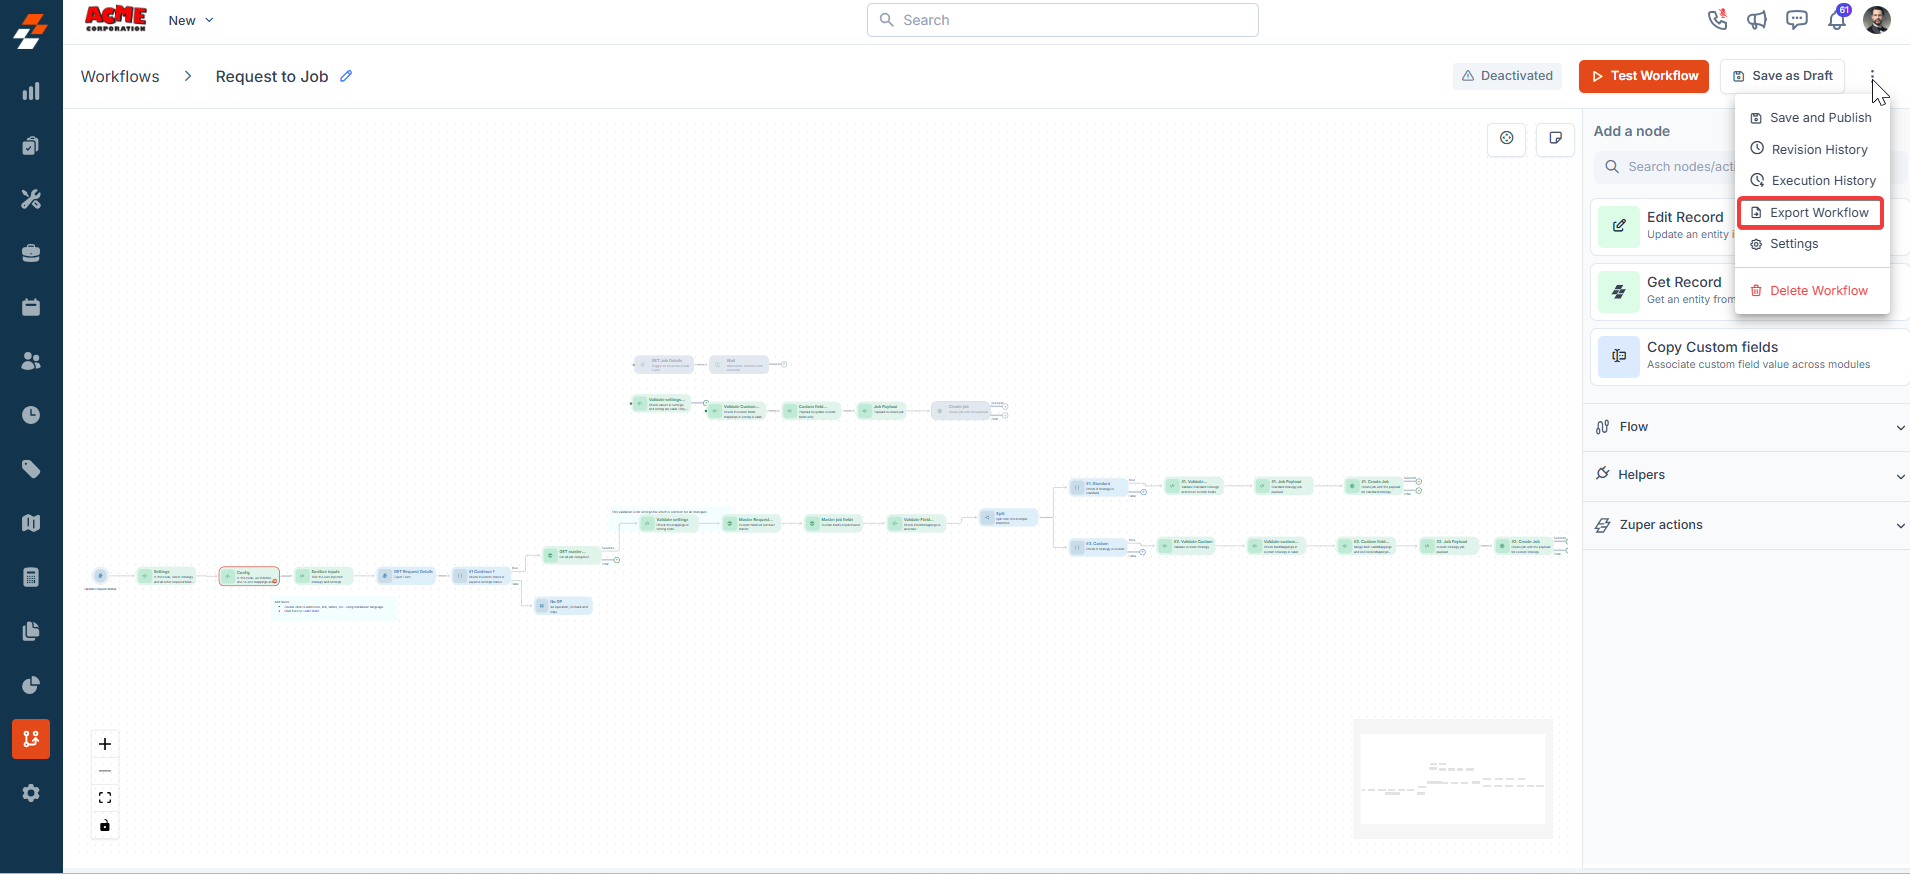
- Click the “Export Workflow” to transfer the workflow to another system.
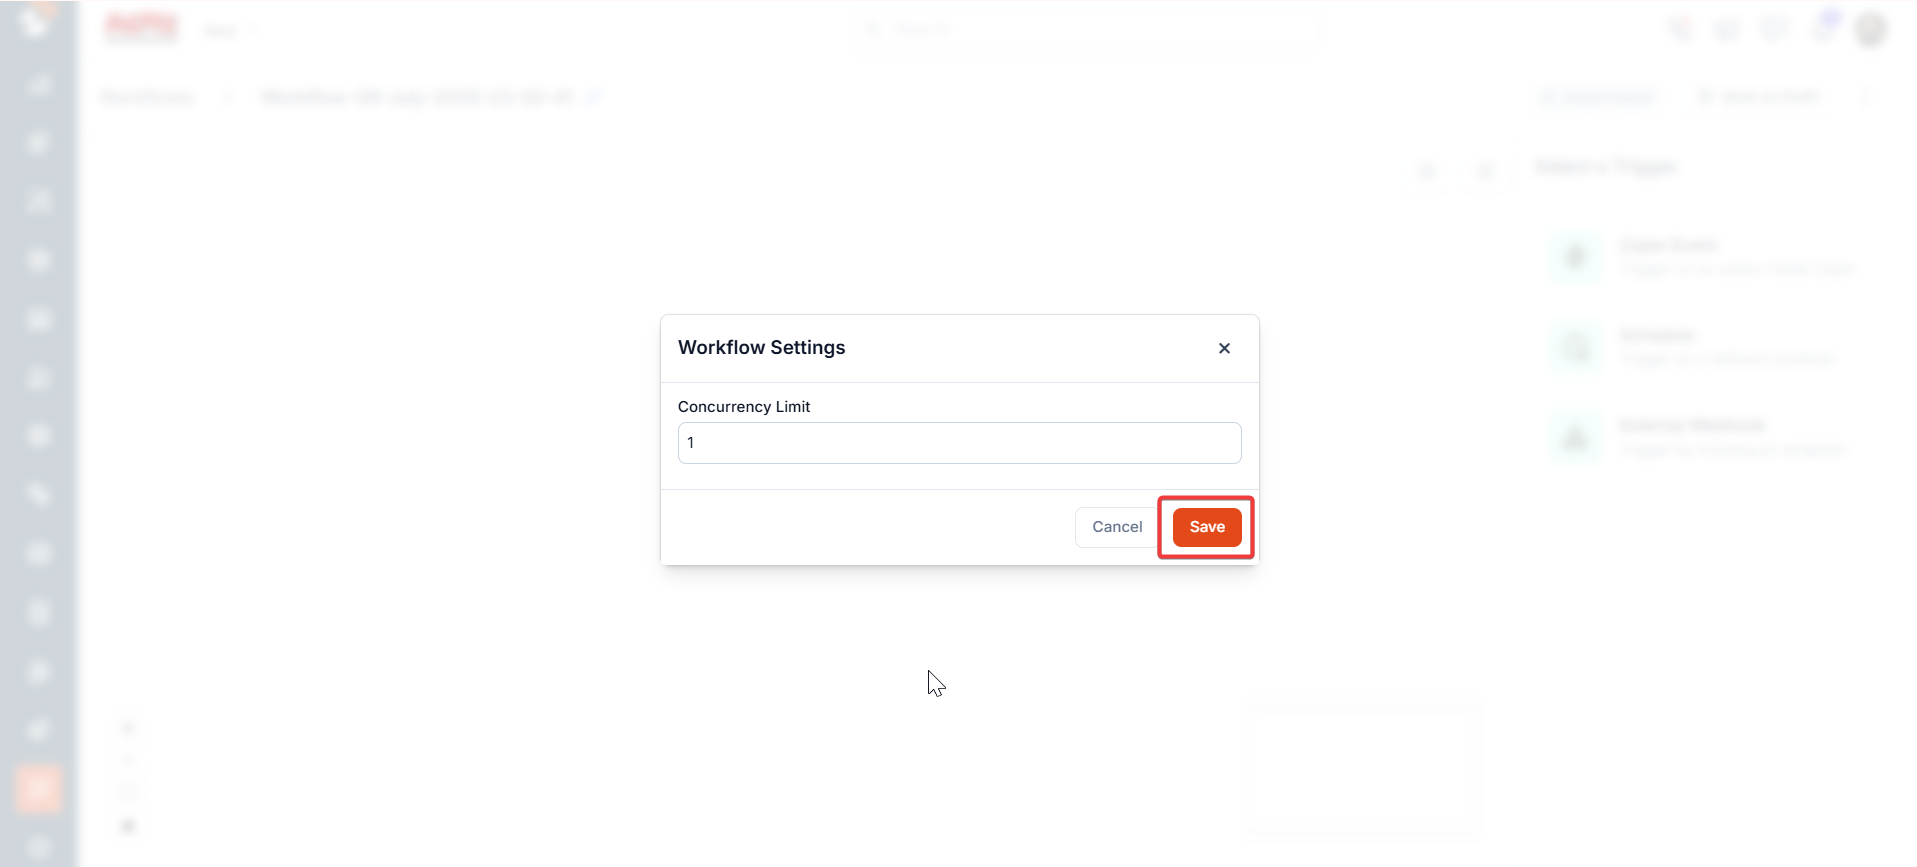
- Click the “Settings” to modify the preferences.
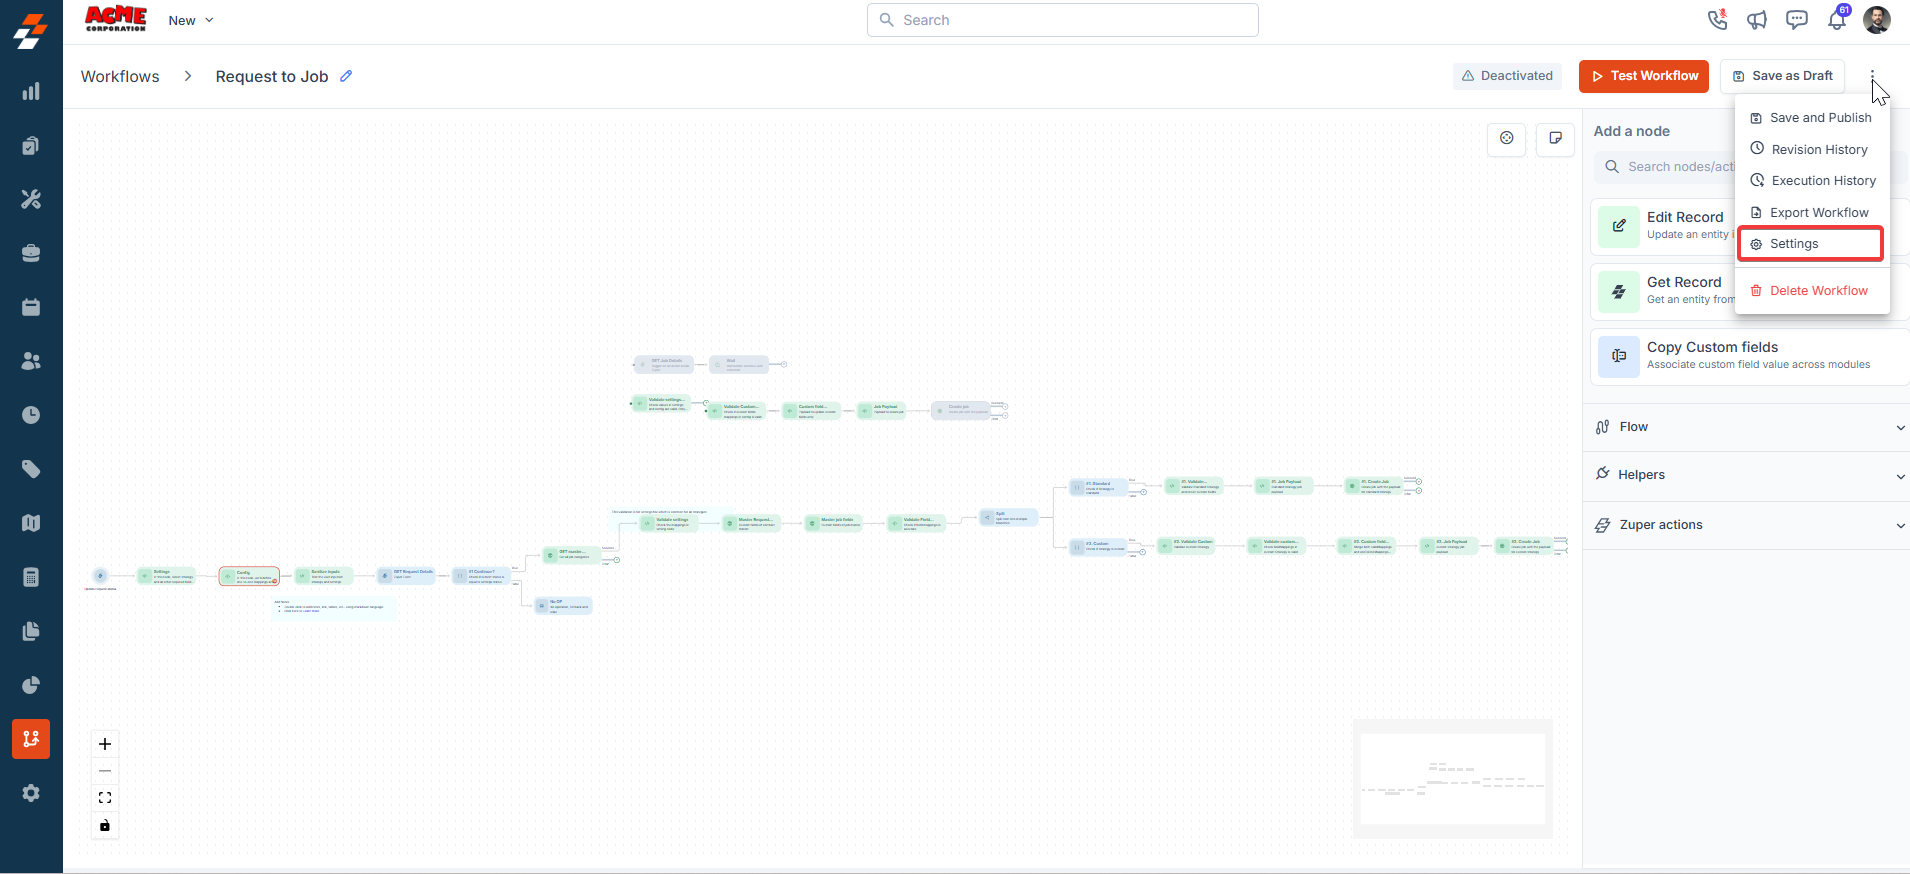
- Adjust the values and click “Save.” The concurrency limit specifies the exact number of simultaneous executions allowed. Any additional executions will be paused until the current ones are completed. For instance, if 100 records are triggered for workflow execution and the concurrency limit is set to 1, 99 records will wait until the single active execution finishes.
- Click “Delete Workflow” to delete the workflow.
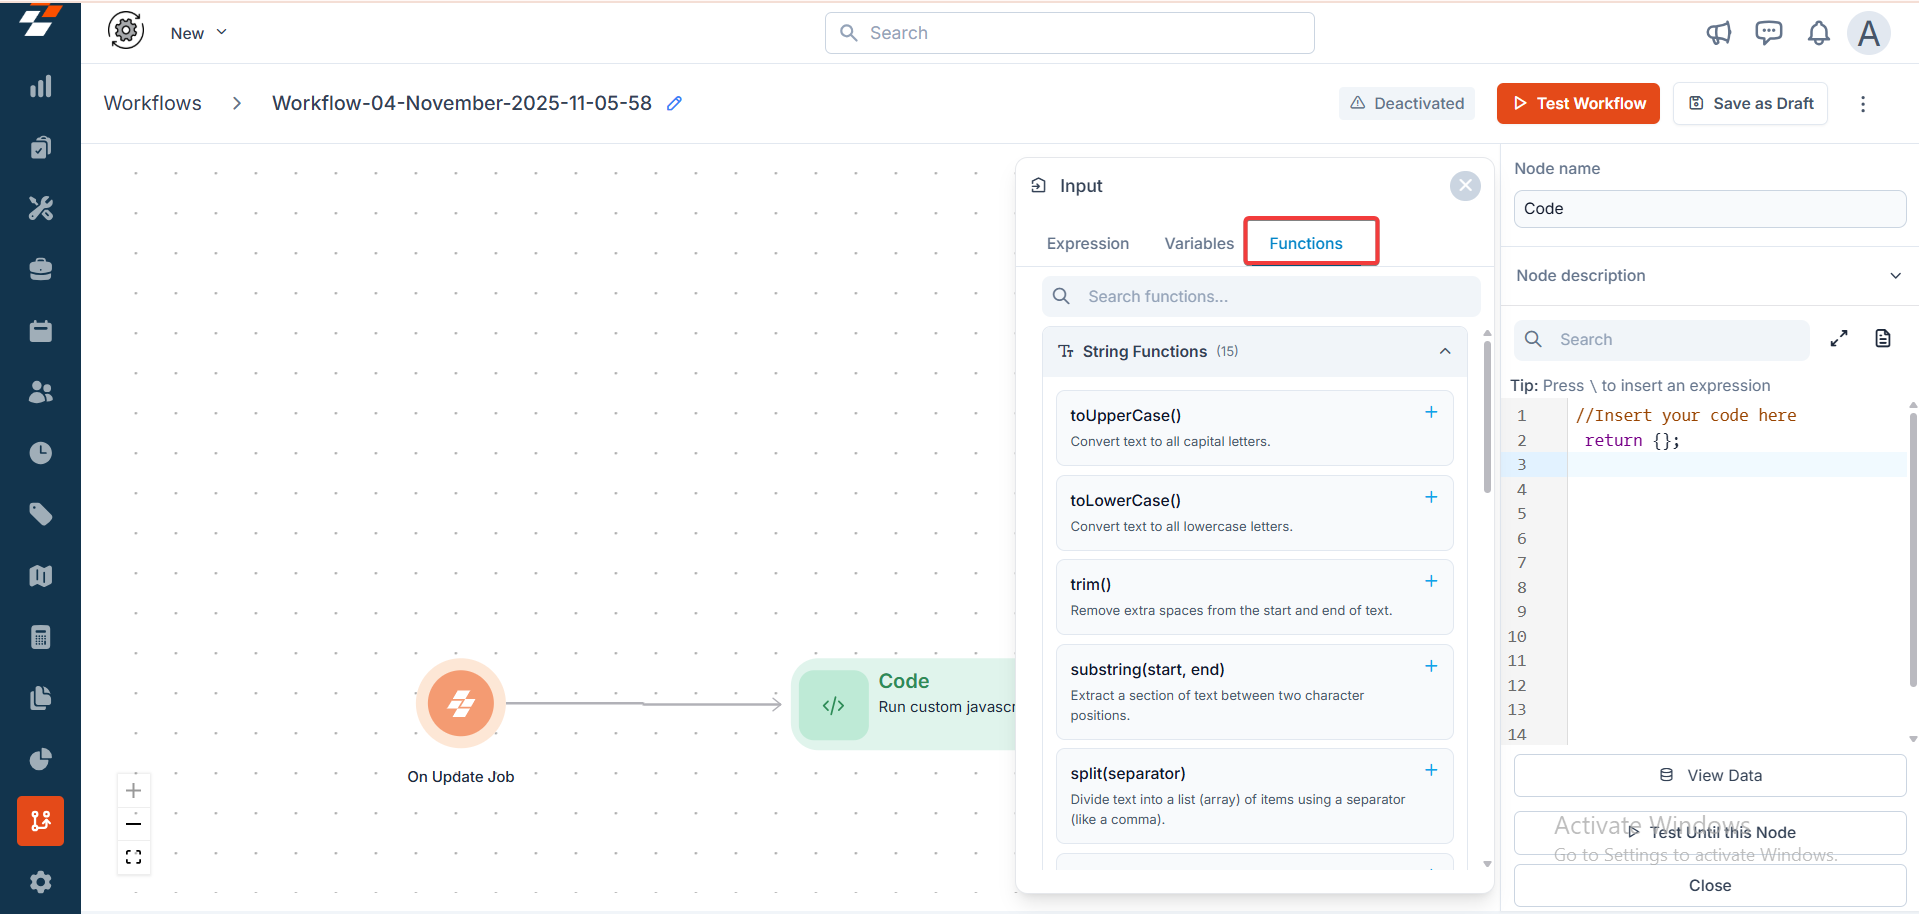
Picker (Expression / Variable / Functions)
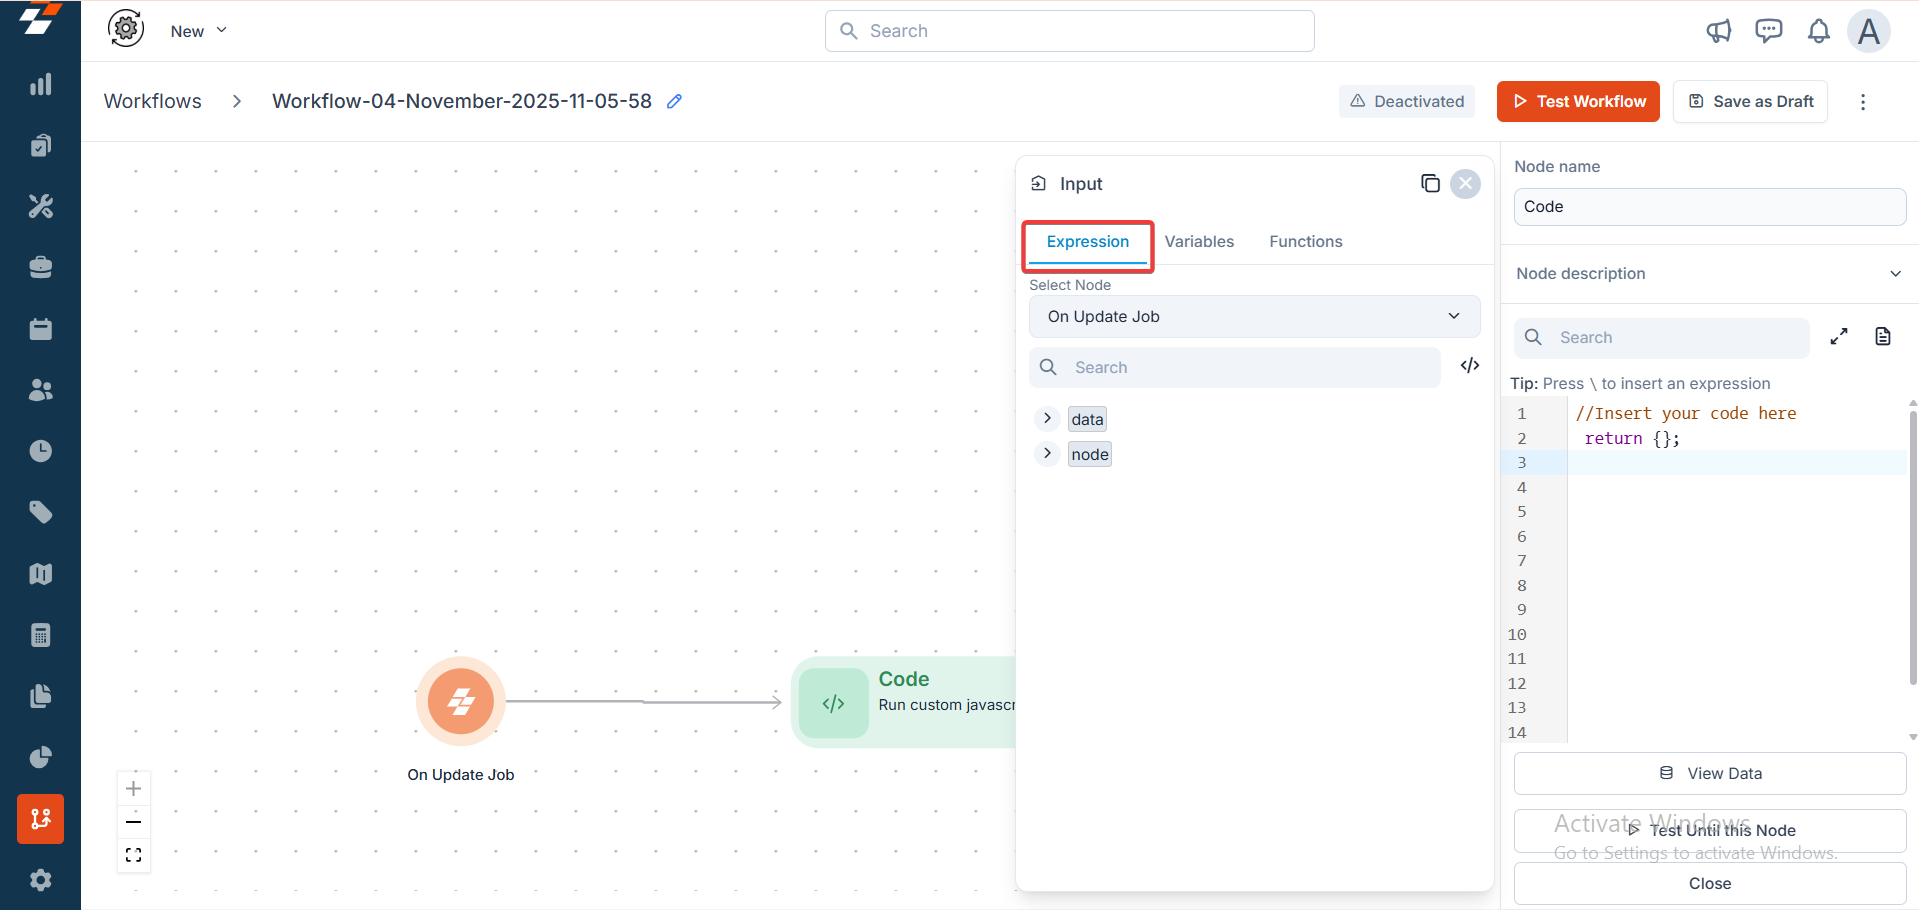
The Picker is a powerful functionality integrated into the editor’s navigation sidebar, designed to streamline the process of building dynamic expressions within nodes. It provides quick, contextual access to three core categories: Expressions, Variables, and Functions—allowing you to insert reusable logic, data references, and operations. This picker enhances productivity by reducing manual typing and minimizing errors, particularly in complex automations that involve conditionals, data transformations, or custom scripting. To open the picker:- Click the node that you would like to configure and place the cursor on any of the input fields, and it will auto-open the picker.
- Expressions: Use this to pull dynamic data from previous steps. This will allow you to select the node from the previously executed nodes.
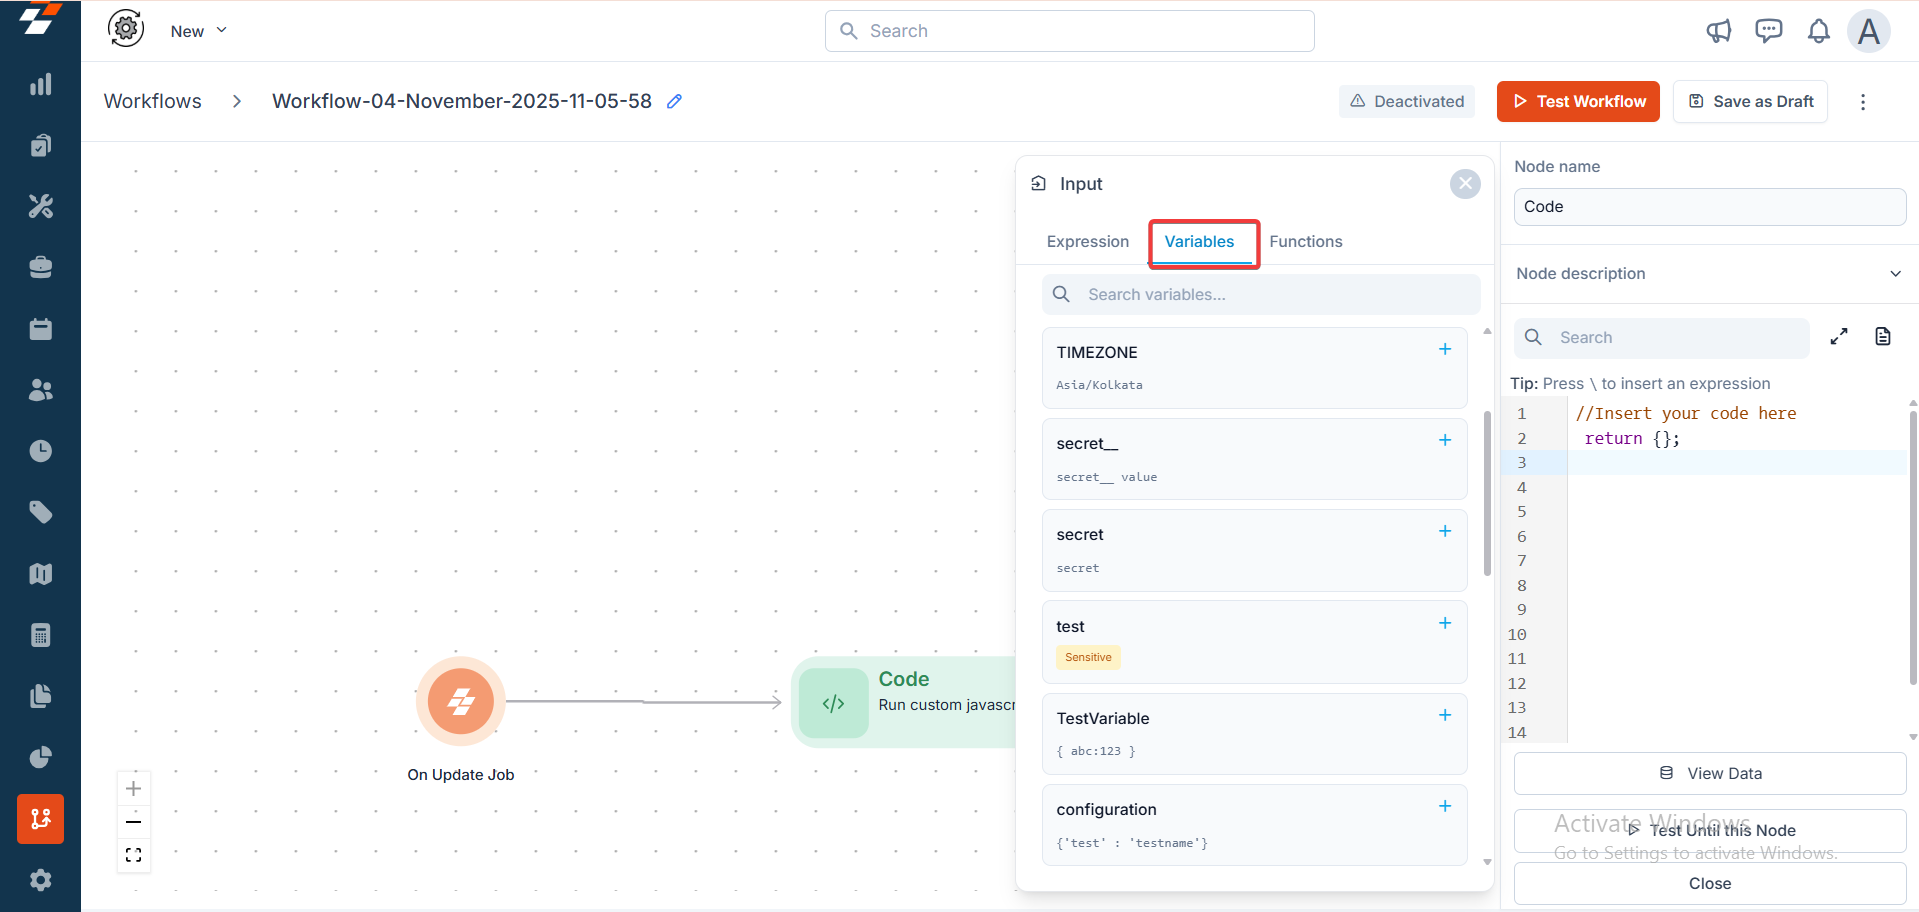
- Variables: Use this to pull the variables from the Variables tab on the home page, such as user-defined constants. This section is ideal for maintaining consistency across multiple nodes, like reusing an account ID or API keys.
- Functions: Dive into categorized libraries of pre-built operations:
- String Functions: Manipulate text for formatting, validation, or extraction.
- Array Functions: Handle lists and iterations, perfect for parsing CSV data or merging results.
II. Templates
- Use Prebuilt Templates: Navigate to “Templates,” select a template (e.g., “Job to Invoice”), and edit it on the canvas.
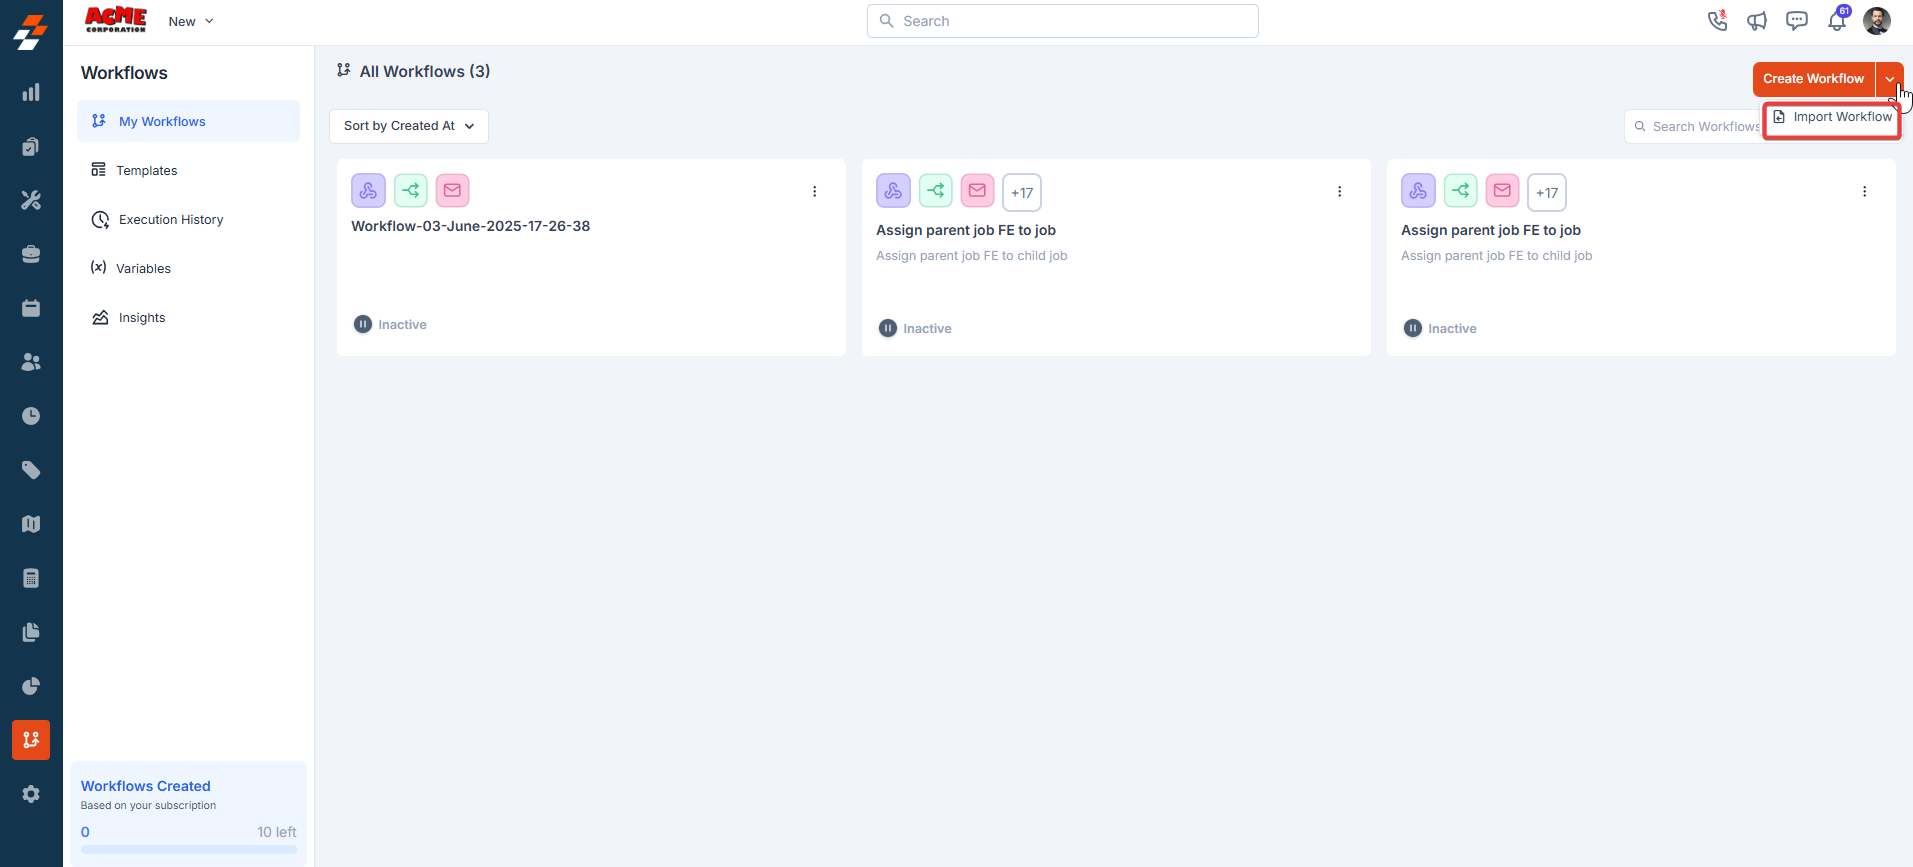
- Import Workflows: Use the “Import Workflow” option to upload a previously exported .json file and adjust as needed.
- Access the Import Option: Navigate to the “Workflows” section in your Zuper instance. Look for the “Import Workflow” option, which allows you to upload a JSON file. This option is typically found in the workflow management area of the Zuper interface.
- Upload the JSON File: Select the “Import Workflow” option, and a file browser window will appear. Select the previously exported .json file containing the workflow you want to import. Ensure the file was exported from Zuper, as only Zuper-exported workflows are compatible.
- Adjust the Workflow: Once the file is uploaded, the workflow will appear in your Zuper workflows list. Open the imported workflow to customize it as needed. This may involve updating configurations, adjusting settings, or modifying the workflow logic to suit your requirements.
- Only workflows exported from Zuper can be imported.
- If you encounter issues during the import process, ensure the JSON file is valid and properly formatted. You may need to check Zuper’s documentation or contact their support for assistance if the file fails to import.
- Add the missing variables.

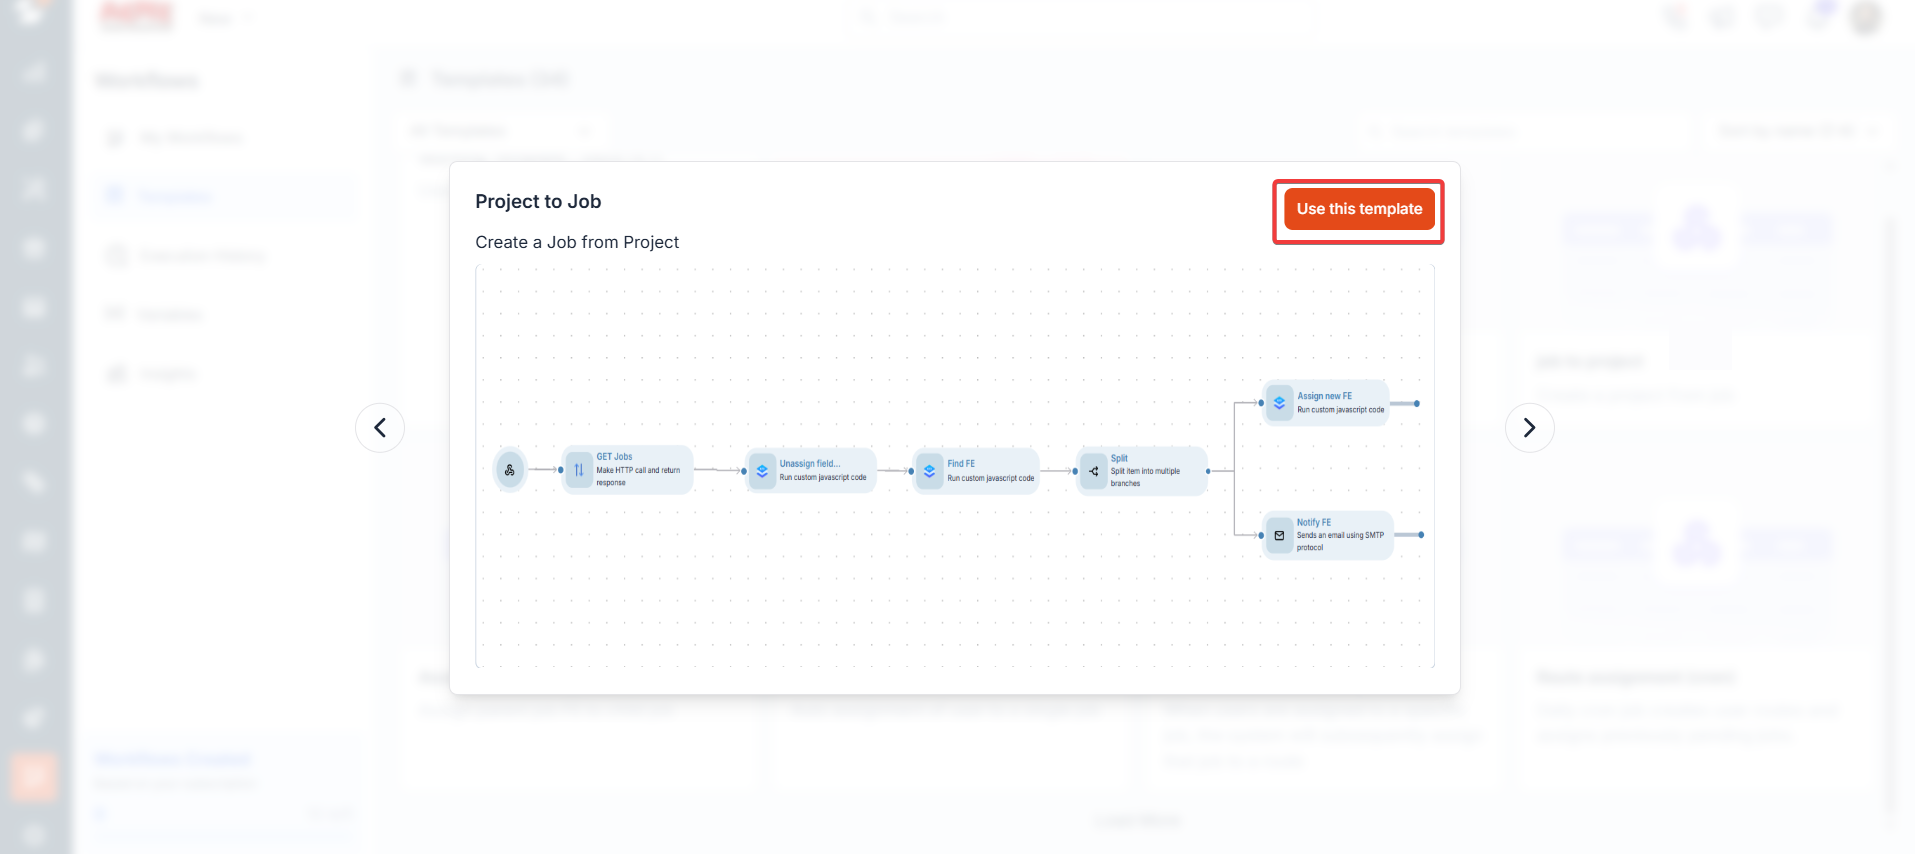
- Navigate to the Workflows section in the sidebar. Click the Templates to view the available options. Use the search bar or sort by name to find a specific template.
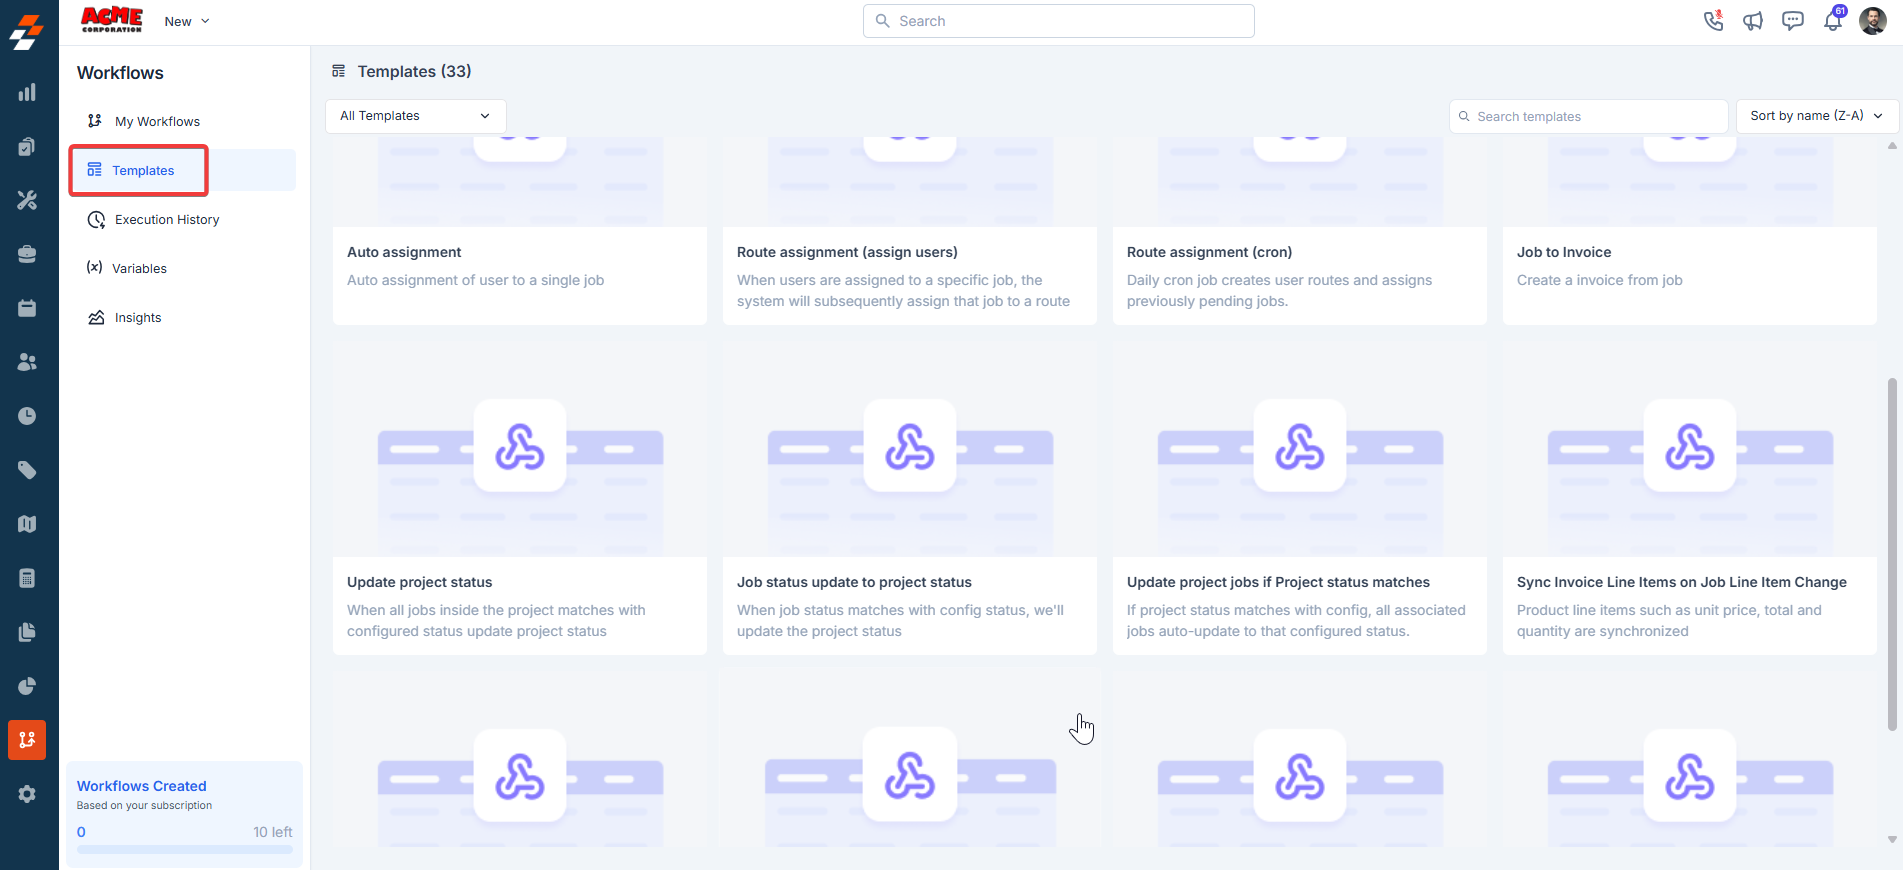
- Click any of the templates to use them for workflow creation. Then, Click “Use this template” to create the workflow.
III. Execution History
Access the Execution History tab to review past workflow runs and monitor their performance. This section provides critical details for tracking and troubleshooting:- Filters: Use dropdowns to filter by Workflow, All Status, Triggered Date, and Mode. Check the “Flagged” box to view only flagged items.
- Search: Enter a Workflow Name in the search bar to quickly find specific executions.
- Columns:
- Execution ID: Unique identifier for each execution.
- Workflow Name: Name of the executed workflow.
- Triggered at: Time when the workflow was initiated.
- Executed at: Time when the workflow was processed.
- Status: Indicates success (green), failure (red), in progress (yellow), or queued (gray).
- Time Taken: Duration of the execution, with warnings for failures.
- Total Executions: Displays the number of executions for the current month, along with the remaining quota.
Note: Once your monthly workflow execution limit is reached, contact Zuper Support for assistance.
- Pagination: Navigate through pages using the controls at the bottom.
- Success: Workflow completed without issues (green checkmark).
- Failed: Workflow encountered an error (red “X” with warning icon).
- In Progress: The Workflow is currently running.
- Queued: The Workflow is waiting to be processed.
- Created Time: The timestamp when the workflow is queued or initiated in the system. This may be slightly later than the Triggered Time due to system processing or queueing delays.
- Triggered Time: The timestamp when the trigger condition is met (e.g., when a “Job Created” event occurs or a webhook is received).
- Why It’s Helpful:
- Troubleshooting: A large gap between Triggered Time and Created Time may indicate system latency or resource issues.
- Audit Accuracy: Triggered Time confirms when the event occurred, while Created Time shows when the system began processing.
- Performance Optimization: Monitoring this gap helps improve workflow efficiency, especially for time-sensitive tasks.
- Compliance: Precise Triggered Times align executions with external events or schedules for auditing purposes.
IV. Variables
Using Variables in Workflow Builder
This guide explains how to define, use, and manage variables in the Workflow Builder, including how to reference them in code nodes and throughout workflows. It also highlights the importance of the “Mark as Secret” feature for enhanced security.Defining Variables
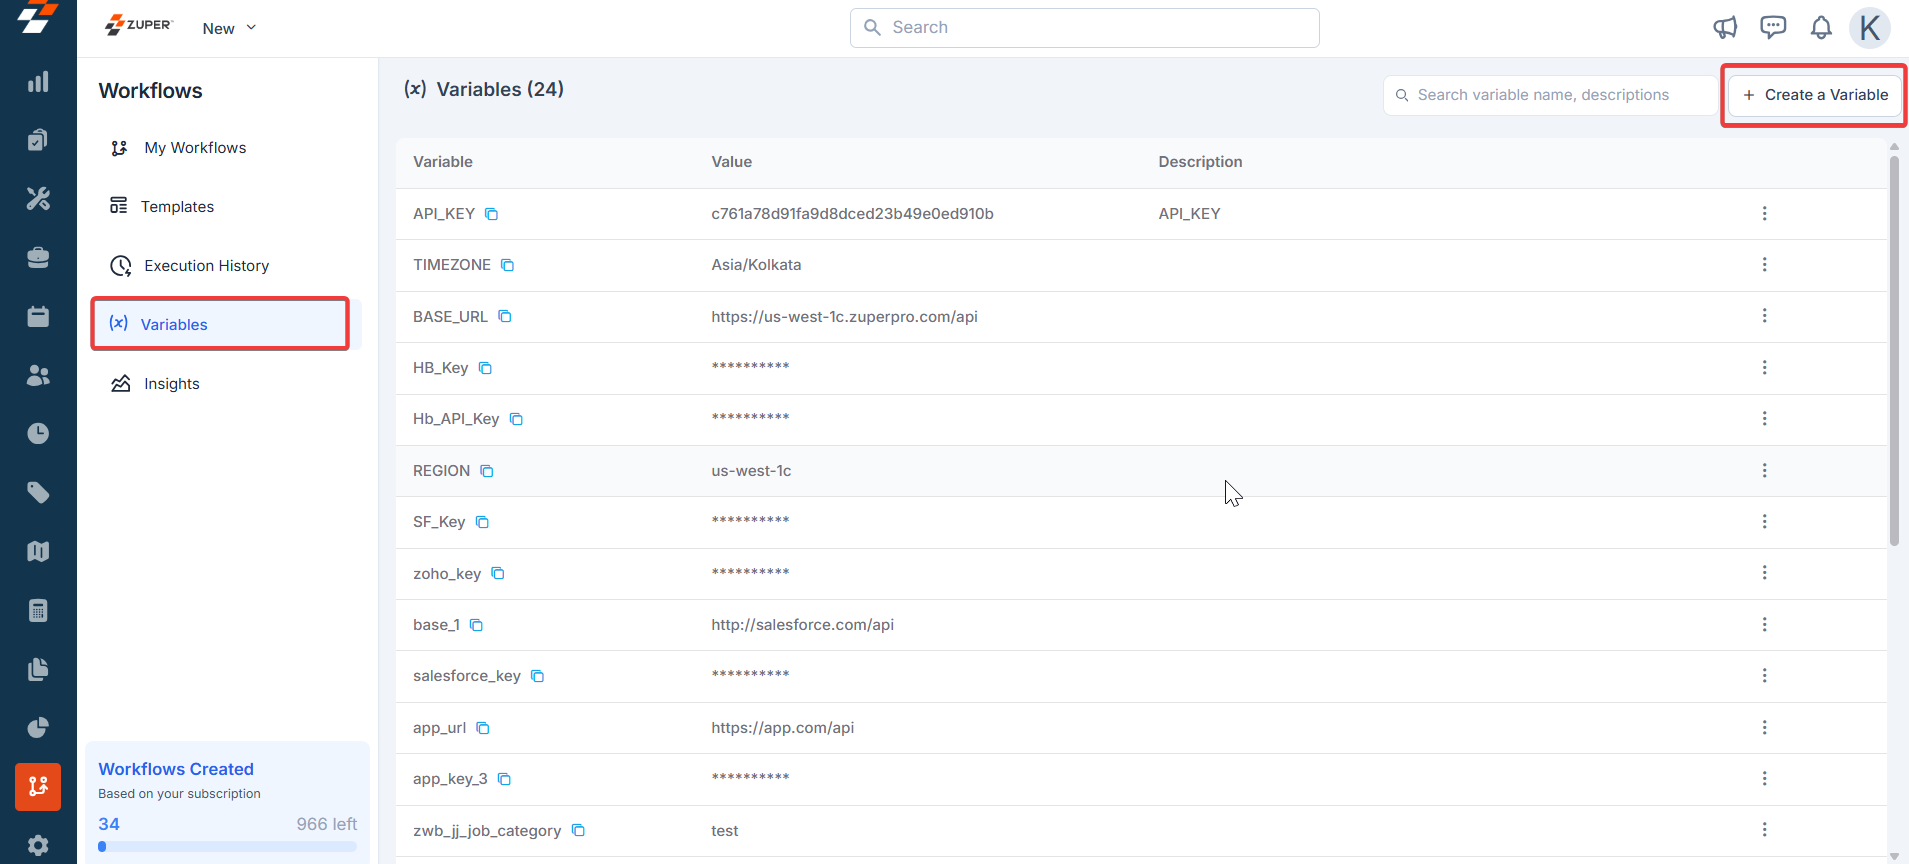
To create a variable in Workflow Builder:- Navigate to the Variables tab in the Workflow Builder interface.
- Click Create a Variable.
- Provide a name for the variable (e.g., client_id).
- Assign a value to the variable or link it to a data source (e.g., an API response, database field, or user input).
- Optionally, enable the Mark as Secret option for sensitive data (see below for details).
- Encrypts the variable’s value in storage and during transit.
- Masks the value in the Workflow Builder interface to prevent accidental exposure.
- Restricts access to authorized users or processes, reducing the risk of data leaks.
- Enhances security by ensuring sensitive data is not logged or displayed in plaintext during workflow execution or debugging.

Using Variables in Workflows
Variables make workflows dynamic and reusable by allowing you to reference data across nodes. You can use variables in:- Node configurations: Insert variables into fields like text inputs, API calls, or conditions to dynamically populate values.
- Code nodes: Reference variables in JavaScript code to process or manipulate data.
- In node configurations, select the variable from a dropdown menu or reference it using the format
{{VARIABLE.<variable_name>}}in supported fields. - In code nodes, use the VARIABLE object followed by the variable name to access its value.
- In the node’s configuration panel, locate the field where the variable is needed (e.g., a URL or payload field).
- Use the variable picker or type
{{VARIABLE.client_id}}to insert the variable’s value dynamically.
Tips for Success
- Test thoroughly: Always test your workflows to ensure variables and expressions are correctly referenced and the return statement provides the expected output.
- Use descriptive variable names: Clear names (e.g., client_id, user_email) improve workflow readability and maintenance.
- Leverage “Mark as Secret” for sensitive data: Always enable this option for variables containing sensitive information to enhance security and compliance.
- Validate data sources: Ensure variables linked to data sources (e.g., APIs, databases) are correctly configured to avoid runtime errors.
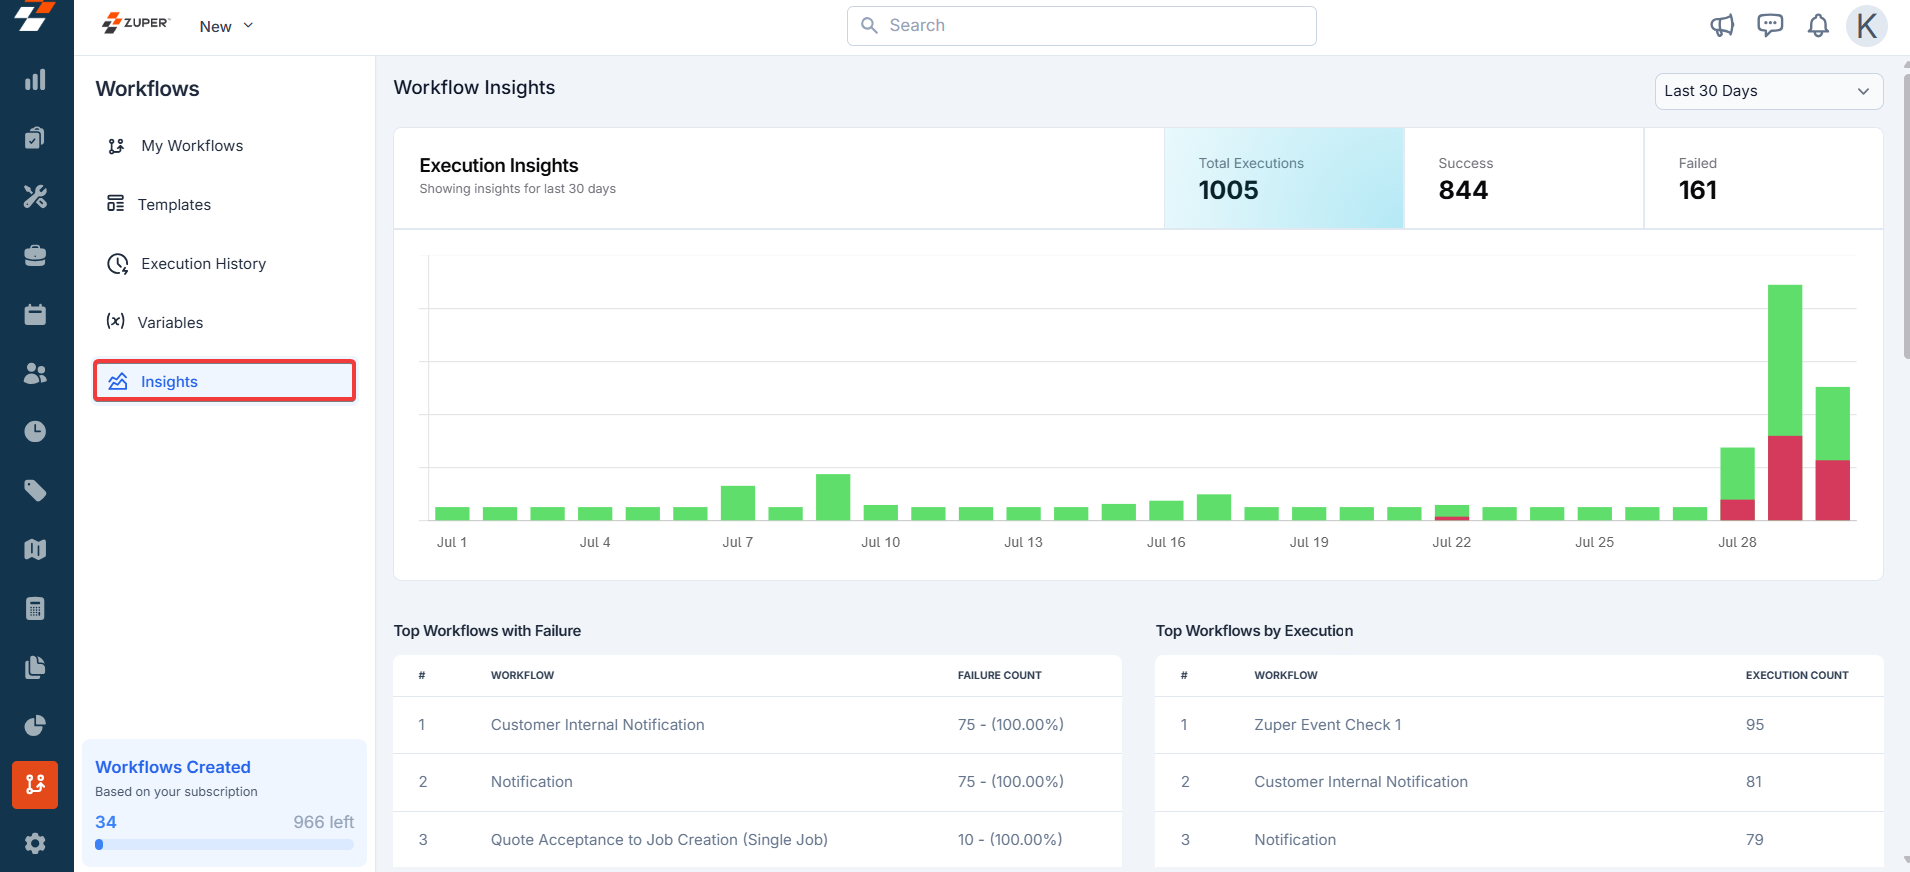
V. Insights
- Navigate to the “Execution Insights” section from the main dashboard.
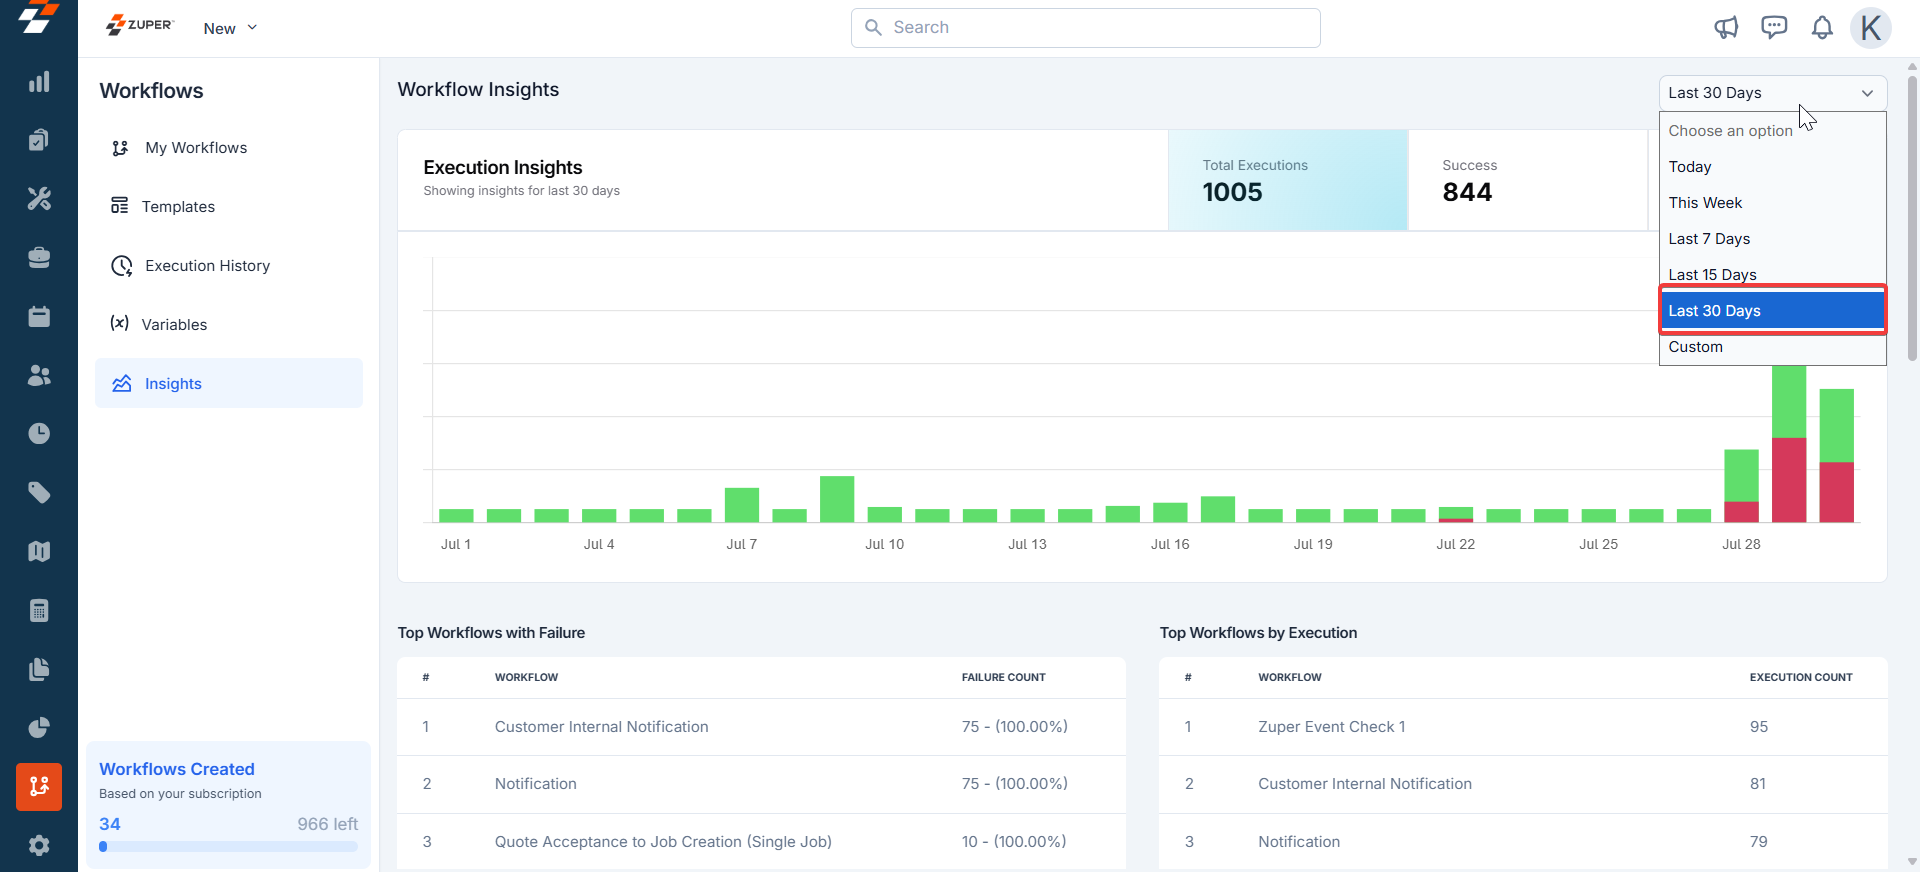
- Check the overview for total executions, success/failure rates, and key trends. Use the “Last Days” filter to adjust the time range for data analysis.
- Save or export insights for future reference.