Navigation: Timesheets —> Shifts
Viewing user shifts
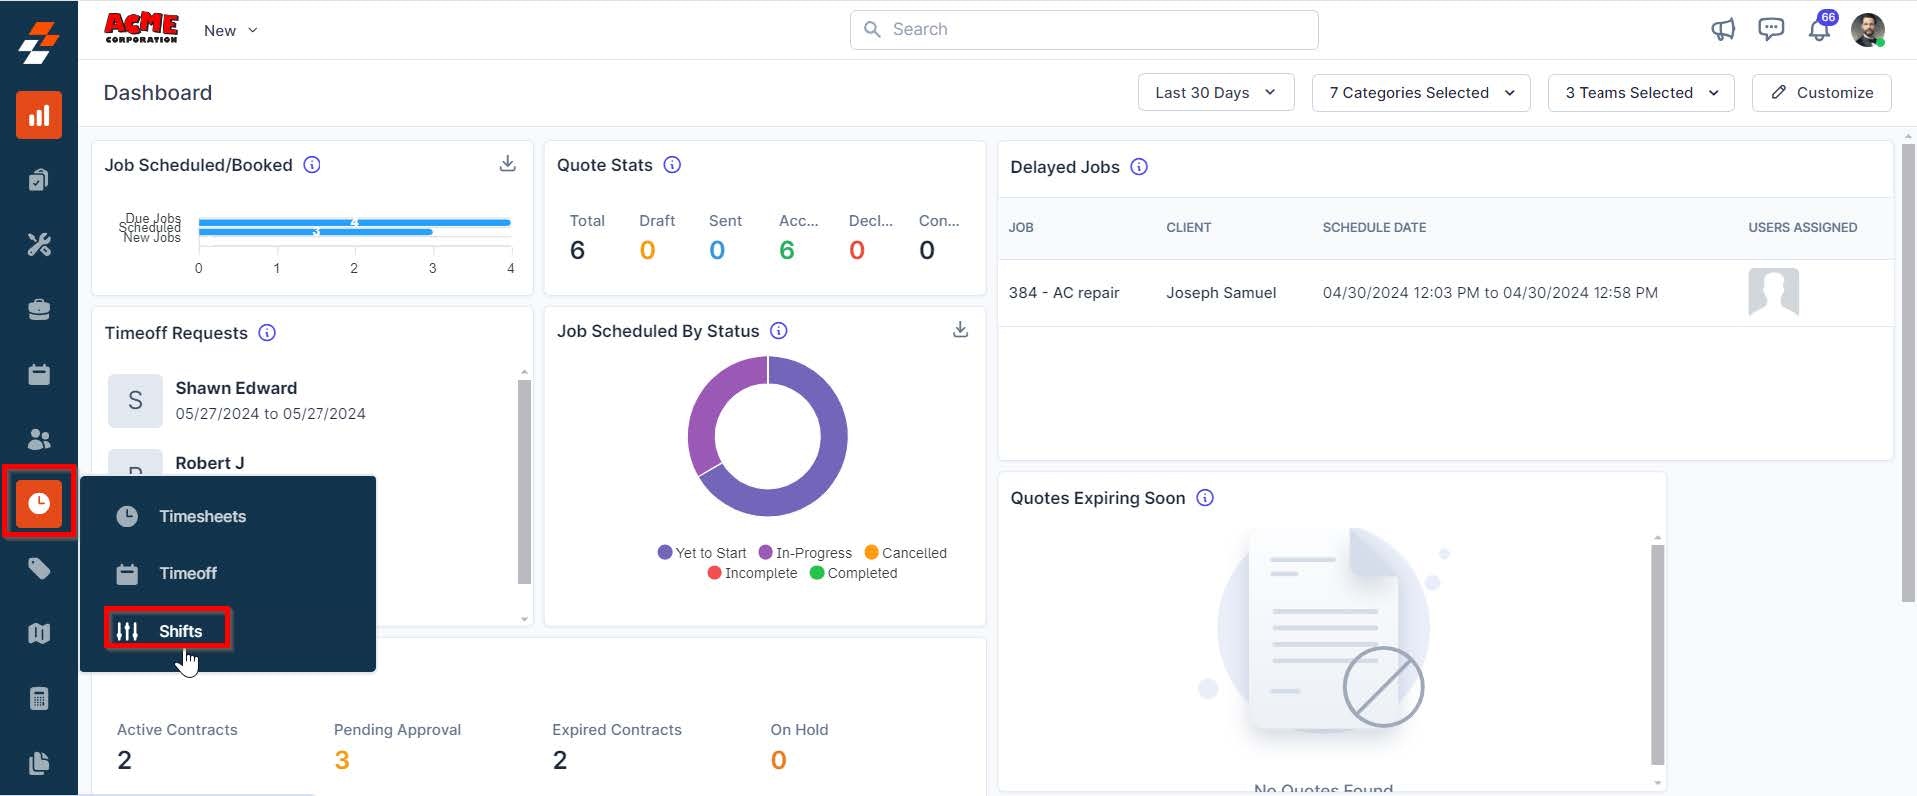
- Select the “Timesheets” icon from the left navigation menu and choose “Shifts.”

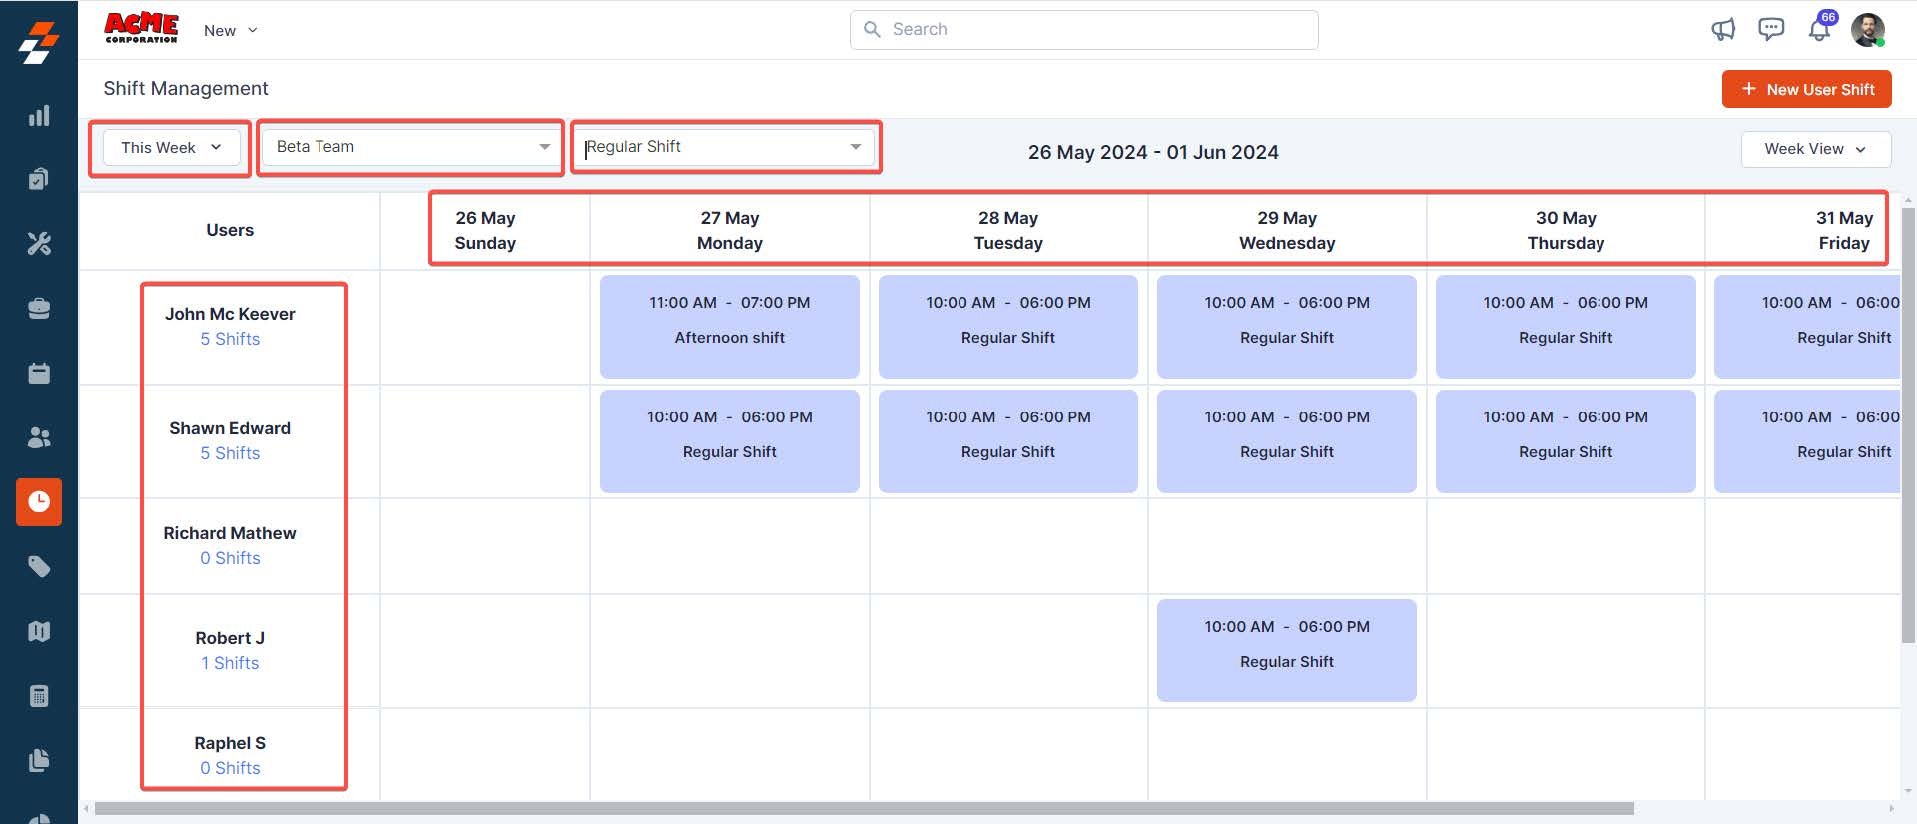
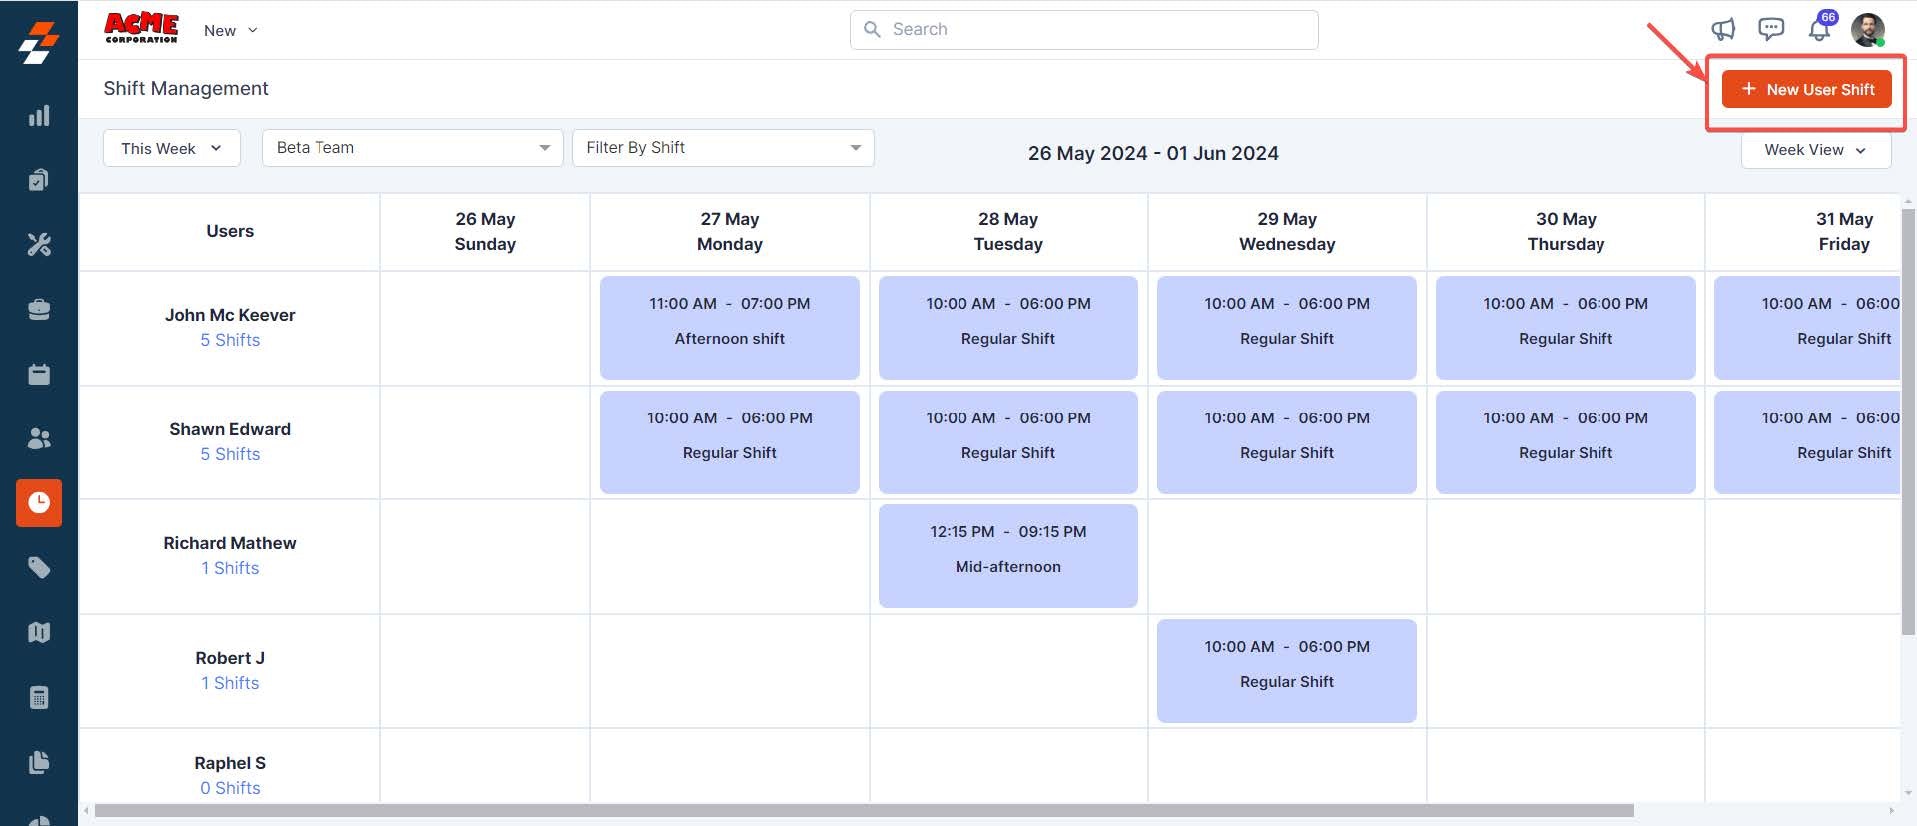
- You can view all the users and their shifts based on the team, date range, and filter applied.

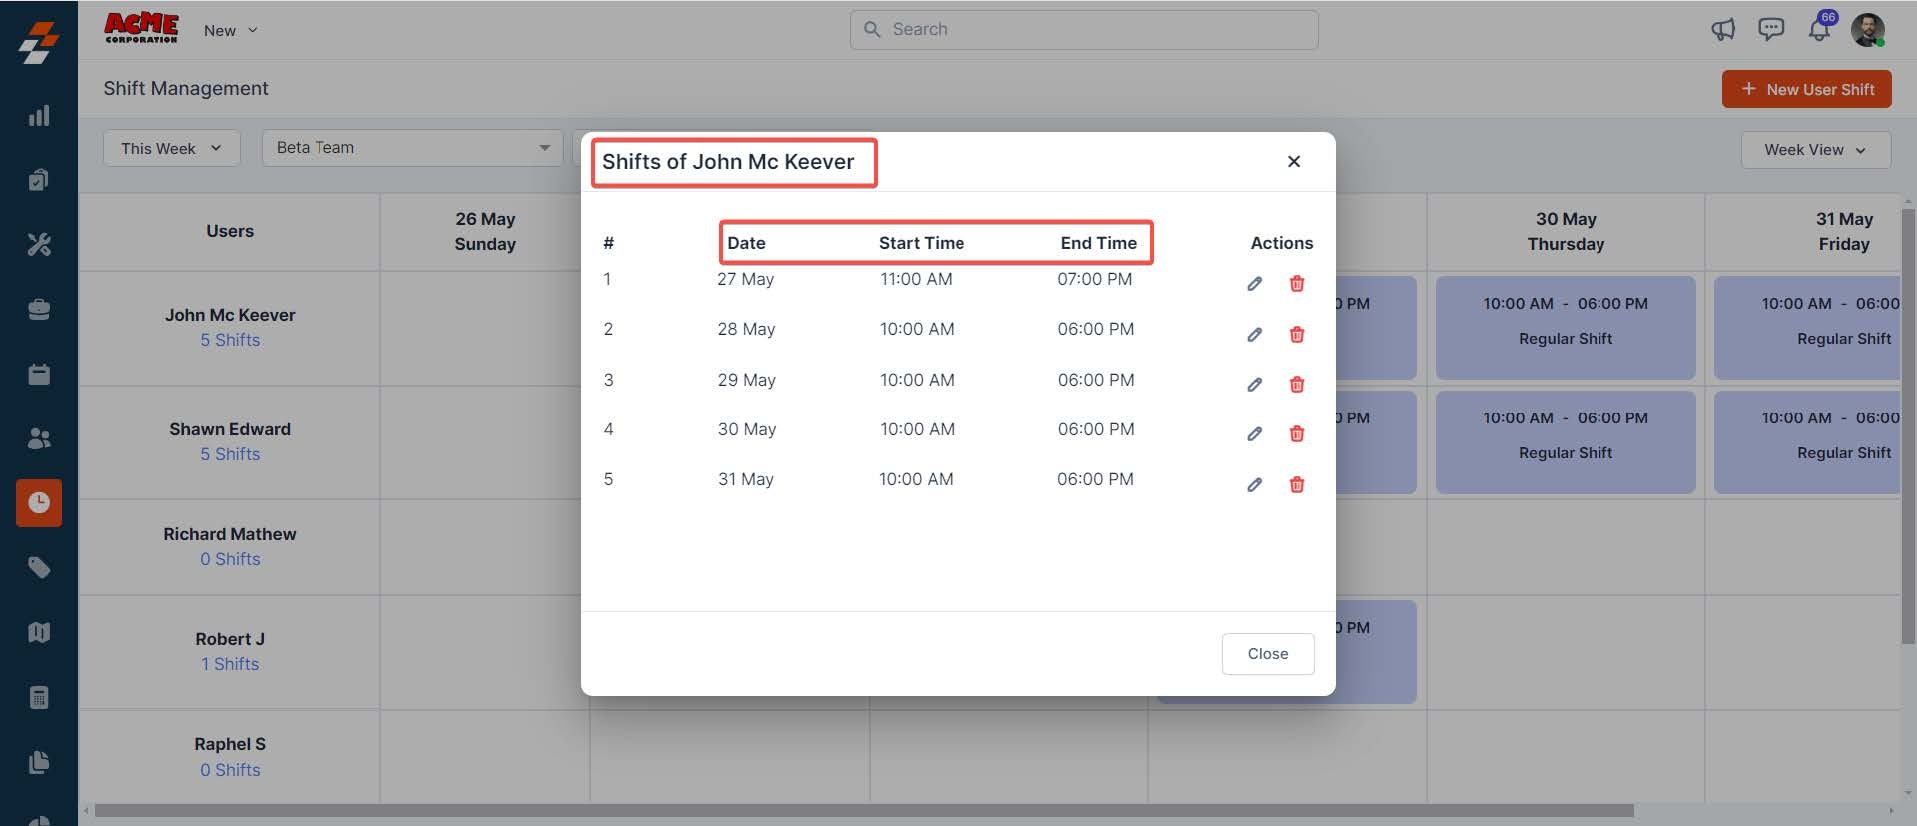
- Select the user’s shifts link on the left to view a specific user’s shifts.

- Once you have selected the user’s shift link, you can view their scheduled shifts, including dates and times.
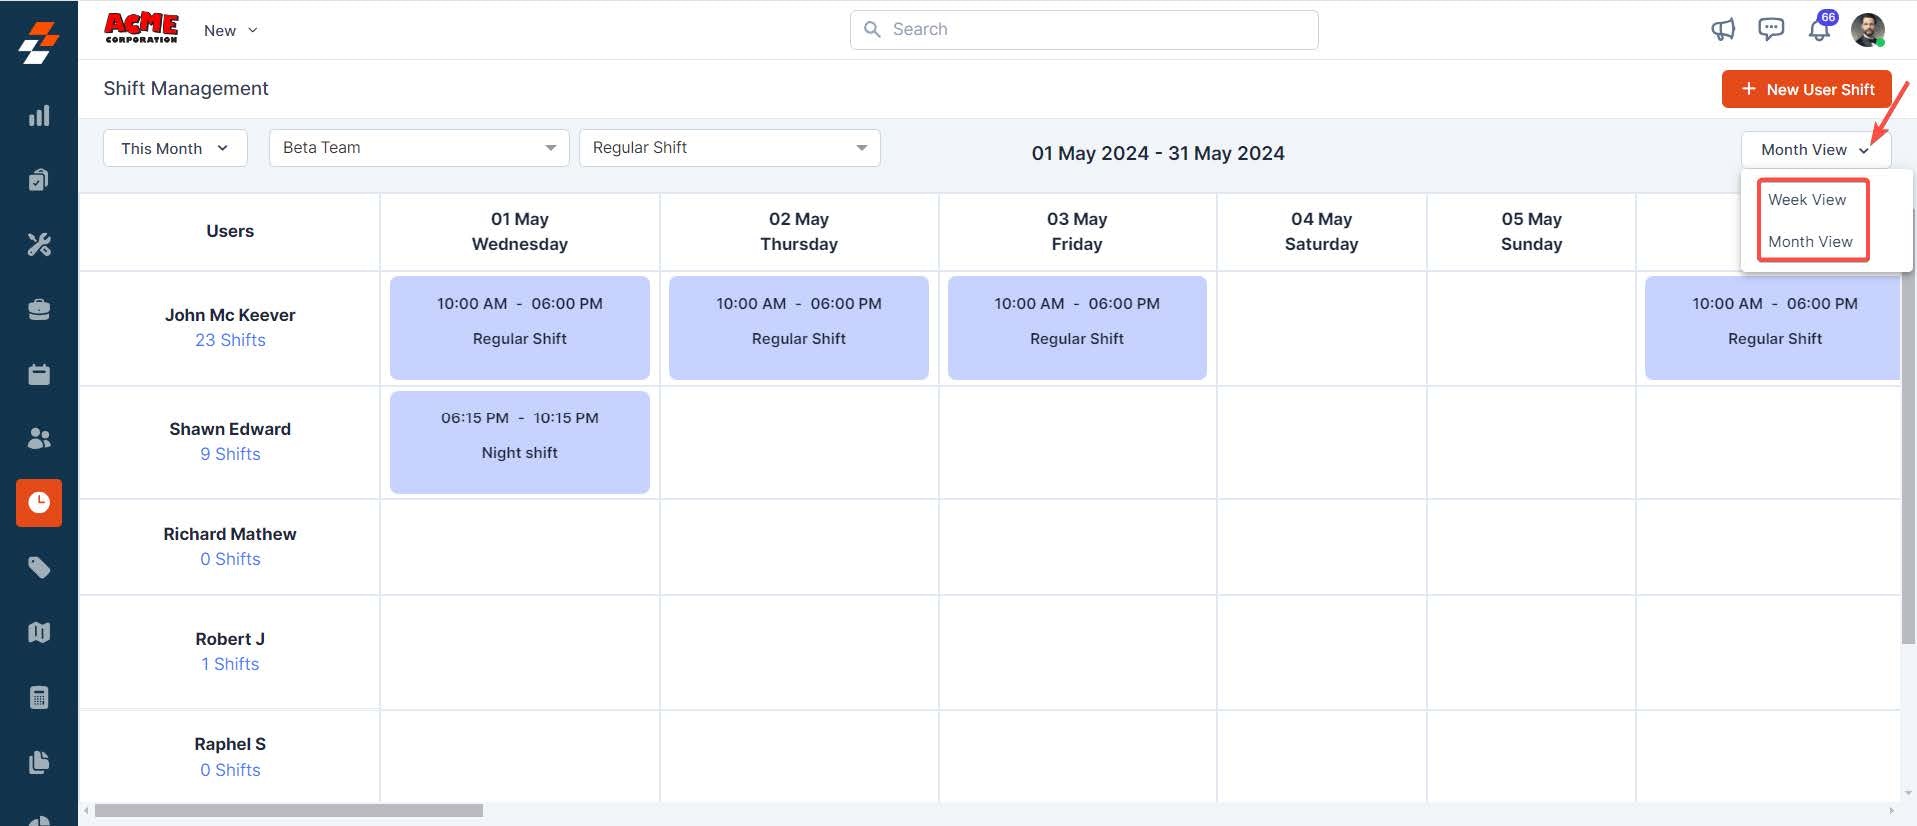
- You can also customize the calendar view in Zuper to suit your needs better:
- Month View: This feature provides an overview of all users’ shifts within a specific month, giving you a broad perspective on scheduling.
- Week View: Provides an overview of users’ shifts each week, allowing for more granular planning and management.
Update user shift
You can update a user shift in Zuper through any of the following ways:- Directly from the shifts page
- Selecting the user’s shifts link from the left panel
Directly from the shifts page:
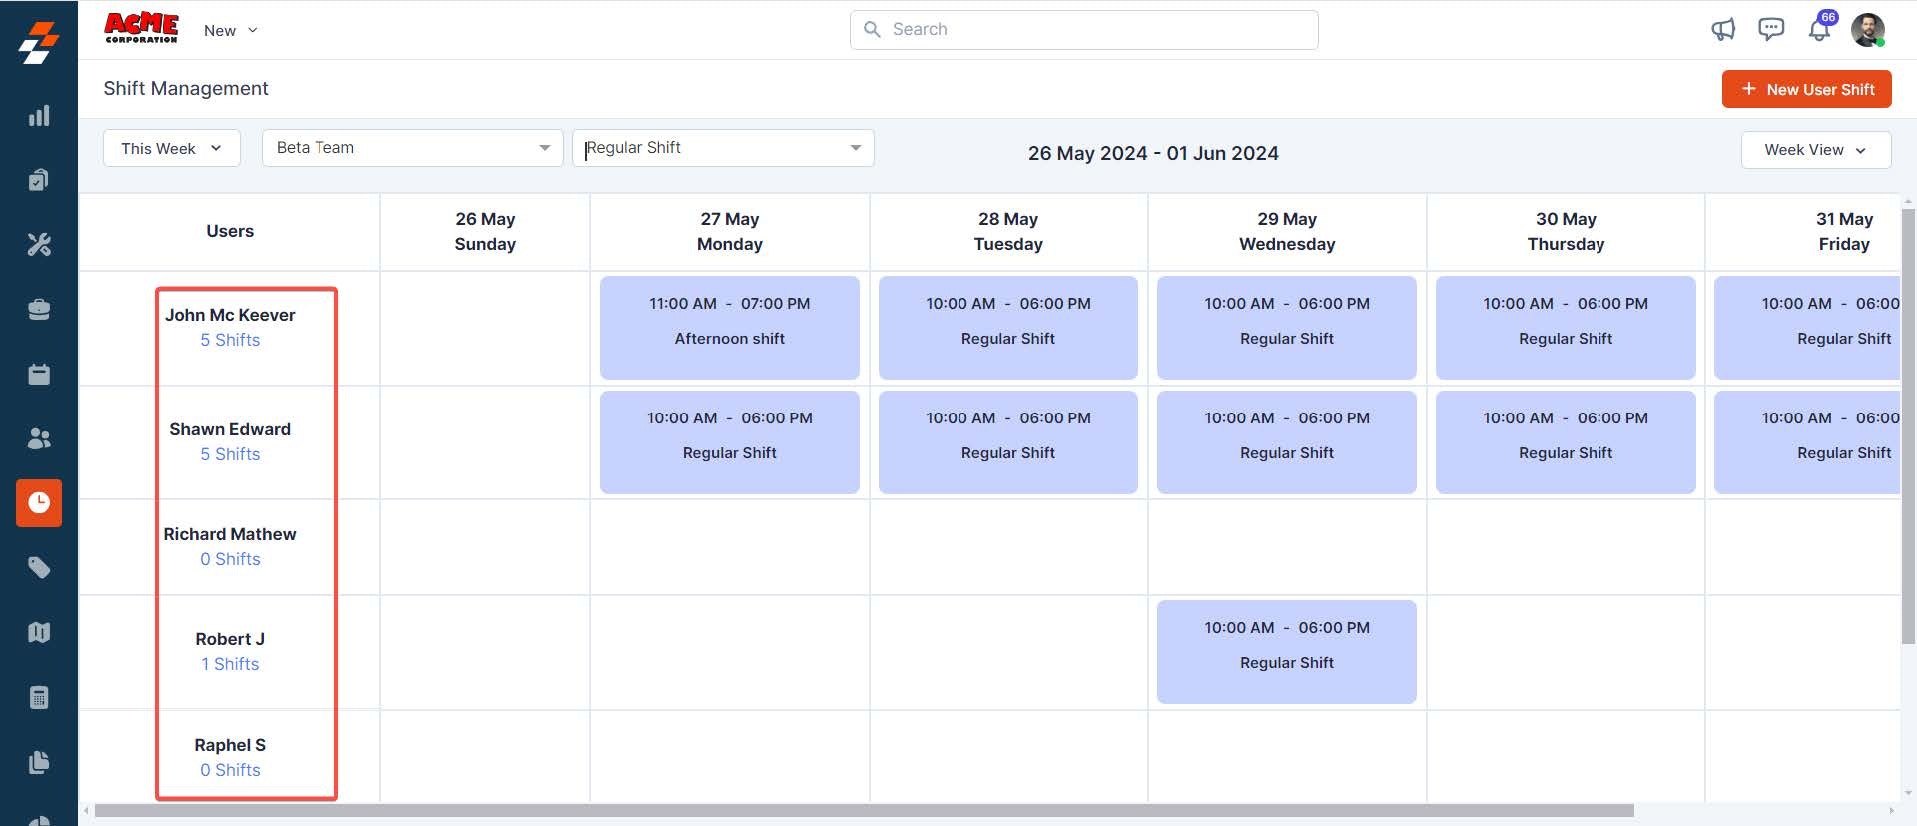
- After landing on the Shifts page, you can view the user’s shifts based on the team and date range selected.
- Hover over the user shift you wish to edit, where you’ll see a pencil icon. Click the “pencil icon” to edit the shift details.
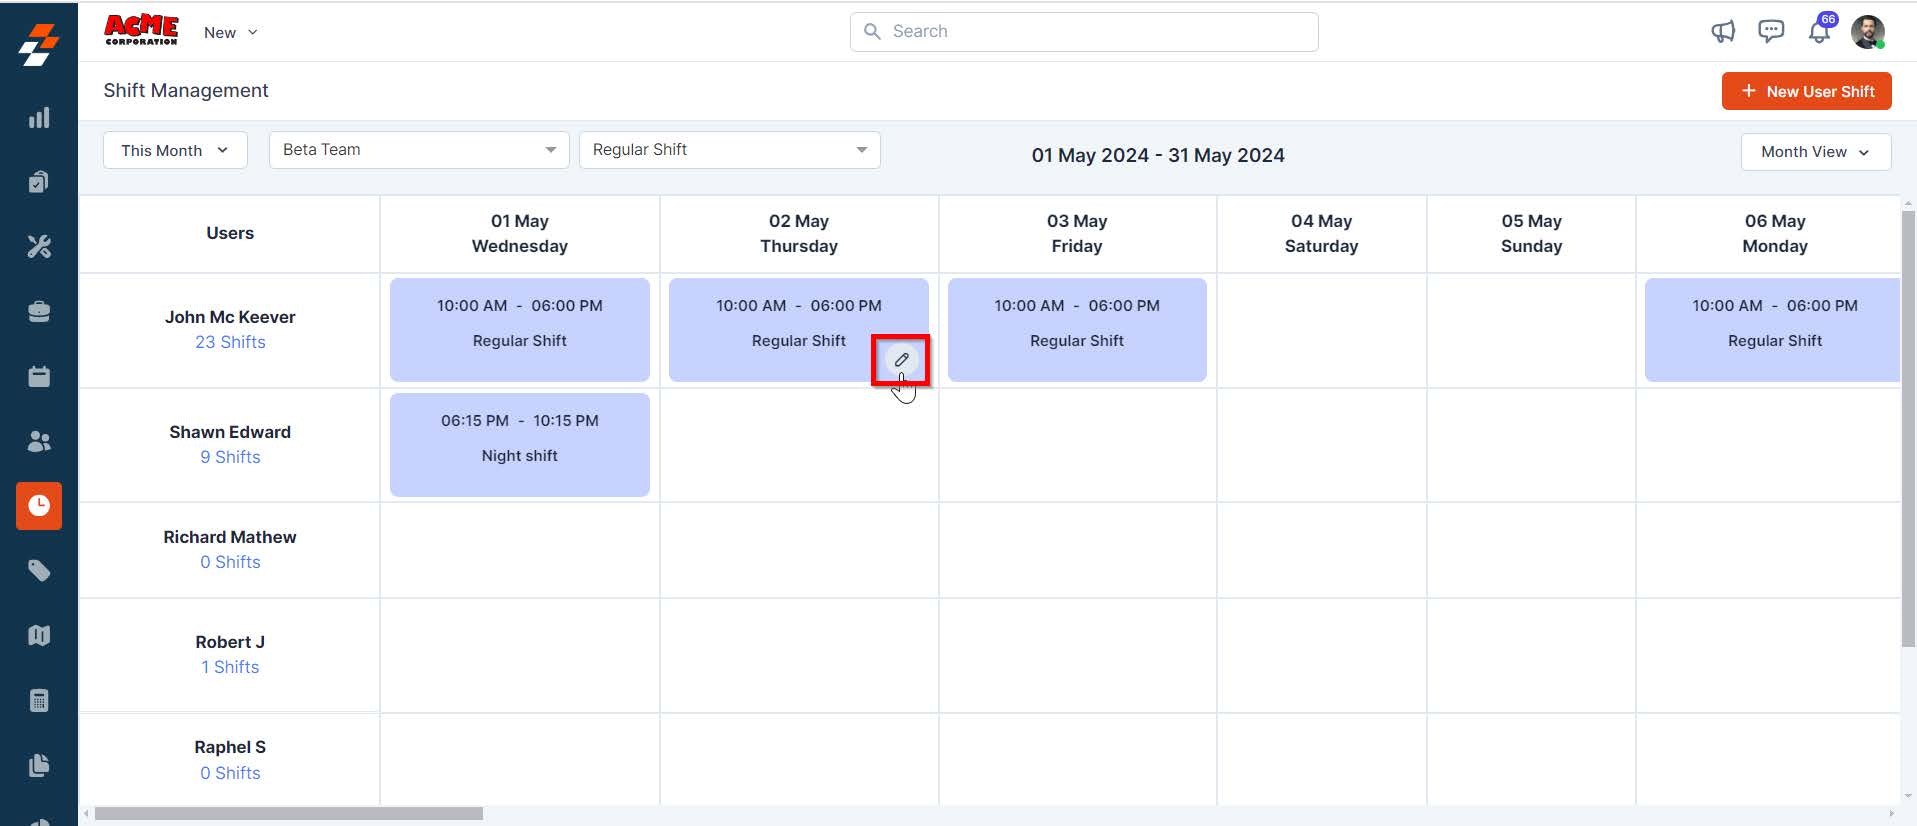
- Once the necessary changes are made, click the “Update” button to save the changes.
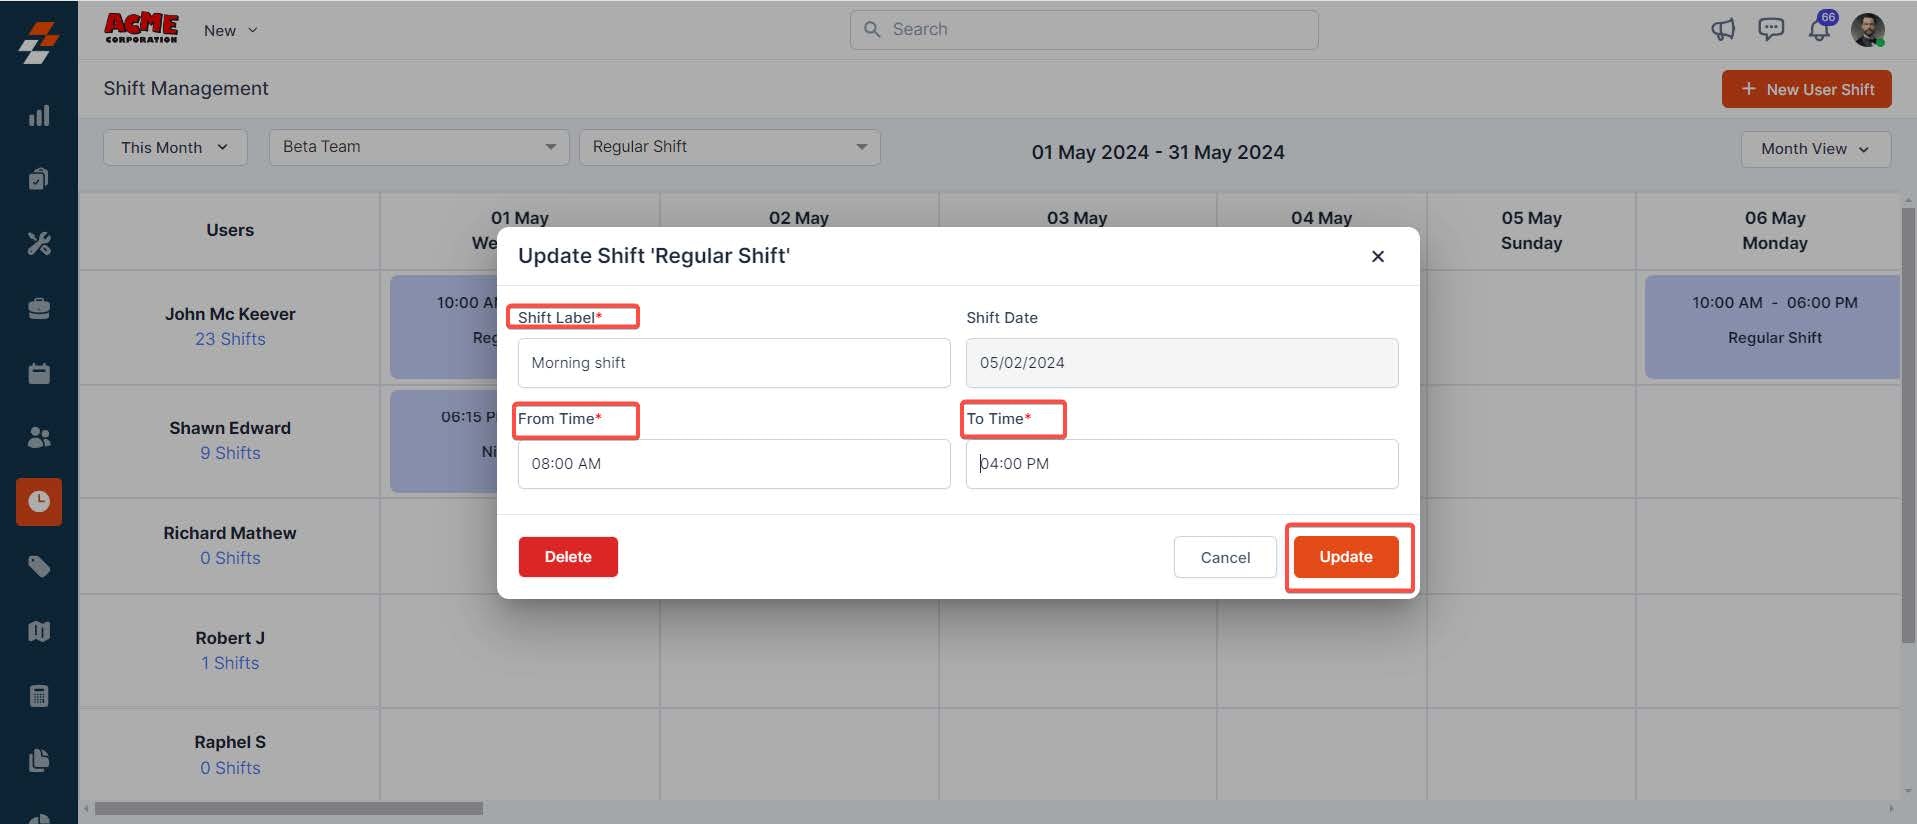
Note: You can only edit the shift label and time, not the date. You can delete the user shift from here by clicking the Delete button.
Selecting User’s shifts link from the left panel:
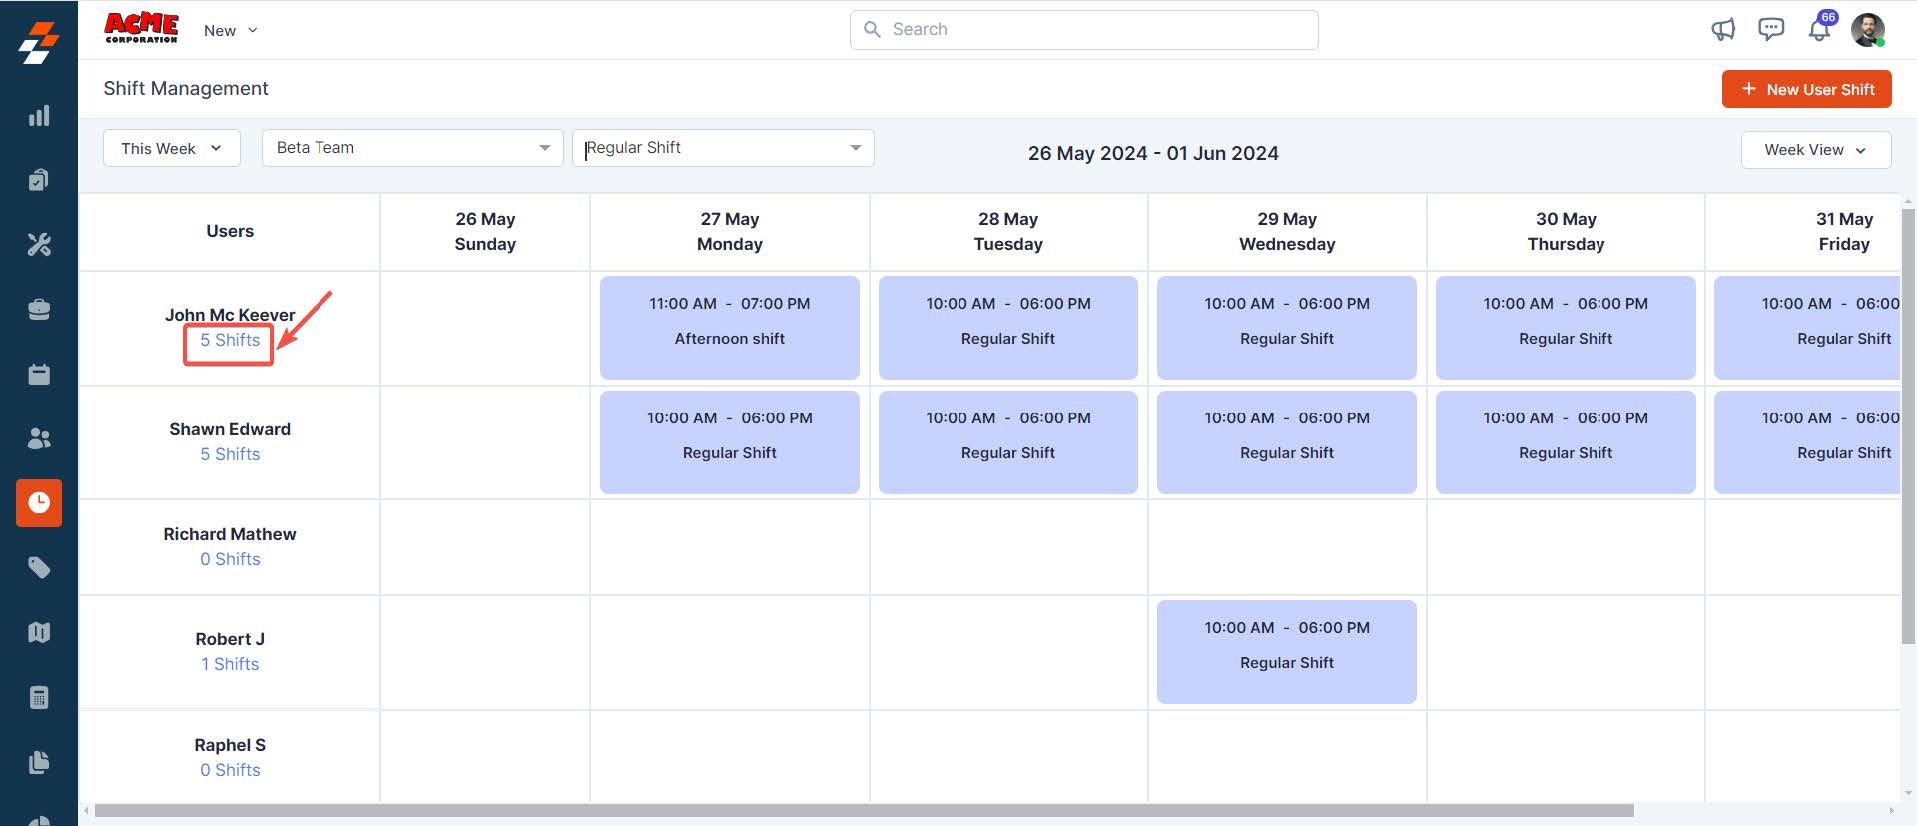
- After landing on the shifts page, you can view the users and the number of shifts on the left.
- Select the user’s number of shifts.
-
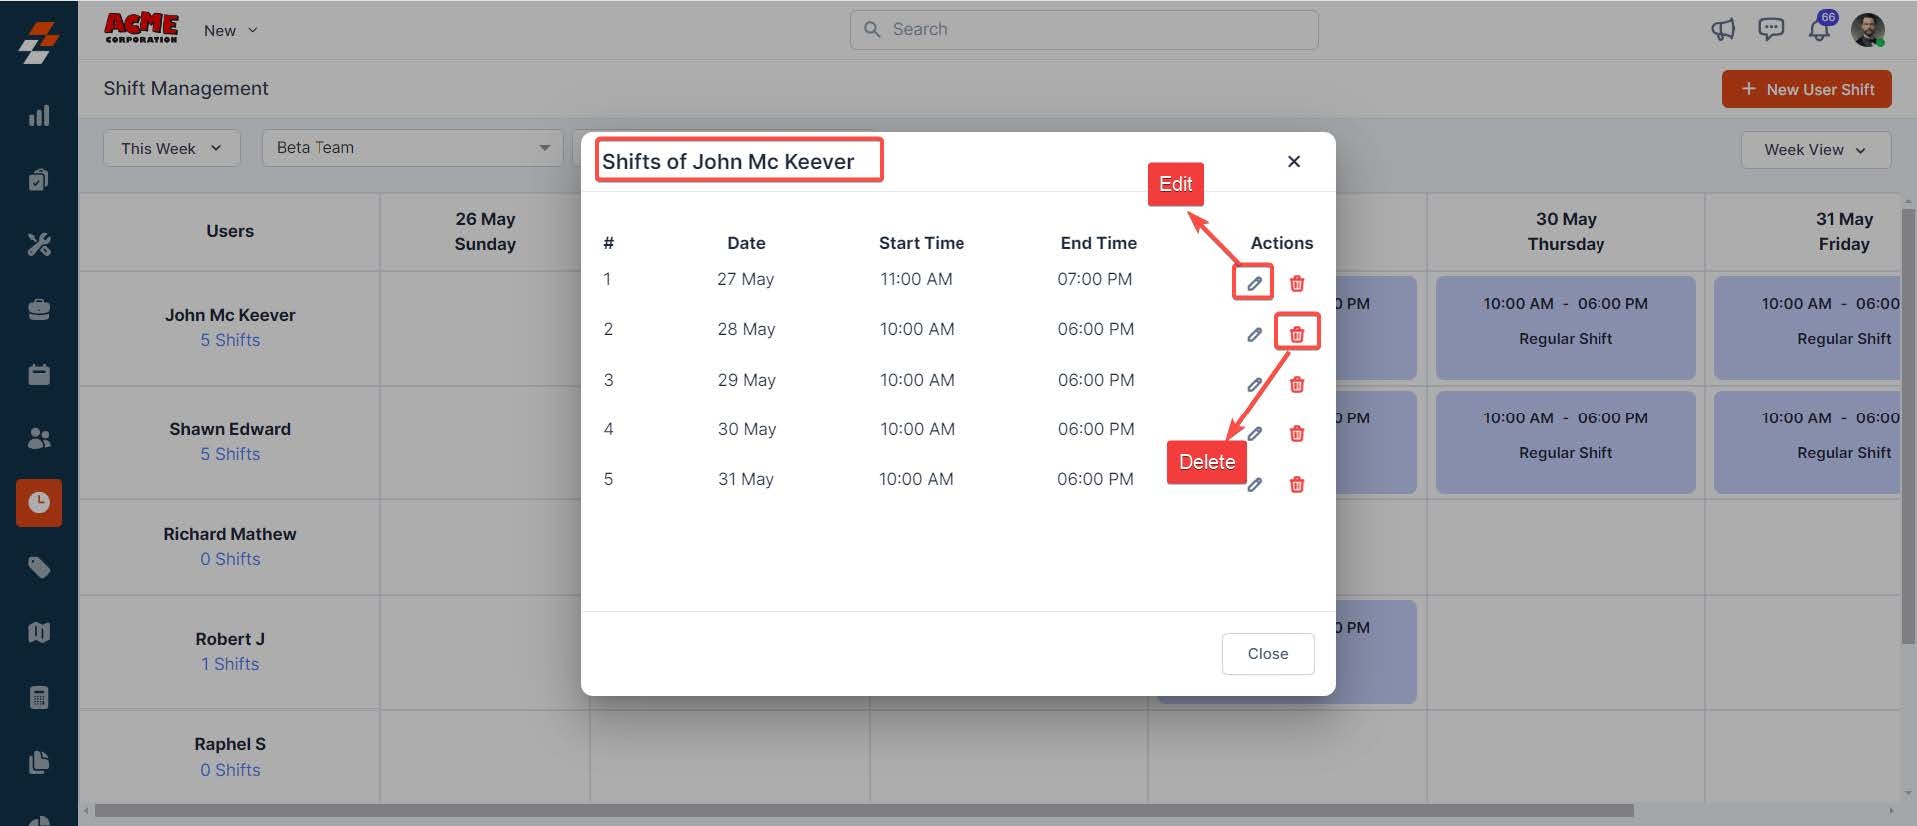
You can view their scheduled shifts, including dates and times. Select a shift and use the edit and delete icons under the Action column to edit or delete it.
Adding a new shift
To add a new shift for a user in Zuper, follow these steps:- Click the “Timesheets” module from the left navigation menu and select “Shifts.”
- You can view all the users and their shifts based on the team, date range, and filter applied.

- To create a new shift, click ”+ New User Shift” at the top right corner of the page. A pop-up appears to create a new User Shift.
- Enter the following mandatory details in the pop-up and click the “Create” button.
- User*: Select the user for whom you are creating the shift.
- Choose shift*: Select the appropriate shift from the list.

Note: Only shifts configured in Master Shifts under Timesheet Settings will be available here.
- Shift Start Date*: Choose the date when the shift begins.
- Shift End Date*: Choose the date when the shift ends.
- The new shift will be added to the user’s schedule, and they will be notified accordingly.