1. Accessing Calls on the Web
Admins can access Calls on the web, but must have permissions enabled in the settings. For detailed steps, refer to “How to Manage User Permissions.”Navigating to the Calls Page
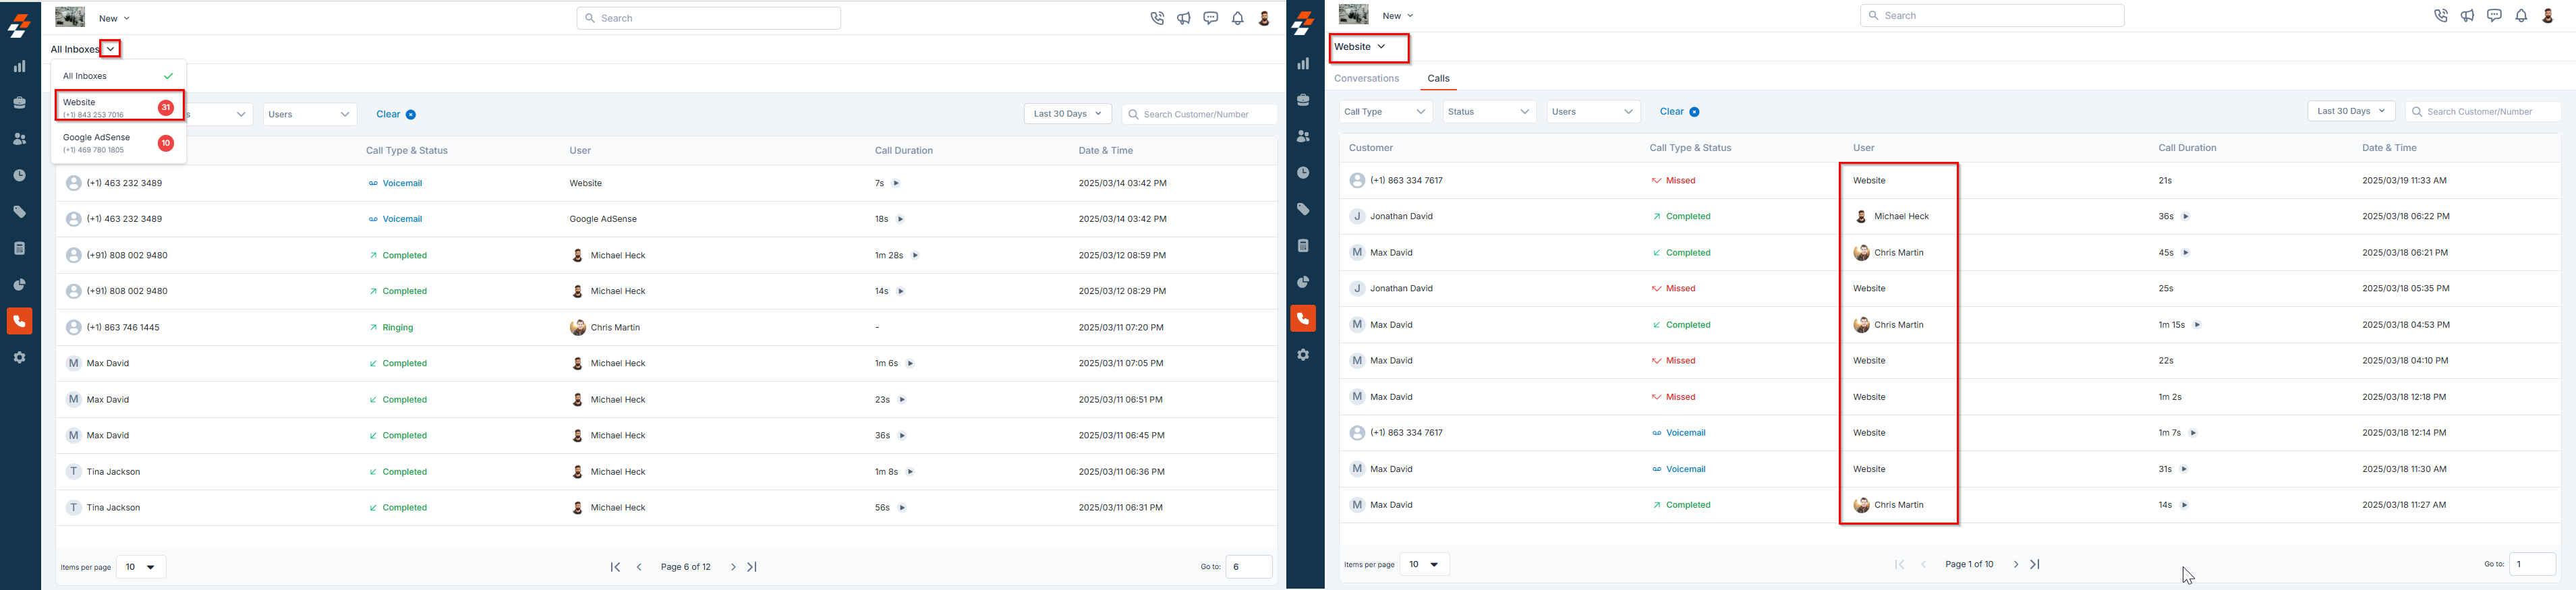
- Click Inboxes from the left navigation menu.
- You will be directed to the All Inboxes listing page.
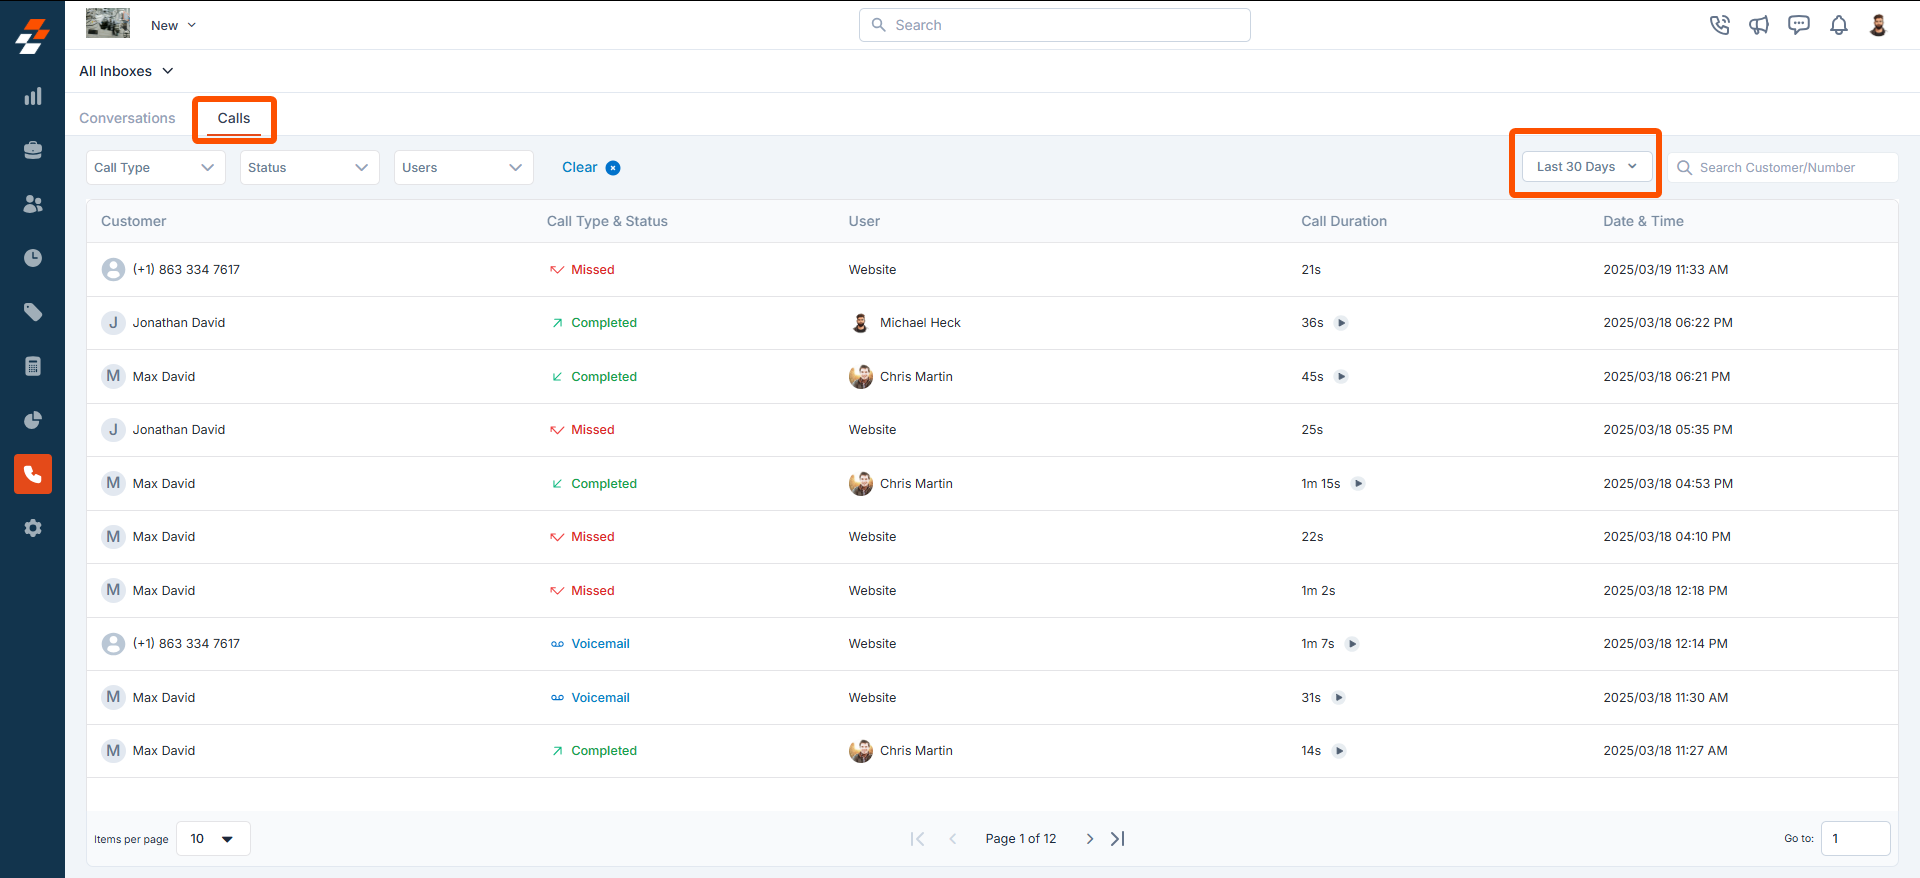
- Navigate to the Calls tab to access all call records. Calls are displayed based on the selected date range (e.g., Today, Last 7 Days, This Month).
Understanding Call Details
The Calls page displays a structured list of all call entries with the following details:- Customer Name: Displays the name of the customer associated with the call. If the number is not saved in the system, the phone number will be shown instead.
- Call Type & Status: Shows if the call was Incoming or Outgoing, along with its status (e.g., Completed, Missed, Failed, Ongoing).
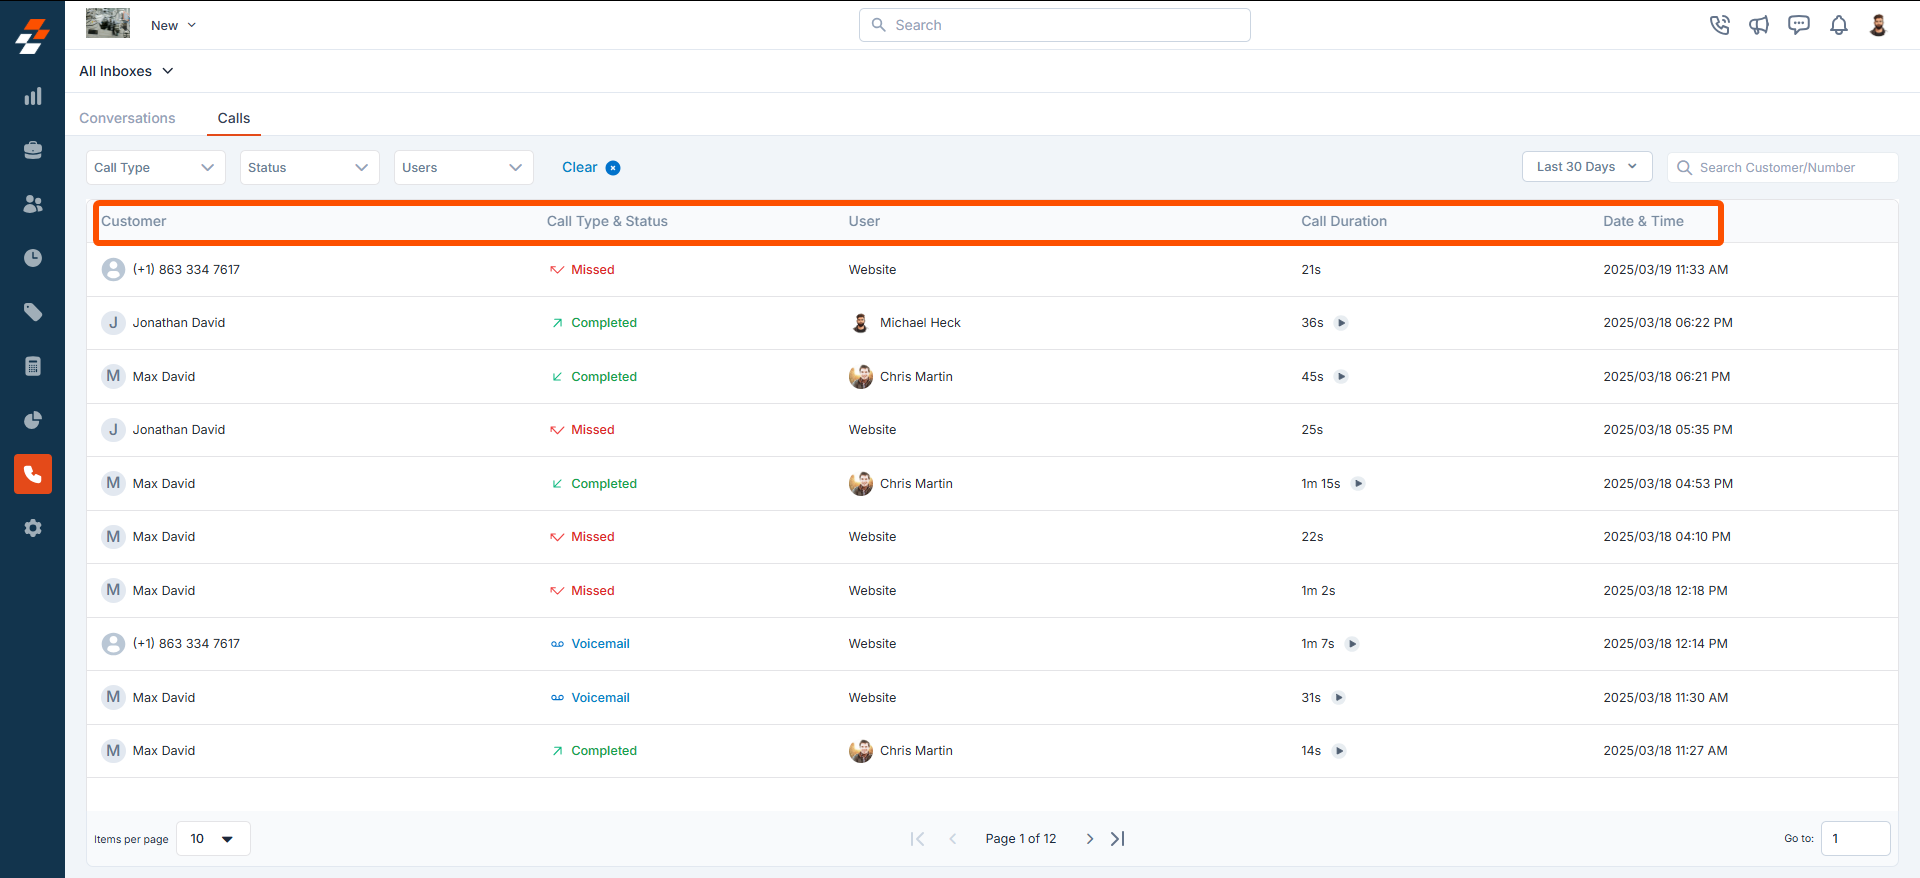
- User Details: Shows the team member who made or answered the call. For missed calls, the Zuper Phone number the call was made to is displayed.
- Call Duration: Indicates the length of the call.
- Date & Time: Records when the call was made or received.
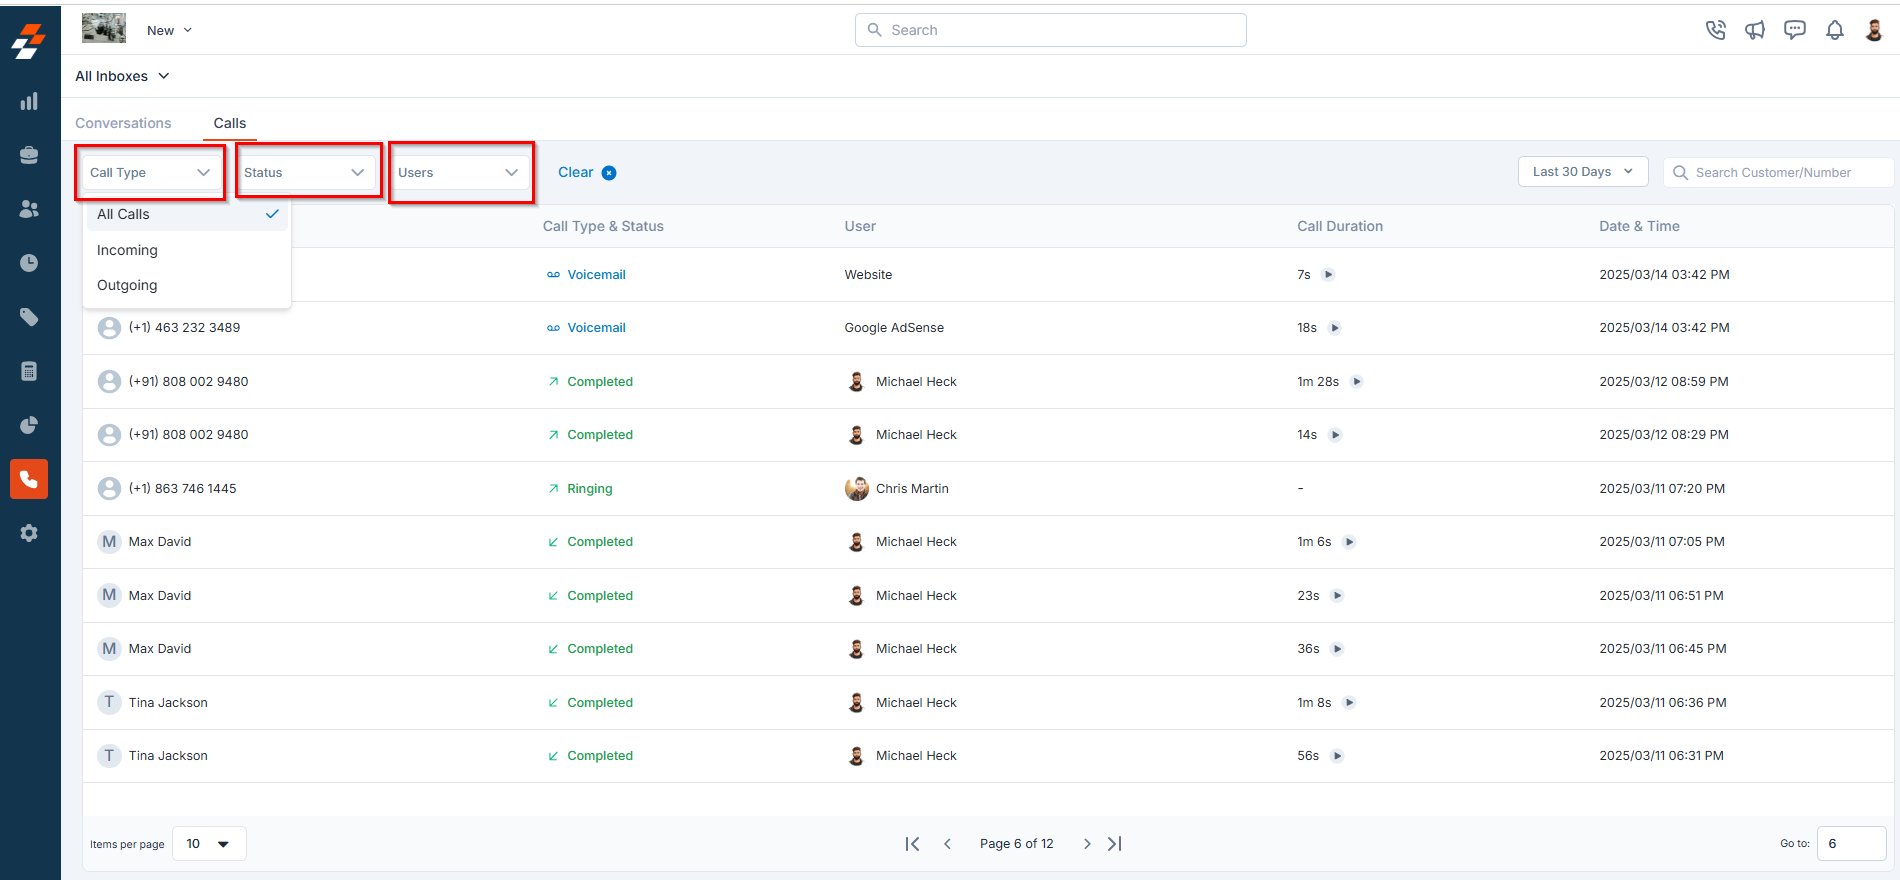
Filtering Calls
To refine your view, you can filter calls based on:- Call Type – Choose between incoming and outgoing calls.
- Status – Filter by call completion status (completed, failed, missed, voicemails, canceled, ongoing, etc.)
- Users – View calls made or answered by specific team members.
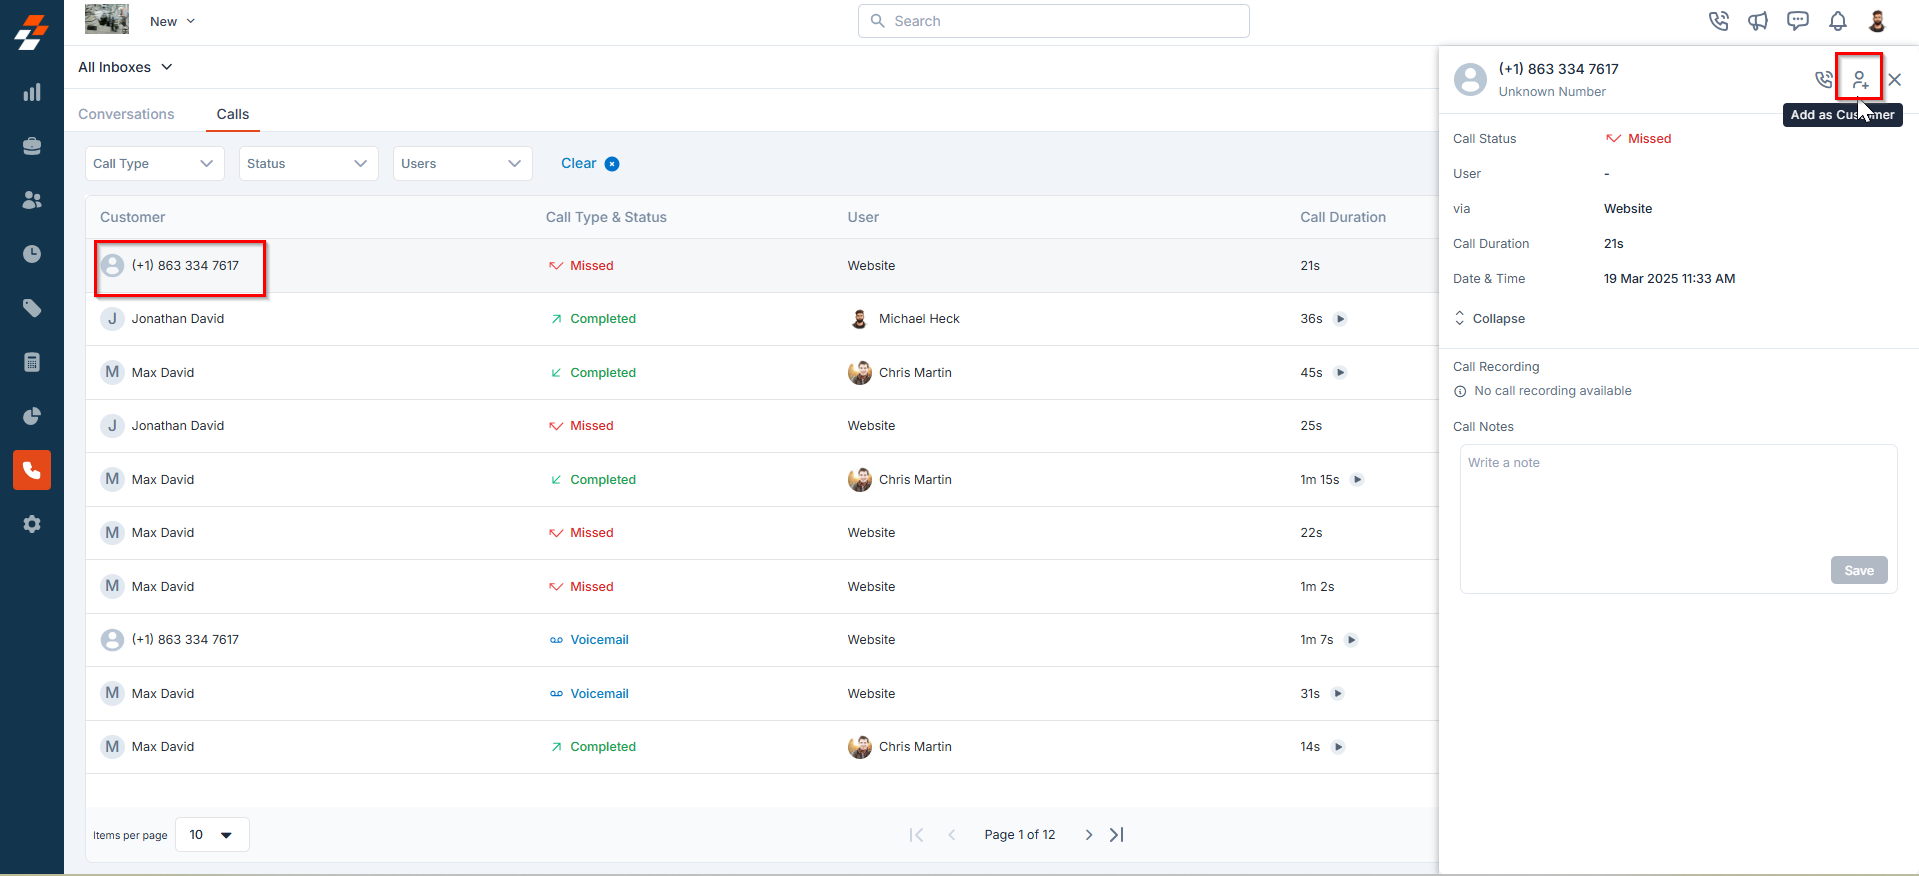
2. Viewing Call Log
To view call history:- Click a call entry on the Calls page.
- A Quick View panel opens with the following details:
- Call Status – Indicates whether the call was Incoming, Outgoing, Missed, etc.
- User – Displays the team member who made or answered the call.
- Zuper number – Displays the number through which the call was made.
- Call Duration – Shows the total length of the call.
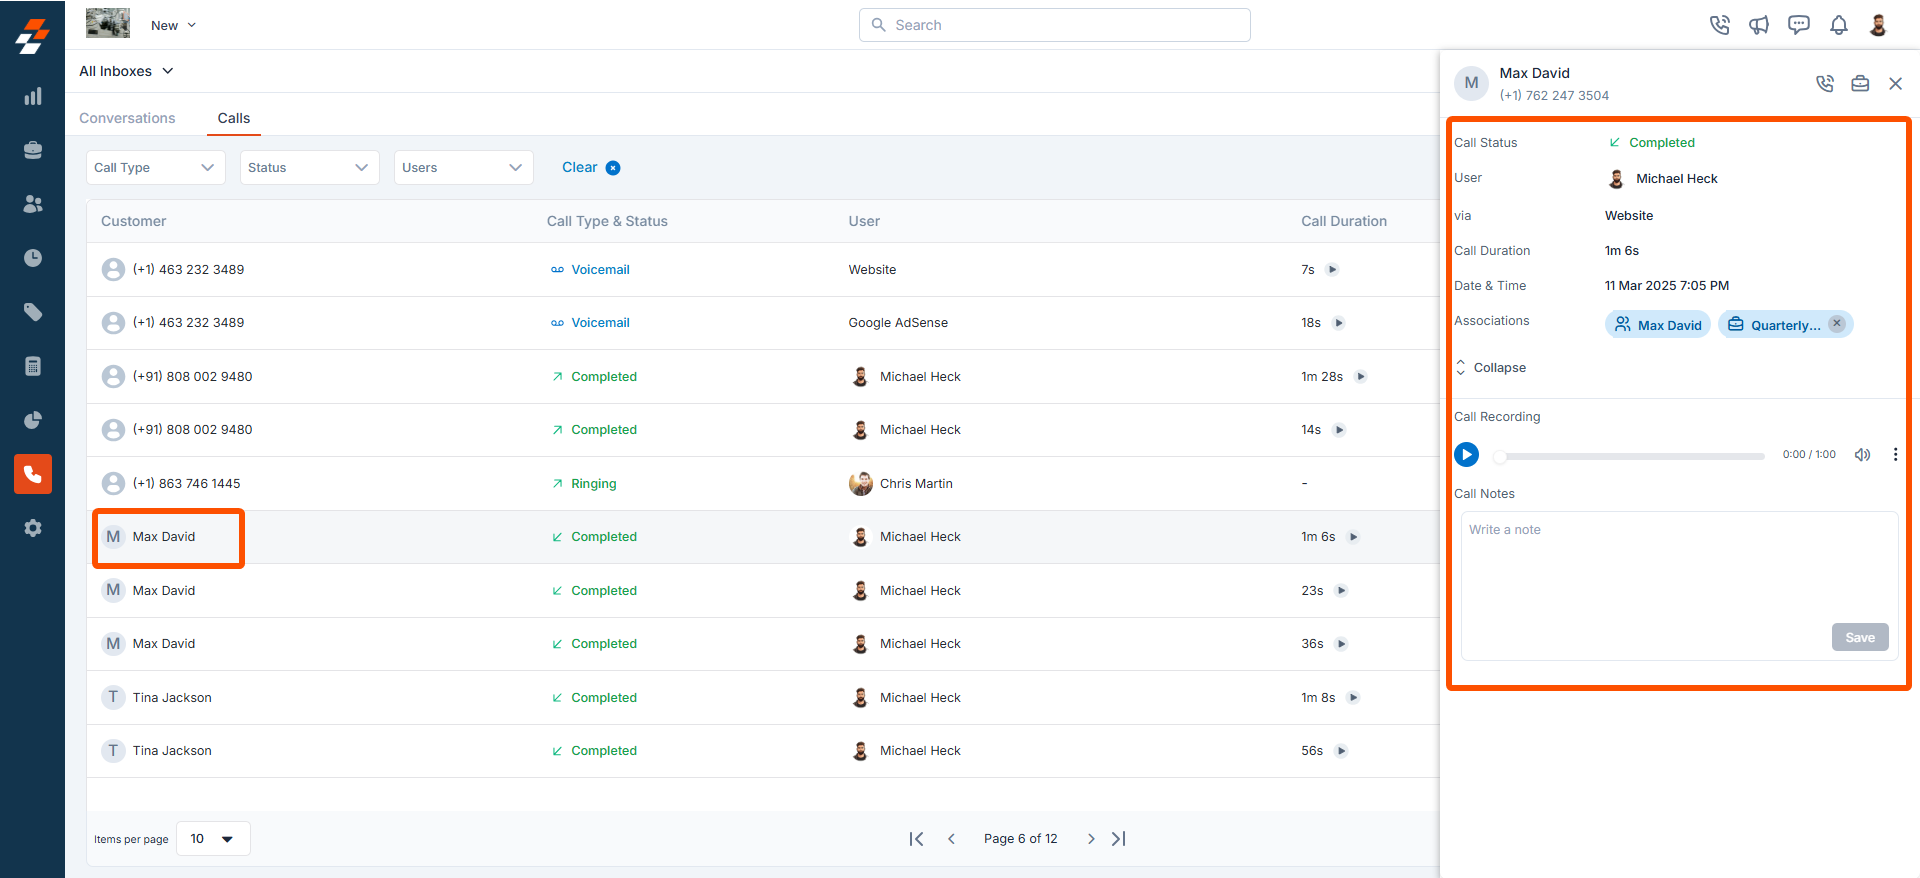
- Date & Time – Records when the call was initiated or received.
- Associations – Displays the associated customer and any job created for the customer.
- Call Recording – Provides access to the recorded call (if available).
- Call Notes – Displays any notes associated with the call for future reference.
3. Listening and Downloading Call Recordings
Zuper Connect automatically records calls if the call recording feature is enabled in your settings. All call recordings and voicemails will appear on the call log Quick View. To listen to recordings,- Locate the call in the Calls tab.
- Click the button to listen.
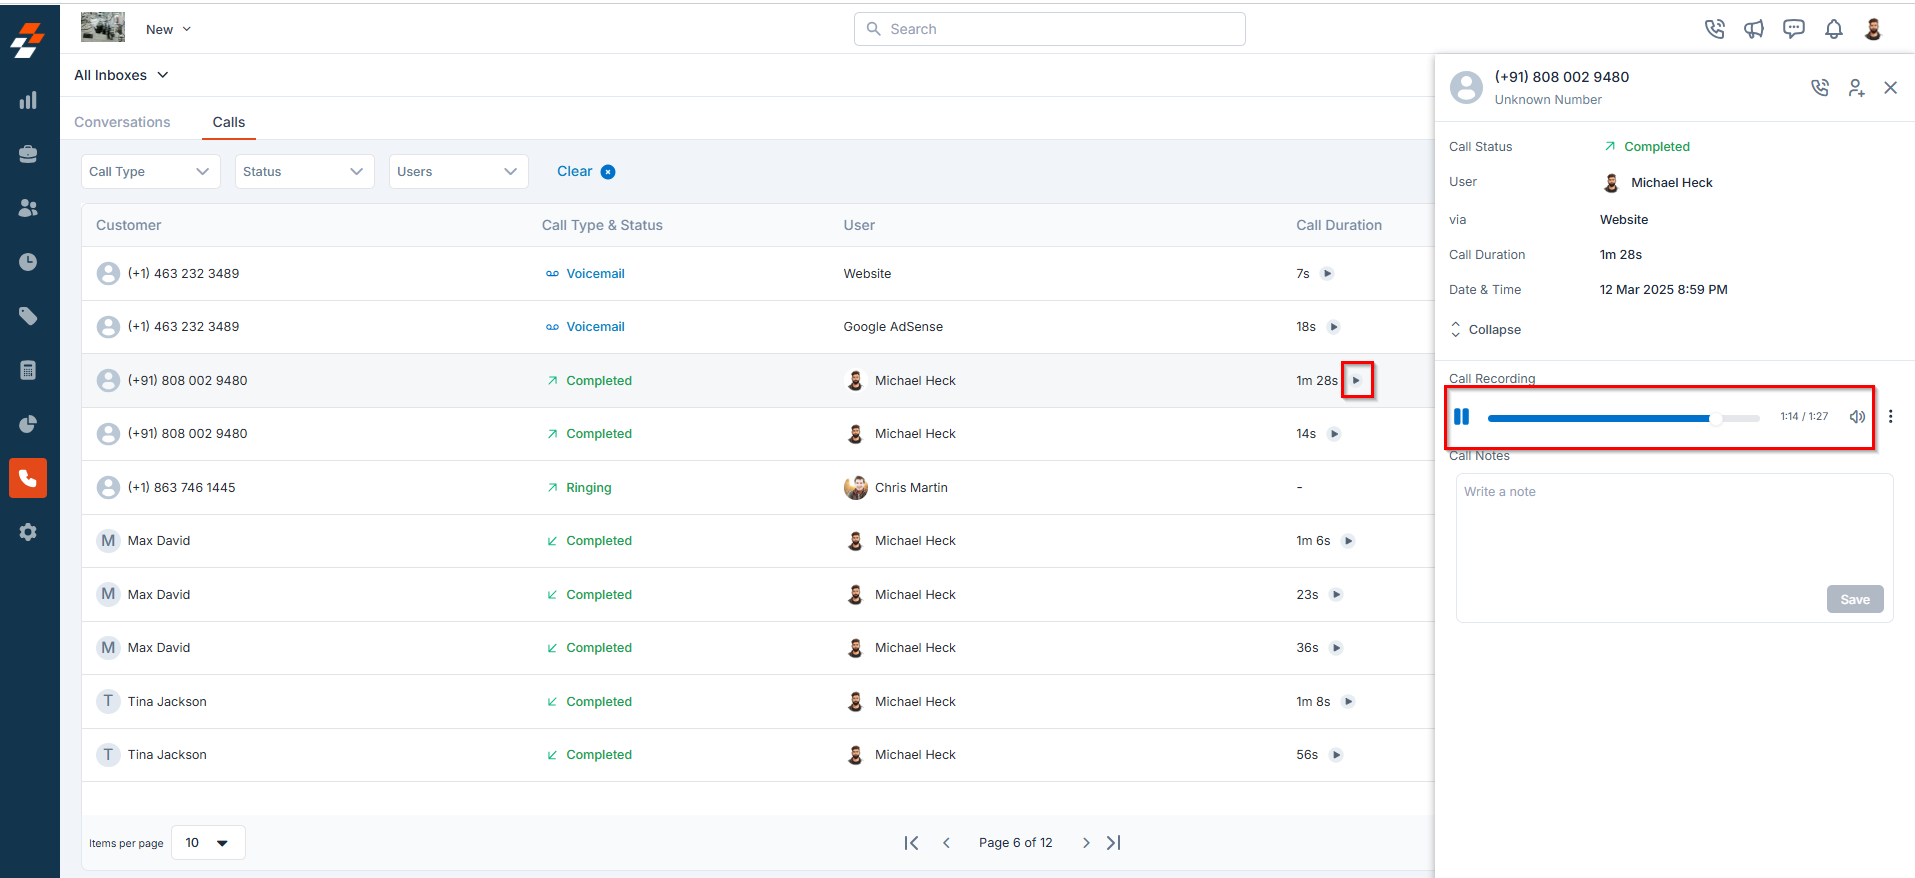
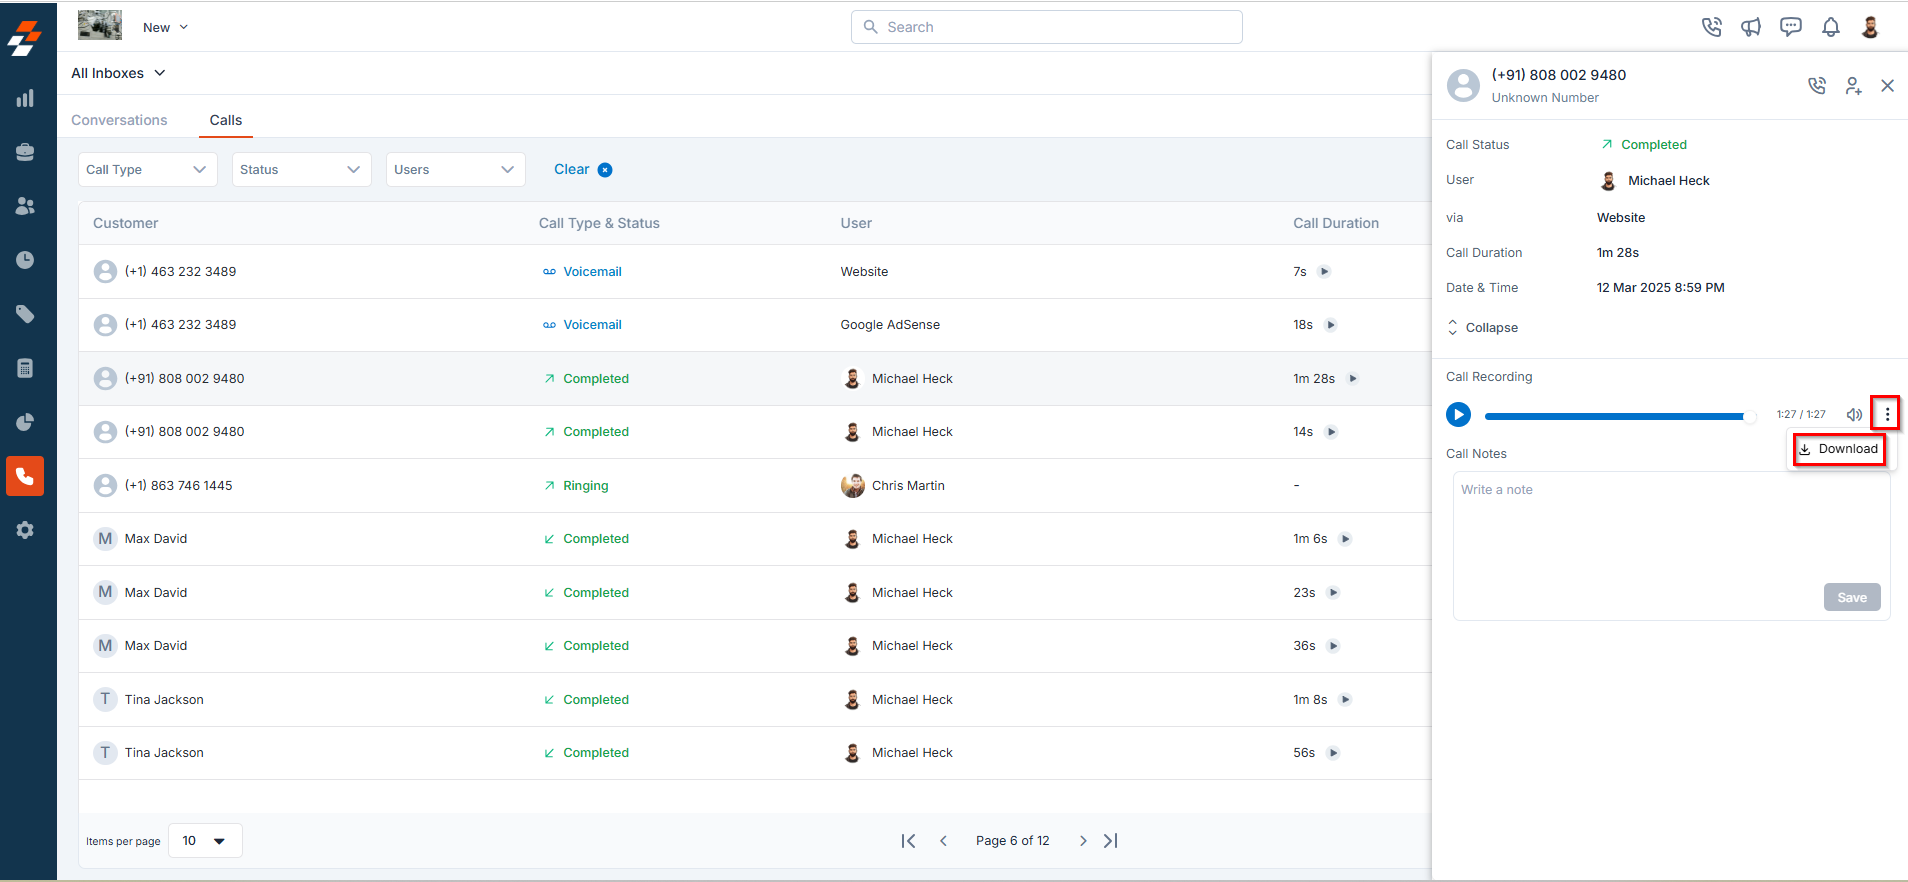
- Click the icon next to the recording in the quick view panel.
- Select Download to save the file to your device for future reference.
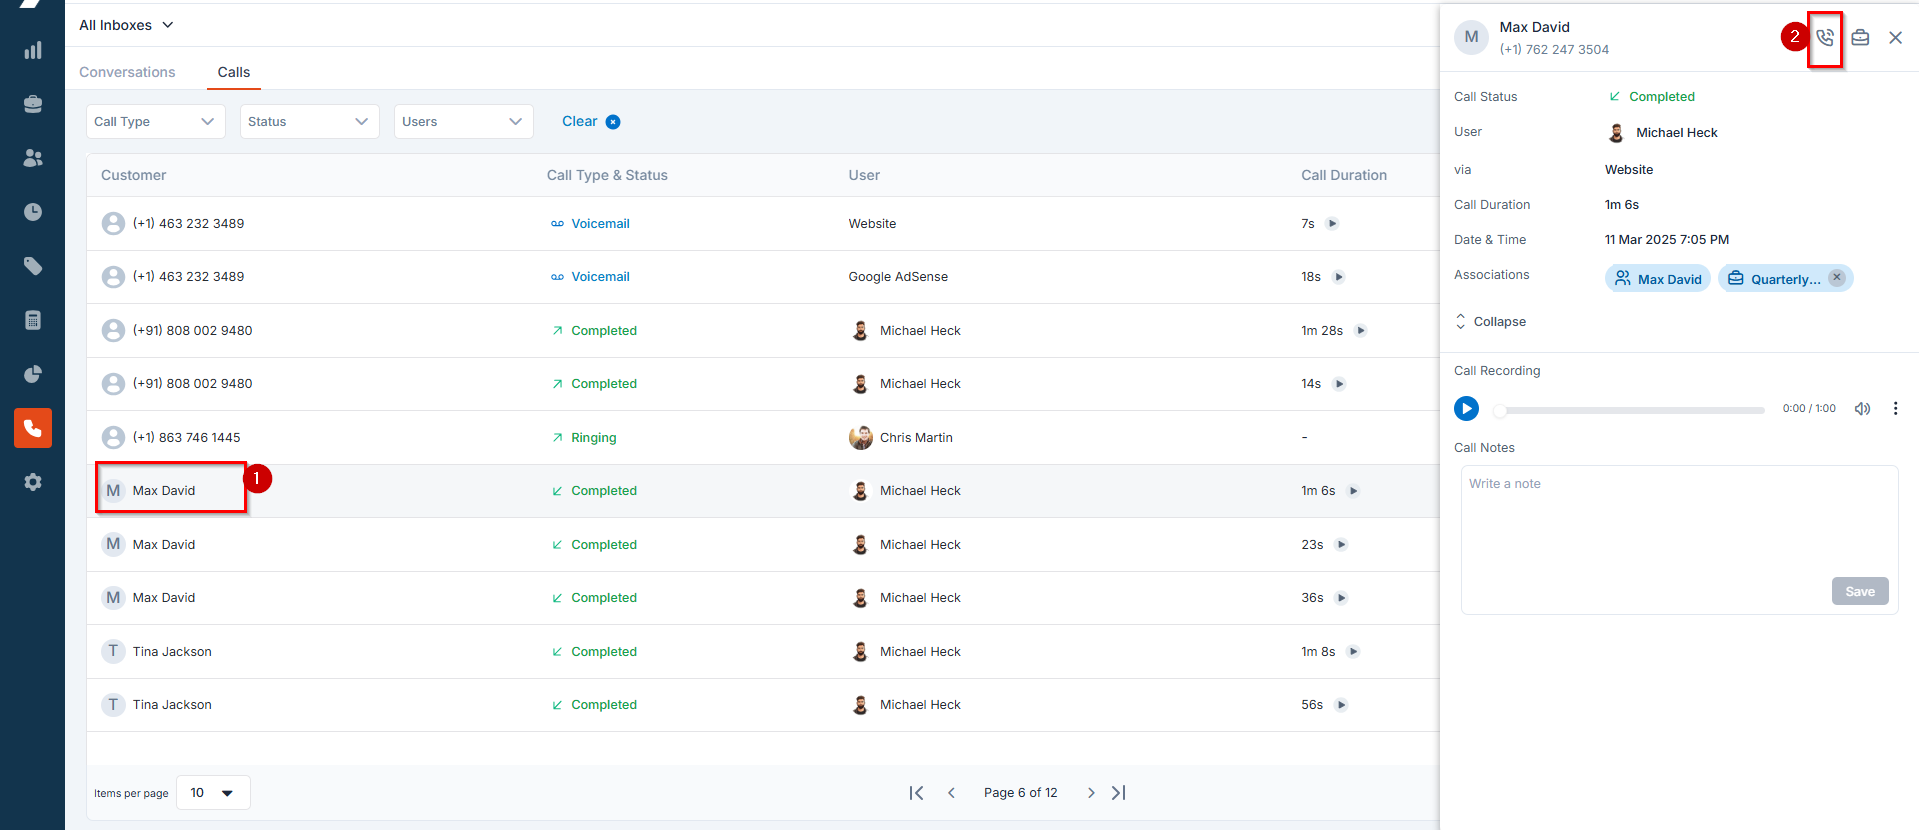
4. Calling Back a Customer
To quickly return a customer’s call:- Select the desired call entry. A quick view panel will appear.
- Click the icon at the top of the quick view panel to redial the customer instantly.
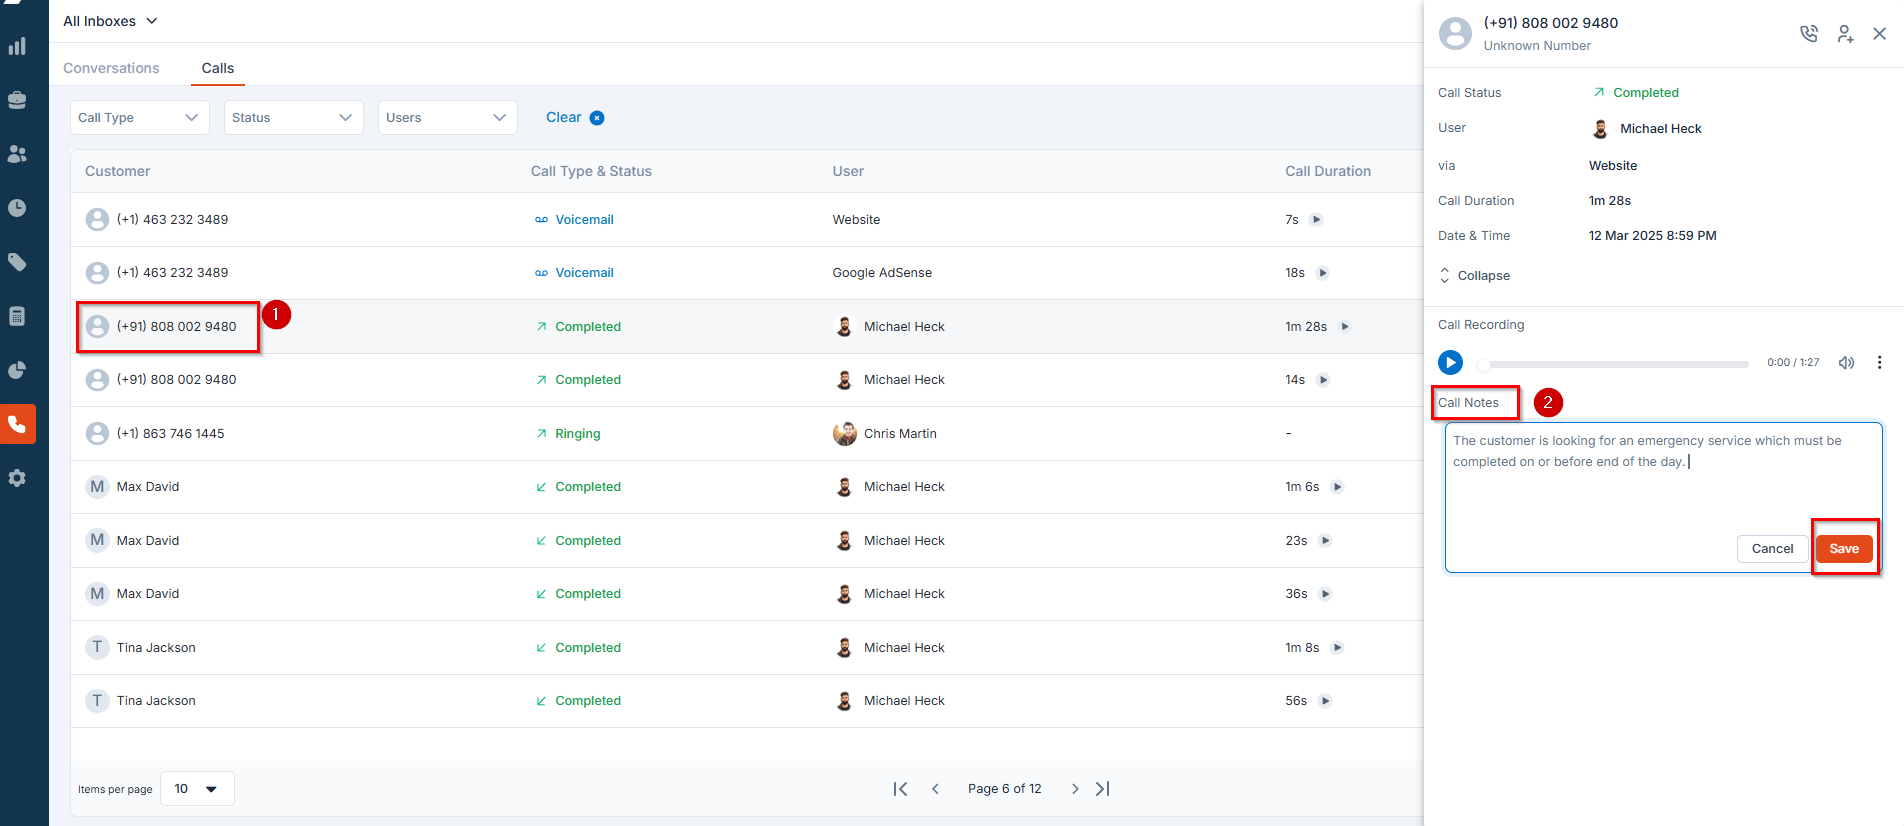
5. Adding Notes to Calls
To add important details related to customer interactions:- Select a call entry on the Calls tab. The quick view panel will appear.
- Scroll down to the Call Notes section.
- Enter any additional details or notes about the conversation. This can include follow-up actions, special requests, or any other relevant information to ensure proper handling in future interactions.
6. Creating a Job for the Customer
To create a job for a customer directly from a call entry:- Select a call entry you want to create a job for. The quick view panel will appear.
- Click the “New Job” icon at the top of the quick view screen to create a new job.
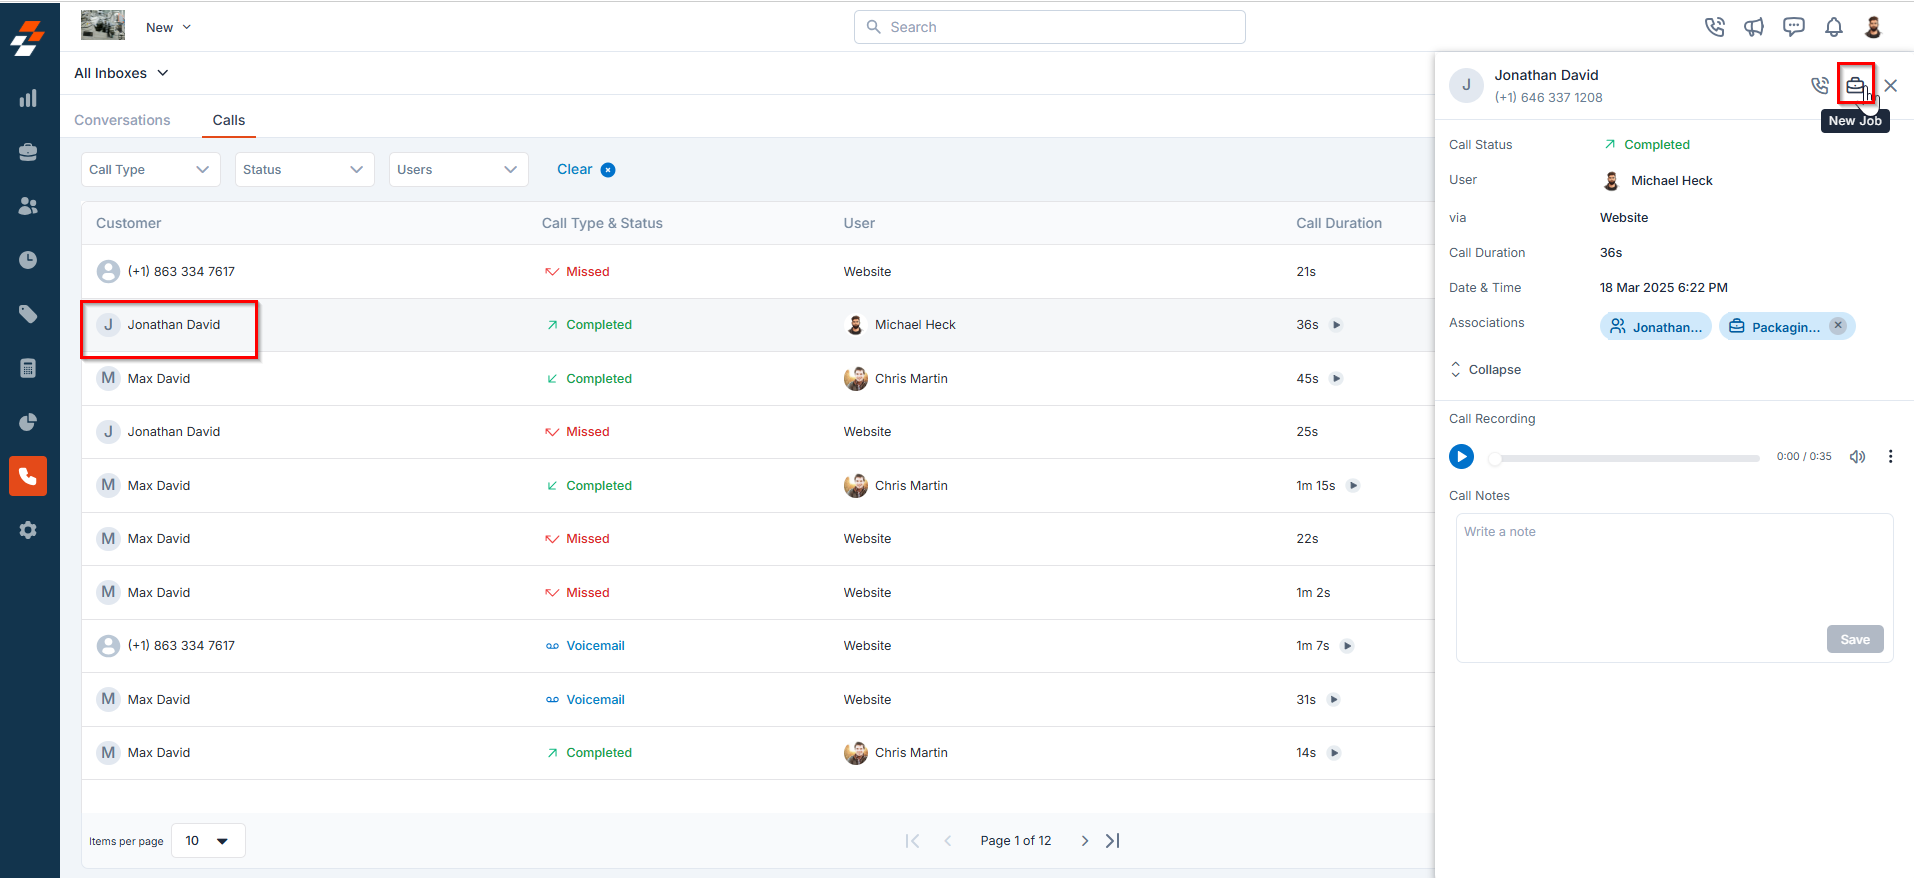
Note: You can only create a job for a saved customer. If the call log is associated with an unsaved number, you must first add the number as a customer before creating a job.
7. Saving a New Customer
If the calls page shows an unsaved number, you can save their details for future interactions:- Select the call entry.
- Click the Add as Customer icon at the top of the quick view panel.
- Fill in the customer details and save.