Navigation: Settings -> Modules -> Jobs -> Job Custom Fields
Navigating to job custom fields
To configure job custom fields, follow these steps:- Select the “Settings” module from the left navigation menu.
- Click “Modules” and select “Jobs” to open the Job Settings page.
- Choose “Job Custom Fields.”
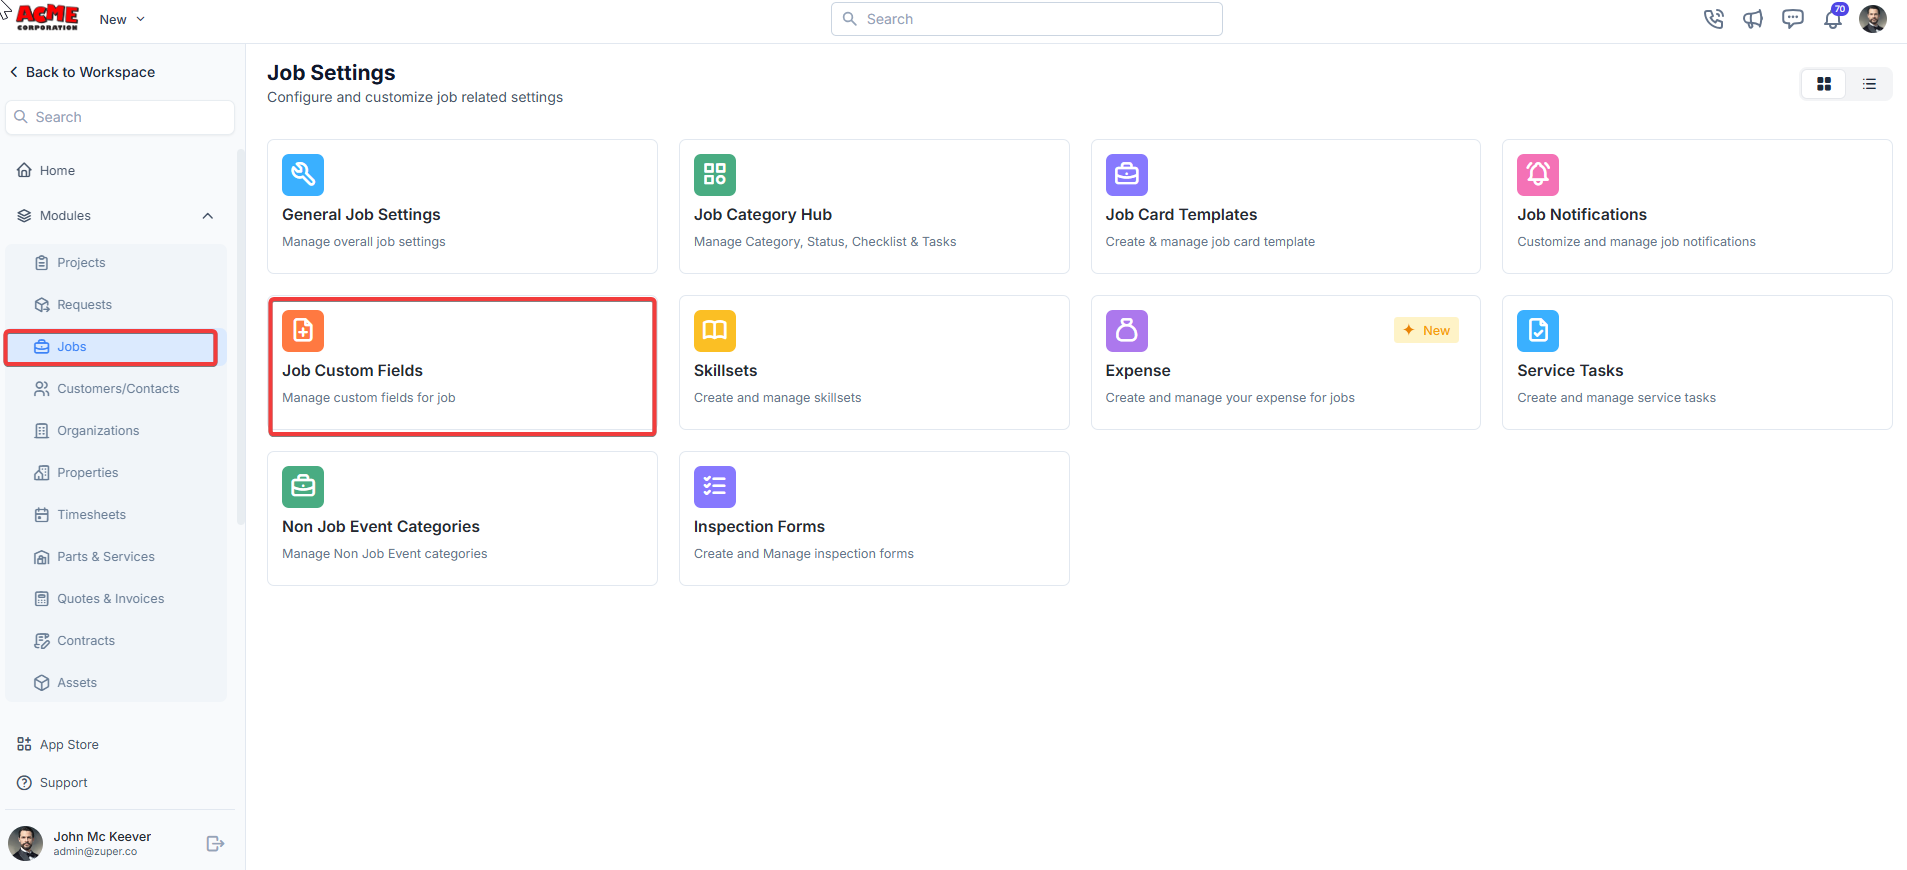
- The existing field groups will be displayed on the left of the screen.
Creating a new custom field group
To create a new field group:- On the left side of the Field Groups listing, click + Create New.
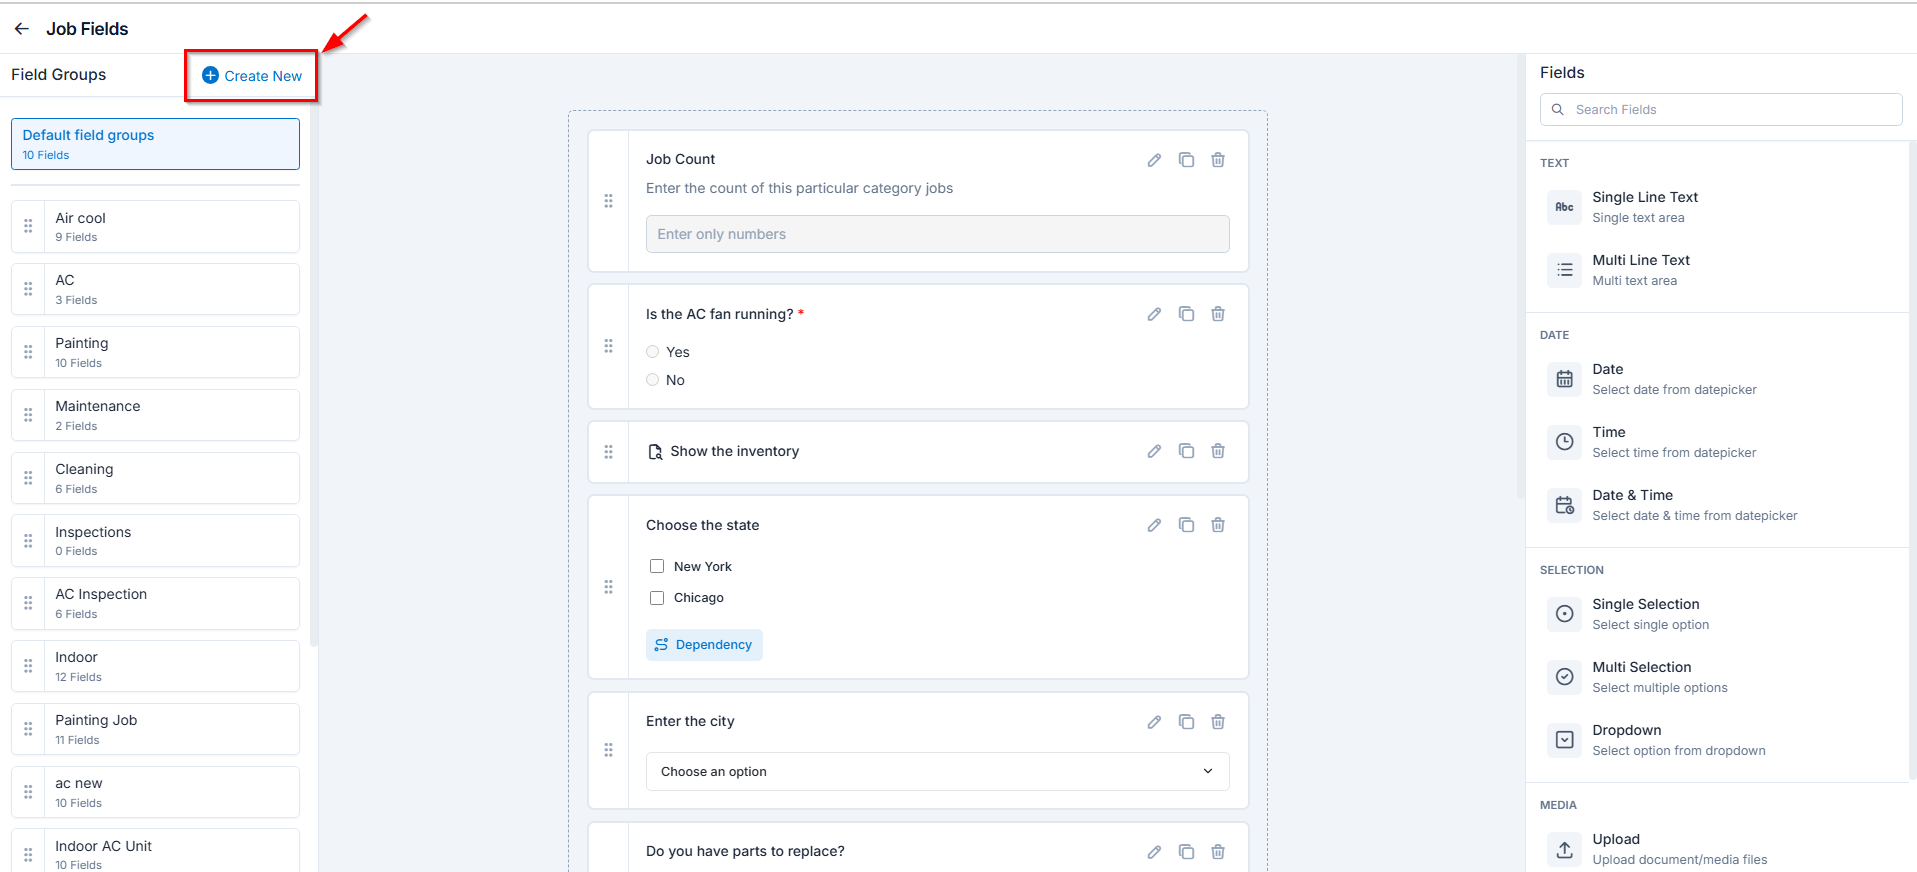
- In the right panel, enter the following details and click Save to create a new custom field group:
- Name: Provide a name for the field group.
- Description: Add a brief description of the group.
- Associated categories: Click Add Category to select the category to associate with this custom field group. When this category is selected during job creation, the custom fields from this group will automatically appear for that job.

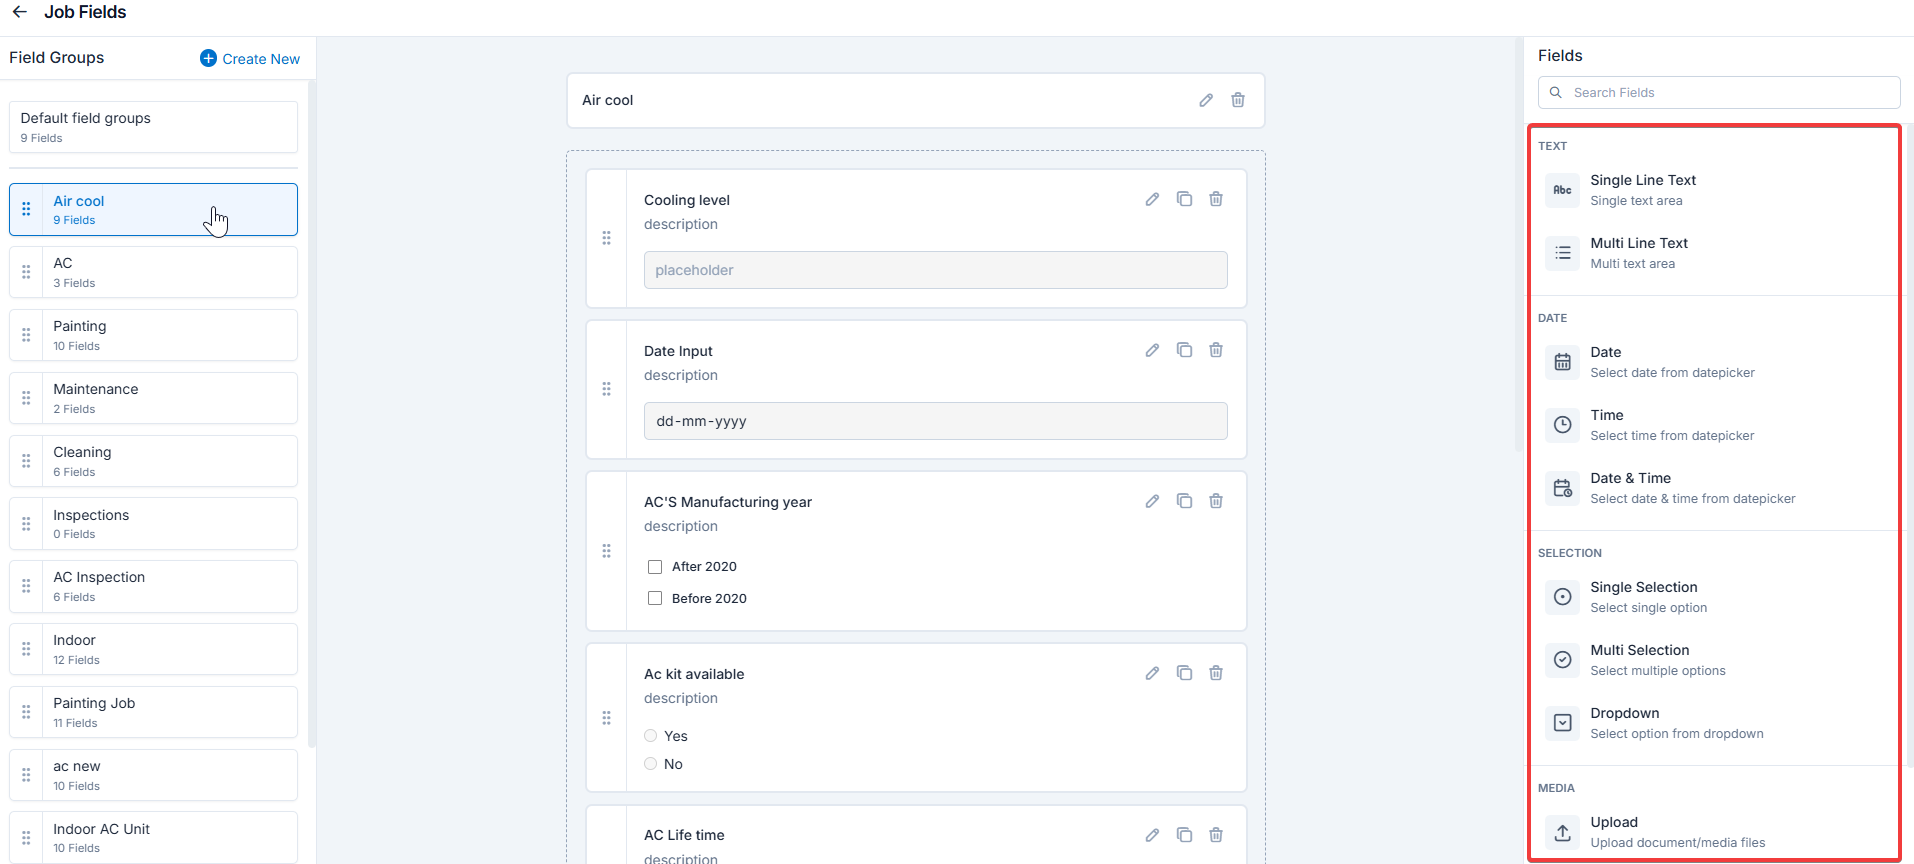
- Single-Line Text: This allows you to create a field to enter a single line of free text.
- Multi-Line Text: This allows you to create a field to enter multiple lines of free text.
- Date: This allows you to create a field to select a specific date from a calendar.
- Time: This allows you to create a field where you can select a specific time.
- Date & Time: This allows you to create a field where both date and time cn be selected.
- Single-Selection: This allows you to create a radio input Field where one of the provided options can be selected.
- Multi-Selection: This allows you to create check boxes where the provided options can be checked.
- Drop-Down: This allows you to create a drop-down field with the required list of options.
- Upload: This allows you to create a file input field to upload files.
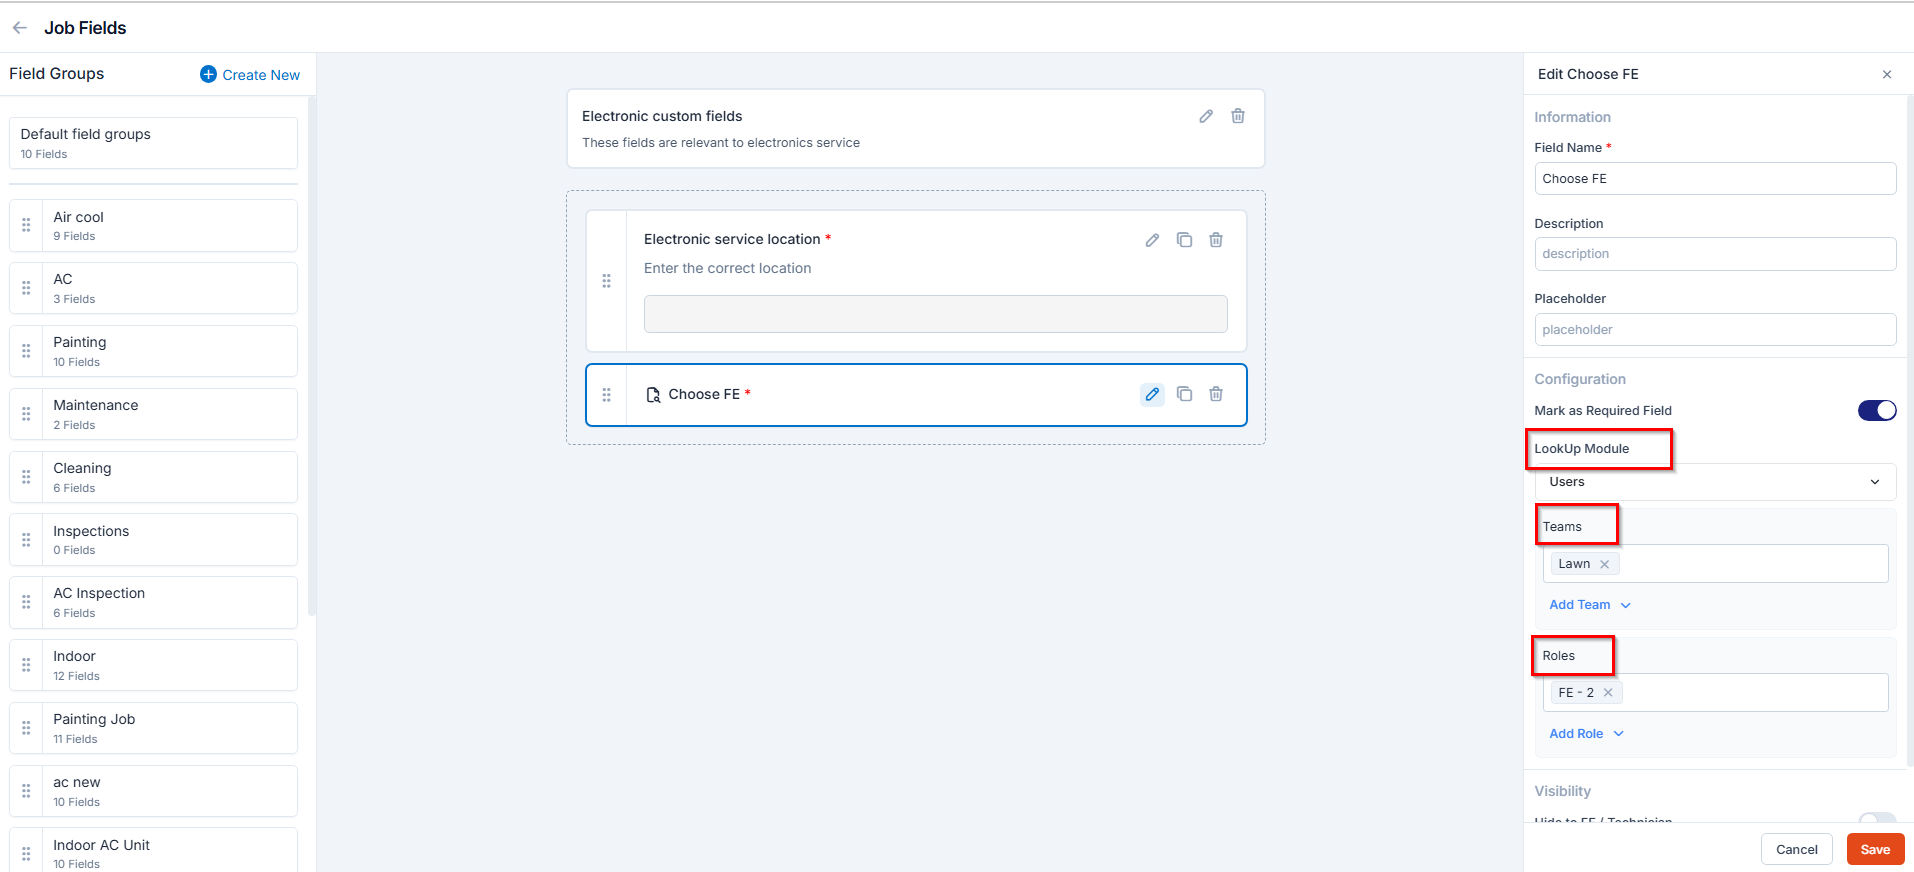
- Look up: This allows you to create a file input field to look up products, users, and assets.
- Products
- When selected, the lookup field in the associated job category will allow you to search and select from existing products in Parts and Services.
- Users
- When configuring Users, you may optionally select a Team and Role to filter the list of users.
- Once configured, the lookup field in the associated job category will display only those users who match the selected team and role, ensuring accurate assignment.
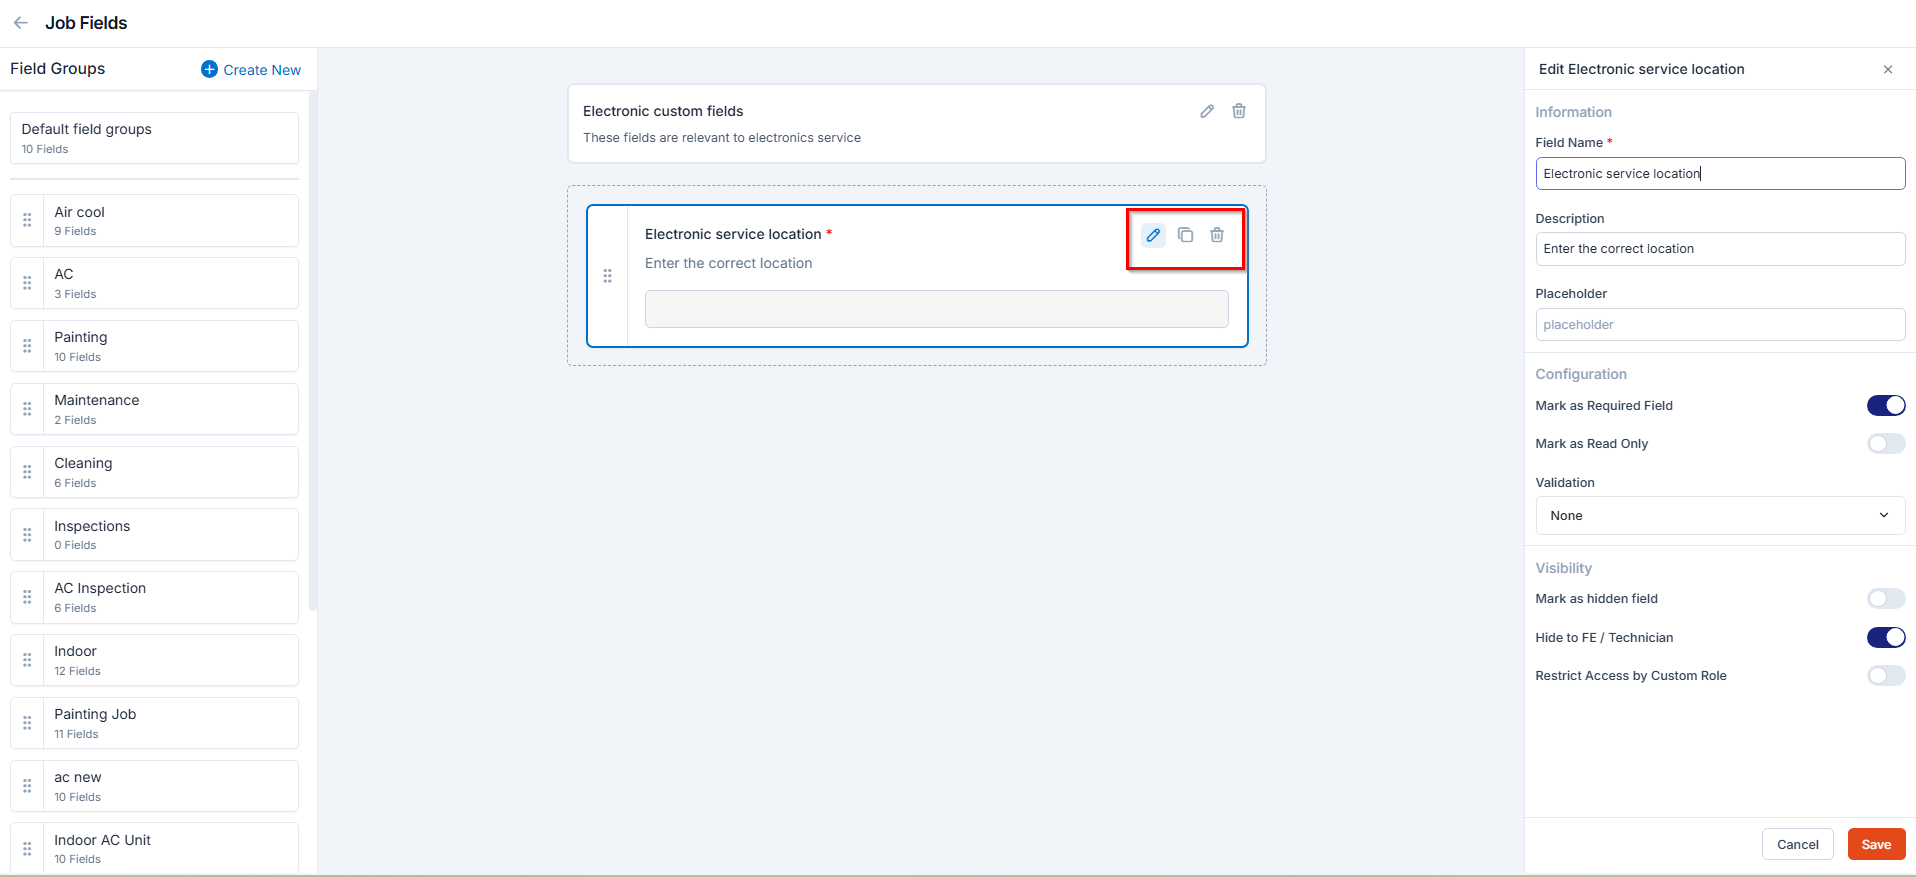
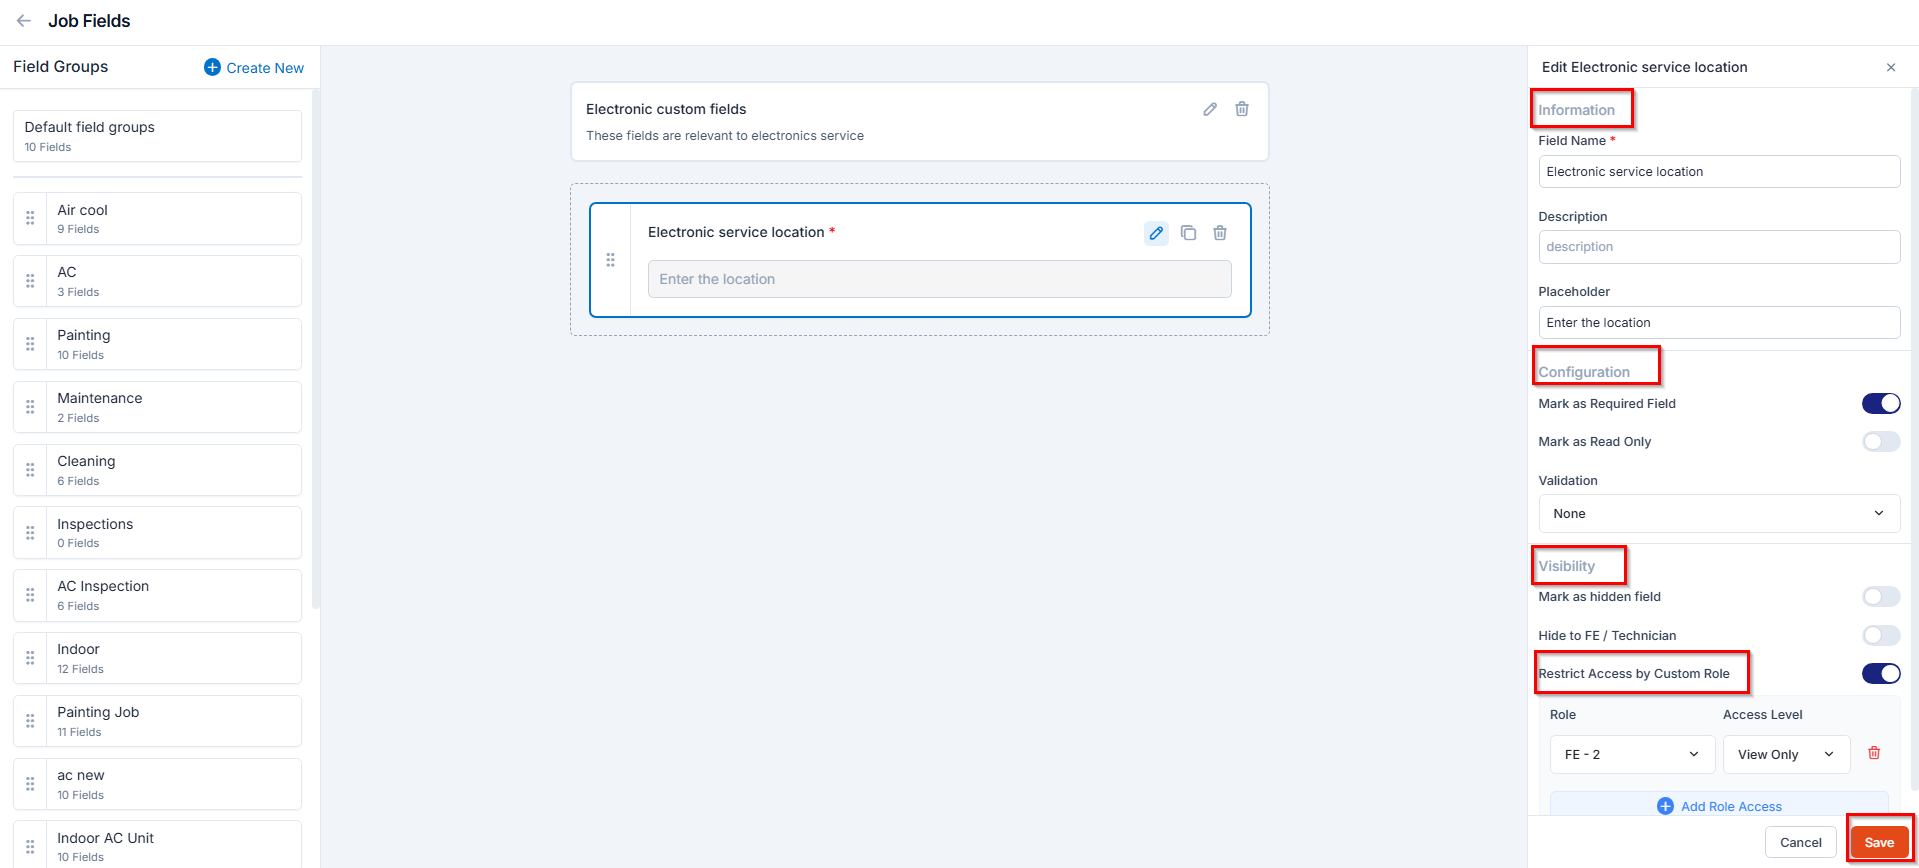
- Field Name: Enter or update the name of the field.
- Description: Provide additional details about the field.
- Placeholder: Add placeholder text to guide users when filling the field.
- Mark as Required Field: Toggle to make this field mandatory.
- Mark as Read Only: Toggle to prevent edits on this field.
- Mark as Hidden Field: Hide the field from all users.
- Hide to FE / Technician: Hide the field from field technicians in the mobile app.
- Restrict Access by Custom Role: Limit access to users with specific roles. This means that only users with the specific role will have access to this field. Other users will not be able to see or interact with it based on the access level assigned. When toggled on, you can choose one or more roles from the dropdown using the “Add Role Access” button. For each role, you can set an Access Level:
- Hidden → The field is completely hidden for this role.
- View Only → The role can see the field but cannot make any changes.
- View & Edit → The role can see and edit the field.
Managing Custom Fields
You can edit, duplicate, or delete custom fields in Zuper to keep your forms and data structured and up-to-date. Follow these steps:How job custom fields are prefilled on creationWhen creating a job from the Jobs module, custom fields are automatically prefilled from matching Customer or Organization custom fields only. Fields from other entities such as Assets are not used in this flow.To prefill job custom fields from an Asset, create the job directly from the Asset record instead. Alternatively, use the Workflow Builder’s Copy Custom Fields node to copy matching field values automatically after job creation.Prefill applies only when the field label matches exactly across both entities.
Edit a Custom Field
To update the details of any custom field:- Click the **Edit ** () icon next to the field you want to modify.
- The Edit Field panel appears on the right. Update the sections as needed.
- Click Save to update the changes.
Duplicate a Custom Field
Duplicating a field lets you quickly create a new field with the same settings:- Click the **clone **() icon next to the field you want to duplicate
- Update the Field Name and other details as needed.
- Click Save.
Tip: Duplicating is useful when creating similar fields without starting from scratch.
Delete a Custom Field
To remove fields that are no longer needed, click the Delete () icon next to the field.