- Create service tasks from the Settings module
- Link service tasks with relevant job categories
- Create a new job and associate it with predefined service tasks
- Update the status of service tasks as they progress
a. How to create master service tasks?
Navigation: Settings_ -> Modules -> Jobs -> Service Tasks
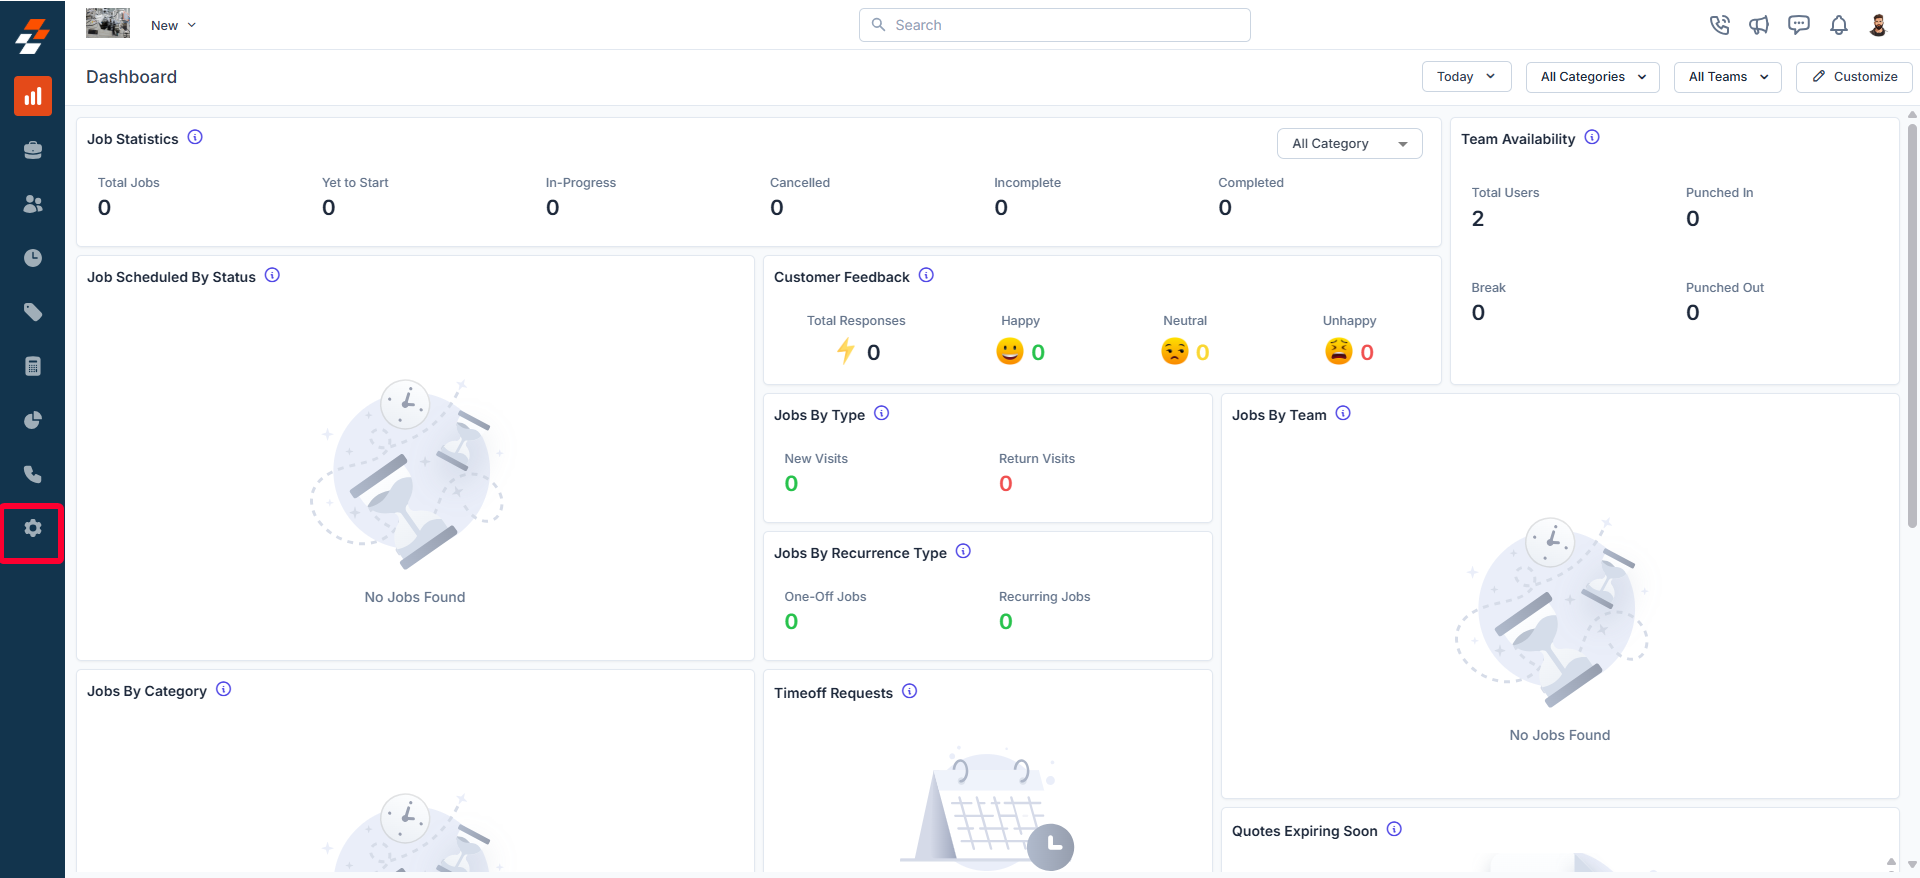
- Select the “Settings” module from the left navigation menu.
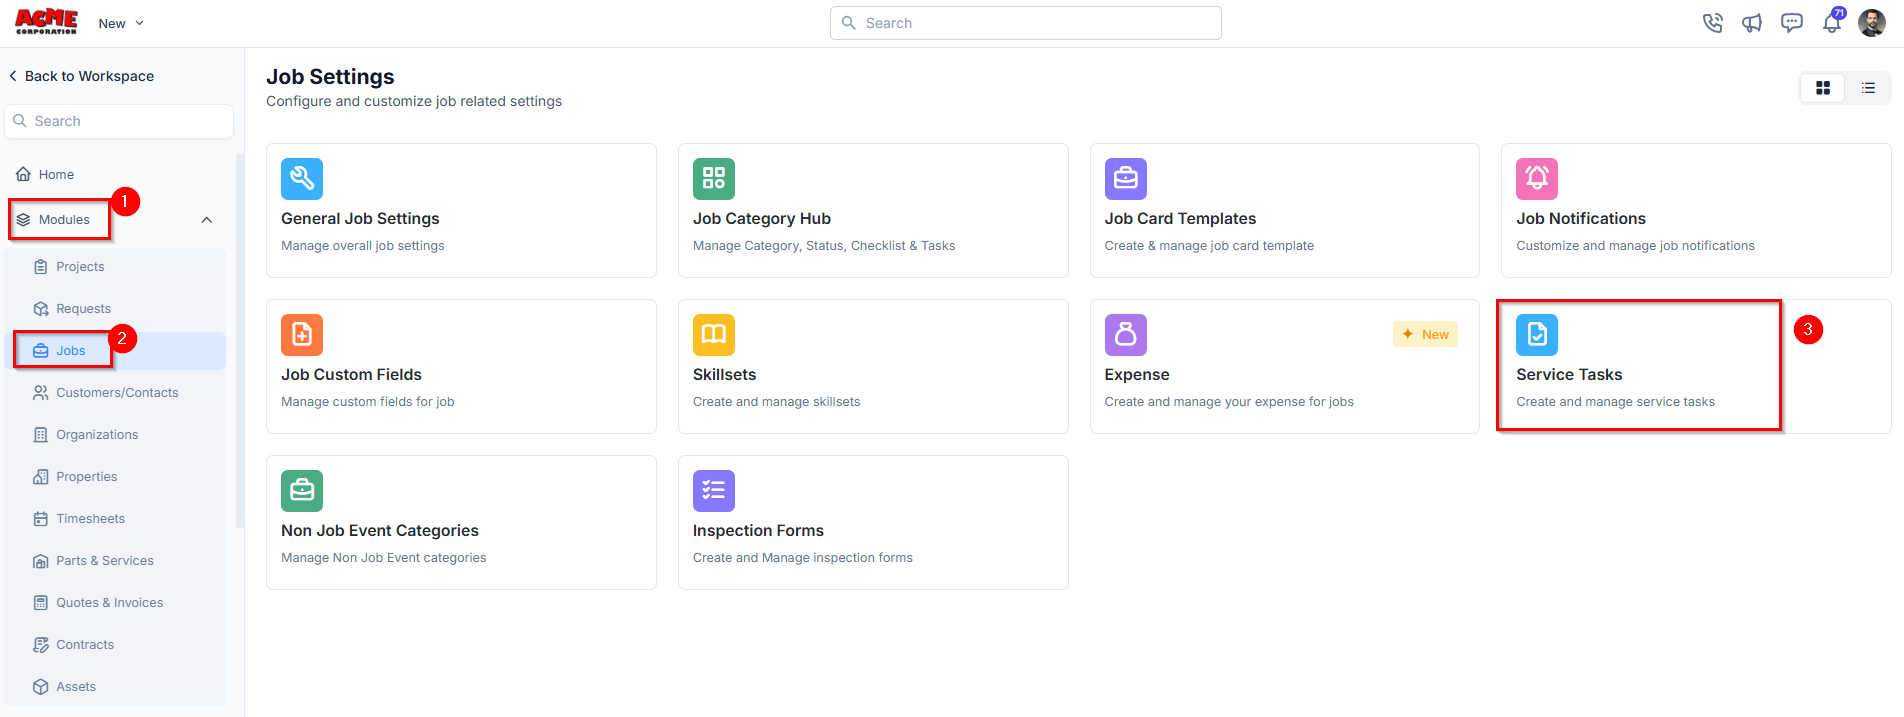
- Click “Modules” and choose “Jobs” to open the Job Settings page.
- Click on “Service Tasks.” The service tasks listing page will appear.
- Click ”+ New Service Task” to create a new service task.
- Enter the required fields and click “Create” to save the new service task.
b. How do you link service tasks with the job category?
Navigation: Settings_ -> Modules -> Jobs -> _Job Category hub ->
- Select the “Settings” module from the left navigation menu.
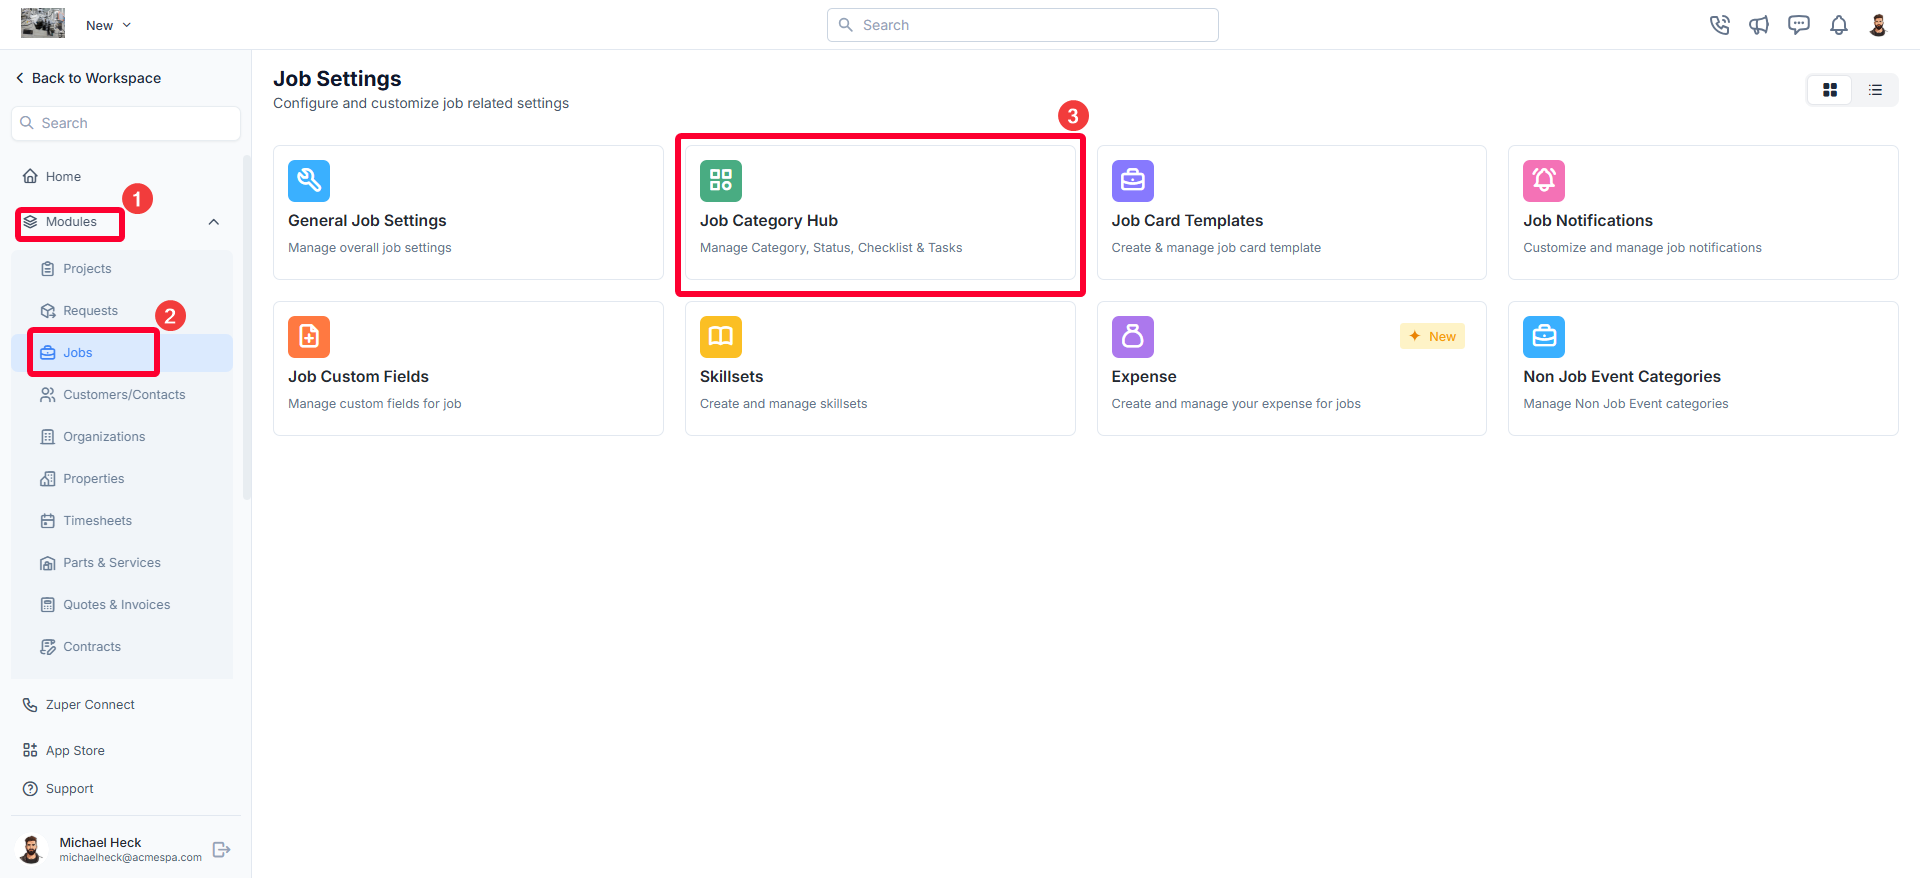
- Click “Modules” and choose “Jobs” to open the Job Settings page.
- Select “Job Category Hub.” You can view all the configured job categories.
- Click on any job category from the Job Categories listing page.
- Navigate to the Service Tasks tab.
- Click + Add Task to assign an existing service task to the job category.
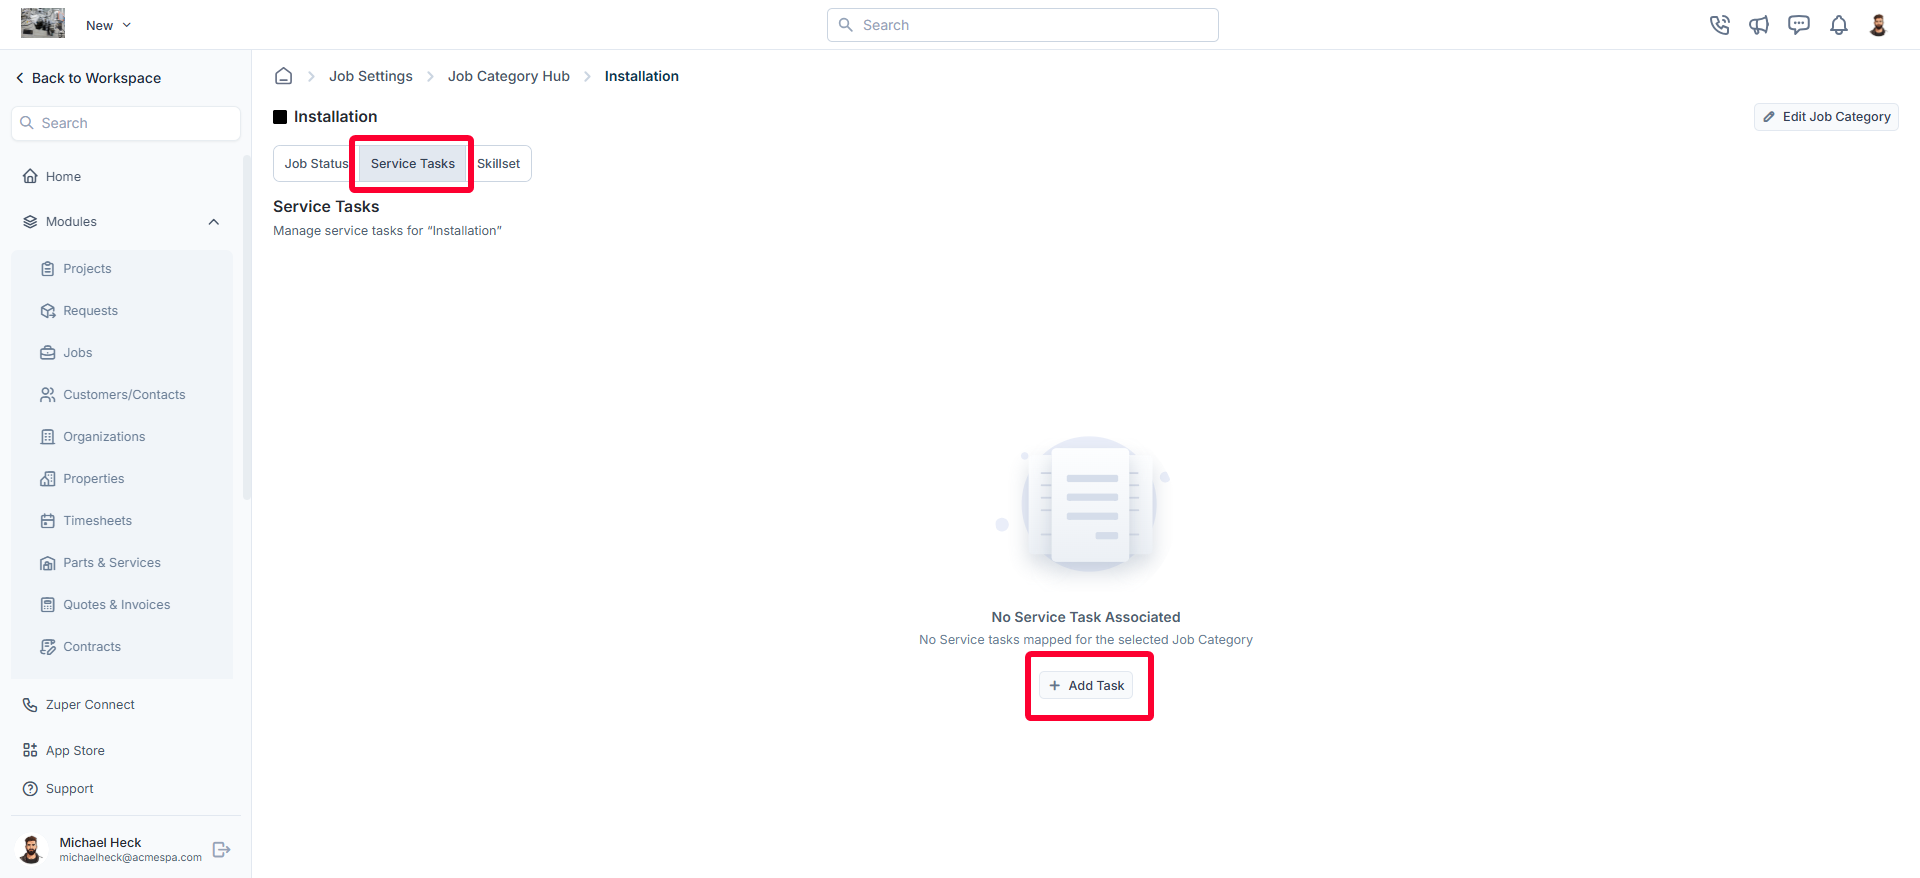
- The service tasks will be mapped successfully to the job category.
C. How to create a new job and link the service tasks?
Navigation: Jobs_ -> + New Job -> Service Task Section -> Add Service Tasks
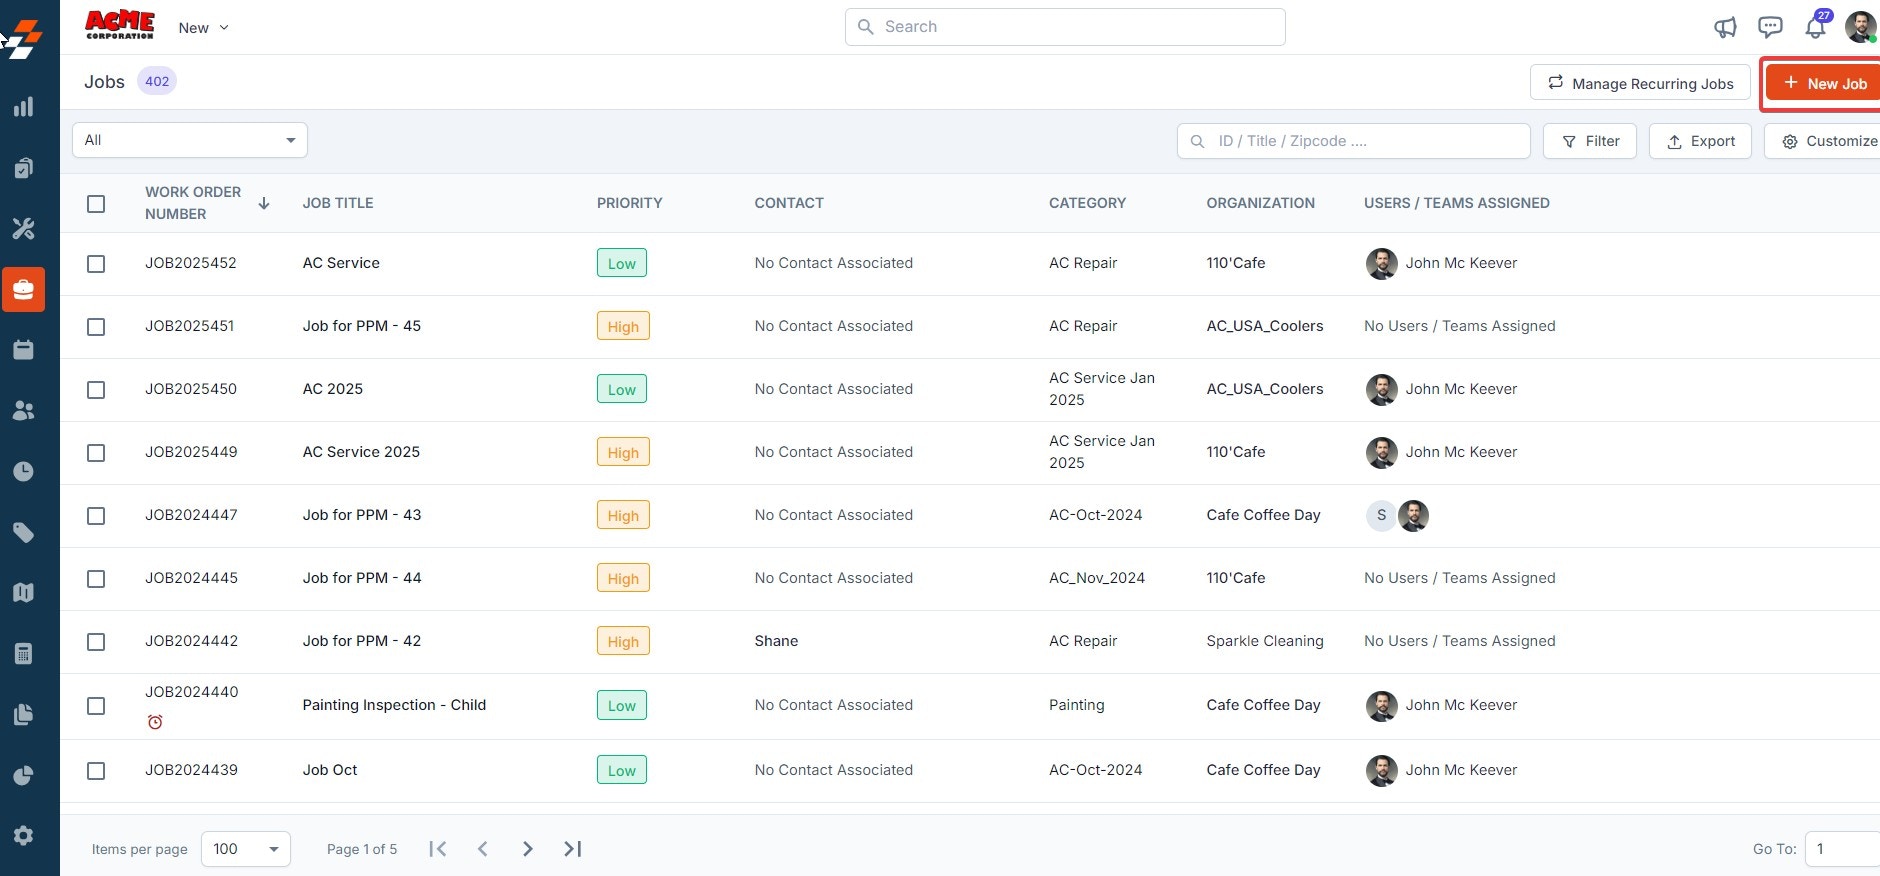
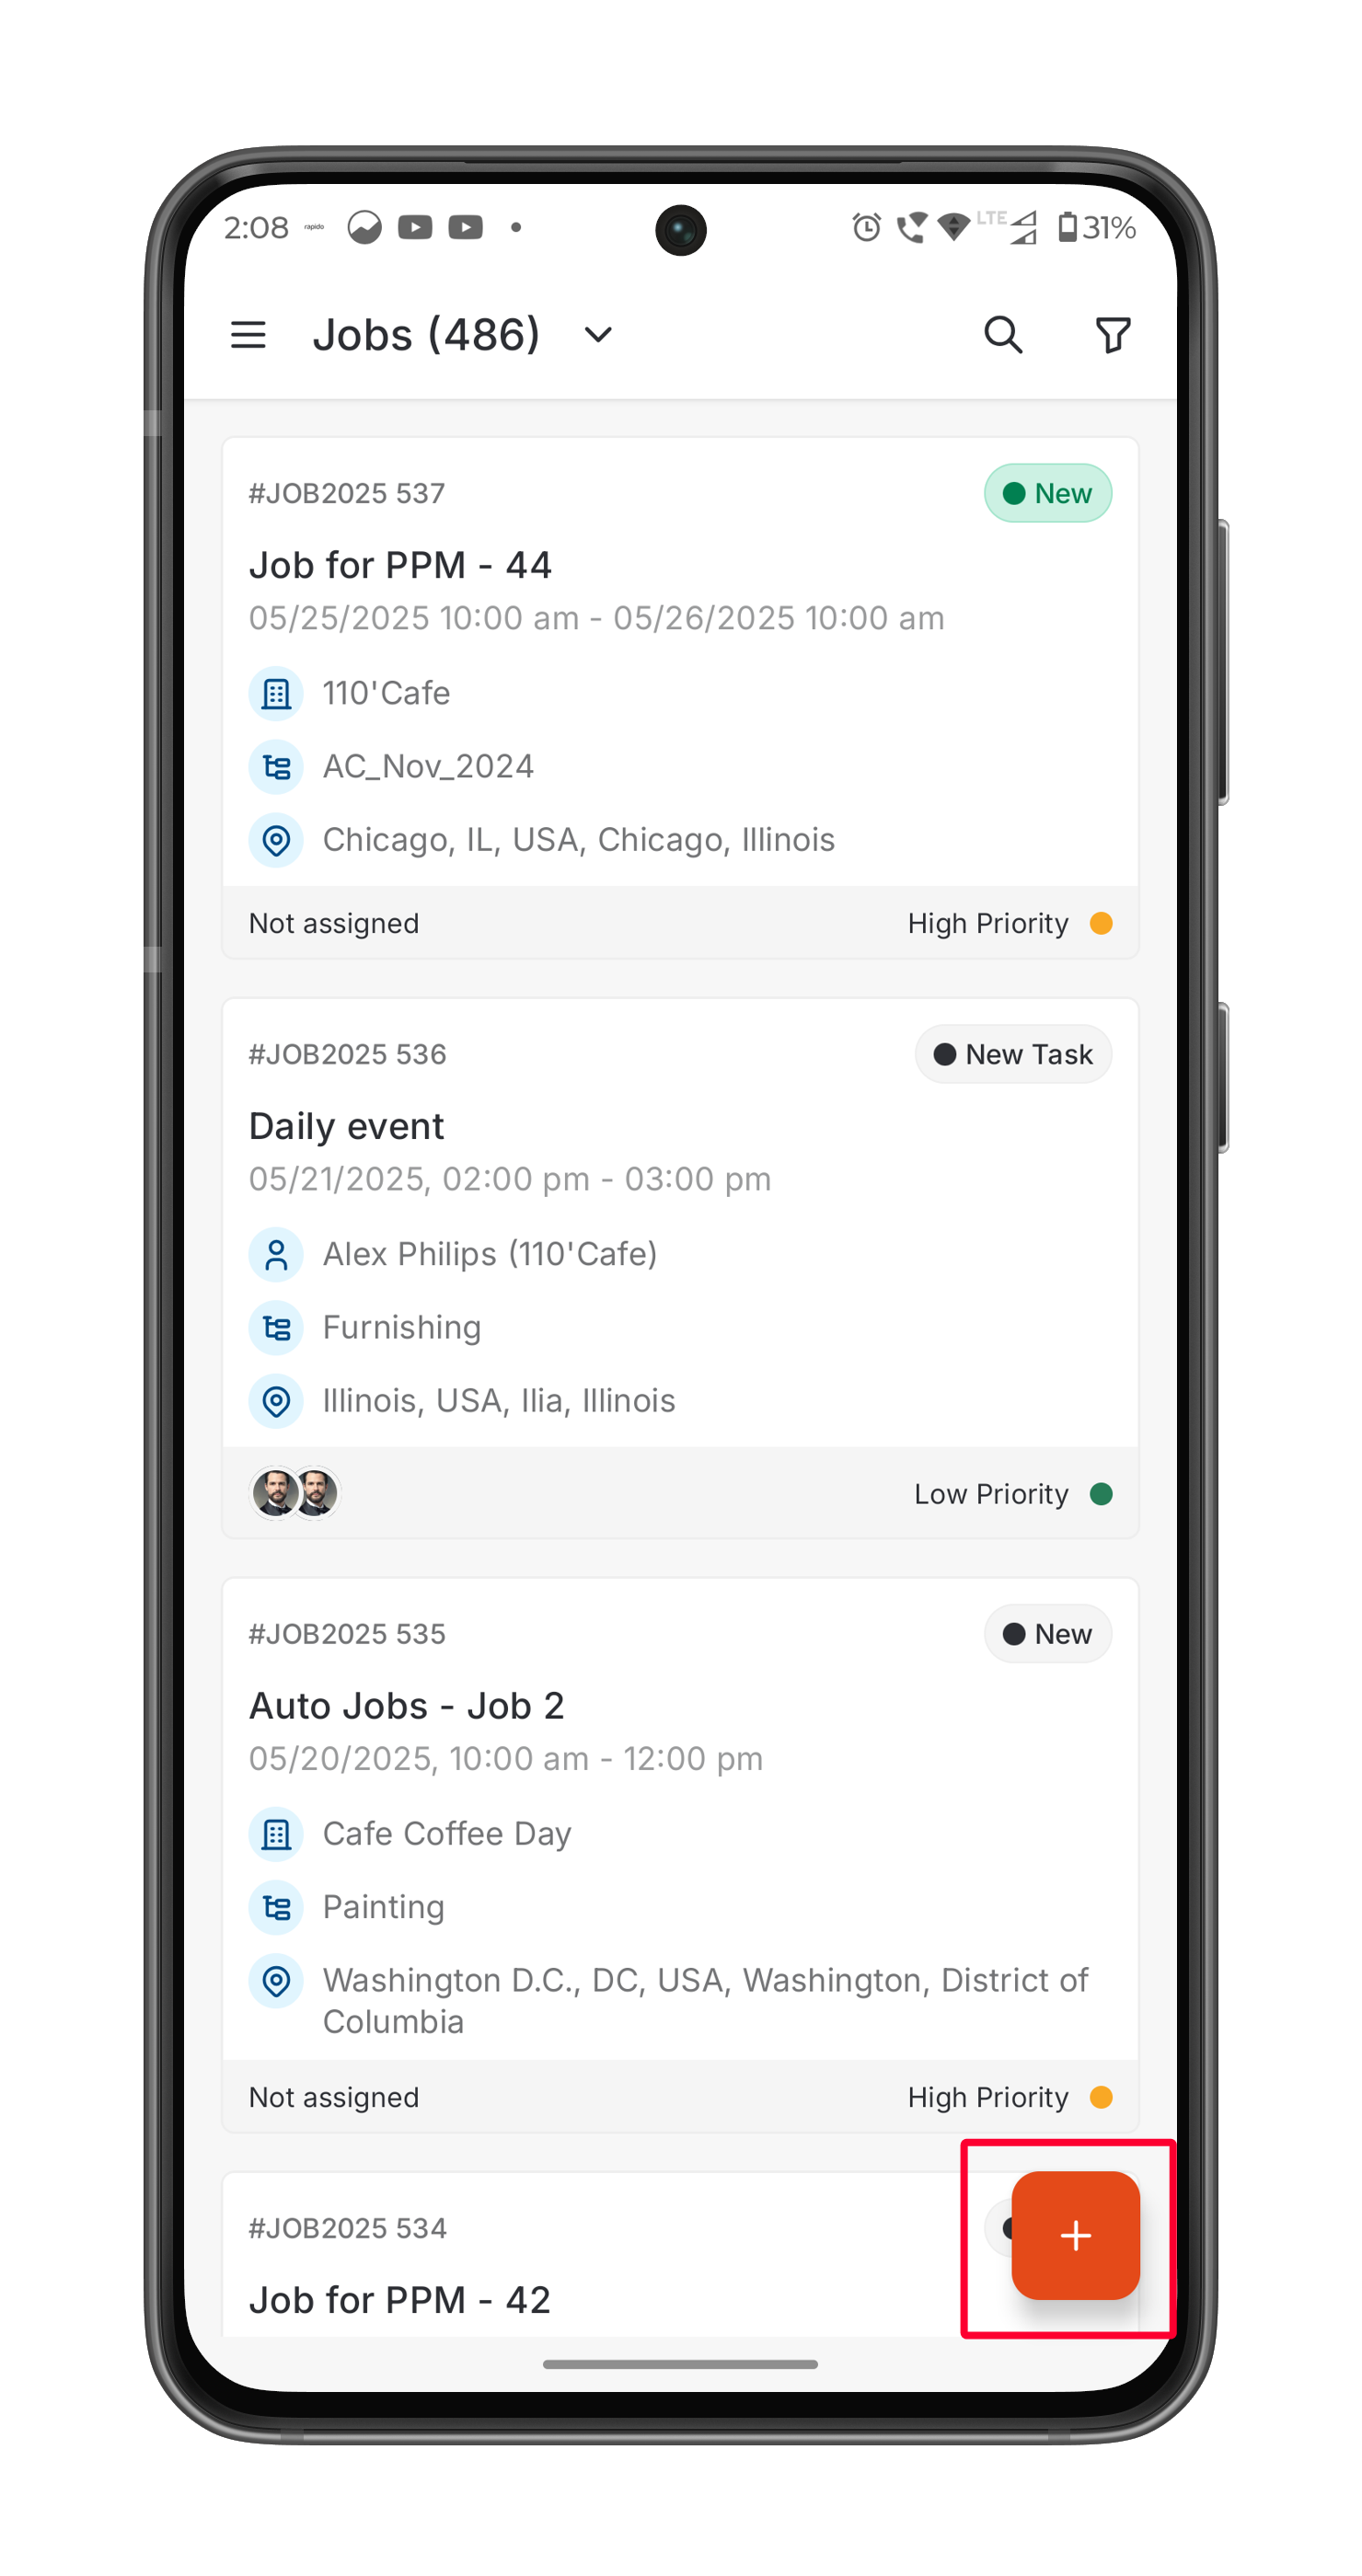
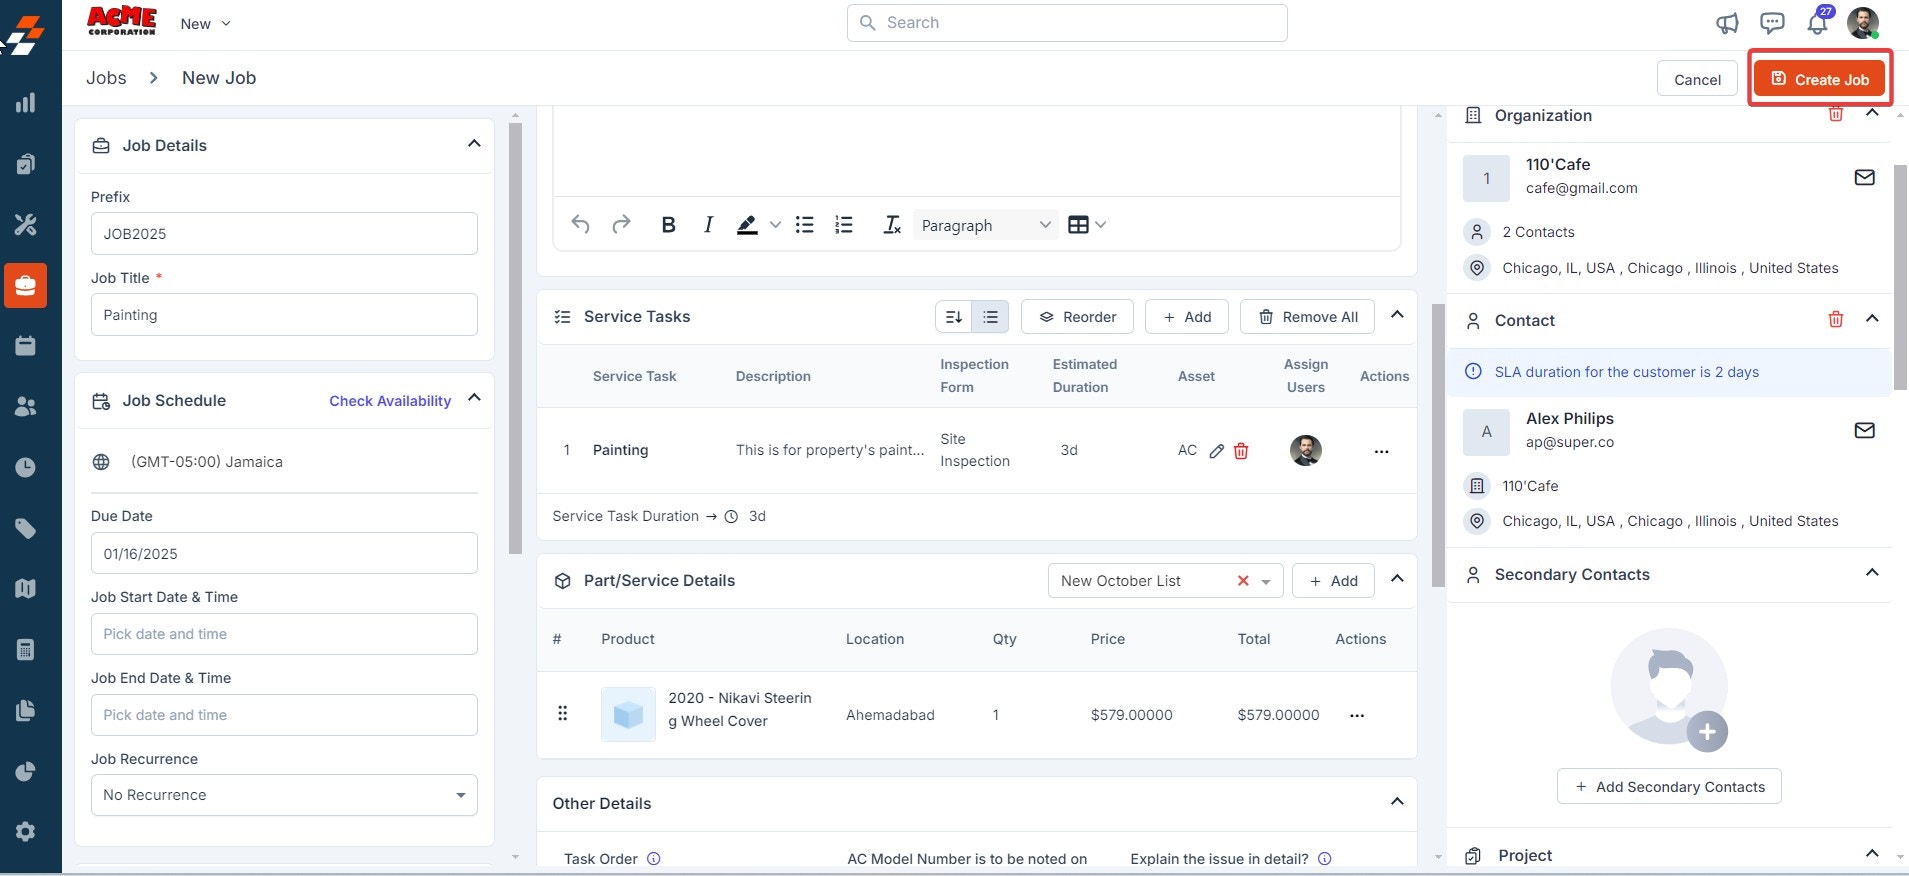
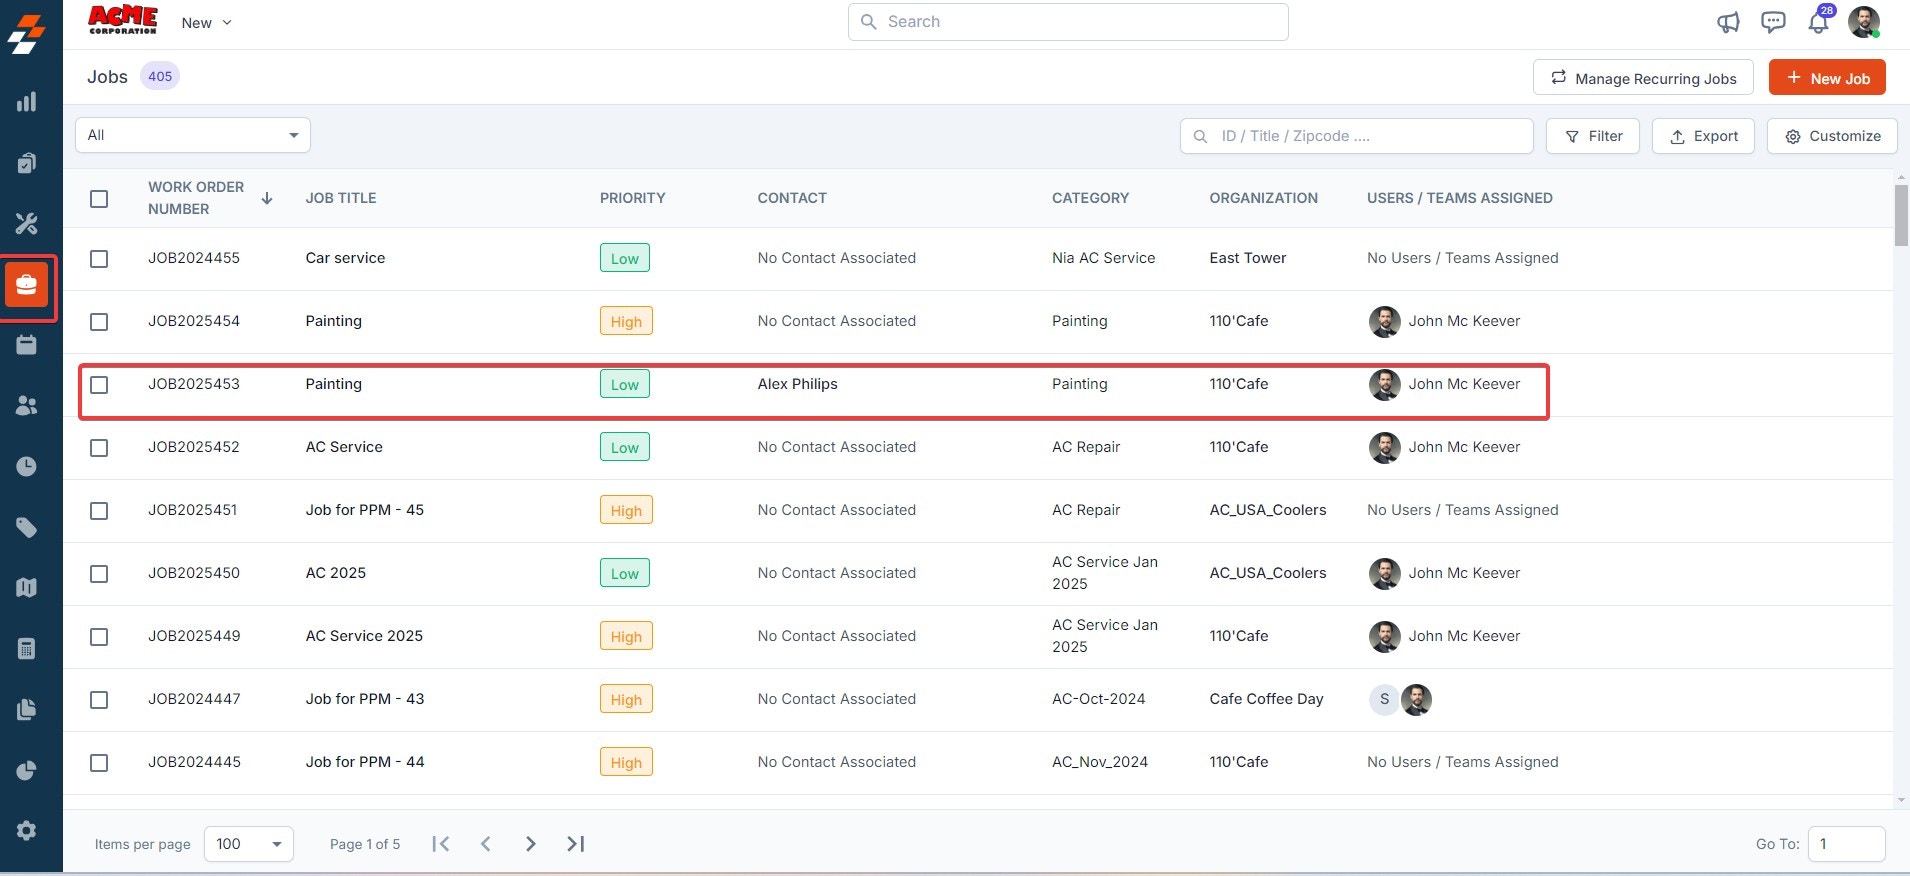
- Select the “Jobs” module from the left navigation menu and click “+New Job.”
- Choose the “Job Category” in the primary details section. Based on the category chosen, you can view the linked service tasks under the “Service Tasks” section.
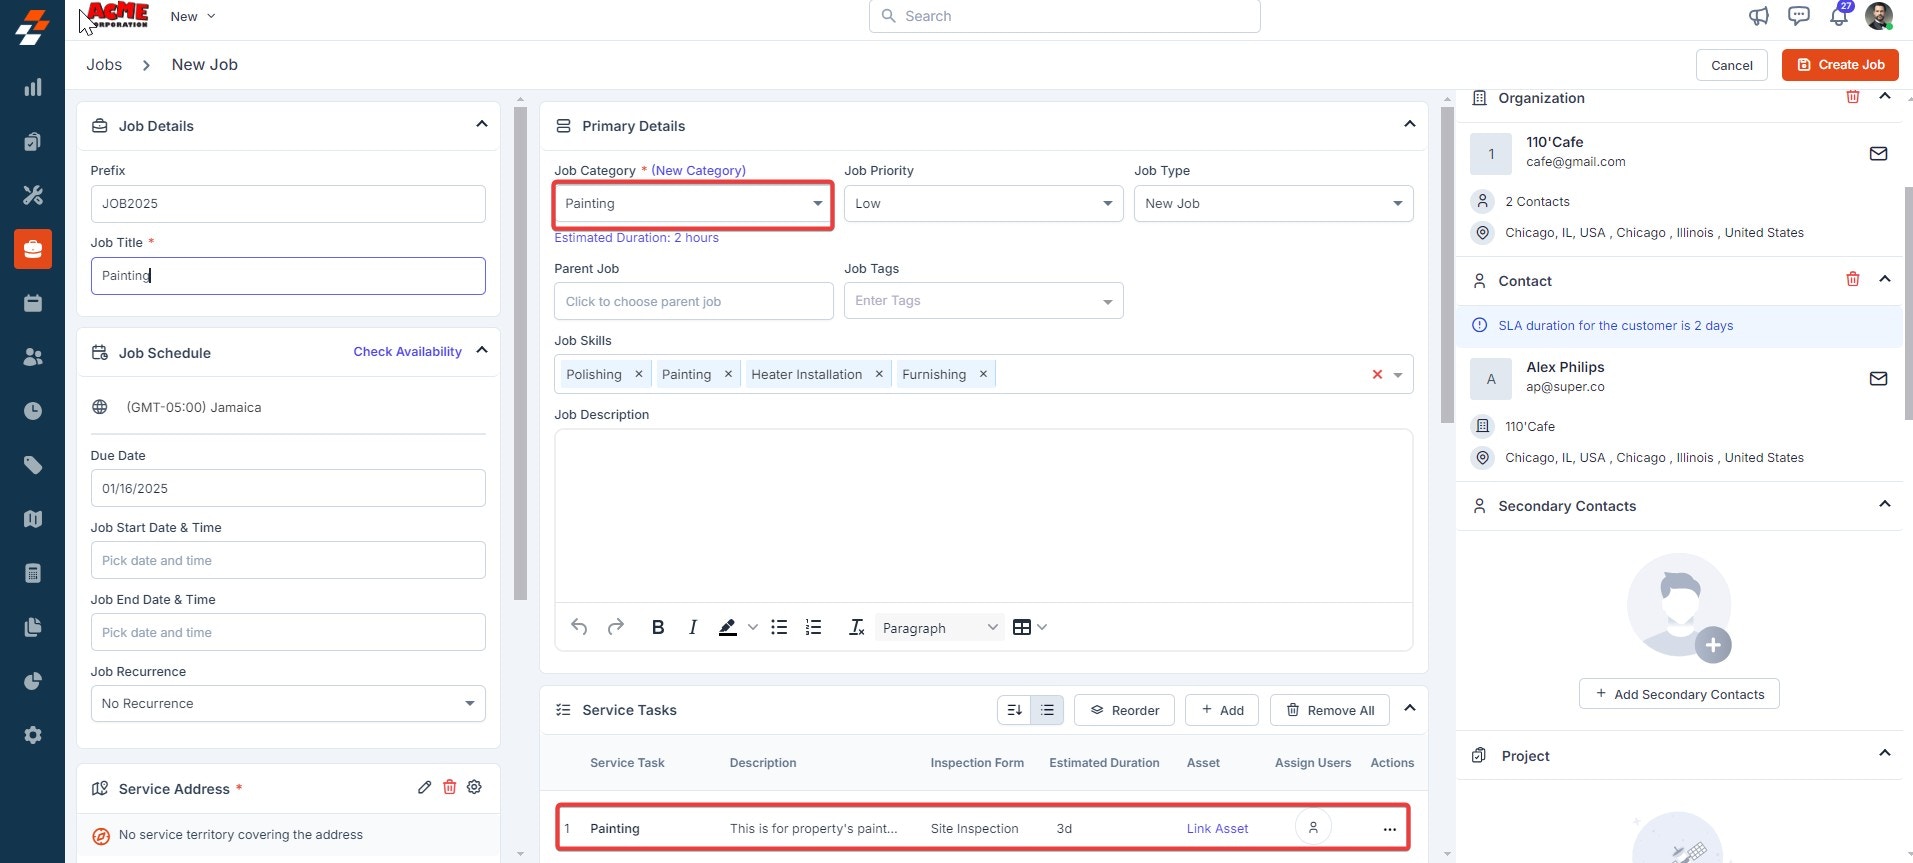
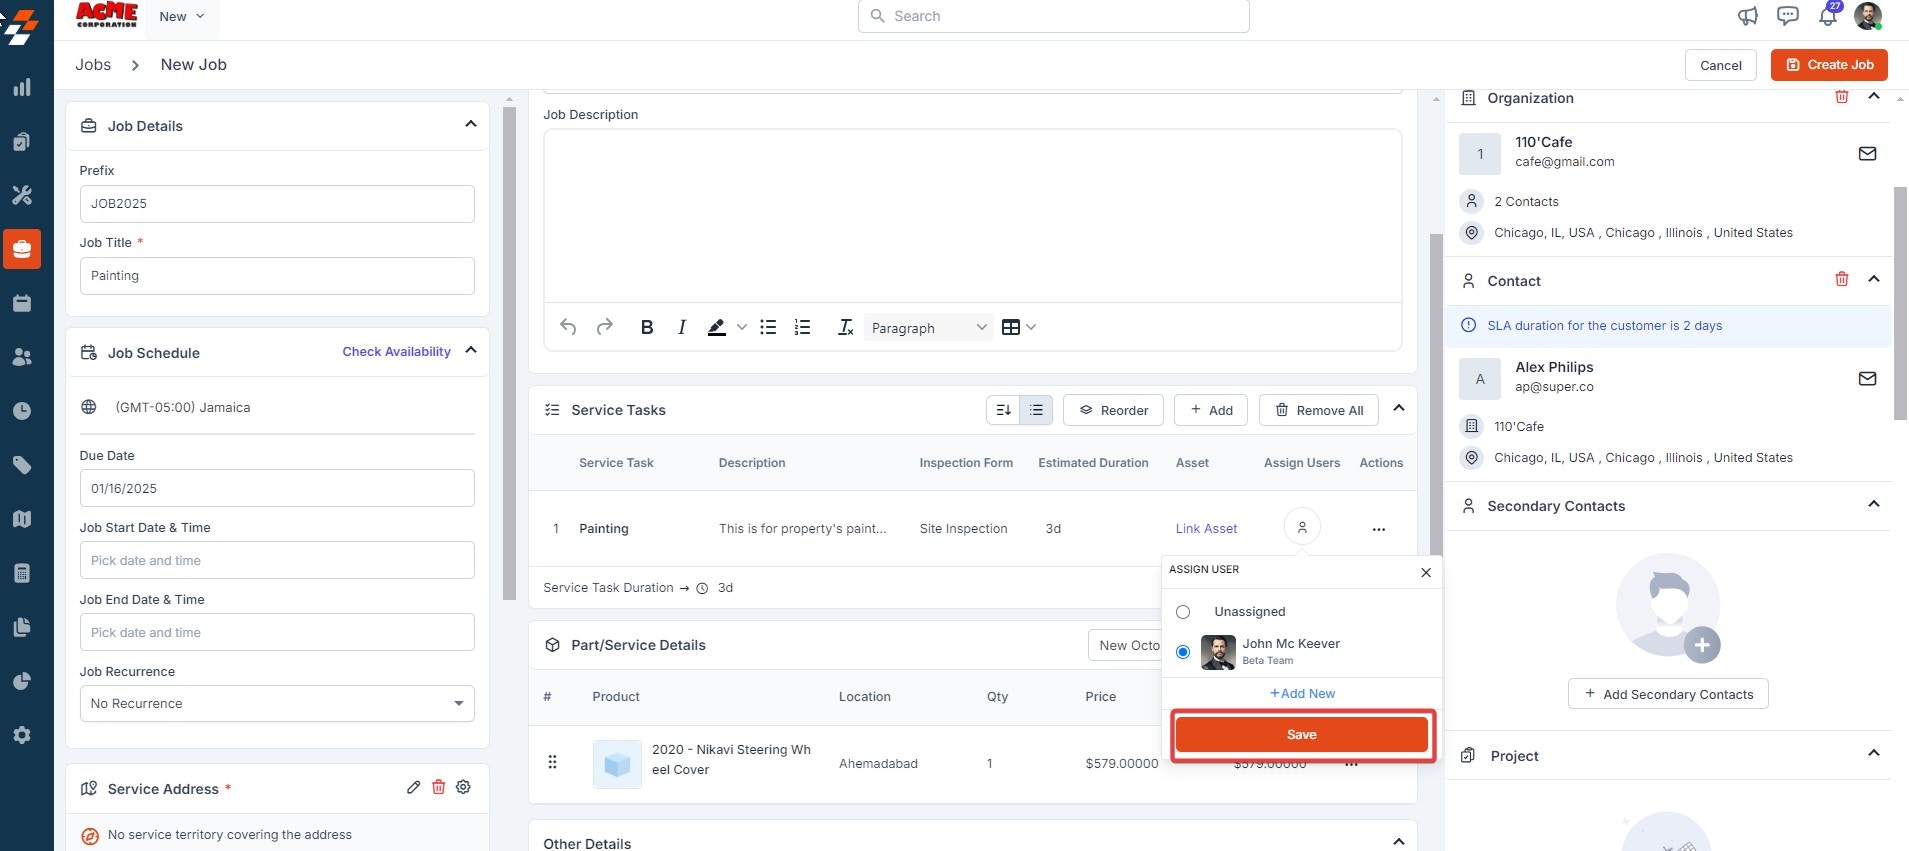
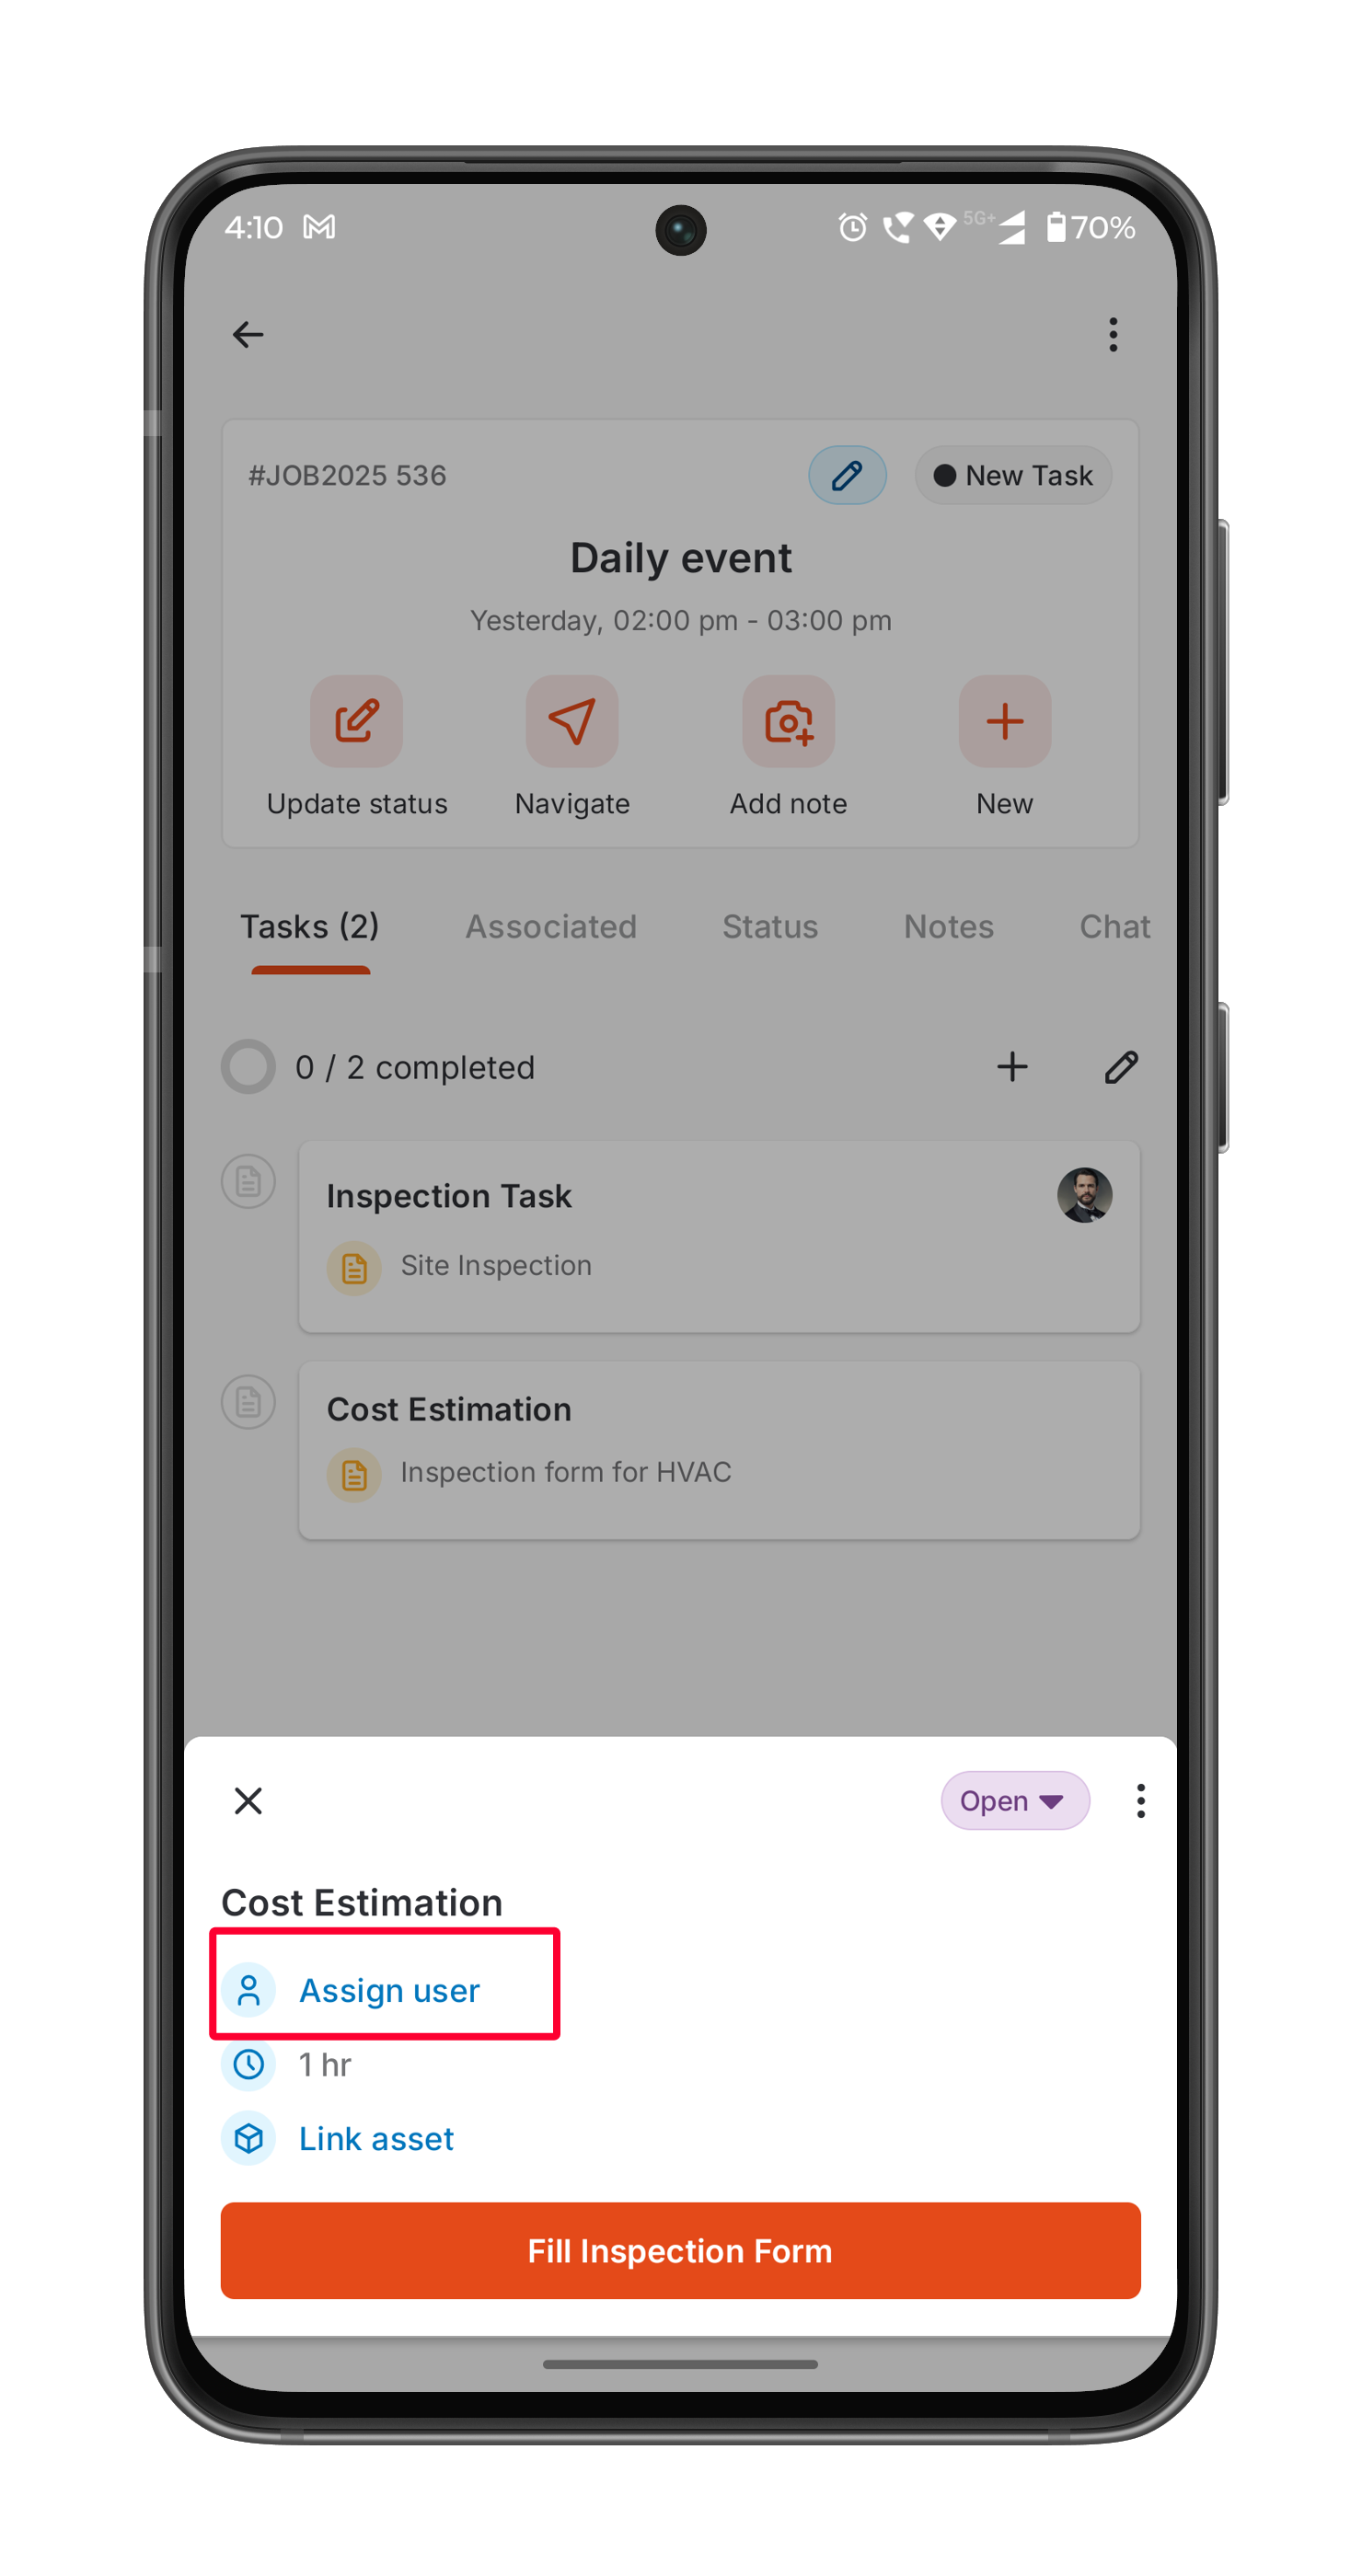
- Click “Assign user” to assign a user to perform the service task.
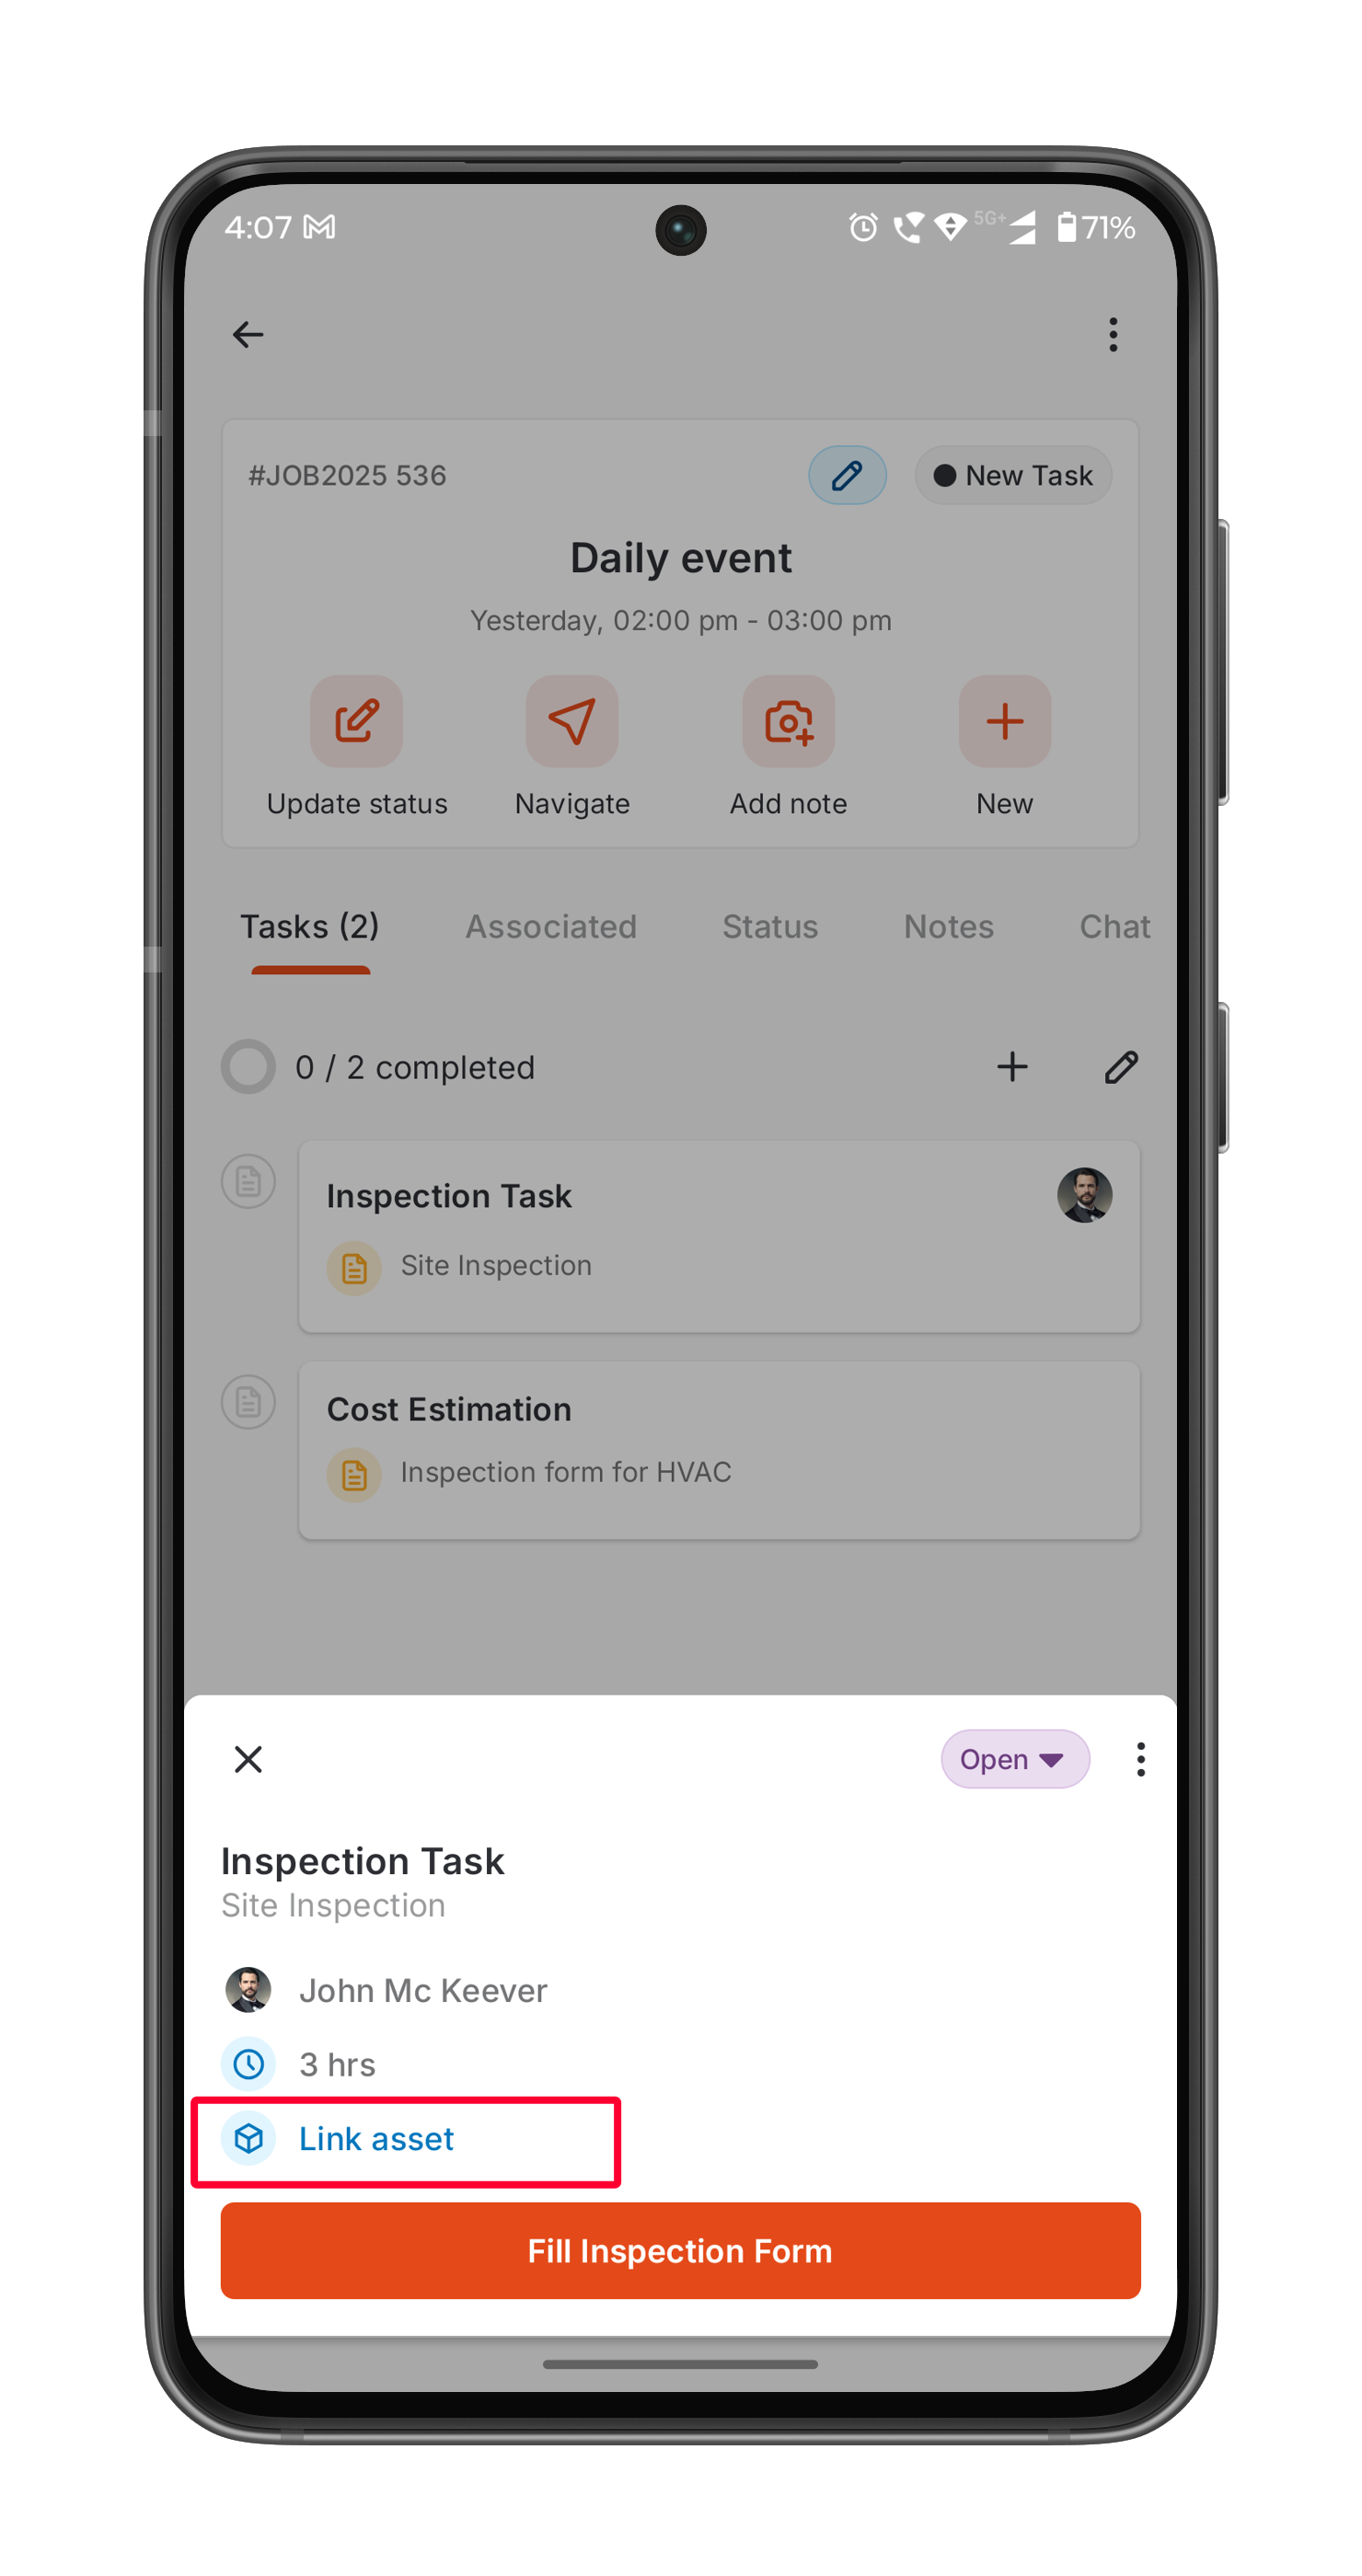
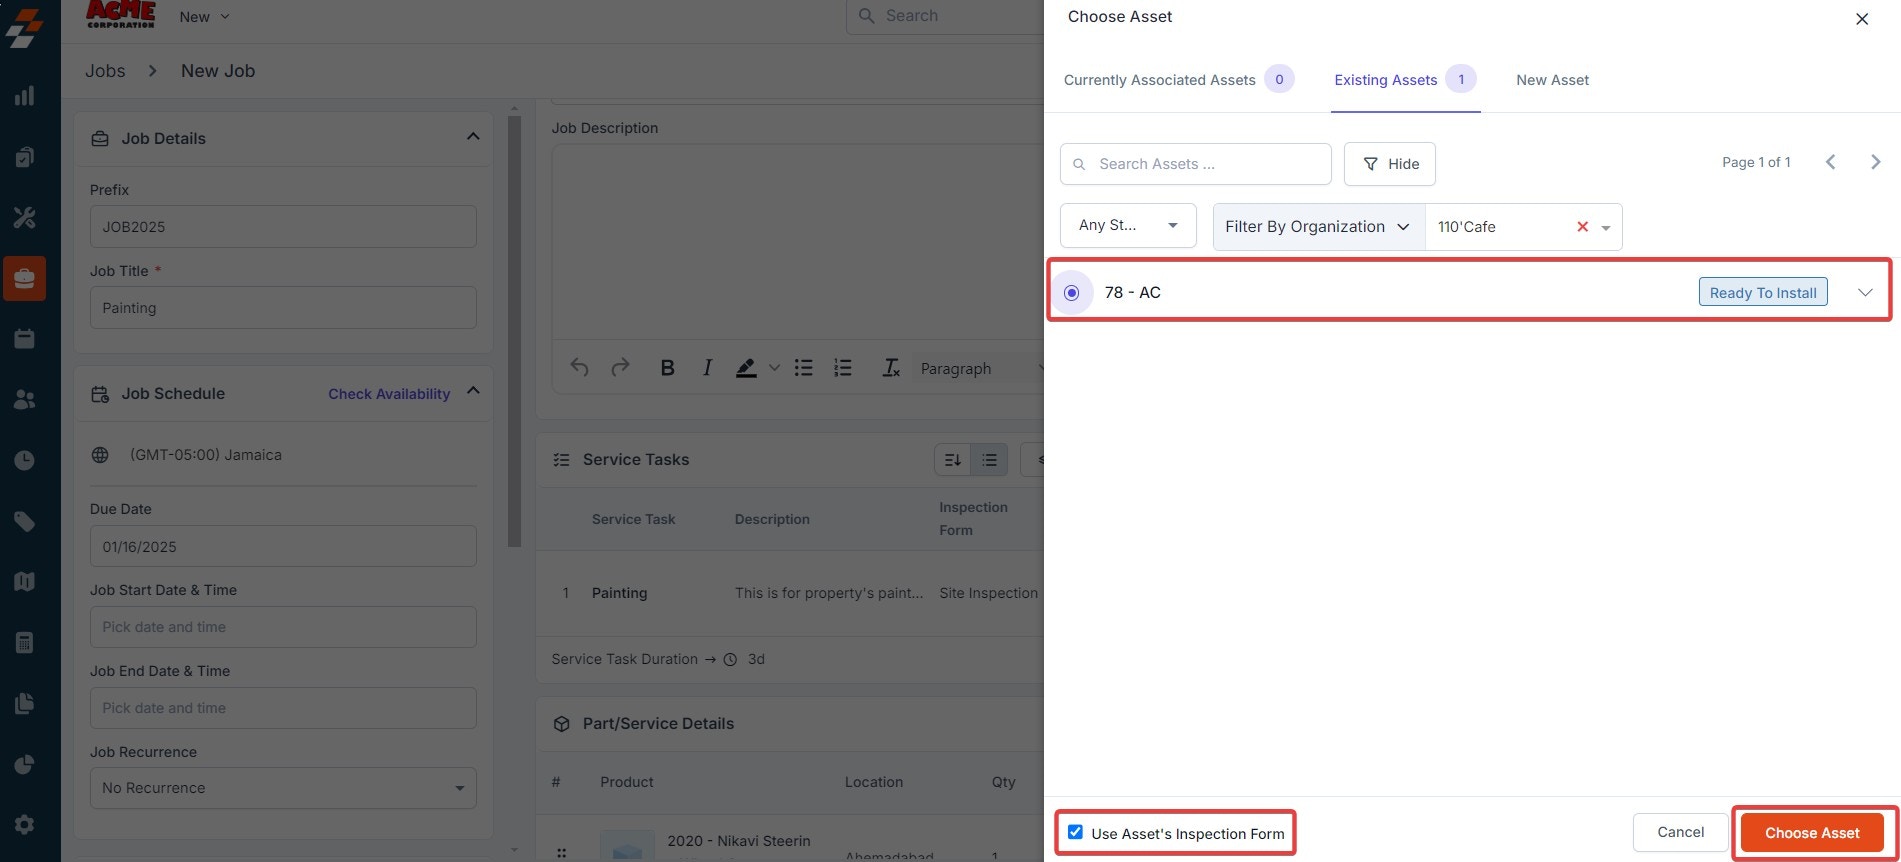
- Once the user has been assigned, you can add assets to the service tasks using the “Link Asset” option.
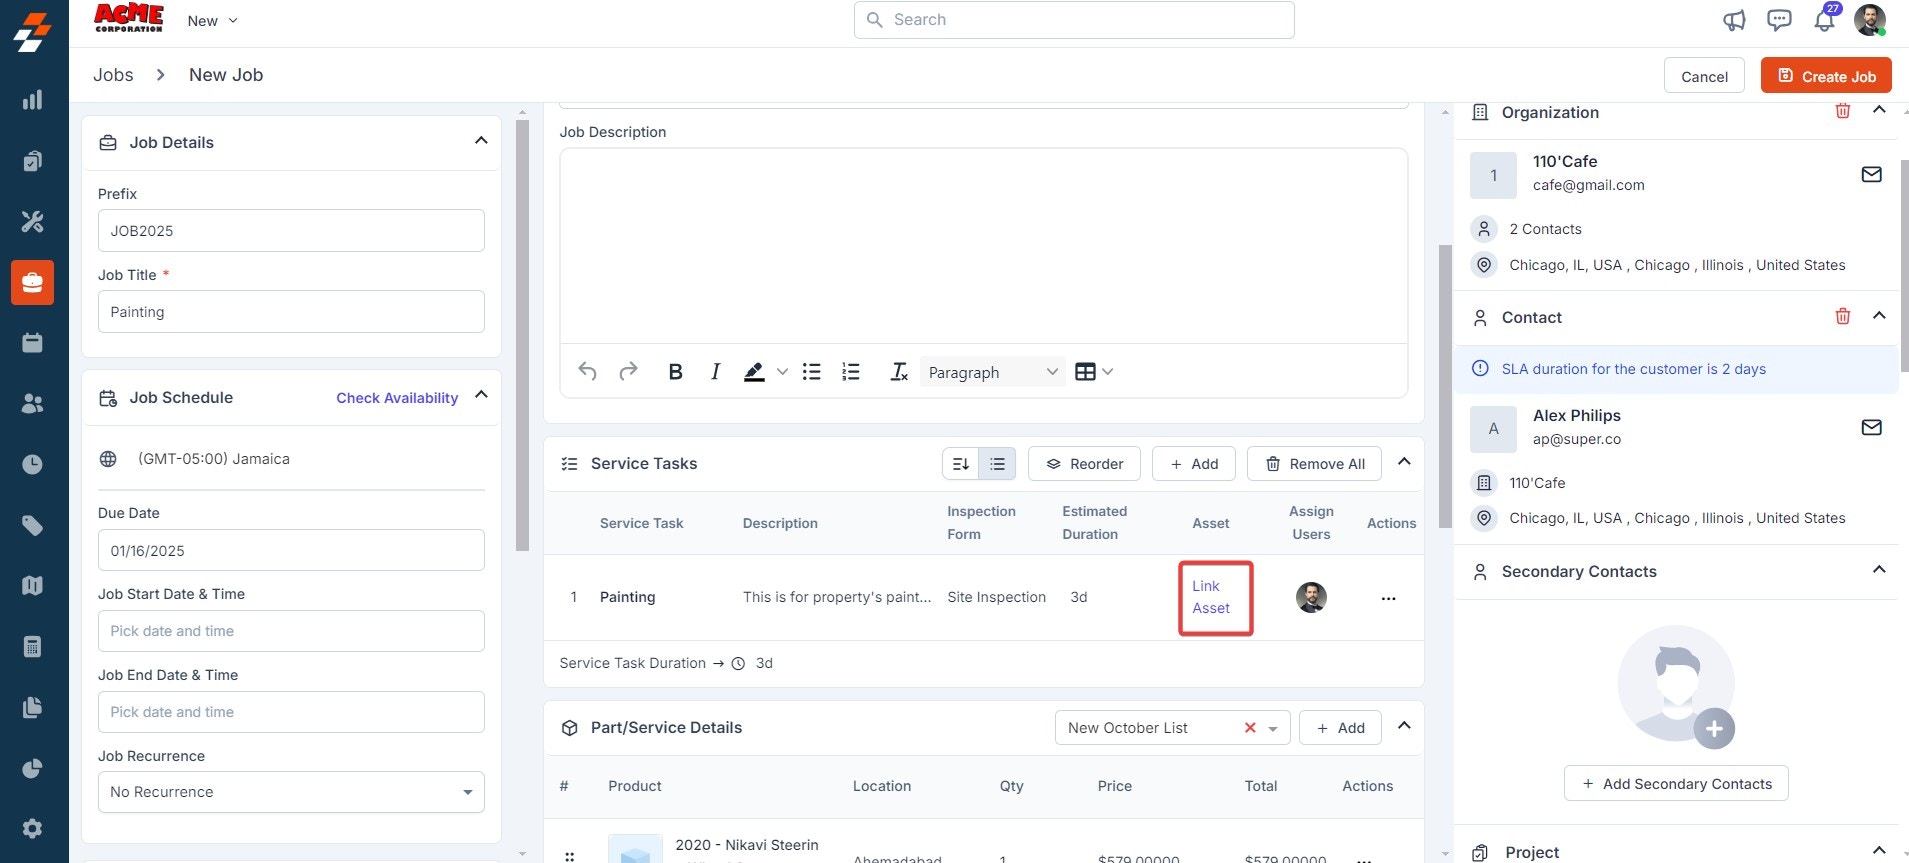
- A “Choose Asset” dialog box will appear. Choose existing assets from the currently associated assets or associate a new asset and click the “Choose Asset” button to link the asset with the service tasks.

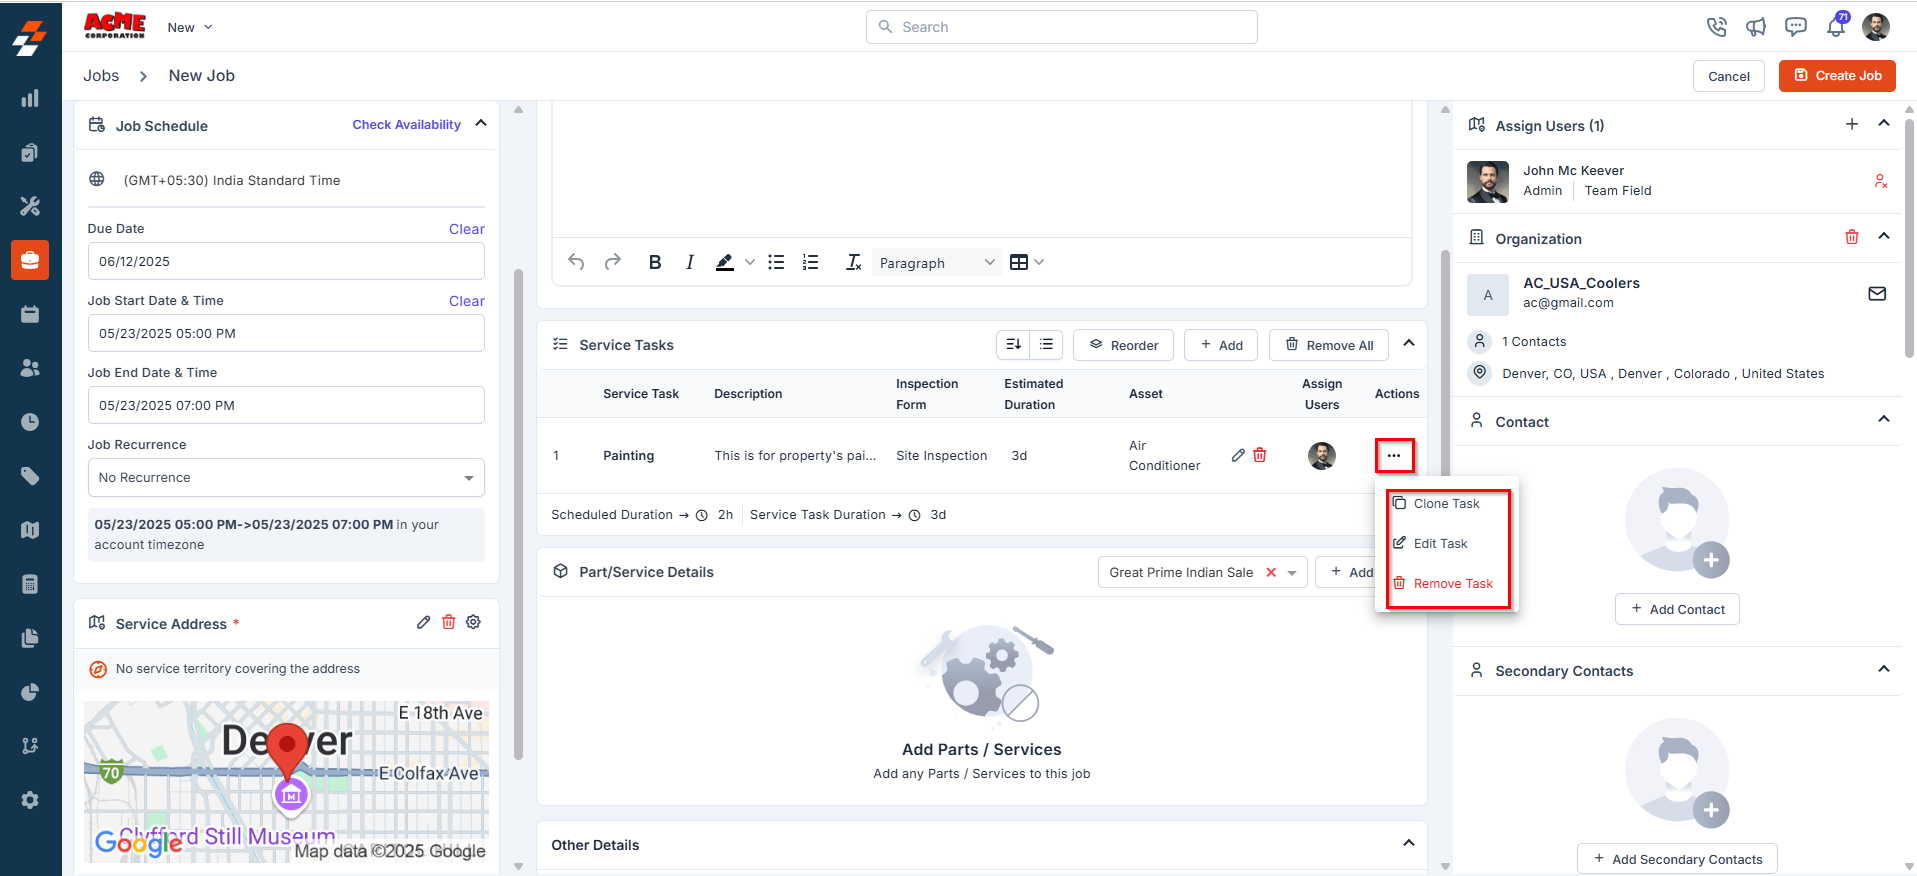
- Once an asset has been assigned to a service task, you can:
- Edit the asset by clicking the edit icon
- Delete the asset using the delete icon Additionally, under the Actions menu (ellipsis icon), you have the following options:
- Clone Task – Duplicate the service task and modify it as needed
- Edit Task – Update or revise the service task details
- Remove Task – Delete the service task from the job
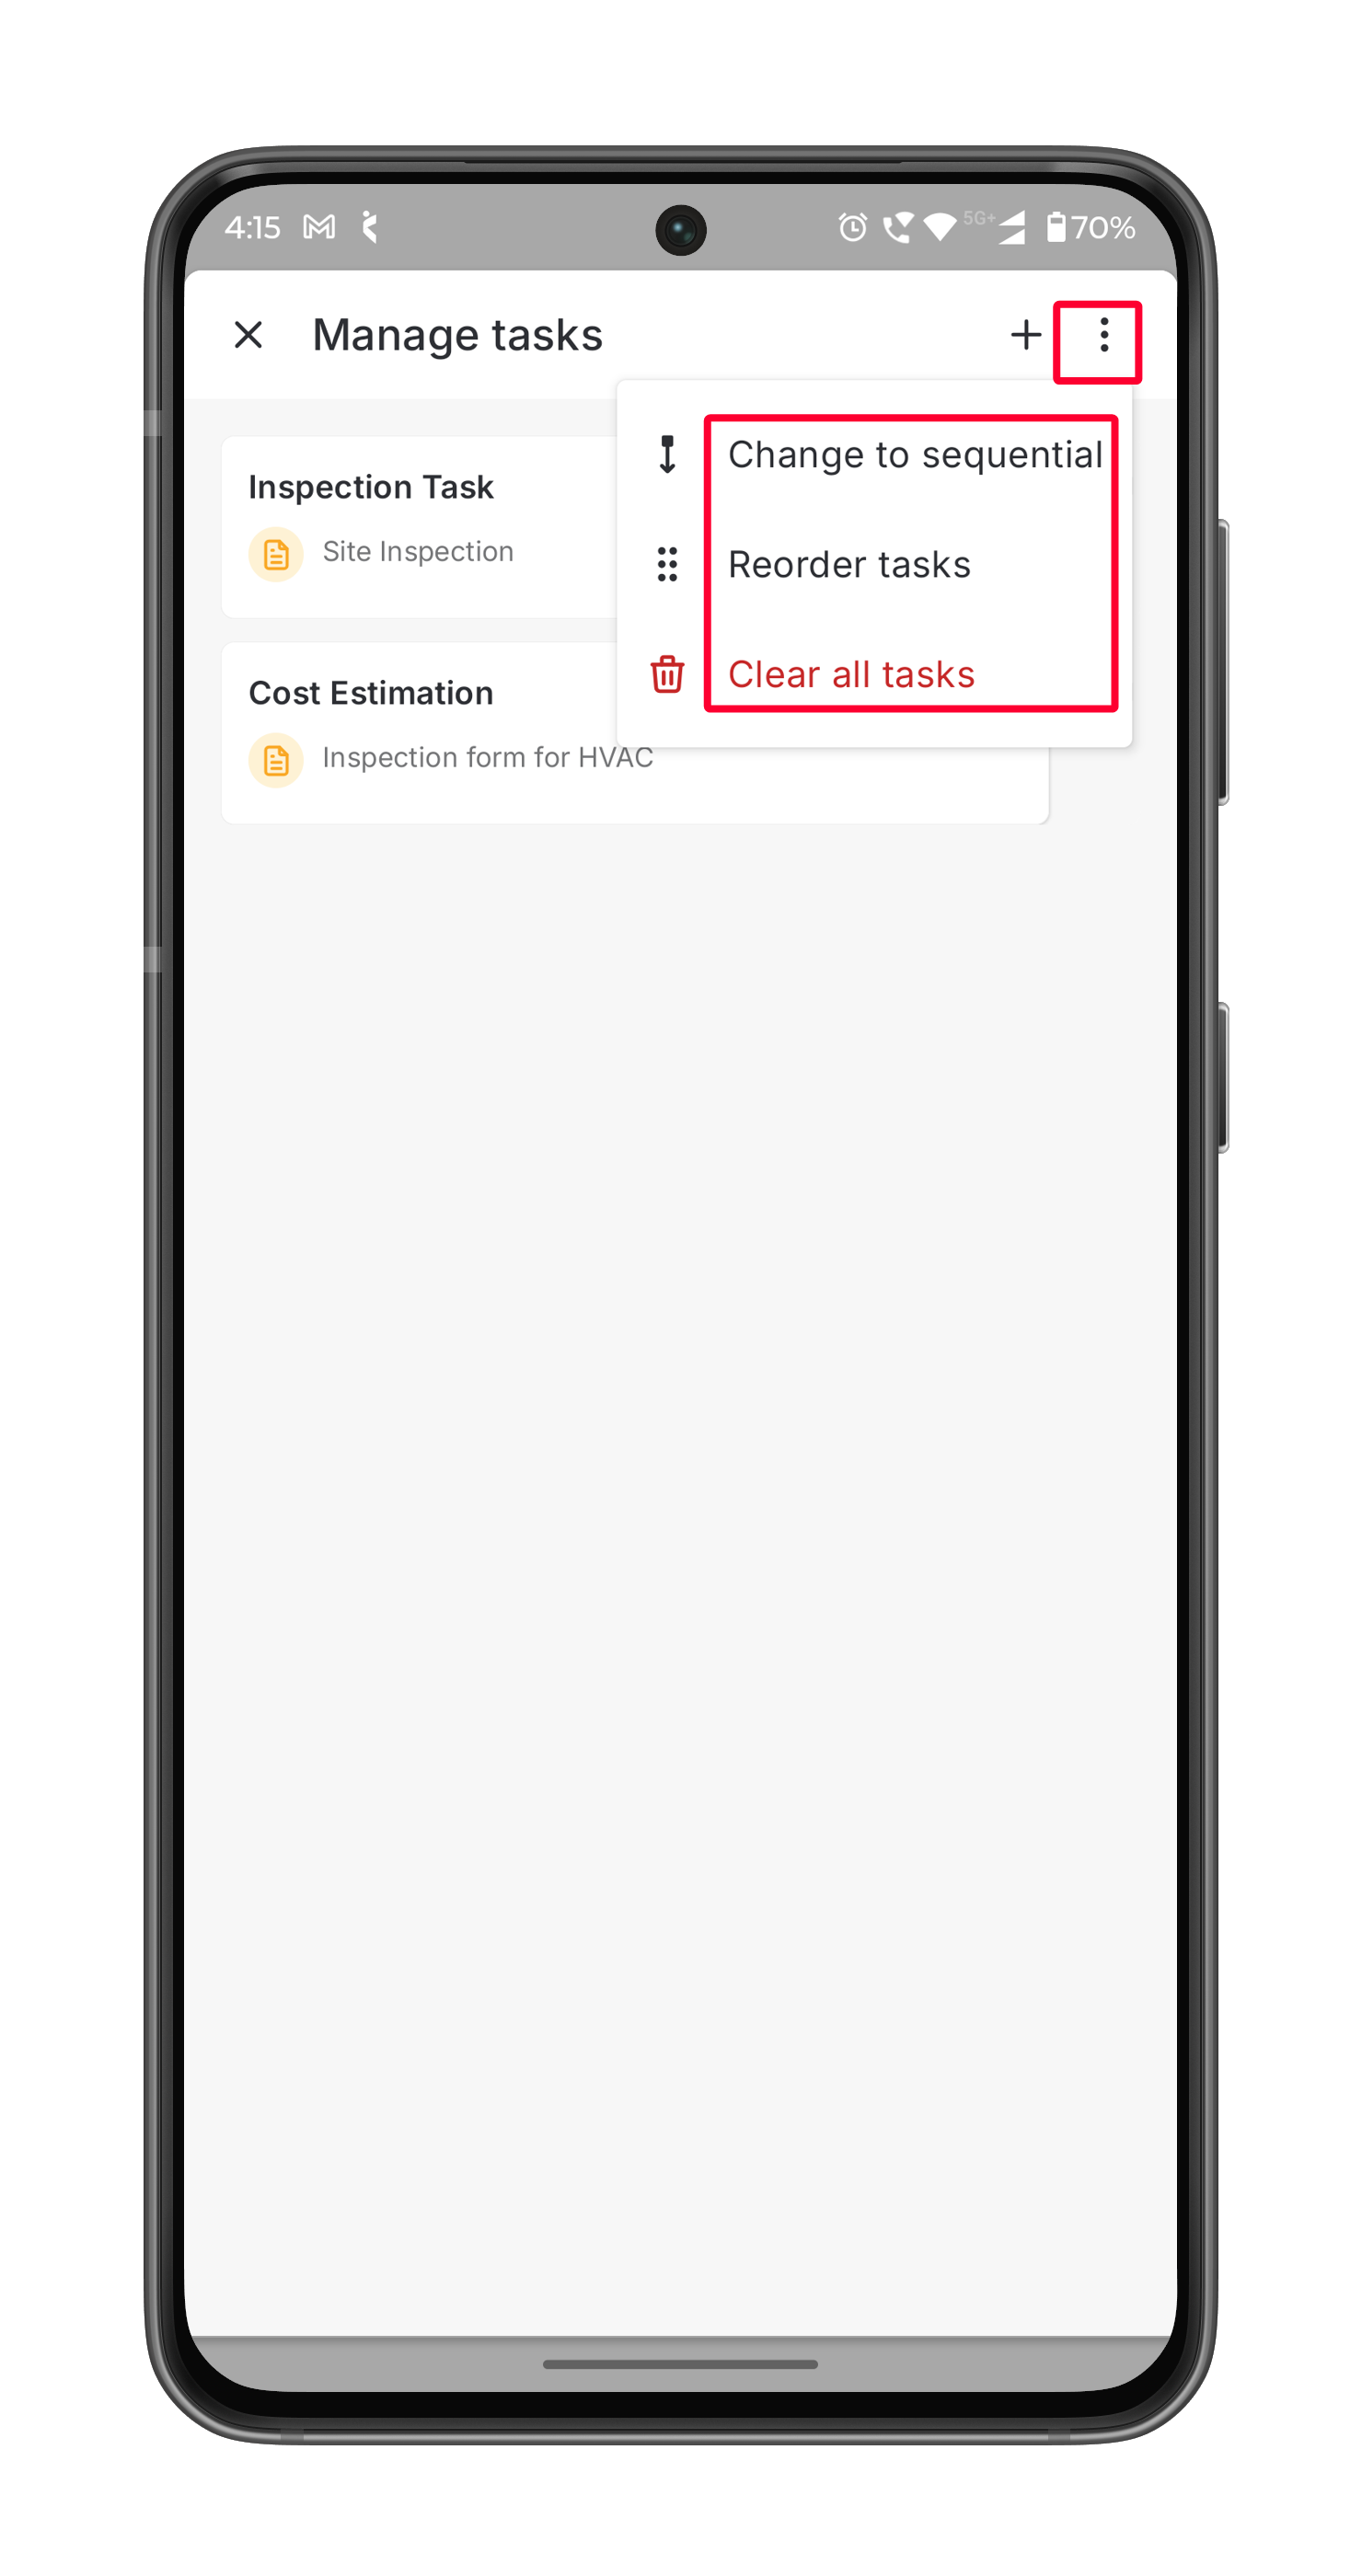
- Sequential: Tasks must be completed one after another. The next task becomes available only after the current one is marked as completed. Use this option when tasks are dependent on each other.
- Parallel: Tasks can be executed independently and simultaneously. There’s no set order, allowing multiple tasks to be performed at the same time—ideal for unrelated or time-efficient workflows.
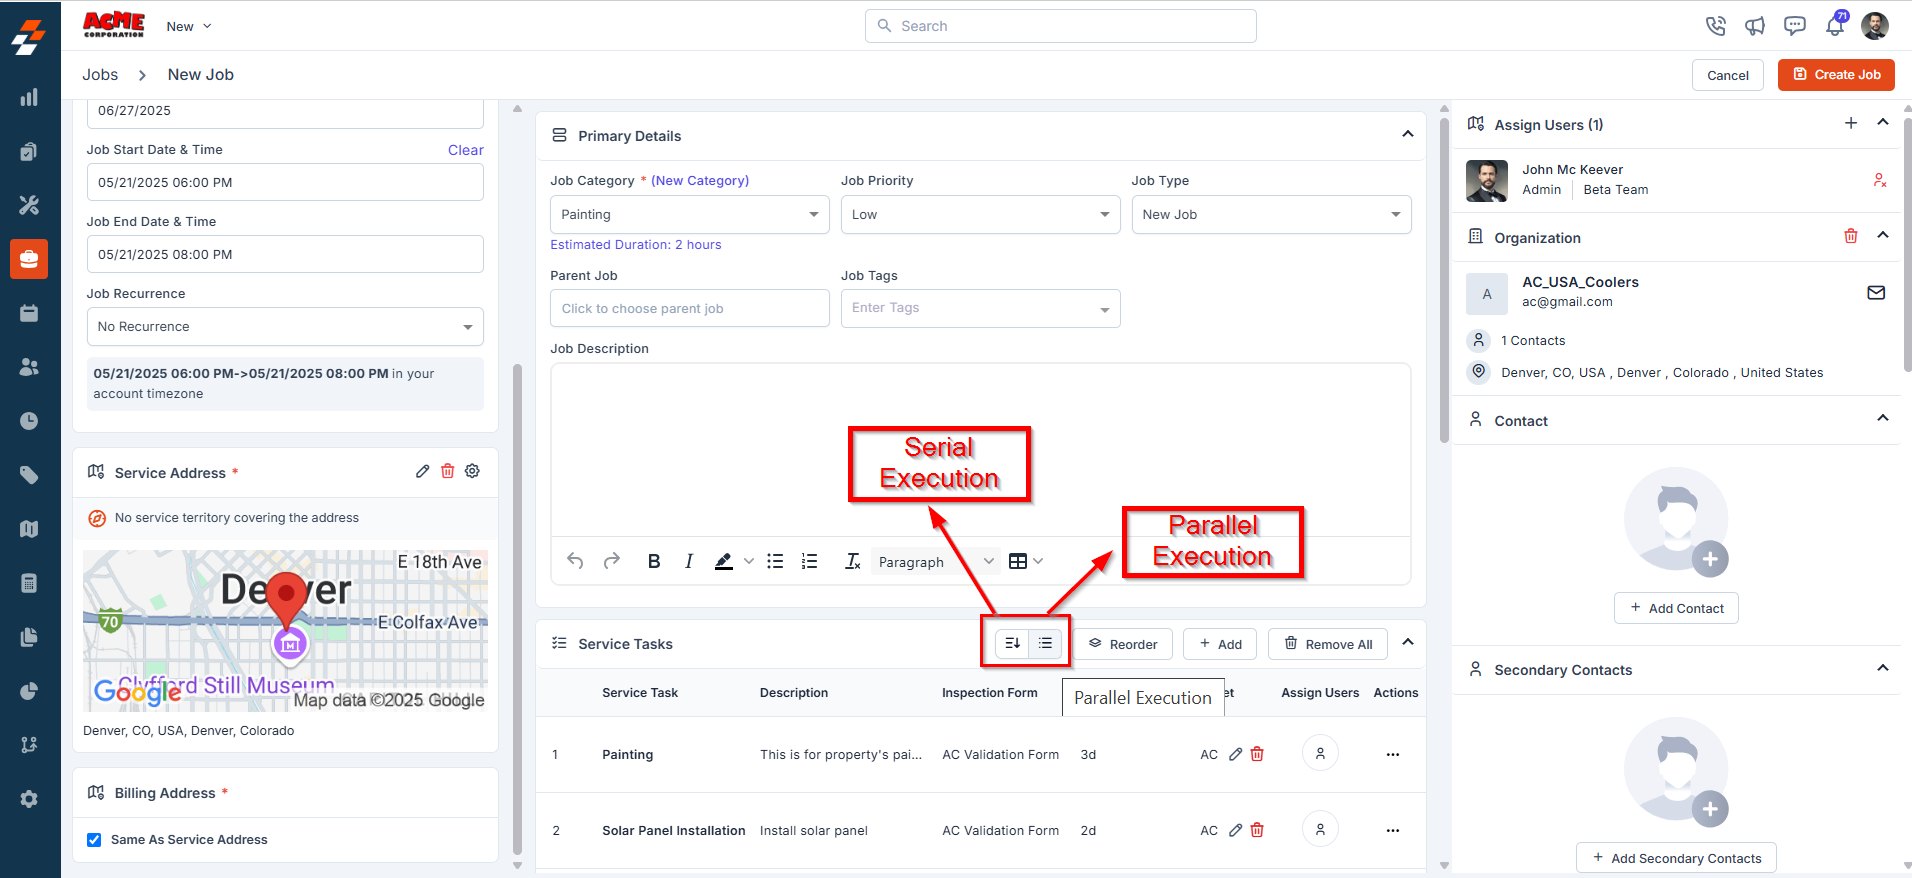
- Switch between Sequential and Parallel task execution
- Reorder tasks using drag-and-drop
- Clear all tasks, if needed
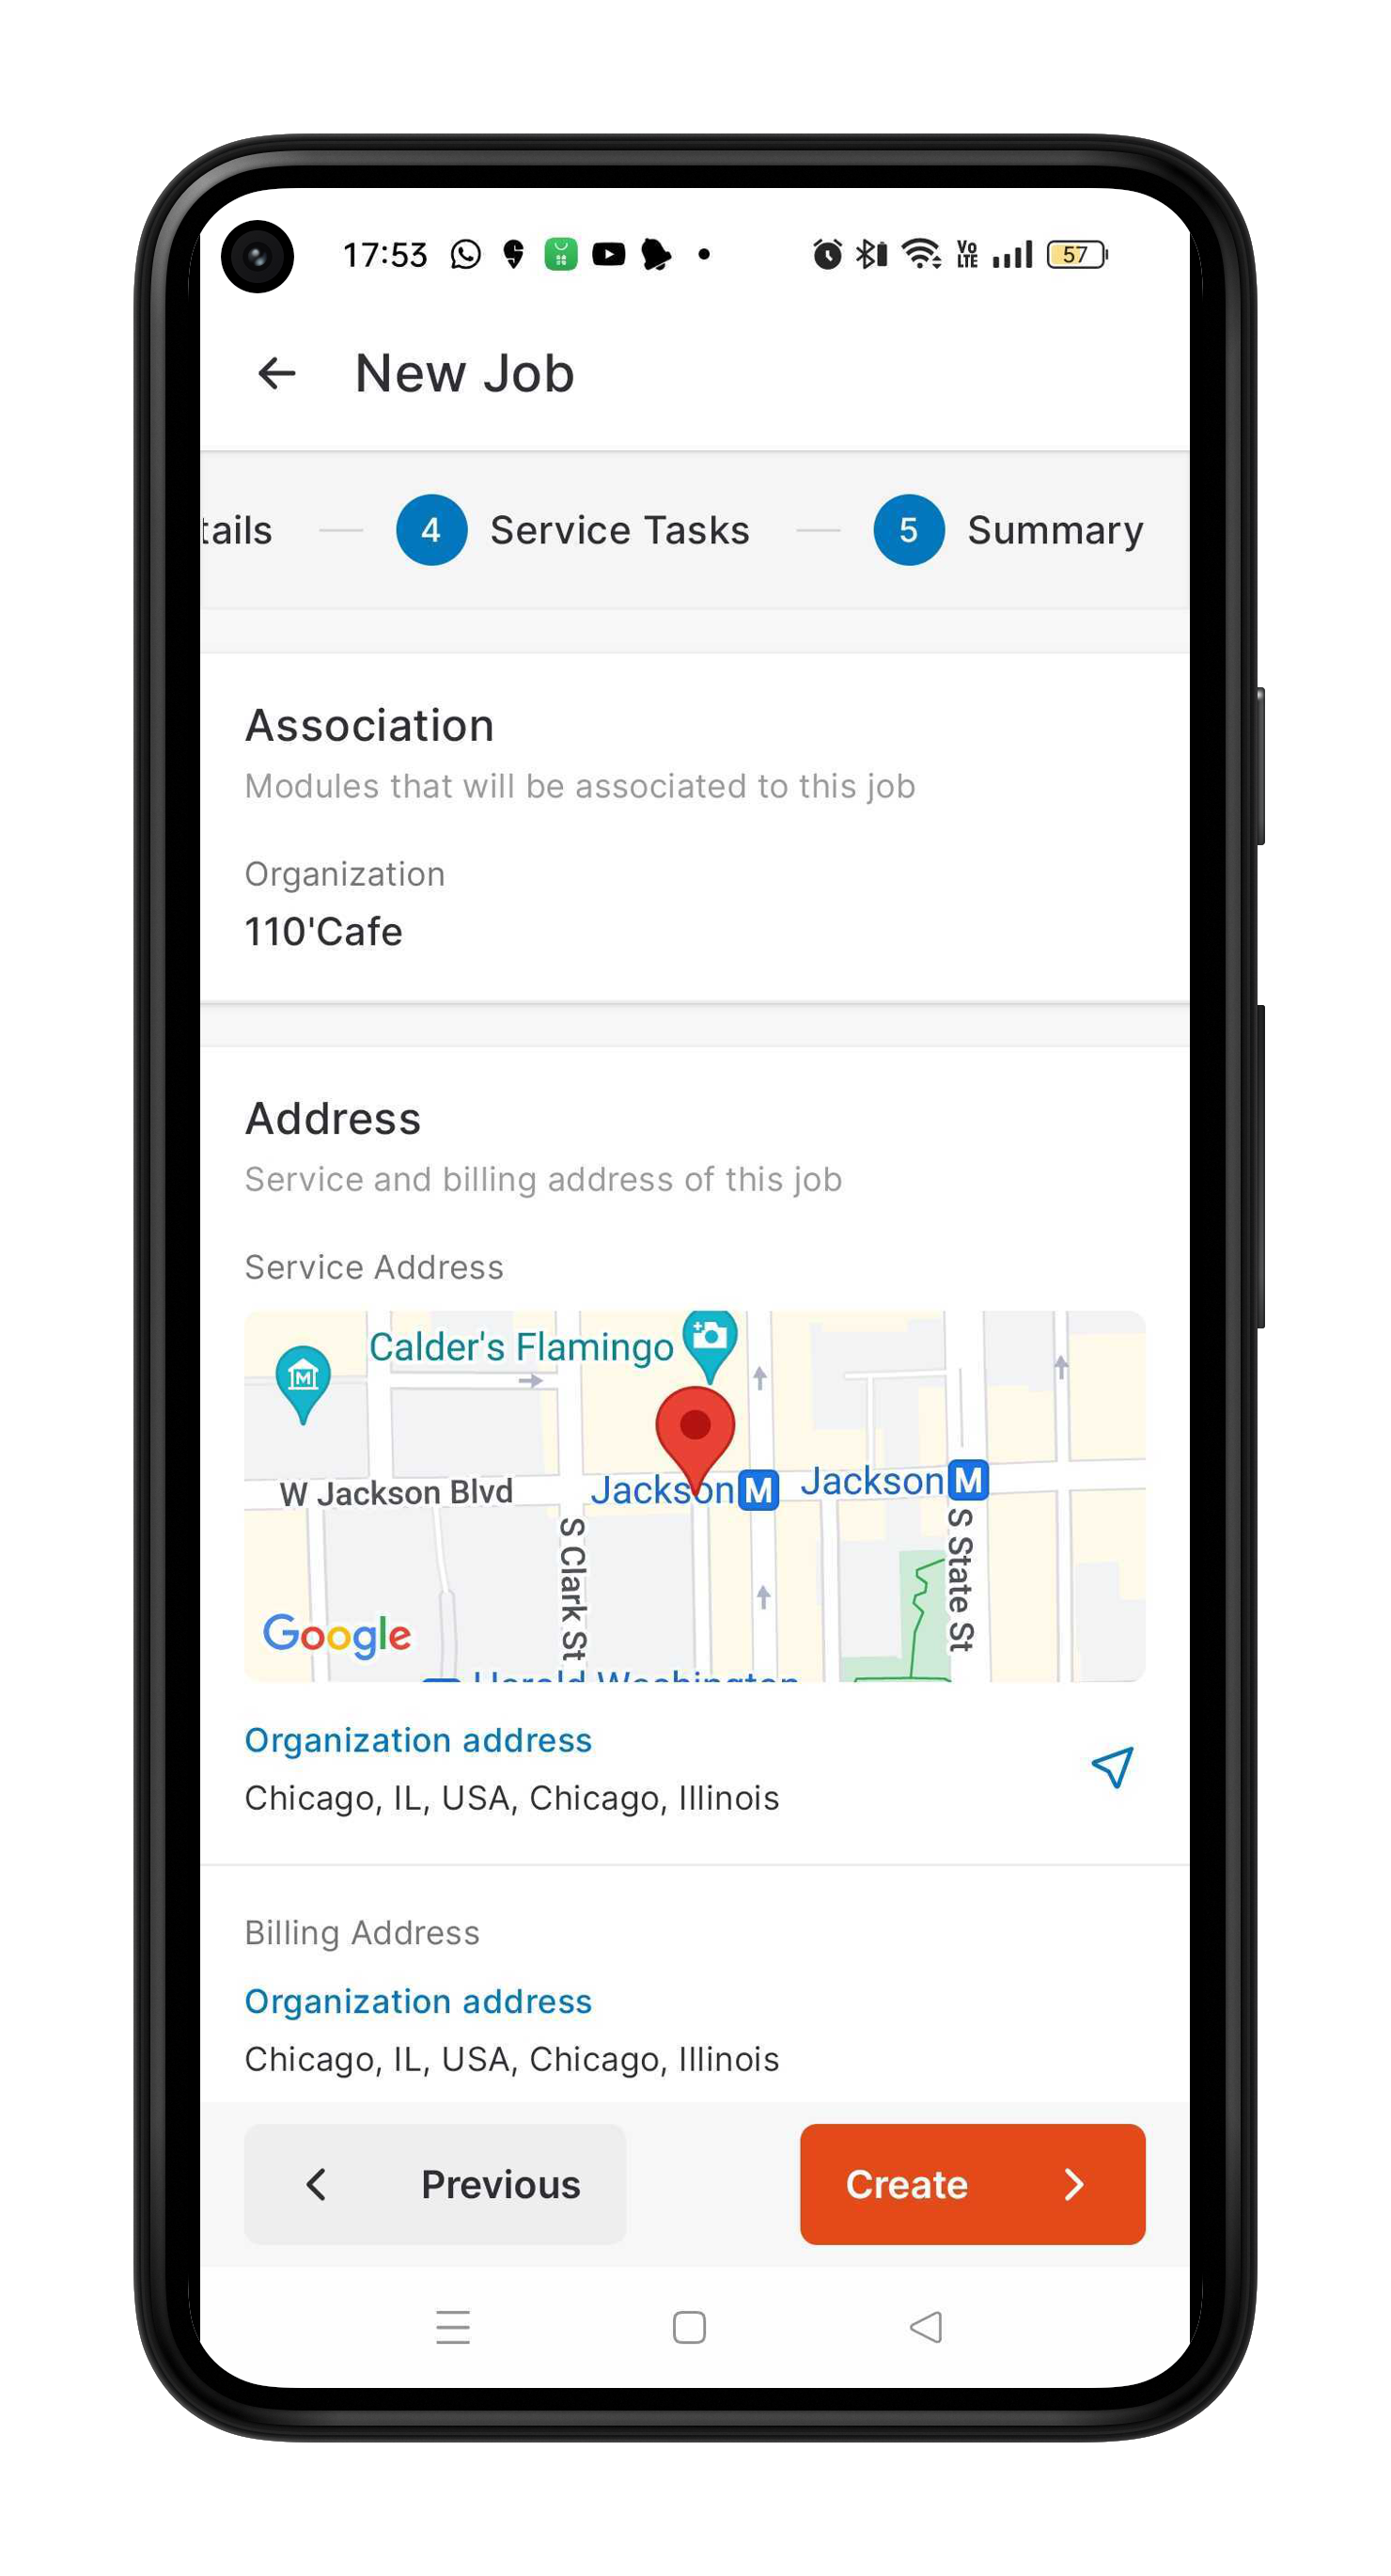
- After filling in the necessary details, click the “Create Job” button to create a new job with linked service tasks.
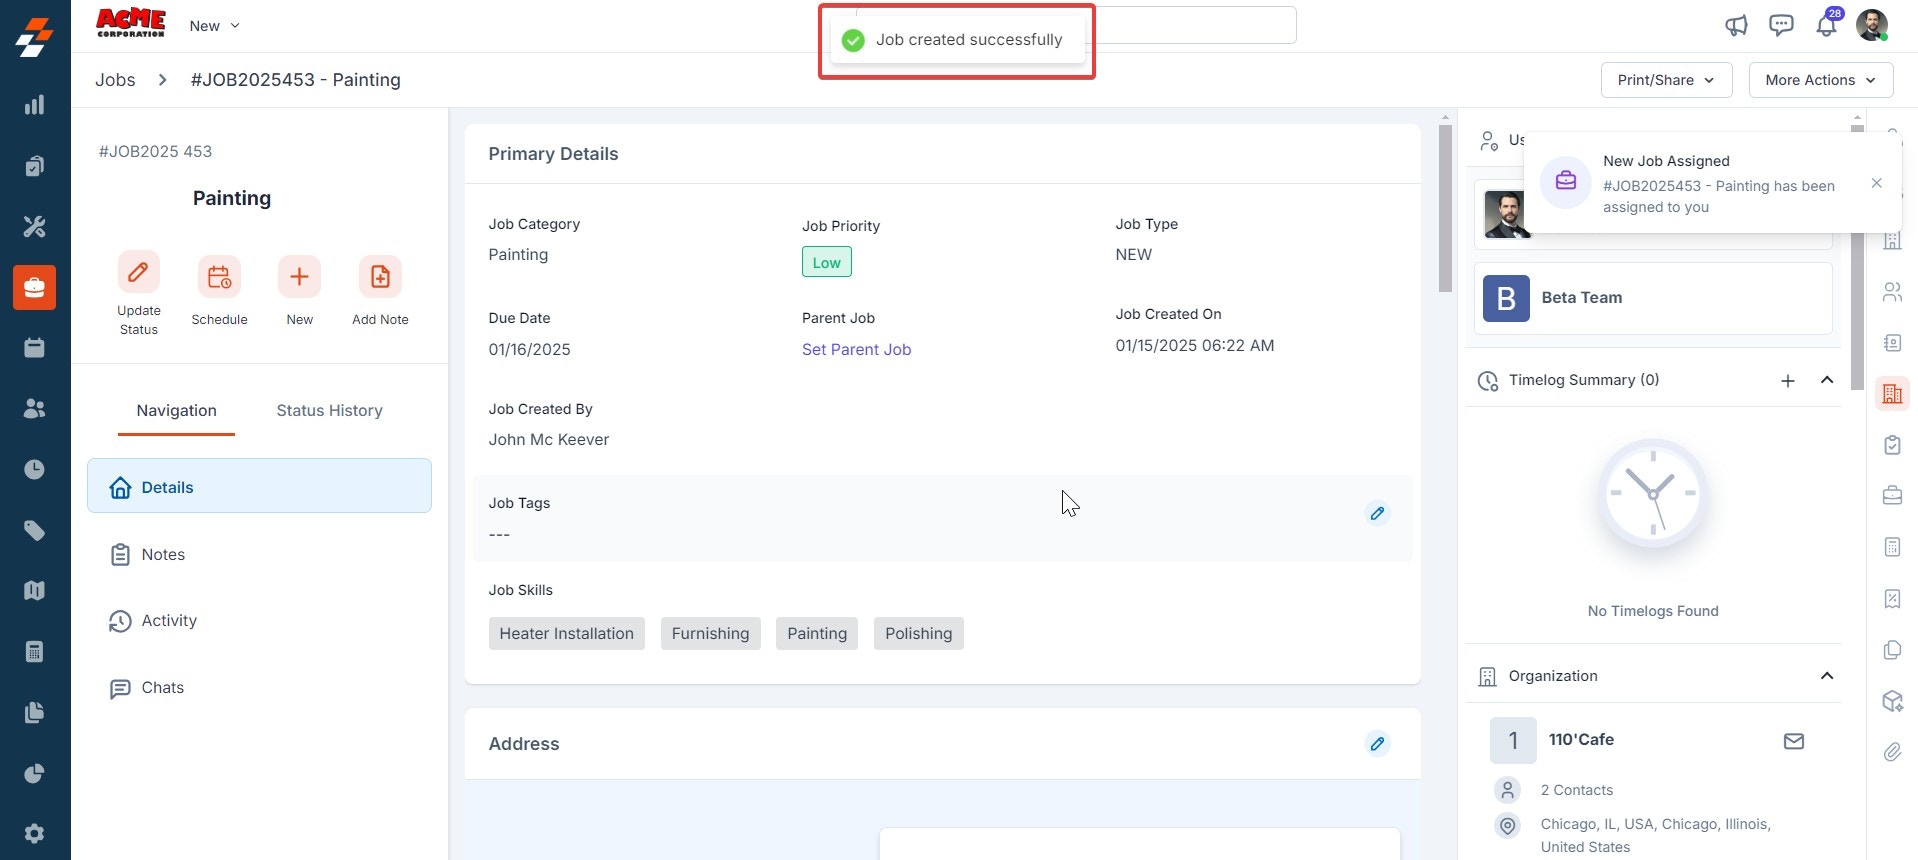
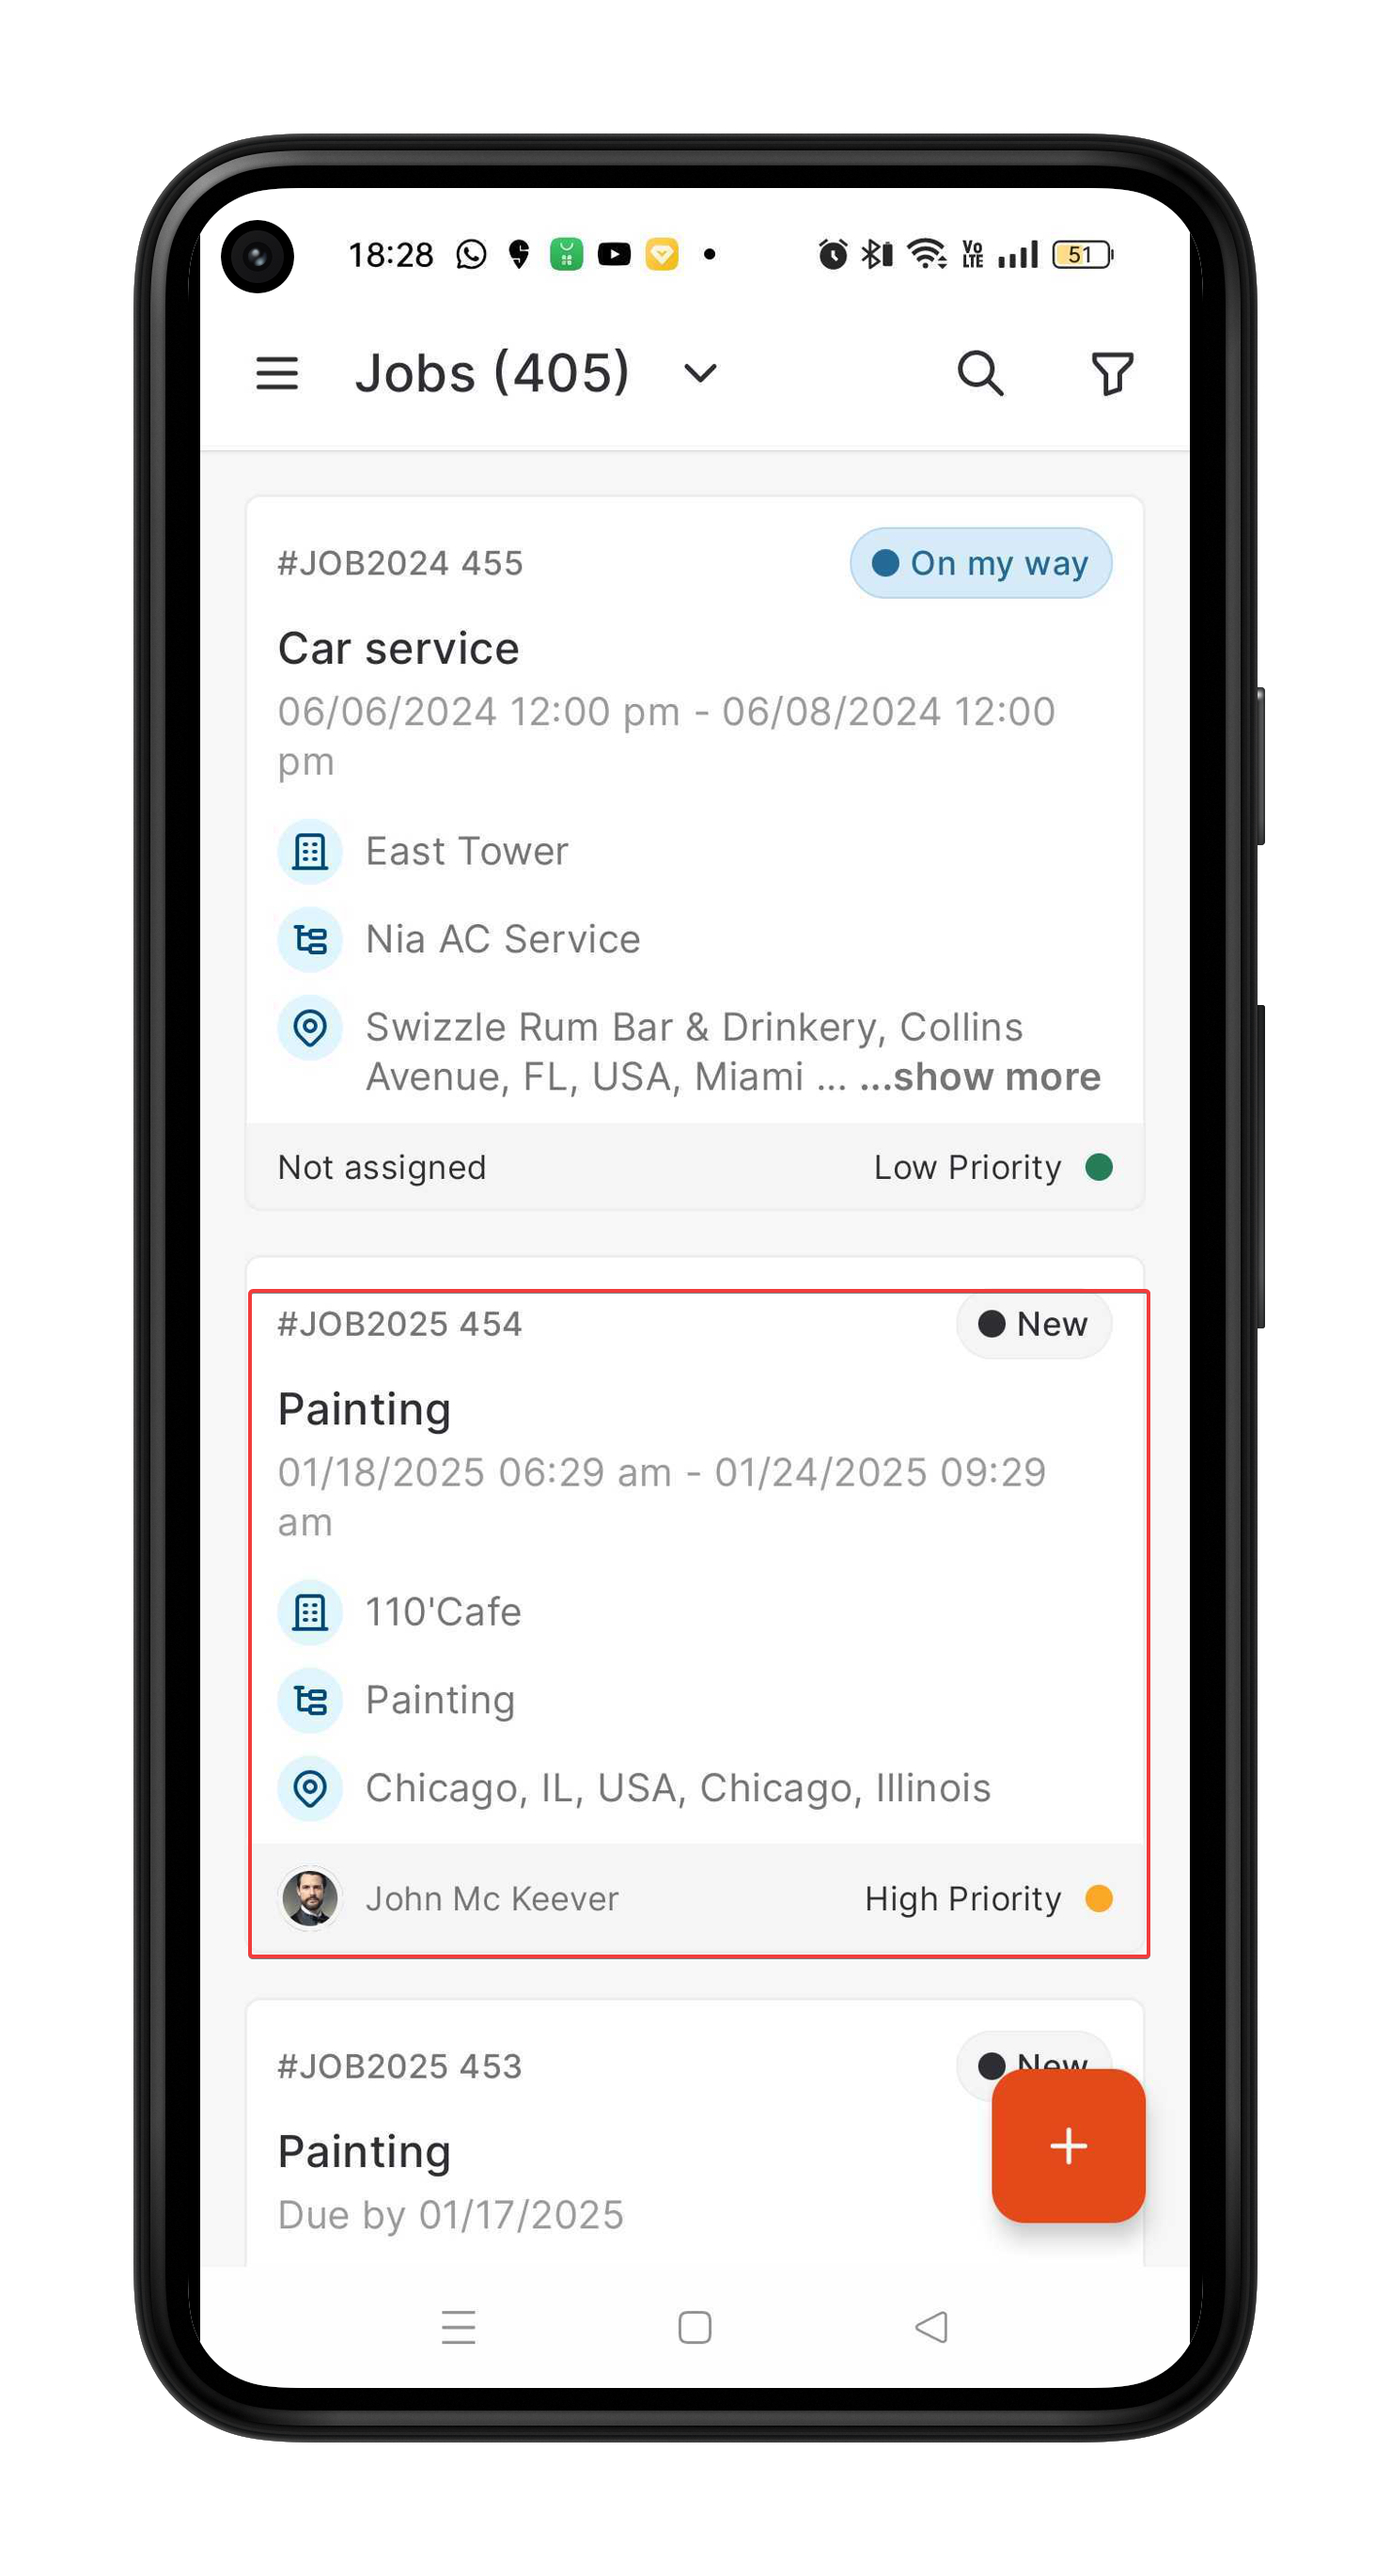
- The new job is created successfully.
-portrait-Copy.png?fit=max&auto=format&n=4-Los4YX_ob2IgRN&q=85&s=36a72081bd3020d995ace3c54f4ab873)
d. Update service task status
Navigation: Jobs -> Job ->Job Details -> Service Task Section -> Update Service Tasks
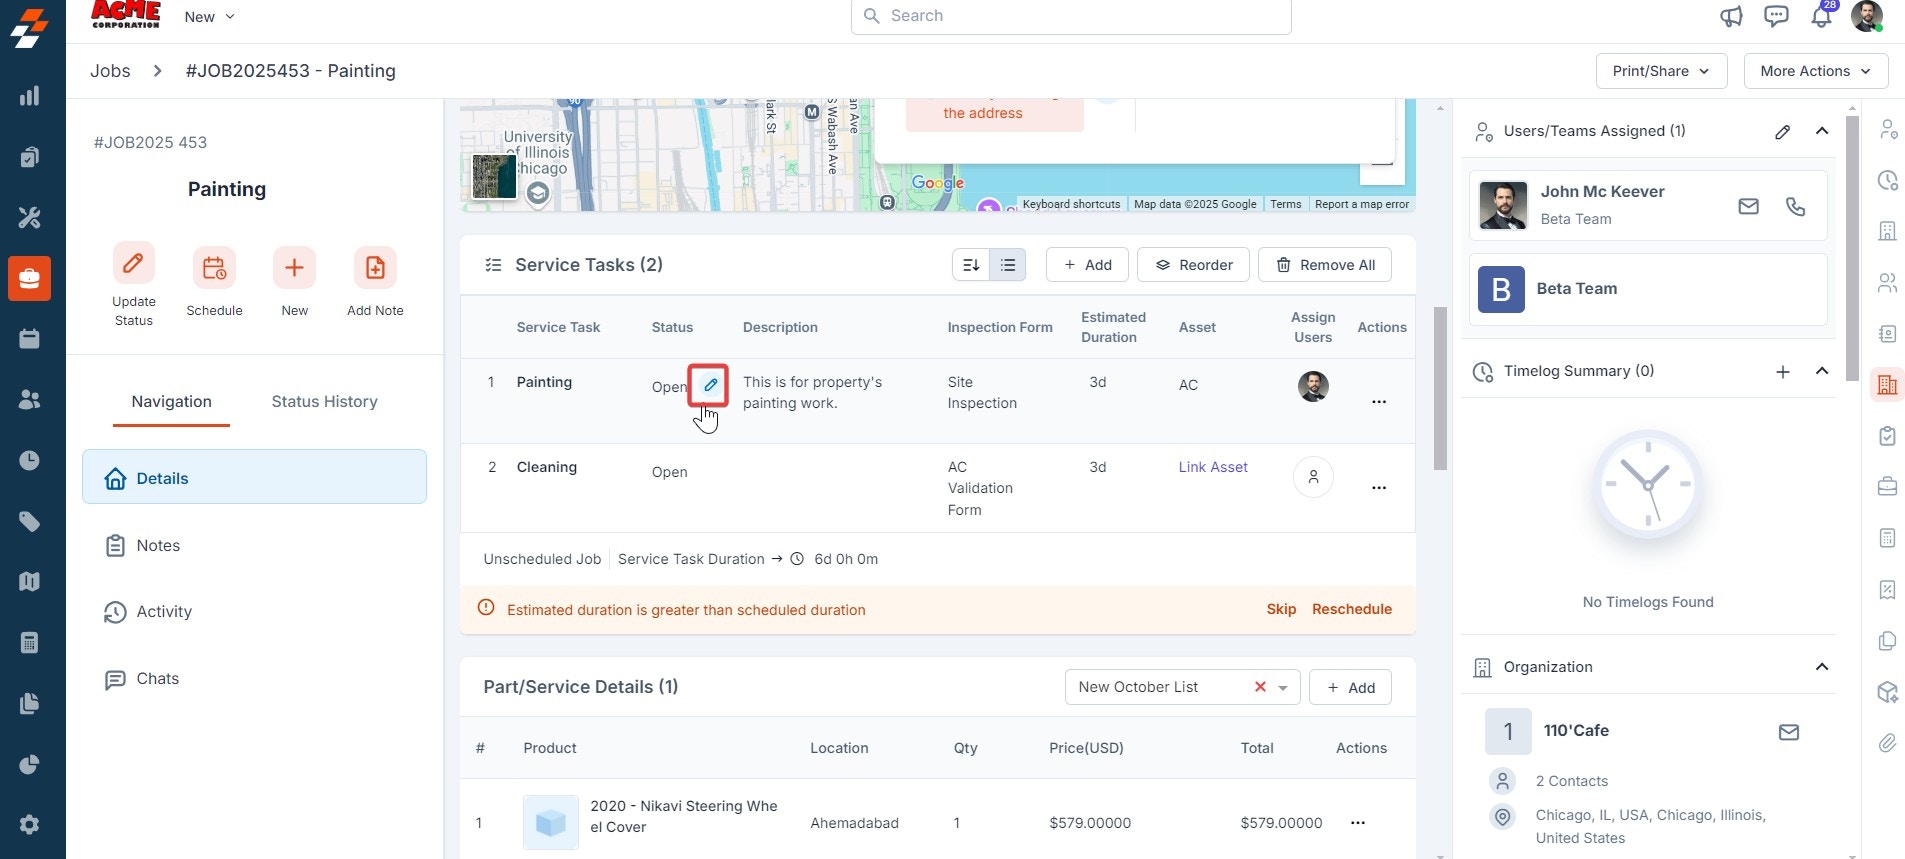
- Click the “Jobs” module from the left navigation menu and choose the job for which you want to update the service tasks status. The job details page will appear.
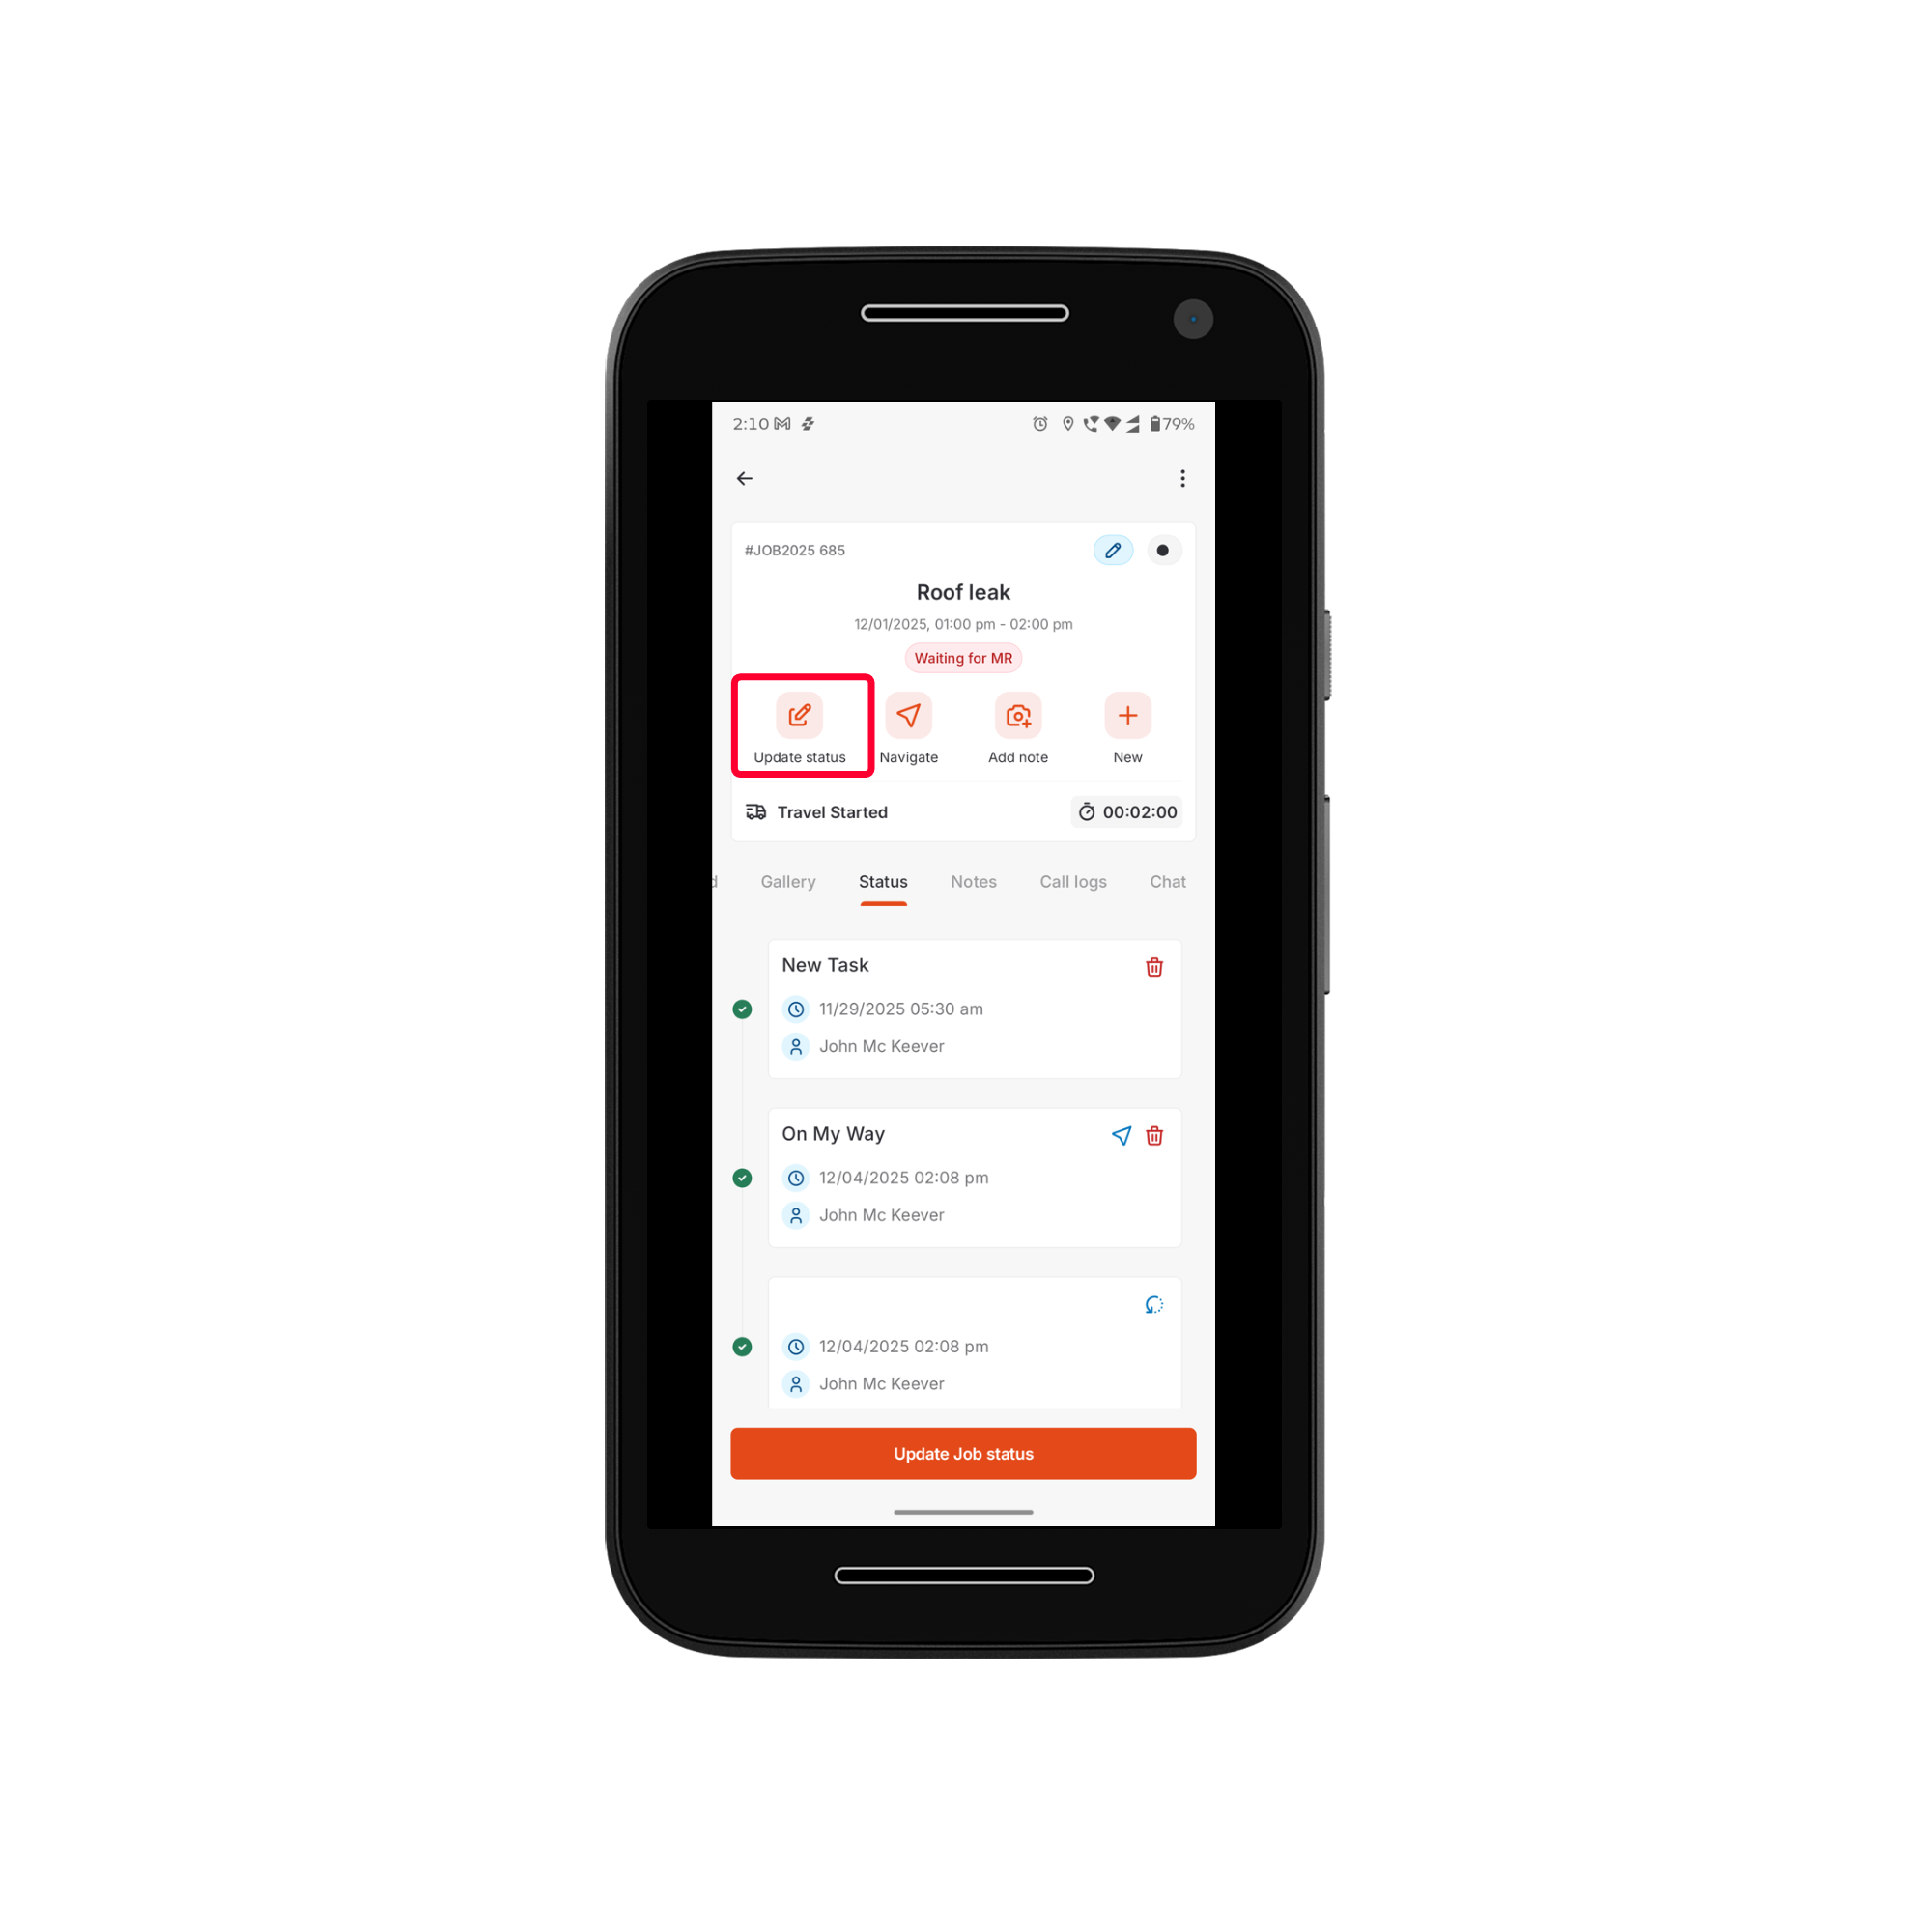
- Navigate to “Service Tasks” on the details page and click the “Edit” icon to modify the task’s status.
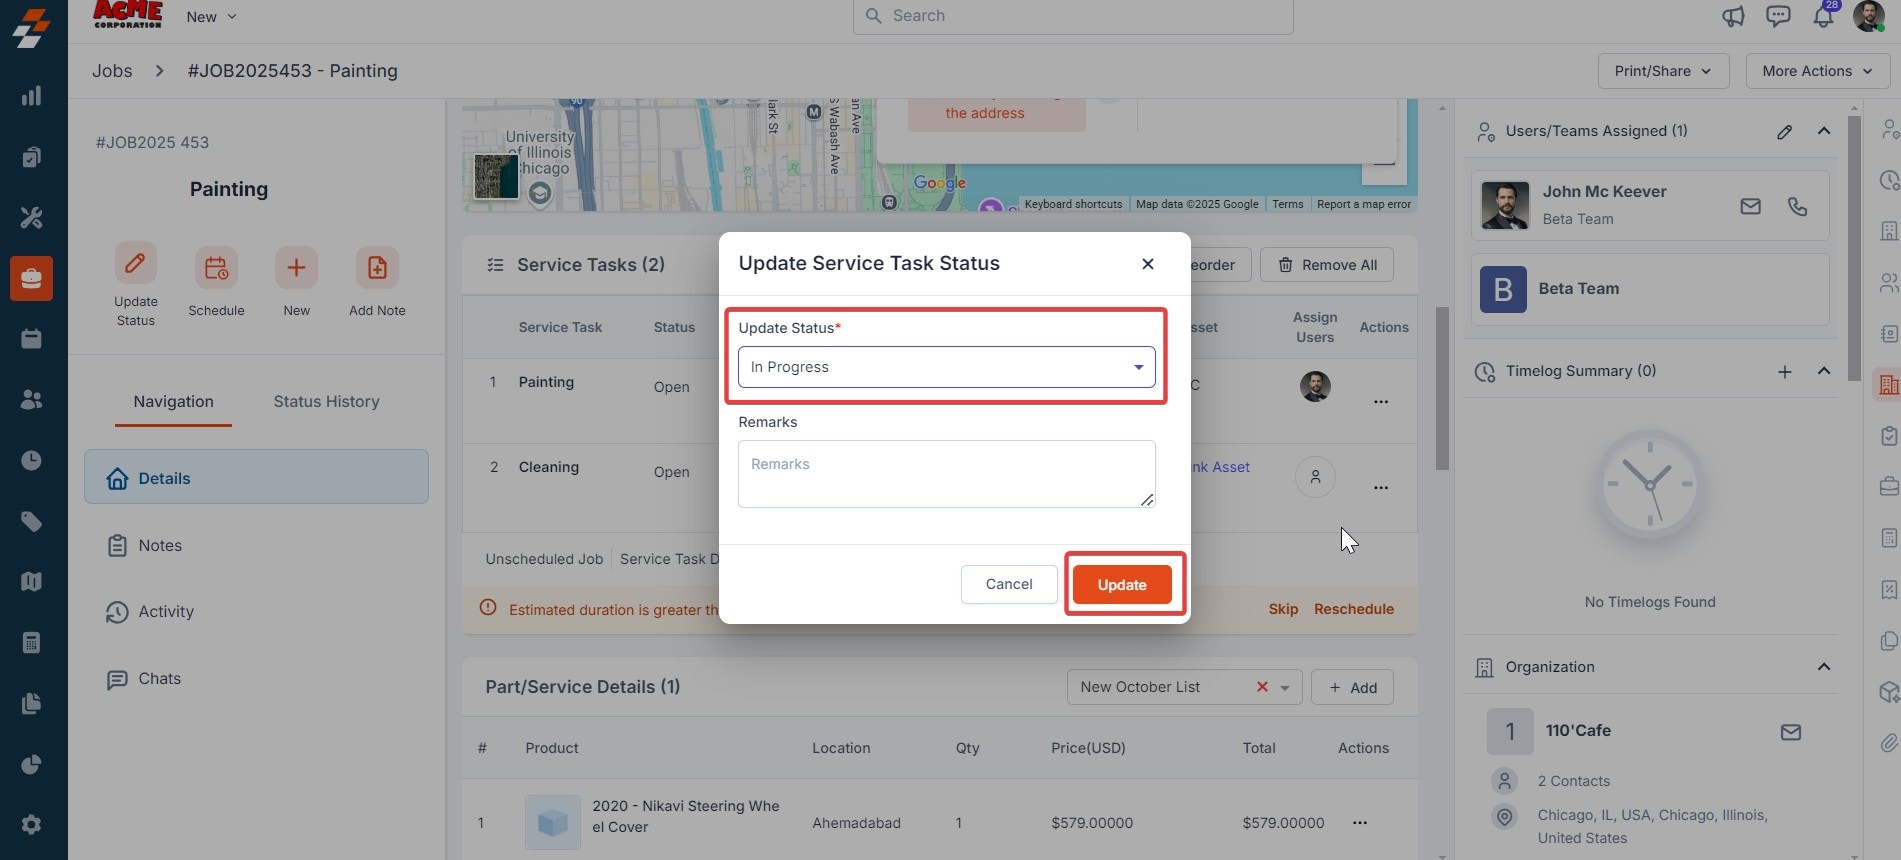
- An “Update Service Task Status” dialog box will appear. Select the status from the drop-down and click the “Update Status” button. Enter additional comments if required.
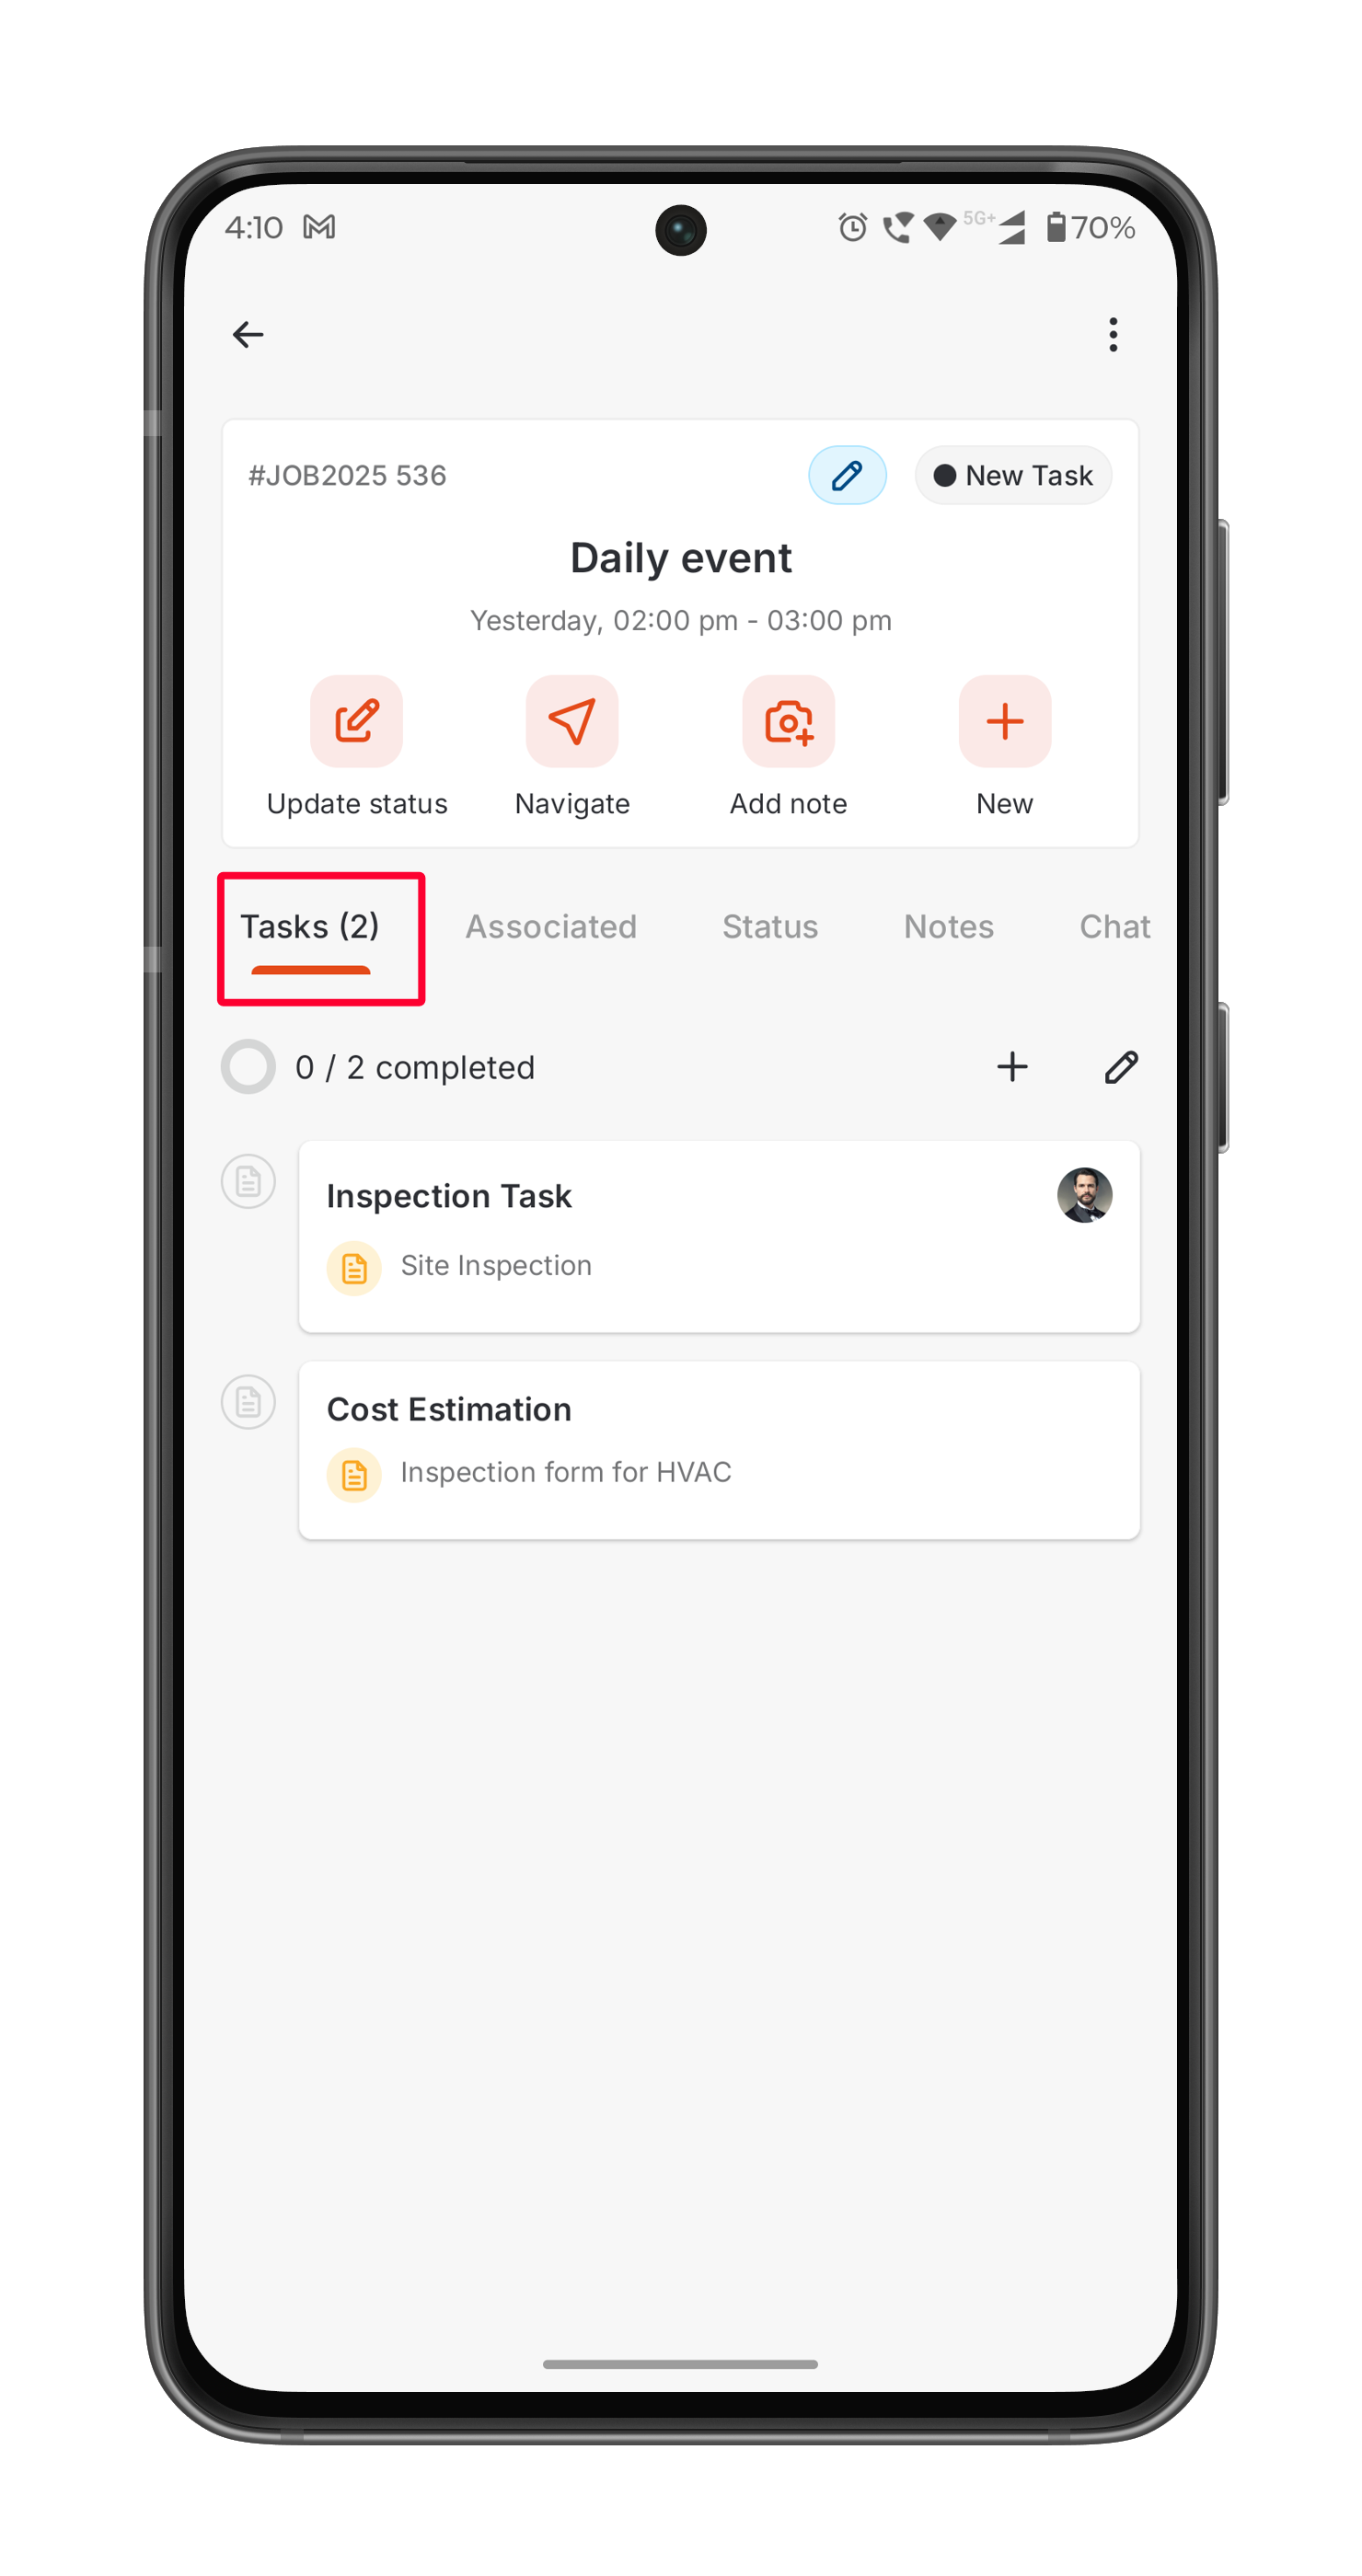
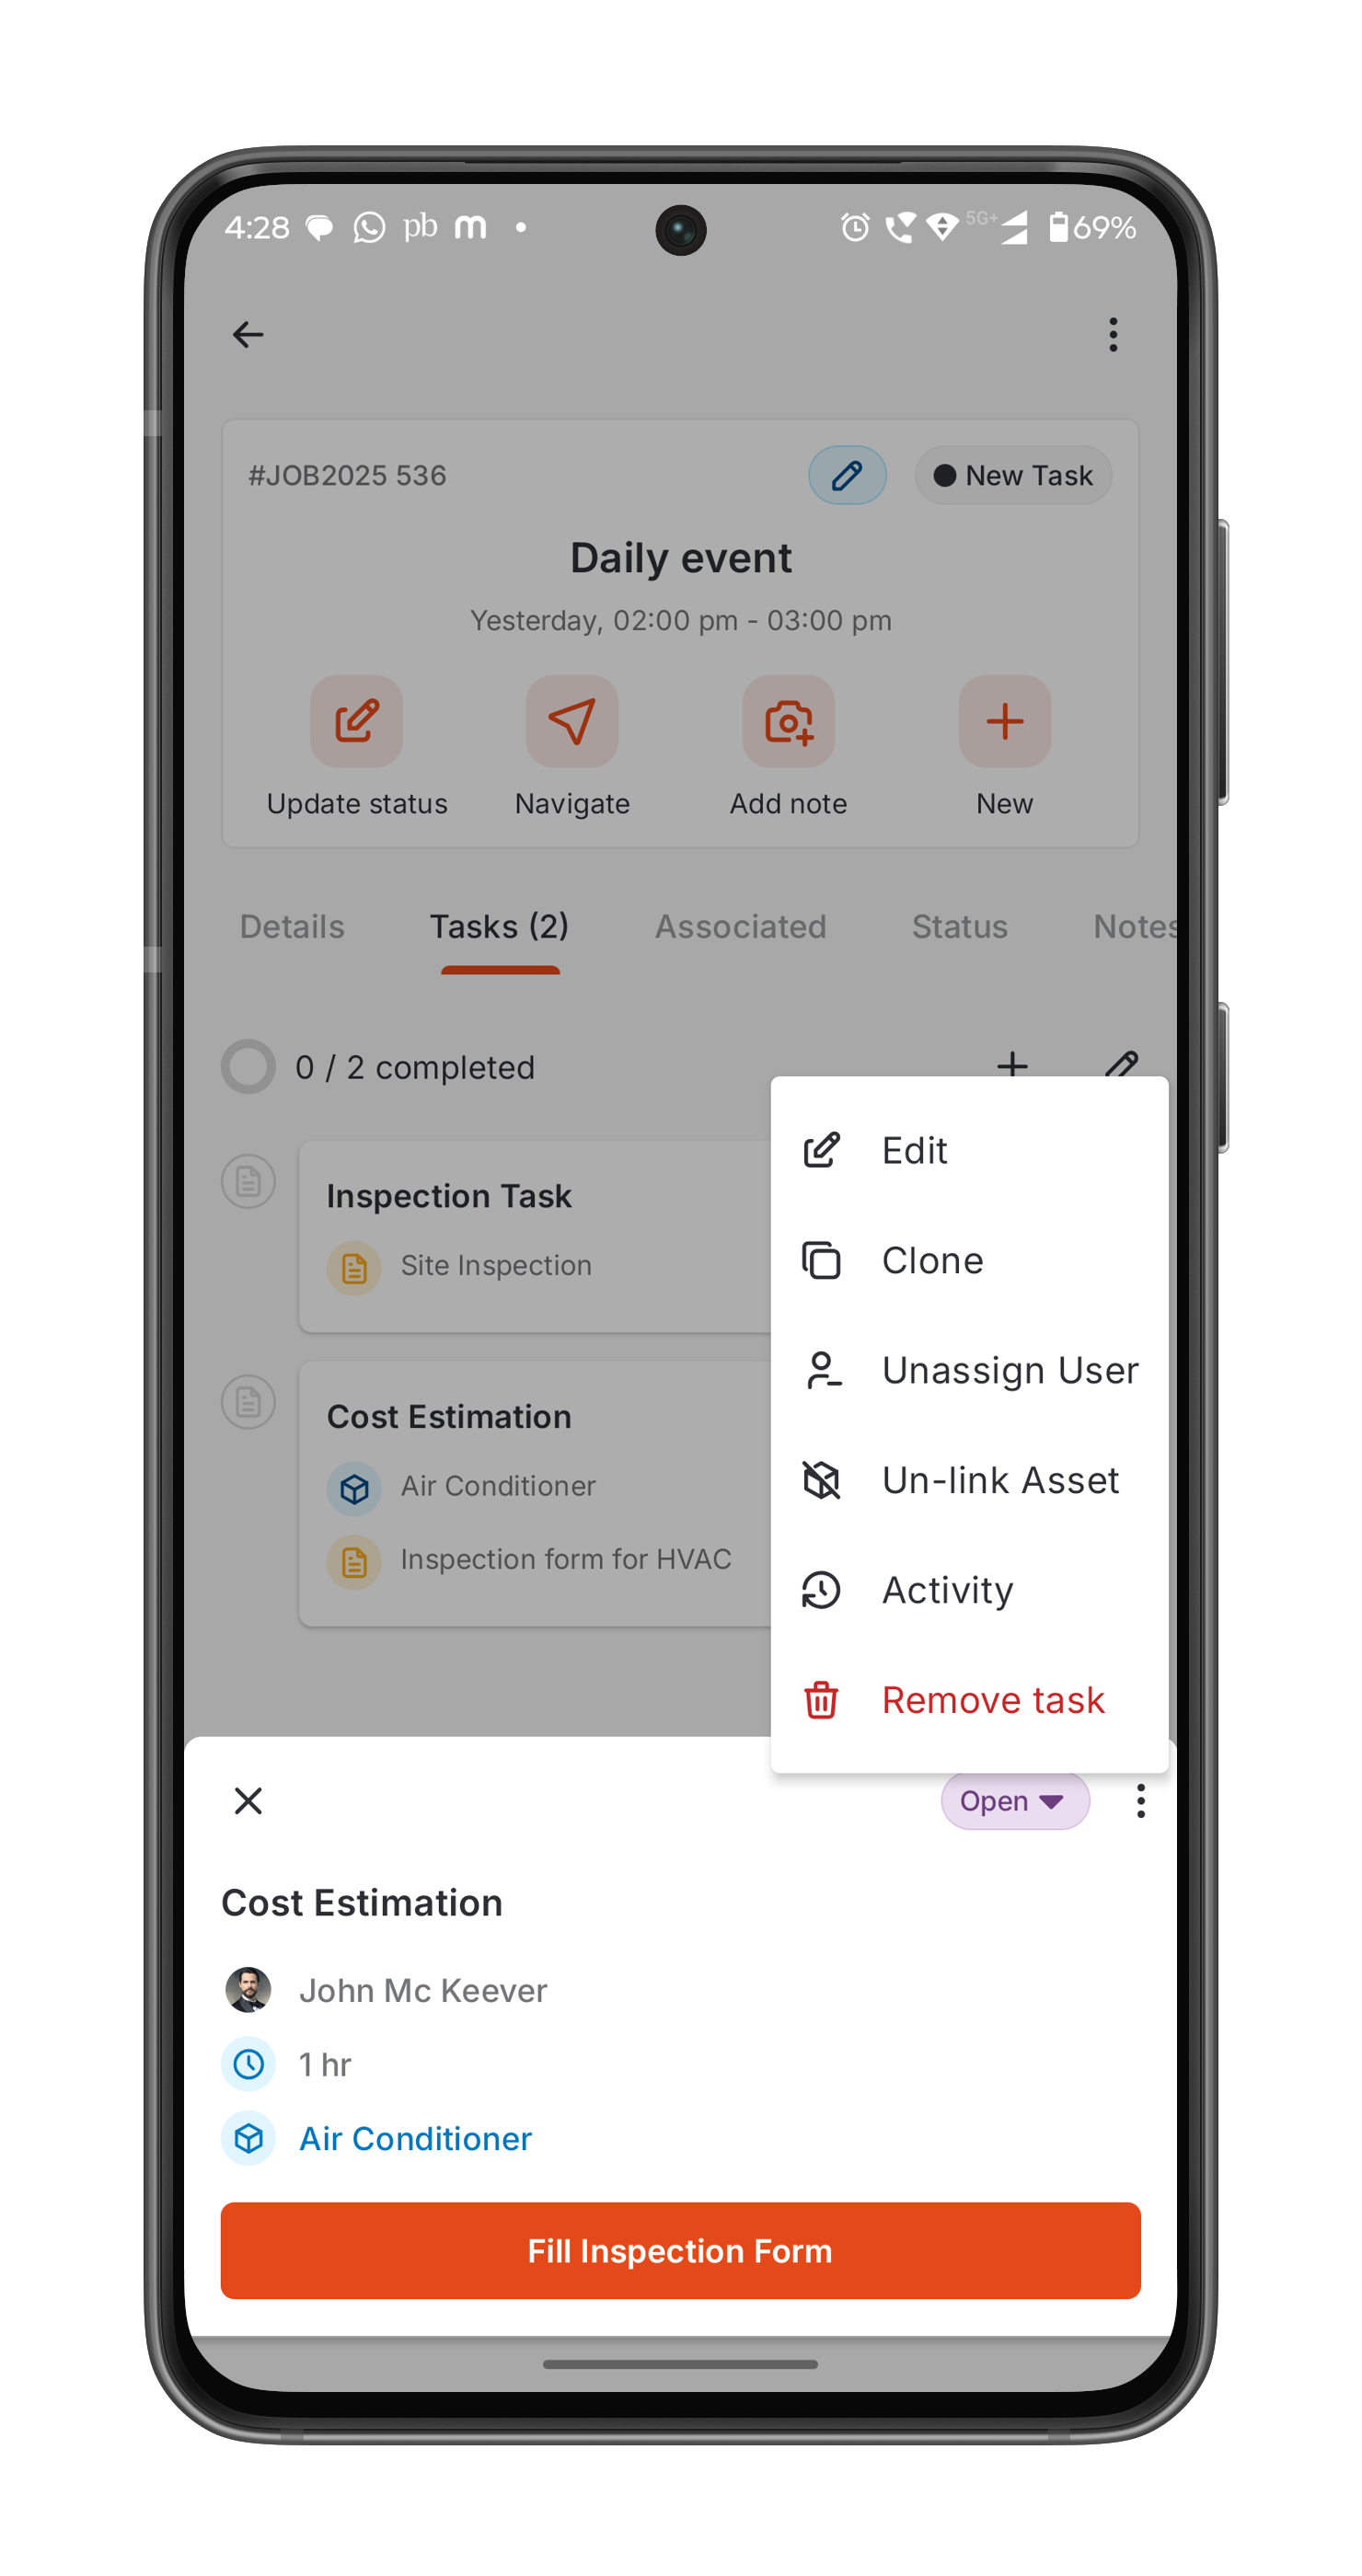
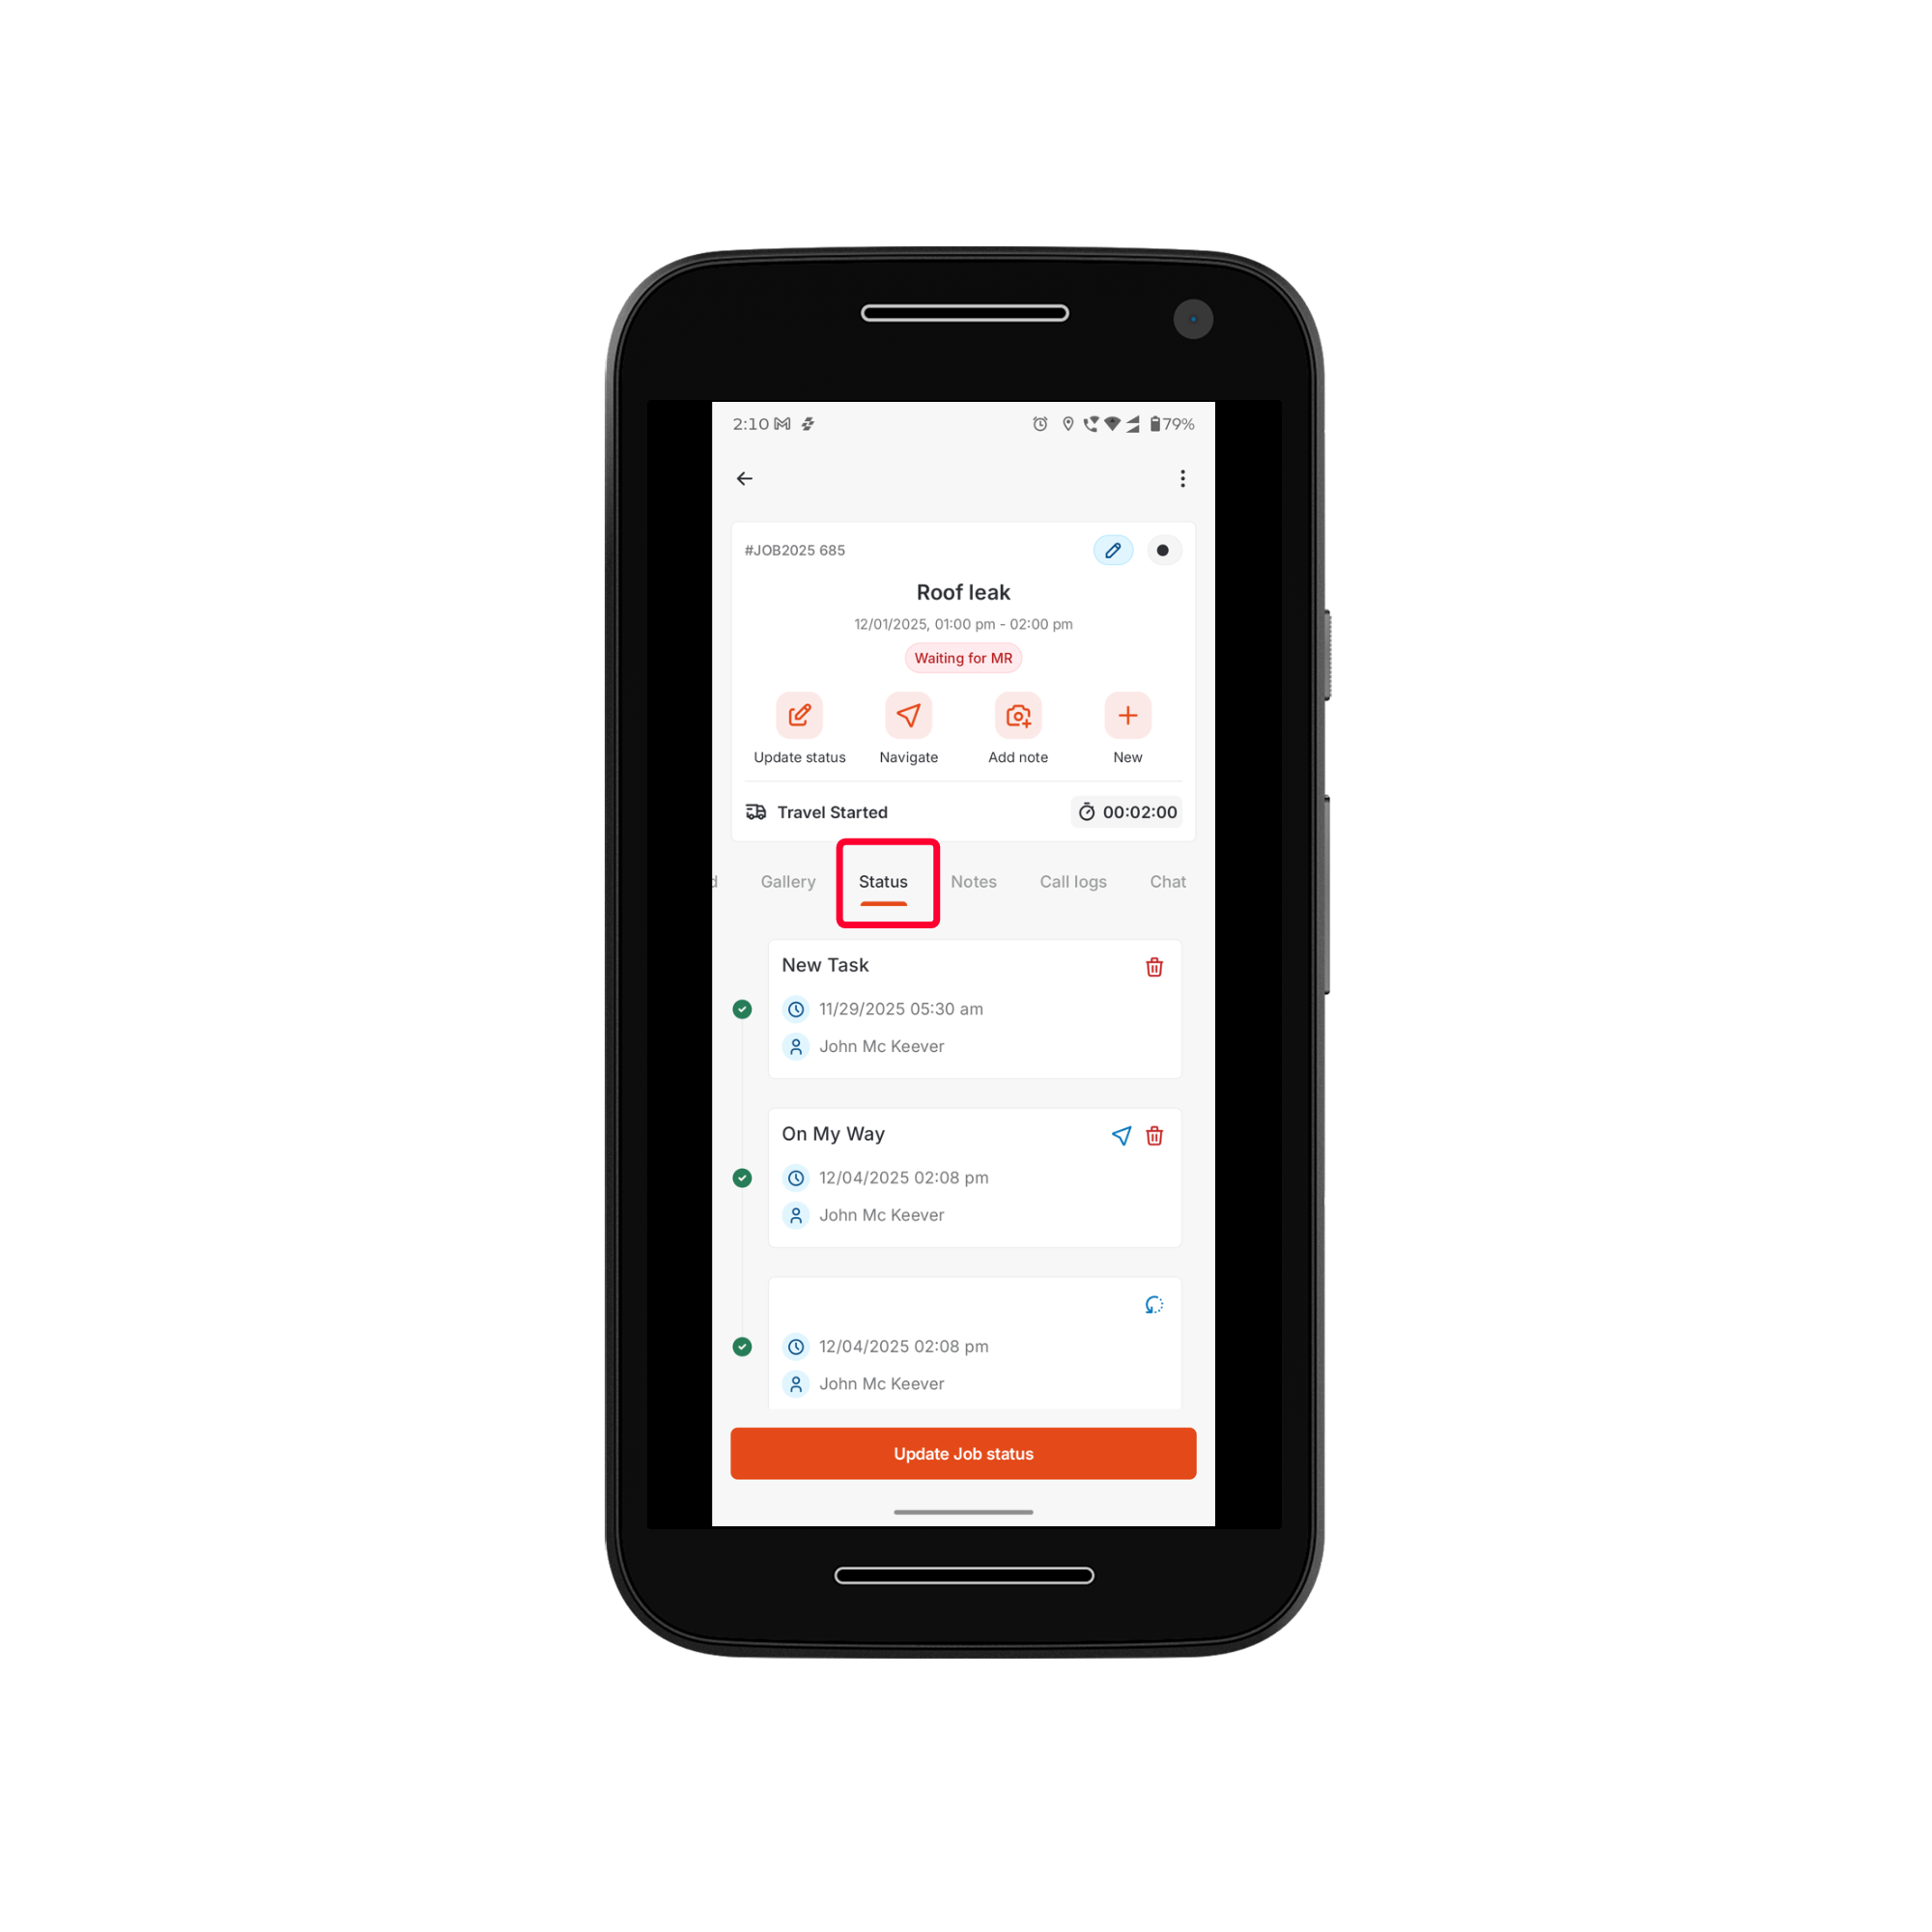
- On the job details page, navigate to the Tasks tab and select the task whose status you want to update. A bottom bar will appear.
- Click the Status drop-down at the right. The configured statuses will appear.
- Select the status to update.
- The service task status is successfully updated.

If your job has service tasks, you must resolve all tasks before you can move the job to Completed or Closed. If any task is still open, Zuper blocks the status update and displays an error. Go to the Service Tasks tab on the job details page to check progress and resolve any remaining tasks.