Master Tags
Before exploring the Gallery feature in the Job Details page, it’s important to set up Master Tags to keep the Job Gallery structured, searchable, and easy to navigate. Without standardized tags, the Gallery can become cluttered and hard to manage. Master Tags ensure consistent labeling, cleaner organization, and easier filtering- making it simple for teams to find the images they need.Creating Master Tags
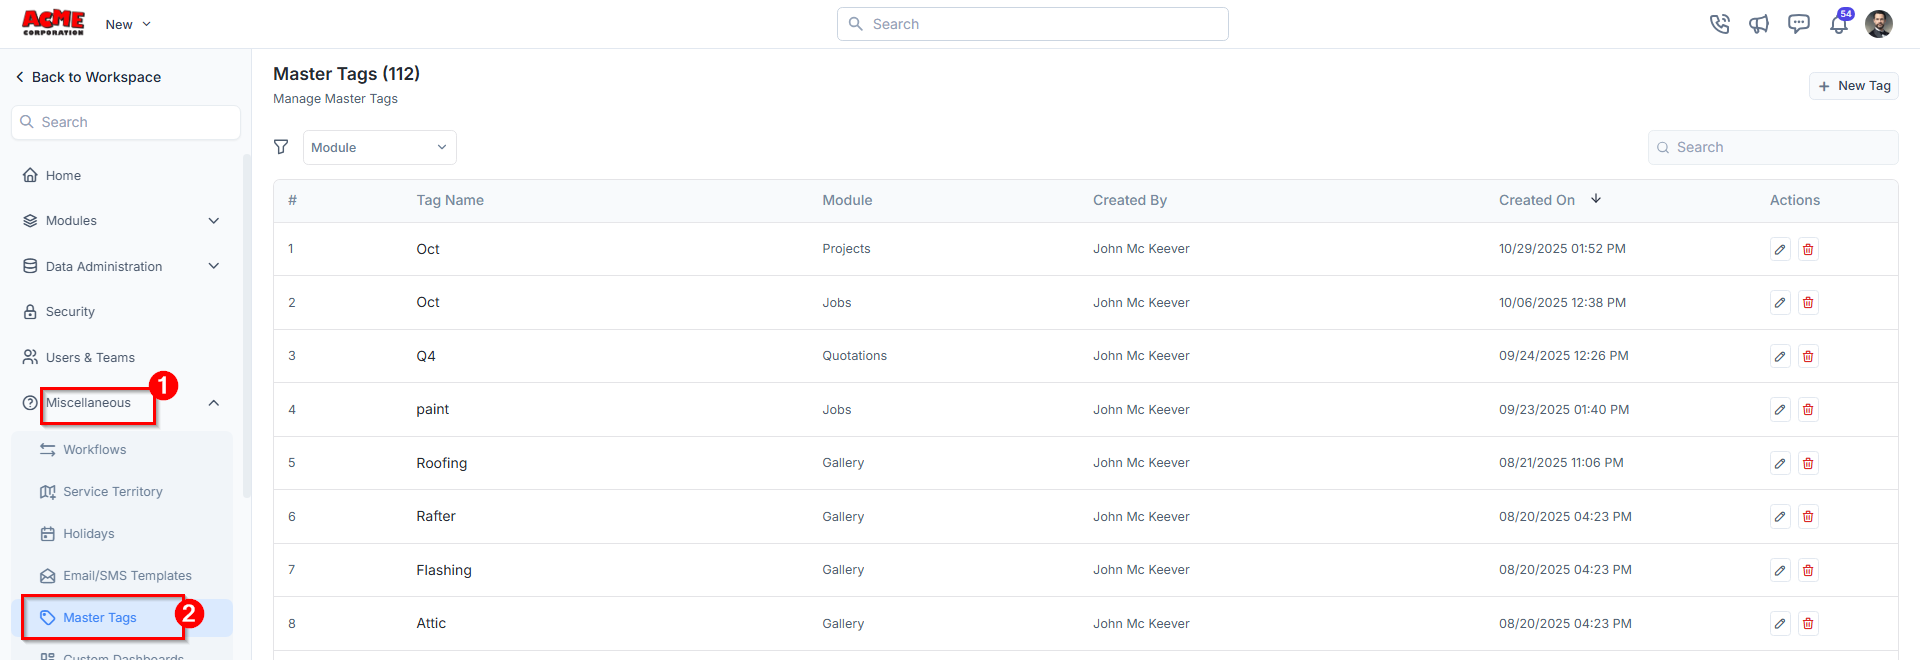
- Navigate to the Settings module from the left navigation menu.
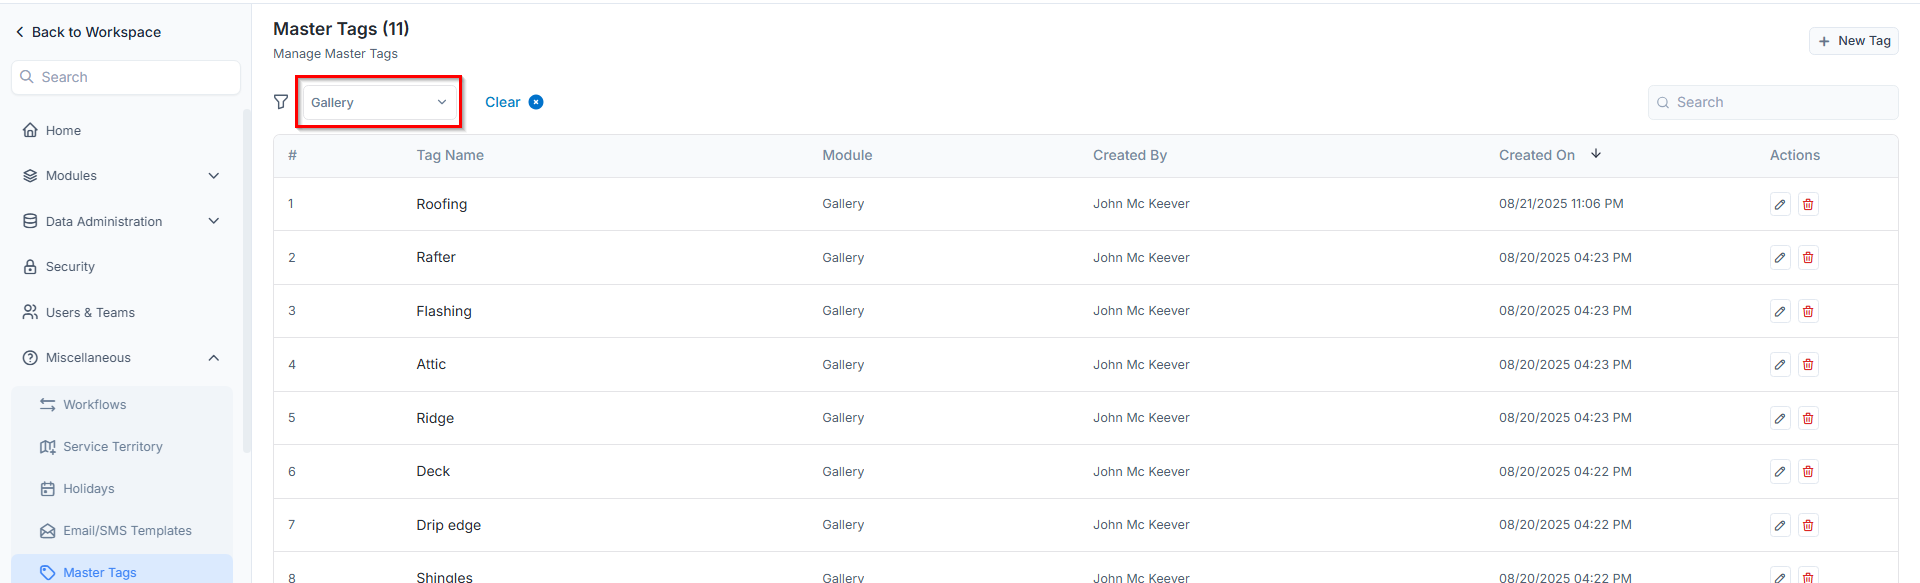
- Click Miscellaneous and select Master Tags. The Master Tags listing page appears, displaying existing tags along with the modules they are associated with.
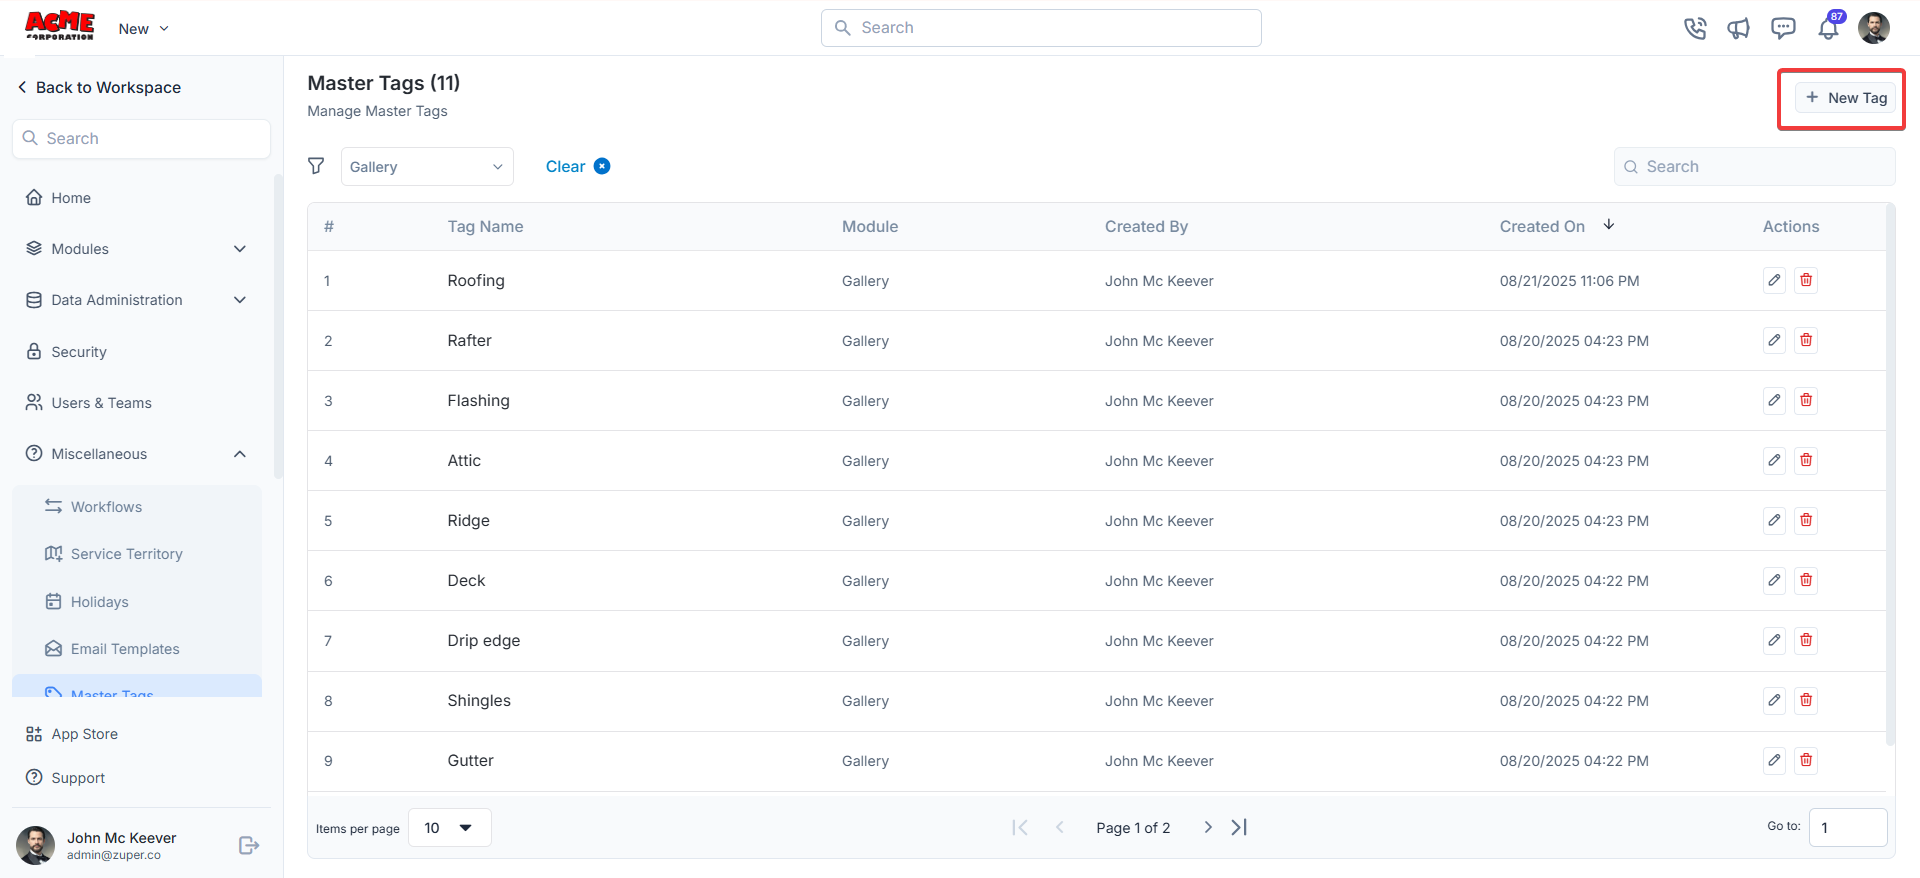
- Click + New Tag to create a new tag.
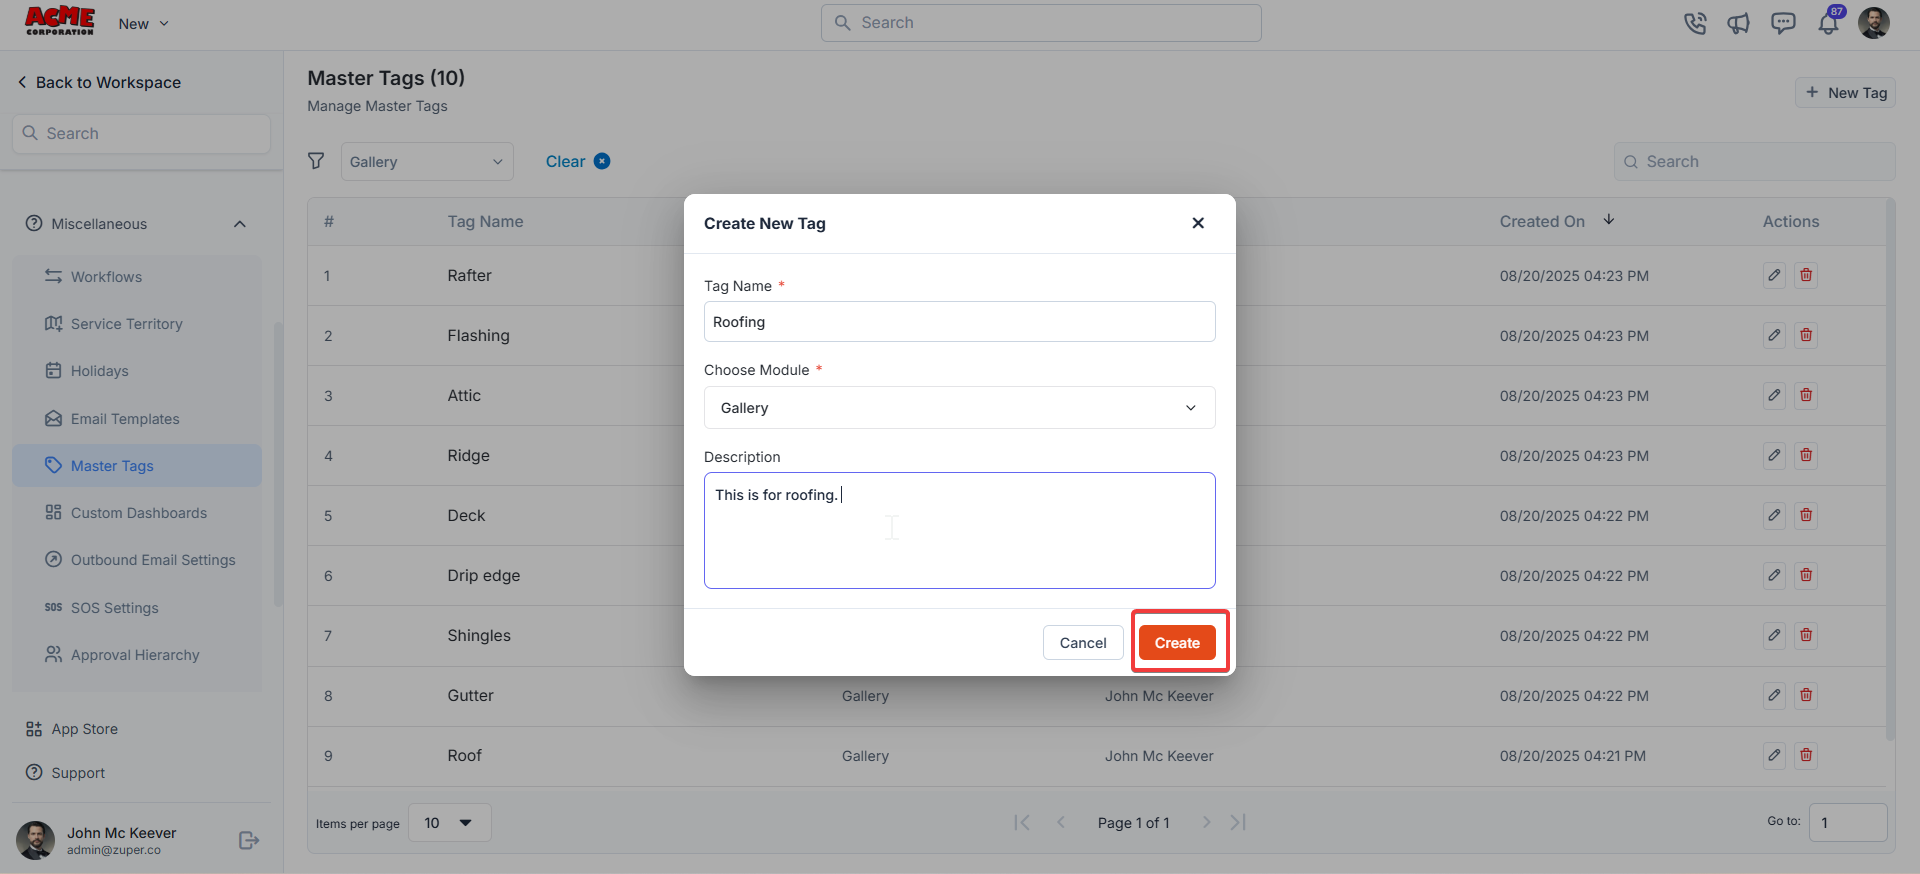
- Enter the following details:
- Tag Name: Provide a unique tag name. (Mandatory)
- Choose Module: Select Gallery from the dropdown. (Mandatory)
- Description: (Optional) Add a brief description for reference.
- Click Create to add the tag.
- The tag is created successfully. Once created, the tag becomes available for use in the Job Gallery across the web and mobile apps.

Explore Job Gallery - Web
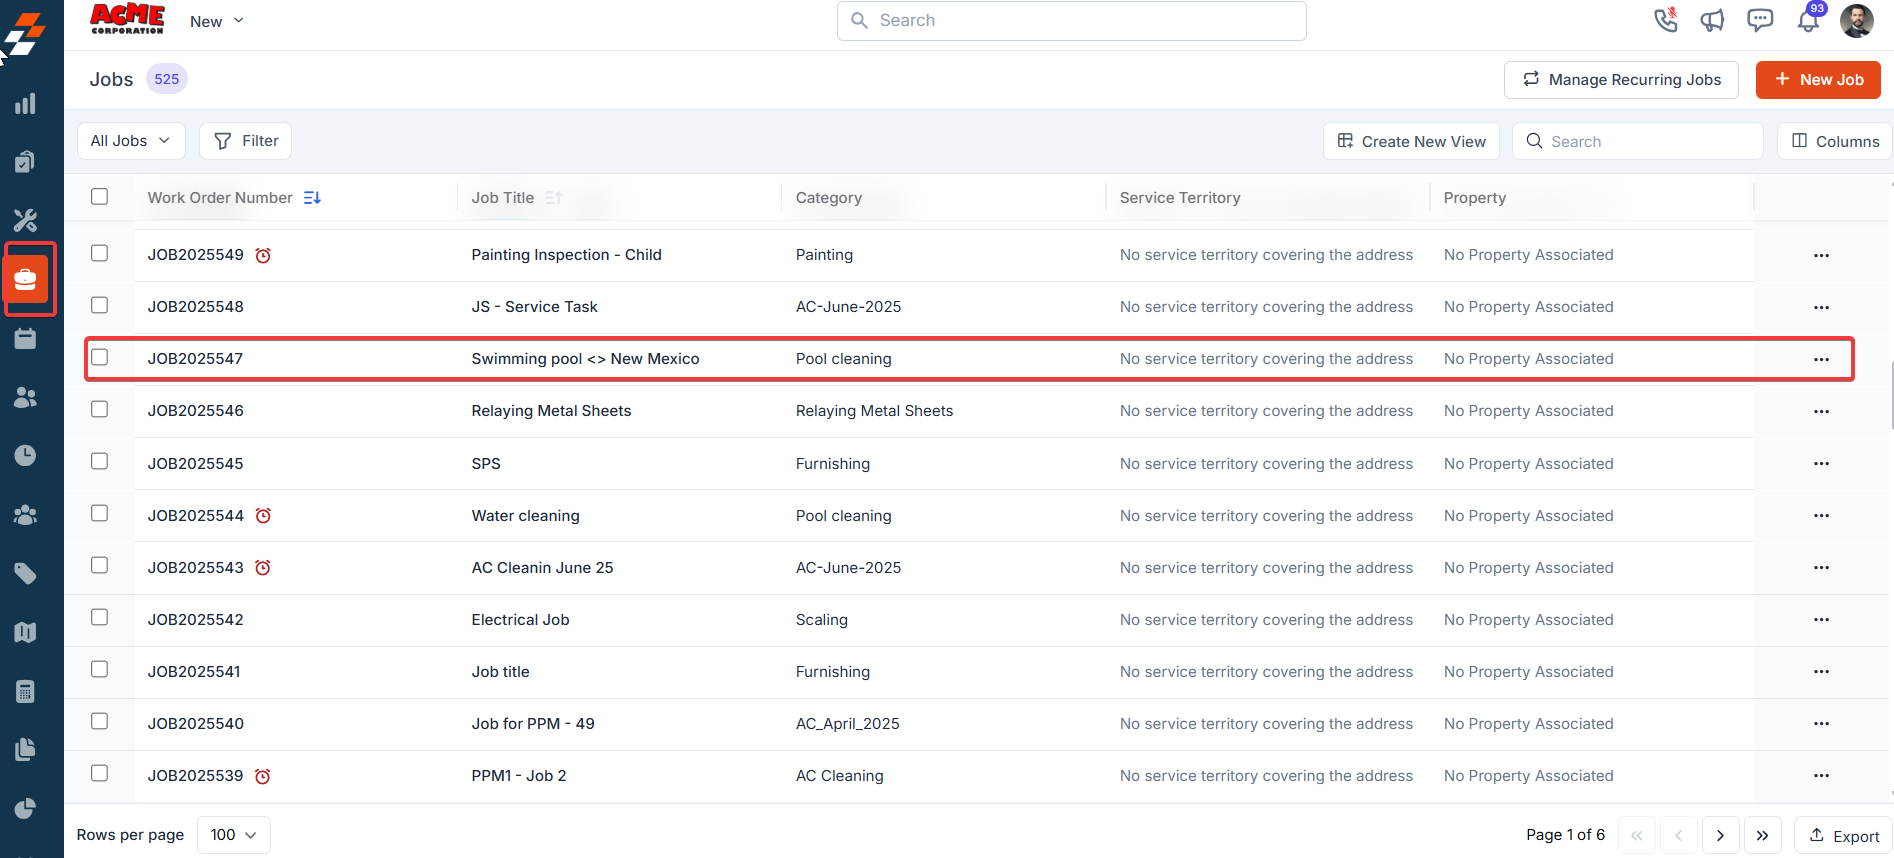
- Select the “Jobs” module from the left navigation menu and click any jobs to view the details page.
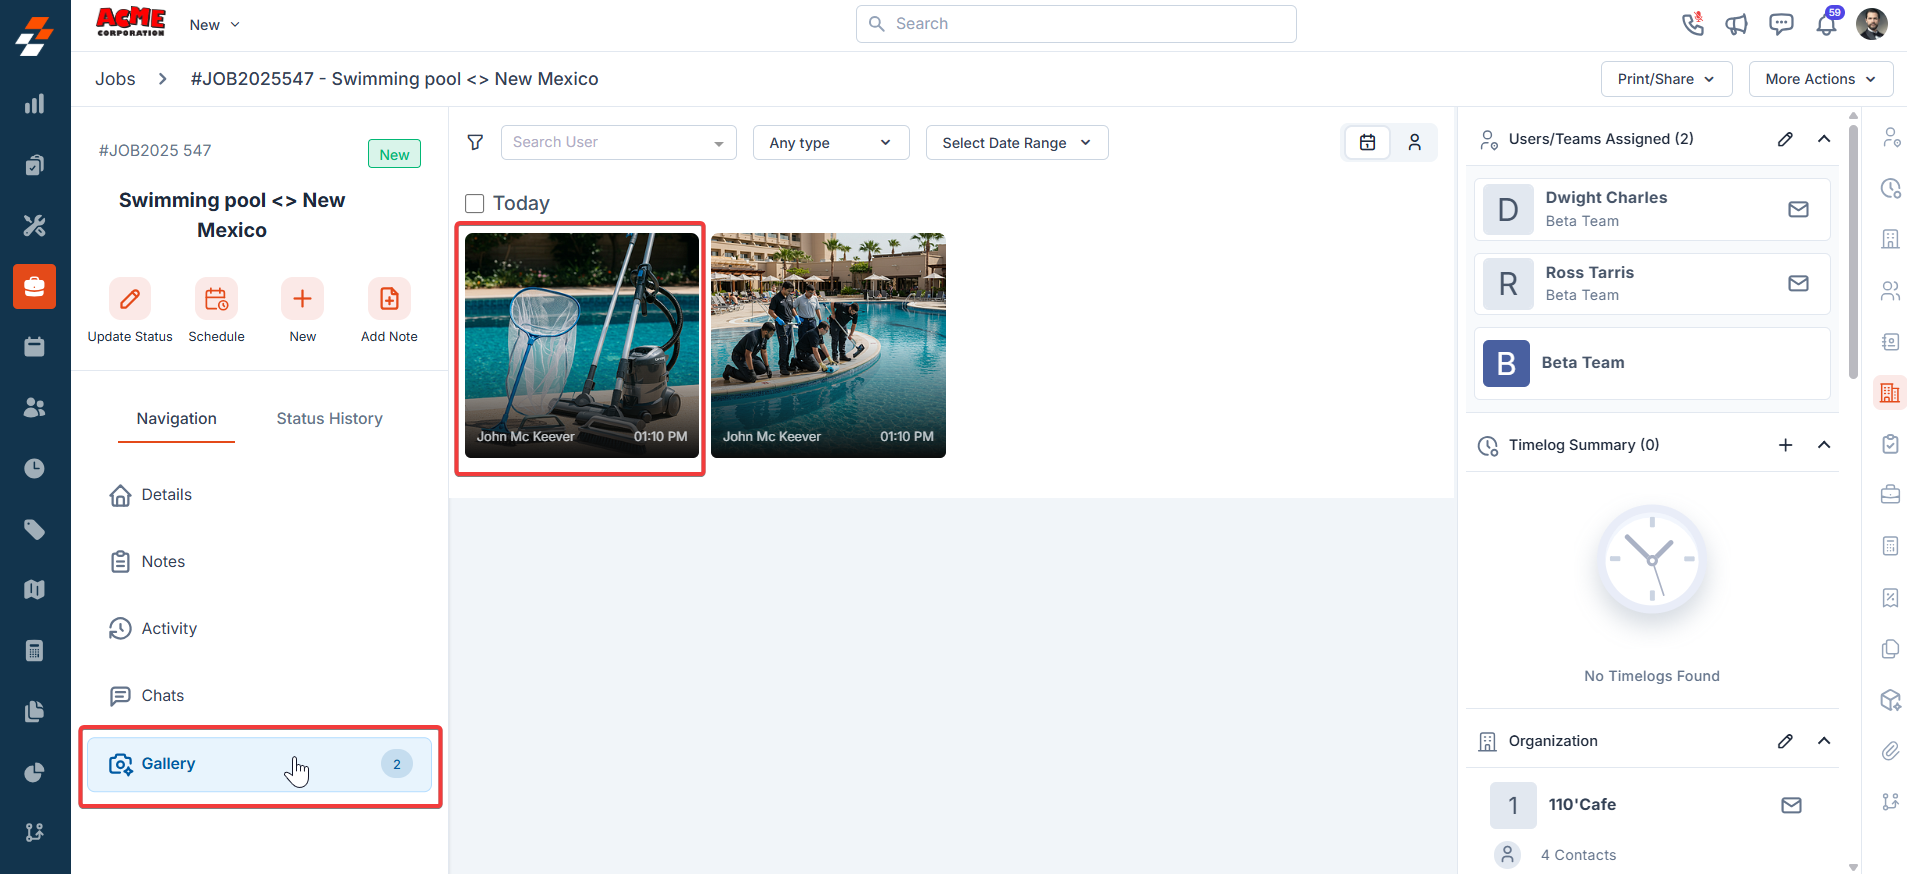
- Under Navigation, click the Gallery tab to view all media in a grid layout.
Available Actions within the Gallery
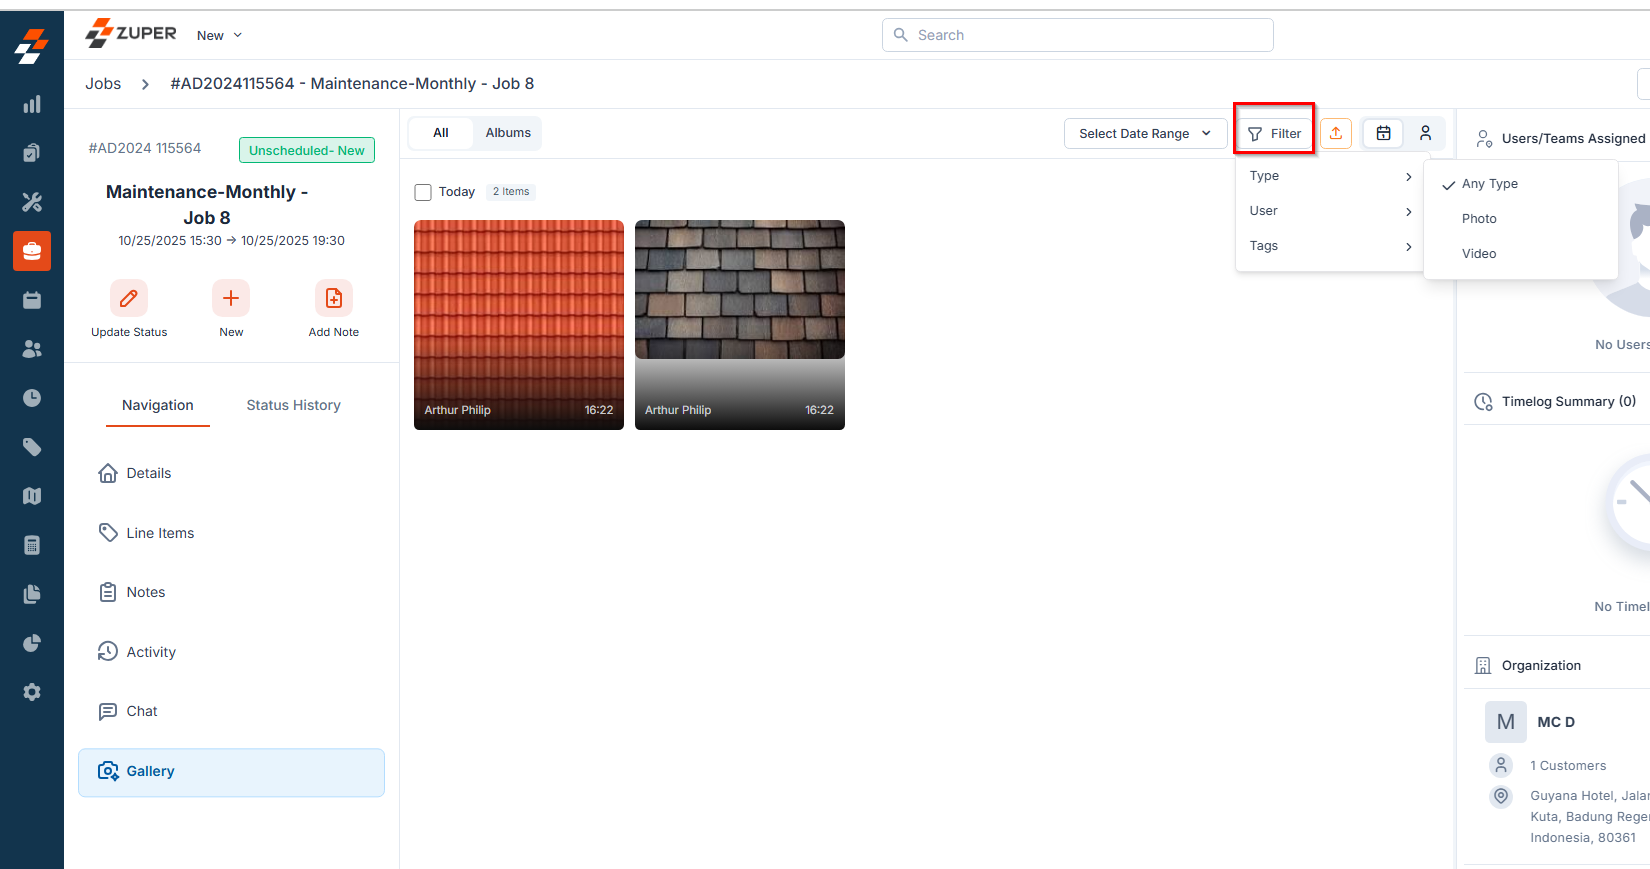
The Gallery feature allows you to view, organize, and manage all media associated with a job. You can filter, download, group, and update media details for better organization and accessibility.Filtering Media
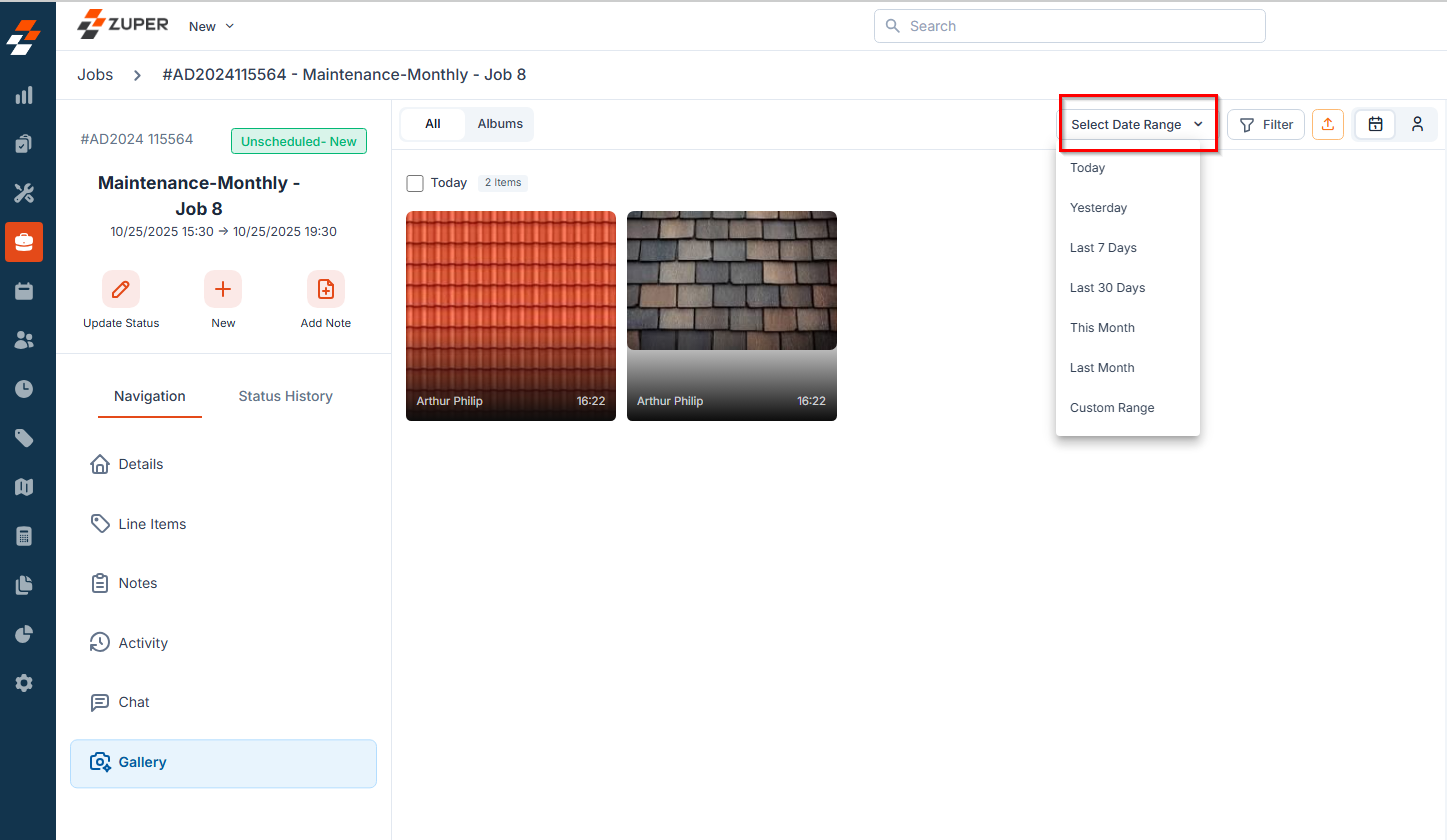
You can refine the media displayed using filters:- Select Date Range – filter media by a specific date range.
- Filter icon – refine media further by:
- Type – Photo, Video, or Any Type.
- User – media uploaded by specific users.
- Tags – filter media by assigned tags.
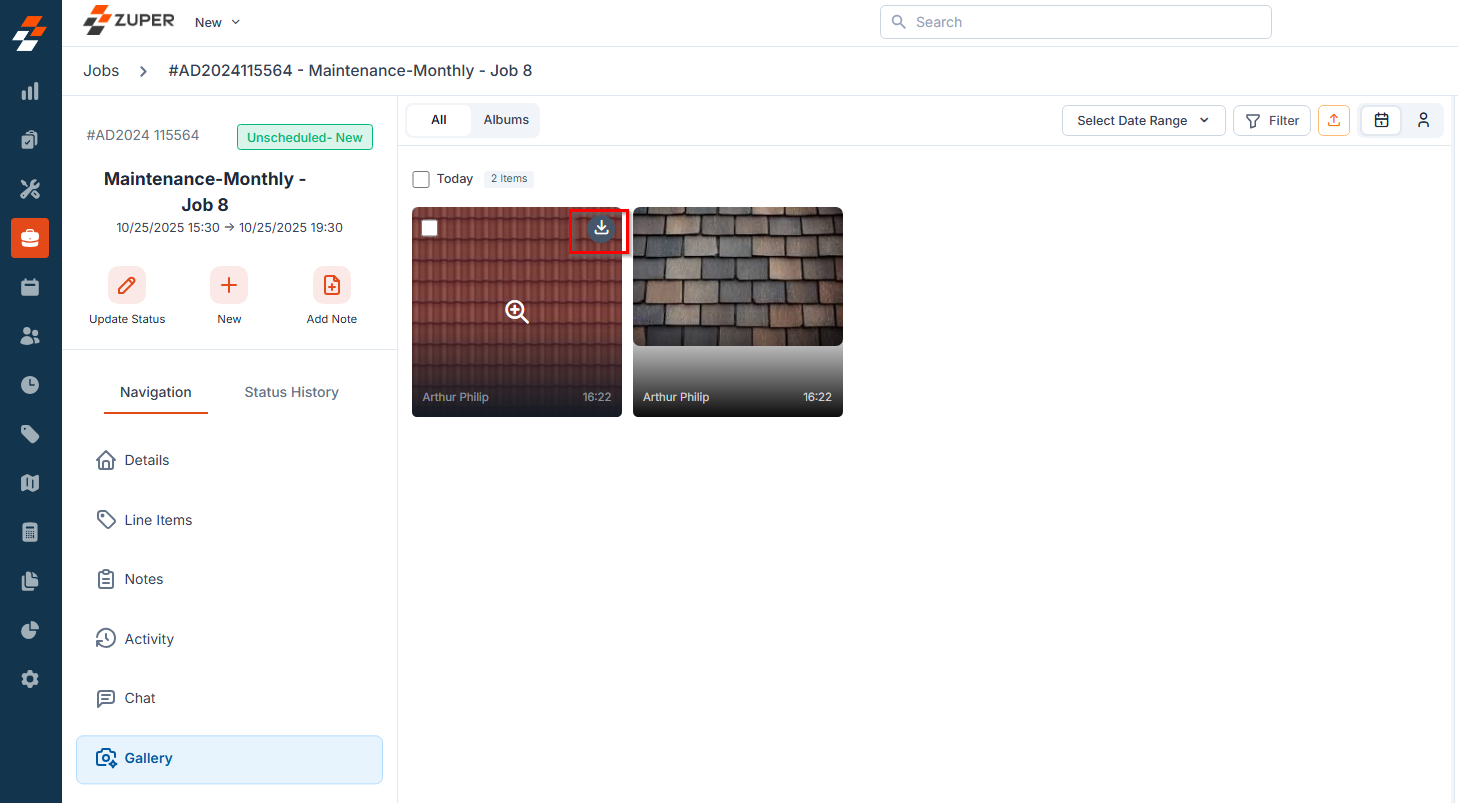
Downloading Media
- Single Image Download: Click the Download icon on an individual image.
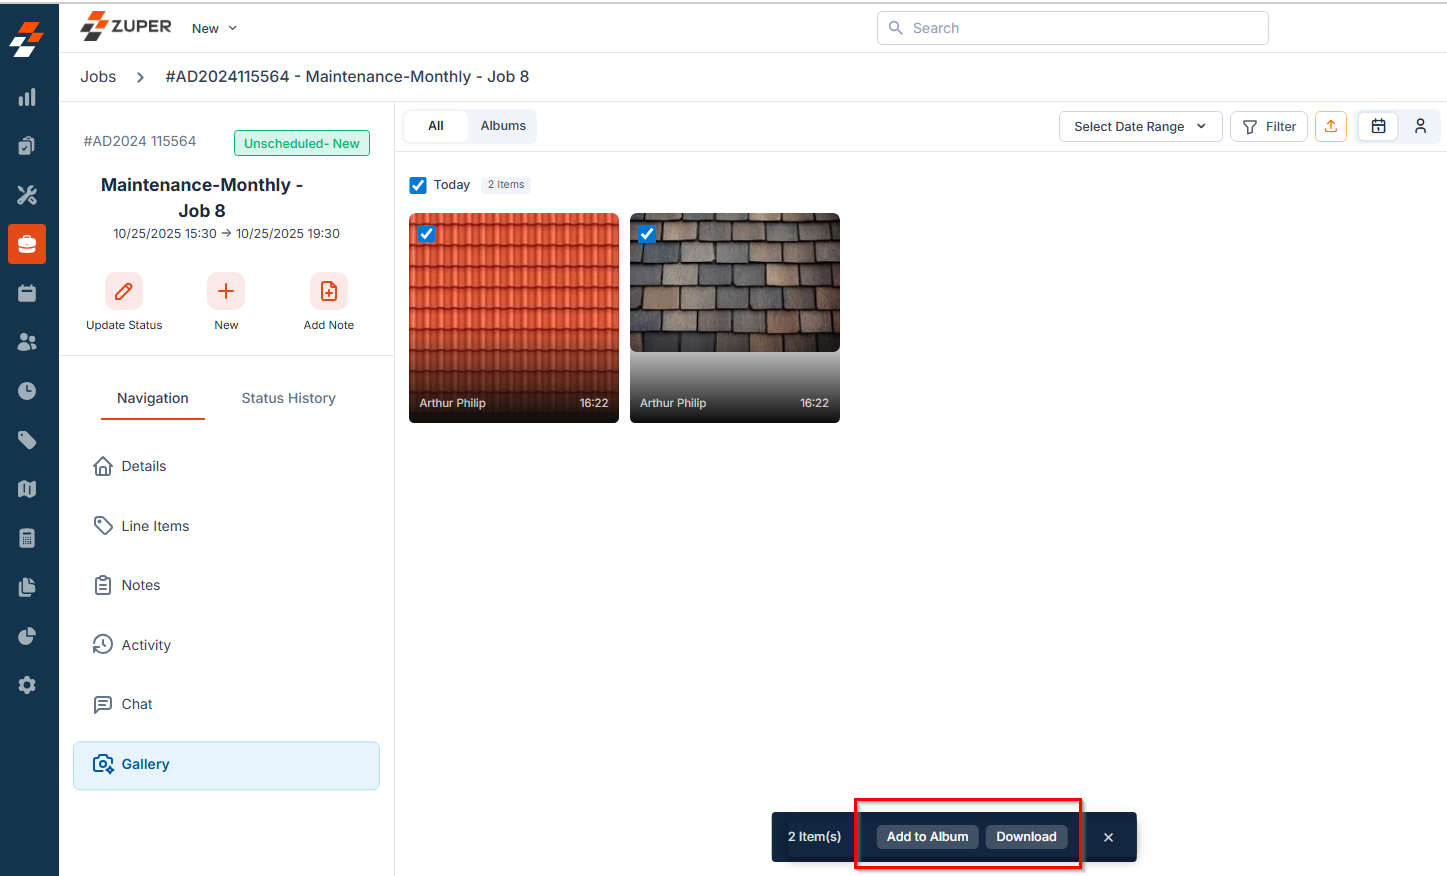
- Multiple Image Download: Select multiple images and click the Download button from the bottom bar.
Adding Media to an Album
- Select one or more images and click Add to Album from the bottom bar to organize media into albums.
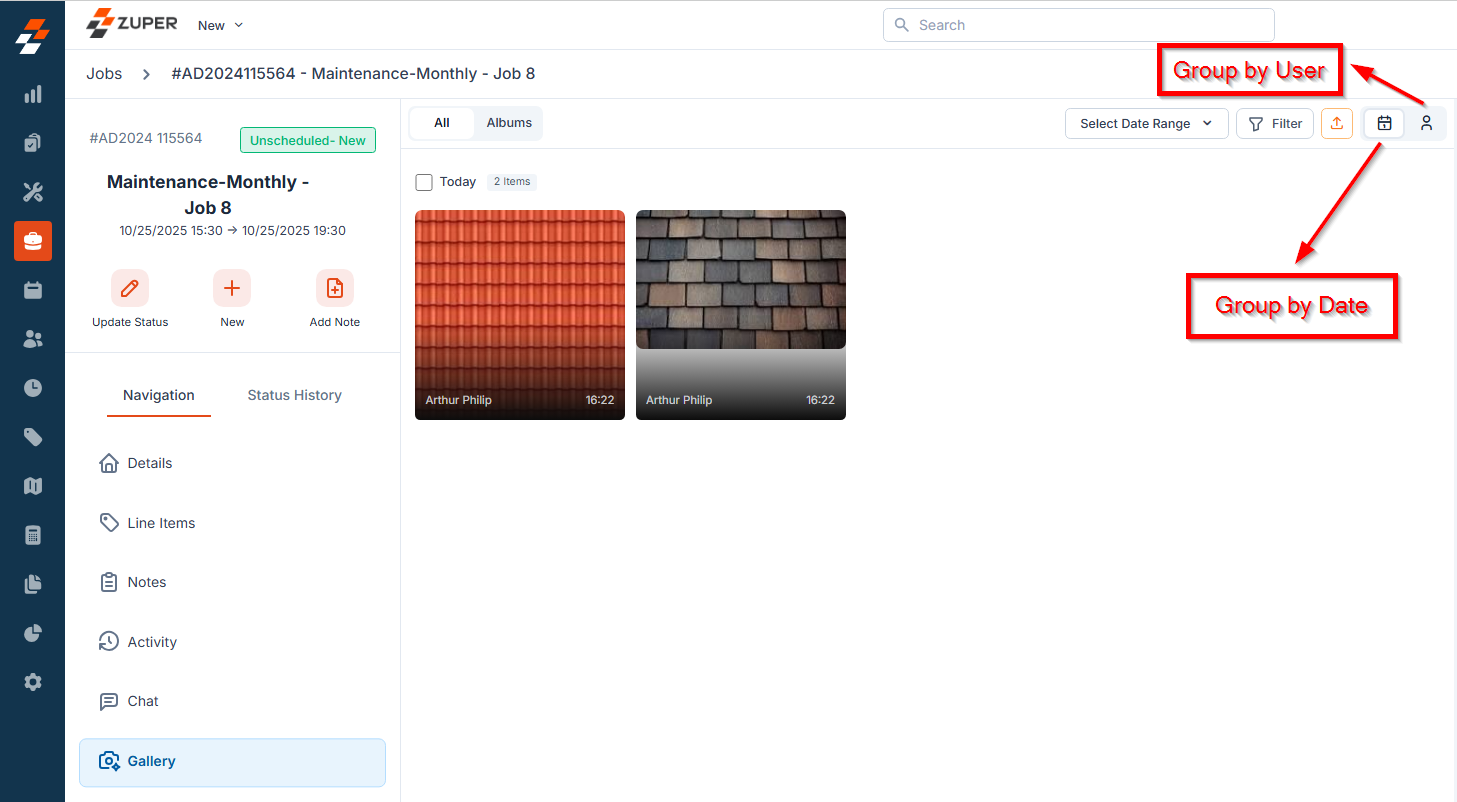
Grouping Media
You can group media by:- Date – view media based on the upload date.
- User – view media uploaded by specific users.
Viewing and Updating Media Details
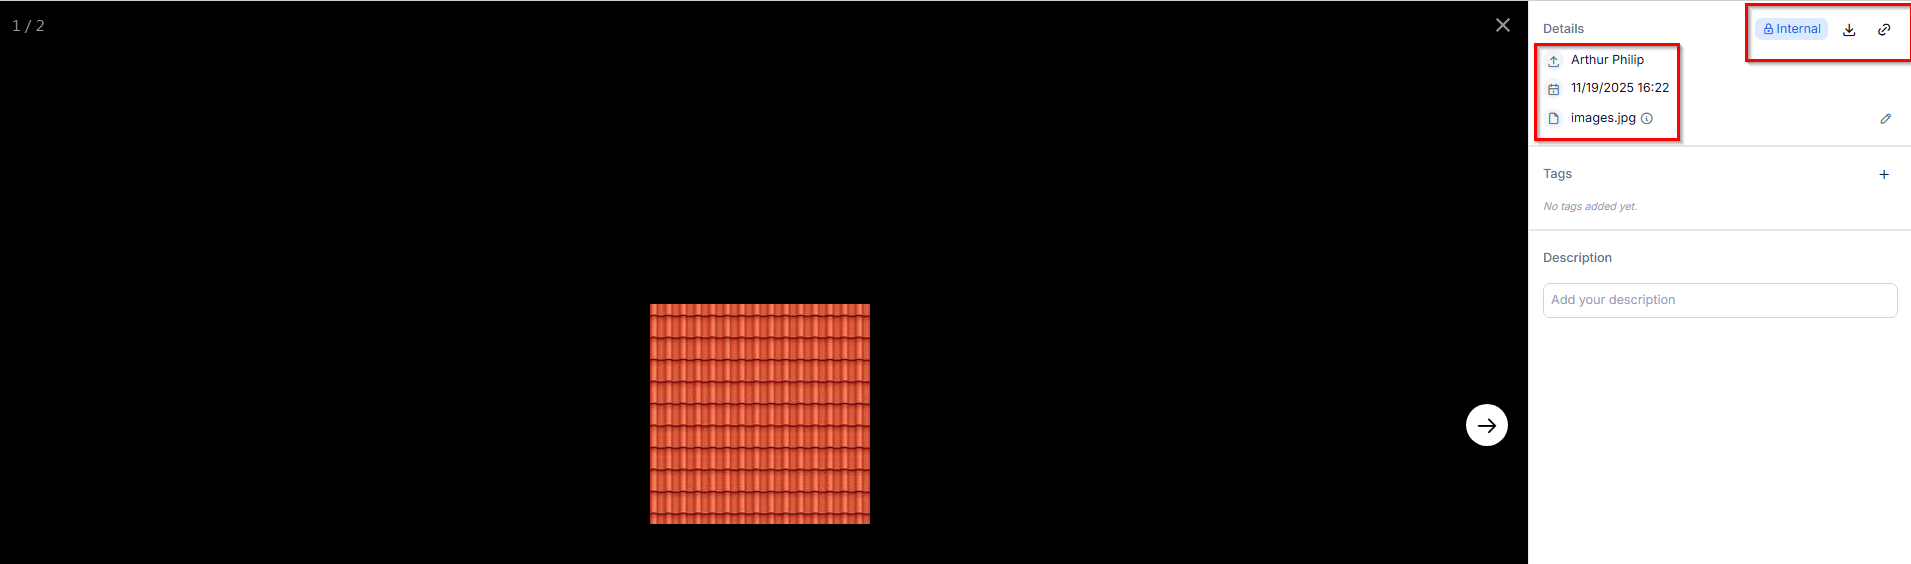
Click an image to view and update the following details:- Uploaded by – see who added the media.
- Date & Time – view when the media was uploaded.
- Media Name – view the name of the media file.
- Visibility – set as Internal or Public.
- Copy Link – copy the media link.
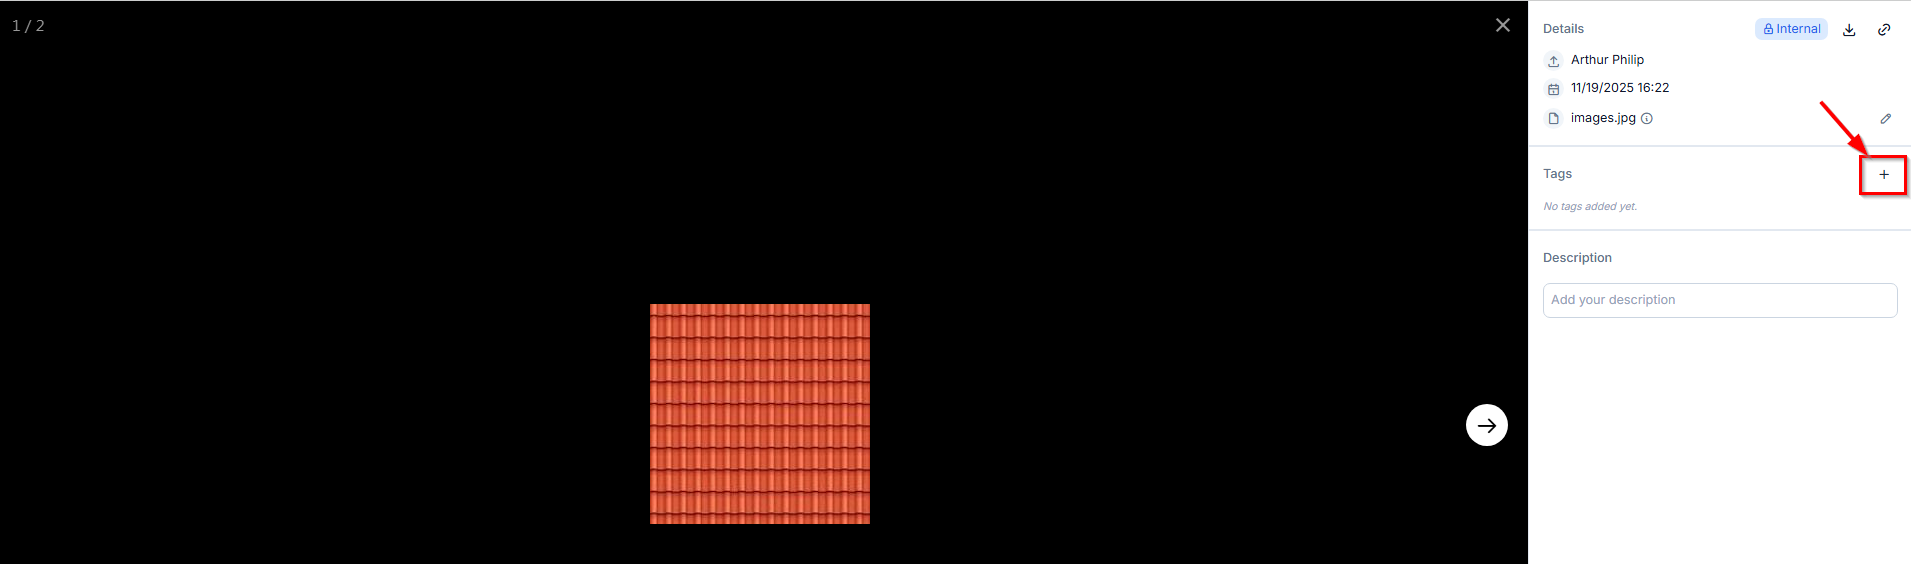
- Tags & Description – add or update tags and description.
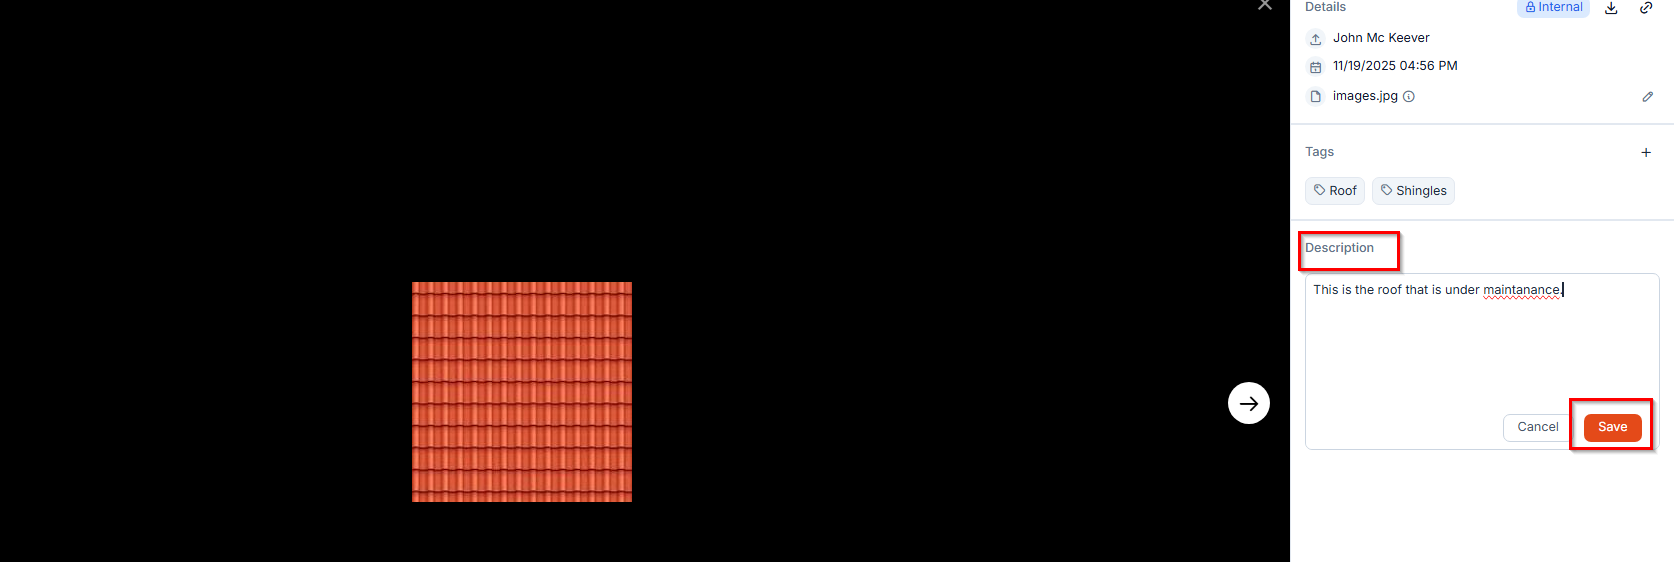
- Adding Description
-
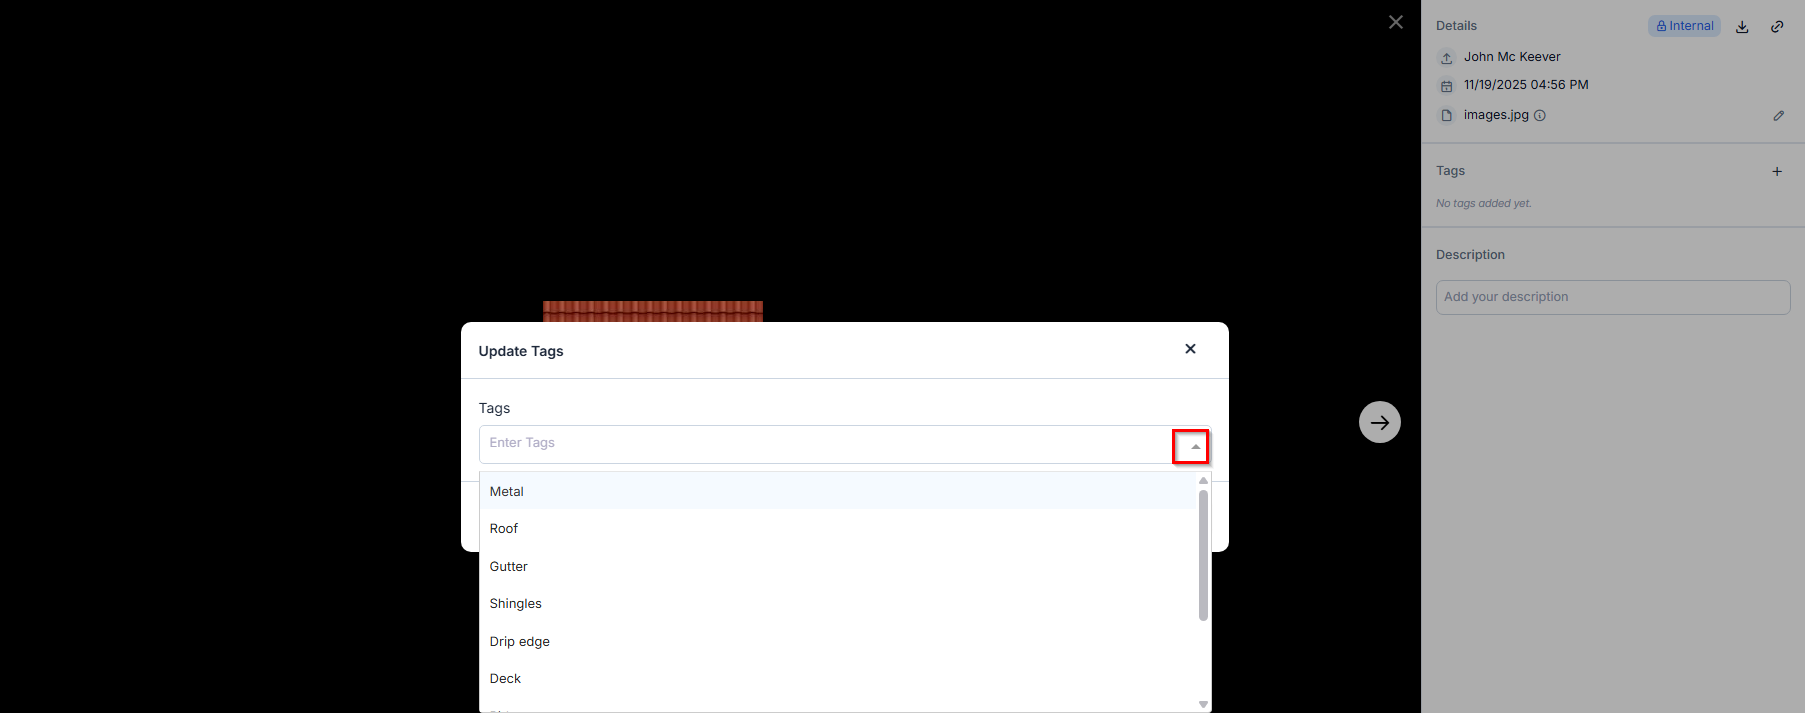
Under Tags, click the + icon to add tags. An Update Tags dialog box appears.
-
Choose the tags from the dropdown menu and click Update to add them. To know how to configure tags, see above.
Removing photos from the gallery
The Jobs gallery lets you remove photos you no longer need without permanently deleting them. When you remove a photo from the gallery, Zuper moves it to a built-in album called Deleted Items. It stays in the deleted album until you choose to restore it.Note: Removing a photo from the gallery does not affect checklists, inspection forms, or notes. Those resources remain unchanged.
- Open the Job from the listing page.
- Select the Gallery tab.
- Select the image using the checkbox, then select Delete from the bottom action bar.
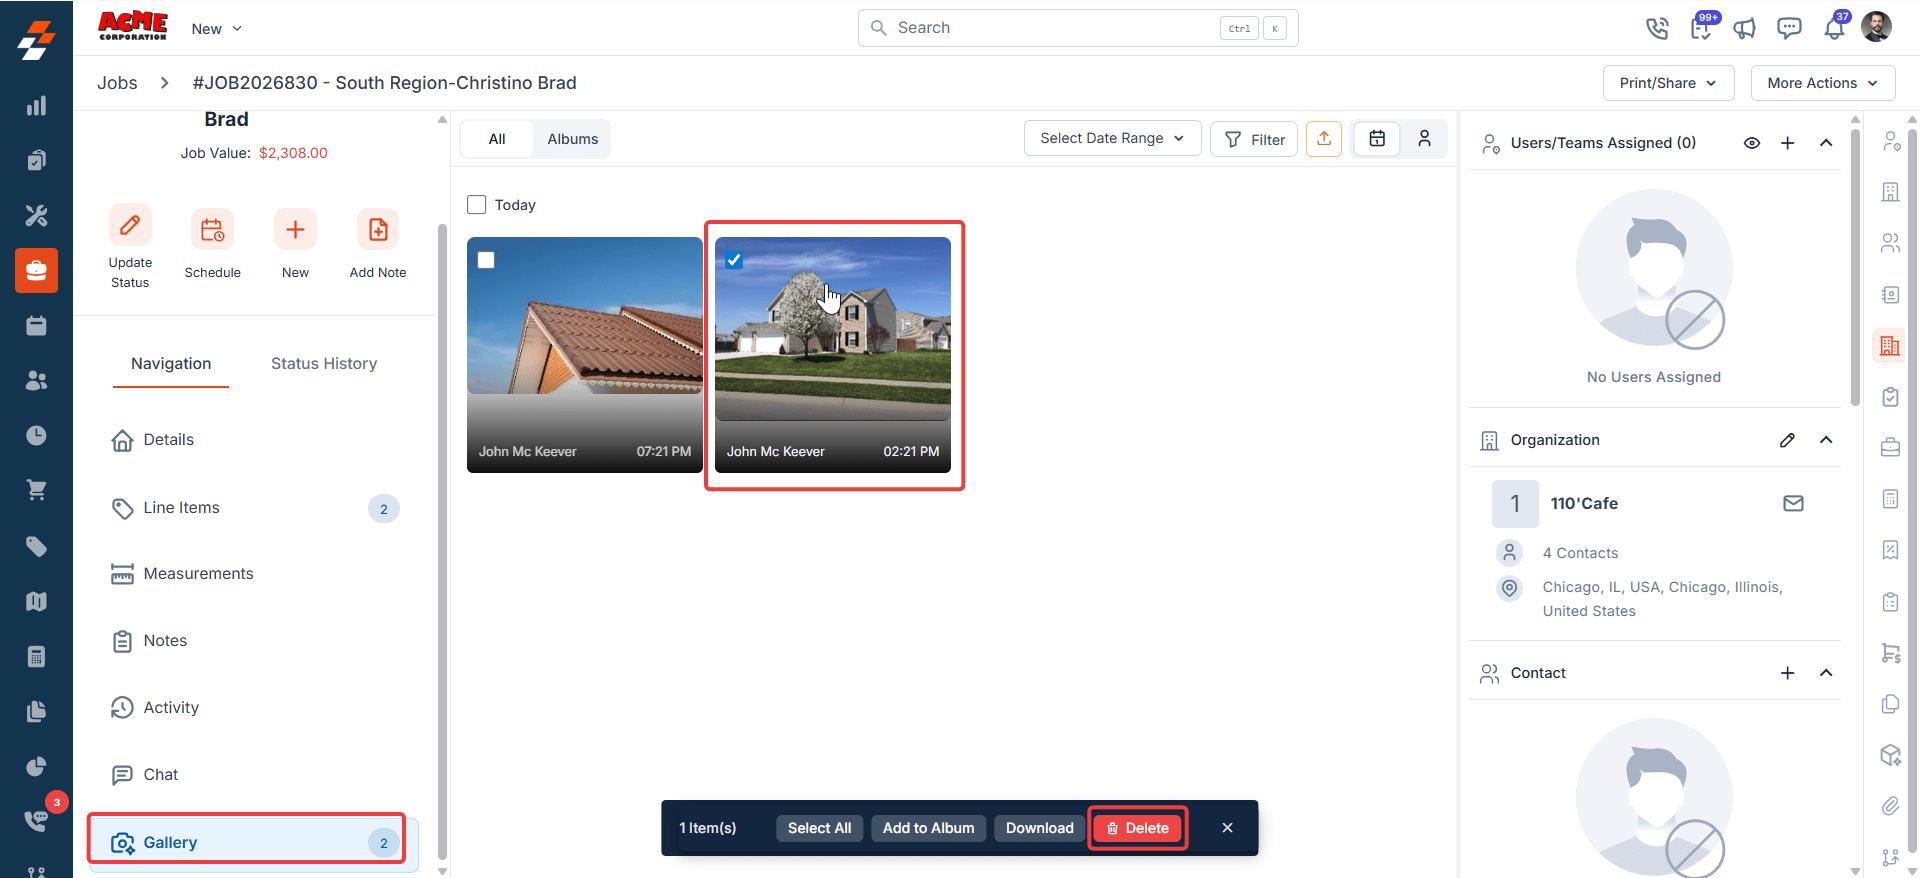
Note: Zuper automatically records every removal in the job’s activity log. You do not need to do anything extra to track this action.
Restore Photos from deleted items album
Every job has a predefined album called Deleted Items. This album holds all the photos removed from the job gallery. Photos stay in this album indefinitely and can be restored at any time.Open the Deleted Items album
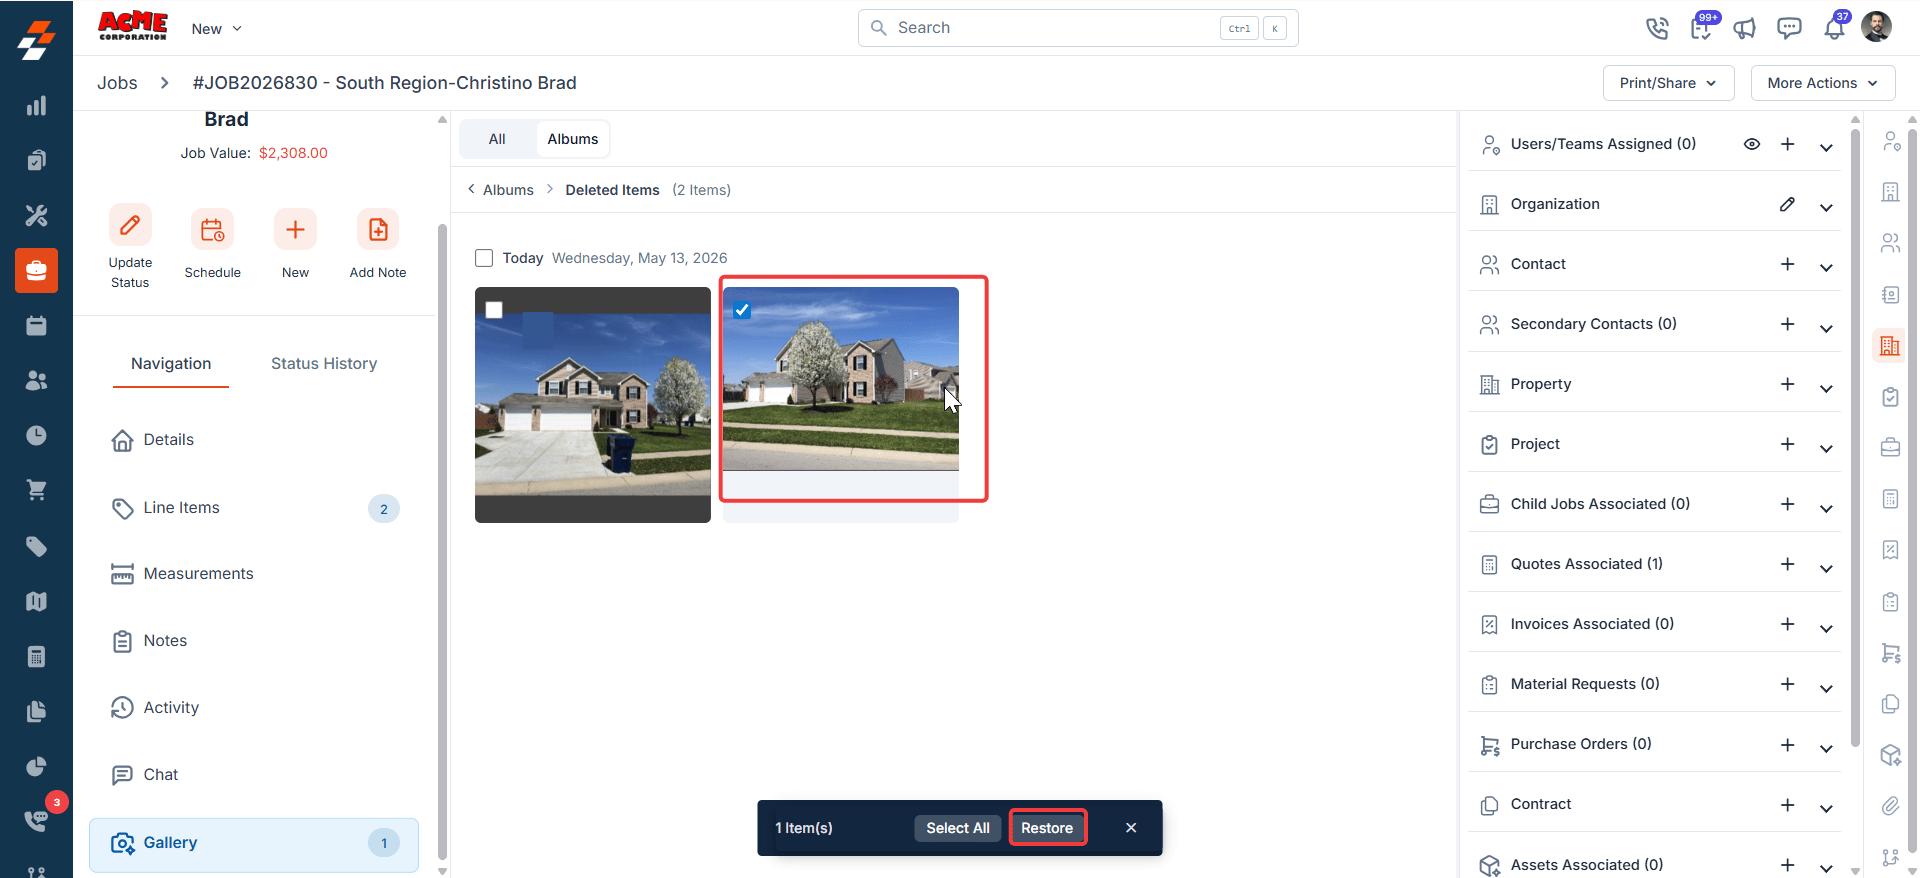
1. Open the job and go to Gallery > Albums > Deleted Items. 2. Select the photo or photos you want to restore.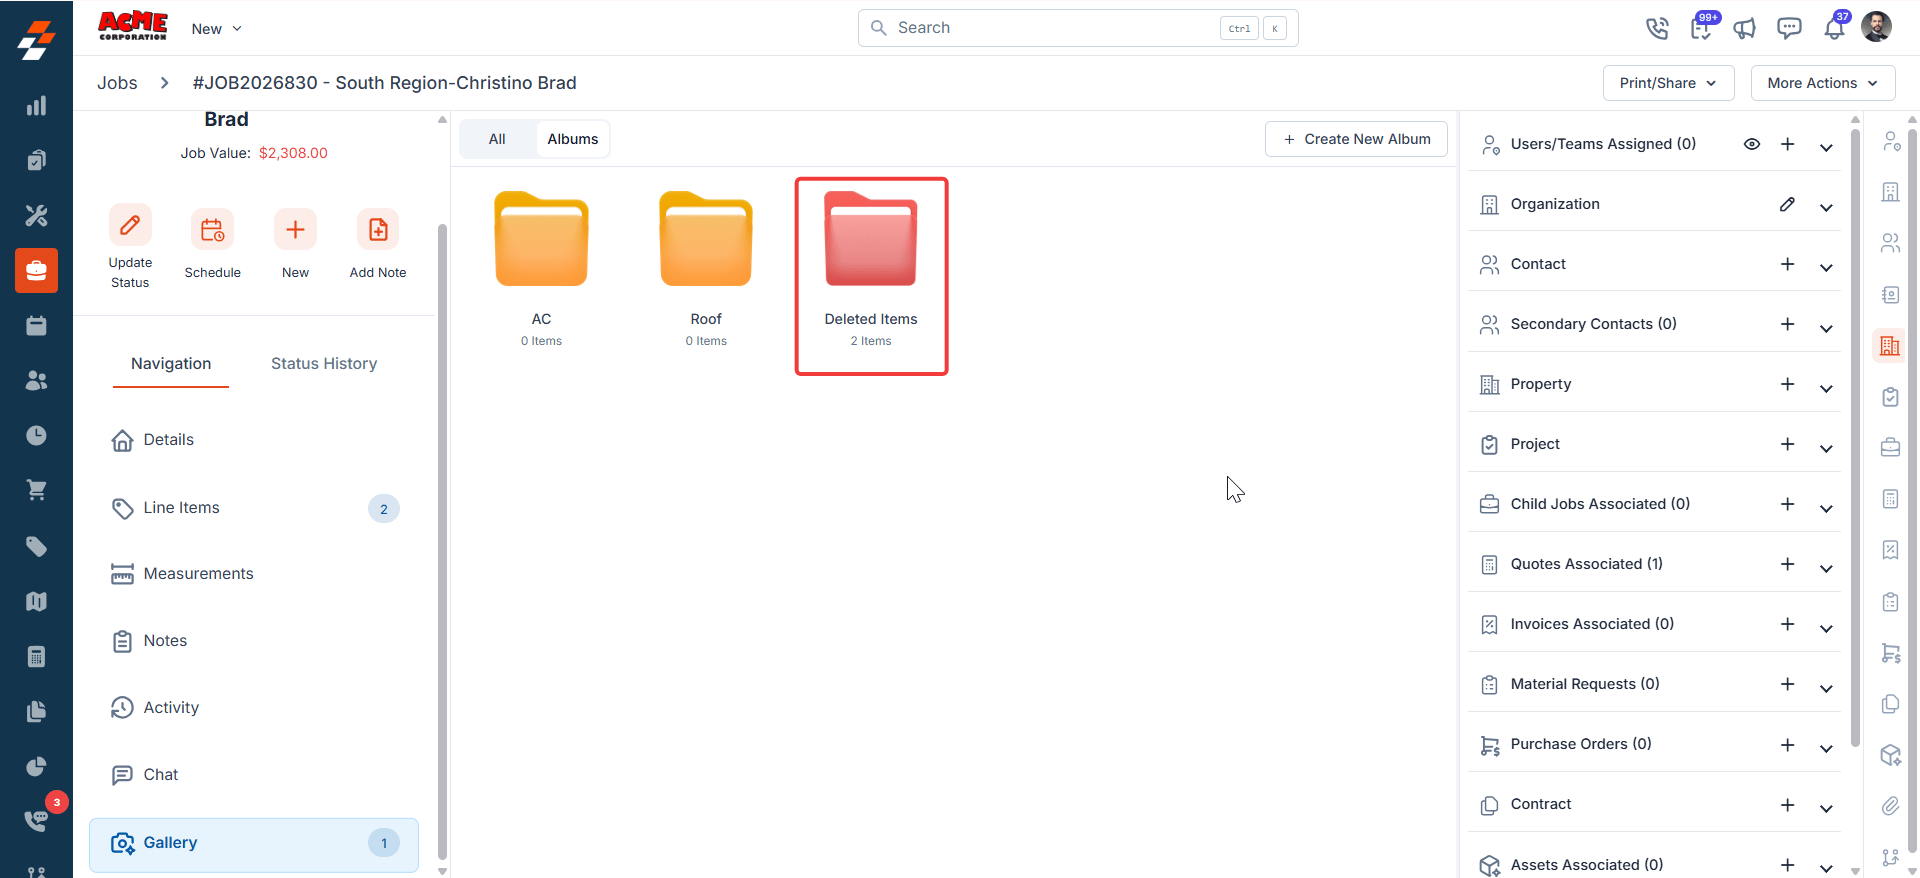
- Select Restore from the action bar. In the Deleted Items album, photos appear only as thumbnails. You cannot open a photo to full-screen view from this album. To view a photo at full size again, restore it to the gallery first. The selected photos return to the job’s main gallery view.
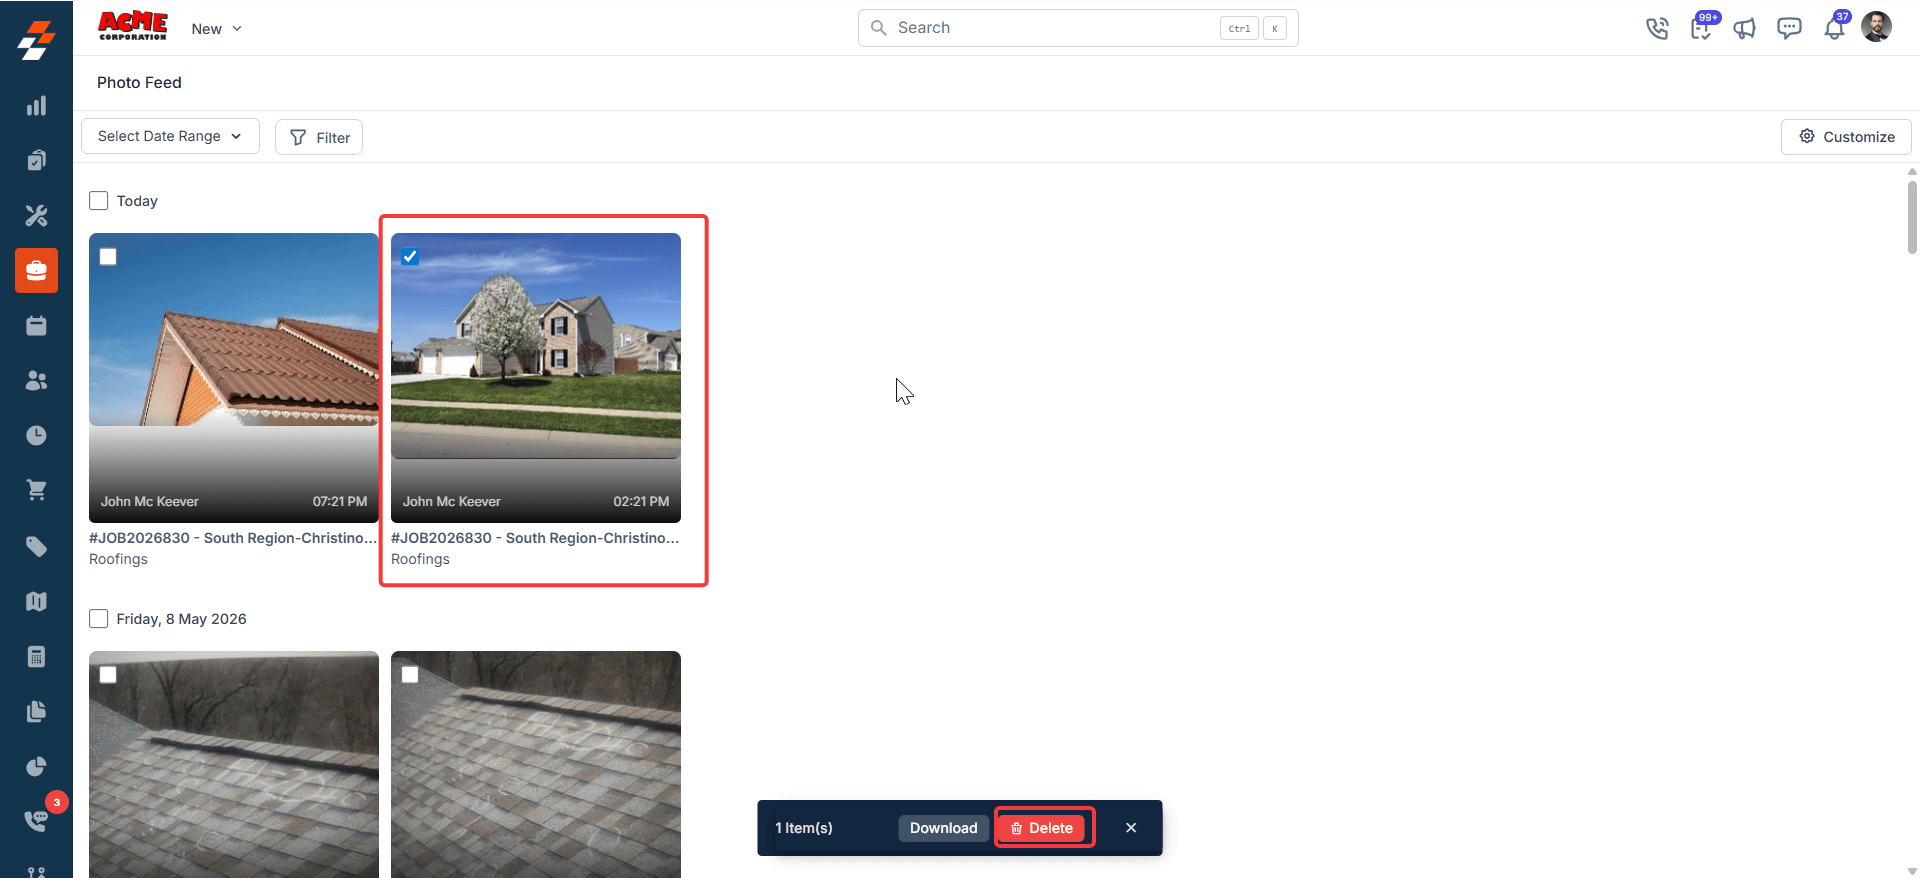
Removing photos from Photo Feed
Photo Feed shows a collection of images across all jobs. If you remove a photo from Photo Feed, Zuper moves it to the Deleted Items album of the job it belongs to — not to a separate deleted folder. Restoring that photo returns it to that job’s gallery.Note: When a job photo is removed from anywhere in Zuper — including Photo Feed, the customer gallery, the property gallery, or the project gallery — it is removed from the job gallery and moved to that job’s Deleted Items album, and the photos stay indefinite. You can restore it from there at any time.
Removing photos in customer, property, and project galleries
Removing a photo from a customer, property, or project gallery permanently deletes that photo. There is no Deleted Items album and no restore option in these galleries. This action cannot be undone.
Customer merge
When you merge two customer records, Zuper does not carry over media from the deleted customer’s gallery. Only the media already in the retained customer’s record remains after the merge.Explore Jobs Gallery-Mobile
The Job Gallery in the Zuper mobile app allows field technicians to capture, upload, view, and manage all photos and videos associated with a job. This centralized view ensures technicians can accurately document job progress and apply tags for easy filtering and retrieval.Accessing the Job Gallery
- Open the Zuper Field Service App on your mobile device.
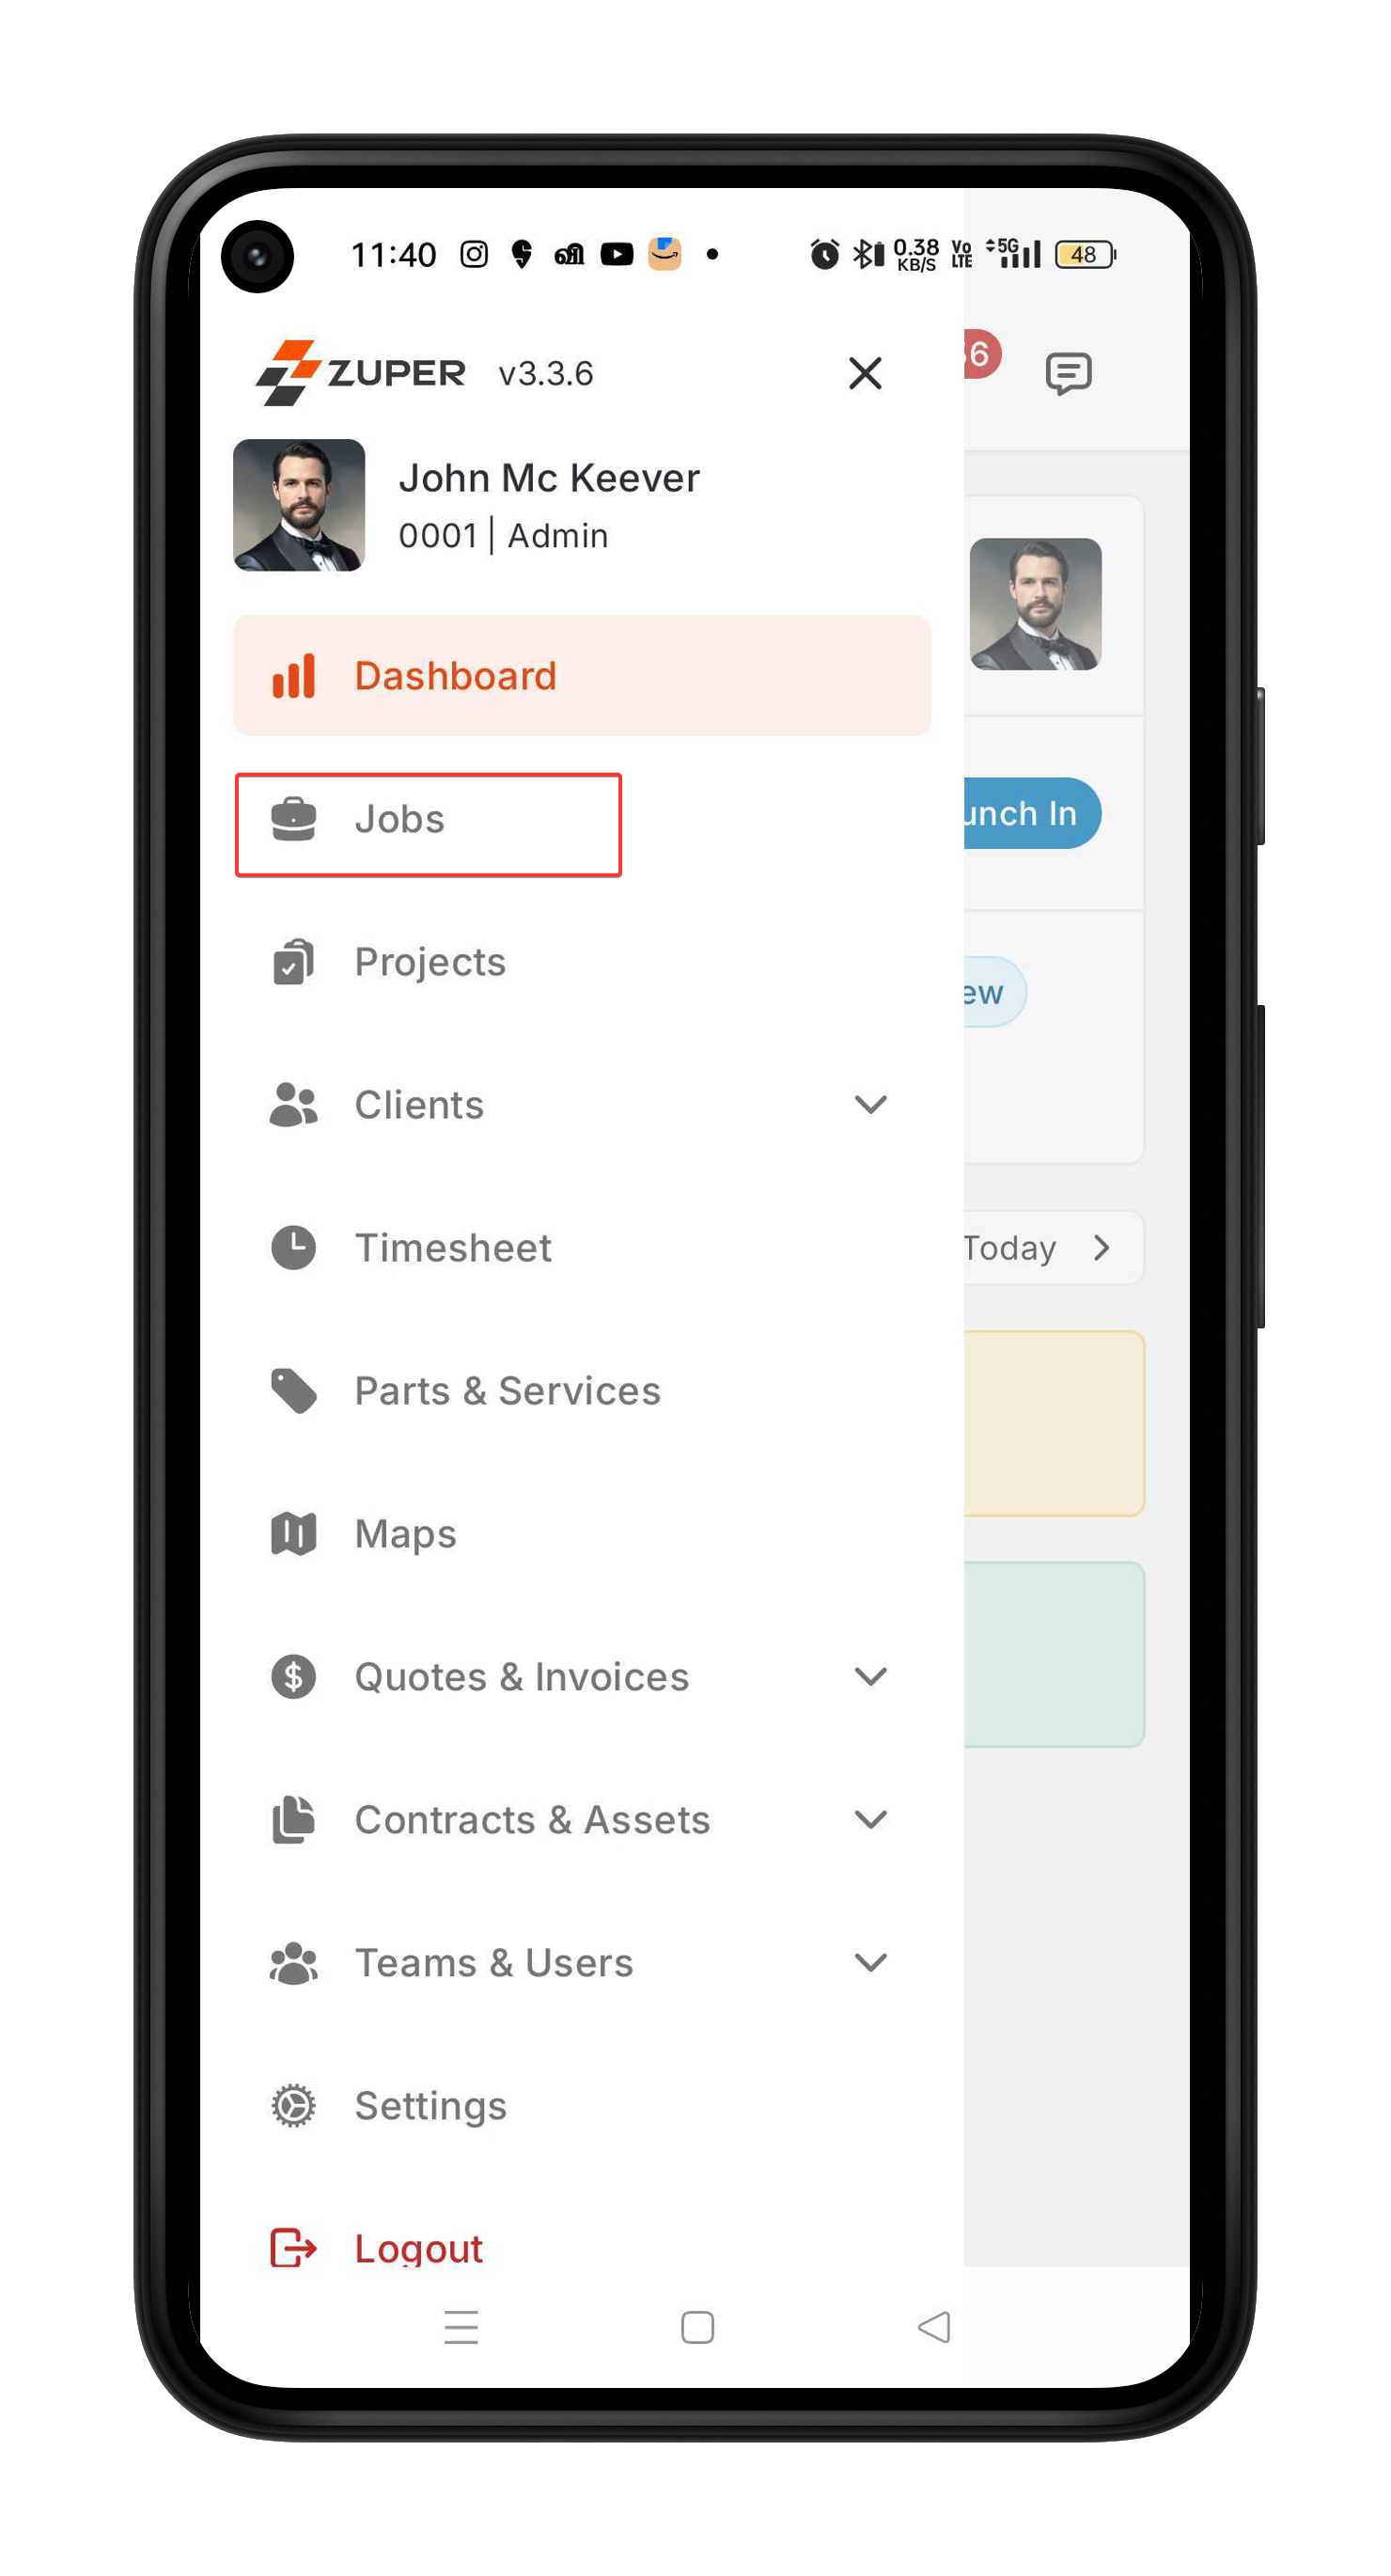
- Select the Jobs module from the hamburger menu.
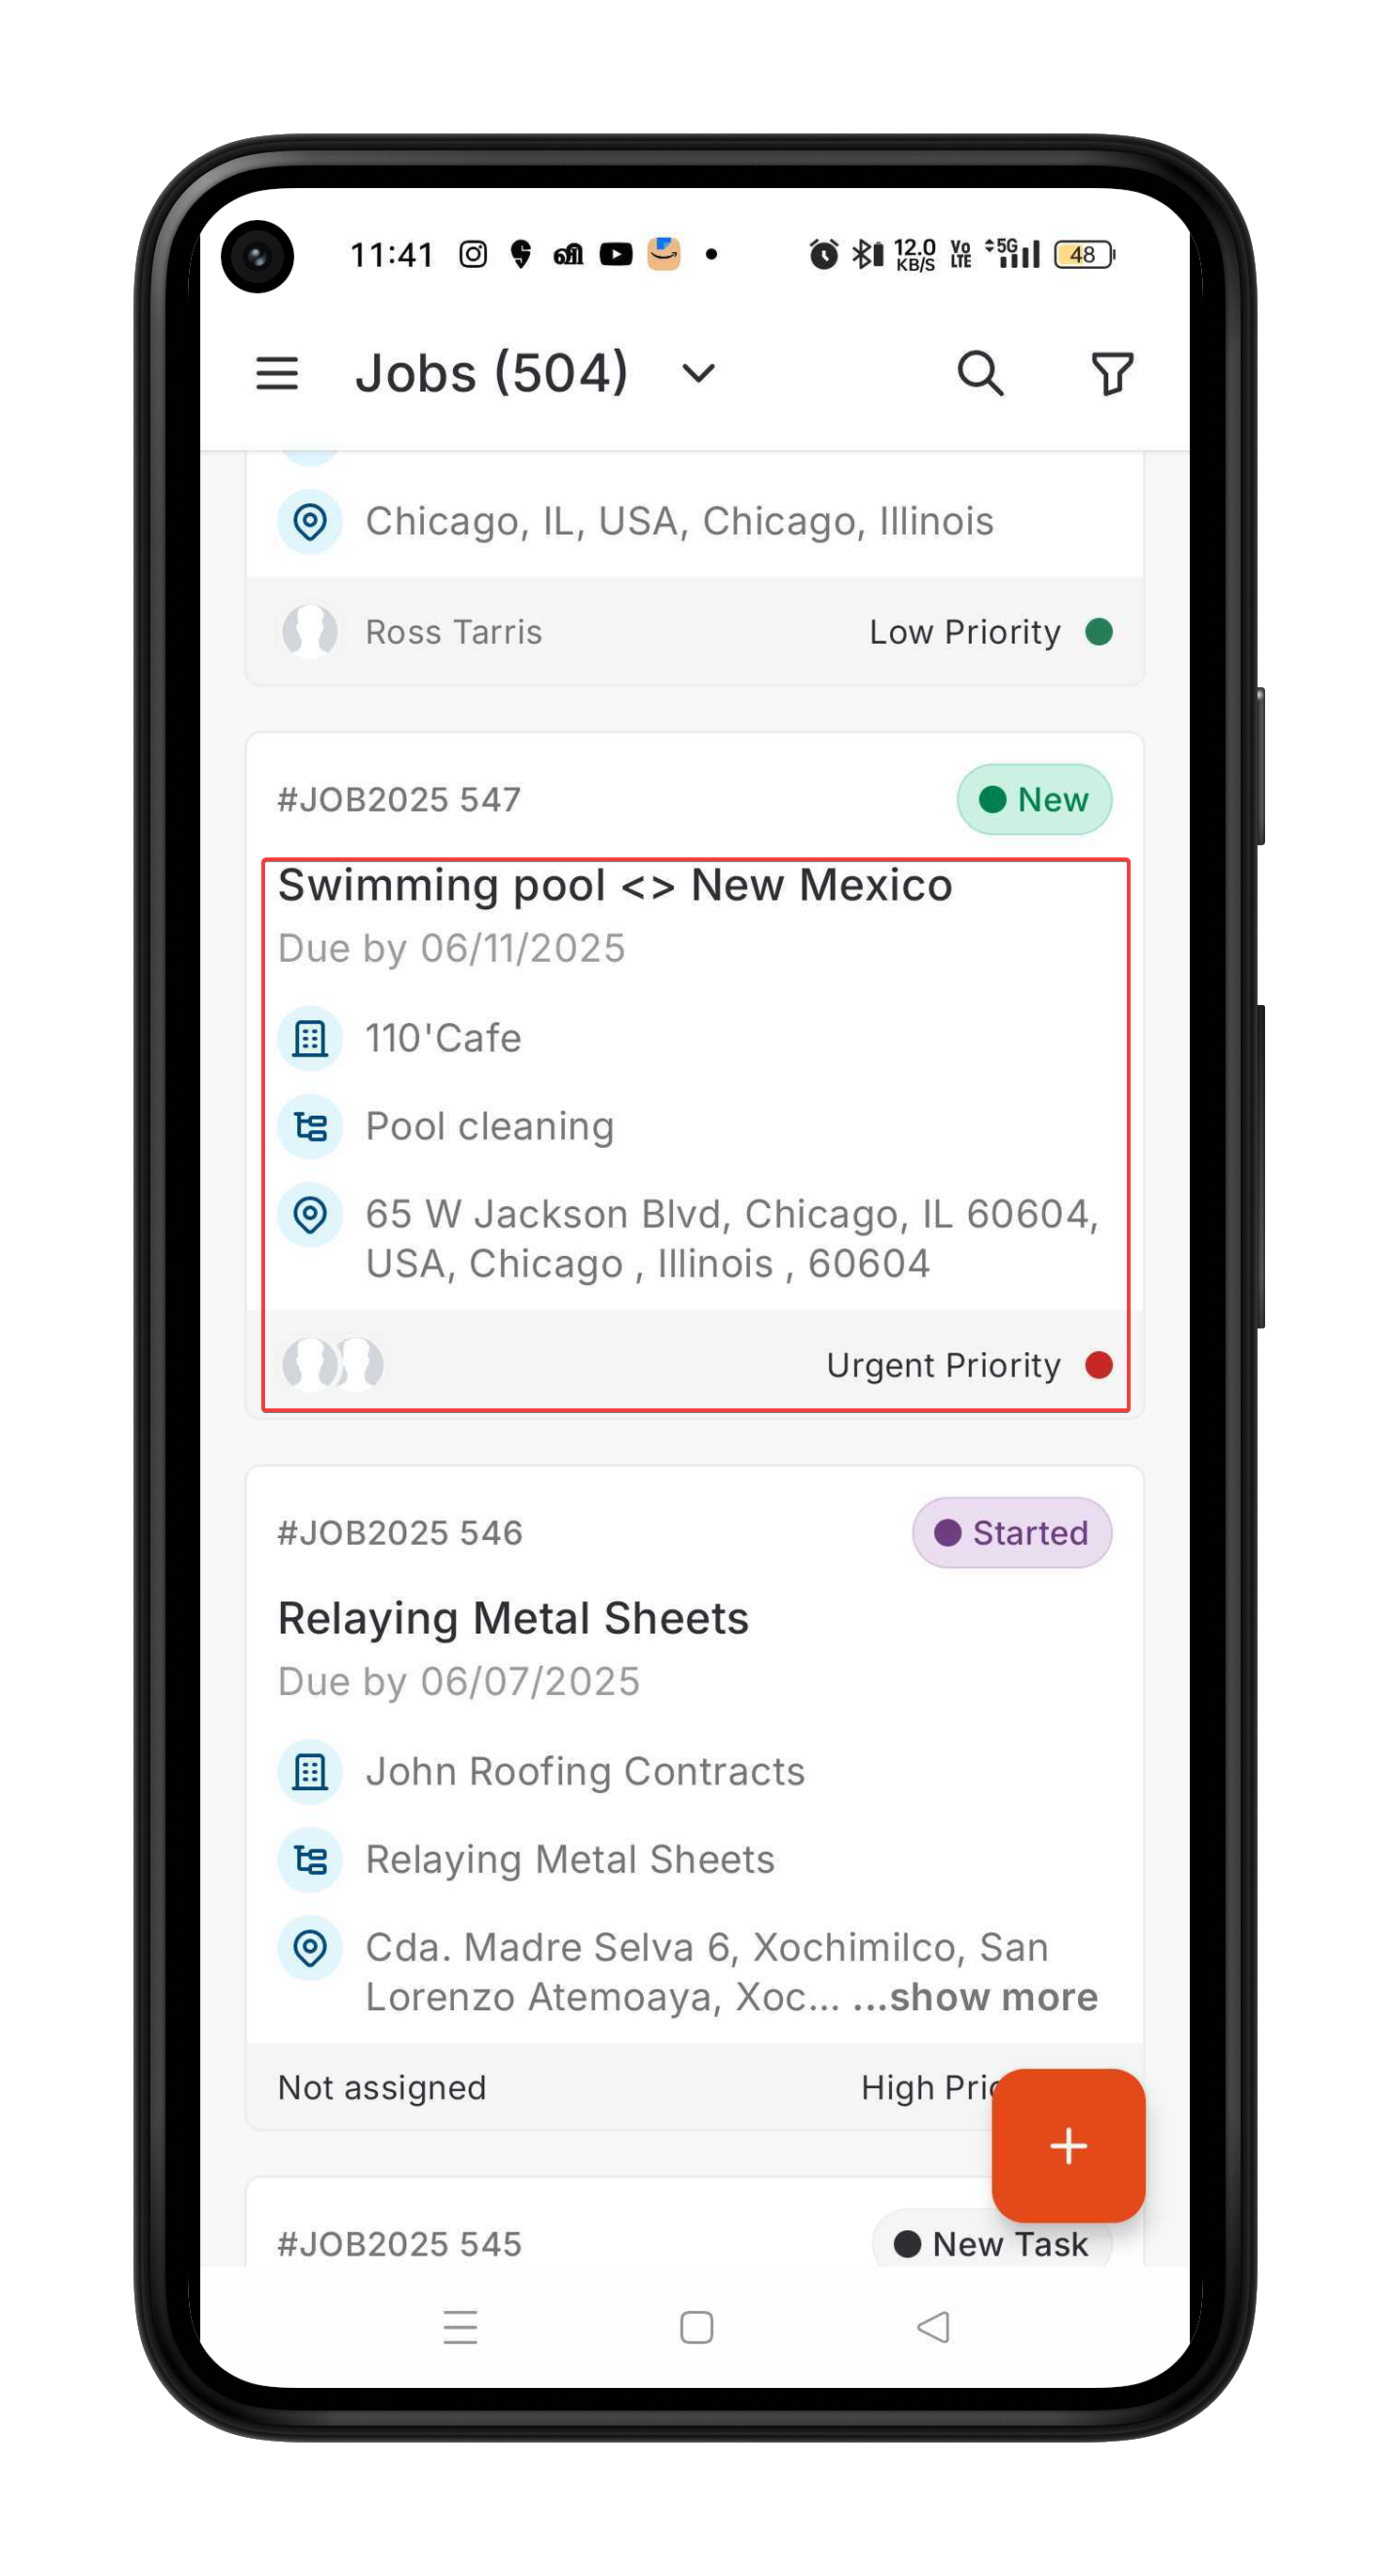
- Choose any one of the jobs from the job listing page to view its details.
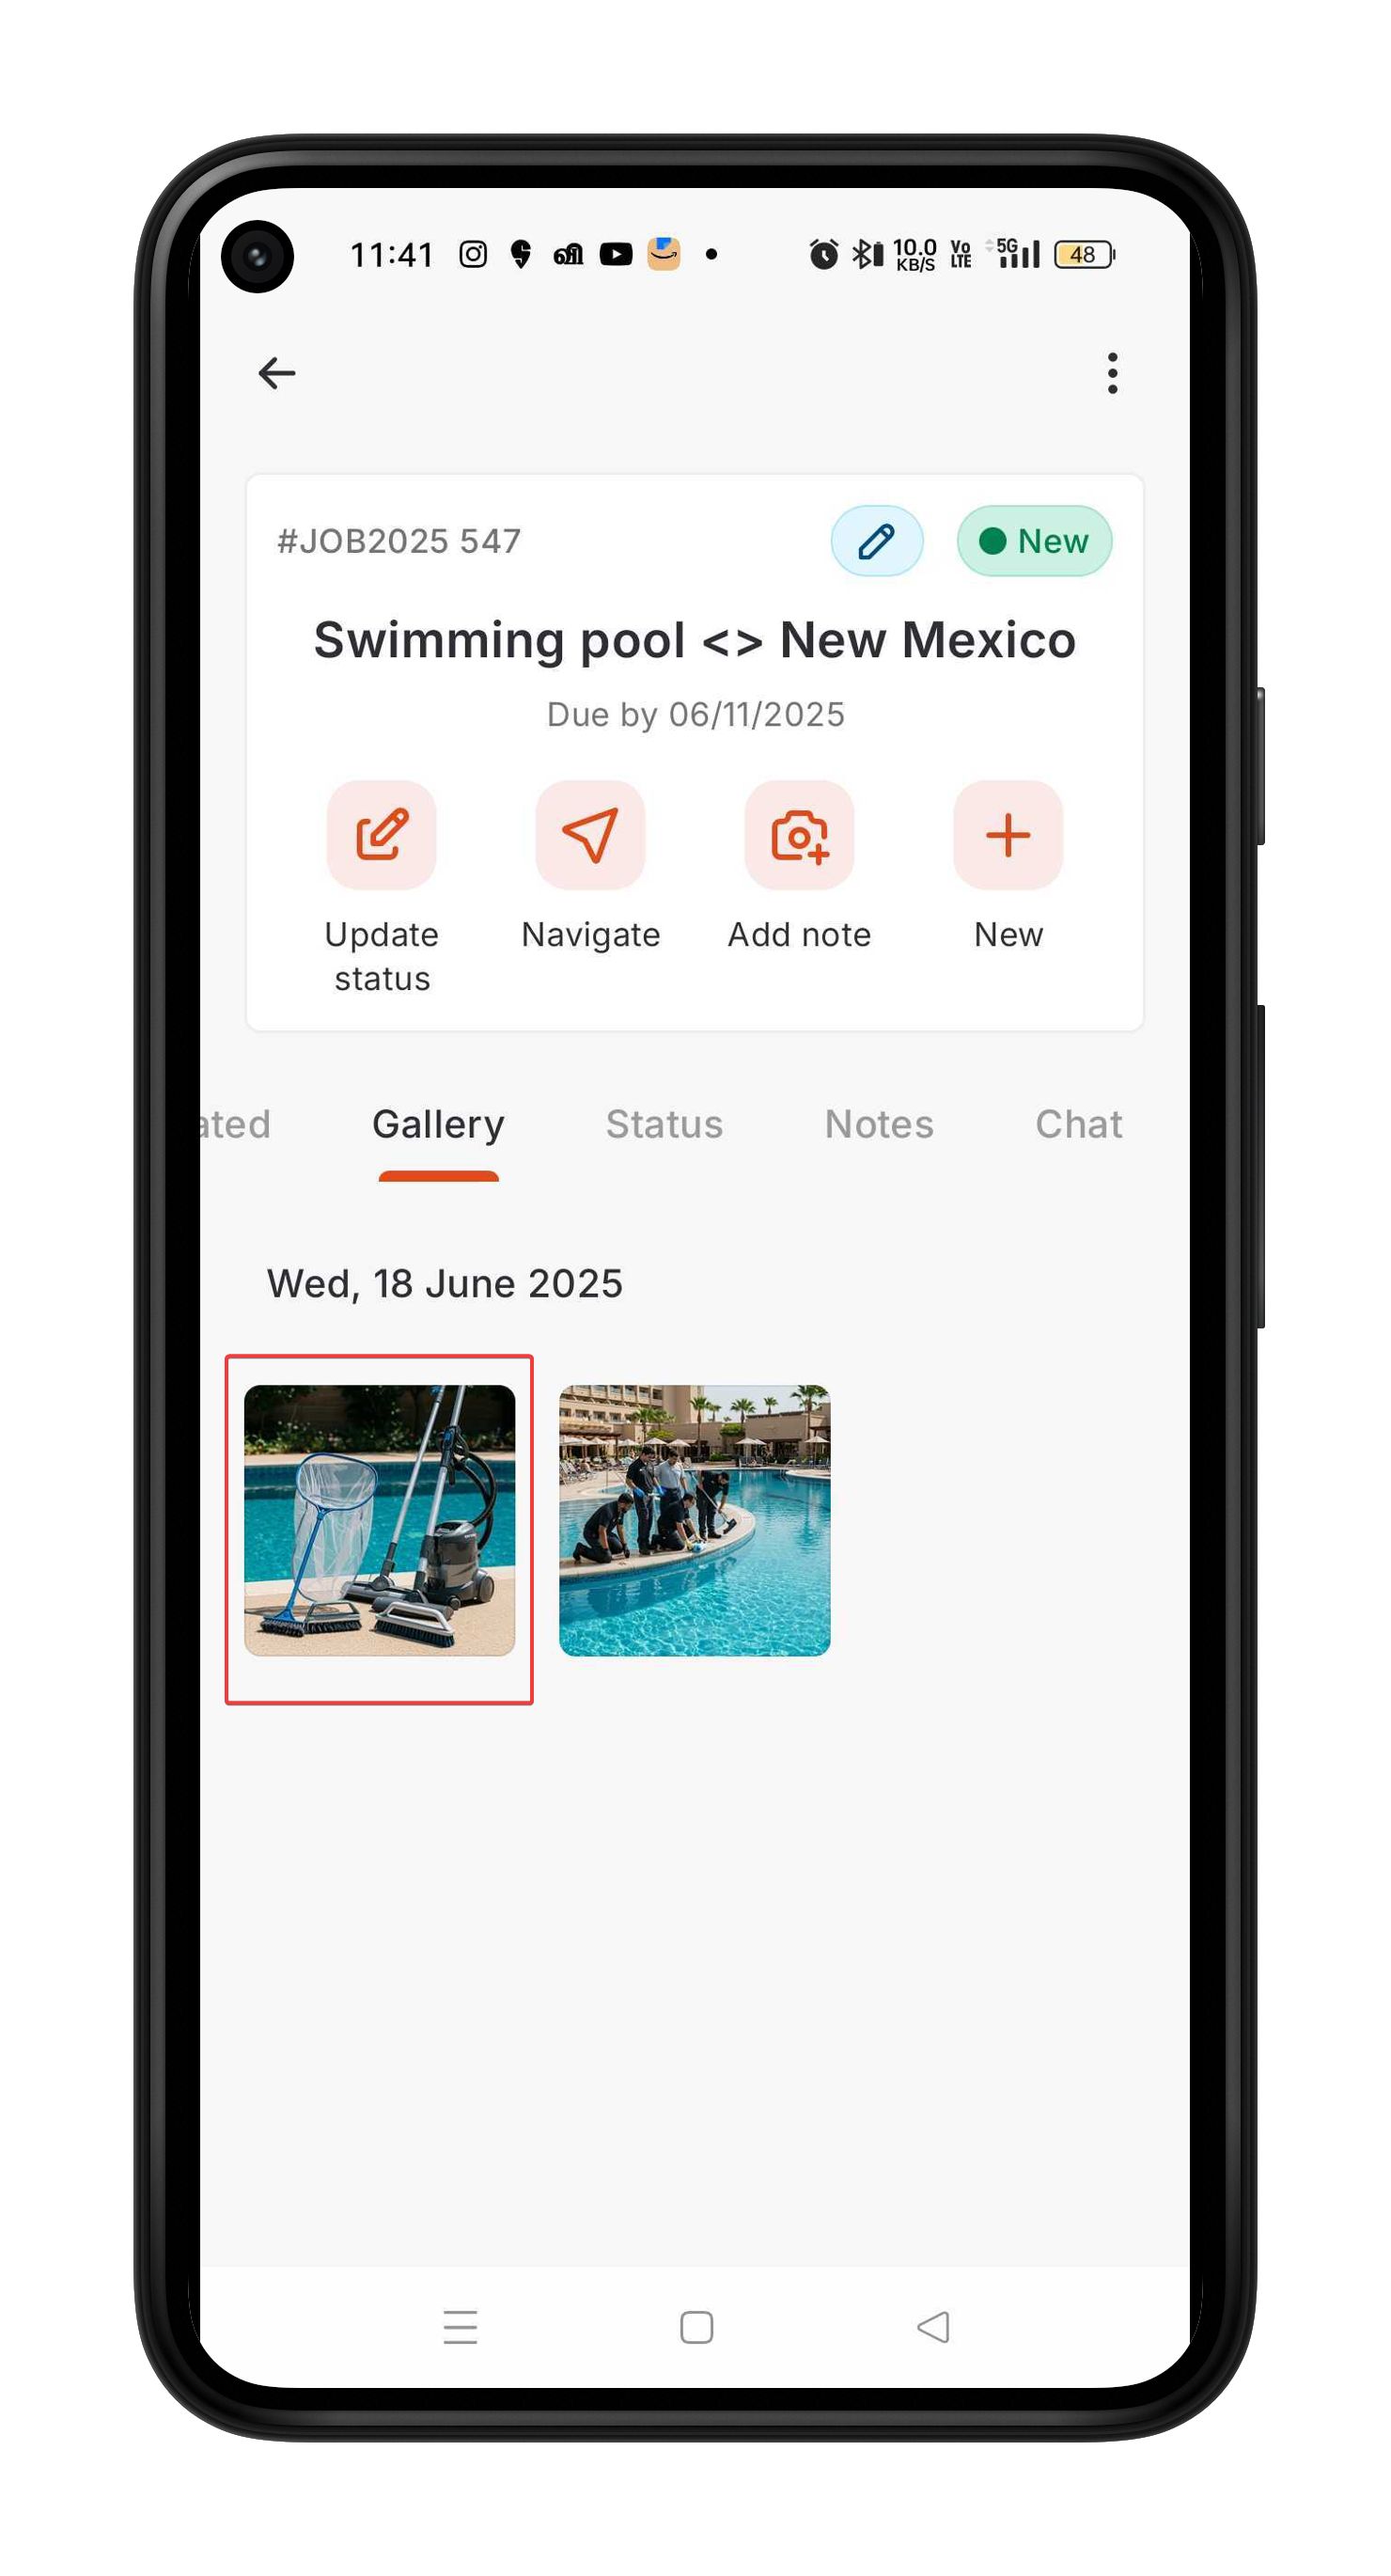
- Tap the Gallery tab.
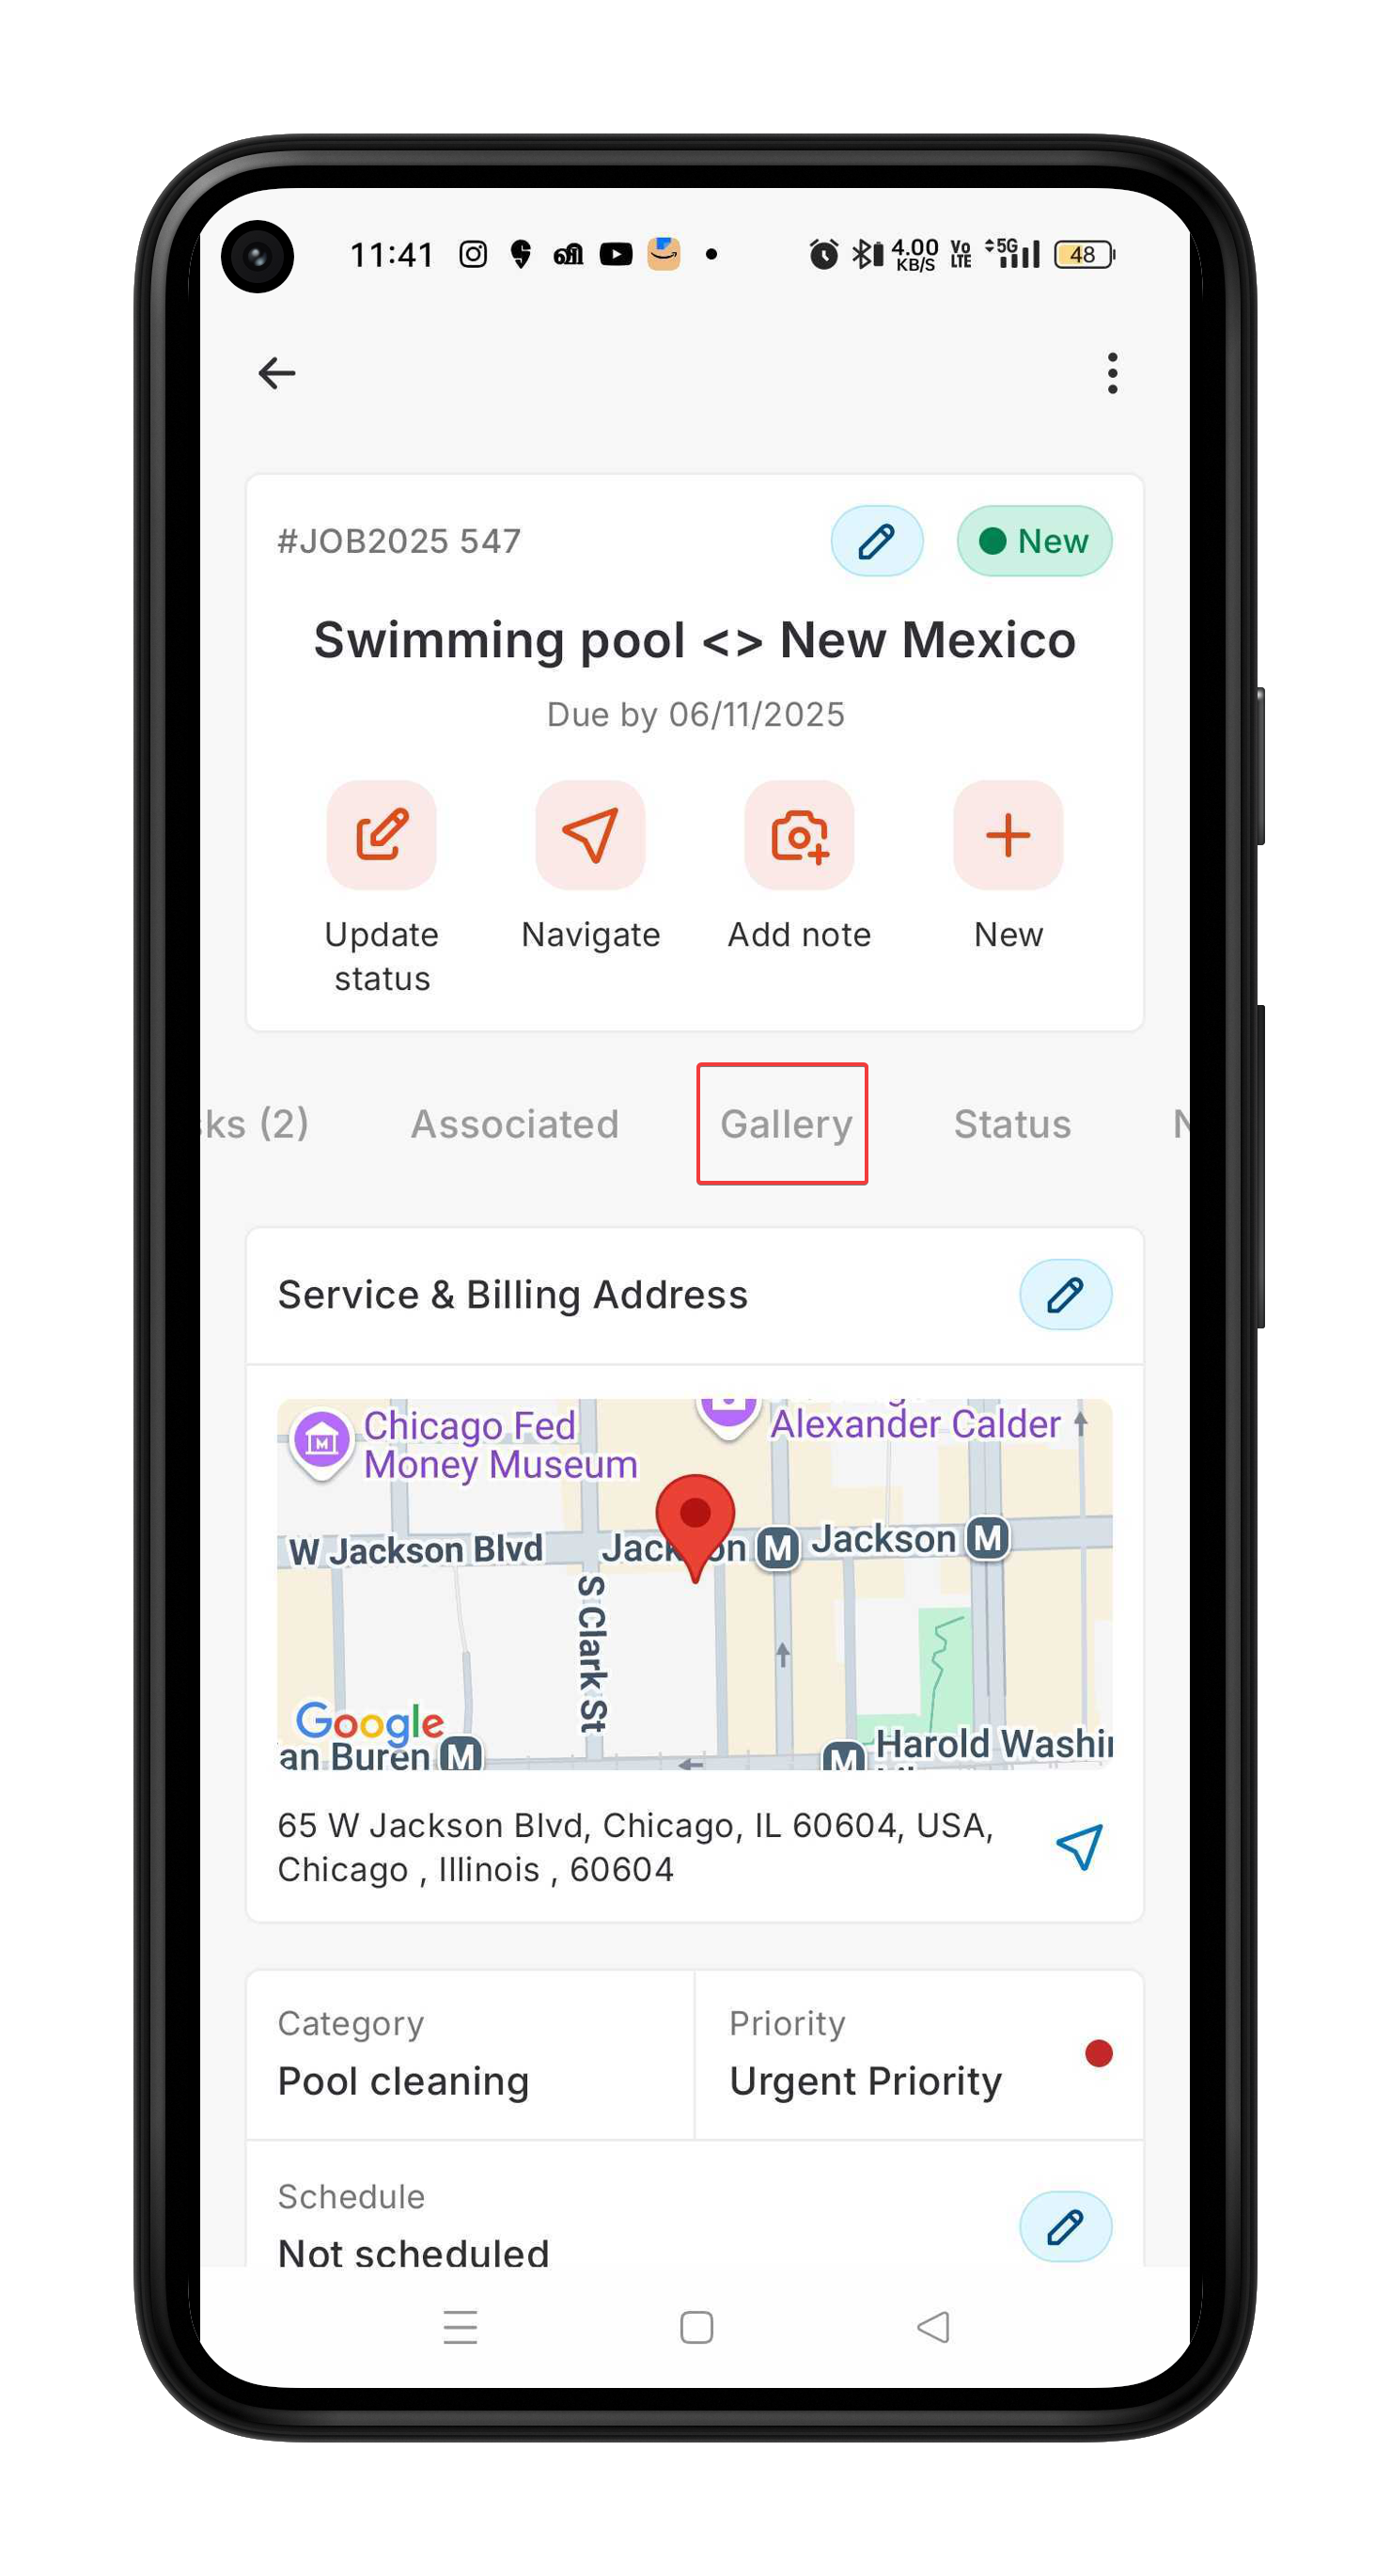
- The Gallery displays all images and videos previously added to the job.
Viewing Details
- Tap any image or video in the Gallery grid to open it in full-screen view.
- The selected media opens along with its associated details.
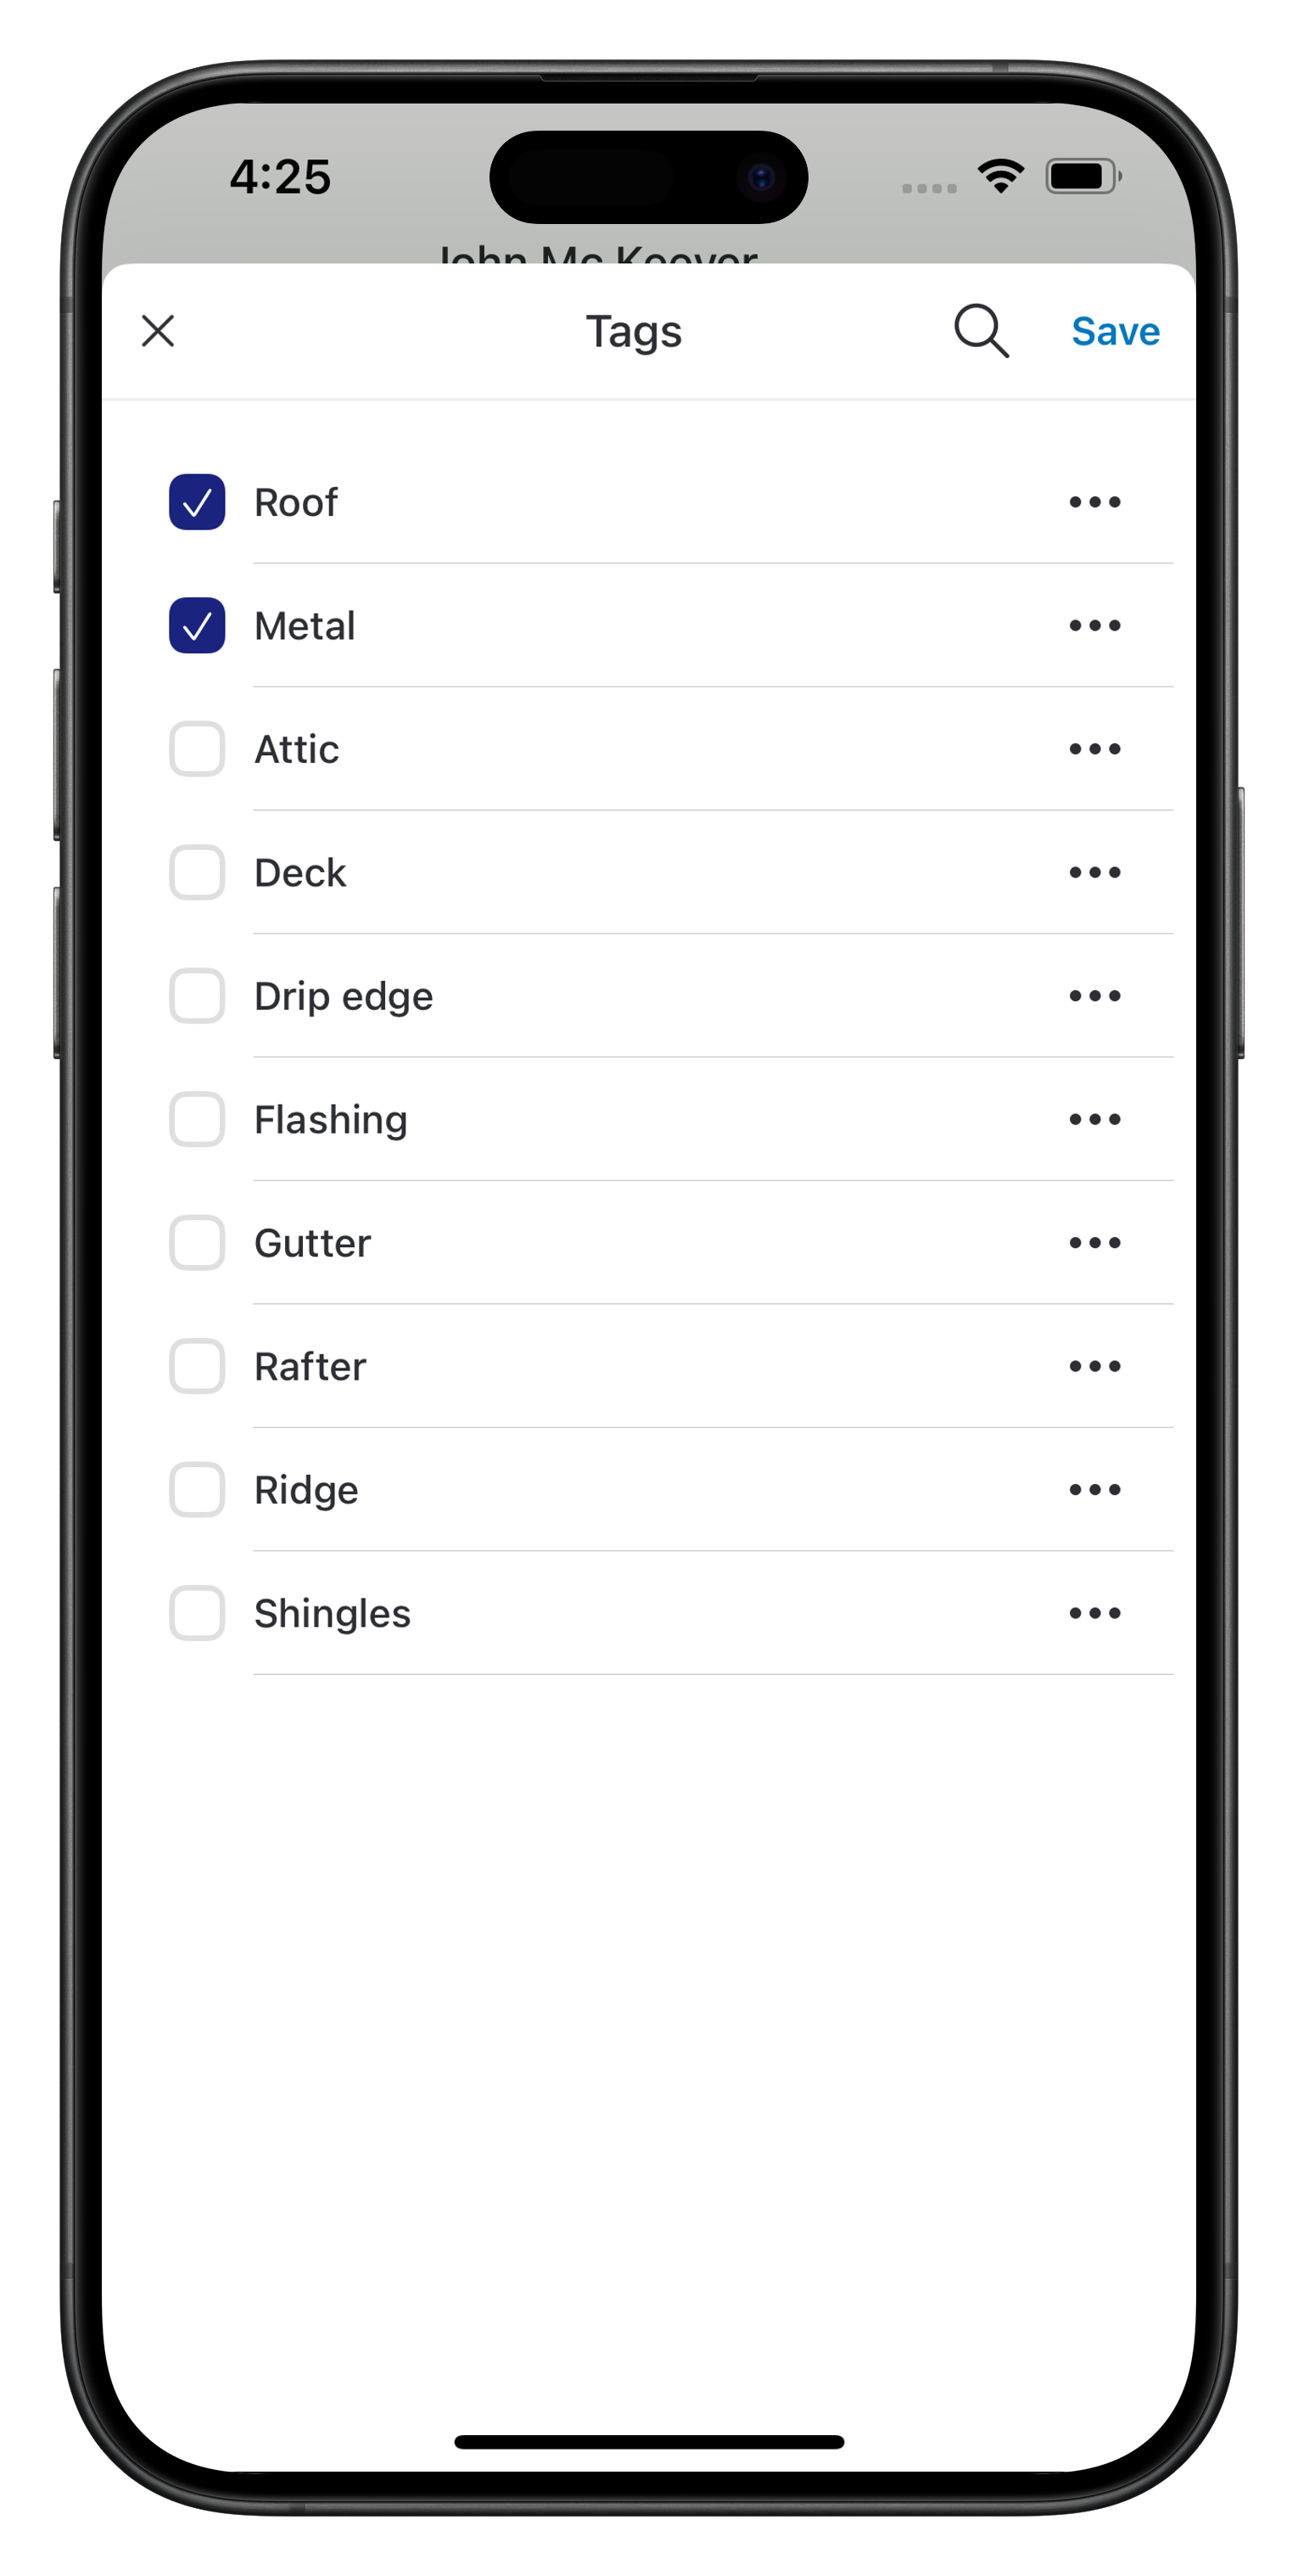
- If required, you can add or update the Description and Tags, then tap Save.
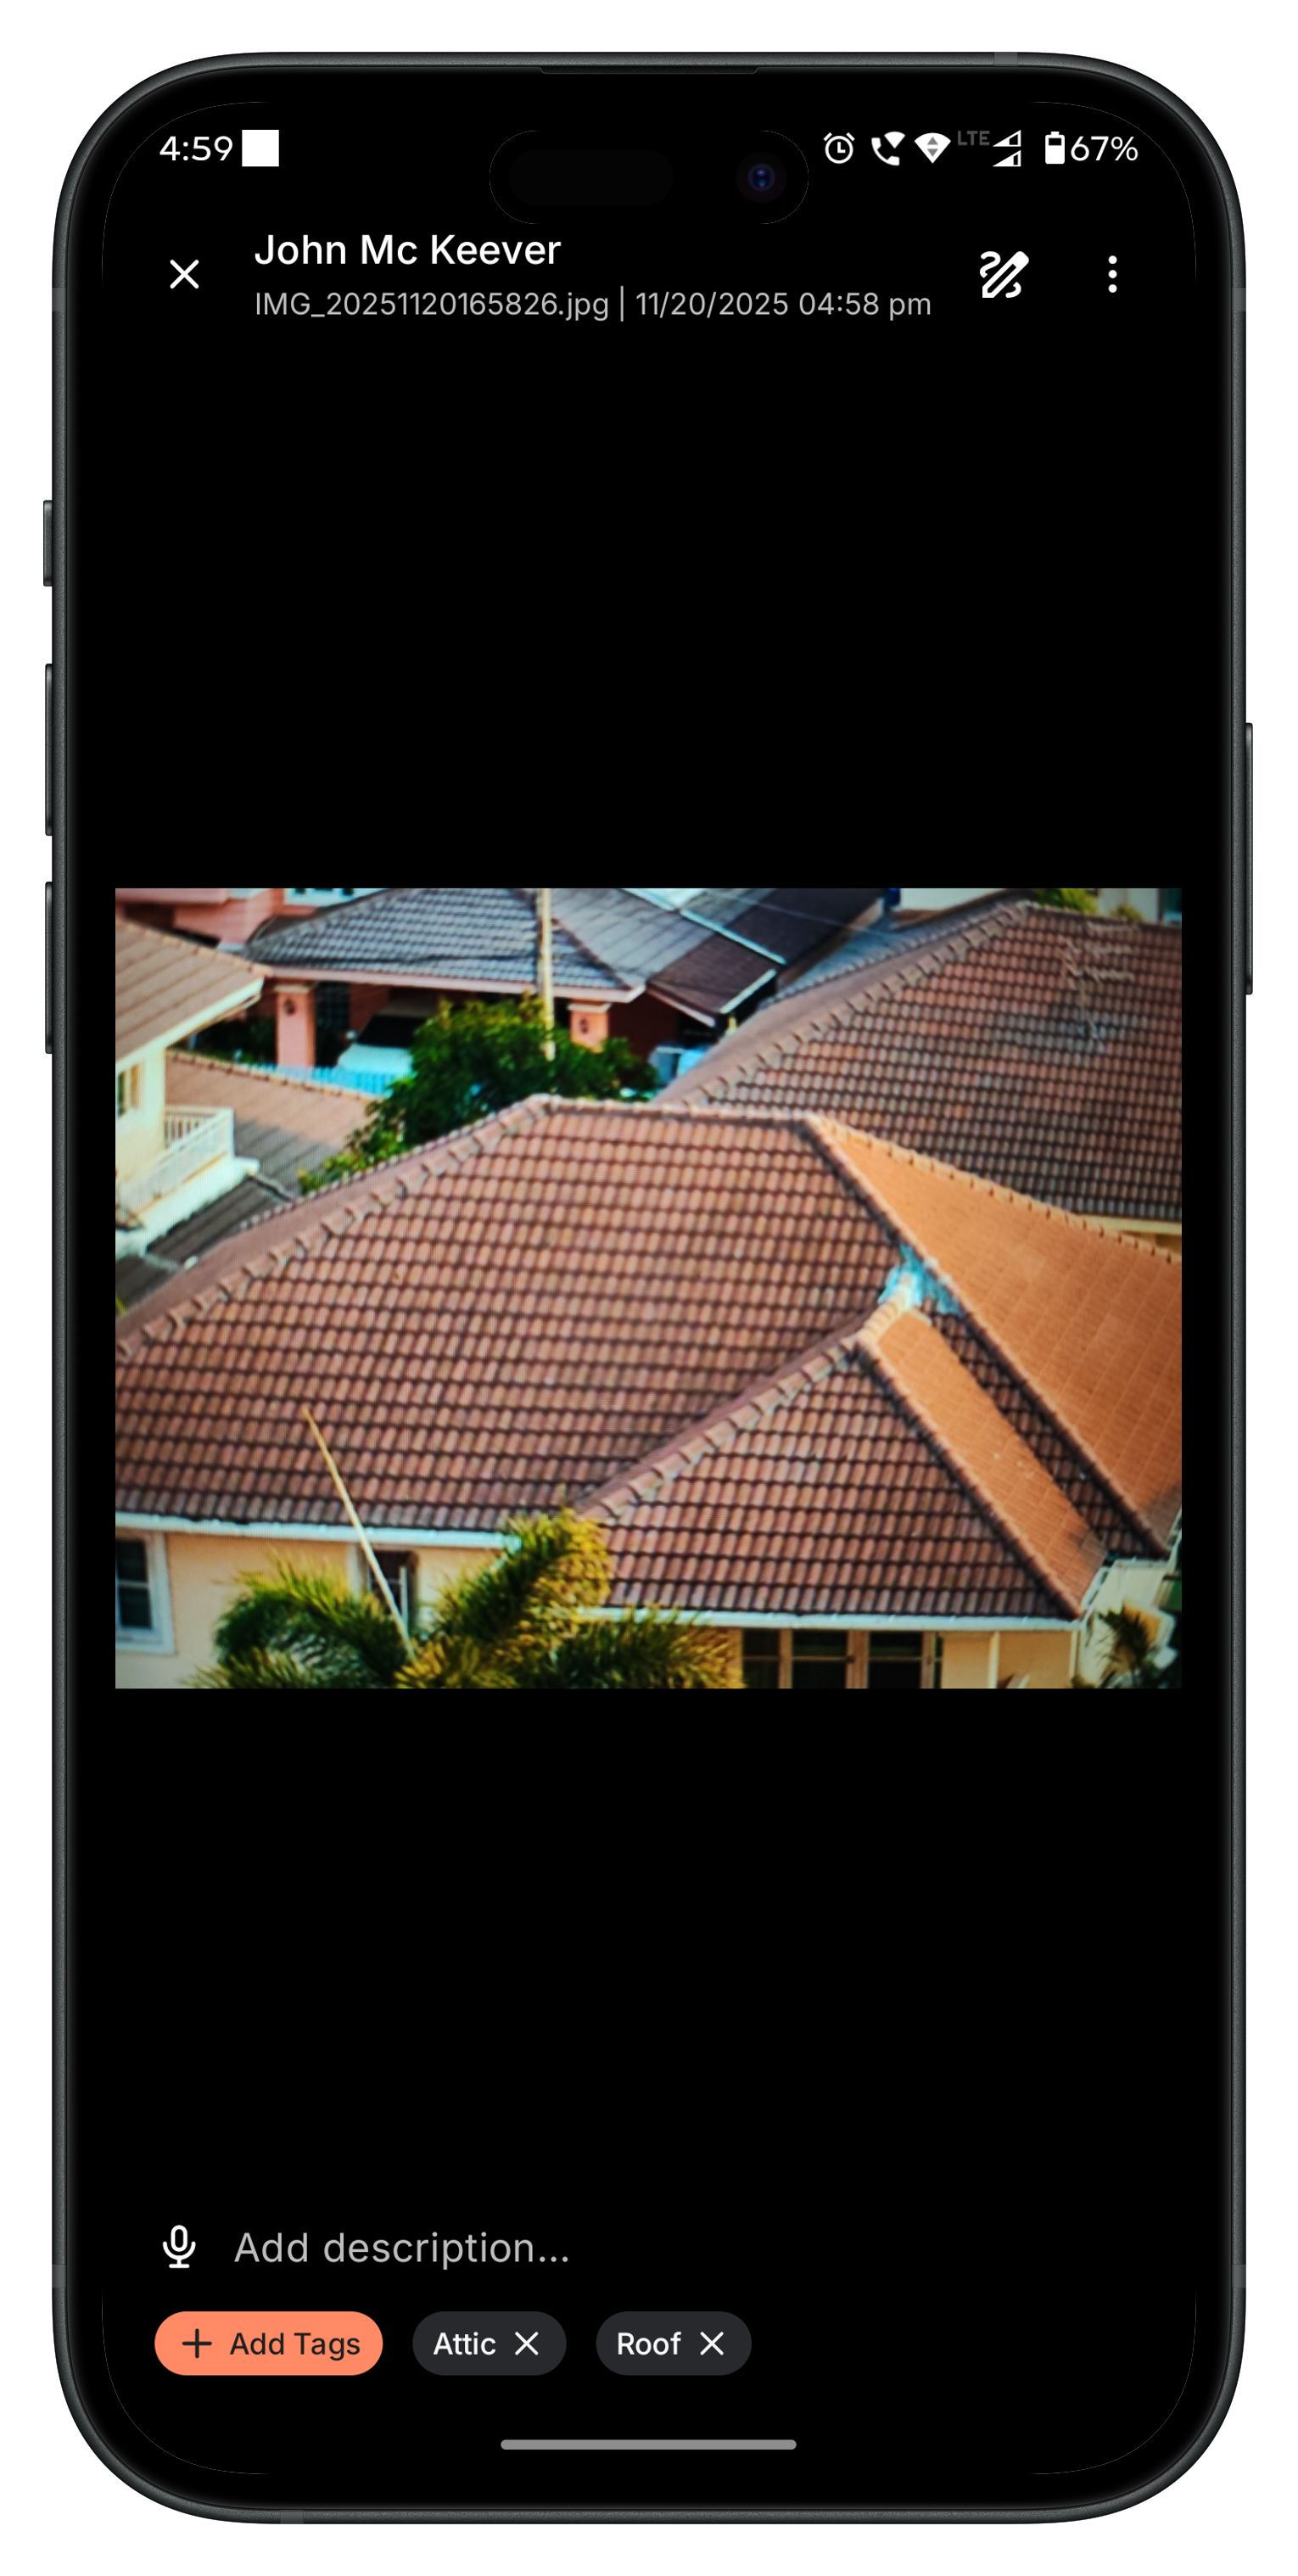
Note: Tags can be added or updated only for images, not for videos.
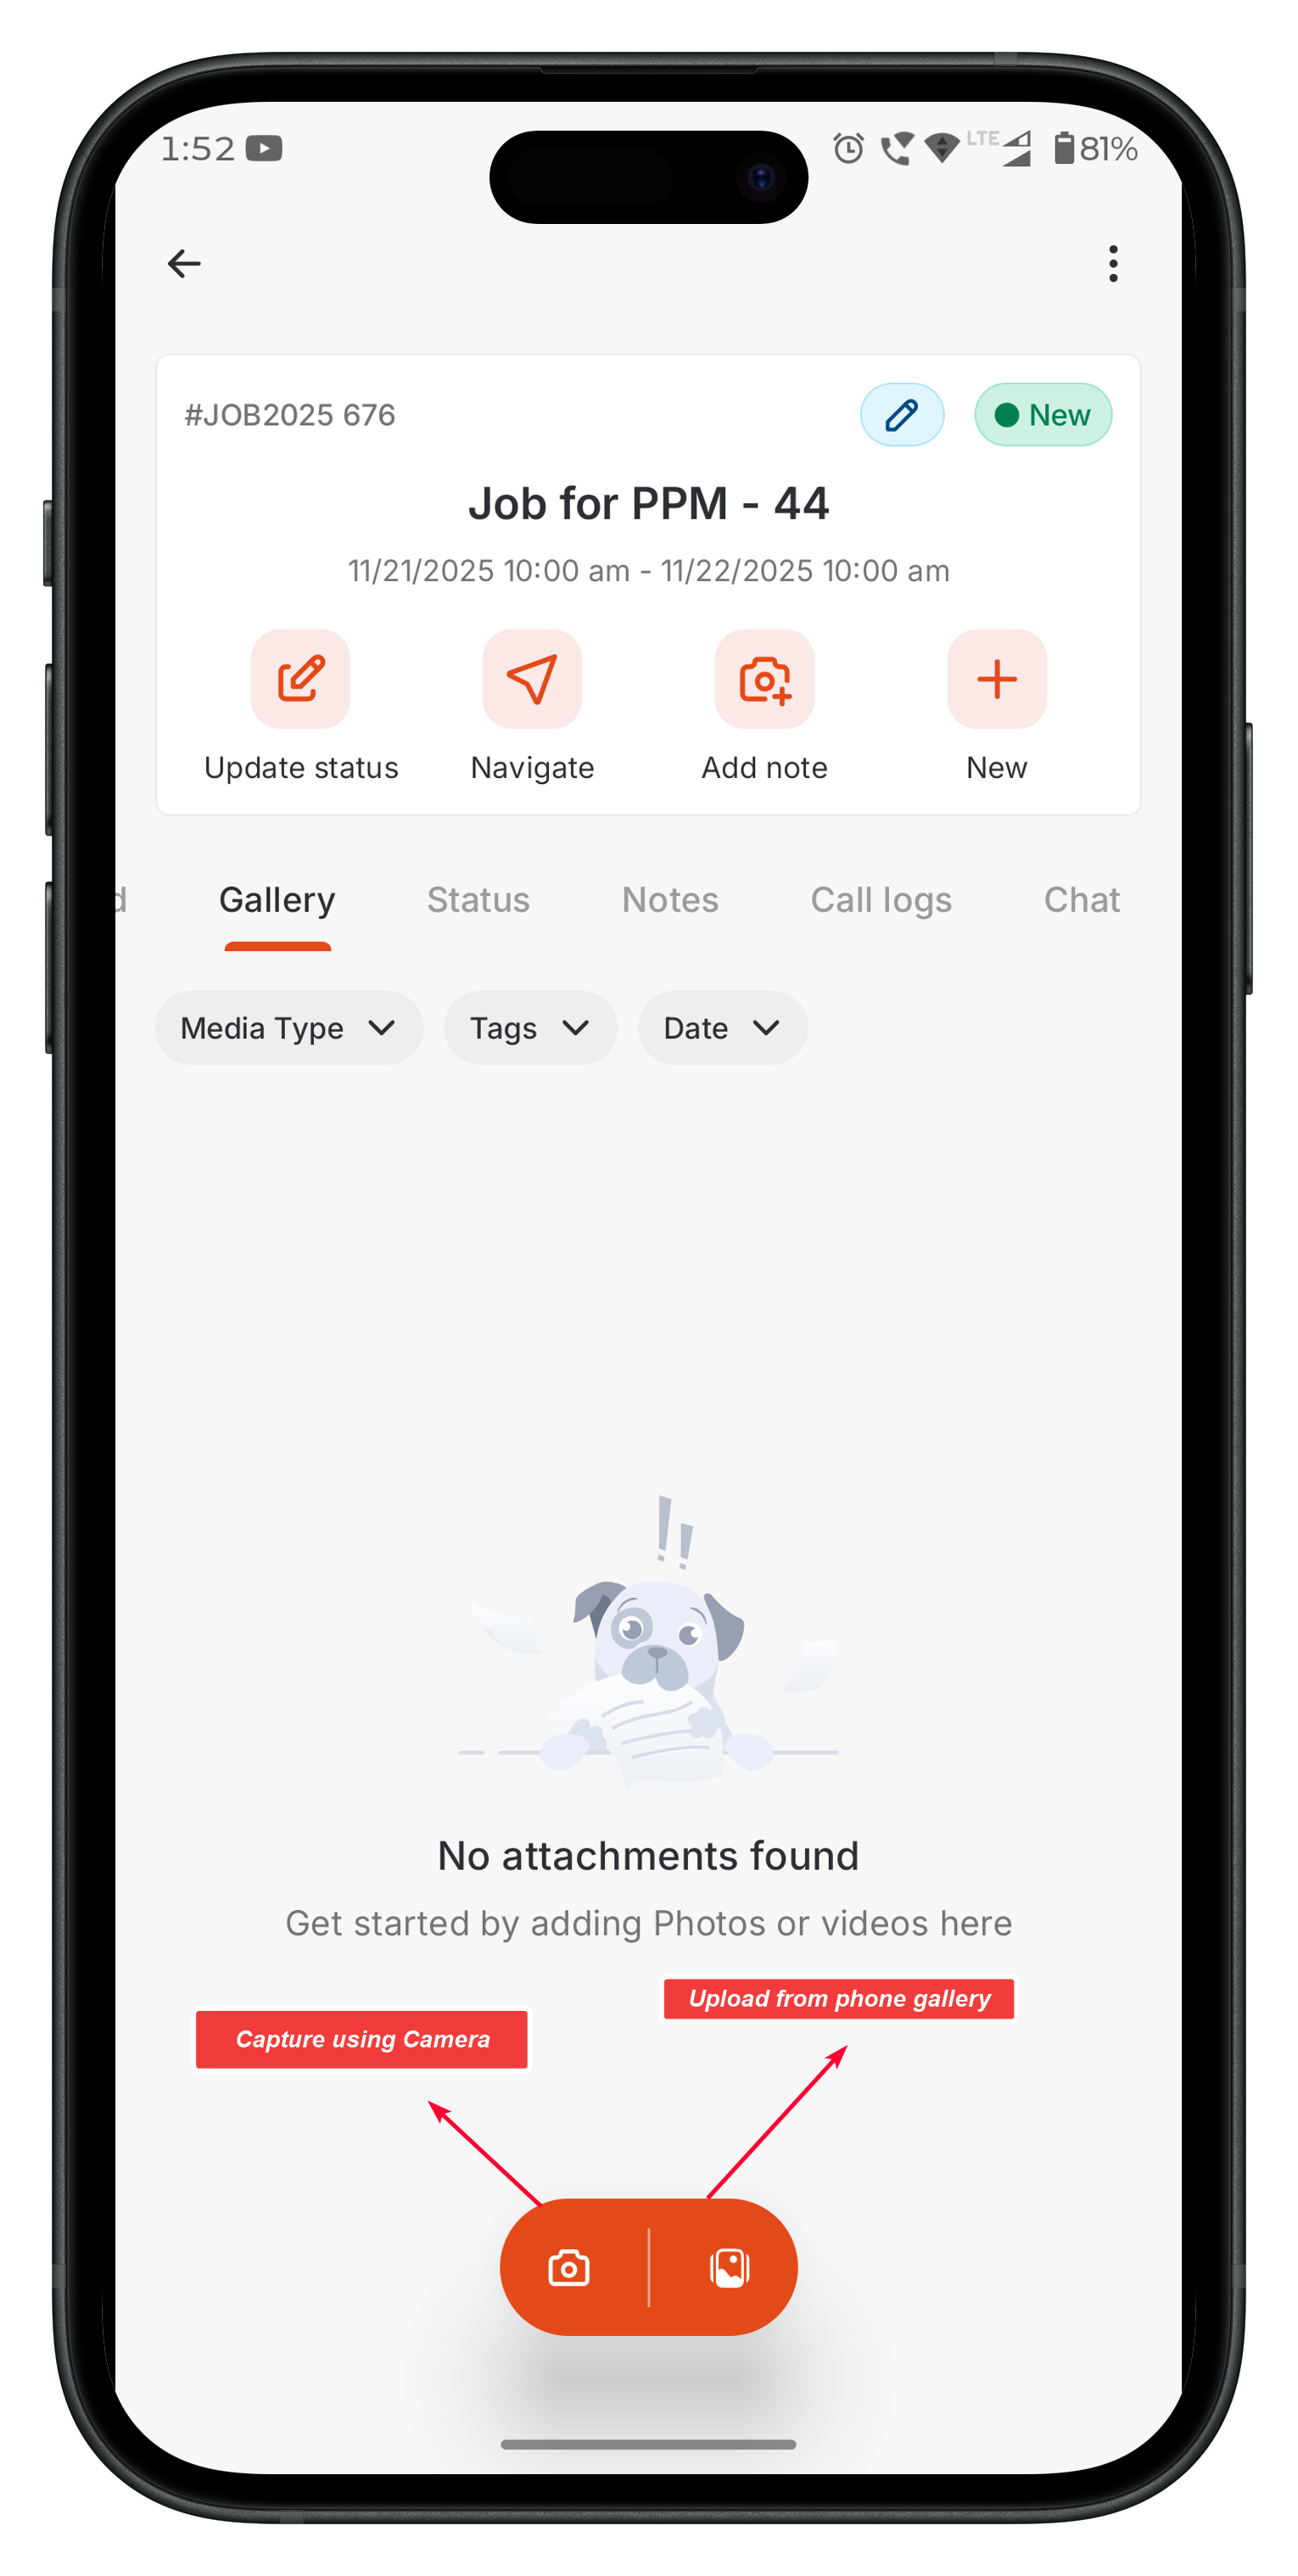
Capturing or Uploading Images
You can add new images/videos to the job using two methods:1. Capture a Photo/Video Using a Camera
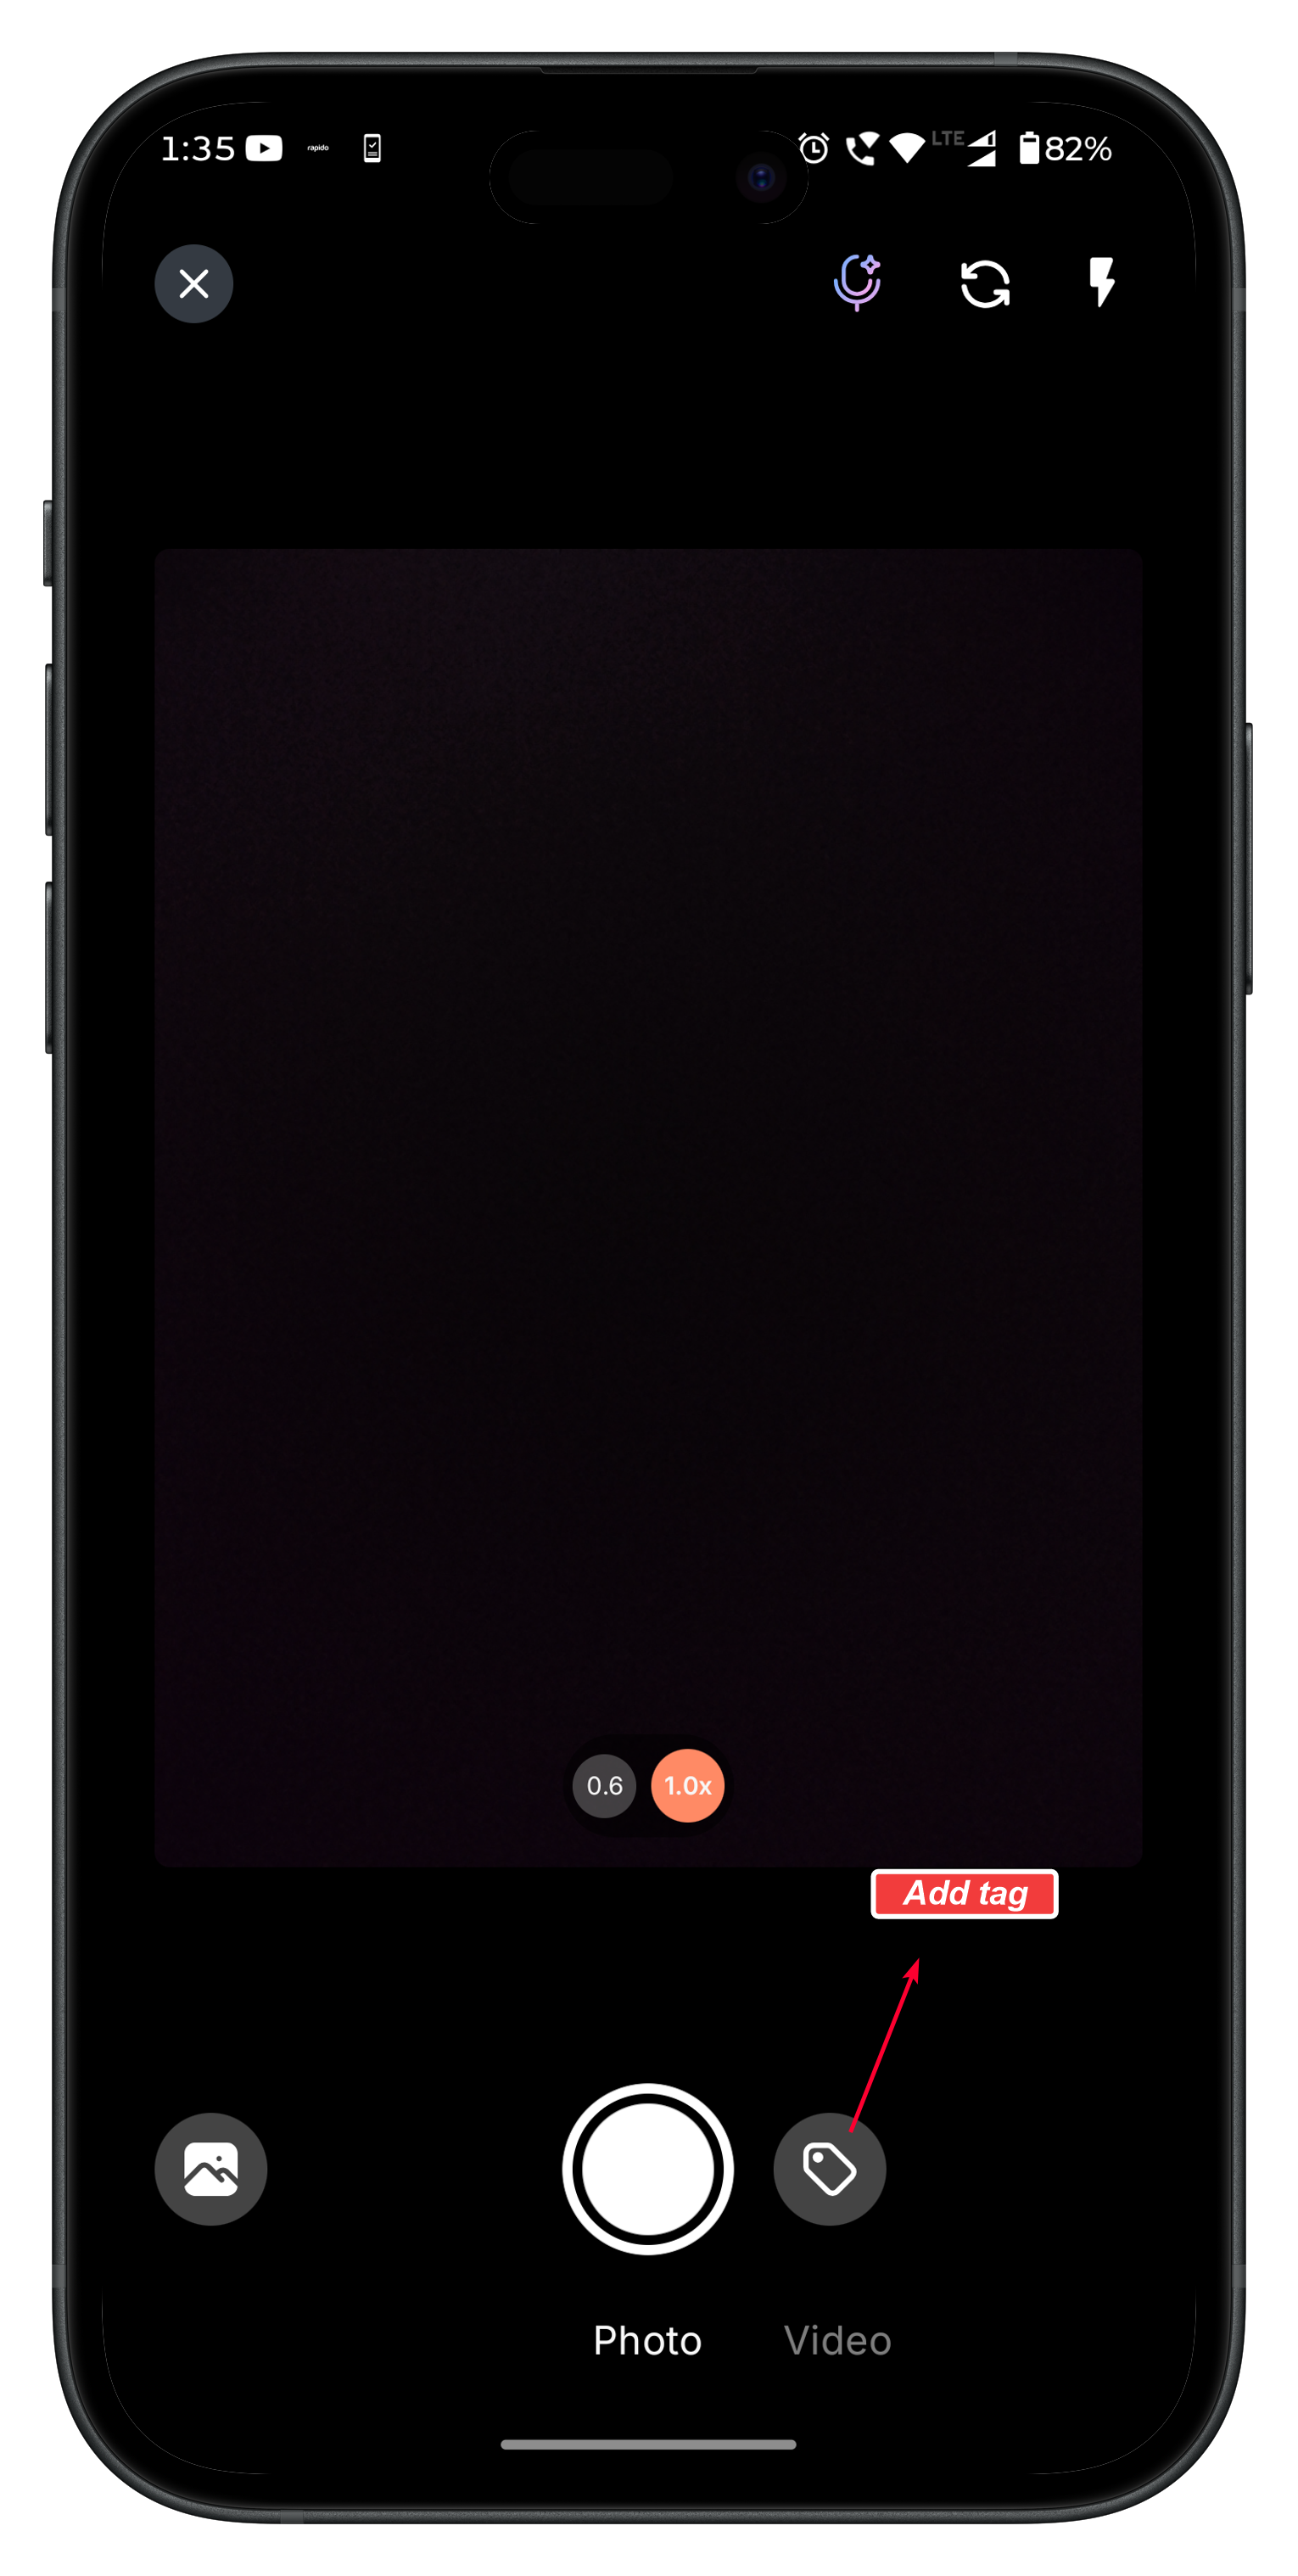
- In the Job’s Gallery tab, tap the Camera icon to open the Zuper Camera Component.
- Take a photo or record a video. Adjust camera settings (e.g., flash, zoom) for optimal image quality.
- Tap the Tag icon (if required) to apply tags before saving.
- From the Gallery, when viewing the image in full screen.
2. Upload from Device
- In the Job’s Gallery tab, tap the Upload icon to browse your phone’s storage.
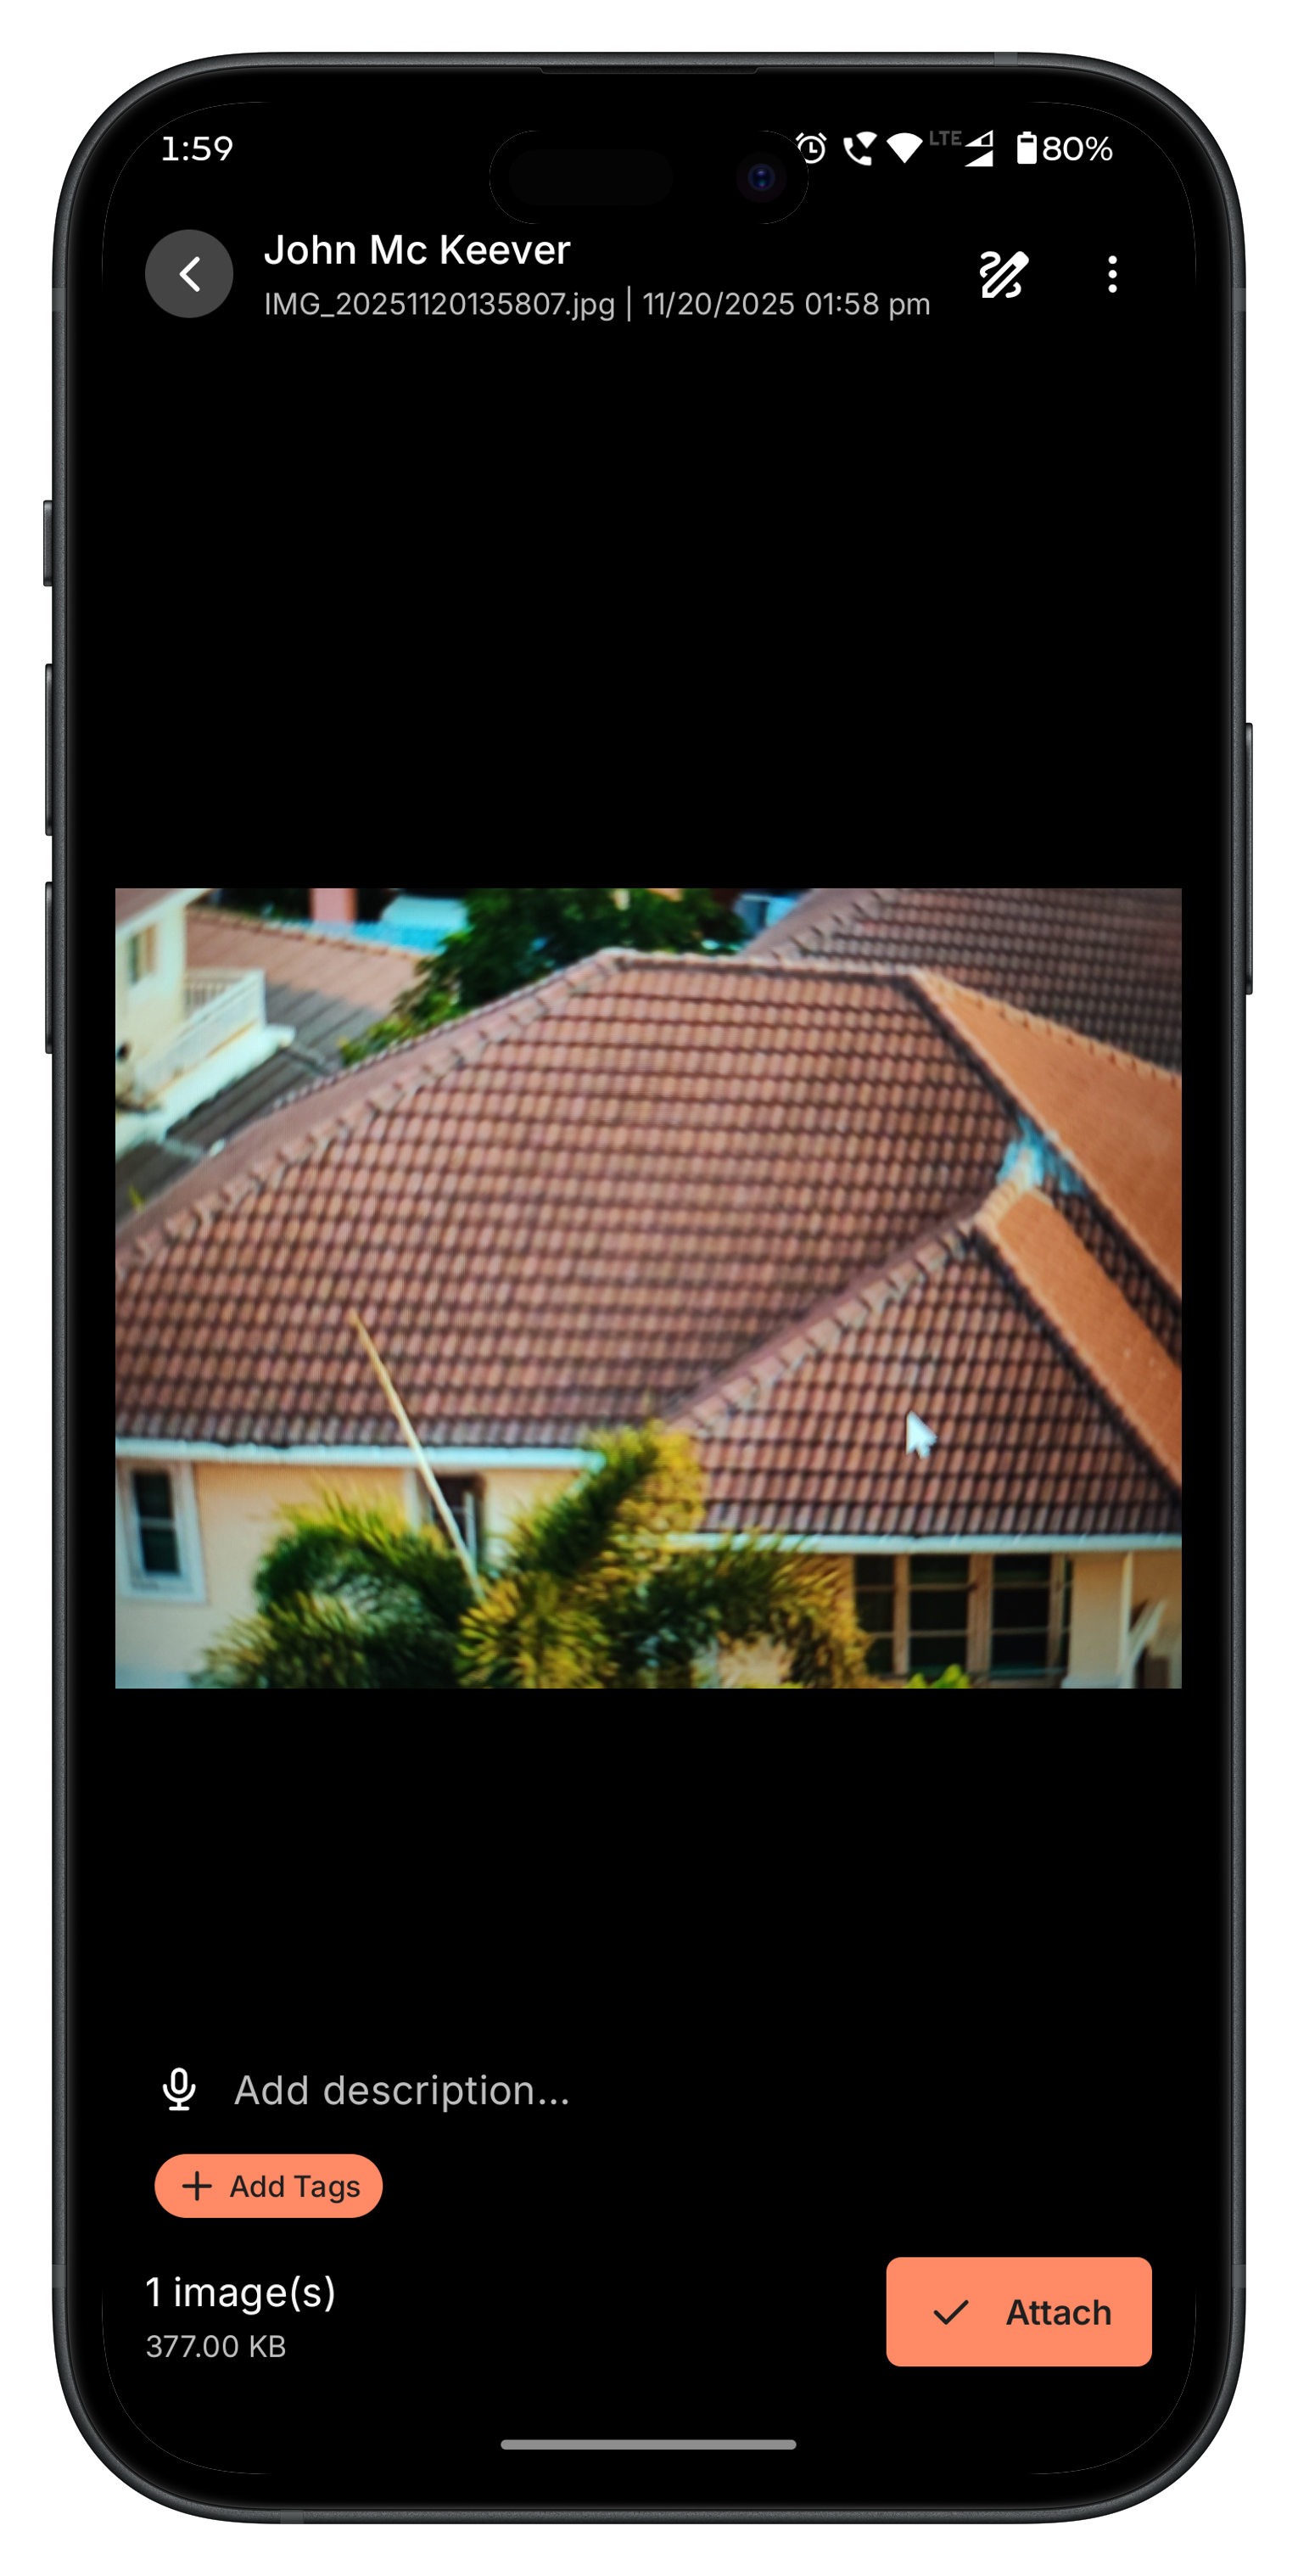
- Choose one or more images/videos.
- Add tags (optional) and tap Save.
Adding Tags to Images
Tags help organize and categorize job images for faster searchability. You can add tags:- Before capturing an image (via the Tag icon on the camera screen)
- After capturing/uploading, from the image preview.
- From the Gallery, when viewing the image in full screen.
| Role | Associate Existing Tag | Create Tag | Edit Tag | Delete Tag |
|---|---|---|---|---|
| Admin | ✅ | ✅ | ✅ | ✅ |
| Team Lead | ✅ | ✅ | ✅ | ✅ |
| Field Executive | ✅ | ❌ | ❌ | ❌ |
Filtering Media in the Job Gallery
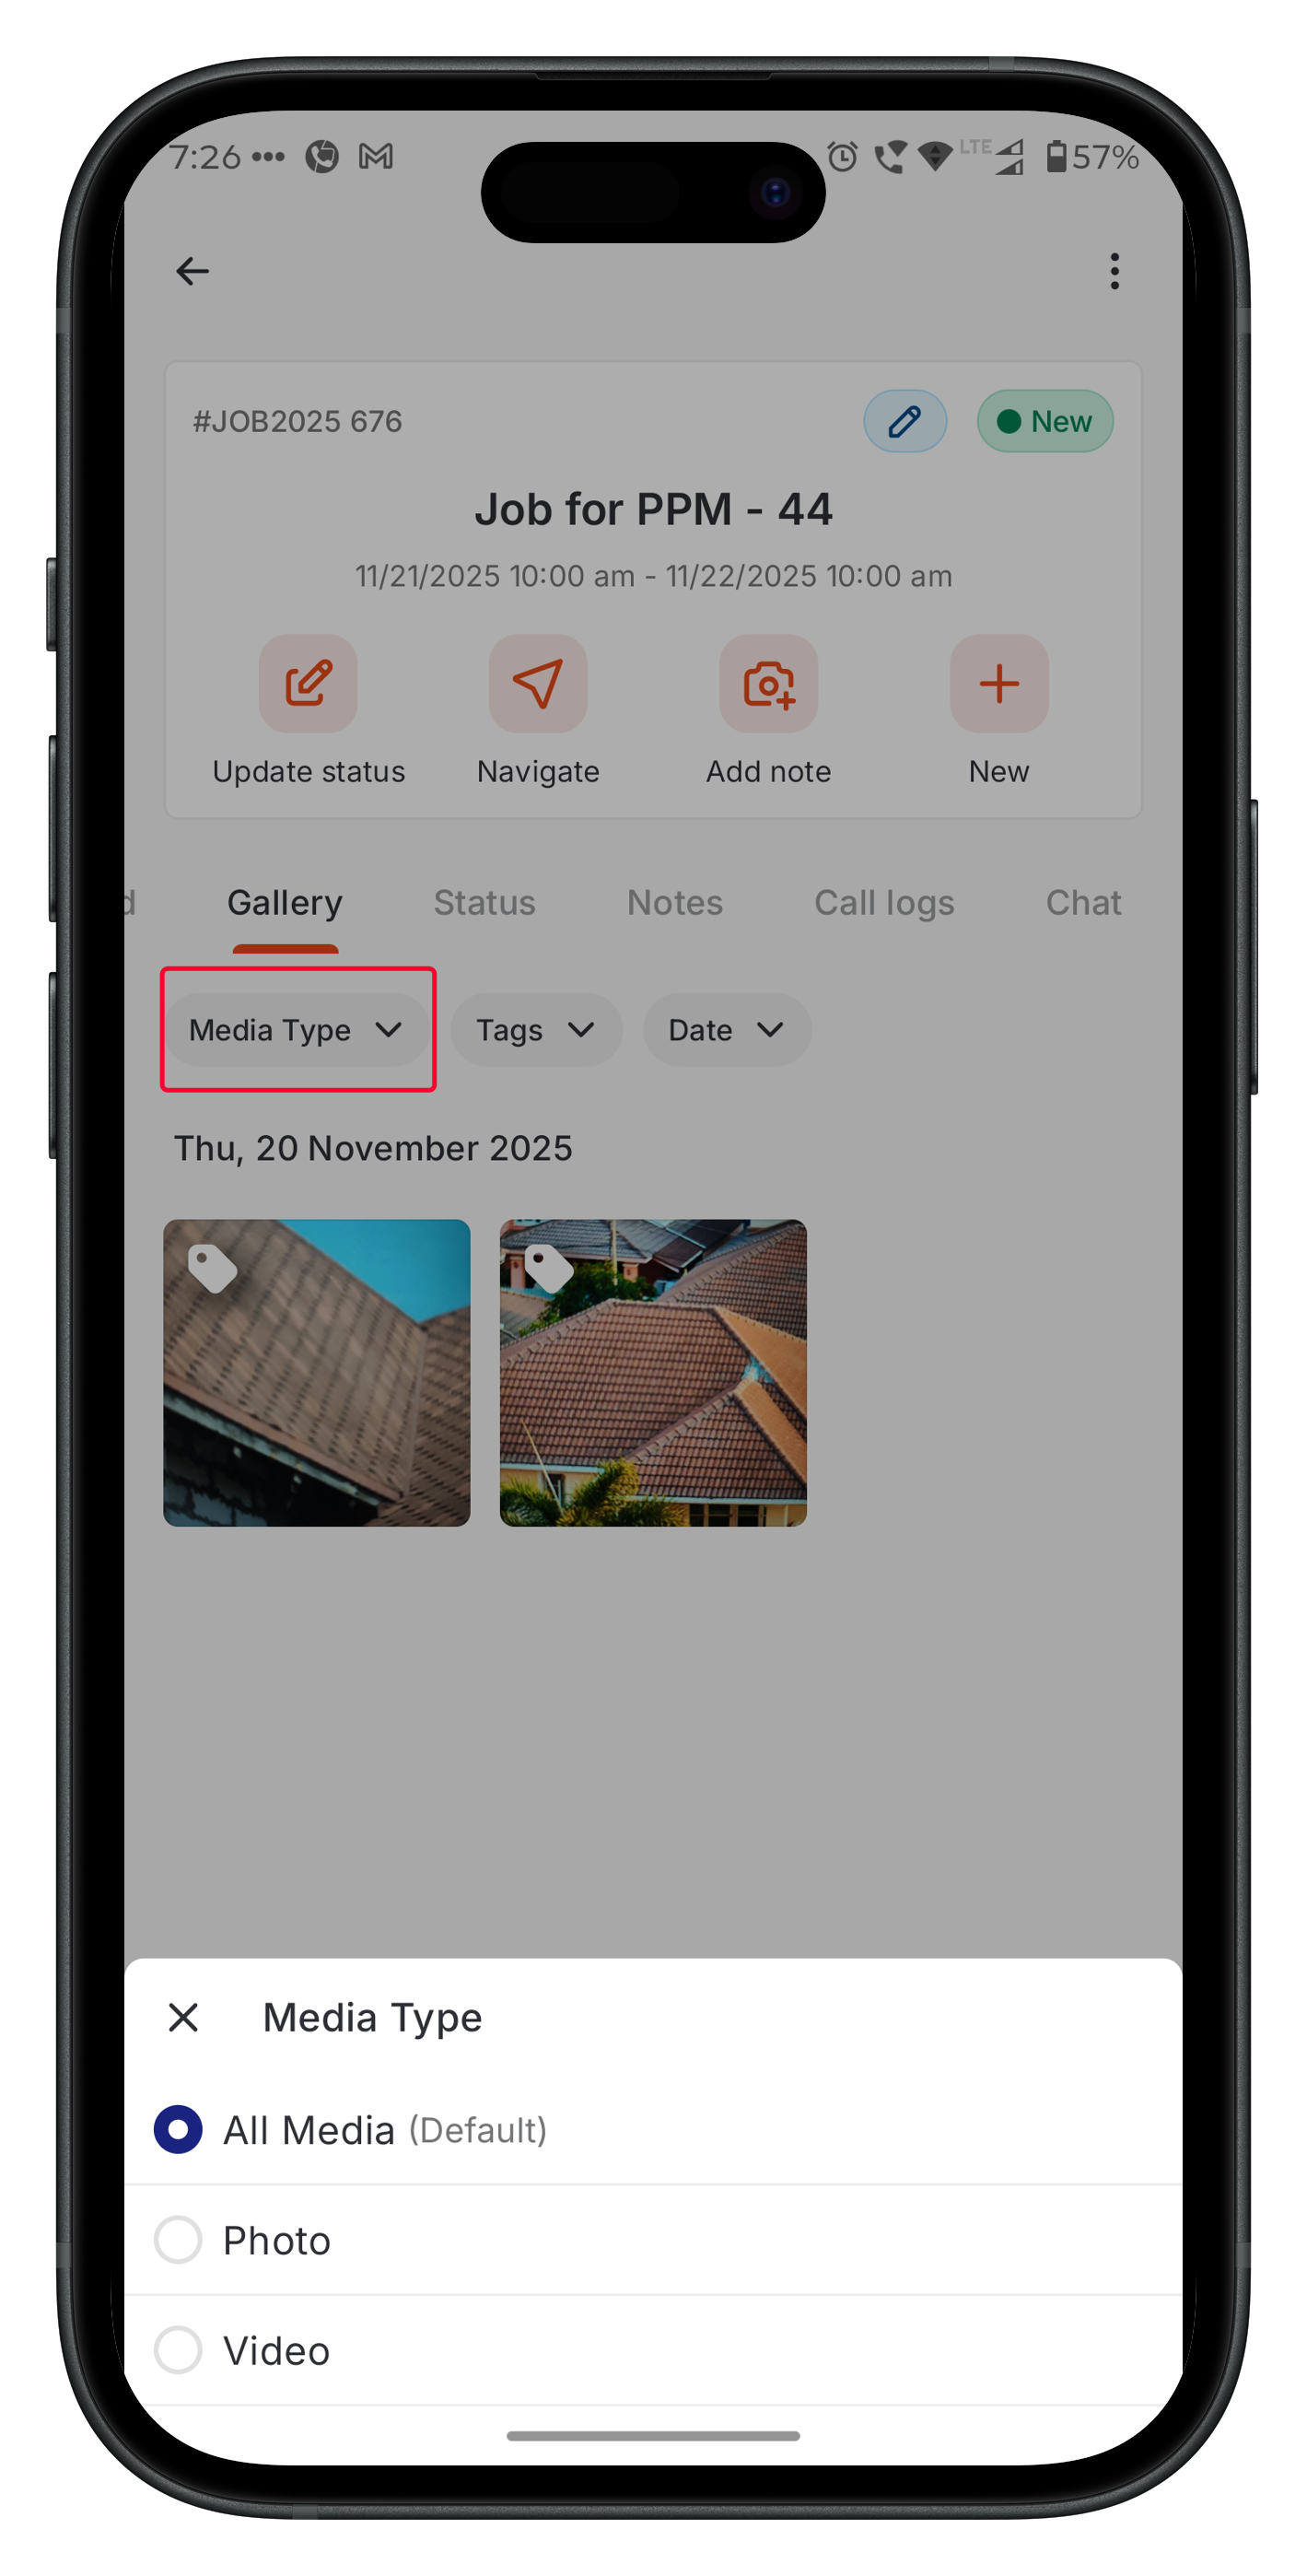
The Job Gallery provides multiple filter options to help you quickly locate specific photos or videos associated with the job. You can apply one or more filters at the same time to refine the results. 1. Filter by Media Type Use this filter to control the type of media displayed in the Gallery grid:- All Media – Shows both photos and videos.
- Photo – Displays only image files captured or uploaded for the job.
- Video – Displays only video files added to the job.
- The filter panel displays all tags used within this specific job.
- You can select one or multiple tags to narrow down the media list.
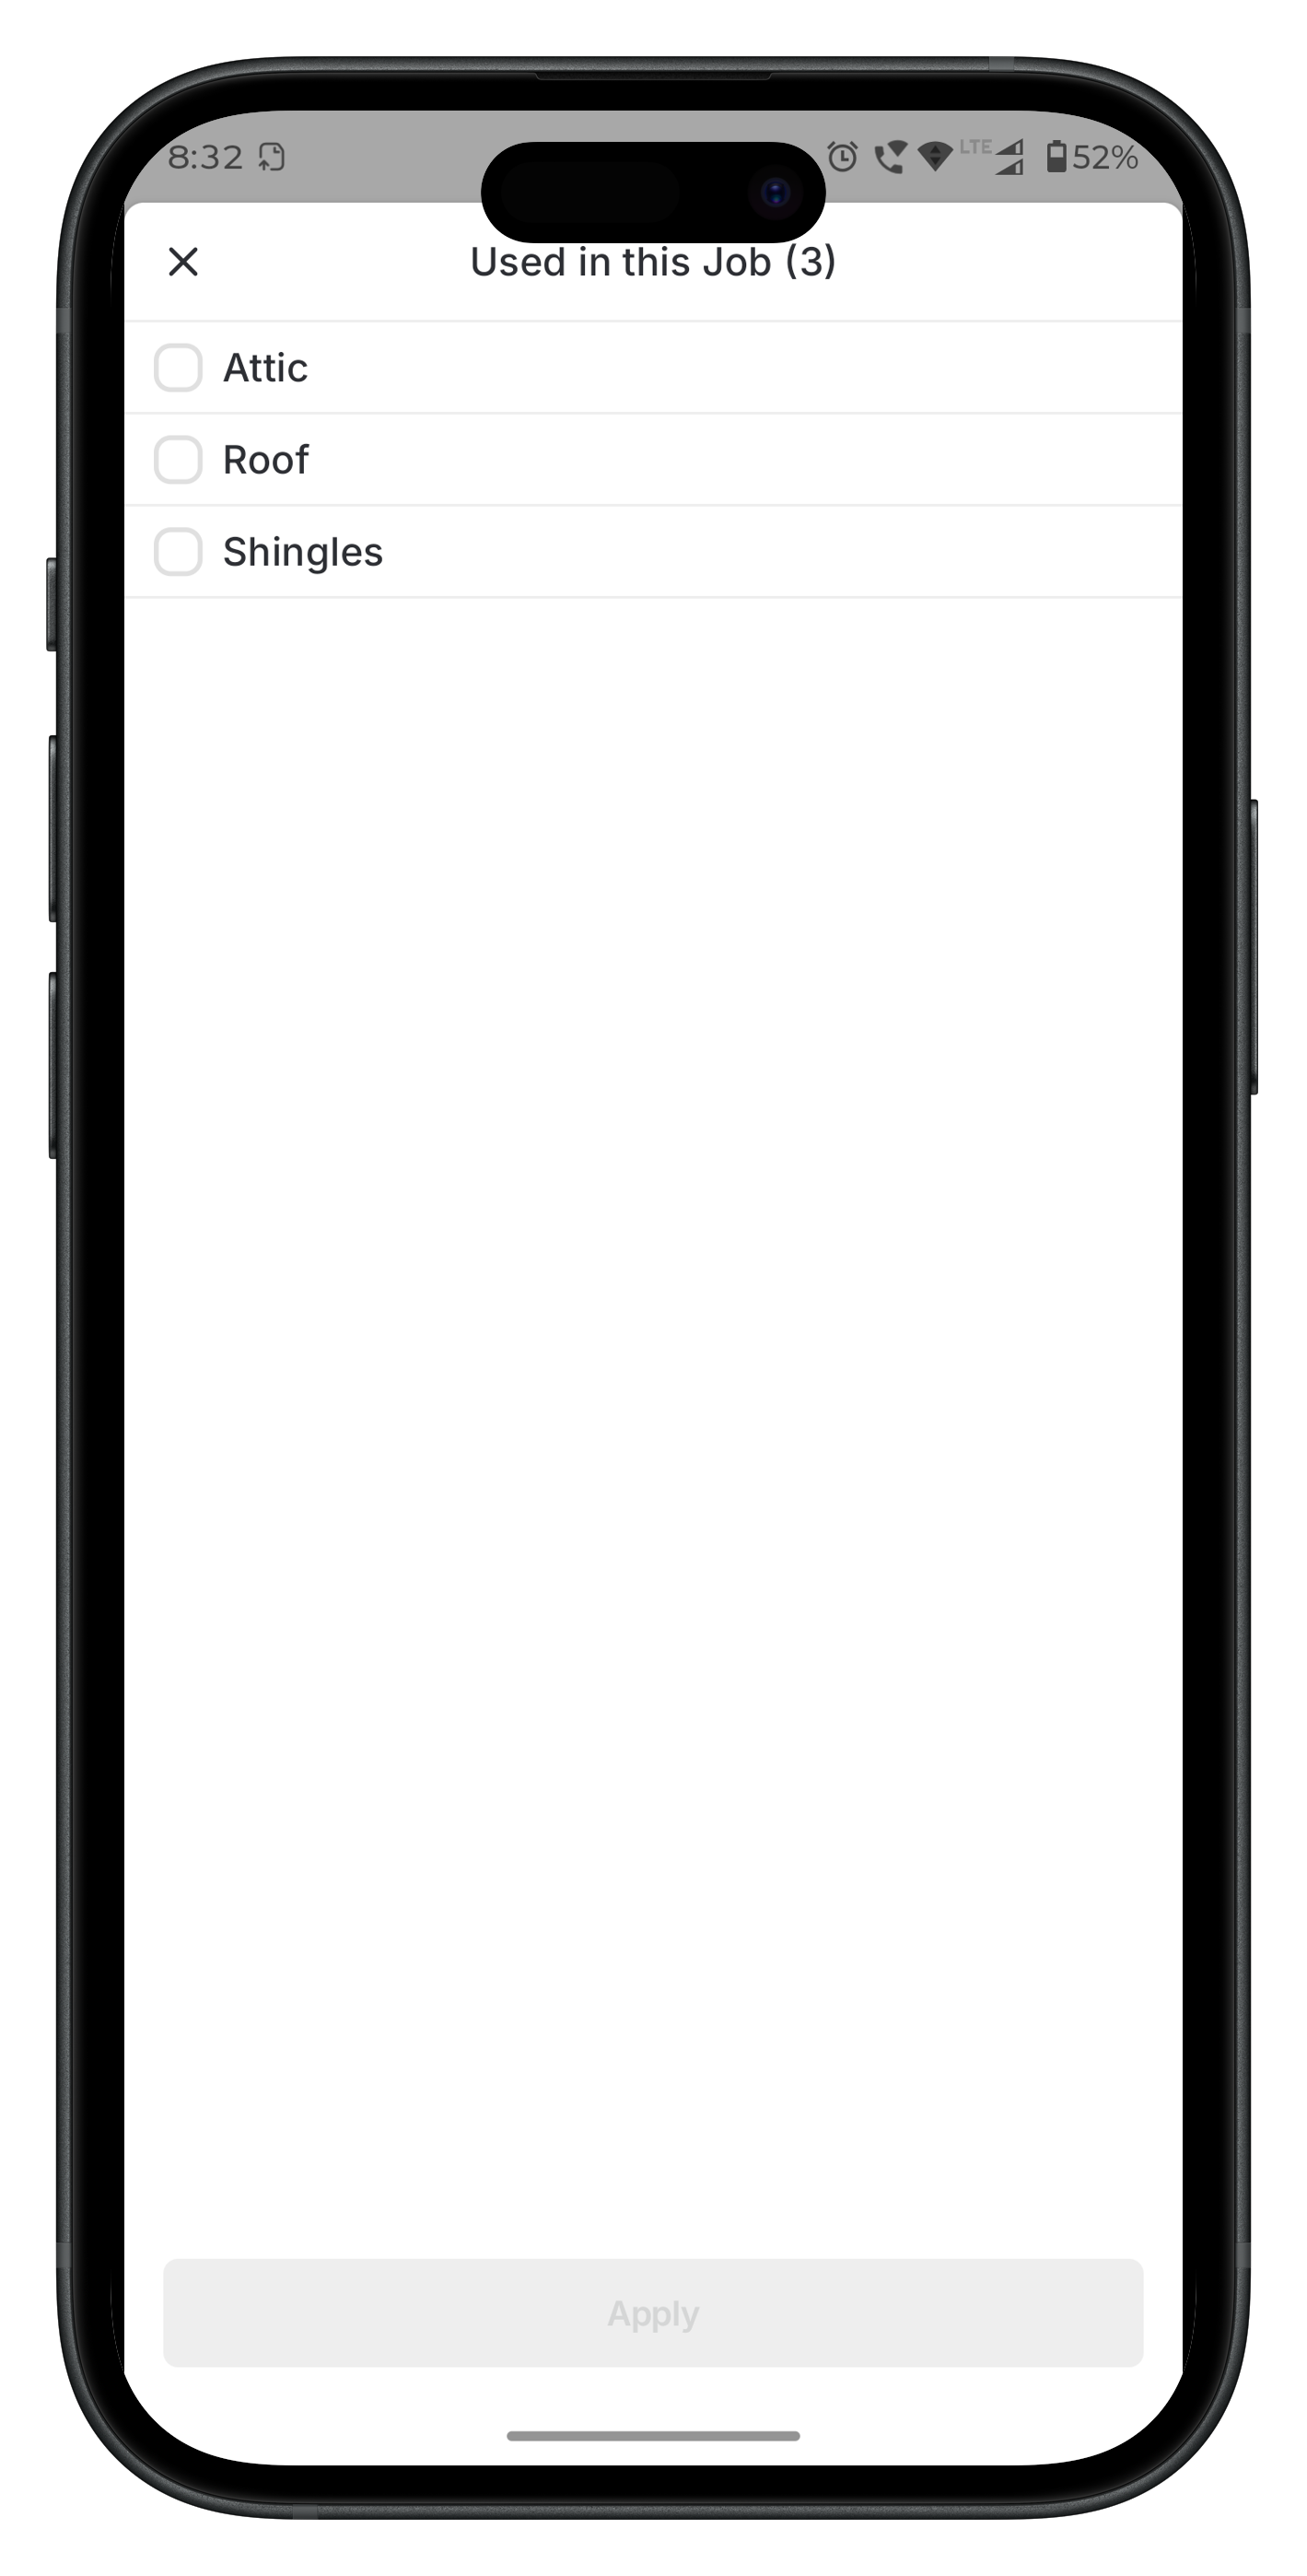
- Only media items associated with the selected tags will be shown in the Gallery.
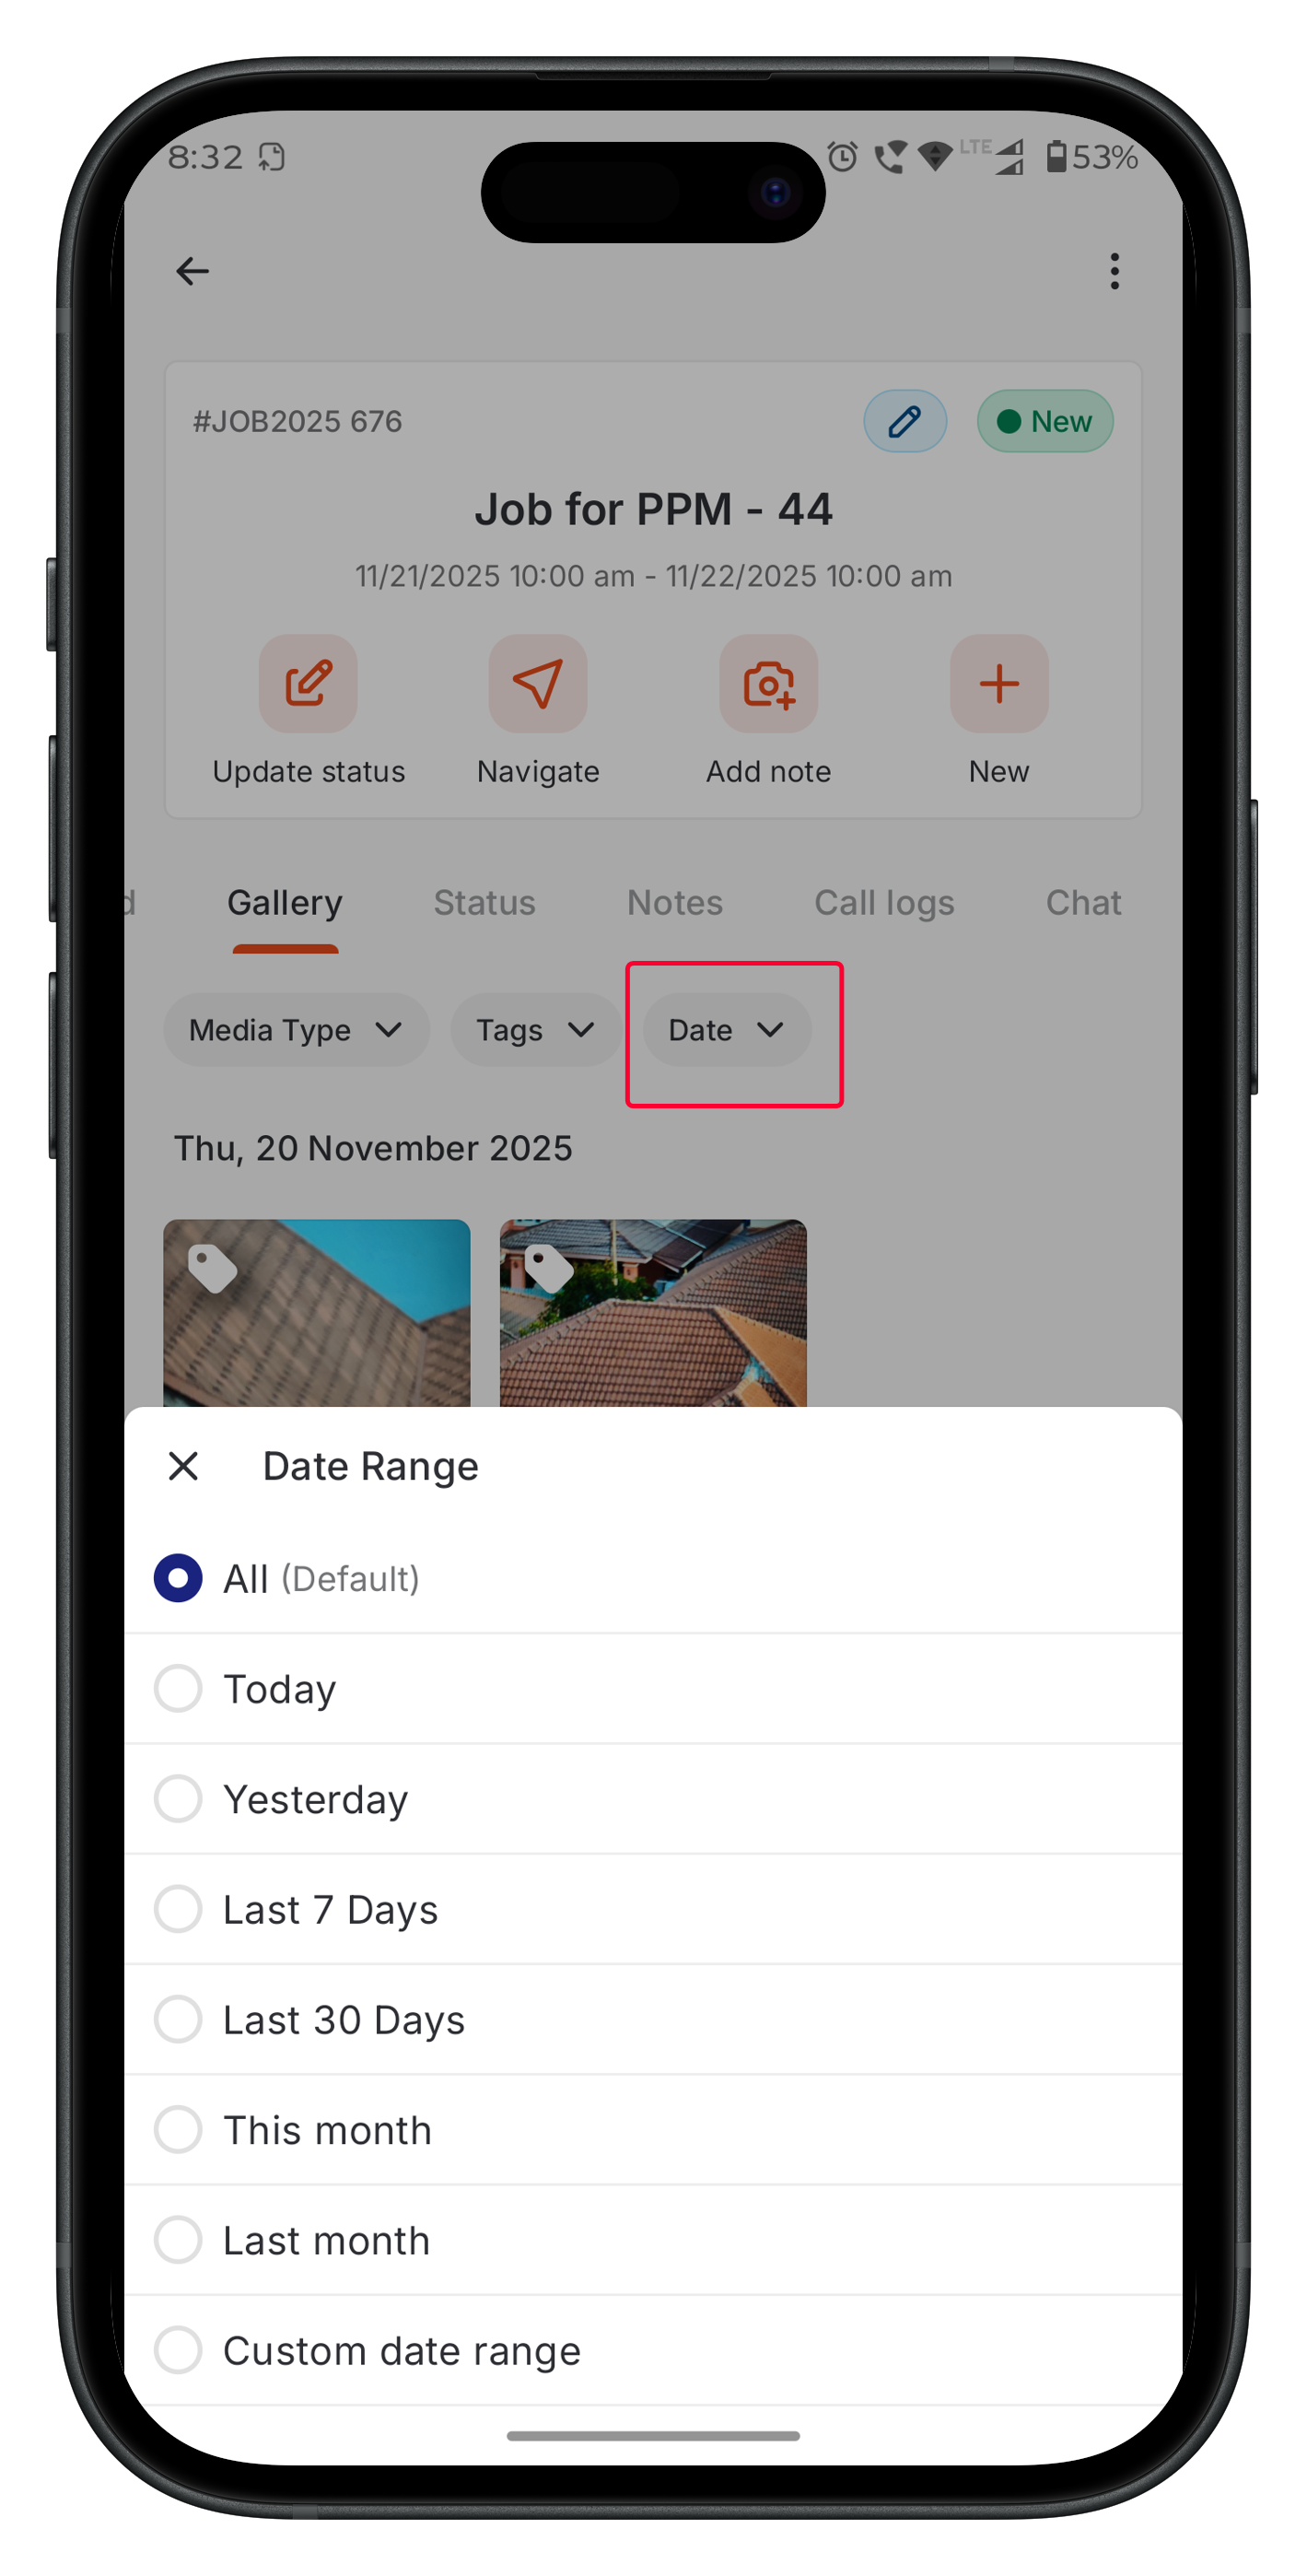
- All
- Today
- Yesterday
- Last 7 Days
- Last 30 Days
- This Month
- Last Month
- Custom Date Range – Select a start and end date based on your requirement.
Pick from Zuper Gallery
The Pick from Zuper Gallery option allows technicians to reuse existing media already available in their Zuper Gallery. This is especially useful when adding images to:- Checklist items
- Notes
- Inspection forms
Bulk select and share gallery images
The Job Gallery lets you select multiple images and share them in one go — straight to any app on your device. No more sending photos one by one from the job site.Note: This feature is available on the Zuper Field Service mobile app only. The apps available in the share sheet depend on what is installed on your device.
Navigation: Zuper Mobile App → Jobs → Job details → Gallery tab
- Open the job and select the Gallery tab.
.png?fit=max&auto=format&n=uUJ6wlWL66Lh8YOx&q=85&s=85d60d921347e38145aeb33c585e7ce0 "Mob Album1 (1)")
- Tap the images that you want to share, and a bottom toolbar shows the option to share.
.png?fit=max&auto=format&n=2on3kNjdNlLELU4r&q=85&s=317fdaf97506d17277451bc952ffd422 "Mob Album1 (1)")
- Select the app you want to use and complete the sharing action.
")
Key Highlights
- Images captured from checklists, inspection forms, notes, or direct upload (online/offline) appear automatically in the Job Gallery.
- Tags are currently supported only for images.
- The Zuper Camera Component provides a unified tagging and preview experience across Gallery and Notes.
- Multiple tags can be applied to a single image for highly accurate categorization.
- Images uploaded to the Job Gallery are not automatically linked to the job’s assets. To associate an image with an asset, navigate to the asset record and manually attach the image.
- The Image Tags feature in the Zuper Mobile Gallery transforms how field technicians and Admins capture, organize, and retrieve job-related images. This feature enhances documentation, streamlines workflows, and improves collaboration by enabling contextual tagging and role-based management.
FAQs
Why do I not see the Gallery tab?
Why do I not see the Gallery tab?
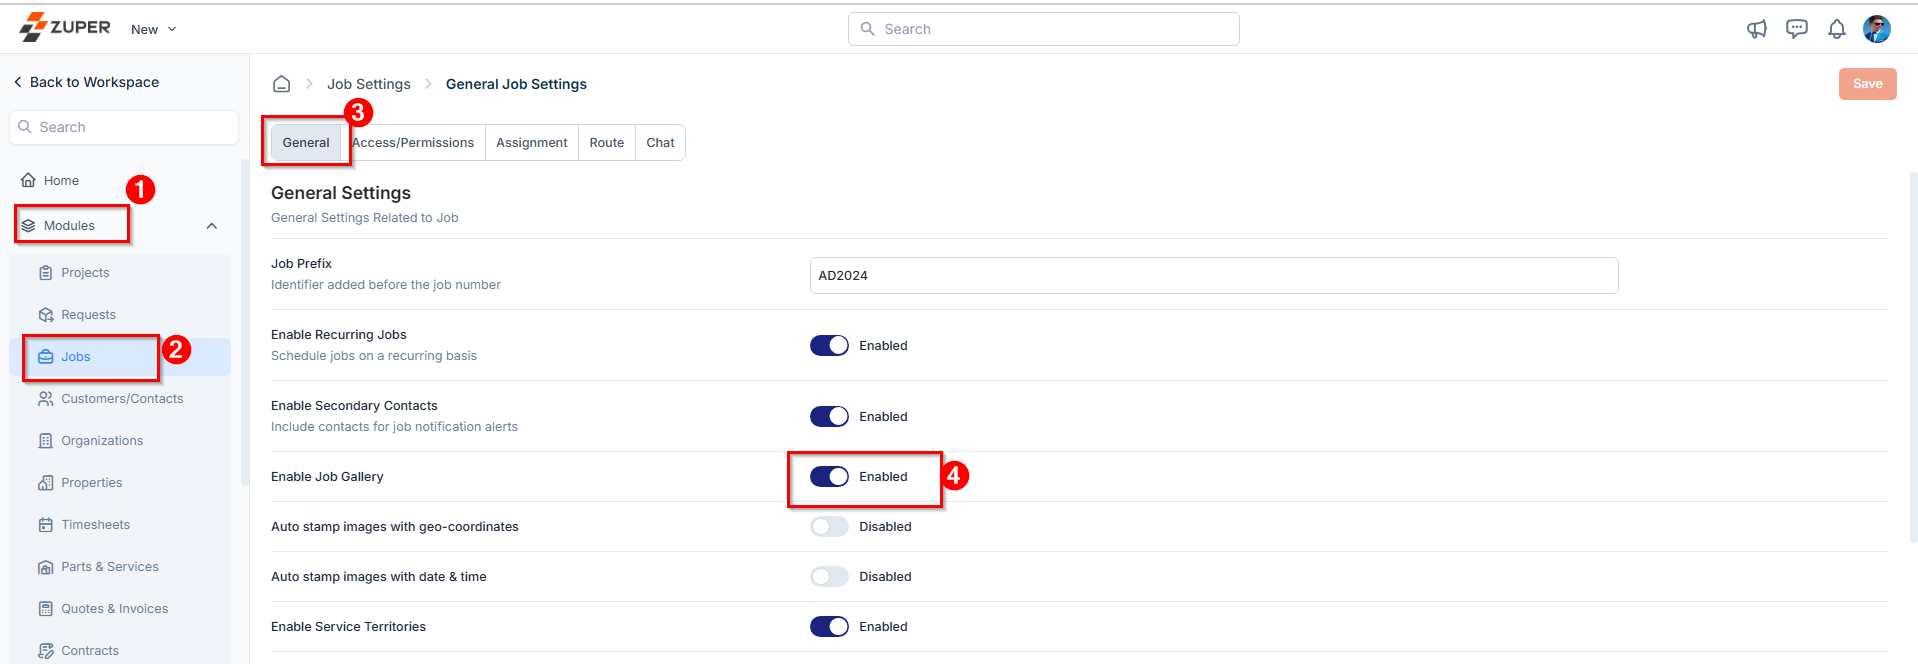
The Gallery tab is disabled by default. To enable it, go to Settings > Organization Settings > Job Settings and turn on Enable Job Gallery.
What file types does the Gallery support?
What file types does the Gallery support?
The Gallery displays standard media files such as JPG, PNG, and MP4. Other file types, for example PDFs, remain in their original sections and do not appear in the Gallery.
Can I tag images after uploading them to the Gallery?
Can I tag images after uploading them to the Gallery?
Yes. Admins can edit tags for any image in the Gallery by selecting the Tag icon on the image thumbnail and accessing Tag Management. Field Executives can reassign existing tags but cannot create new ones.
How many tags can I apply to a single image?
How many tags can I apply to a single image?
Does removing a photo from the job gallery delete it permanently?
Does removing a photo from the job gallery delete it permanently?
No. Removing a photo from the job gallery moves it to the Deleted Items album for that job, where it stays indefinitely. You can restore it to the main gallery at any time. Permanent deletion is not triggered by this action.
Does removing a photo from the job gallery affect my checklists, notes, or inspection forms?
Does removing a photo from the job gallery affect my checklists, notes, or inspection forms?
No. The photo remains visible in any checklist, note, or inspection form where it was added. However, you can no longer edit the photo’s tags, description, or annotations from within those records once it has been removed from the gallery. Restore the photo to re-enable editing.
Where does a restored photo go?
Where does a restored photo go?
A restored photo returns to the job’s default gallery. It does not return to any custom album it was organized into before removal.
Is there a record of who removed a photo?
Is there a record of who removed a photo?
Yes. Every removal is recorded in the job’s activity log. The log shows the action, the user who performed it, and the time it occurred.
Can I remove multiple photos at once?
Can I remove multiple photos at once?
Yes. Select the photos you want to remove using the checkboxes, then select Delete from the bottom action bar. You can also use Select All to remove all photos in view at once. The same bulk selection applies when restoring photos from the Deleted Items album.
I removed a photo from Photo Feed. Where did it go?
I removed a photo from Photo Feed. Where did it go?
The photo moved to the Deleted Items album of the job it belongs to. Open that job, go to Gallery > Albums > Deleted Items, and restore it from there. It returns to the original job gallery.
I removed a photo from the customer or project or property gallery. Can I restore it?
I removed a photo from the customer or project or property gallery. Can I restore it?
No. Photos removed from customer, property, or project galleries are permanently deleted. There is no Deleted Items album or restore option in these galleries.If the issue continues, contact Support.