Navigation: Jobs -> Job Listing page -> Job Details
Accessing the jobs listing page
The Jobs Listing Page in Zuper provides tools to manage your view, select columns, and save customized layouts. All view configurations can be created and managed directly from the module’s listing page. Default Listing Behavior Zuper maintains the system’s default listing behavior, ensuring that existing configurations and pre-set views remain unchanged. When you access the Jobs Module Listing Page for the first time, the default view appears with commonly used columns such as Work Order Number, Job Title, Contact, Users/Teams Assigned, Category, and Service Address. However, the Jobs Listing Page also supports flexible layout customization. You can select and reorder columns, apply different views, save personalized views, and configure permissions to provide the appropriate access for your team. Use the available options to tailor the layout to your workflow and save it for future use.Create view configuration
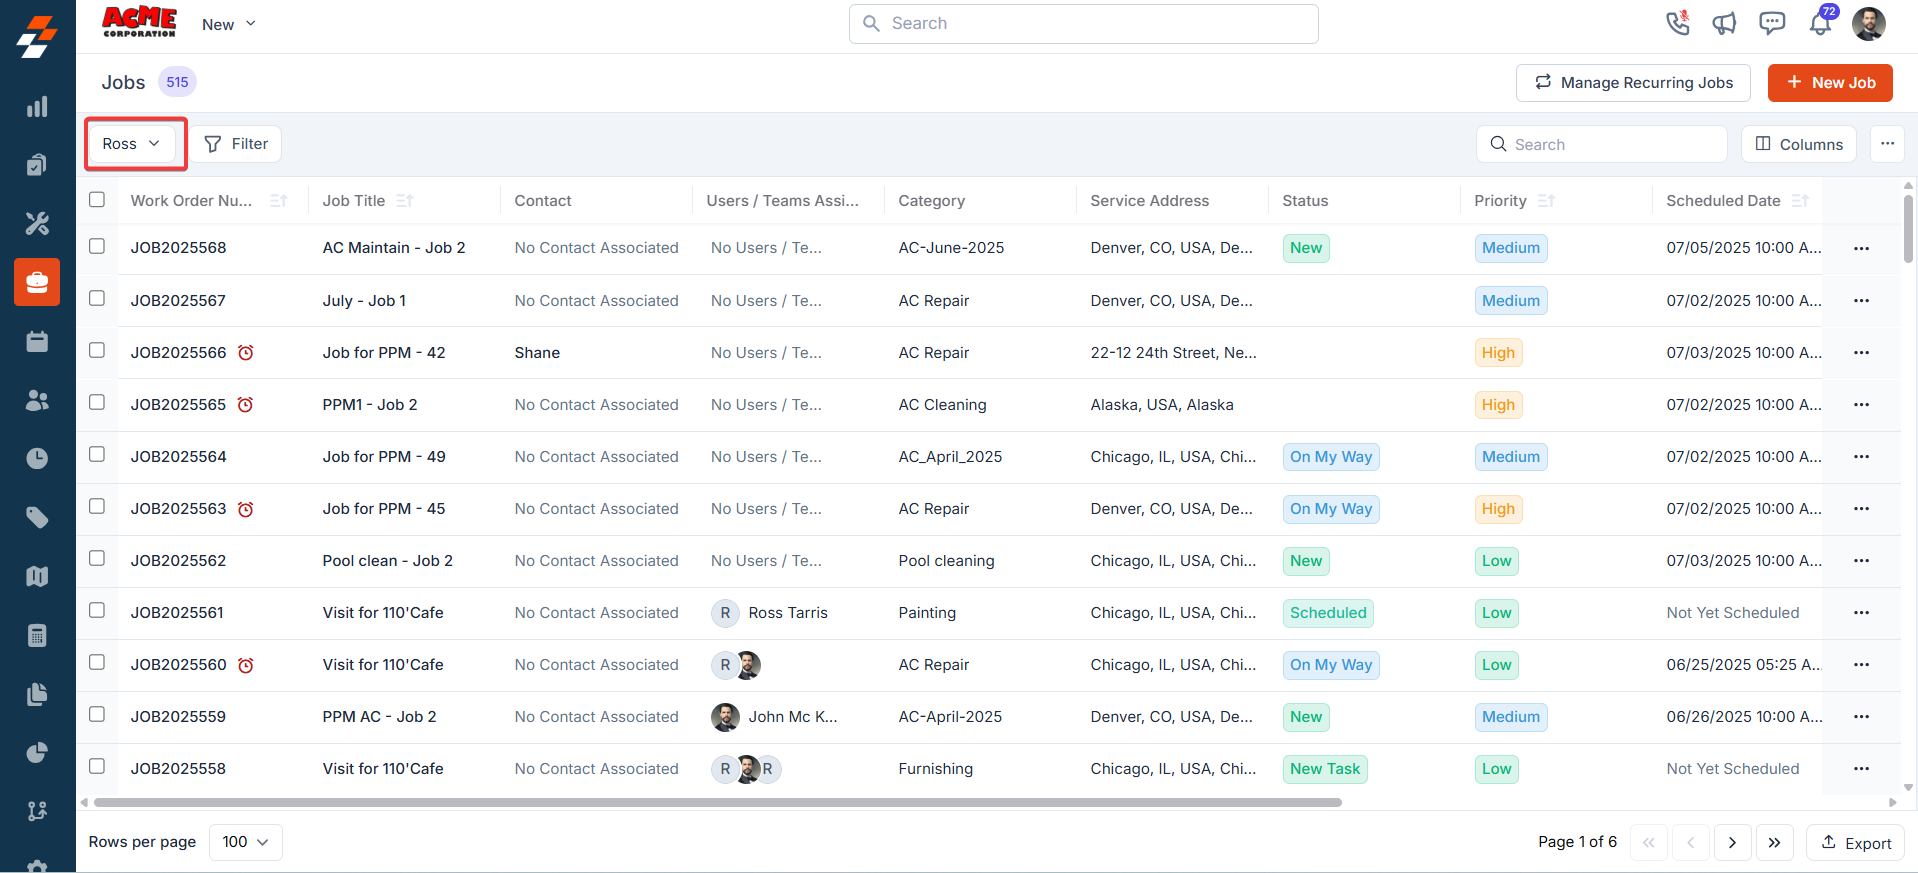
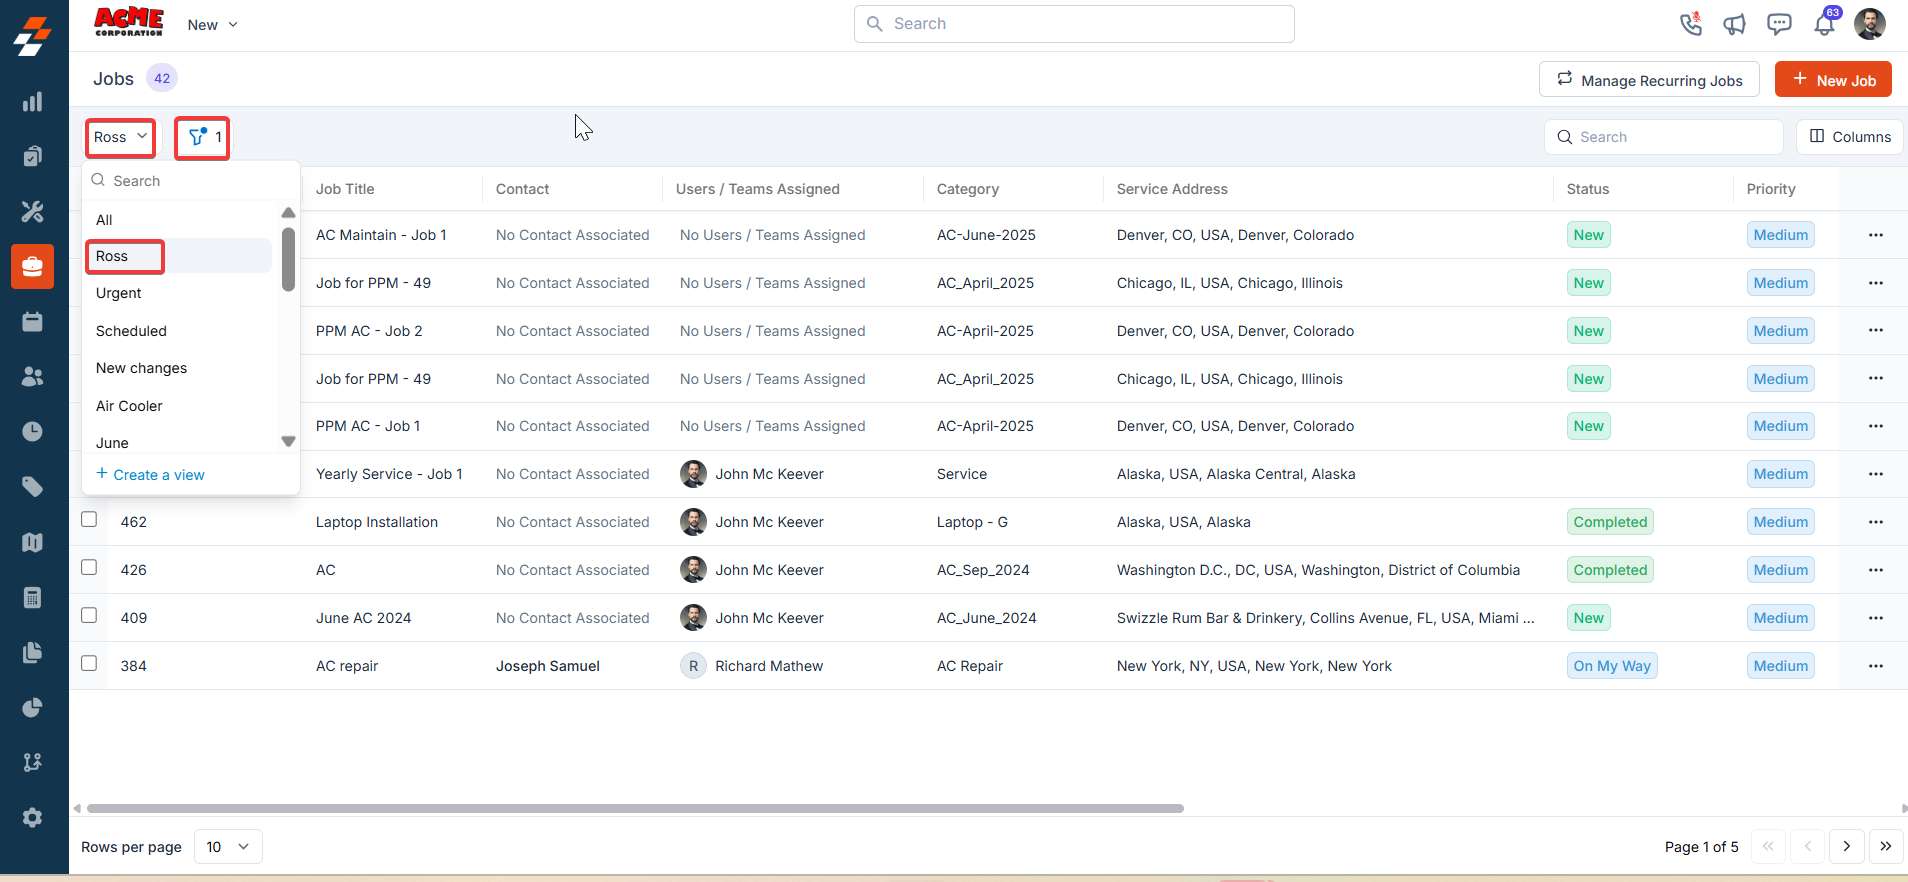
Selecting columns You can choose which columns to display to focus on relevant data: 1. Select the “Jobs” module from the left navigation menu. You can view the listing page.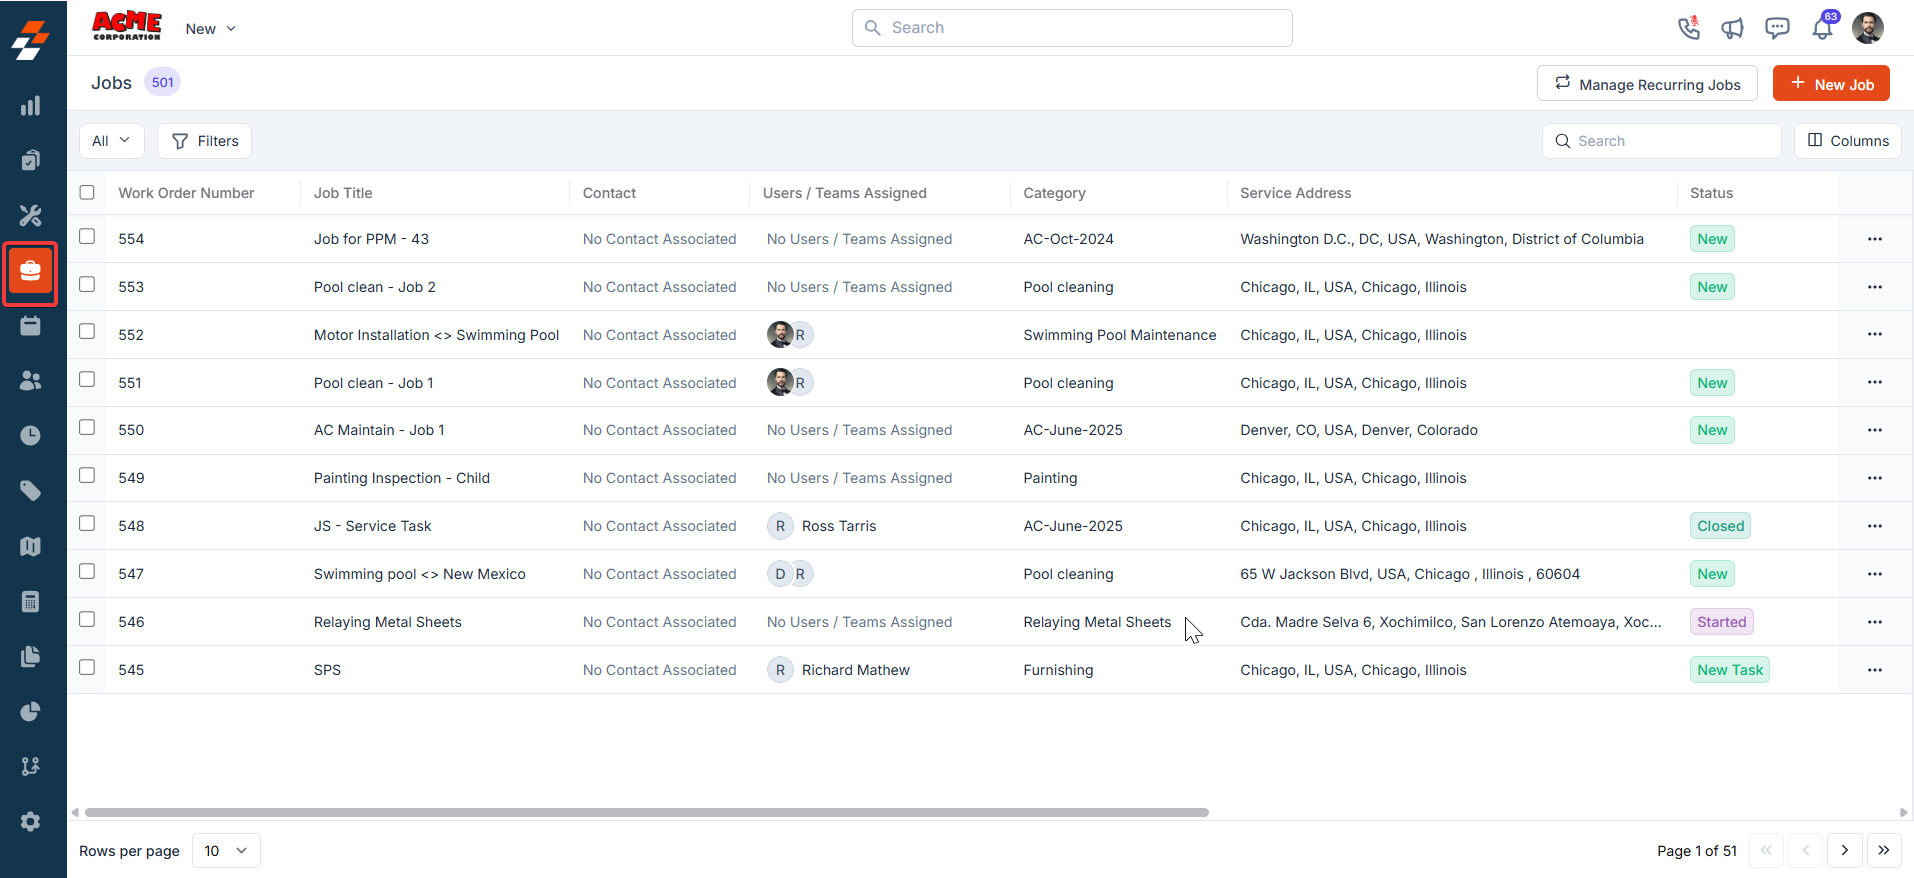
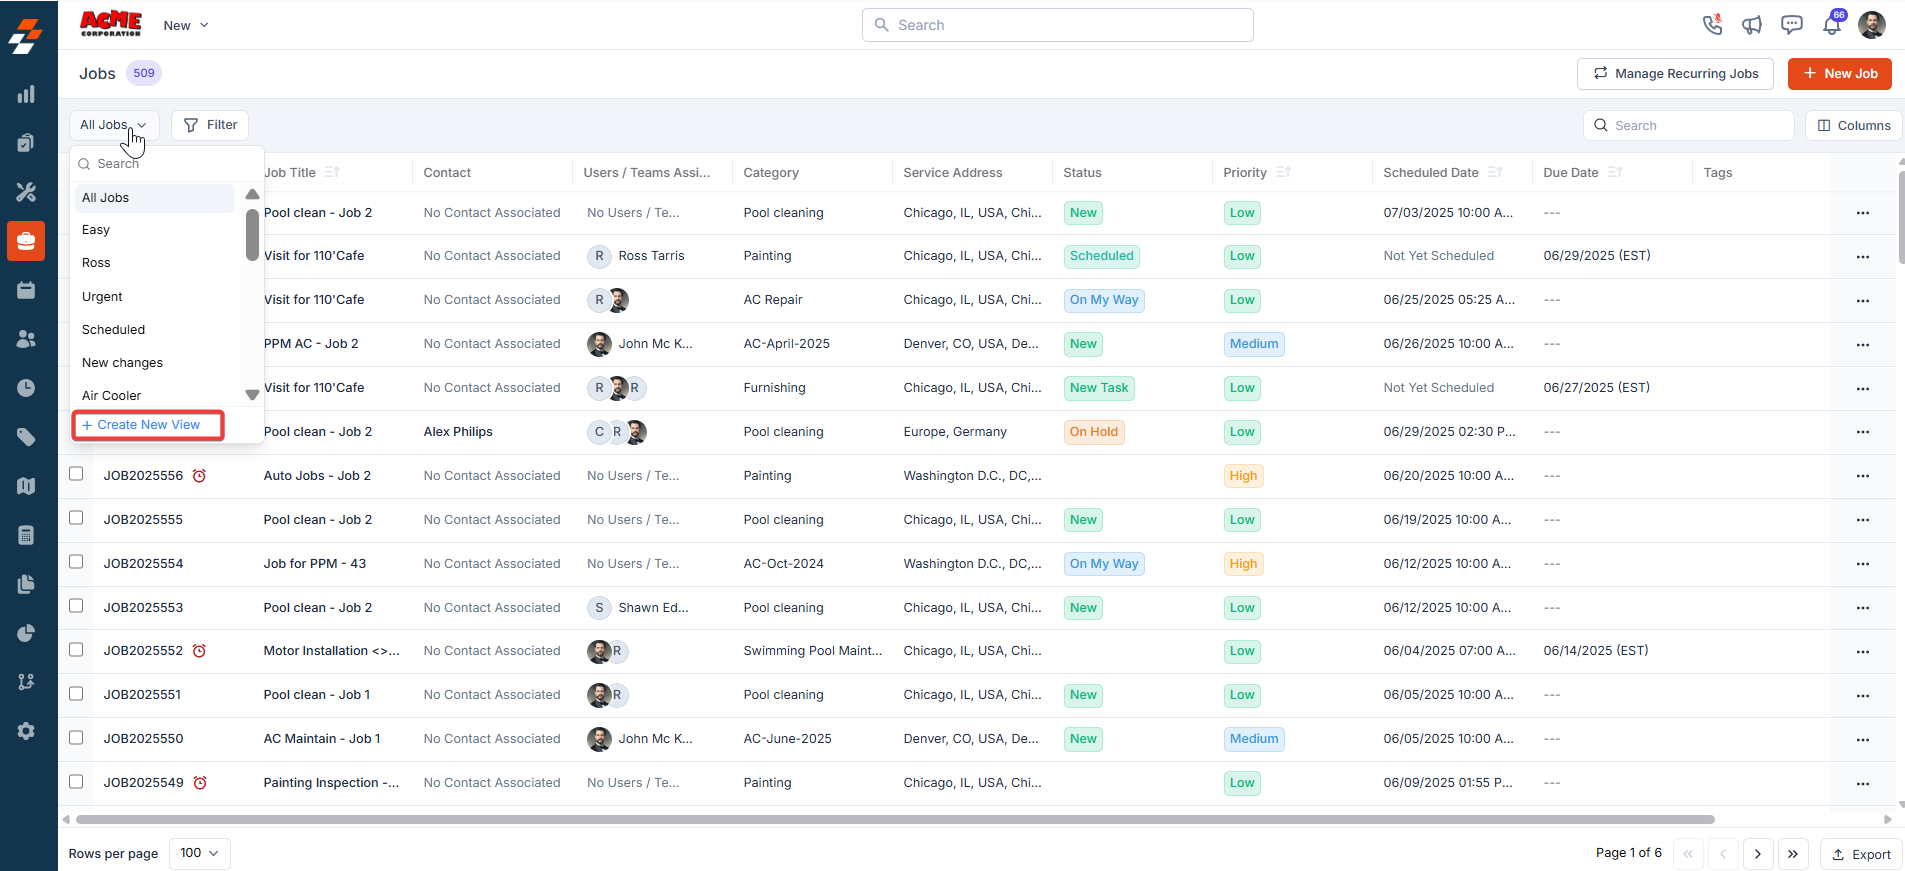
- From the “Views” list, click “+Create a view.”
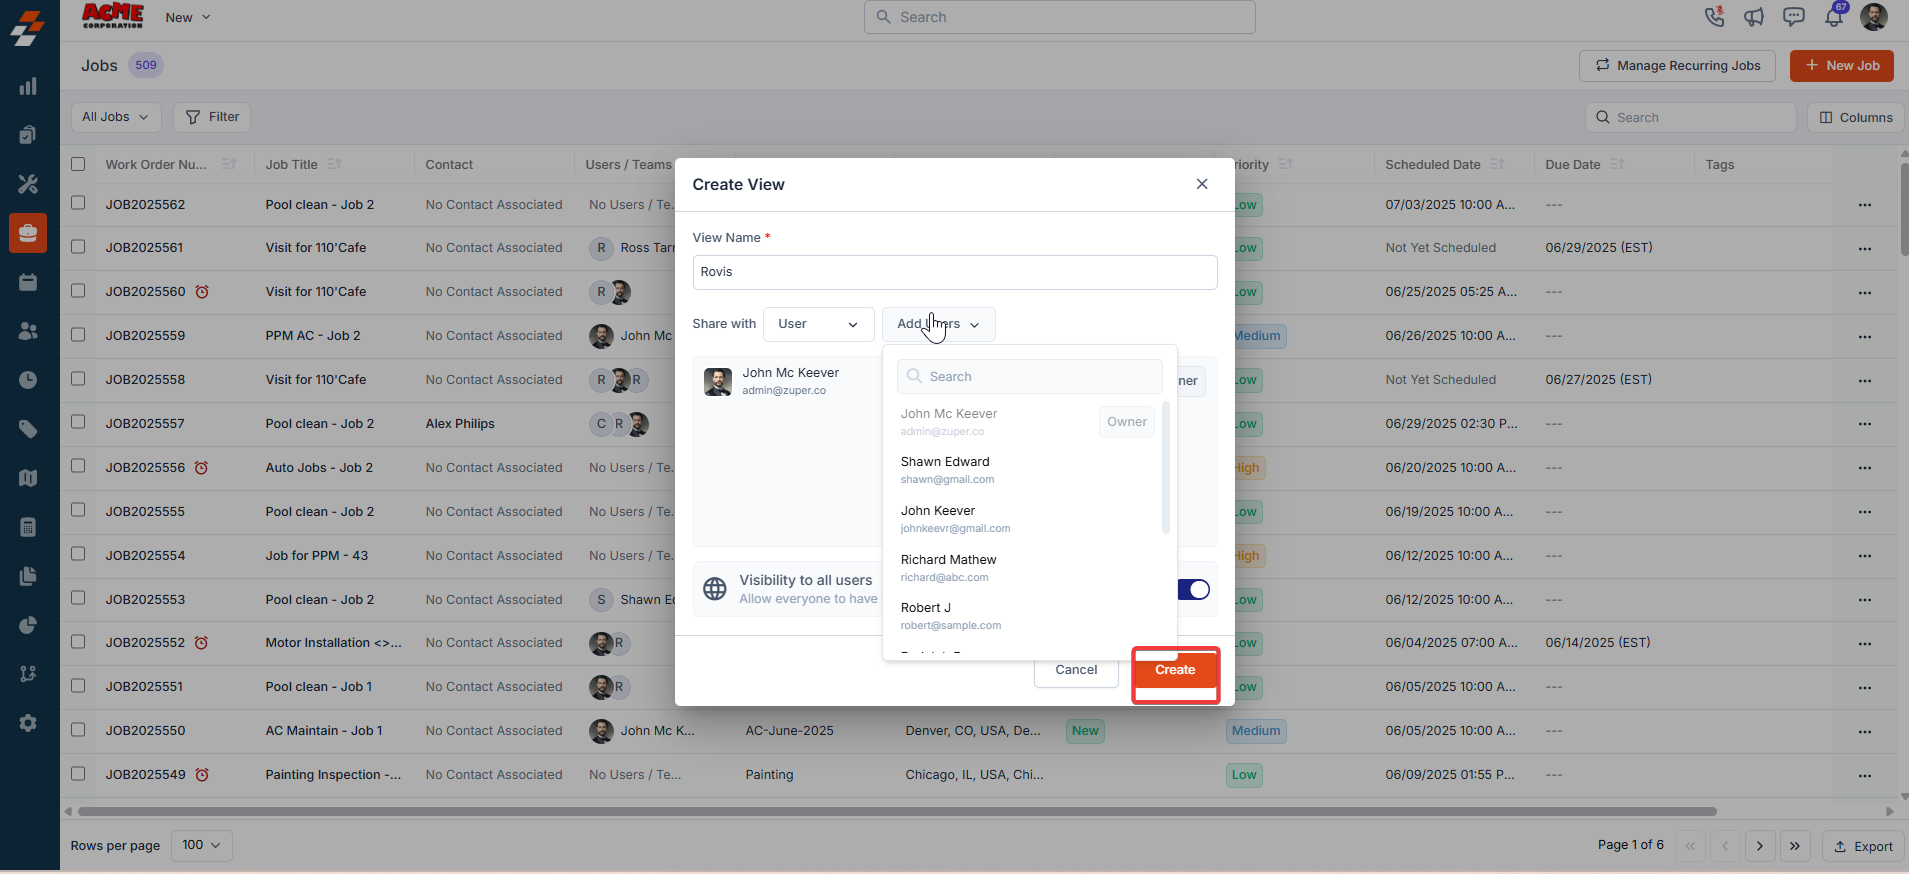
- A “Create View” dialog box appears. Enter the following details:
- View Name (Mandatory) – Enter the view name.
- Share with - Select any one of the options (User, Team), and you can add the relevant users.
- Visibility to all users – Toggle on to make this view visible.
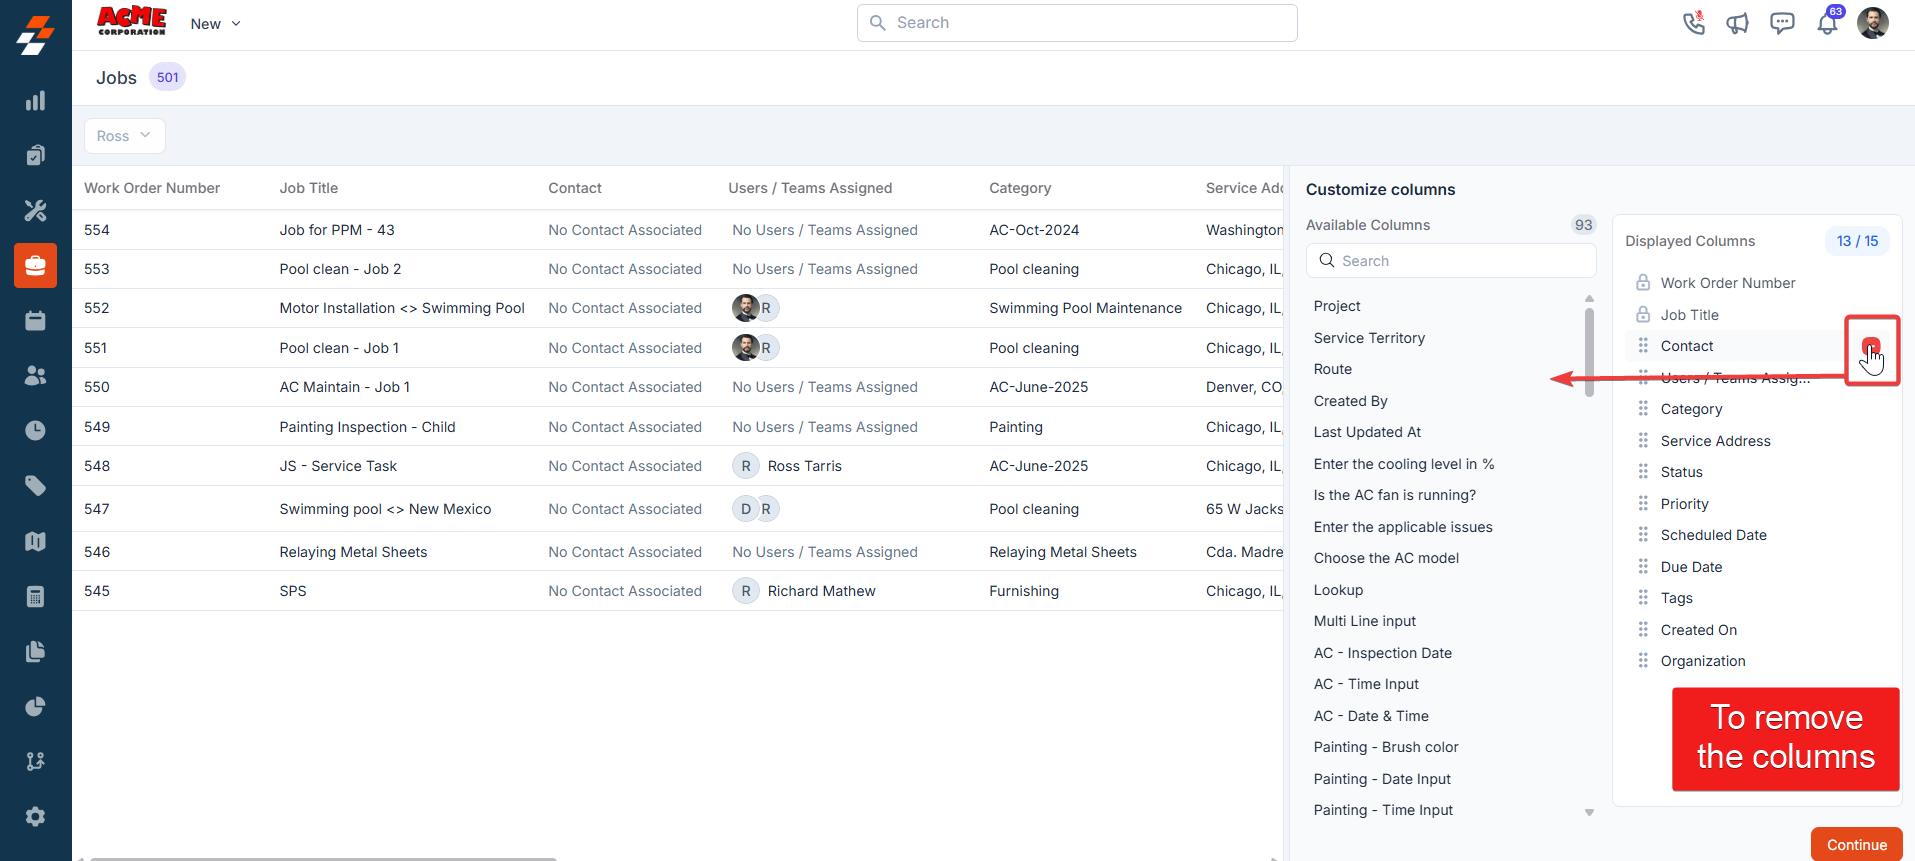
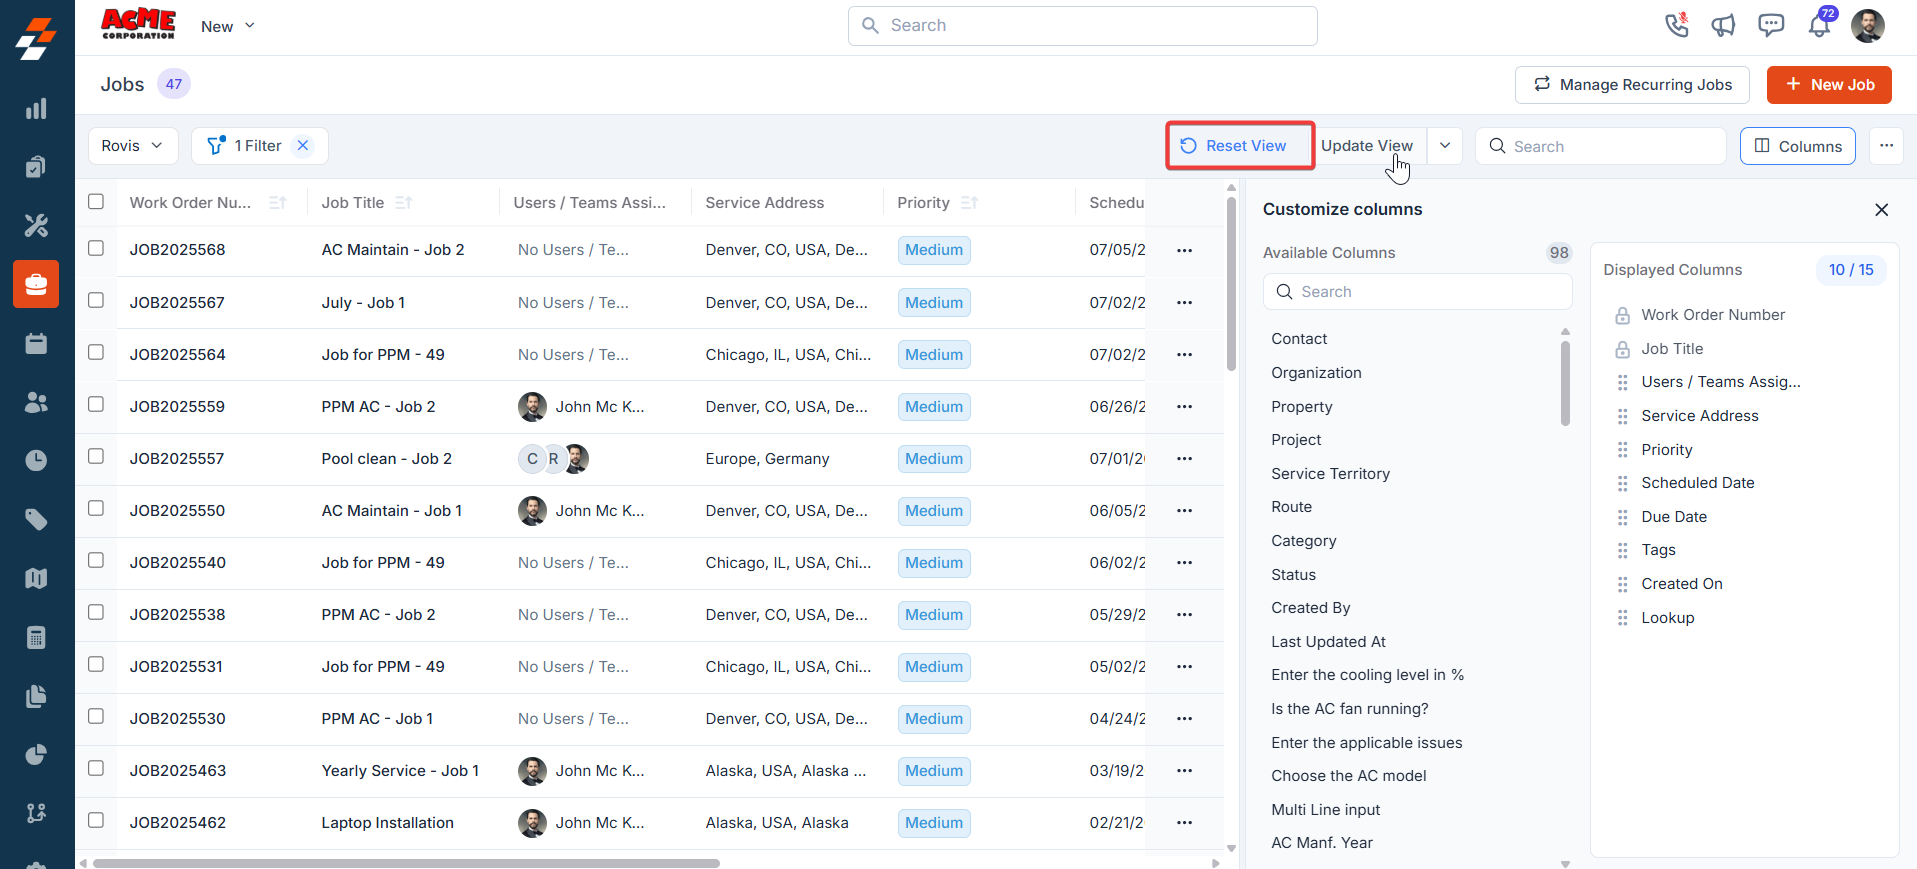
- Once you click “Create,” the Columns sidebar appears, showing “Available Columns” and “Displayed Columns.” To add a column, drag and drop it from the “Available Columns” list on the left to the “Displayed Columns” list on the right. Once done, click “Continue.”
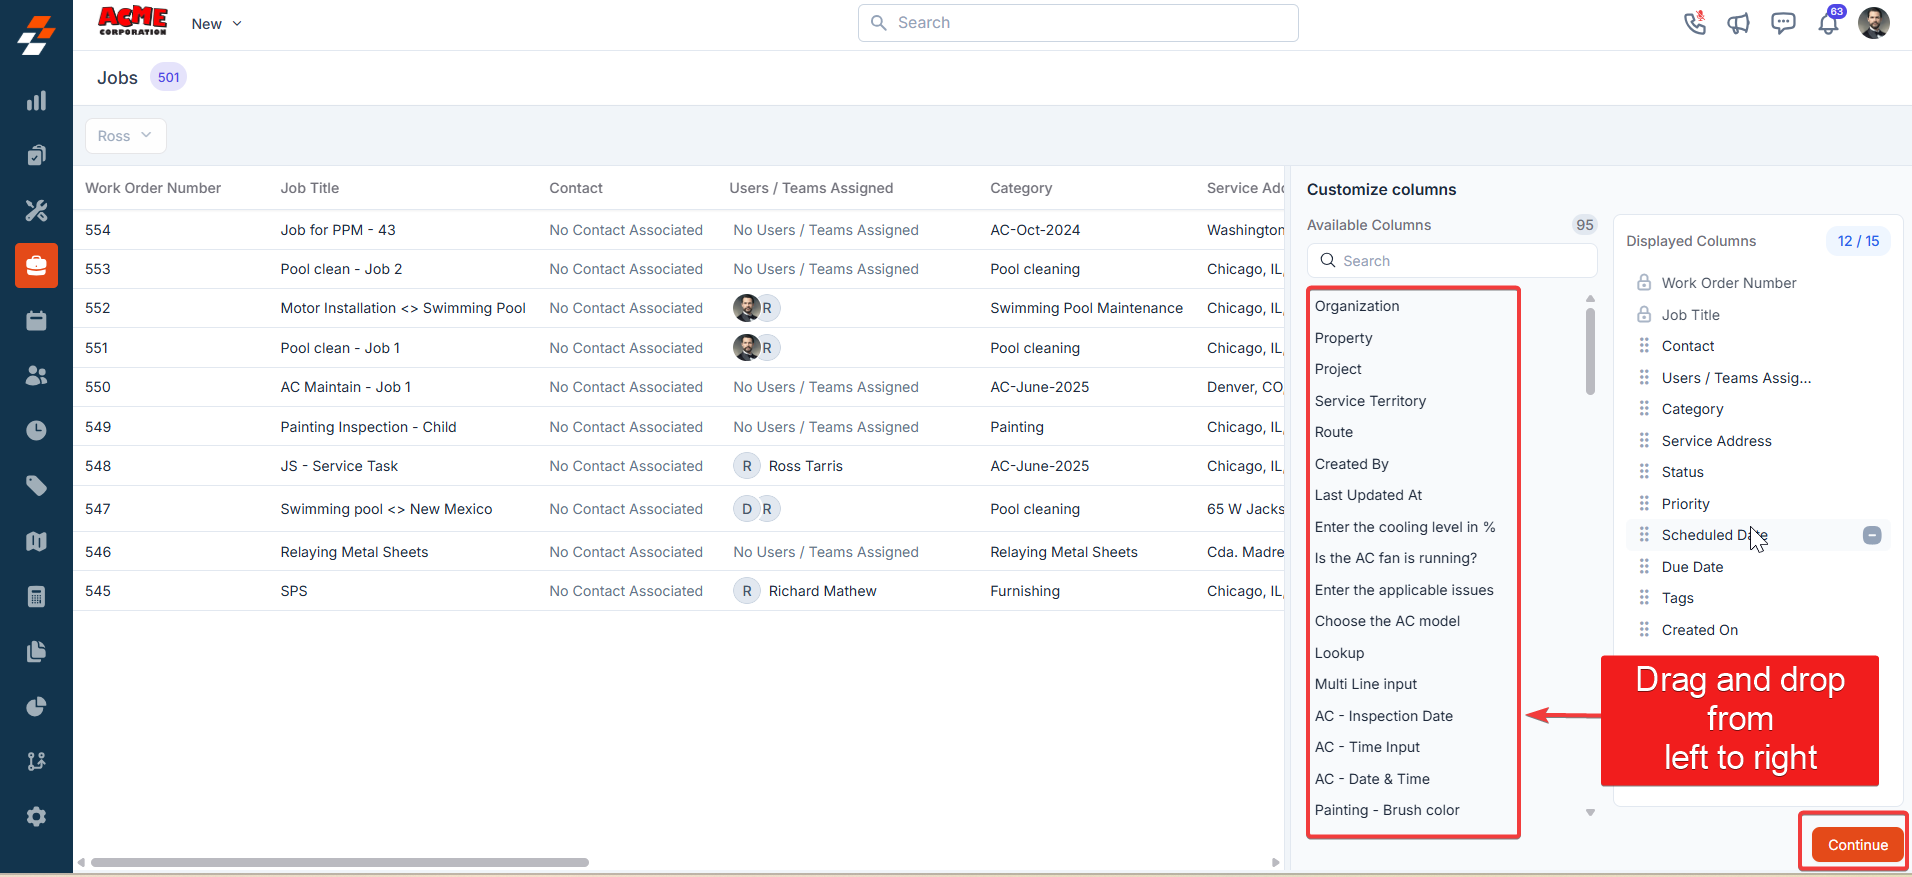
- To remove a column, drag it from the “Displayed Columns” list back to the “Available Columns” list or click the remove icon next to the column name. Click Continue to apply the changes.
- If you wish not to add any filter, click “Skip and Save” to create the view.

- The view is saved successfully.
Applying filters
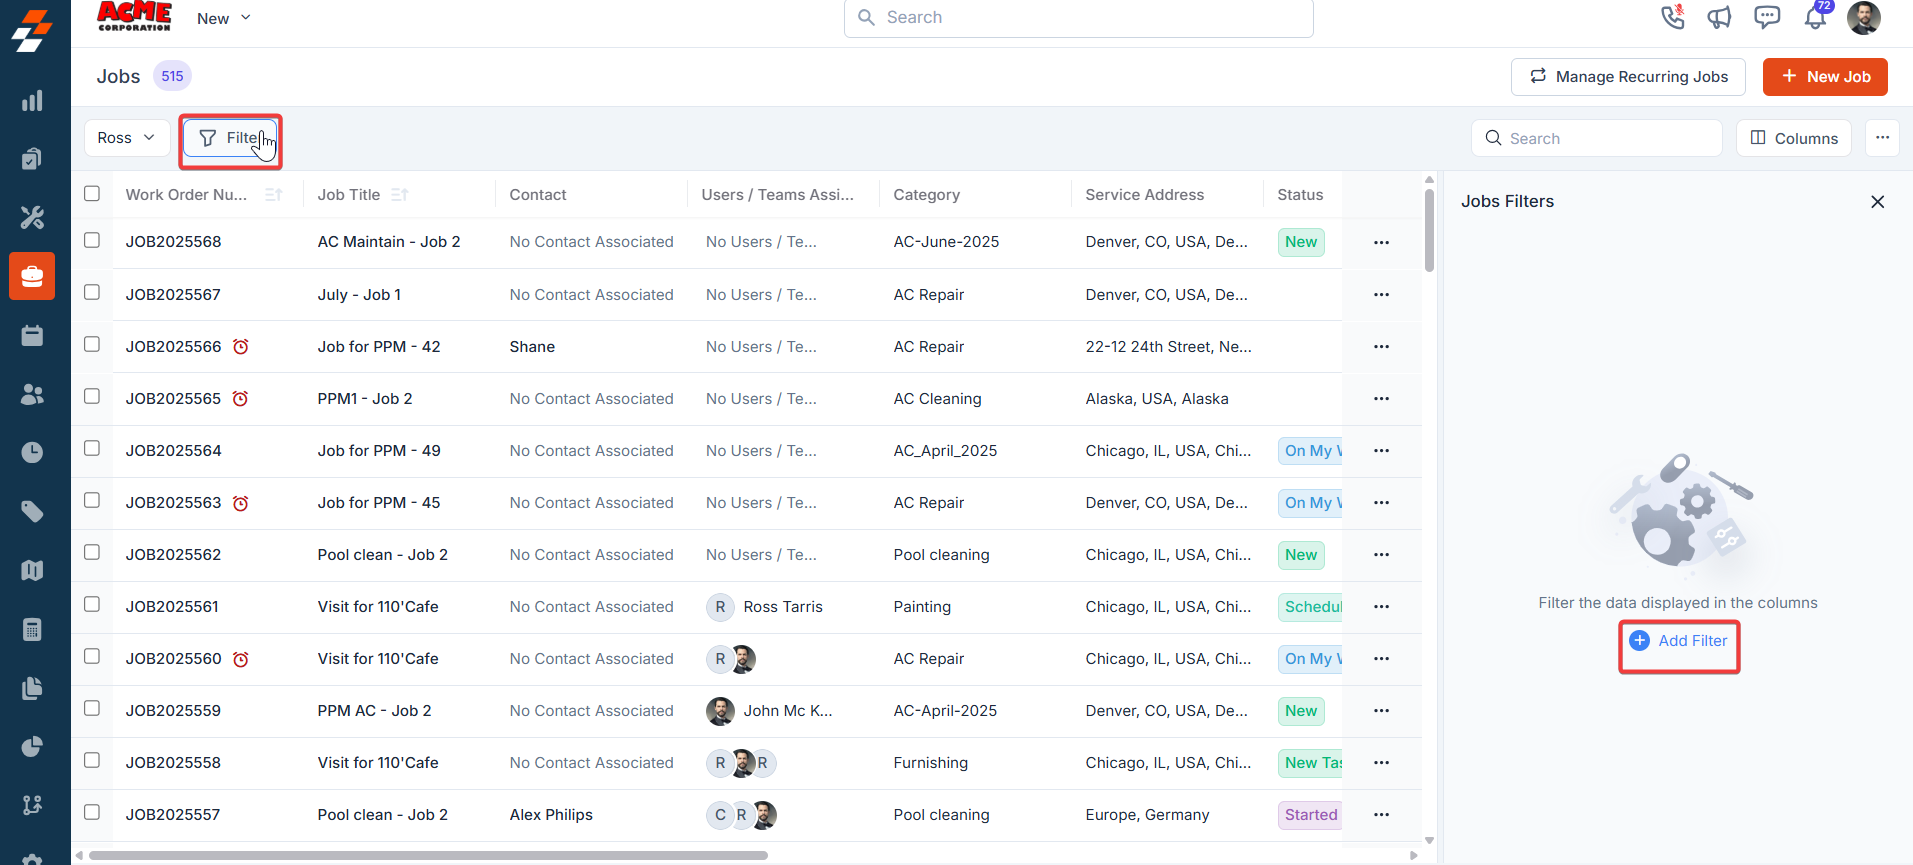
The Filter feature lets you refine your view by applying multiple filters based on available attributes. For example, you can select an attribute like “Job Status Type,” choose conditions such as “Equal to,” “Contains,” or “Does Not Contain,” and enter the desired value. Once the filter is applied, the results will update to show only the jobs that meet your criteria, making it easier to find and manage relevant jobs.- Click “Filter” at the top left of the page and select “Add Filter.”
- Choose the attributes you want to filter by, apply the desired conditions, and click the “Add” button to view the results.
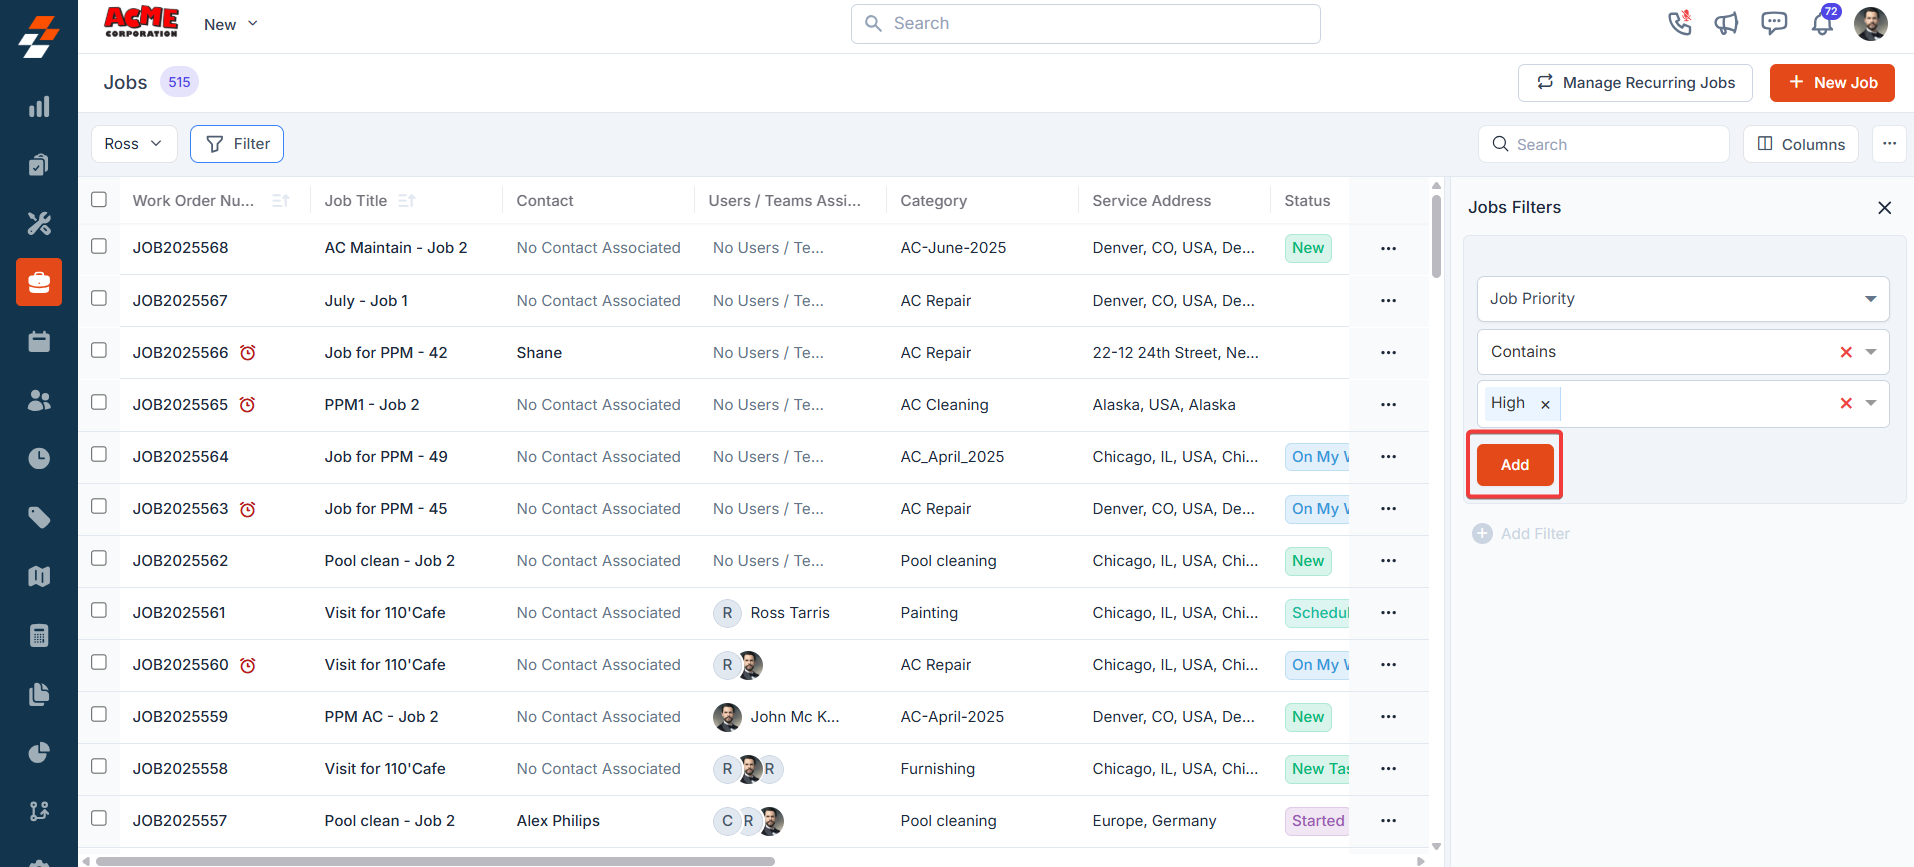
- The new view is set successfully with the filter. You can view the filter created and the filter name from the view list.
Update view
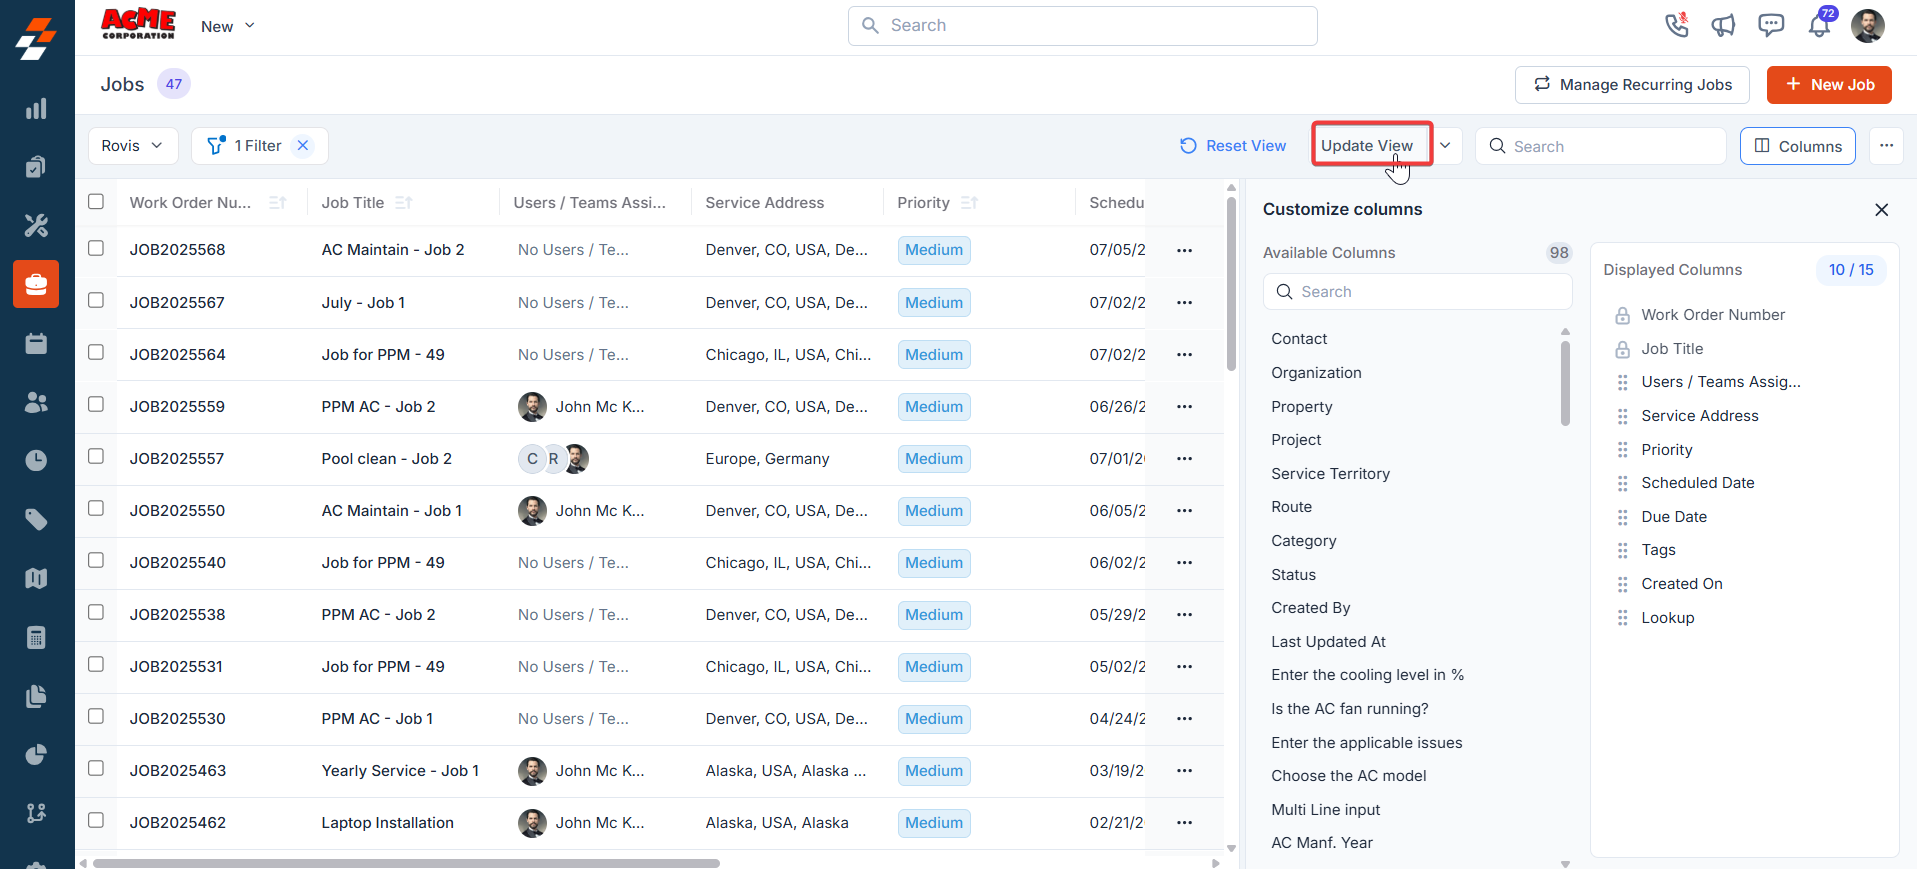
The Update View feature allows you to modify the current display settings of the Jobs Listing Page. After making the required changes, you can save the updated configuration to the existing view or create a new one.Modify an existing view
- Add or remove columns as needed.
- Click Update View to save the changes to the current view.
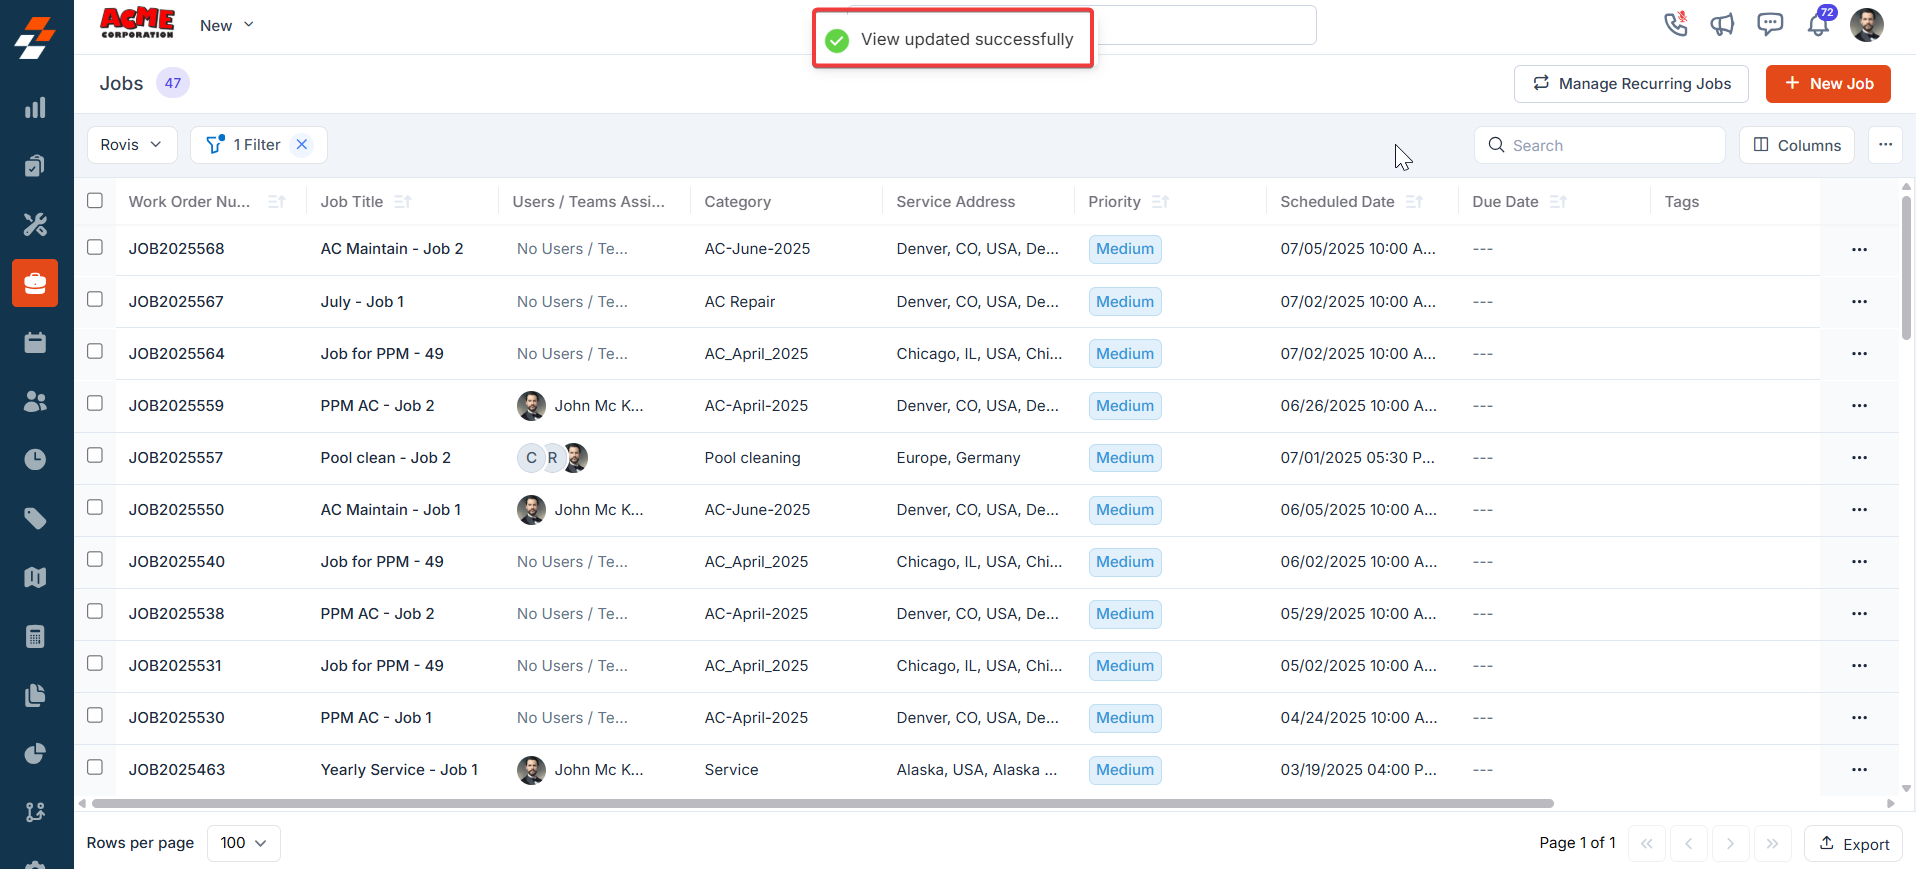
- A success message confirms that the new view has been updated.
Create a New View
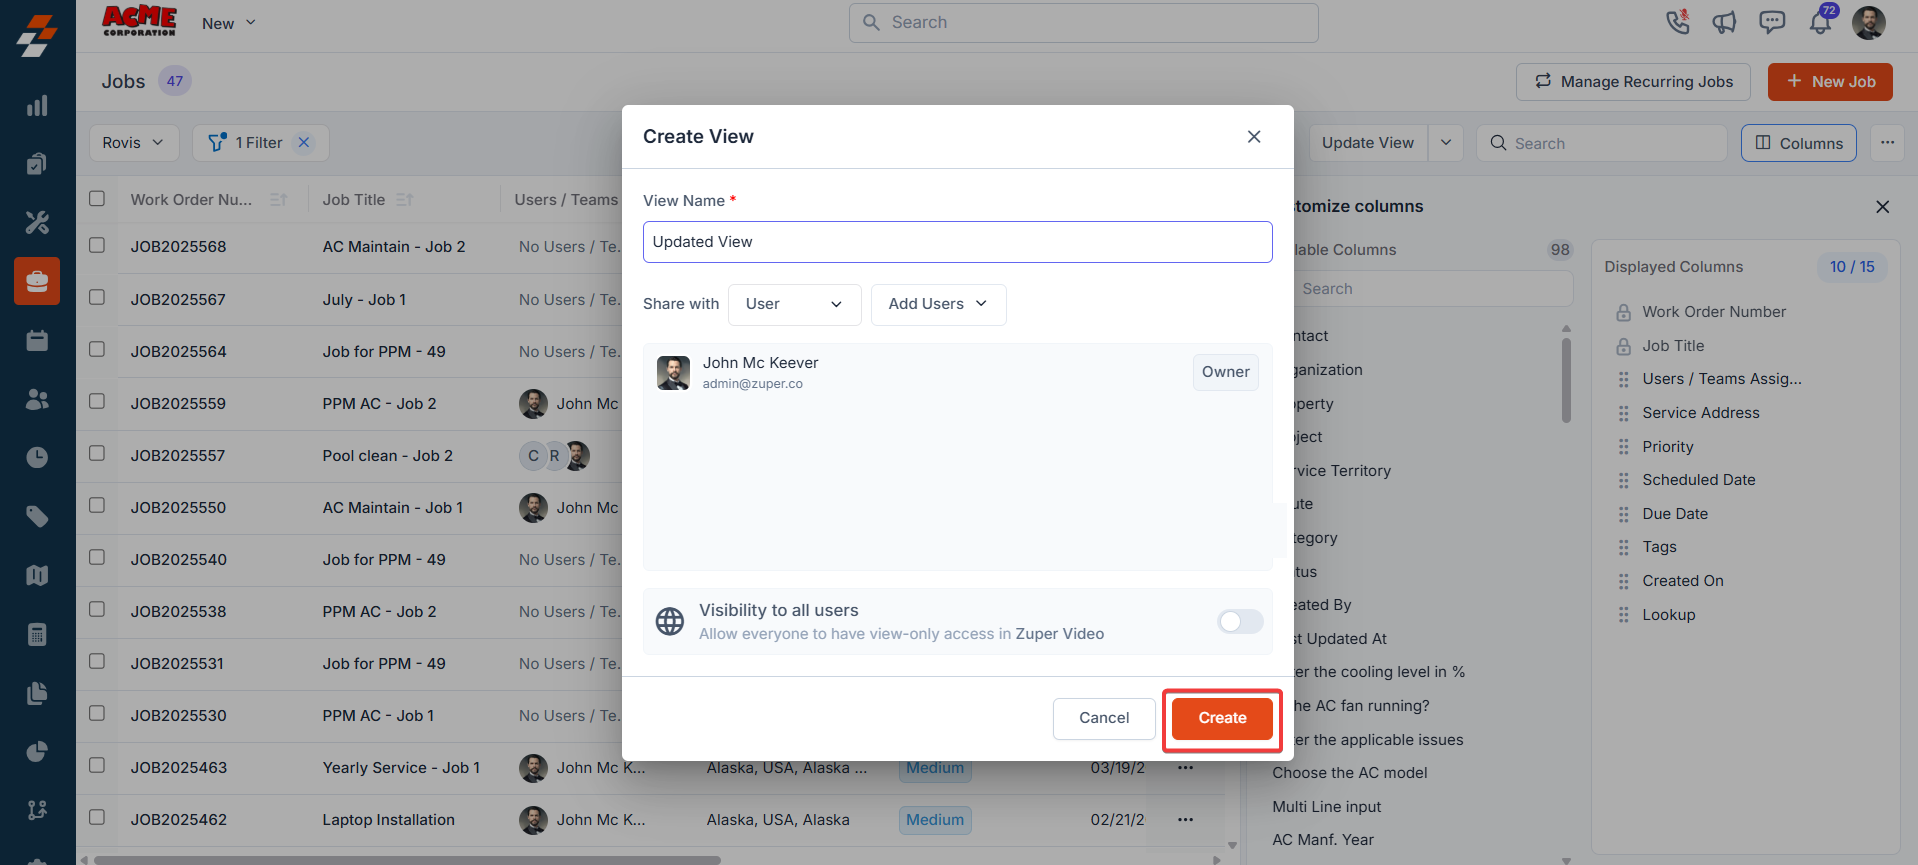
- Click the dropdown next to Update View and select Save as New View.

- The Create View dialog box appears.
- View Name (Mandatory): Enter a name for the view.
- Share With: Select User or Team, and add the relevant users.
- Visibility to All Users: Enable the toggle to make the view visible to all users in the organization.
Reset a View
- Click Reset View to revert the current view to its default configuration.
Setting Permissions for Views
Edit Permissions
Users with edit permission can:- Add or remove columns.
- Reorder columns and adjust view settings.
- Save changes to the existing view or create a new one (if permissions allow).
View Permissions
Users with view-only access can:- View the customized layout and filters.
- Save the layout as a new view for their own use.
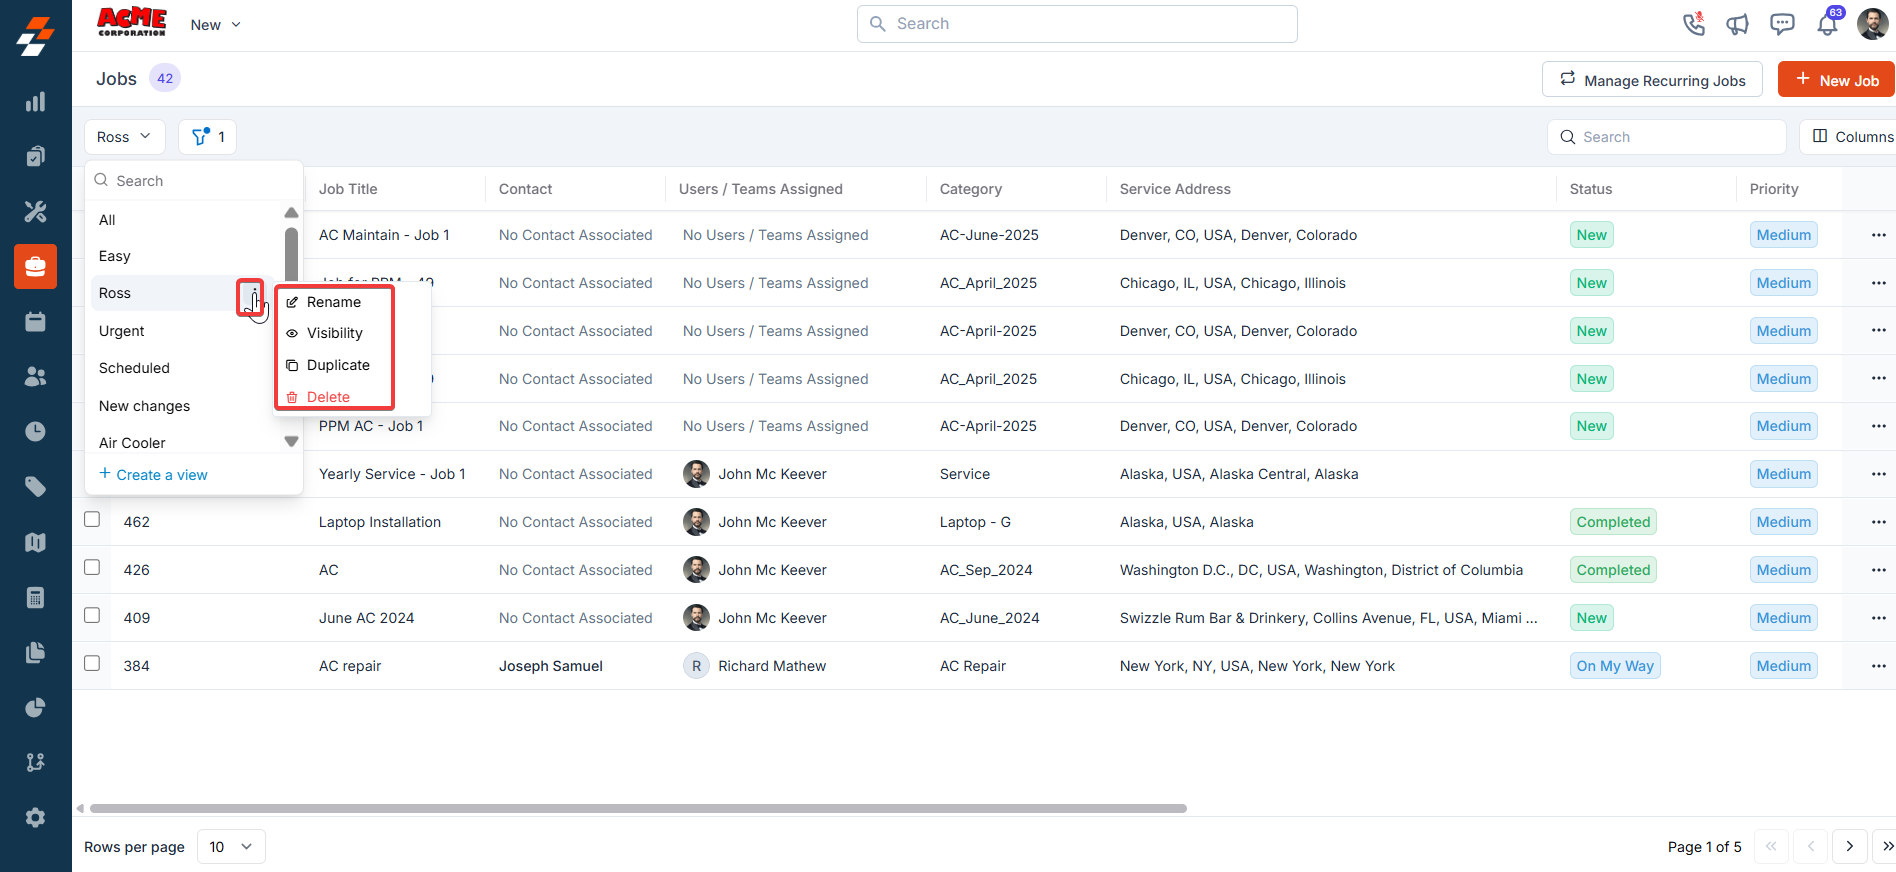
Manage View Settings
You can make additional modifications to views:- Rename: Change the view name.
- Visibility: Update who can access the view—share it with a user, team, or keep it private (Only Me). You can also enable visibility for all users.
- Duplicate: Create a copy of the selected view to modify it without changing the original.
- Delete: Remove the view permanently. Only the user who created the view can delete it.
When a custom view is deleted, the listing reverts to the default or another saved view.
Pinned filters
Zuper’s Jobs module supports pinned and default filters to help you streamline job viewing and management. Pinned filters allow quick access to your most-used criteria (such as category, date range, or tags), while default filters automatically load when you open the module. You can pin up to three filters in any module.Navigation: Jobs -> Filters -> Pinned Filter
- Open the Jobs module from the left navigation menu.
- Click the Filter icon and select + Add Filter.
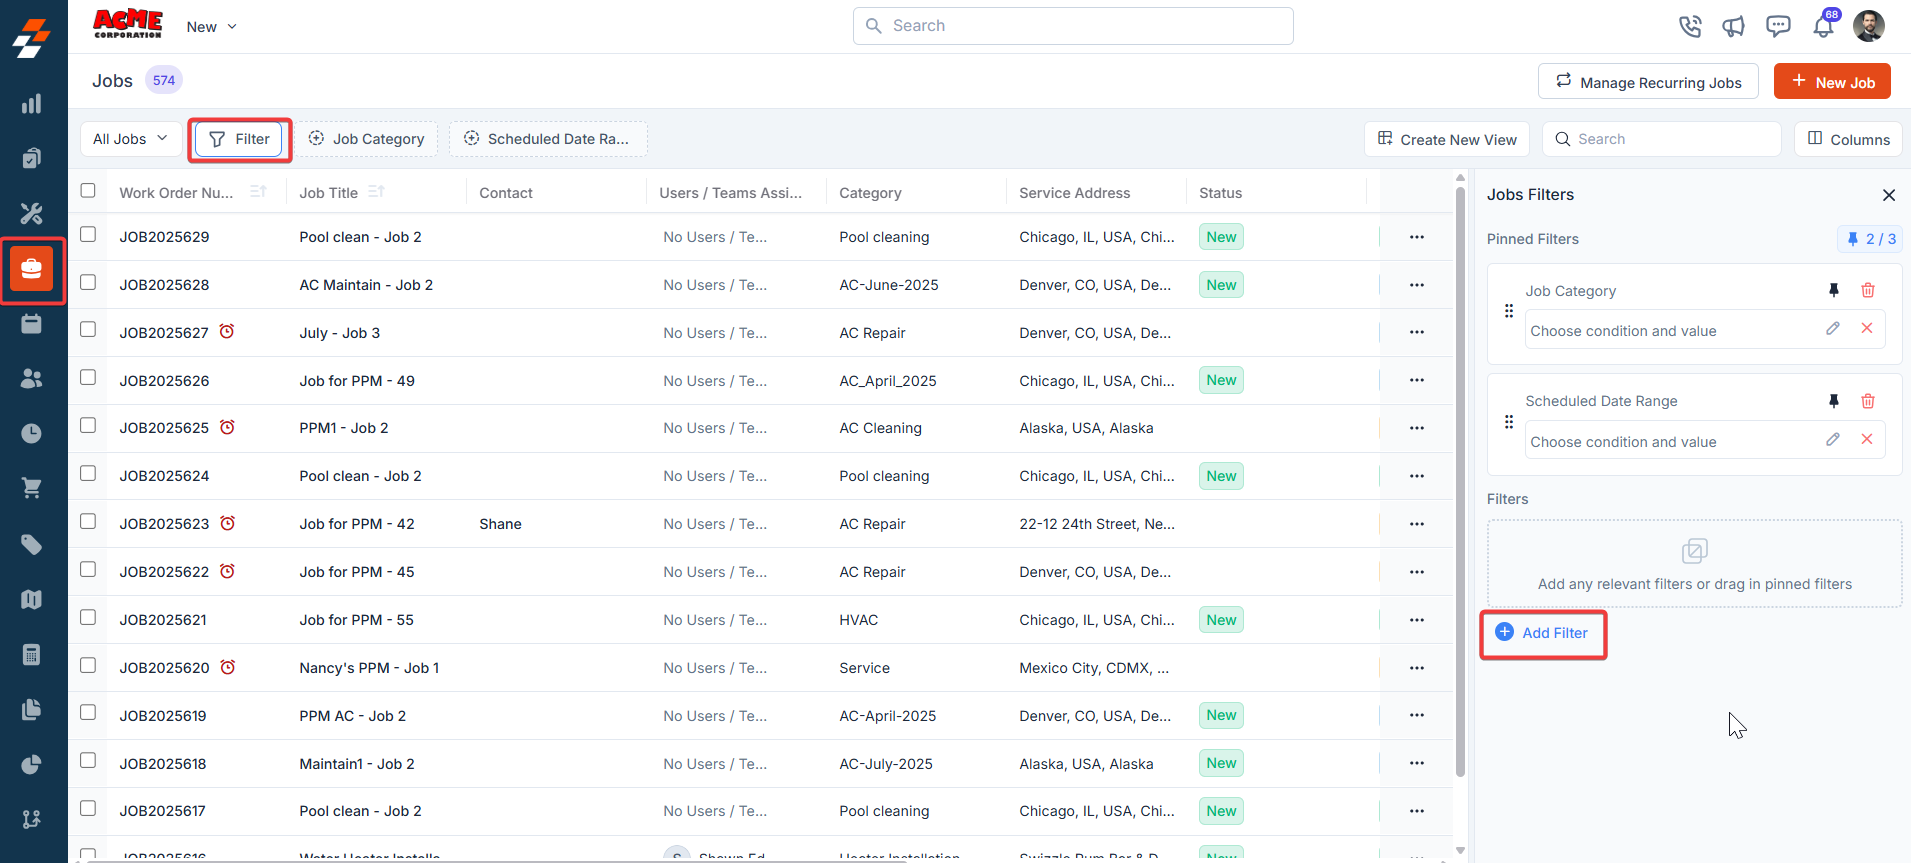
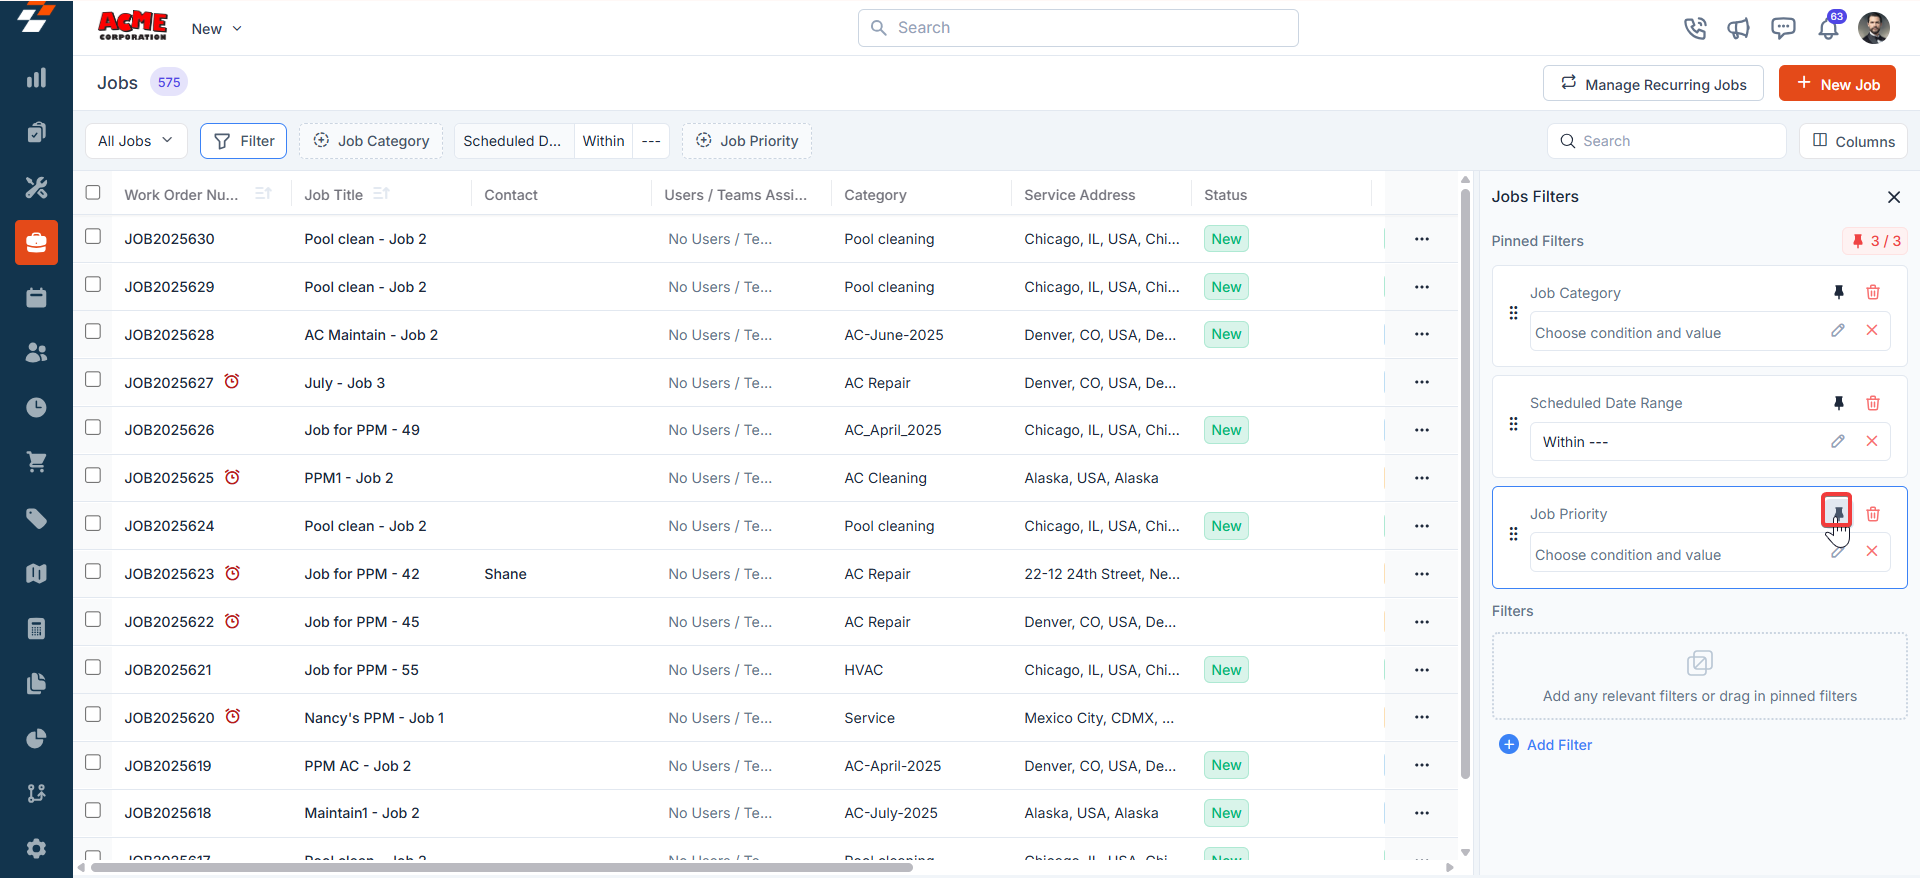
- The system displays default filters automatically:
- Job Category
- Scheduled Date Range
- Job Priority
- Pin Filters for Quick Access
- Once your filters are set, click Pin Filters in the dialog box.
- The pinned filters appear in the Pinned Filters section, allowing you to apply them with one click.
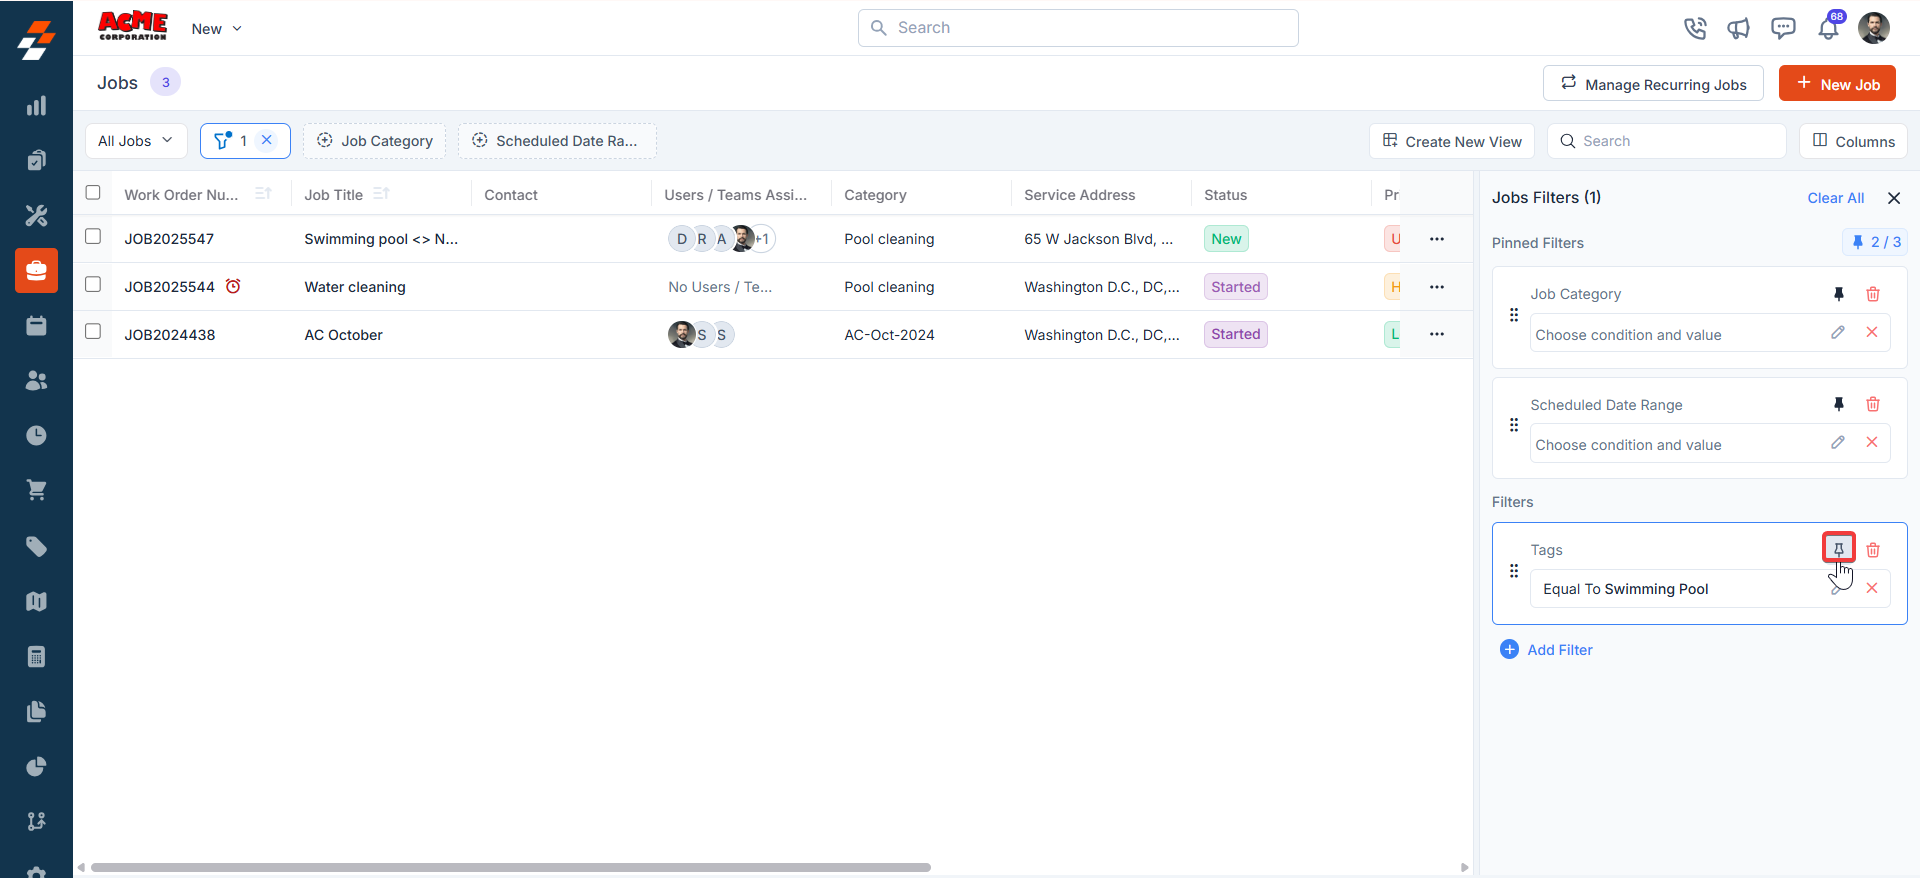
- Unpin the filter
- Select the pinned filter you want to remove.
- Click Remove to unpin it.
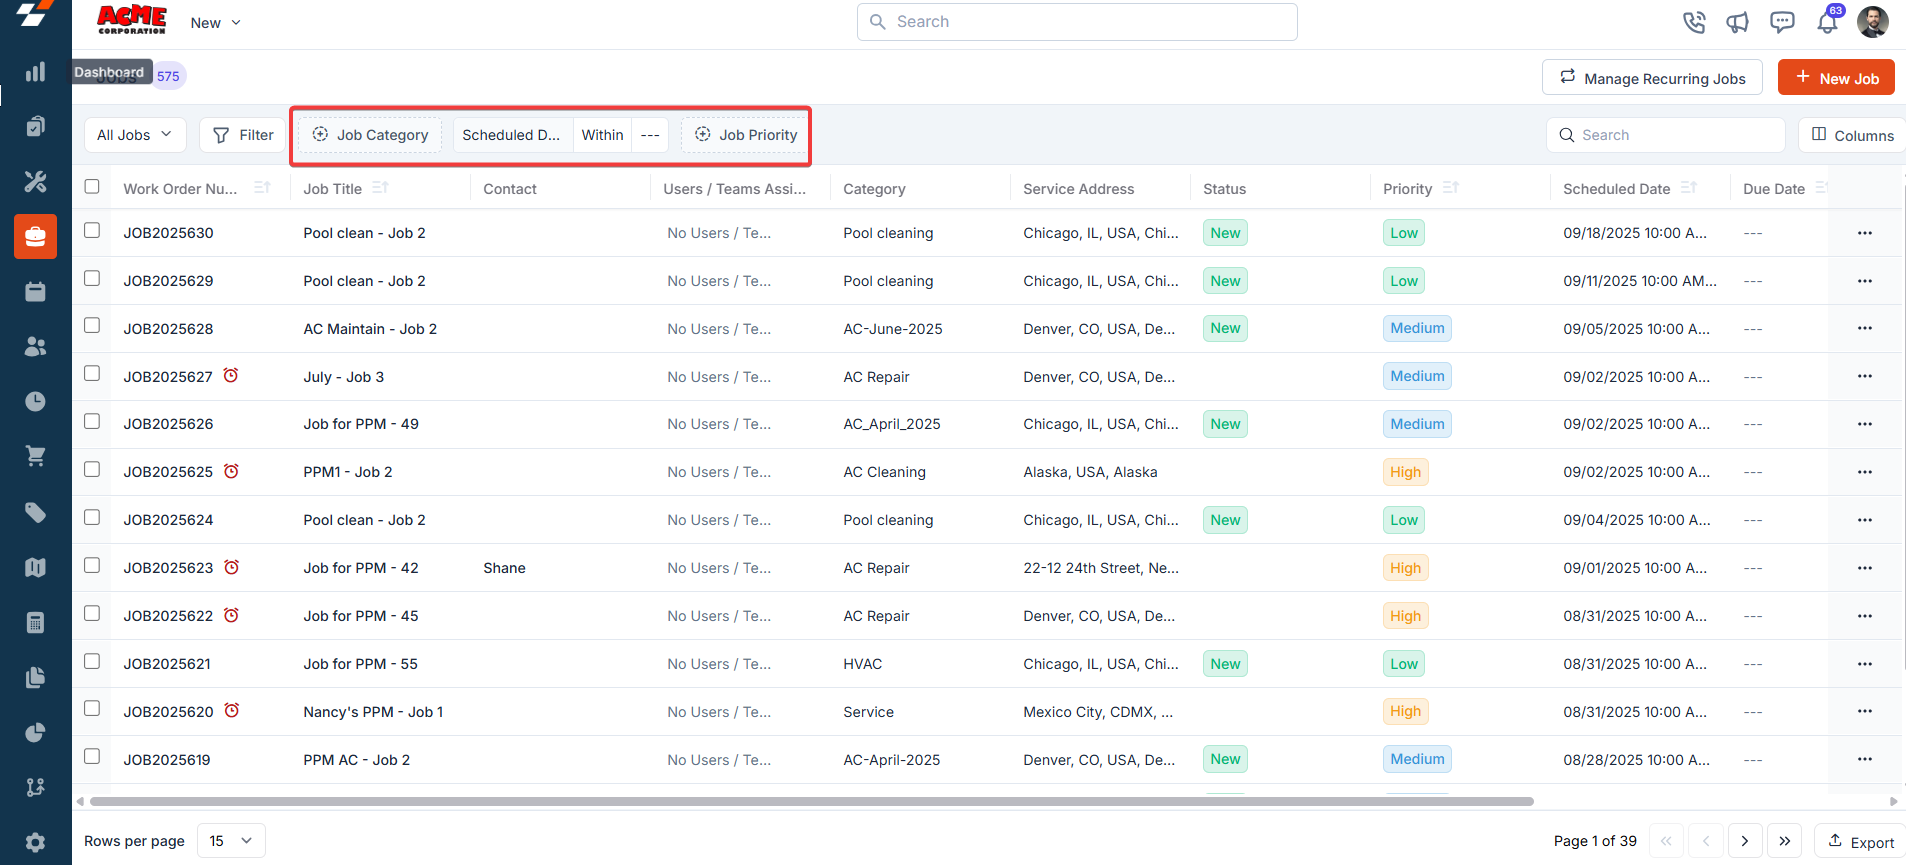
Apply filters
- Open the filter dialog box and select pinned or default filters to apply them.
- Click Clear All to remove all active filters and return to the complete job list.
- The job list updates in real time and displays status indicators such as New or Started.
Bulk actions
When you manage a large number of jobs, updating each one separately takes time. Bulk actions let you select multiple jobs at once and apply a change to all of them in a single step. This saves time and reduces the risk of missing a job. For example, you can reassign 20 jobs to a new technician, reschedule a group of jobs after a weather delay, or move a set of jobs to a new status — all in one action. Select the checkbox next to each job you want to update. The action bar appears at the bottom of the page.Note: To include every job in the current list, select Select All at the top of the list. The action bar shows the total number of selected jobs.
Available bulk actions
Once you select one or more jobs, the action bar at the bottom of the page gives you the following options.- Update field
- Update schedule
- Update job status
More actions
Select More Actions in the action bar to see additional bulk options. The available actions are:- Assign / Unassign
- Link parent job
- Assign to route
- Assign service territory
- Send a text message
- Delete job
FAQs
- Why can I not change the status of a job?
One or more linked child jobs or tasks have not yet reached the required status. Your workflow configuration requires child jobs or tasks to reach a specific status before you can update the parent job. To resolve this:- Open the job and go to the Linked Jobs or Tasks section.
- Identify any child jobs or tasks that have not yet reached the required status.
- Update those jobs or tasks to the required status.
- Return to the parent job and update its status.
- Why do I not see the bulk status update option?
Bulk status updates are available only to users with the Manager role. If you have a Field Executive role, this option does not appear in your interface. Contact your manager if you need a bulk status update performed on your behalf. - Why are some statuses missing from the bulk action dropdown?
Your organization’s workflow configuration controls which statuses are available for bulk updates. Not all statuses might be eligible for bulk updates. The order and conditions that apply to individual status changes also apply to bulk actions. If a status is not listed, it might not be available at this point in the workflow. To confirm which statuses are eligible for bulk updates, ask your administrator to review your workflow configuration. - Can I skip a status in the workflow?
No. Status changes must follow the order set in your workflow configuration. You need to complete each required step before moving to the next one. If you believe a status step is incorrect or unnecessary for your workflow, contact your administrator to review your workflow configuration.
If the issue continues, contact Support.