Note: Currently, the Kanban view is supported for the Job module.
Creating a Kanban View
You can create multiple Kanban views tailored to different needs. For example, you can view jobs by statuses such as New Booking, On My Way, Started, or Completed. Within each view, you can also sort jobs by attributes like Job Value or Scheduled Date to prioritize work effectively. Let’s see how to create and save personalized Kanban views for your workflow.-
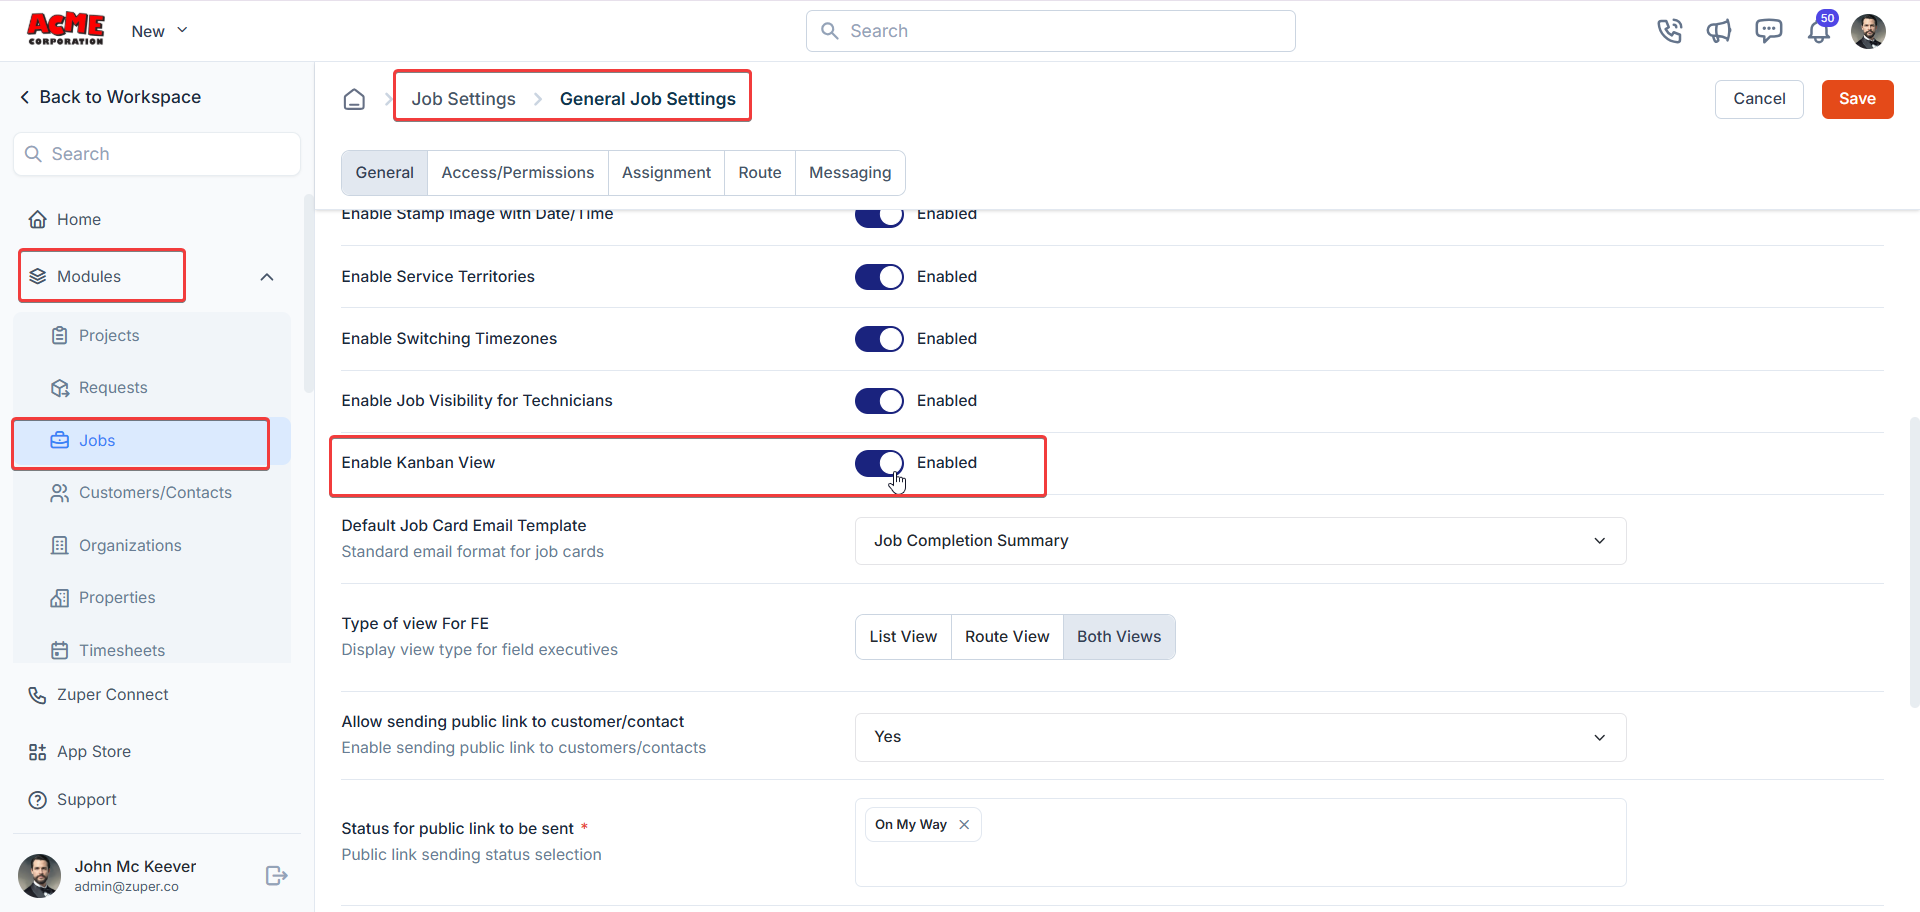
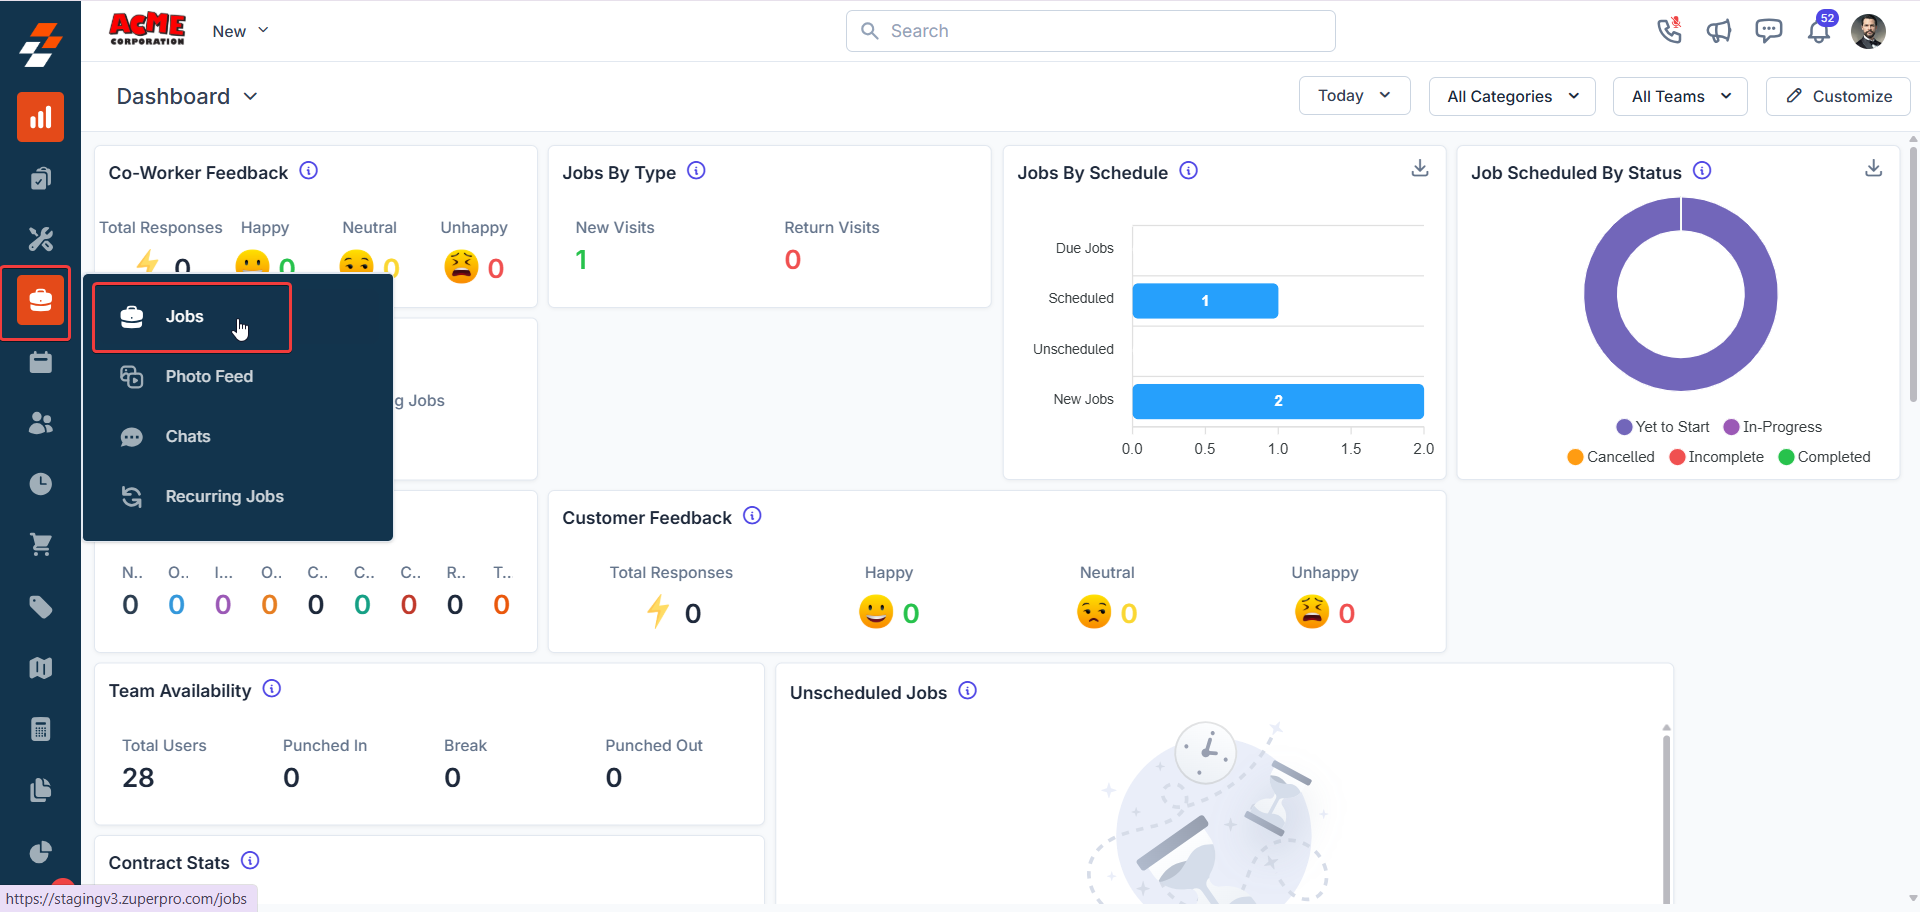
Navigate to the Job module from the left navigation and select “Job”.
-
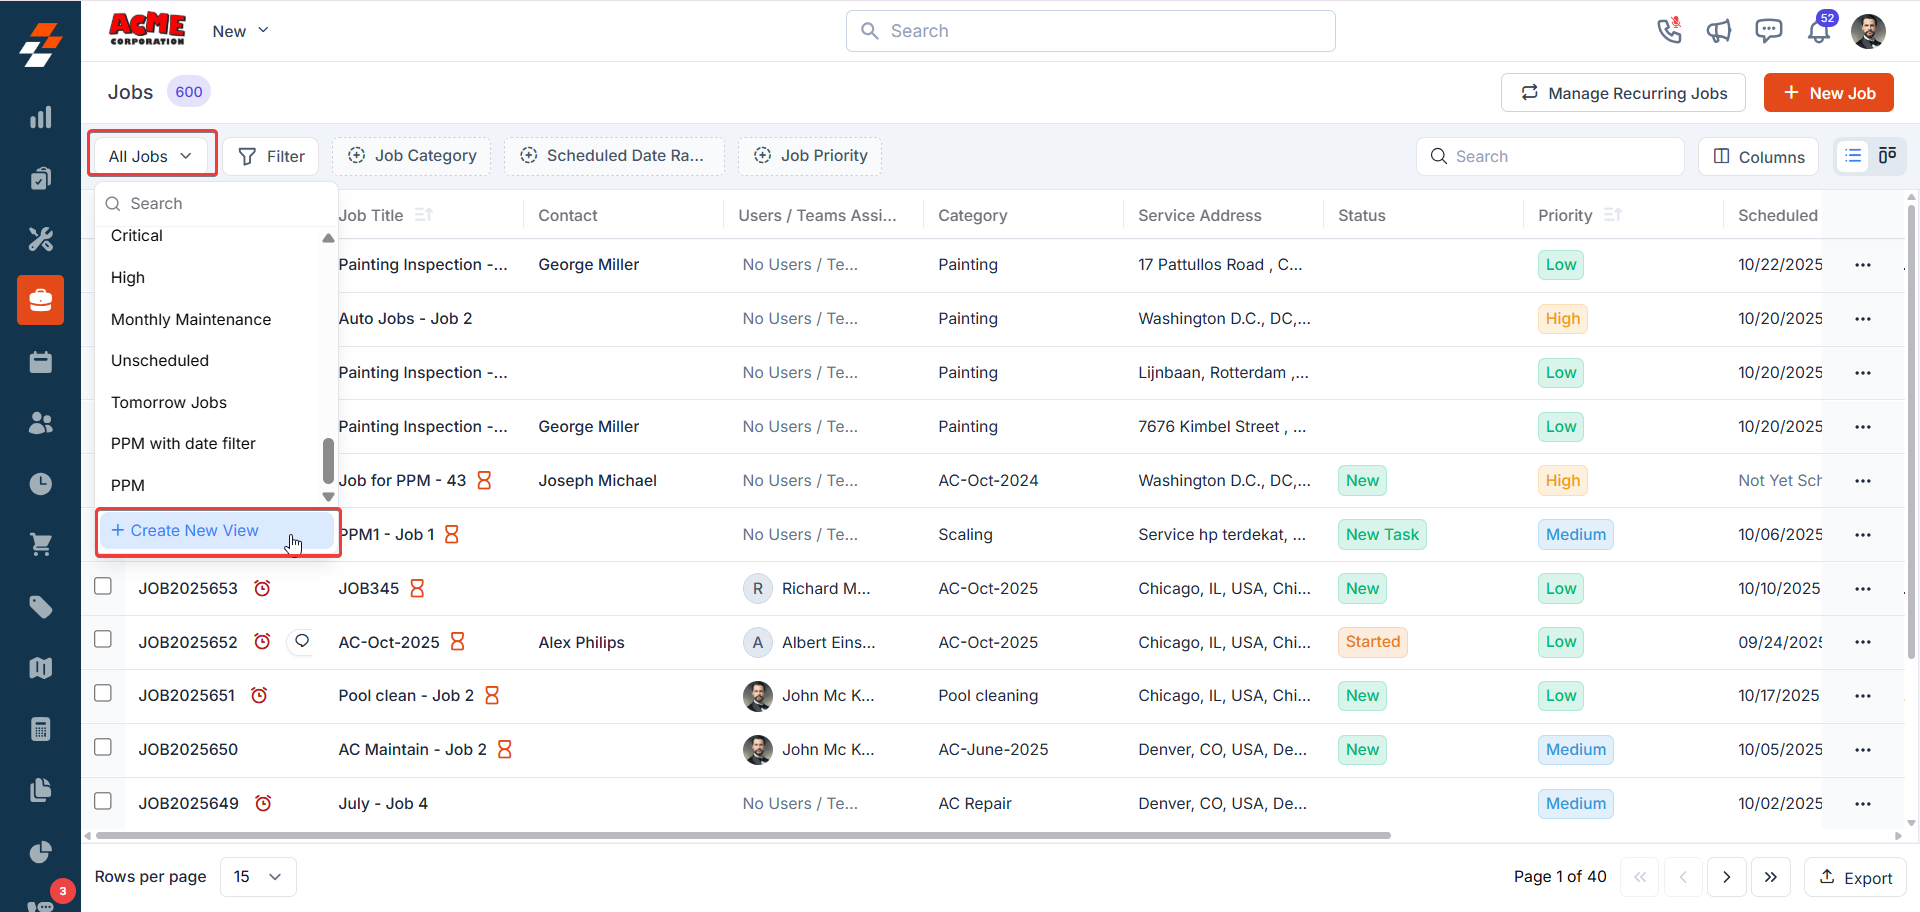
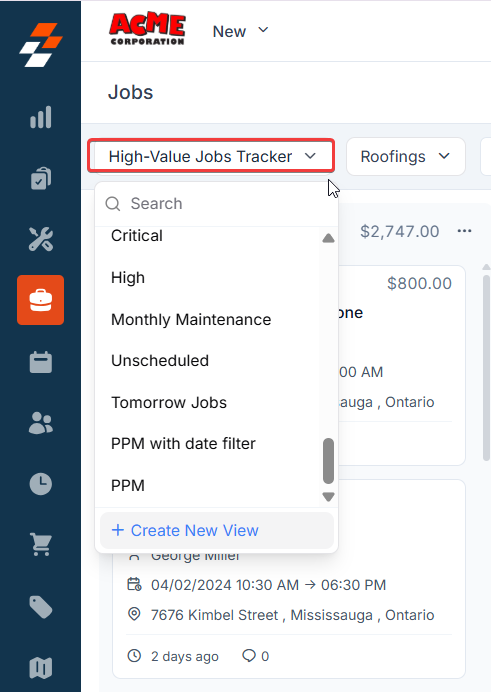
Click View Picker in the top left corner of the Job listing page and select “+ Create New View”.
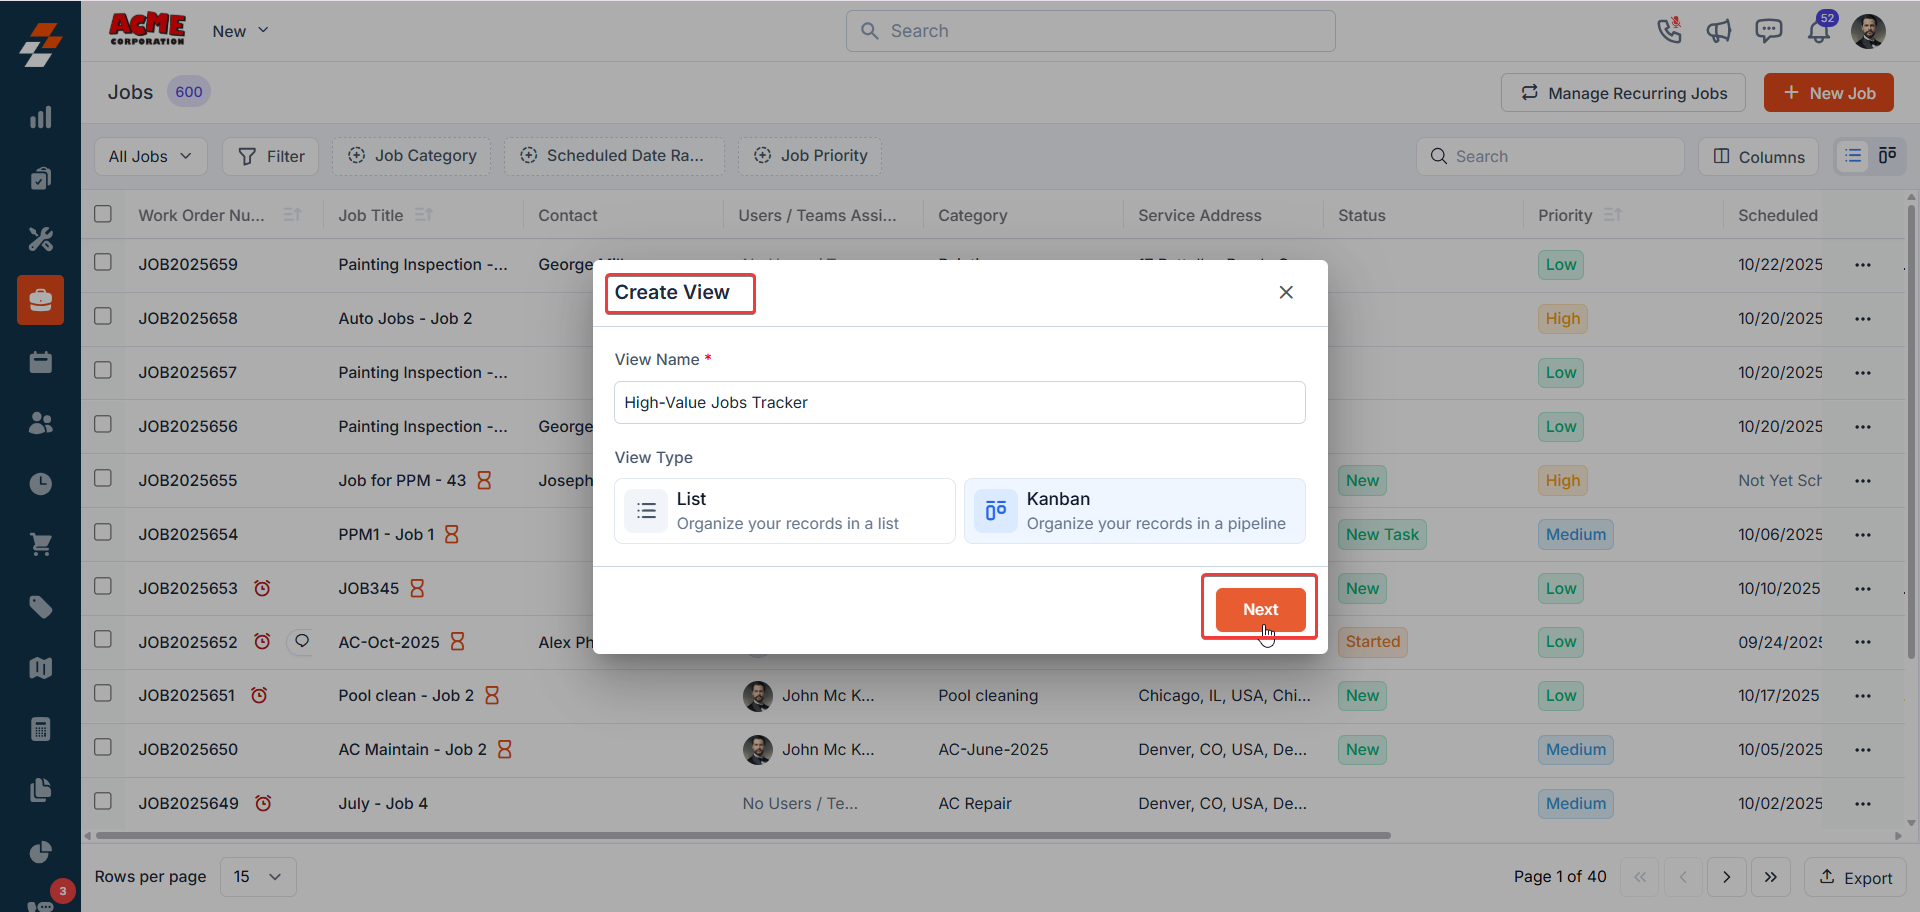
- Enter the View name and choose the View Type. In our case, you need to select “Kanban”. If you wish to create a list view, choose “List”.
-
Click Next to proceed.
-
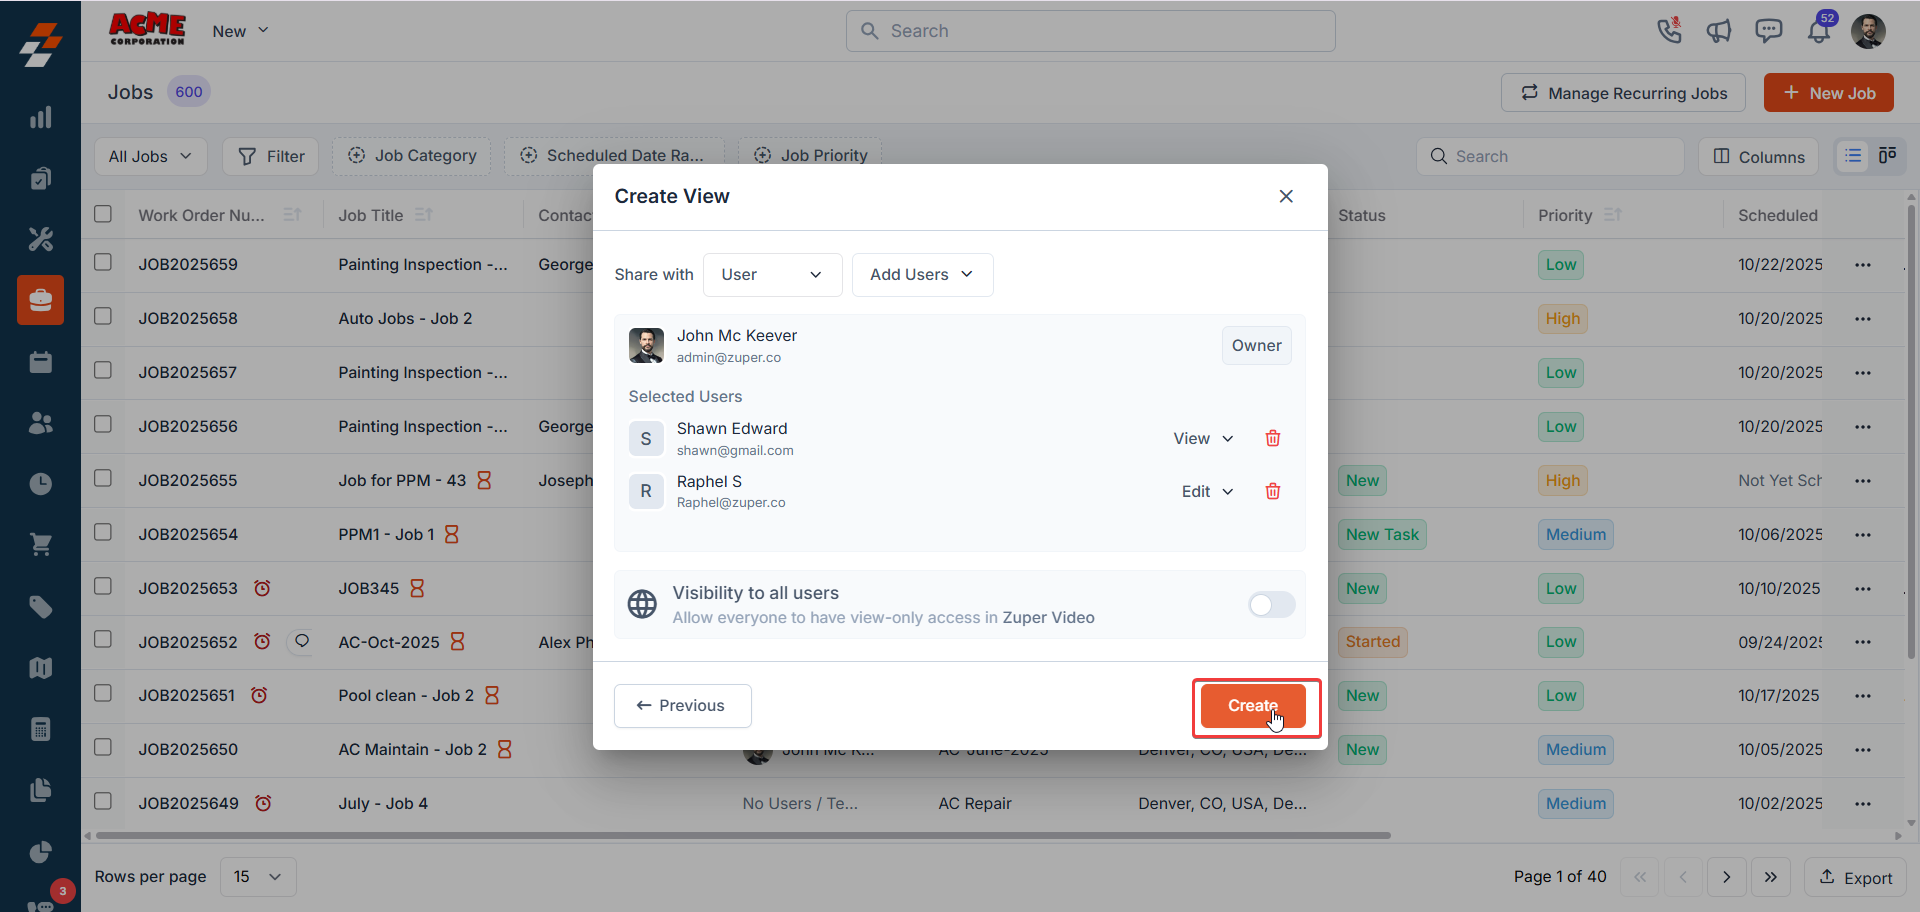
In the Create View dialog box, choose which users or teams can access this view (optional).
- If you assign, set their permissions accordingly: View or Edit.
- To give your entire company view-only access, simply toggle Visibility to all users.
-
Click Create to save your initial configuration.
-
The customization panel will open on the right-hand side, where you can tailor the board to your needs.
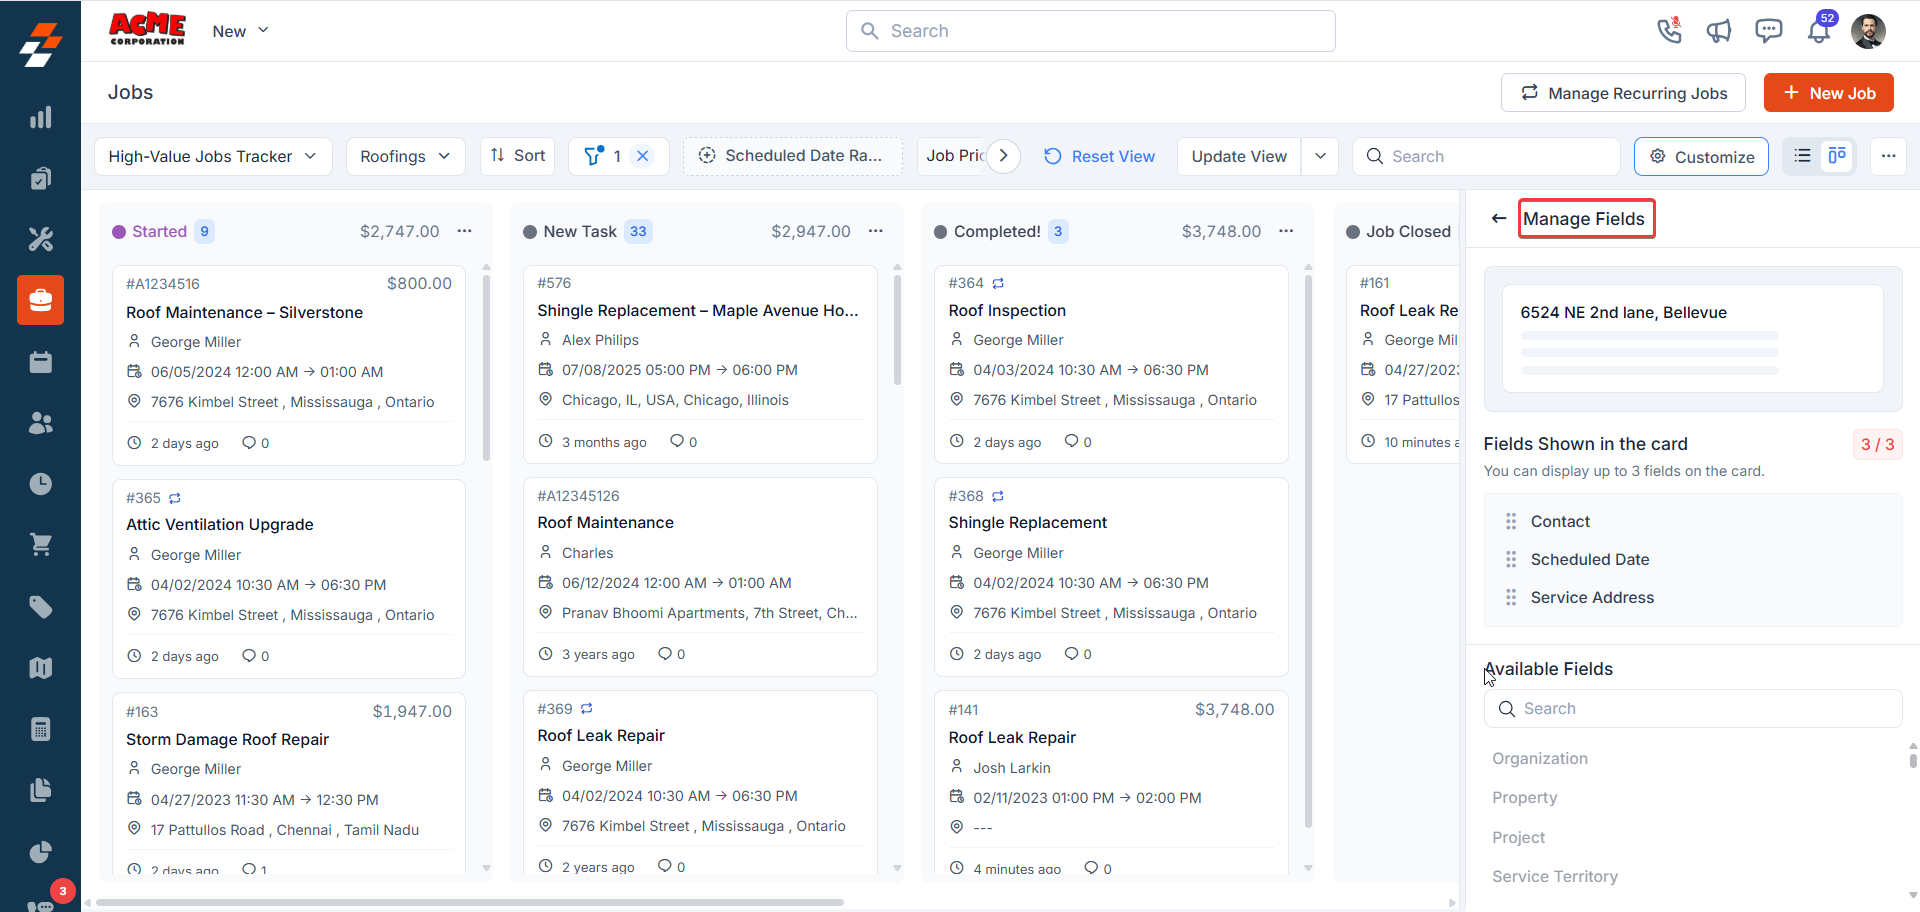
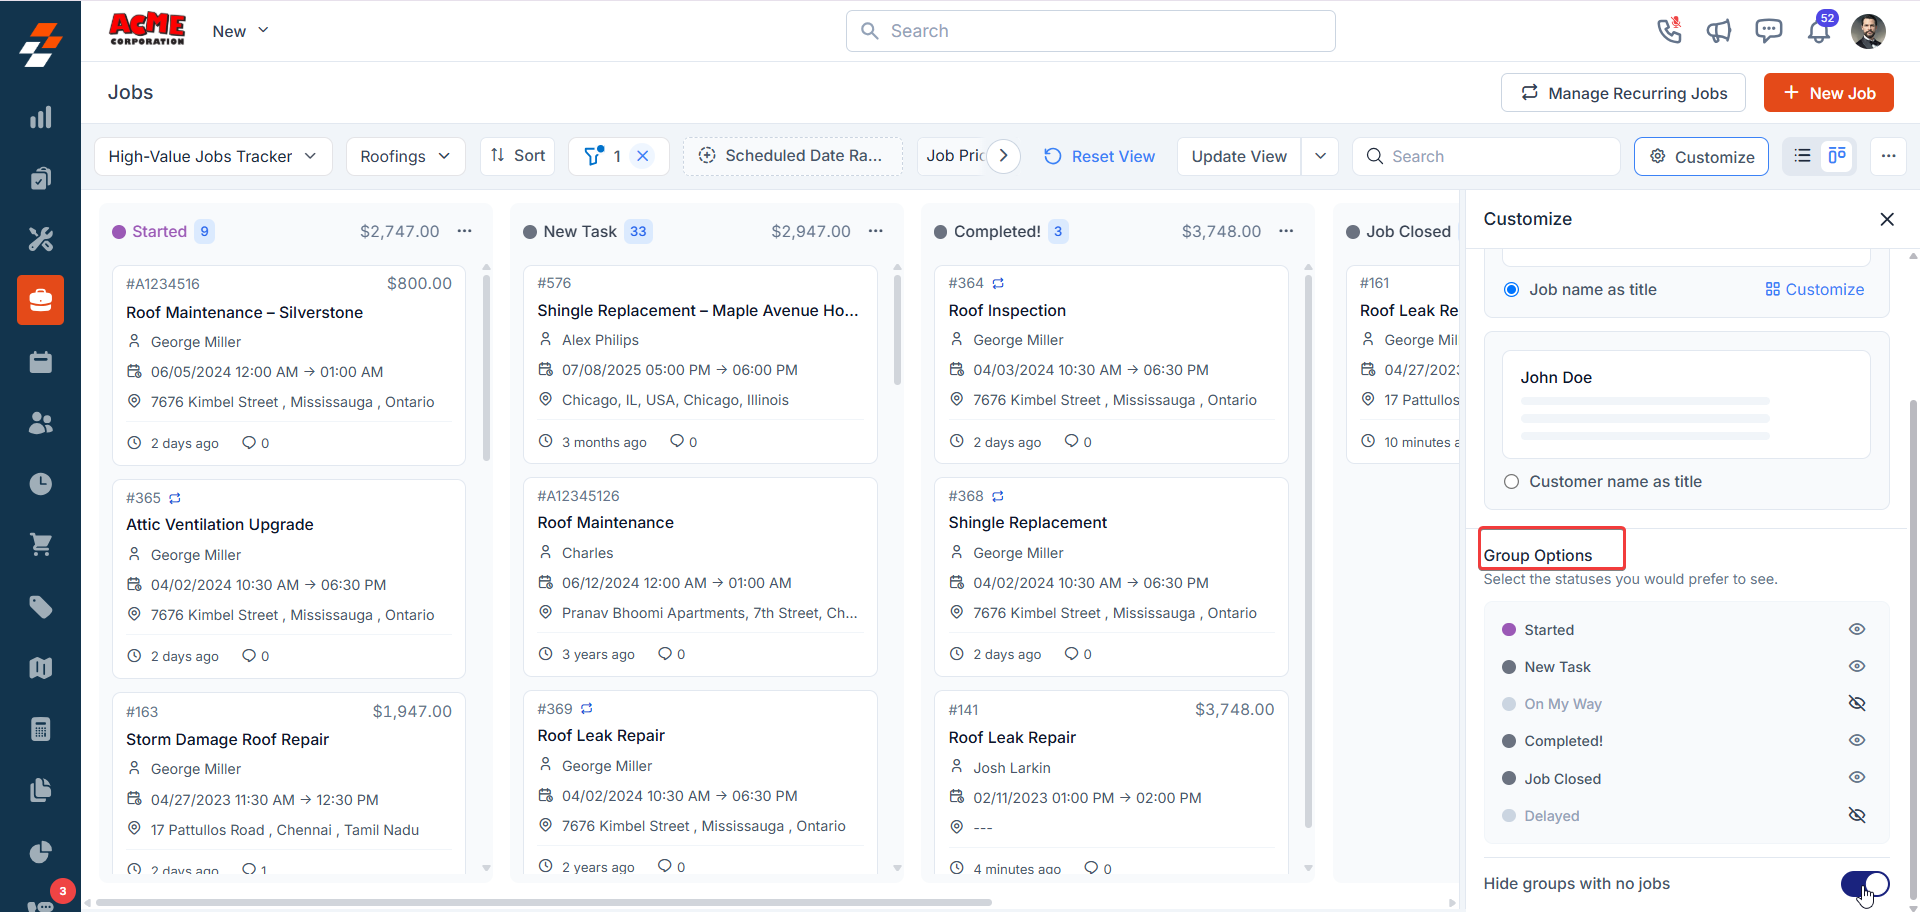
- Choose whether each job card displays the Job Name (e.g., “#Gutter Cleaning and Realignment”) or Customer Name (e.g., “George Miller”) as the title. To further enhance the Card Details, click on ‘Customize’ on your chosen card style. You can search and select up to three fields to display on the card (e.g., Priority, Scheduled Date), hover over the fields to reveal the “+” icon, and click to add those fields. You can also reorder fields by dragging and dropping them into your preferred order.
- In the Group Options, select the statuses to display (e.g., Started, New, On My Way, Completed, Job Closed) by toggling the eye icons; only selected statuses will appear as columns in your view.
- You can activate the Hide groups with no jobs toggle to conceal empty columns, ensuring a streamlined view of active tasks.
- Then, click Continue to proceed to the filters.
- Now, refine your view by adding filters. You can apply up to three filters to your view. For instance, if you are adding ‘Scheduled Date Range’ (choose a condition and date).
-
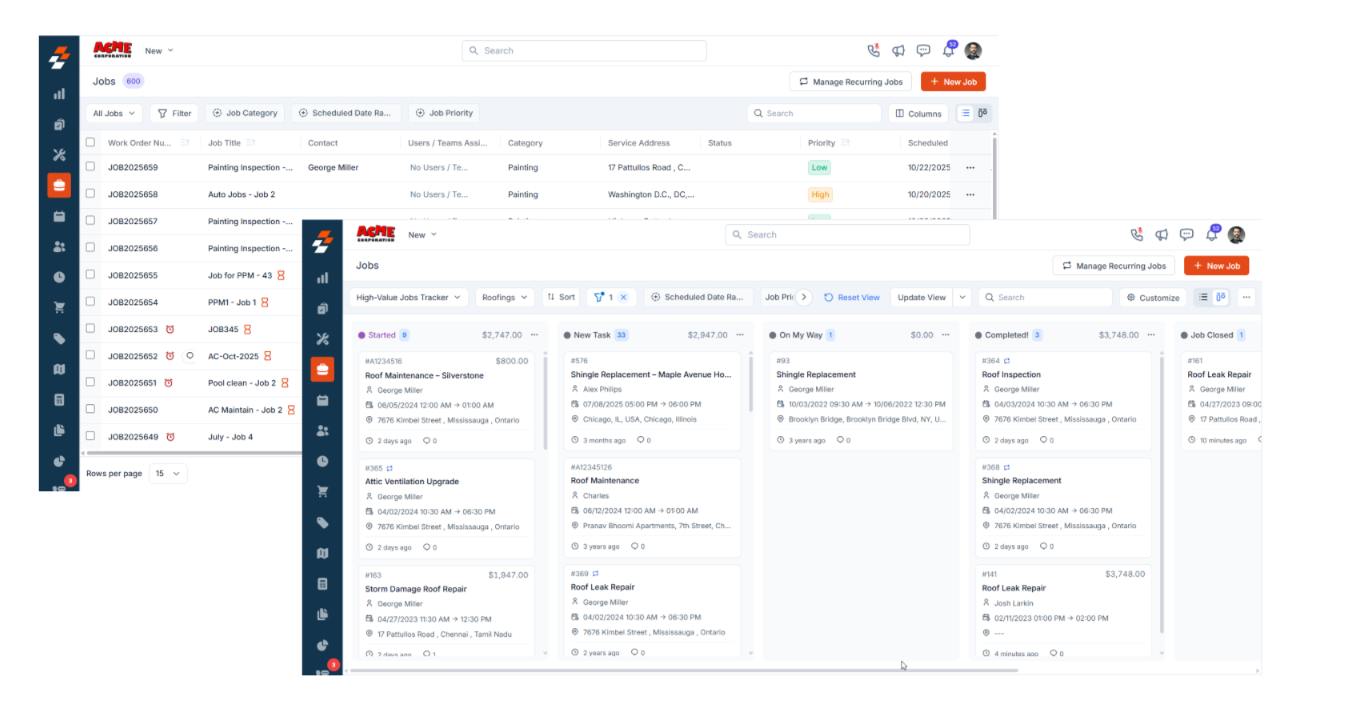
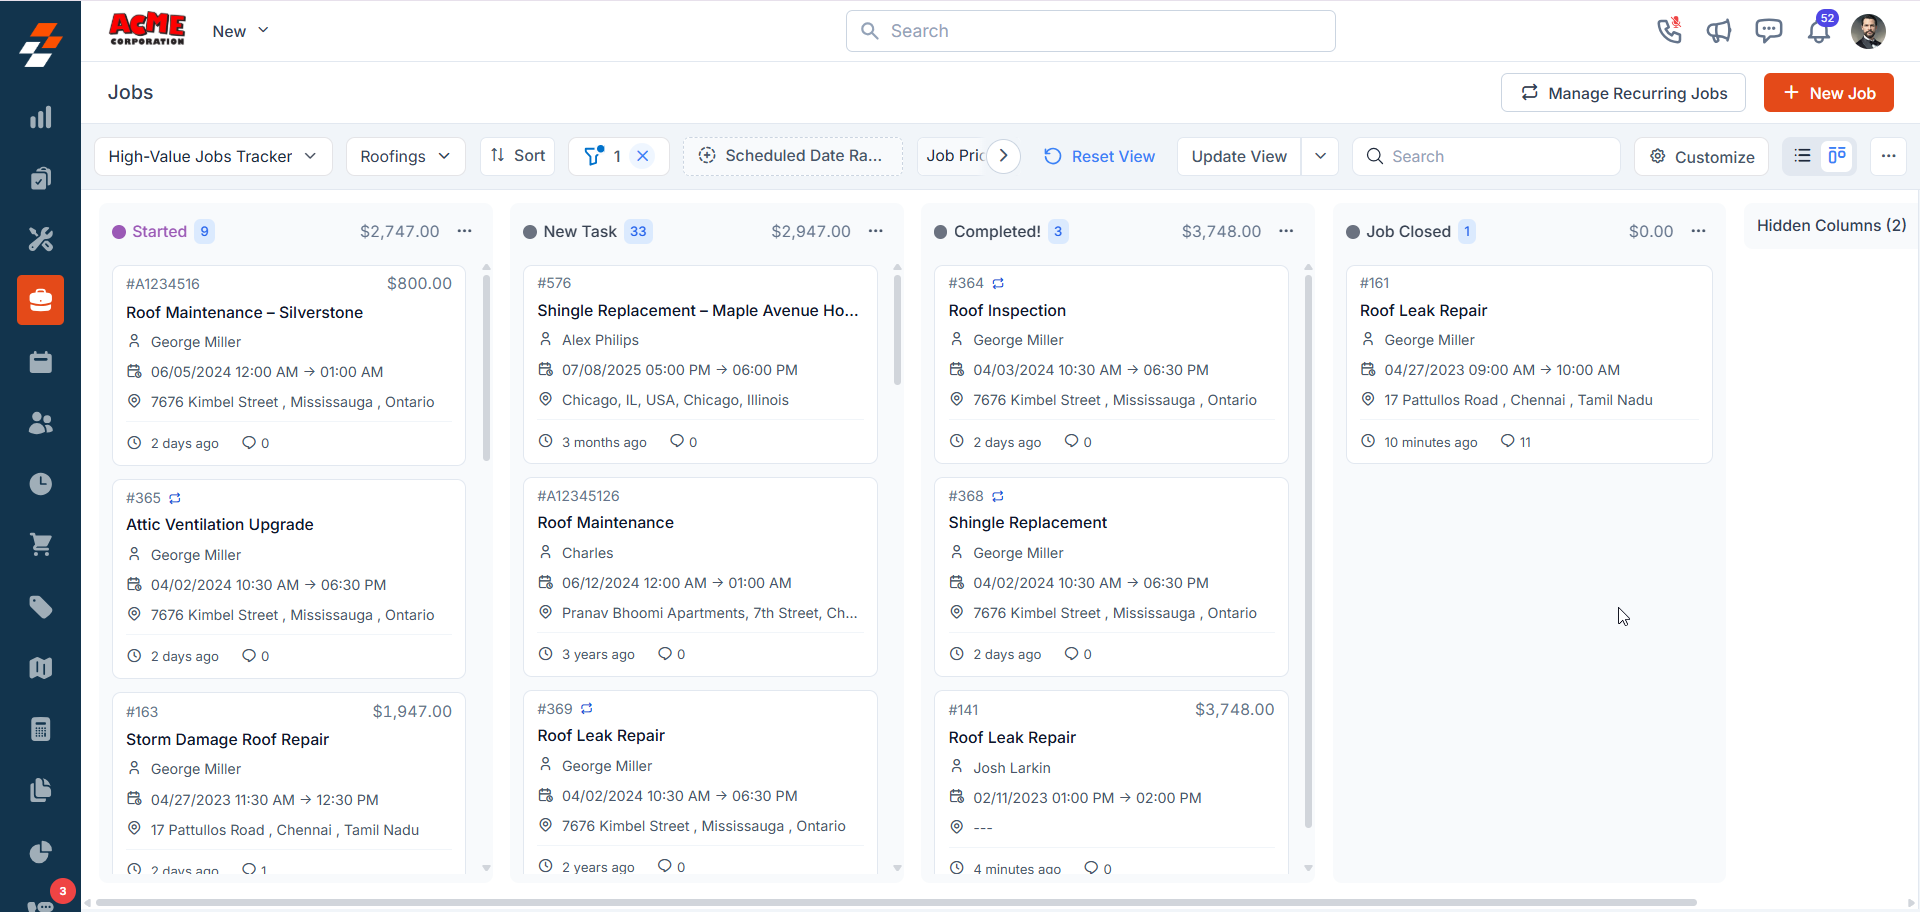
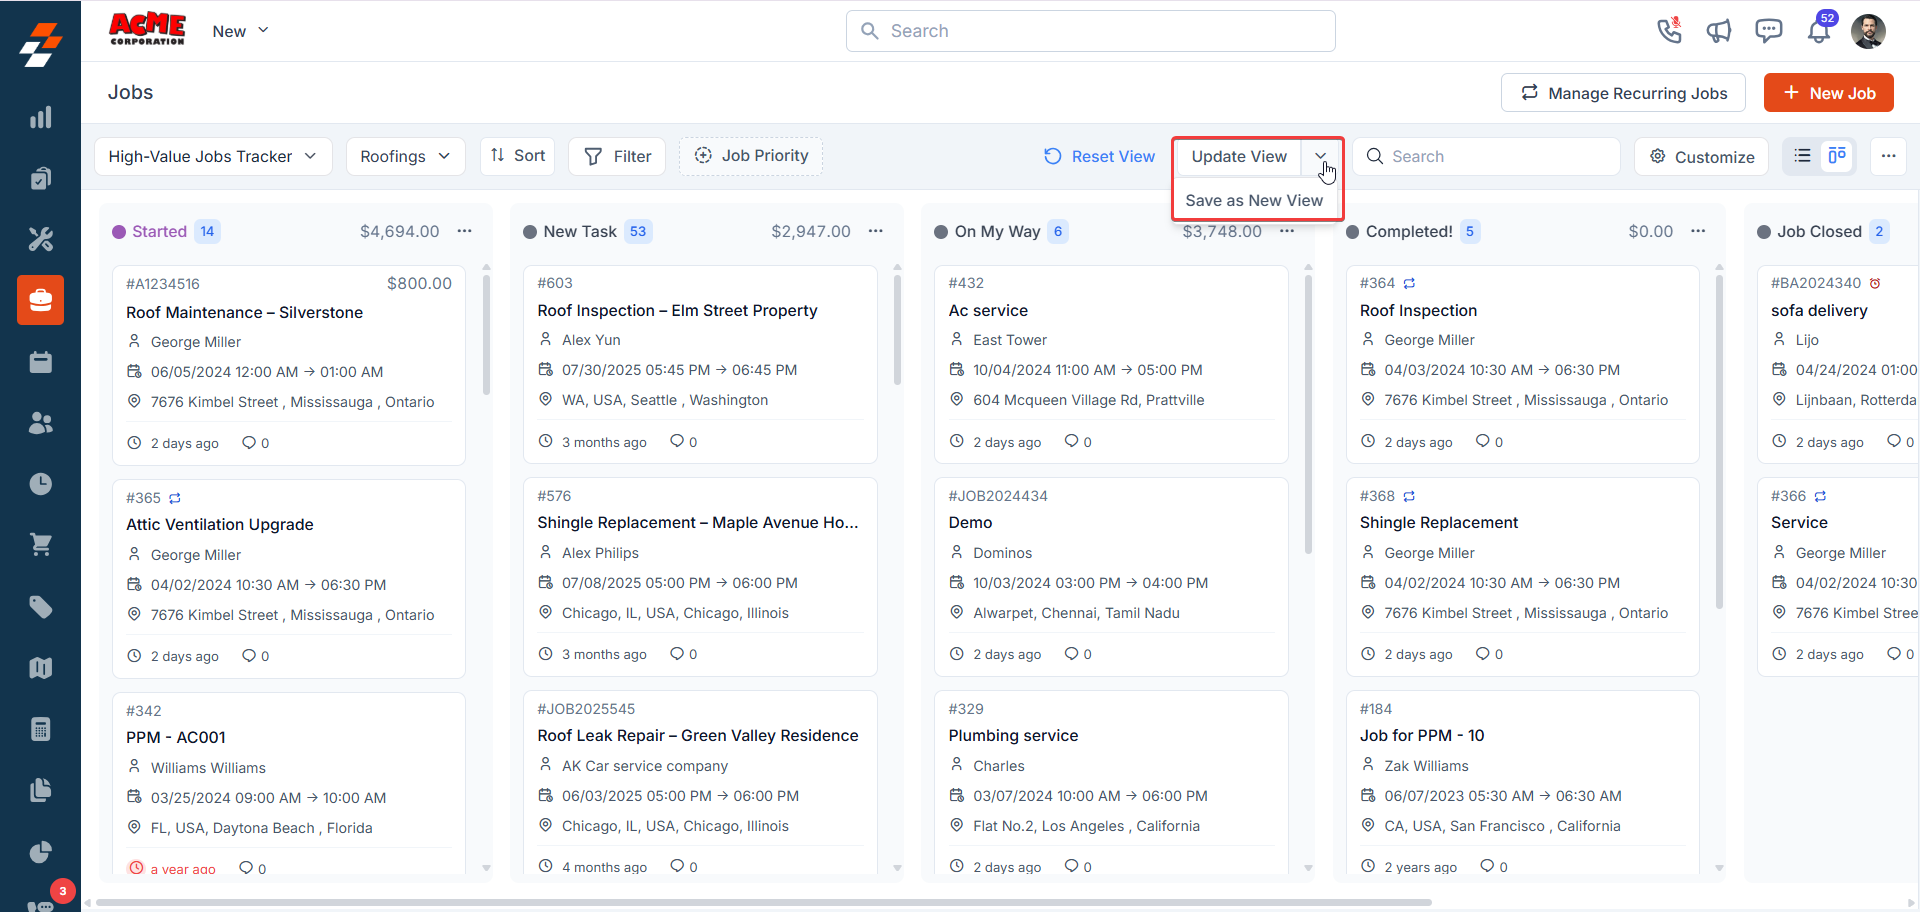
Click Save View, and your Kanban view is complete, presenting jobs in columns by job status.
Your new view will appear in the View Picker dropdown for easy access.
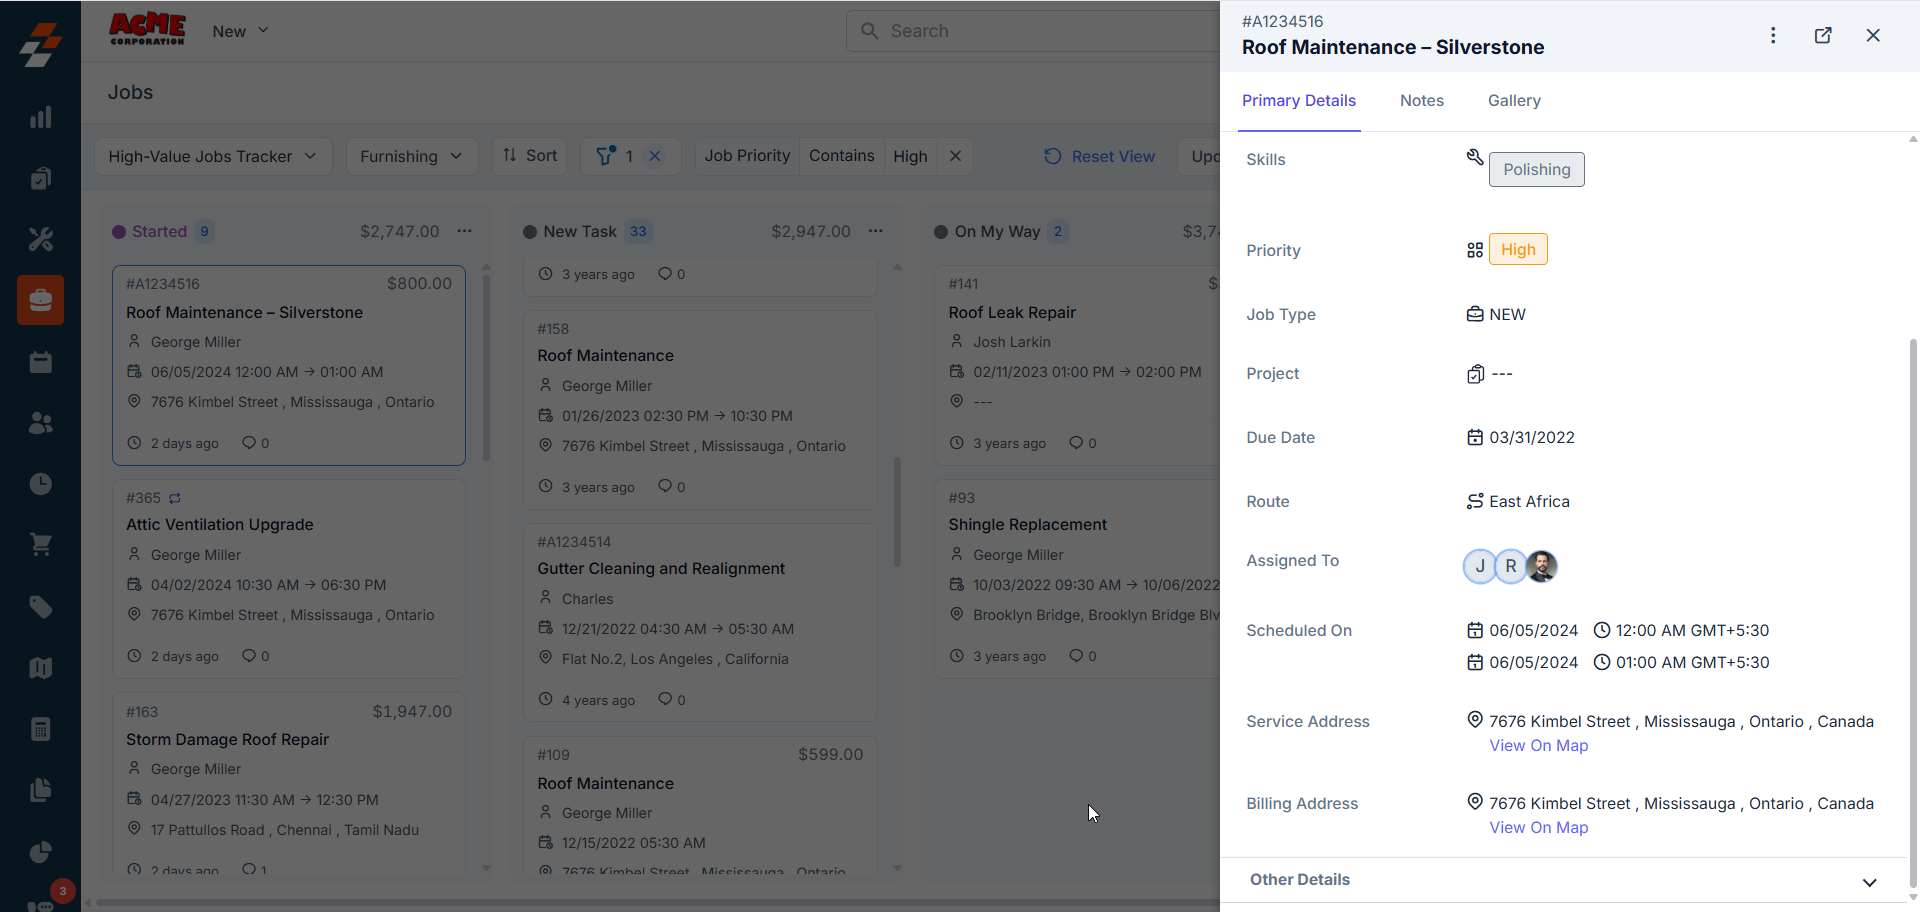
Additionally, you can view fields such as scheduled date, due date, chat, service address, title, contact, and job value for each job. The aggregated revenue from the jobs is displayed at the top of the respective columns.
Working with Kanban Views
In addition to viewing the record details in an organized manner, you can perform several other operations from the Kanban view. Let us take a look at each of them:-
Drag and Drop: You can drag and drop a record from one column to another based on the requirement. For instance, if a customer declines an offer but you want to keep them in the pipeline, you need to drag their job card from ‘New’ to’Pending’ . The status updates automatically, and the column’s aggregated revenue adjusts in real-time.
Note: When you move a card to a status with an associated checklist, Zuper will prompt you to complete the checklist before updating the status.
-
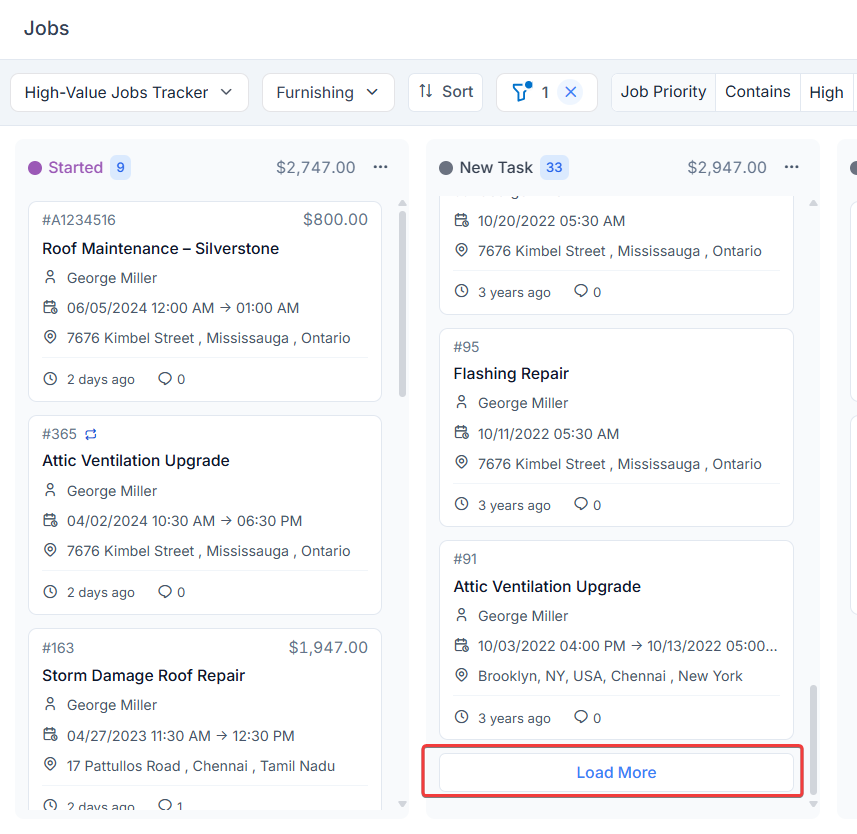
Expand and Scroll: You can expand each status column to view more details or scroll to see all jobs within that stage. You need to click “Load More” on the column to expand it.
-
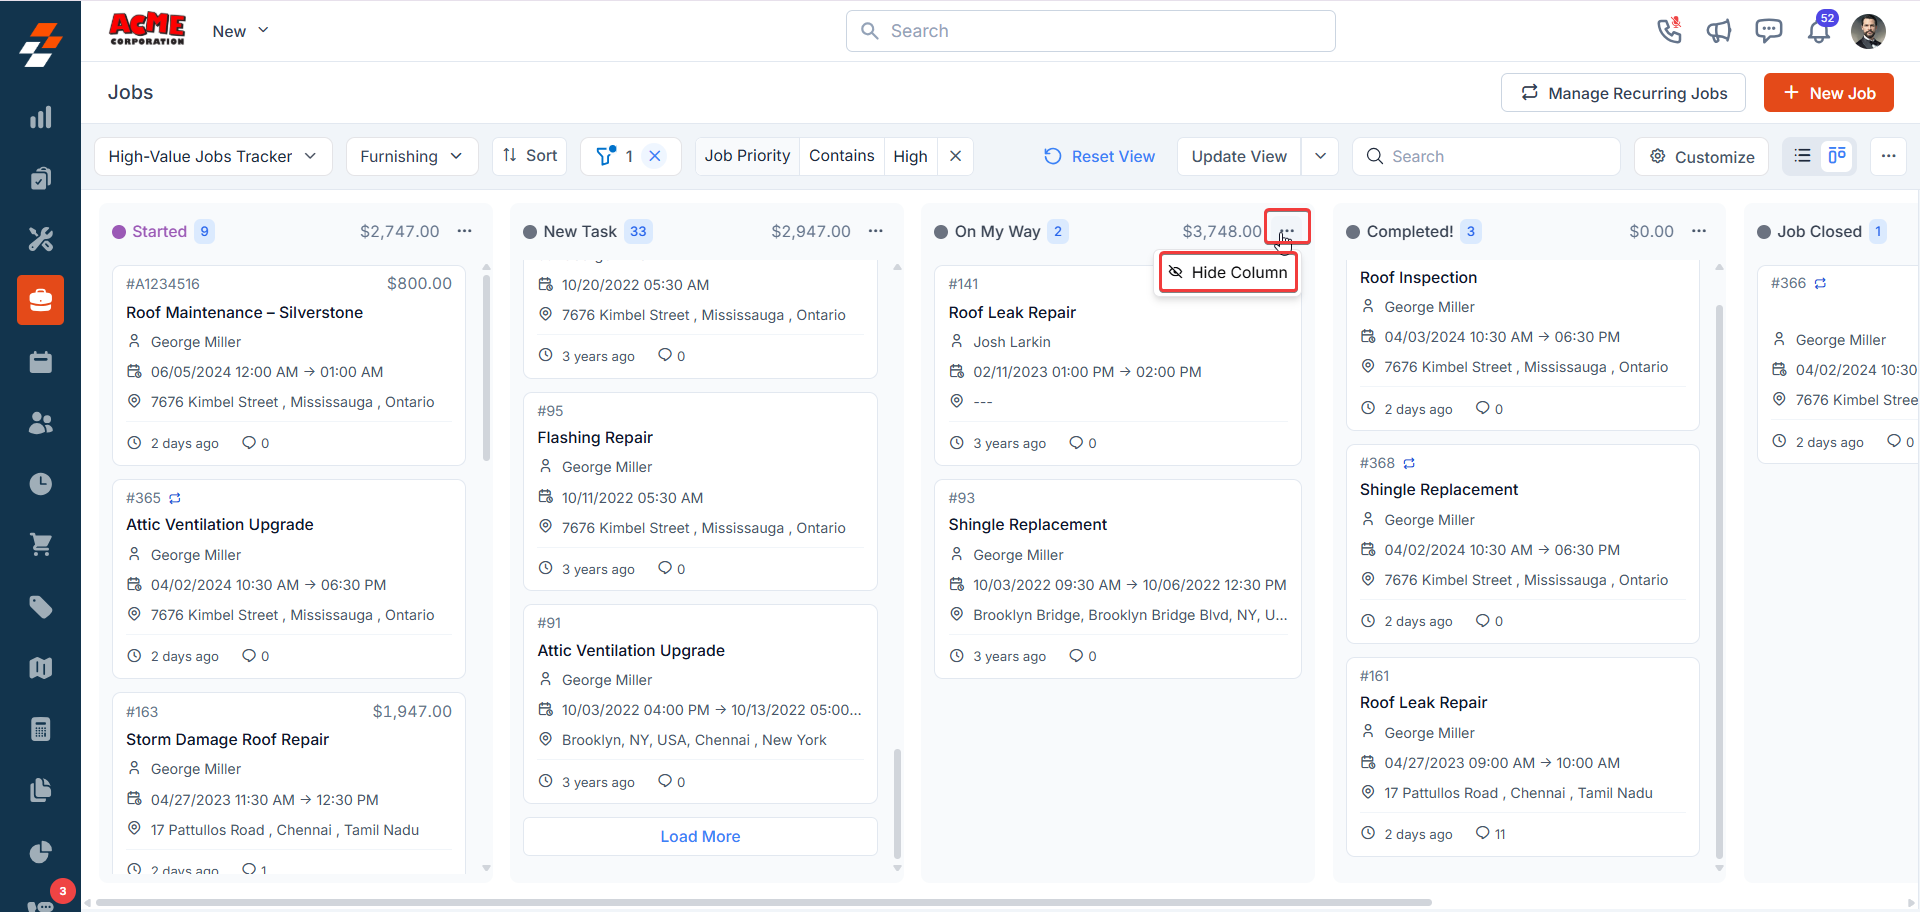
Hide Columns: You need to click the context menu (three dots) at the top of a column and select Hide if you don’t need to see a particular status, helping you declutter your view.
-
View Key Details: Each job card displays essential information, such as:
- Job Title
- Customer Name
- Scheduled Date
- Due Date
- Job Site
- Job Value
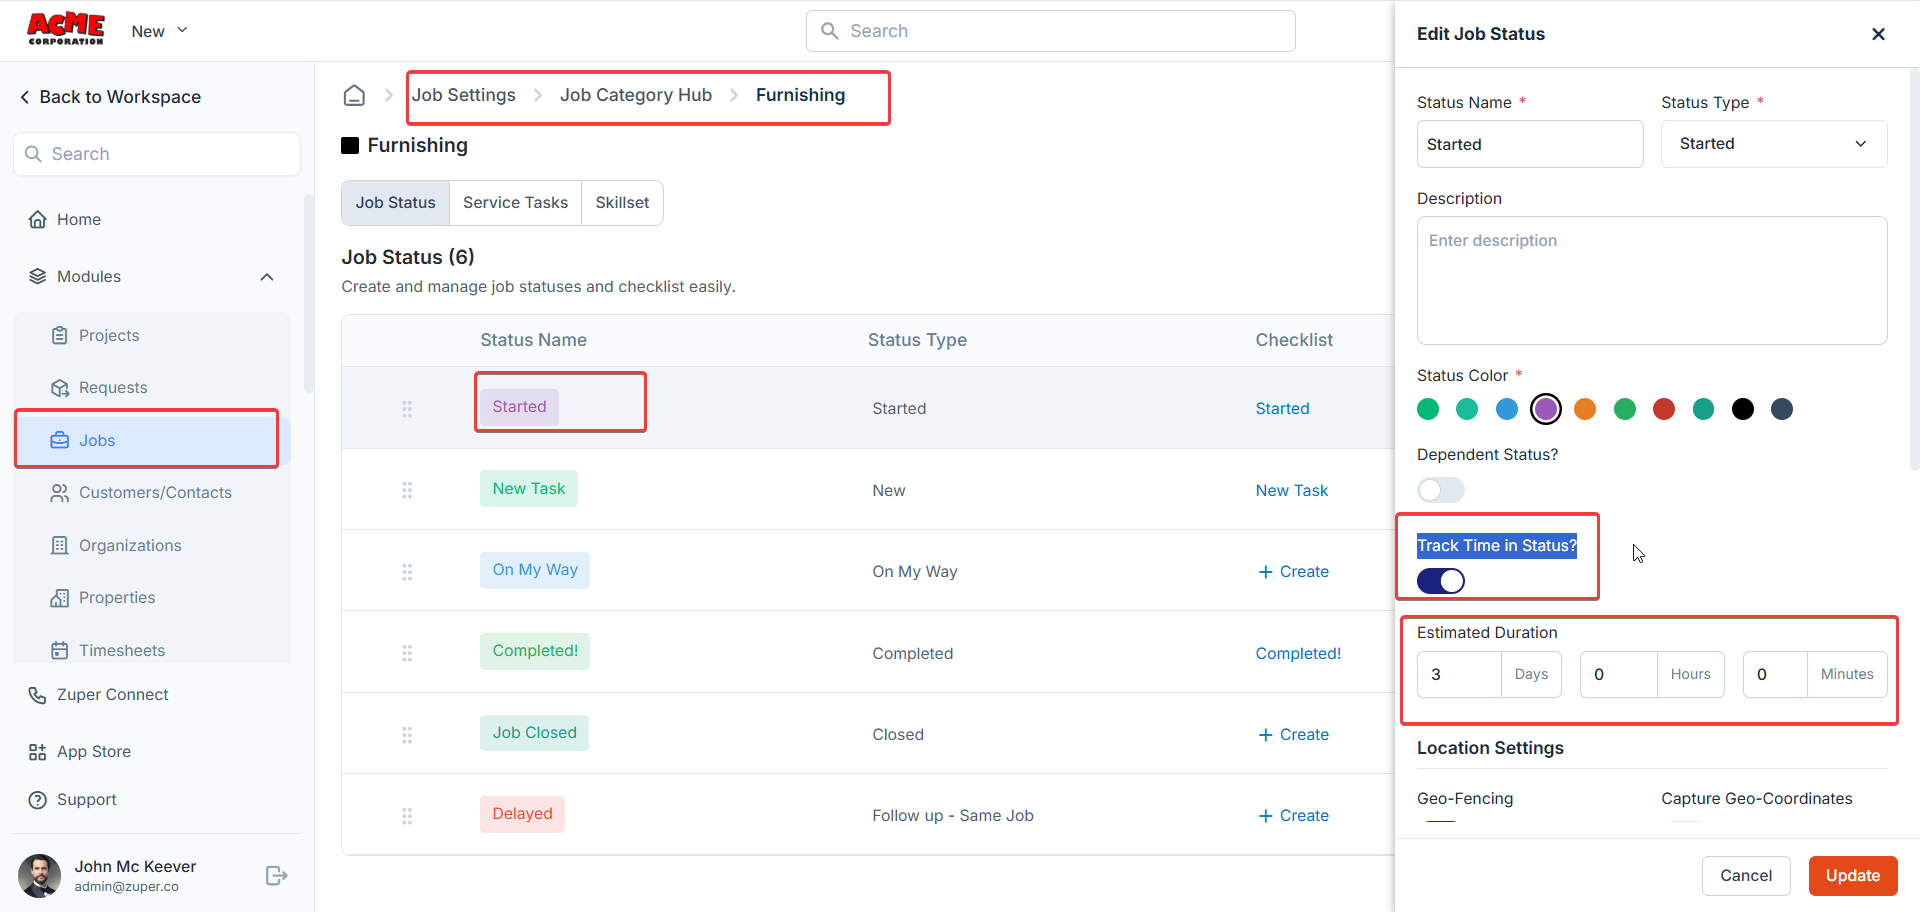
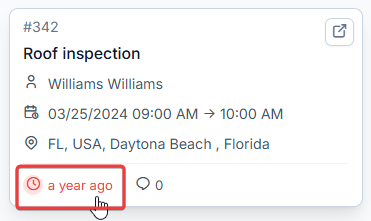
- Duration (displays how long the job has been in its current status. If the Track Time in Status setting is enabled and the job exceeds the estimated duration, the timer turns red to indicate a delay)
-
Notes (for adding comments or updates)
You can also customize the card details that appear. To know more, see Customization.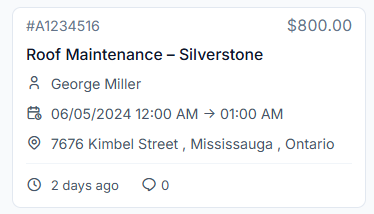
- View Job Details: You can click on a job card to view its details directly.
Managing Kanban Views
Given that you can create multiple views, you can also manage and delete views based on your requirements. Managing views would mean that you can customize the Kanban views based on your individual preference.Customizing a Kanban View
You can adjust your Kanban view to suit your needs with these steps:-
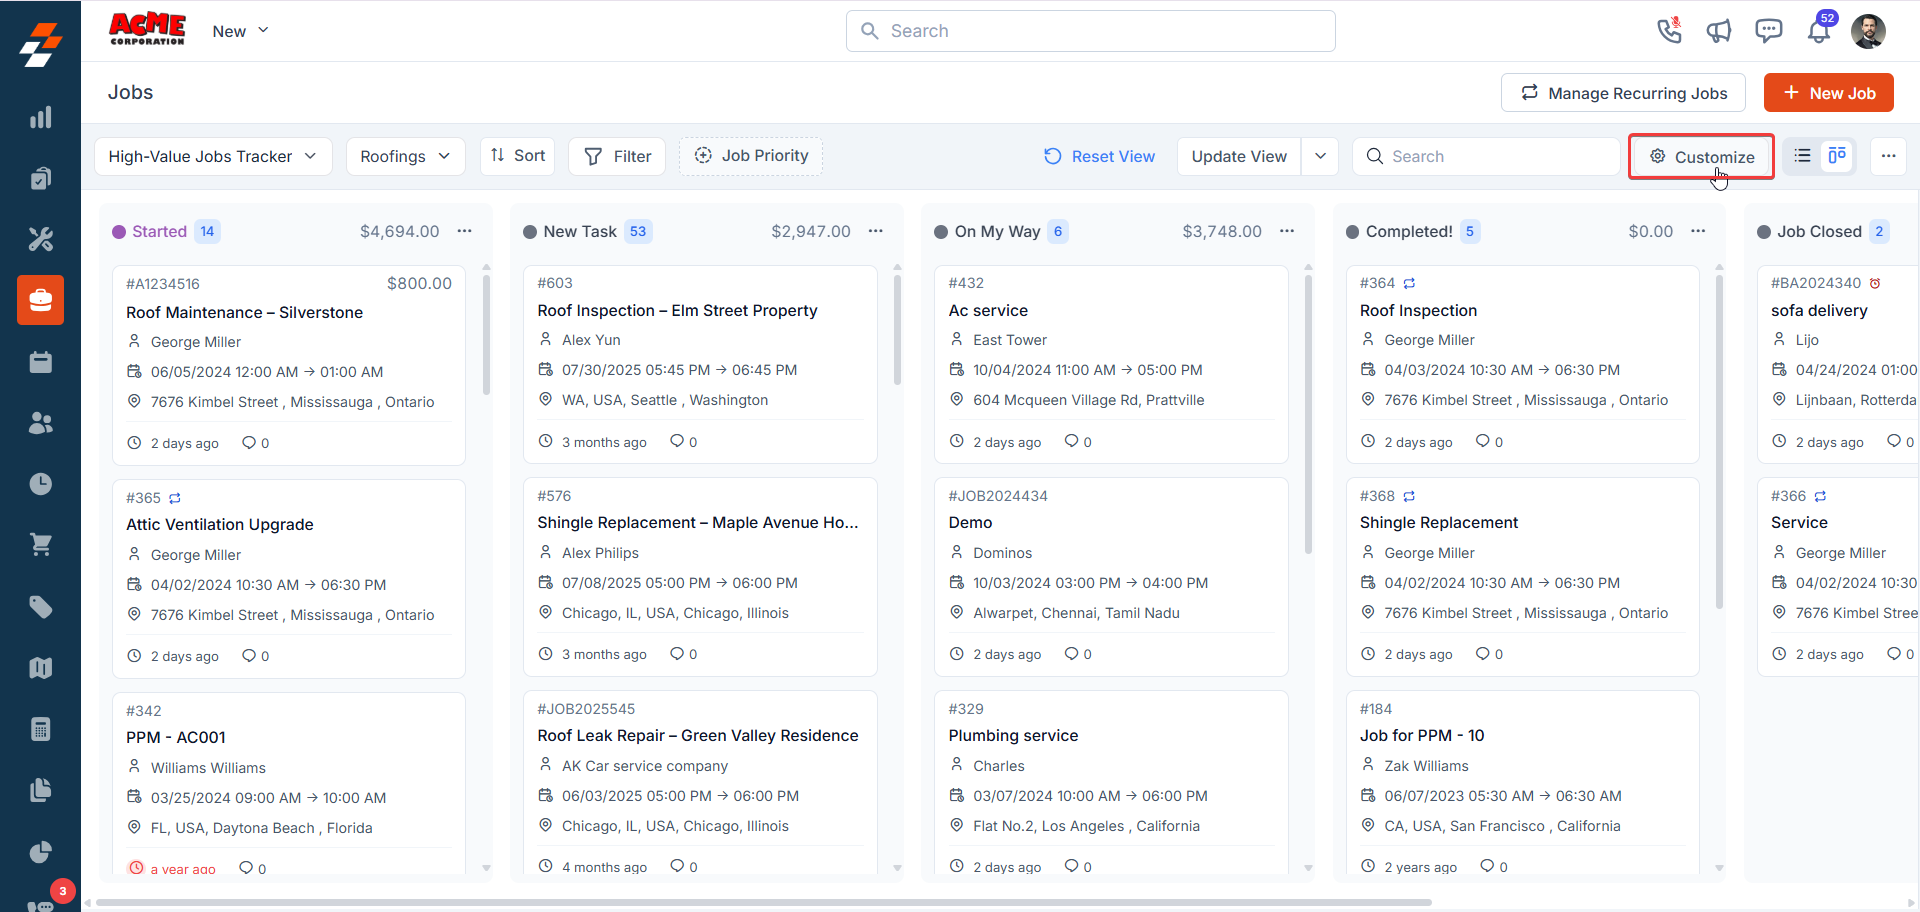
Click the Customize button at the top of the Kanban View to access the panel.

-
You can decide whether to display Job Name or Customer Name as the card’s title.

- If you want to show more details, you need to click Customize on the card style, then select up to three fields (e.g., Priority, Scheduled Date) to display on each card. You can search for fields, hover over them, and click the + icon to add them.
-
You can reorder fields by dragging and dropping them into your preferred order.
- You can use the eye icon to toggle which statuses (e.g., New, Started, Completed) appear in your view.
-
You can enable the Hide groups with no jobs toggle to remove columns without any jobs, keeping your view clean and focused.
Quick Actions in Kanban View
You can streamline your workflow with these actions available on the view.-
View Picker: You can switch between your saved Kanban and List Views.
-
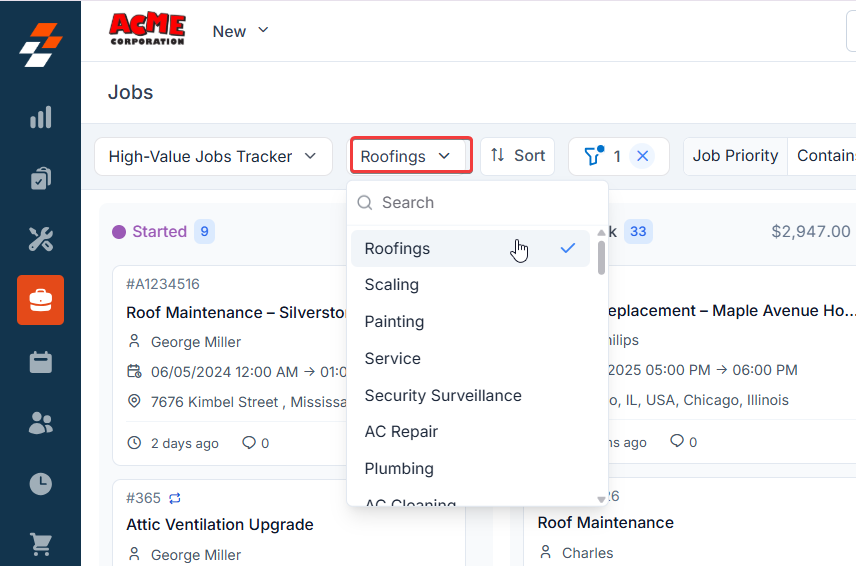
Job Category: You can view jobs based on job category (e.g., Roofing) to organize your view by specific types of work.
-
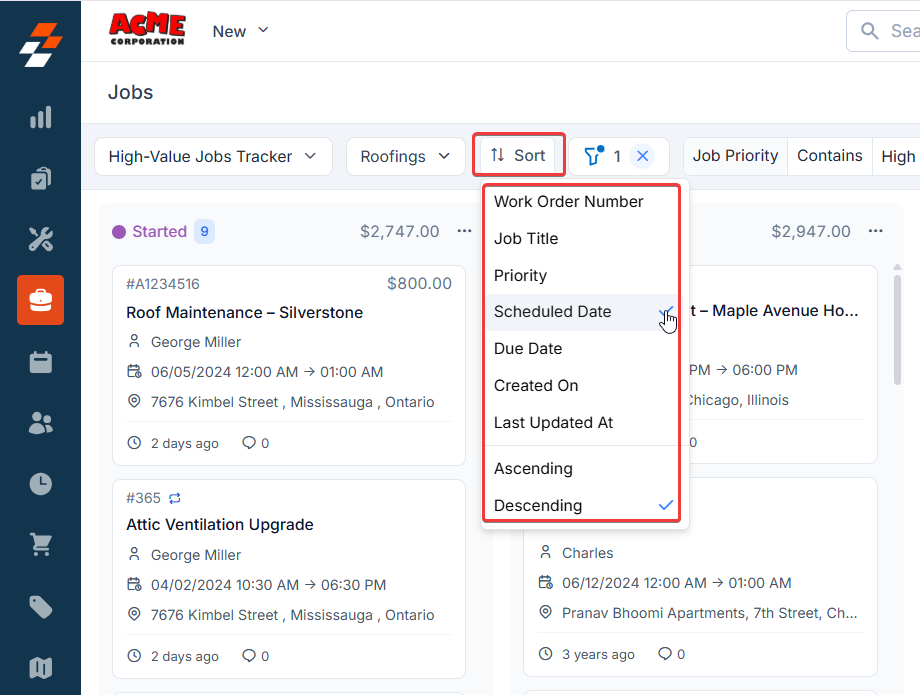
Sort: You can arrange jobs within columns by fields such as Work Order Number, Job Title, Priority, Scheduled Date, Job Value, and more, in either ascending or descending order.
-
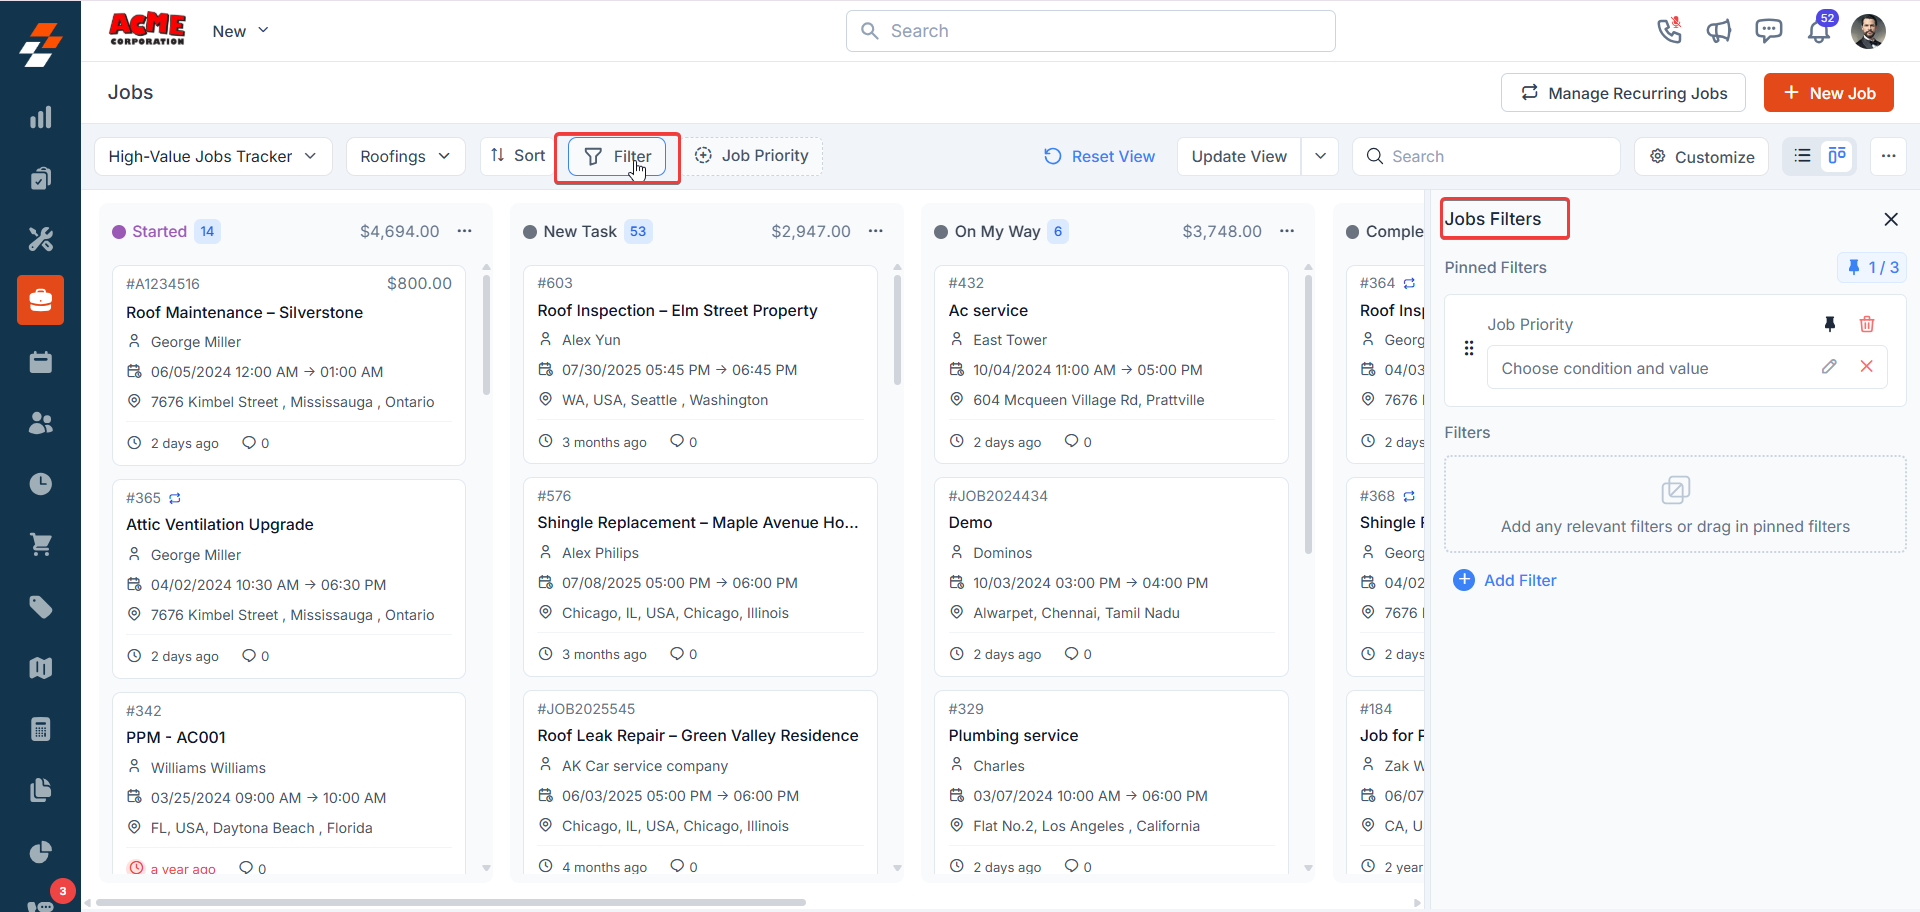
Filters: You can narrow down jobs by criteria like Scheduled Date Range or Job Priority.
- Search: You need to type keywords in the search bar to quickly find specific jobs.
-
Customize: You can access the customization panel to adjust card details, group options, and filters, tailoring the Kanban View to your preferences.
-
Context Menu Actions: You can manage your view with these options:
- Rename: You can update the name of your view for better identification.
- Visibility: You need to adjust who can access the view (e.g., Only Me, Everyone, or Selected Users) to control sharing.
-
Delete: You can remove a view you no longer need to keep your workspace tidy.

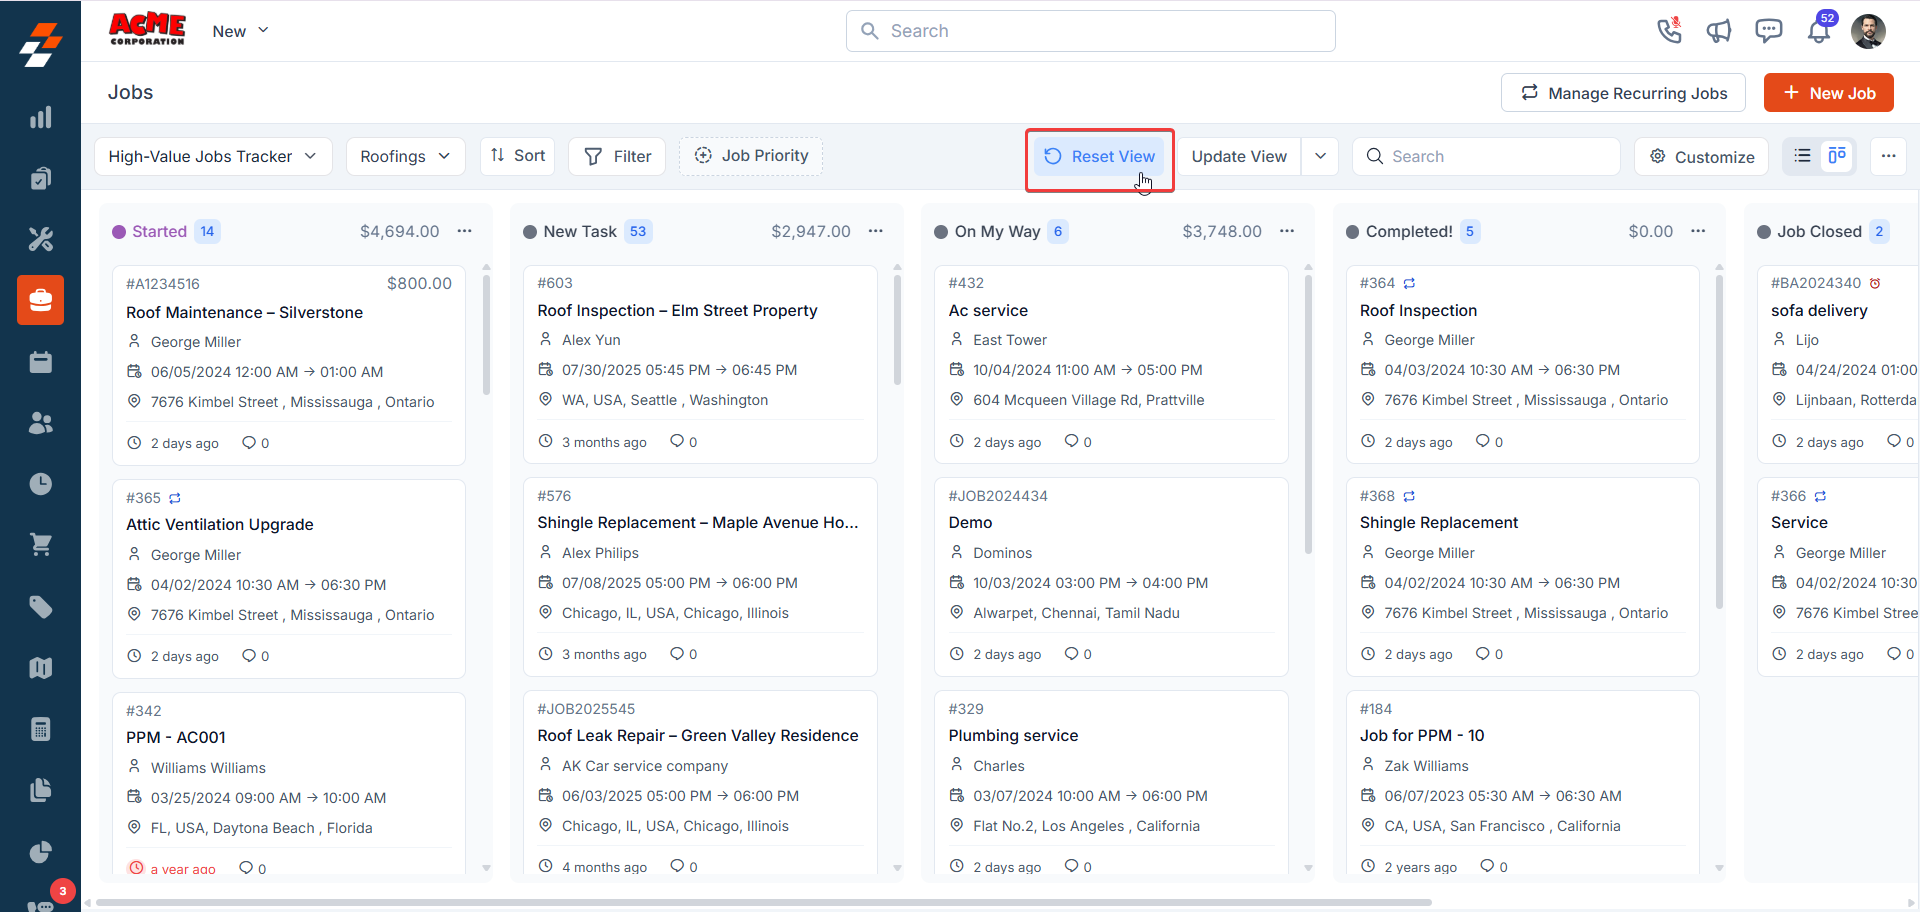
You need to confirm the reset to proceed, ensuring no accidental changes.
Sharing Kanban Views
Kanban Views are designed for collaboration. When creating or editing a view, you can set its visibility to:- Selected Users/Teams: You need to grant access to specific individuals or teams, with either View or Edit permissions.
- Everyone: You can share it with all users in your company for team-wide access.
FAQs
Q: Can I create multiple Kanban Views for different purposes? A: Yes, you can create multiple Kanban Views tailored to your needs. For example, you can set up one view to track high-priority jobs and another for monitoring cancelled tasks. Q: How do I switch between Kanban and List Views? A: You can switch between views using the View Picker dropdown at the top of the Job listing page. You need to select either Kanban or List from the available options to change the display format. Q: Can I hide columns that don’t have any jobs? A: Yes, you can activate the Hide groups with no jobs toggle in the Customize panel to conceal empty columns, keeping your view focused on active tasks. You need to save your changes by clicking Save View for this to take effect. Q: How do I share a Kanban View with my team? A: You can set the visibility during the creation or editing process in the Share View dialog box. You need to choose Everyone for company-wide access or Selected Users/Teams to grant specific permissions (e.g., View or Edit).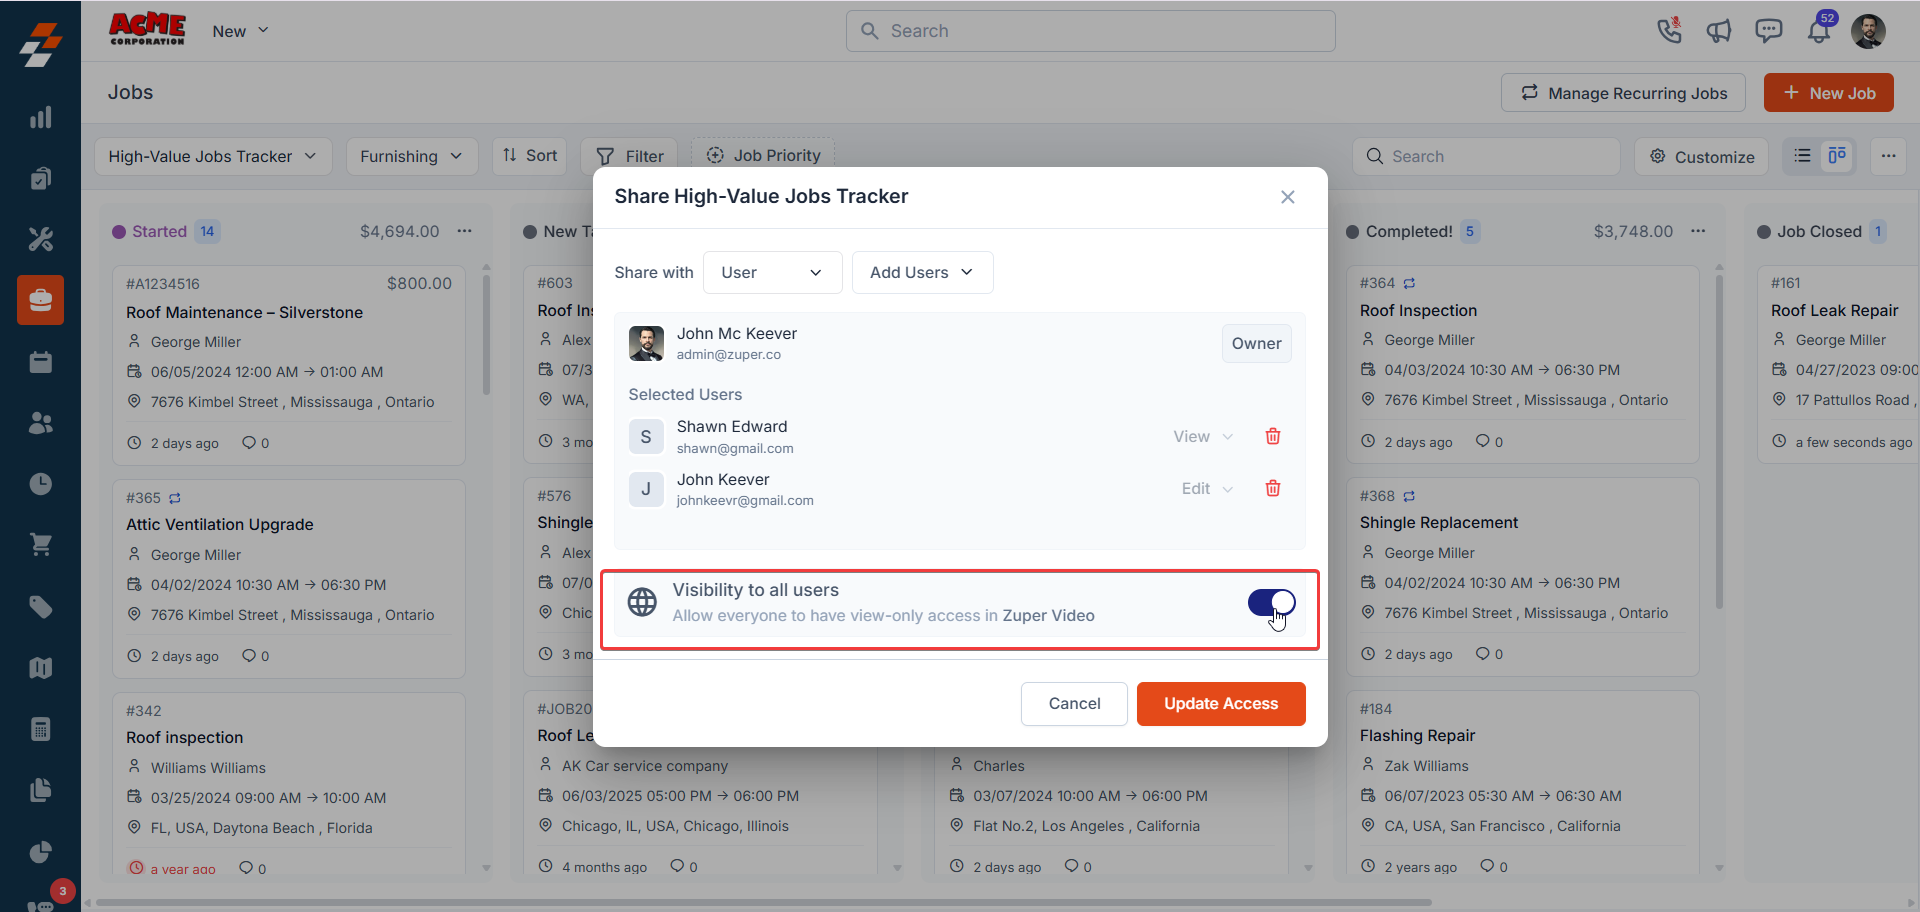
This visual cue helps you and managers quickly identify bottlenecks and take timely action to keep operations on track.