Overview
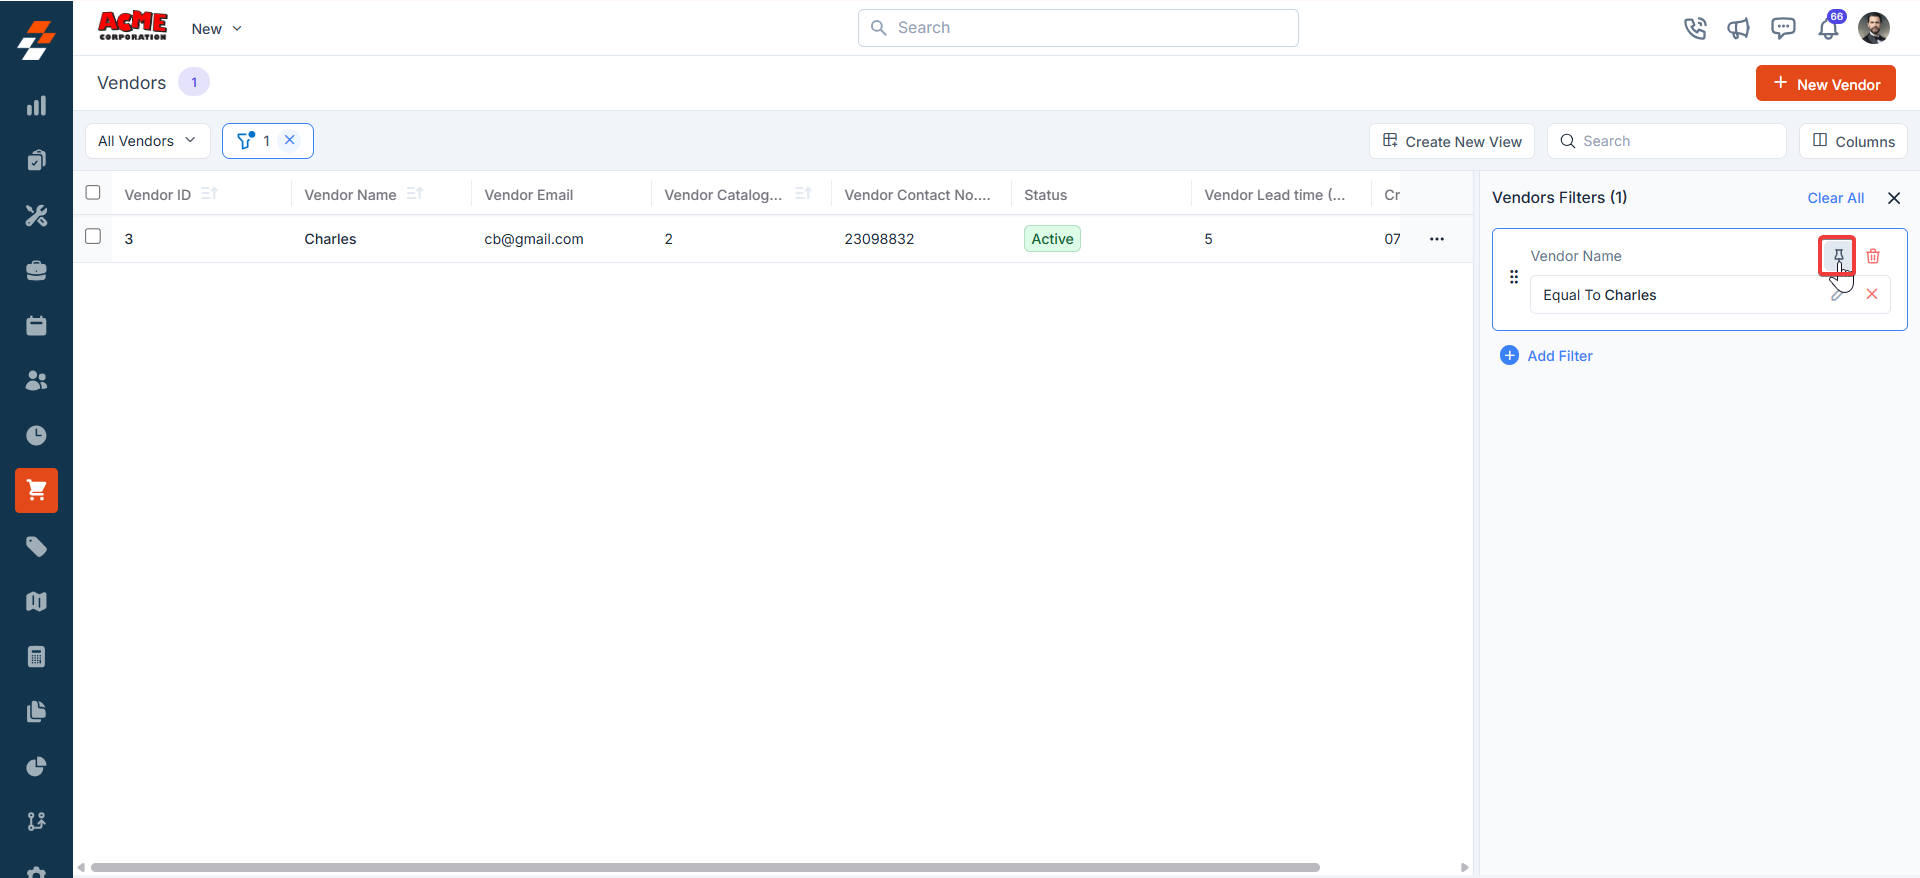
Zuper’s Vendor Management module helps streamline how businesses manage vendors, their product catalogs, and related transactions. From maintaining contact and banking details to assigning delivery preferences and organizing product SKUs, this feature centralizes all essential vendor-related data in one place.Pinned filters
Navigation: Vendors -> Filters -> Pinned Filter
- Select the “Vendor Management” module from the left navigation menu.
- Pin Filters for Quick Access
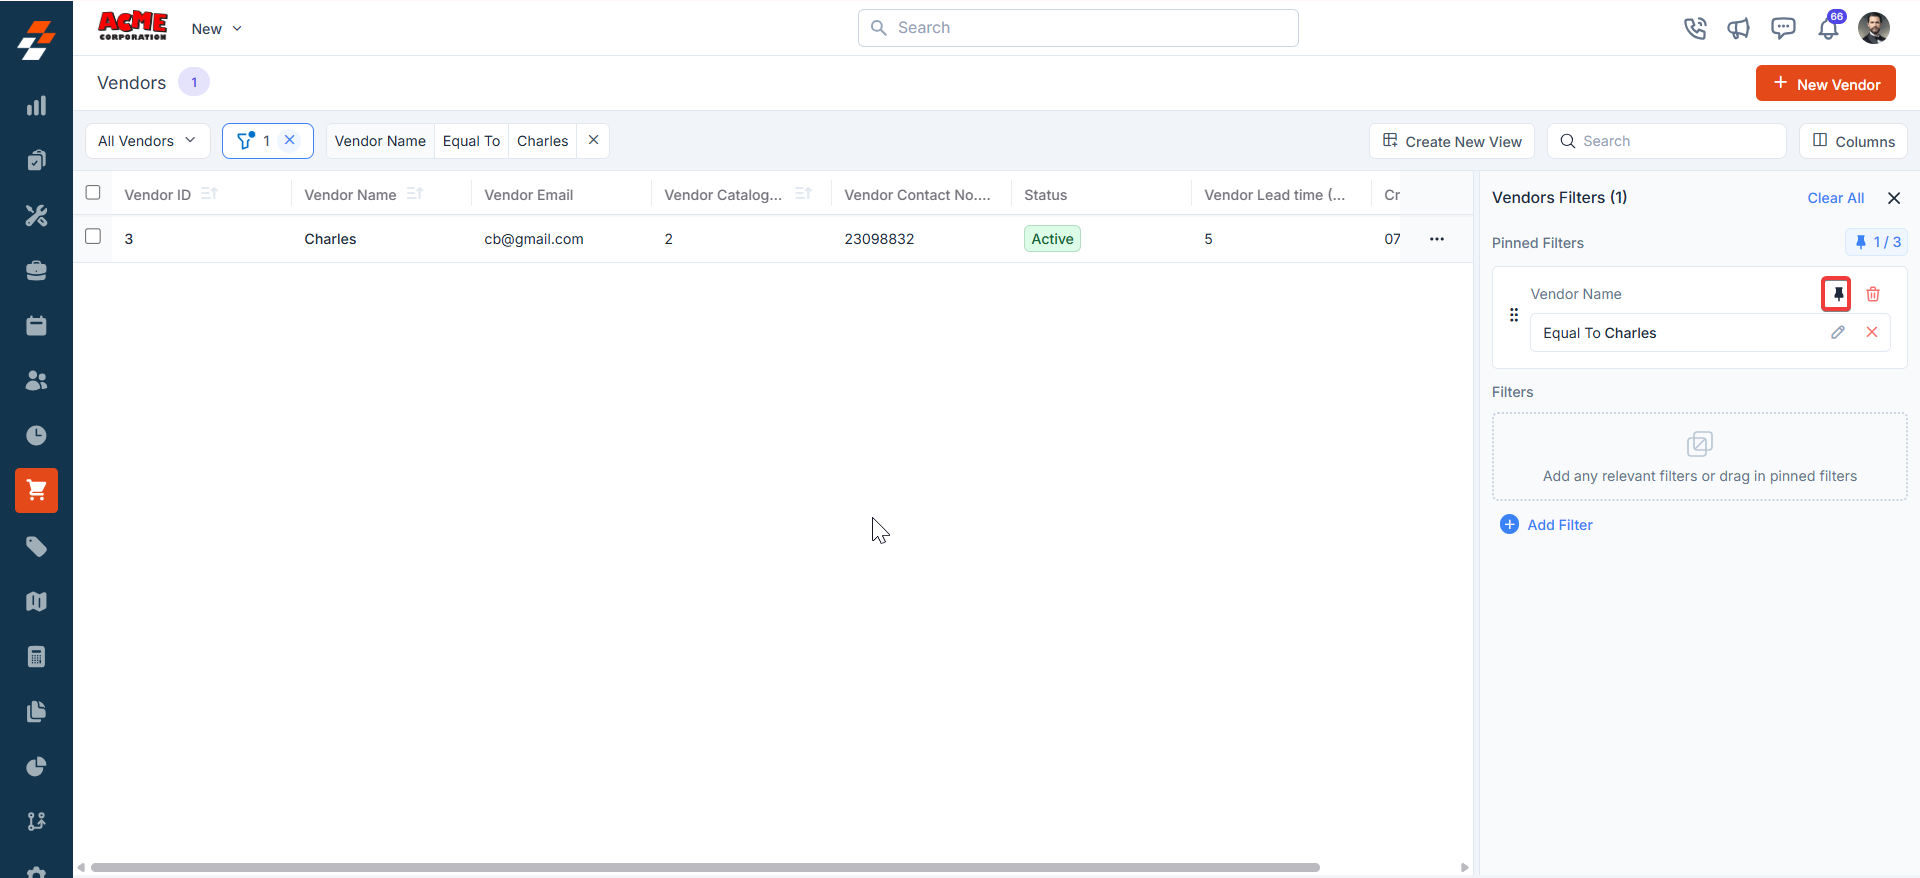
- Once your filters are set, click the Pin Filters button in the dialog box to save them as pinned.
- Pinned filters appear in the dialog box’s “Pinned Filters” section, allowing you to apply them with one click in future sessions.
- To Unpin the filter:
- To unpin, select a pinned filter and click Remove.
- To apply pinned or default filters, open the dialog box and select them.
- Use Clear All to remove active filters.
1. Primary Details
- Vendor Name: Enter the name of the vendor.
- Contact Name: Enter the primary contact person’s name.
- Display Name: Enter a recognizable name for the vendor. This name will be displayed across the platform.
- Vendor Email: Enter the vendor’s email address.
- Vendor Work No: Enter the vendor’s work phone number.
- Mobile Number: Enter the vendor’s mobile contact number.
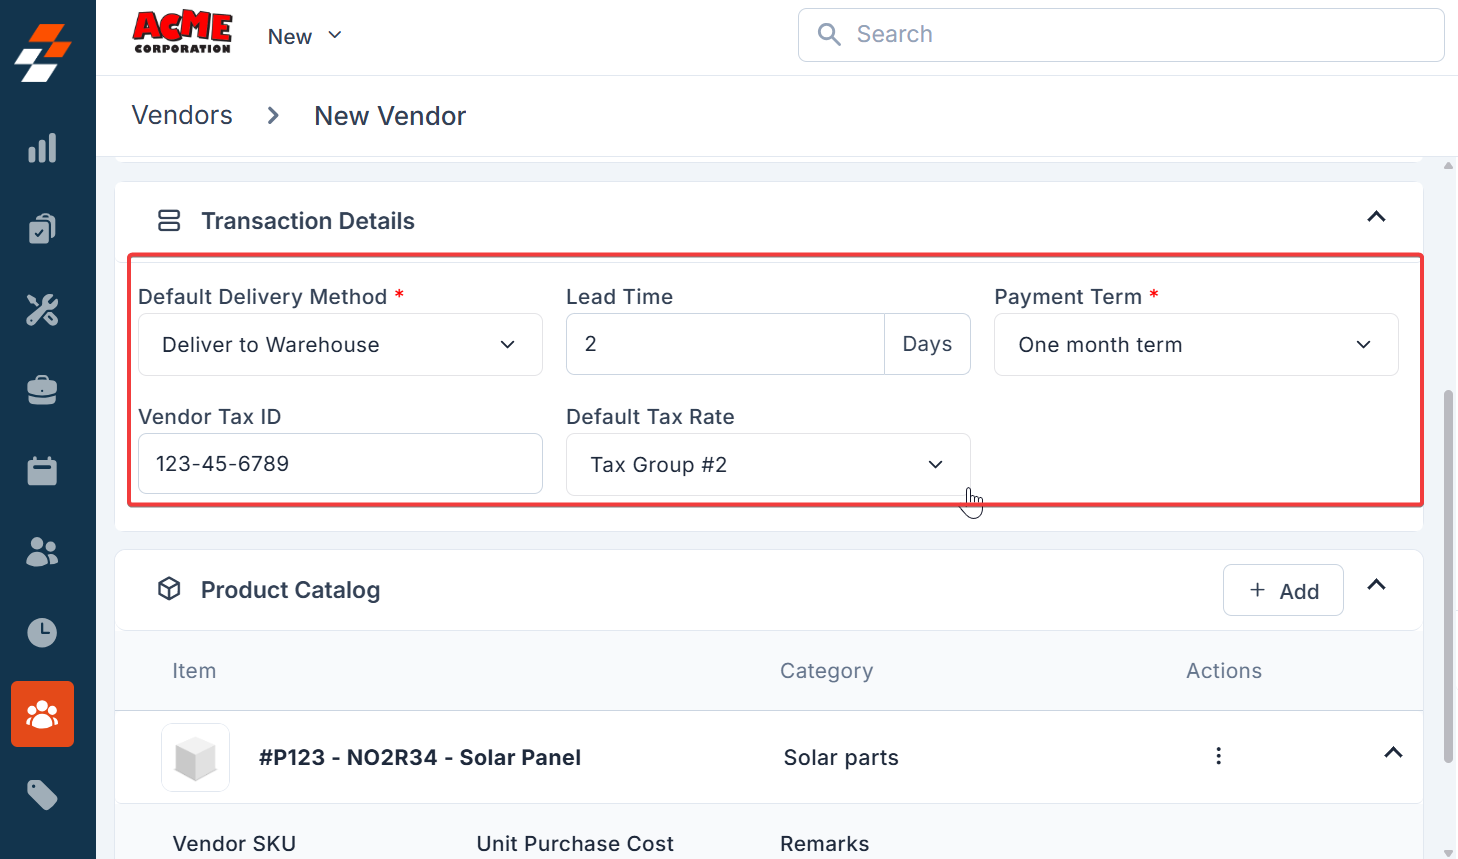
2. Transaction Details
Delivery Method: Choose any delivery method: direct shipment, delivery to warehouse, or pickup address. When adding or modifying a vendor, indicate their preferred delivery method.- Direct Shipment to Job’s site: If the purchase order (PO) is associated with a job, the delivery address will automatically populate with the job’s service address. You must choose a warehouse or provide a custom address if no job is linked.
- Deliver to Warehouse: If the assigned technician has a designated product location, it will be prefilled. Otherwise, select from the available warehouse locations.
- PickUp Only:The vendor won’t deliver the parts to a warehouse or job site. Instead, you’ll need to pick them up at a designated location. If this option is selected, a dialog box appears where you can enter the pickup address.
- Lead Time: This represents the days required for the part to become available at the warehouse or designated location. Essentially, it reflects the time it takes for the vendor to fulfill and deliver the part to the agreed-upon delivery location.
- Payment Term: Select the payment term (e.g., a two-month term). The term is defined under the organization settings.
- Vendor Tax ID: Enter the vendor’s tax identification number.
- Default Tax Rate: Choose the applicable tax rate.
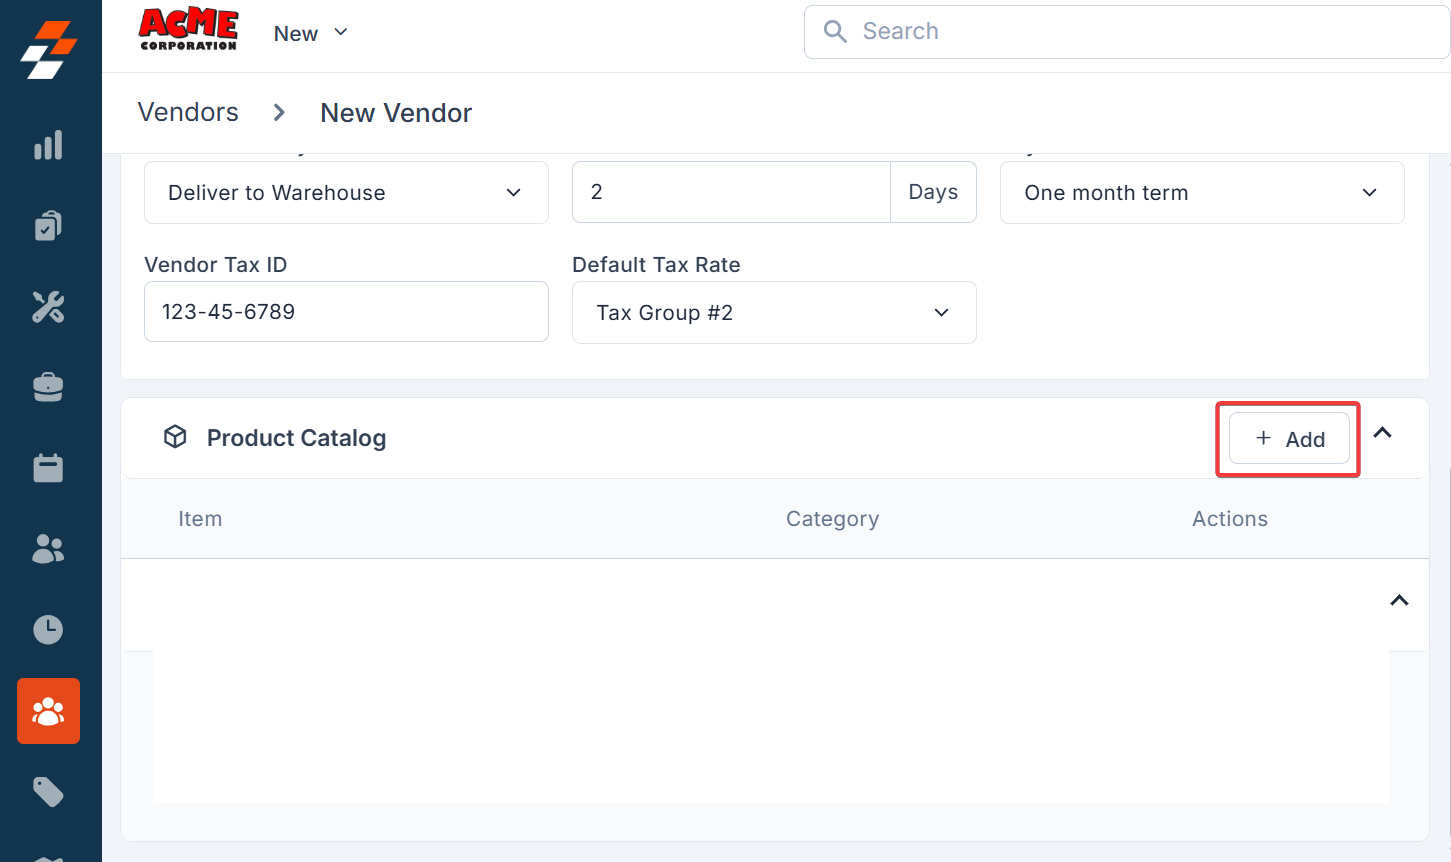
3. Product Catalog
You can include one or more SKUs (variants like size, color, or model) for each product and input the vendor-specific cost associated with each SKU.- Click the ”+ Add” button to add products associated with the vendor. A dialog box will appear. Choose and add the Parts or Products and click “Next.”

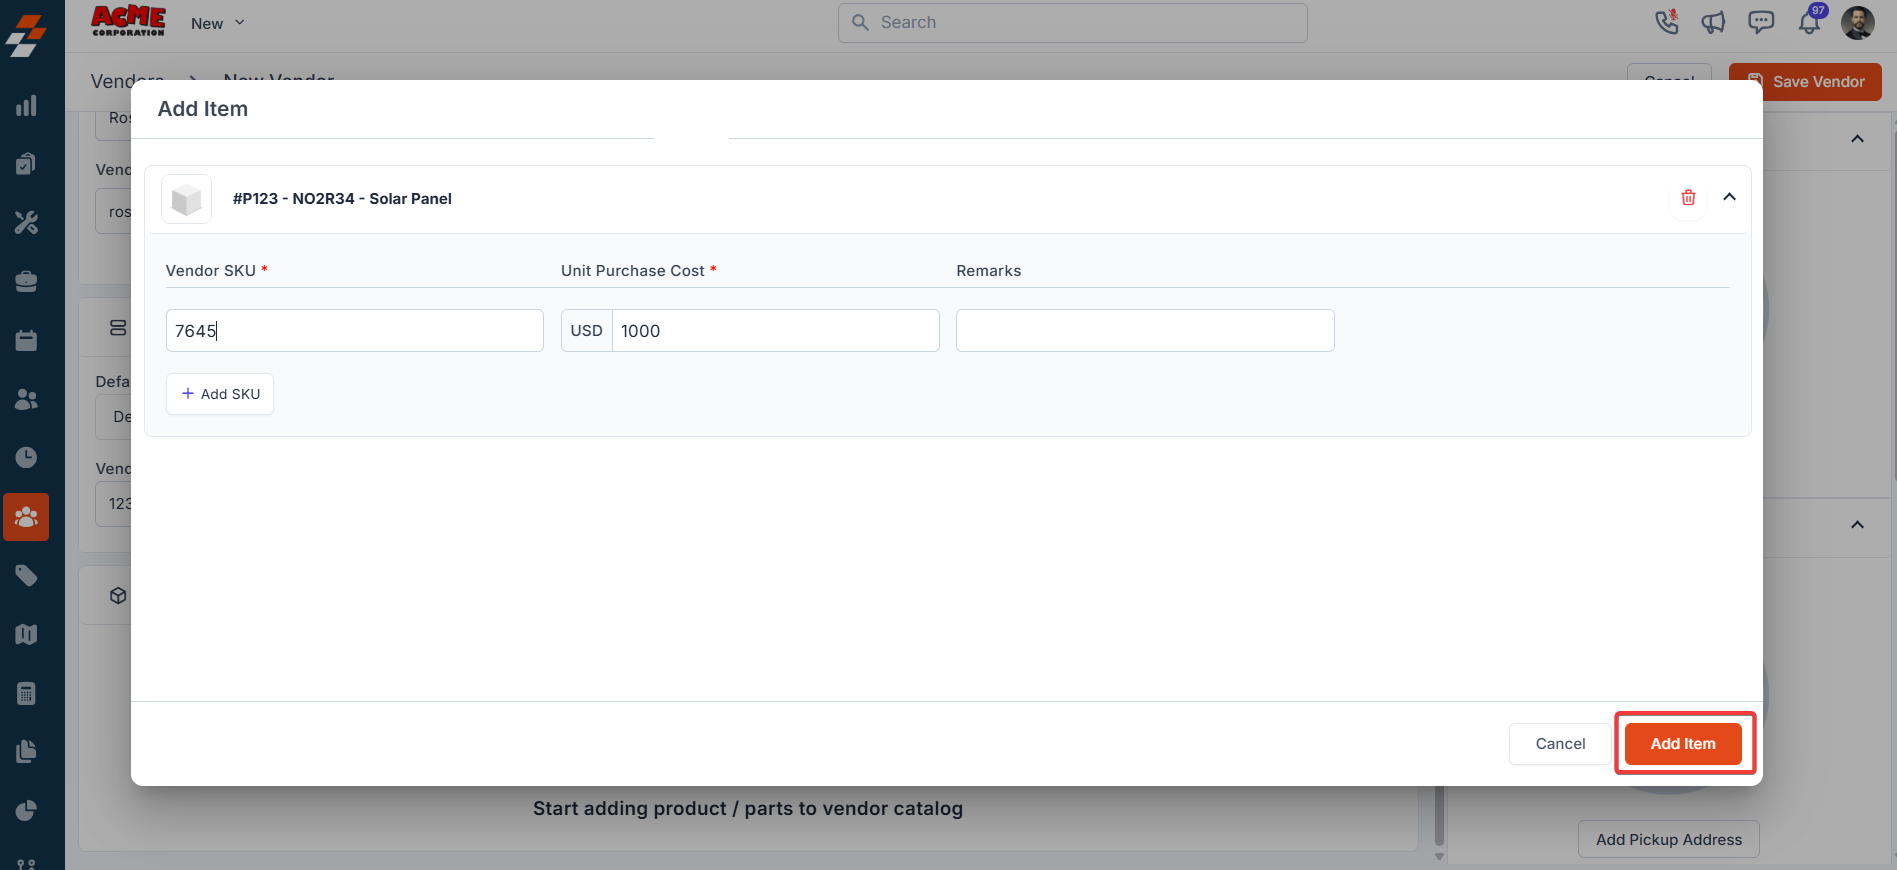
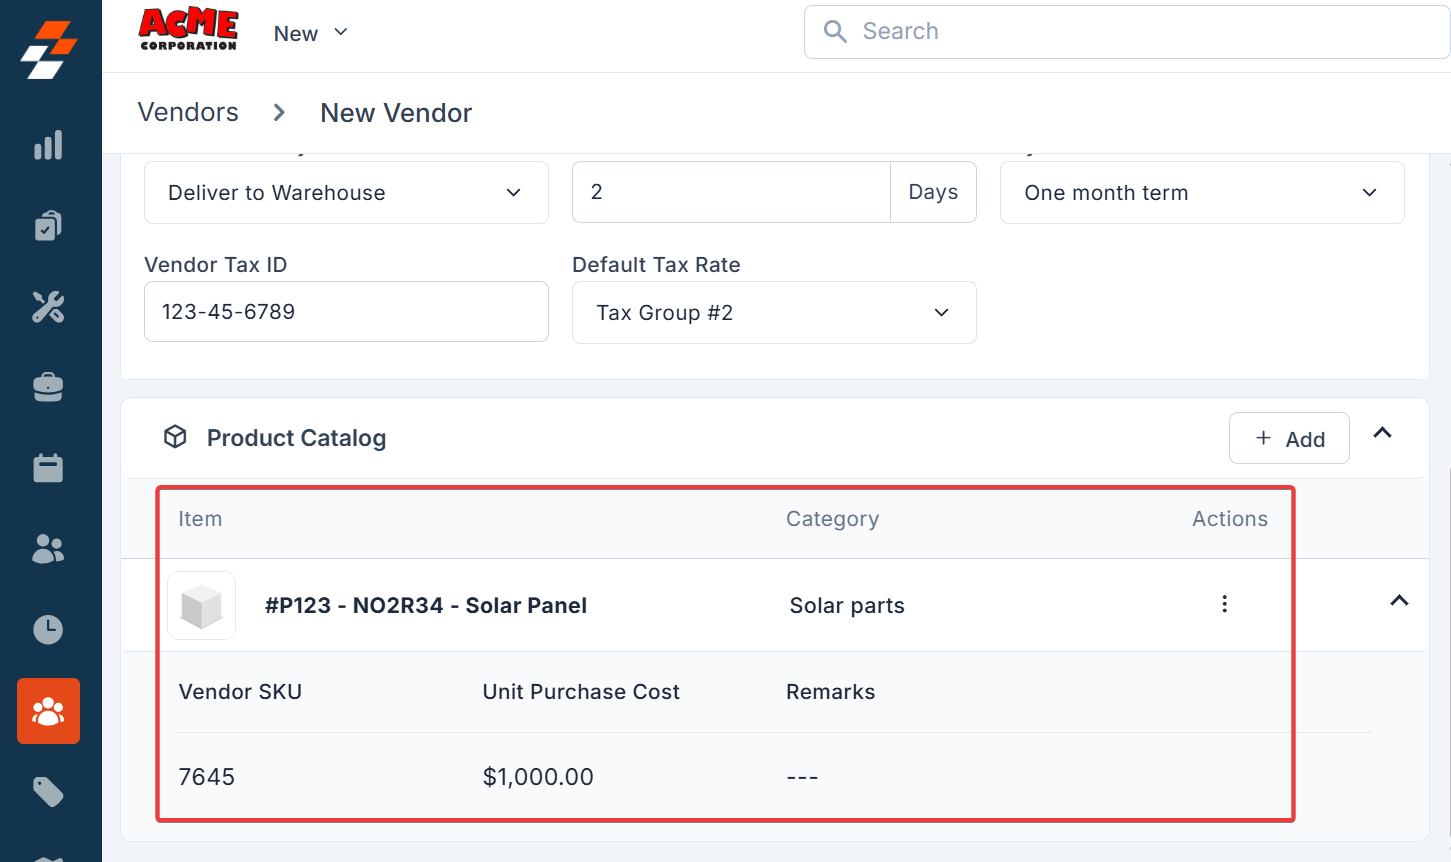
- Parts in the product catalog can be managed in two ways. If variants are not tracked in the master catalog, they can be managed directly under the vendor details. Alternatively, if the business requires all parts to be maintained in the master catalog, the Vendor SKUs will remain consistent across both the product catalog and the master.
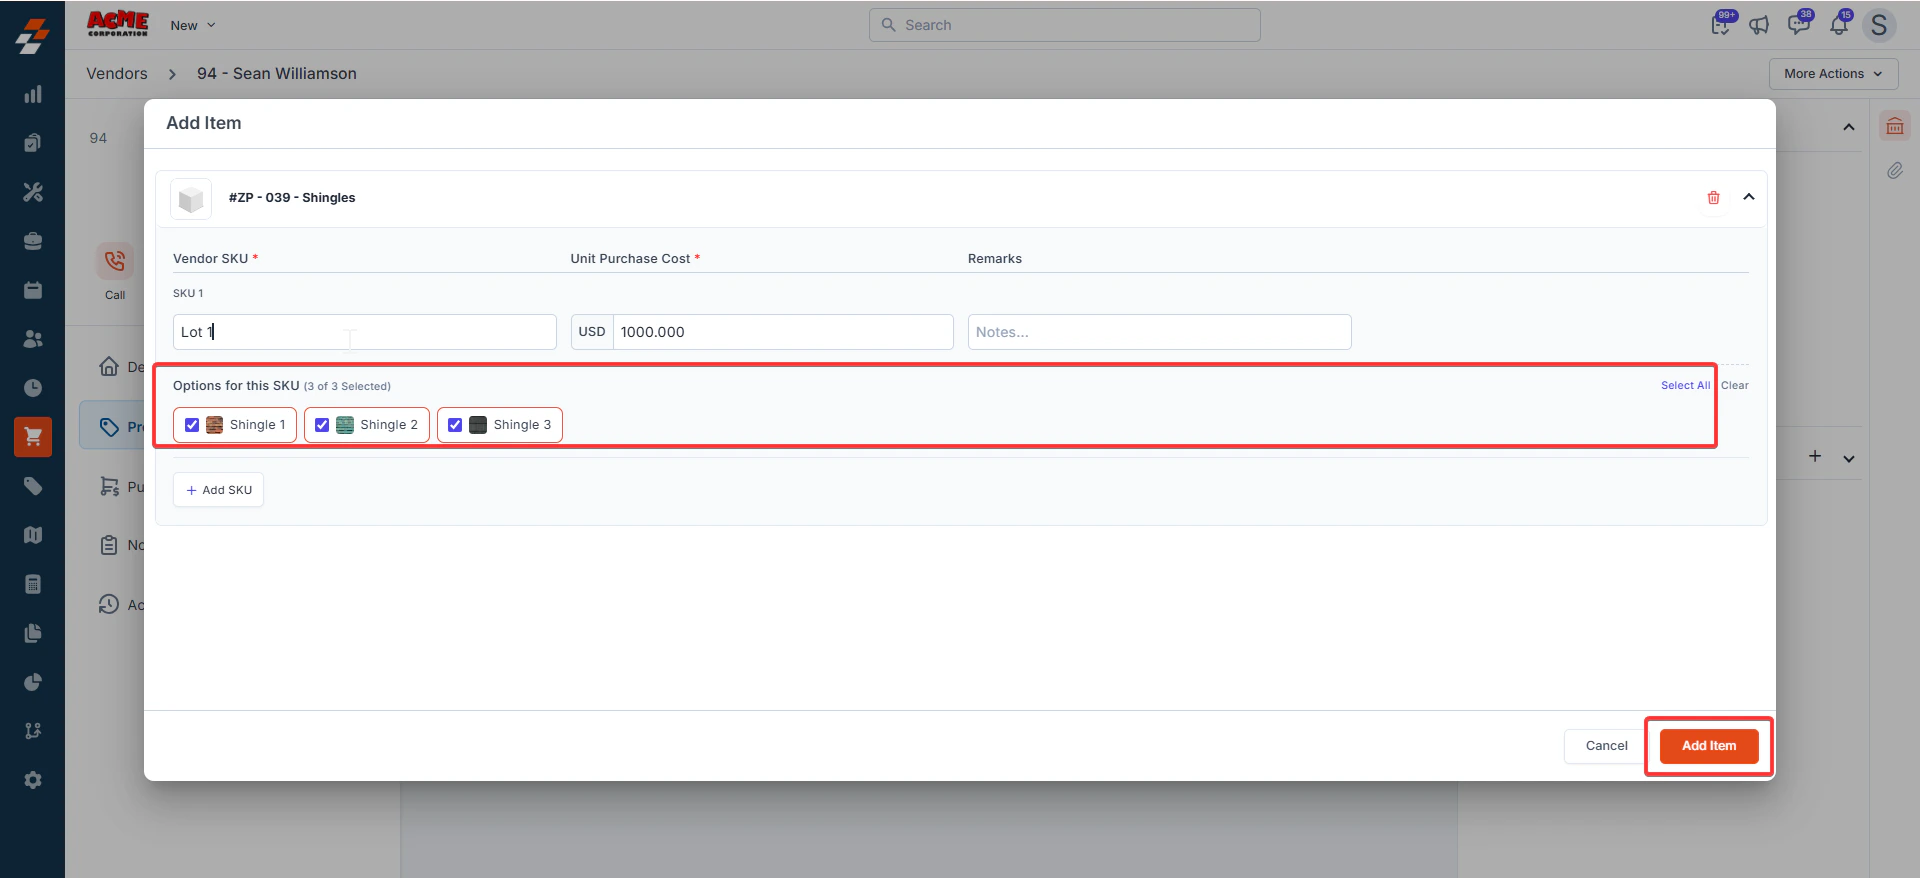
- Vendor Side: Add items with multi-select options
4. Addresses
- Billing Address: Add the billing address using the “Add Billing Address” option.
- Pickup Address: Use the “Add Pickup Address” option to add the pickup address. When the delivery method is set to Pick Up only, providing a pickup address is mandatory.
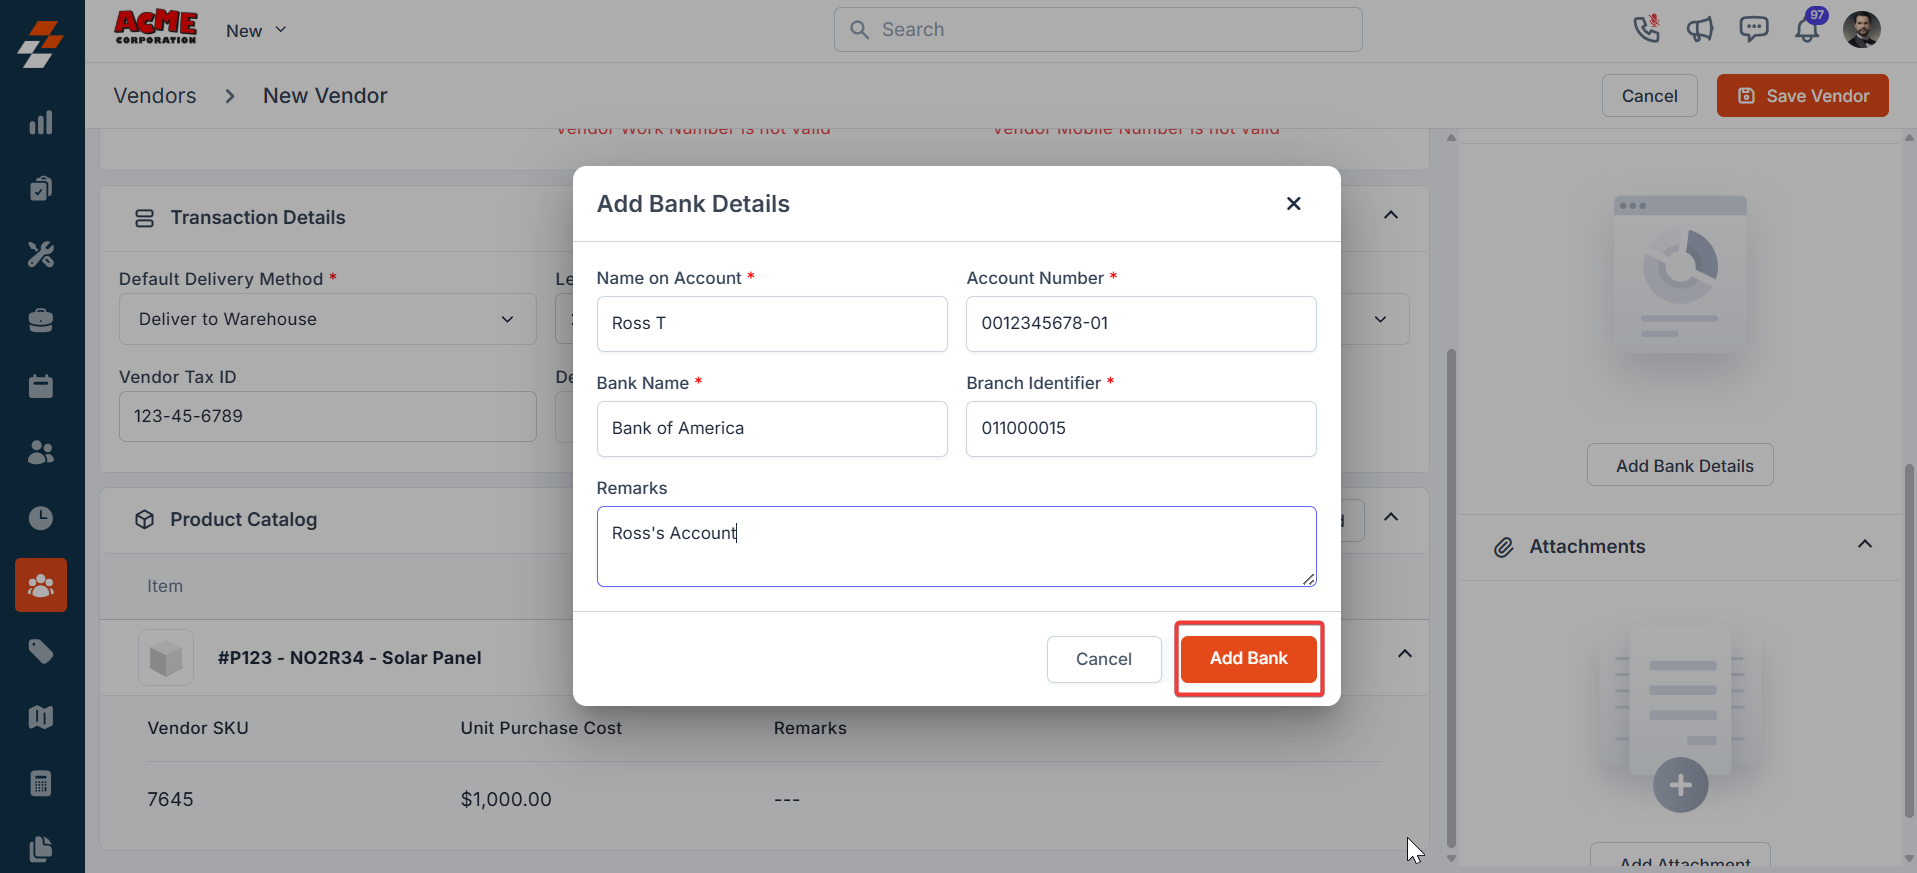
5. Bank Details
Input the vendor’s bank details under the “Bank Details” section. Name on Account - The account holder’s full name. Account Number - Enter the vendor’s bank account number. Bank Name - Name of the vendor’s bank. Branch Identifier - Typically the routing number or branch code. Remarks - Notes or description about the account.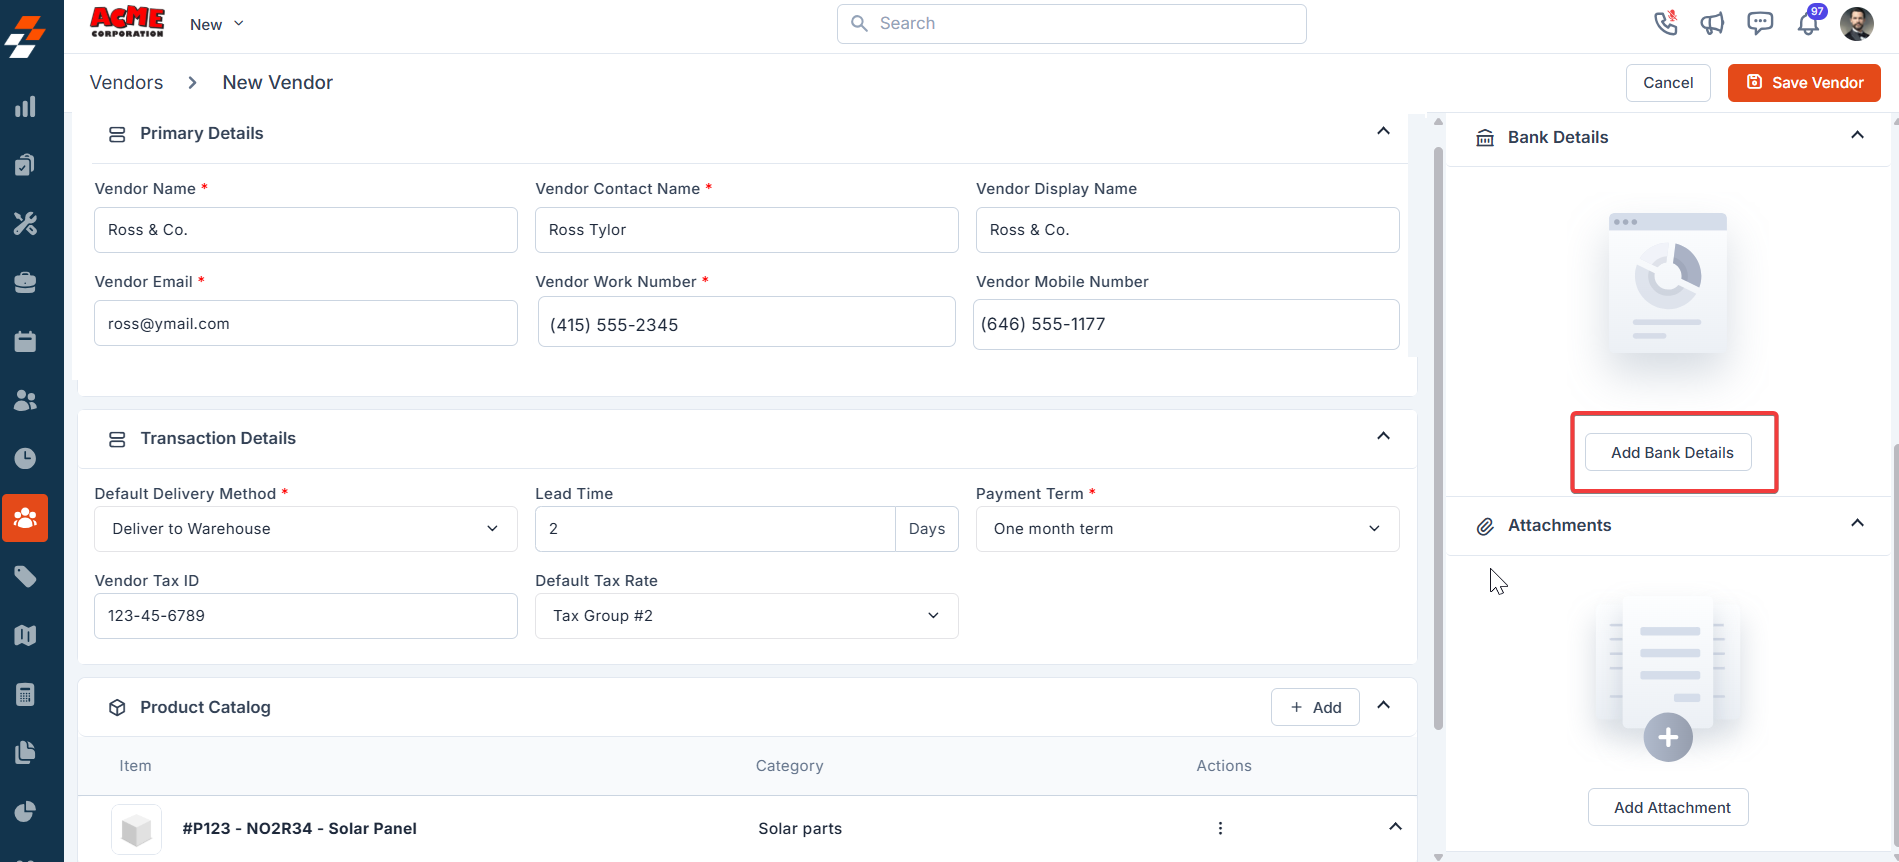
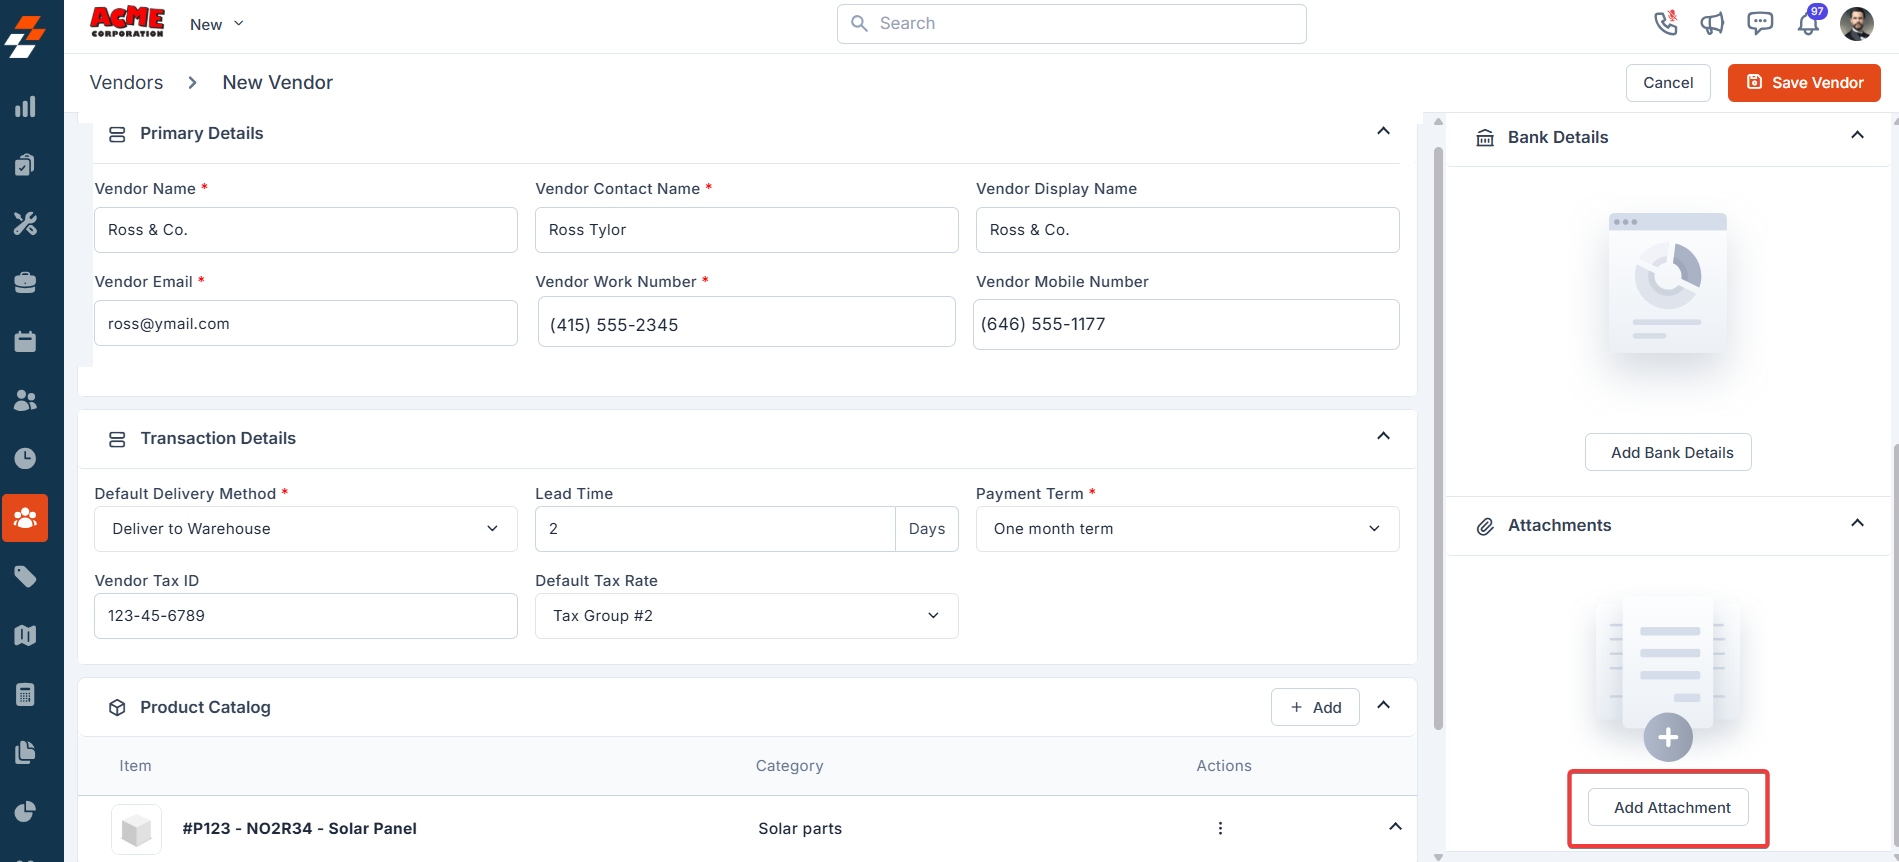
6. Attachments
- Upload relevant documents or files using the “Add Attachment” option.
- Click “Save Vendor” to save the vendor details.
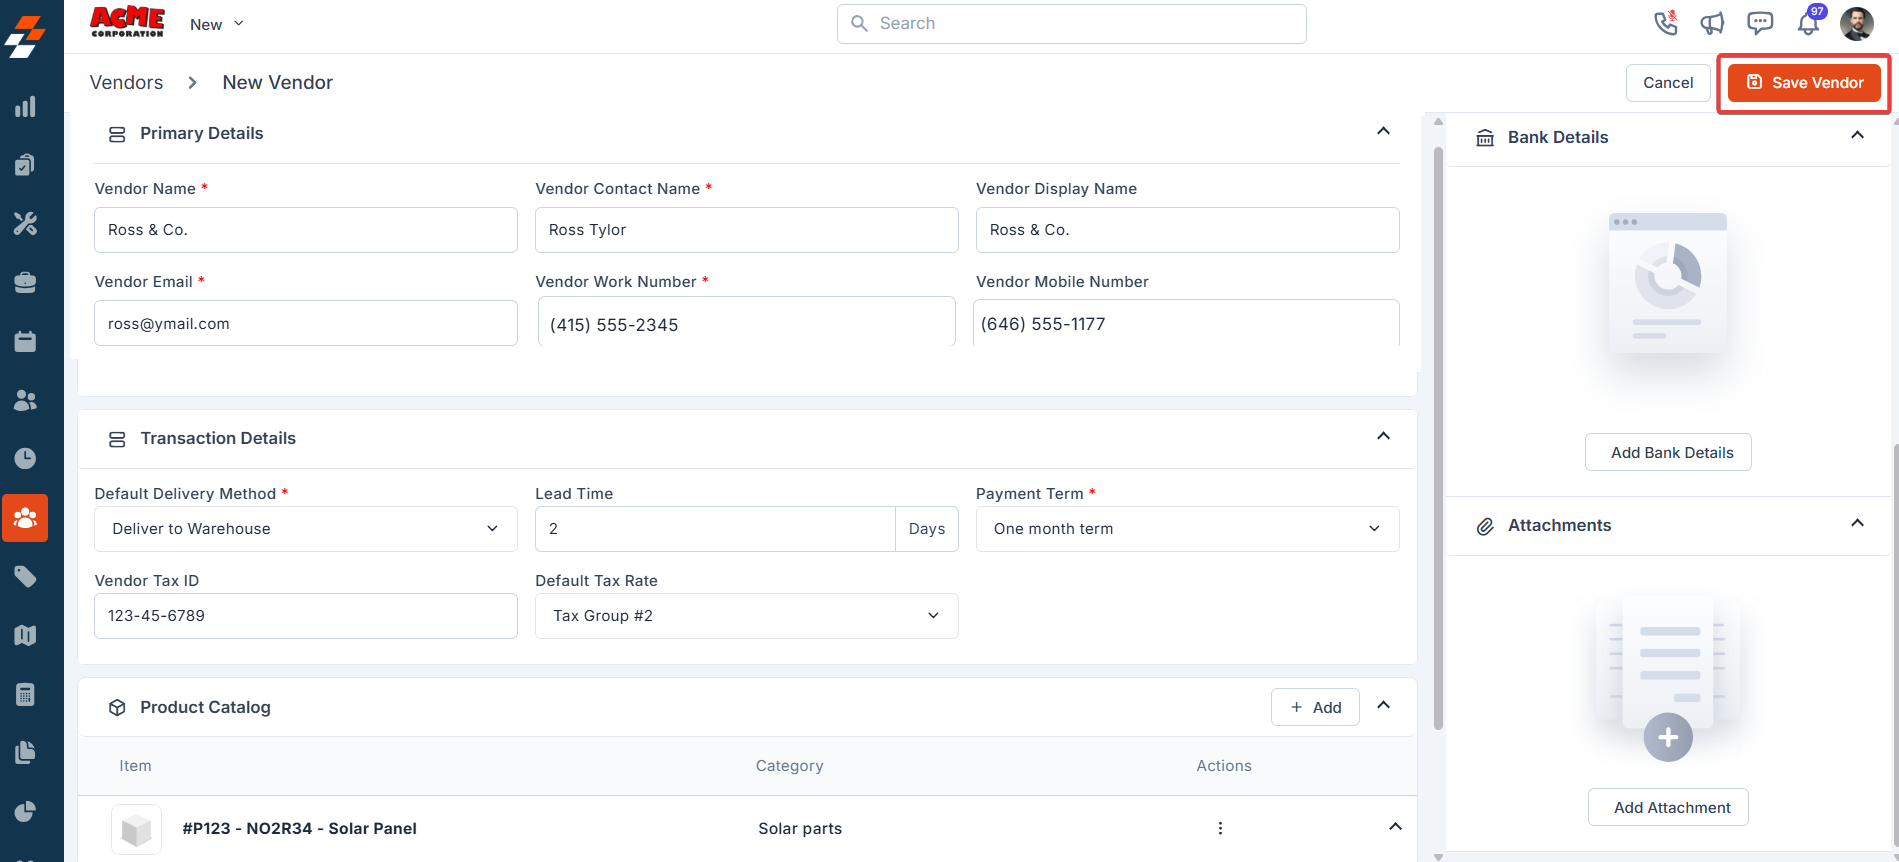
- Click “Create Vendor” to create the new vendor.
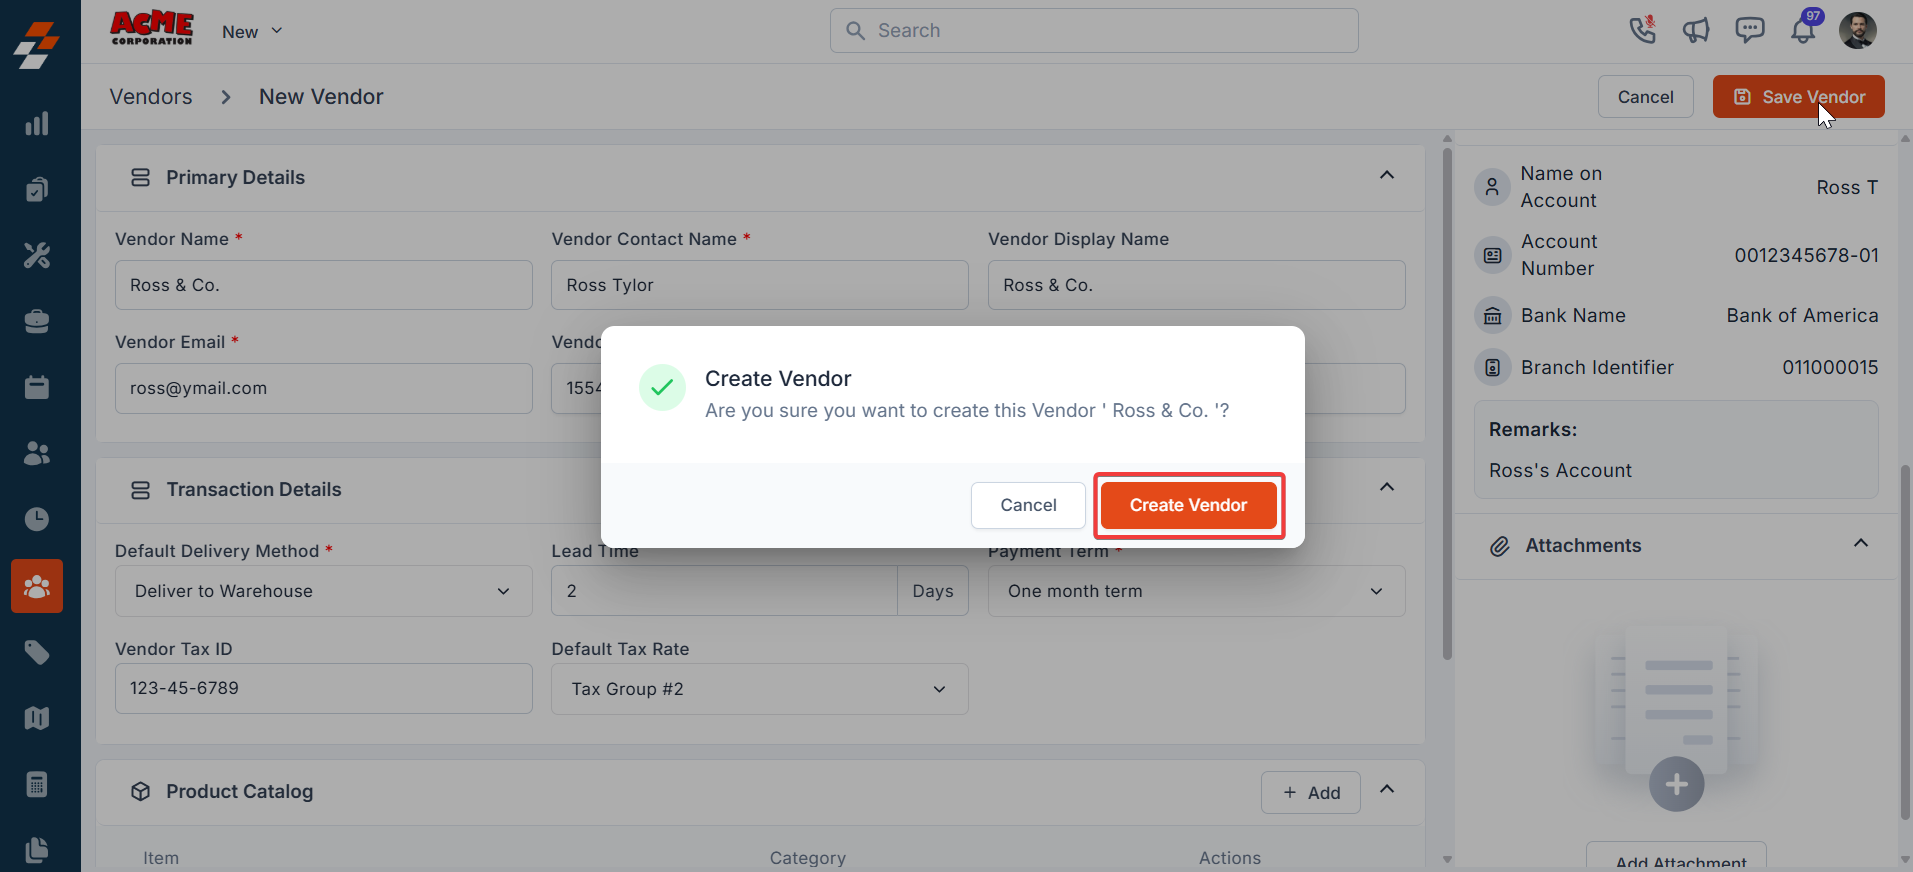
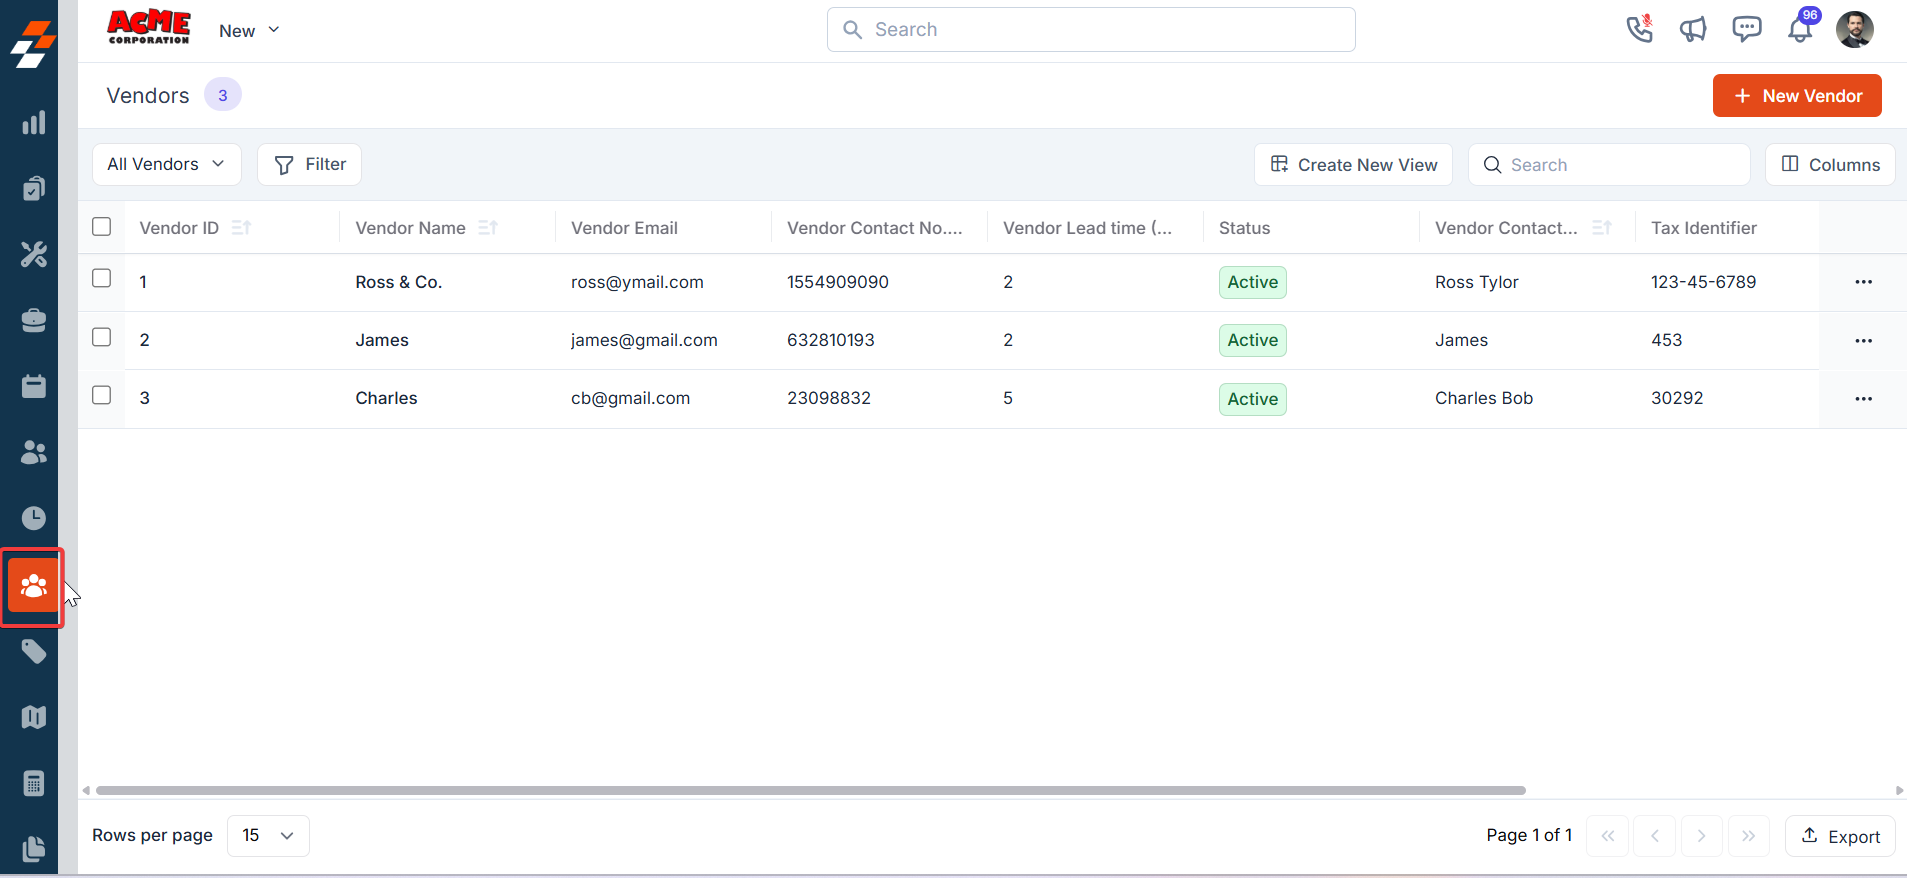
- The new vendor is created successfully.

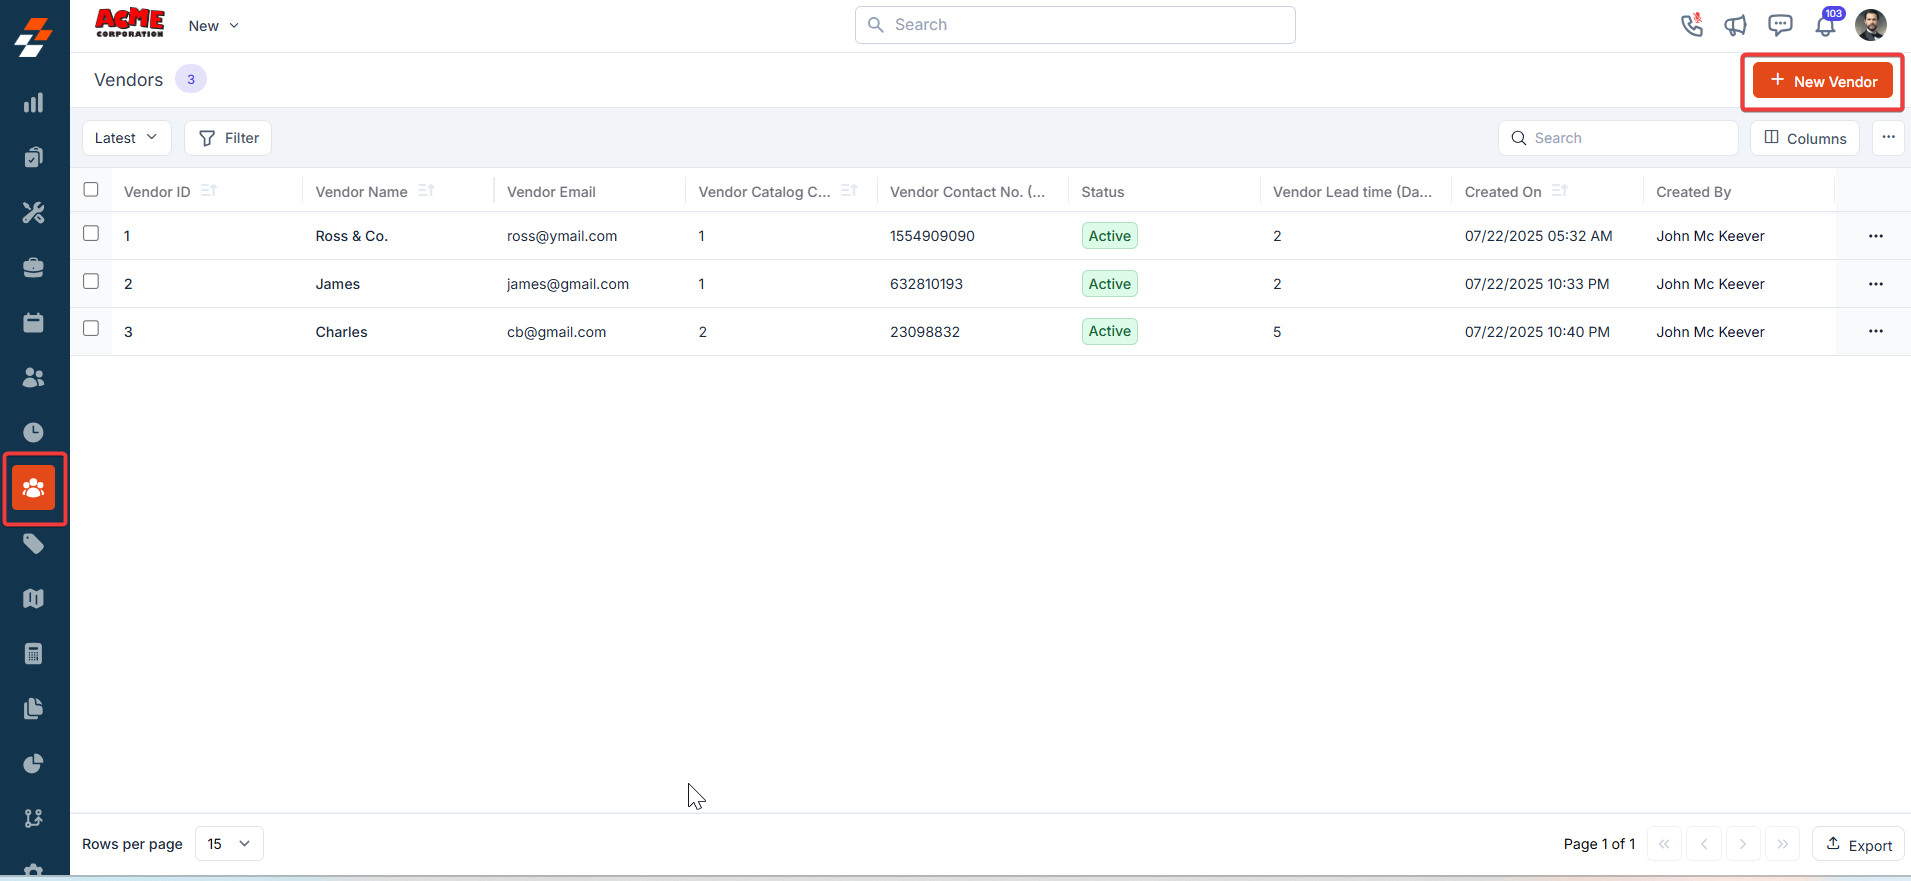
Vendor Listing Page:
The Vendor Management Module Listing Page layout in Zuper includes view management, column selection, views, and saving customized views. This process is performed directly on the module’s listing page.Default Listing Behavior
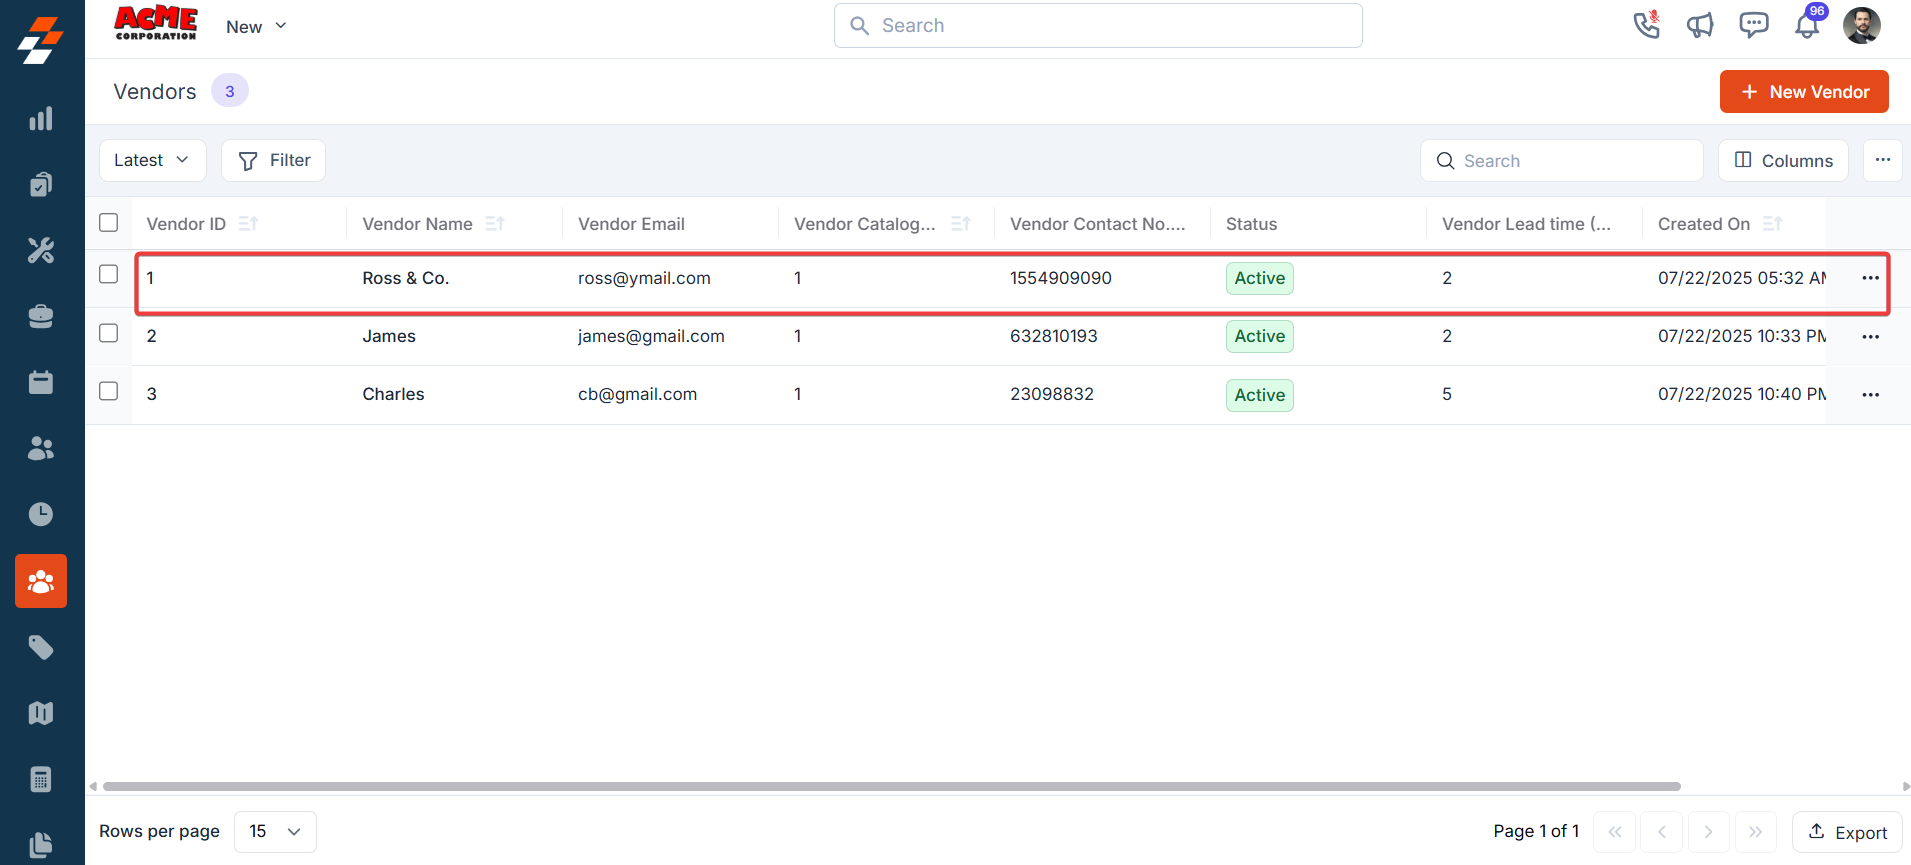
The system retains its existing default listing behavior, ensuring that pre-set configurations or default views are preserved. When you first access the Vendor Management Module Listing Page, you’ll see the default view with columns such as Vendor ID, Vendor Name, Contact, Vendor Email, Vendor Catalog, Vendor Contact Number, Vendor, Lead Time, Created On, and Created By. mainCreate View Configuration
Selecting Columns You can choose which columns to display to focus on relevant data:- Select the “Vendor Management” module from the left navigation menu. You can view the listing page.
- From the “ Views ” list, click “+Create a view. ”
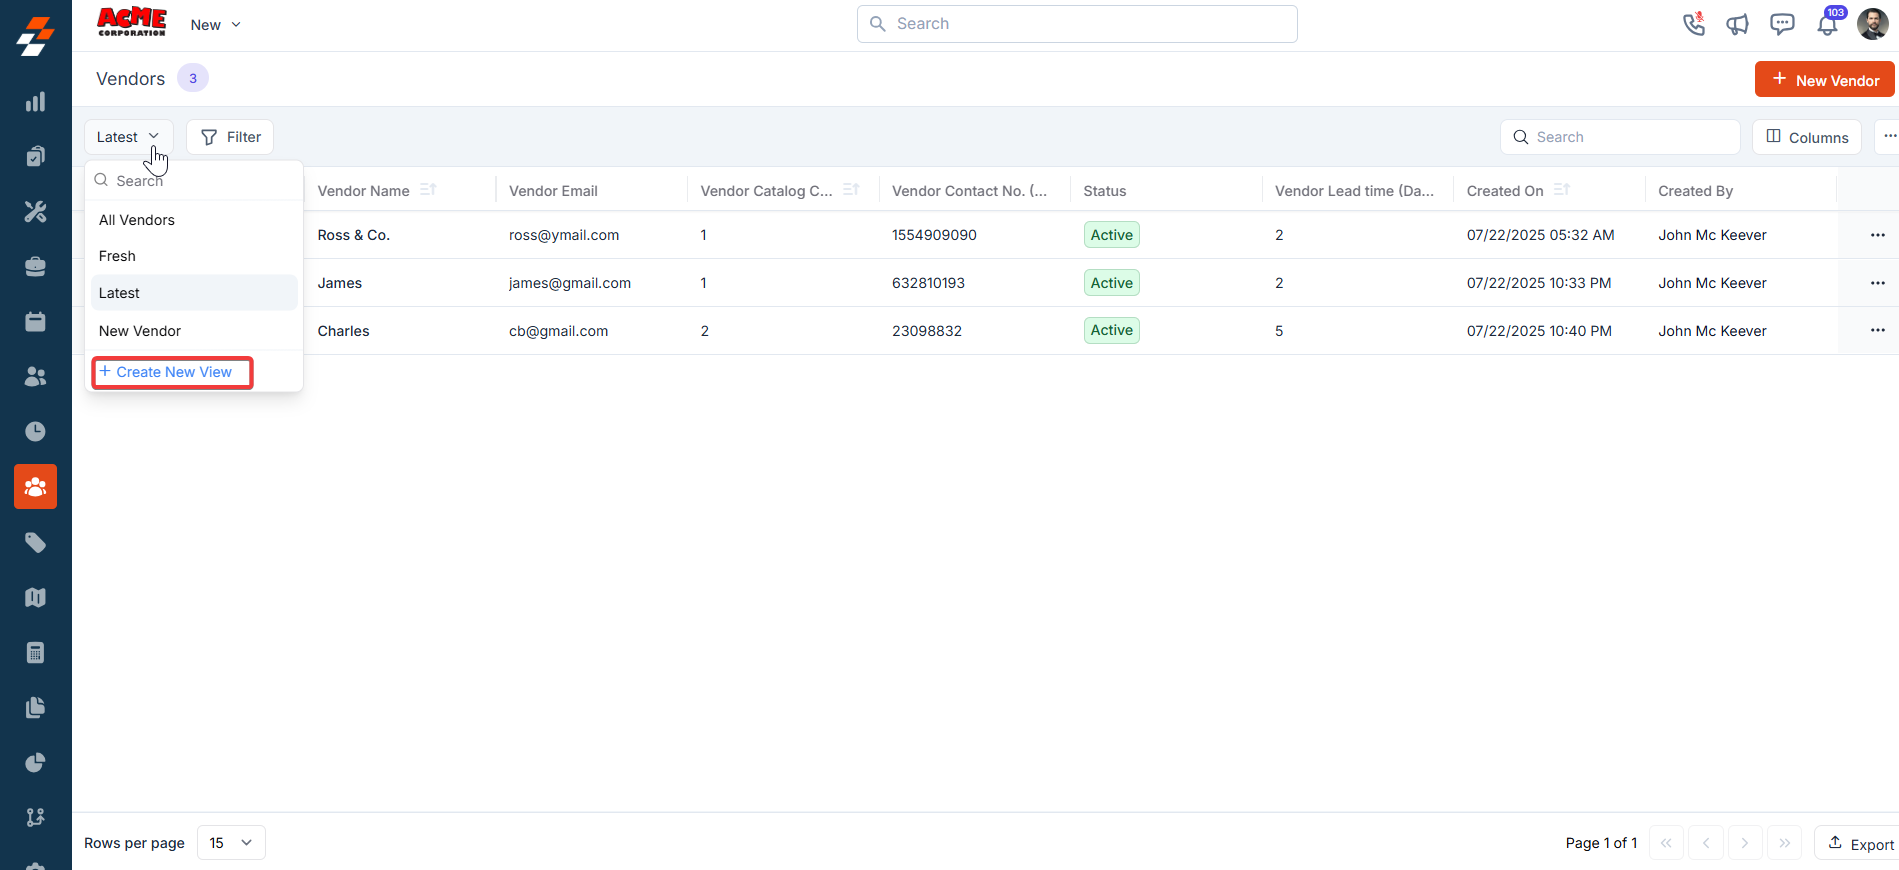
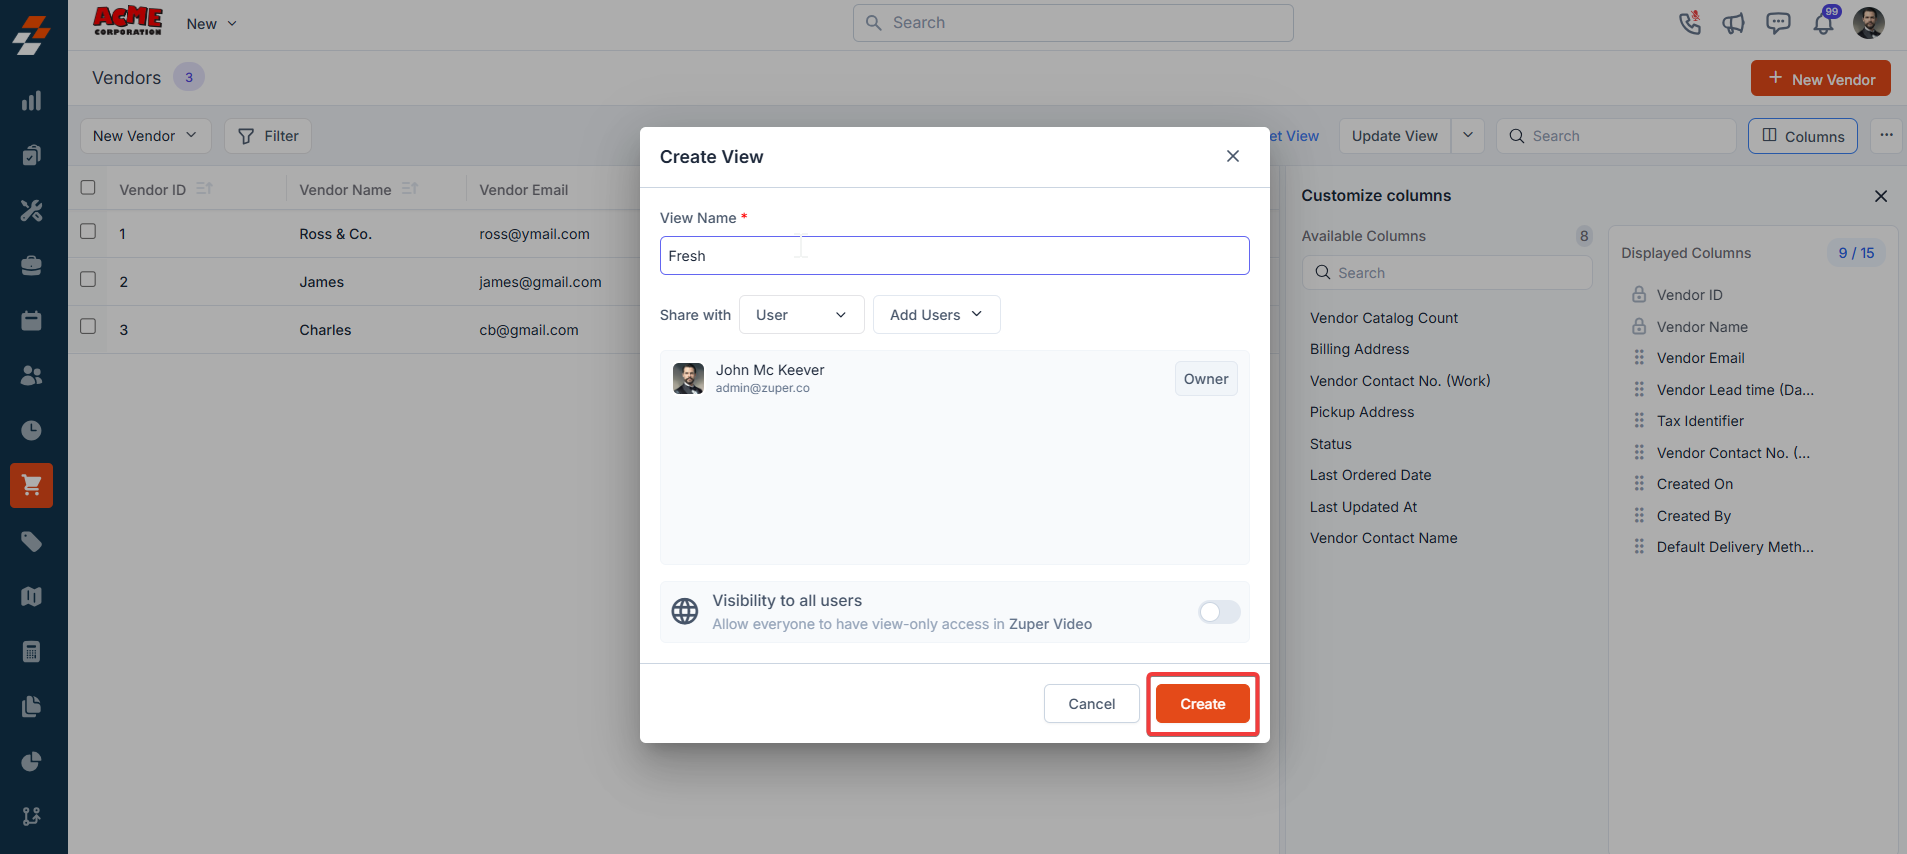
- A “Create View” dialog box appears.
- View Name (Mandatory) – Enter the view name.
- Share with - Select any one of the options (User, Team), and you can add the relevant users.
- Visibility to all users – Toggle on to make this view visible.
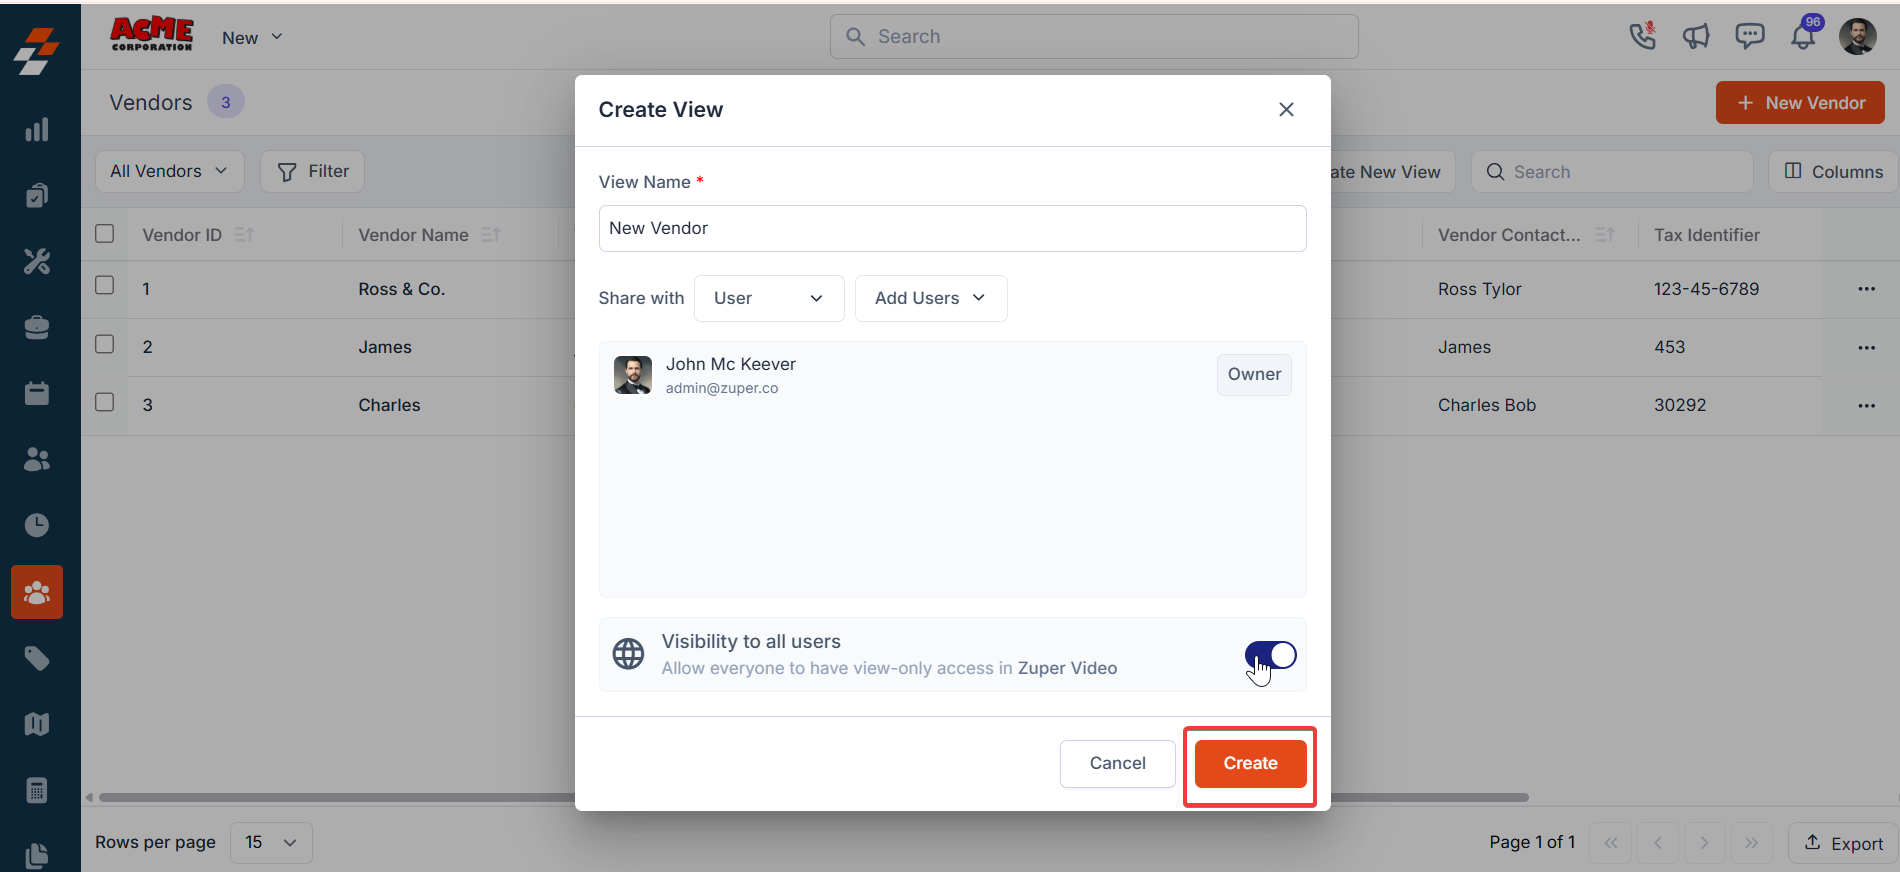
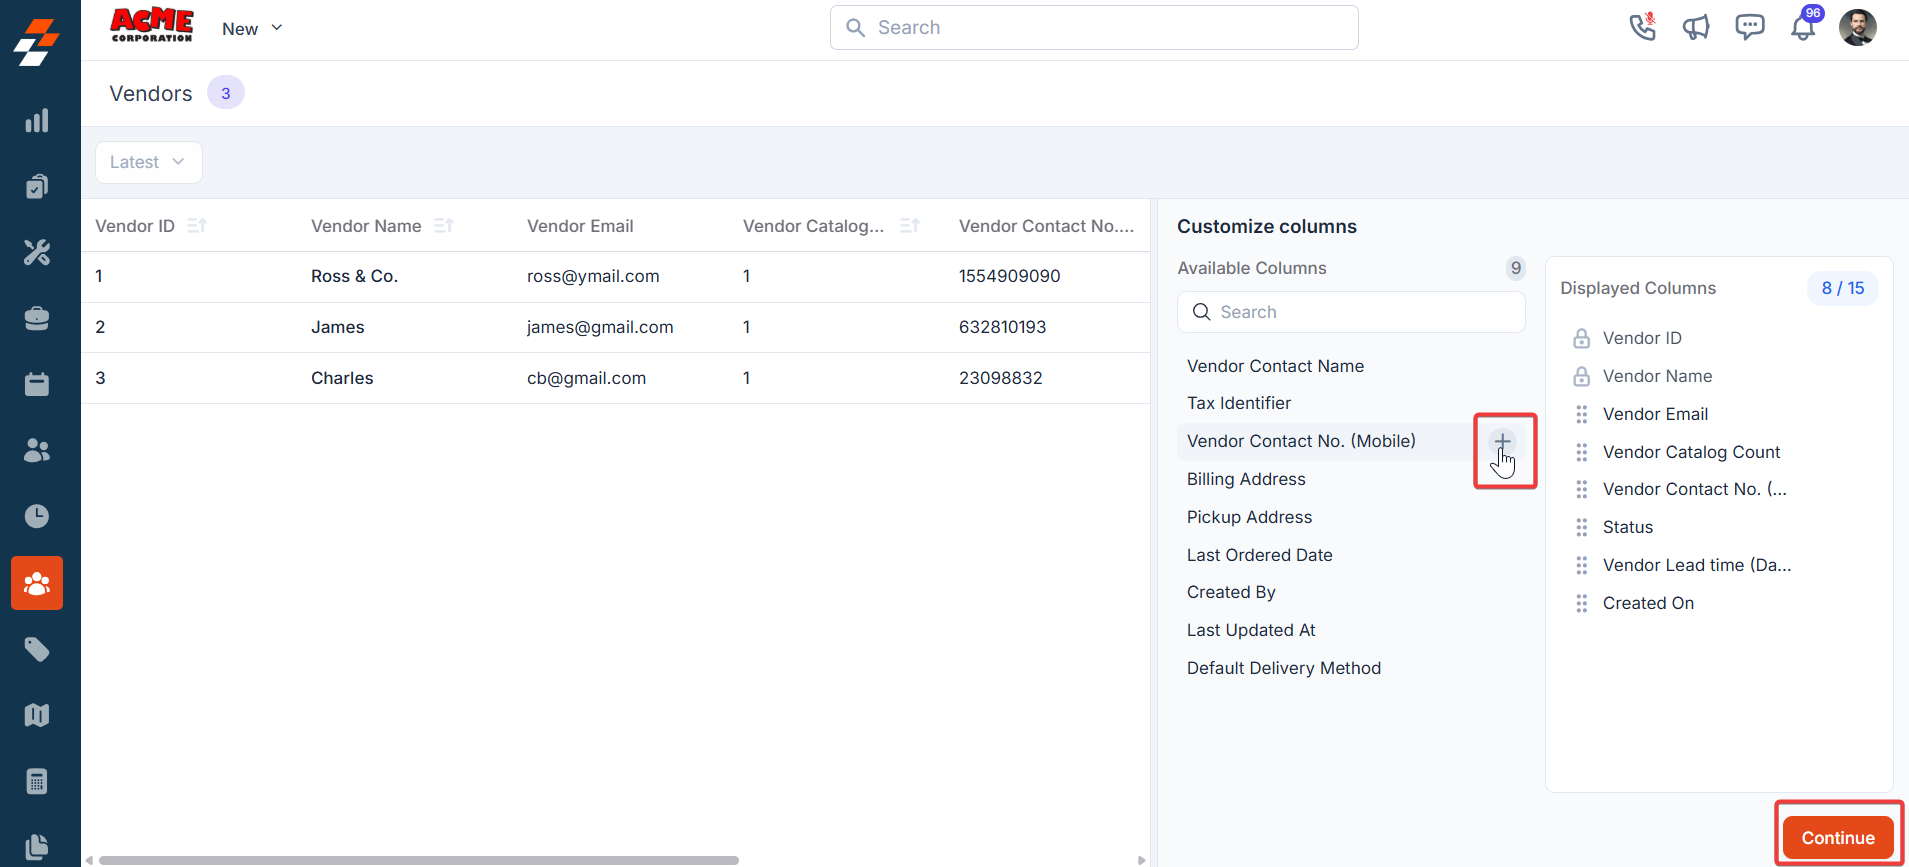
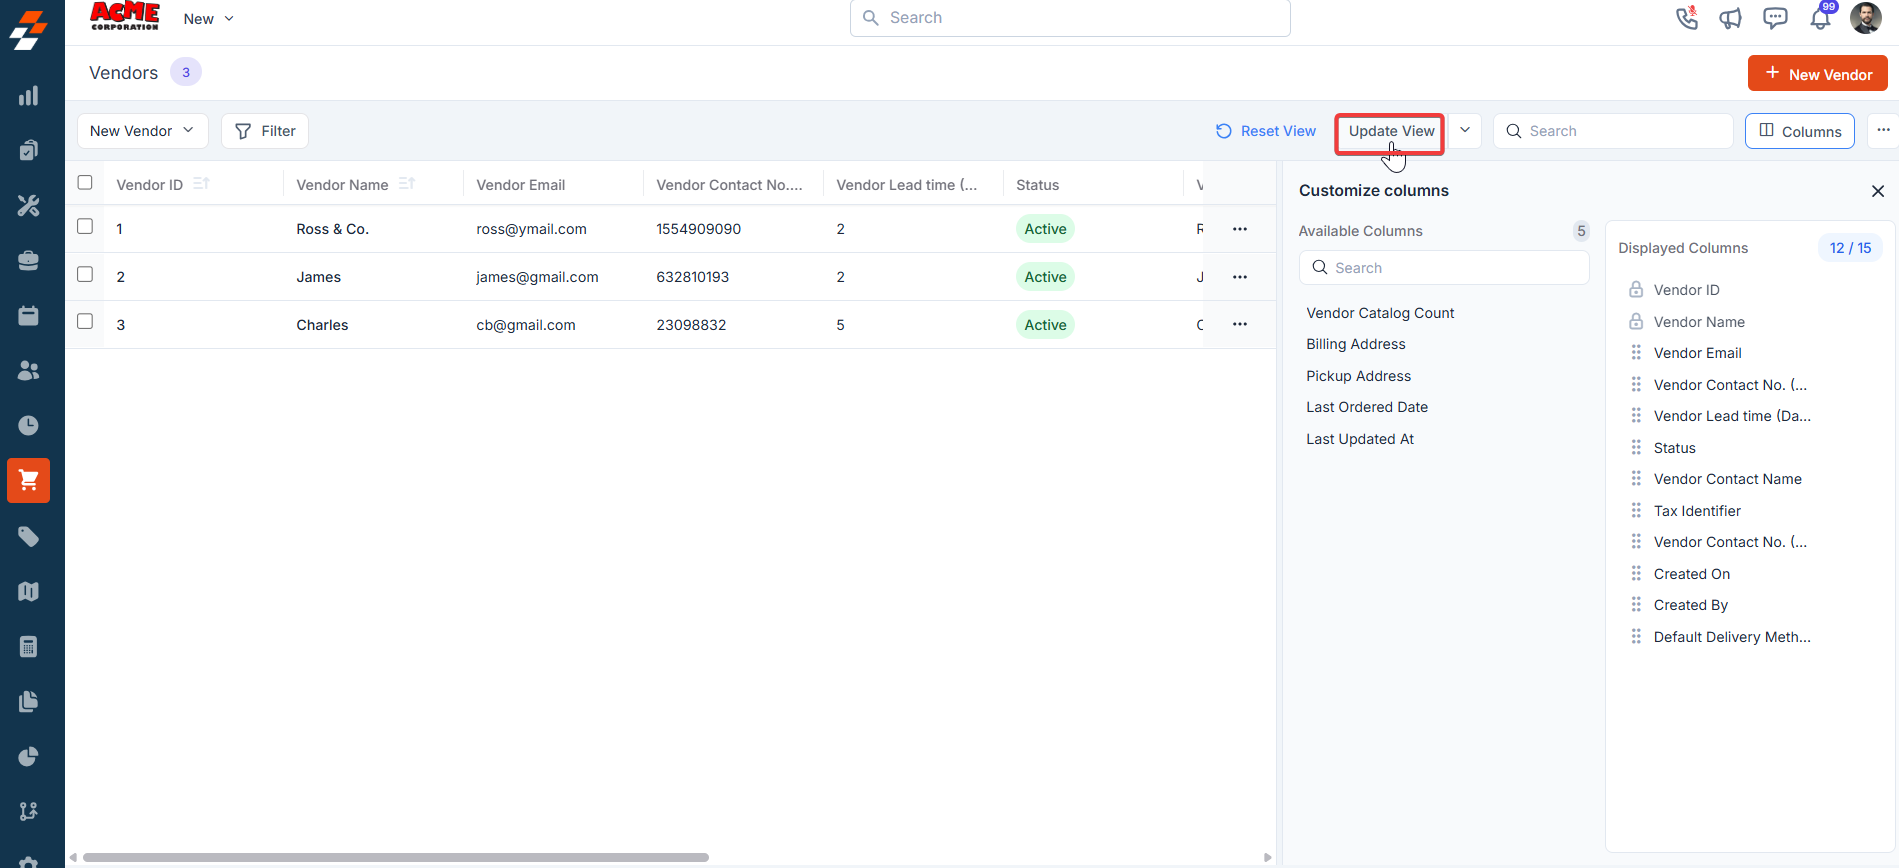
- Once you click “Create,” the Columns sidebar appears, showing “Available Columns” and “Displayed Columns.” To add a column, drag it from the “Available Columns” list on the left to the “Displayed Columns” list on the right. You can click “Continue.”
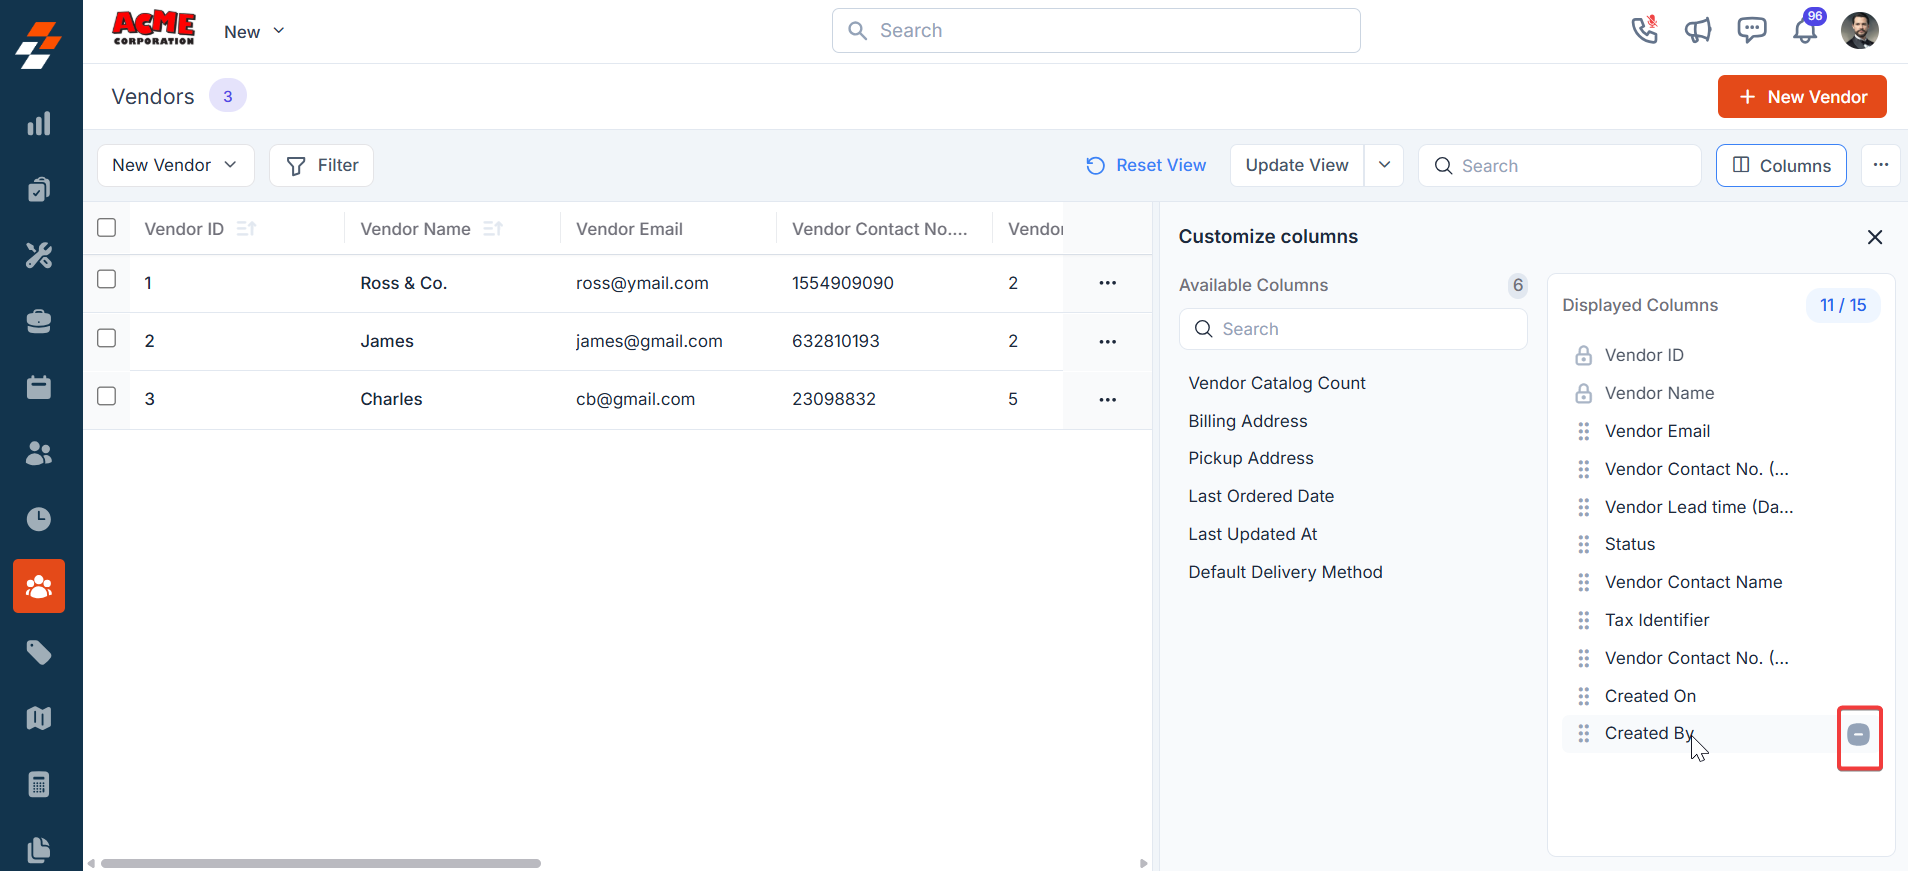
- To remove a column, drag it from the “Displayed Columns” list back to the “Available Columns” list or click the - next to the column name. Click Continue to apply the changes.
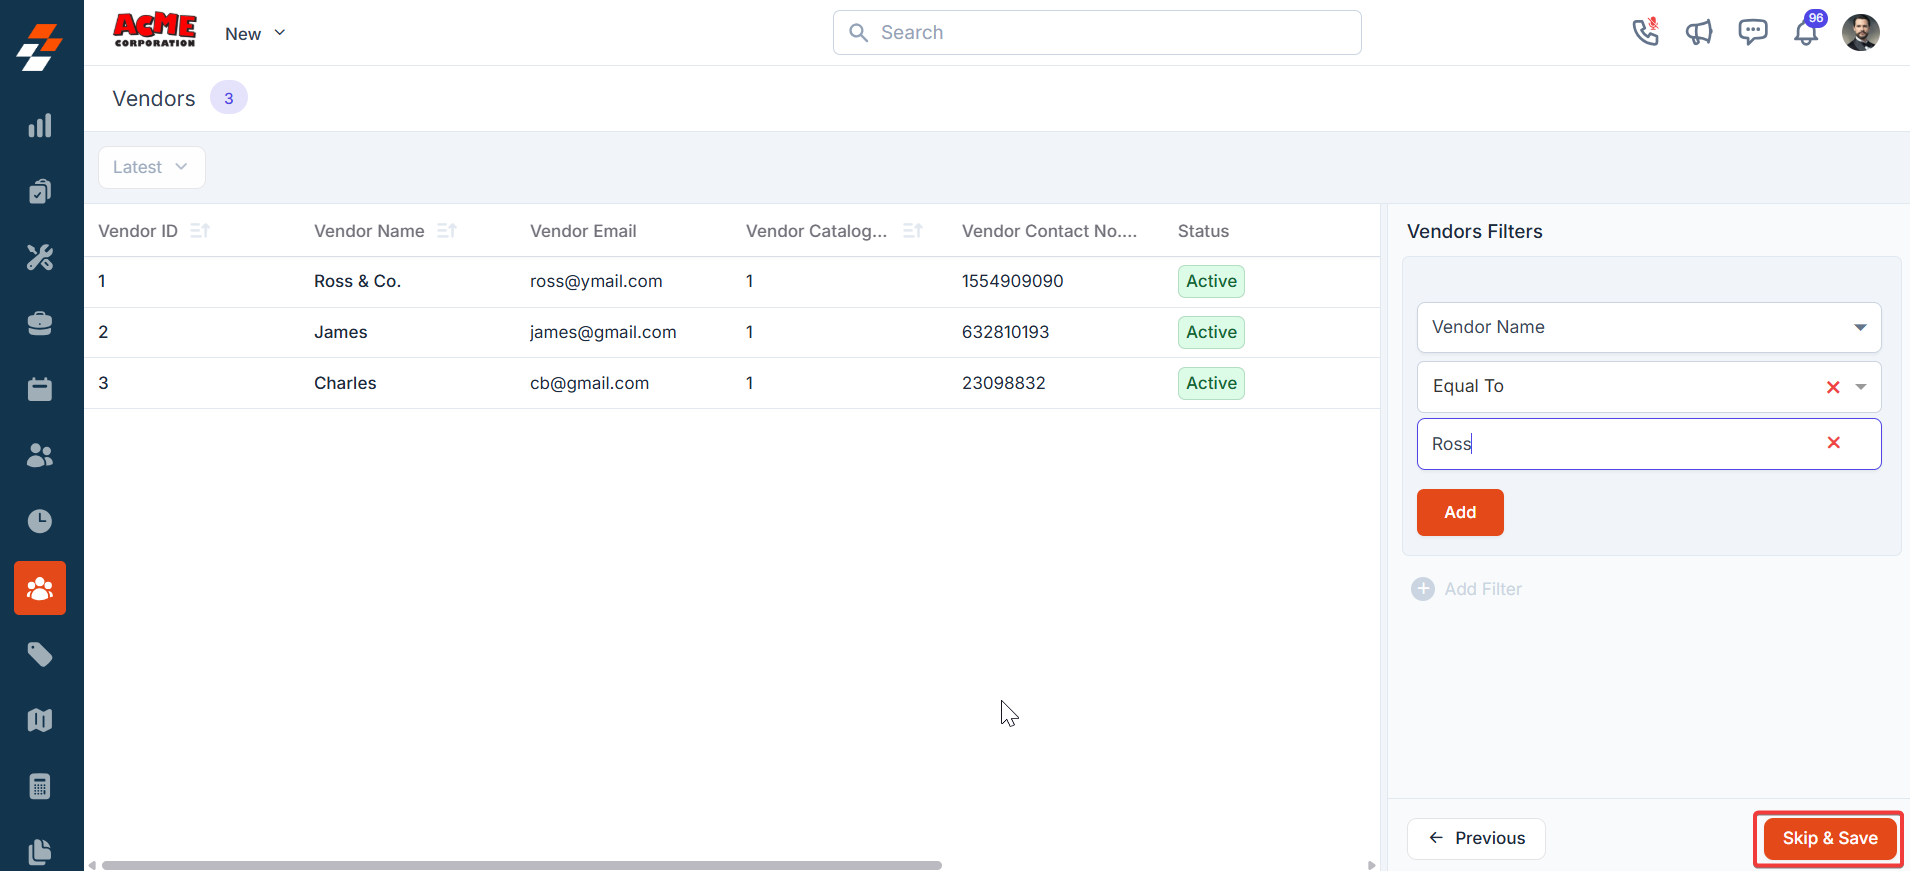
- If you not wish to add any filter, click “Skip and Save” to create the view.
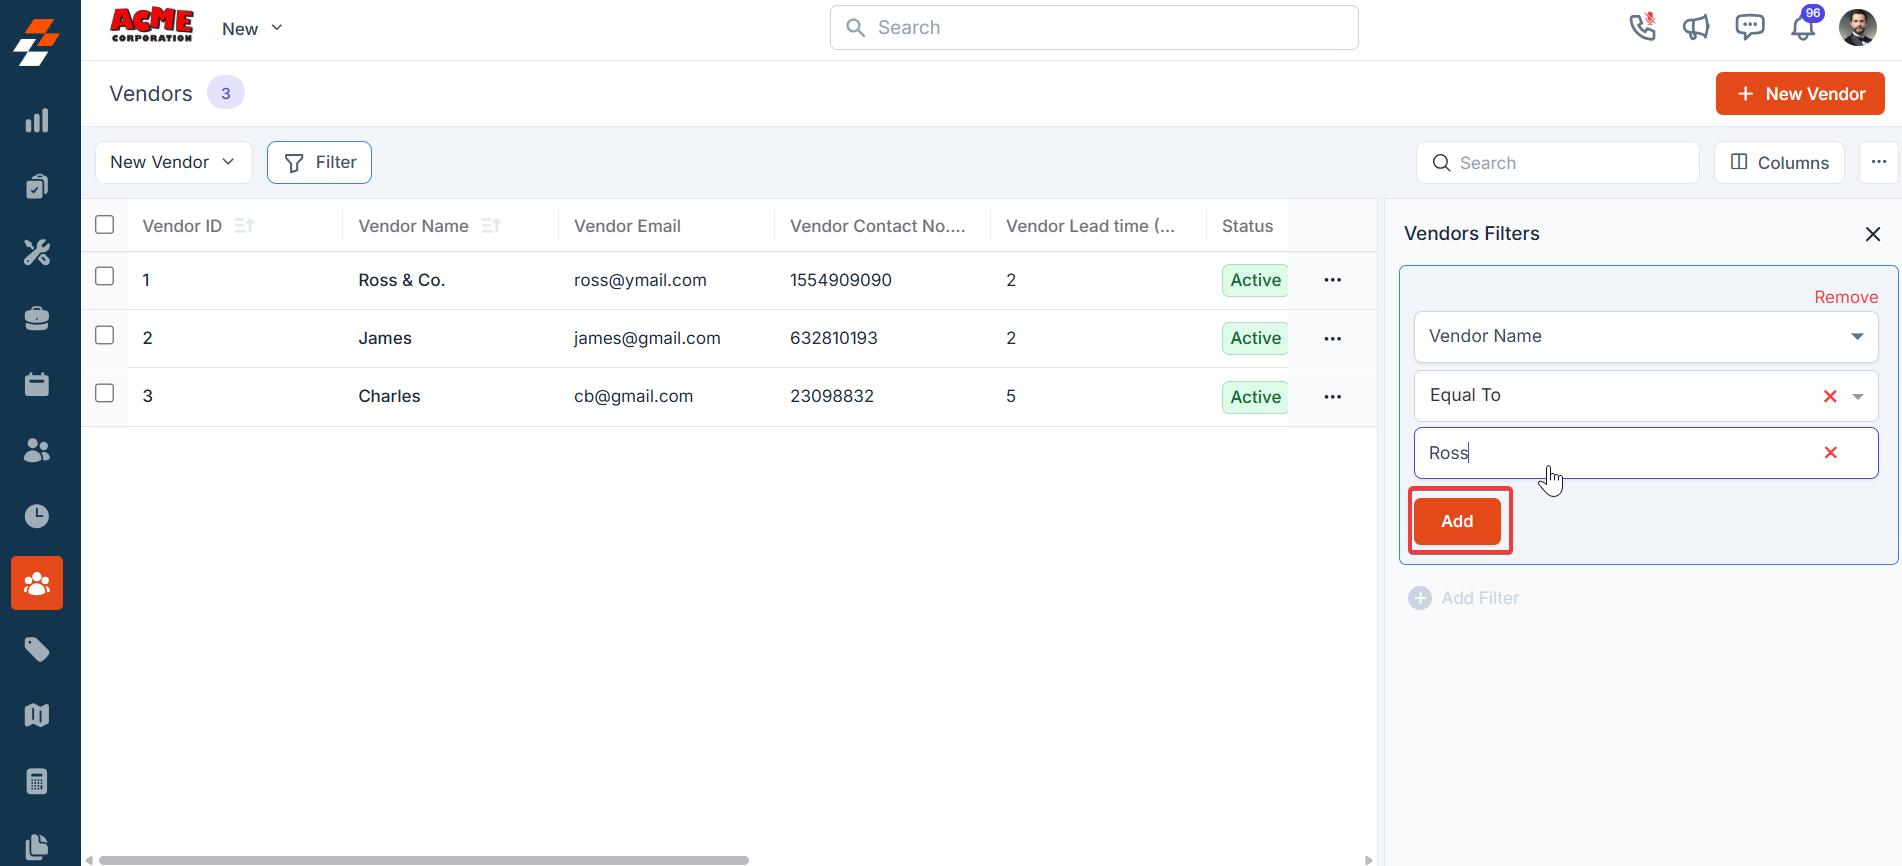
- To add a filter, click “+Add.”
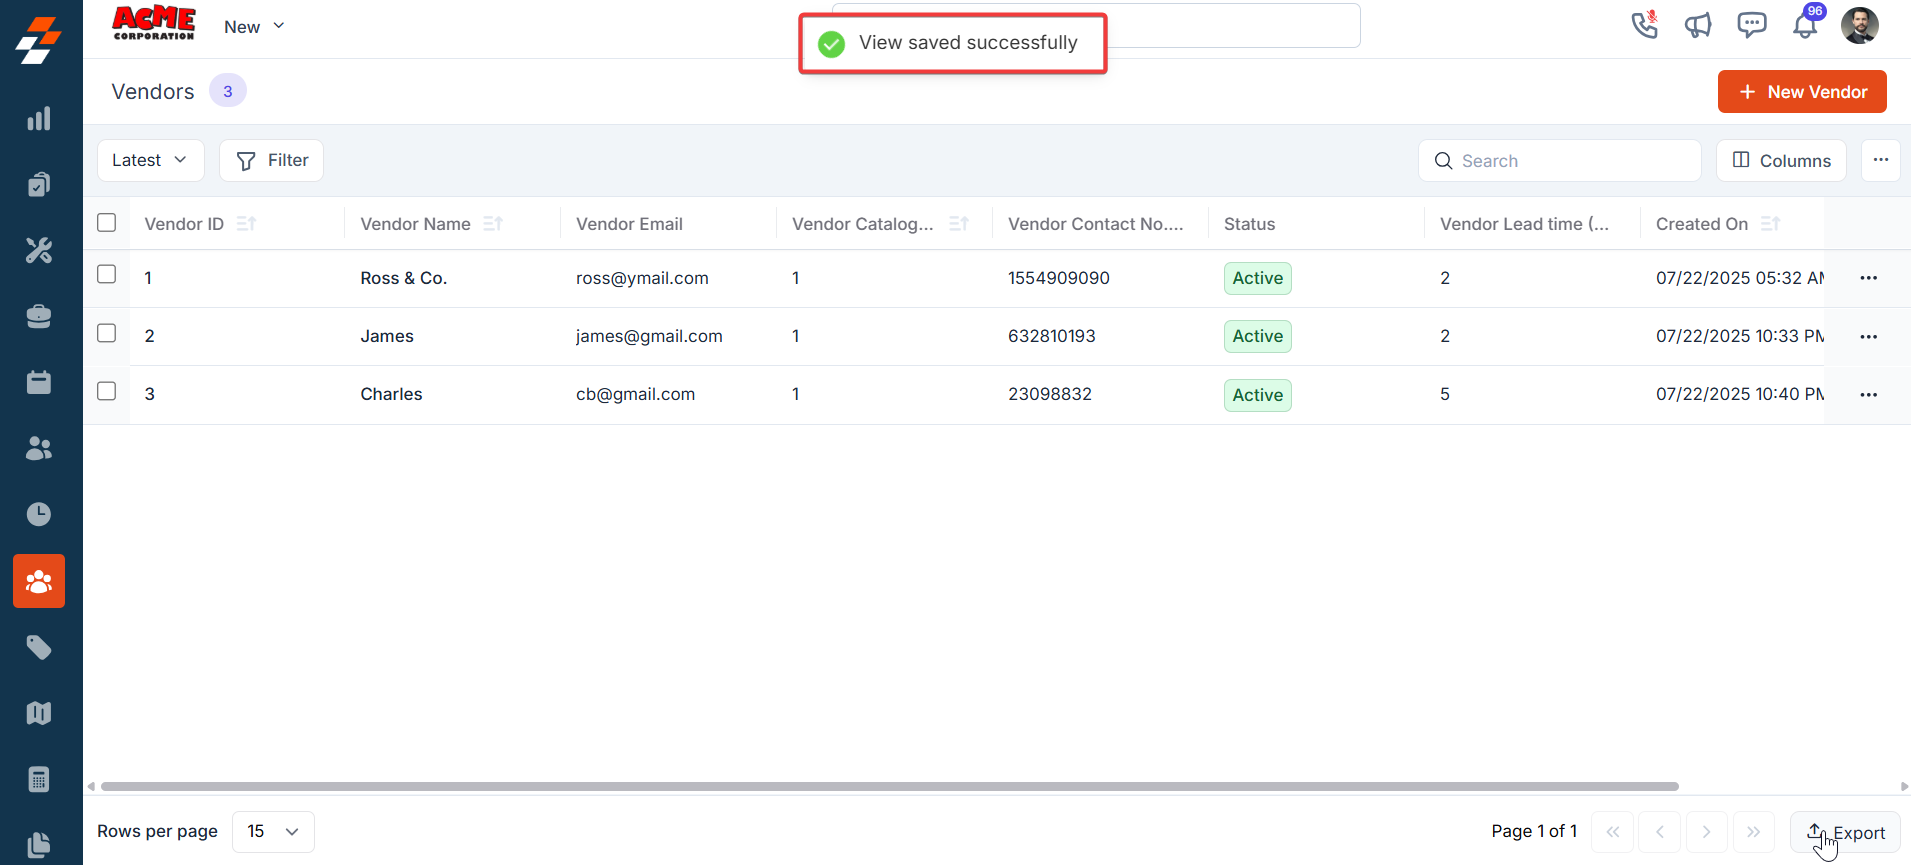
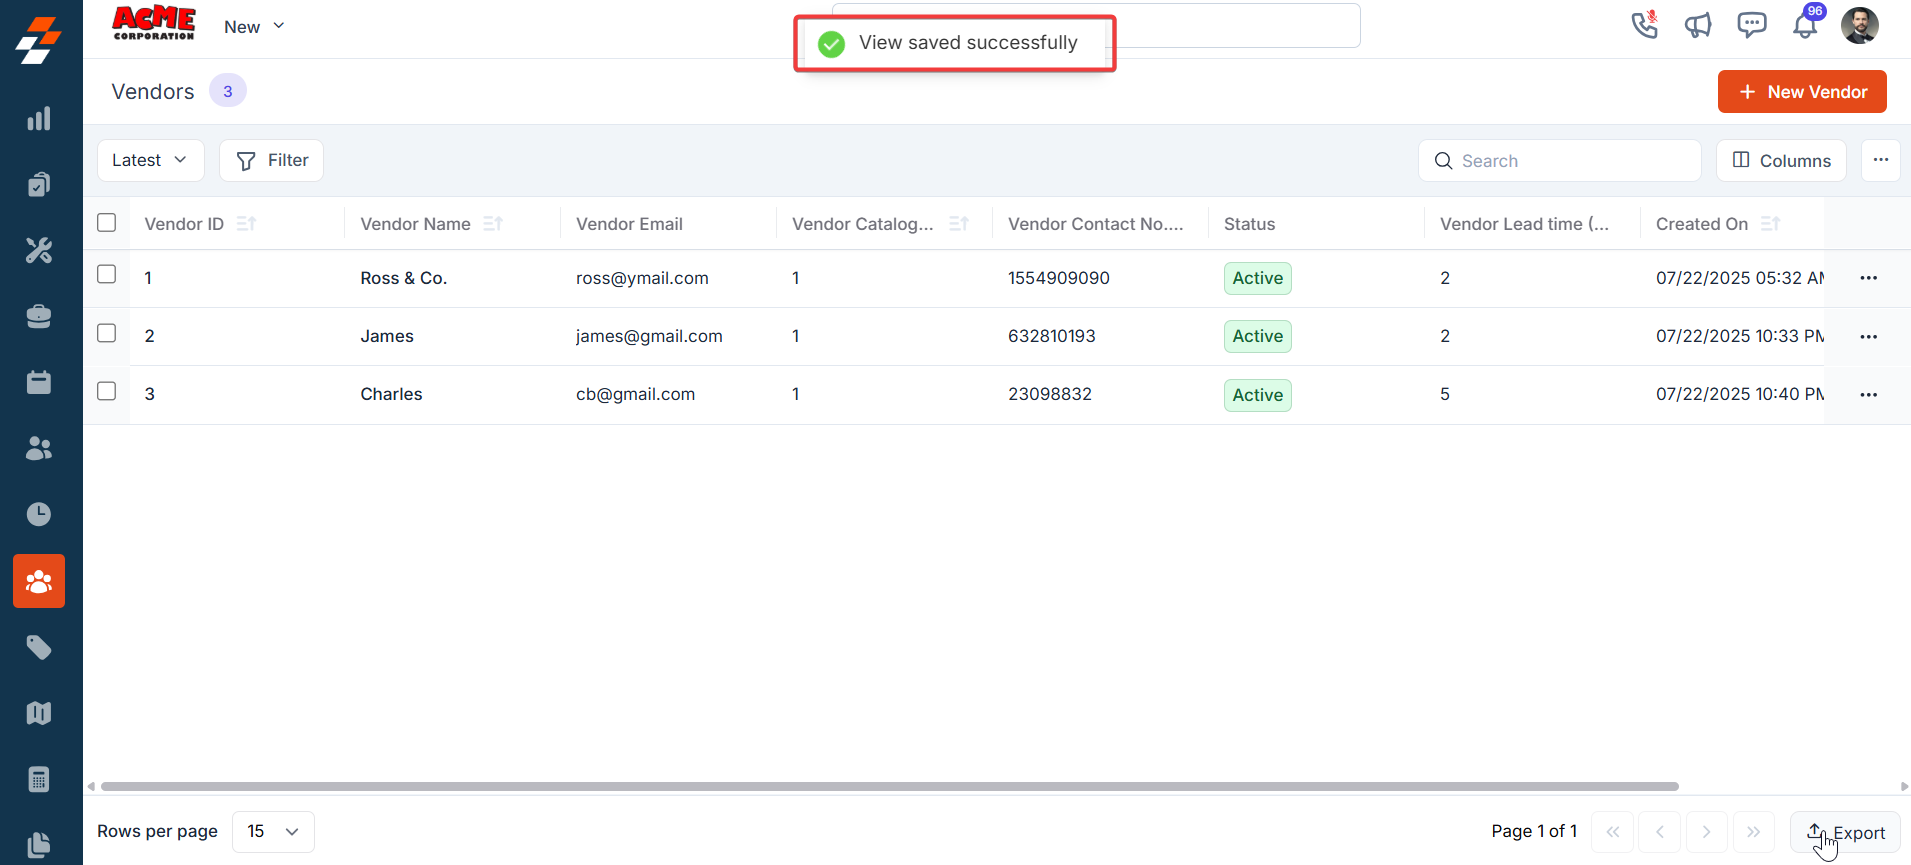
- The new view has been set successfully. You can view the filter created and its name from the view list.
Update View
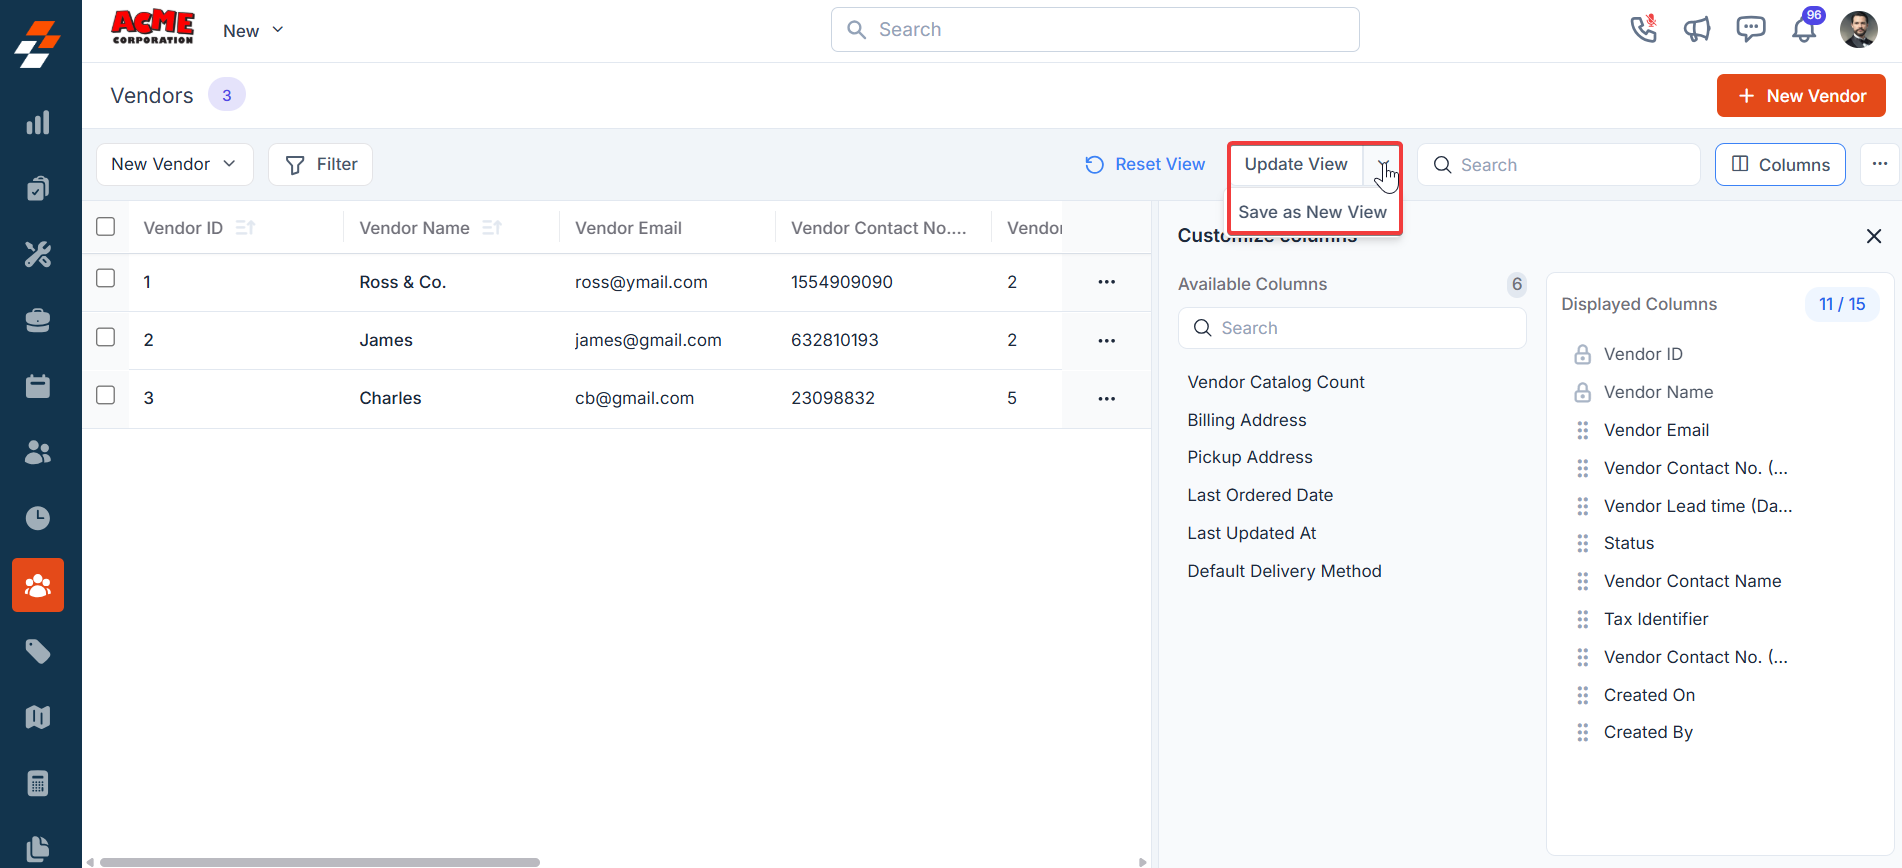
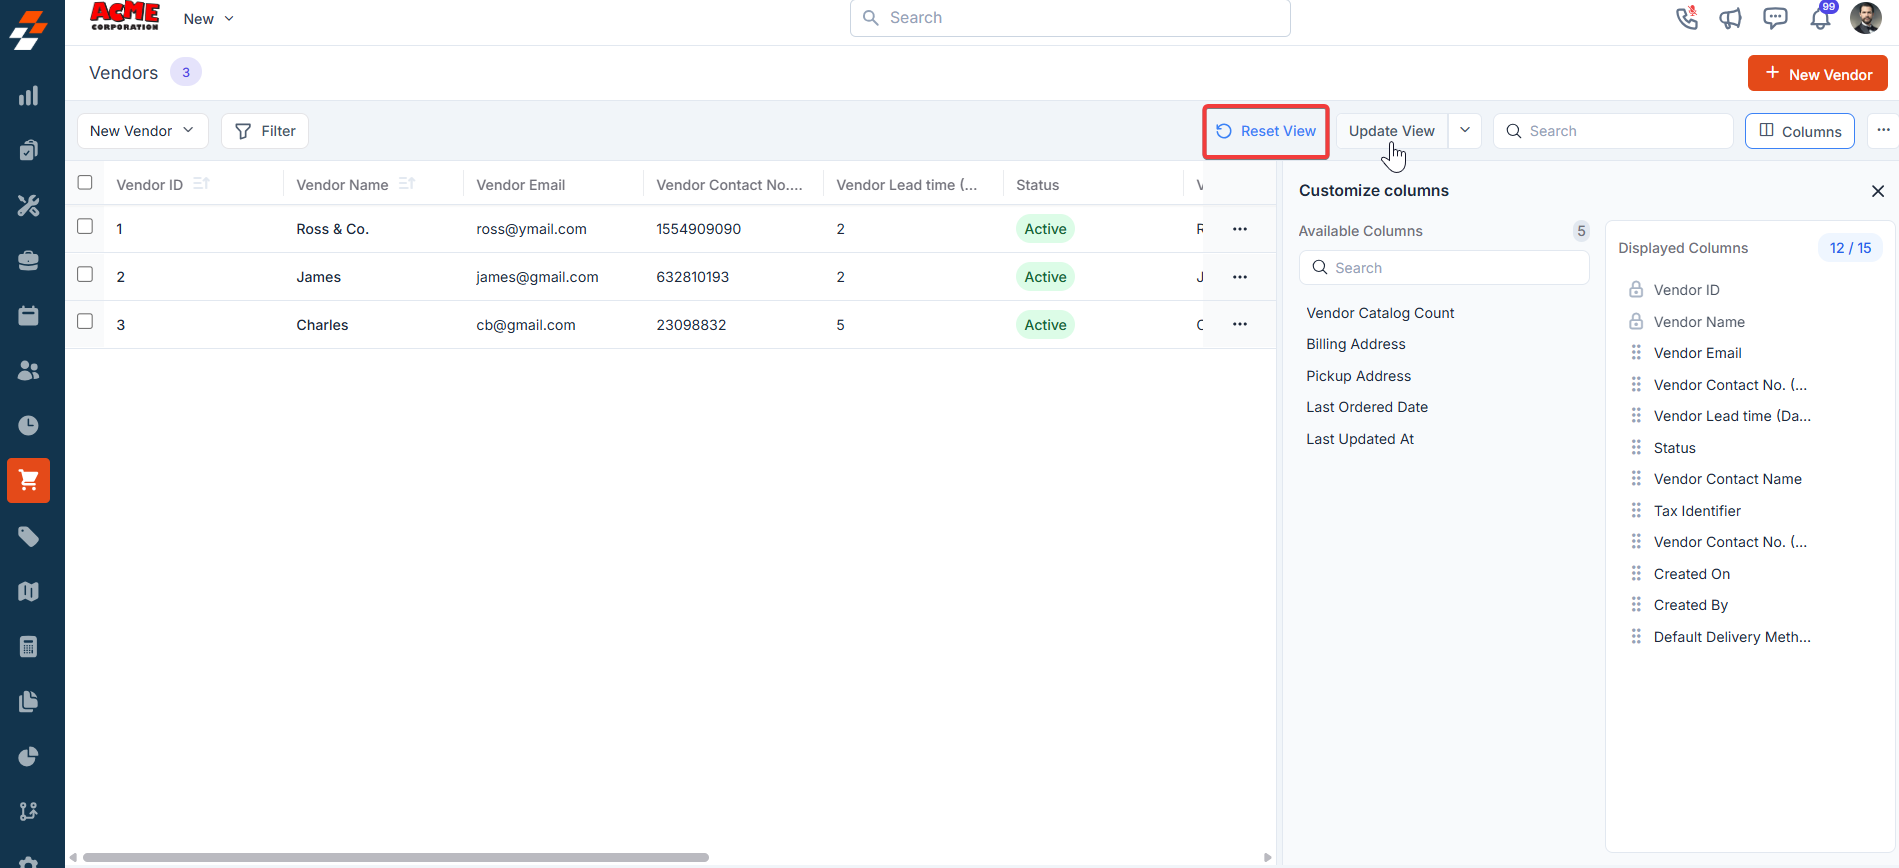
An update view allows you to modify the current display settings of the “Vendor Management” section. After making changes, you can save the updated configuration to the existing one or use it as a new view by naming it.- Add/remove the existing columns and we can update the view for the existing view.
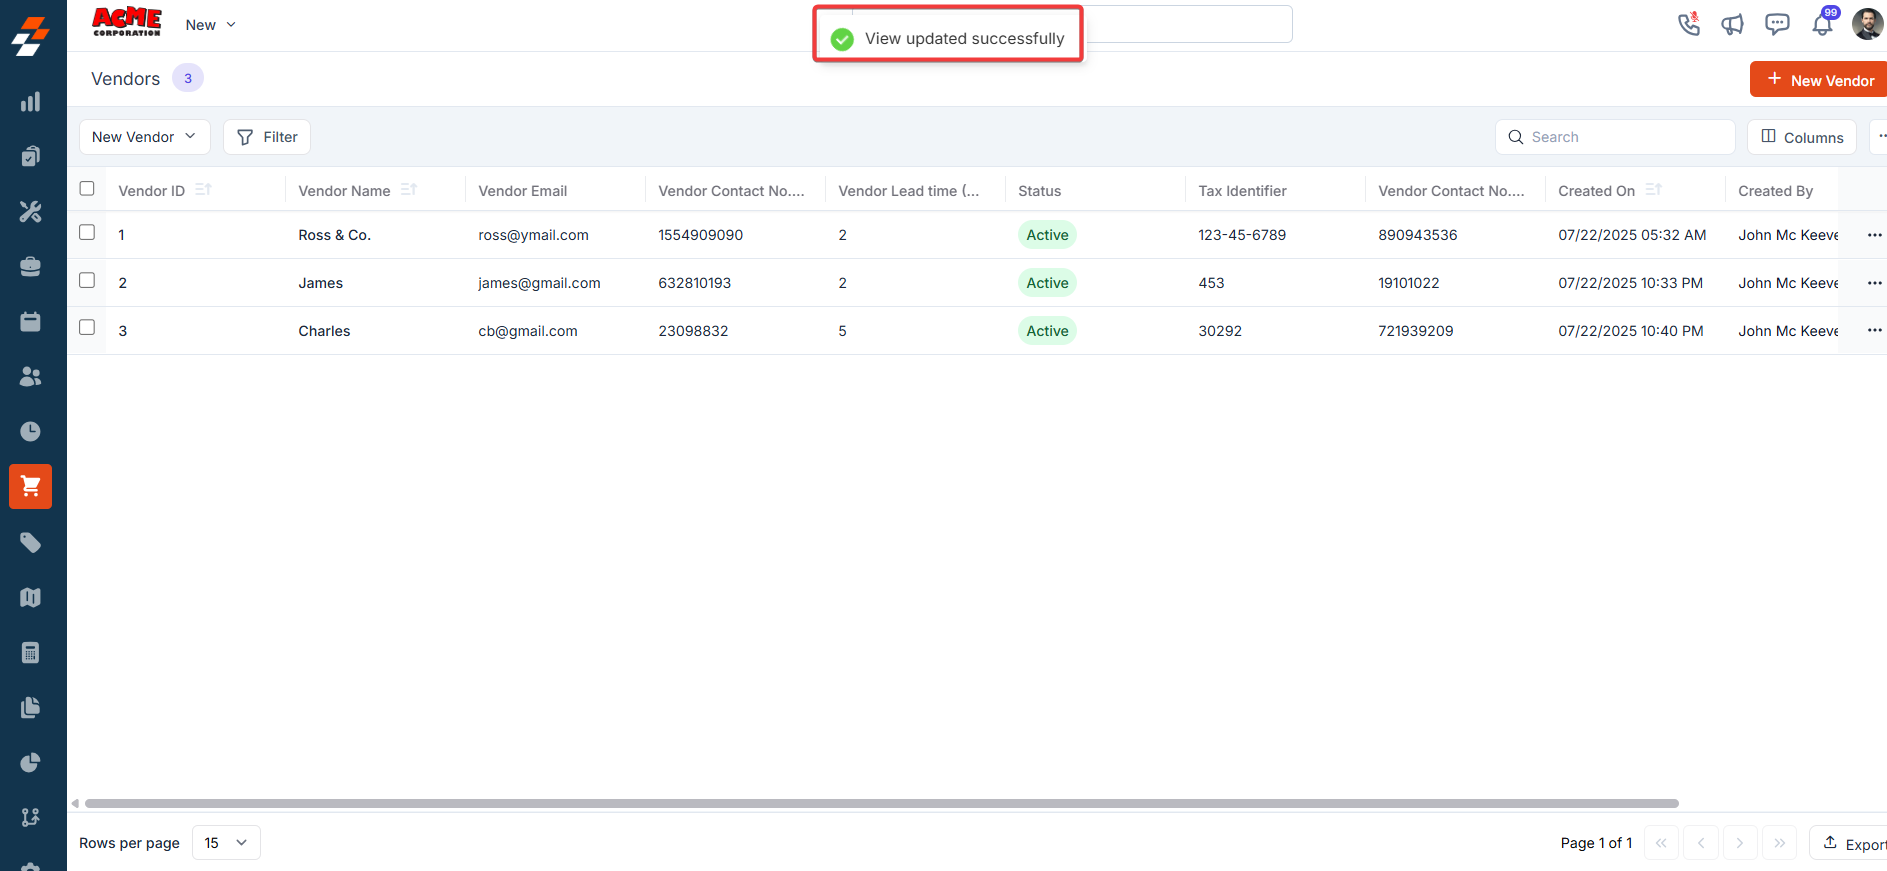
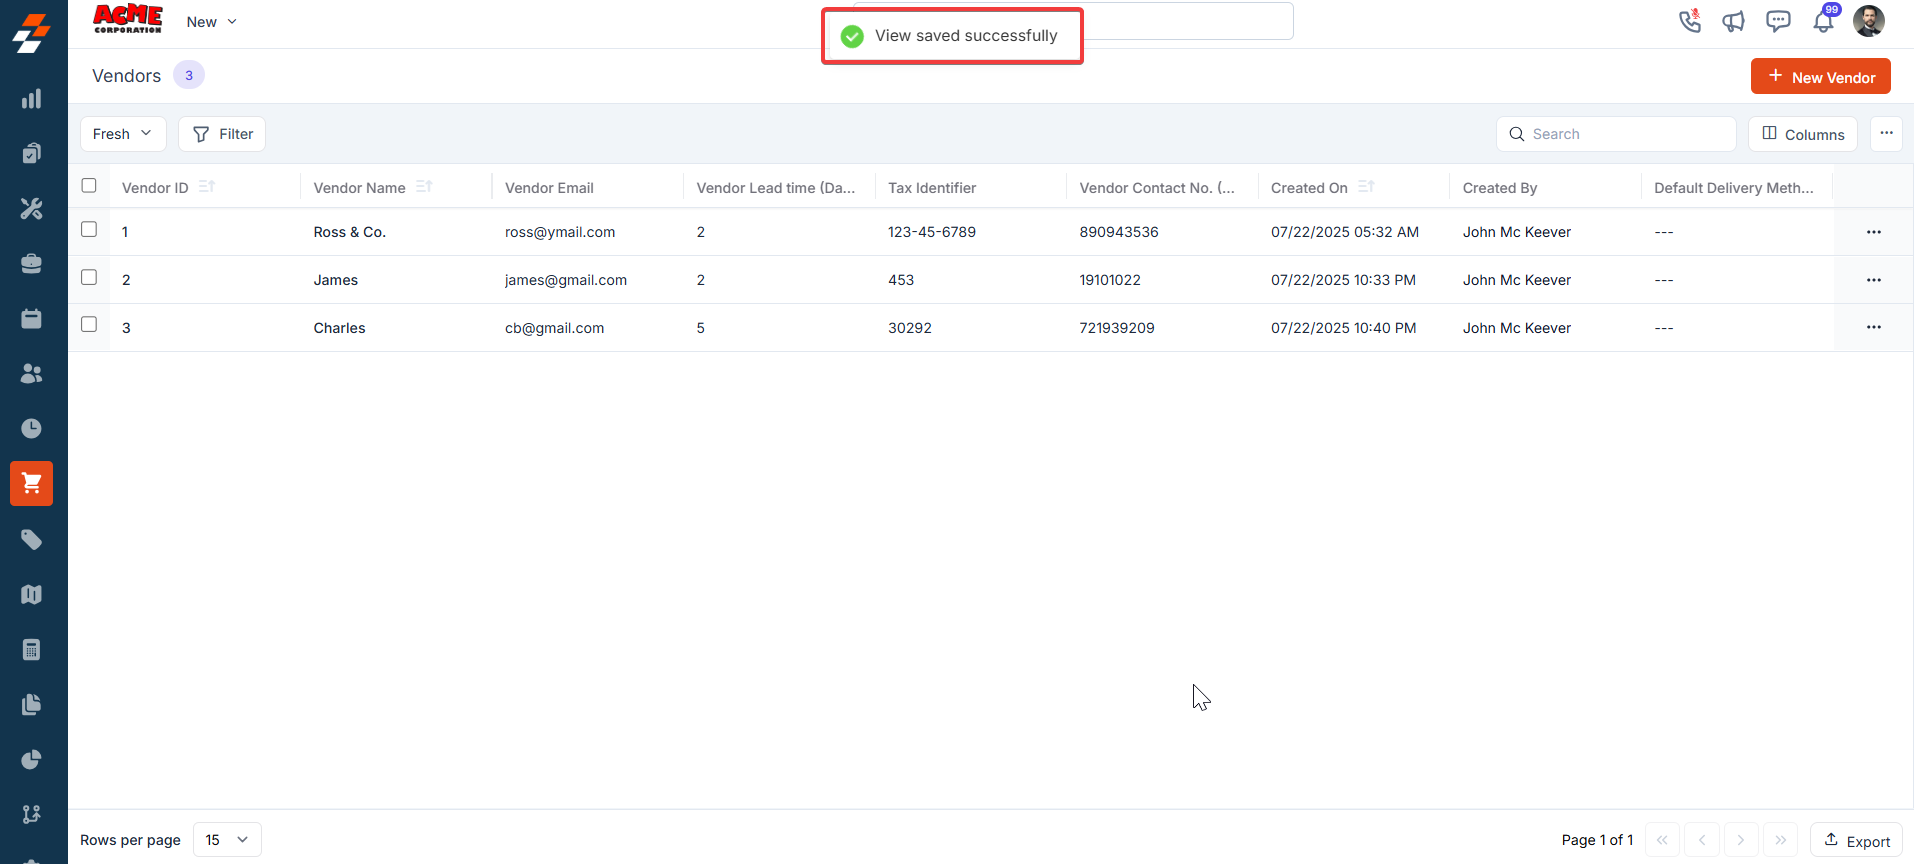
- The view is updated successfully.
To save as new view:
- View Name (Mandatory) – Enter the view name.
- Share with - Select any one of the options (User, Team), and you can add the relevant users.
- Visibility to all users – Toggle on to make this view visible.
- The view is updated successfully.
- Click “Reset View” to reset the current view.
- The view is updated successfully.
Setting Permissions for Views
Edit Permissions Users with edit permissions can modify the layout:- They can add/remove columns, reorder them, and adjust views as described above.
- If permission is given, changes can be saved as a new view or overwritten as an existing one.
- They can view the customized columns and filters but cannot edit them. To ensure consistency for viewers, they can save them as a new “View.”
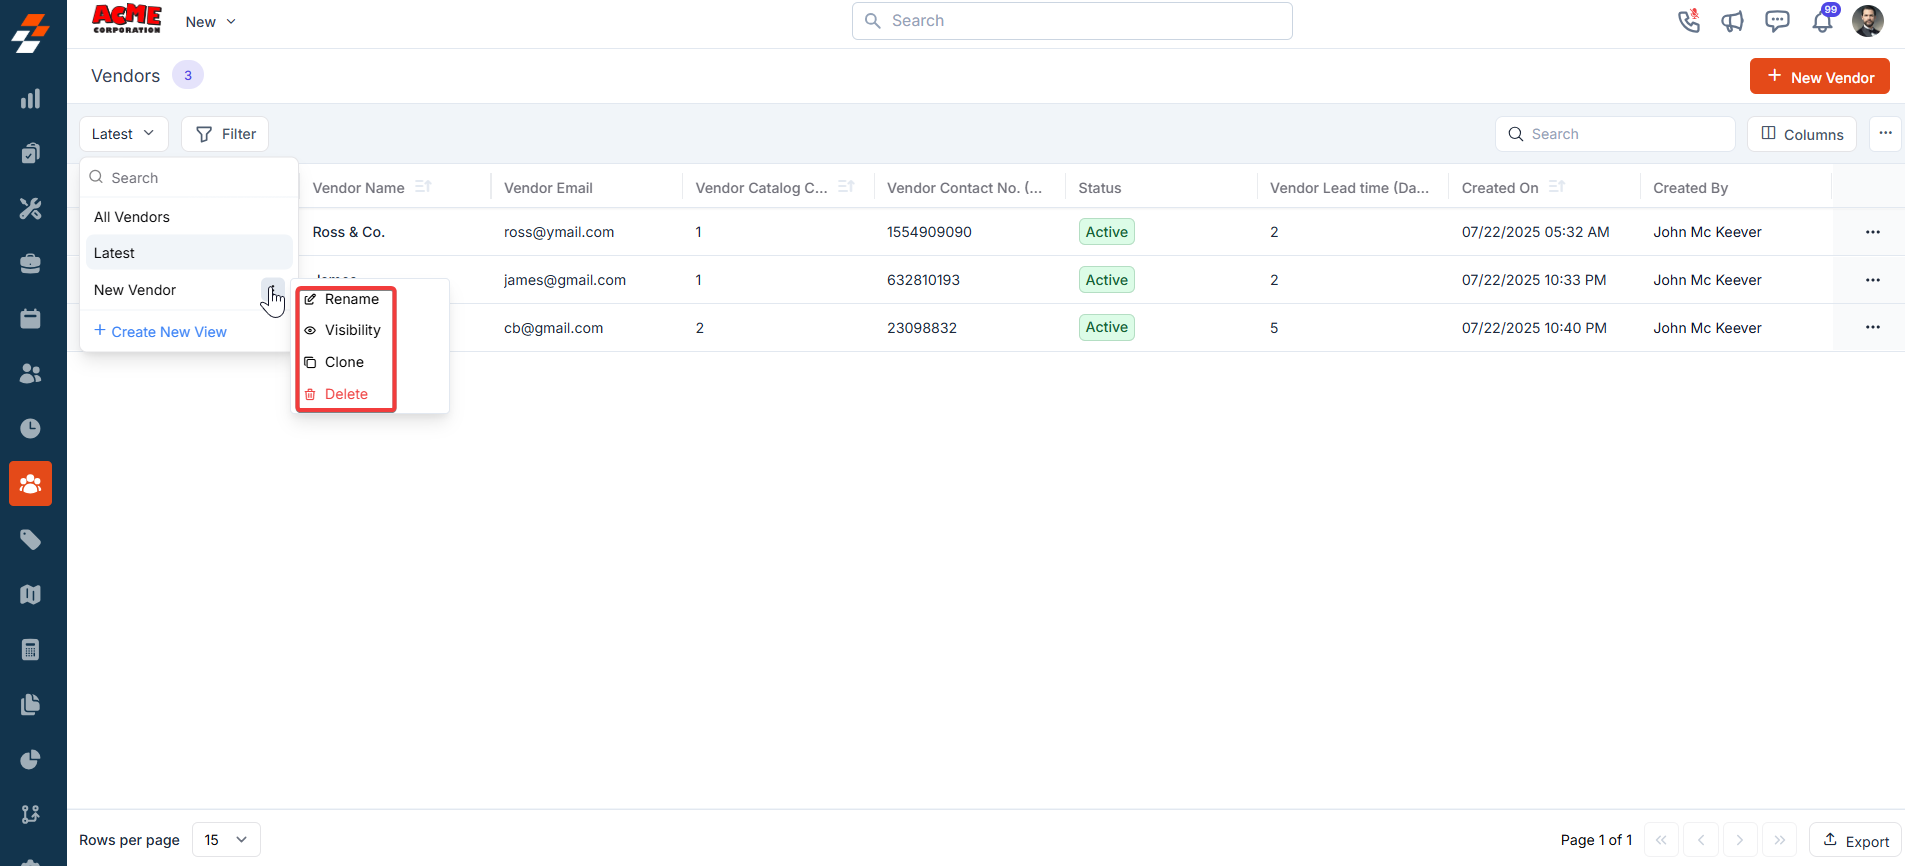
- Rename: This option allows you to change the view’s name.
- Visibility: This lets you adjust who can see the view. Options include sharing with a user or team or keeping it private (“Only Me”), as well as toggling visibility for all users in Zuper (as shown in the “Create a View” dialog in prior images).
- Clone: This function creates a copy of the view, allowing you to modify the duplicate without affecting the original.
- Delete: Removes the view entirely. Since this is a custom view, deleting it would revert the listing to the default view or another saved view. Only the created user can delete the view.
Managing Vendor Details
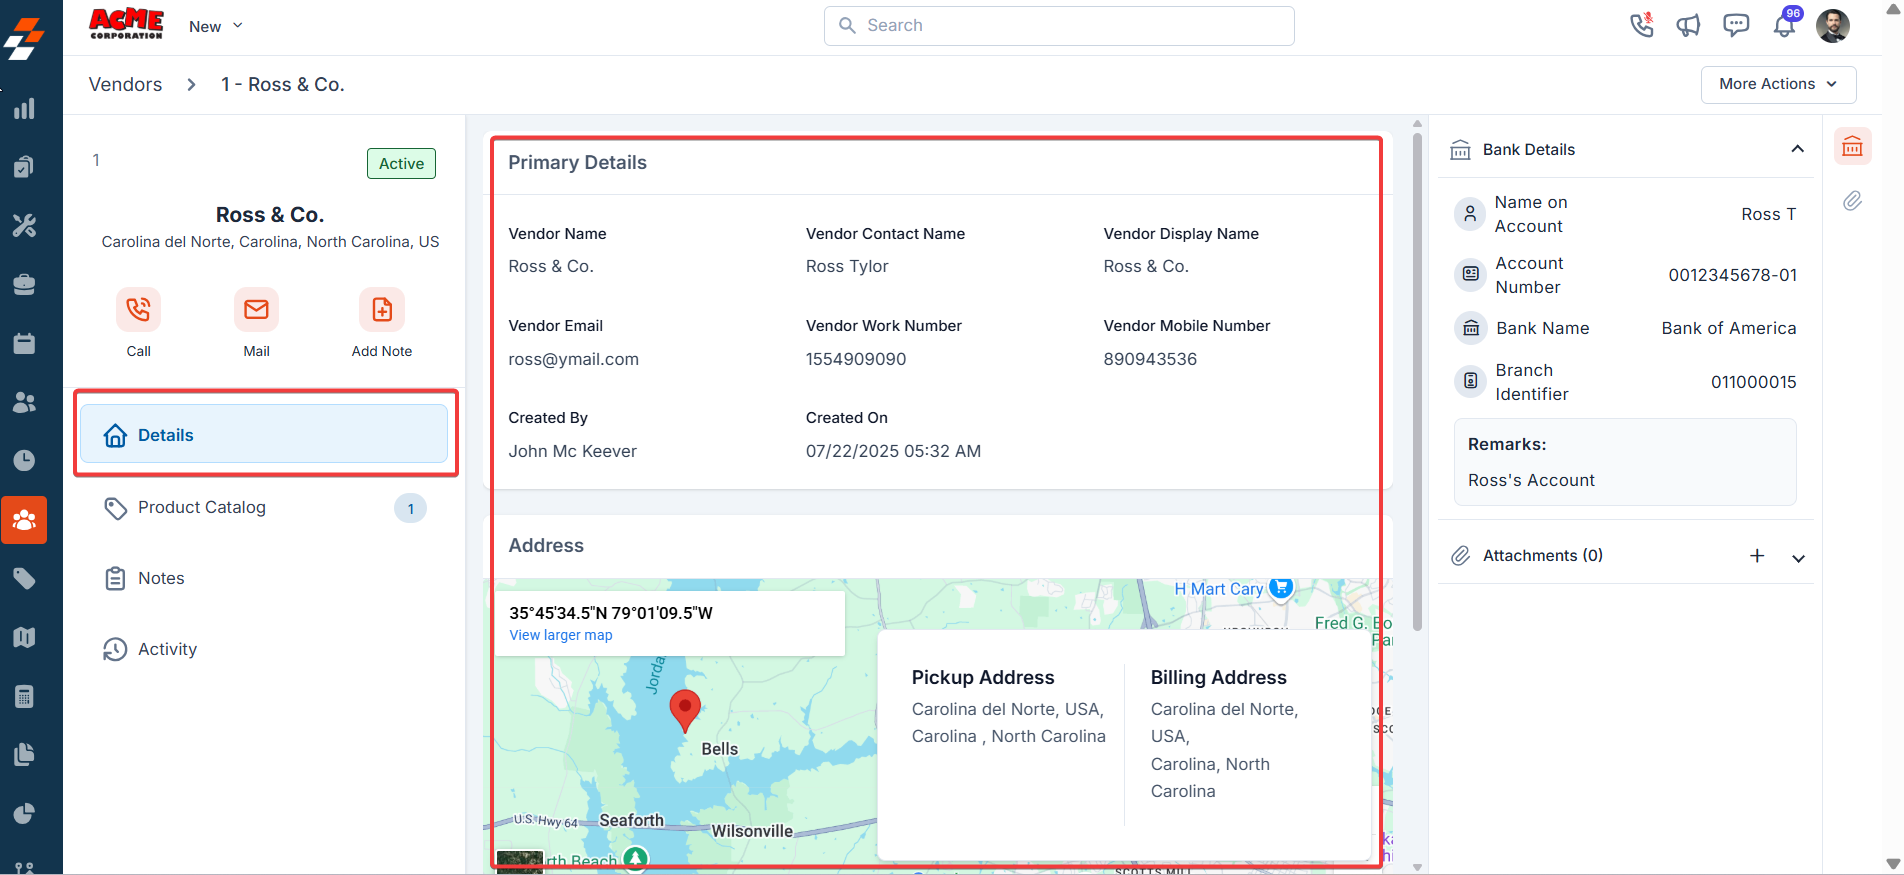
The details page allows you to view and manage the selected job details. Its three-column layout provides quick access to information and actions within each panel.- Click any of the vendors to view the details page.
Left Panel
The left panel contains vendor-related details such as Call, Mail, and Add Note. Below this is the quick actions bar, which provides contextual action buttons, including options such as Details, Product Catalog, Notes, and Activity. Details:- Click the “ Details ” button to view the Vendor’s details.
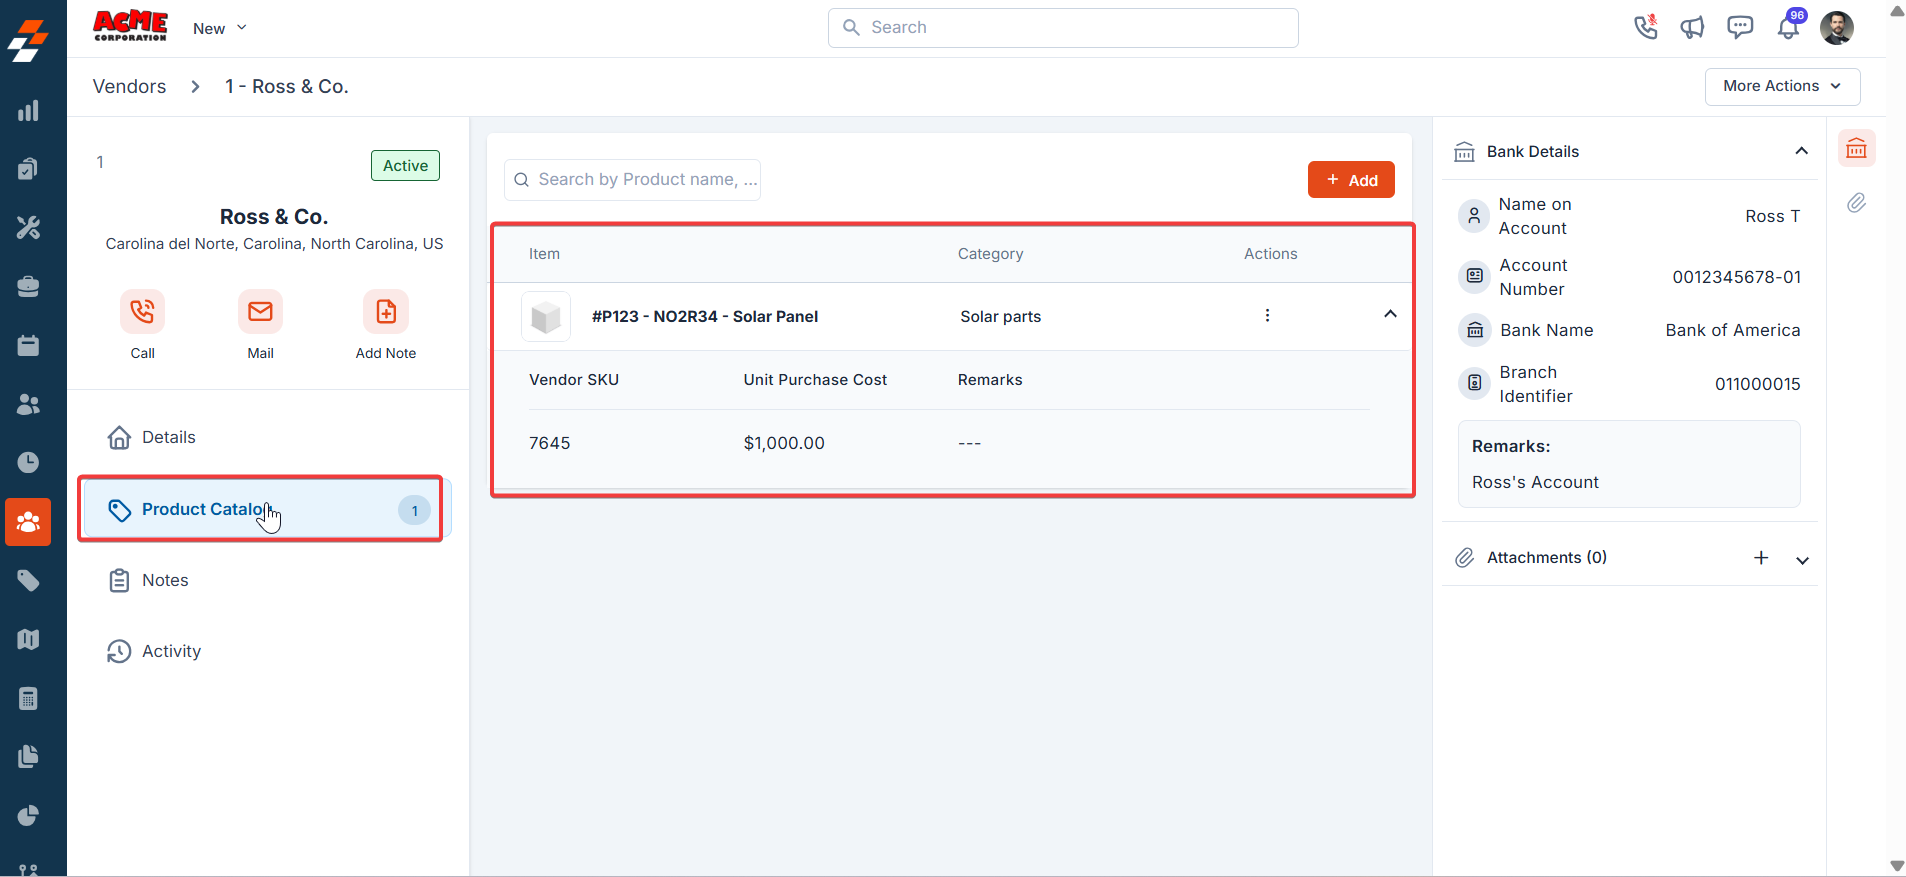
- Select the “ Product Catalog ” to view the catalog item details.
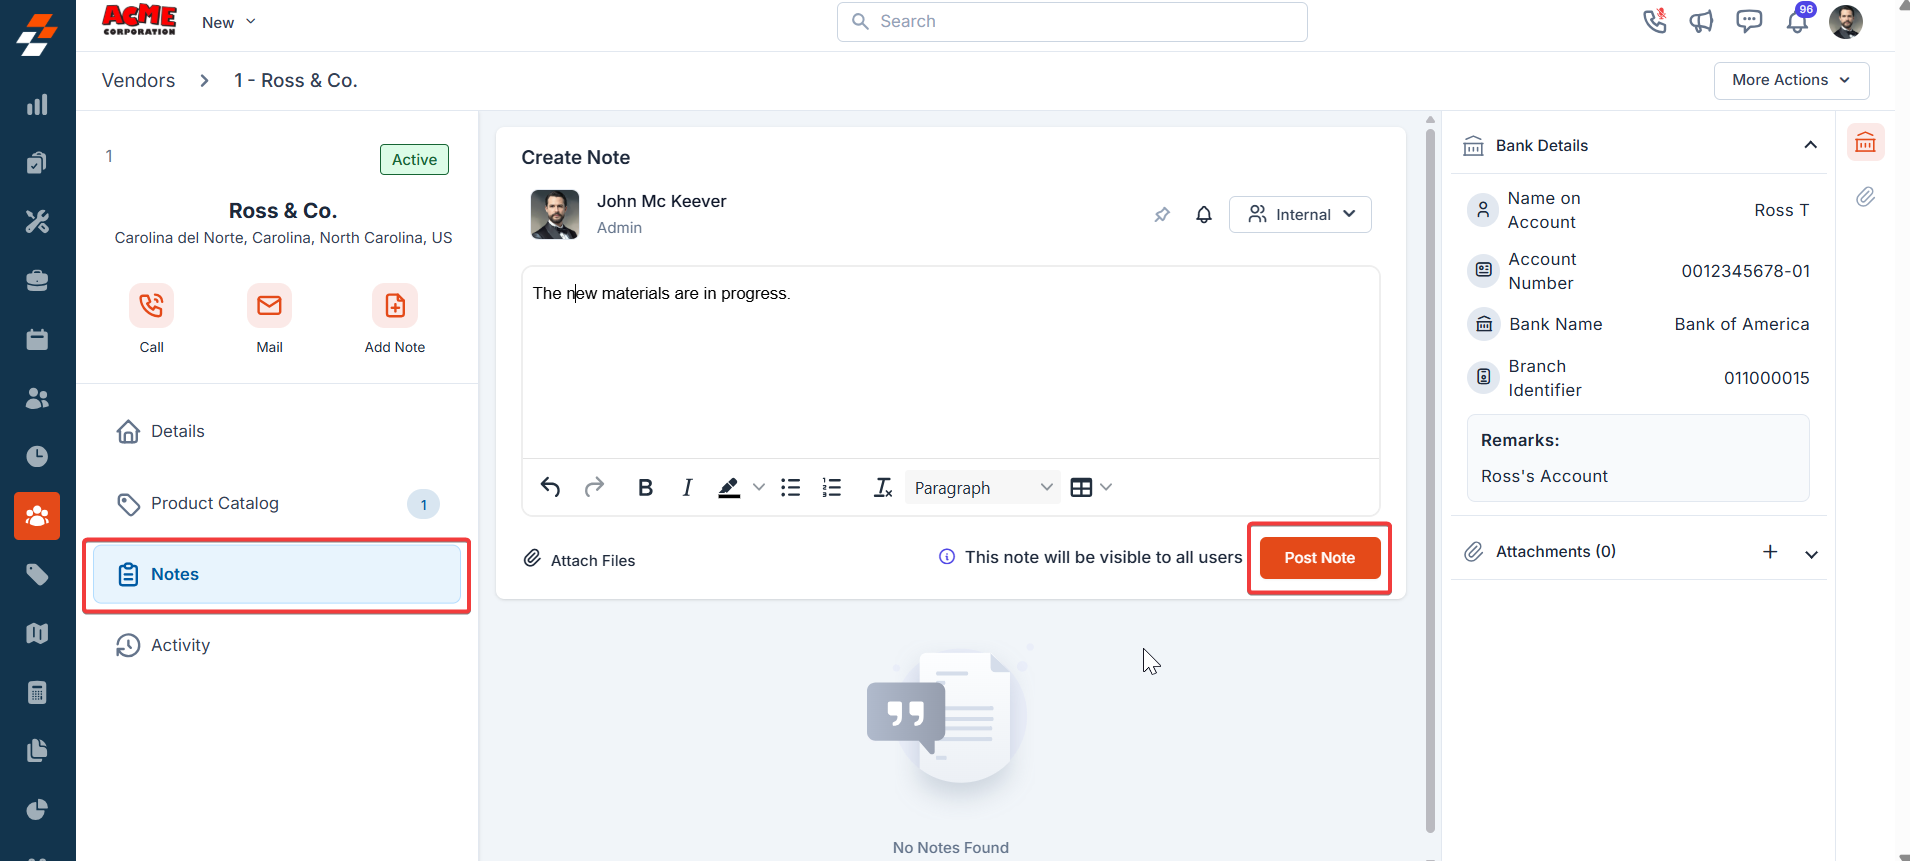
- Select the “ Notes ” section to add and manage the notes.
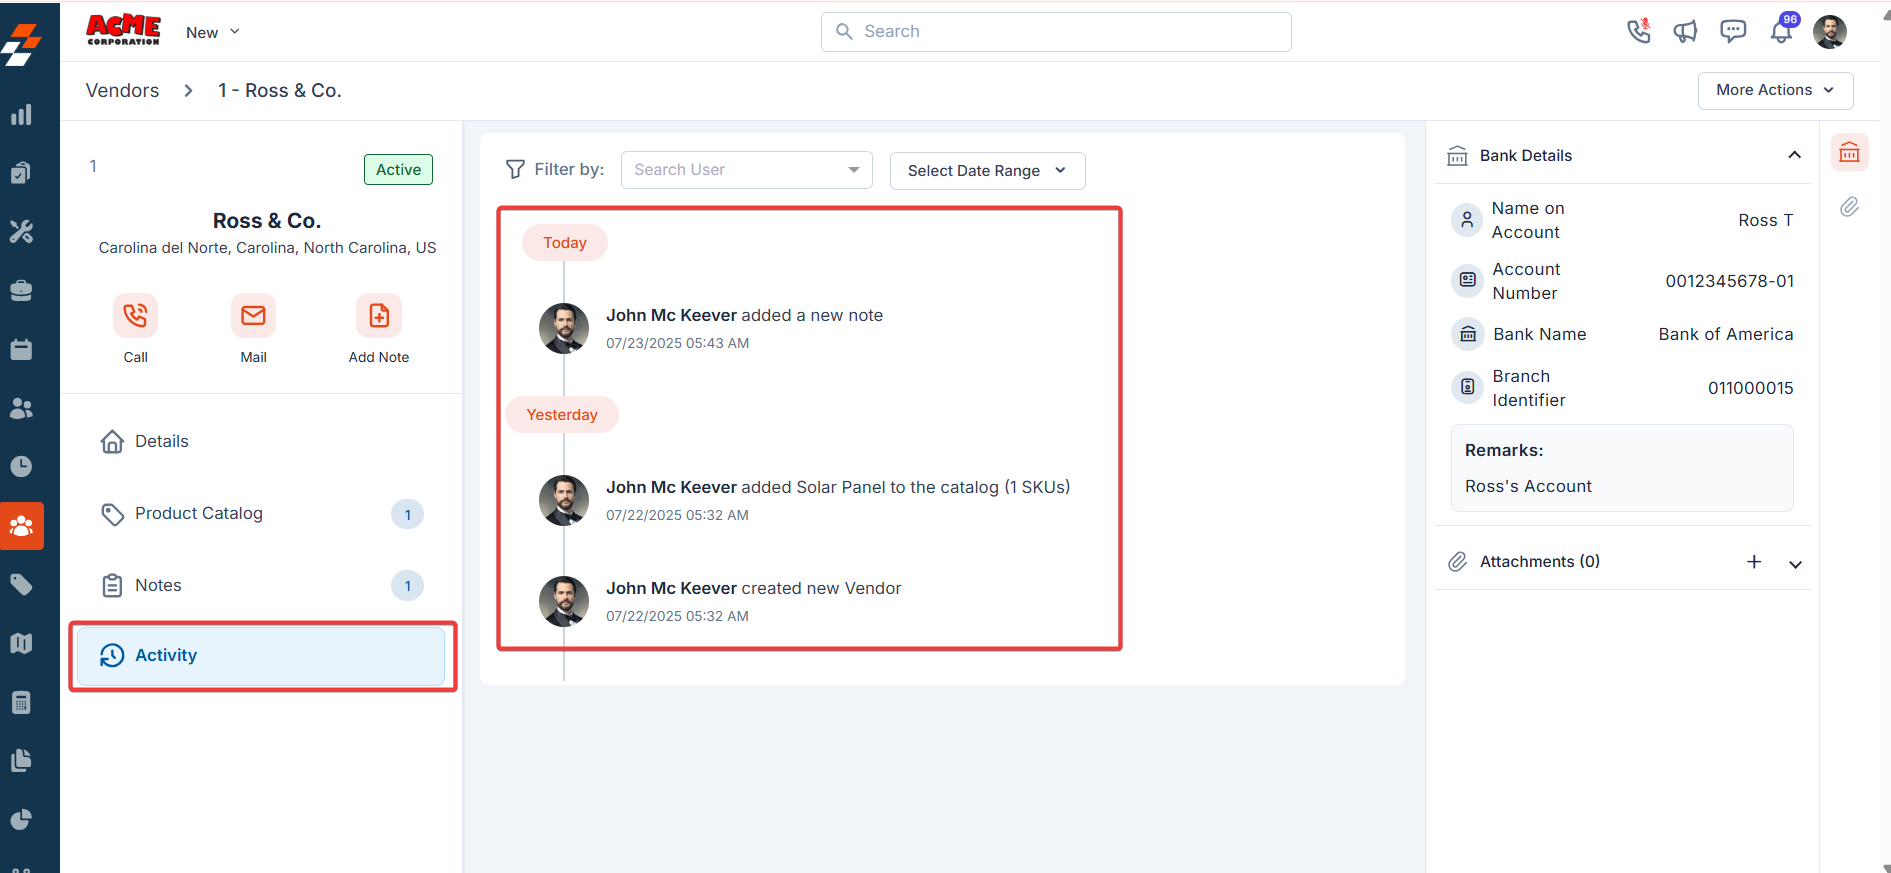
- Click the “ Activity ” section to view the list of actions.
Right panel
You can view the bank details and add attachments.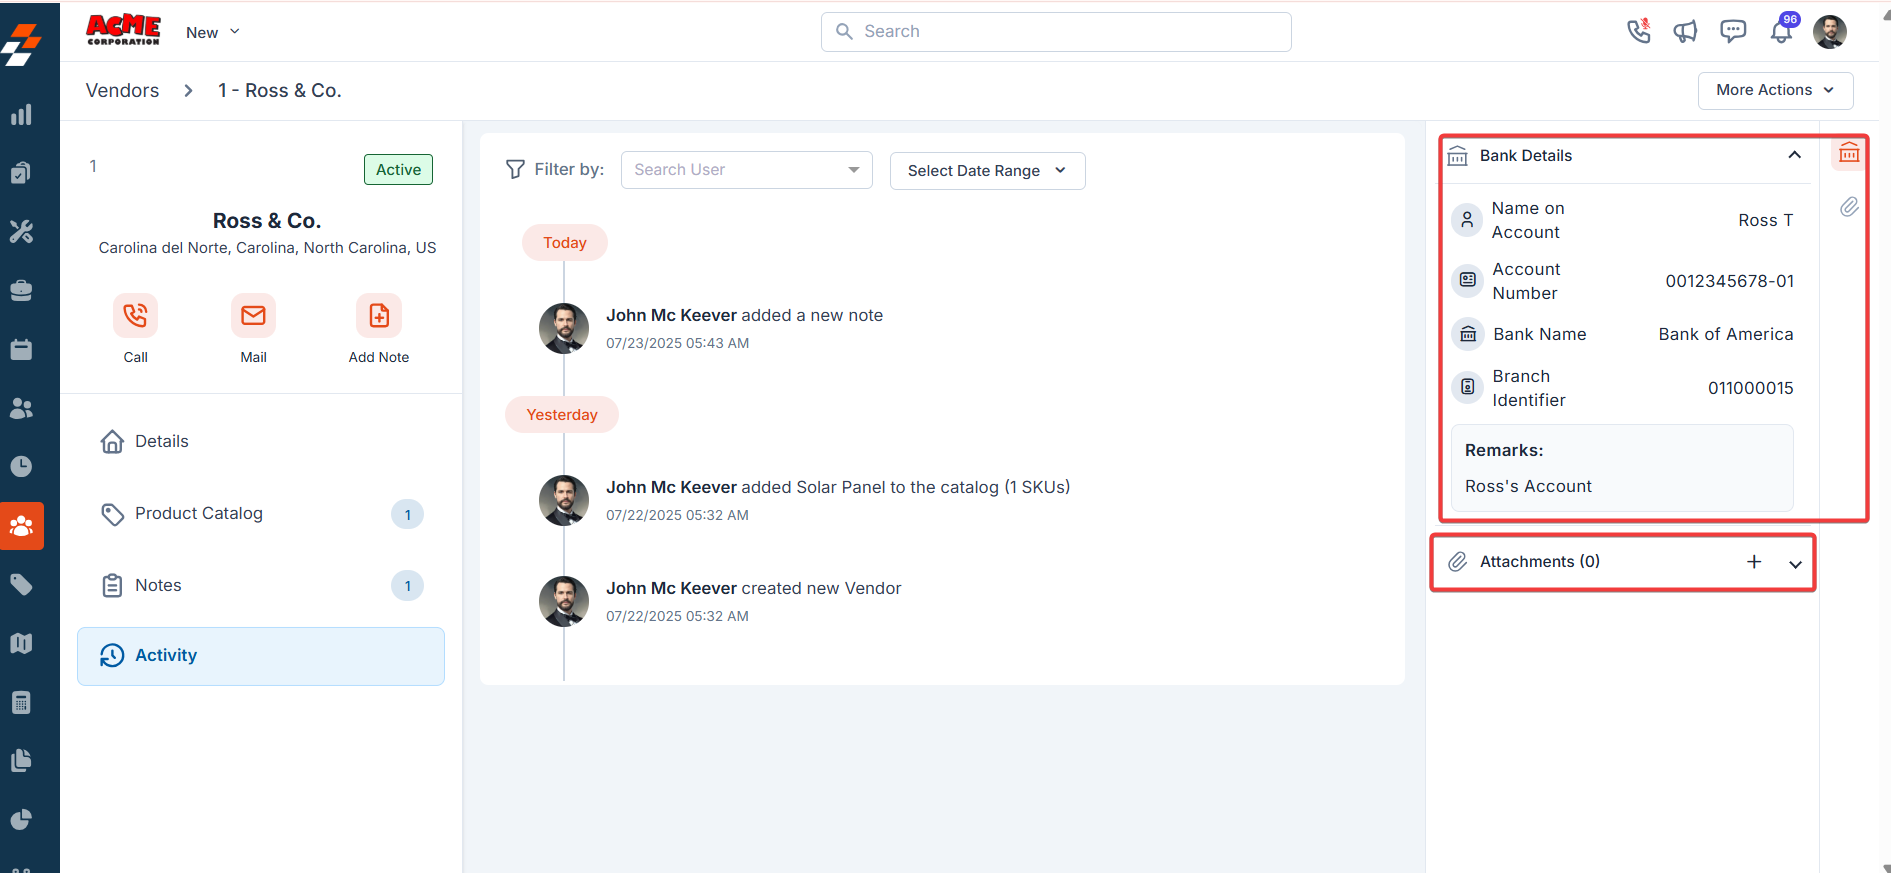
More Actions
On the details page, in addition to editing details, you can also perform various actions, such as sending an email or SMS or deactivating the vendor. The “Delete” option is only available to admins by default. To enable Delete access for users with a Team Leader role, you can create a custom access role and turn on the “Delete Job” permission in the Jobs module. Once enabled, use the delete option under “More Actions” to delete the vendor.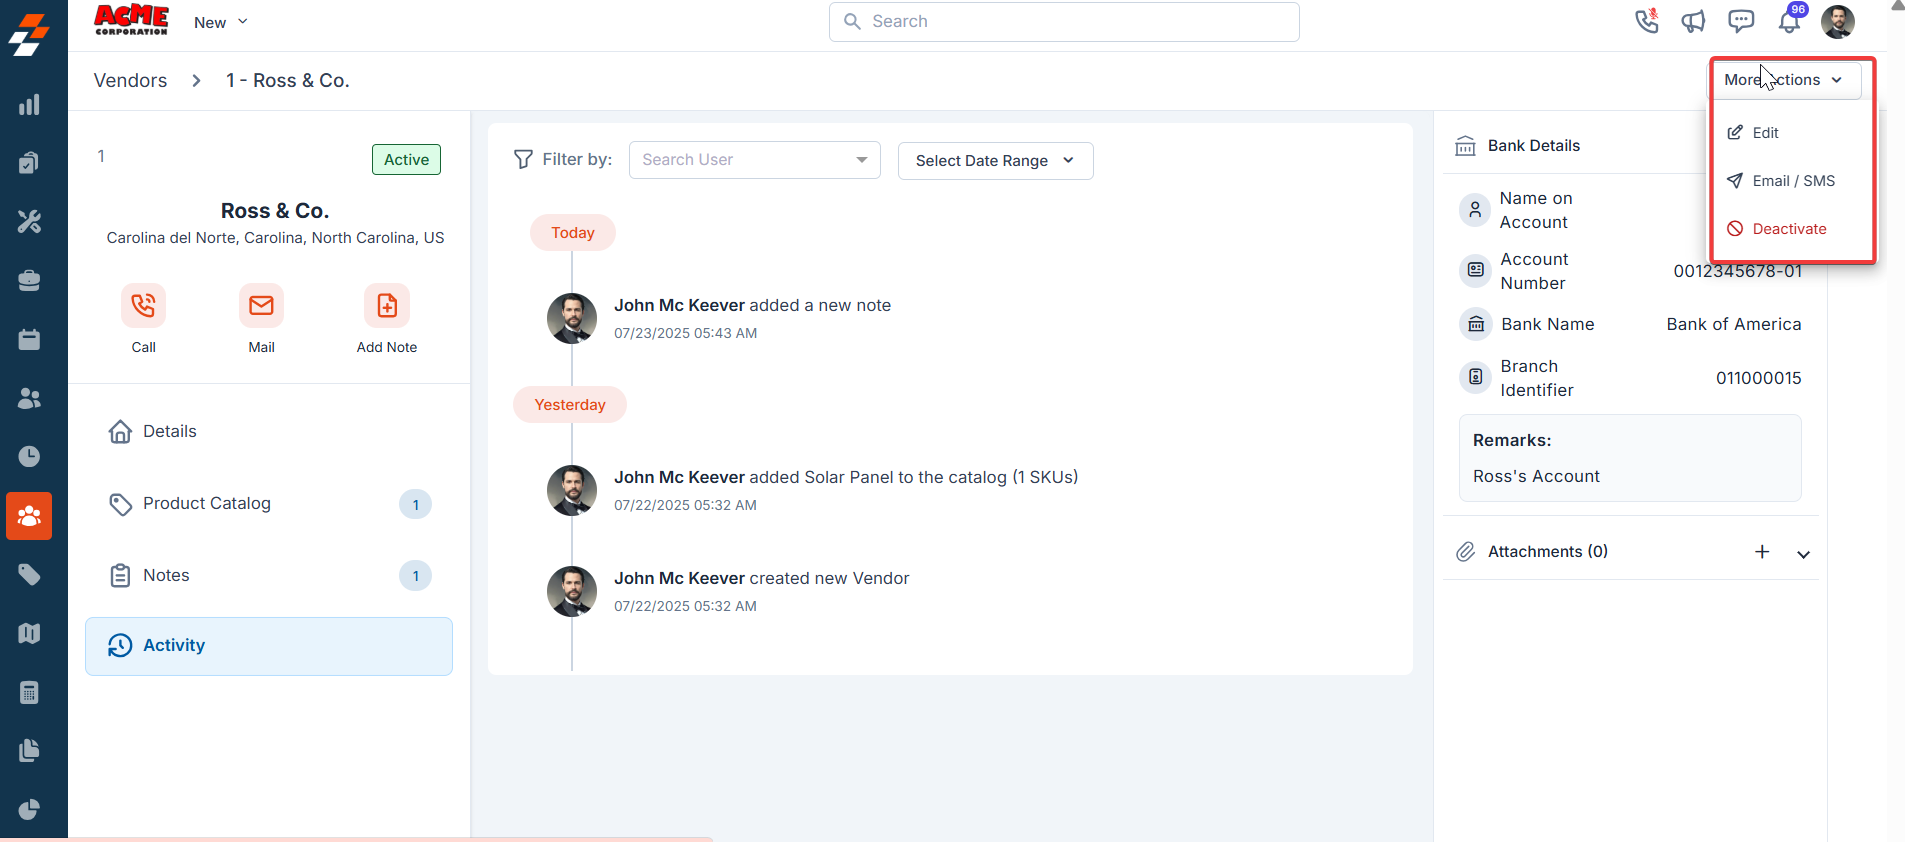
Best Practices
- Standardize Vendor Naming
Use a consistent naming format for vendors to avoid duplicates and improve searchability. - Set Preferred Vendors
For each part or product, assign a preferred vendor to speed up PO creation and ensure consistency. - Use Pickup Locations Judiciously
When using “PickUp Only” as the delivery method, always provide a precise pickup address using the “Pick from map” option. - Update Lead Times Regularly
Keep lead times accurate to prevent delays in planning and field execution. - Leverage View Customization
Create views based on role-specific needs (e.g., Procurement Team vs. Finance Team) to improve focus and productivity. - Audit Attachments and Notes
Regularly review notes and uploaded documents to ensure all vendor records are current and complete. - Apply Permissions Thoughtfully
Use role-based permissions to ensure sensitive details (e.g., bank info) are only accessible by authorized users.
FAQs
Q1: Can I assign multiple vendors to a single product?Yes. You can associate multiple vendors with a product and also define one as the preferred vendor for auto-selection during PO creation. Q2: What happens if no job is linked to a PO with Direct Shipment?
If no job is linked, you’ll be prompted to choose a warehouse or enter a custom delivery address manually. Q3: Is it mandatory to provide a pickup address for “PickUp Only” delivery?
Yes. When this delivery method is selected, entering a pickup address is mandatory. Q4: Can I restrict who sees or edits a custom view?
Yes. You can control visibility by sharing views with specific users or teams and toggling public access. Q5: Are vendor SKUs always synced with the master product catalog?
Only if the business mandates centralized control. Otherwise, SKUs can be managed directly in the vendor catalog. Q6: How do I delete a vendor?
Only Admins (or Team Leaders with the right permission) can delete a vendor via the “More Actions” menu. Deactivation must be done first. Q7: Can I update product costs per vendor?
Yes. Each vendor’s SKU entry can have its own cost, which helps track pricing variations.