Navigation: Dashboard → quick create (+ icon) → New Non-Job Events
Overview
Not every part of your workday is tied to a job. When you have a team meeting, a training session, or an administrative task to log, you can create a non-job event directly from your Zuper mobile app.Before you start
- Ensure that ‘Can Field Technicians create new non-job events?‘ is enabled under Job General Settings -> Access/Permissions by the admin.
- Creating recurring non-job events is not supported on the mobile app.
Create the event
- Go to your Dashboard.
- Tap the + button in the Quick Links section.
- Select New Non-Job Events from the list.
- The New Non-Job Event screen opens.
- Fill in the required fields in the Non-Job Event Details section:
- Event Name — Type a short and clear name.
- Category — From the Category list, select the category that matches the type of event.
- Event Description — Specify any additional context about the event. By default, Zuper fills this field automatically based on the category you selected. You can modify it or add a new description.
- Attendees — Assign one or more FEs who will participate in this event. (As a field executive, you can add only yourself as an attendee.)
- Specify the location:
- Event Address — Provide the location of the event by picking it from the map. Set the schedule:
- To schedule the event for the full day, turn on the All-day toggle. Zuper hides the Start time and End time fields.
- To schedule the event for a specific time:
- In the Schedule On field, select the event date.
- In the Start time field, set the event start time.
- In the End time field, set the event end time. If your organization uses multiple time zones, select a Preferred time zone. This option is available only if time zone switching is enabled.
- Complete the Additional Settings section: Availability — This applies to all event attendees.
Tap Busy if attendees are unavailable during this event, or Free if attendees are available. When you set availability to Busy, Zuper blocks this time slot in Assisted Scheduling. - Notify attendees — Mark this checkbox to send a push notification to all attendees regarding the event. Tap Create to save the non-job event.
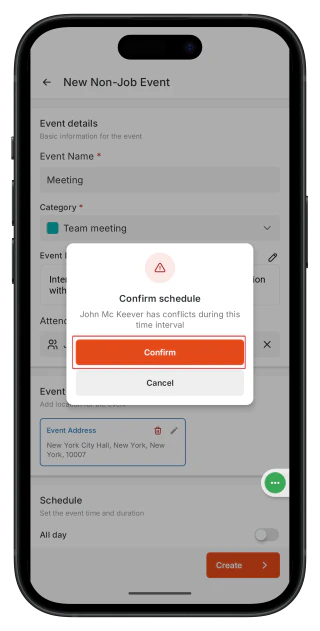
Note: If you or other attendees (if you are a Team Lead or Admin) have an event, job, or time off scheduled at the same time, Zuper displays a Confirm schedule warning. You can still create the event if needed or modify the schedule timings
FAQs
- What should I do if I see a conflict warning after creating an event?
You see a conflict warning when the event overlaps with a busy event, a time-off request, or an existing job on your schedule. Open your schedule in Day View to identify the overlap. Adjust the start or end time of the event to resolve the conflict.
A TL and Admin can view all employees with conflicts, while FE, when scheduling non-job events, can see their conflict alerts and adjust their schedule accordingly. - Why did attendees not receive a notification for my event?
Confirm that the Notify Attendees checkbox was selected before you created the event. The Zuper mobile app sends push notifications to attendees’ devices. Ask attendees to confirm that push notifications are enabled on their devices. - Can I assign additional attendees to a non-job event?
As a field executive, you can create a non-job event for yourself only. Zuper automatically adds you as the sole attendee. You cannot assign other attendees to the event. Your team lead can assign themselves or any member of your team. Your admin can assign any user.
If the issue continues, contact Support.