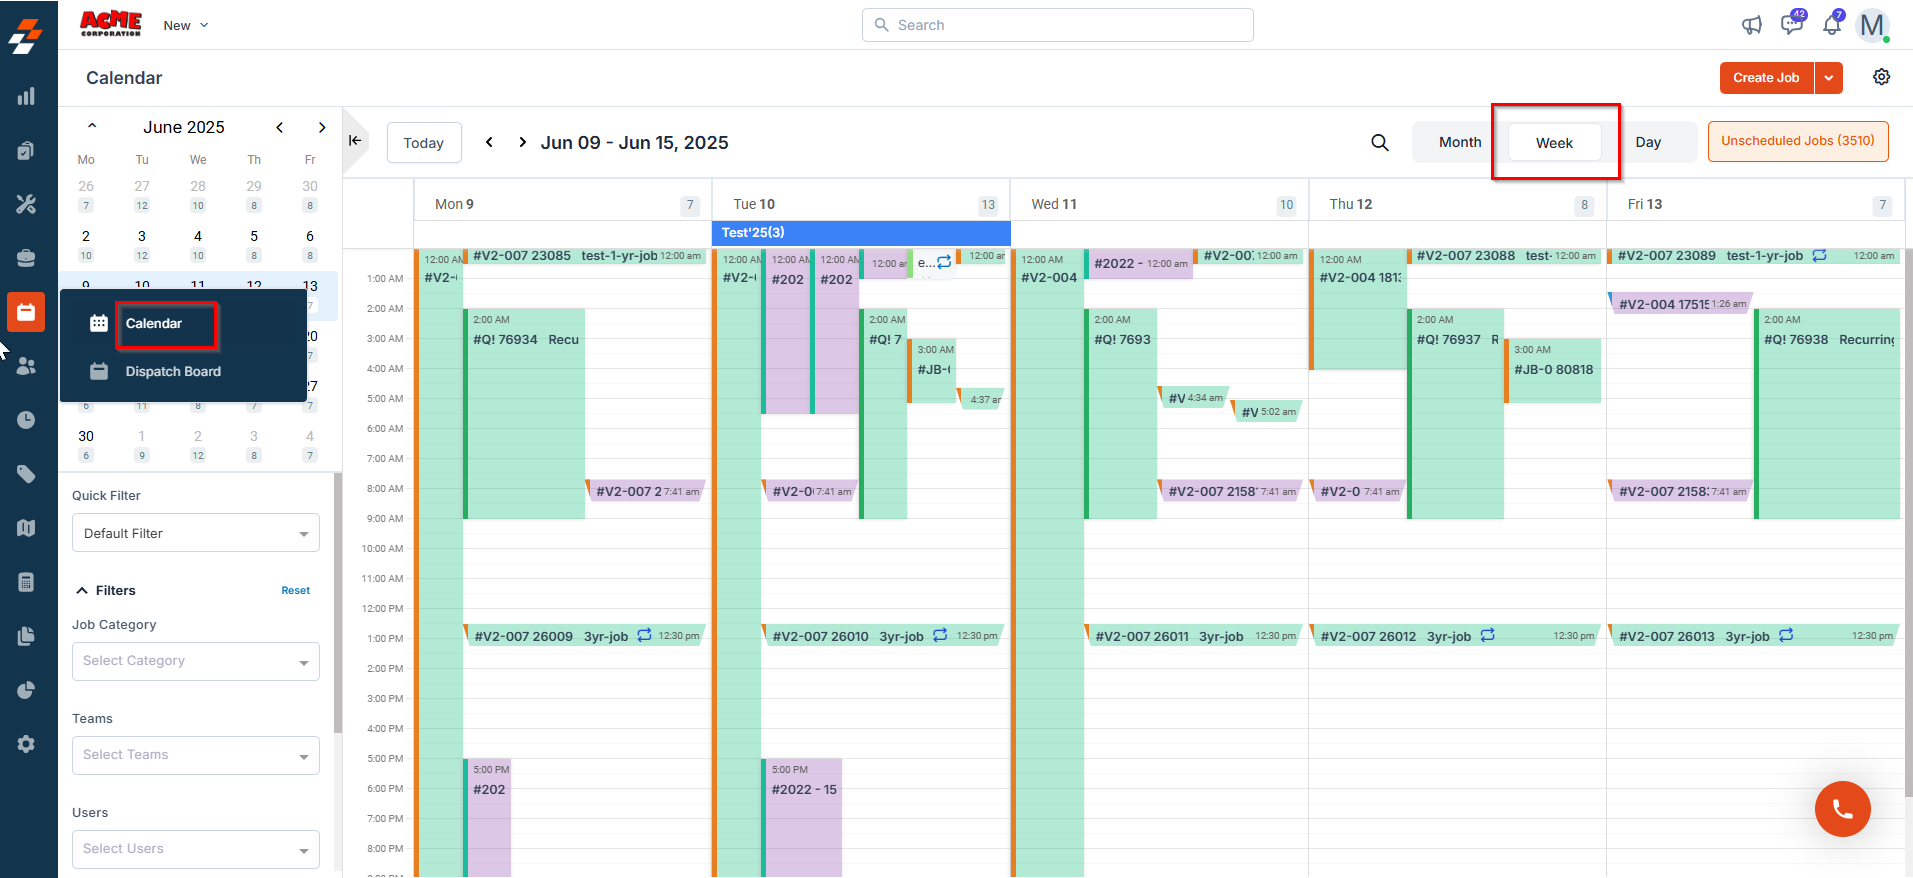
Navigation: Scheduling & Dispatching module -> Calendar
Accessing calendar
- Select the scheduling & dispatching module icon from the left navigation menu and choose “Calendar.”
- The calendar will display events based on the selected view (Day, Week, or Month).
Note: When viewing the events on the calendar in a month view, if multiple jobs are scheduled on the same day, click the “+n more” link to view them. A pop-up will appear, listing all jobs scheduled for that day. You can scroll through the pop-up to see the full list, as shown below.

Actions in the Calendar Module
1. View and schedule unscheduled Jobs
Unscheduled jobs are pending tasks that have yet to be assigned a specific time slot. To view and schedule them:- Click the “Unscheduled Jobs” button at the top right corner of the page.
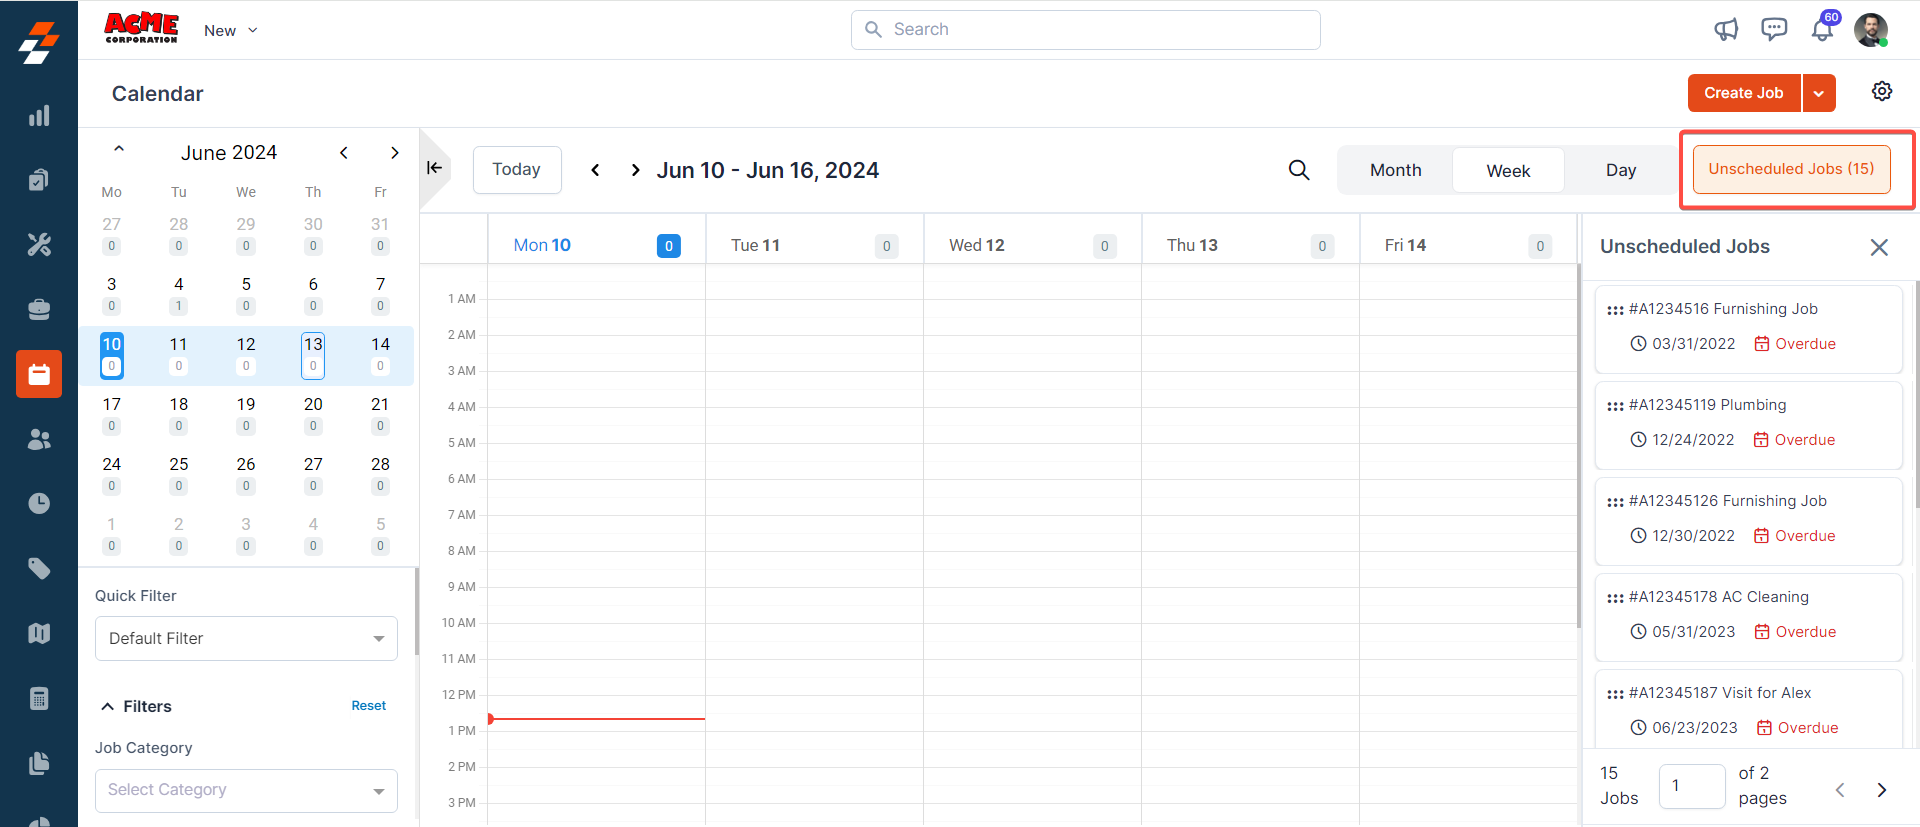
- A list of unscheduled and overdue jobs will appear. Drag and drop a job onto the calendar to schedule it.
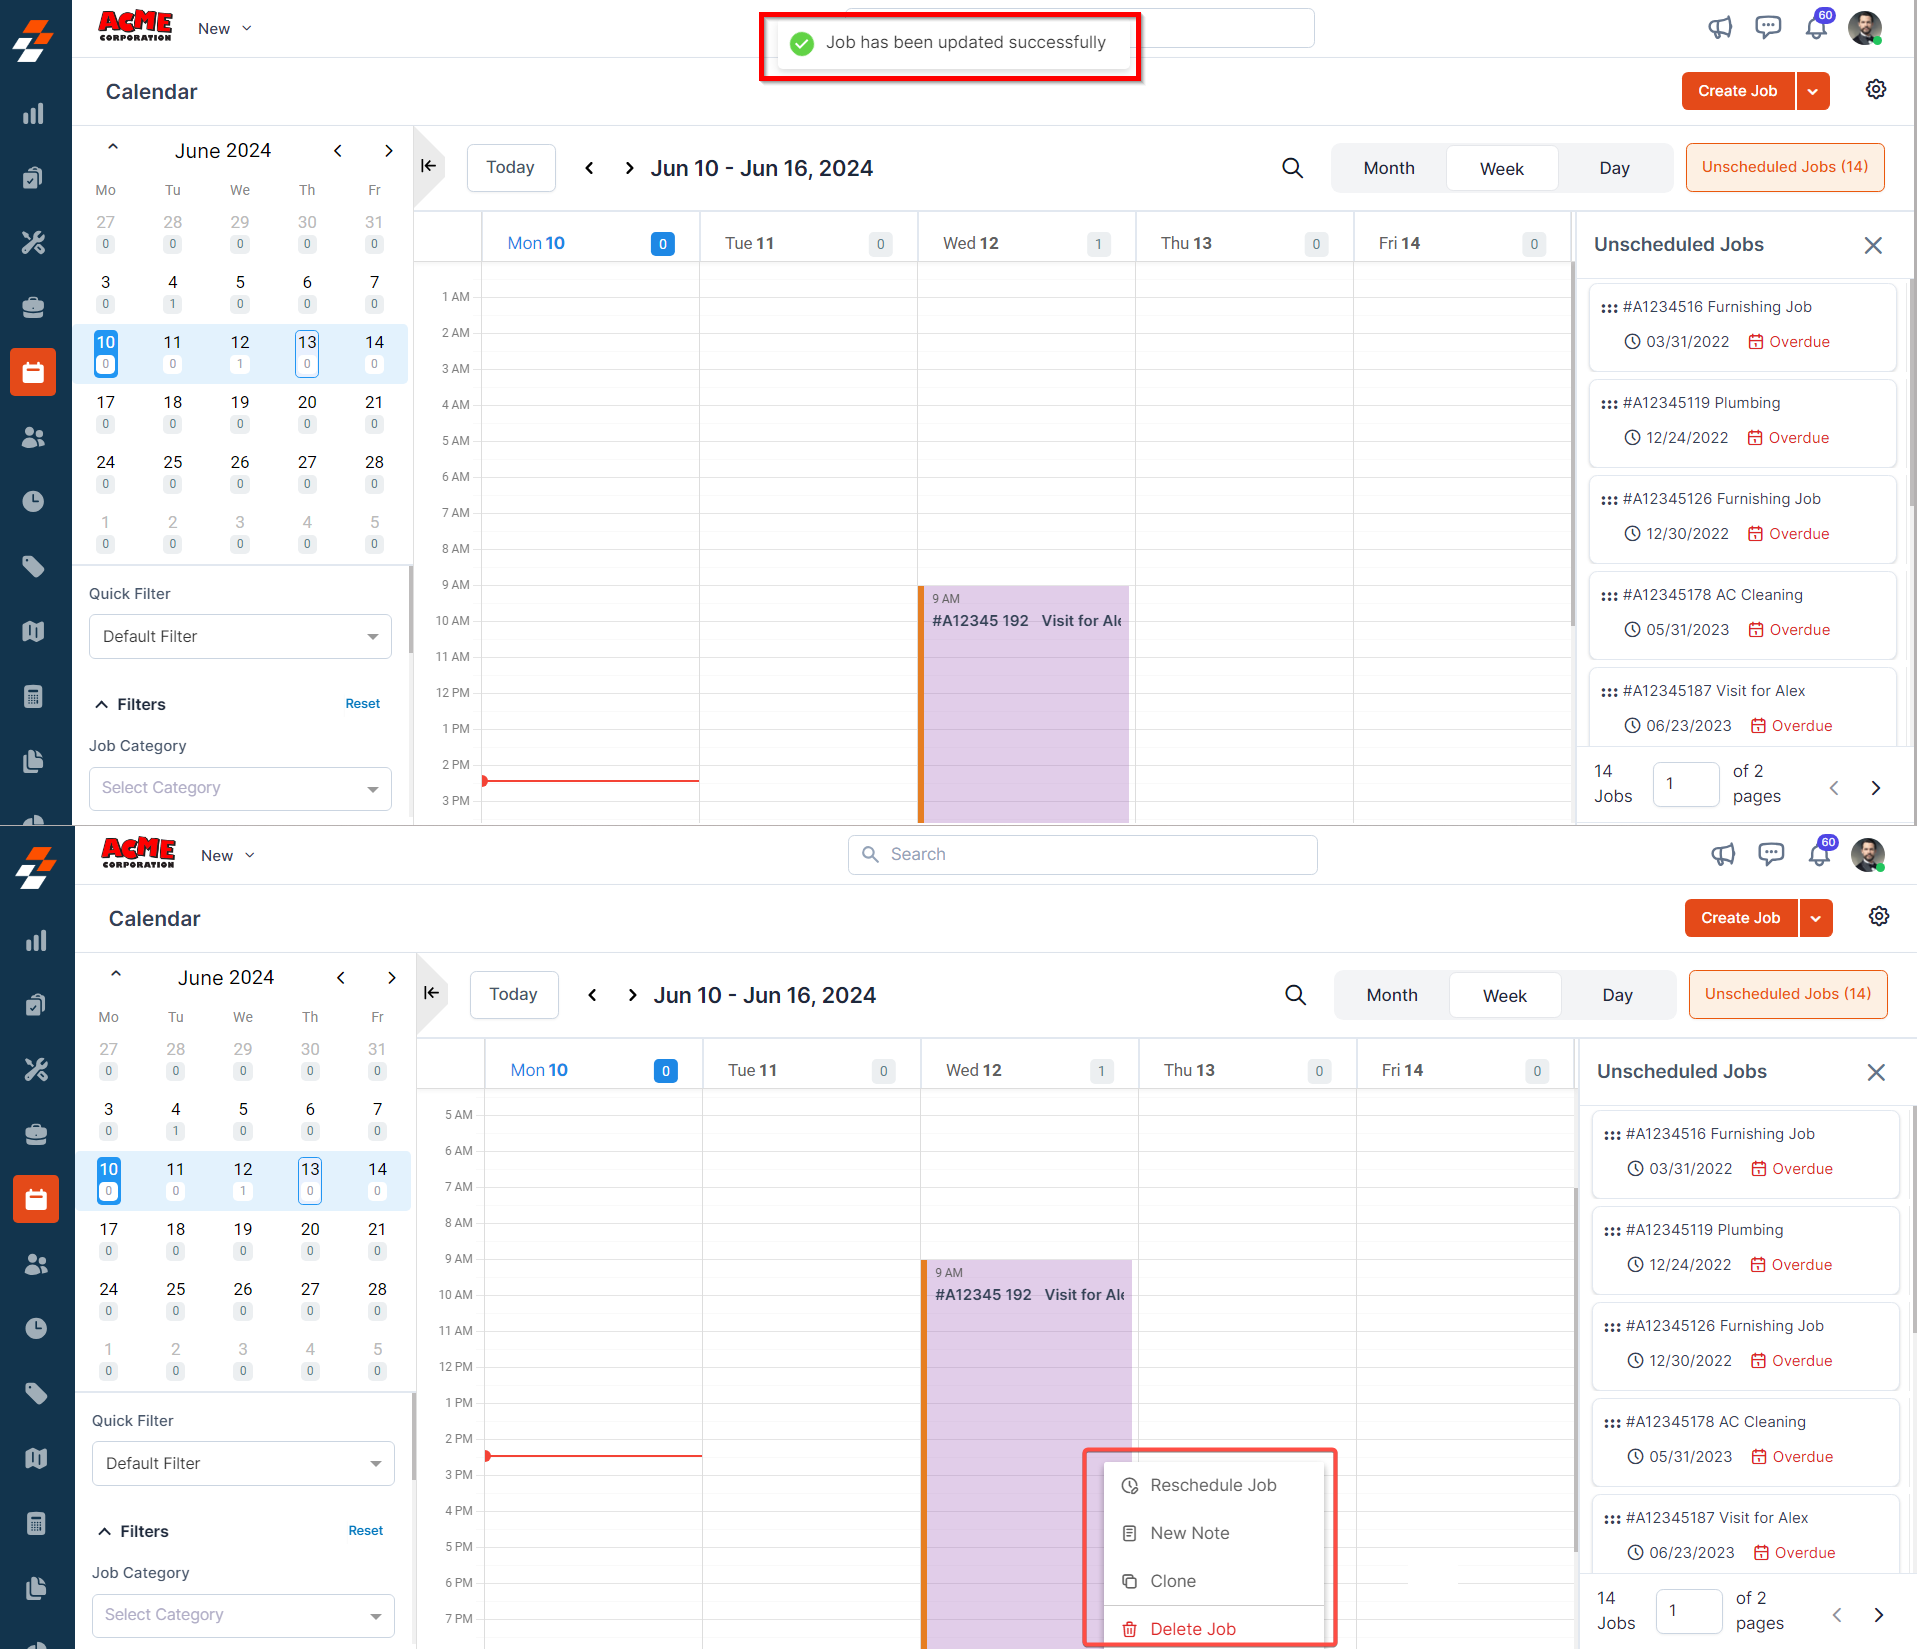
Note: When you drag and drop, a pop-up will appear as shown below, where you will be prompted to confirm the scheduled/rescheduled start & end date and time. Once done, click the “Update” button.
- The job is scheduled successfully. Once scheduled, you can reschedule, add a note, clone, or delete it by right-clicking on it.
2. Create & schedule a new Job
This feature allows you to create and schedule jobs directly from the calendar, streamlining job assignments without navigating away from the scheduling interface.- Click and drag over the desired time slot to create a new job.
- A sidebar appears with pre-filled date and time details.
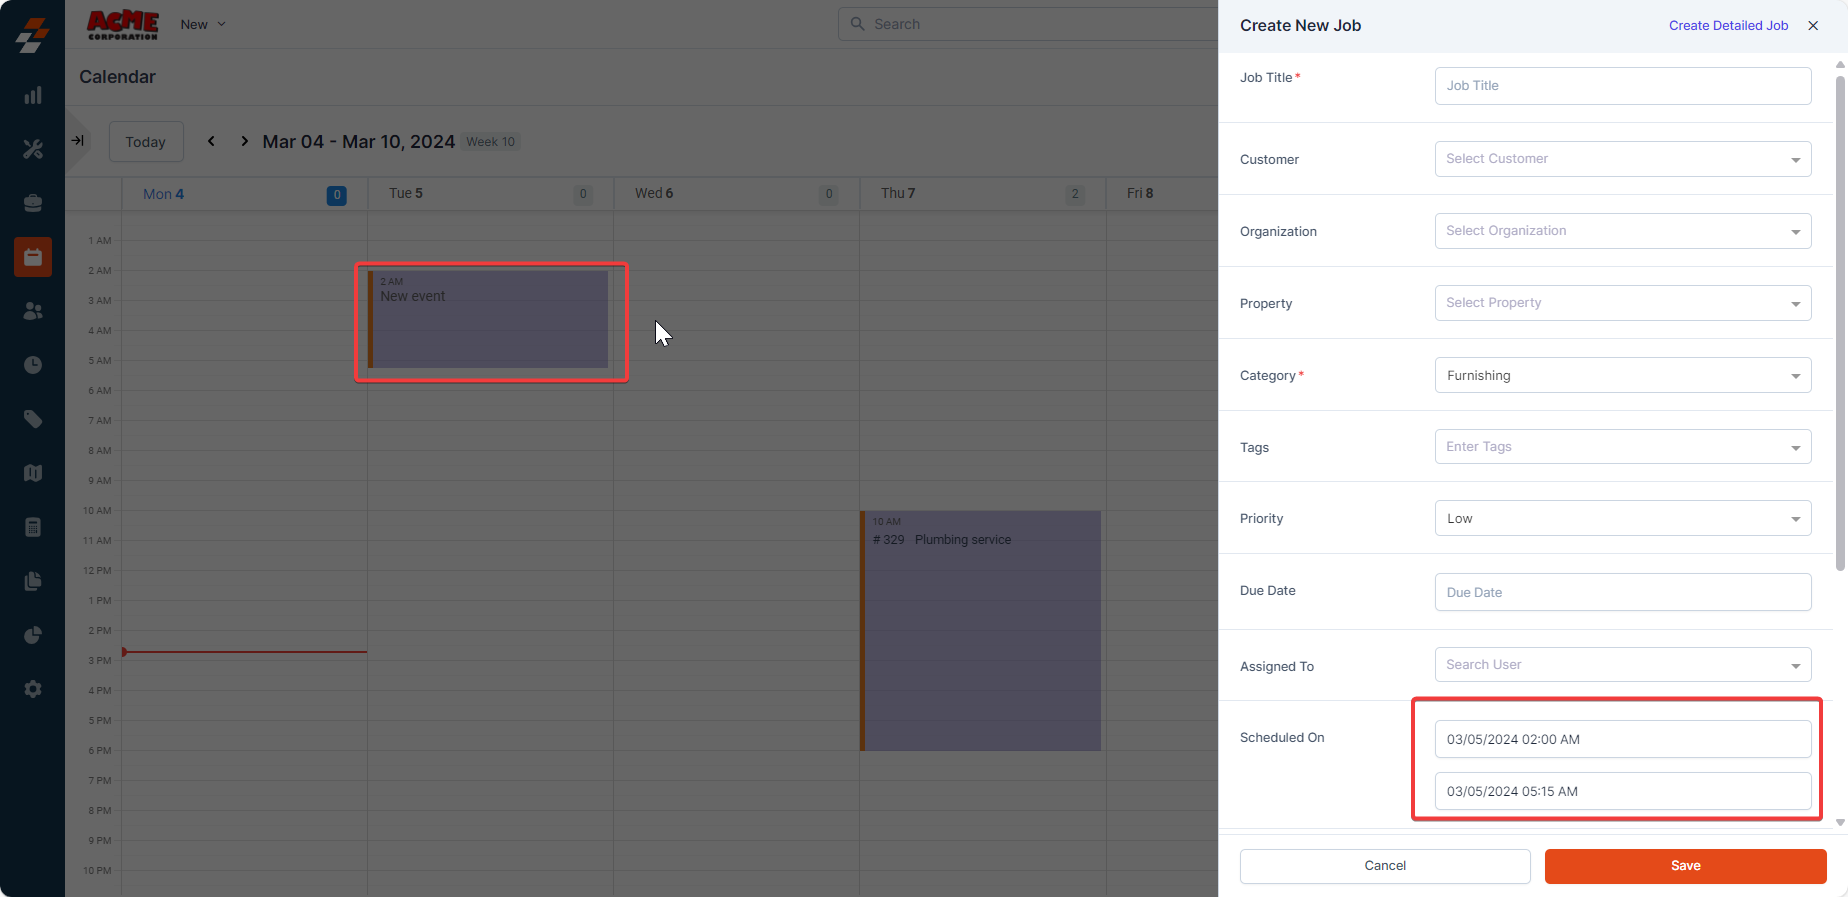
- Enter additional details such as Job Title, Customer, Organization, Property, Category, etc., and click “Save.”
- To add more details like service tasks, parts/services, assets, contracts, and attachments, click “Create Detailed Job” at the top right of the sidebar.
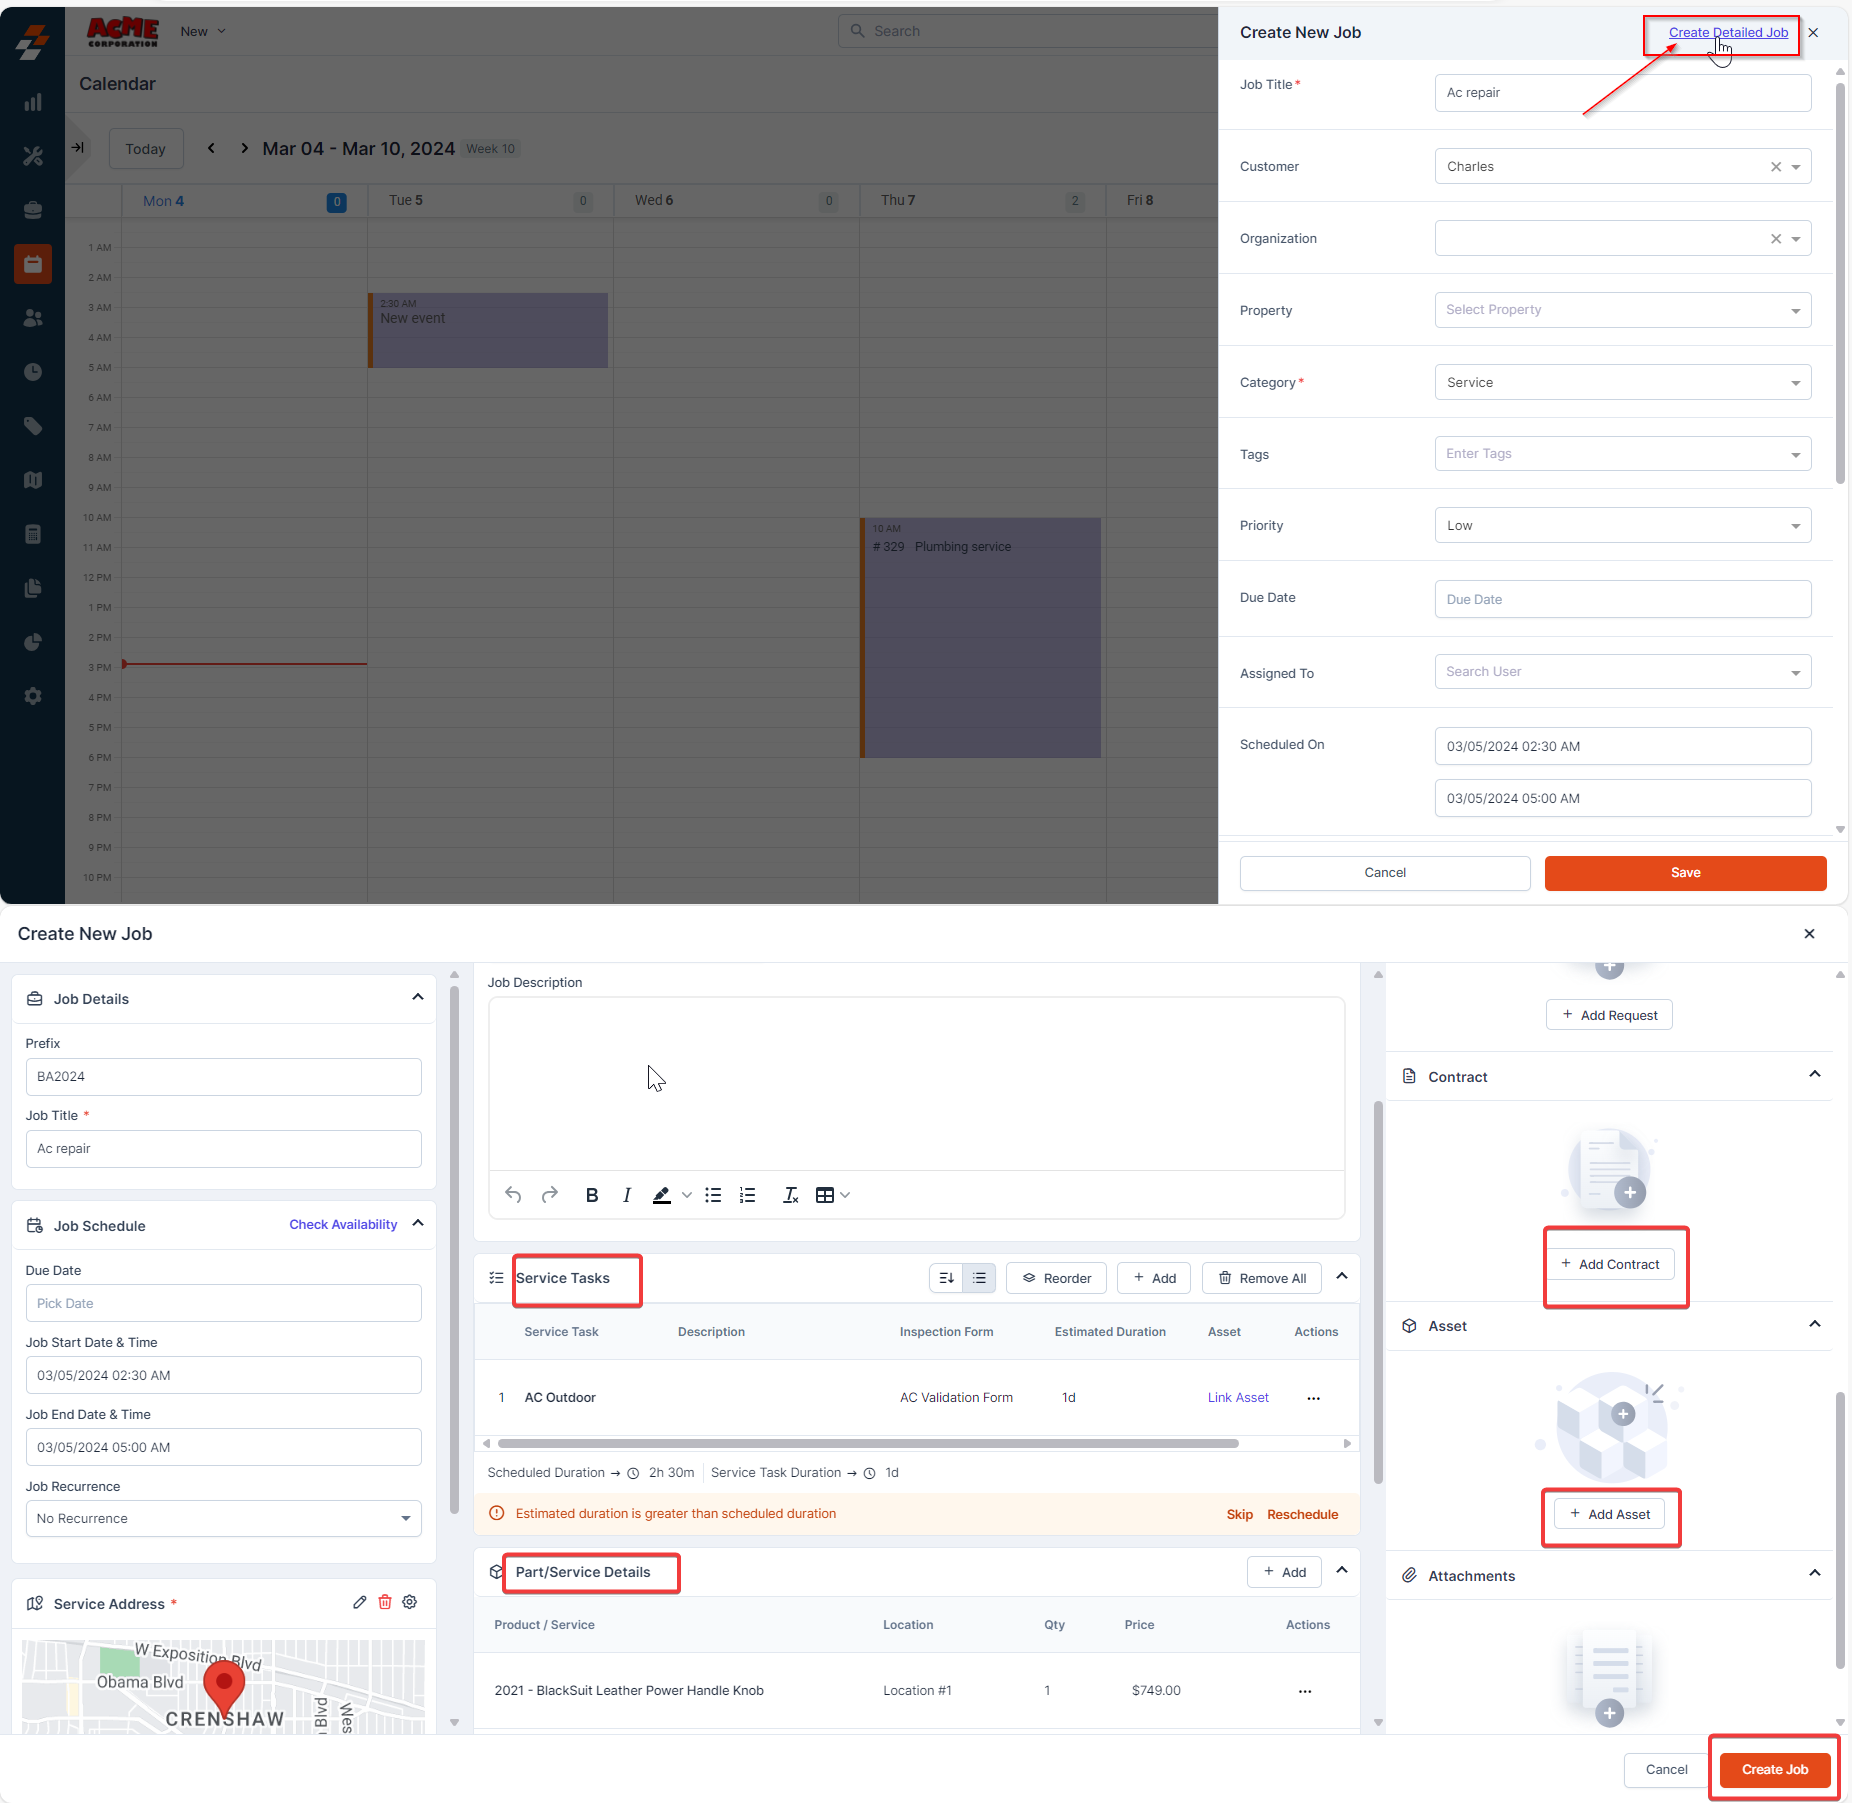
- Once the job is created, you can manage it by rescheduling, adding notes, cloning, or deleting it.
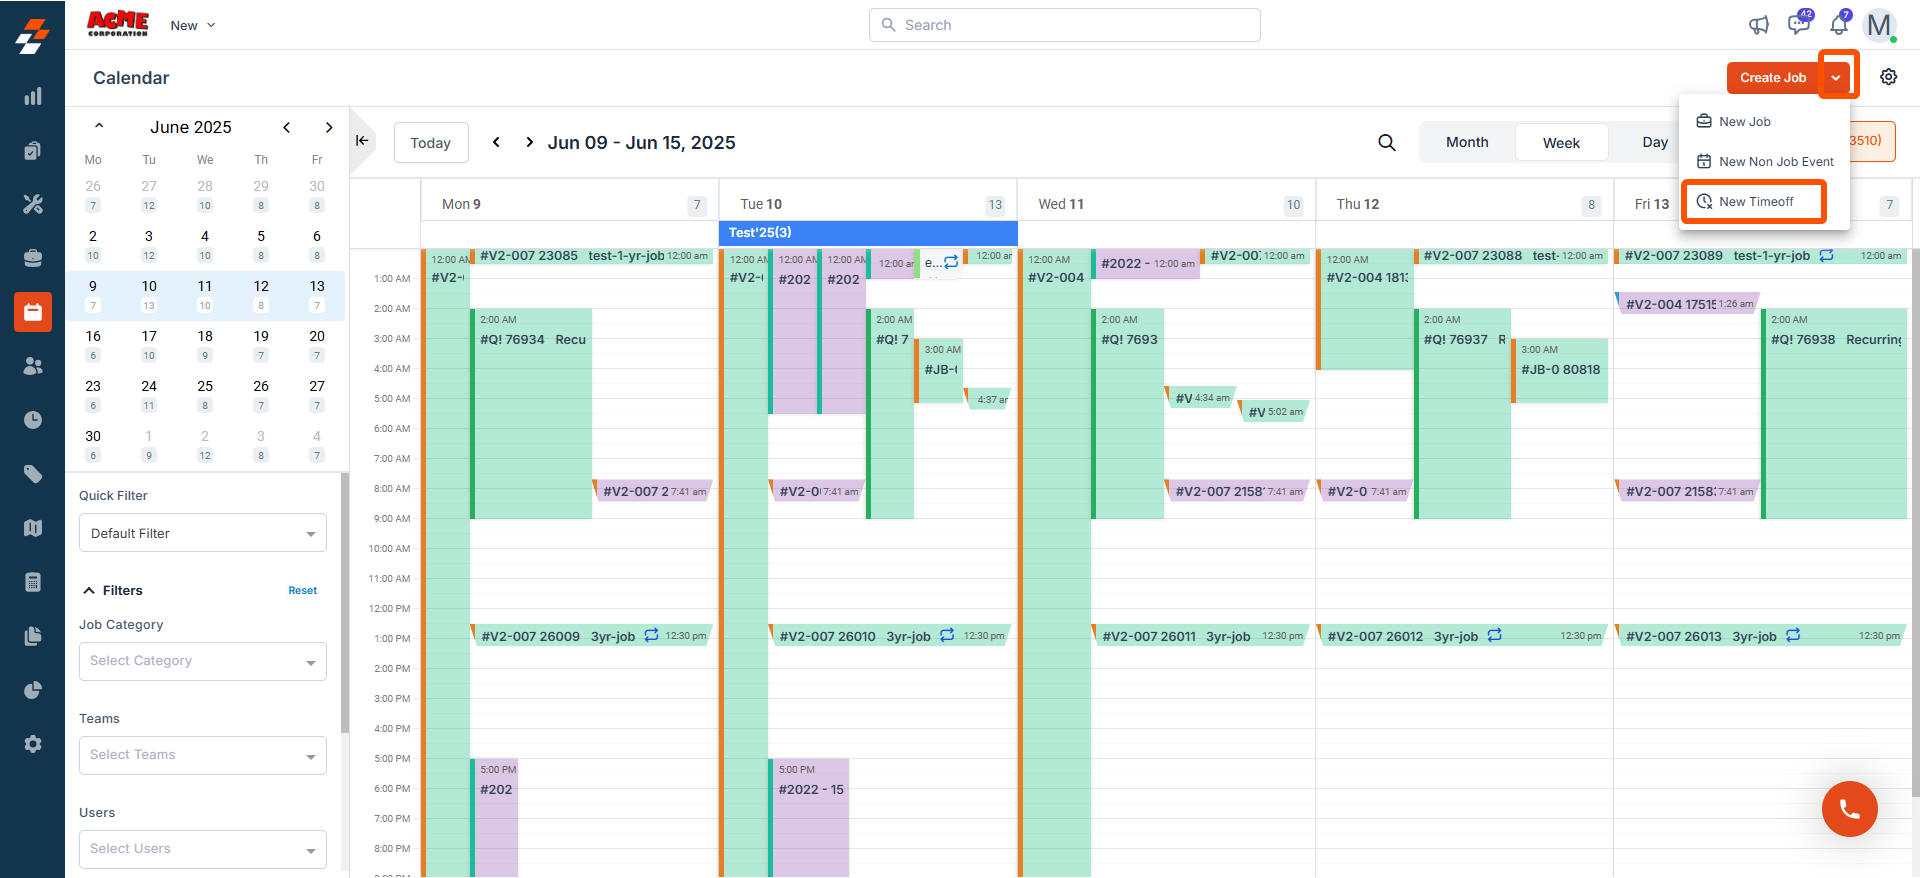
- You can also create a new job using the ”+ Create Job” button at the top right corner.
Note: When you create a new job using the “Create Job” button at the top right corner. You will then need to follow the steps mentioned above but remember that the date and time won’t be prefilled since you are creating a new job from scratch.
3. Create and review timeoff requests
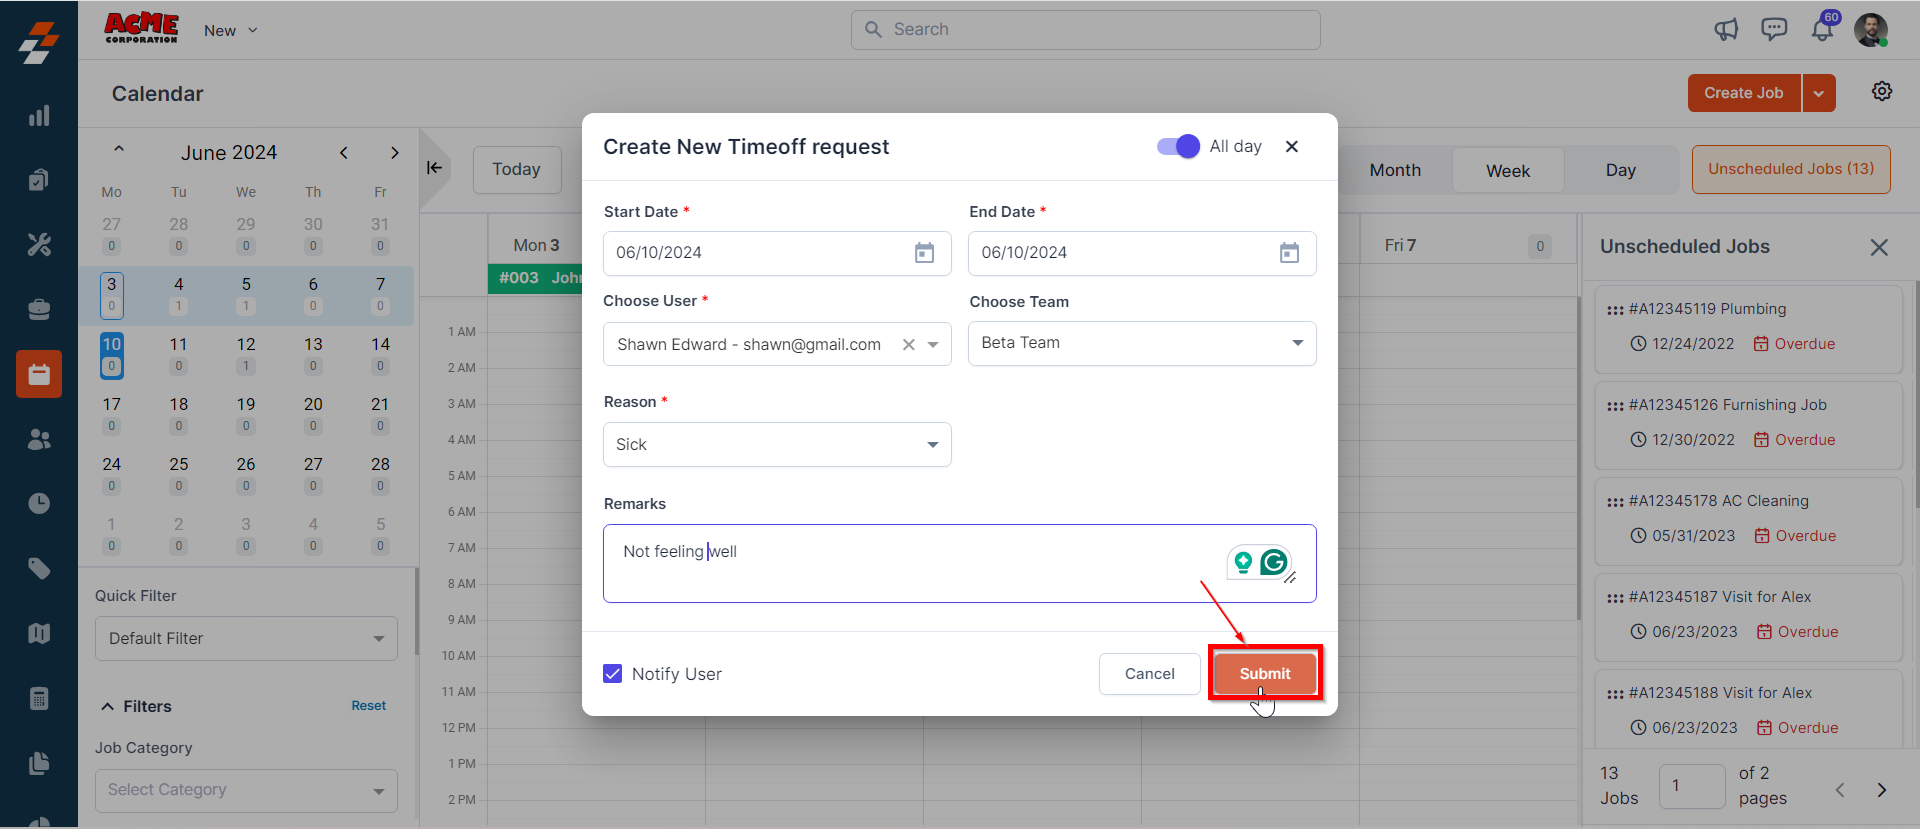
Manage technician availability effectively by adding time-off requests directly in the calendar. This feature helps plan workloads efficiently while ensuring seamless scheduling. To create a new time-off request from the calendar, follow these steps:- Click the drop-down menu next to “Create Job” and select “New Time-off.”
- Enter details such as Start & End Date, User, Team, Reason (Sick, Vacation, etc.), and Remarks.
- Check “Notify User” if you want to send a notification about the request.
- Click “Submit” to create the time-off request.
- After creating a time-off request, you can view more information by hovering over the request. To edit the request, simply click on it.
- Ensure that the “Display Time-off” checkbox is enabled to view submitted requests in the calendar.
4. Create and review non-job events
A non-job event refers to any activity that a field technician or employee participates in that is not directly linked to a specific job. These events can include meetings, training sessions, administrative tasks, or any other non-job-related activities. To create a new non-job event from the calendar, Click the drop-down menu next to “Create Job” and select “New Non Job Event.”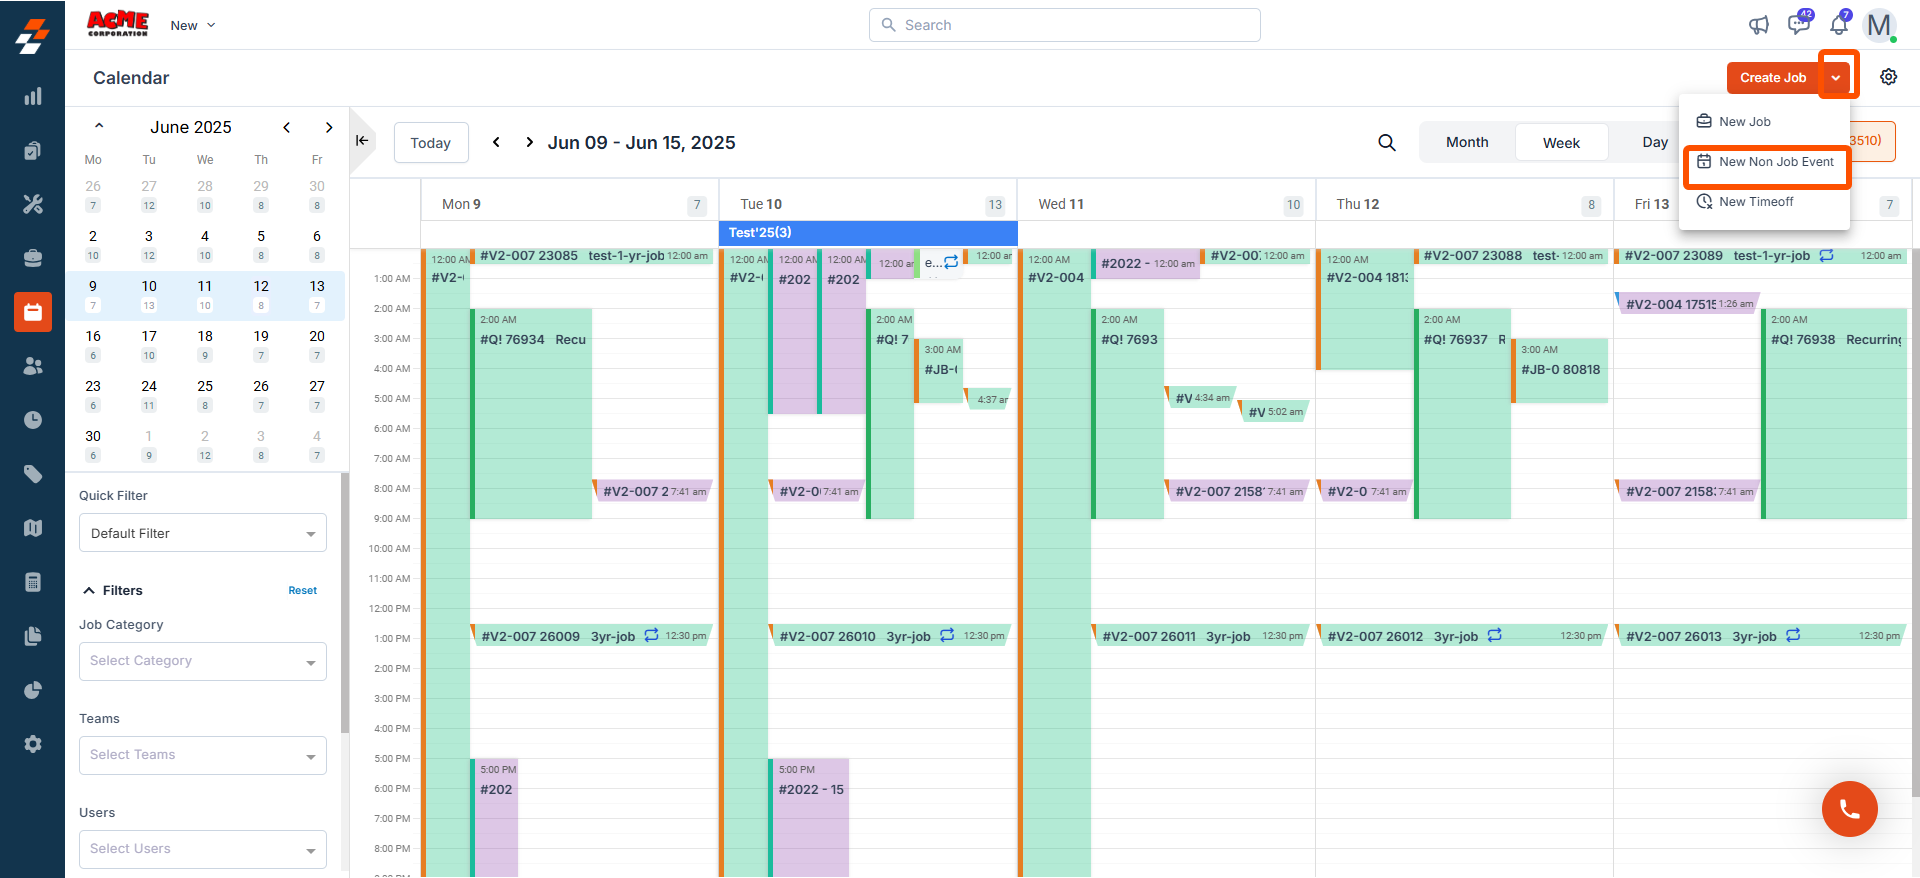
5. Calendar Sidebar
The sidebar provides quick access to the scheduled jobs in the calendar. Here’s a breakdown of the components found in the sidebar:Mini calendar
Mini calendar
The mini calendar displays all dates in a month, allowing you to navigate through different days, weeks, and months easily. It also serves as a visual representation of scheduled jobs on the date.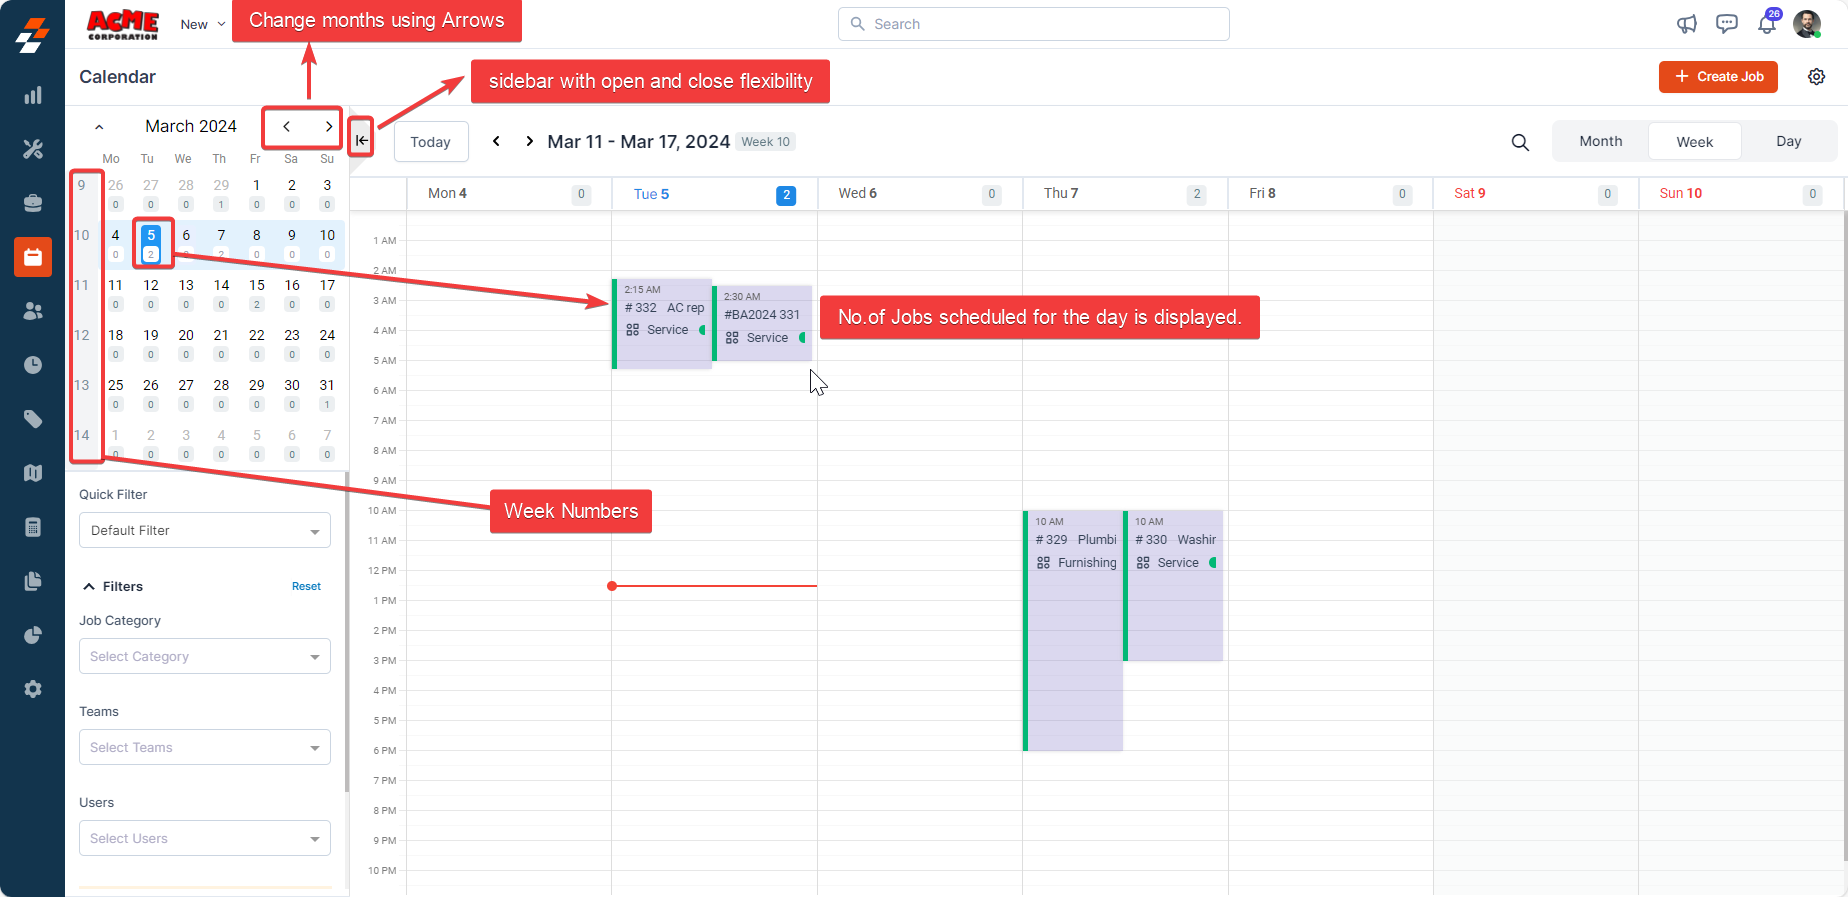
Filters
Filters
The filter feature allows you to search scheduled jobs in the calendar by category, status, team, and user. To remove the filters applied, click the “Reset” button next to the filters.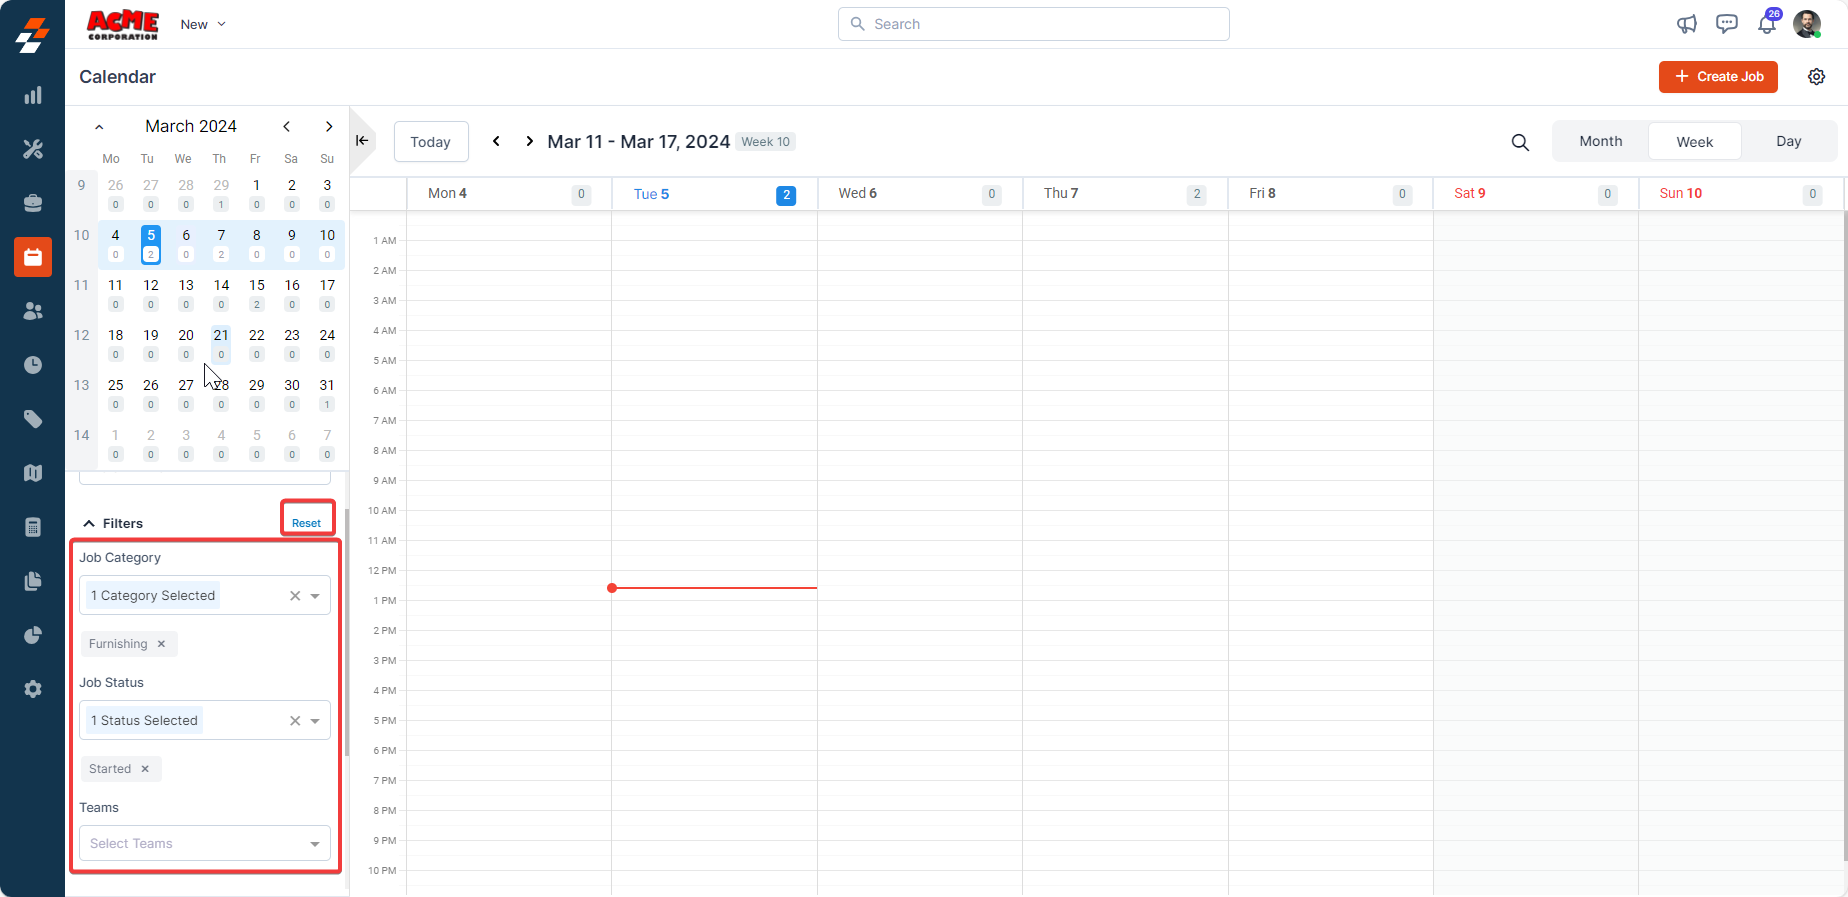
Advanced filter
Advanced filter
Advanced filters feature allows you to quickly view jobs in the calendar by applying various filters. This means, if you cannot locate the specific job using the above-said parameters, you can use this option for a more refined search: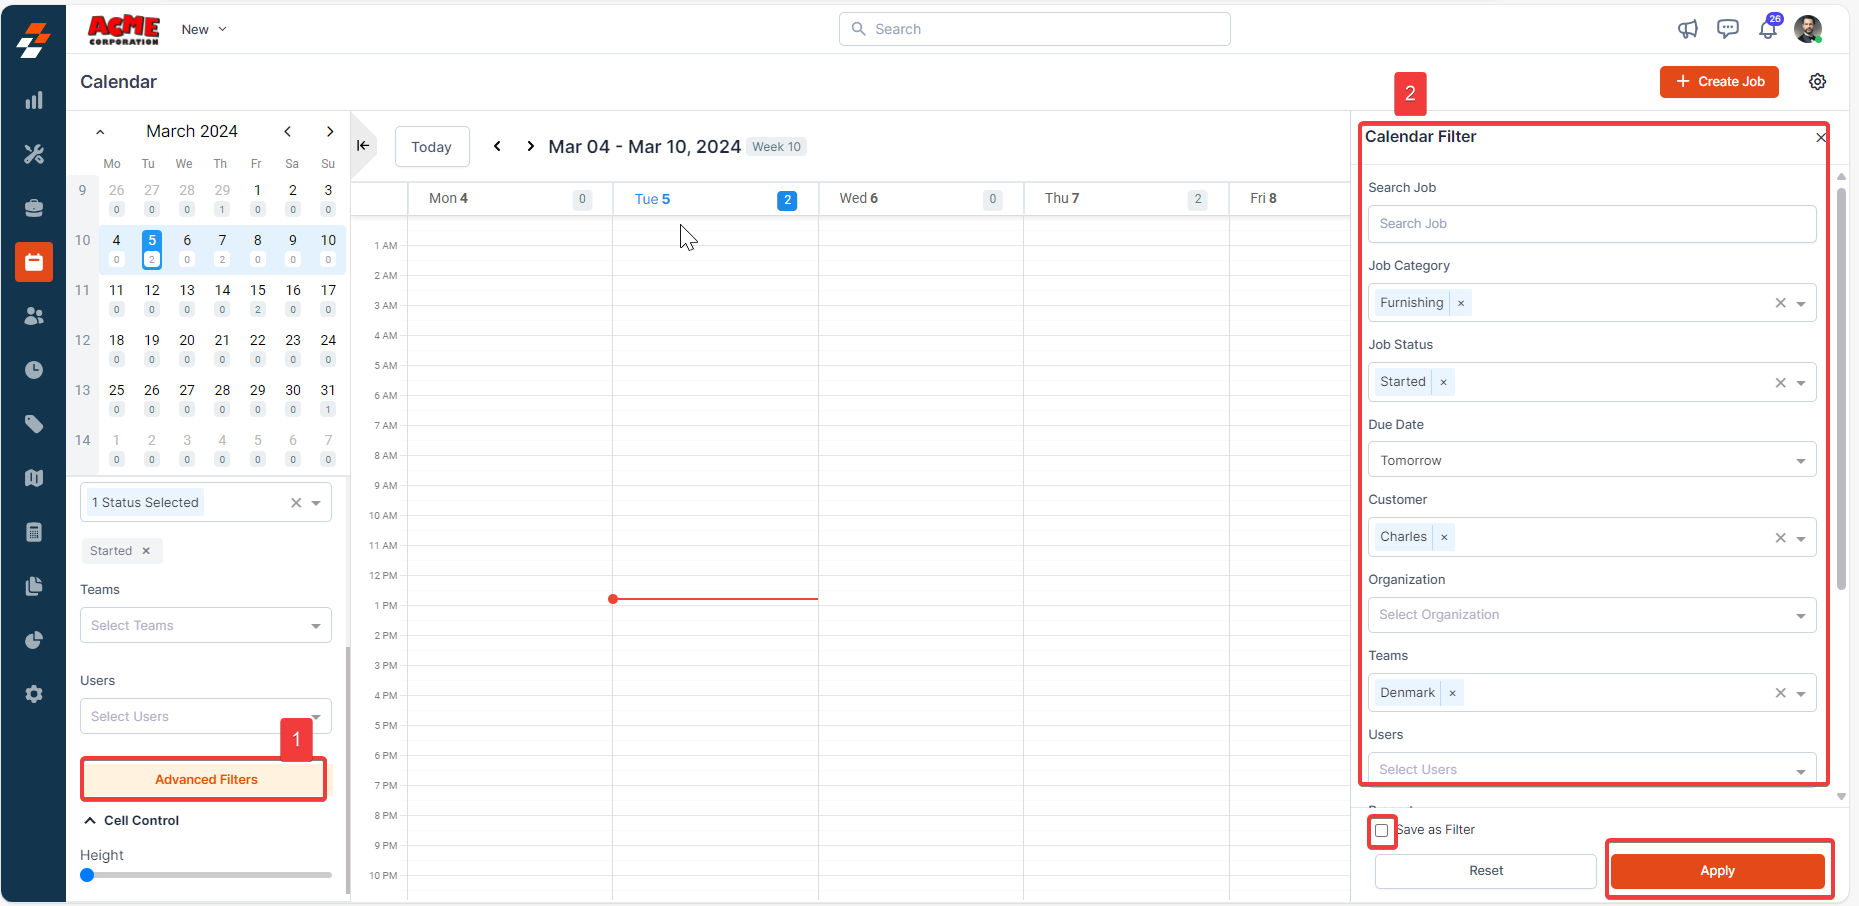
Step 1
Click the “Advanced Filters” option at the bottom of the sidebar. This will open a “Calendar Filter” at the right.
Step 4
To save the applied filter, check “Save as Filter.” Saved filters appear in “Quick Filter” for easy access.
Cell control
Cell control
This feature allows you to adjust the height and width of individual cells within the calendar when choosing day and week view. Increasing the cell height and width gives you refined visibility of the timing associated with the job and view more information.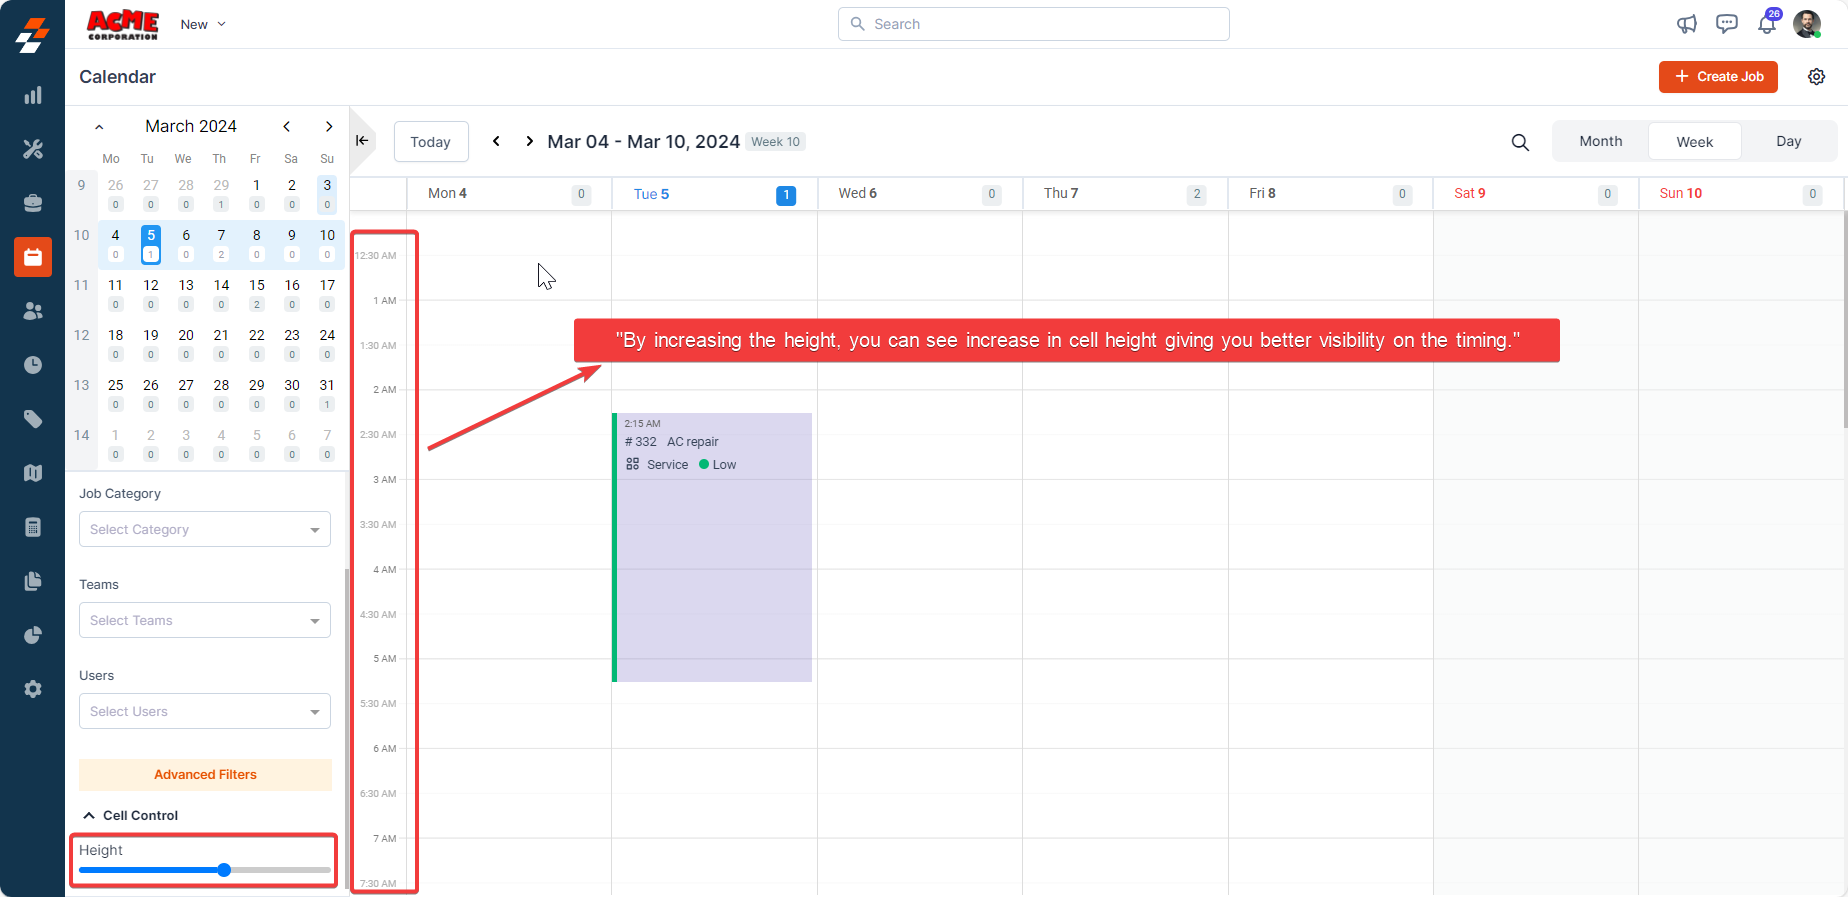
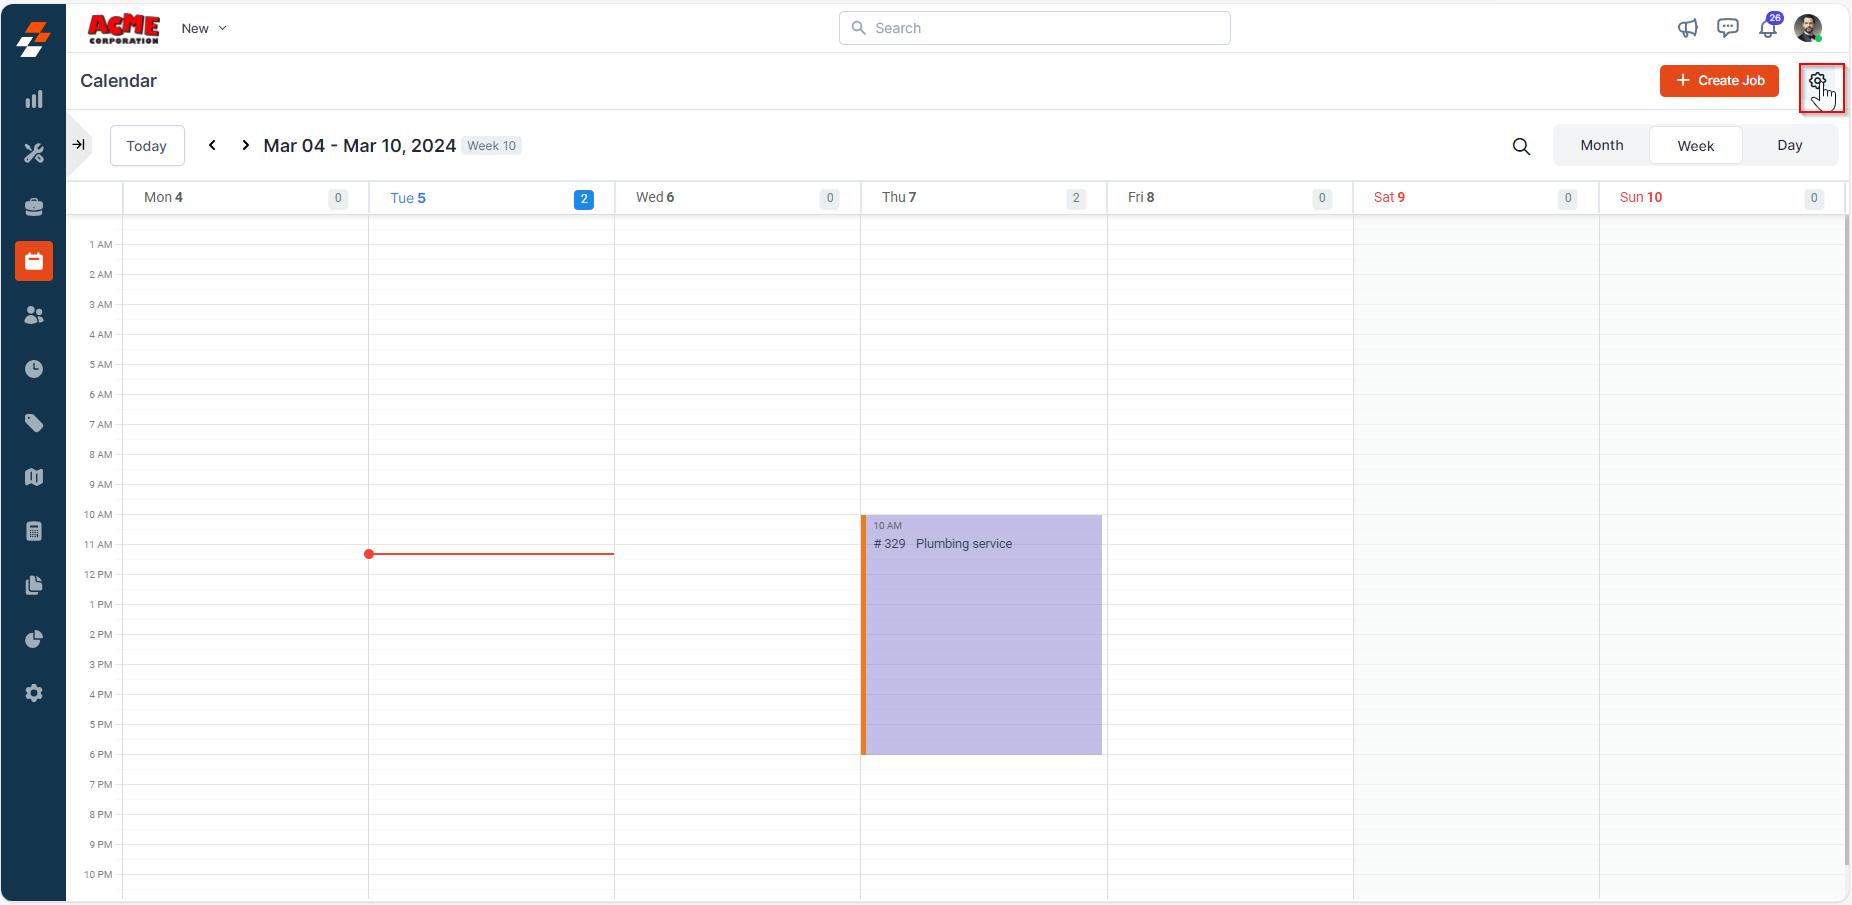
6. Calendar settings
The settings in the calendar module allow you to customize its display and job card details for a better user experience.Job card information
Job card information
To customize job cards displayed in the calendar:
-
Click the “Settings” icon at the top right corner.
- Select “Job Card Information.”
-
Choose a primary and secondary color for job categories.
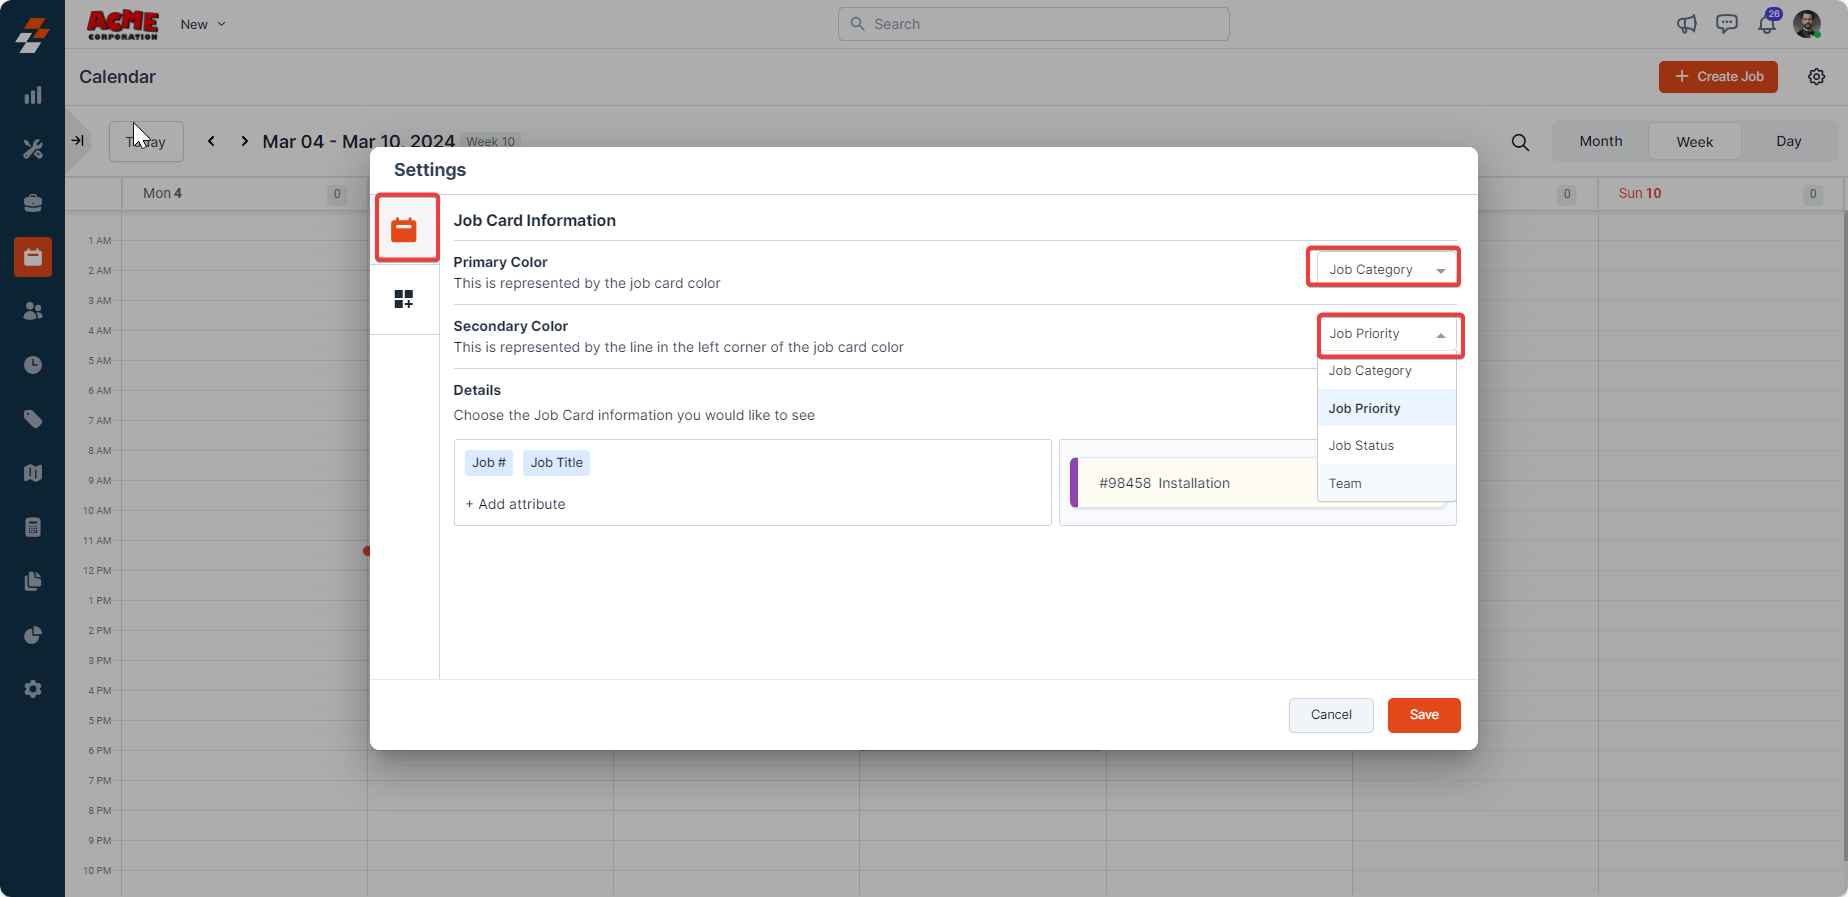
- Customize displayed attributes for Week & Day View and Month View.
- Click “Save” to apply changes.
Display
Display
- Click “Settings” at the top right corner.
-
Select “Display.”
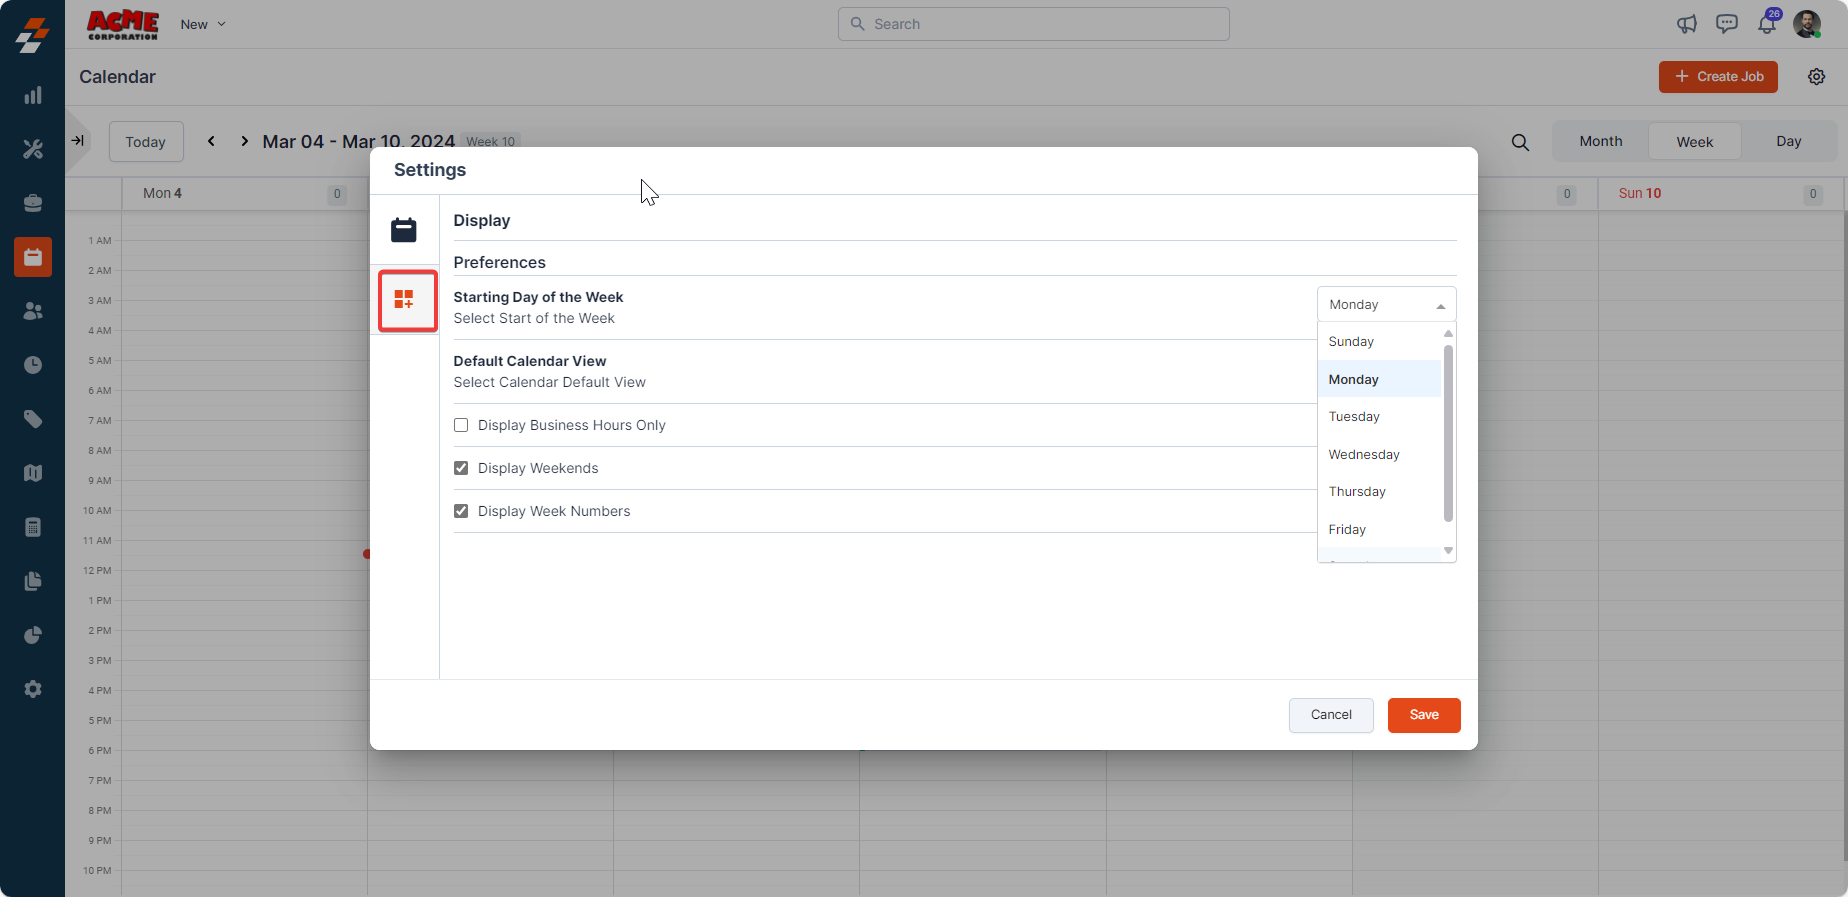
- Set the start of the week (e.g., Monday, Sunday).
-
Choose the default view (Day, Week, or Month).

-
Enable/disable additional options:
- Business Hours - When enabled, calendar shows only the business hours and does not show out-of-business hours to schedule a job.
- Weekends- When enabled, the weekend (Saturday and Sunday) is also included while scheduling a job.
- Week Numbers: When enabled, week numbers are included in the calendar to schedule a job.
- Display Time-off - Show time-off requests.
- Click “Save” to apply settings.
Troubleshooting
| Cause | What to do |
|---|---|
| Job is already completed or canceled | Ask your admin to reopen the job, then try again. |
| You don’t have permission to edit jobs | Ask your admin to update your access or make the change for you. |
| The new time is outside working hours | Pick a time within your business hours, or ask your admin to update the working hours in Settings. |
| This is part of a repeating job | Open the job directly and edit the time from there. |
| Something else is blocking the change | Contact Zuper Support with a description of the job and what you were trying to do. |