Create a non-job event
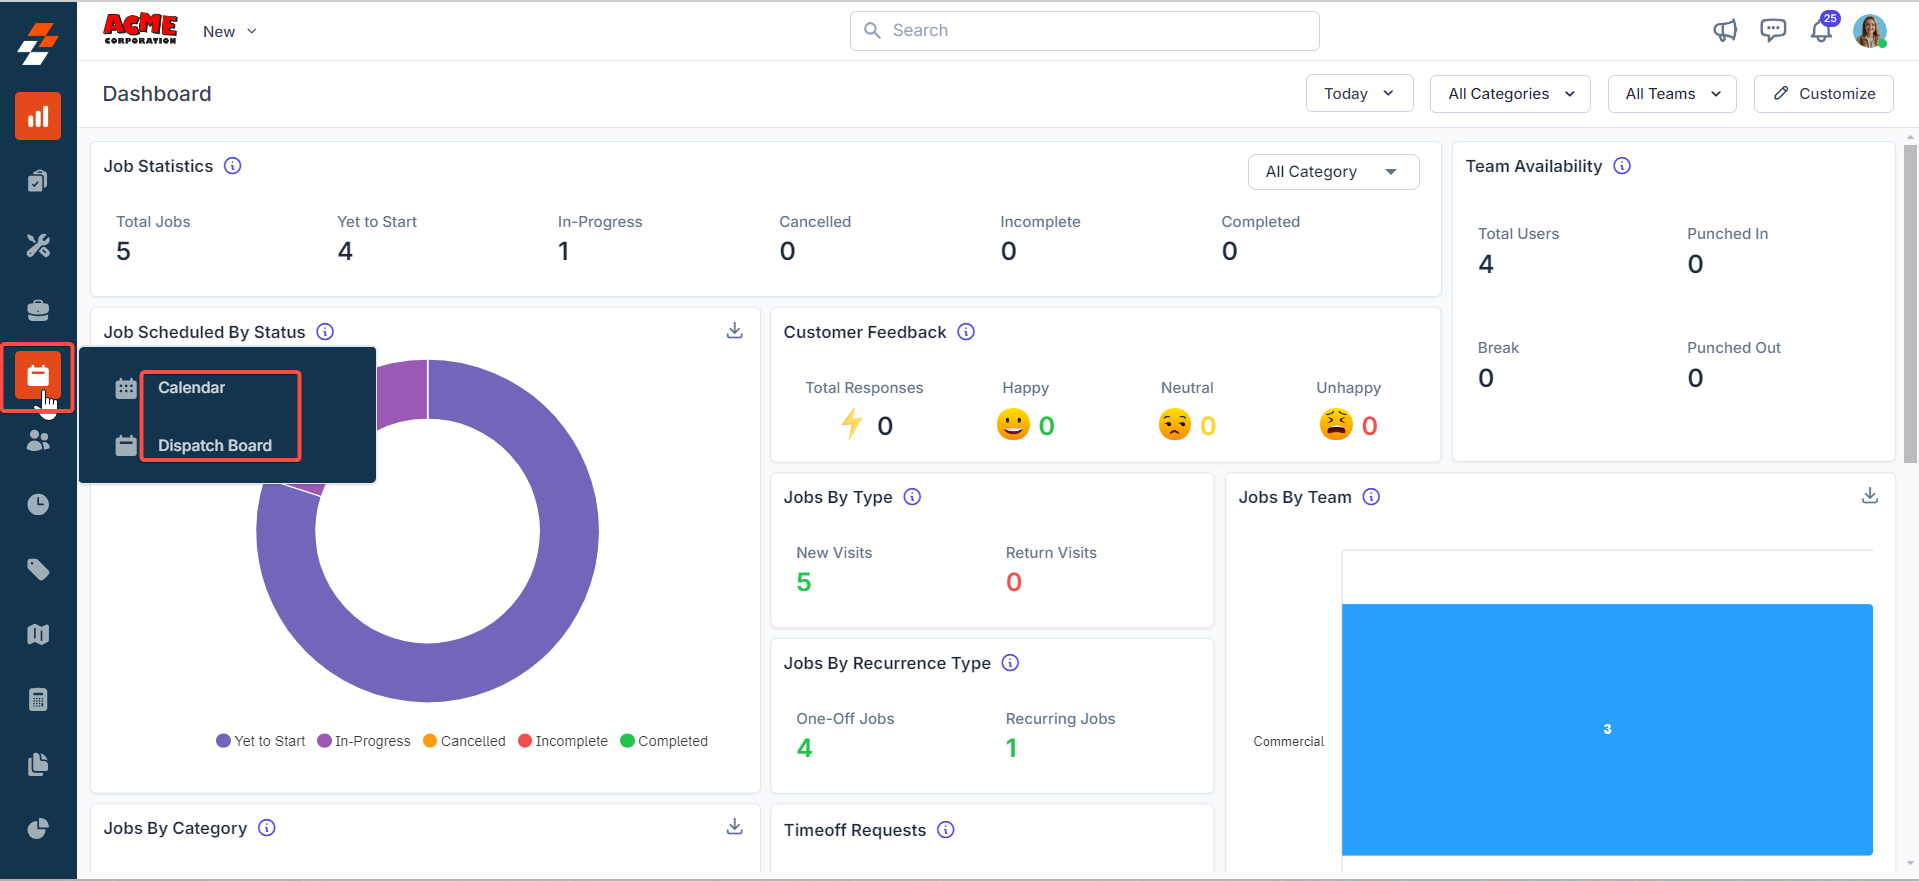
- Select the Scheduling and Dispatching module from the left navigation menu and choose either Calendar or Dispatch Board.
- Click the drop-down menu next to the “Create Job” button located at the top-right corner of the page and select “New Non Job Event”.
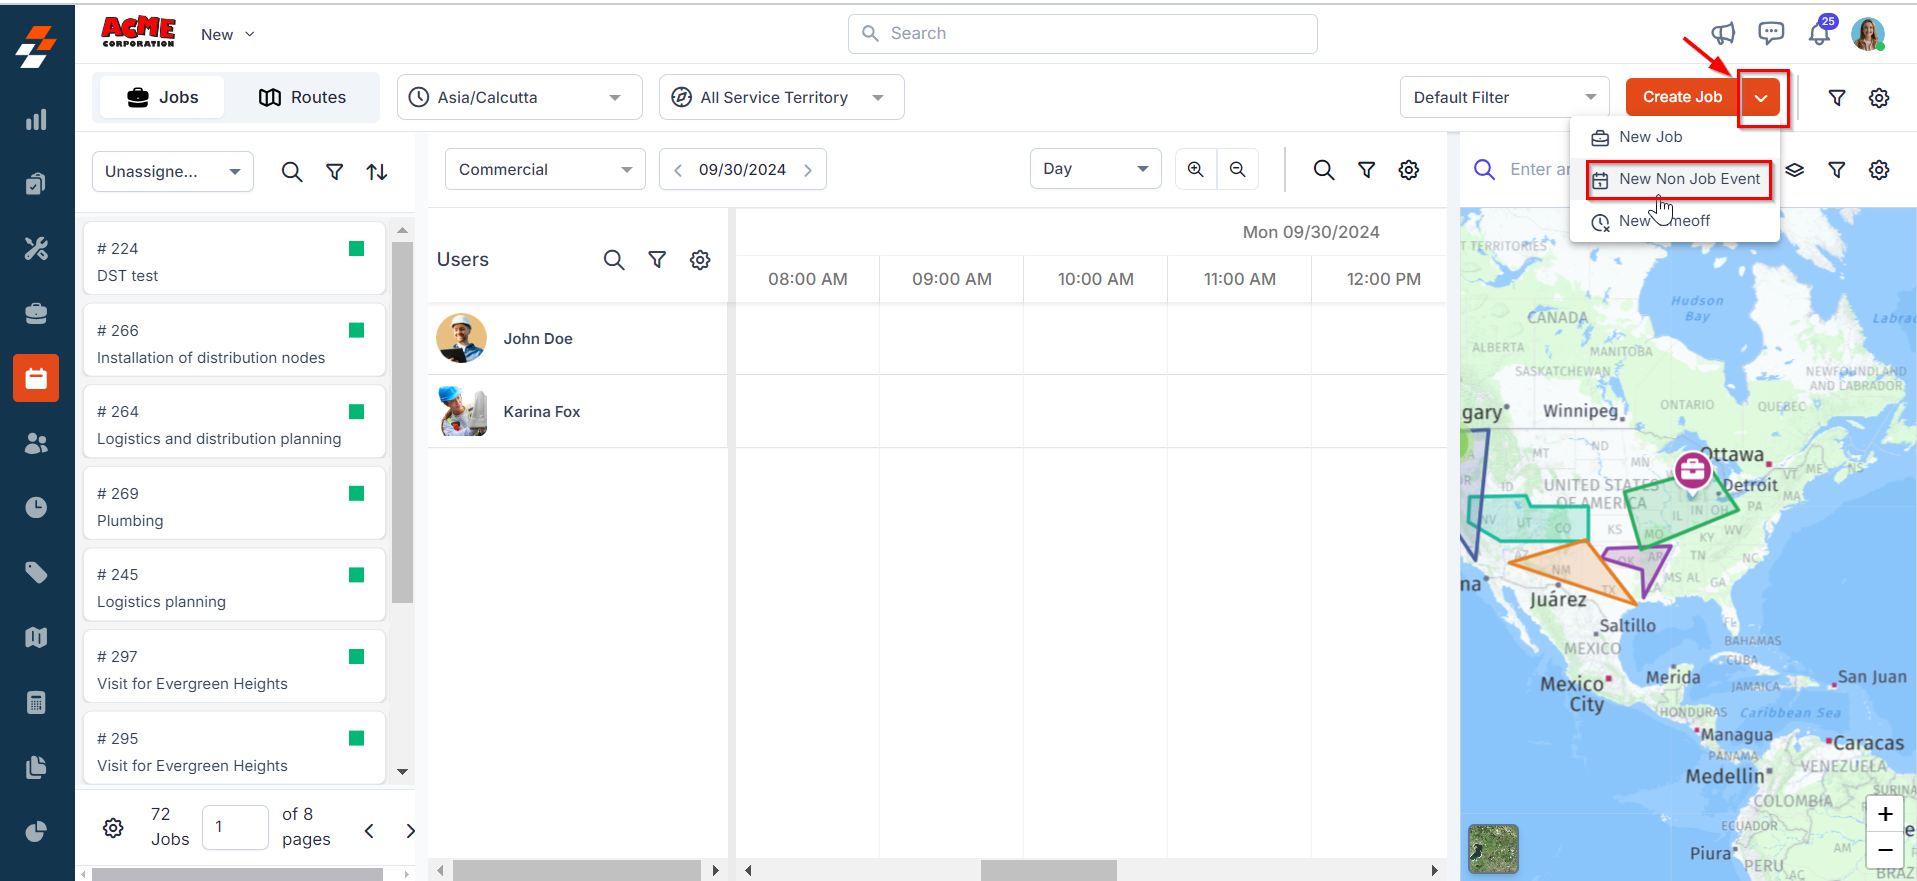
- A Create Non Job Event sidebar will appear.
Note: You can create a non-job event for a specific time period on the Dispatch Board by clicking and dragging the cursor across the desired time range in the scheduler. Once selected, choose “Create a Non-Job Event” from the available options.
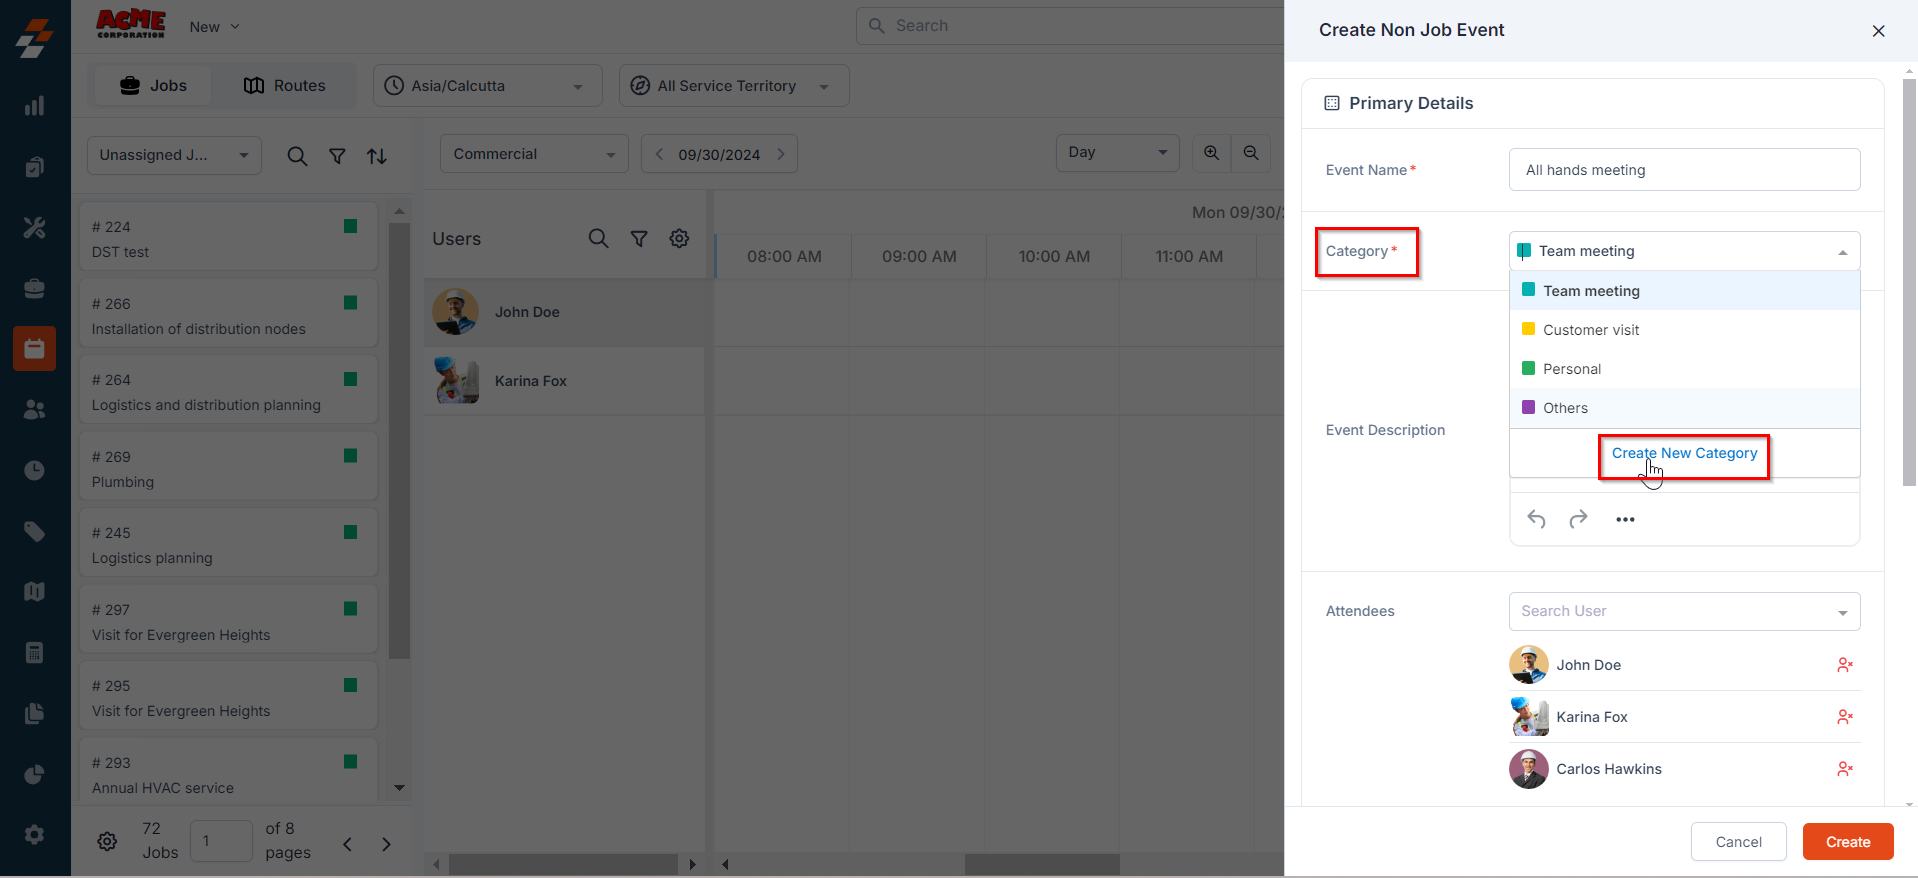
- Fill in the Primary Details section:
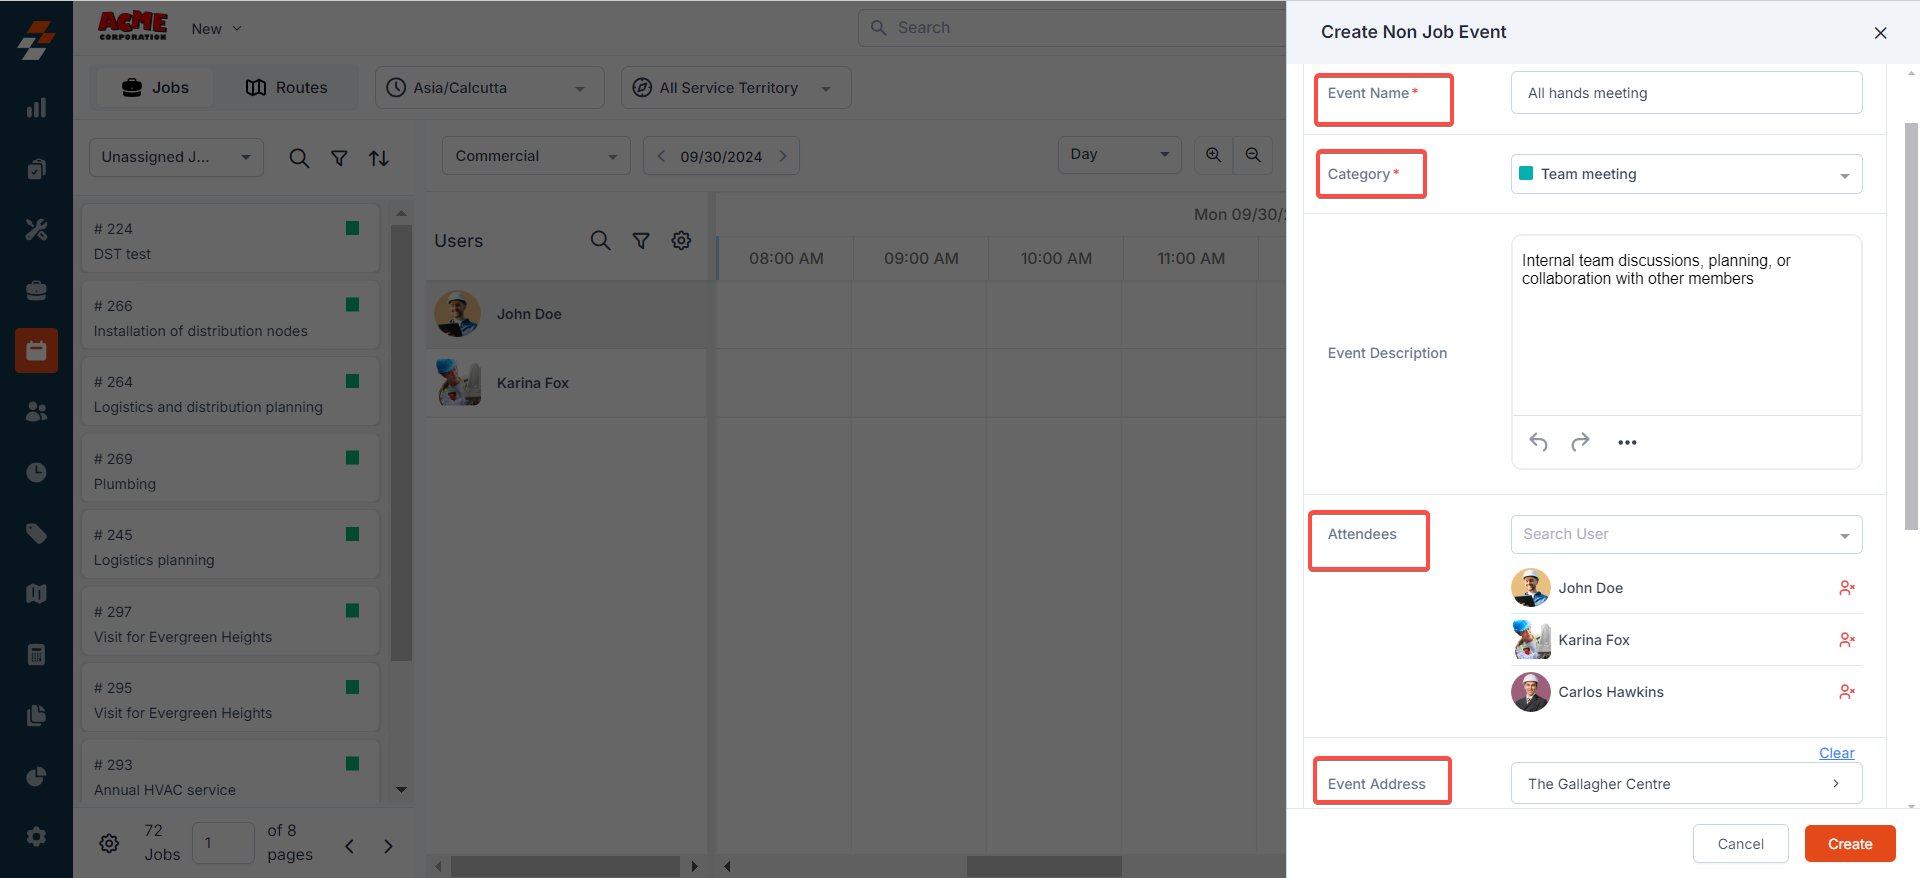
- Event Name (mandatory): Provide a name for the event, with a maximum limit of 200 characters.
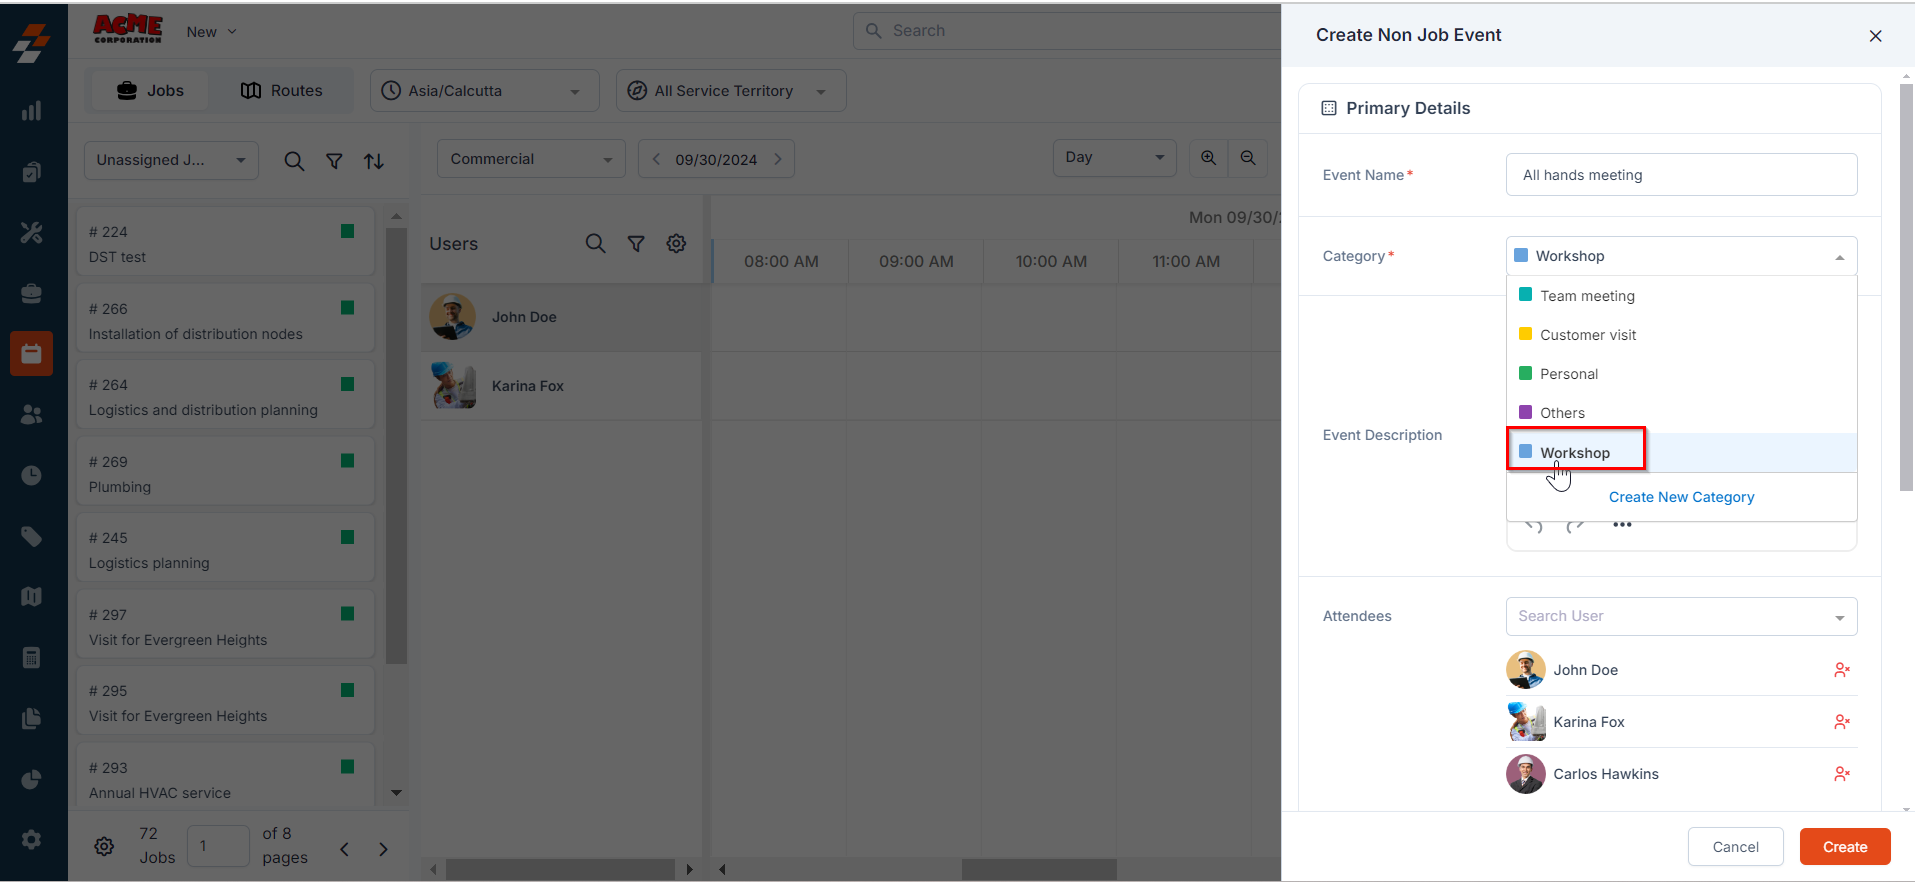
- Category (mandatory): Choose the category for the event from the list. If needed, you can also create a new category directly from here.
To create a new category
To create a new category
- Click “Create New Category”.
- Provide the category name, color, and description.
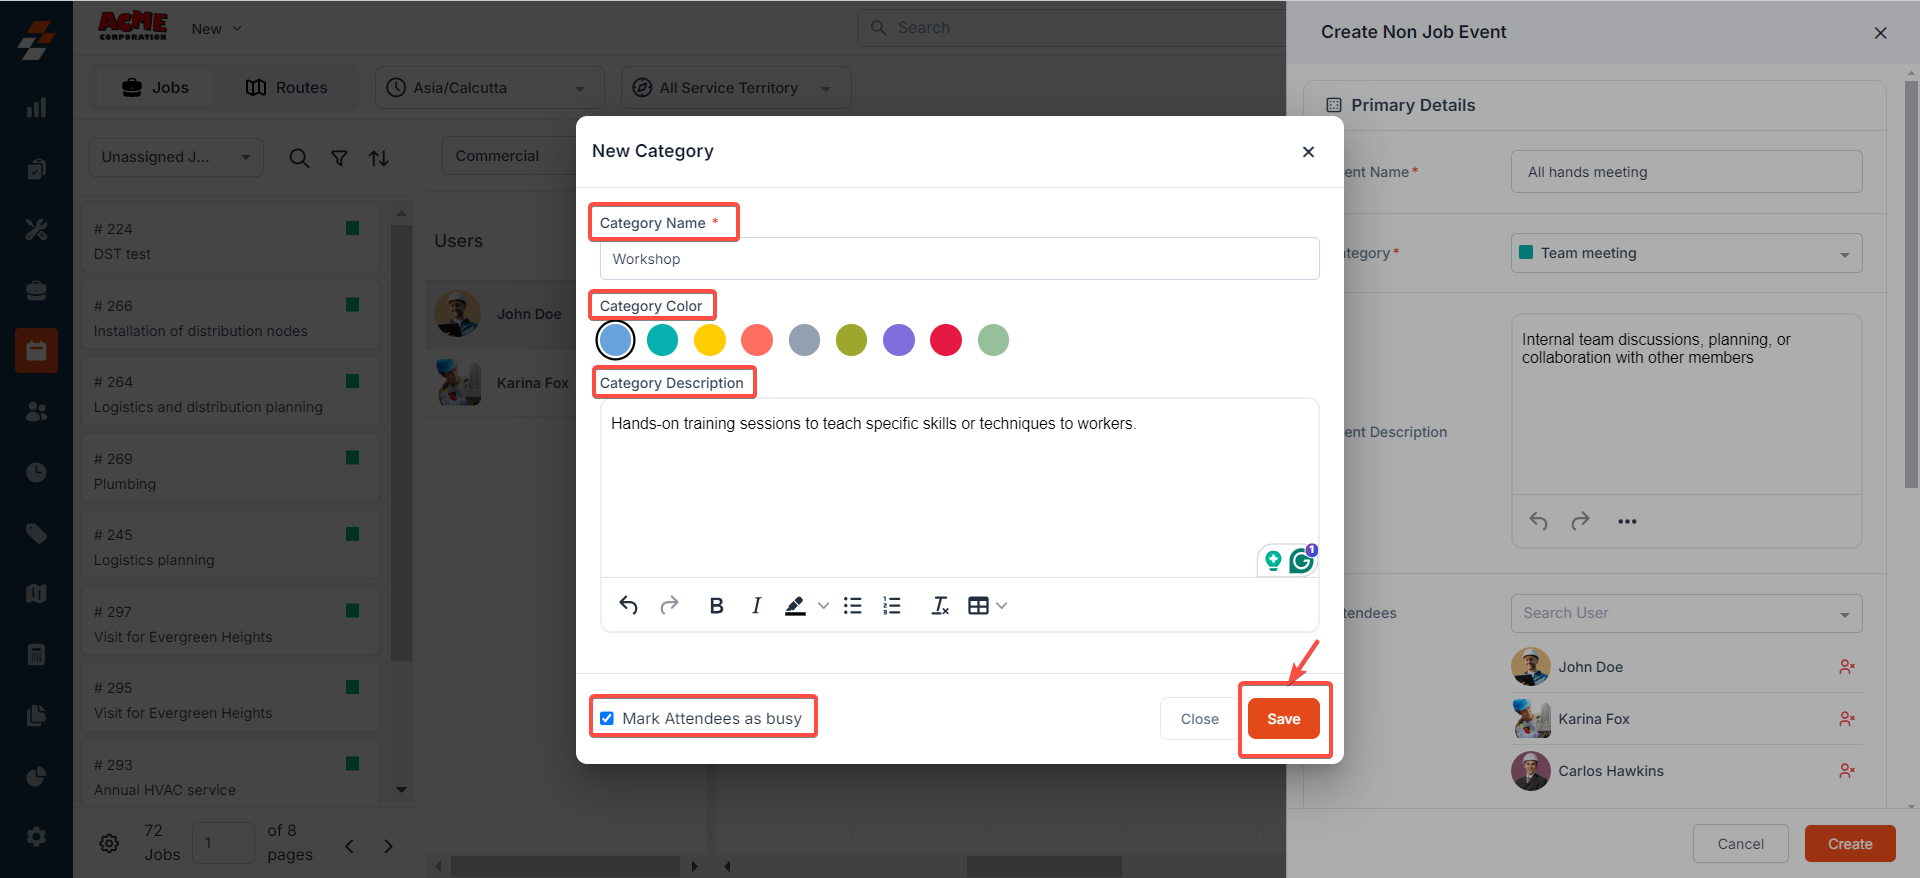
- Click the “Save” button. The new category will be created and added to the existing list.
- Event Description: Provide a description of the event, with a maximum limit of 8000 characters.
- Attendees: Select the user(s) who will be engaged in this non-job event.
- Event Address: Select and add the event address using the map.
- Fill in the Schedule section:
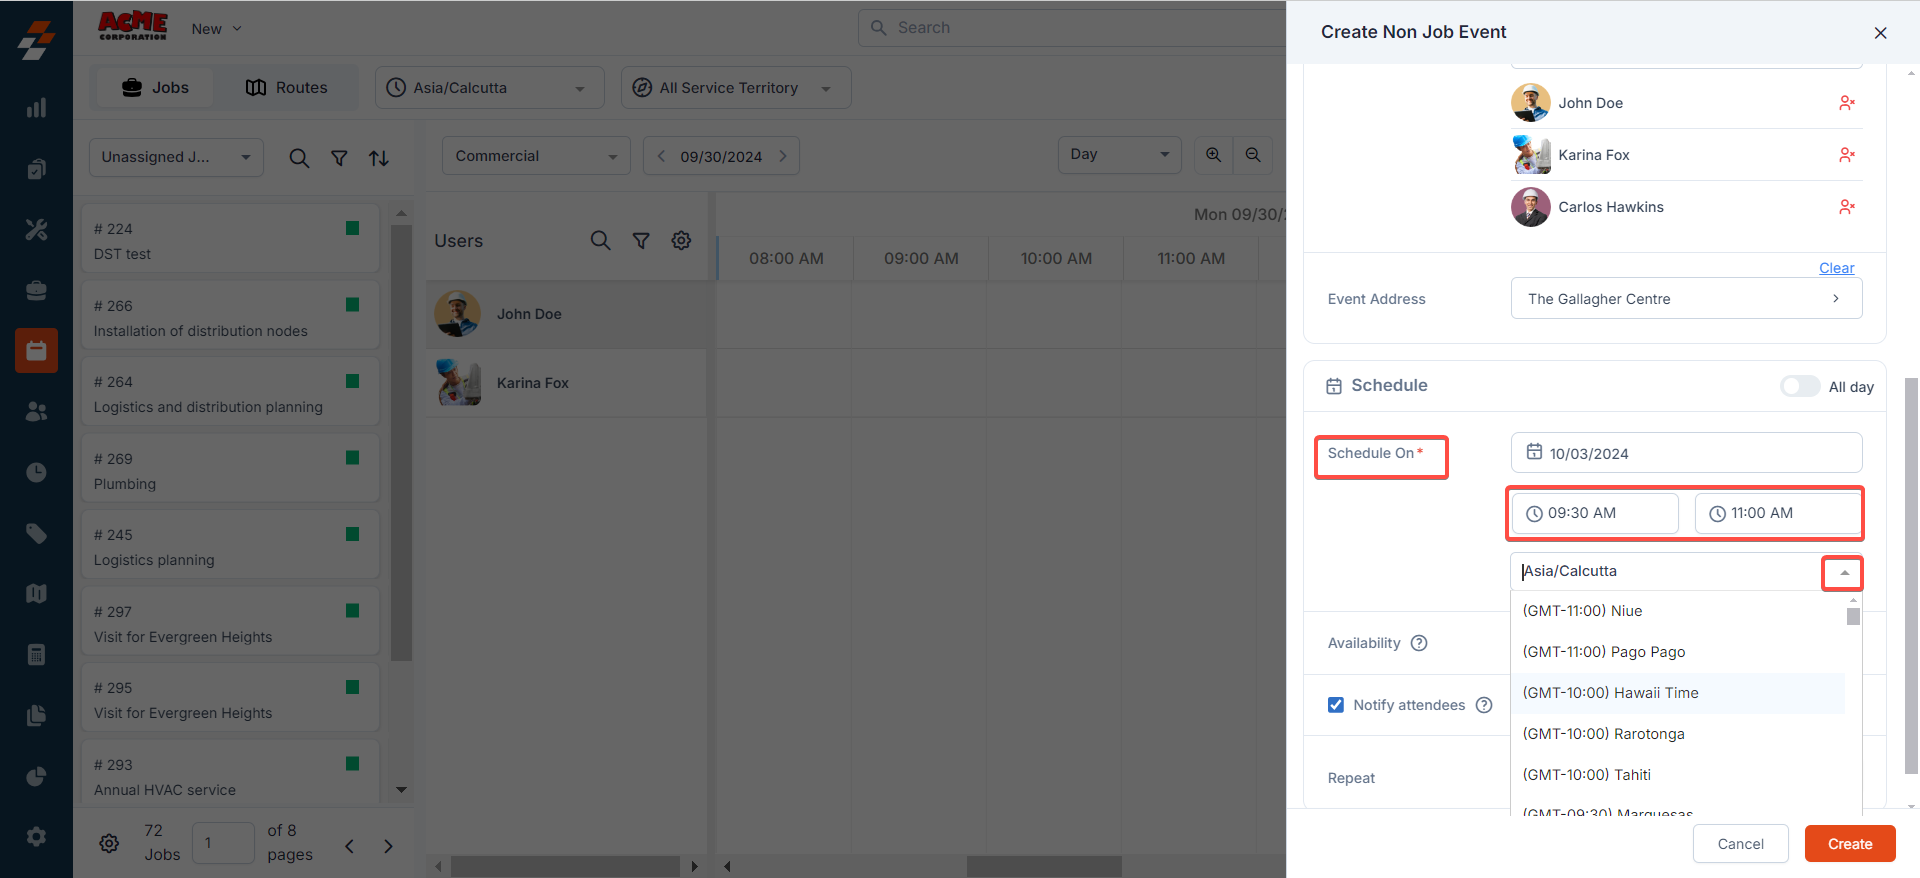
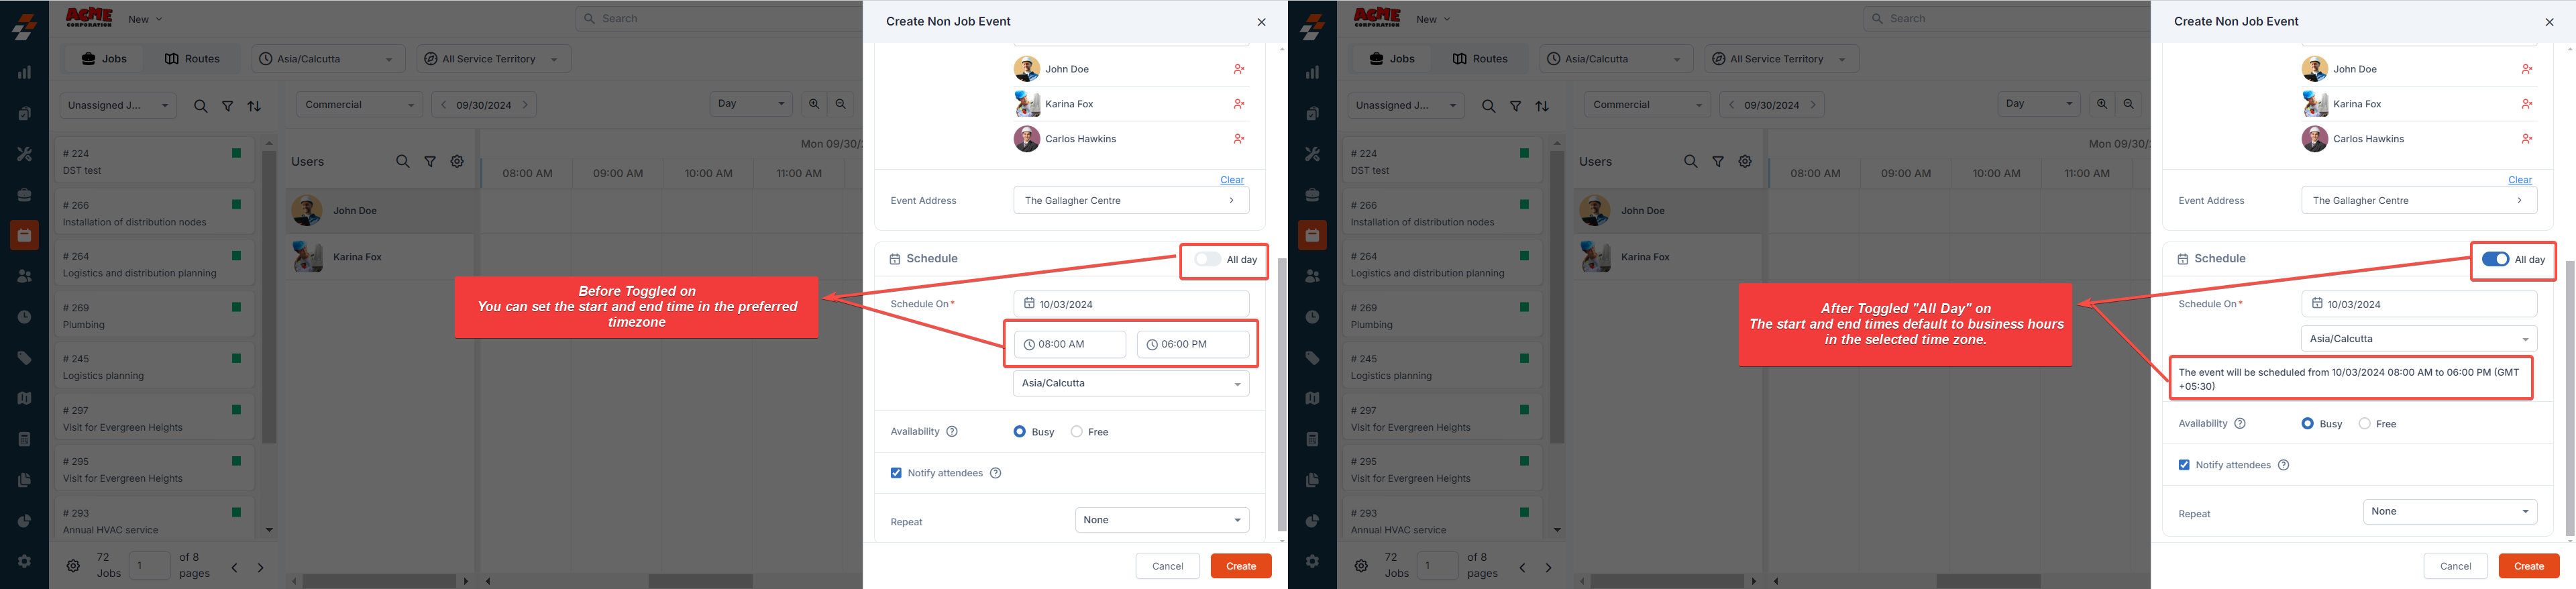
- Schedule On (mandatory): Set the start and end times for the selected date, along with the preferred time zone.
- Optionally, toggle ‘All Day’ on or off at the top right. When enabled, the start and end times default to business hours in the selected time zone, which can be adjusted as needed.
Note: Non-job events can only be scheduled for a single day, not multiple days.
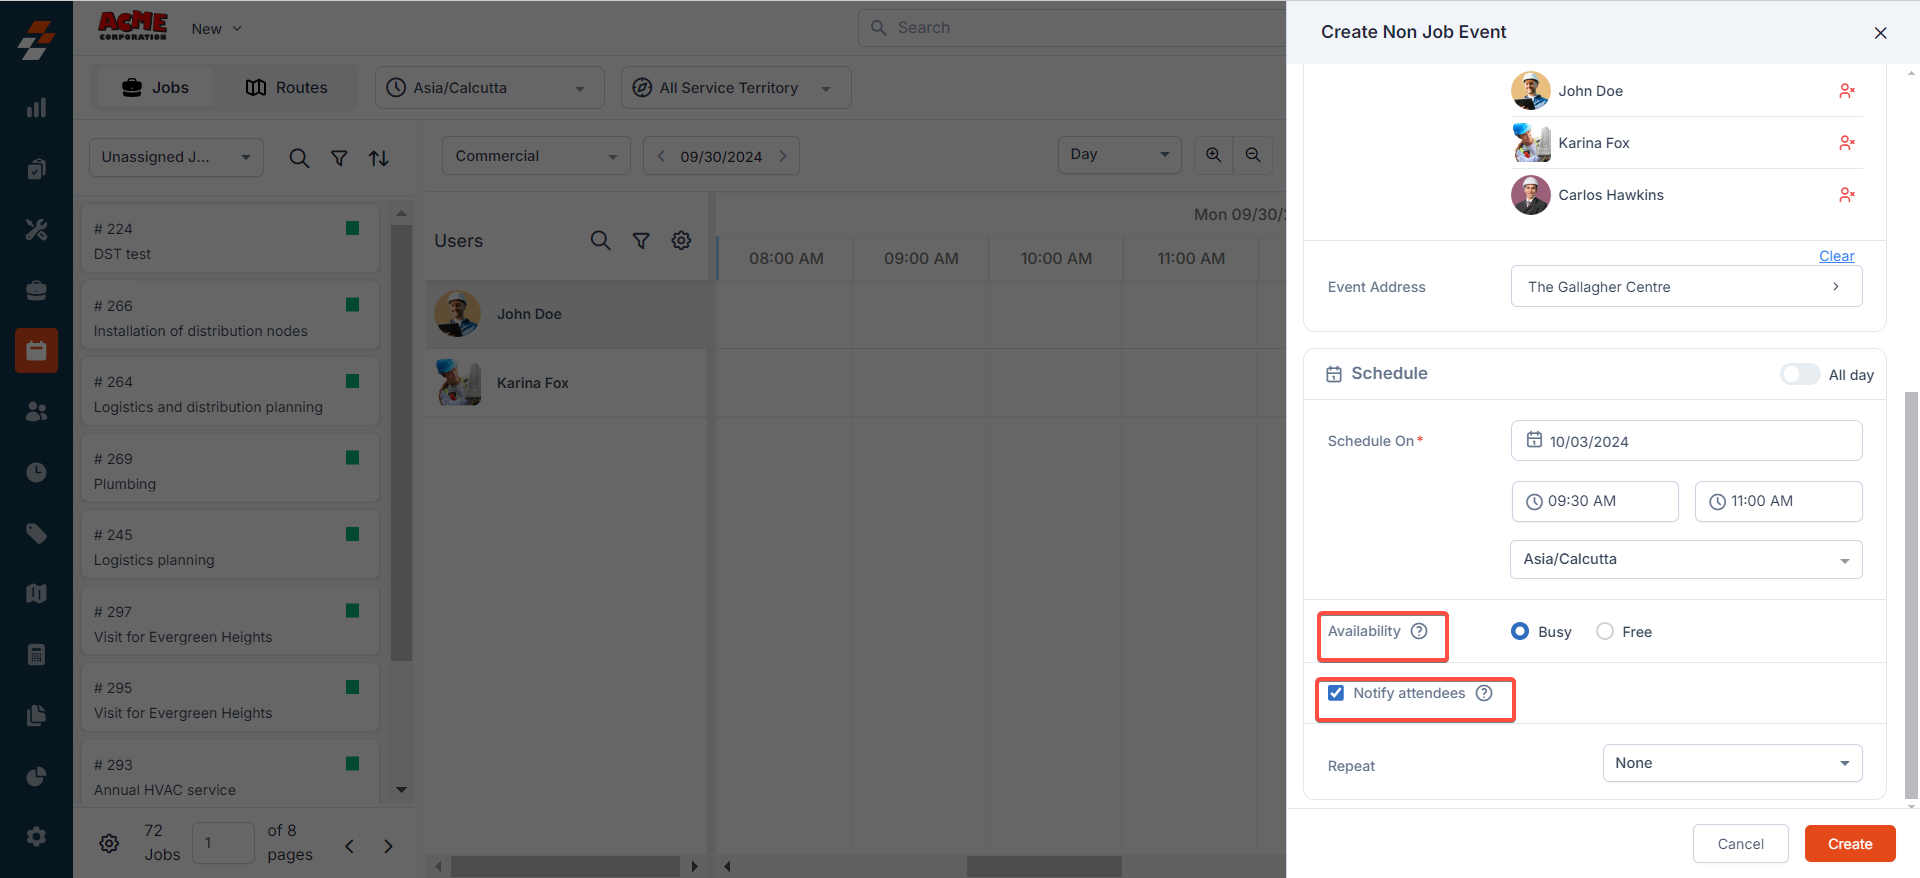
- Availability: Choose whether the attendees will be marked as “Busy” or “Free” for the event.
Busy
Busy
The scheduled time will be blocked for the attendees in Assisted Scheduling. If there is a conflict between a job and the non-job event, the dispatcher will be notified
Free
Free
The scheduled time will remain open, allowing the dispatcher to schedule jobs for the attendees during the non-job event. In this case, the dispatcher will not be notified of any conflicts with the non-job event.
- Notify Attendees: If this checkbox is selected, attendees will receive notifications via push messages on both mobile and desktop devices.
Note: Notifications will also be sent to attendees when there are changes to the event’s schedule, assignment, or address.
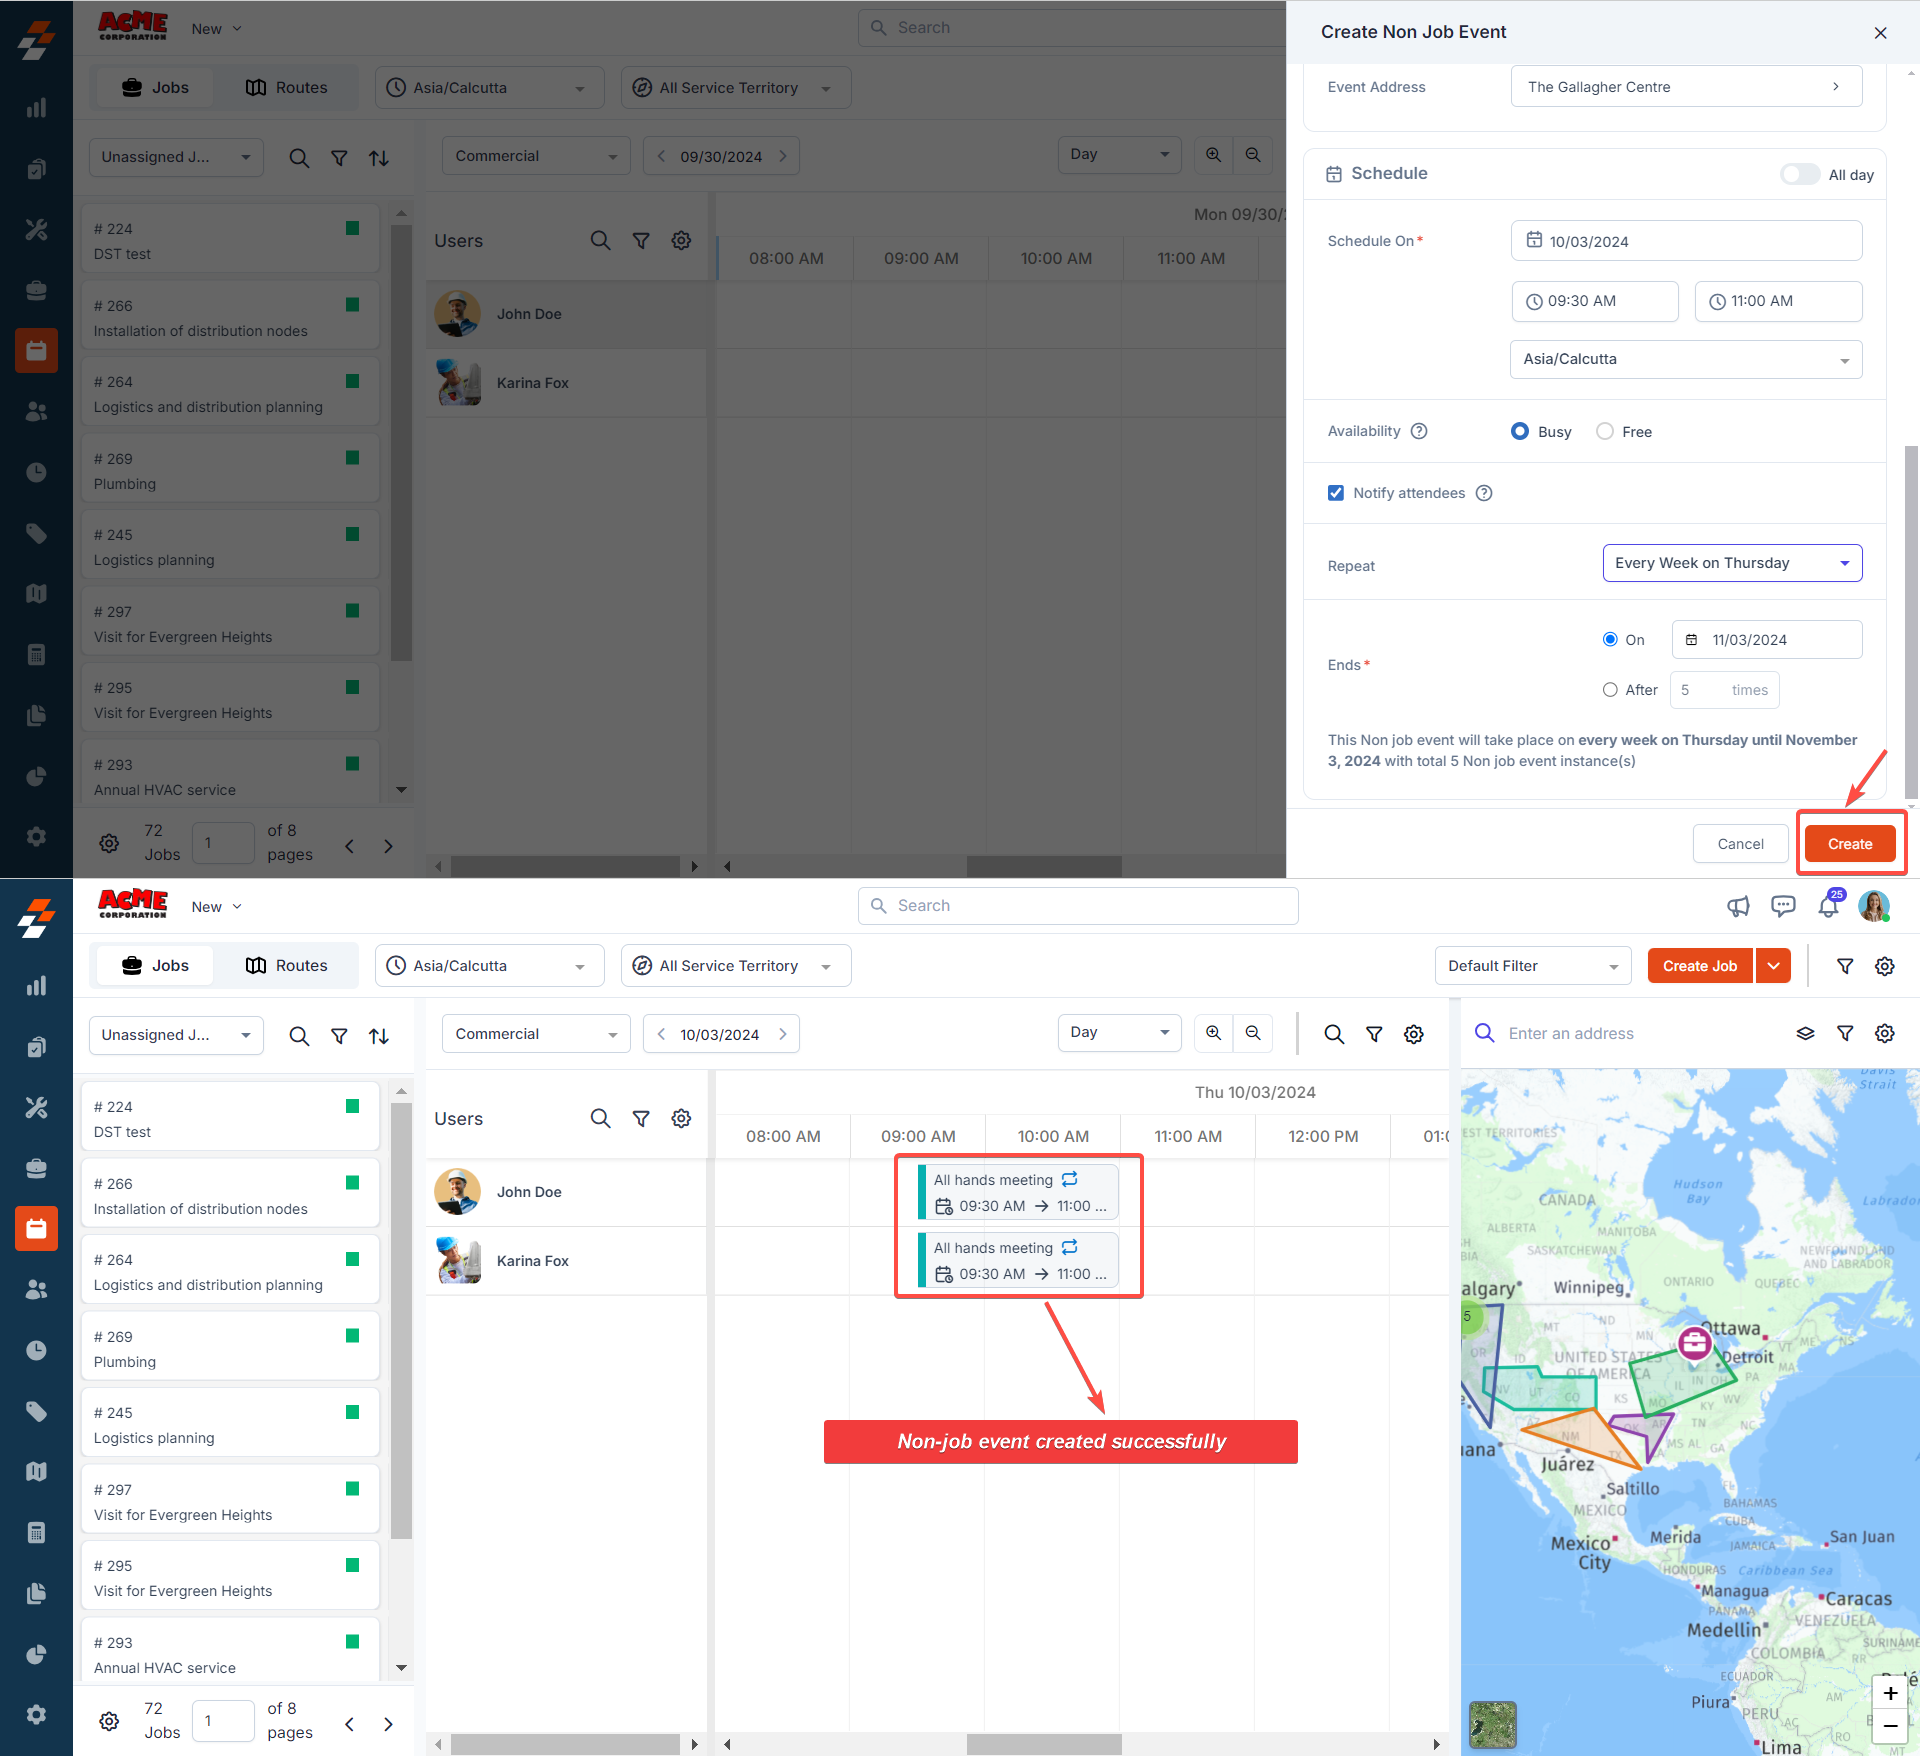
- Repeat: Select how often this non-job event will occur:
- None (one-time event).
- Repeats: Set the event to repeat daily, weekly, monthly, or yearly based on the scheduled date or day. If you choose to repeat the event, you will be prompted to specify when the recurrence should end.

- Ends (mandatory): Choose either an end date or the number of occurrences after which the recurrence will stop.

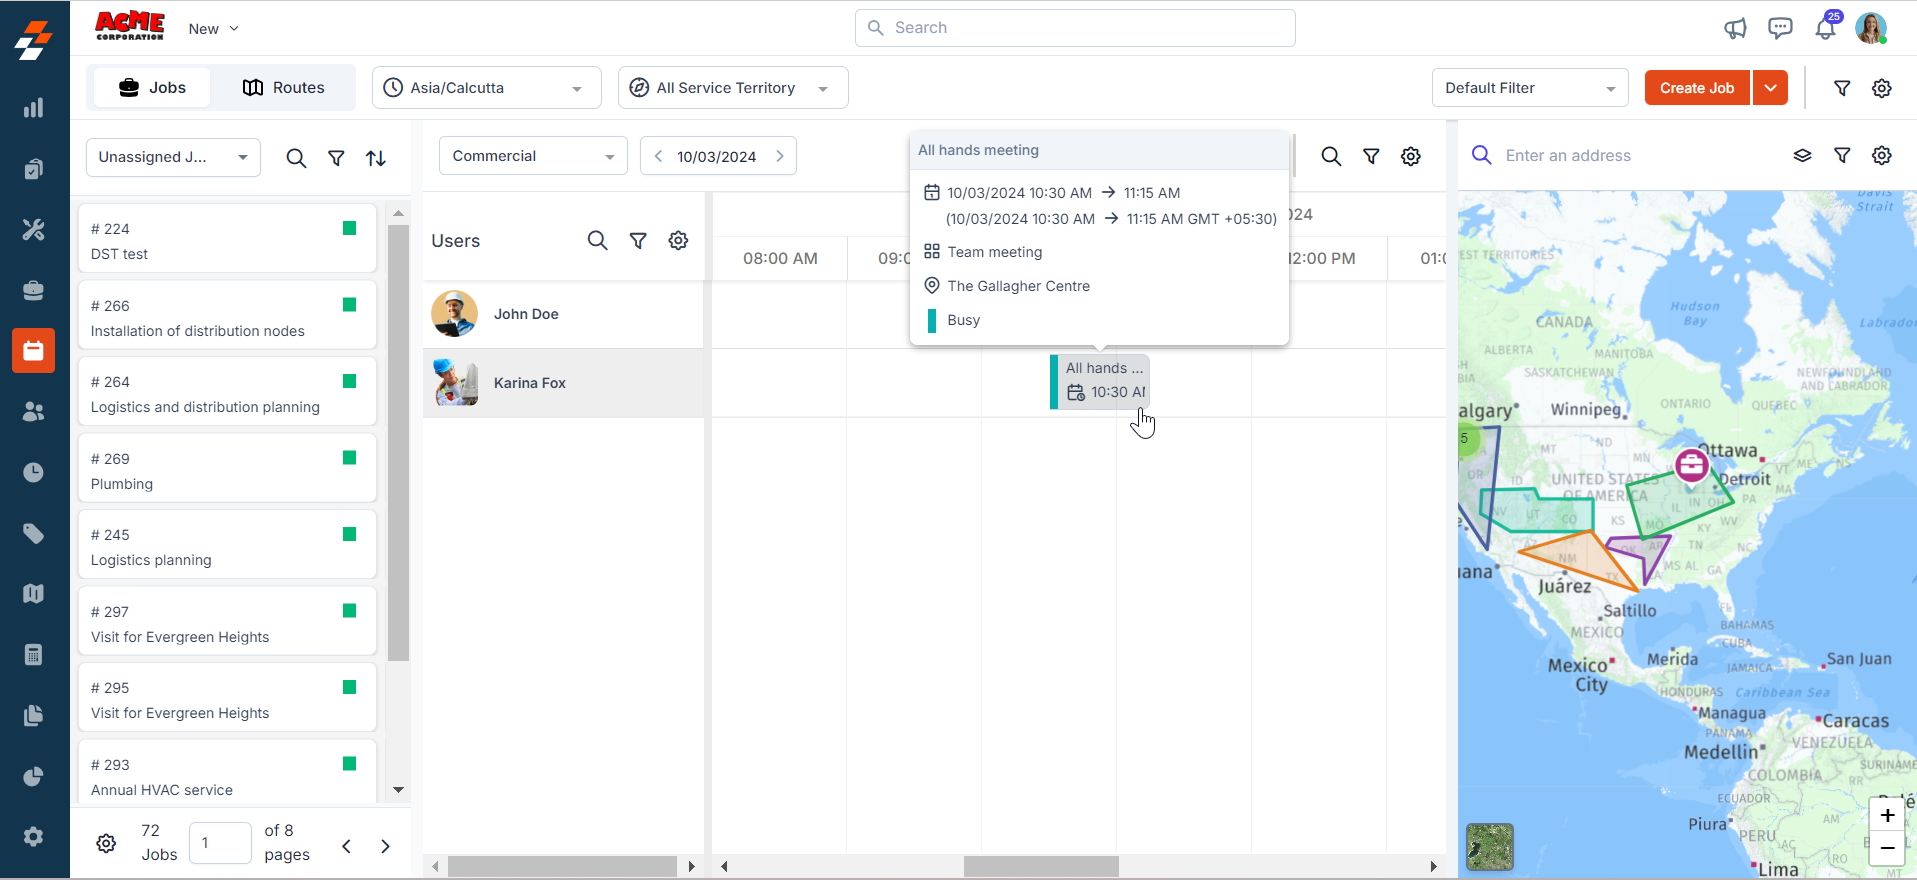
- After entering the required details, click the Create button. The non-job event will be successfully created for the selected date and time and will appear on the Dispatch Board and the Calendar alongside the attendees.
Managing non-job event
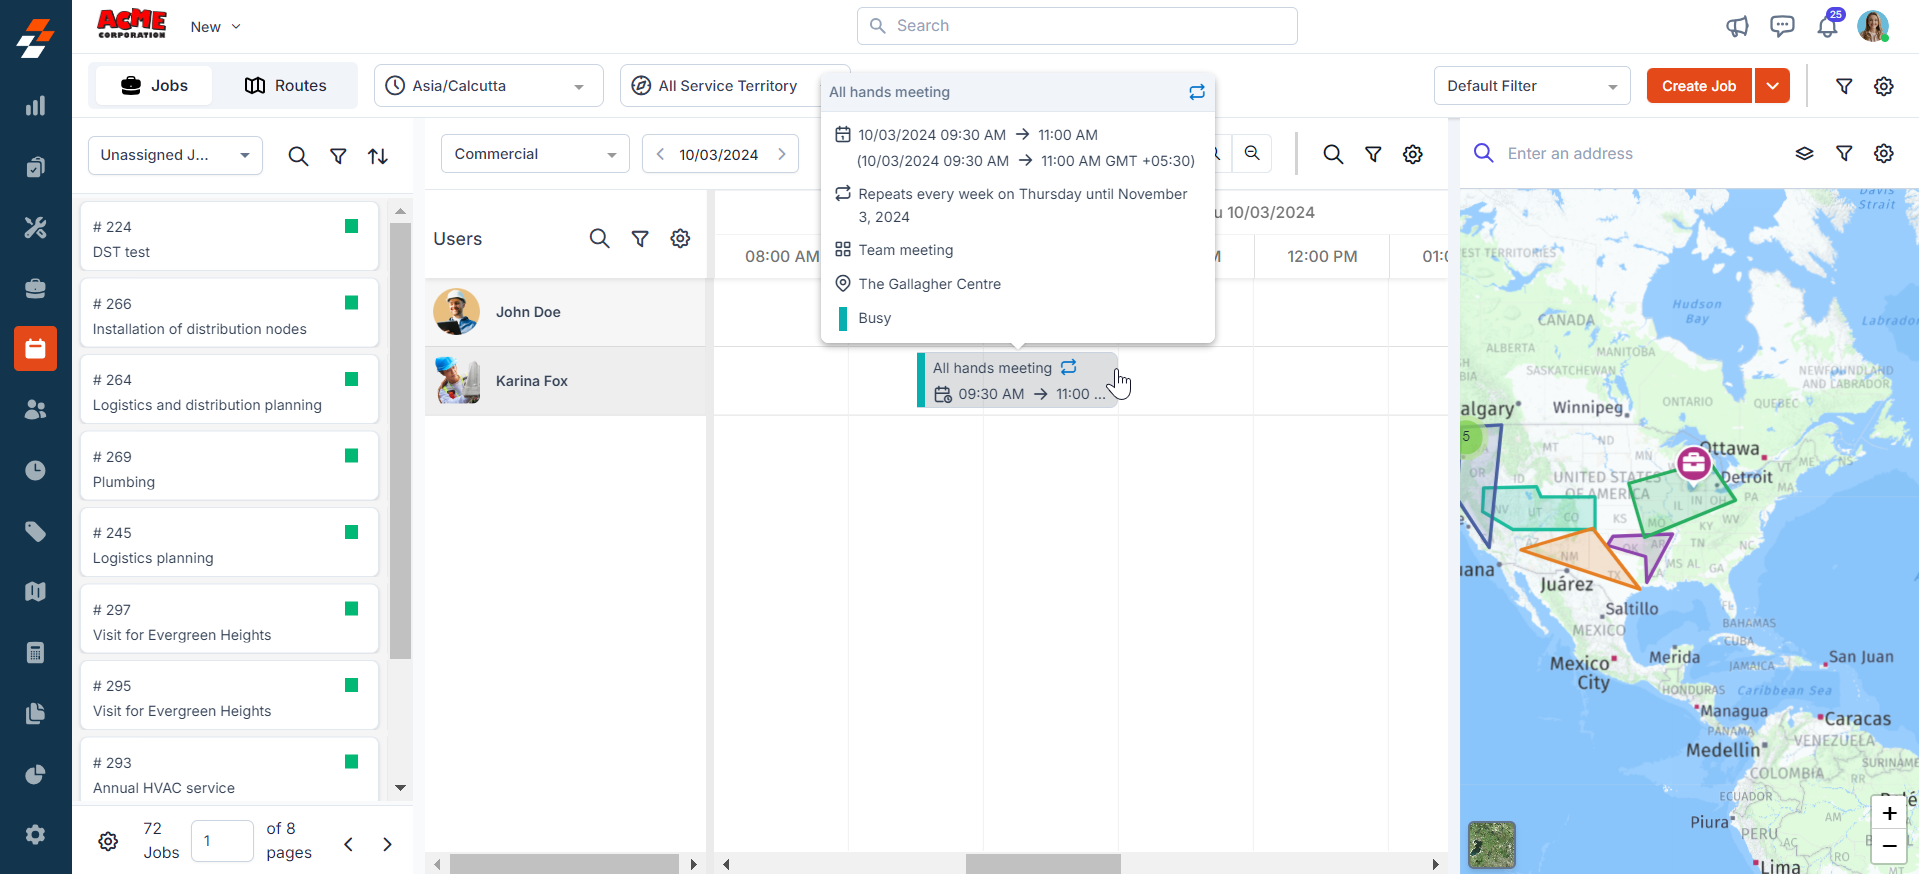
Once the non-job event is created, you can view, edit, or delete it as needed. The event will appear in gray, with a ribbon on the left side that may be striped or unstriped, depending on the attendees’ availability:- A striped ribbon indicates that the attendees are available.
- A solid ribbon (no stripes) indicates that the attendees are busy.
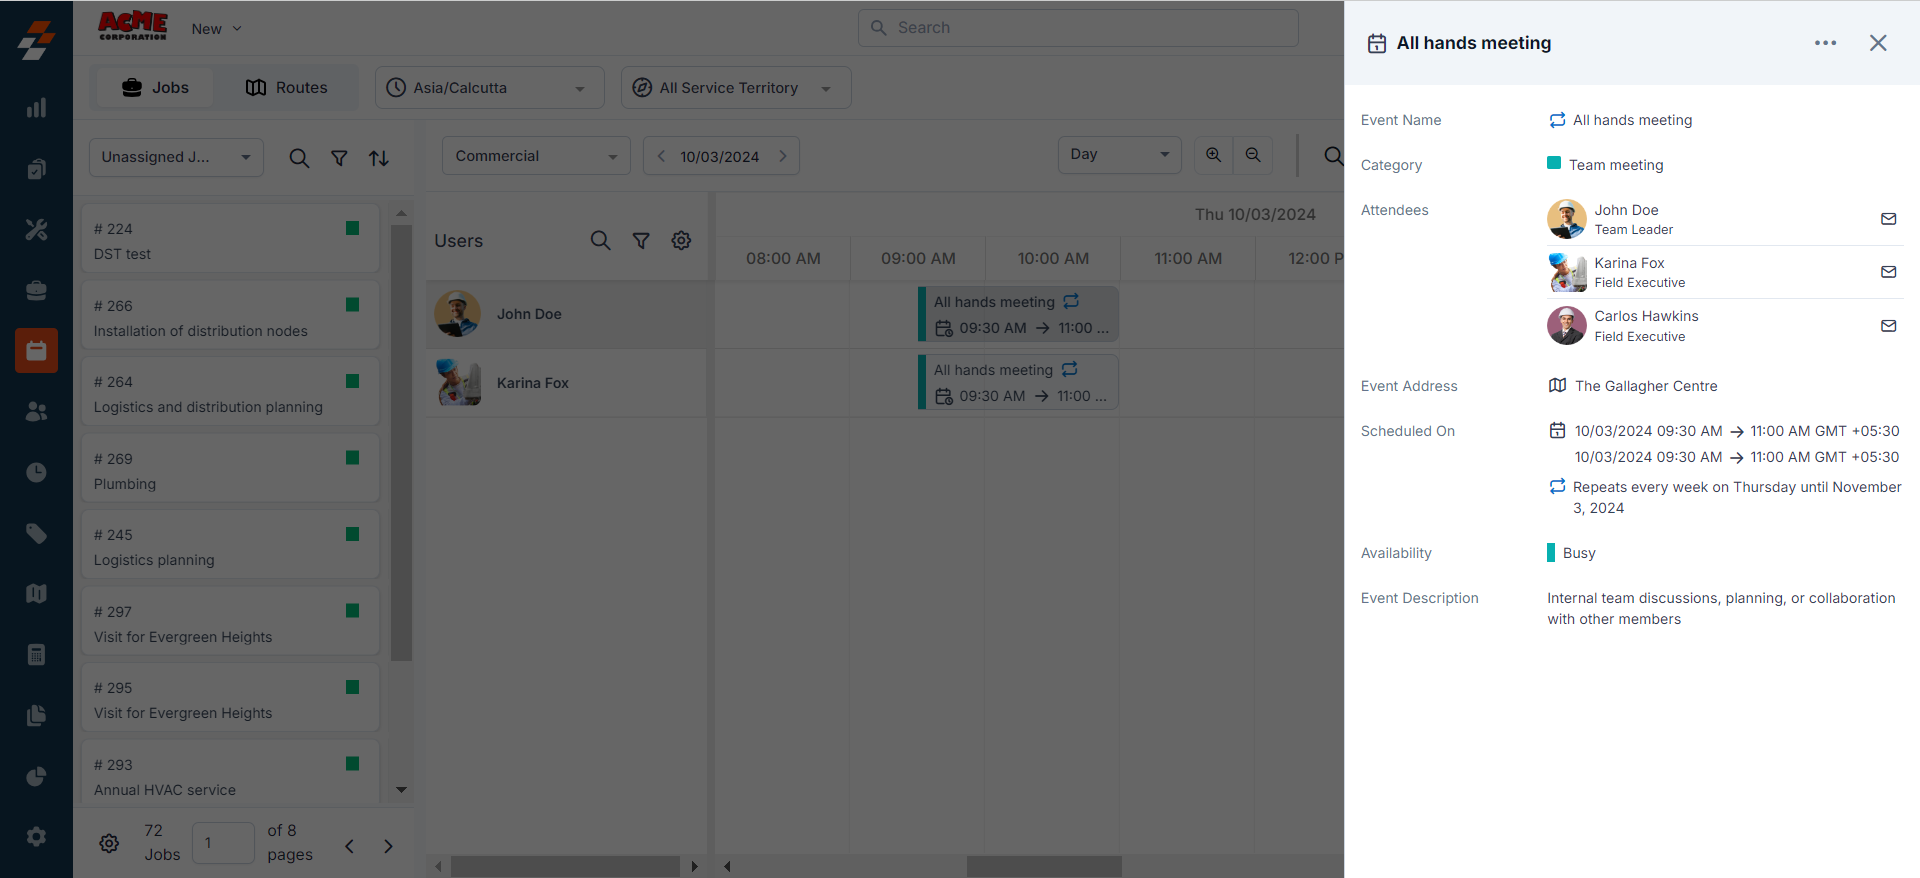
Edit non-job event details
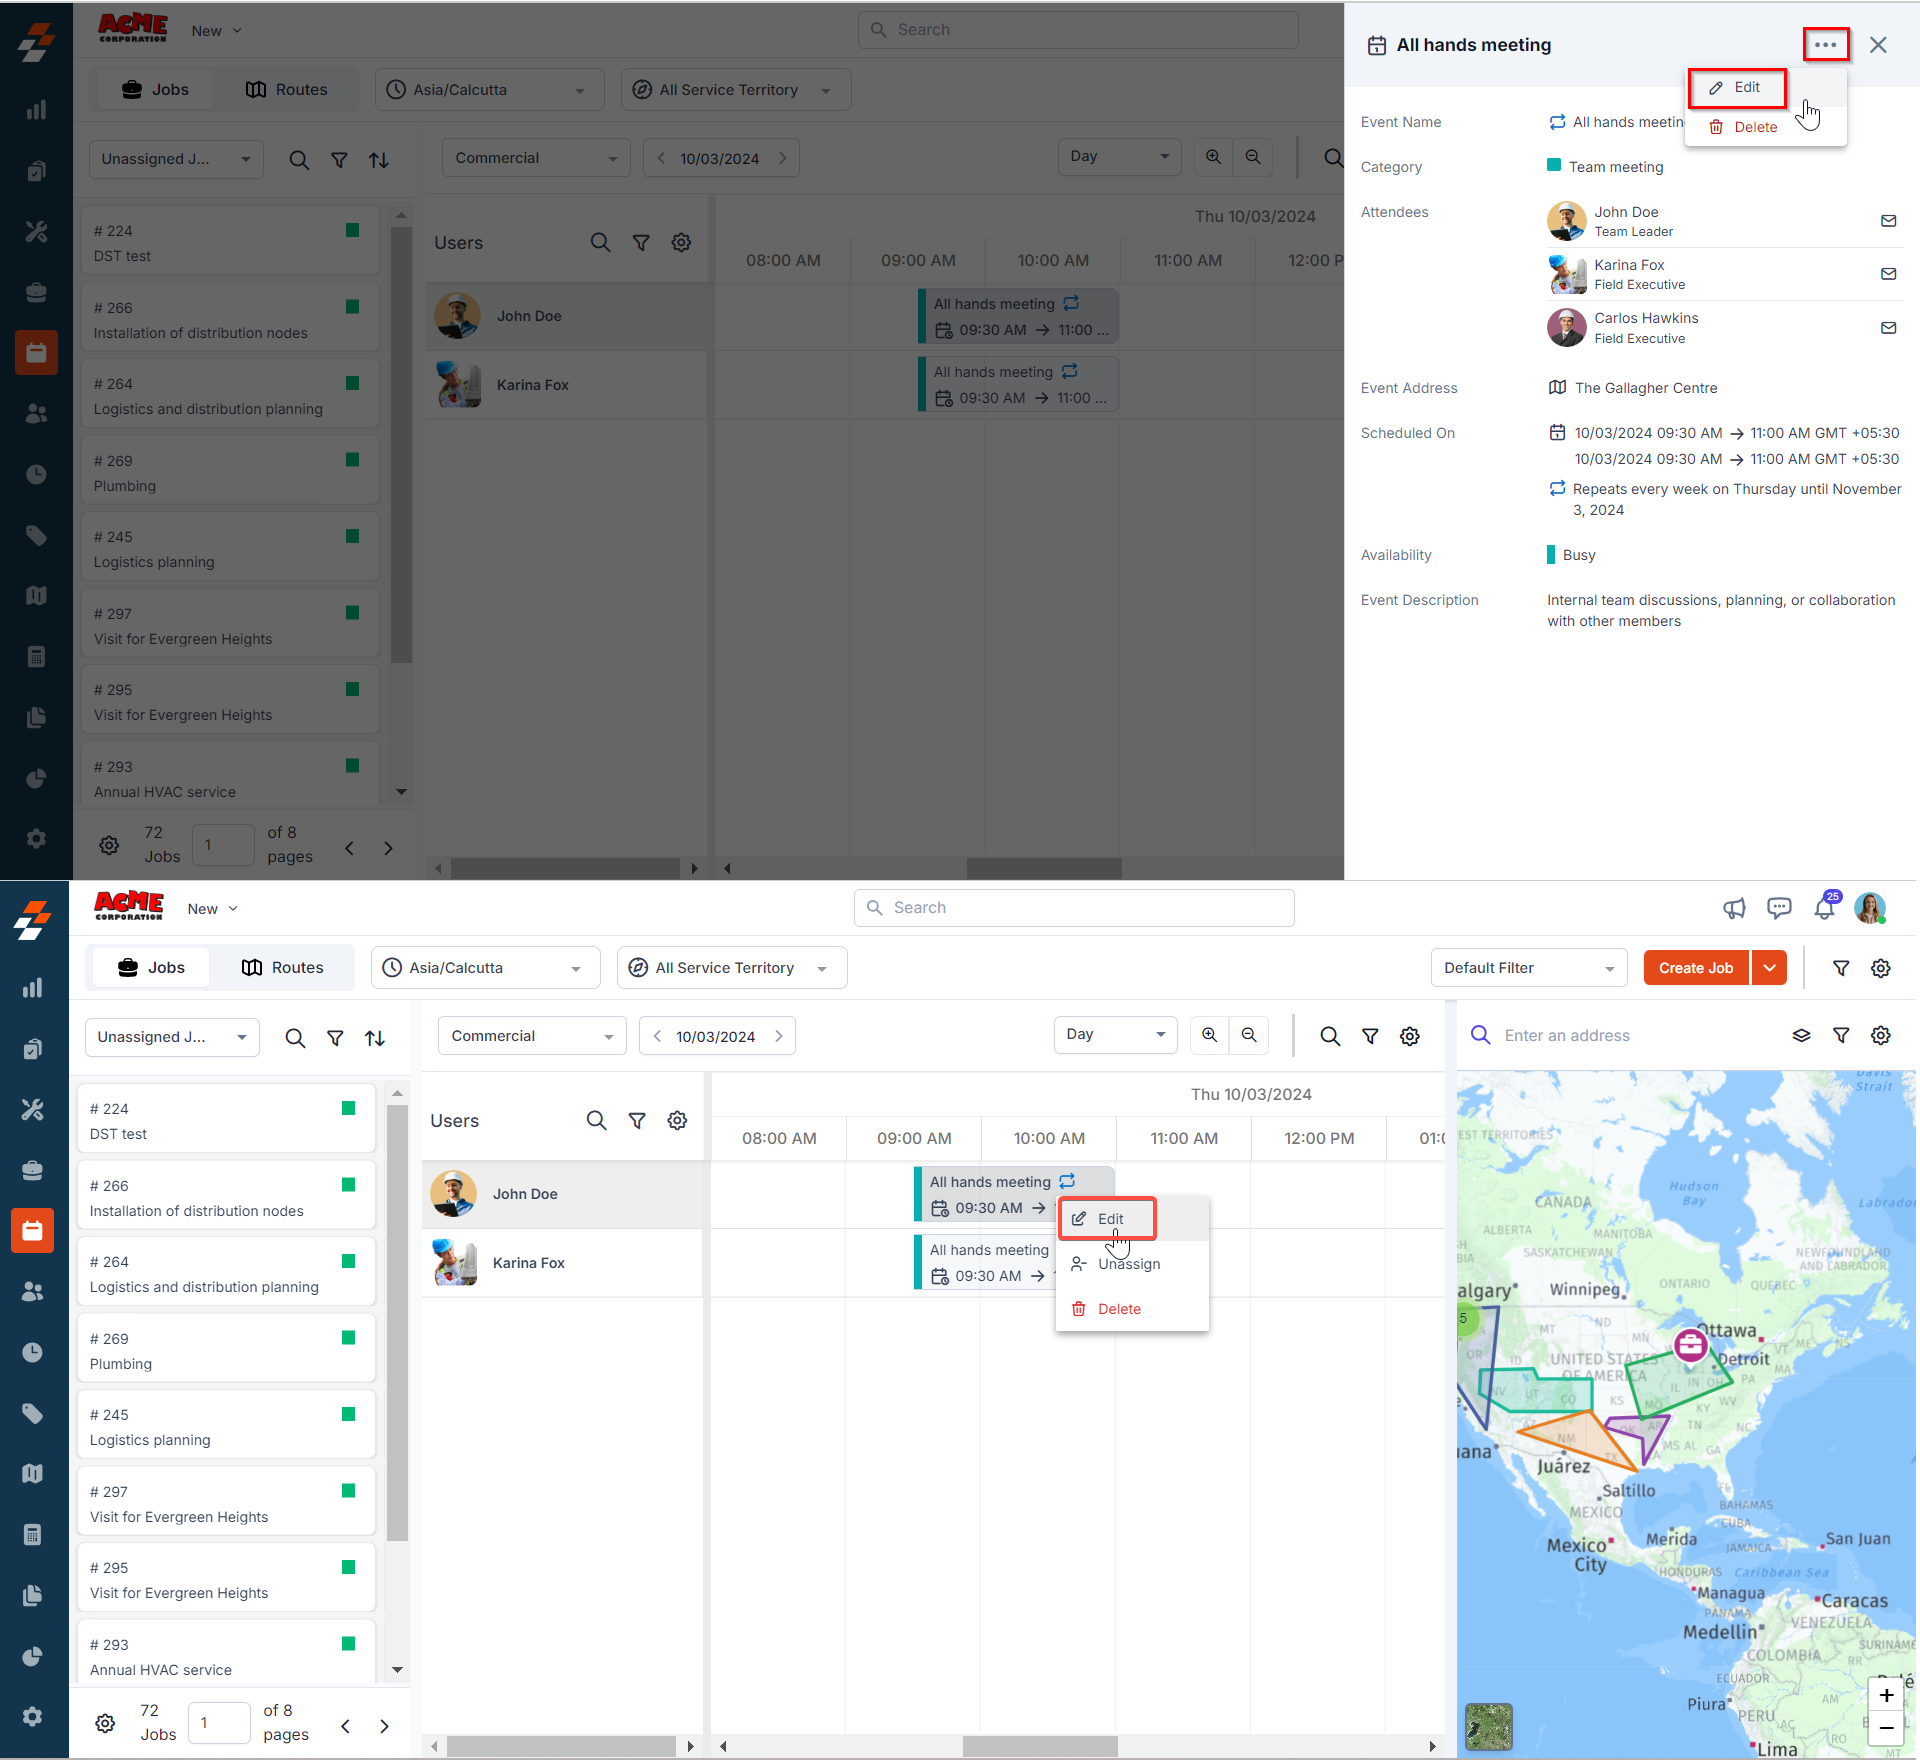
To view and edit a non-job event, follow these steps:- Select the specific event on the calendar or dispatch board. This will open the non-job event details on the right, showing all relevant information.
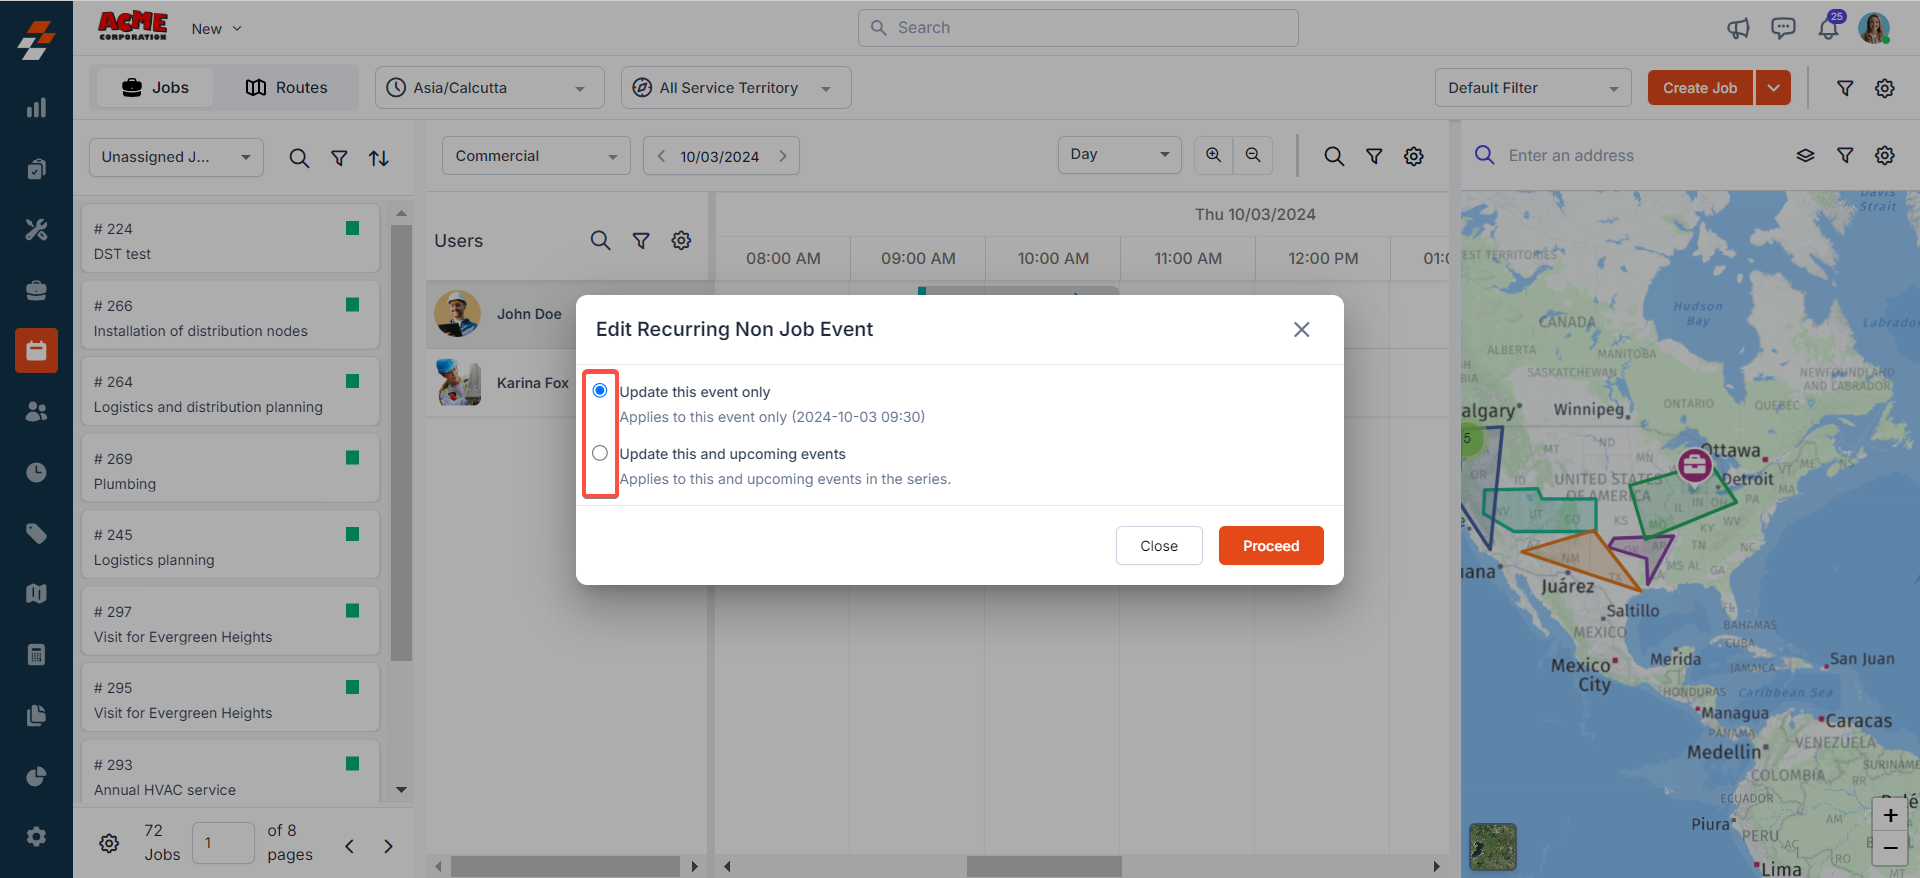
Note: If the event is part of a recurring series, a pop-up will appear prompting you to choose one of the following options:
- Update this event only: Changes will apply only to the selected instance of the event.
-
Update this and upcoming events: Changes will apply to the selected event and all subsequent events in the series.
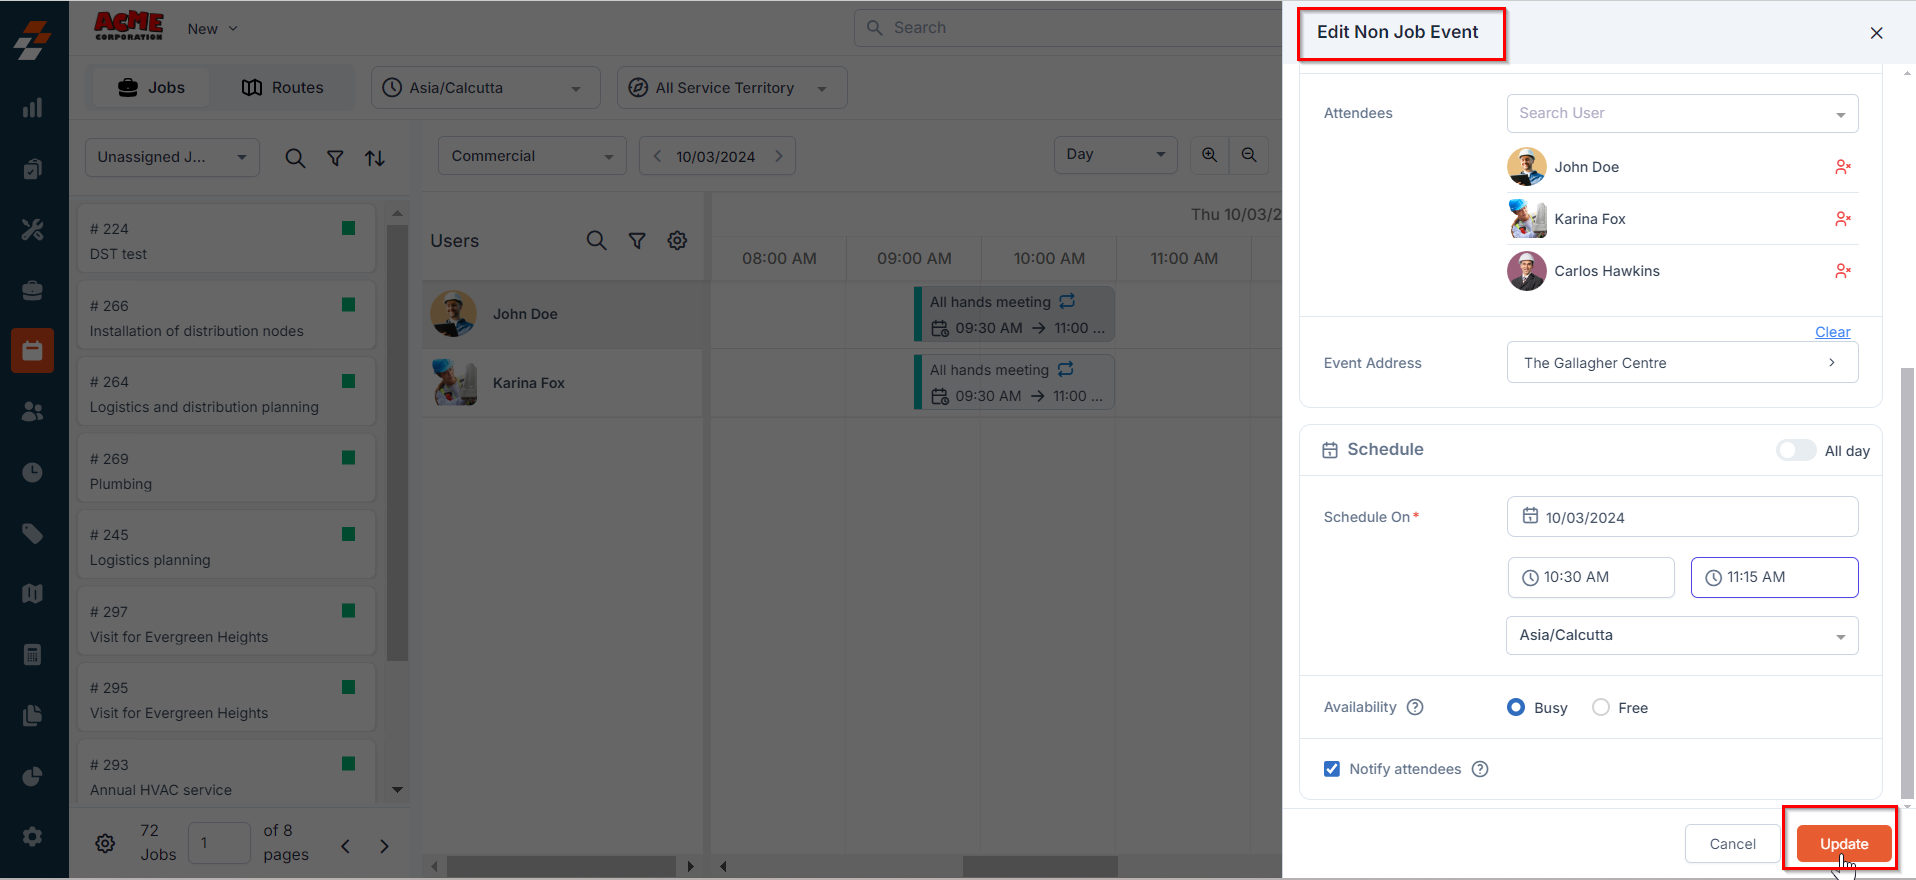
- Once you’ve made the necessary changes, click the “Update” button to save the updated event details. The changes will also be notified to the relevant attendees.
Note: When you update a single instance of a recurring event, that instance will no longer be part of the recurrence and will become a single event.
Delete non-job event
To delete a non-job event, follow these steps:-
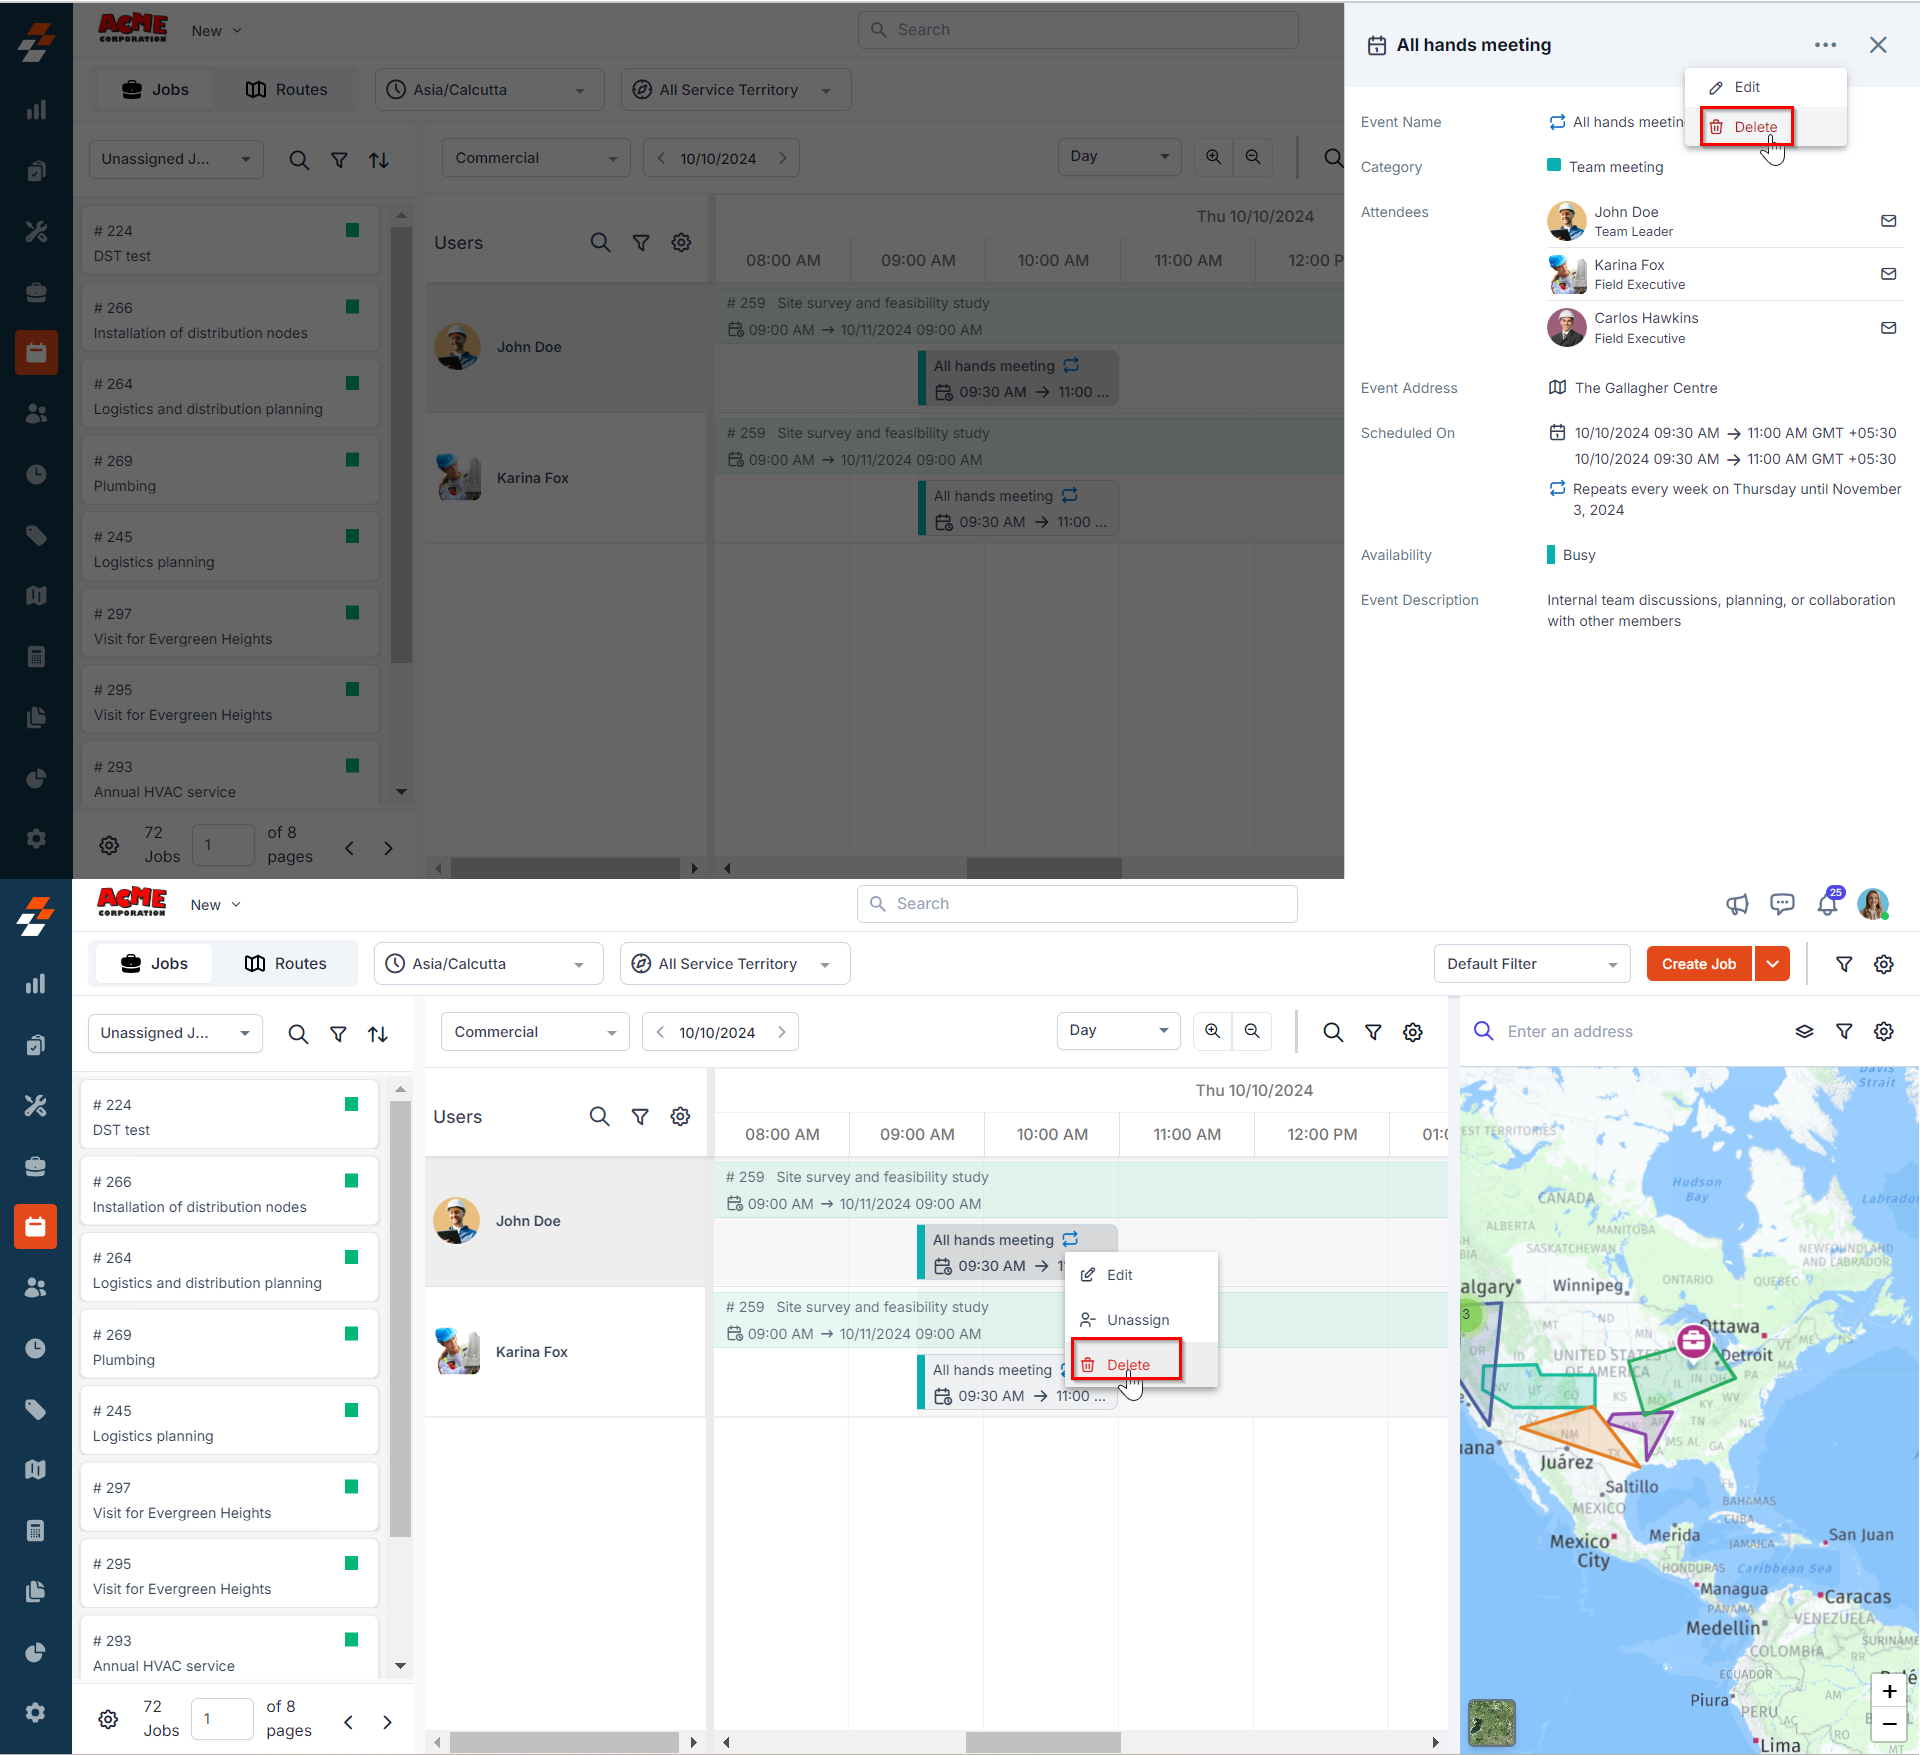
Select the specific event on the calendar or dispatch board. This will open the non-job event details on the right, showing all relevant information.

-
Click the ellipsis icon (three dots) at the top right of the page and select “Delete.” A confirmation pop-up will appear. Click “Delete” to proceed. Alternatively, you can also right-click on an event and choose the “Delete” option.
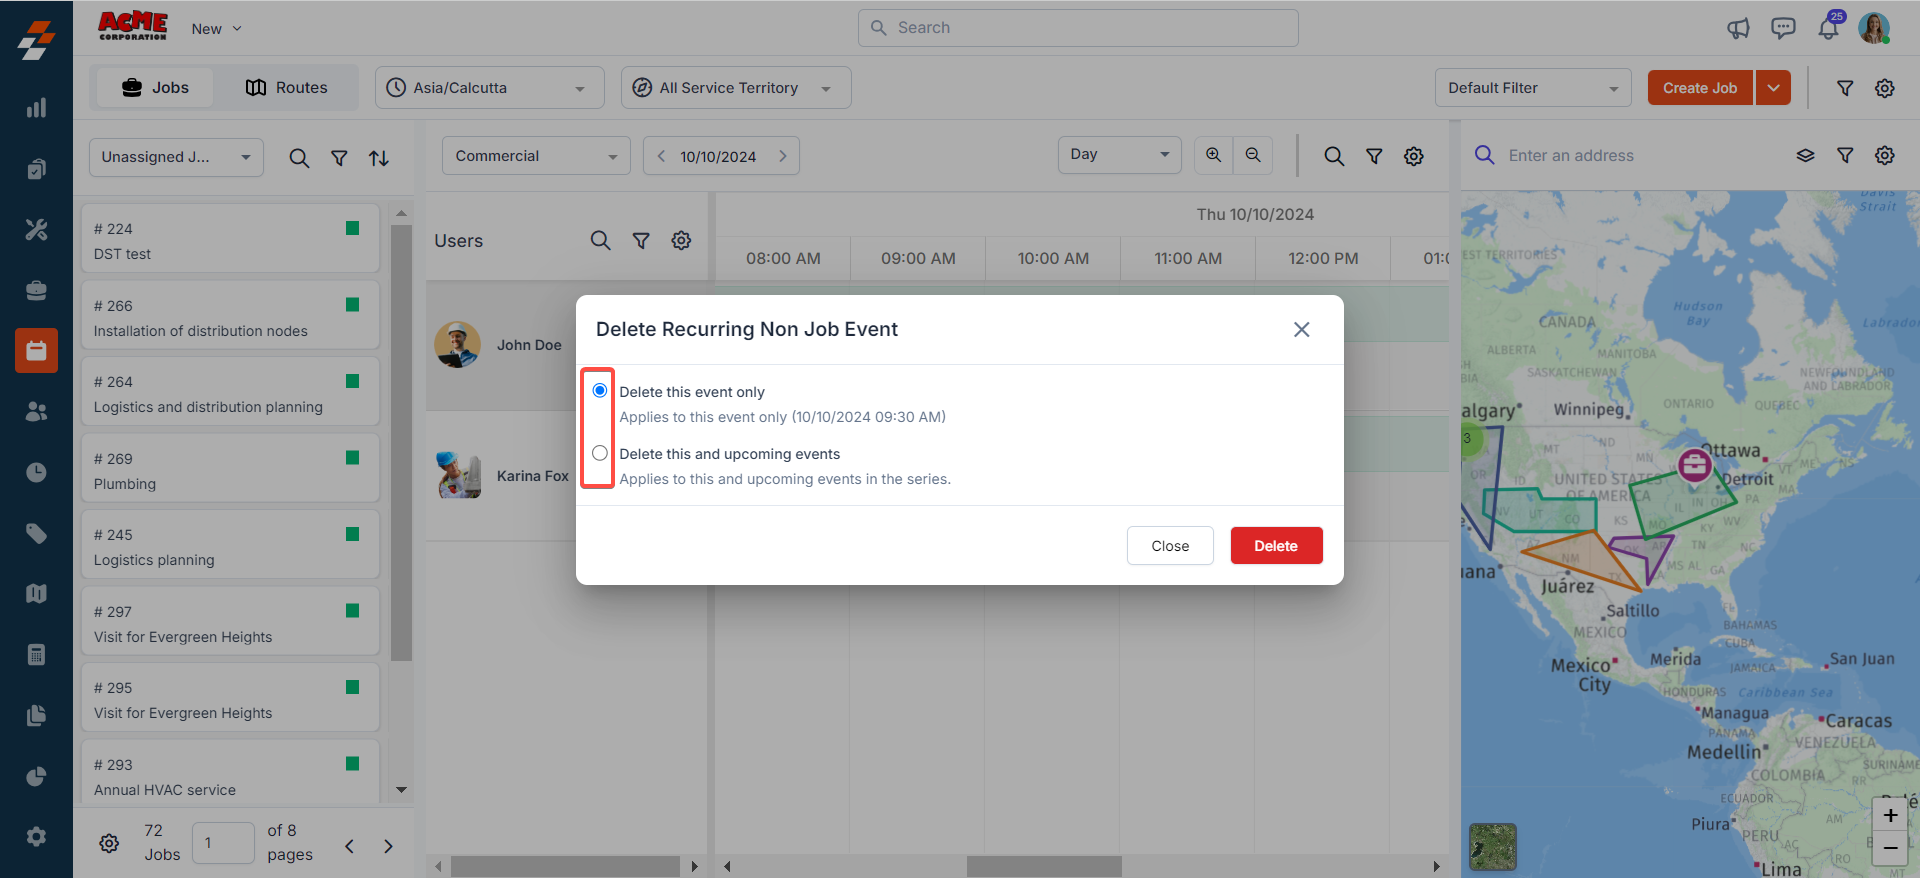
Note: If the event is part of a recurring series, a pop-up will appear, prompting you to choose one of the following options:
- Delete this event only: Deletes only this specific instance.
-
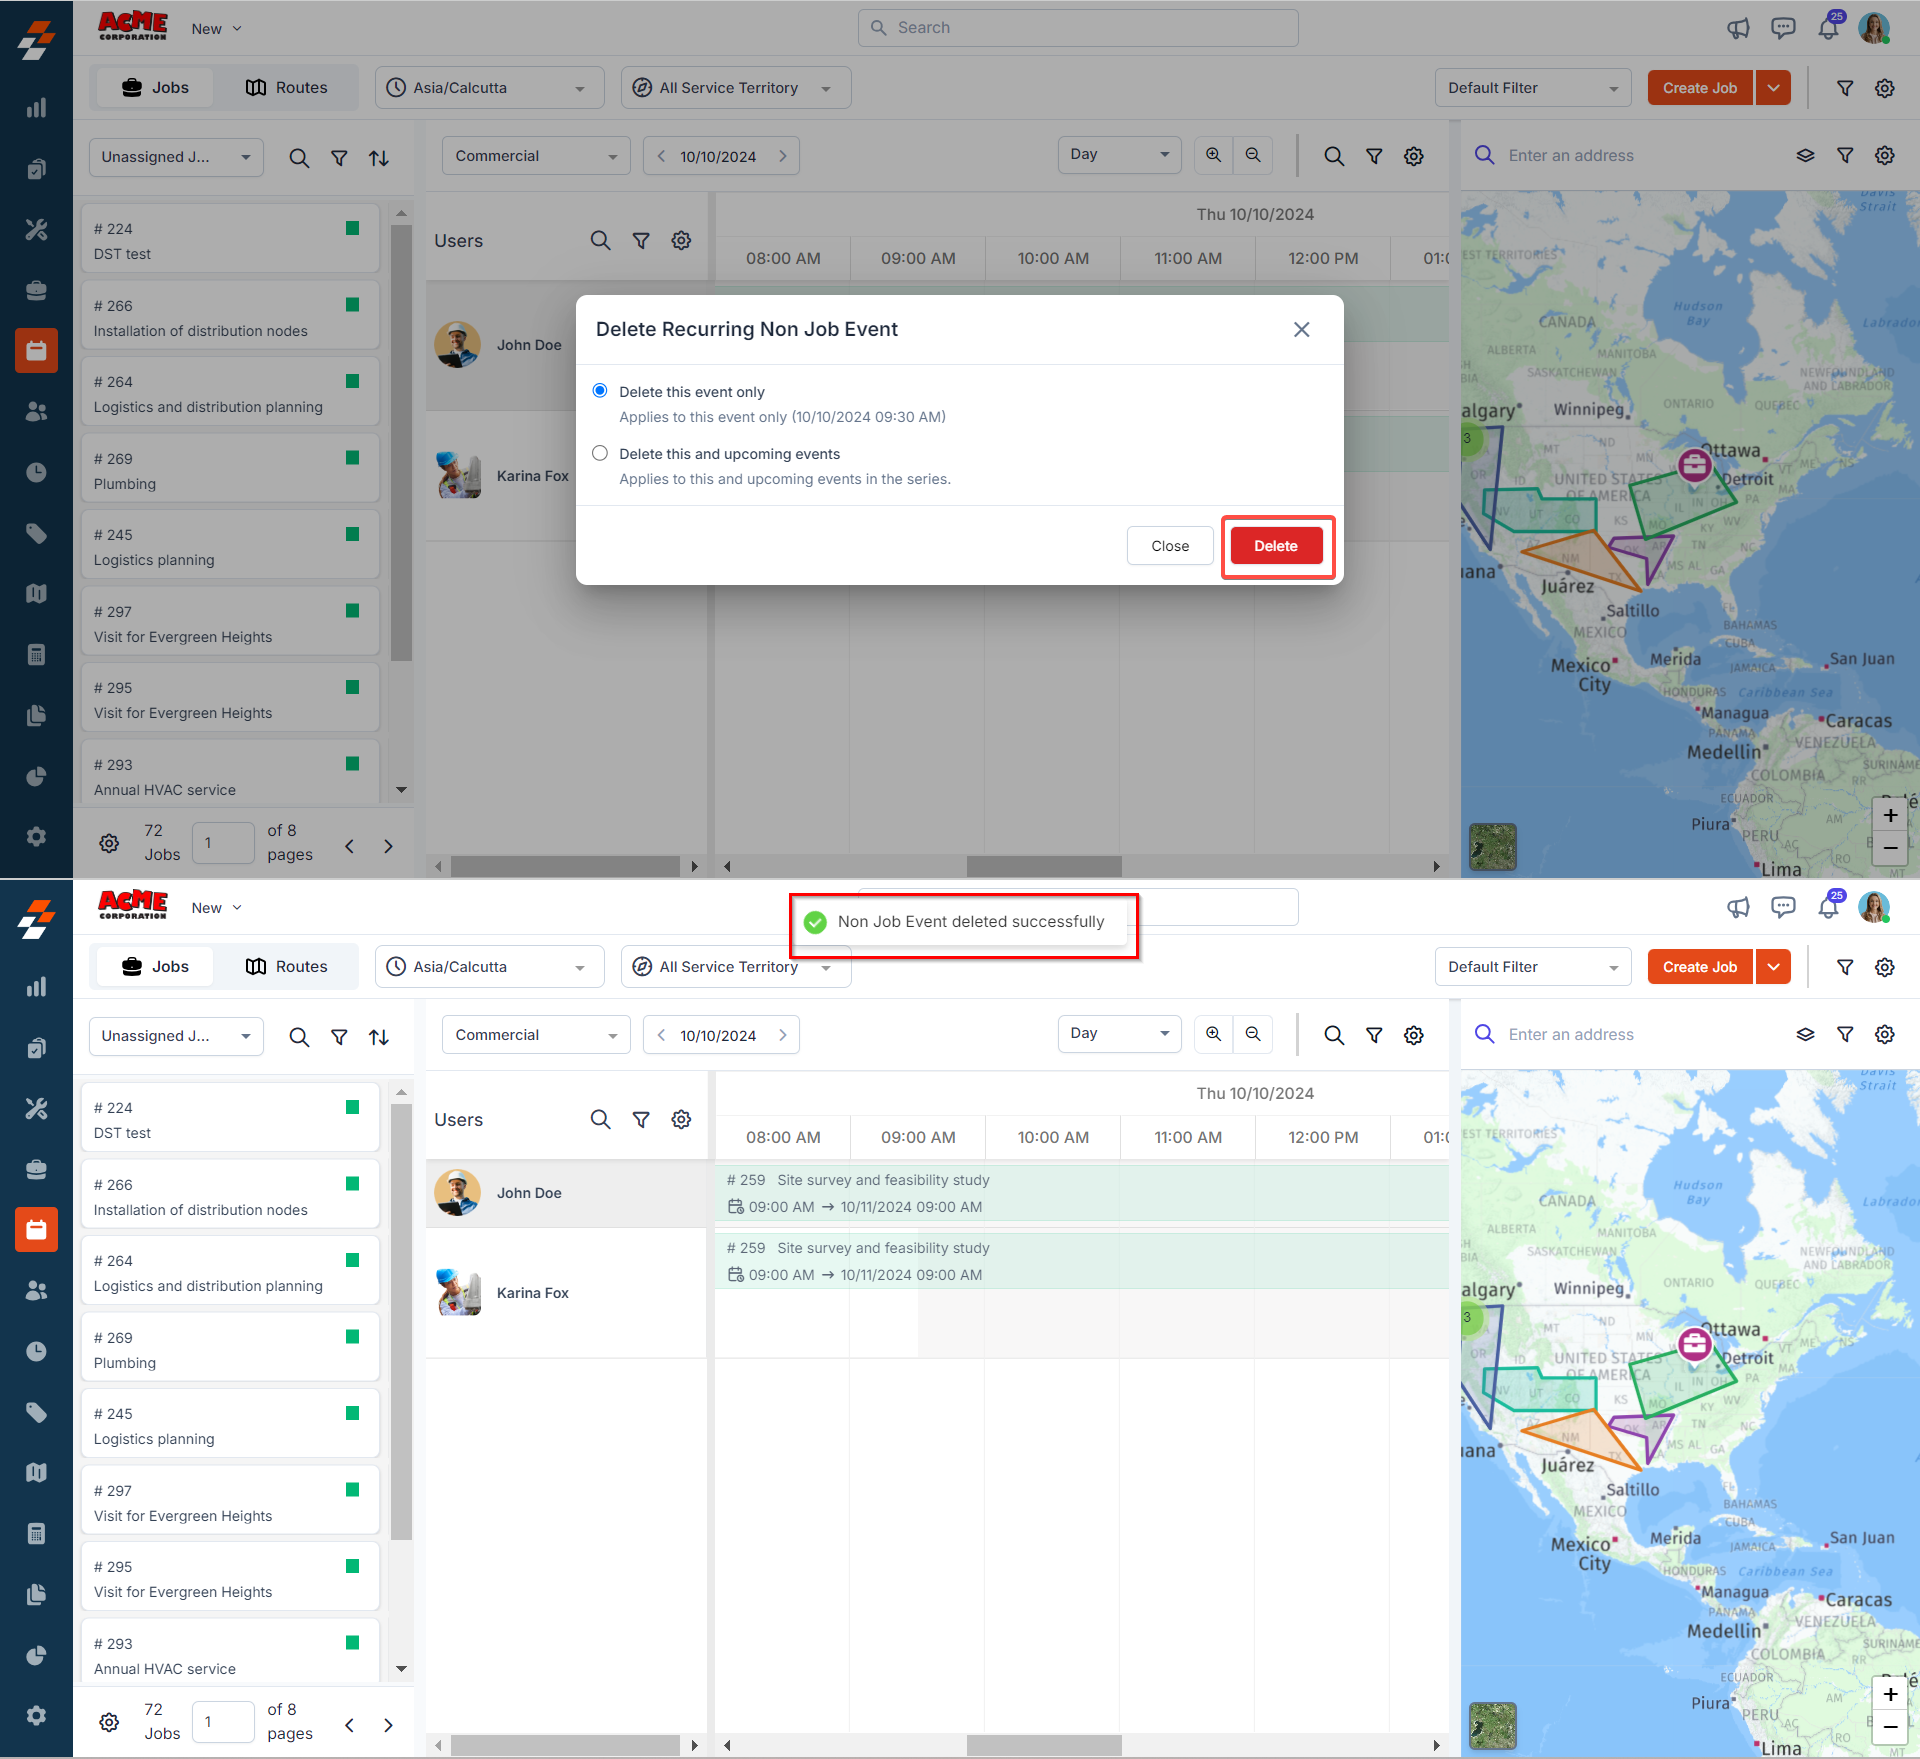
Delete this and upcoming events: Deletes this event and all future occurrences in the series.
- Click the “Delete” button to proceed with deleting the event.
Non-job events on mobile
After creating a non-job event, attendees will receive a notification on their mobile device. From the mobile app, they can view the event details and delete the event as needed. Recurring events are indicated with a ‘recurring’ icon.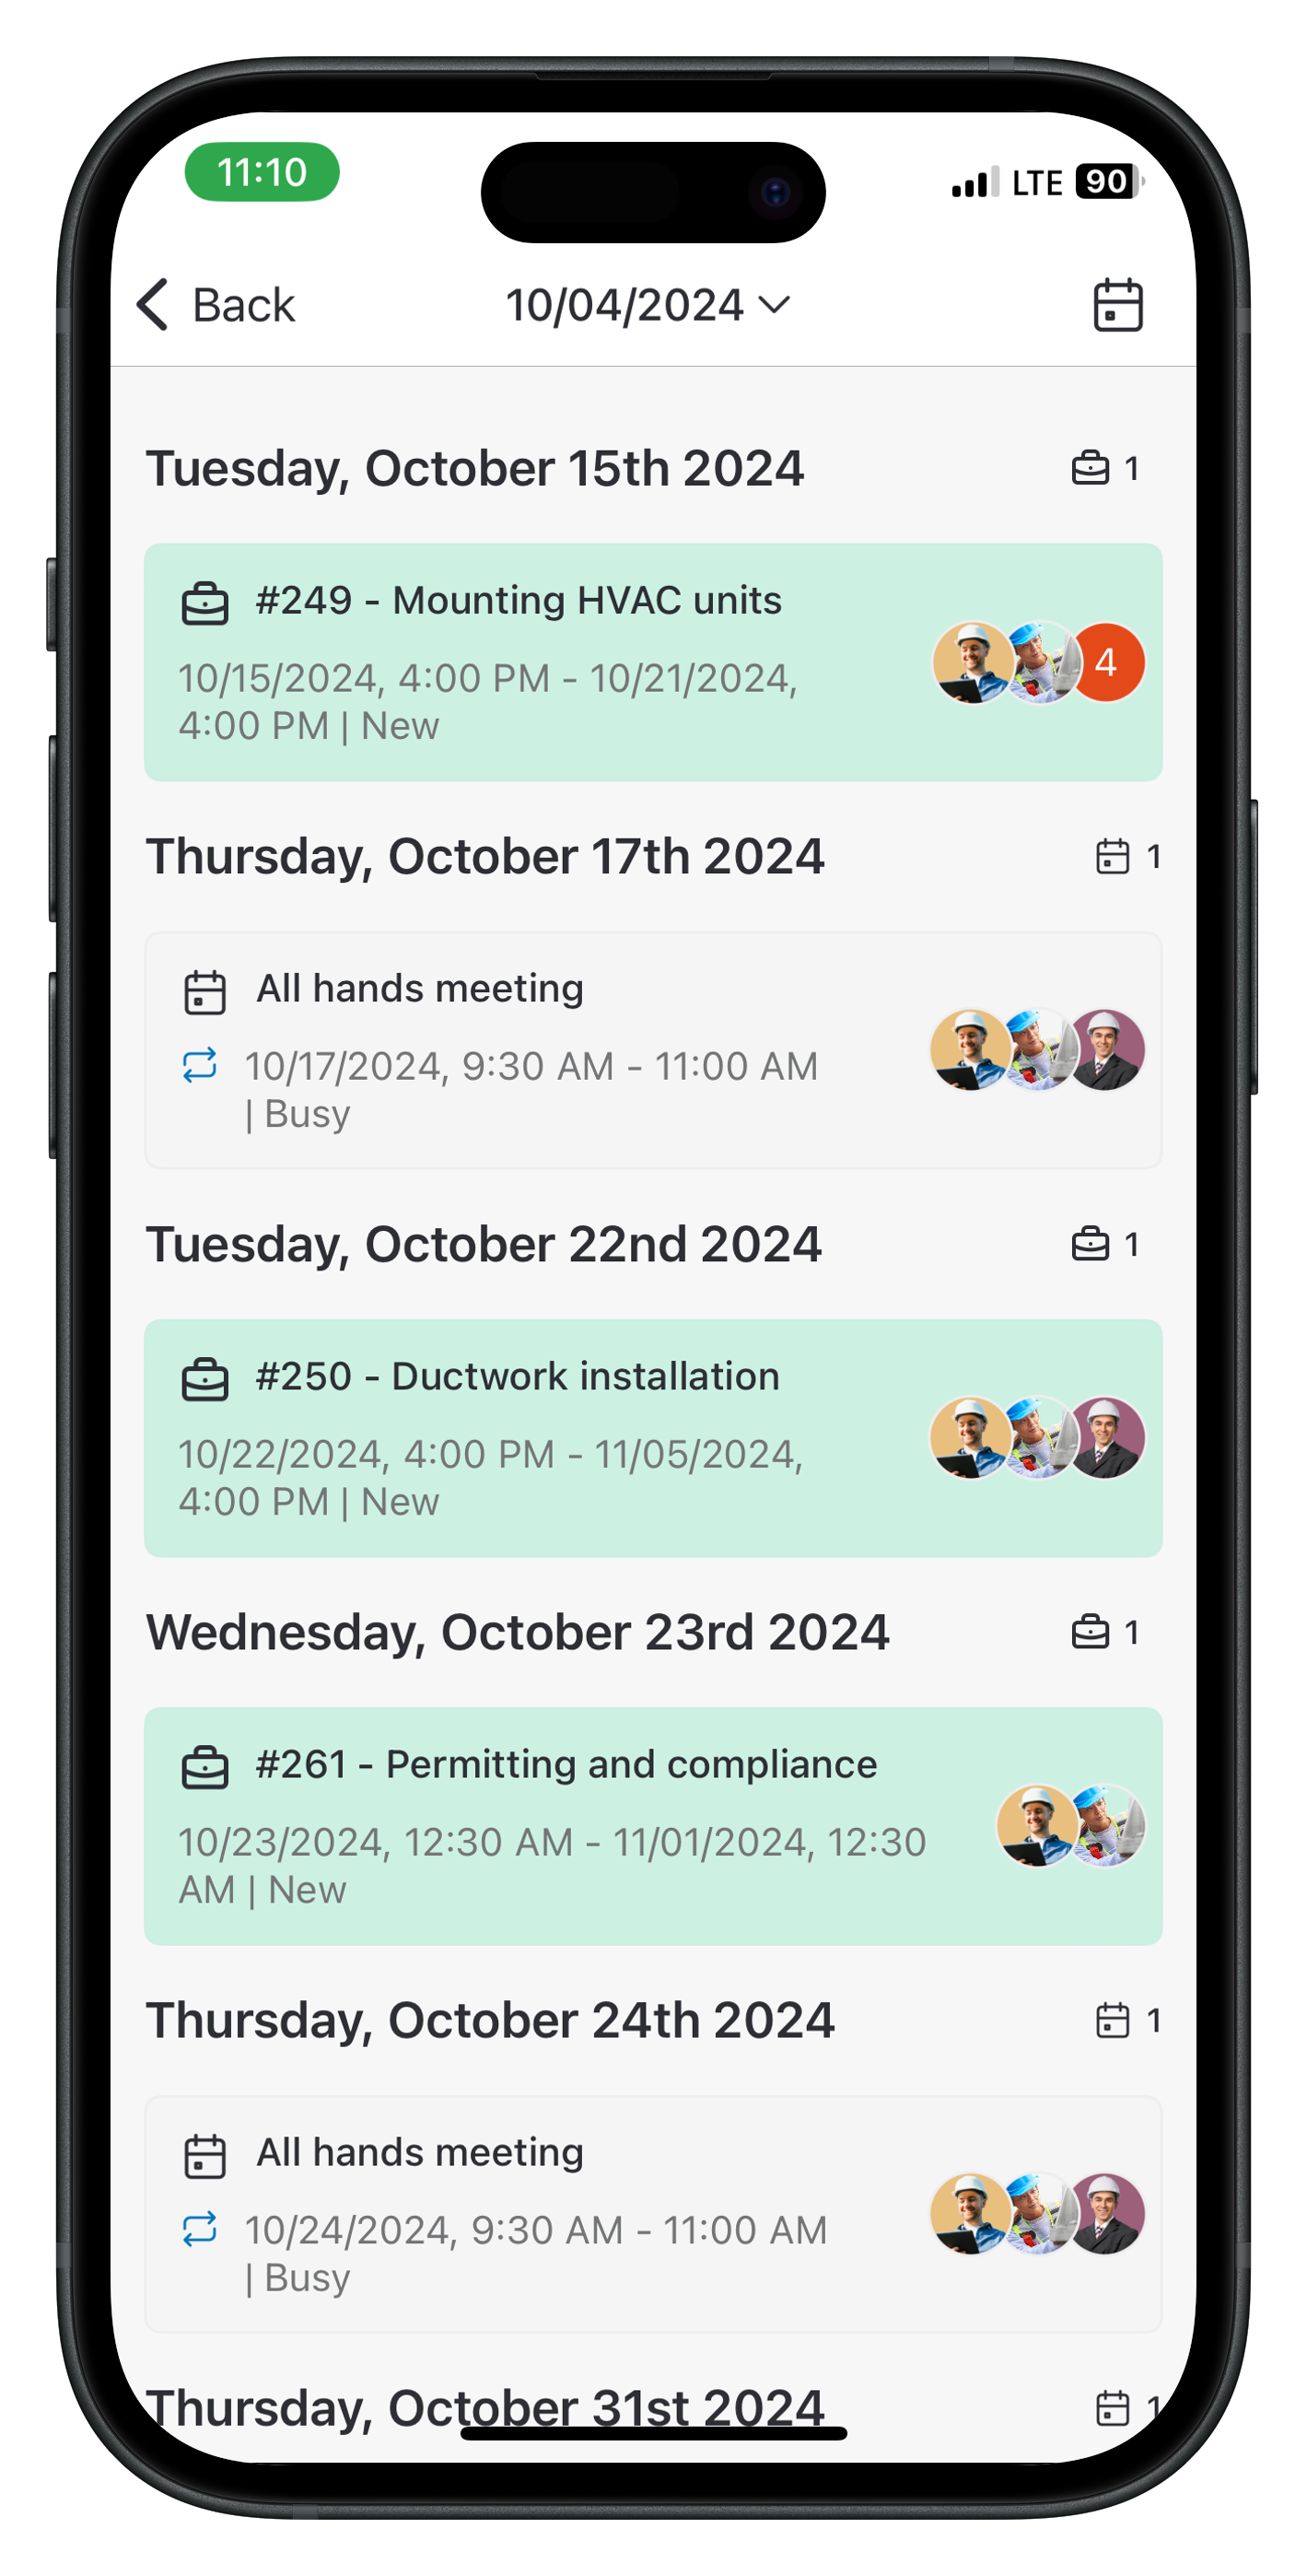
Note: If the event is part of a recurring series, users can only delete a specific instance and cannot delete the entire series.