Navigation: Settings -> Miscellaneous ->Workflows
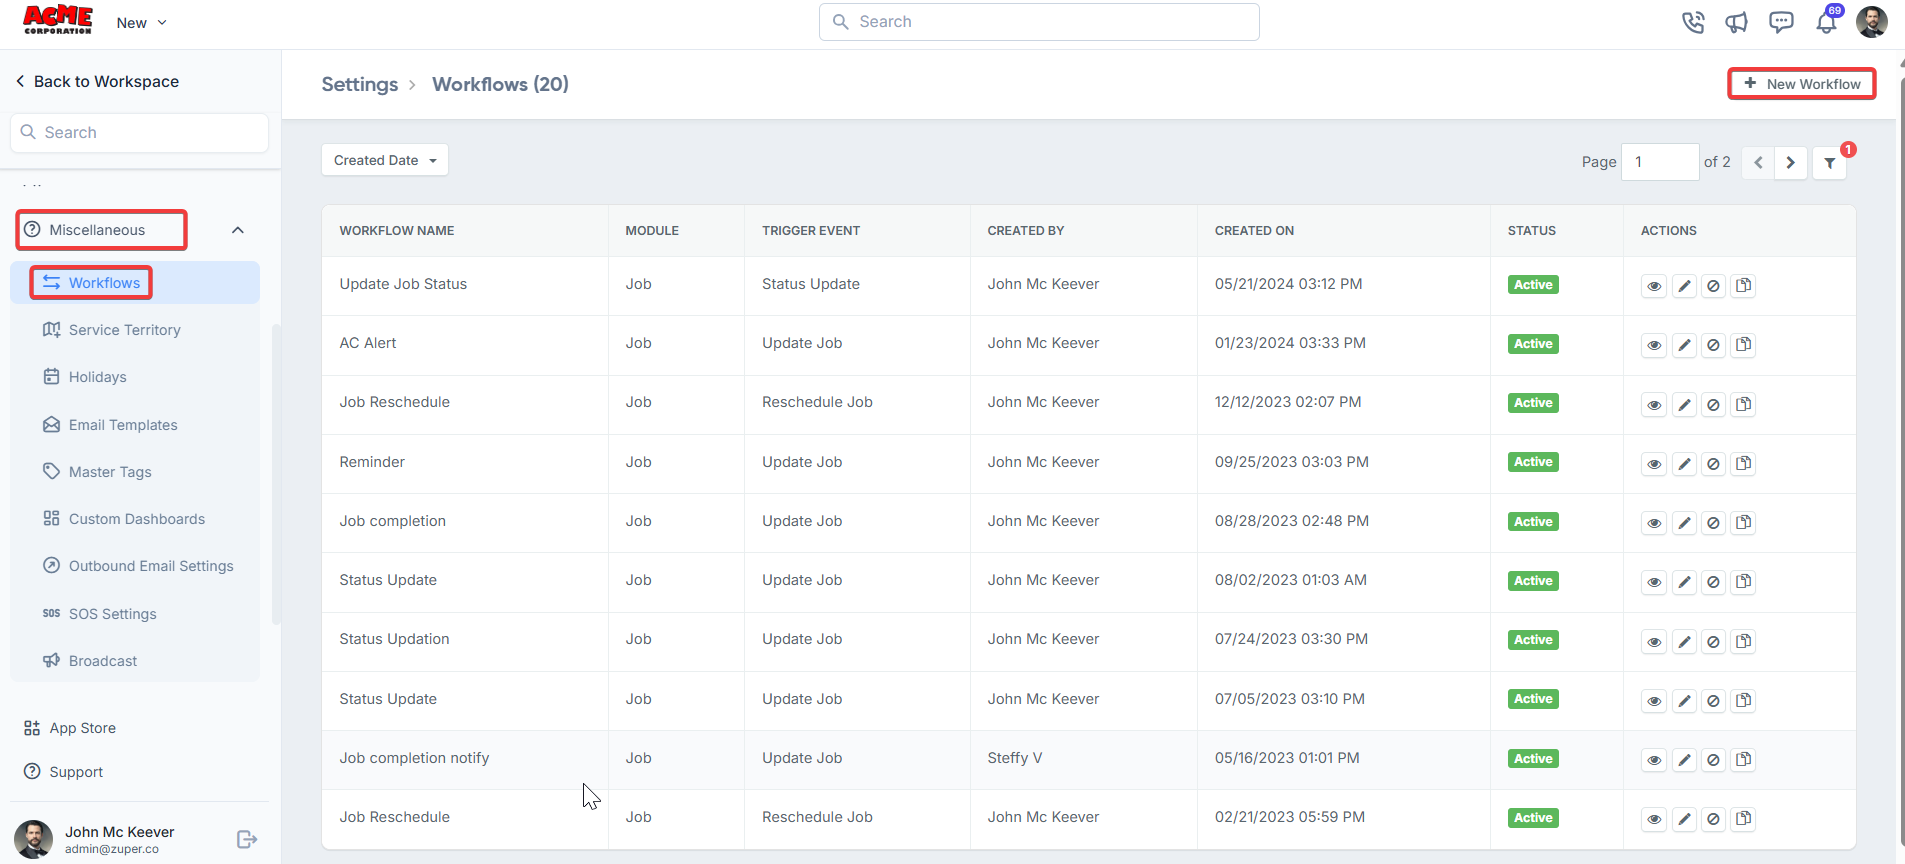
- Select the “Settings” module from the left navigation menu, and under the “Miscellaneous” section, select “Workflows.” Click “+New Workflow” button.
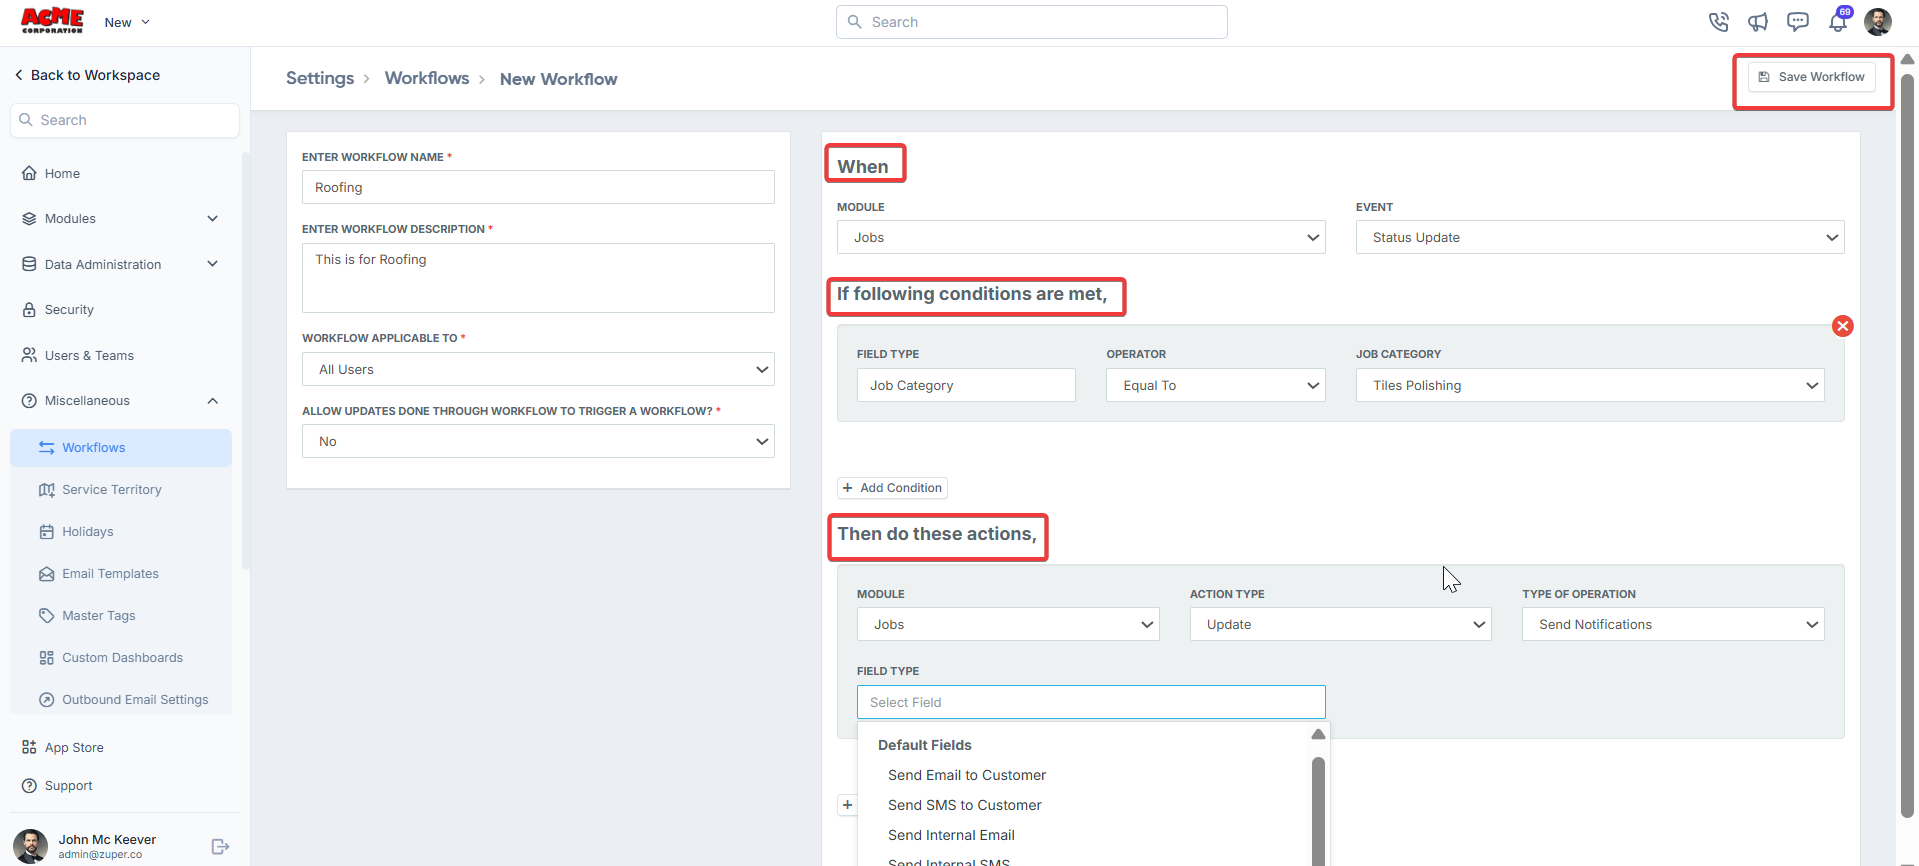
- Under “Workflow Applicable to”, there are 4 options. -> Only Me -The workflow will be applied only for the user who created the workflow. -> All Users - The workflow will be applied to all the users, -> Teams - The workflow will be applied to a team(s) and enter the team names. -> Selected Users - The workflow will be applied to the selected users, and then the names of the different users will be entered.
- Under “When,” select the”Module” and event from the dropdown menus from which the workflow will be initiated.
- Under “If following conditions are met,” click “Add Condition.”.
- Select Field - Select the name of a field from the drop-down. -> Select type - The condition. -> Enter the value. (Job Category >> Equals To >> Mobile server) Note: The fields on the first list are based on the event selected from the when section.
- Under “Then do these actions,” click “Add Action”. -> Module - Select the module on which the actions is to be performed. -> Action Type - Select the type of action to be performed on the selected module. -> Type of Operation - Select the type of operation, providing more details on the action.
- Click “Save Workflow”.
- The workflow setup is divided into 3 simple steps. -> WHEN -> IF following conditions are met -> THEN do these Actions
WHEN
“When” is the base condition for the workflow that determines which event, if selected, should trigger the workflow. To set up the workflow, select the appropriate module and the corresponding event. The following Modules are available from Zuper.- Jobs
- Customers
- Quotes
- Invoices
- Assets
- Payments
- Request
- Project
If the following conditions are met
Here, we need to set the condition for the workflow. If the condition(s) are If satisfied, the workflow will be executed.
- The first one is the Field against which the condition will be validated; it can be a Job Title, a customer’s zip code, or even a custom field.
- Once you select the base field, the next one will be the conditional field “Type.” Under this, we have text-based values: Equal To, Not Equal To, Contains, and Not Contains, as well as number-based values: Greater Than, Less Than, Greater Than or Equal To, and Less Than or Equal To.
- We will add a value that needs to be checked against the base field value (point number 1). It should be related to the field we select. For example, if the field selected is “Job Category,” the value we enter should be a valid Job Category name. -> Select Equal To when the base value matches the value entered in the third field. -> Select Not Equal To when the base value doesn’t match the value entered in the third field. -> Select Contains if the value entered in the third field is a part of the selected base field type. -> Select Not Contains when the value entered isn’t part of the selected base value.
- We can add multiple conditions to be checked with/against. After adding the first condition, click ”+ New Add Condition” (available below the fields) and select AND or OR depending on the condition. Upon selecting AND, the system will check both conditions. If both conditions are satisfied, then the workflow will be triggered. If OR is selected, then the system will check both conditions. If either of them is true, then the action will be triggered.
- Repeat steps 1 - 3.
Then do these actions
This is the post-action for the workflow. When the workflow is triggered, the action setup will take place.
- Module: Select the appropriate module where the action should occur.
- Action Type : Select the action type to create, update, or delete.
- Type Of Operation : Select the type of update that should take place. For eg, Updation of Job Assignment or Updation of Status.
- Whatever we select under workflow applicability should be reflected in this field. Click the field and select the value. For example, if the workflow applicability is Teams, click on the field and select “Choose Team.”
- In the next field, select the appropriate value(team/user, etc).
- If required, we can add multiple actions that need to be performed. Click “+ Add Action” and repeat steps 1 - 5.
Sample Scenario
To understand the setup better, check the example workflow given below. Workflow Scenario : Whenever a new job is created in the system, IF the Customer Zip Code is “70116” and the customer belongs to “Michigan” state, then the Job should be automatically assigned to the user “Floyd Lawton”. Workflow setup : Let us look at the scenario step-by-step.WHEN a new job is created,IF the zip code of the customer is “70116” and belongs to the state of MichiganTHEN assign the job to the user “Floyd Lawton”.
- Click on the “+ New Workflow”.
- Enter an appropriate workflow name and description.
- Under Workflow Applicable To, click on Selected Users, enter “Floyd Lawton” and select the user from the dropdown.
- Under ‘When’, select the module as ‘JOBS’ and select the event as a new job.
- Under IF condition, select the base field as customer address - Zip code, select the condition type as “Equal To”, and then enter the value “70166” in the third field.
- To add the other condition, click on “+ Add Condition”.
- Select AND under the condition type.
- In the base field, select Customer Address - State.
- Set the condition to Equals To, and then enter the value “Michigan” in the third field.
- Under “Do these actions”, select the module as Jobs.
- Select the Action Type as Update.
- Under Type of Operation, select Update Job Assignment - Assign.
- In the next step, select Choose Team, then click on the relevant team name (Idaho Falls, Idaho in this scenario).
- The final step is to click on the user FLOYD and then click on “Save Workflow”.