Navigation: Settings -> Miscellaneous -> Email Templates
Configure
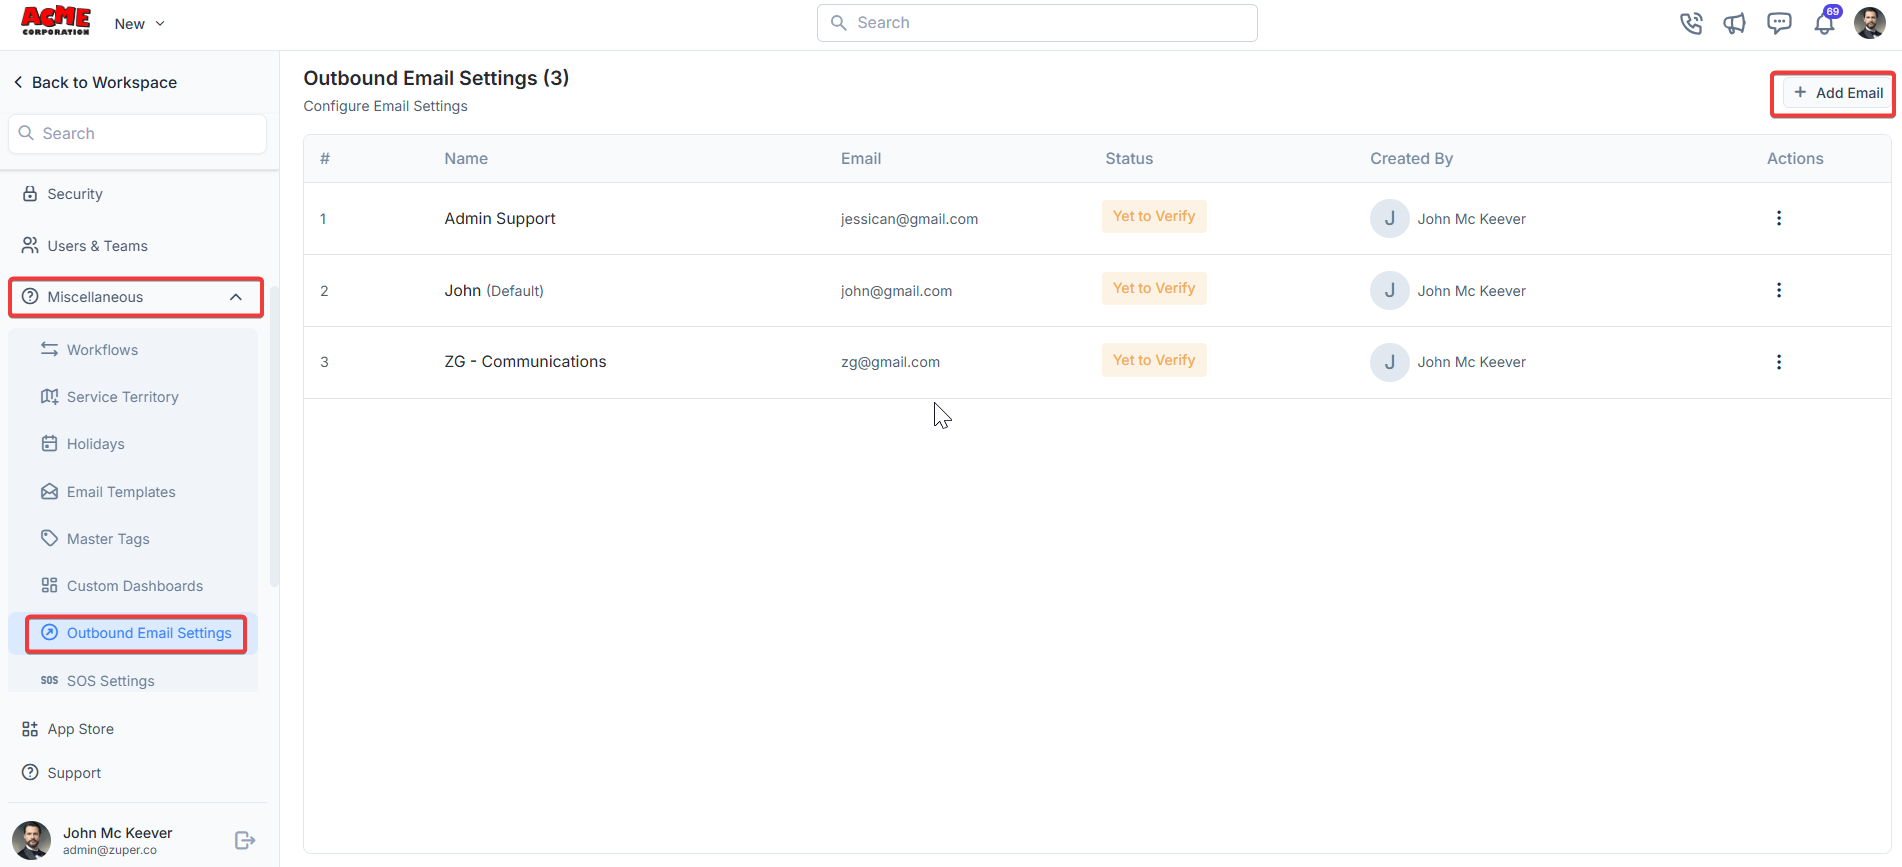
- From the settings, select “Miscellaneous.” Under the “Outbound Email Settings” section, choose “+ Add Email.”
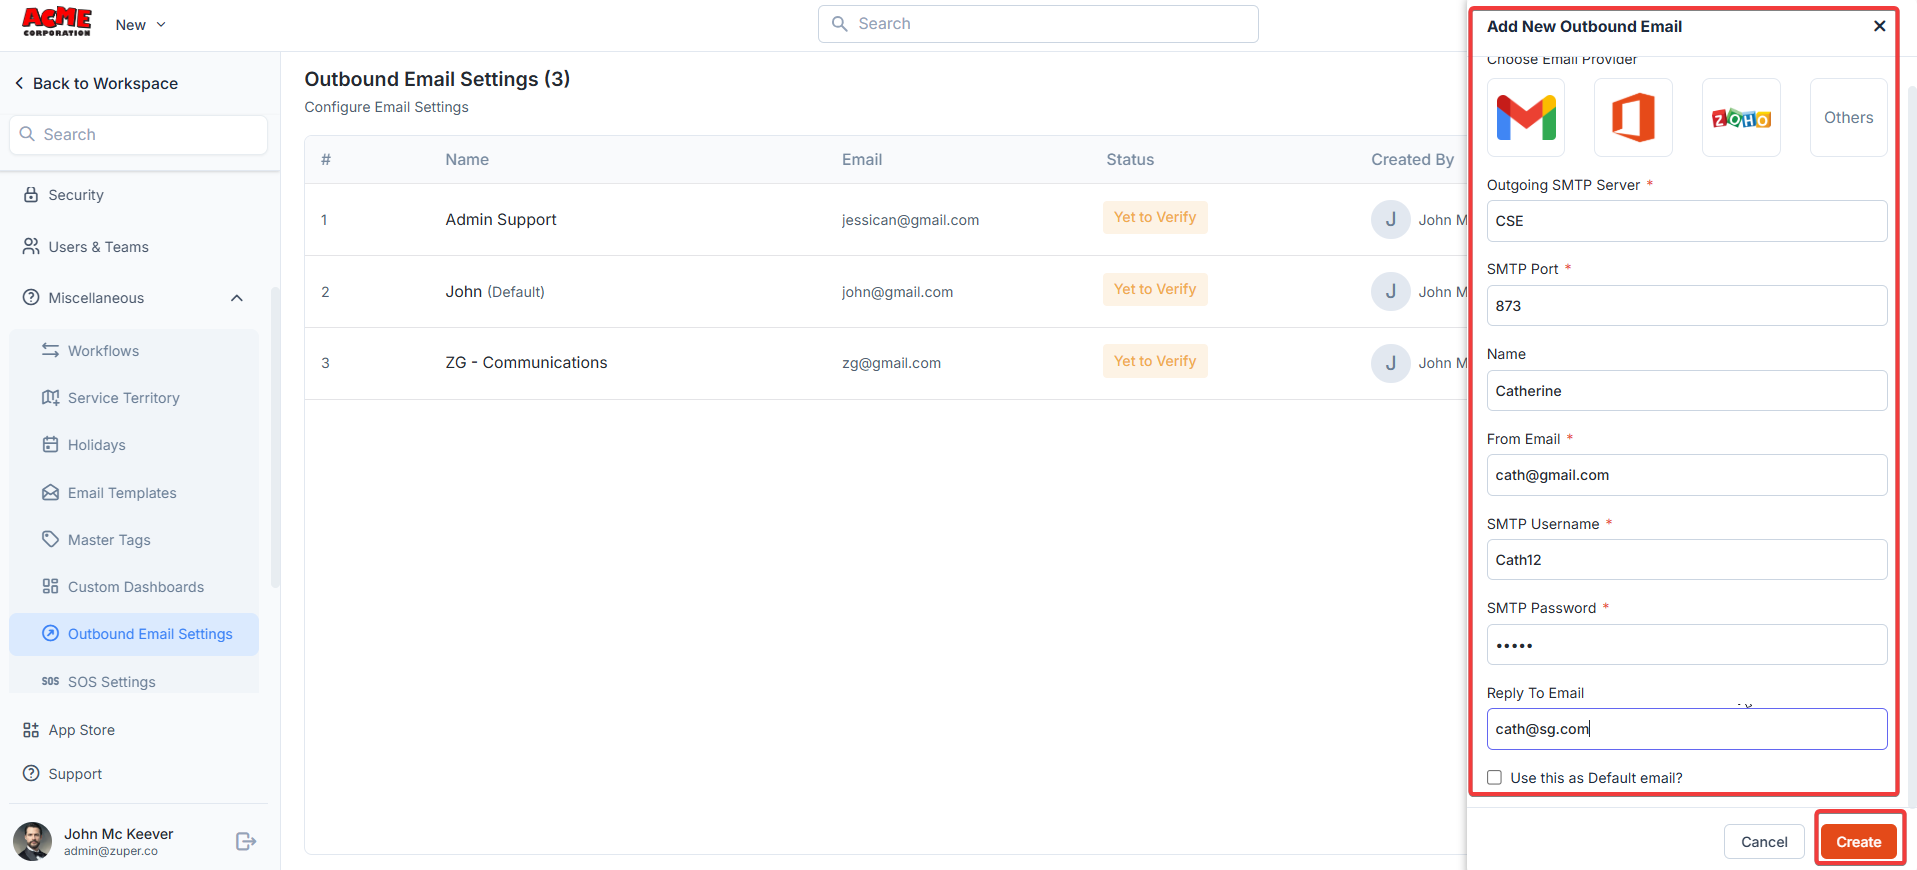
- Fill in the following details.
- Choose Email Provider: Select your email provider (Gmail, Microsoft 365, Yahoo, or Others).
- Outgoing SMTP Server: Enter the SMTP server (e.g., smtp.gmail.com for Gmail). This field auto-populates based on the provider but can be edited by selecting “Others.”
- SMTP Port: Enter the port number (e.g., 587 for TLS). This is also auto-filled based on the provider.
- Name: Enter a display name for the email (e.g., “Catherine”).
- From Email: Enter the email address (e.g., [email protected]).
- SMTP Username: Enter the username for authentication (e.g., cath12).
- SMTP Password: Enter the password for the email account.
- Reply To Email: Optionally, specify a reply-to email address (e.g., [email protected]).
- Use as Default Email?: Check this box if you want this email to be the default for outbound communications.
Setup
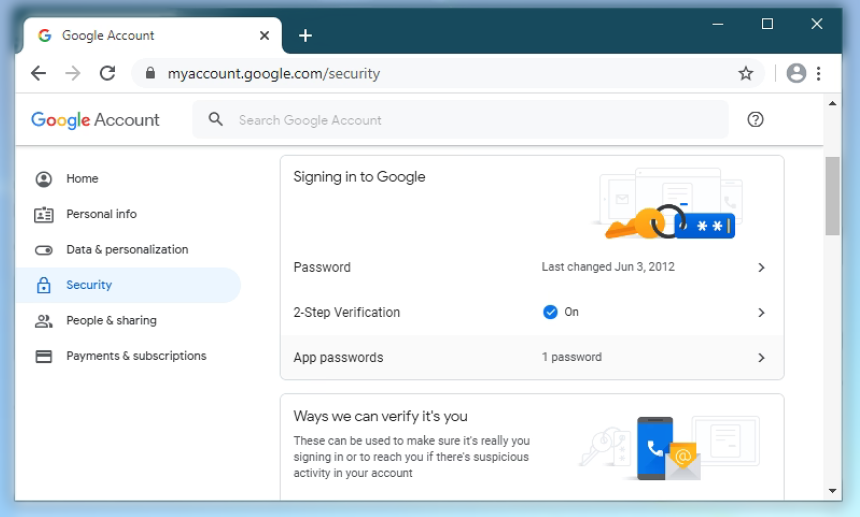
If the mailbox is selected as Gmail, follow the steps: Please ensure to have 2FA enabled in your Google Account and follow the below steps- Go to the Google account.
- On the left navigation panel, click Security.
- Click App passwords on the “Signing in to Google” panel. If prompted, enter your password.
Note: If you can’t get to the page, 2-Step Verification is:
- Not set up for your account
- Set up for security keys only
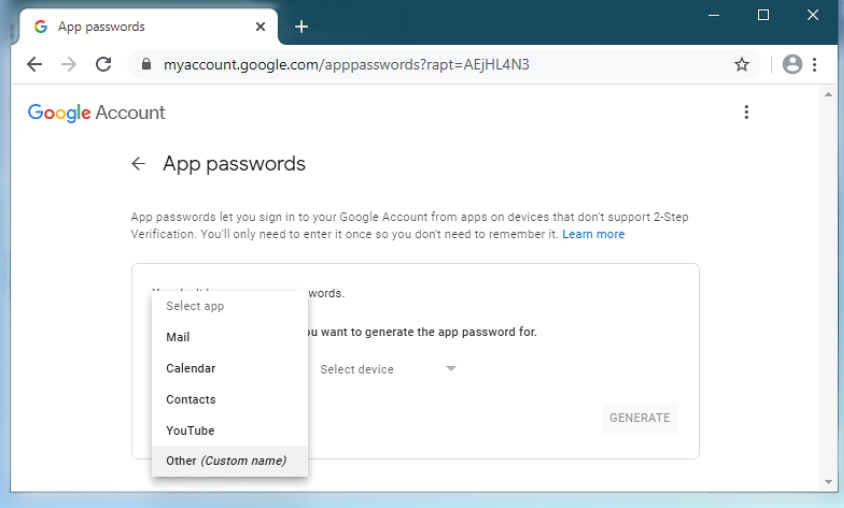
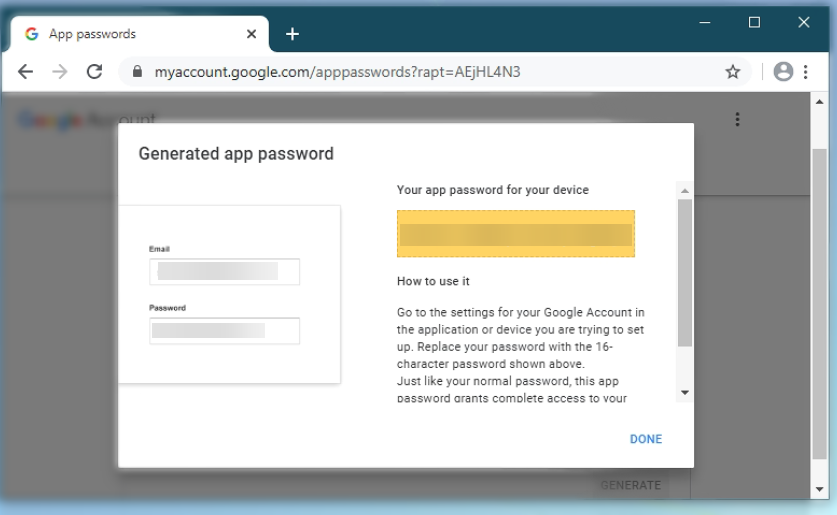
- Click Generate. Use the generated password, which is being displayed both in the IMAP and SMTP sections in your email account settings in Zuper.
