

Before you start
Before you start
Make sure you meet the following requirements before running the test:
- Internet connection: Make sure you’re connected to the internet.
- Call status: Finish any ongoing calls and wait until no incoming calls are ringing.
- Microphone: Connect the microphone or headset you normally use for calls. Allow microphone access if your browser requests permission.
Run the call quality test
- In the top bar of Zuper, click the phone icon to open the Zuper Connect dialer.
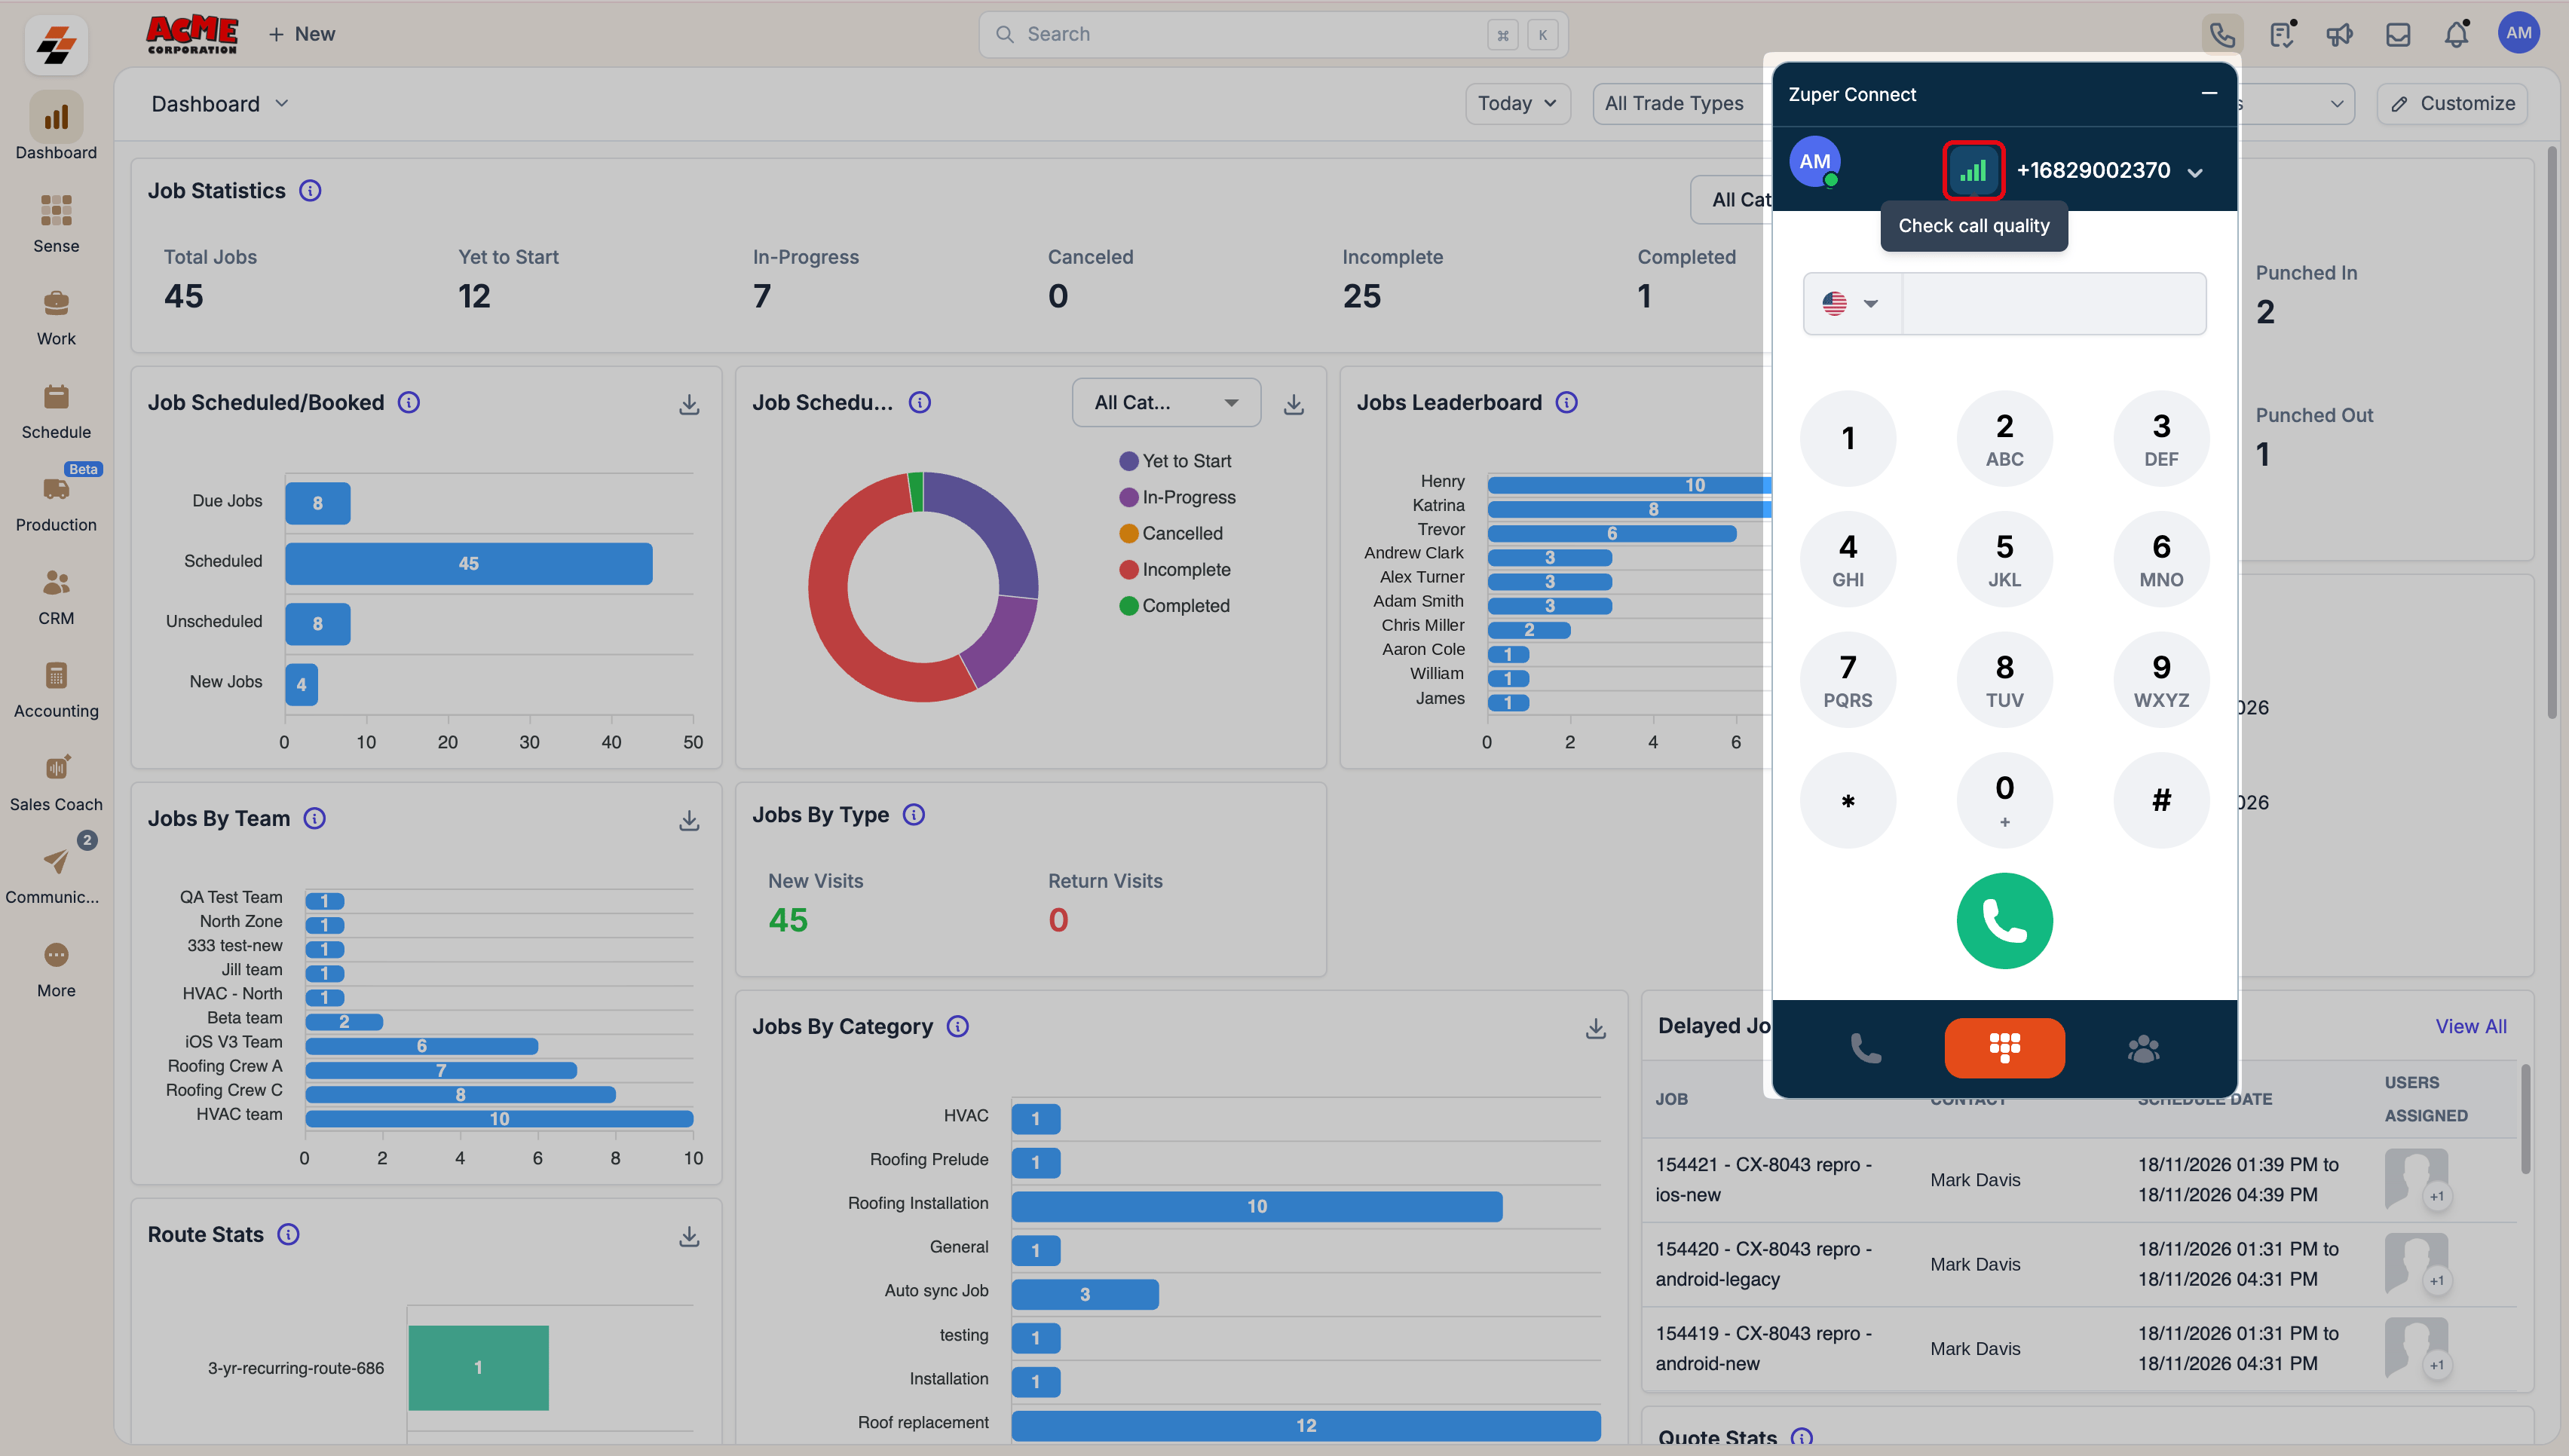
- Click the signal bars icon next to the phone number to open the call quality panel.
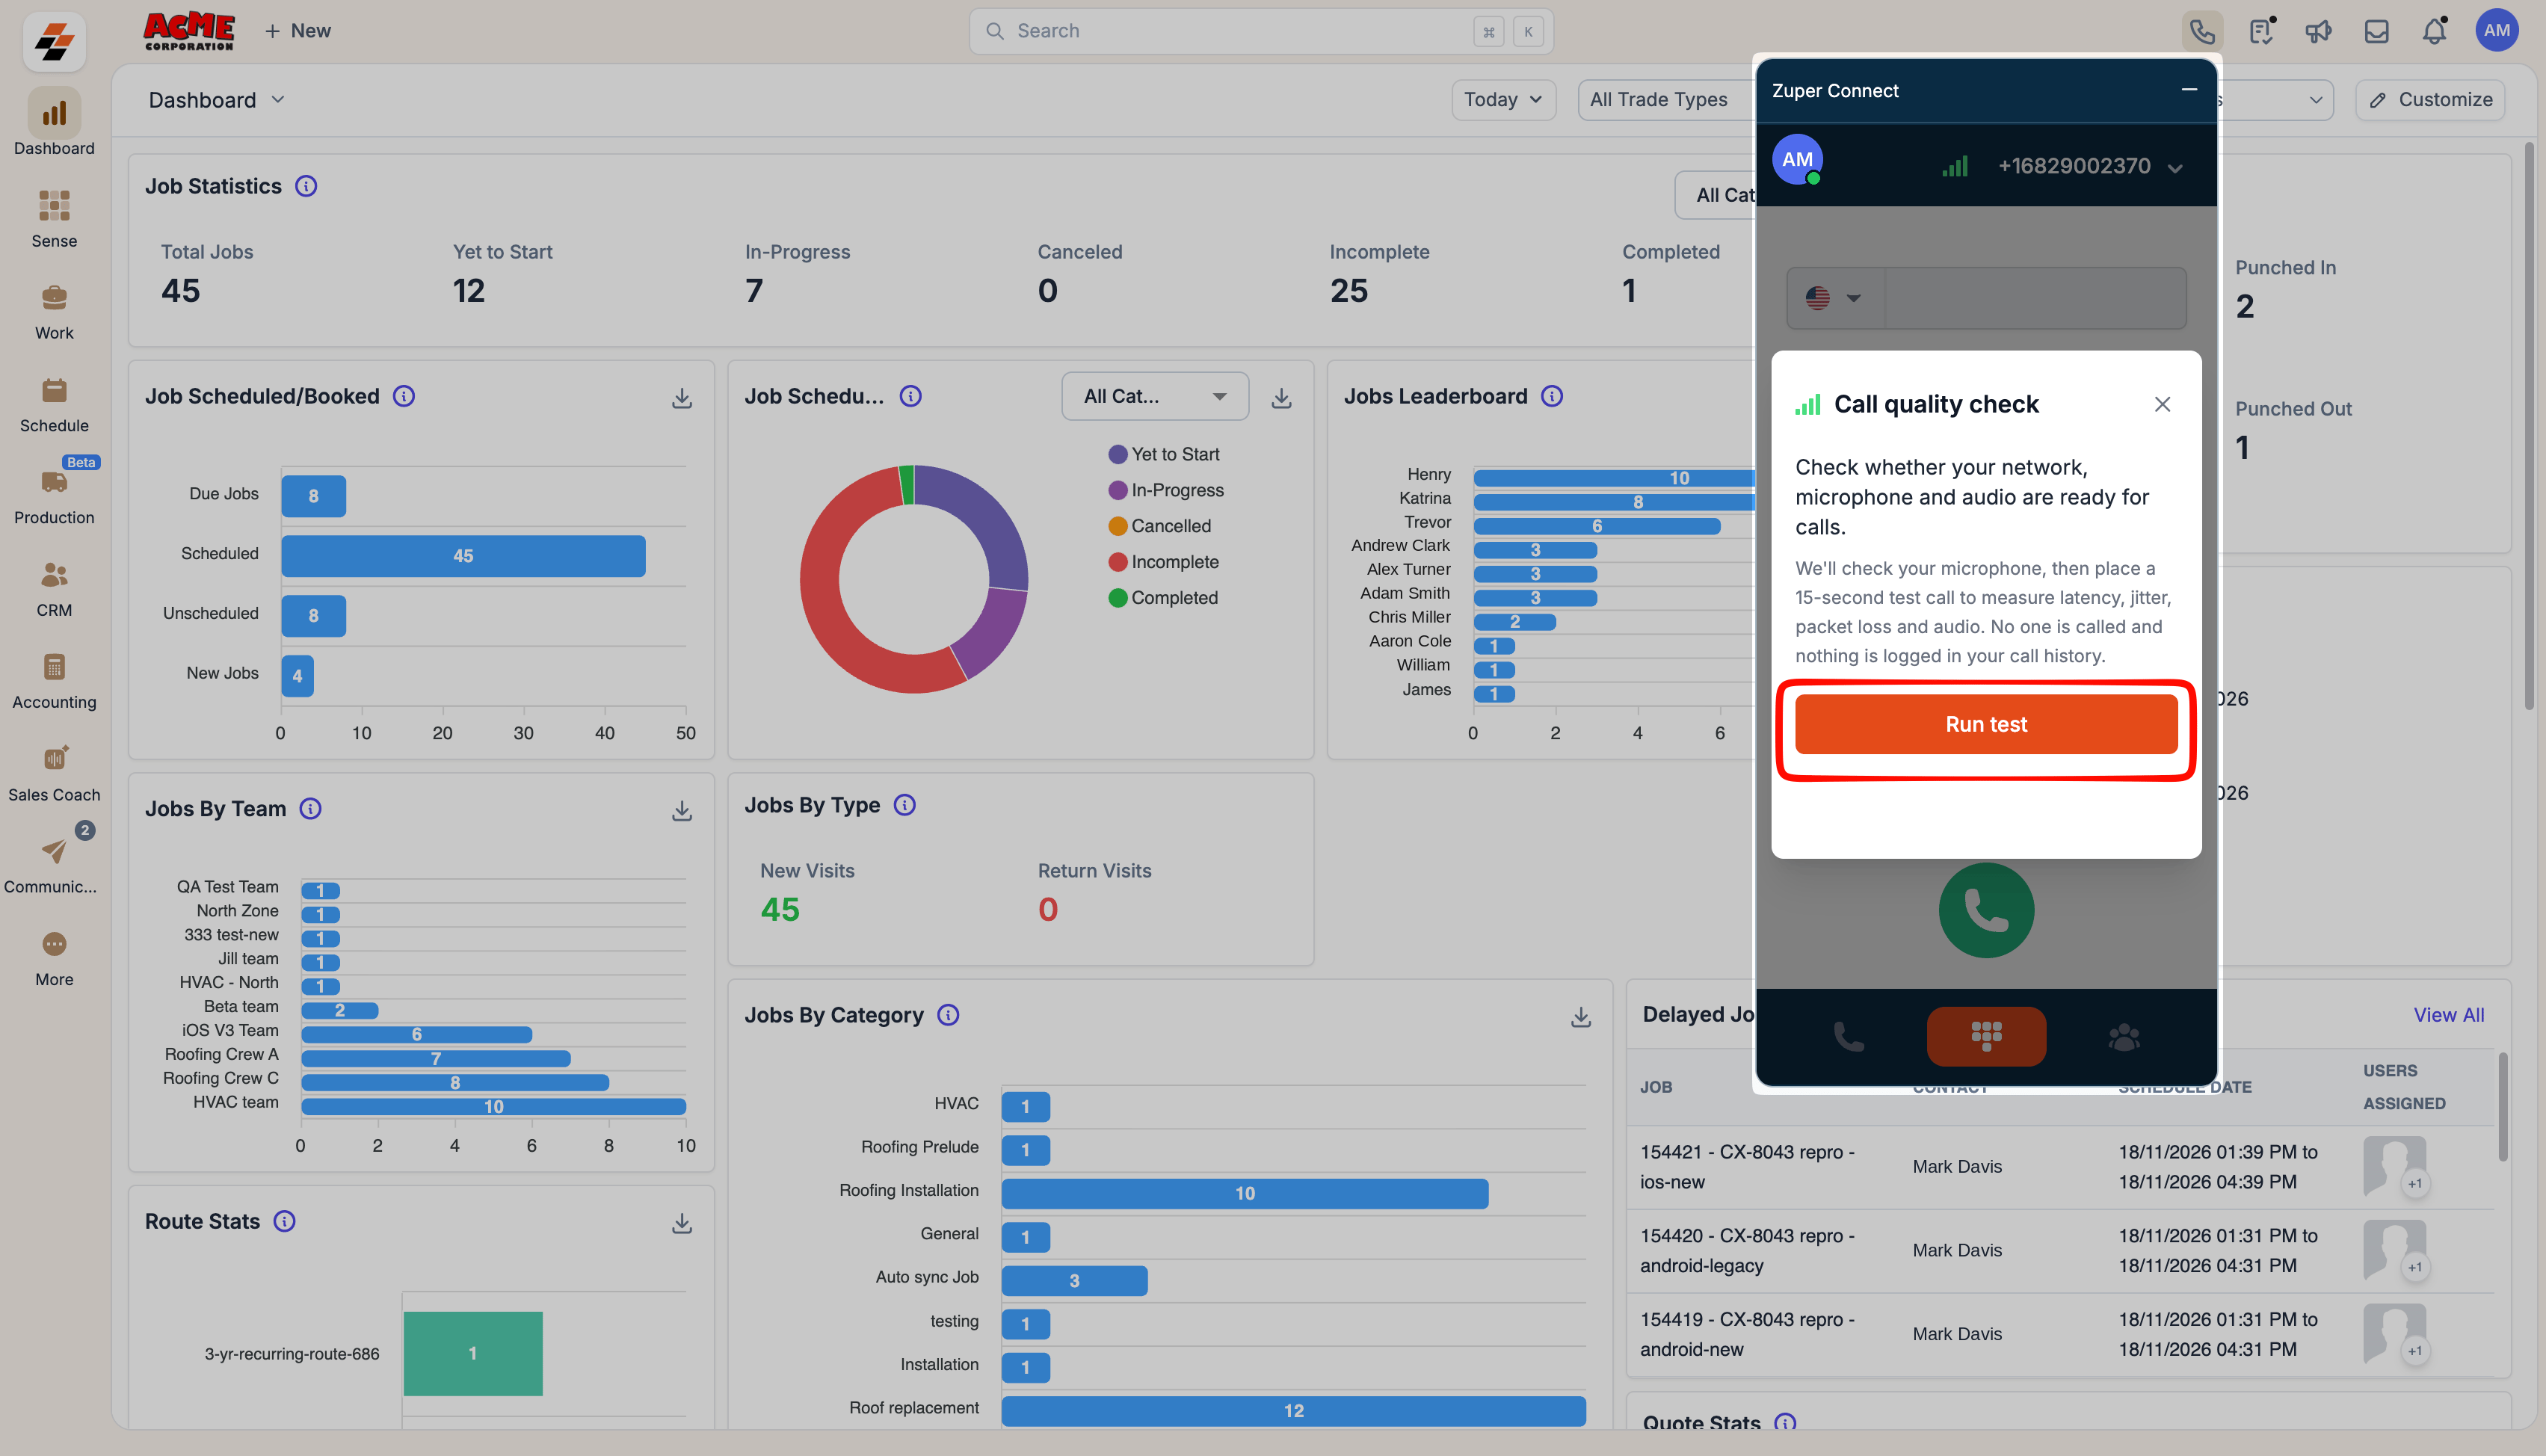
- Click Run test to start the call quality check.
- When Checking your microphone… appears, speak in your normal voice for 3 seconds. For example, say, “Testing, one, two, three.” A meter displays your microphone input level.
- Wait for the test call to connect. The status changes to Connecting test call….
-
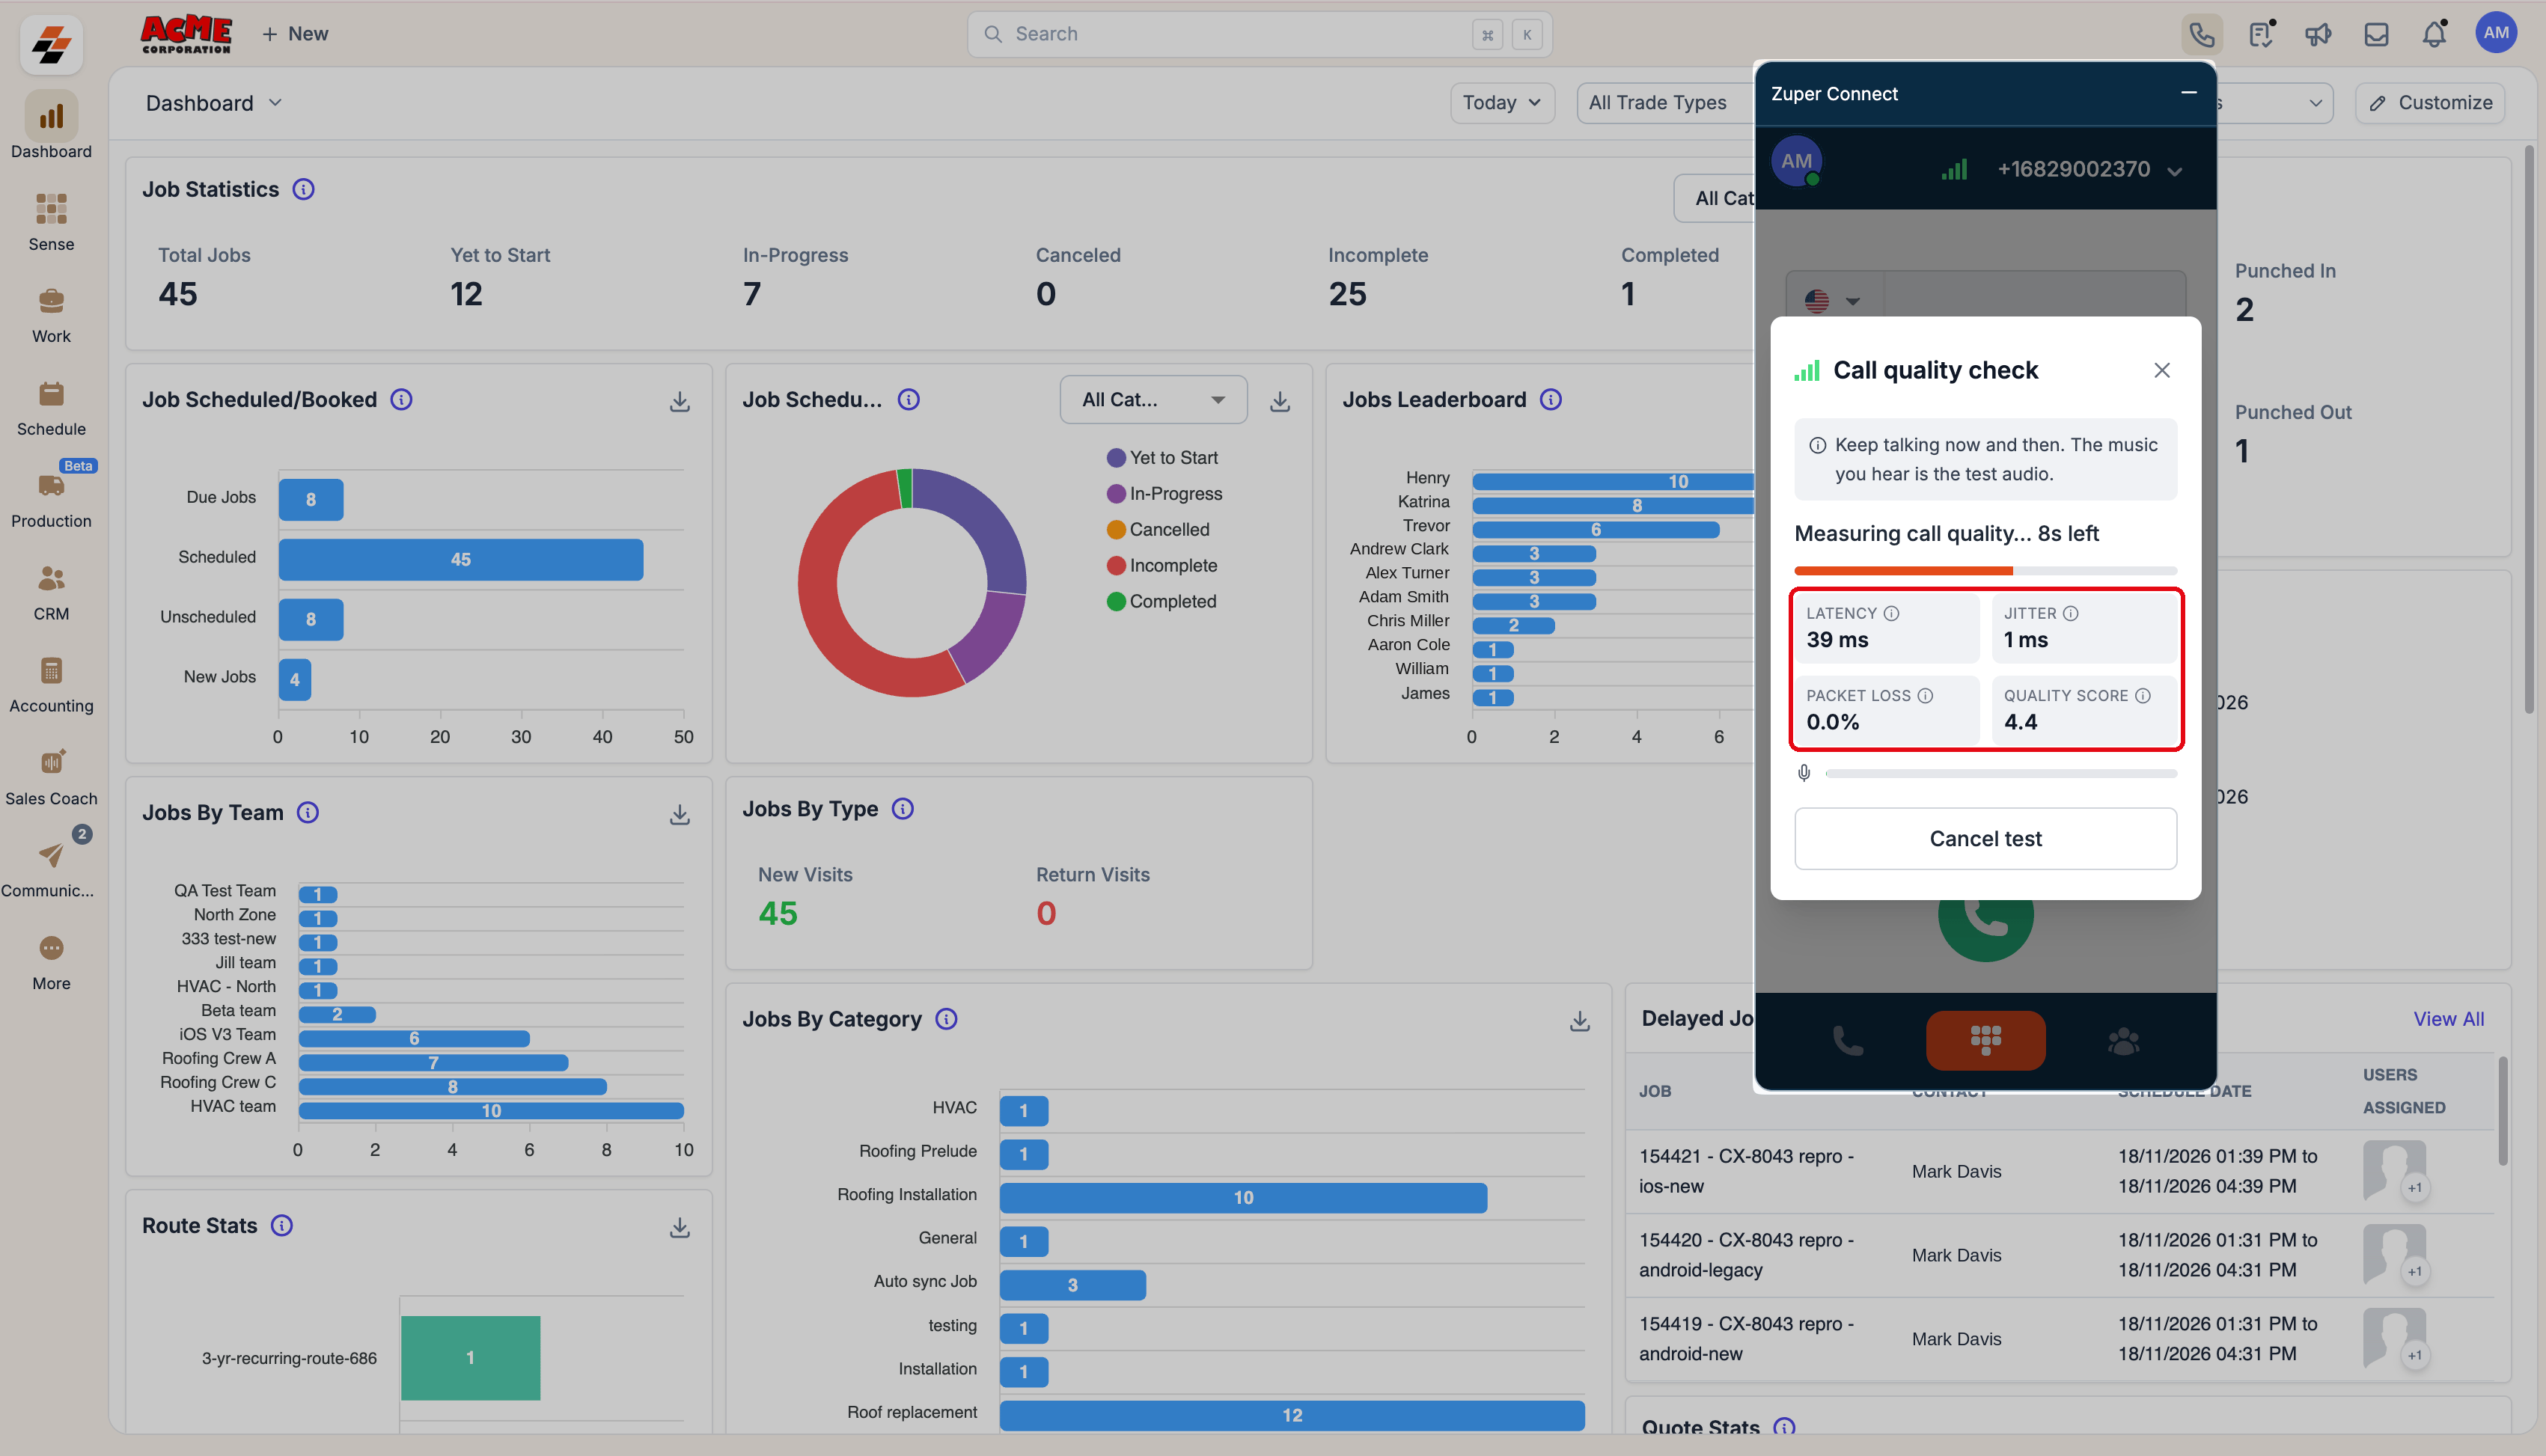
Once connected, the test measures your call quality for 15 seconds. During this time:
- You hear music from the test line.
- A countdown shows the remaining test time.
- Occasionally, speak to check your microphone.
- When the test finishes, your results appear automatically.
Stop a test
To stop the test before it finishes, click Cancel test. You can also close the panel or pressEsc.
The test stops automatically if you receive an incoming call, allowing you to answer it. Cancelled or interrupted tests aren’t saved.
Understand your test results
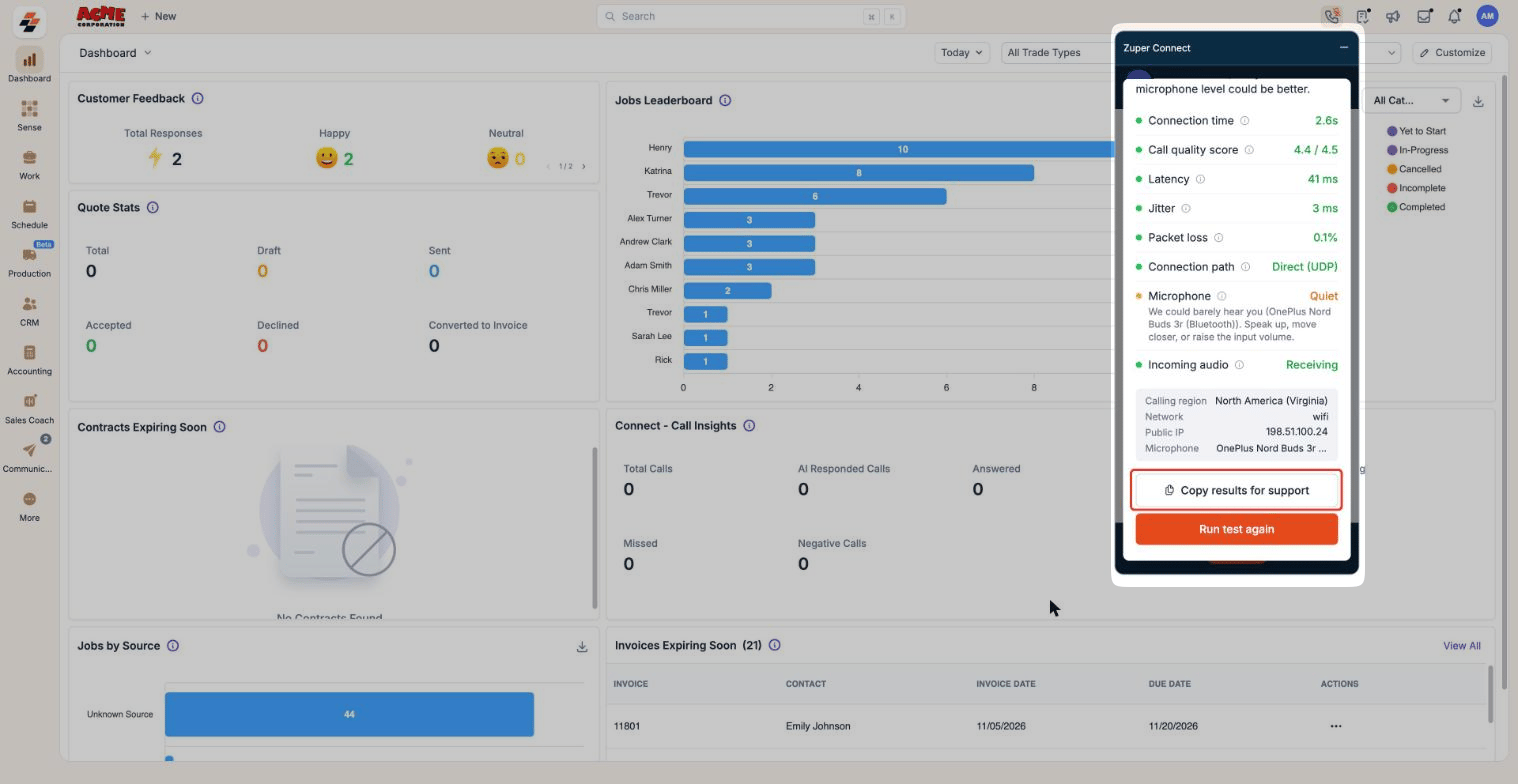
After the test finishes, you’ll see an overall rating, a summary of your connection quality, and when the test was performed.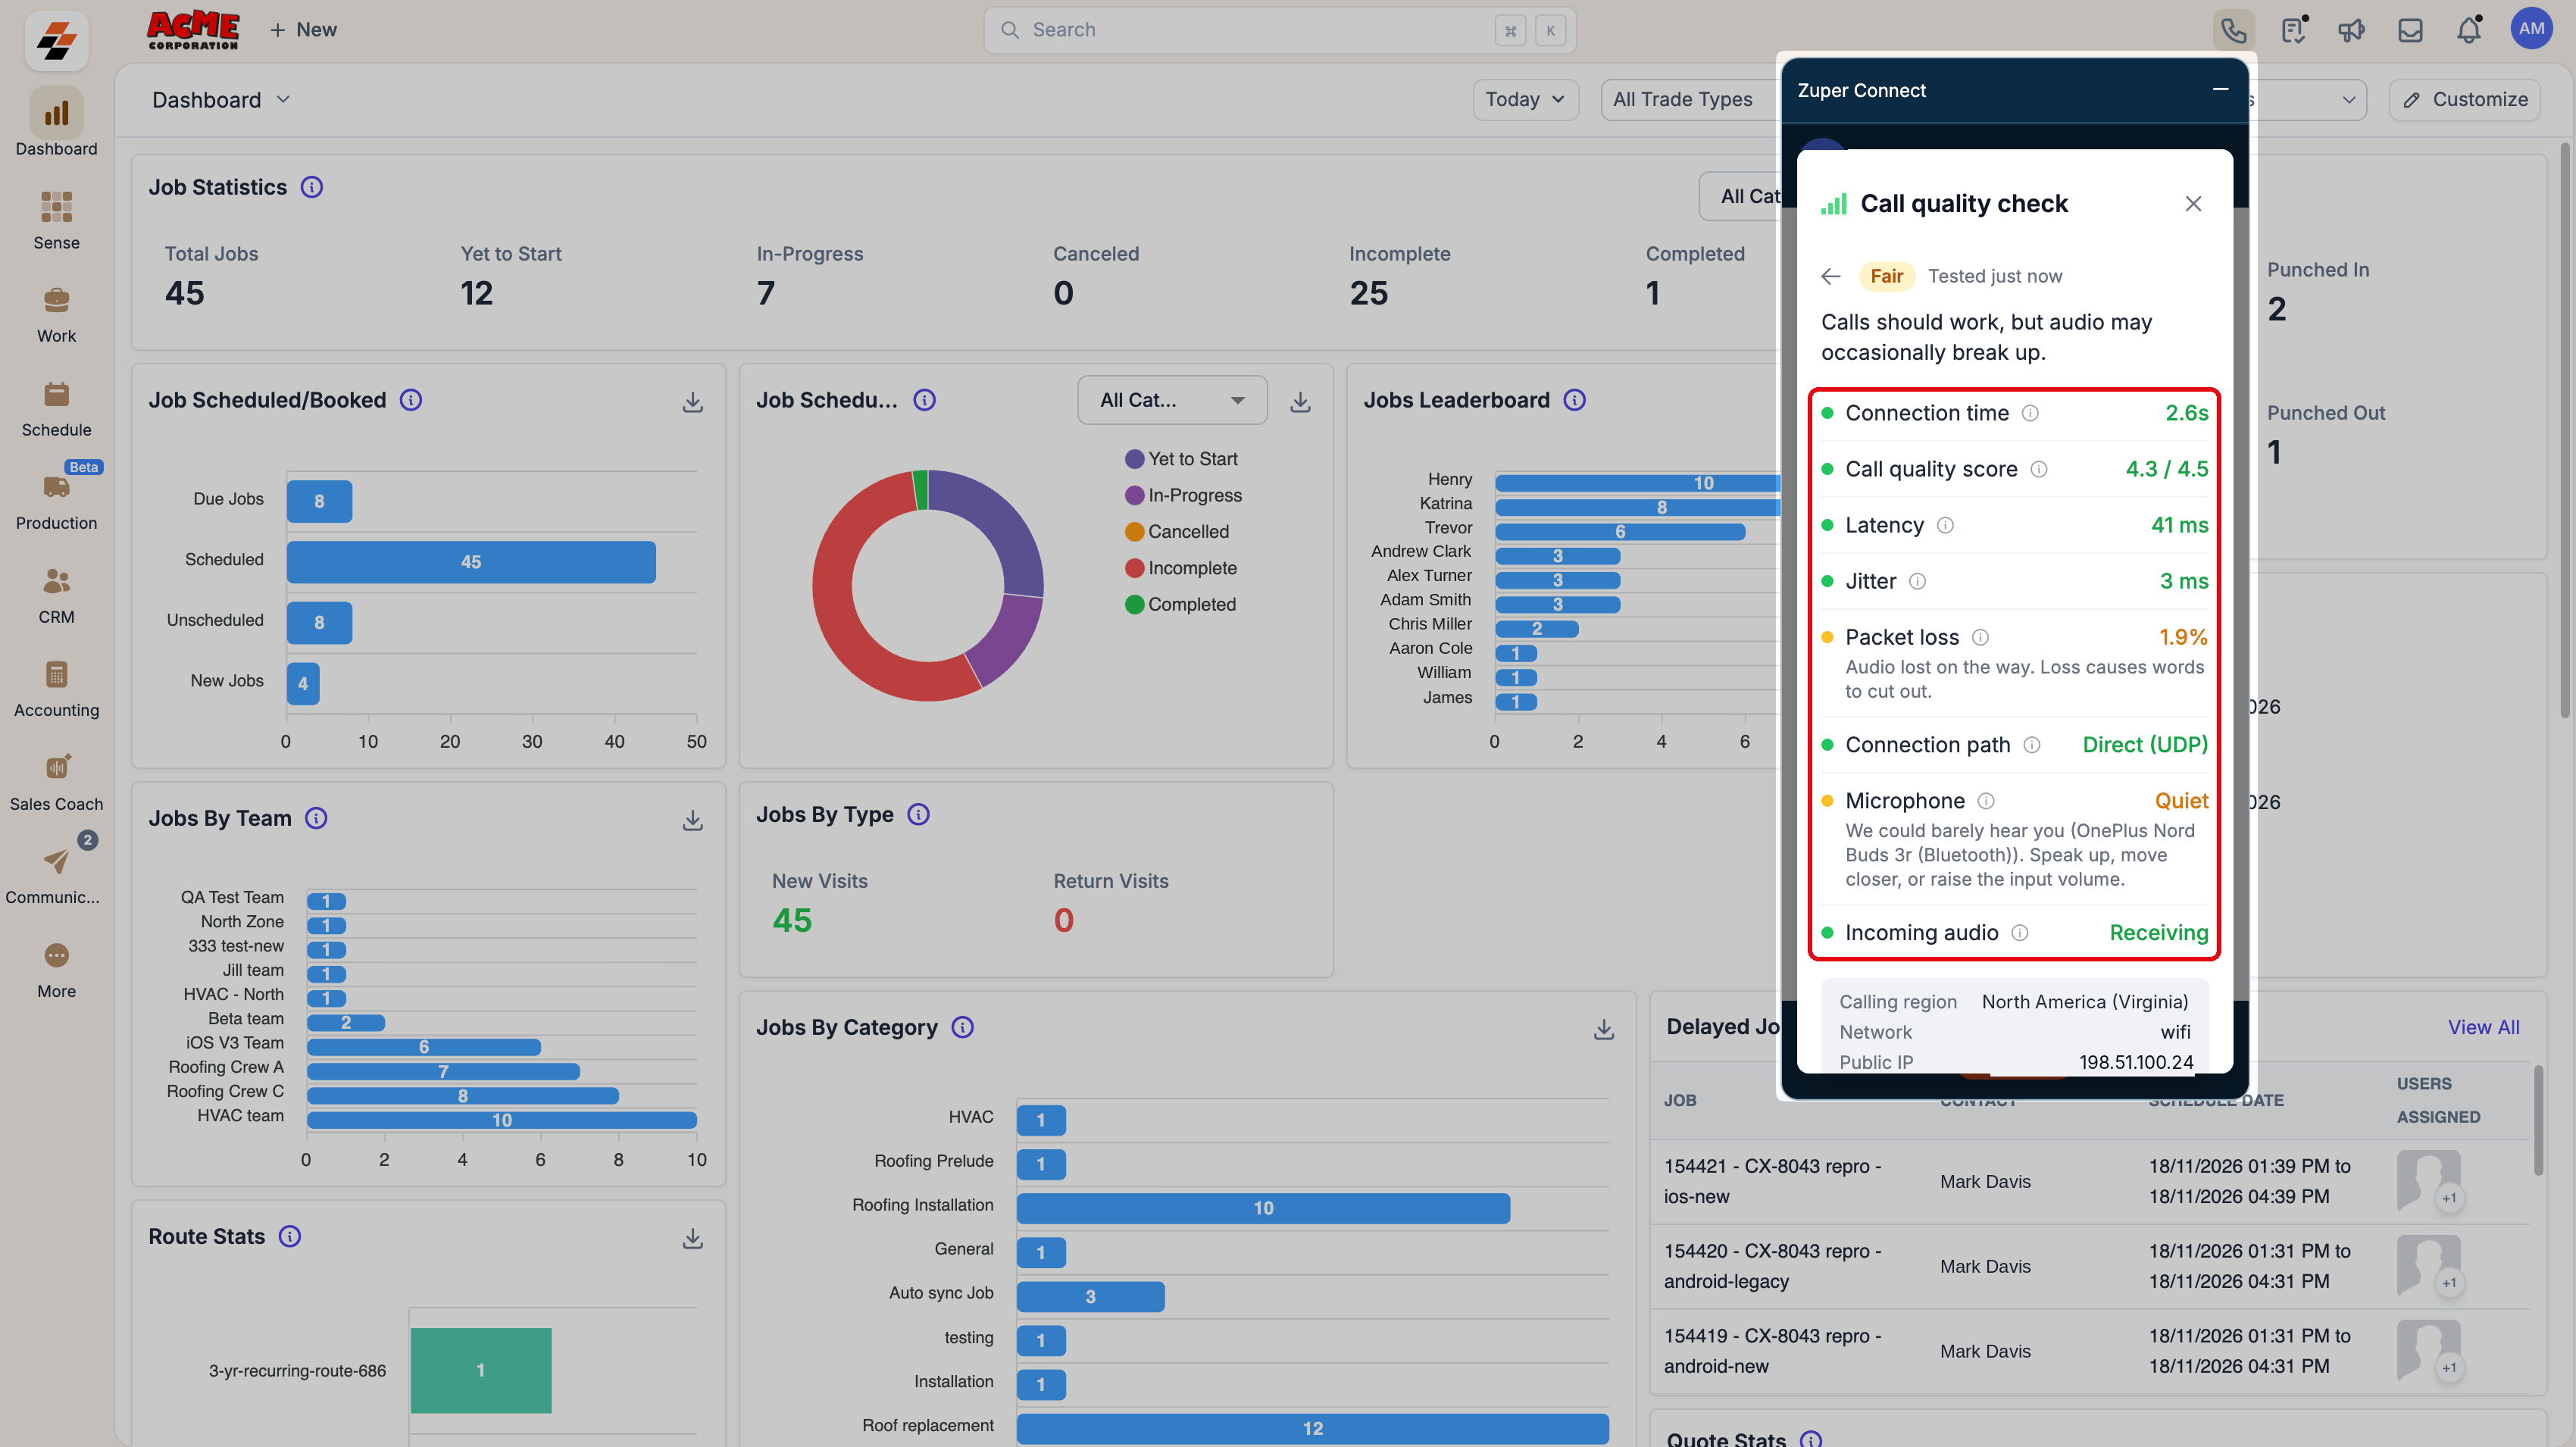
Your overall rating is based on the lowest rating among the individual checks. For example, if all checks are rated Excellent except one Poor check, your overall rating is Poor.
If a check is rated Fair or Poor, you’ll see a recommendation below it. To learn more about a check, hover over or select the information icon next to its name.
Expand a check to see what it measures and the values used to determine its rating.
Connection time
Connection time
Time taken for the test call to connect.
Call quality score
Call quality score
Estimated call audio quality, measured on a scale of 1 (lowest) to 4.5 (highest).
Latency
Latency
Time taken for audio to travel to its destination and return. High latency can cause people to talk over each other.
Jitter
Jitter
Variation in the time it takes audio packets to arrive. High jitter can make audio sound choppy or robotic.
Packet loss
Packet loss
Percentage of audio packets lost during transmission. Packet loss can cause words to cut out.
Connection path
Connection path
Network route used to transmit your call audio.
Microphone
Microphone
Whether your microphone is detected and captures audio at an appropriate level.
Incoming audio
Incoming audio
Whether audio from the test call reaches your browser.
- Latency, jitter, and call quality score are calculated as averages over the 15-second test call.
- The Connection path check isn’t displayed if the connection path can’t be measured.
- If the test call can’t be completed, the overall rating is Poor. Instead of the full results, you’ll see a single issue, such as Call connection: Failed or a Microphone problem.
- Depending on the test results, additional information may appear, including Calling region, Network, Public IP, and Microphone (the name of your microphone).
Troubleshoot call quality issues
If your test results show a Fair or Poor rating, expand the relevant section below to identify the issue and follow the recommended steps.Fix microphone issues
Fix microphone issues
Fix network and connection issues
Fix network and connection issues
View your last test result
Your most recent call quality test result is saved in the browser where you ran the test. You can view it again without running a new test. To view your last result:- Open the Zuper Connect dialer.
- Click the signal bars icon.
- Select Last run test. The button displays when the test was last performed, such as Tested 5 min ago.
Note: Your result is saved only in the browser where you ran the test, and clearing your browser’s site data removes the saved result.
Share your test results with Zuper Support
If you still have call problems, send your result to Zuper Support:- Open your result.
- Click Copy results for support. The button changes to Copied — paste it into your support request.
- Paste the text into your support request or email.
Frequently asked questions
Does the test call anyone?
Does the test call anyone?
No. The test connects to a private test line that plays music. It doesn’t dial another person’s phone number or appear in your call history.
Will I hear my own voice during the test?
Will I hear my own voice during the test?
No. The test line plays music but doesn’t play your voice back. Your microphone is checked by measuring its input level.
Why don't I see the signal bars icon?
Why don't I see the signal bars icon?
The call quality check is available only in the Zuper web app when your company’s Zuper Connect calling provider is Twilio. Contact your Zuper admin if you aren’t sure which provider your account uses.
Why can't I run the call quality test?
Why can't I run the call quality test?
You may be offline, or a call may be ringing or in progress. Reconnect to the internet or finish the ongoing call before running the test.
What does the red dot on the signal bars icon mean?
What does the red dot on the signal bars icon mean?
A red dot on the dialer’s signal bars icon indicates that you’re offline. You can’t make or receive calls until your internet connection is restored. When you’re online, the icon turns green.This is different from the colored status indicators displayed next to individual checks in your test results.
Can I run the call quality test in the Zuper Field Service app?
Can I run the call quality test in the Zuper Field Service app?
No. The call quality check is currently available only in the Zuper web app.