Accessing Phone number settings
- Select the “Settings” module from the left navigation menu.
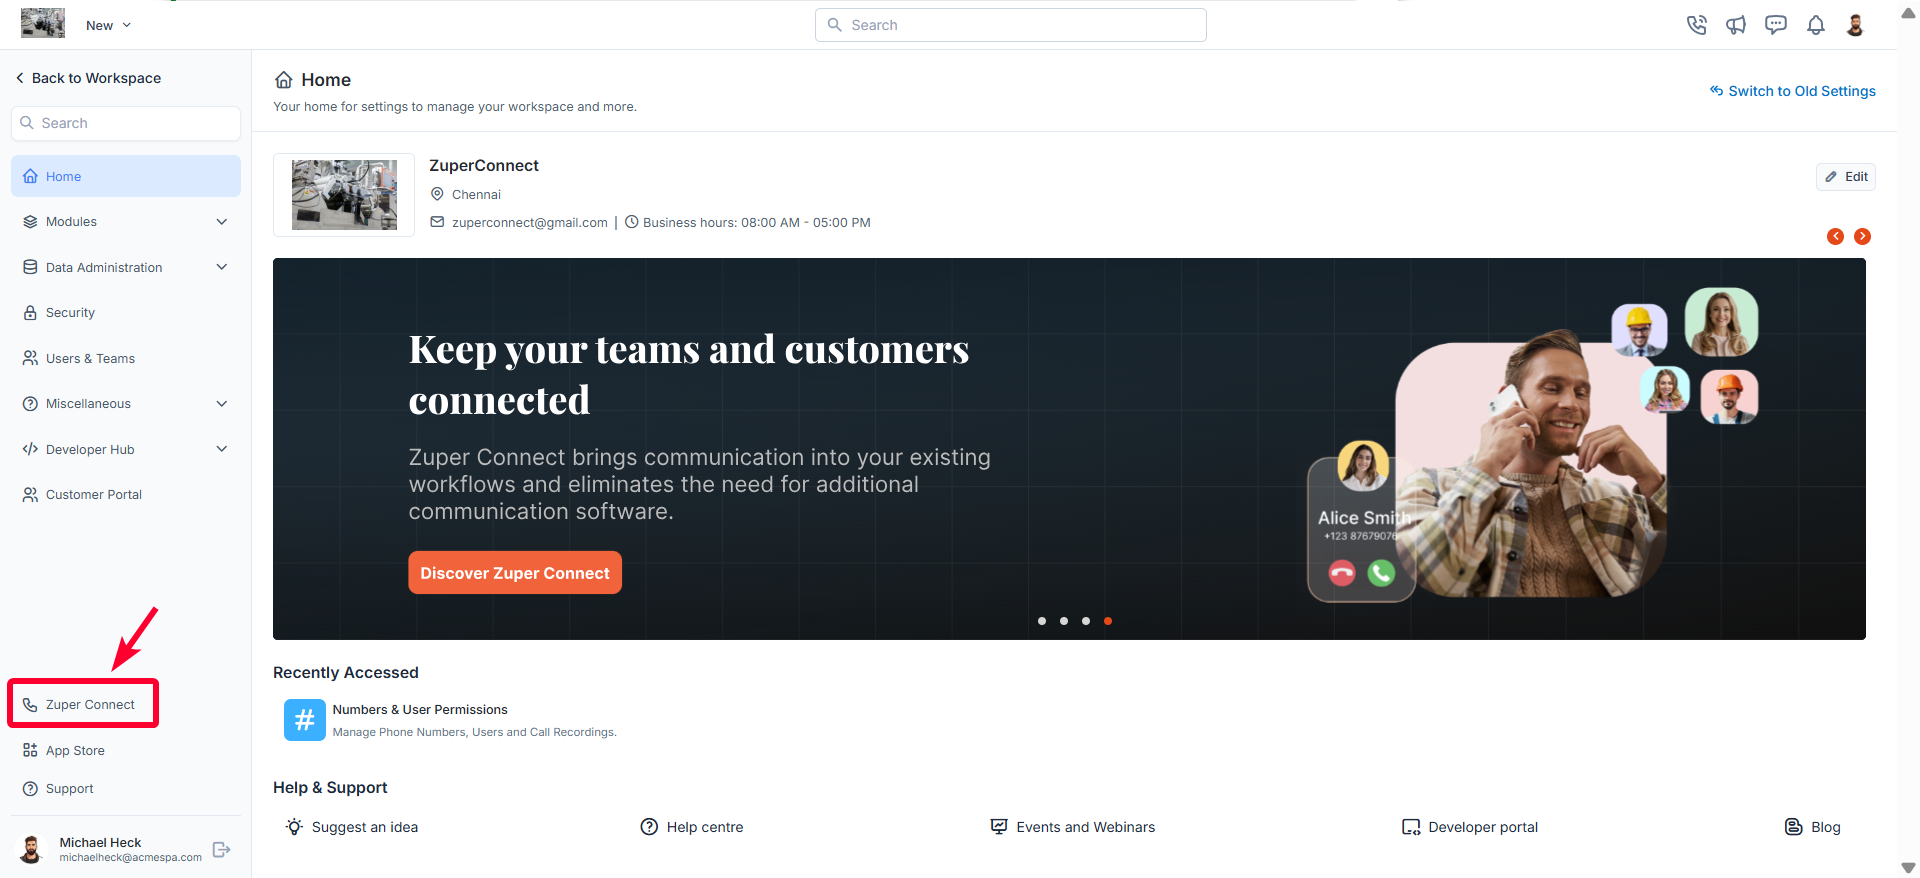
- On the settings page, click “Zuper Connect.” The Zuper Connect settings page will appear.
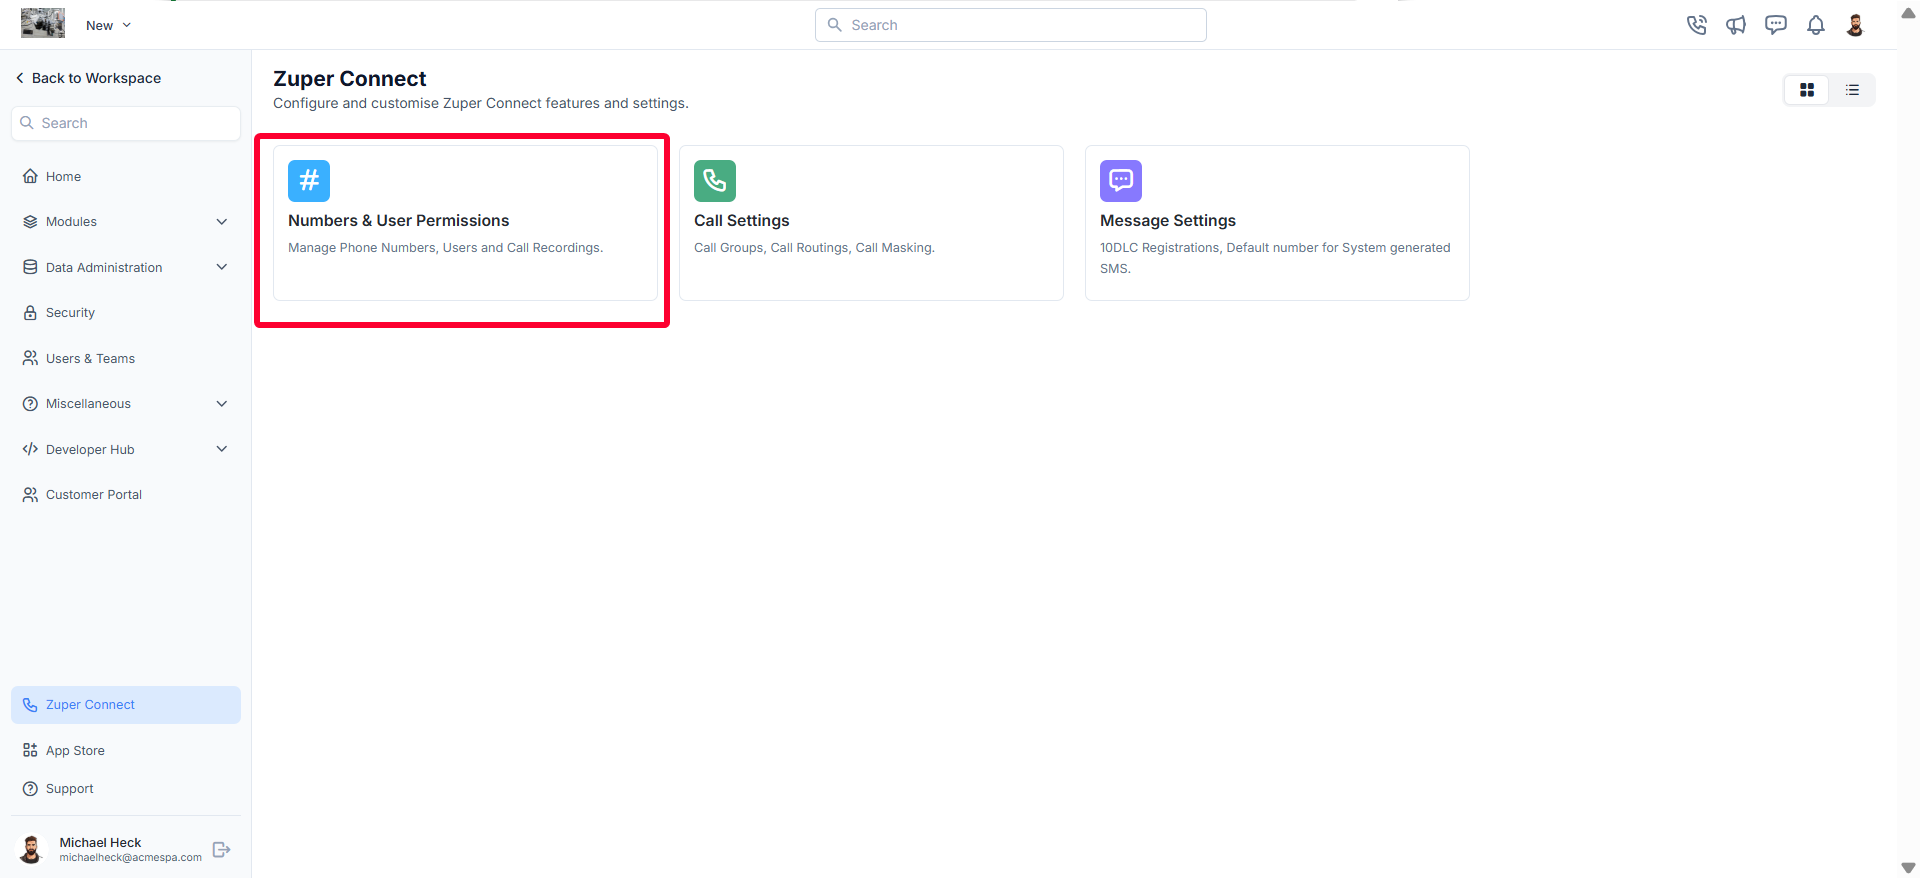
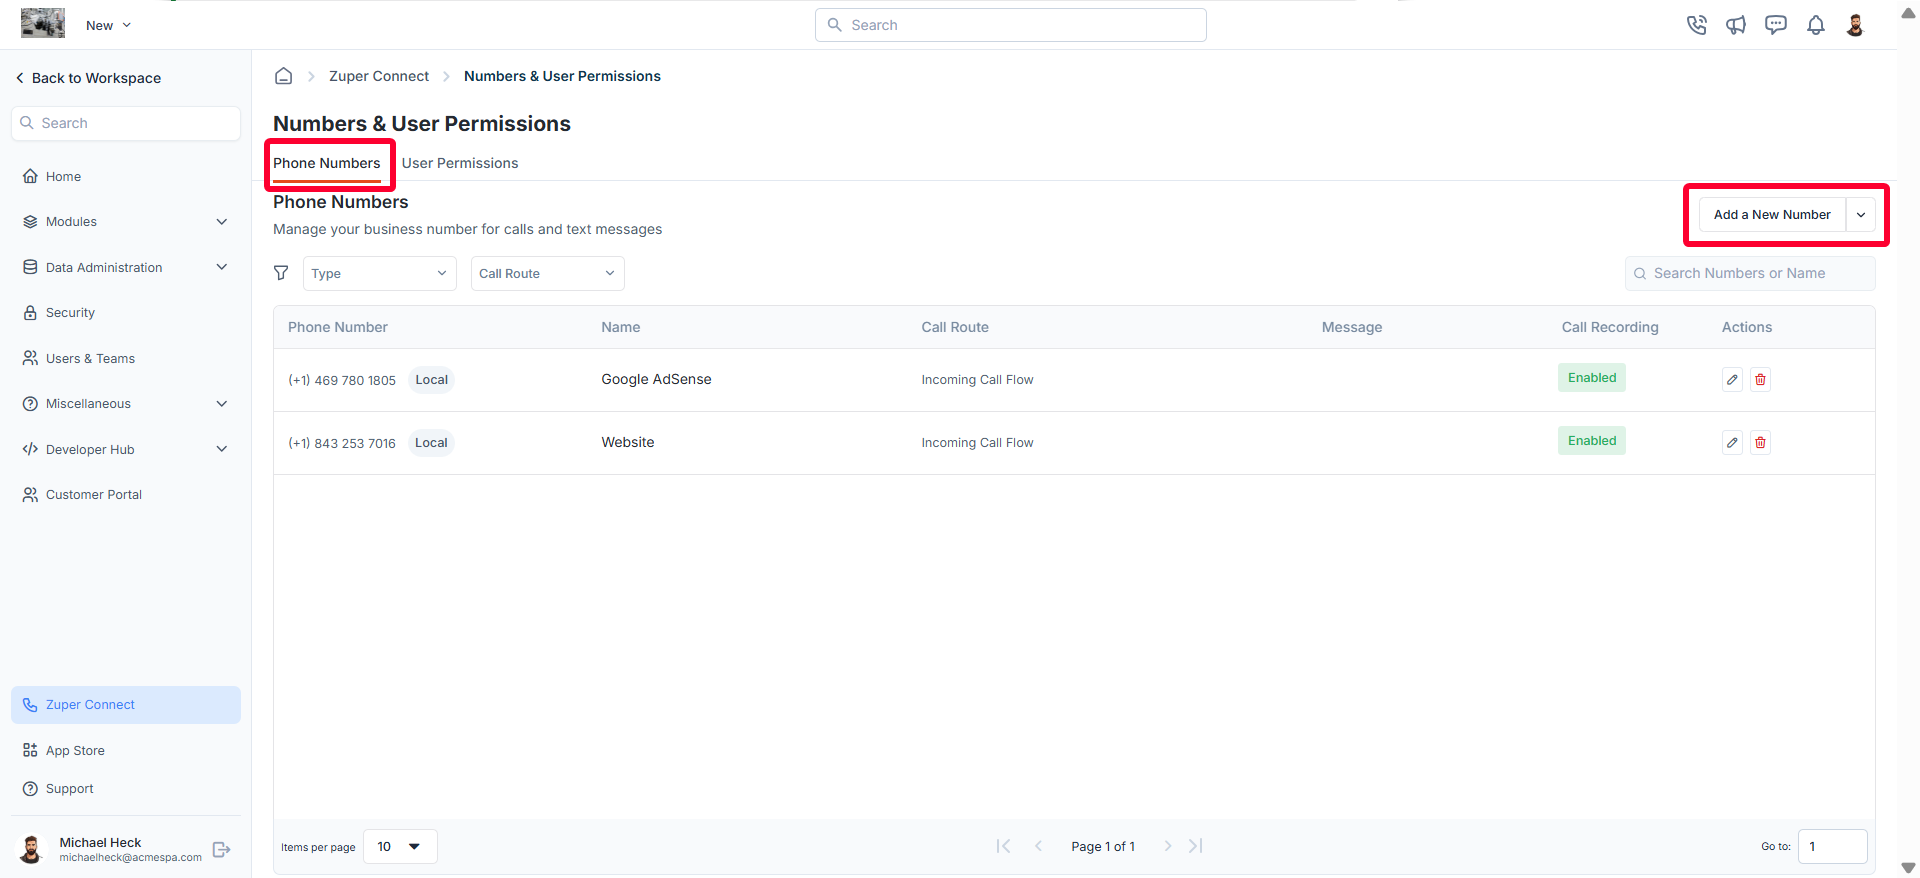
- Select “Numbers & User Permissions.” By default, you will land on the Phone Numbers listing page.
Adding a new Zuper phone number
To add a new Zuper phone number,- Click the “Add a New Number” button at the top right corner of the page. A dialog box will appear.
- Choose your number type. Based on your selection, a number will be generated below.
- Local Number: A region-specific number that helps establish a local presence and build customer trust.
- Toll-Free Number: A cost-free number for customers, ideal for businesses with a nationwide reach.
- If you wish to change the number, click “Change.” A new dialog box will open, allowing you to choose a preferred number by city, area code, or specific digits. Click “Get Number” to confirm.
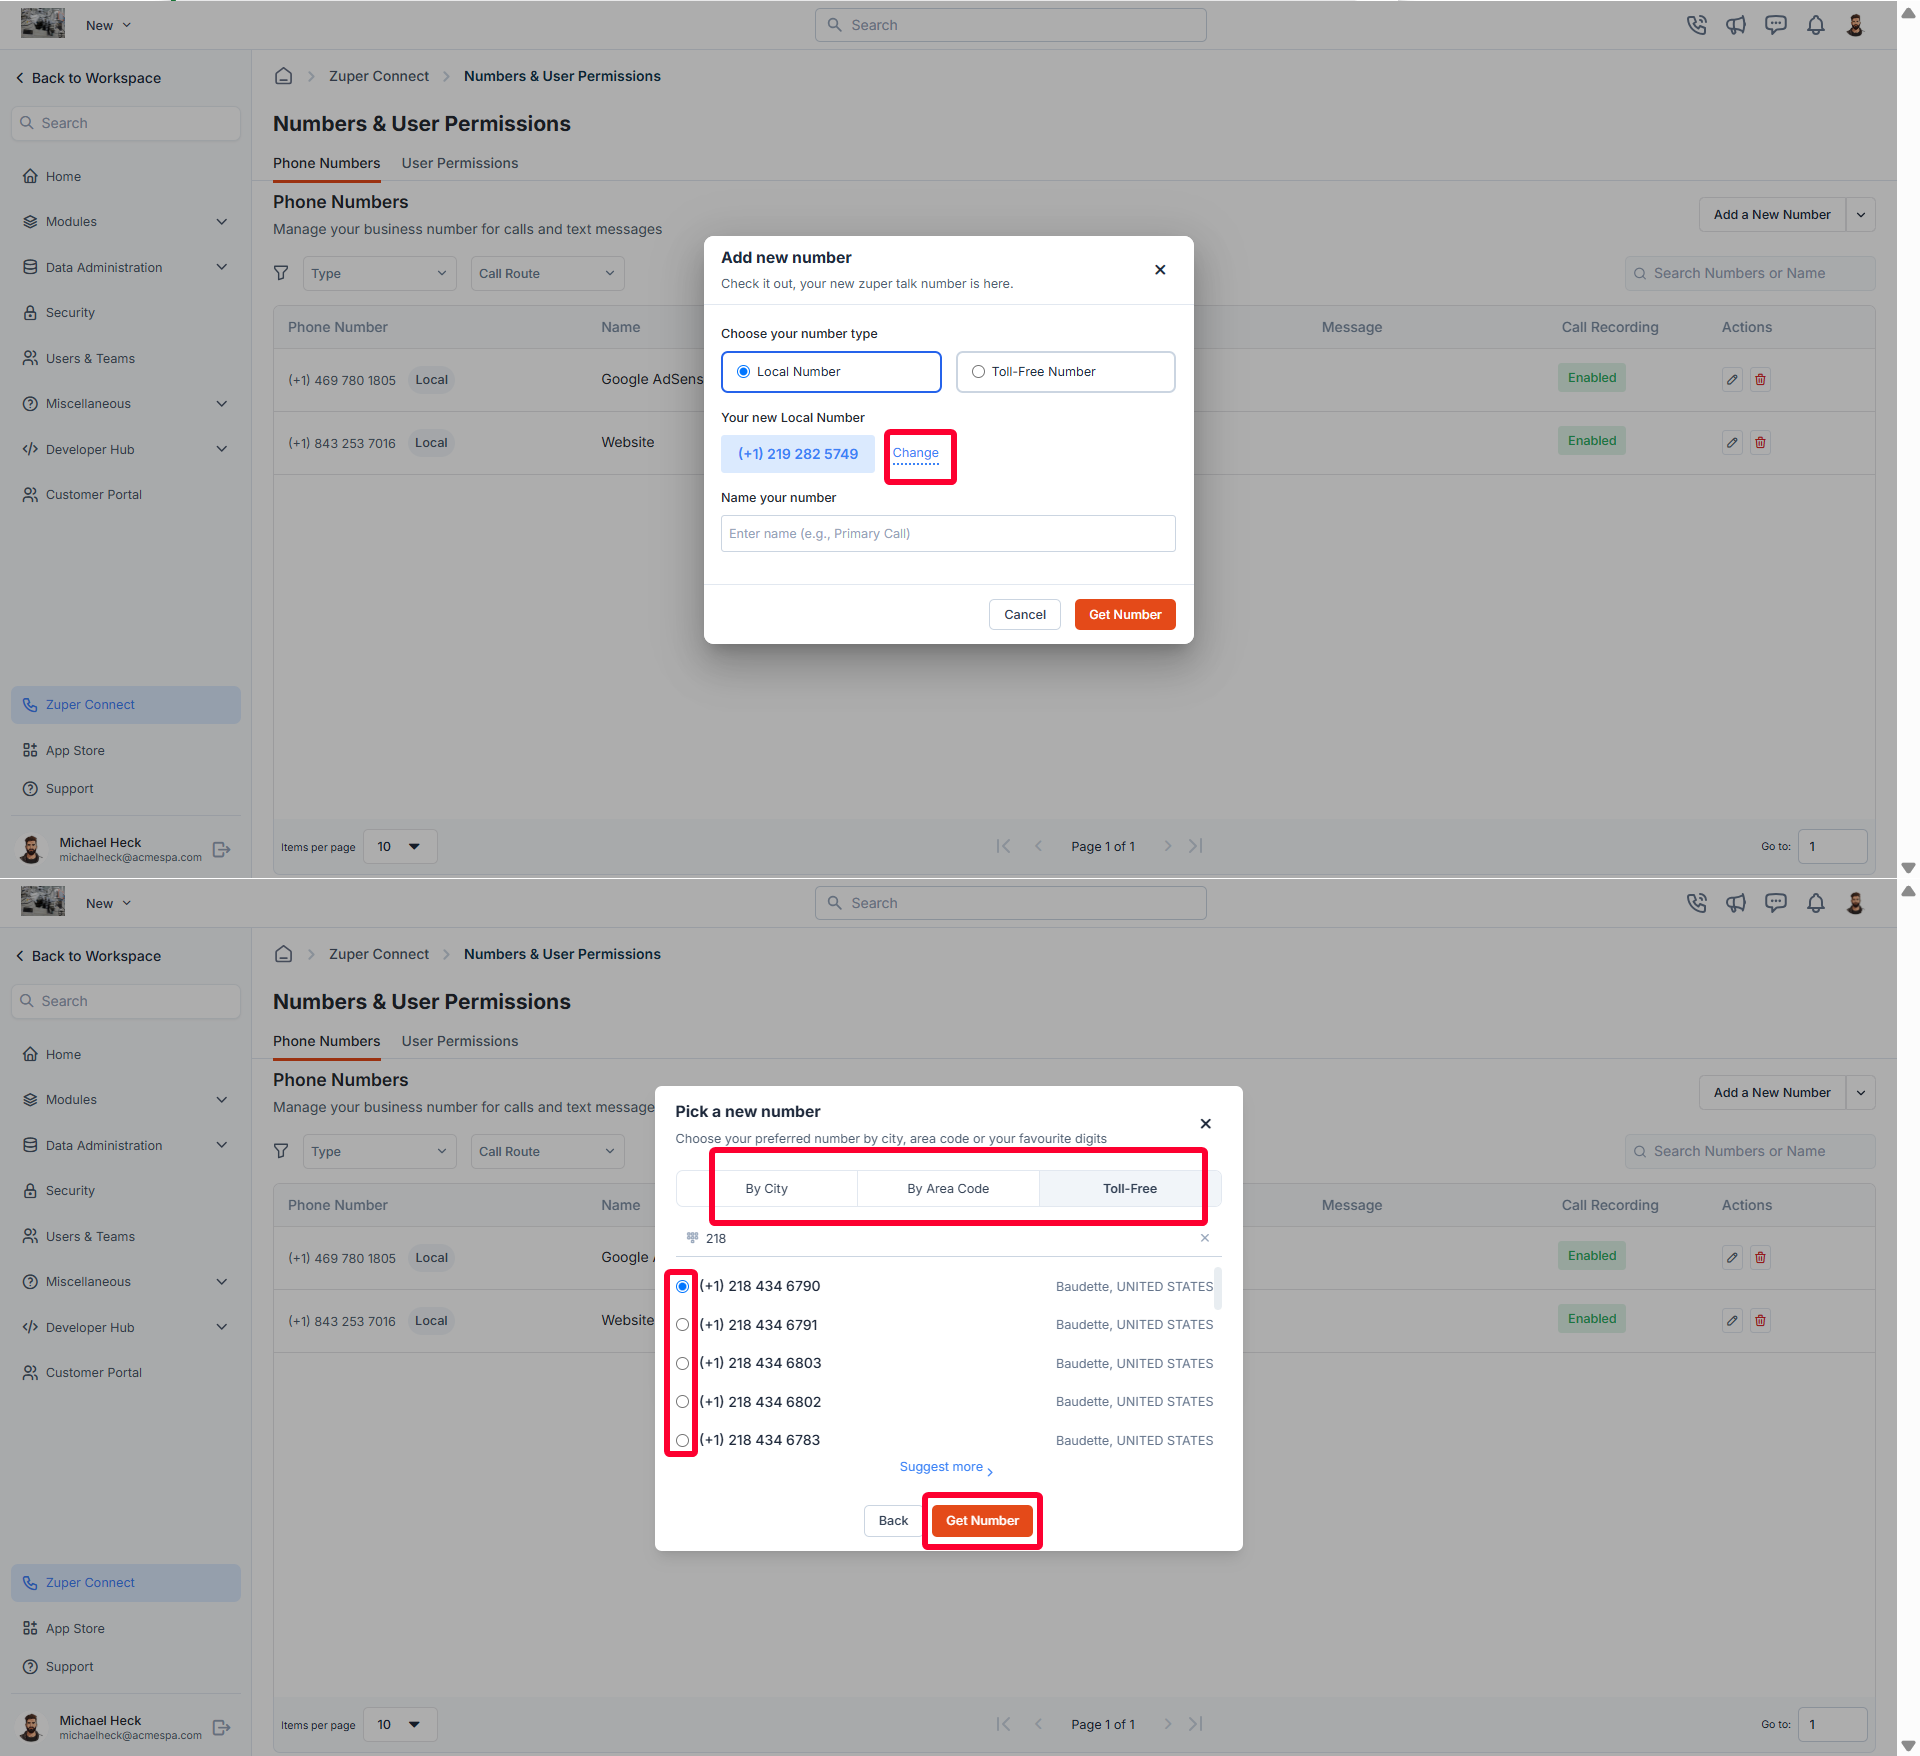
Note: If you’d like more options, click Suggest More to display additional numbers.
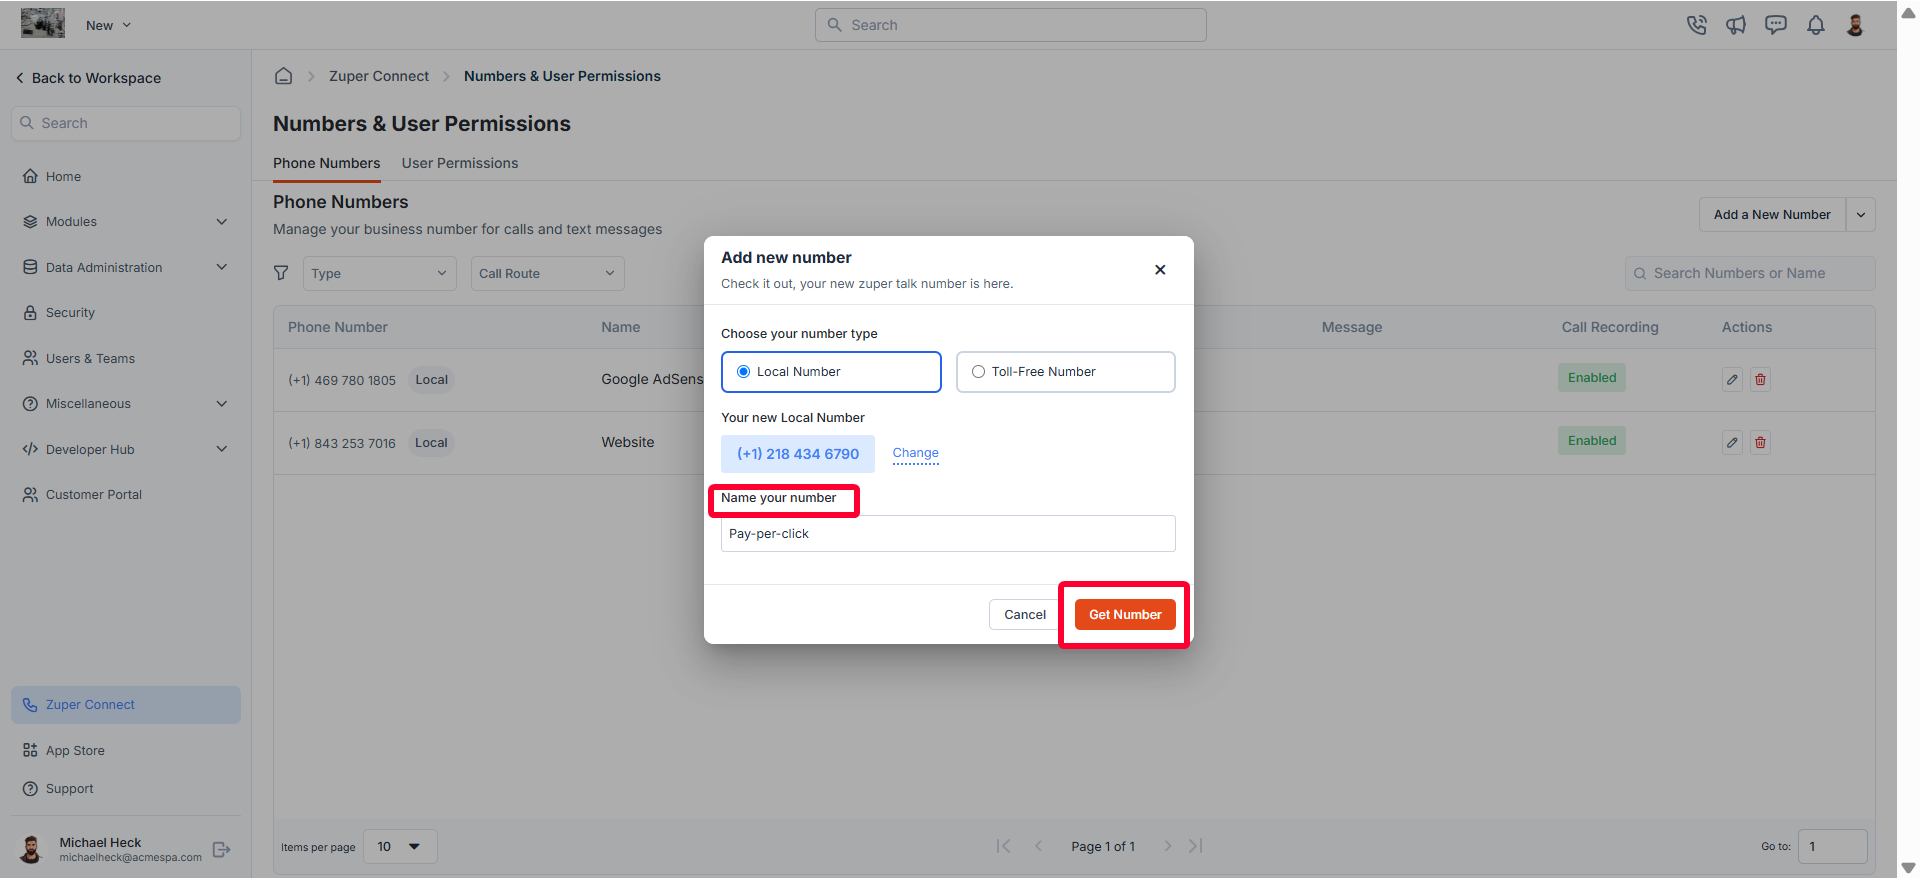
- Enter a name for the number and click the “Get Number” button to finalize your selection. Your new number is now ready.
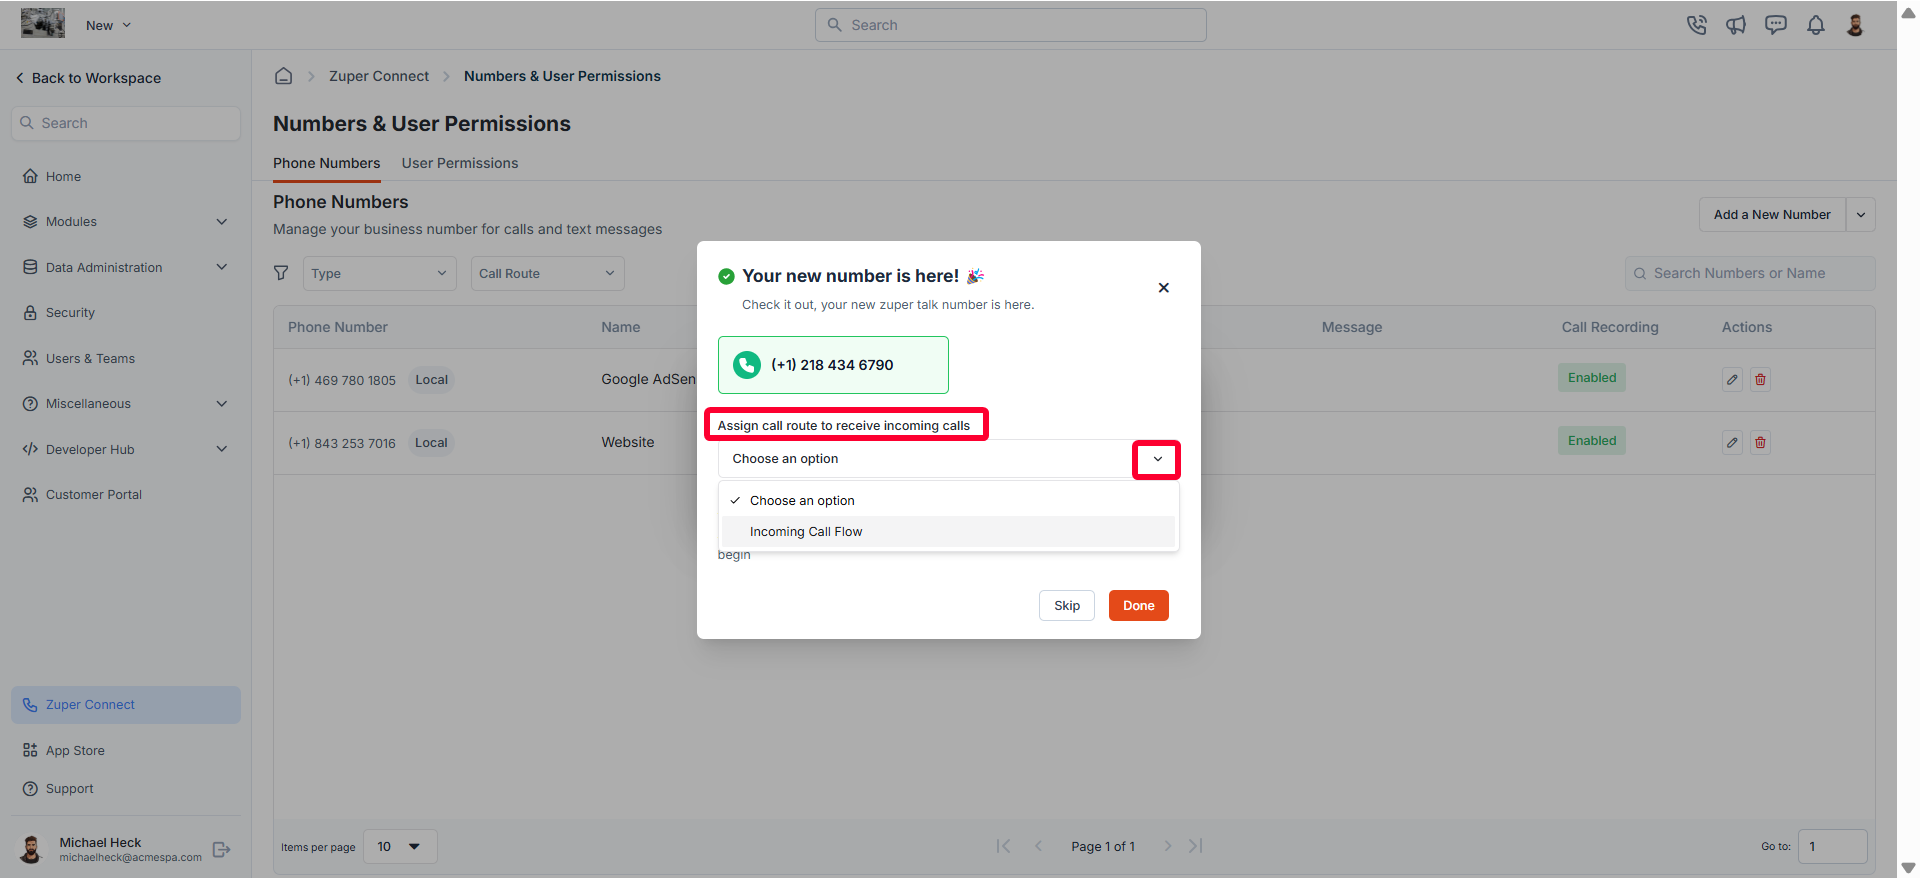
Set up call routing
After getting a new number, you can assign a call route to handle incoming calls. All calls directed to this number will follow the assigned routing flow.- Select a call route from the drop-down menu. (For more details, see How to create a call routing.)
- Enable or disable Auto Call Recording as needed.
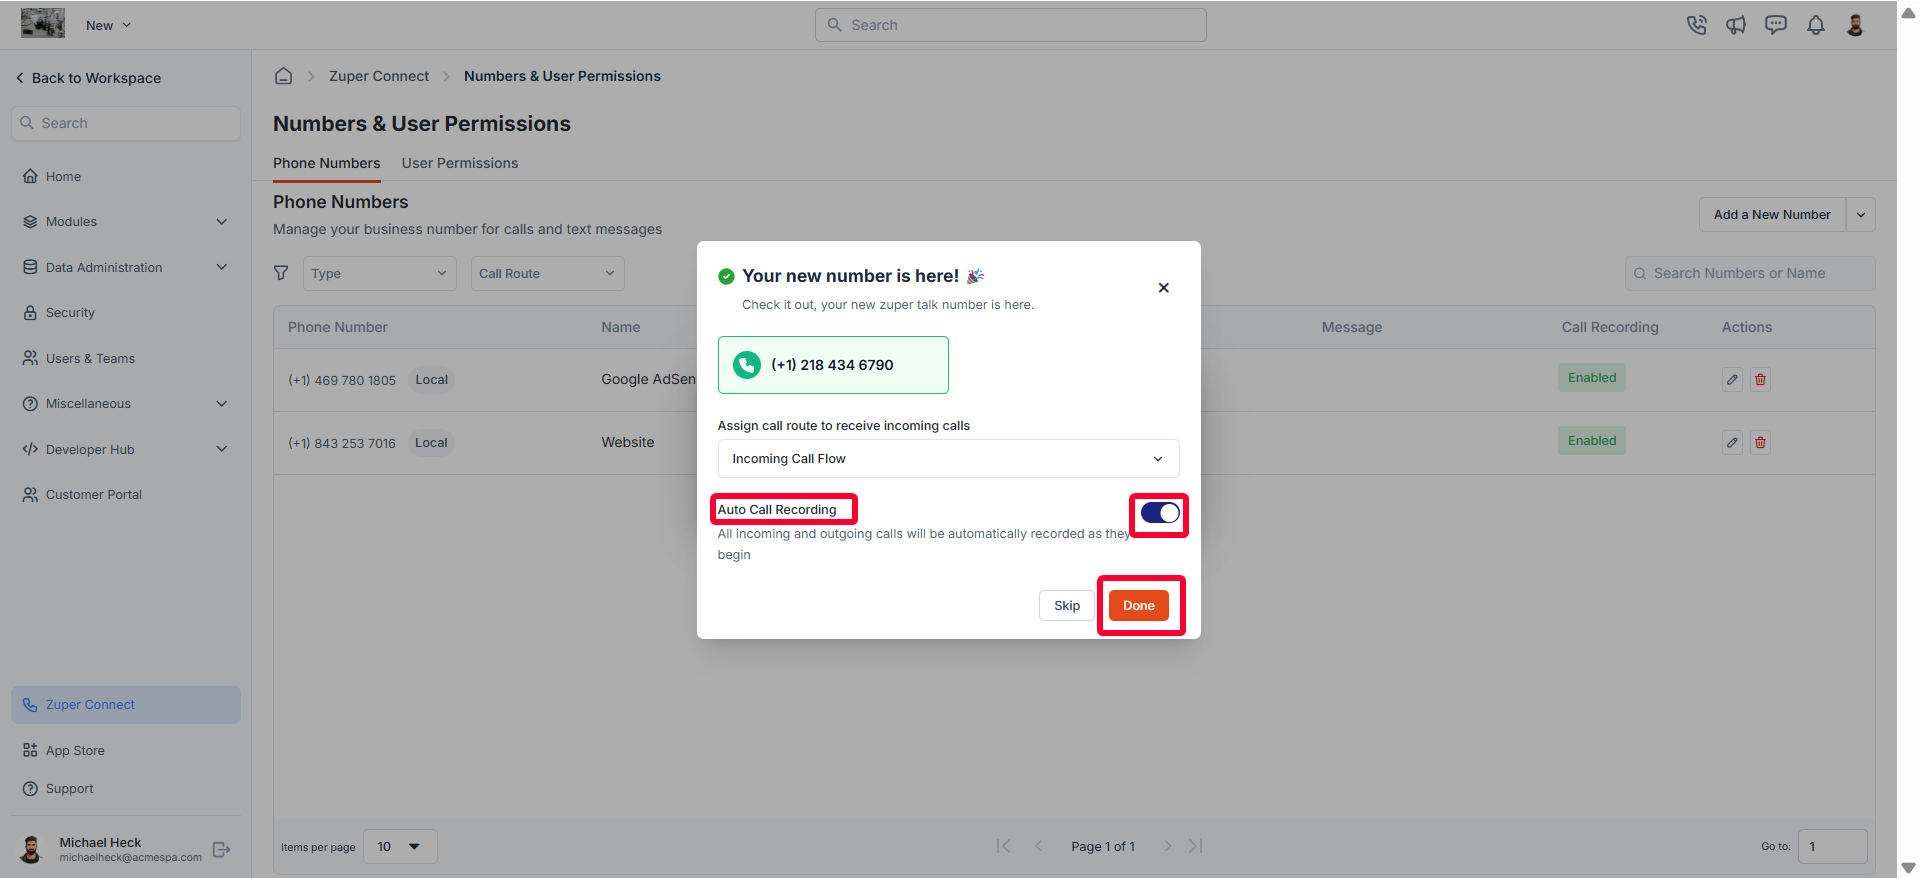
Note: When the call recording feature is enabled in your settings, all calls to this number will be recorded automatically. If recording is paused during an active call, it cannot be resumed for that session. Recorded calls are securely stored and can be accessed based on your purchased license.
Call Recording Announcement (Auto-play)
You can choose to automatically announce when a call is being recorded. This helps ensure transparency with customers. To enable the call recording announcement:- Navigate to Settings → Zuper Connect → Call Settings → General Settings.
- Locate the option Recording Announcement (Auto-play).
- Toggle the setting to Enable.
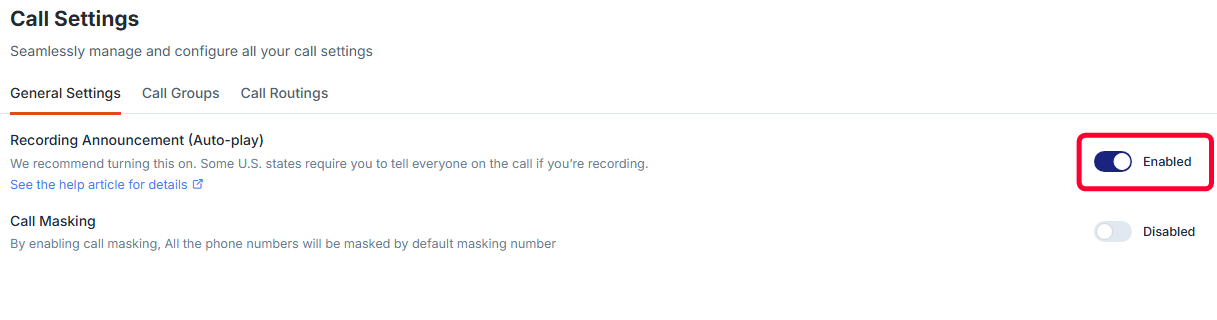
- At the start of every recorded call, Zuper will automatically play an announcement informing the other party that the call is being recorded.
- This ensures compliance with communication guidelines and provides transparency to participants.
- No announcement will be auto-played. The call will still be recorded (if recording is active), but the participants will not hear an automated notification.
Recommendation: Keep this setting enabled, as certain U.S. states require notifying all participants when a call is being recorded. For more details on the states that require notification, click here
Edit a Phone Number
- On the Phone Numbers listing page, click the icon next to the phone number you want to update.

- The Update Number dialog box opens.
- Modify the following details as needed and click Save to apply your changes.
- Name assigned to the number.
- Call route.
- Auto Call Recording (enable/disable).
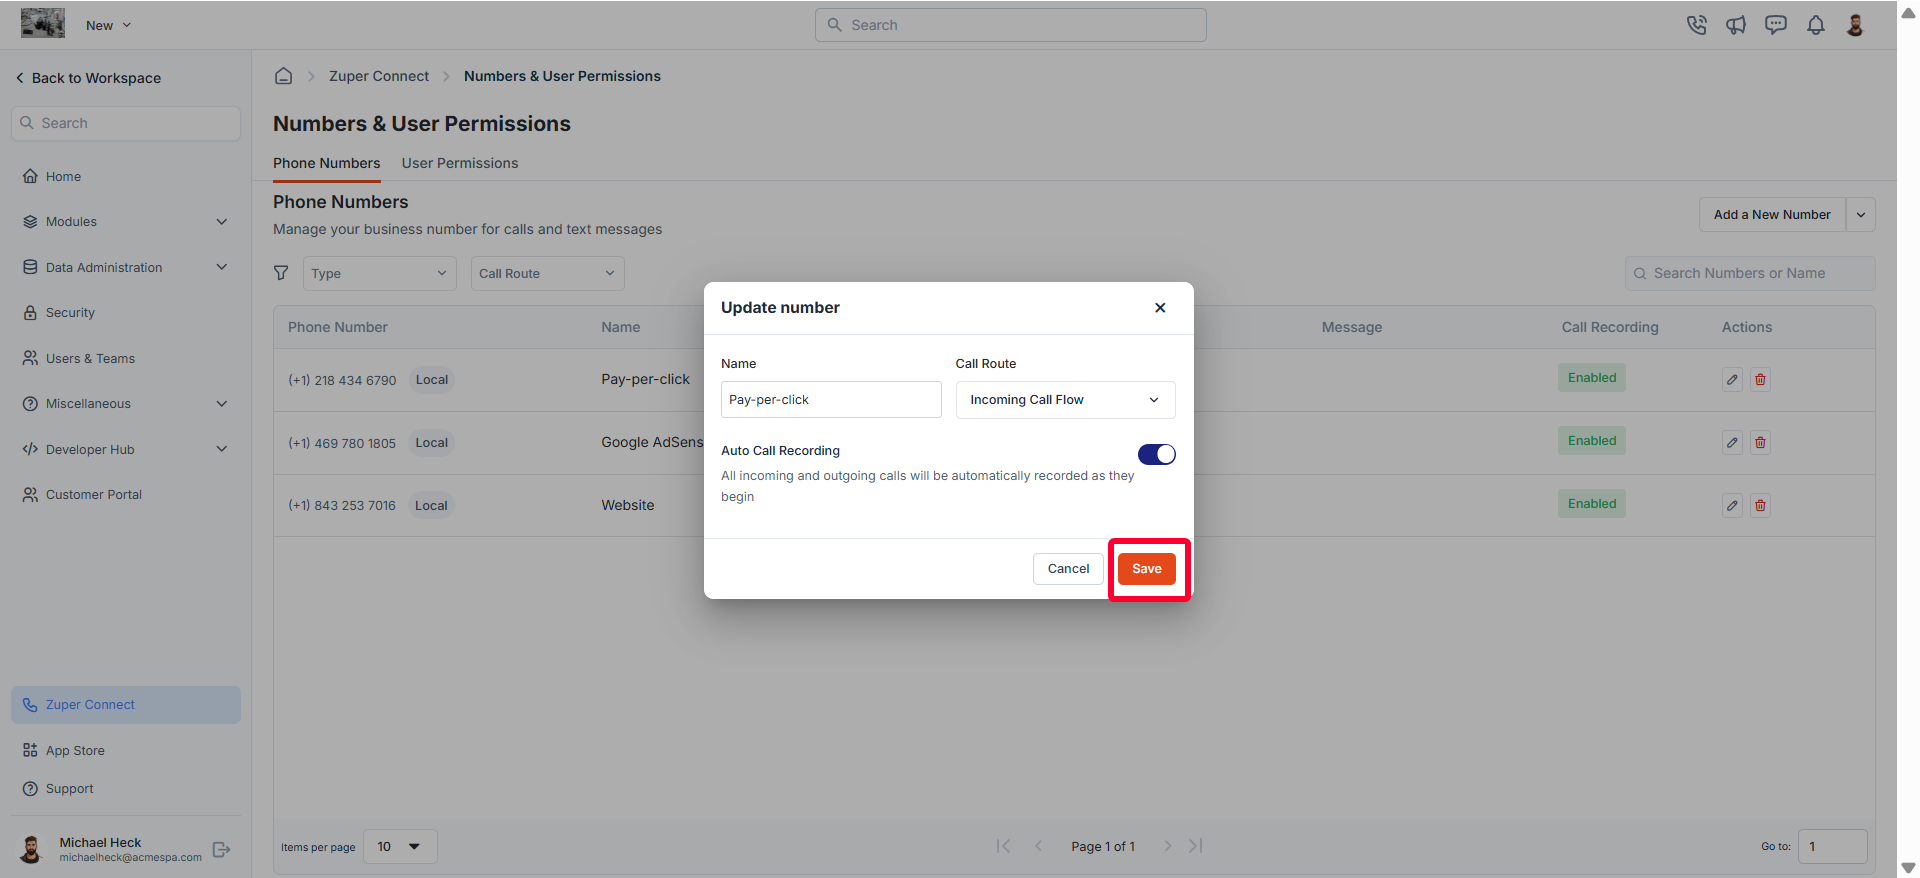
Note: The phone number itself cannot be changed.
Delete a Phone Number
- On the Phone Numbers listing page, click the icon next to the phone number you want to delete.
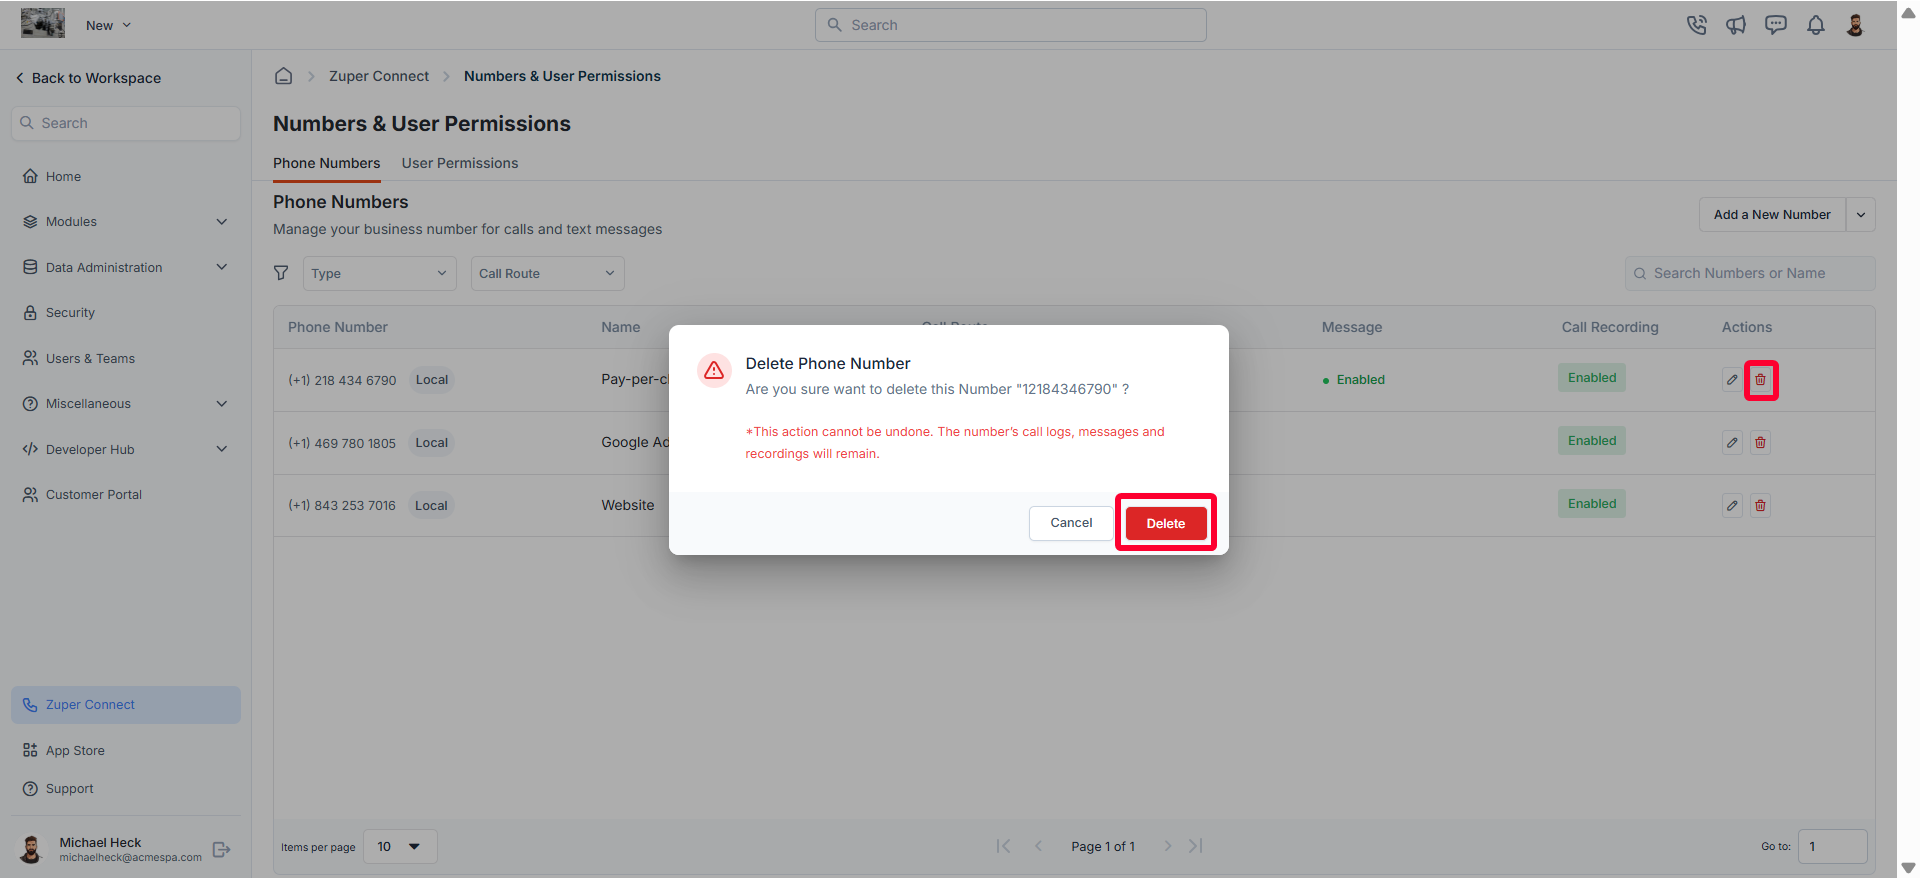
- A confirmation dialog box appears.
- Click Delete to delete the phone number.
Note: Deleting a phone number will not remove its call logs, messages, or recordings—they will remain accessible.
FAQs
When should I tell callers that a call is being recorded?
When should I tell callers that a call is being recorded?
In several US states, you must inform everyone on the call before recording begins. The safest approach is to play a short announcement at the start of every recorded call — especially when participants might be calling from different states.States that require notifying all participantsThese states generally require that everyone on the call knows about and agrees to a telephone recording:What counts as notifying participants?
- California
- Connecticut (telephone calls)
- Florida
- Illinois
- Maryland
- Massachusetts
- Montana
- Nevada (phone calls)
- New Hampshire
- Pennsylvania
- Washington
Delaware and Michigan have less clear-cut rules. Many businesses choose to notify all participants on every call to stay on the safe side. If participants are calling from different states, the stricter state’s rule can apply — announcing at the start of each call is the lowest-risk approach.
- A clear message at the start of the call, for example: “This call is being recorded.”
- Some teams also play a periodic beep tone during the call as an additional signal.
- If the caller stays on the line after the announcement, many jurisdictions treat that as implied consent. Rules vary, so announcing upfront is always the safest approach.
- Enable Recording Announcement (Auto-play) for all recorded lines.
- Keep the wording simple: “This call is being recorded.”
- Maintain basic logs confirming that the notice played.
Can I use my Zuper Connect number to receive 2FA or OTP codes?
Can I use my Zuper Connect number to receive 2FA or OTP codes?
Zuper Connect numbers are provisioned as VoIP numbers, not mobile numbers. Many third-party platforms — such as CRMs, accounting tools, and business portals — do not deliver two-factor authentication (2FA) SMS messages or one-time passcodes (OTP) to VoIP numbers. This restriction is applied by the sending platform before the message reaches Zuper Connect. It is not a Zuper configuration issue, and changing settings on your Zuper Connect number will not resolve it.Inbound voice calls to your Zuper Connect number are not affected.Recommended alternativesIf a third-party platform does not deliver 2FA or OTP codes to your Zuper Connect number, use one of the following options instead:
- Personal or business mobile number — Set a mobile number as your 2FA destination on the third-party platform.
- Authenticator app — Use an app such as Google Authenticator or Microsoft Authenticator to generate one-time codes without SMS.
- Email OTP — If the platform supports it, choose email as your OTP delivery method.
- Voice verification — Request a voice call instead of an SMS code. Inbound voice calls to Zuper Connect numbers work normally.