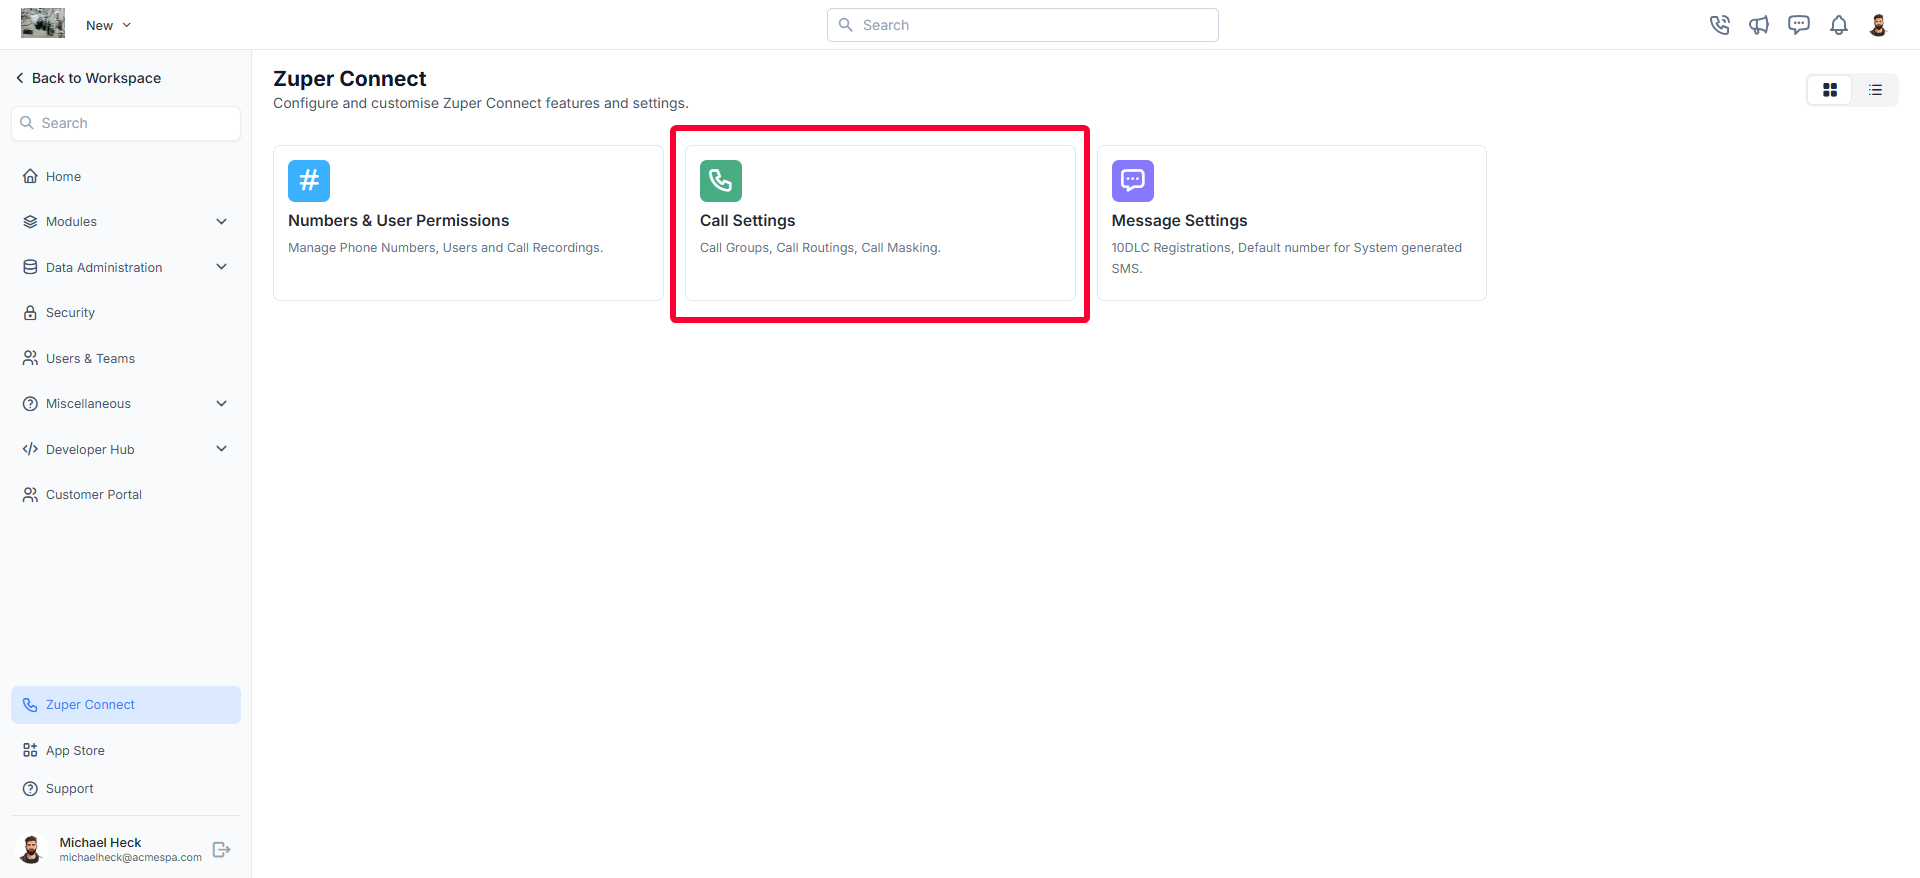
Access call group settings
- Select the “Settings” module from the left navigation menu.
- On the settings page, click “Zuper Connect.” The Zuper Connect settings page will appear.
- Select “Call Settings.” You will land on the call groups listing page, displaying group names, the number of users assigned to each group, and the associated call routings.
Create a new call group
To create a new call group,- Click the “+ New Group” button on the call groups listing page.
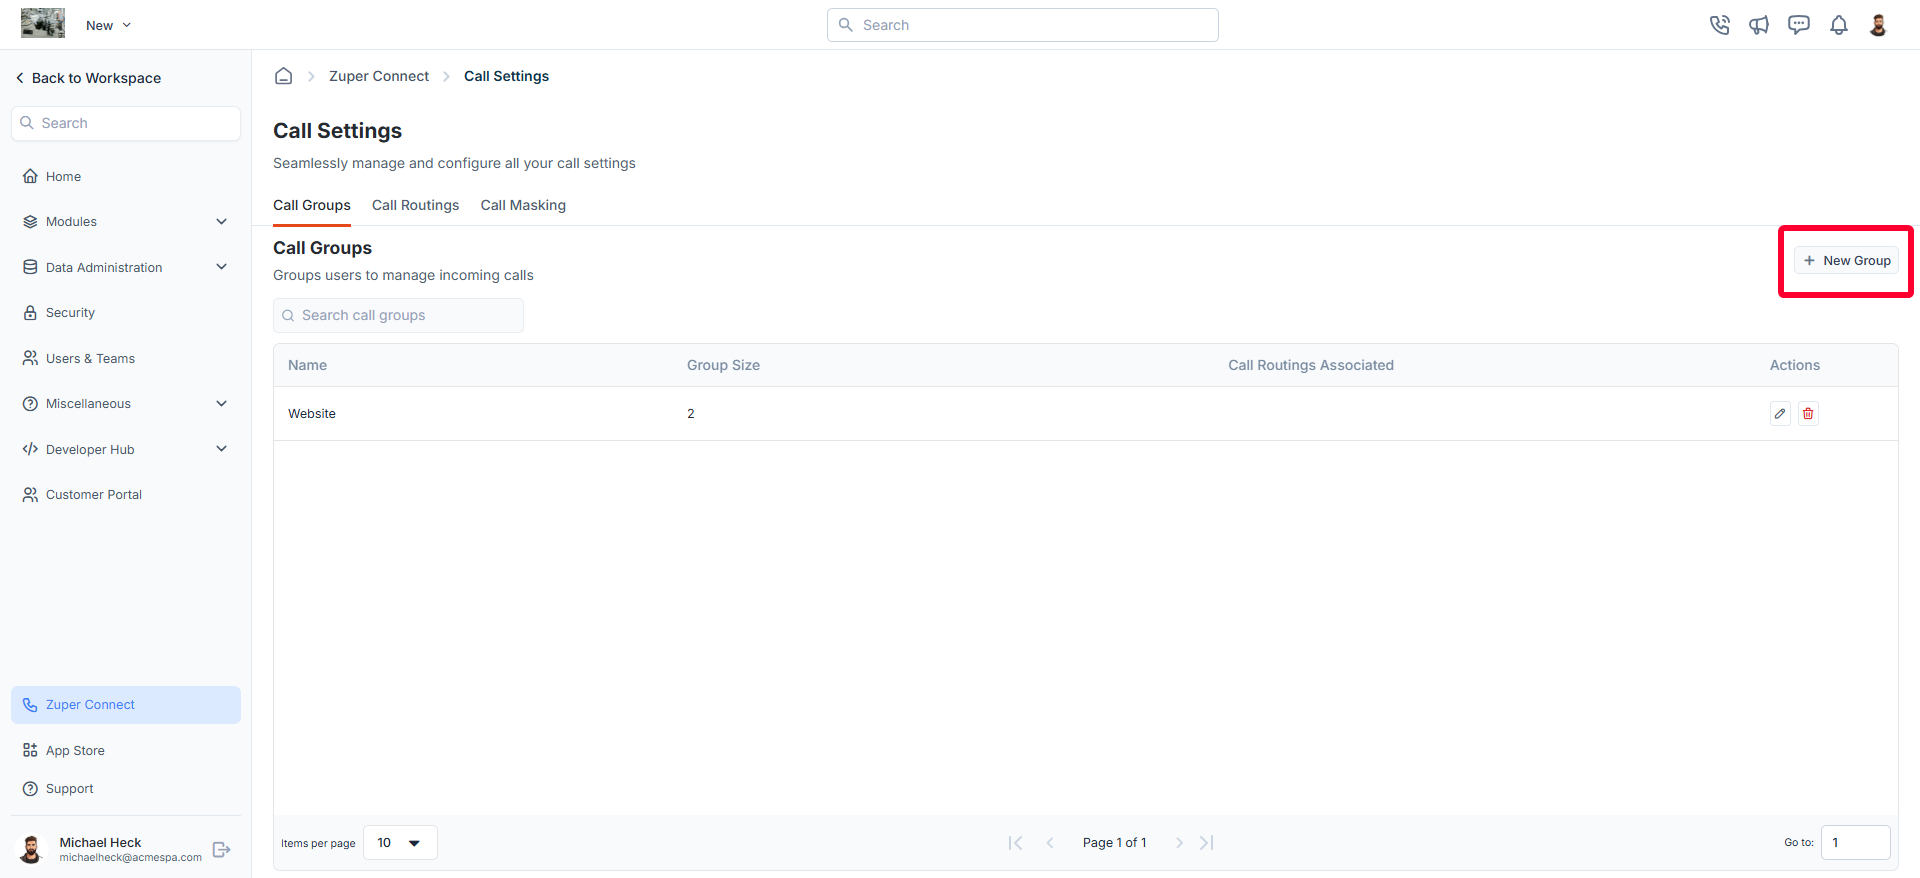
- A dialog box will appear to create a new call group.
- Group name: Enter the name of the group you are creating.
- Members in group: Add all of the users you want to include in this call group.
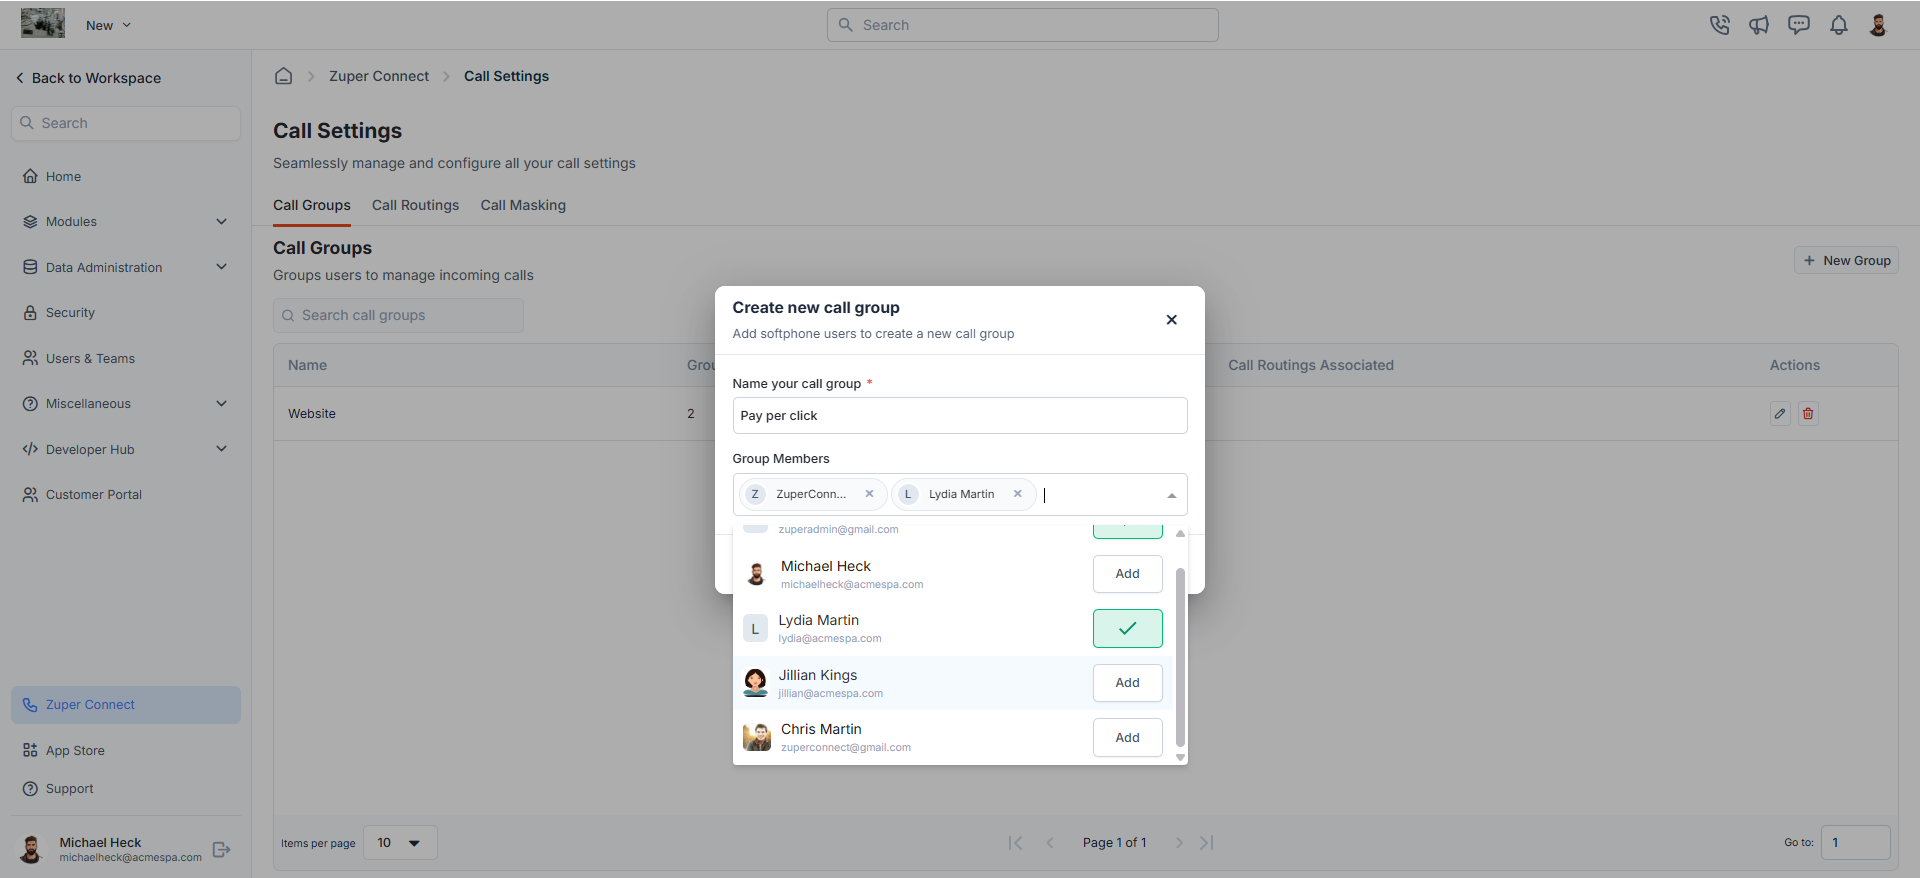
Note: Only users who have access to Zuper connect will be displayed for selection. For more details, see Manage user permissions.
- Click “Create.”
Edit a call group
- On the Call Groups listing page, click the icon next to the call group you want to update.
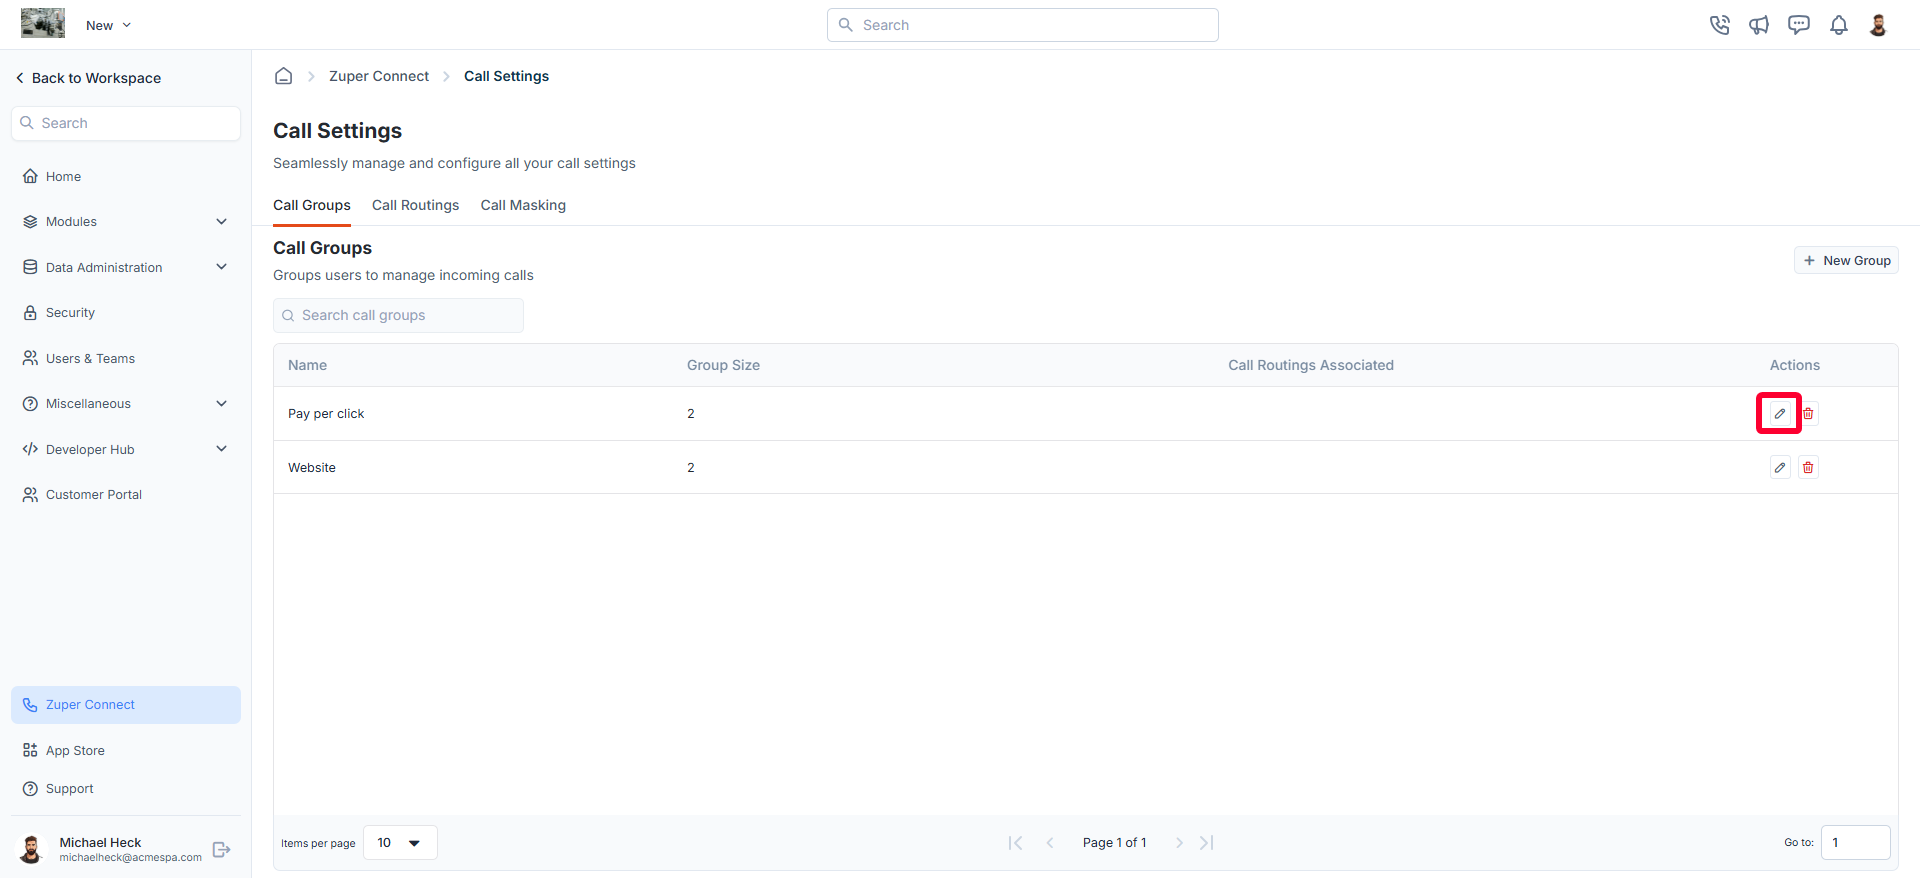
- The Update Call Group dialog box will open, allowing you to make the following modifications:
- Call Group Name: Update the name of the group as needed.
- Group Members: Add new members to the group or remove existing ones.
- Click Update to apply your changes.
Delete a call group
- On the Call Groups listing page, click the icon next to the call group you want to delete.
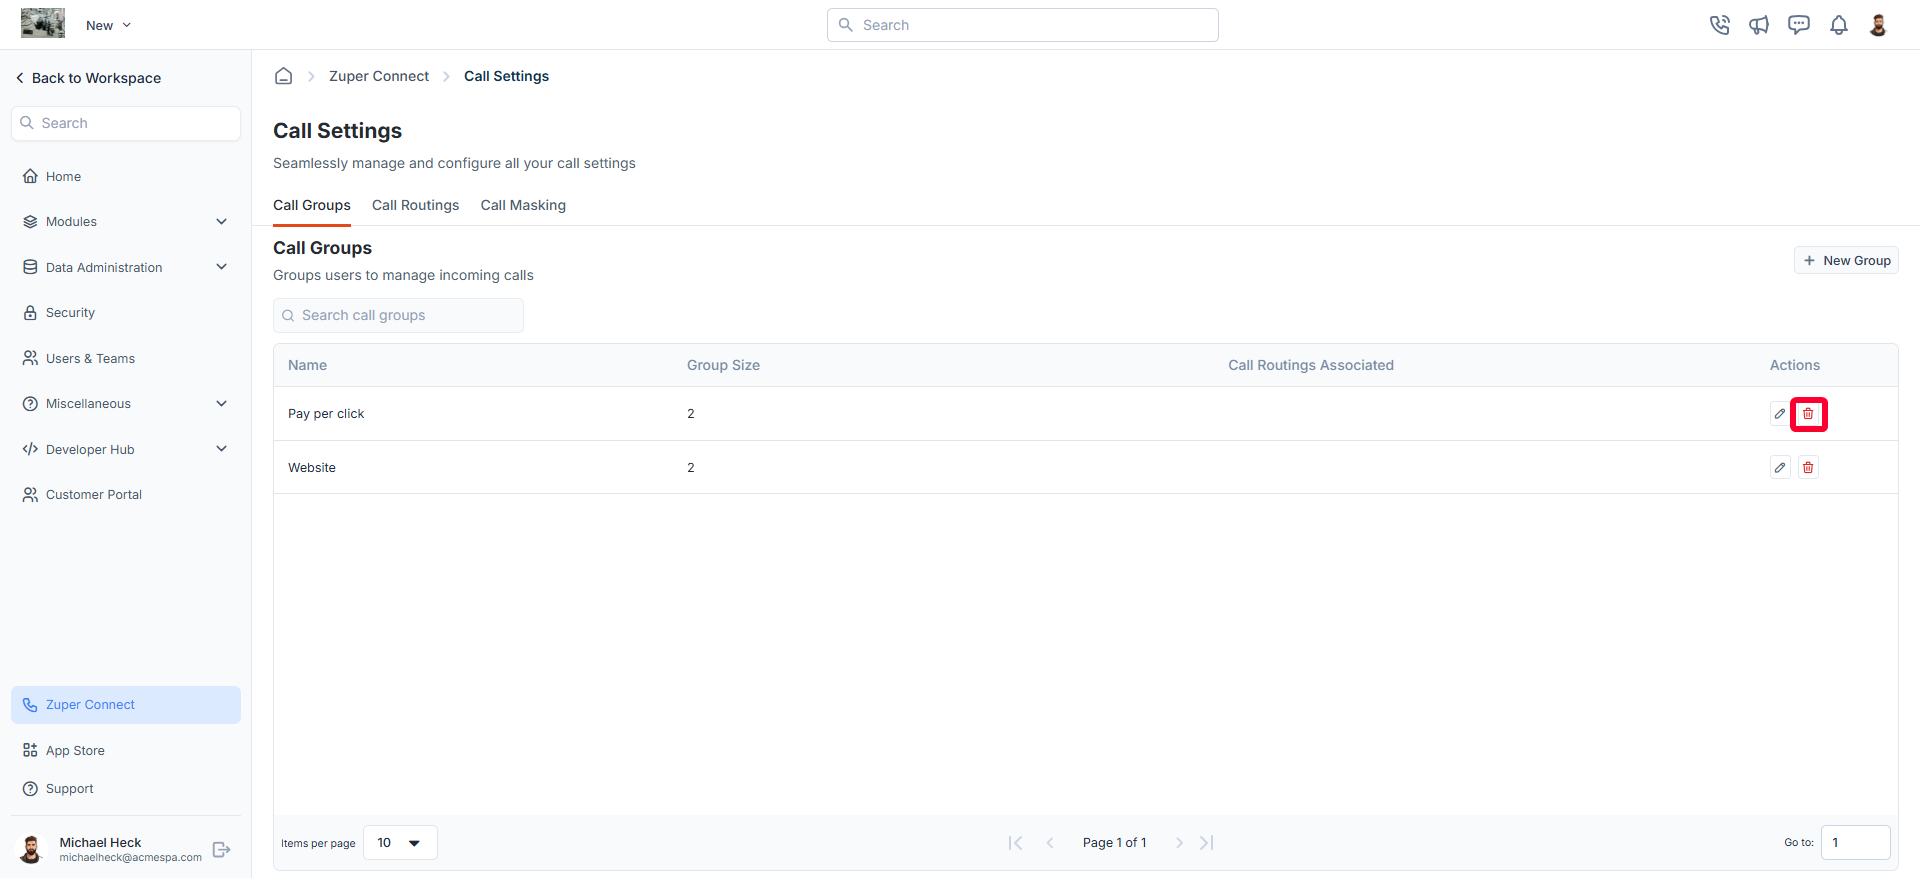
- A confirmation dialog box appears.
- Click Delete to delete the phone number.
Note: Deleting a call group will remove it from any associated call routings. To ensure uninterrupted call management, assign a new group to handle incoming calls.