Overview
The Attribution feature in Zuper Connect lets you assign a marketing source (such as Google Ads, Facebook, Yelp, or TikTok) to each Zuper Connect phone number and organize them with tags. This provides better visibility into where inbound calls and messages originate, helping you analyze marketing ROI and campaign performance directly within Dialer and Analytics. By linking each number to marketing sources, admins can also identify which campaigns drive the highest customer engagement and make informed, data-driven marketing decisions.Key Features
- Attribution Assignment
- Custom Attribution
- Date and Time Scheduling
- Notes Field
- Attribution Status Tracking
- Integrated Display Across Zuper Modules
- Dialer: Shows the attribution icon and name beside the caller ID in the Dialer, making the lead source instantly visible for incoming and outgoing calls.
- Sidekick: Displays the active attribution for the phone number in the call context, helping agents understand the lead source during live calls and follow-ups.
- Analytics: Enables filtering and reporting by attribution, helping teams measure campaign effectiveness and ROI.
- Settings → Numbers: Displays attribution icons next to each number for quick visual recognition and easier number management.
- Tag Organization
Limitations
- No Automated Attribution: The system does not yet auto-assign attributions based on call source or UTM parameters.
- Single Attribution per Number: Each phone number supports only one active attribution at a time.
- No API Integration: Direct integration with third-party ad platforms (e.g., Google Ads API, Facebook Ads Manager) is not yet supported.
- Manual Updates Required: Changes to campaigns or dates must be updated manually by admins.
- Reporting Scope: Attribution filtering is currently limited to Dialer and Analytics modules (exportable reports planned for future release).
- Date Range Conflicts: Overlapping date ranges may cause attribution visibility issues if not managed properly.
Prerequisites
- Available for customers with Zuper Connect enabled.
- You must have the required permissions to configure phone numbers and manage attribution sources in Zuper Connect.
Configuring Attributions & Tags
Step 1: Open Phone Numbers Settings- Log in to your Zuper Connect account.
- From the left navigation menu, select Settings→ Zuper Connect→ Numbers & User Permissions→ Phone Numbers.
-
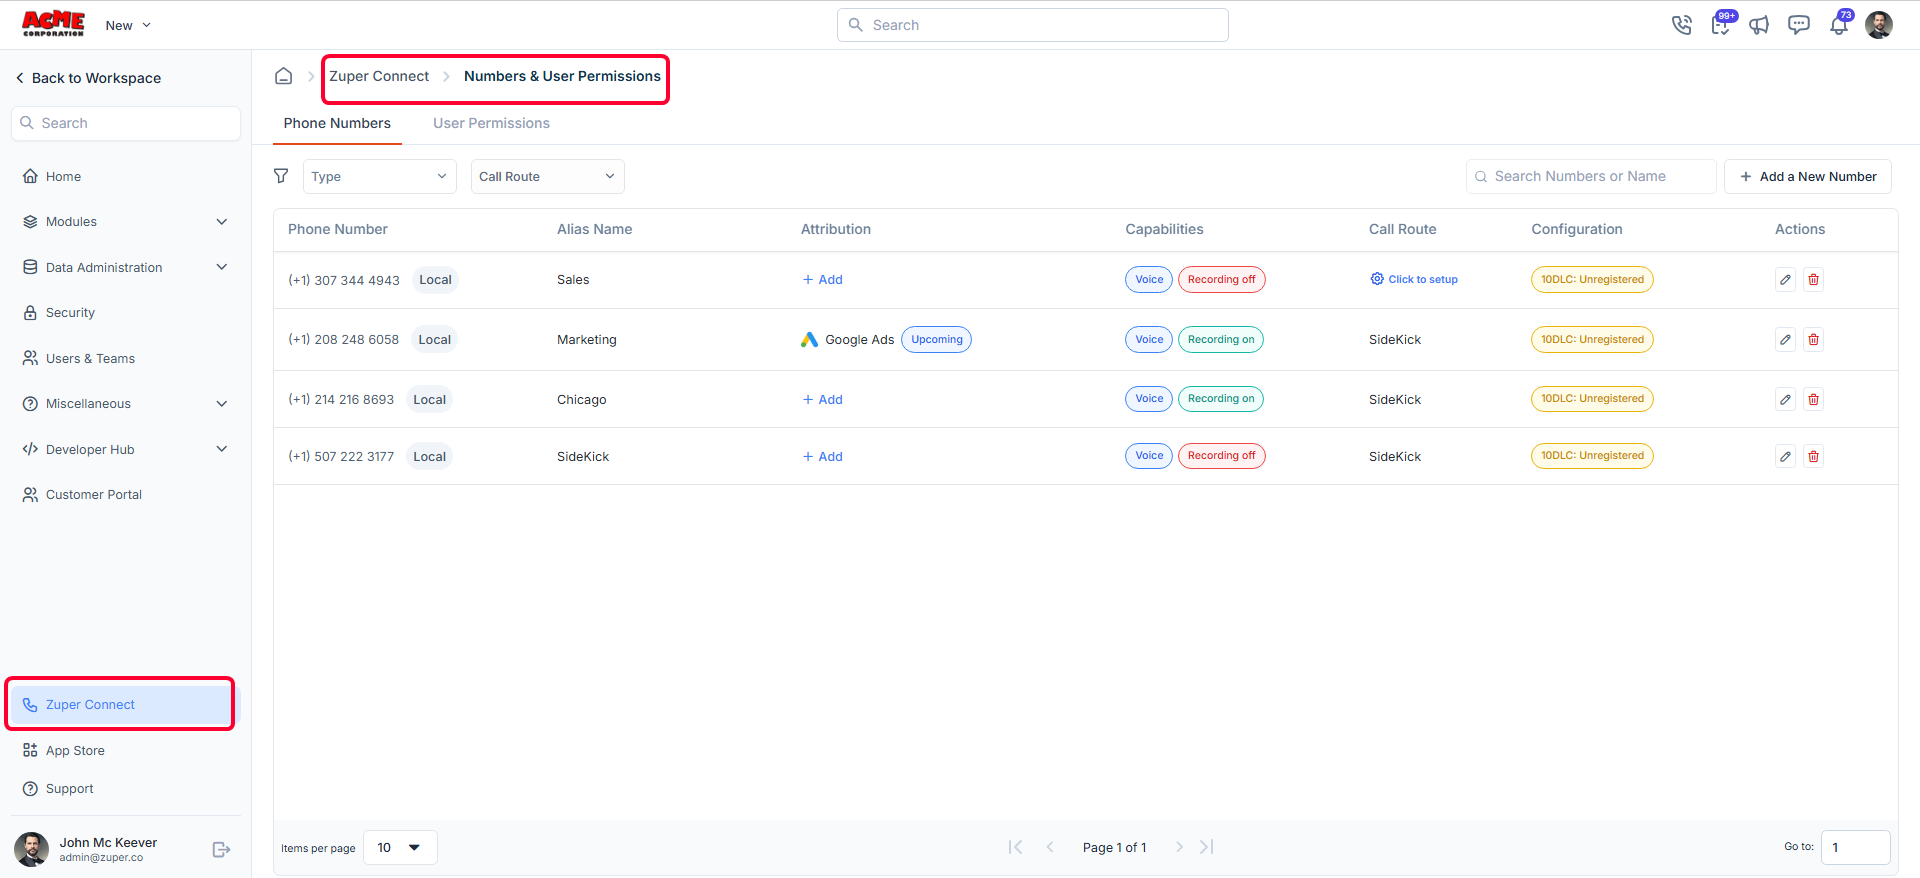
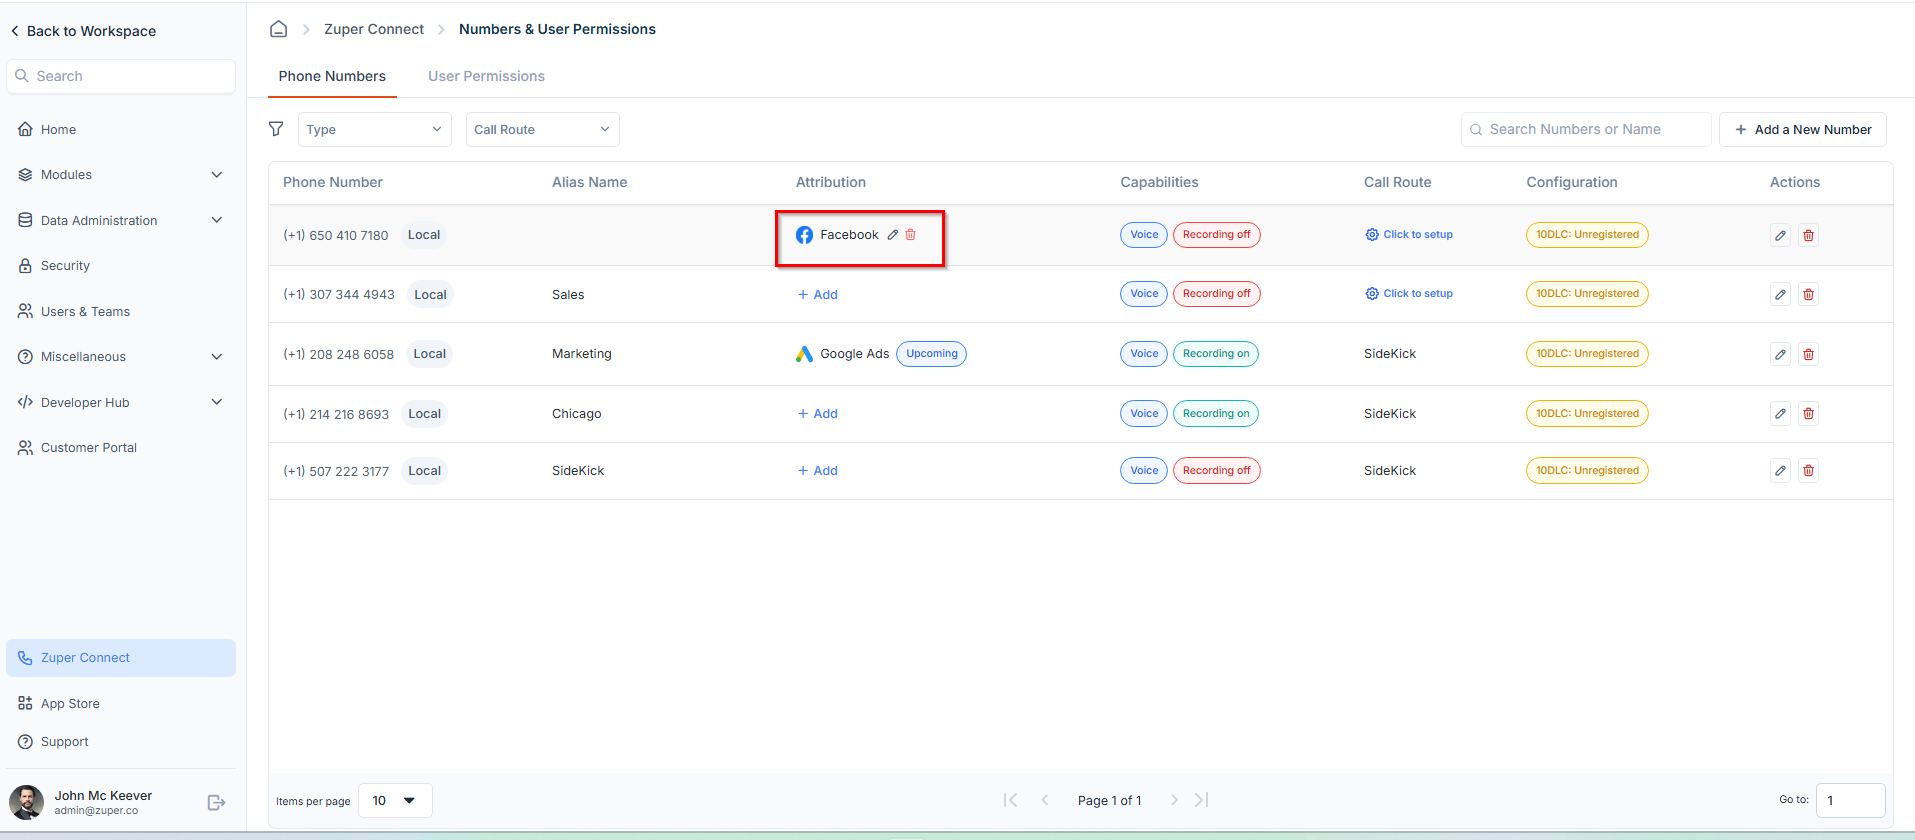
On the Phone Numbers listing page, you can view the following details:
Phone number listing page details
- Phone Number: Displays the registered business phone number along with its number type (Local or Toll-Free).
- Alias Name: The custom name assigned to the phone number to help identify its purpose.
-
Attribution: Shows the marketing or attribution source linked to the number (such as Google Ads, Instagram, YouTube), along with its attribution status:
Status Description Active The attribution source is currently enabled and actively tracking calls. Upcoming The attribution source is scheduled to become active at a future date. Always Active The attribution source remains enabled continuously with no start or end date. Expired The attribution source remains enabled continuously with no start or end date. Note: The attribution and its status appear on the Phone Numbers listing page only after you configure and save the attribution settings. See step 3 for configuring attribution details. - Capabilities: Indicates the enabled capabilities for the number, such as Voice and the Call Recording status (Recording on or recording off).
- Call Route: Displays the configured routing for incoming calls. If not set, select “Click to setup” to create or assign an existing route. For more information on creating a new call route, refer to the “Creating a Call Route” article.
- Configuration: Shows the compliance and registration status of the number.
- Actions: Provides options to edit or delete the phone number configuration.
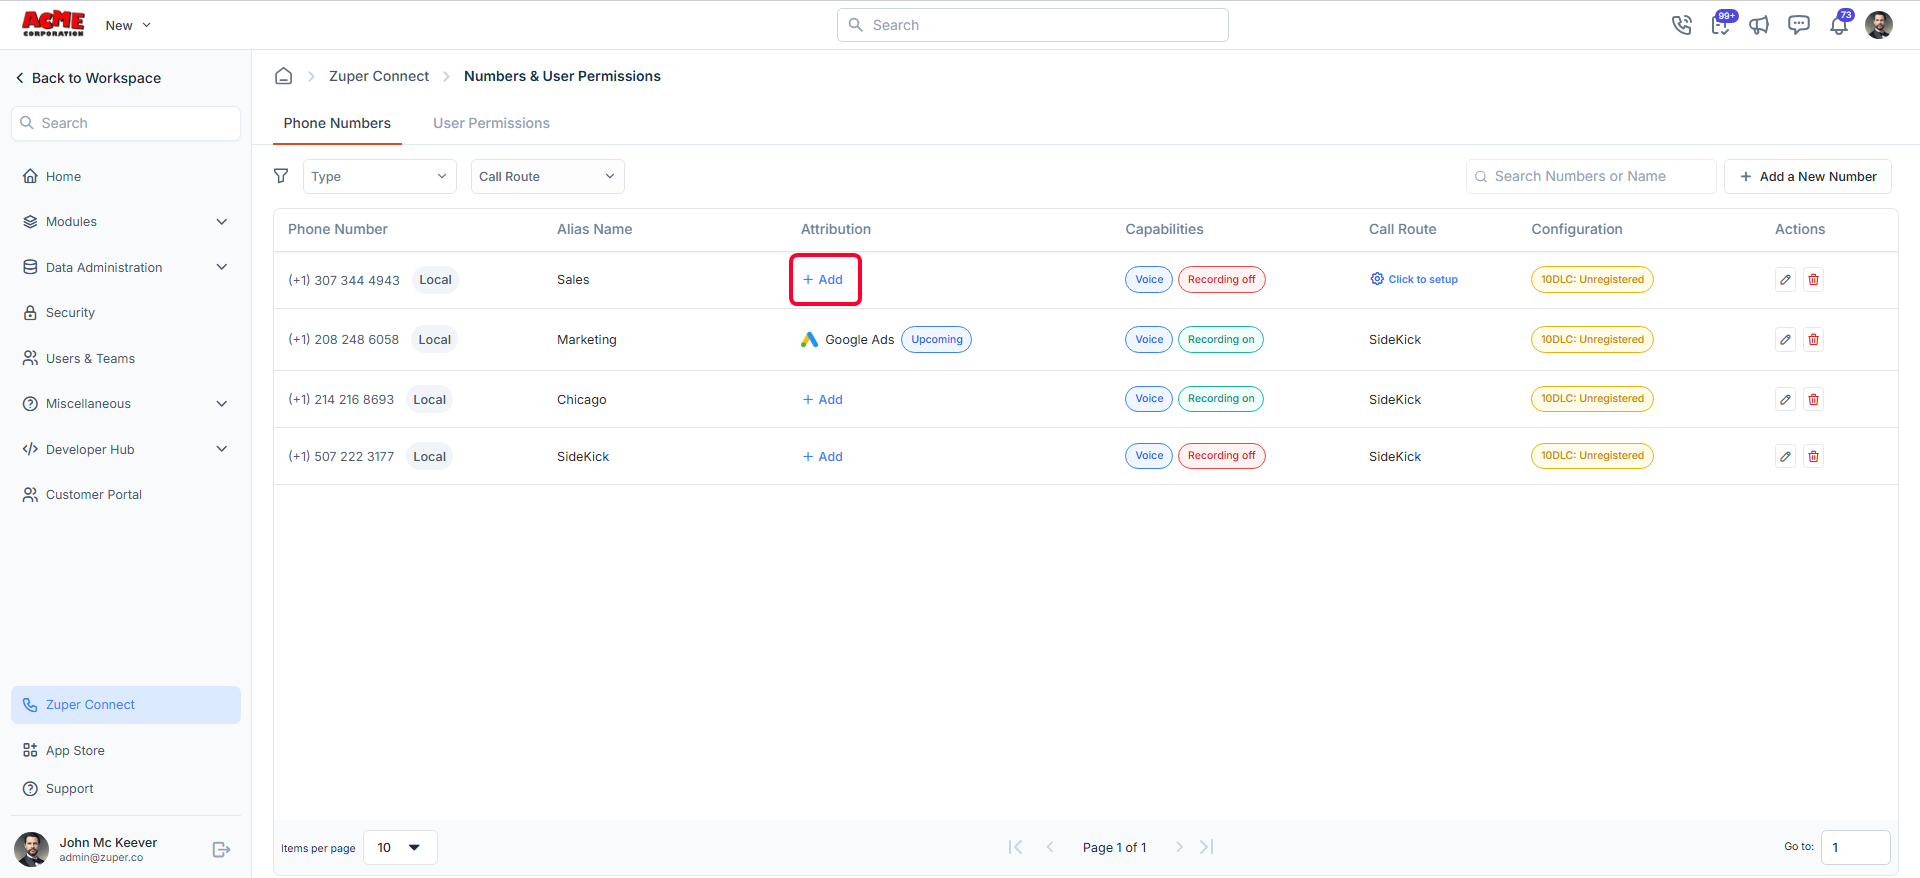
- Locate the phone number you want to configure.
- Click “Add” under the Attribution column to associate a marketing attribution. See step 3 for configuring attribution details.
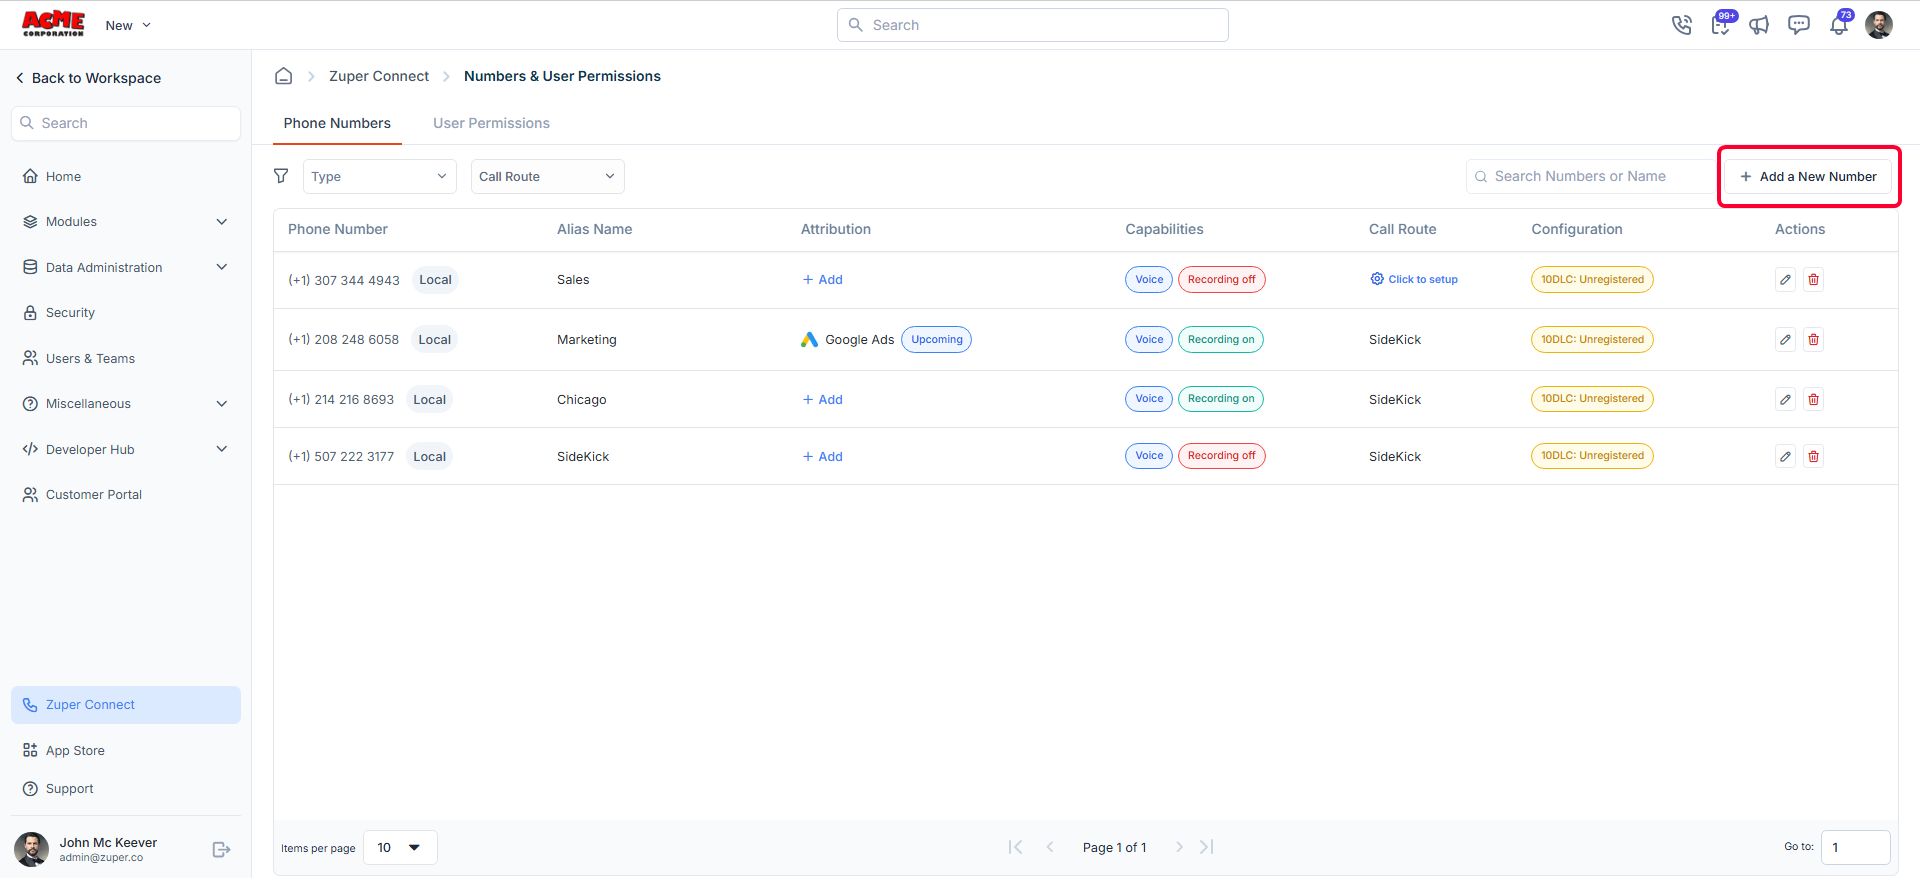
- Click “Add a New Number” on the top right of the page.
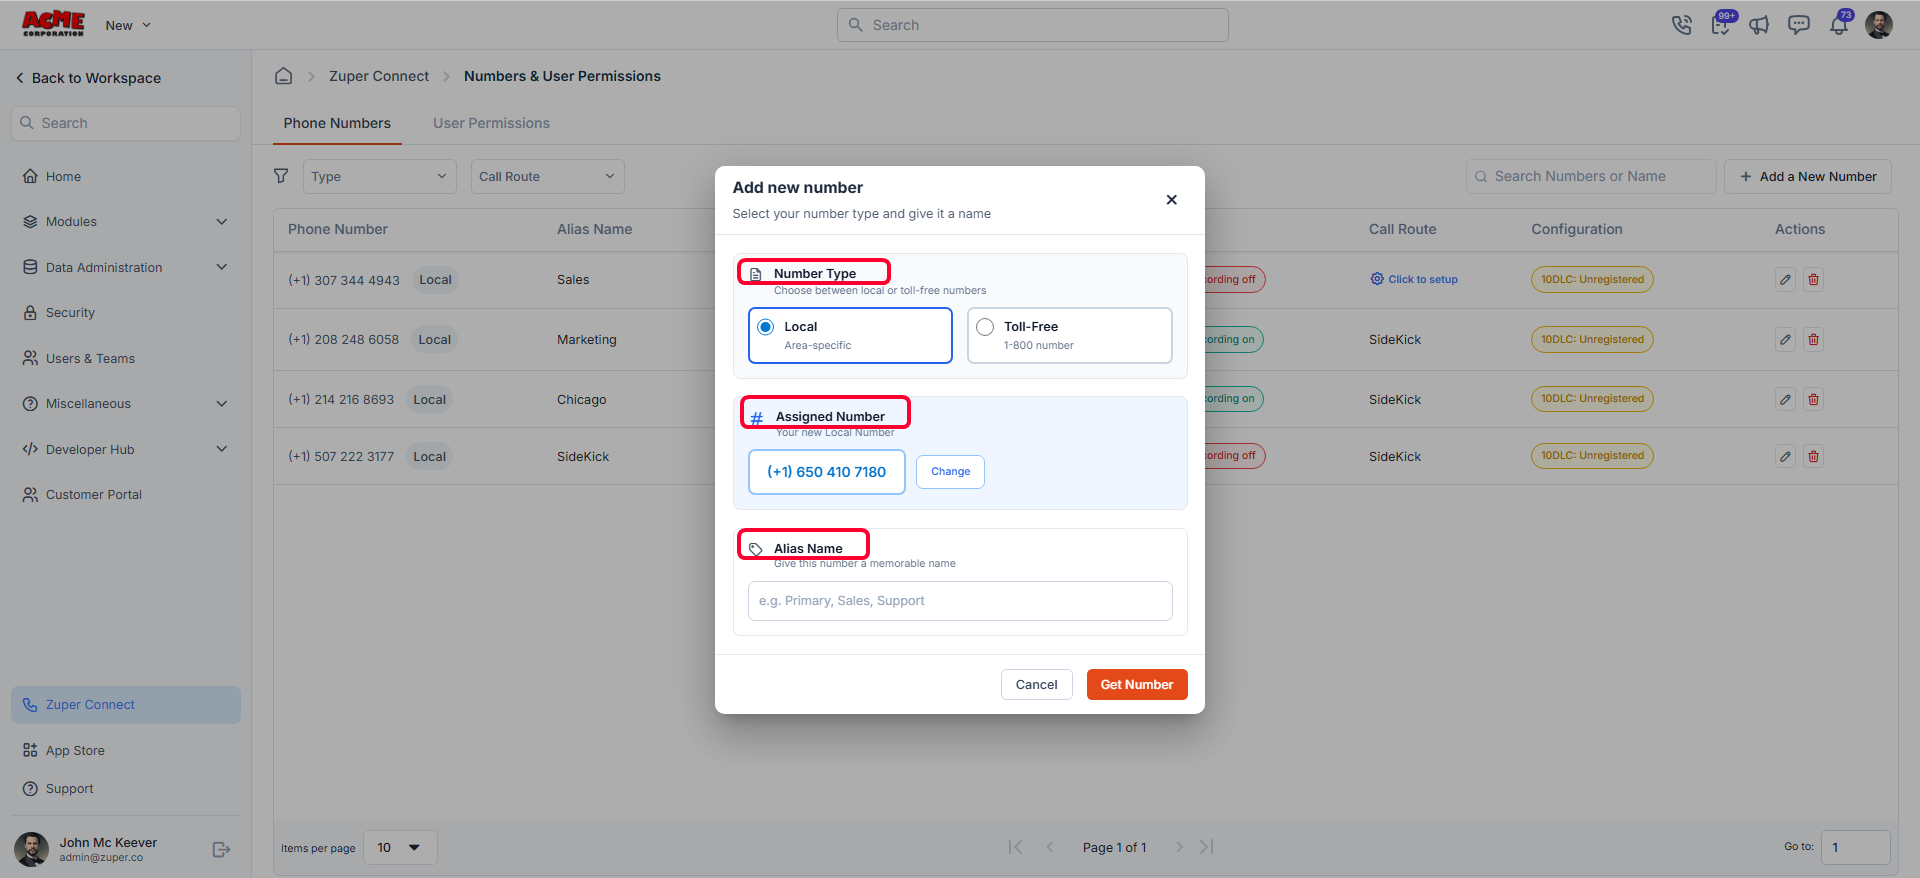
- Select the number type (Local or Toll-Free).
- Review the assigned phone number.
- Enter an Alias Name.
- Configure the Call Route (optional).
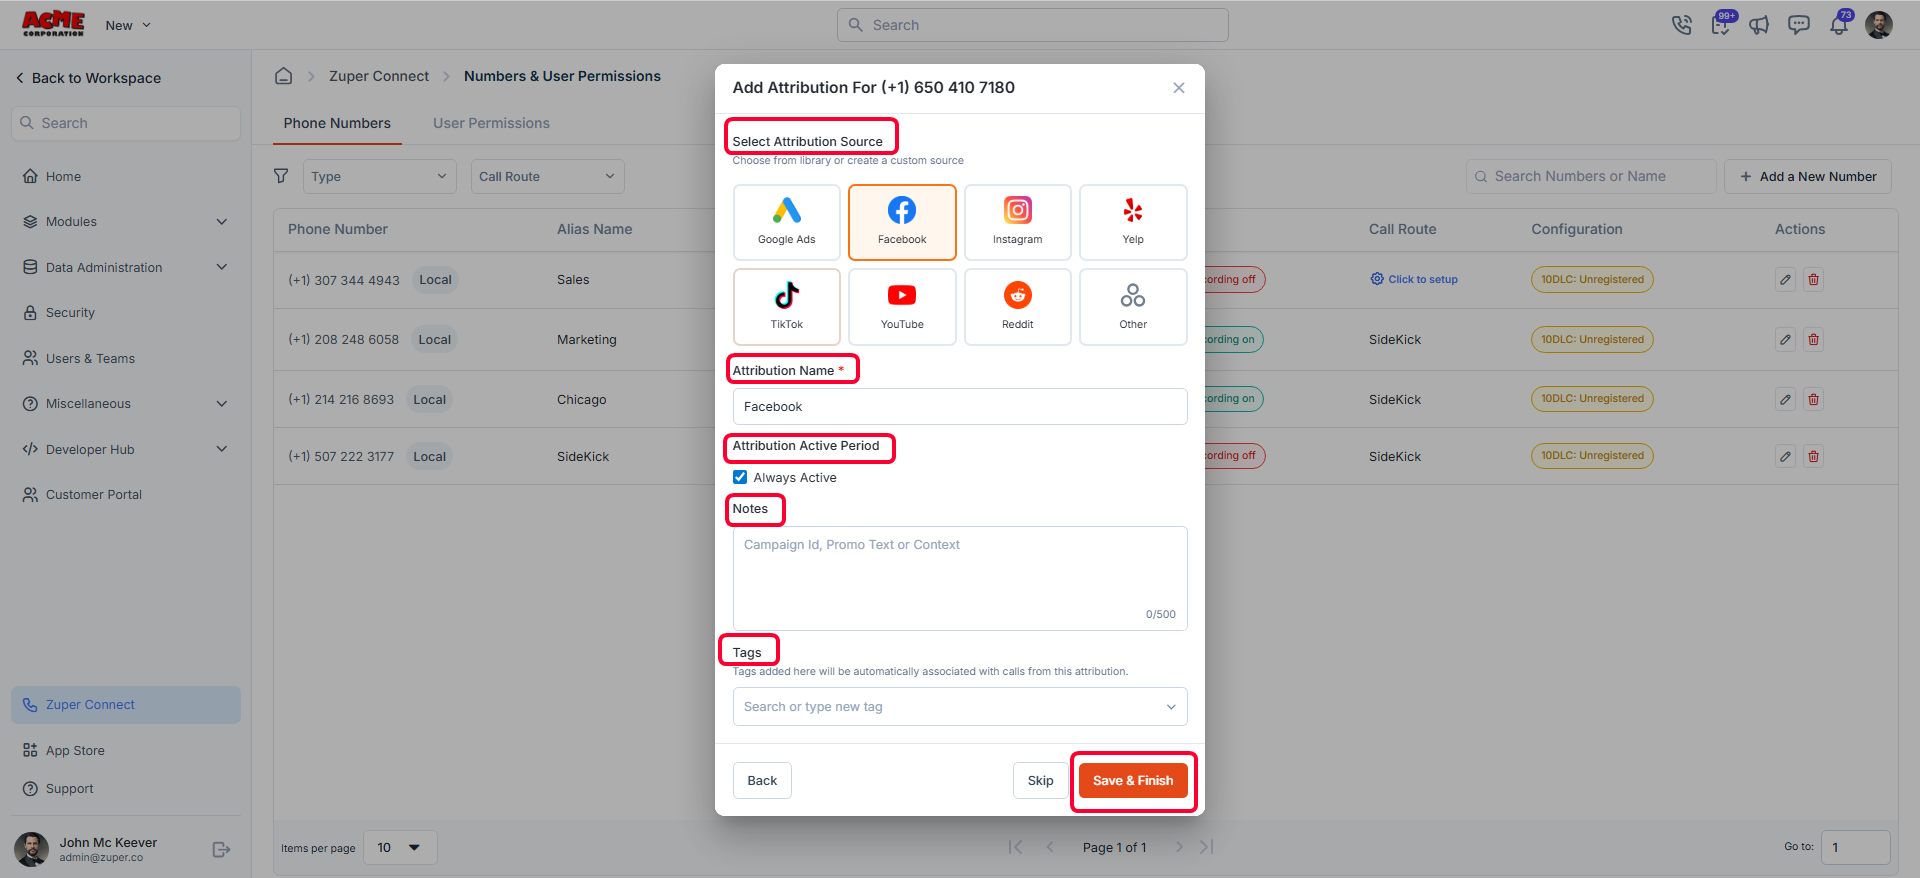
- Select an existing attribution source from the library (Google Ads, Facebook, Yelp, Instagram, etc.) or create a custom source.
Note: Each phone number can have only one attribution.
- When creating or editing an attribution, you can configure:
- Attribution Name
-
Attribution Active Period
- Check the Always Active box to keep the attribution active continuously, or
- Uncheck the box and specify the start and end date.
Note: Calls received during the active dates are automatically attributed to the selected source. - Notes for campaign context (such as campaign ID, promo name, or offer details)
- Tags for the phone number. Add one or more tags (e.g., Google, Emergency, Q1-Campaign). See Step 6 for creating & managing tags.
Note: A phone number can have multiple tags.
- Click Save Attribution. The attribution is now linked to that number.
| Module | Behavior |
|---|---|
| Dialer | Shows the attribution icon and name beside the caller ID. |
| Sidekick | Displays the active attribution for the number. |
| Analytics | Enables filtering calls and messages by attribution. |
Note: If attributions are not visible in any of the modules above, ensure the phone number is correctly linked to an attribution and that the changes are saved and published.
- Go to Settings→ Zuper Connect→ Call Settings → Call Tags.
- On the call tags listing page, you can add a new tag or delete it if needed.
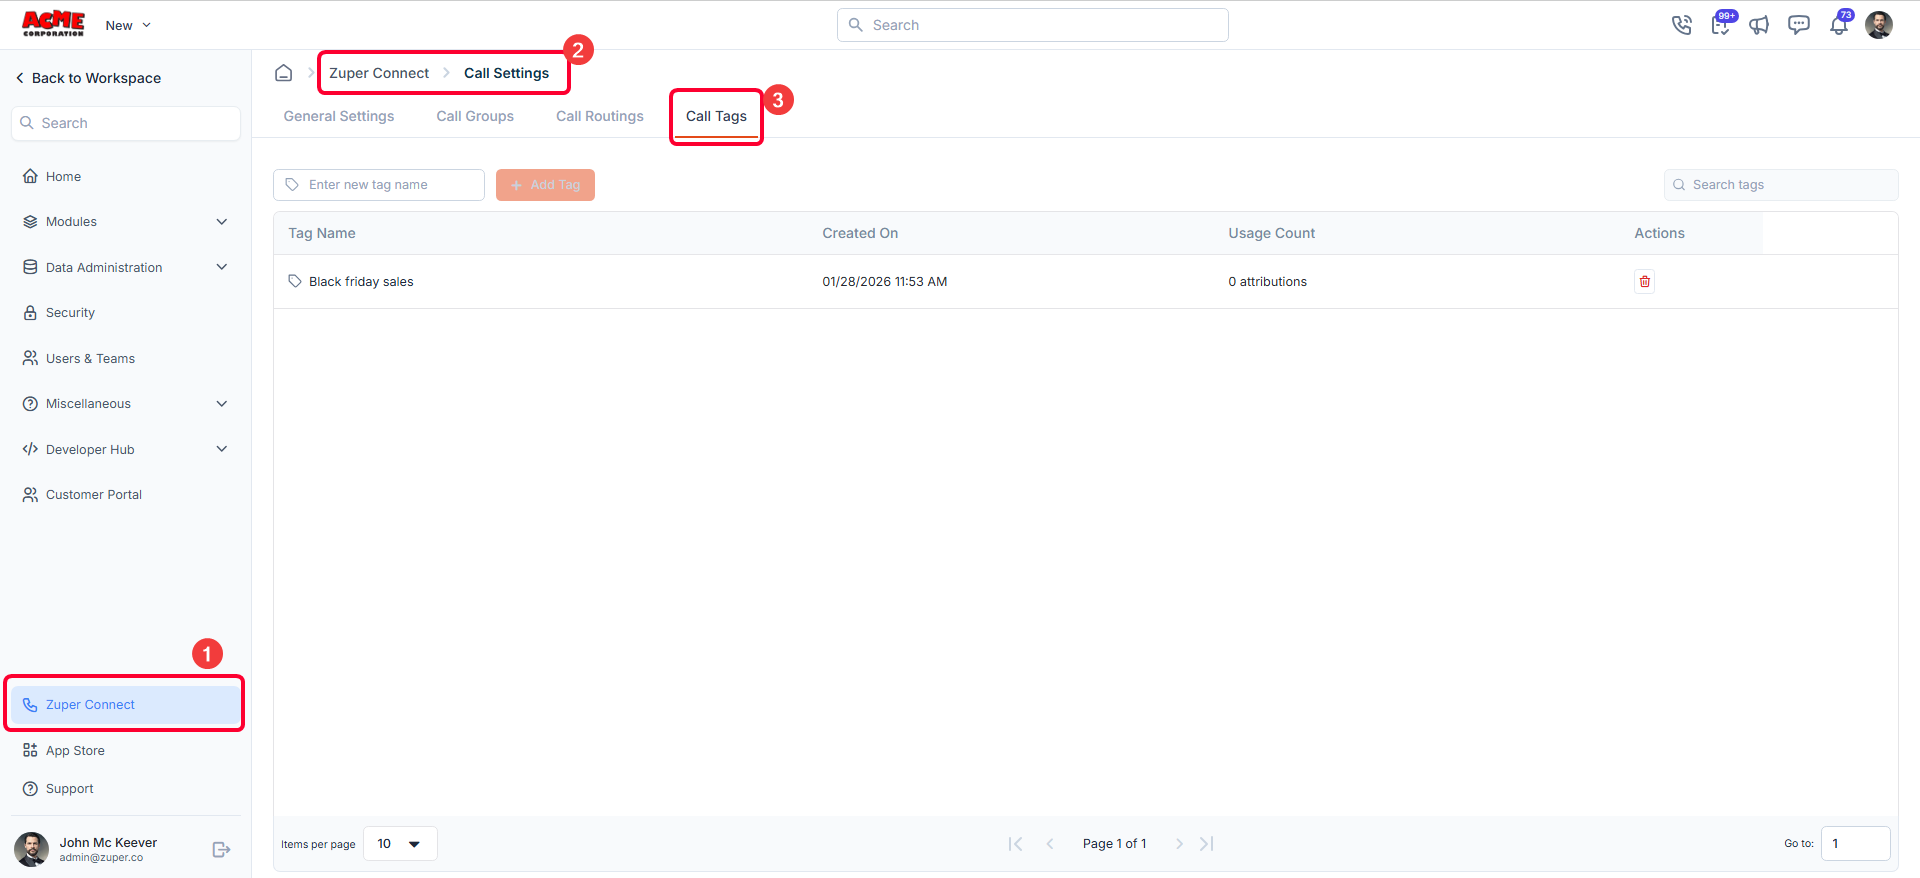
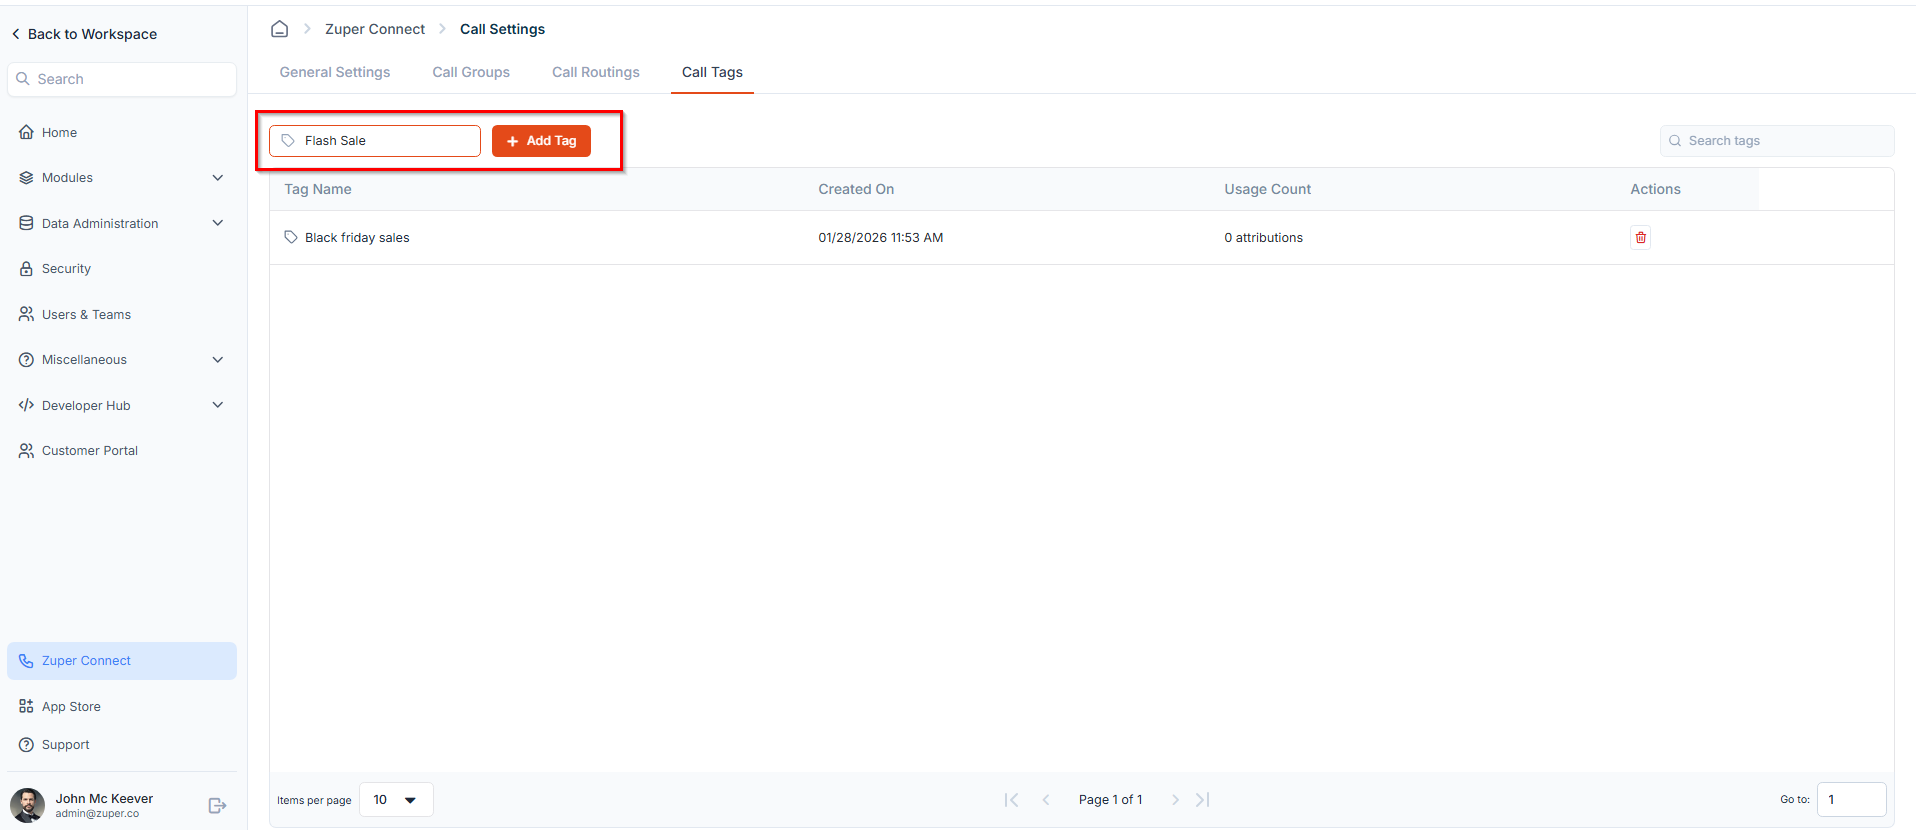
- In the Enter new tag name field, enter a descriptive name (for example, Black Friday 2026 or Referral Campaign).
- Click Add Tag.
- Tag Name: The label assigned to the tag.
- Created On: The date & time the tag was created.
- Usage Count: The number of attributions currently using this tag.
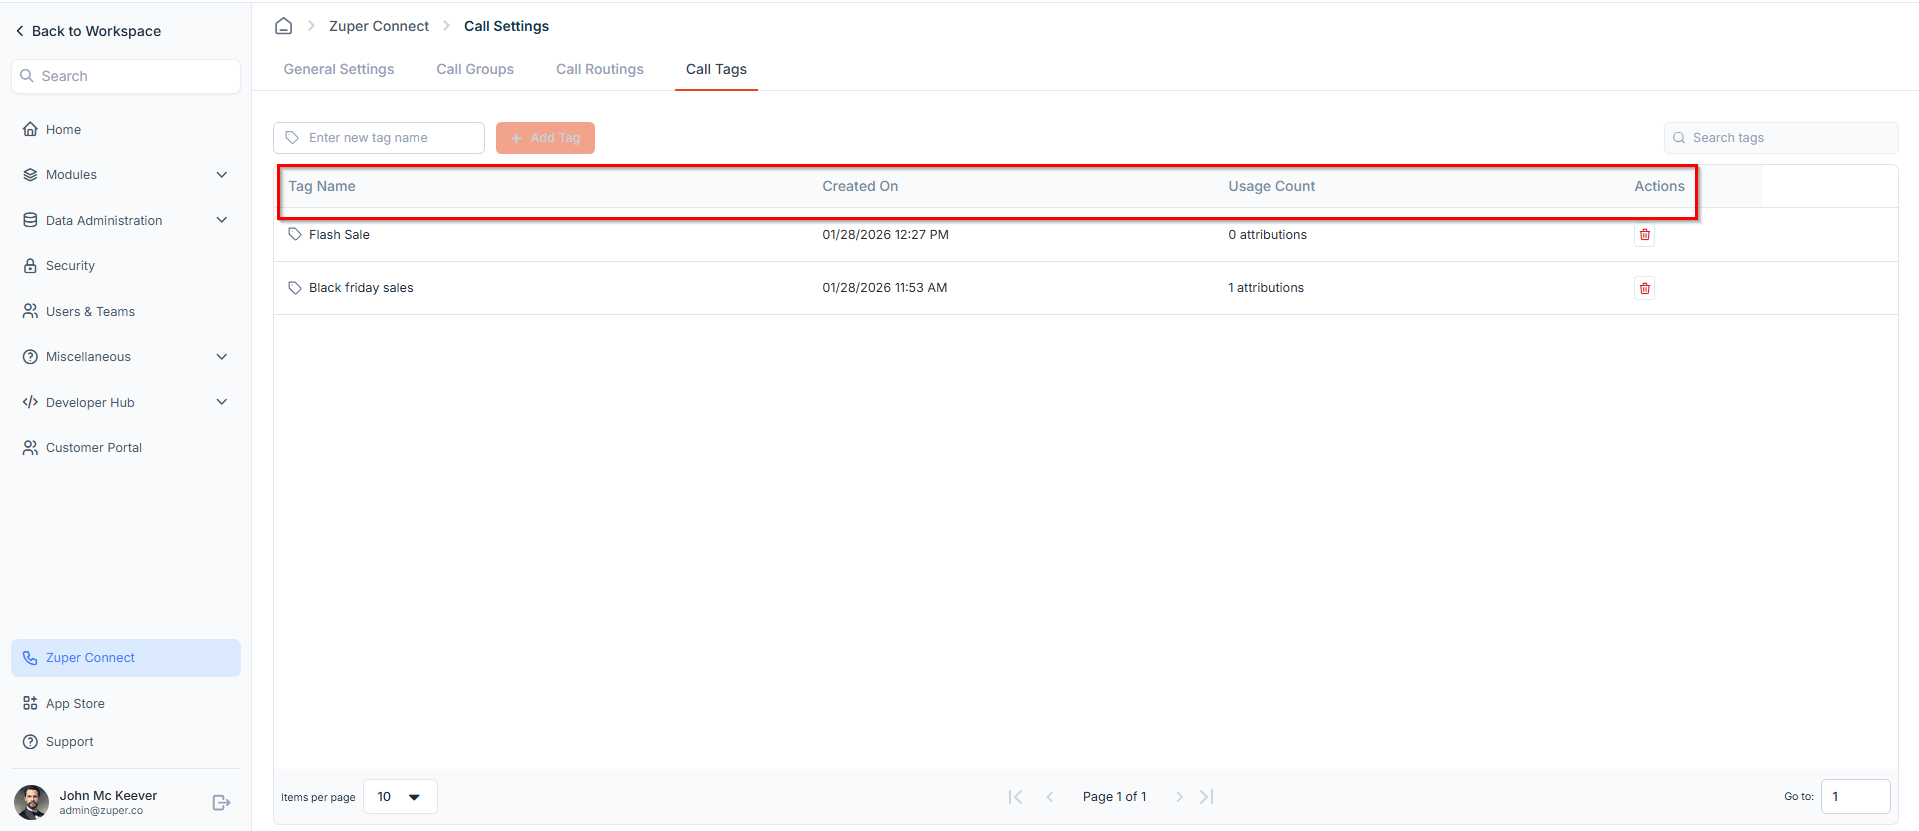
- Click the Delete icon under Actions.
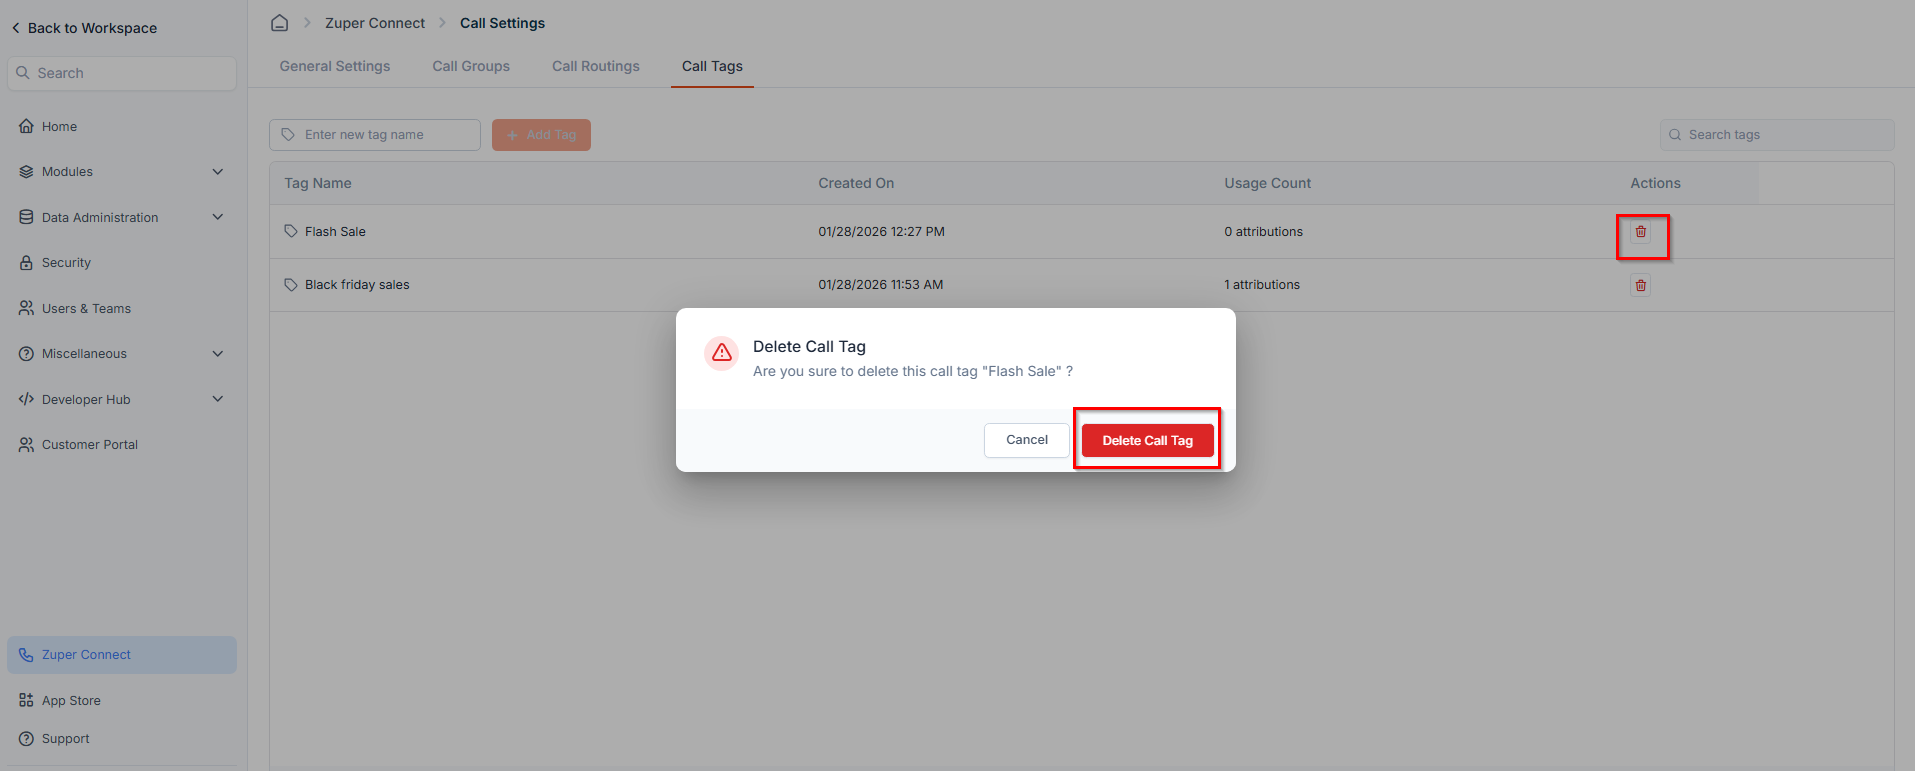
Note: Deleting a call tag removes it from all phone numbers.
Edit Attribution
- On the Phone Numbers listing page, hover over the Attribution field for the required phone number.
- Click the Edit icon to update the attribution details, such as the active duration, notes, and tags.
Delete Attribution
- On the Phone Numbers listing page, hover over the Attribution field.
- Click the Delete icon to remove the attribution from the phone number.
Note: Once deleted, the phone number will no longer be associated with that attribution source.
Quick Rules to Remember
- One attribution per phone number
- Tags are optional and for internal grouping
- Tags do not affect analytics logic
- Attributions are not auto-assigned
Best Practices
- Use attributions for campaigns
- Use tags for internal organization
- Keep naming consistent
- Review expired attributions regularly