Accessing Built-in Reports
To access the built-in reports in Zuper, navigate to the Reports module from the left navigation menu and select Reports (Beta). Then, click Template on the right panel of the Report home page to view all available preconfigured reports. These reports are categorized based on the modules they belong to, ensuring you can find the relevant data effortlessly.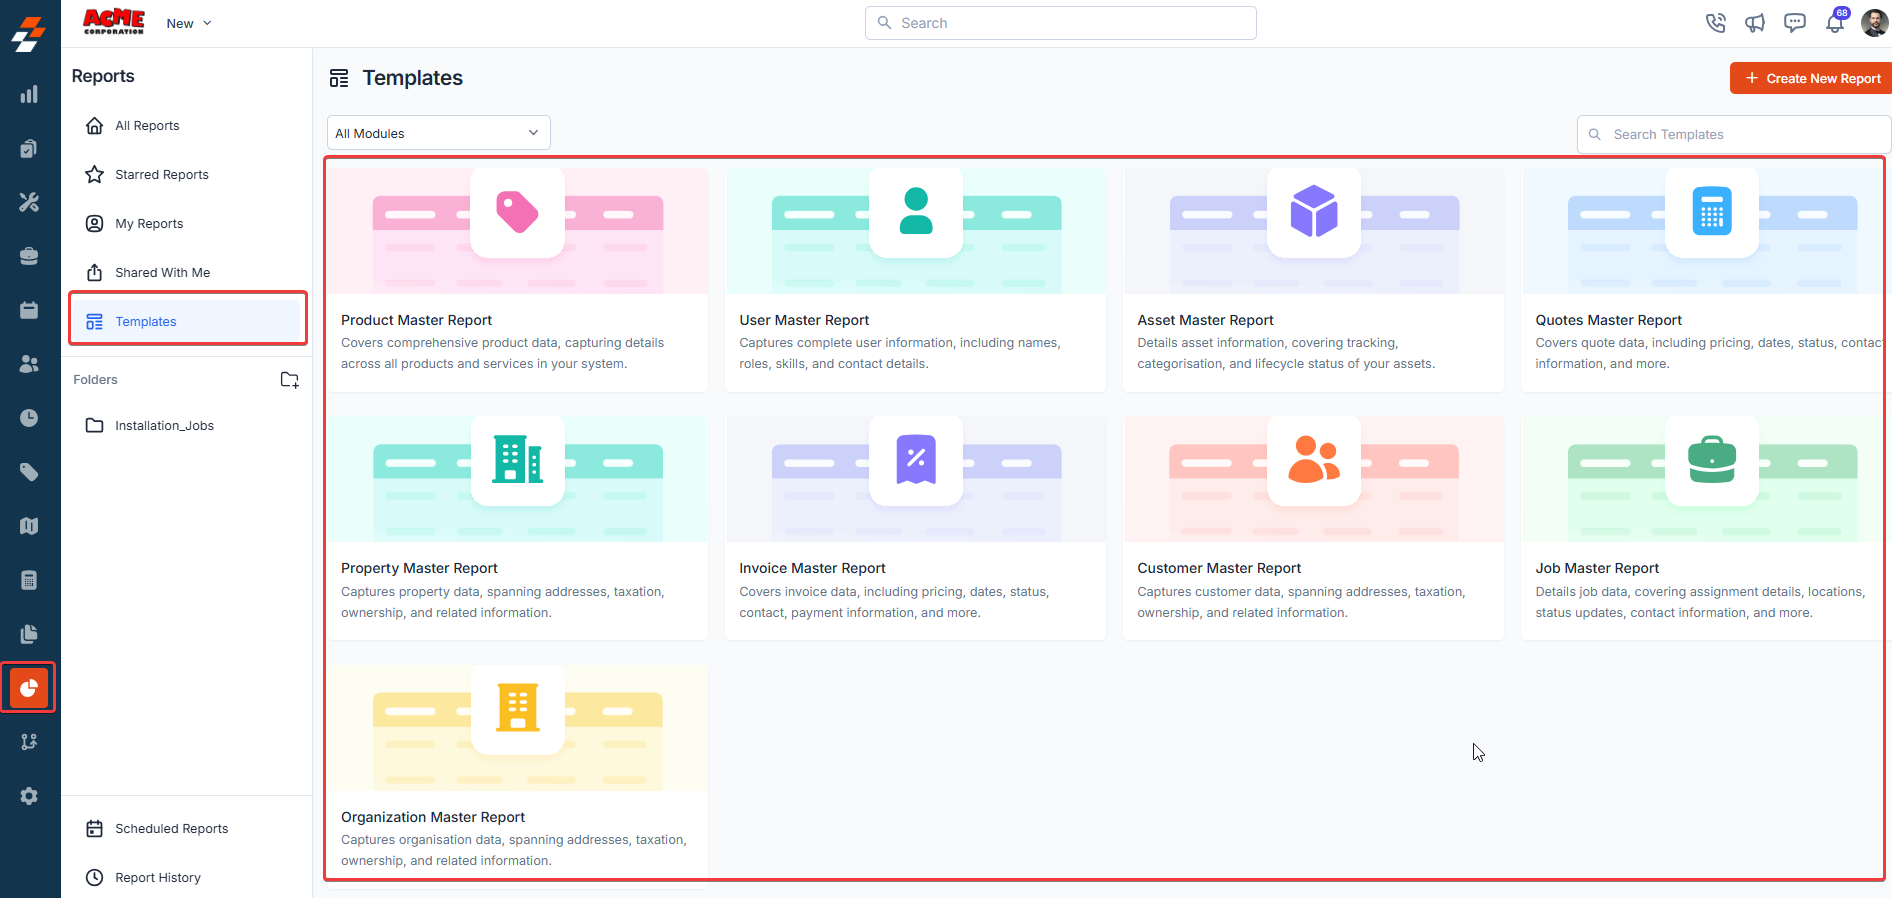
Managing the Template page
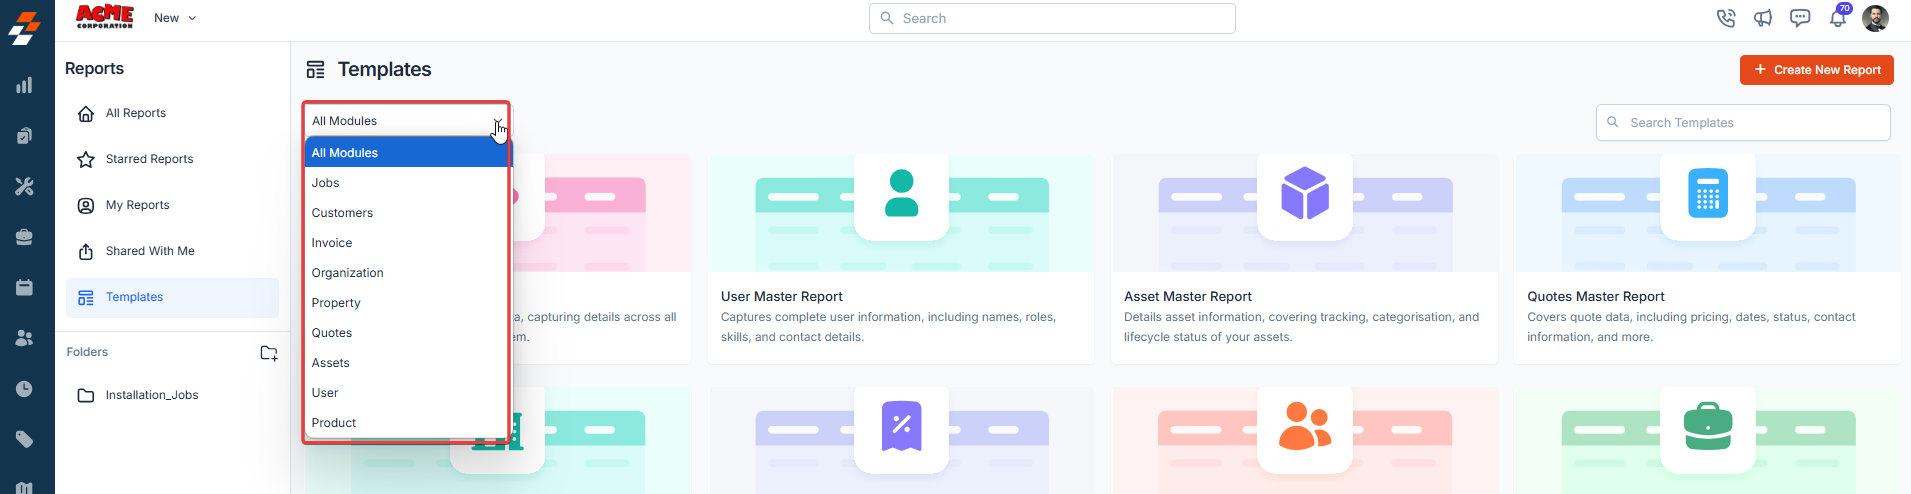
The Template reports page offers various ways to organize and refine your selection:-
Module Filter: Use the module dropdown to filter reports based on specific modules, such as Customers, Jobs, or Invoices.
-
Search Bar: If you have a specific report in mind, use the search function to quickly locate it.

Selecting and Customizing a Template Report
Once you have selected the appropriate template, click on it to open the report preview. Template reports provide structured data fields based on their respective modules, offering a convenient starting point for analysis. To use the template, click the Use this Template button.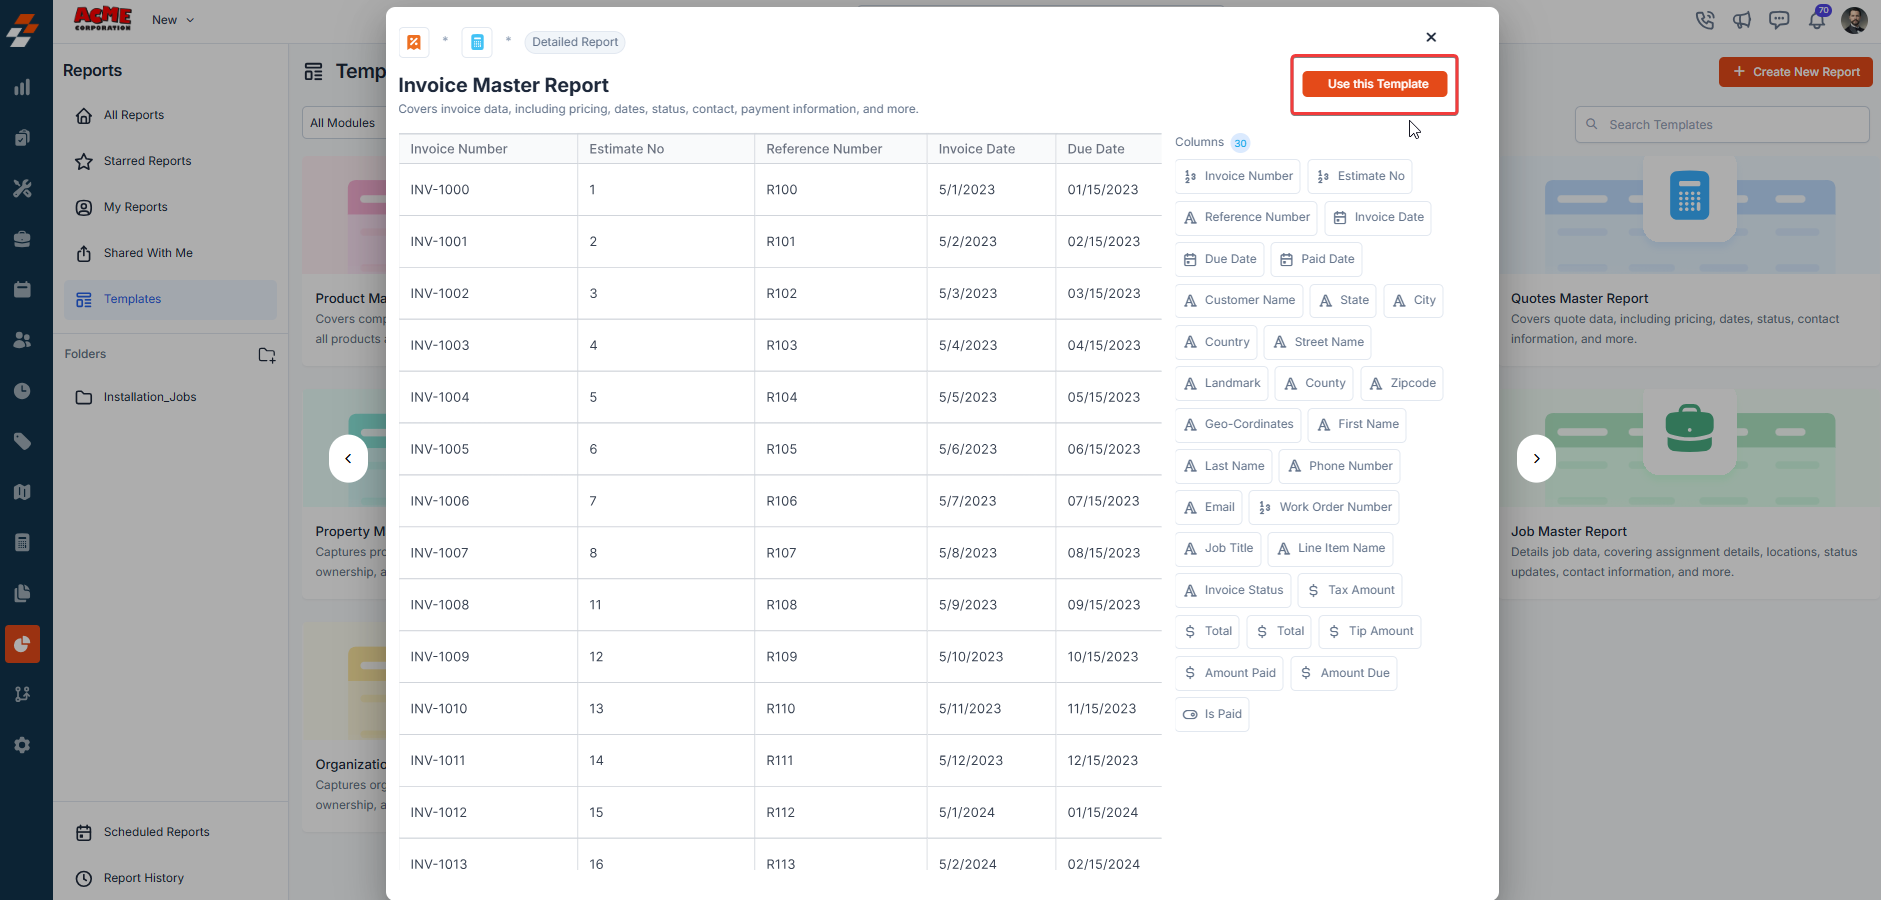
- Select specific data fields to include in the report. For instance, when generating a customer report, you can add fields like Customer Name, Contact Number, and Location.
- Customize individual fields by pinning columns for better visibility, grouping rows for structured organization, or applying aggregate functions like counting total jobs, summing invoice amounts, or calculating average job duration.
- Drag and drop fields to adjust their position in the report table for better readability.
- Define filters to display only relevant data. For example, filter jobs by Completion Date, Job Status, or Assigned Technician.
- Use operators such as Equal To, Contains, Greater Than, or Less Than to refine the displayed data.