Report Access Permissions by Role
Your user role determines access to reports in Zuper:
Your user role determines access to reports in Zuper:
- Admins: Can create, edit, and delete reports, as well as share and schedule them.
- Team Leaders (TLs): Can view reports that have been shared with them, but cannot create, edit, or delete reports.
- Users (FEs): Cannot access reports in Zuper.
Navigation: Reports -> Reports (beta)
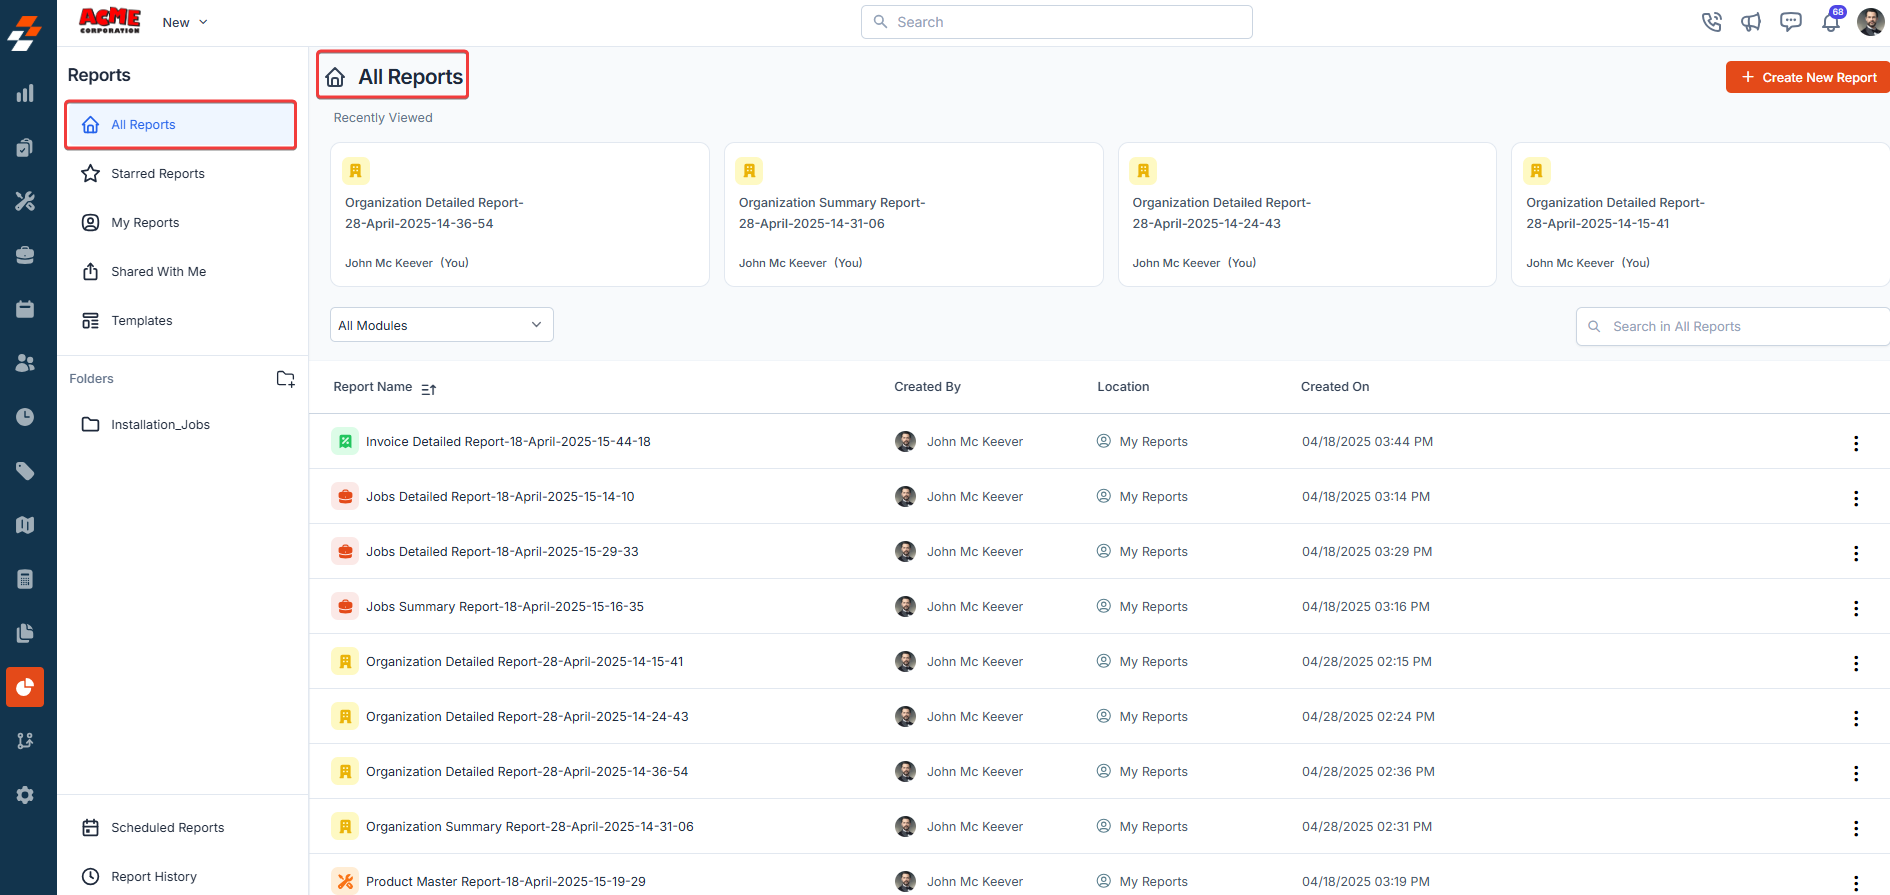
Accessing the Reports home page
- Click the Reports module from the left navigation menu and select “Reports” (beta).

- The Reports home page will open, displaying a comprehensive list of all reports available to you.
Panels on the Reports home page
The Report home page is laid out in two main panels: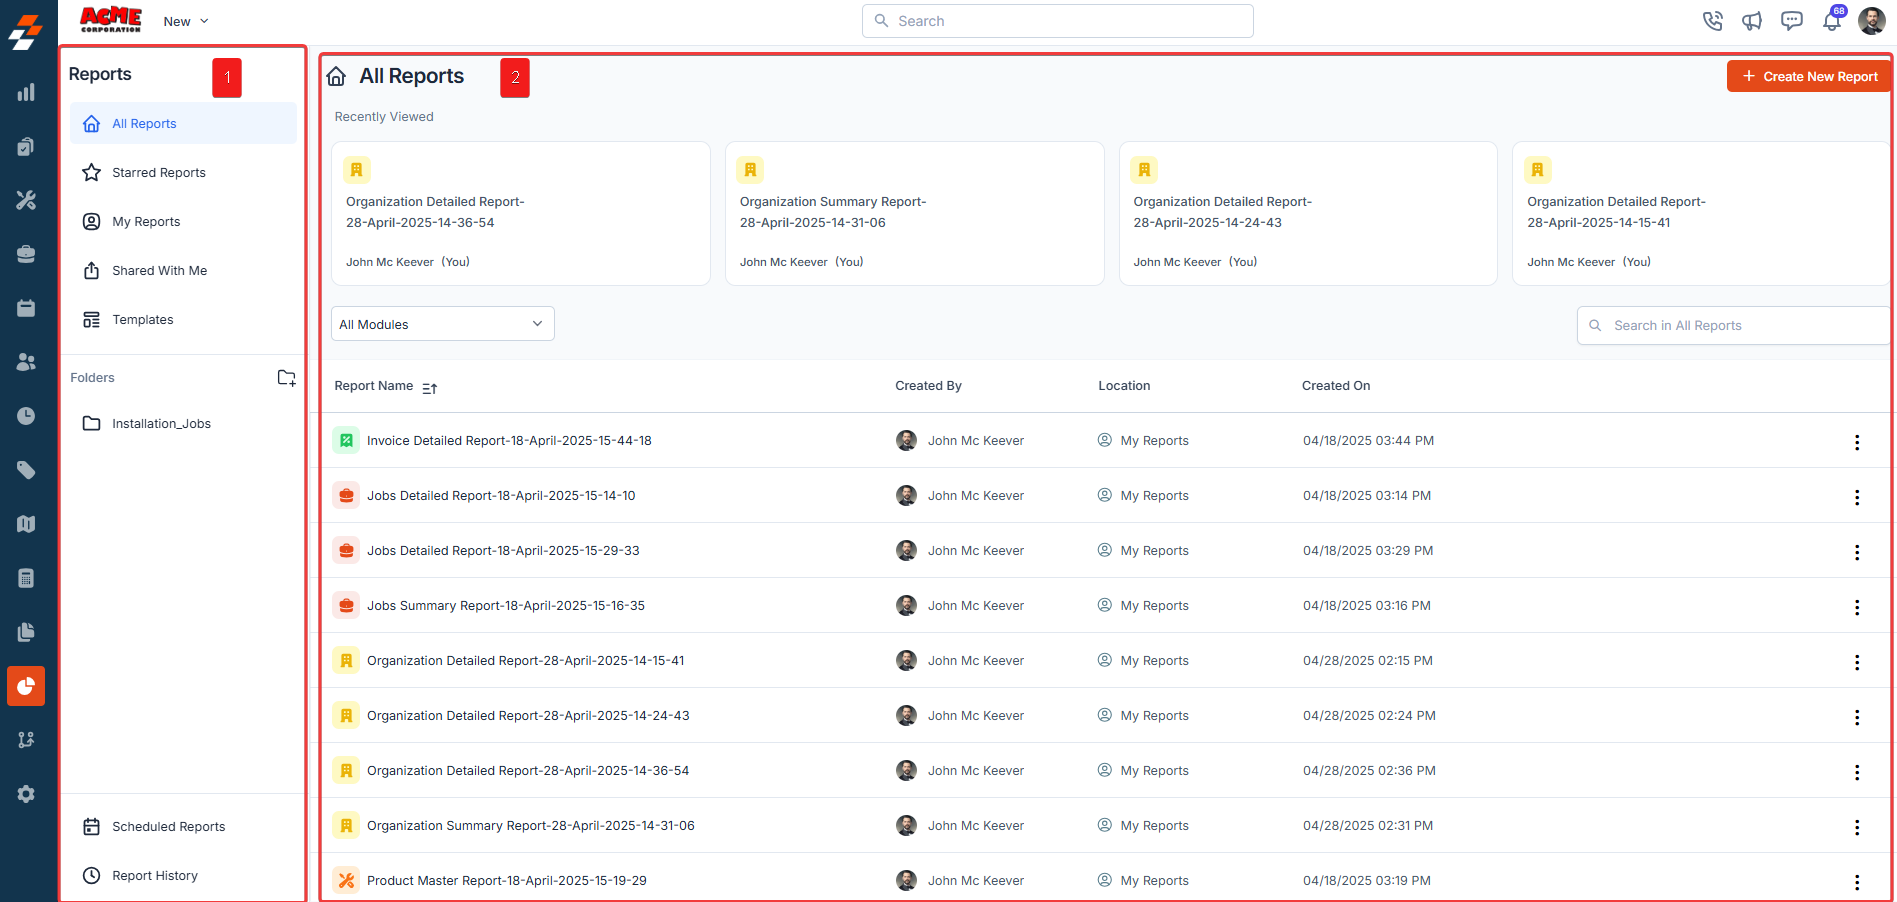
A. Navigation panel
The Navigation panel is located on the left side of the page and helps you filter and navigate between different categories of reports. The available categories are:- All Reports: Displays a complete list of all reports that are accessible to you.
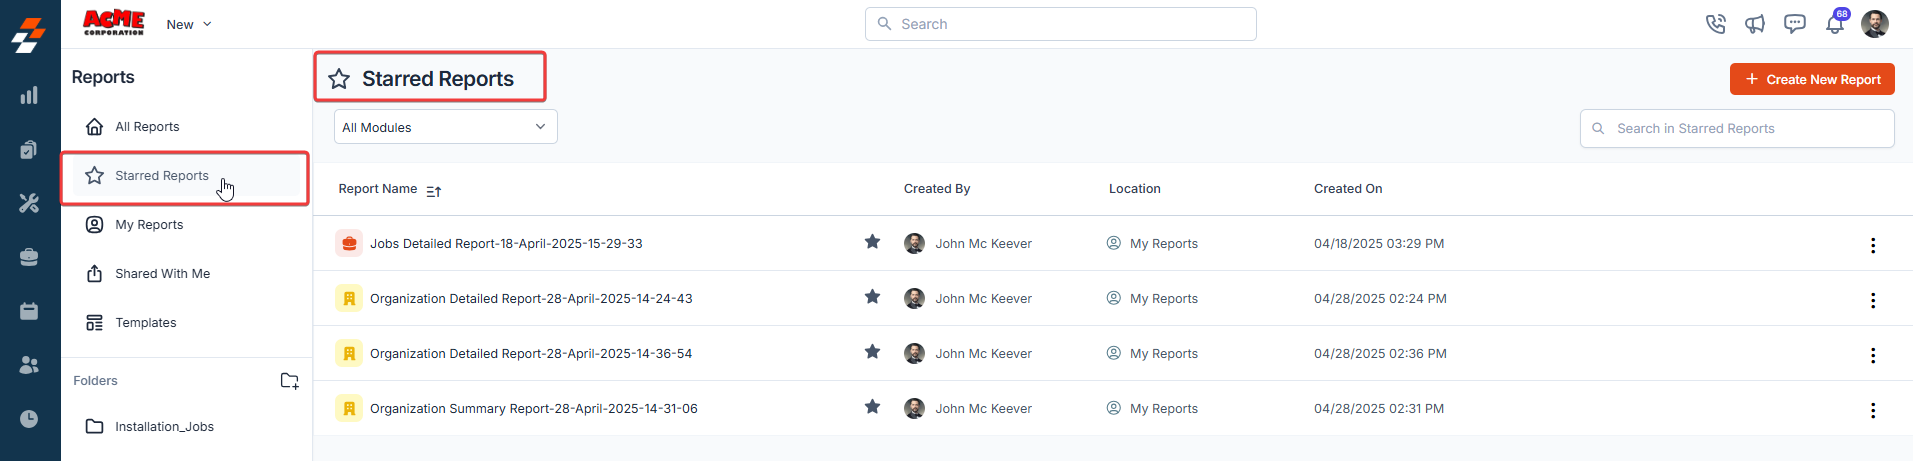
- Starred Reports: Lists your favorite or most-used reports that you have marked with a star for easy access.

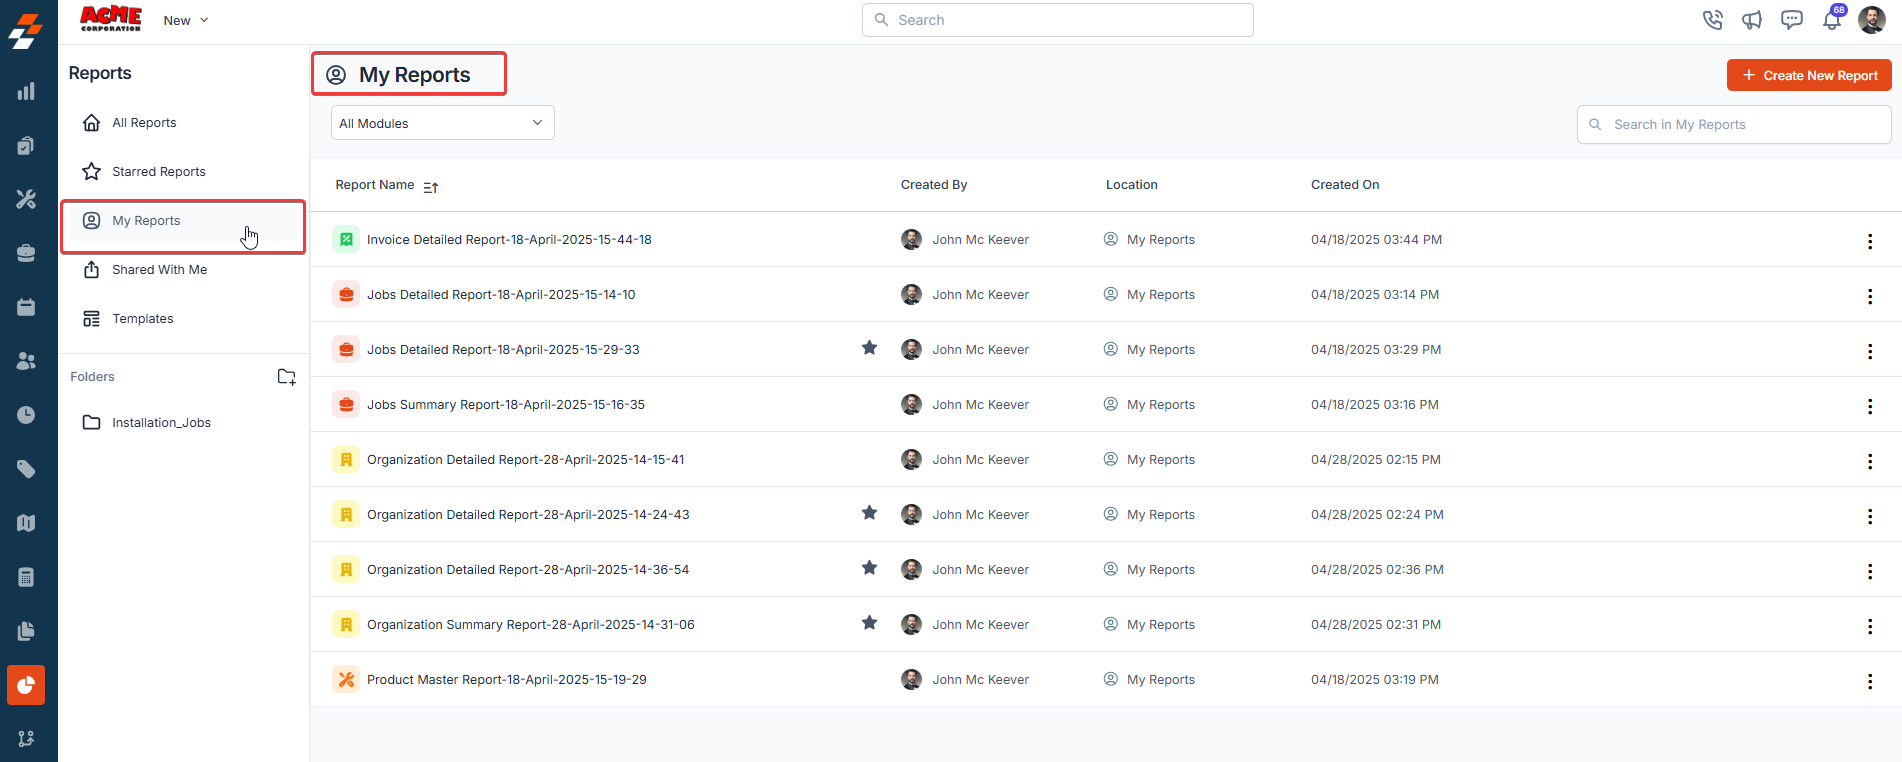
- My Reports: Shows the reports you have created or own.
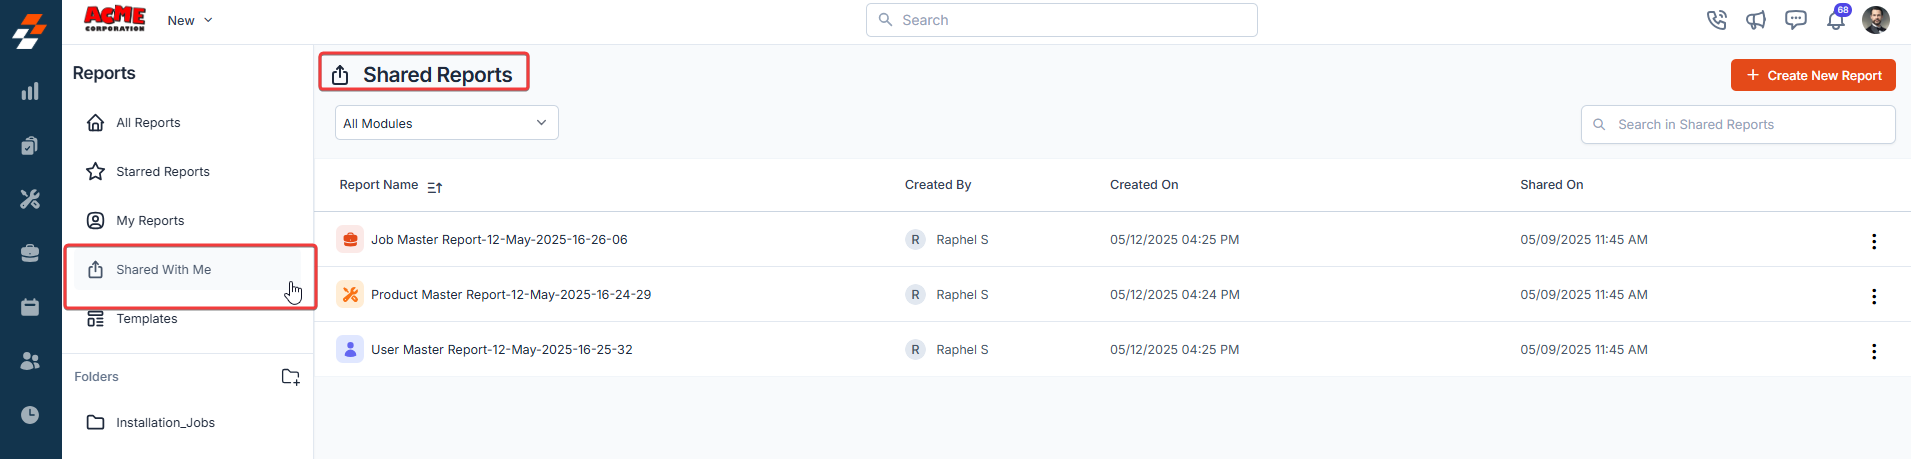
- Shared Reports: Displays reports that have been shared with you by other users or teams.
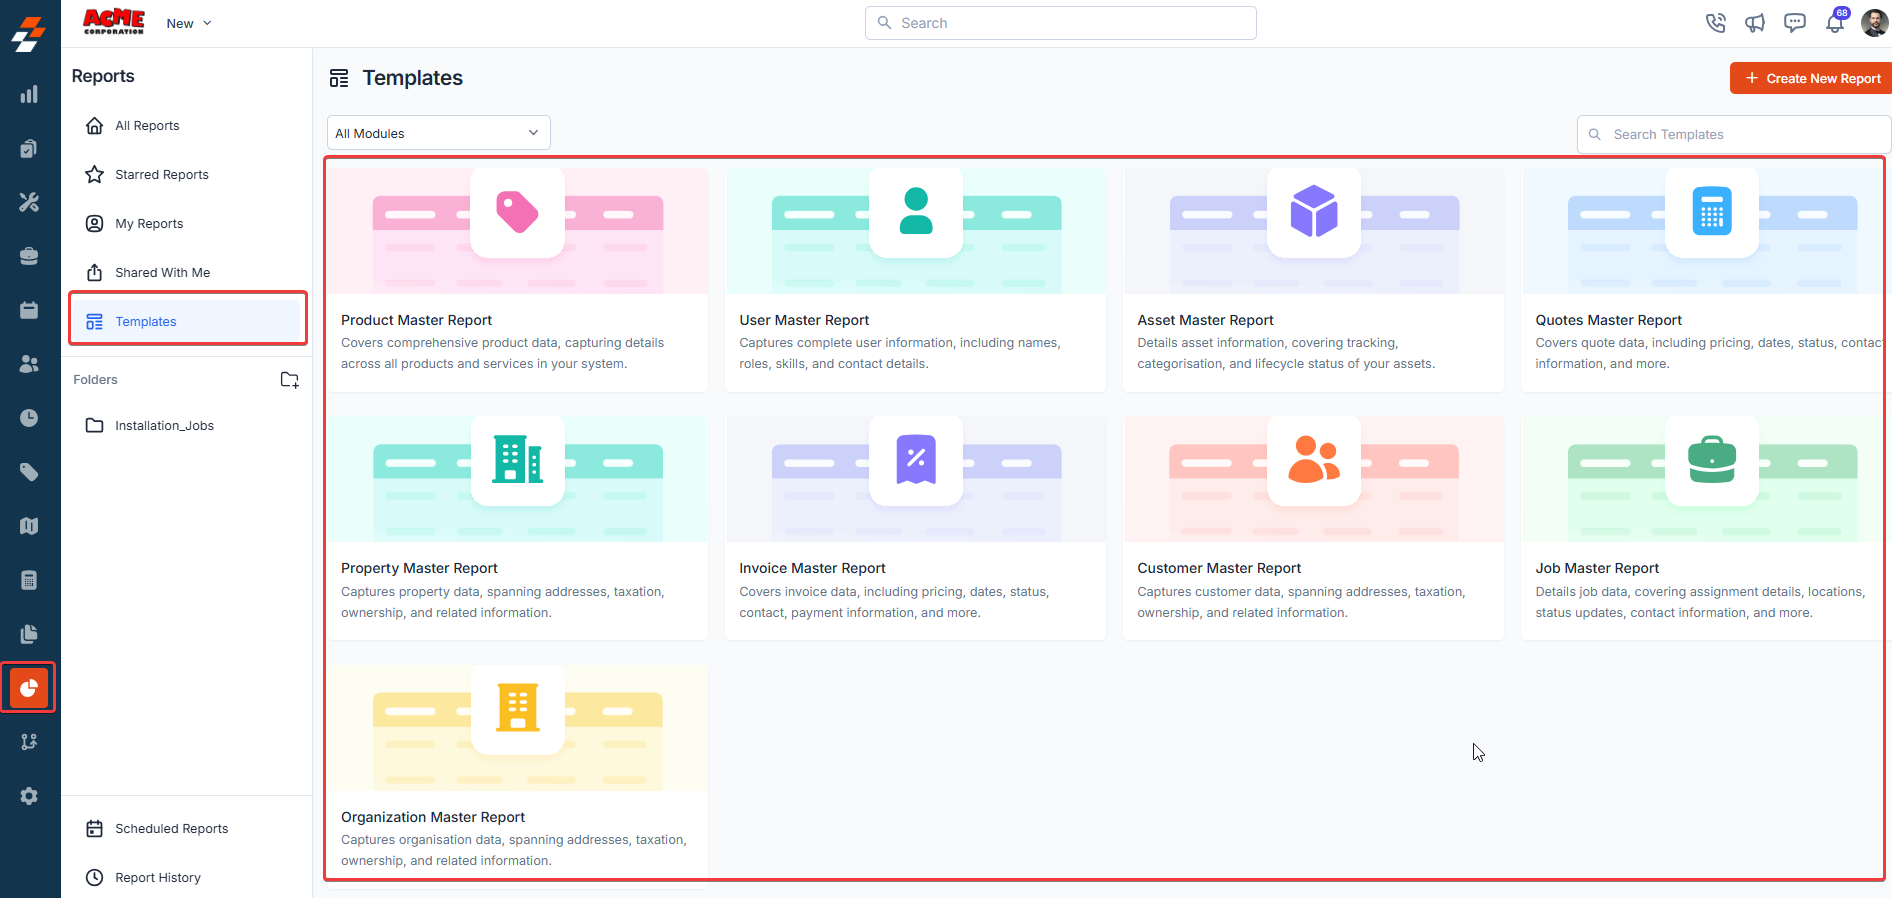
- Templates: Allows you to access and use predefined templates to create new reports quickly.
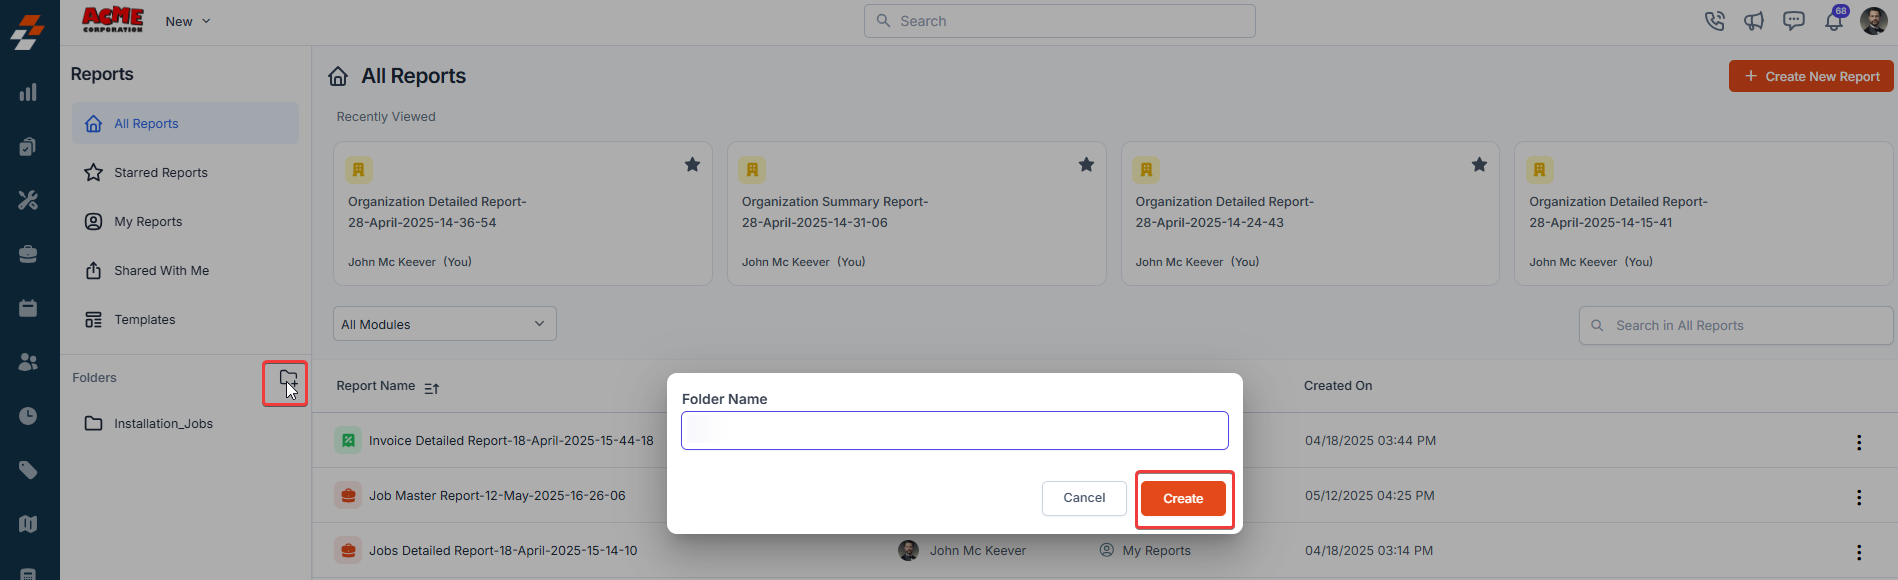
- Folders: Organize your reports into folders to categorize them based on your organizational needs. You can create up to 10 folders.
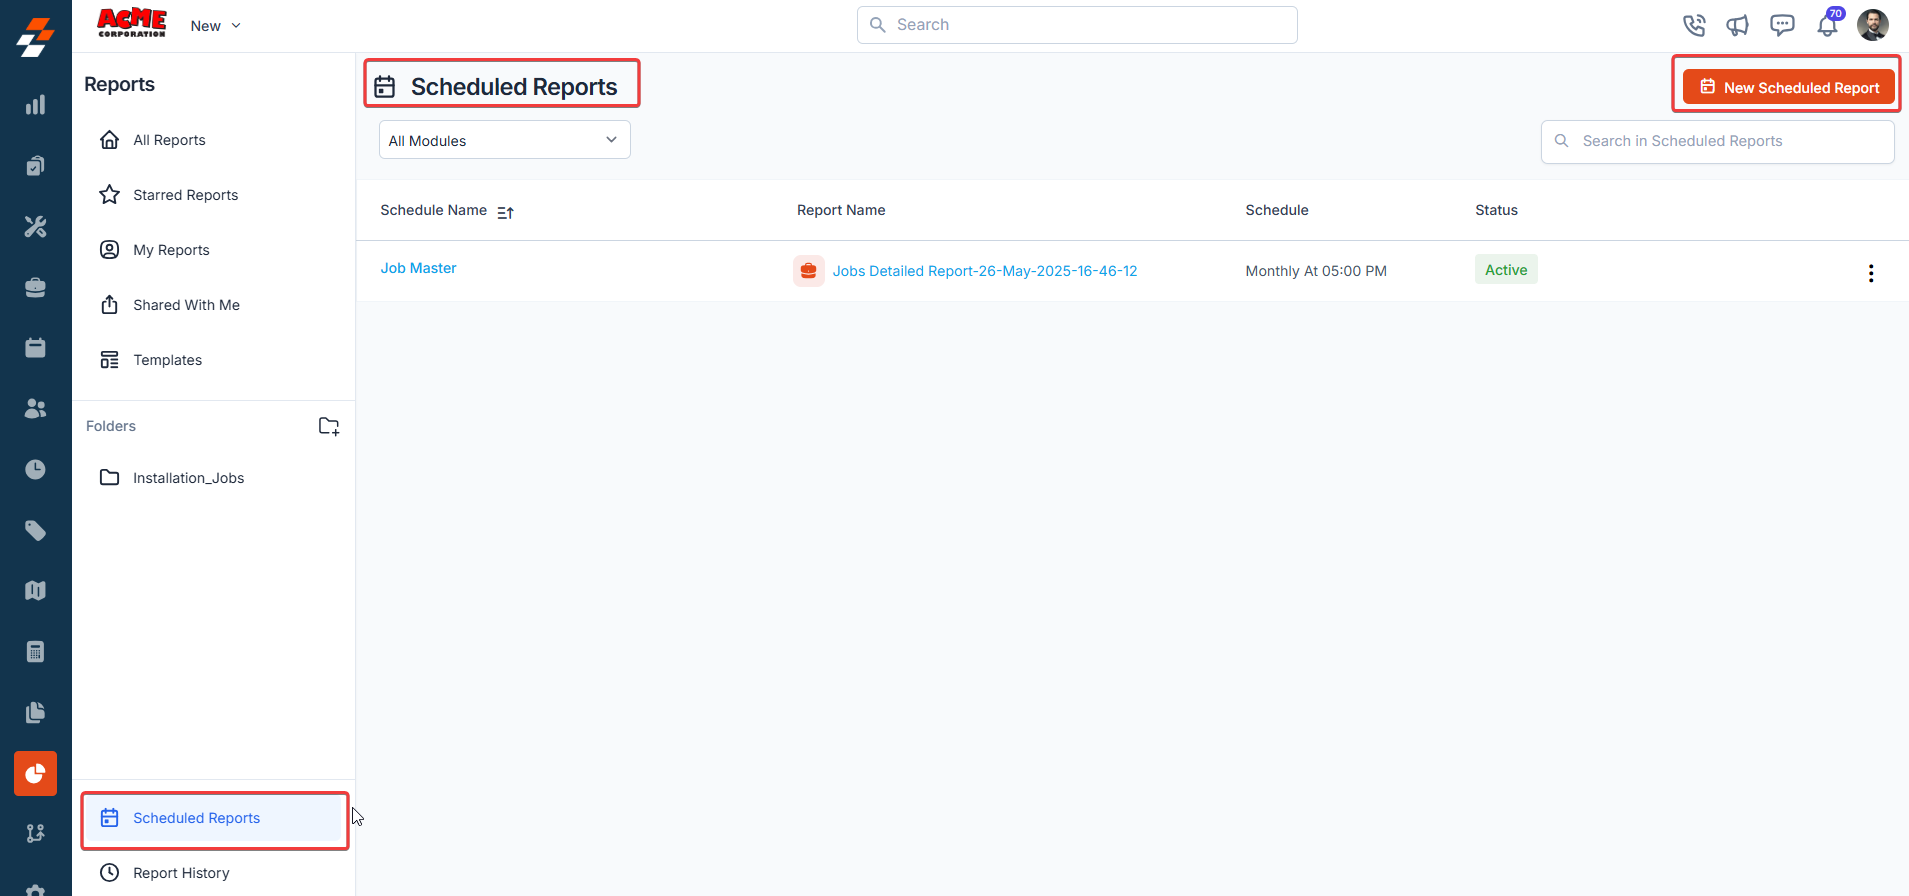
- Scheduled Reports: View reports that are set to be generated automatically at specified intervals. You can also create a new scheduled report by selecting the New Scheduled Report button.
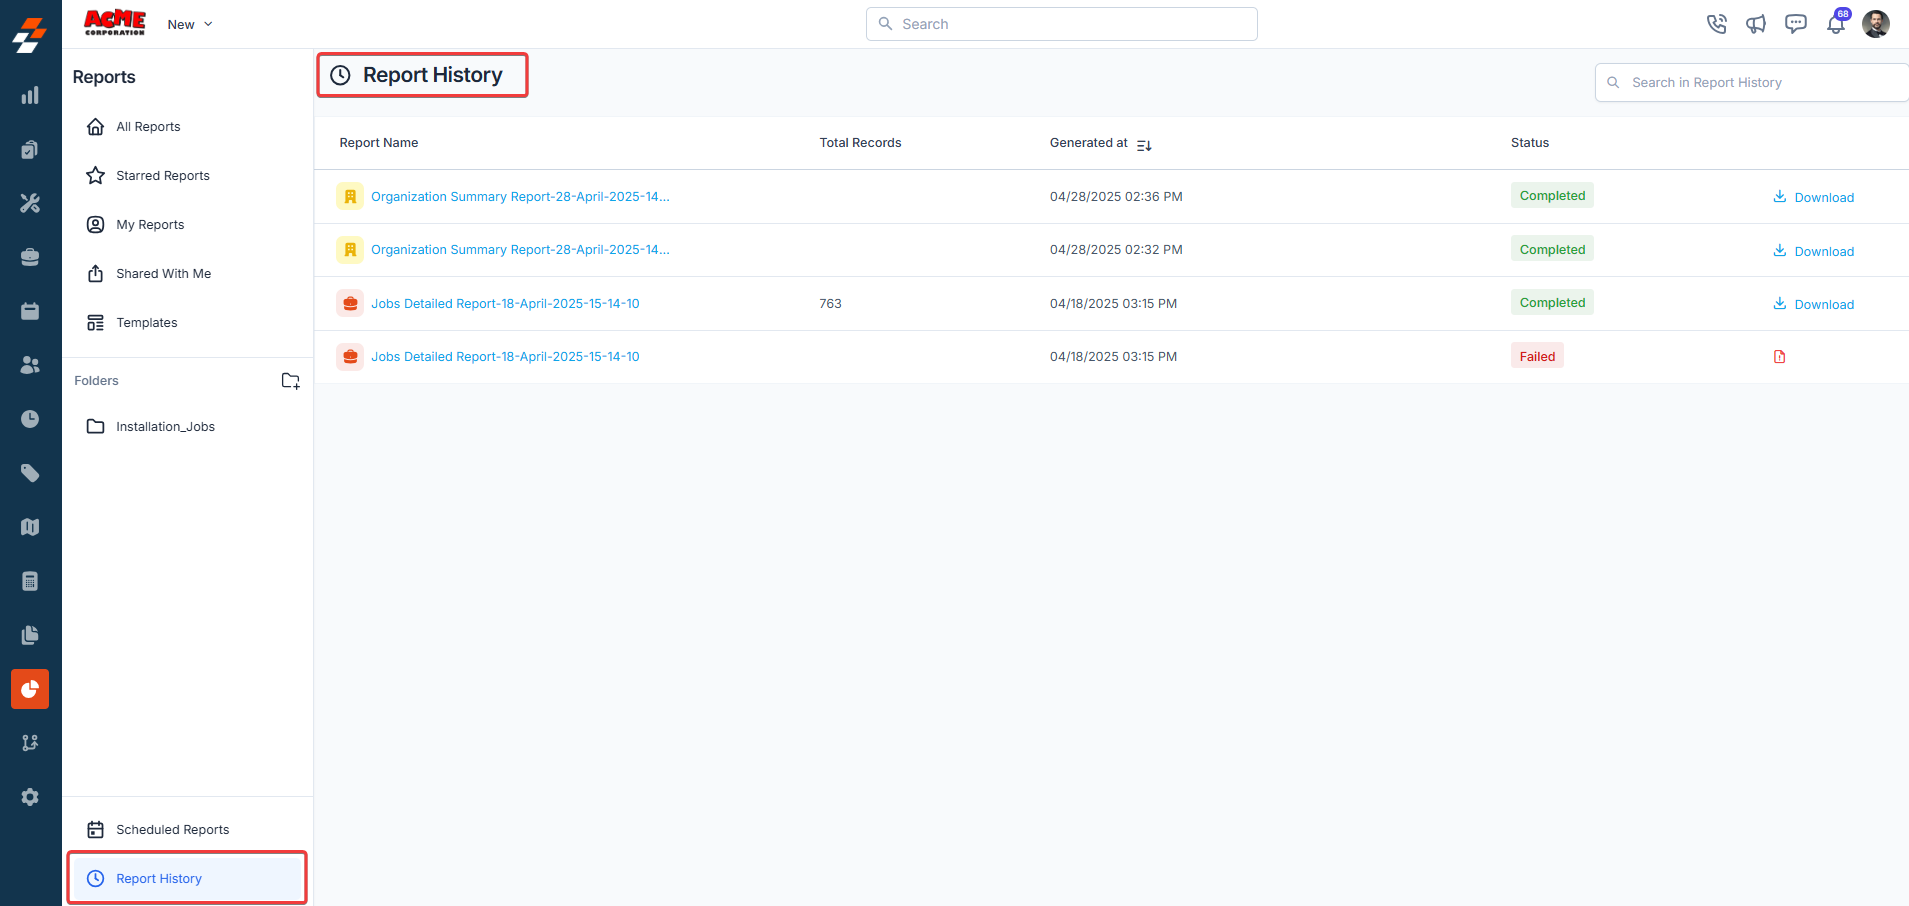
- Report History: Track previous versions or iterations of reports that have been modified or updated over time. This feature provides a record of changes made to each report.
B. Main Panel
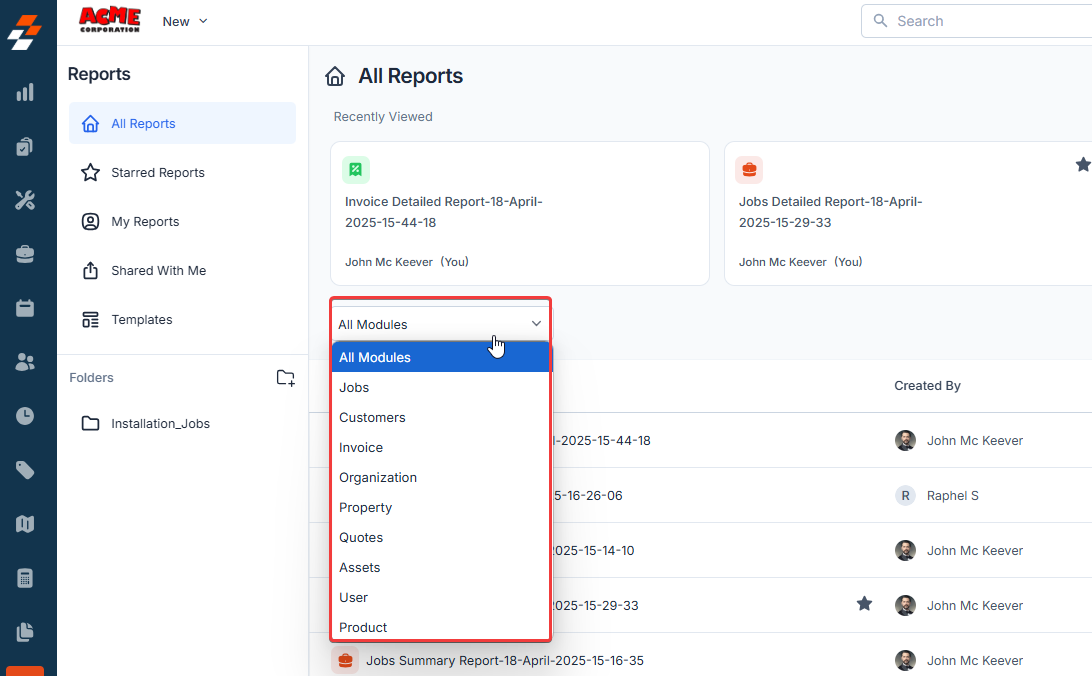
The Main Panel is the central area where you interact with reports. The following features are available in this panel:- Report Modules: This allows you to switch between modules, such as ‘All Reports’ or any specific report module. Reports that belong to the selected module will be displayed in the list.
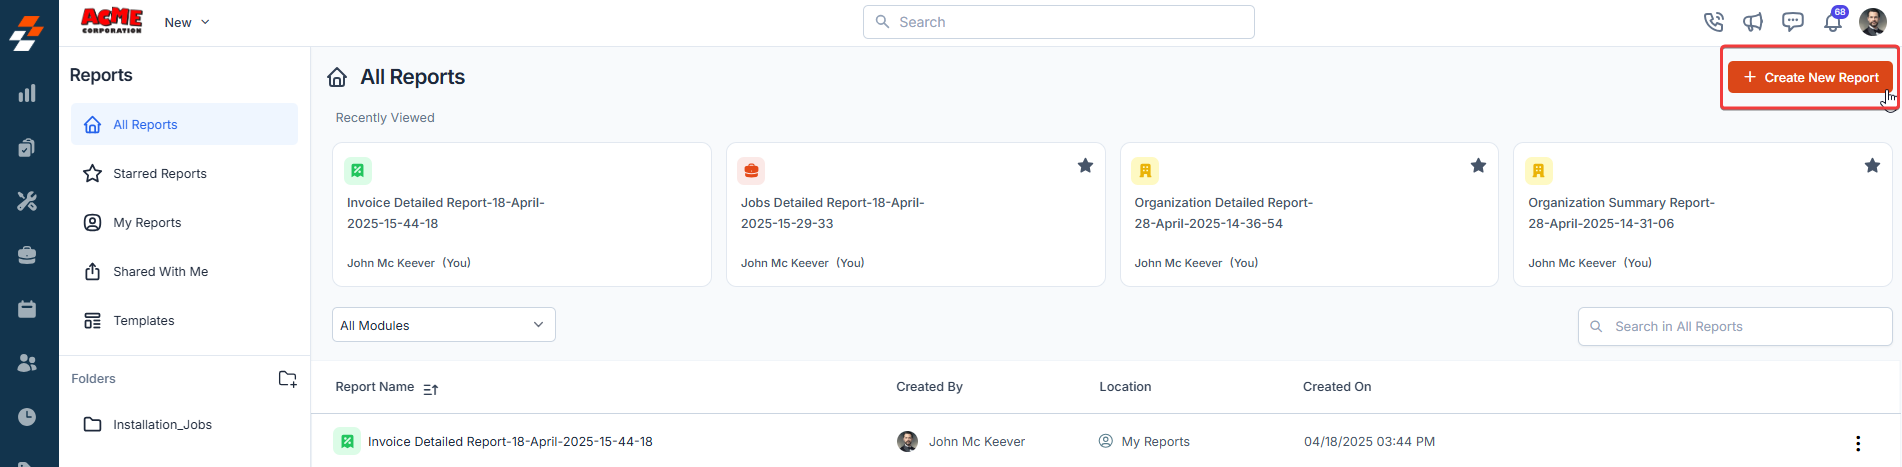
- Create New Report: Click on this button to start creating a new report. You will be directed to the Report Builder interface, where you can define the parameters of your report.
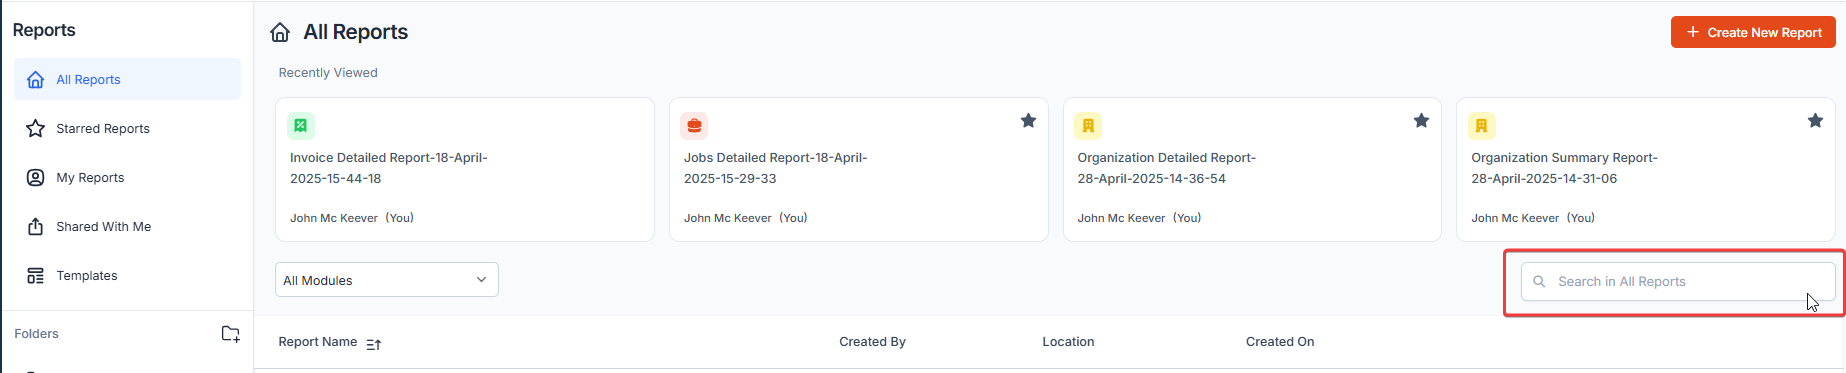
- Search Bar: This allows you to search for reports by name, category, or type. As you type, Zuper will filter the reports to match your search criteria.
- Recently Viewed Section: Displays the reports you have accessed recently. This section allows for quick navigation to previously viewed reports.

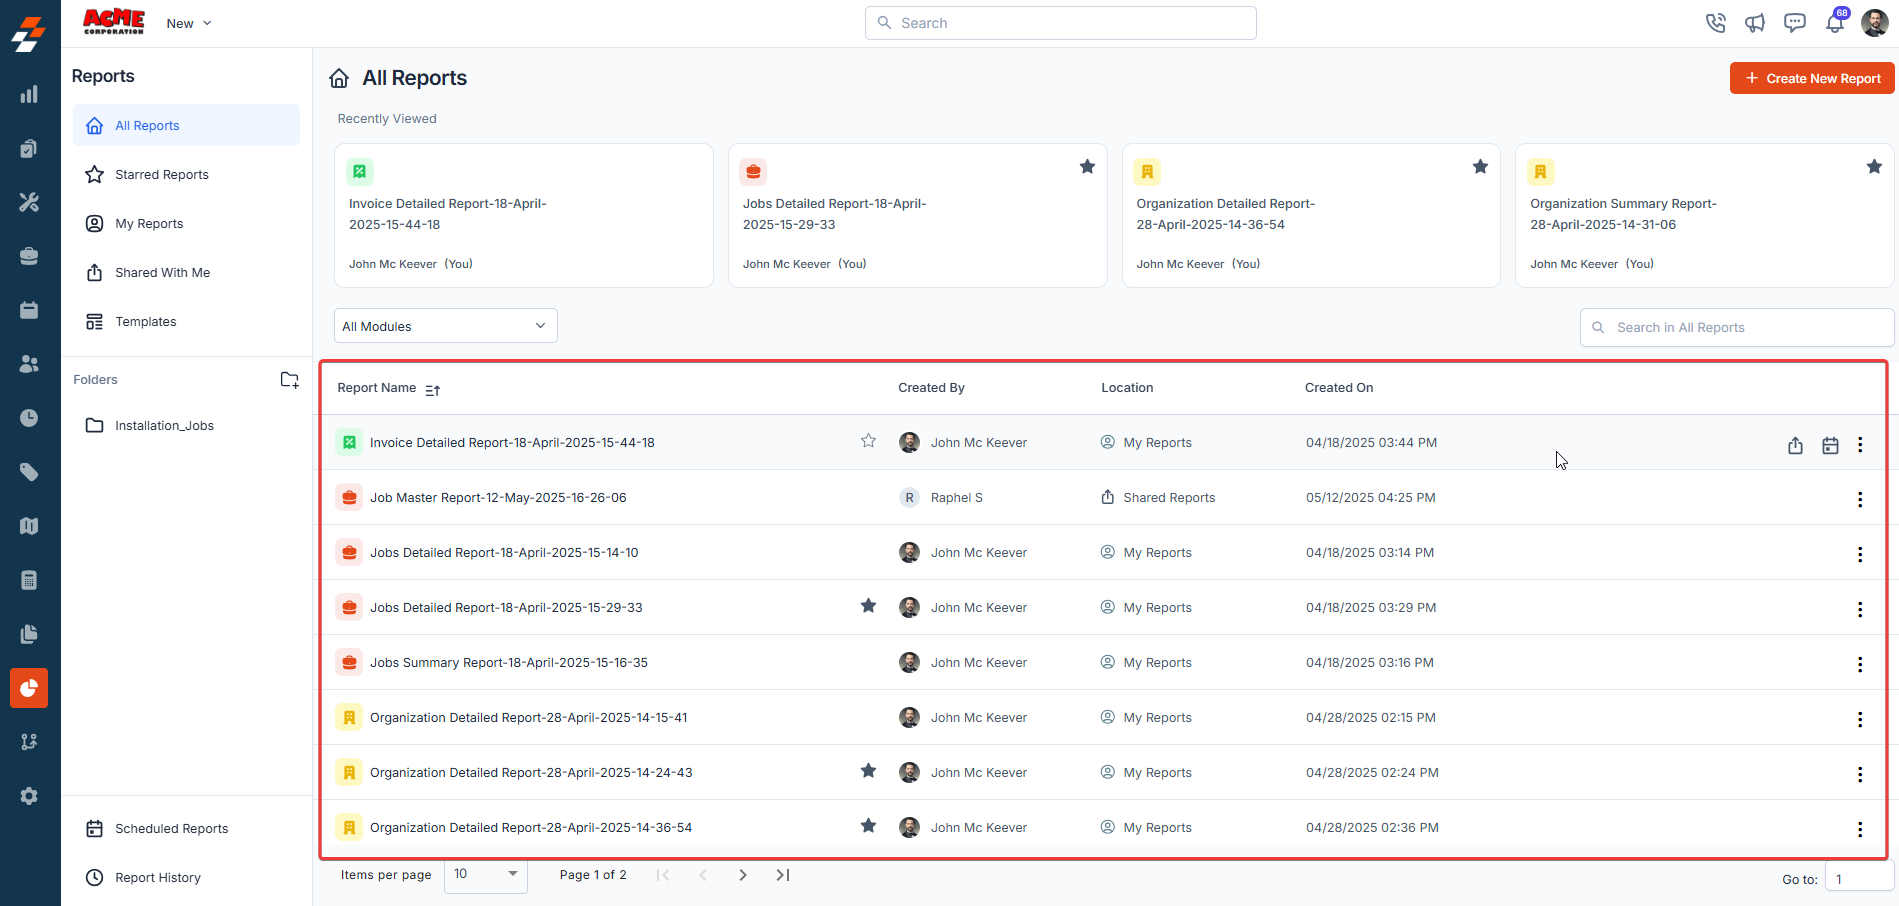
- Reports List: This section provides a detailed listing of all the reports available to you. Each report entry includes critical information, such as the report’s Title, Creator, Location, Creation Date, Sharing Status, and more.
Actions and features on the Reports list
Next to each report in the Reports List, there are several actions you can take. These functions allow you to manage your reports efficiently: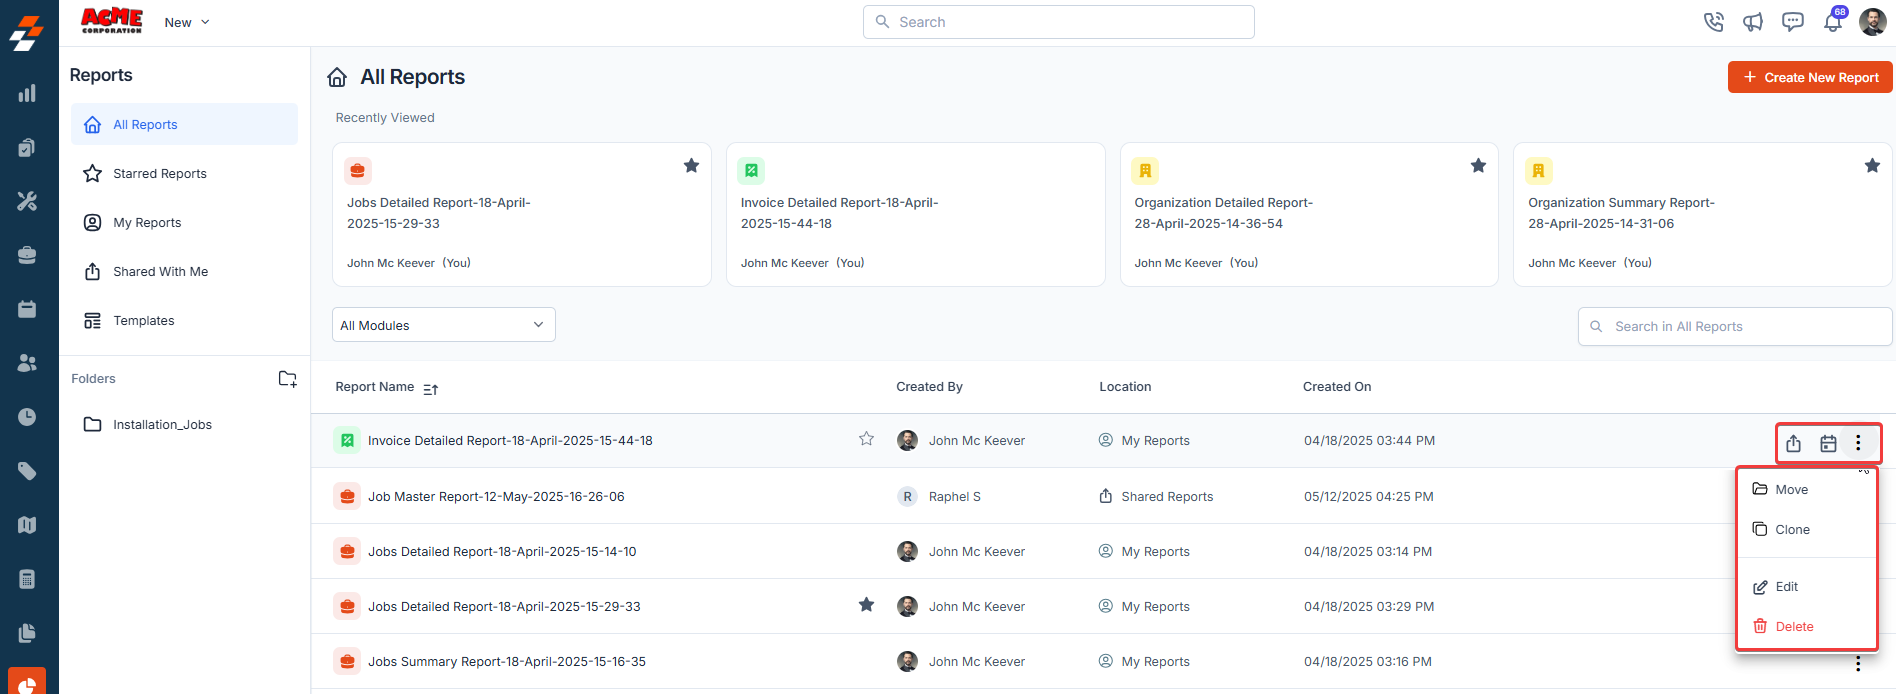
- Share Report: Share a report with other users or teams and define their access permissions, such as view-only or edit permissions.
Note: The Share option appears when you hover over the report you want to share._
- Schedule Report: Set up an automated schedule for reports to be generated and sent to specific recipients at defined intervals.
Note: The Schedule option appears when you hover over the respective report.
- Move Report: Organize the report by moving it into an existing folder or creating a new folder for better categorization.
- Edit Report: Modify the parameters, filters, or layout of the report.
- Clone Report: Make a copy of the existing report. The cloned report will retain the original settings but can be edited independently.
Note: There is a limit on the number of reports you can clone. If you select Clone Report and a Cloning pop-up appears and then disappears without creating a new report, you have reached your cloning limit. Contact Zuper Support to request a limit increase.
- Delete Report: Permanently remove the report from the system. Deletion is irreversible, so ensure that you no longer need the report before deleting it.
Scheduling reports for automatic generation
You can schedule reports to be automatically generated at specific times and intervals. This is useful for recurring reports that need to be sent out regularly, such as weekly or monthly reports. To know more, see Schedule Report.Organizing reports in folders
You can categorize reports based on function, department, or any custom classification in Zuper.- On the Reports home page, click the Folders icon to create a new folder. Note that you can create up to 10 folders.
- Alternatively, you can select the existing folder to categorize your reports.
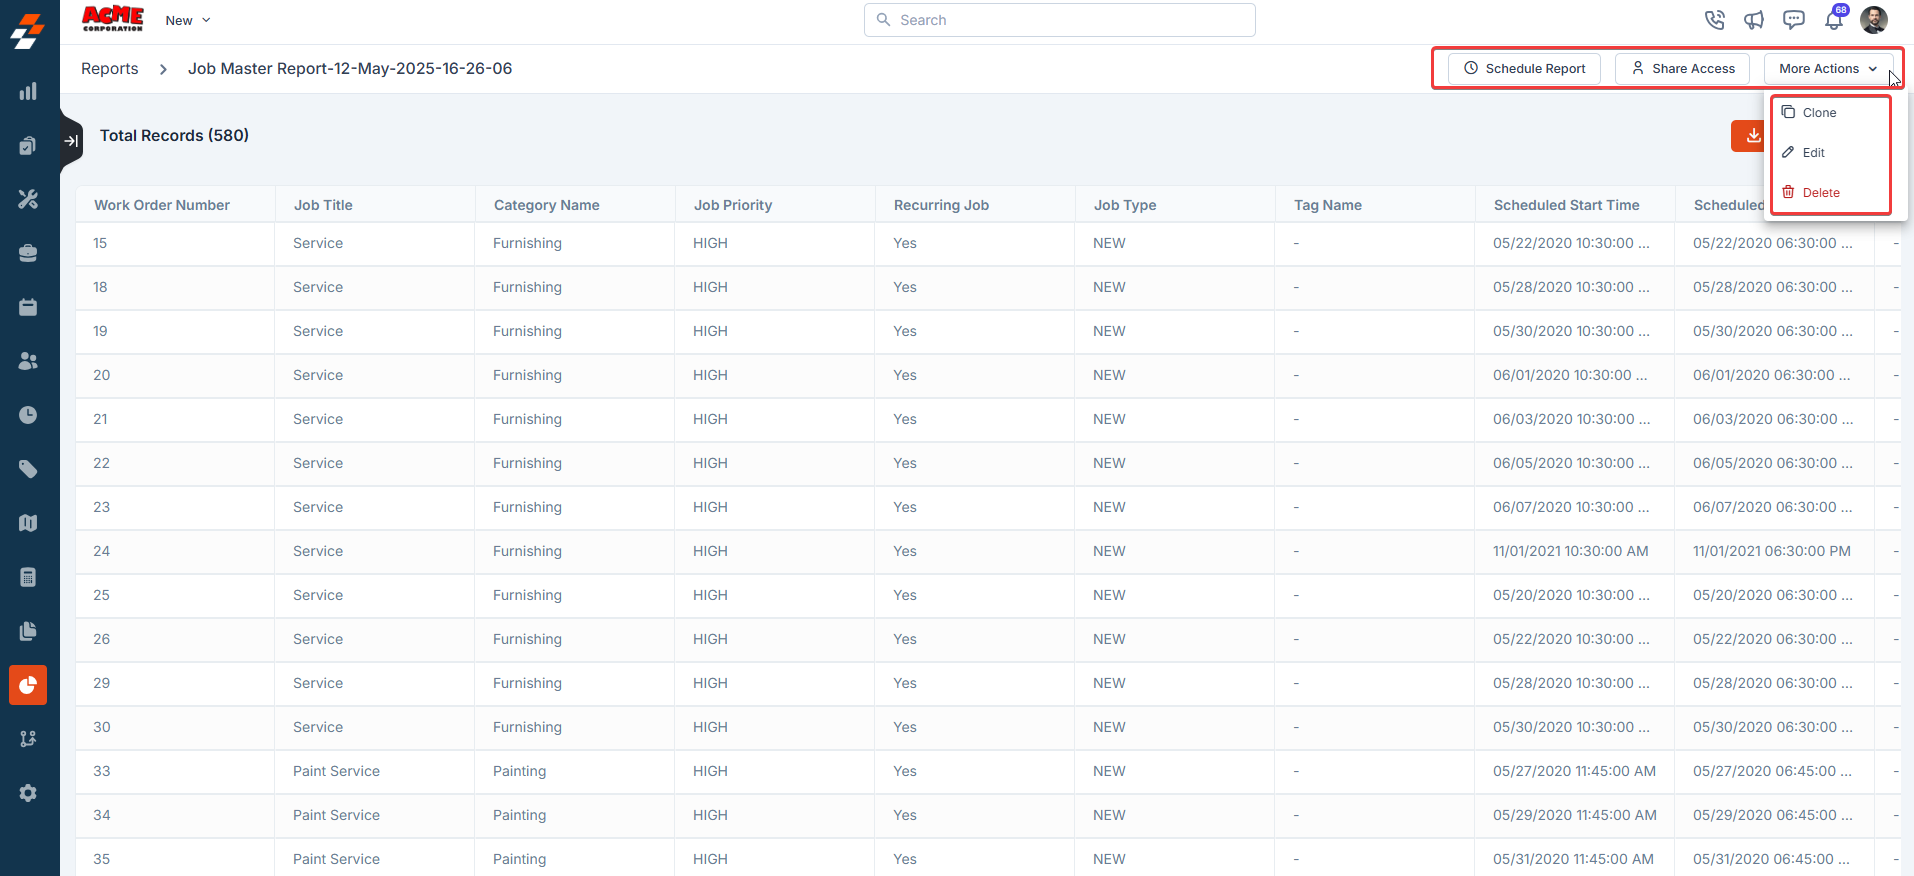
- Schedule Report: Click the Schedule Report button to set up an automated schedule for reports to be generated and sent to specific recipients at defined intervals.
- Editing Reports: Click the Edit button to modify its settings. This will open the report configuration page, where you can adjust filters, add or remove columns, and customize the layout.
- Cloning Reports: Click the Clone button to create a duplicate of any report, which is helpful when you want to reuse report settings for a different dataset.
Note: There is a limit on the number of reports you can clone. If you select Clone Report and a Cloning pop-up appears and then disappears without creating a new report, you have reached your cloning limit. Contact Zuper Support to request a limit increase.
- Moving Report: Click the Move button to move it to an appropriate location.
- Deleting Reports: Click the Delete button to permanently delete the report.
- Download Report: Click the Download Report button to download a successfully generated report in Excel format.
Sharing Reports
Collaboration is key when working with reports, and Zuper makes it easy to share reports with individuals or teams while maintaining control over access permissions. You can share reports directly from the Reports home page or the Report Details page.- On the Reports home page, hover over the report and click the Share icon that appears.
- Alternatively, you can open the report and share it from the Detail page.
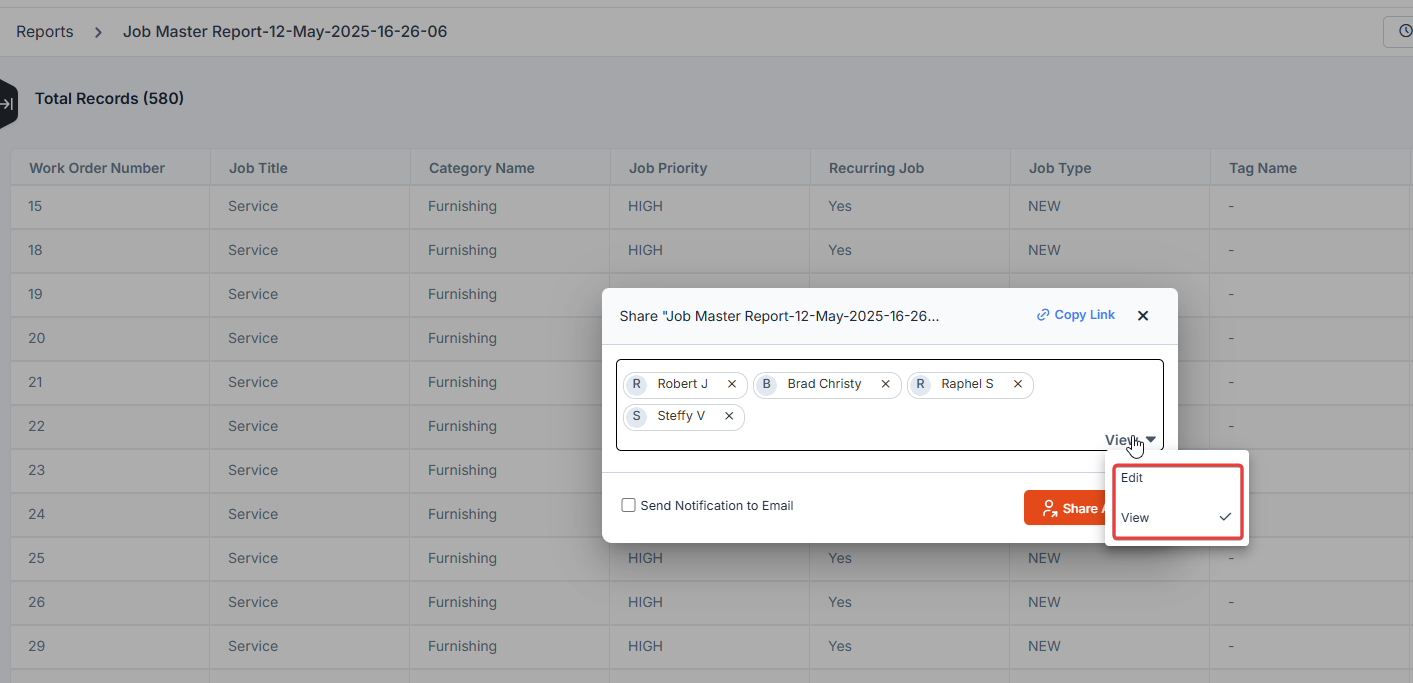
- Click on the Share Access button.
- Select the individuals or teams you want to share the report with.
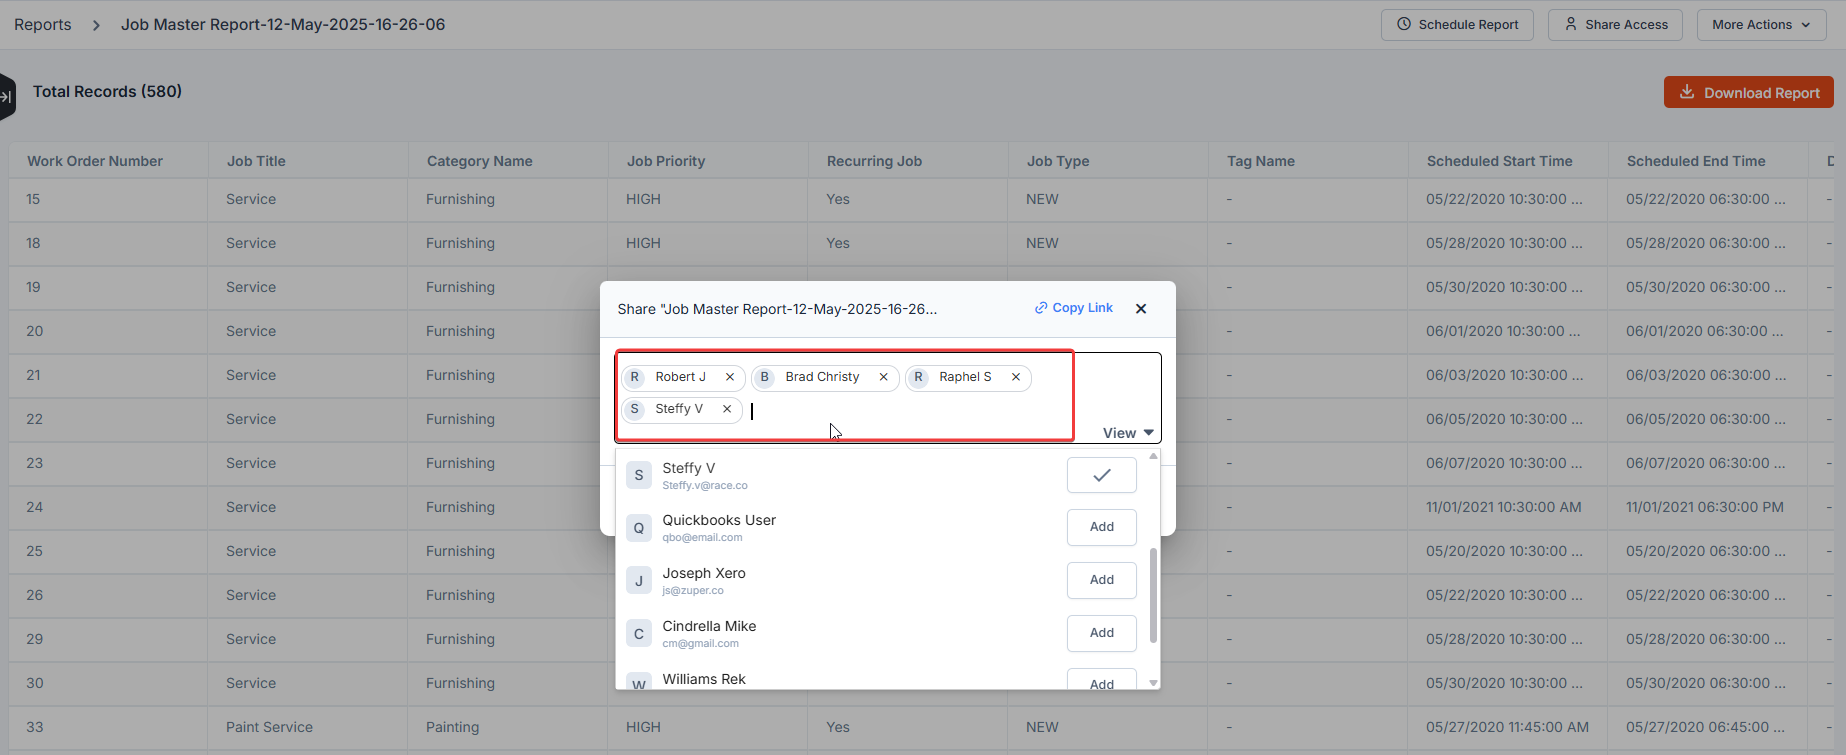
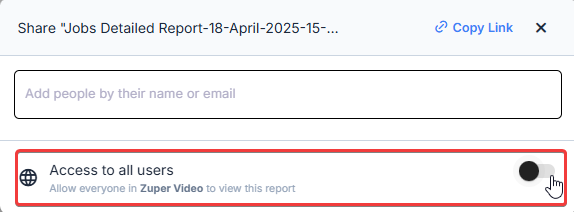
- Alternatively, if the report should be accessible to all users, enable theAccess to all users option.
- Set Access Levels – Choose from:
- View – The recipient can only view the report.
- Edit – The recipient can make changes to the report.
- To notify recipients via email when sharing a report, check the Send Notification to Email option. This ensures that the individuals or teams you’ve shared the report with receive an email notification about their access.
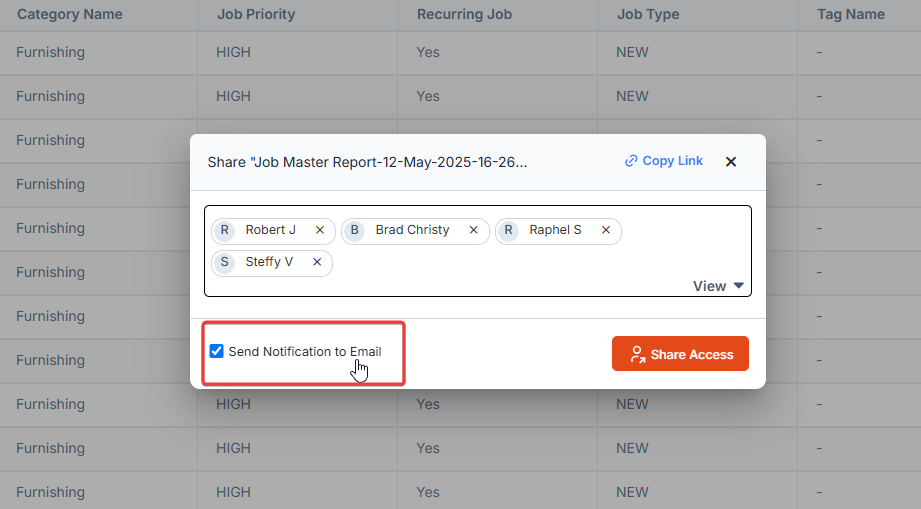
- Click the “Share Access” button to send it successfully.

Managing Shared Reports
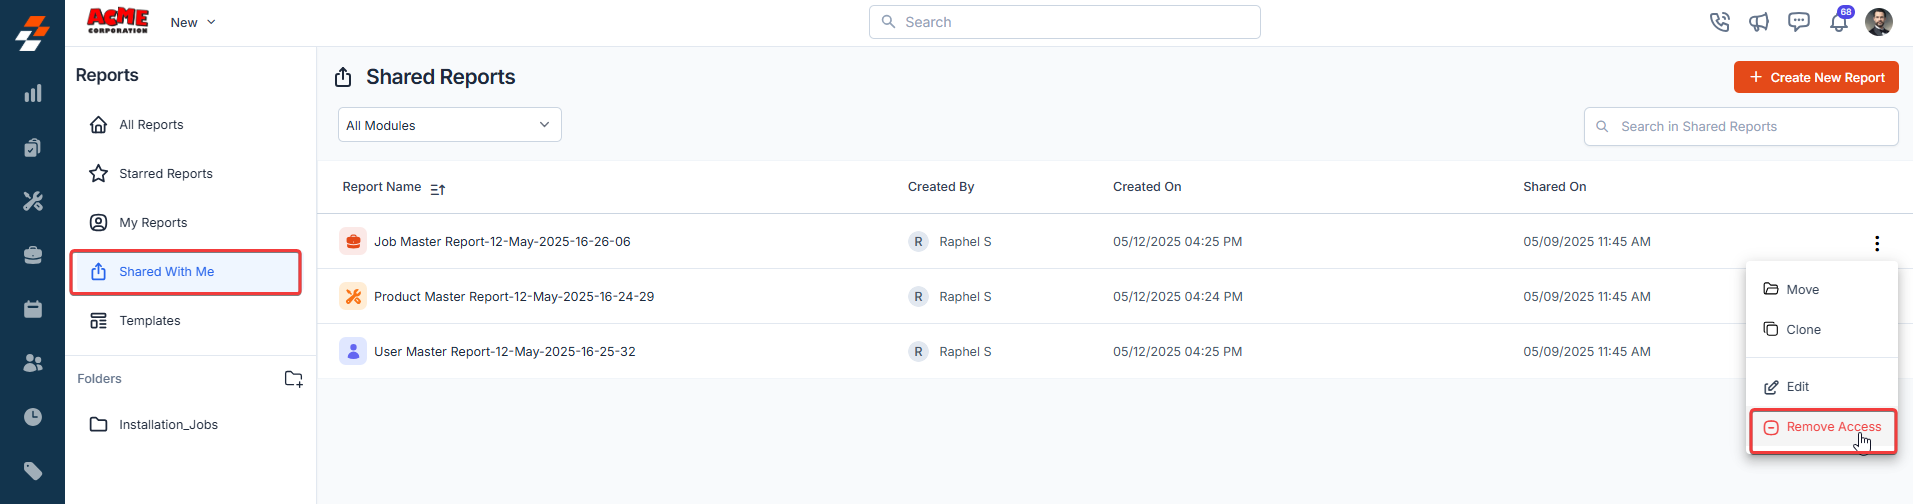
- Viewing Shared Reports – Once a report is shared, it will appear under the Shared With Me categories for the recipient.
- Removing Access – To revoke access, open the Share Access panel and remove the user or team by clicking “Remove Access”.
Marking Favorites
To mark a report as a favorite:- Click on the star icon next to the report name in the Report listing.
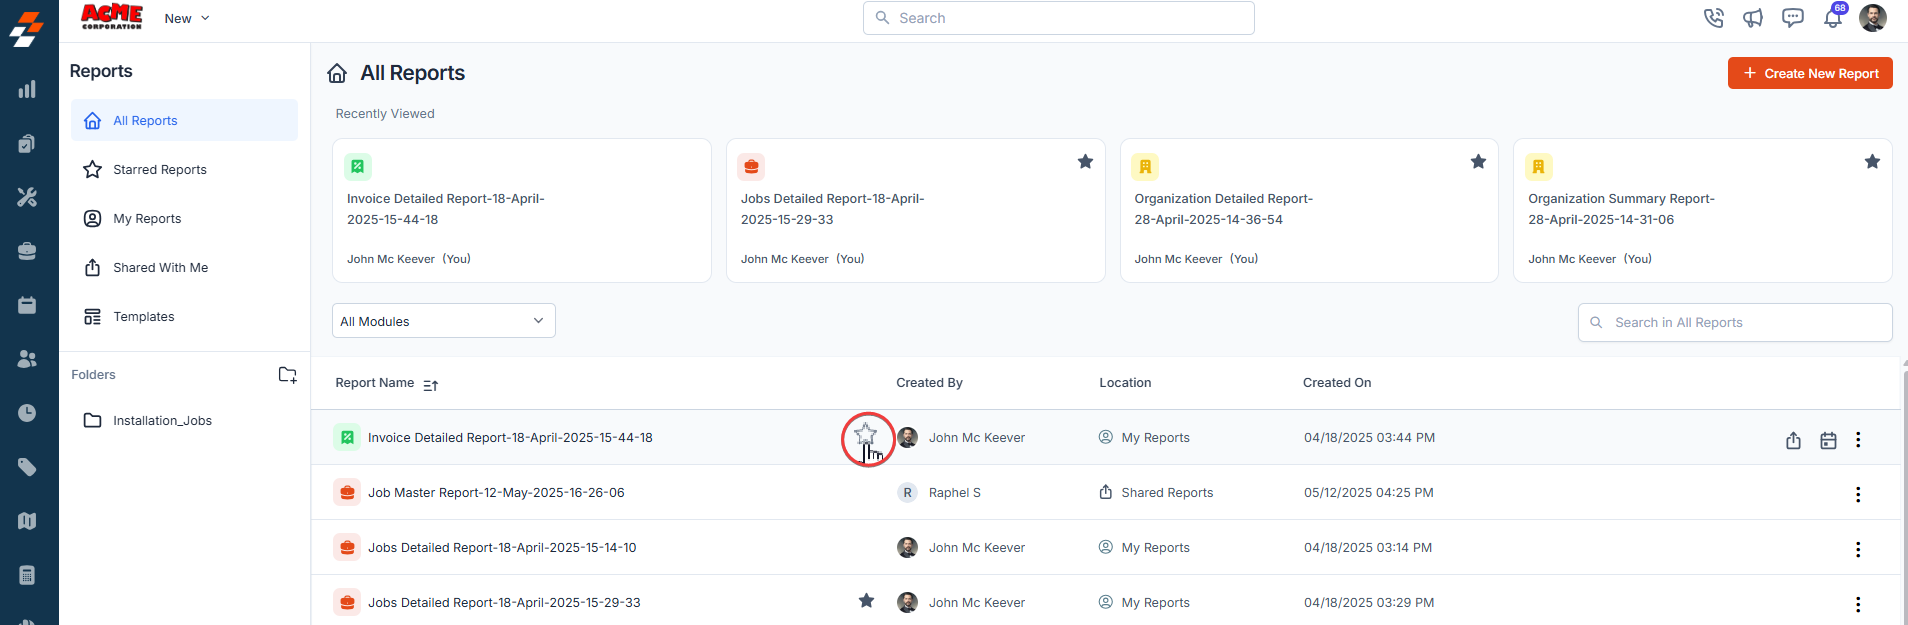
- Favorite reports will appear in the Favorites section for quick access.
Troubleshooting
Greyed-out fields in the field selector
Symptom A field in the Available Fields panel appears greyed out and you cannot select it. Cause The field is already added to your report. Zuper greys out fields that are currently in use to prevent duplicates. Fix No action is needed. If you want to use the field in a different position, remove it from your report first, then add it again.- Locate the field in your report’s column list.
- Select the remove icon next to the field.
- Add the field again in the position you want.
Expense Created At filter
Symptom You are building a report on expenses and want to filter by the date an expense was created, but you are unsure which filter to use. Cause The Expense Created At filter is available in the Expenses module within Report Builder. It filters expense records by the date and time they were created in Zuper. Fix- Select Reports from the left navigation menu and select Reports.
- Open your expense report or create a new one using the Expenses module.
- Go to the Filters panel.
- Select Expense Created At from the filter list.
- Enter the date range you want to report on.
- Select Apply.
Expense Category filter returns no results or an error
Symptom You apply the Expense Category filter in your report and receive no results or an unexpected error message. Cause This is a known issue. The Expense Category filter does not return results as expected in some configurations. Fix There is no workaround available at this time. Avoid using the Expense Category filter until Zuper confirms the fix is deployed. If the issue continues, contact Support.Report Builder is not visible in my account
Symptom You do not see Reports (beta) in your left navigation menu, or the option is unavailable. Cause Report Builder is a paid add-on. It is not included in the standard Zuper plan. Fix Contact your Zuper account manager to confirm whether Report Builder is included in your plan, or to request access. If the issue continues, contact Support.FAQs
- Is there a limit on how many reports I can clone?
Yes. Zuper sets a default cloning limit for reports. If you need a higher limit, contact Zuper Support so the team can review your account and discuss your options. - What should I do if the Cloning pop-up keeps disappearing?
1. Confirm that you have not reached the cloning limit for your account.
2. Refresh the page and try again.
3. If the issue continues, contact Zuper Support. - Why are some fields greyed out in the Available Fields panel?
Greyed-out fields are already added to your report. Zuper prevents you from adding the same field twice. Remove the field from your current column list first, then add it in the position you want. - Is Report Builder included in my Zuper plan?
Report Builder is a paid add-on and is not included in all plans. Contact your Zuper account manager for pricing details. - Can I still use Legacy Reports if I have Report Builder?
Yes. Legacy Reports remain available to all users under the Legacy Reports section in the left navigation menu, regardless of whether you have Report Builder enabled. If the issue continues, contact Support.