Navigating to Purchase Order Status
To view the status of a purchase order:- Click the Purchasing module from the left navigation menu and select Purchase Orders.
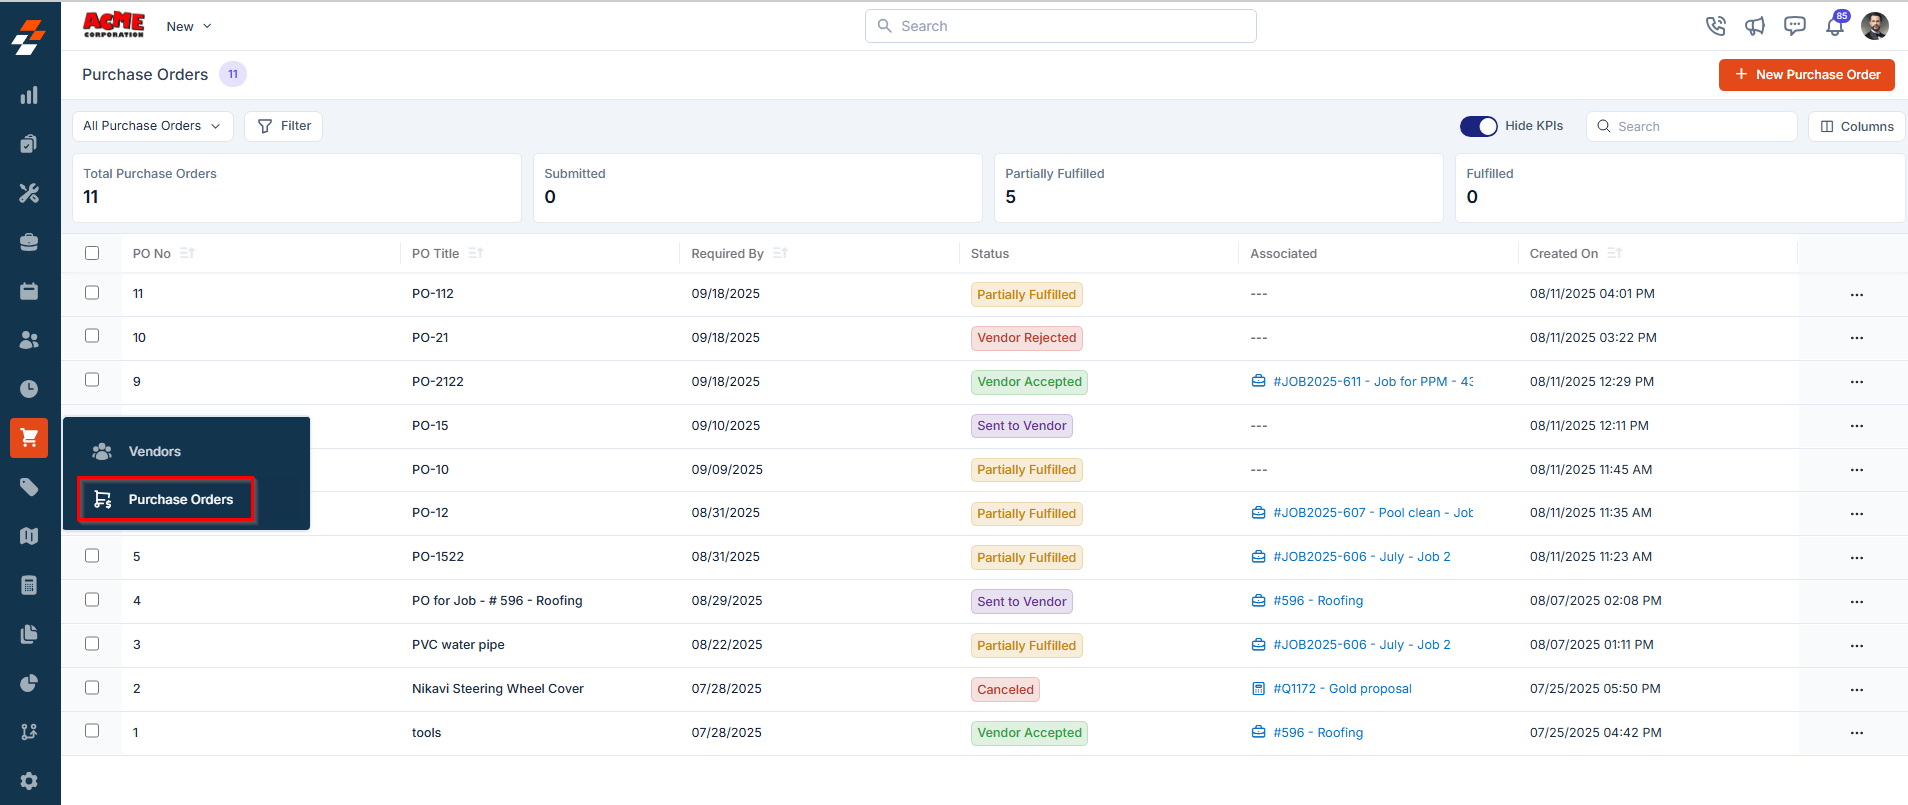
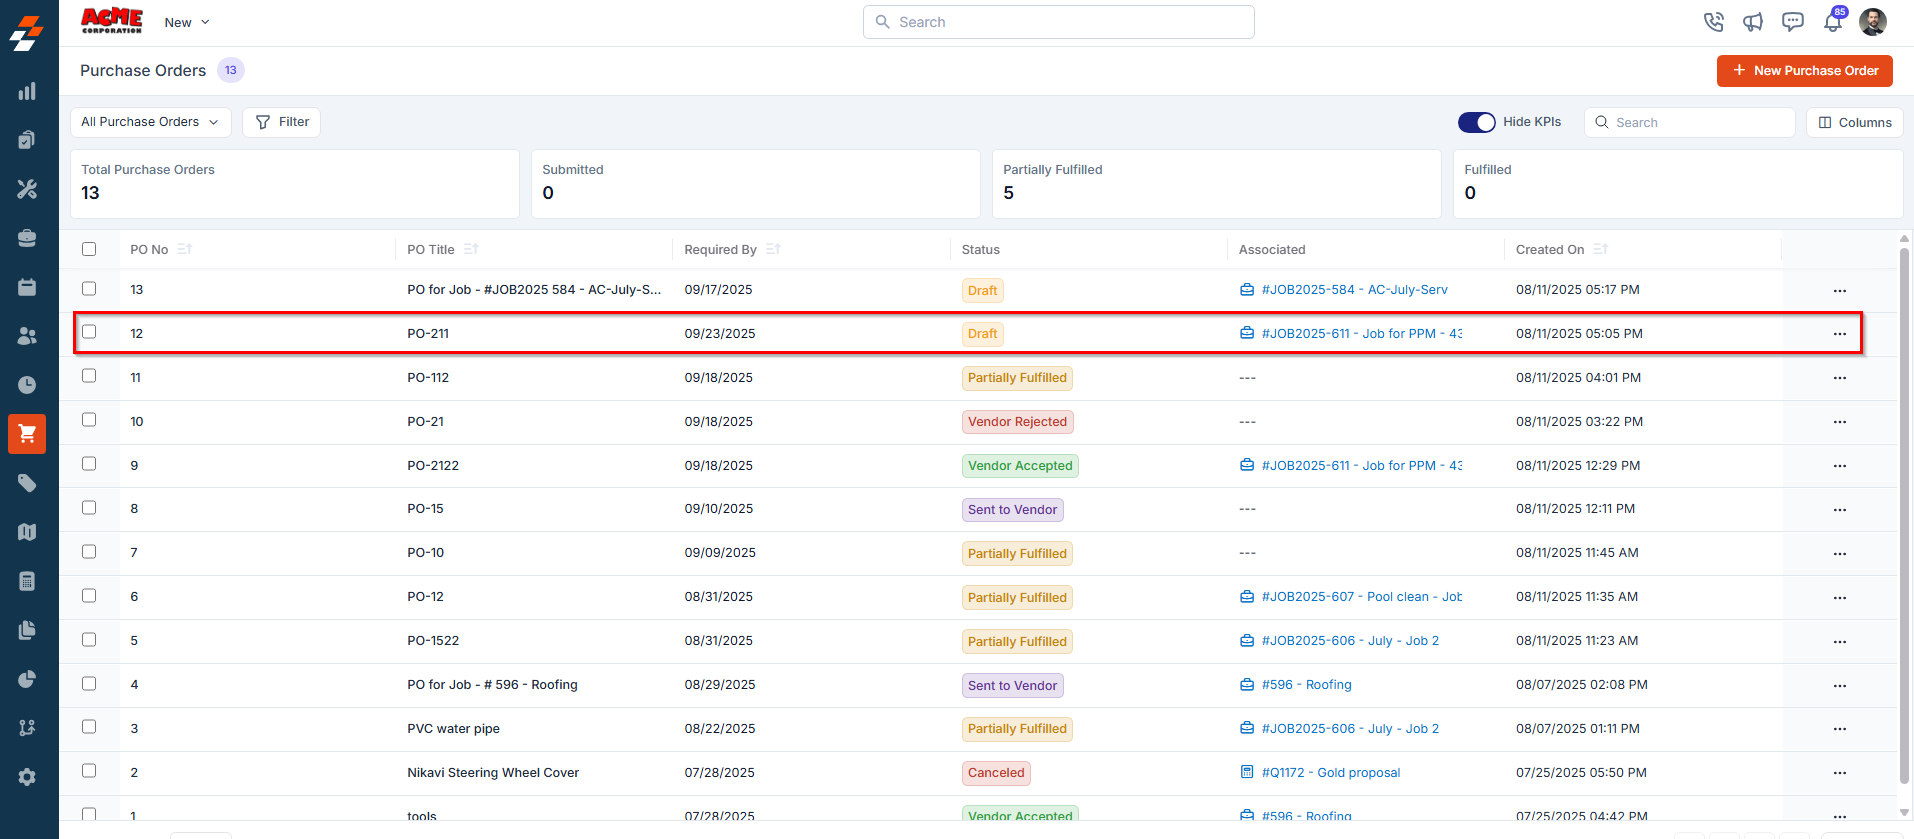
- A list of existing purchase orders will be displayed, showing key details such as PO ID, Title, Status, Vendor Name, Total Amount, and more.
- Select any PO from the listing to open its Details page.
- The current status of the PO is displayed prominently at the top of the screen.
Statuses of a Purchase Order
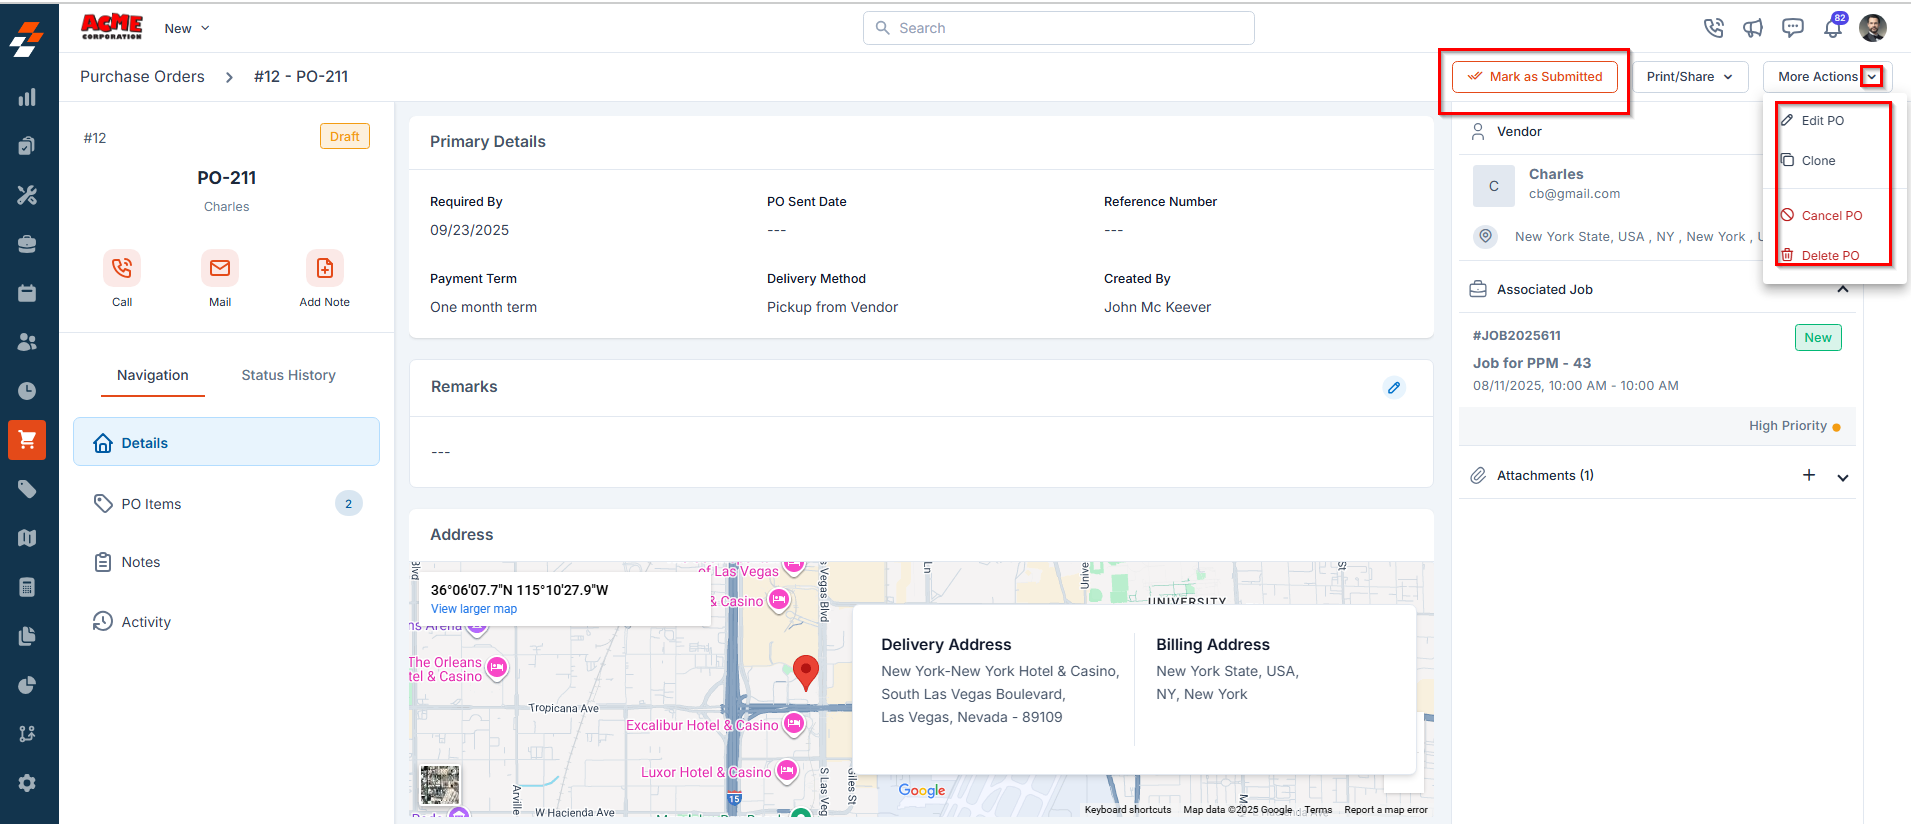
1. Draft
This status indicates that the purchase order has been created but not yet submitted for approval.
- Mark as Submitted – This moves the PO to the next stage.
- More Actions menu (top-right):
- Edit PO: Update the details of the purchase order.
- Clone: Create a duplicate of the purchase order.
- Cancel PO: Mark the purchase order as cancelled.
- Delete PO: Permanently remove the purchase order from the system.
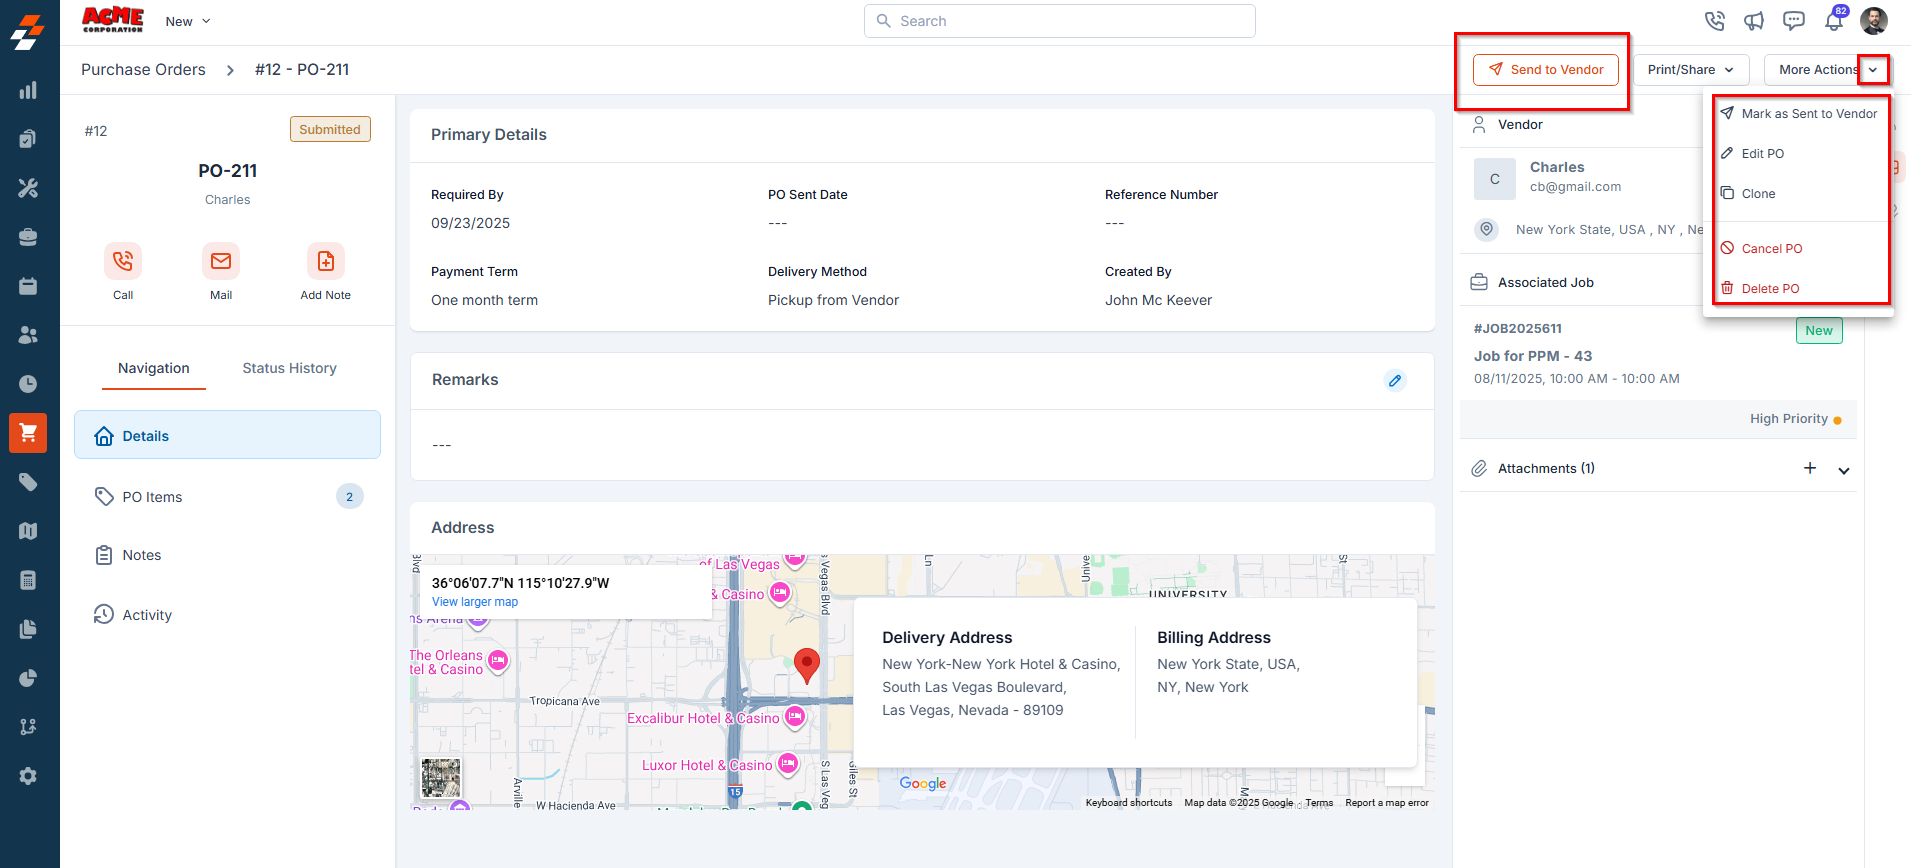
2. Submitted
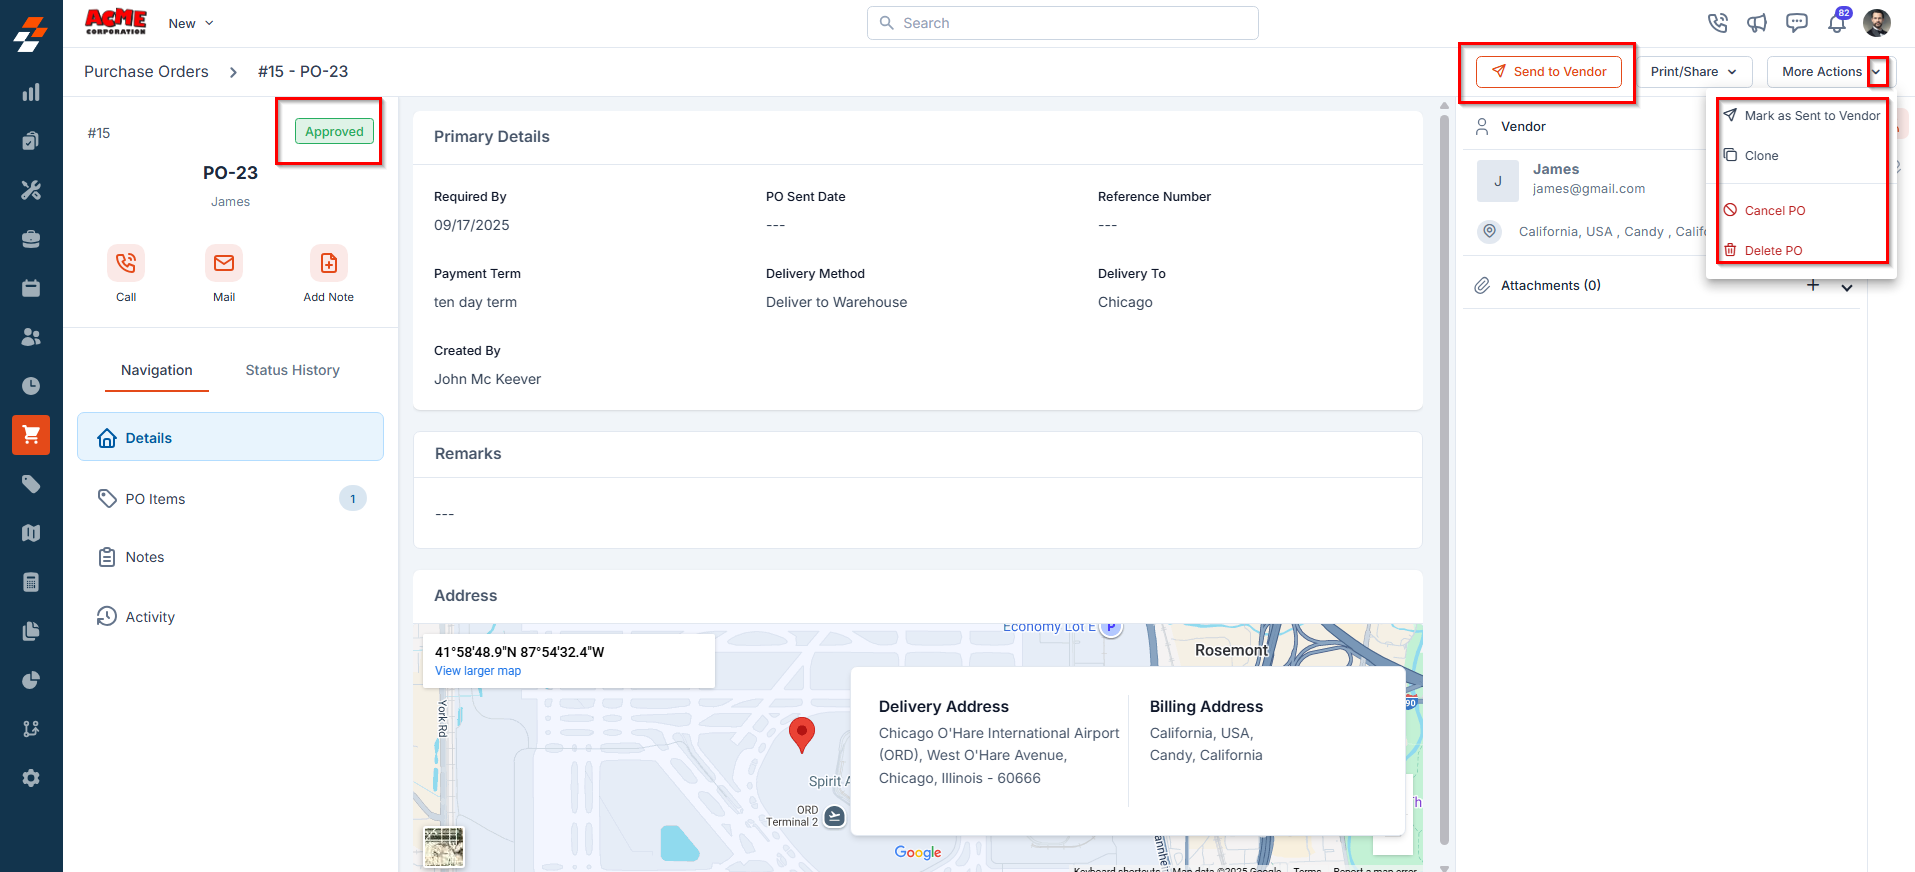
This status indicates that the purchase order has been submitted and is ready to be sent to the vendor.- Click Send to Vendor to send the purchase order details to the vendor in XLS or PDF format.
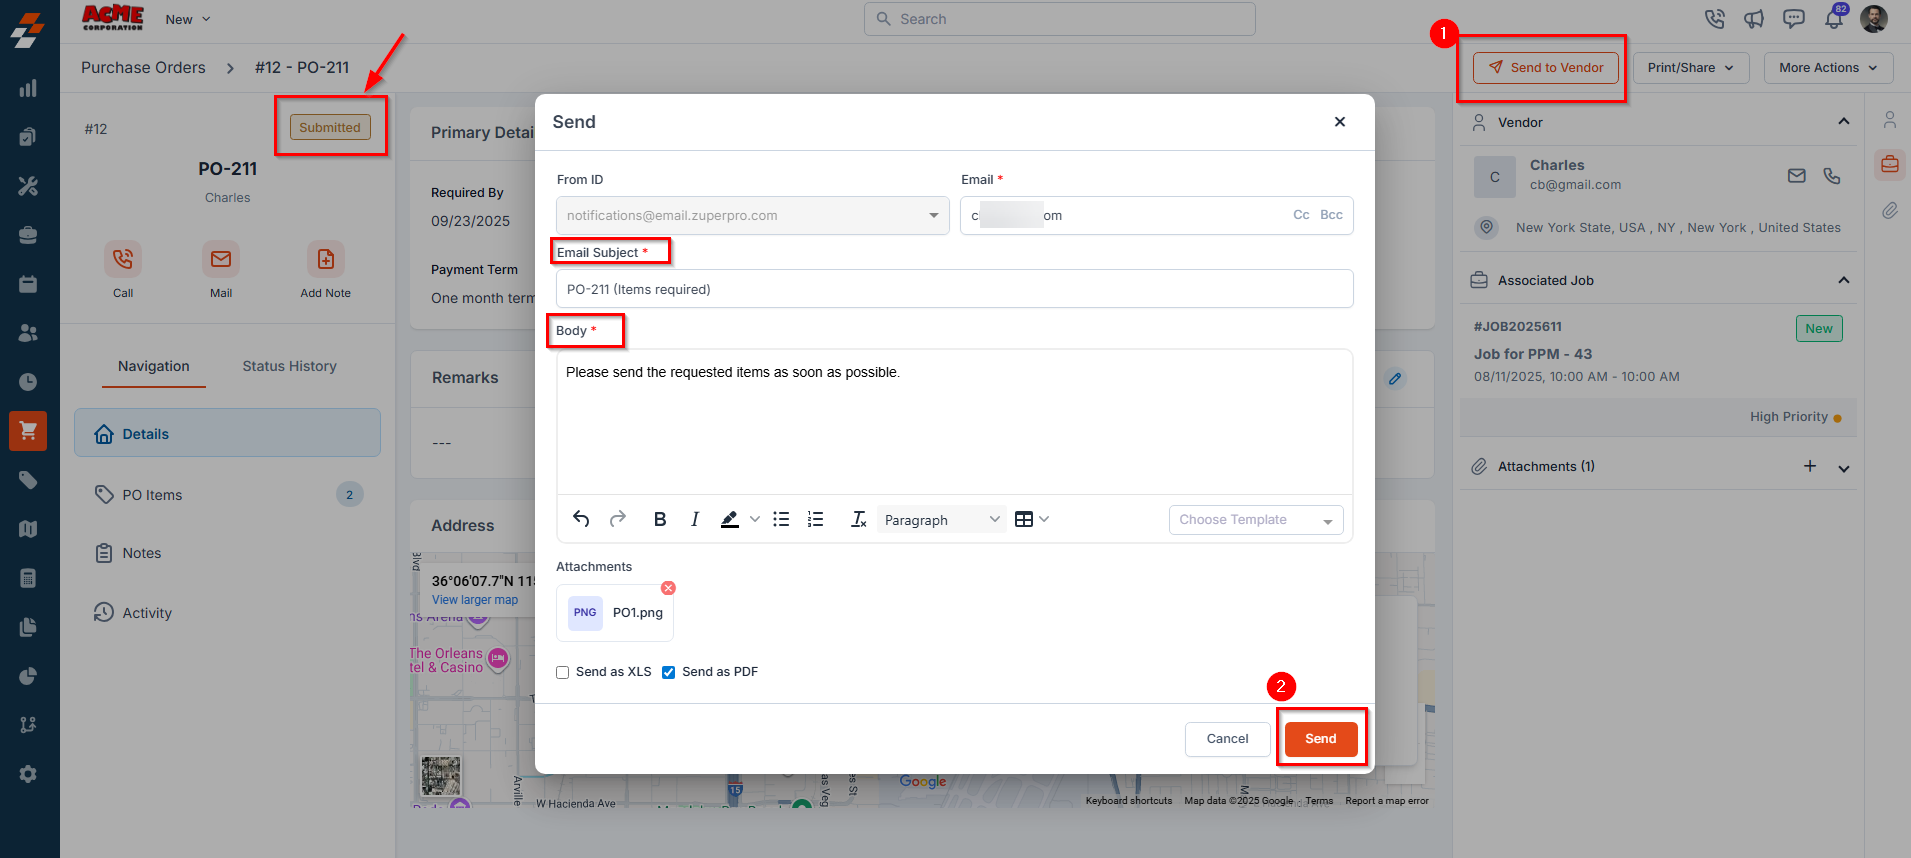
- Mark as Sent to Vendor – Update the purchase order status to indicate it has been sent to the vendor.
- Edit PO – Modify the details of the purchase order.
- Clone – Create a duplicate of the purchase order.
- Cancel PO – Change the purchase order status to Cancelled.
- Delete PO – Permanently remove the purchase order from the system.
Note: This status applies when no approval hierarchy is configured in the organization settings. If an approval hierarchy is enabled, the purchase order will first follow the approval workflow before it can be sent to the vendor. For more details on configuring and managing approval workflows, refer to the Approval Hierarchy section.
For POs linked to an integrated vendor such as SRS or ABC Supply, Send to Vendor is a direct action — no email modal appears. Status changes for these POs are driven automatically by vendor webhooks and do not require a manual trigger.
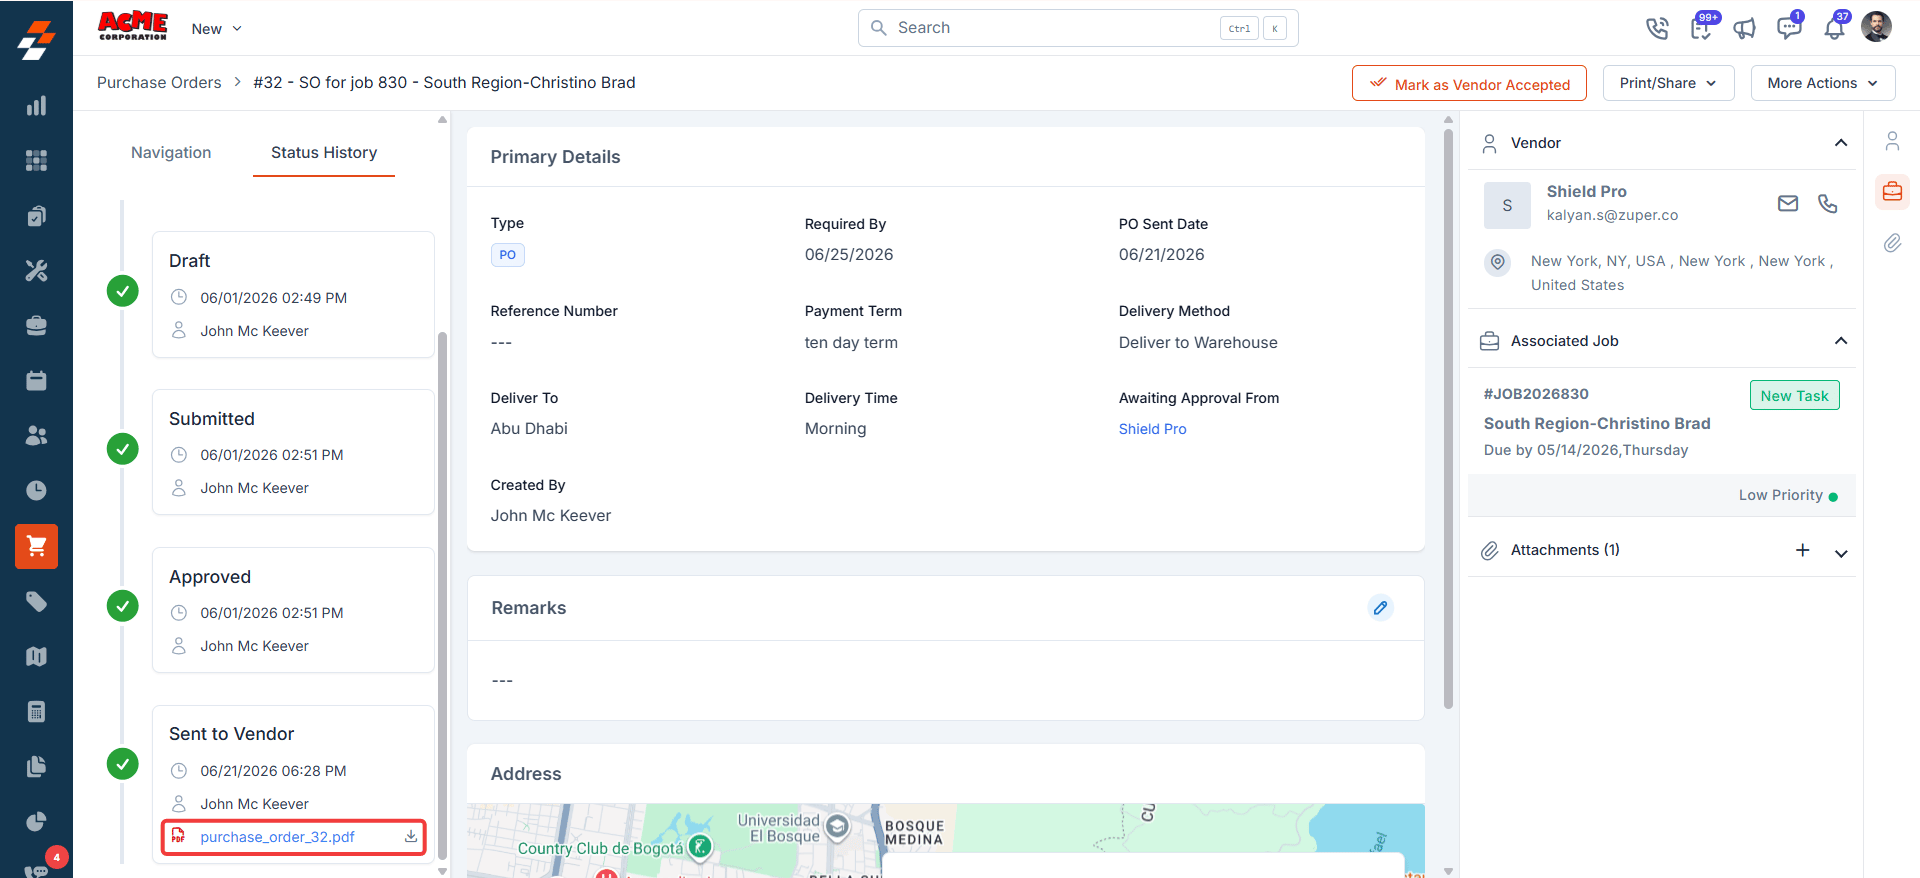
3. Sent to Vendor
This status indicates that the PO has been shared with the vendor and is now ready for fulfillment tracking.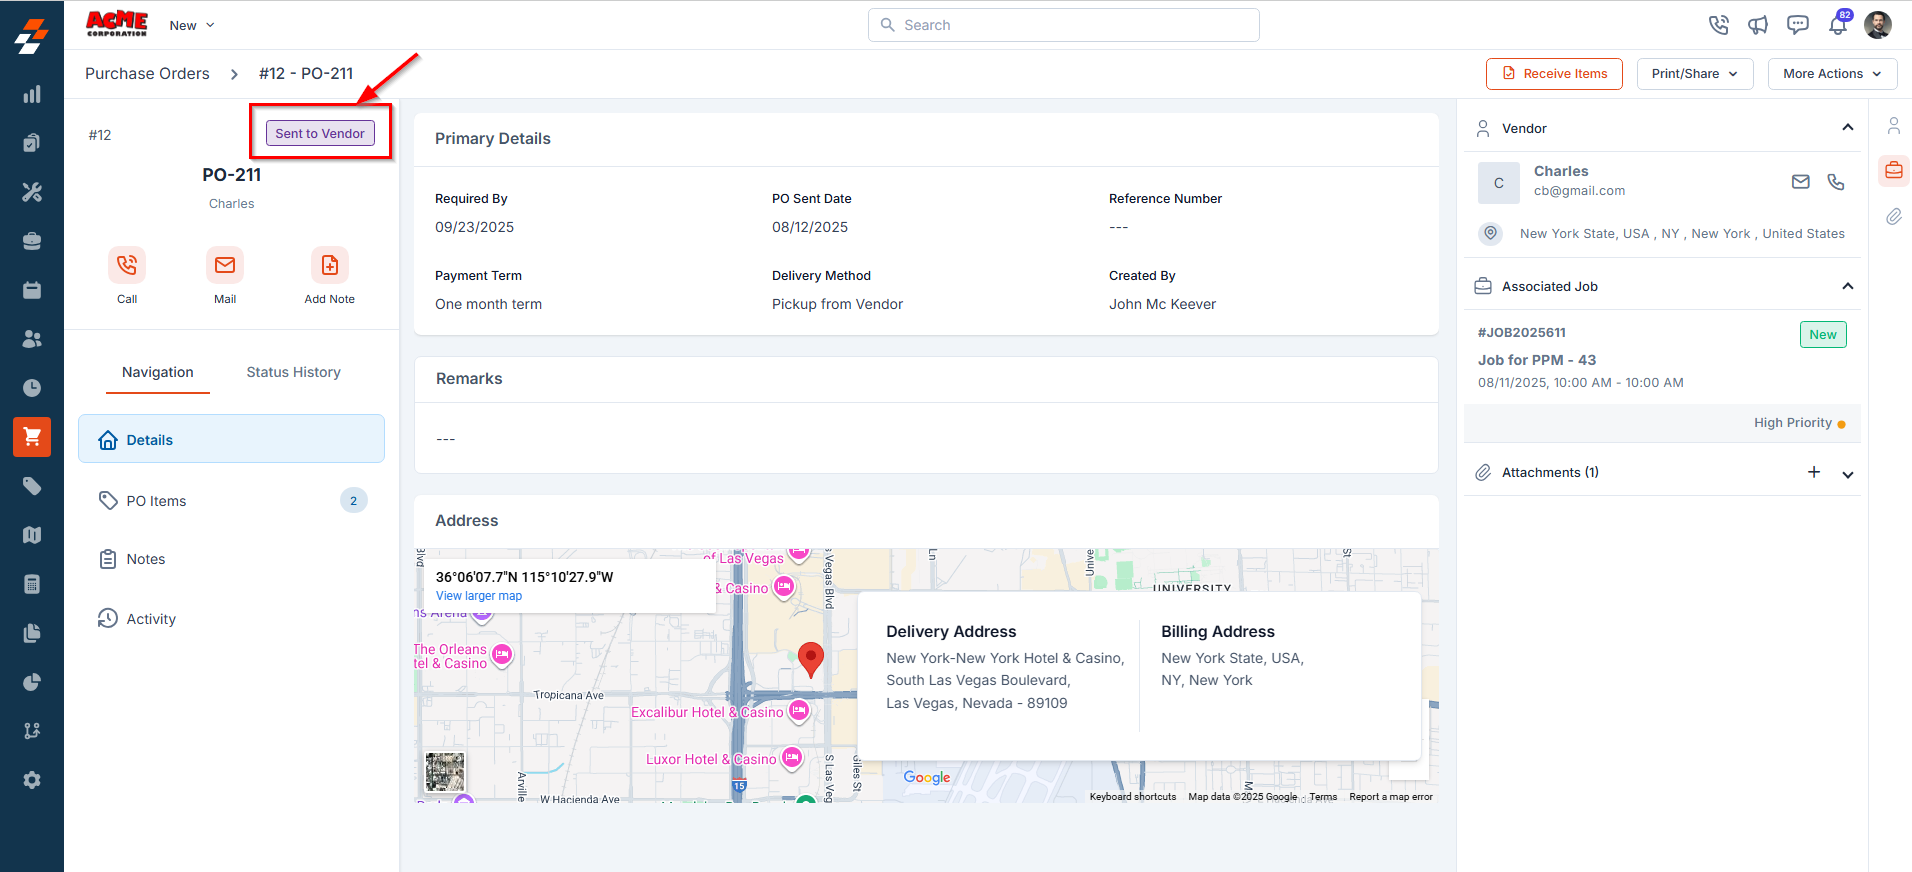
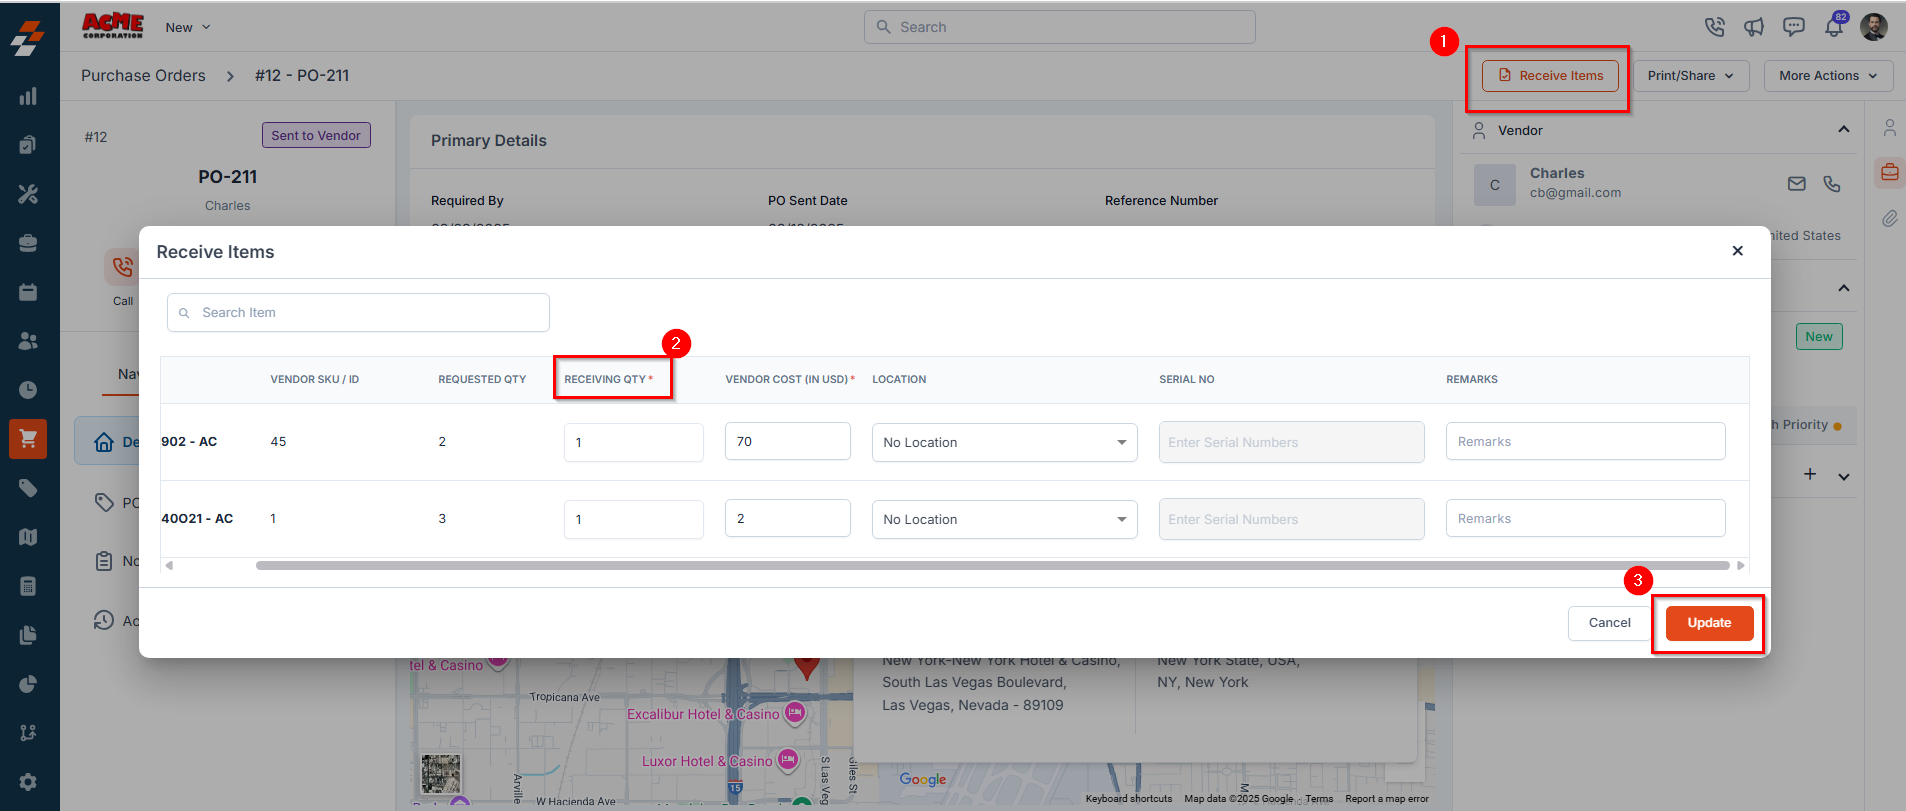
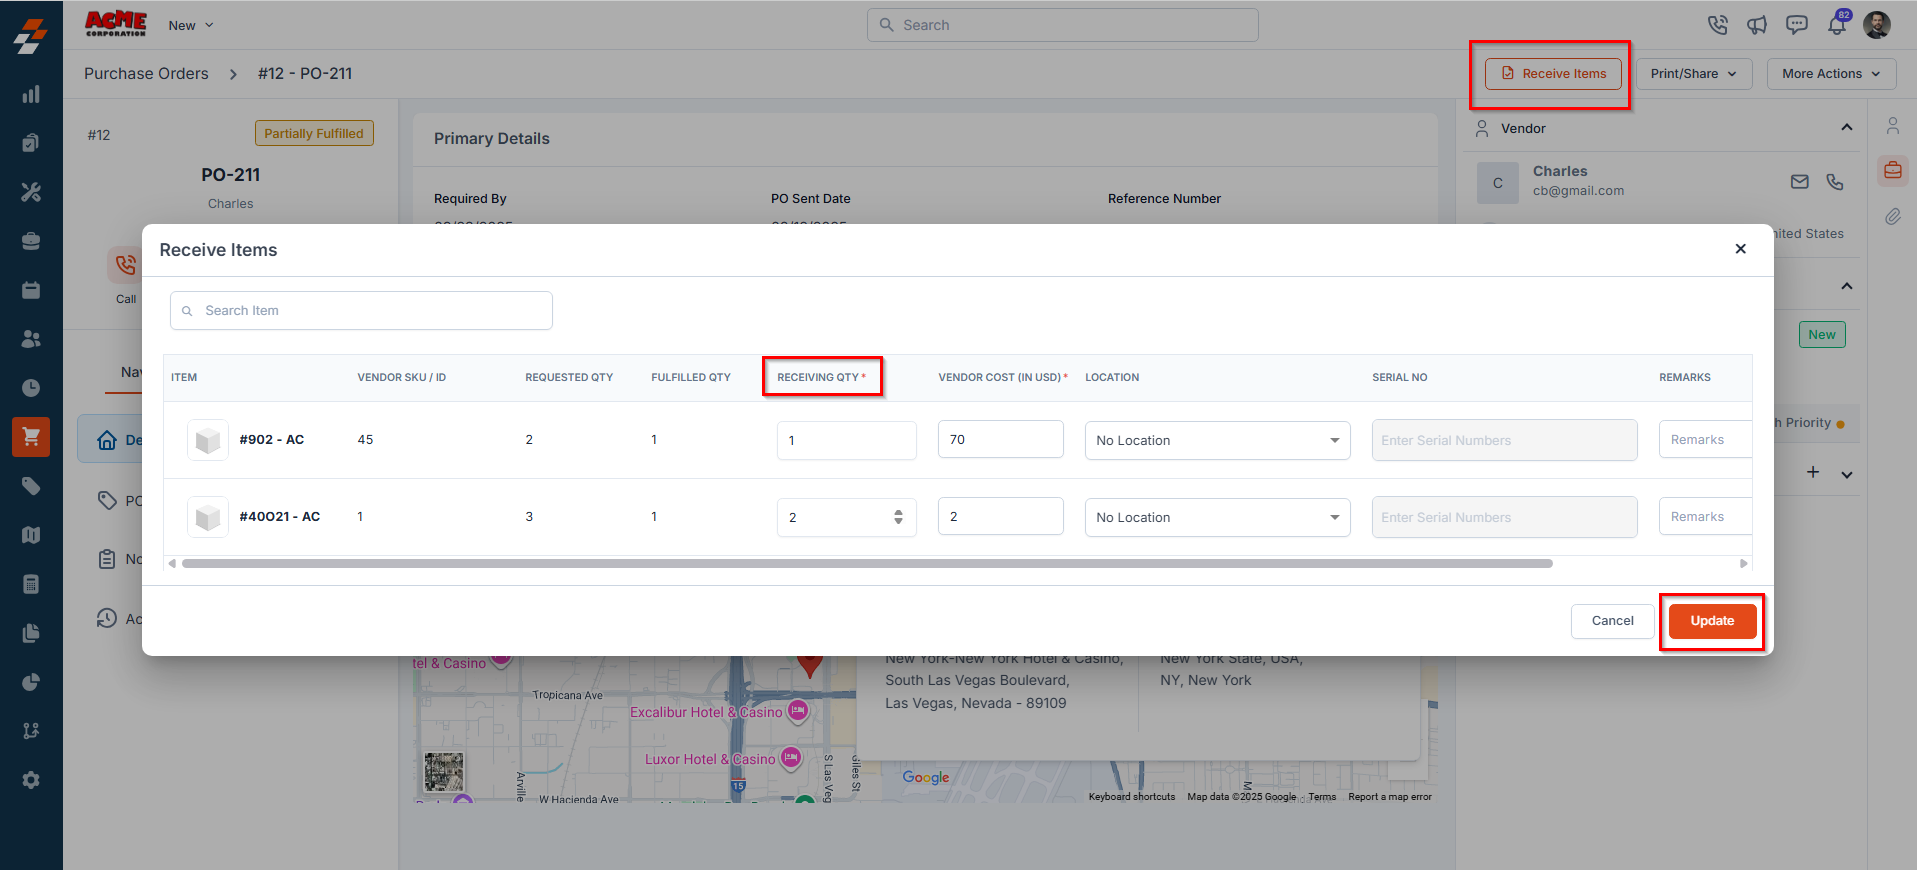
- Receiving Qty (mandatory): Enter the number of items received from the vendor.
- Delivery Location: Not mandatory if the delivery method is Direct Shipment or Vendor Pickup. If the delivery method is Warehouse, the location will be prefilled. For custom line items, location selection is not available as these items are not linked to a predefined inventory location.
- Serial No.: Only applicable if a location is selected. The count should match the quantity received (for example, if two items are received, enter two serial numbers such as “4, 5”).

Note: This applies to Zuper’s internal PO template only. Custom or third-party templates are not affected.
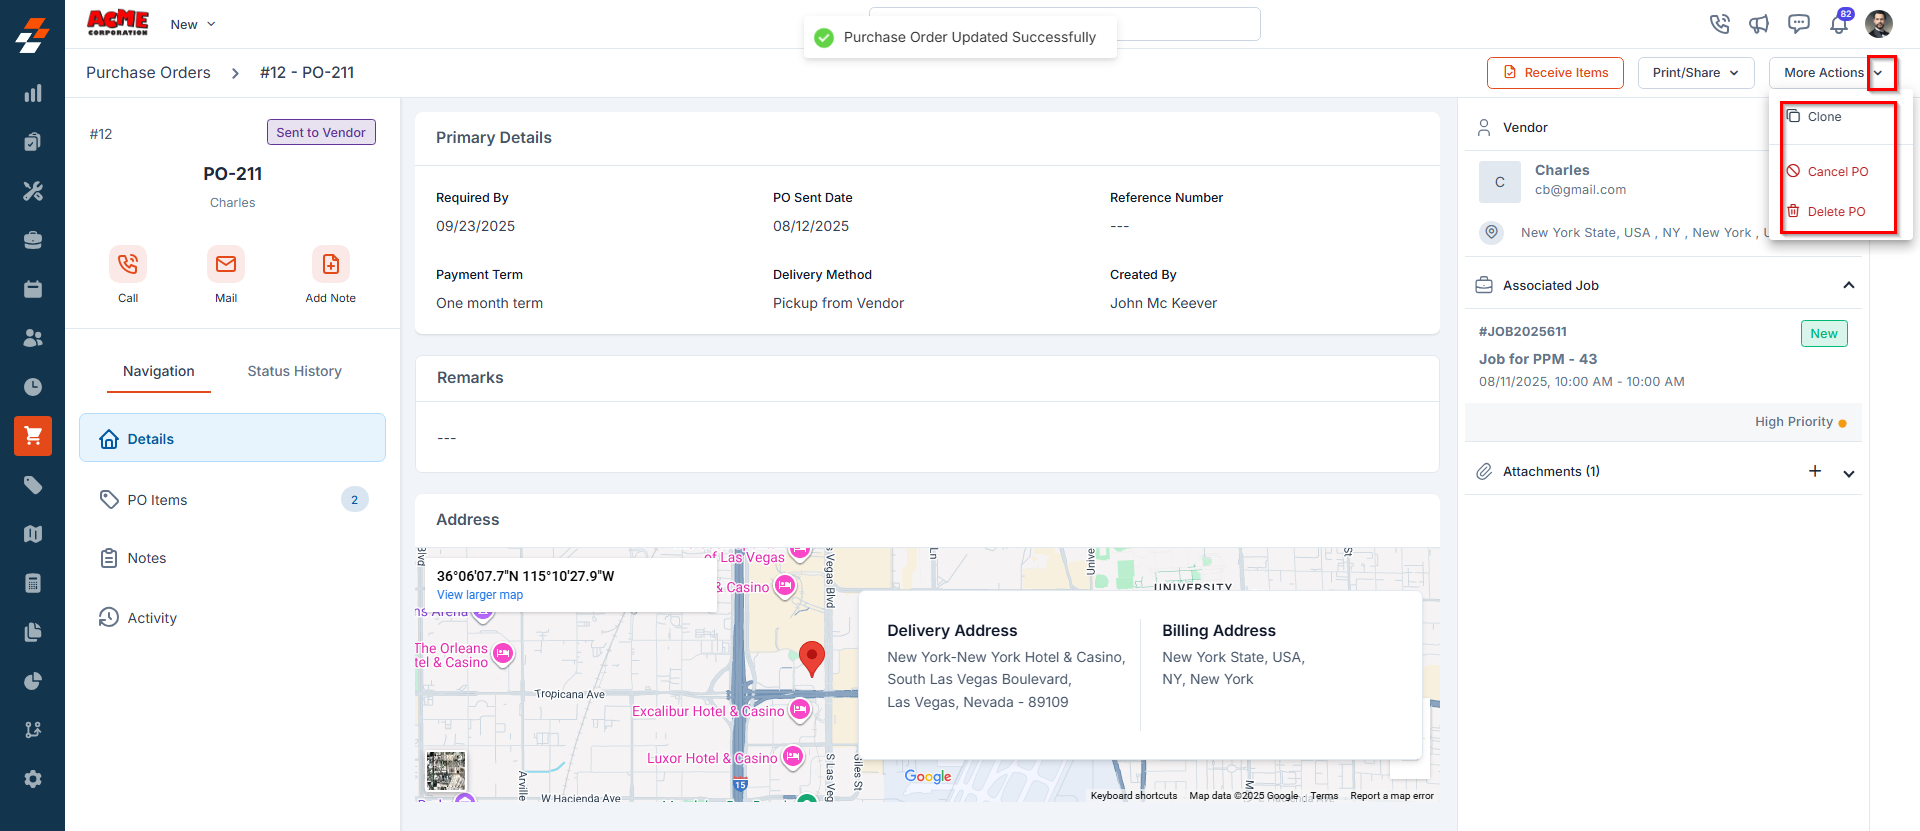
- Clone
- Cancel PO
- Delete PO
Note: To access the panel, go to Purchasing → Purchase Orders → select a PO → Status History. Select the file name or download icon on any entry to open or save the document for that version.
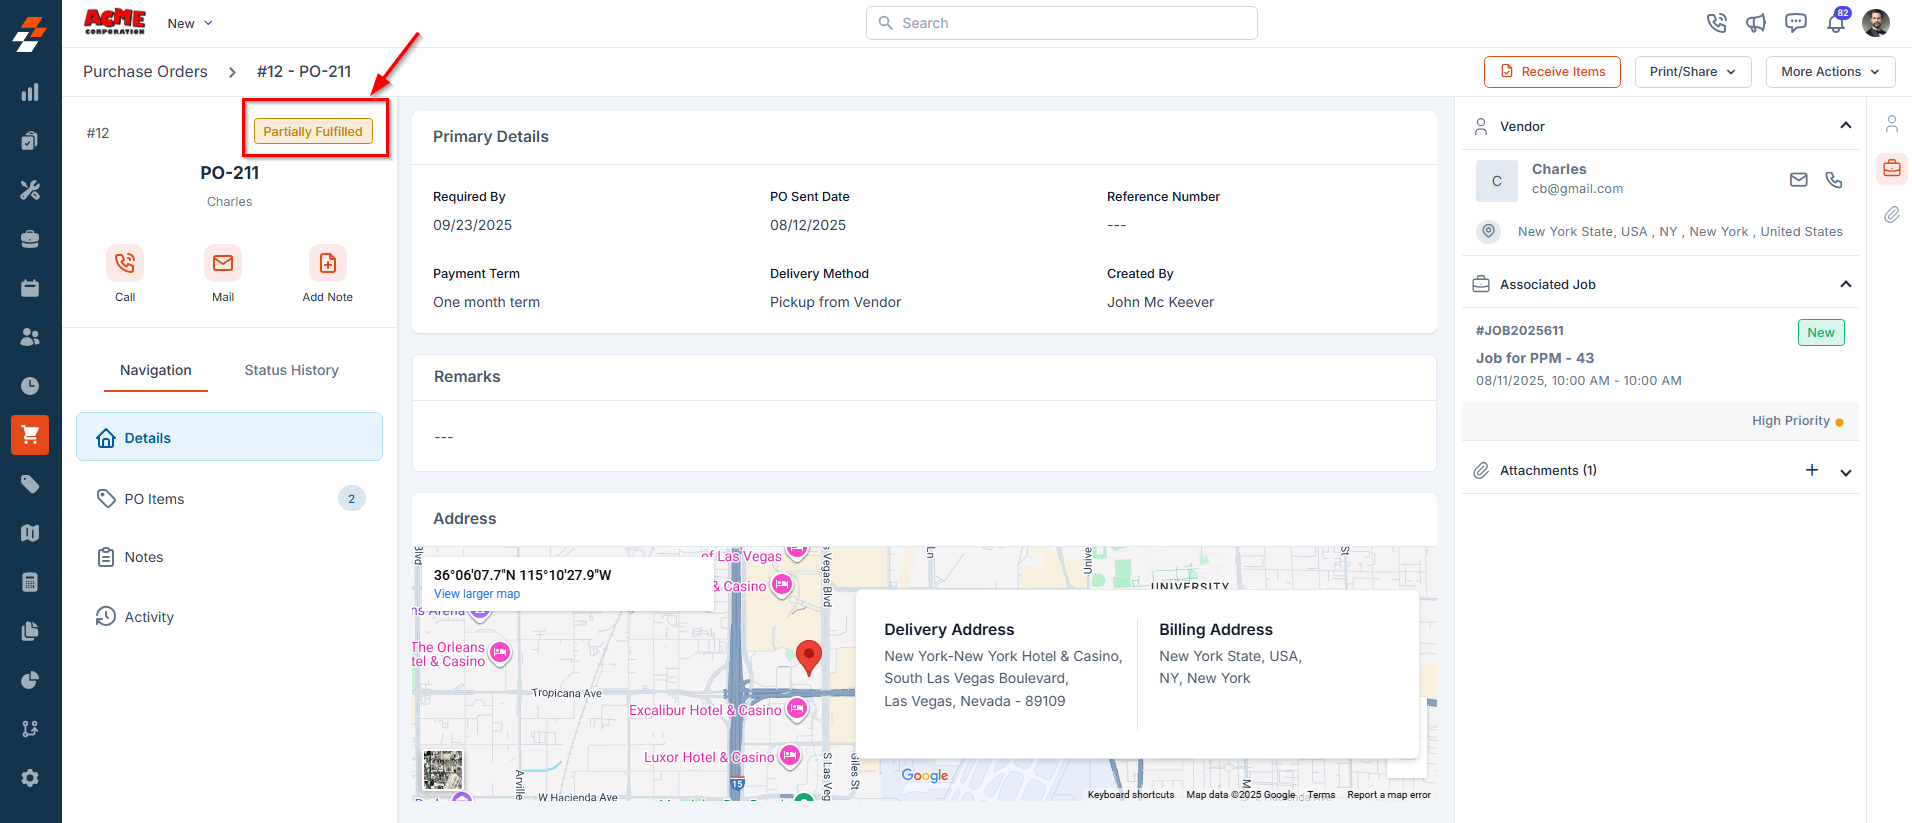
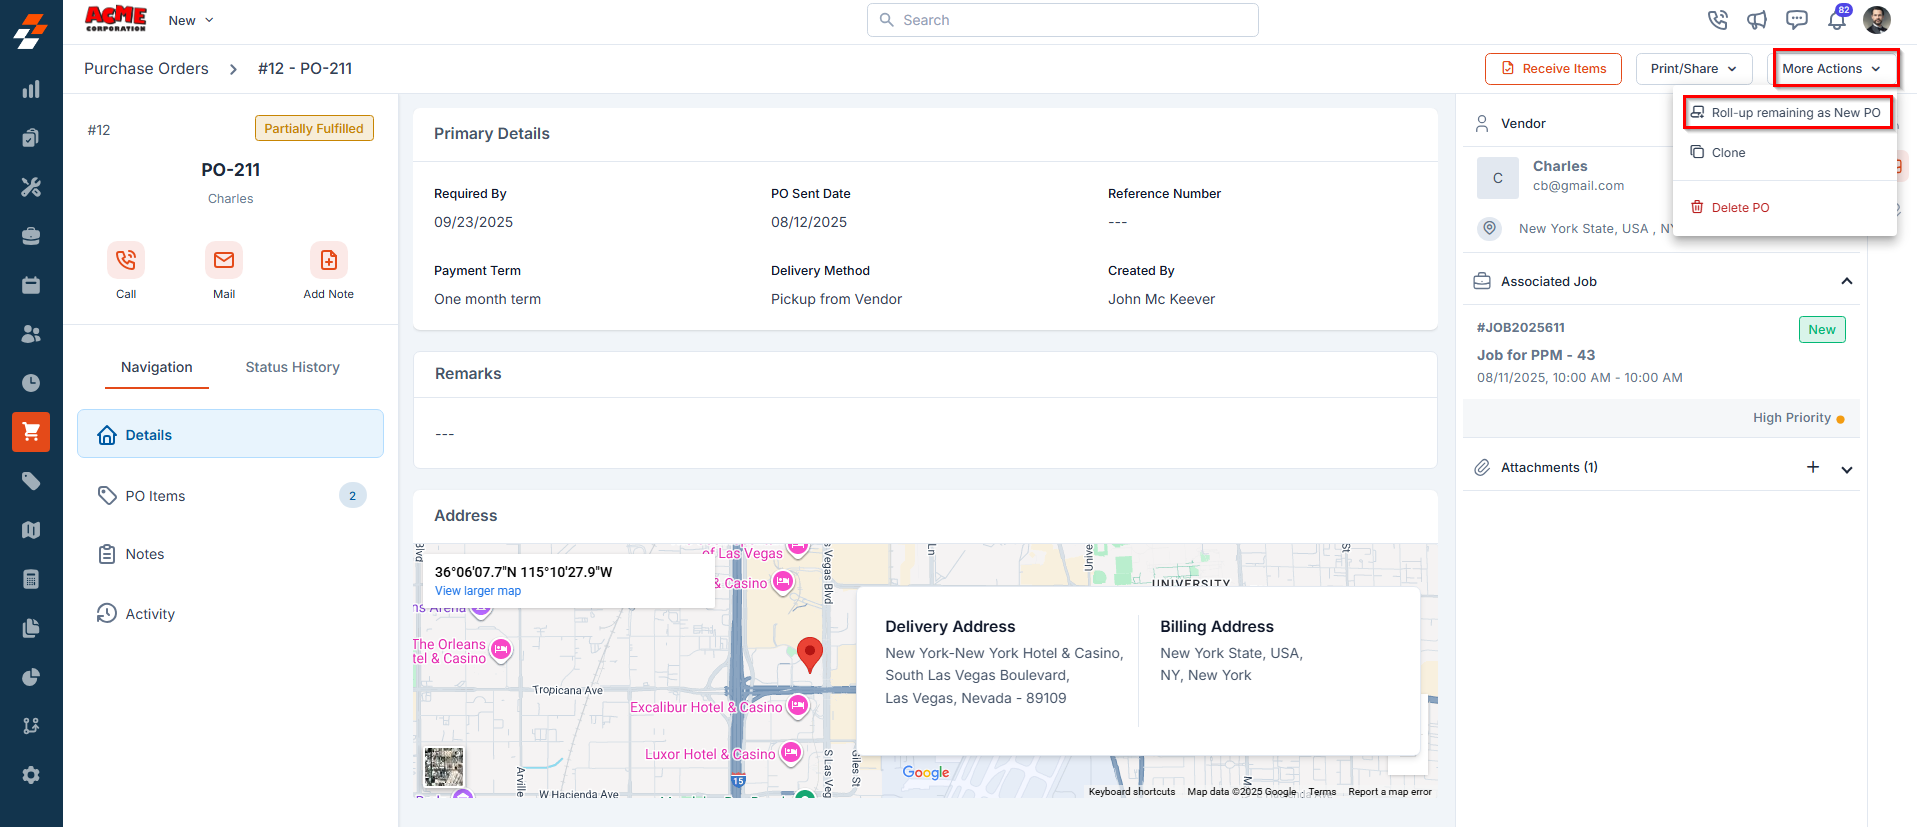
5. Partially fulfilled
This status means only some items in the purchase order have been received from the vendor. The remaining items are still outstanding. Available actions- Receive Items — Wait for the remaining items and receive them together when they arrive.
- Roll-up Remaining as New PO — Go to More Actions and select Roll-up Remaining as New PO to create a new purchase order for the outstanding items. When you do this, the original PO automatically moves to Fulfilled status.
A job linked to this PO cannot be closed while the PO is in Partially Fulfilled status. Once the roll-up items are created as a new PO, the linked job can be closed.
- Receive Remaining Items in Bulk: Wait until all pending items arrive and receive them together using the Receive Items button.
- Roll-up Remaining as New PO: From the More Actions menu, select Roll-up Remaining as New PO to generate a new purchase order for the pending items.
- Clone
- Delete PO
Identifying a rolled-up PO
When a new PO is created from a roll-up, Zuper marks it with a Rolled-Up PO icon next to the PO number. This icon appears on the: • PO details page • PO listing page • Vendor PO page • Associated Jobs and Quotes This approach ensures workflow continuity across associated modules, such as Jobs and Quotes, while keeping records clean and accurate.Note: When you hover over the Rolled-up PO icon, you will see the number of the parent PO from which the rolled-up PO came.Click on the Rolled-PO icon to open the parent PO in a new tab.If the parent PO is deleted, the current Rolled-up PO blue icon will be grayed out, and you will be able to hover and see only the parent PO number; you will not be able to view the parent PO.

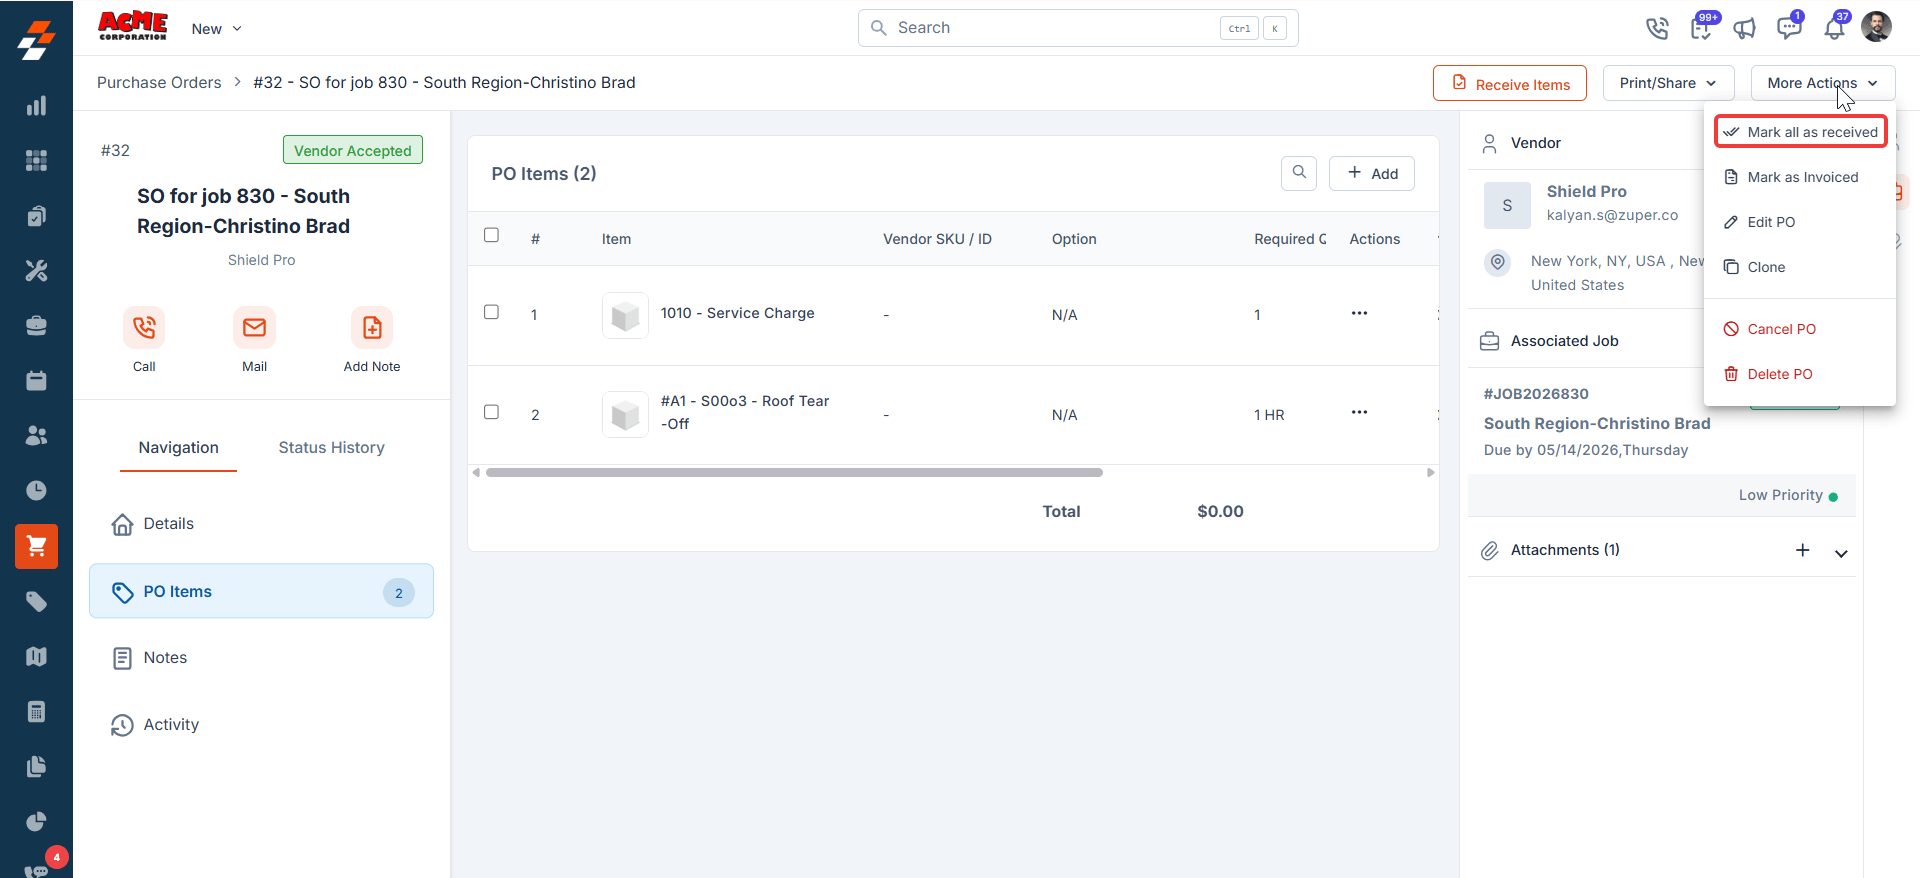
6. Fulfilled
This status indicates that all items on the purchase order have been received from the vendor. A PO reaches Fulfilled status in two ways:- All items are received in full via the Receive Items process.
- A roll-up PO is created from a Partially Fulfilled PO — the original PO moves to Fulfilled status automatically.

- Any associated Jobs or Quotes will automatically receive the items from this PO.
- This ensures a smooth handover of materials and keeps your supply chain records accurate and up to date.
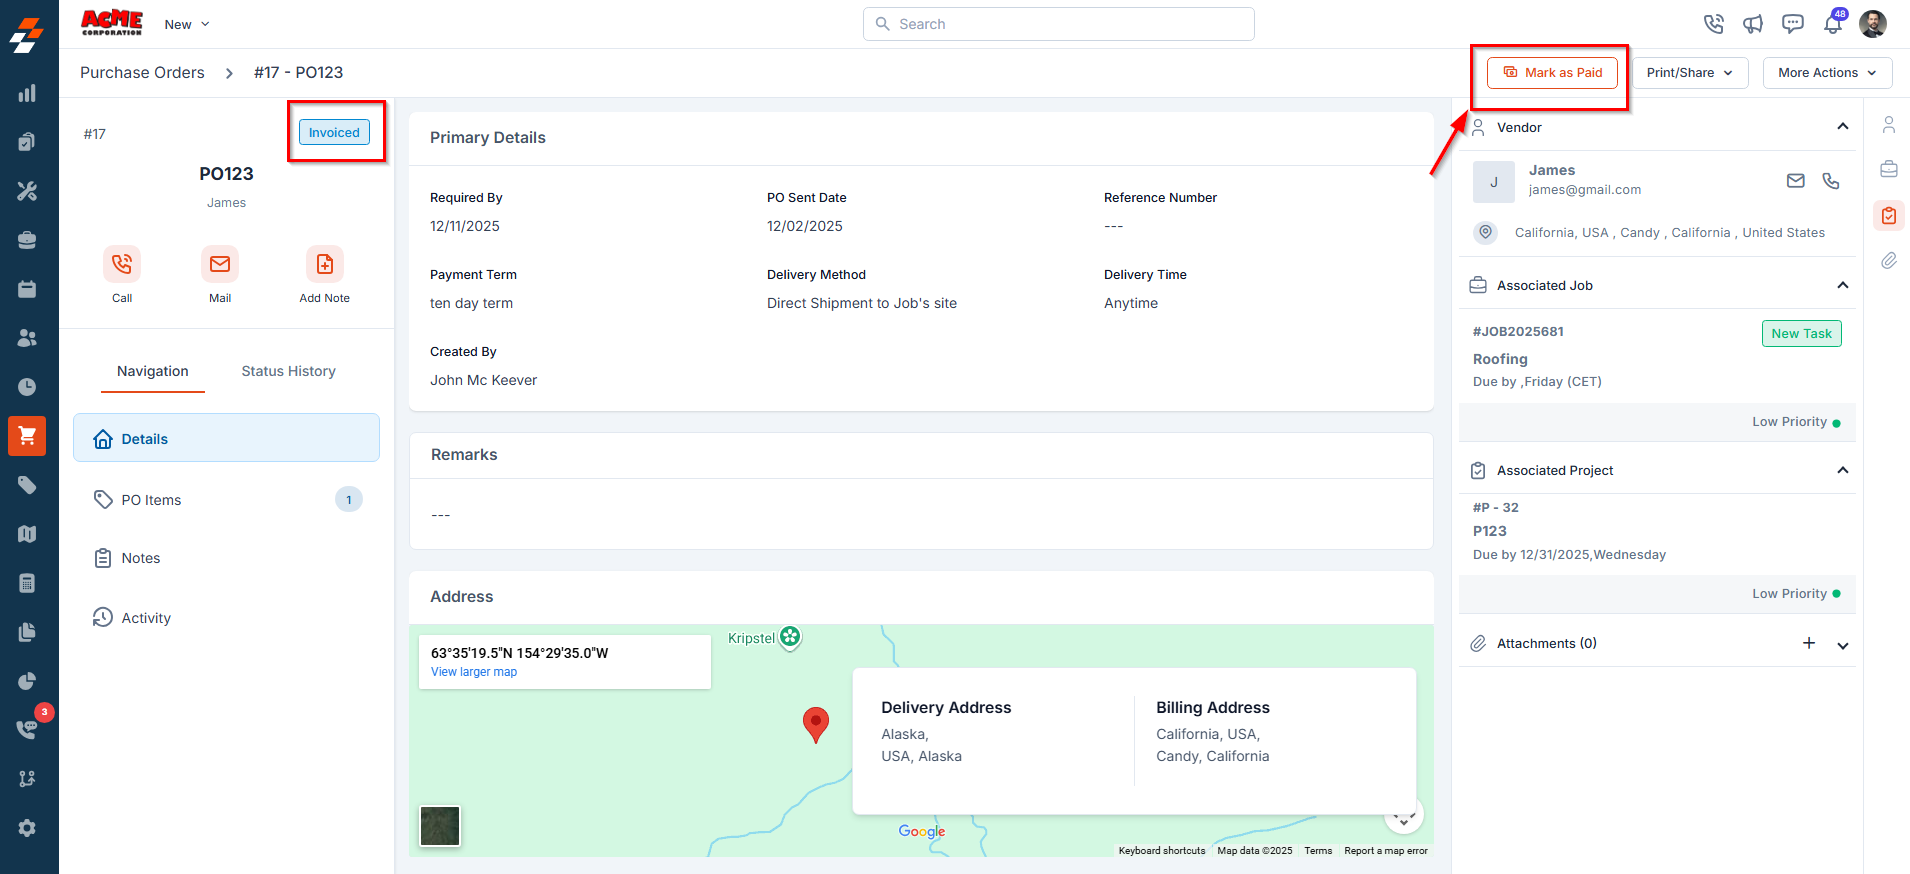
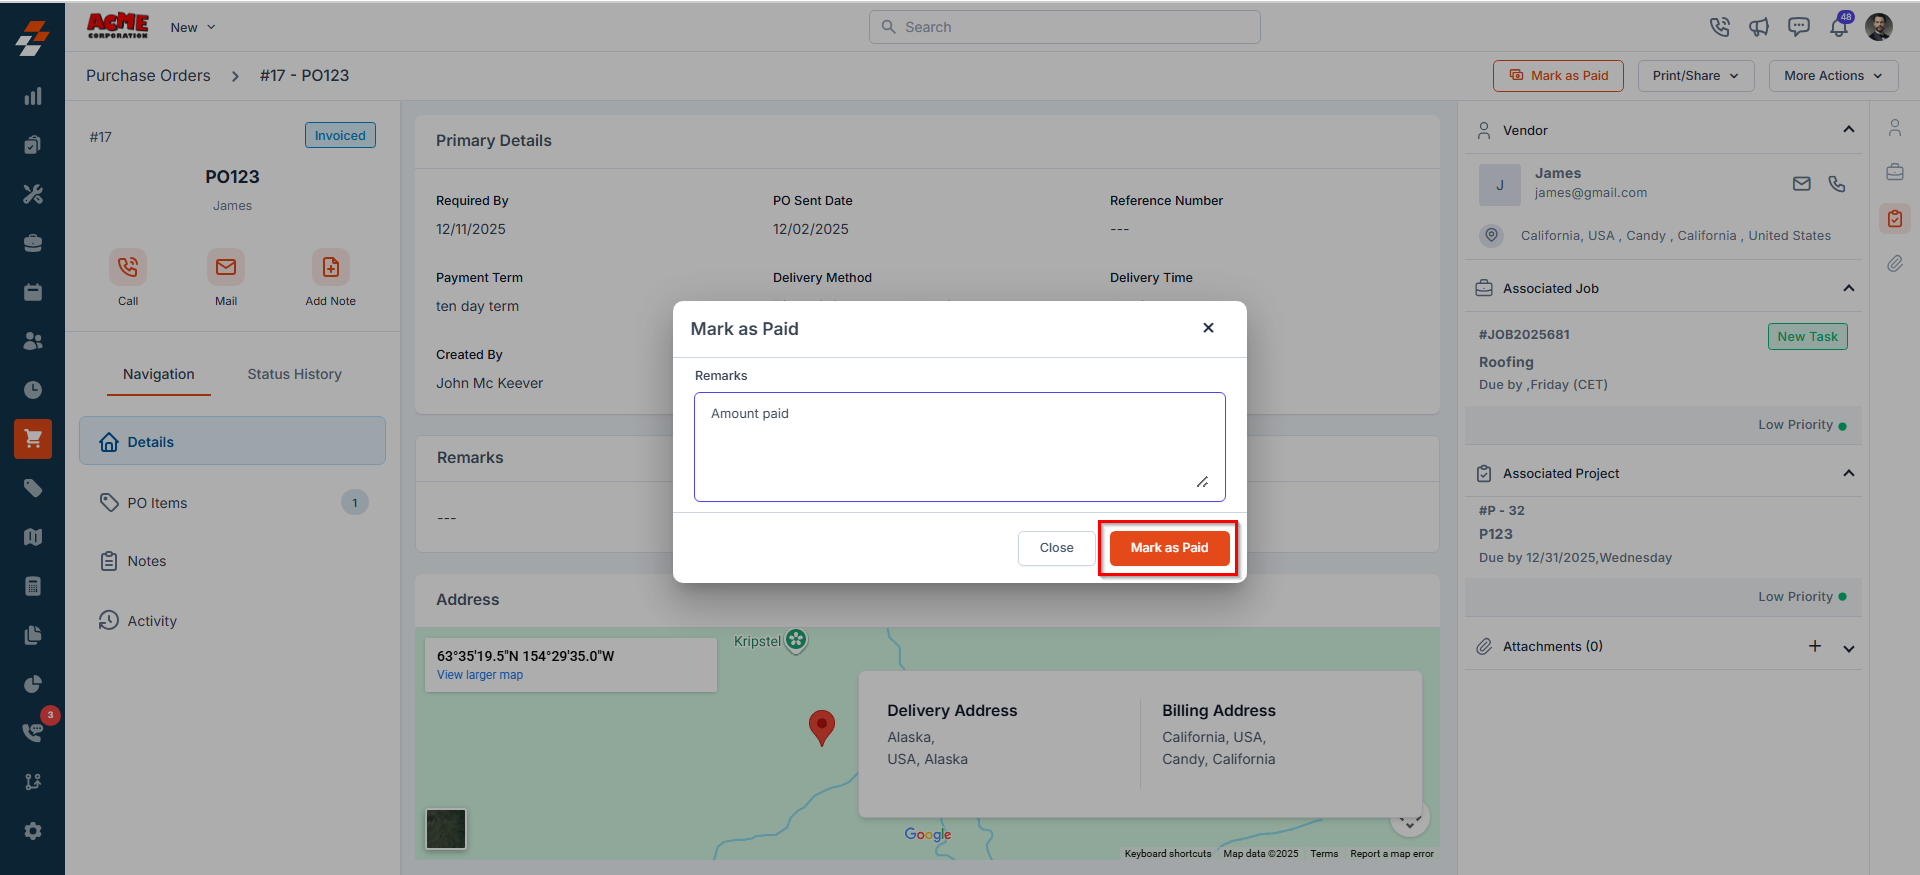
7. Invoiced
This status indicates that the vendor has issued an invoice for the delivered items and it has been recorded against the purchase order. You can attach the invoice document directly to this status entry and view it in the Status History panel. You can now select Mark as Paid to complete the financial process. Edit rules at this status:- Requested Qty is editable.
- Inline edits are allowed for Receiving Qty, Price, Location, and Remarks.
- You cannot reduce Requested Qty below the fulfilled quantity.
- Removing a line item that is partially fulfilled is not allowed.
8. Paid
This status indicates that payment for the vendor invoice has been successfully completed. All financial obligations related to the purchase order have now been settled.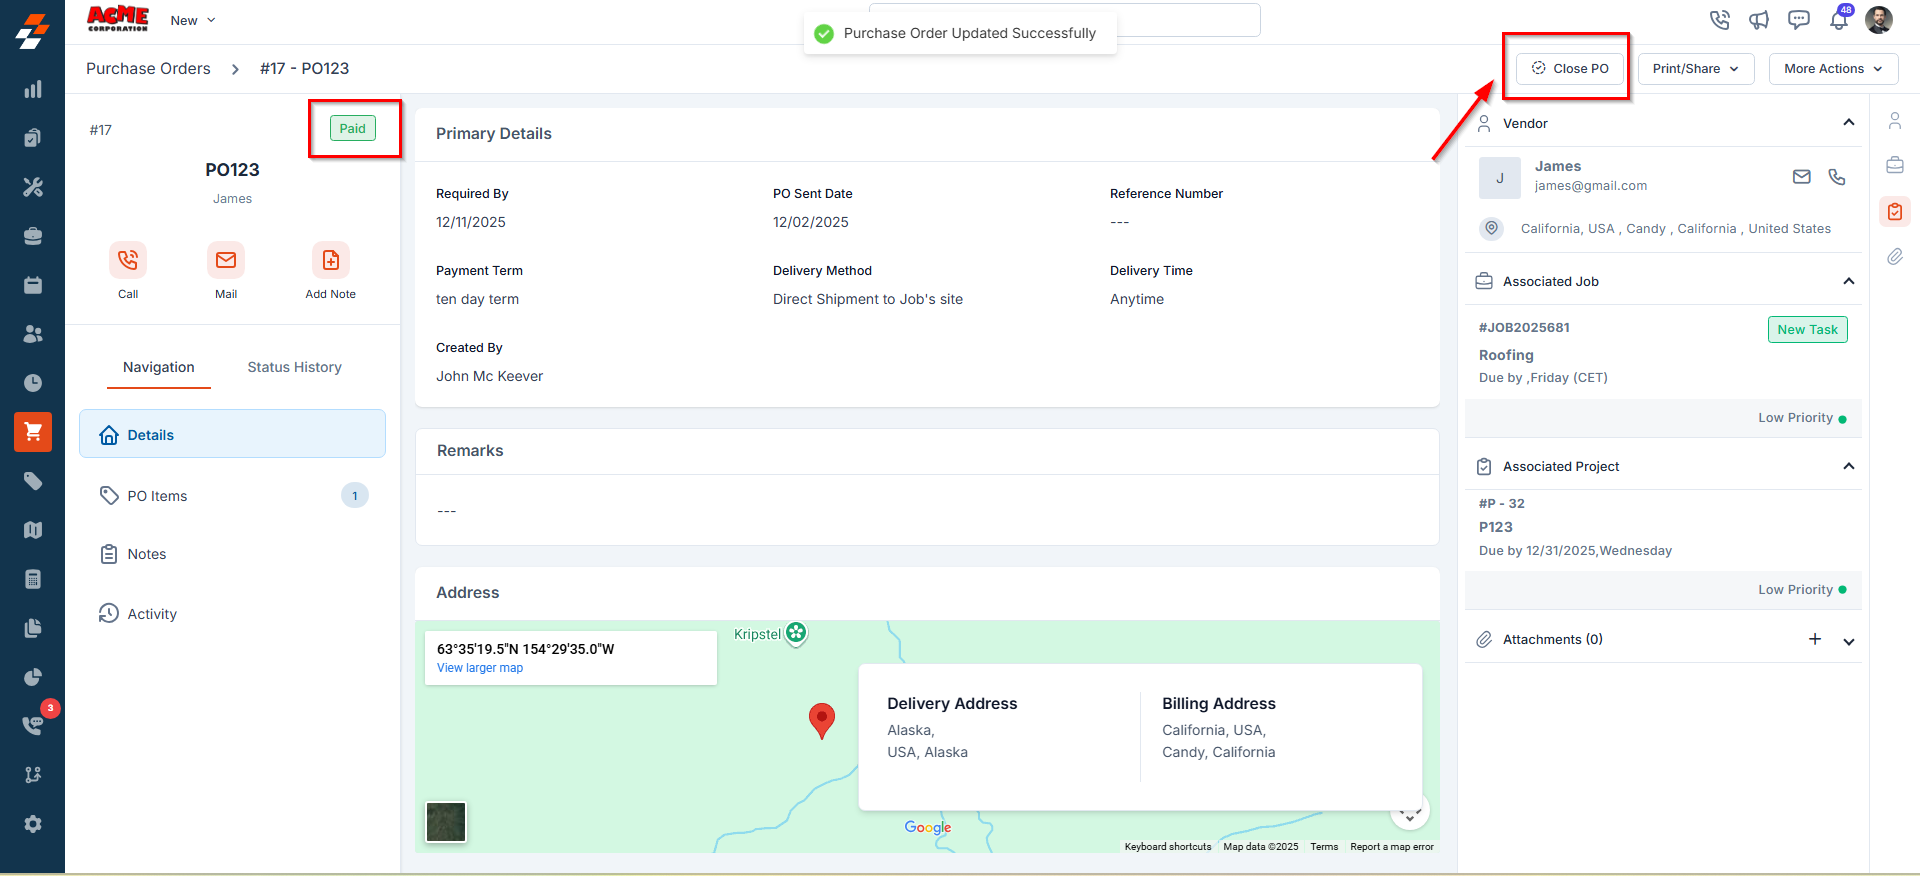
Editing a purchase order
Zuper uses a two-tier edit model for purchase orders. The type of edit available to you depends on the current status of the PO.Hard edit
A hard edit lets you modify the full PO details — including primary details, line items, and vendor information. It is available via the More Actions menu at the following statuses: Draft, Submitted, Approved, Rejected, and Vendor Rejected.Selecting Edit PO from More Actions at any of these statuses moves the PO back to Draft. All prior status history is retained.
Line item edit
A line item edit lets you add or modify individual line items without moving the PO back to Draft. It is available across most statuses up to and including Invoiced (before Paid). The PO status stays intact except in the following cases:- Adding a new line item when the PO is in Fulfilled or Invoiced status moves the PO back to Partially Fulfilled.
| Status | Requested Qty | Add line item | Remove line item | Inline edits |
|---|---|---|---|---|
| Draft | Editable | Allowed | Allowed | Allowed |
| Submitted | Editable | Allowed | Allowed | Allowed |
| Approved | Editable | Allowed | Allowed | Allowed |
| Rejected | Editable | Allowed | Allowed | Allowed |
| Vendor Rejected | Editable | Allowed | Allowed | Allowed |
| Partially Fulfilled | Cannot go below fulfilled qty | Allowed | Not allowed for partially fulfilled items | Allowed |
| Fulfilled | Cannot go below fulfilled qty | Allowed — triggers rollback to Partially Fulfilled | Not allowed for partially fulfilled items | Allowed |
| Invoiced | Cannot go below fulfilled qty | Allowed — triggers rollback to Partially Fulfilled | Not allowed for partially fulfilled items | Allowed (Receiving Qty, Price, Location, Remarks) |
| Paid | Locked | Locked | Locked | Locked |
Additional Statuses Based on Organization Settings
Some purchase order (PO) statuses appear conditionally, depending on how your organization has configured Approval Hierarchy and Vendor Approval settings.These settings can be accessed under:
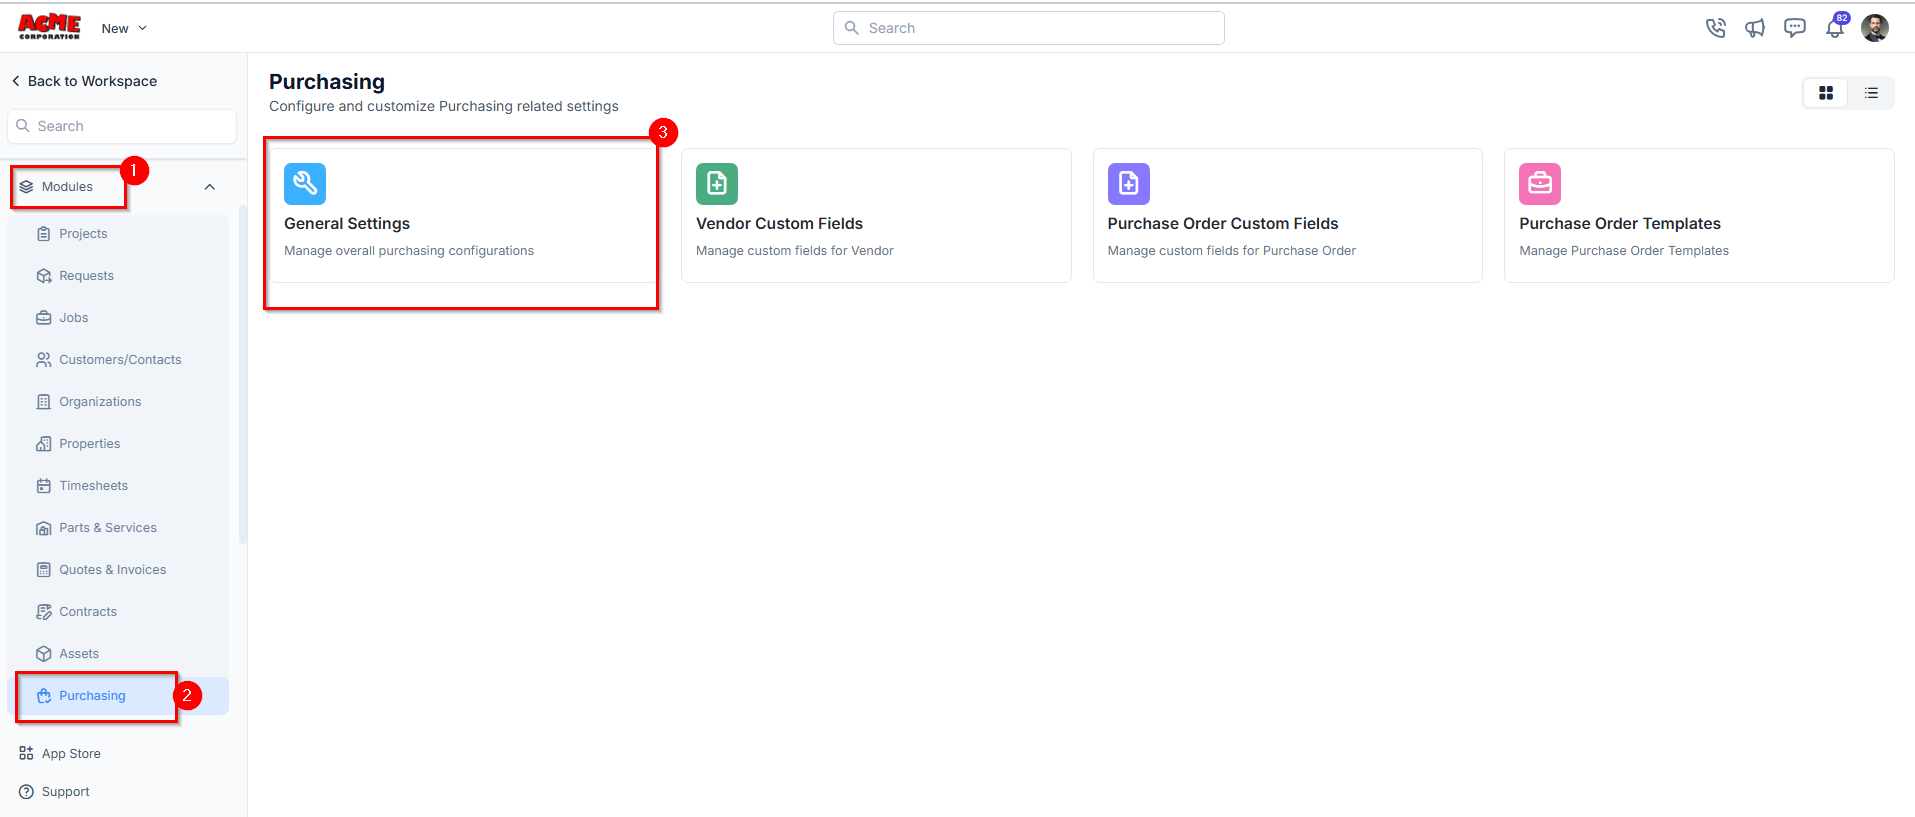
Settings -> Modules -> Purchasing -> General Settings
Settings -> Modules -> Purchasing -> General Settings
Approval Hierarchy–Related Statuses
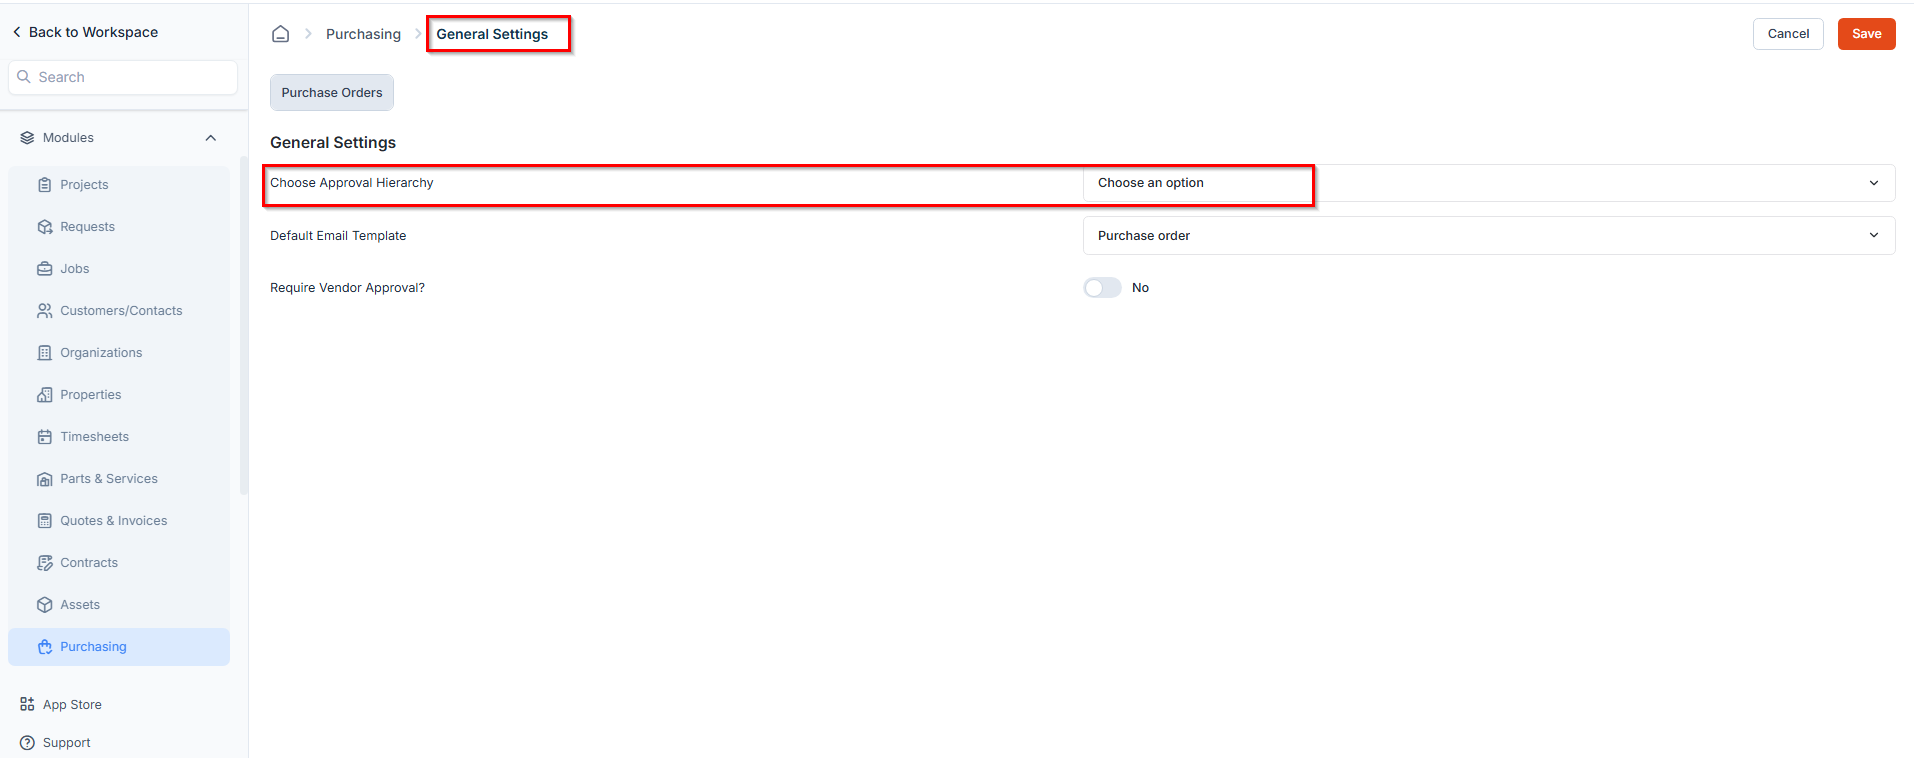
If your organization has set up or configured an approval hierarchy, a submitted PO will move through the following statuses: Configuration Path:- Enable Approval Hierarchy: Settings -> Modules -> Purchasing -> General Settings -> Choose Approval Hierarchy
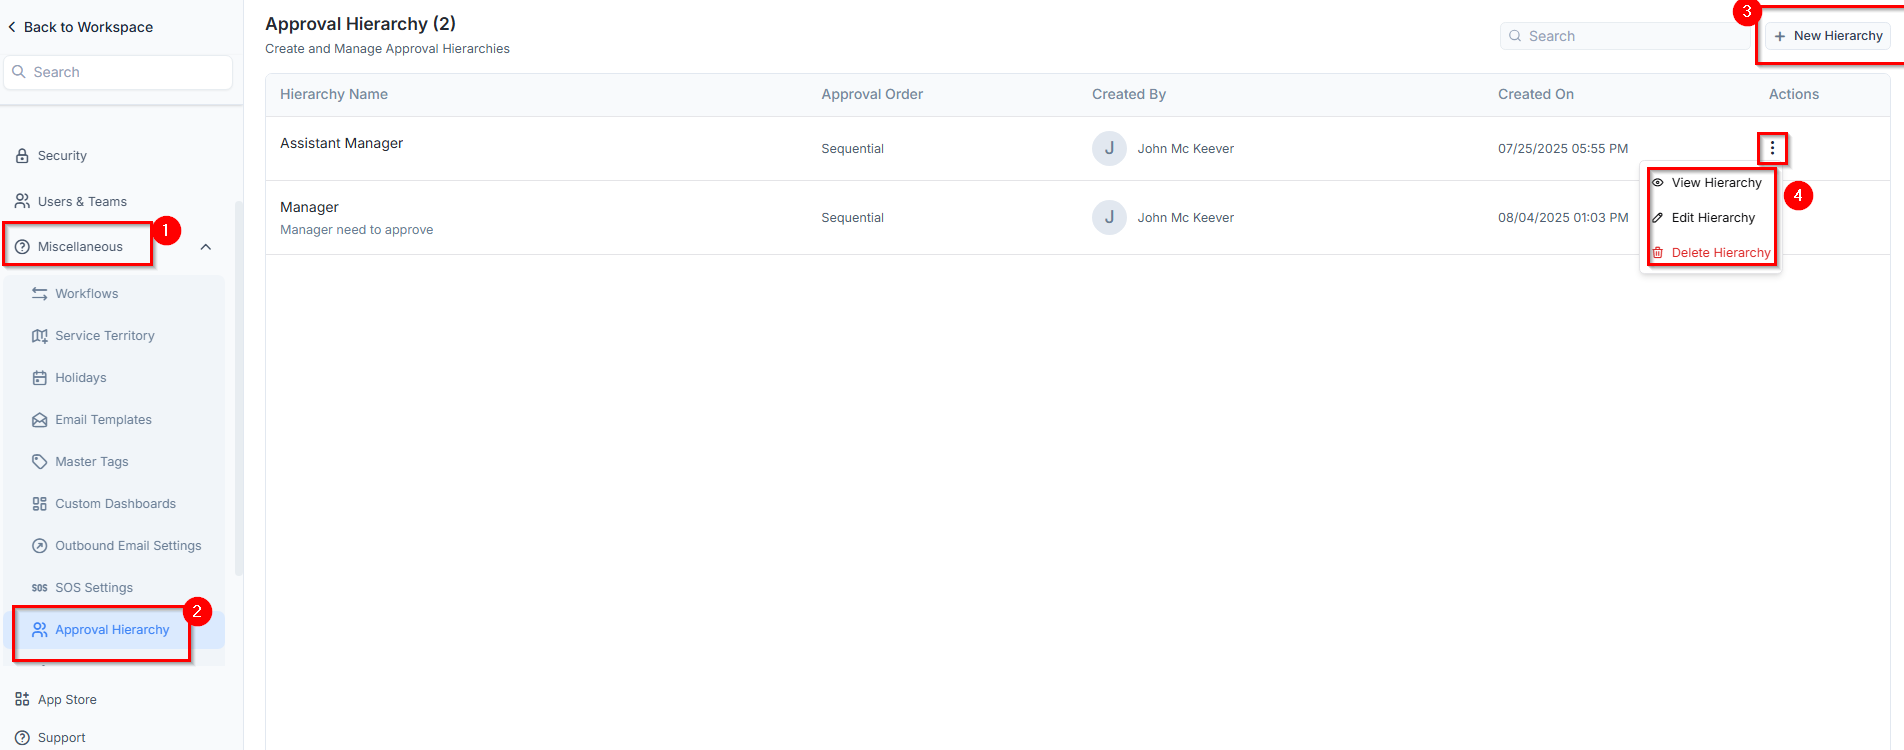
- Create & Manage Hierarchies: Settings -> Miscellaneous -> Approval Hierarchy
- Approve or reject the PO directly from the email notification.
- Log in to the Zuper web application to approve, reject, and/or add comments.

- Mark as Approved / Rejected– Approve or decline the PO. ( Available to Admin users)
- Clone – Create a duplicate PO.
- Cancel – Mark the PO as Cancelled.
- Delete – Permanently remove the PO from the system.
Note: No further edits are allowed once the PO is in this status.
- Mark as Sent to Vendor – Update the status to indicate the PO has been sent.
- Clone – Create a duplicate PO.
- Cancel PO– Mark the PO as Cancelled.
- Delete PO– Permanently remove the PO from the system.
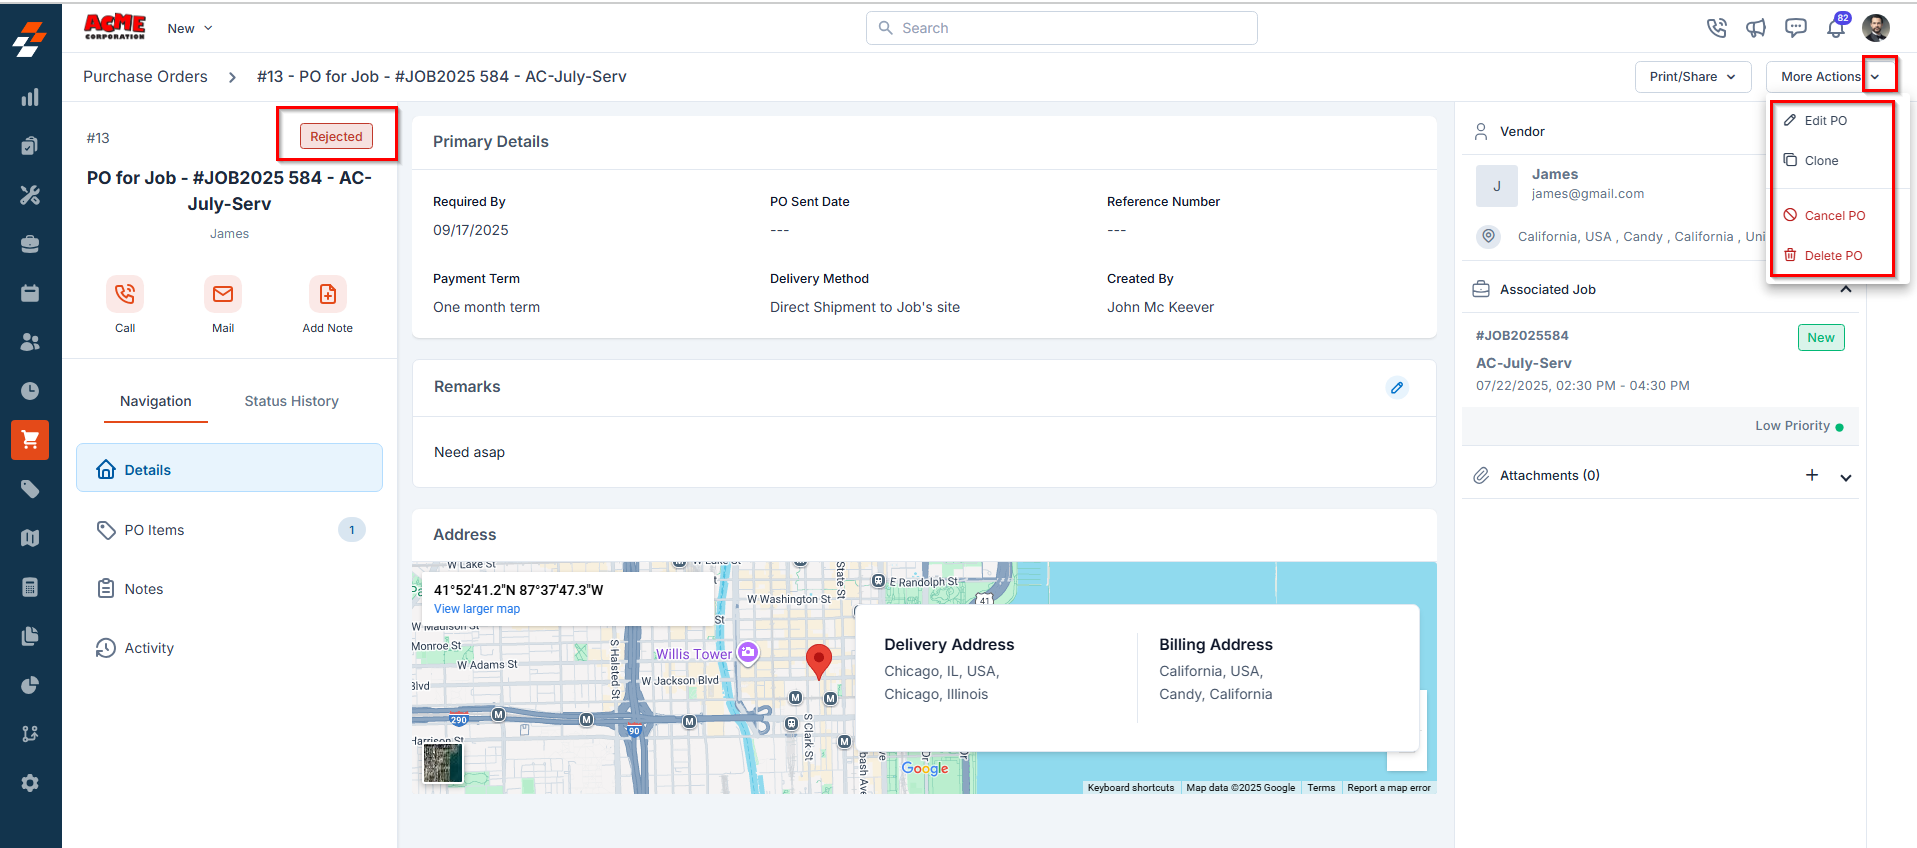
Note: The PO cannot proceed to vendor communication unless it is revised and resubmitted. Rejection comments are recorded in the Activity section for transparency.
- Edit PO – Update the PO and resubmit for approval.
- Clone – Create a duplicate PO.
- Cancel PO – Mark the PO as Cancelled.
- Delete PO – Permanently remove the PO from the system.
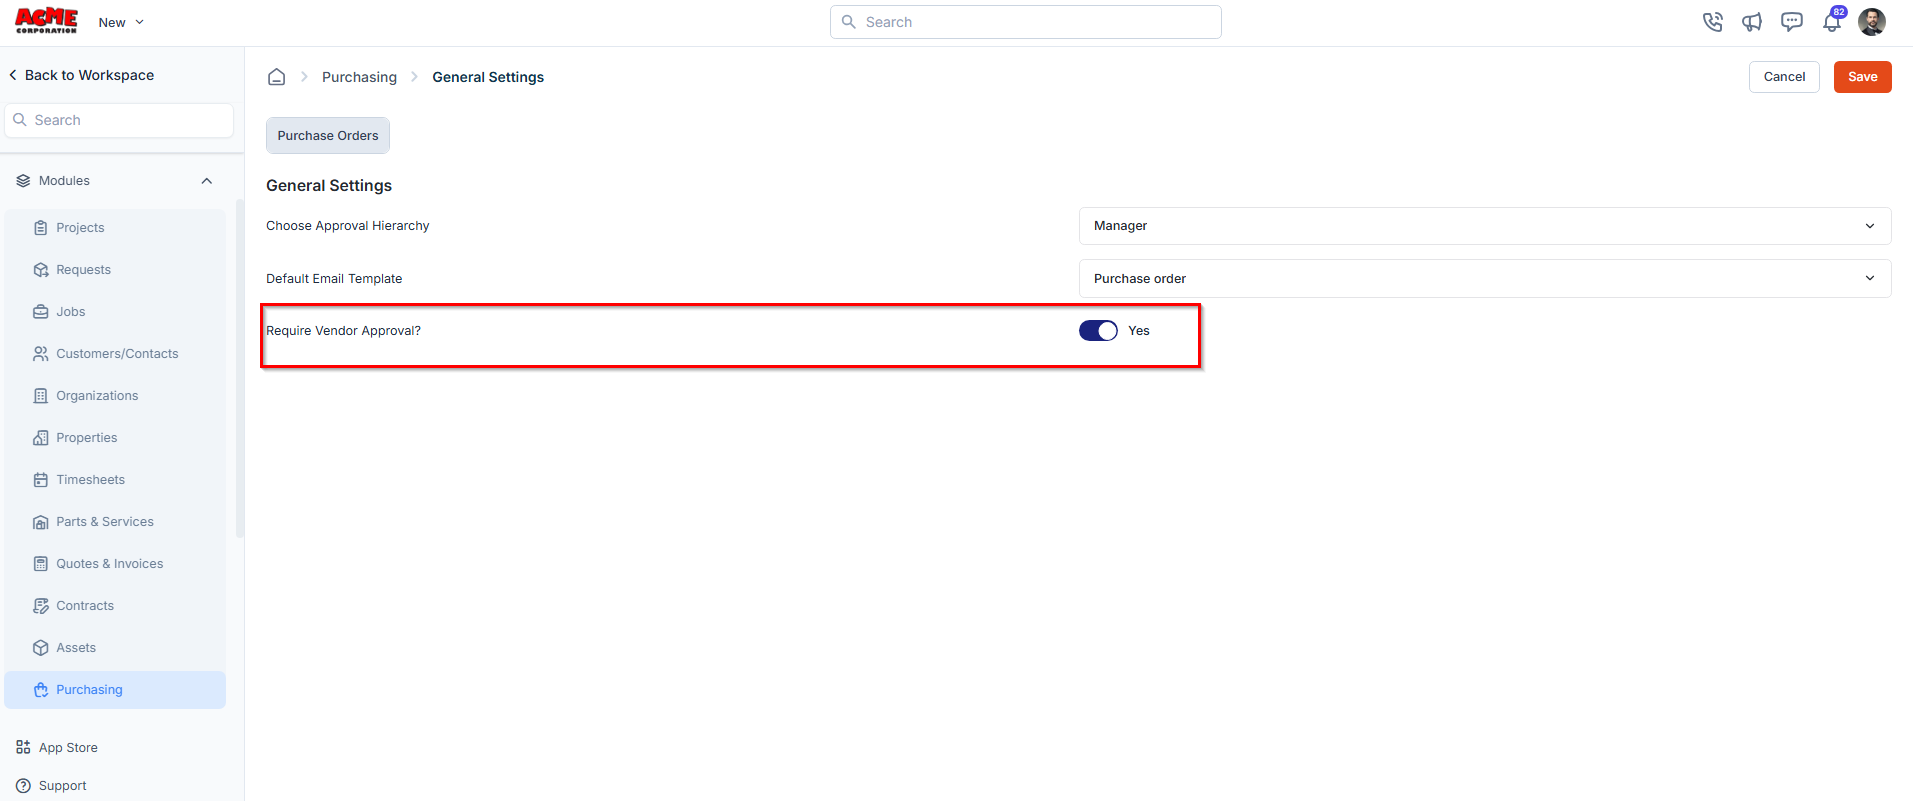
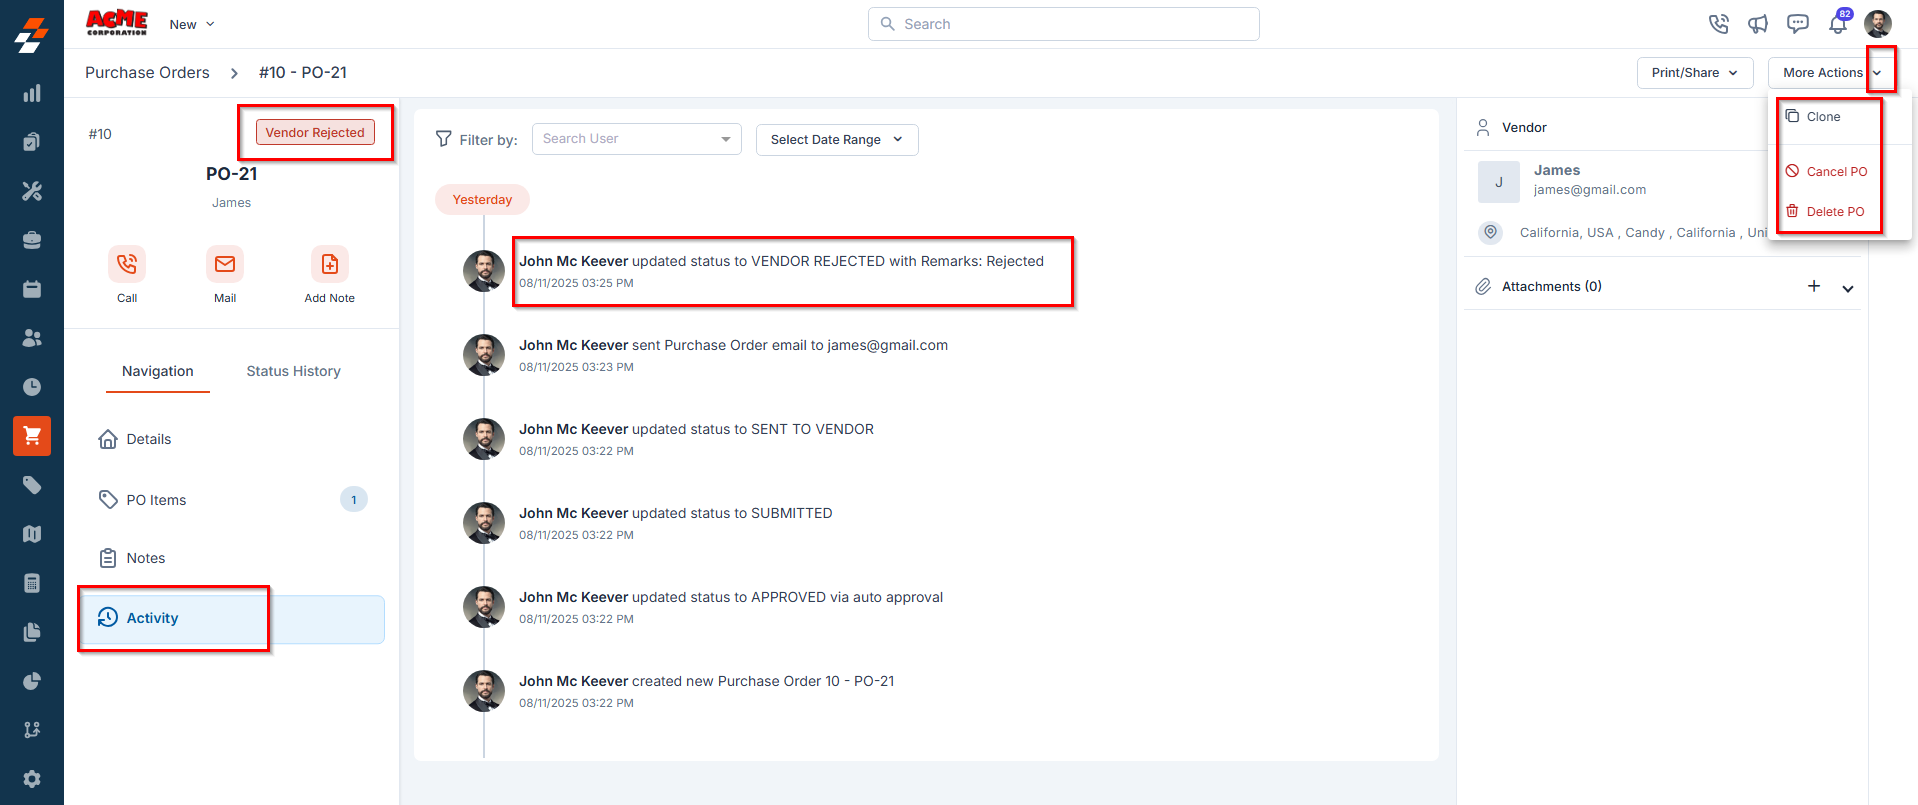
Vendor Approval–Related Statuses
If your organization has enabled vendor approval after a purchase order (PO) is sent, you can record the vendor’s response. In such cases, the following statuses may appear: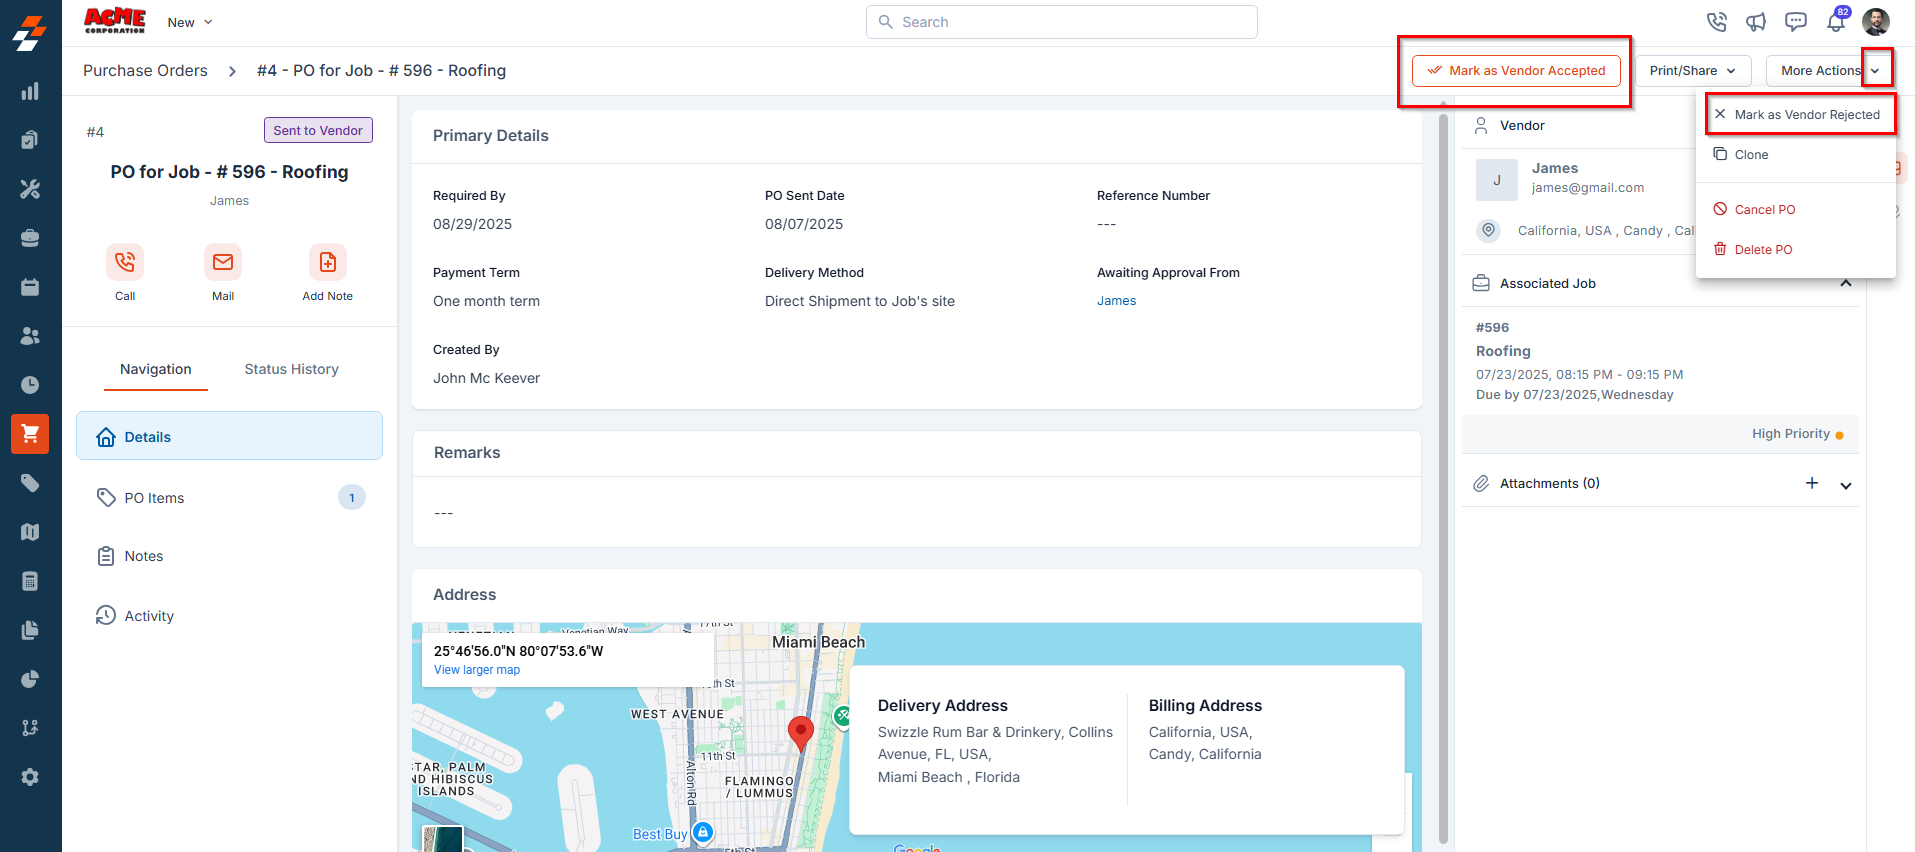
Enable Vendor Approval: Settings -> Modules -> Purchasing -> General Settings -> Require Vendor Approval -> Toggle “Yes”
- Clone – Create a duplicate PO.
- Cancel PO – Mark the PO as Cancelled.
- Delete PO – Permanently remove the PO from the system
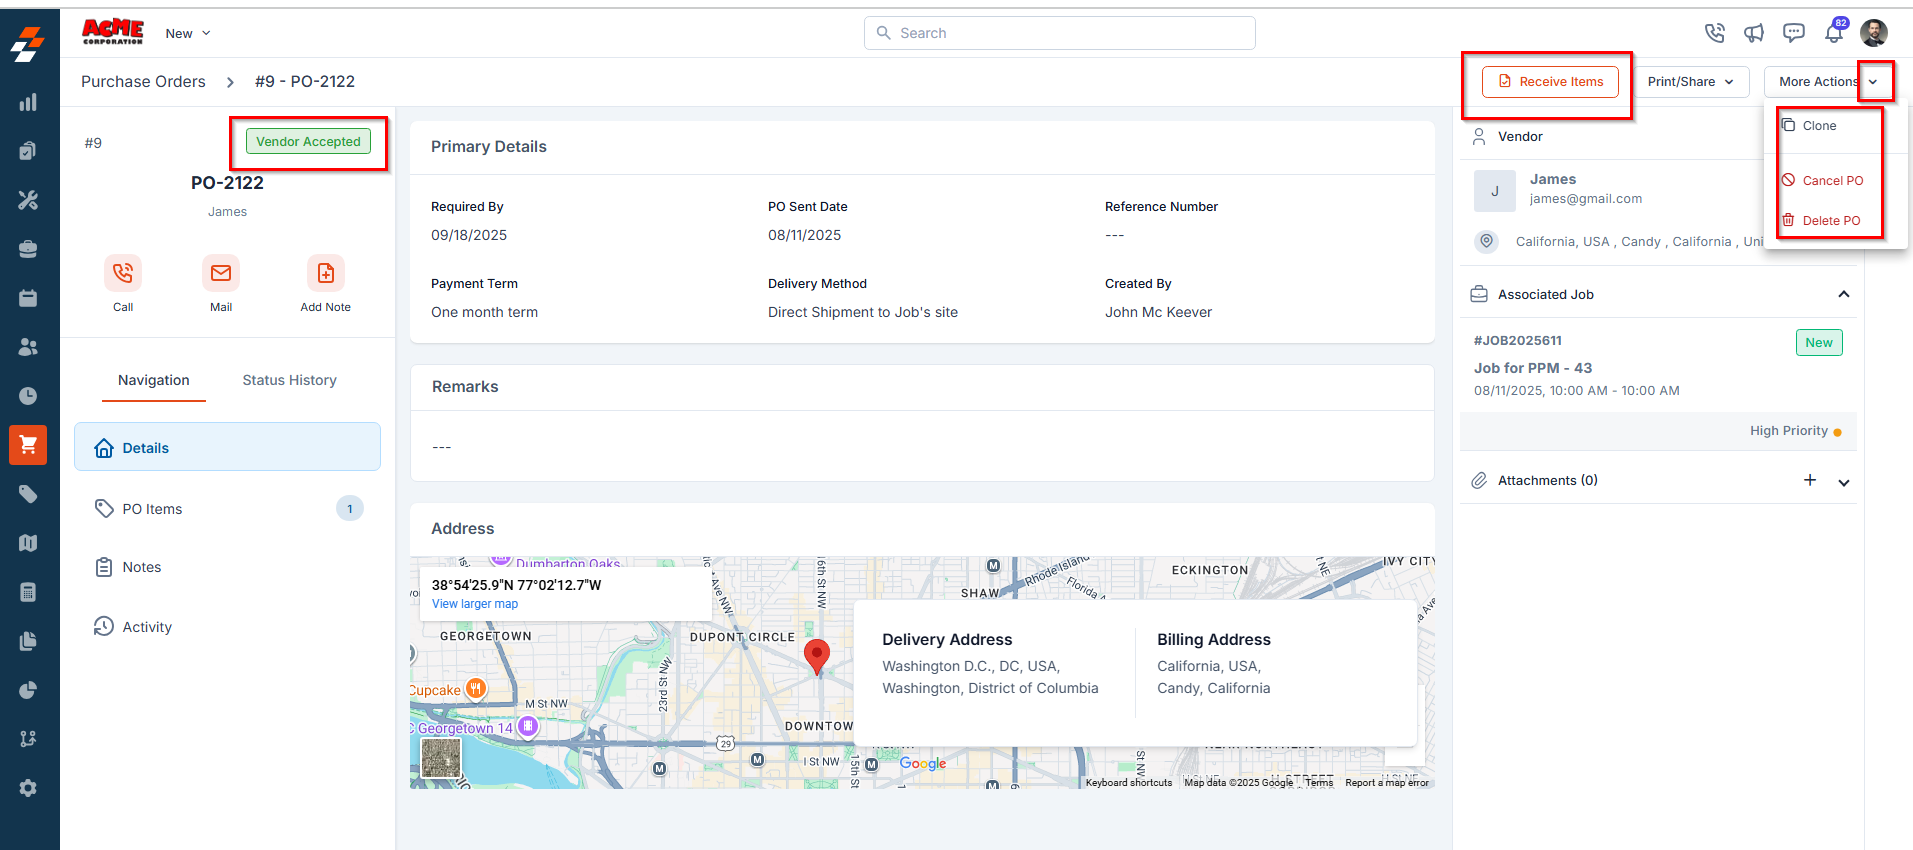
- Clone – Create a duplicate PO.
- Cancel PO – Mark the PO as Cancelled.
- Delete PO – Permanently remove the PO from the system
Status Flow Summary
- Approval Hierarchy enables the PO to move through the following statuses: Awaiting Approval → Approved / Rejected.
- Vendor Approval enables the PO to move through the following statuses: Vendor Accepted / Vendor Rejected.
- If neither setting is configured, the PO moves directly from Submitted → Sent to Vendor → Partially Fulfilled or Fulfilled → Invoiced → Paid based on the items received and payment recorded.