Create project
Navigation: Projects -> Projects listing page -> + New Project
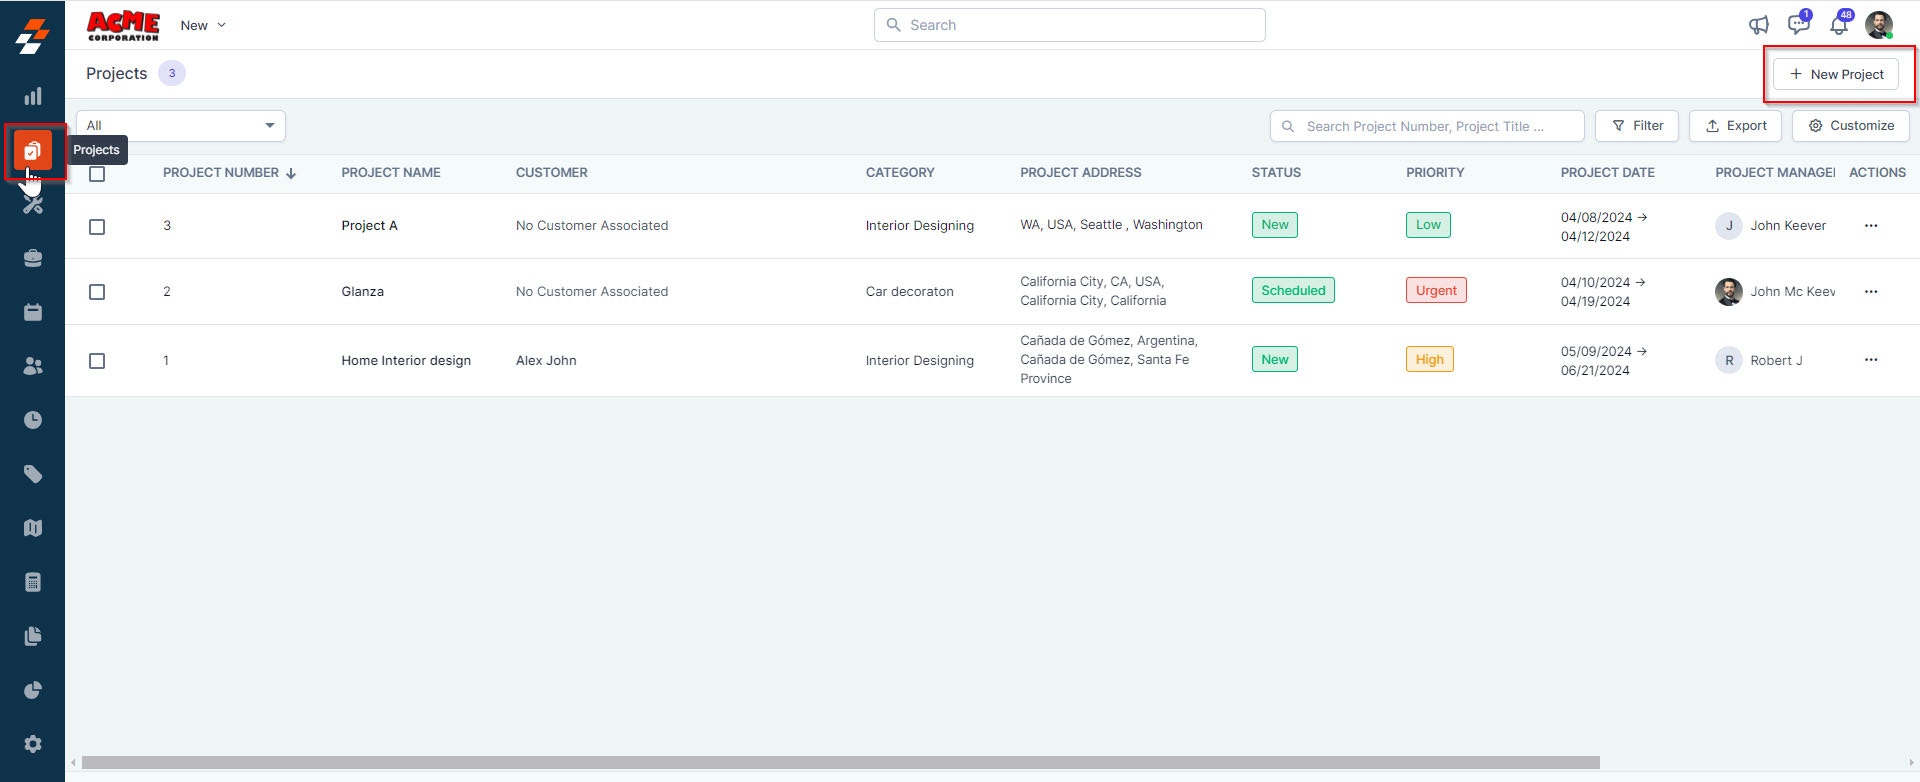
- Click the “Projects” icon from the left navigation menu. You can view the list of projects created earlier on the listing page. To create a new project, click the “+ New Project” button at the top right corner of the page.
- A new project creation page appears. Fill in the following sub-sections:
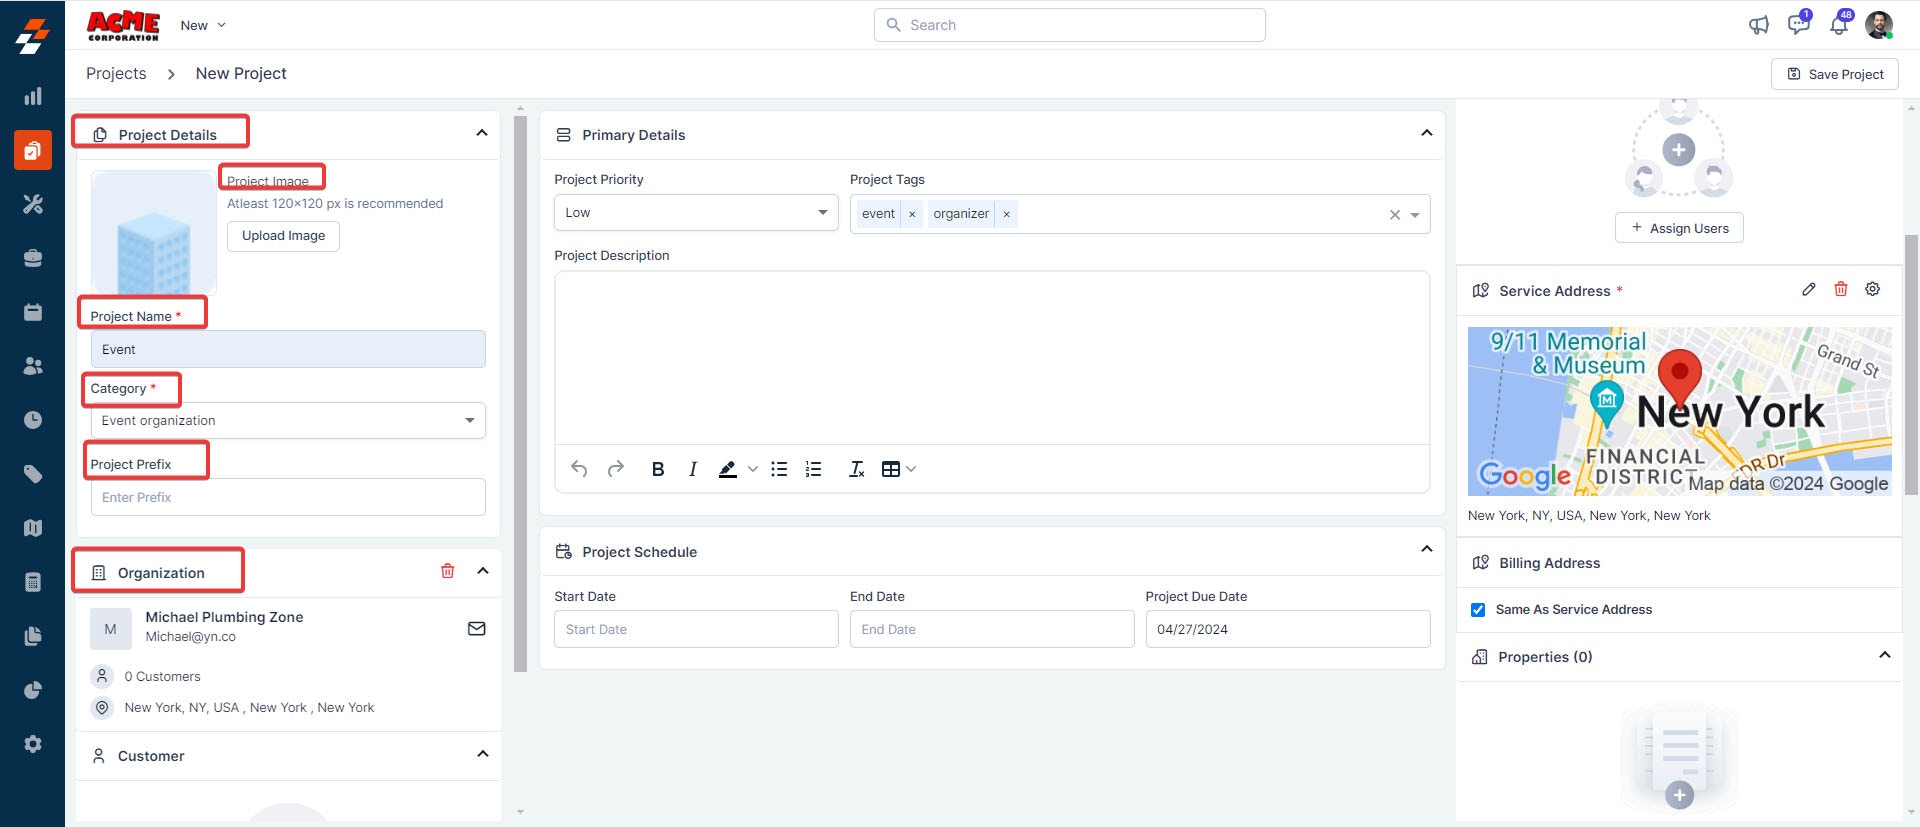
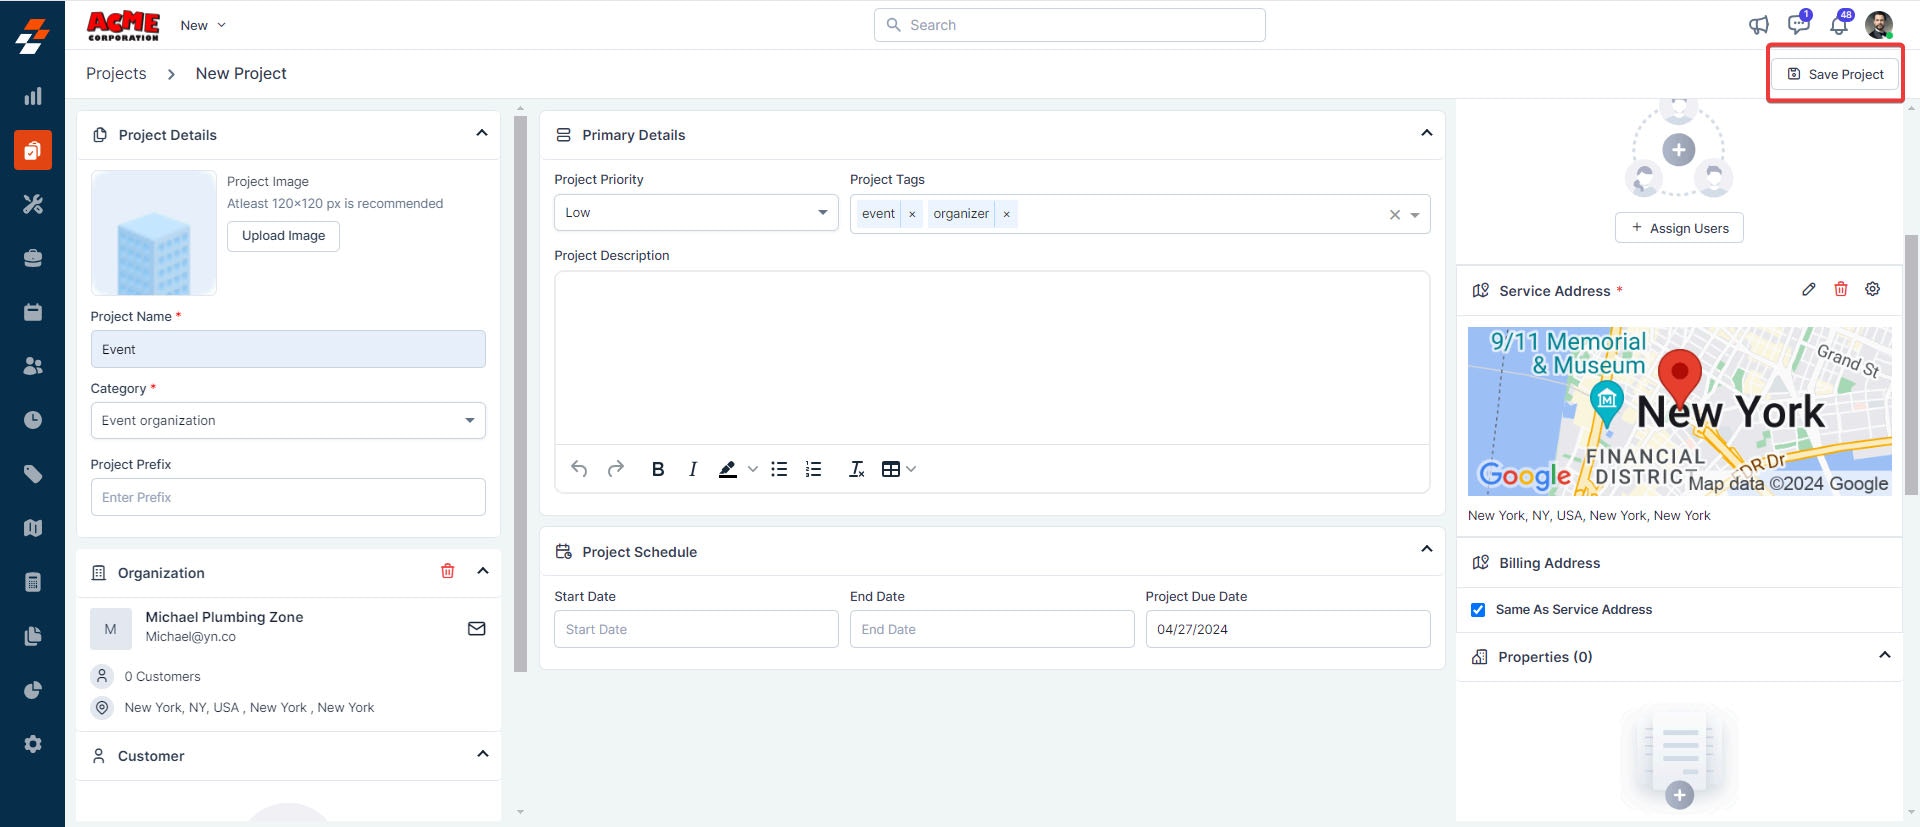
A. Project Details
Project image (Optional): Upload an image with dimensions of 120x120 px. Having an image helps in project identification.- Project name(Mandatory): Provide a name for the project.
- Category (Mandatory): Choose the category to which this project belongs from the dropdown menu.
- Project Prefix: Provide any Prefix that will then be displayed as Project number.
Note: The available categories are those configured in the project settings.
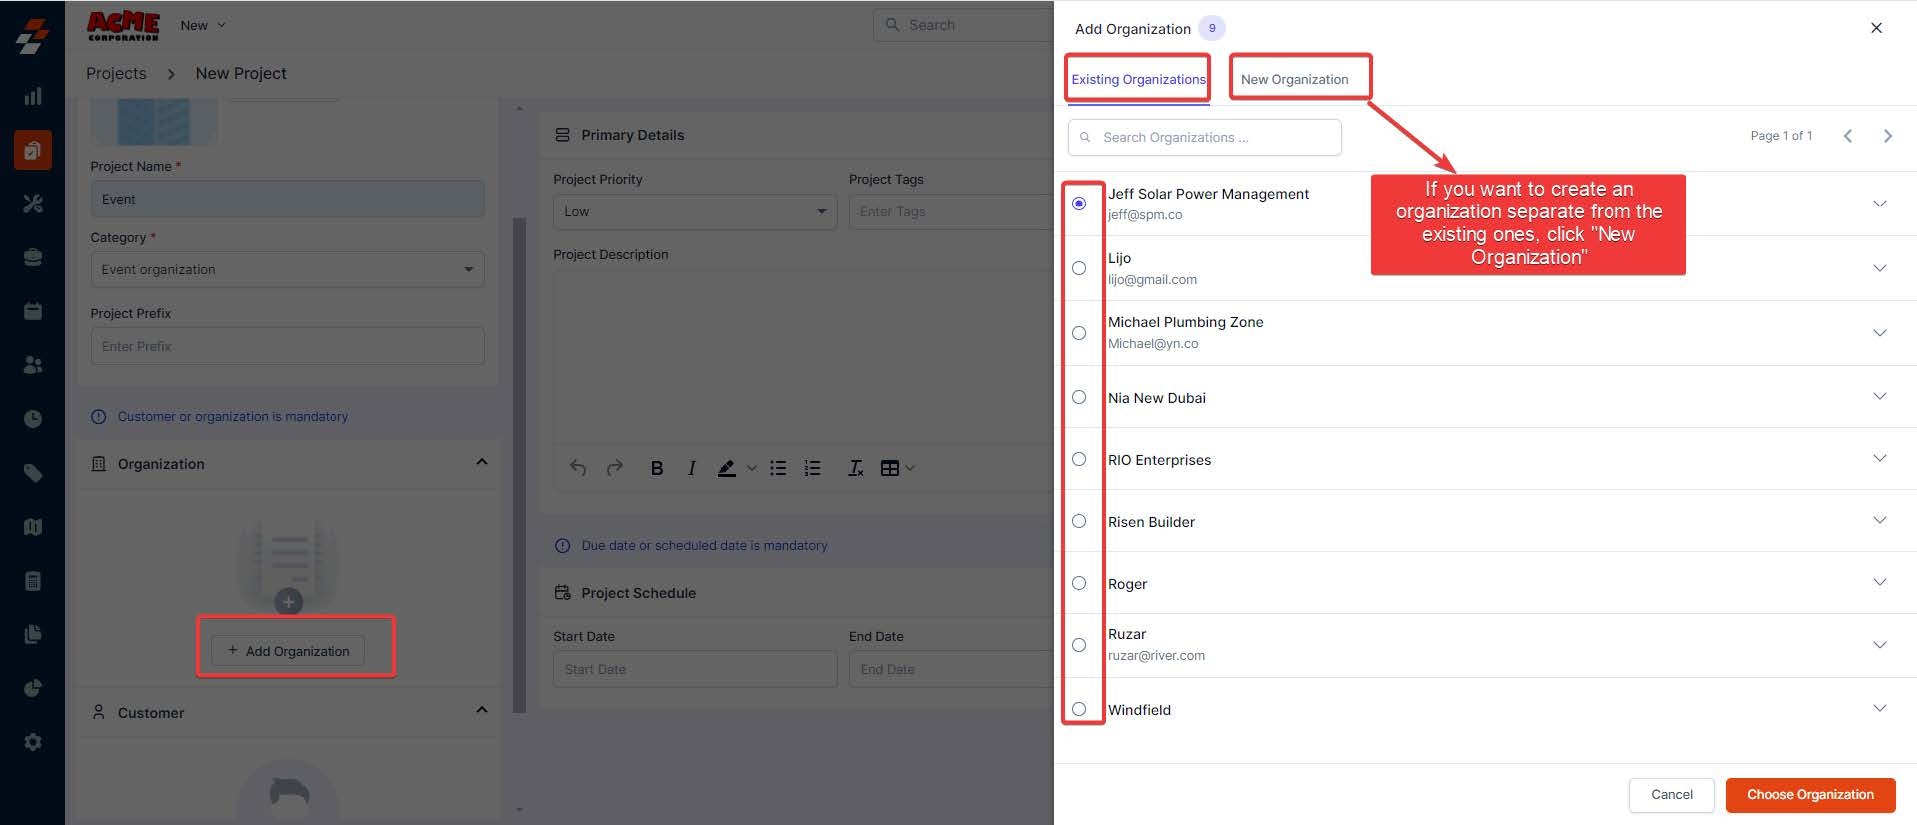
- Organization/Customer: Add an organization/customer. To add one, click the ”+ Add Organization/Customer” button under “Organization/Customer” and choose from the existing list. Alternatively, click the “New Organization/Customer” tab to add a new one.
B. Primary Details
- Project Priority: Select the project’s priority level from the dropdown menu. By default, the priority levels are low, medium, high, and urgent.
Note: When an organization is selected, the service address will be auto-filled. You can use the sameaddress as the billing address or add a new one by the “Edit ” icon next to the billing address.
- Project tags: Click Enter to add several tags to this project. Adding tags helps organize and search for projects.
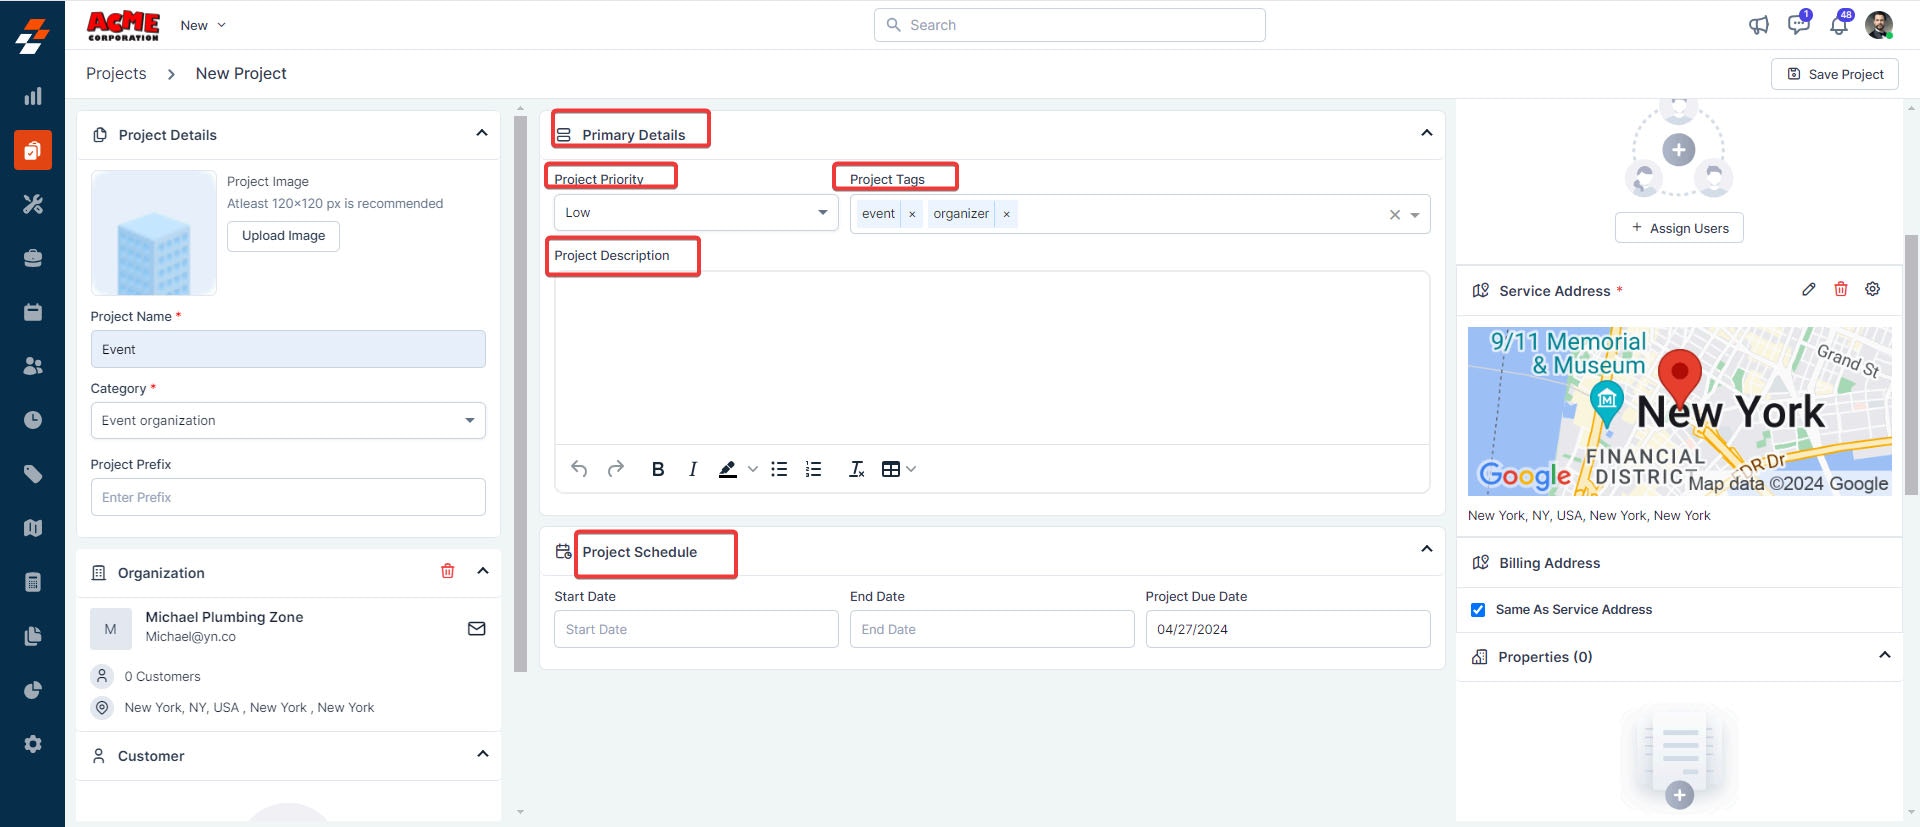
- Project Description: Add a brief description explaining the purpose or scope of this project.
- Project schedule (Mandatory): Specify either the project’s due date or its start and end dates.
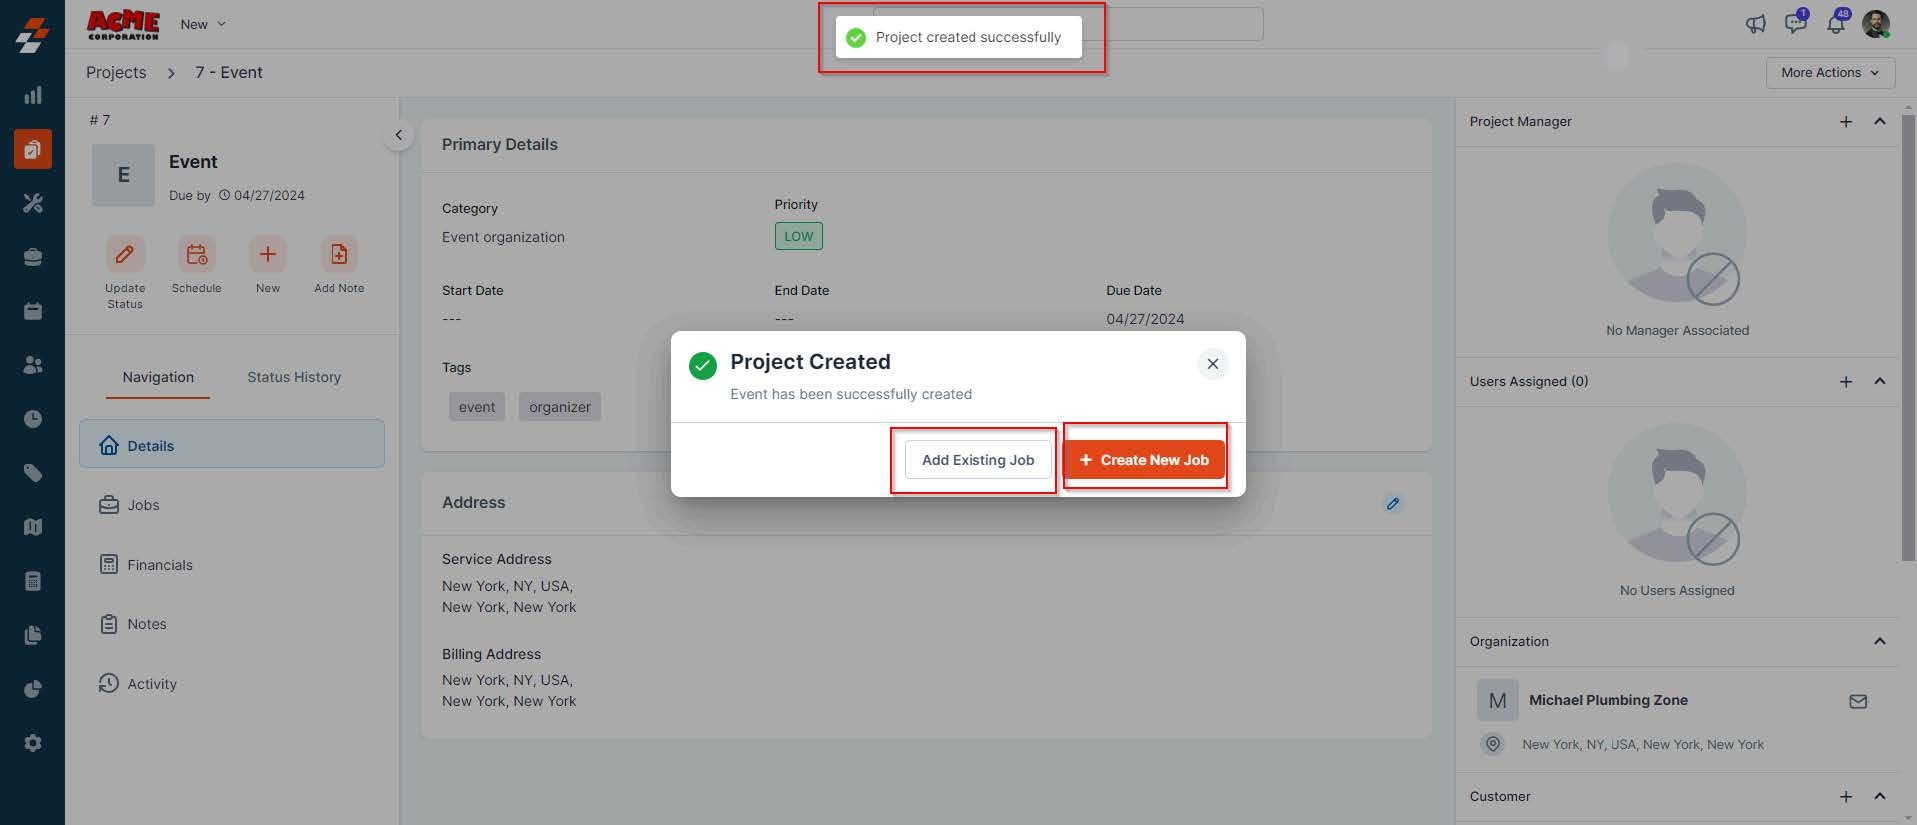
- Once you have completed all the mandatory fields, click the “Save Project” button at the top right corner of the page.
- A new project is created successfully, and you’ll be prompted to add a job. You have the option to either add an existing job or create and add a new one. You can close this pop-up if you prefer not to add a job now.
Options
When adding a new part or product to a project, you can select the available Options configured for that specific item.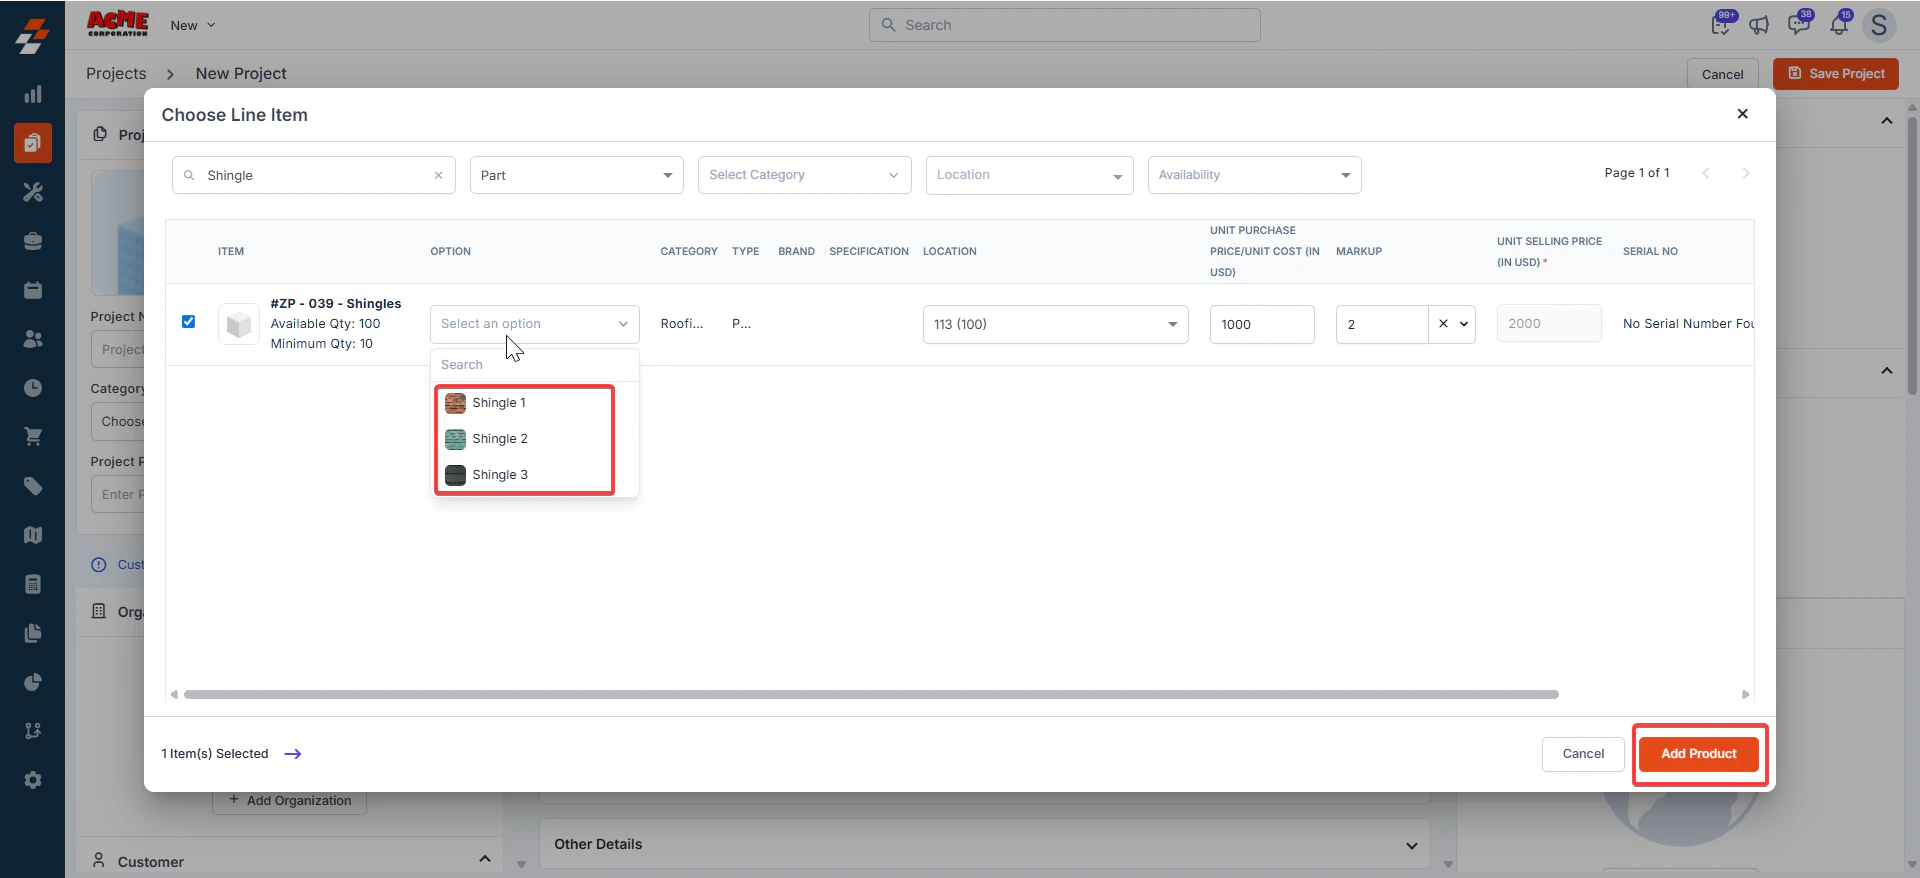
Add job to the project
You can add a Job to the project through either of the following ways:- Existing Job
- Create New Job.
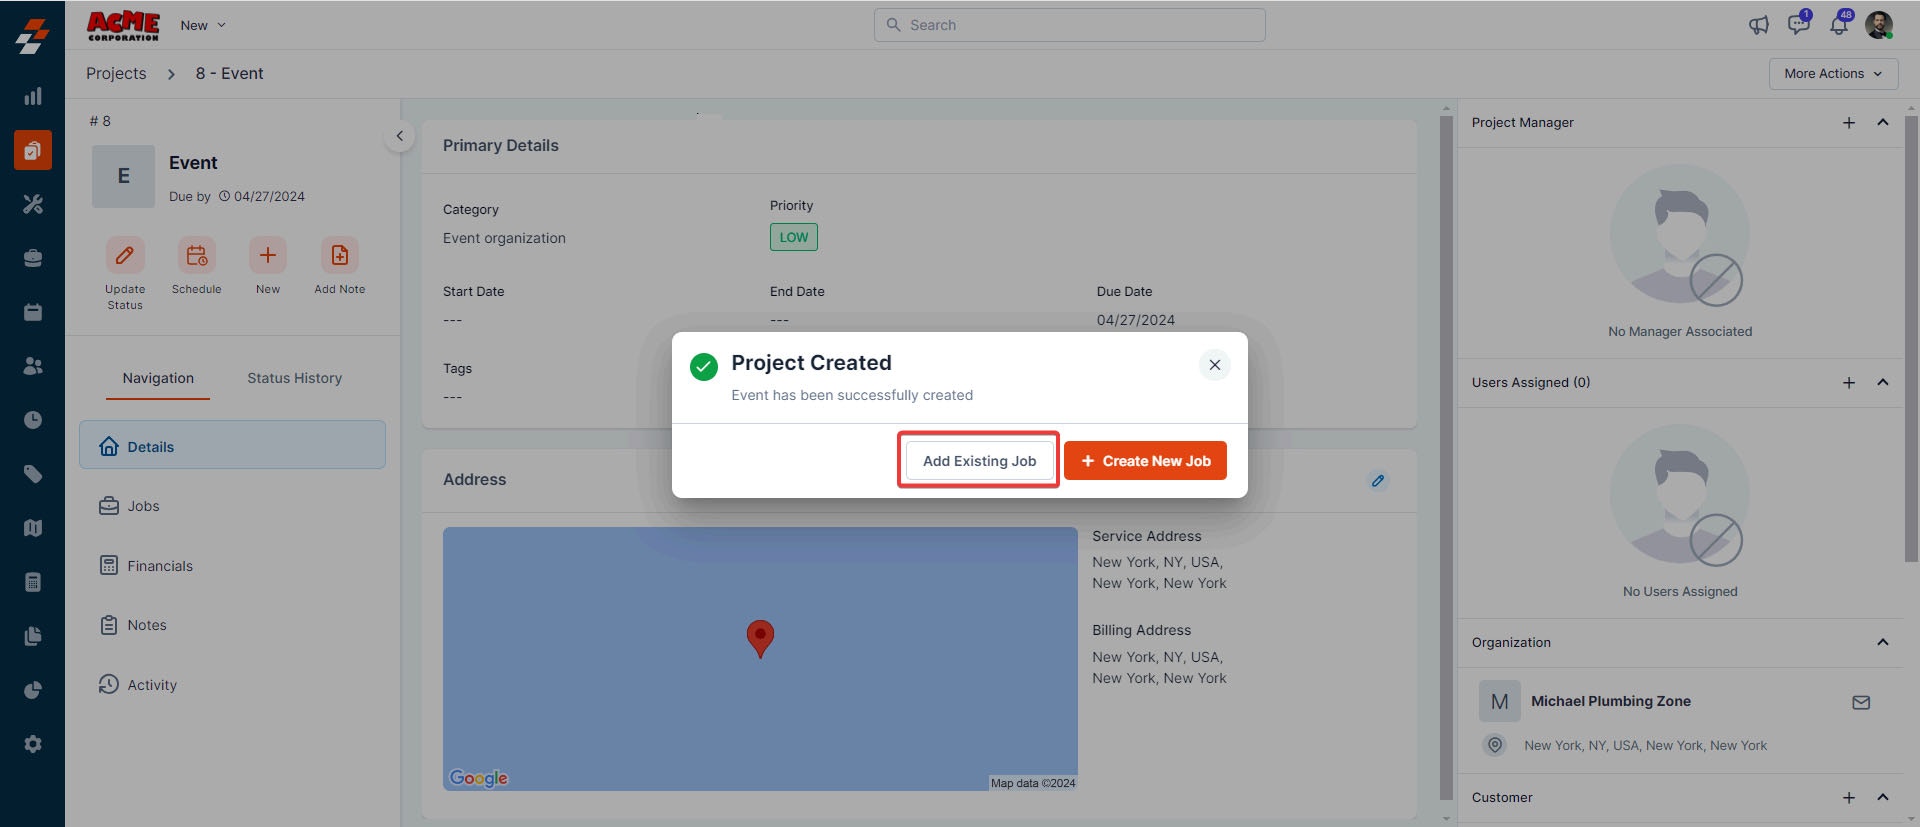
Add existing job
To add an existing job, follow these steps:- In the dialog box, click “Add Existing Job”
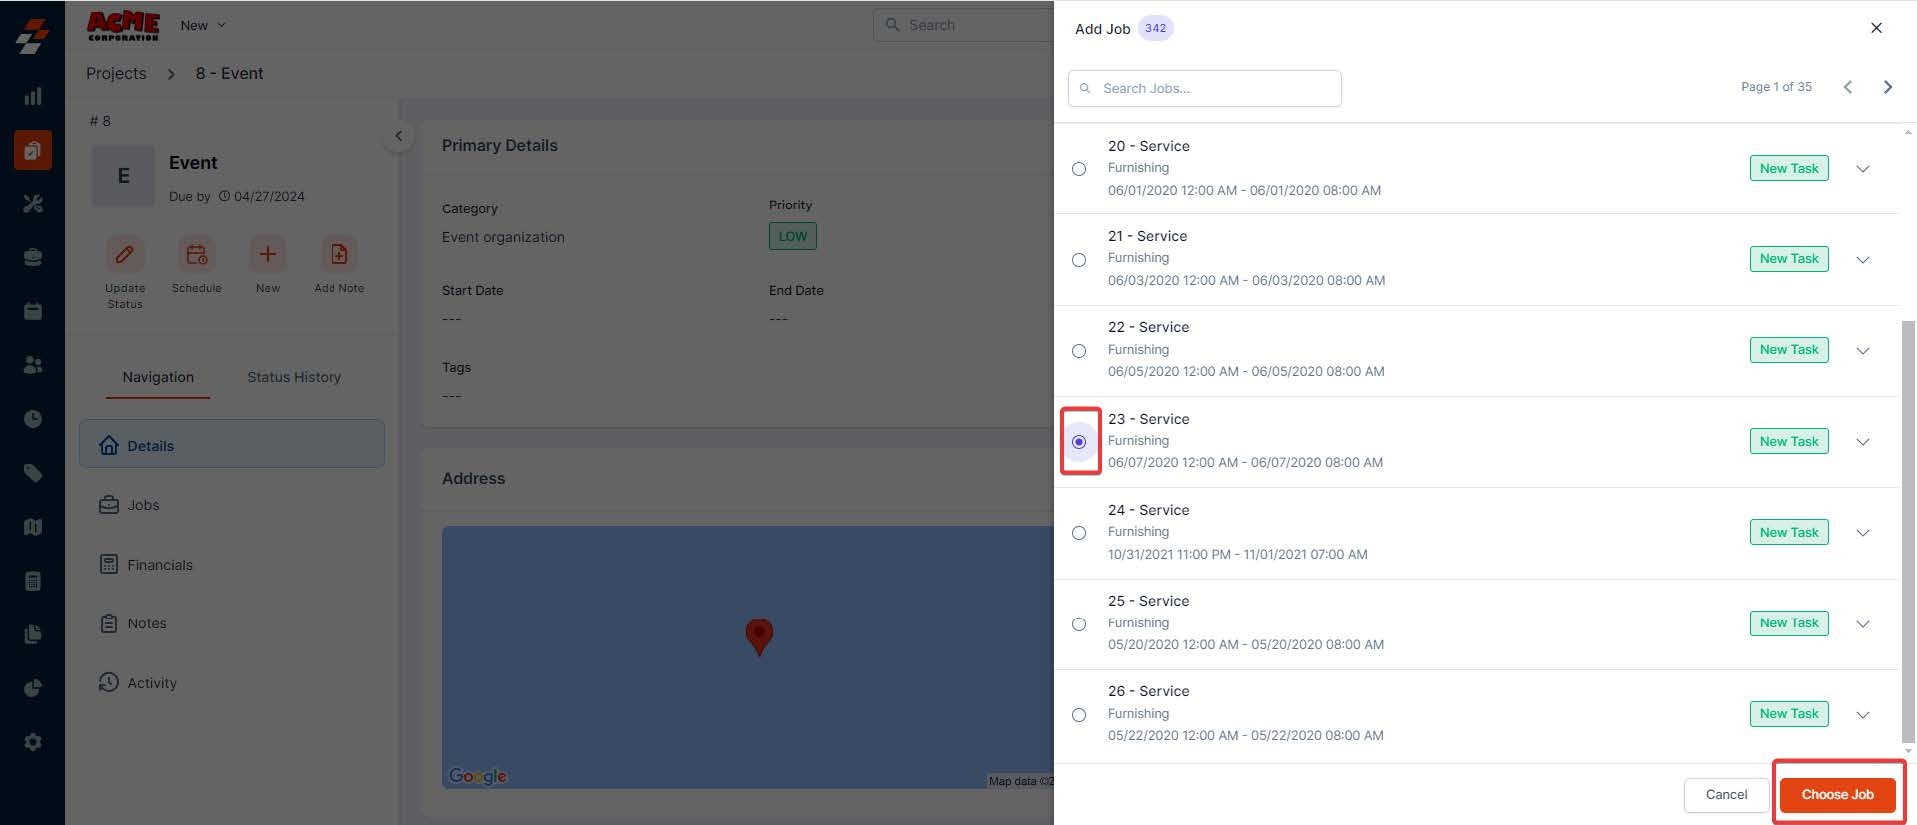
- A sidebar appears with existing jobs (which you’ve created earlier). Search and select a job from the list. Upon selection, click the “Choose Job” button.
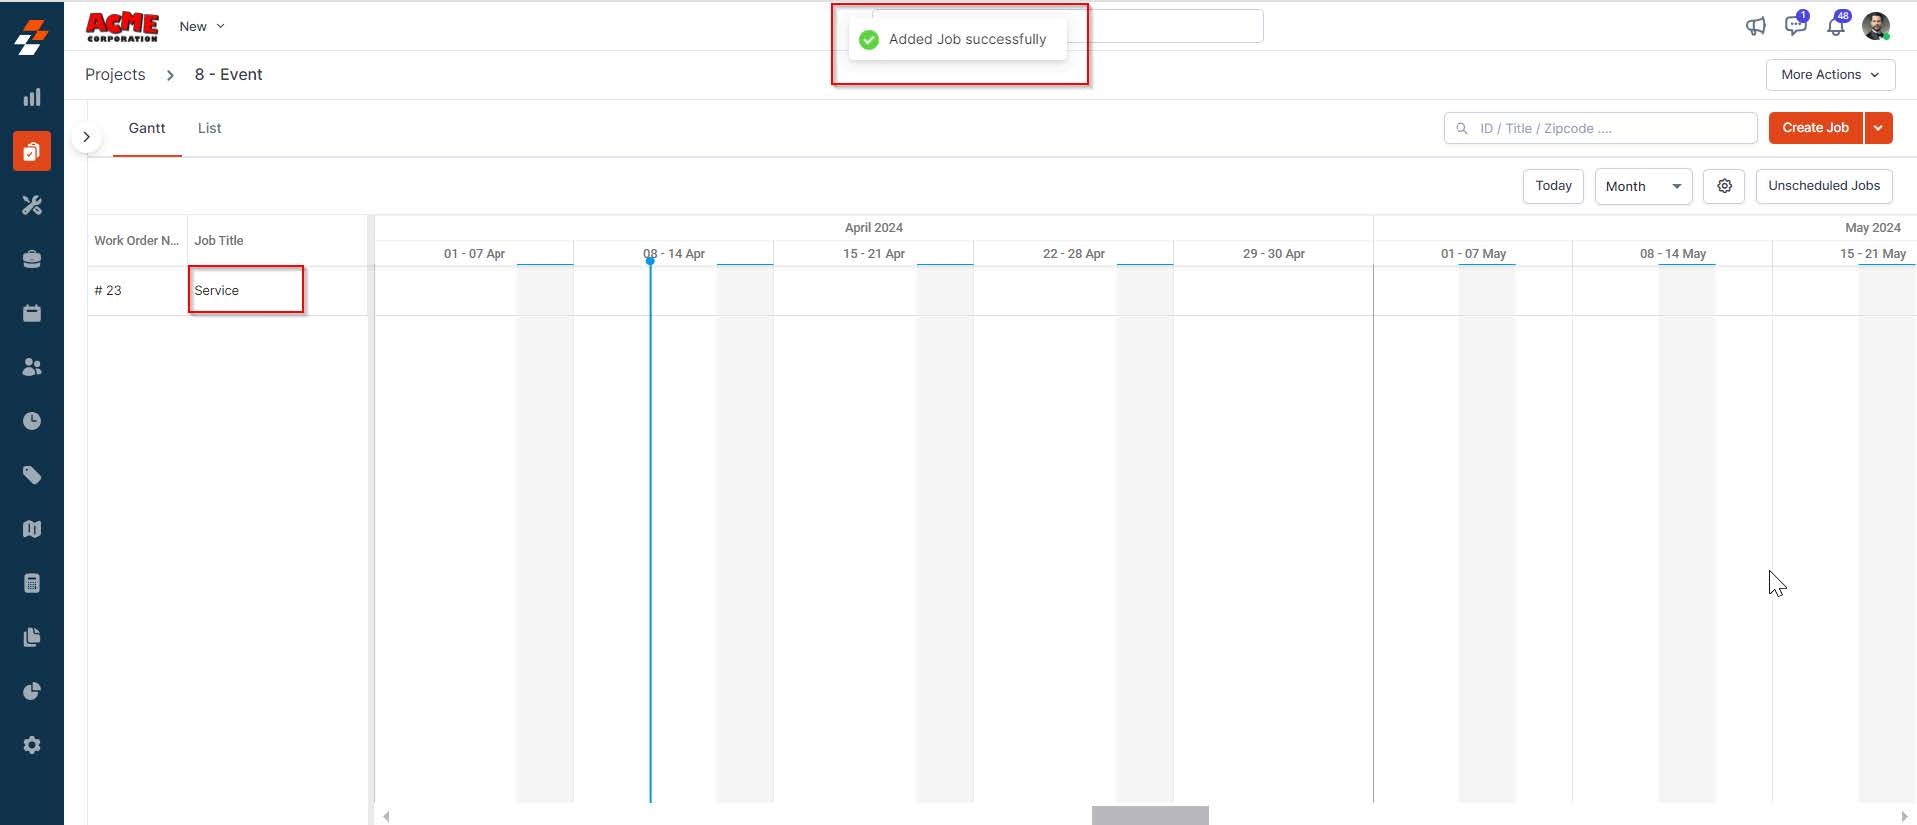
- The Existing job will be added to the project successfully. You can then click the “Job Title ” to view the job’s primary details and notes associated with the job.
Create new job
To create and add a new job to the project, follow these steps:- Click the ”+ Create New Job” button in the pop-up.
Note: For detailed step-by-step instructions on creating a Job in Zuper Web App, click here.

- A sidebar appears on the right with prefilled details such as organization/customer name, priority level, and service/billing address. You can also add details such as job title, category, and due date to these records and click the “Create” button. A new job will be created and associated with the project.
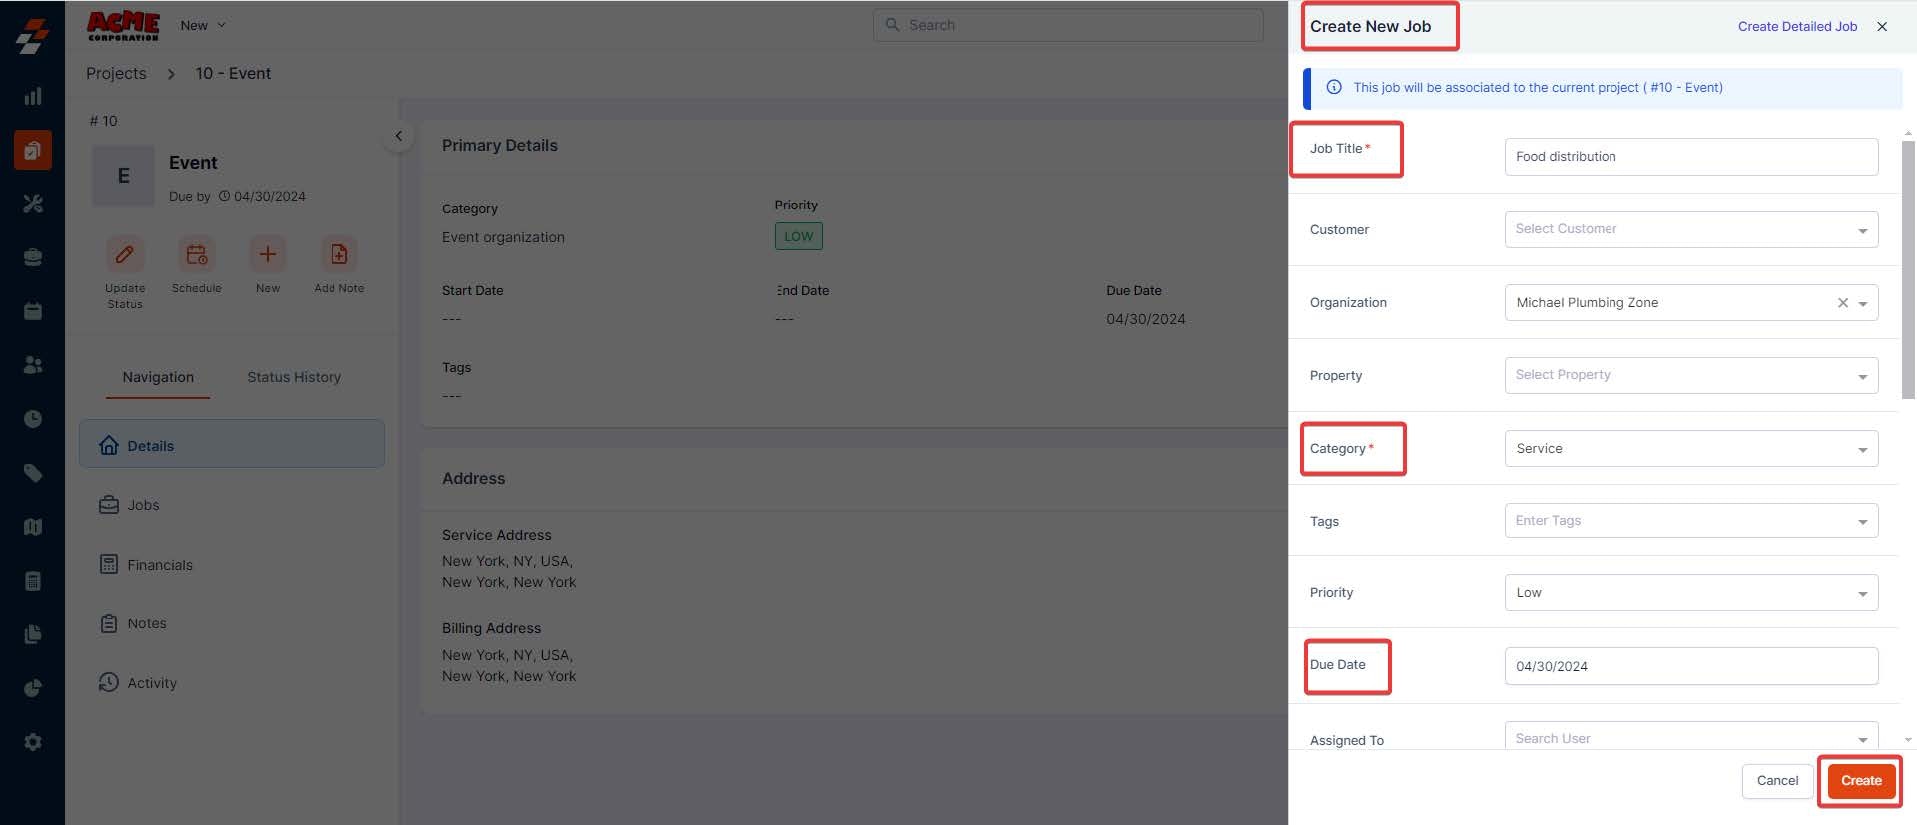
Note: If you want to add more details to the job, click “Create Detailed Job” at the top right corner of the new job creation sidebar. This will redirect you to a new page.