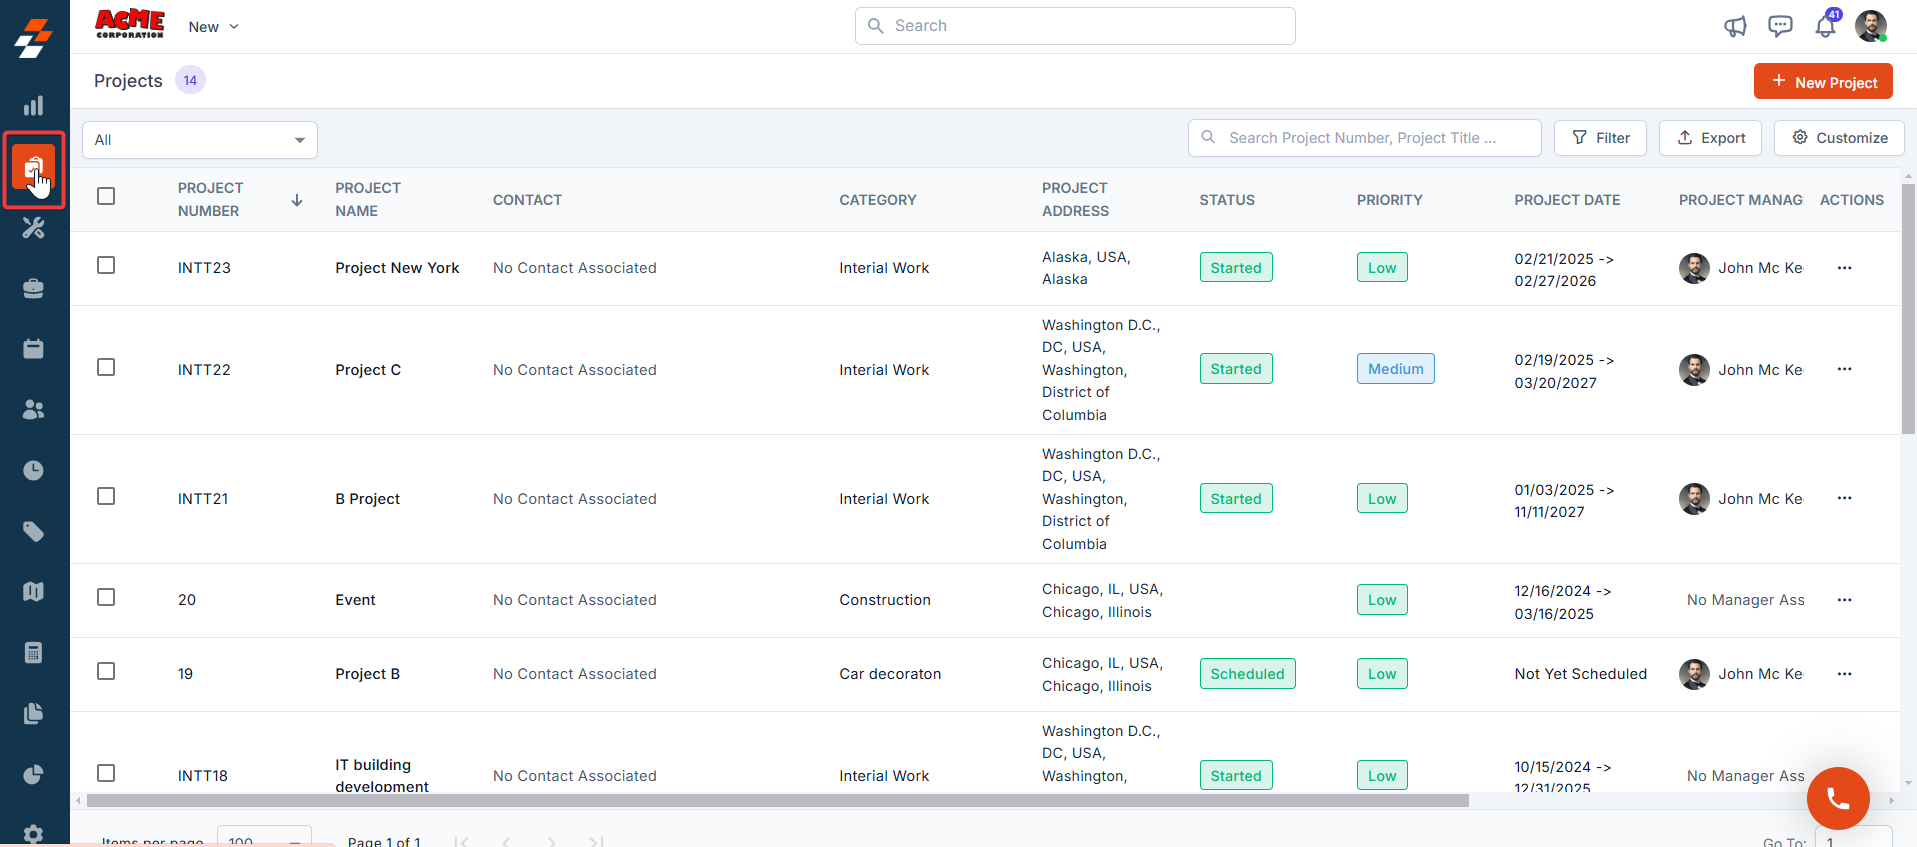
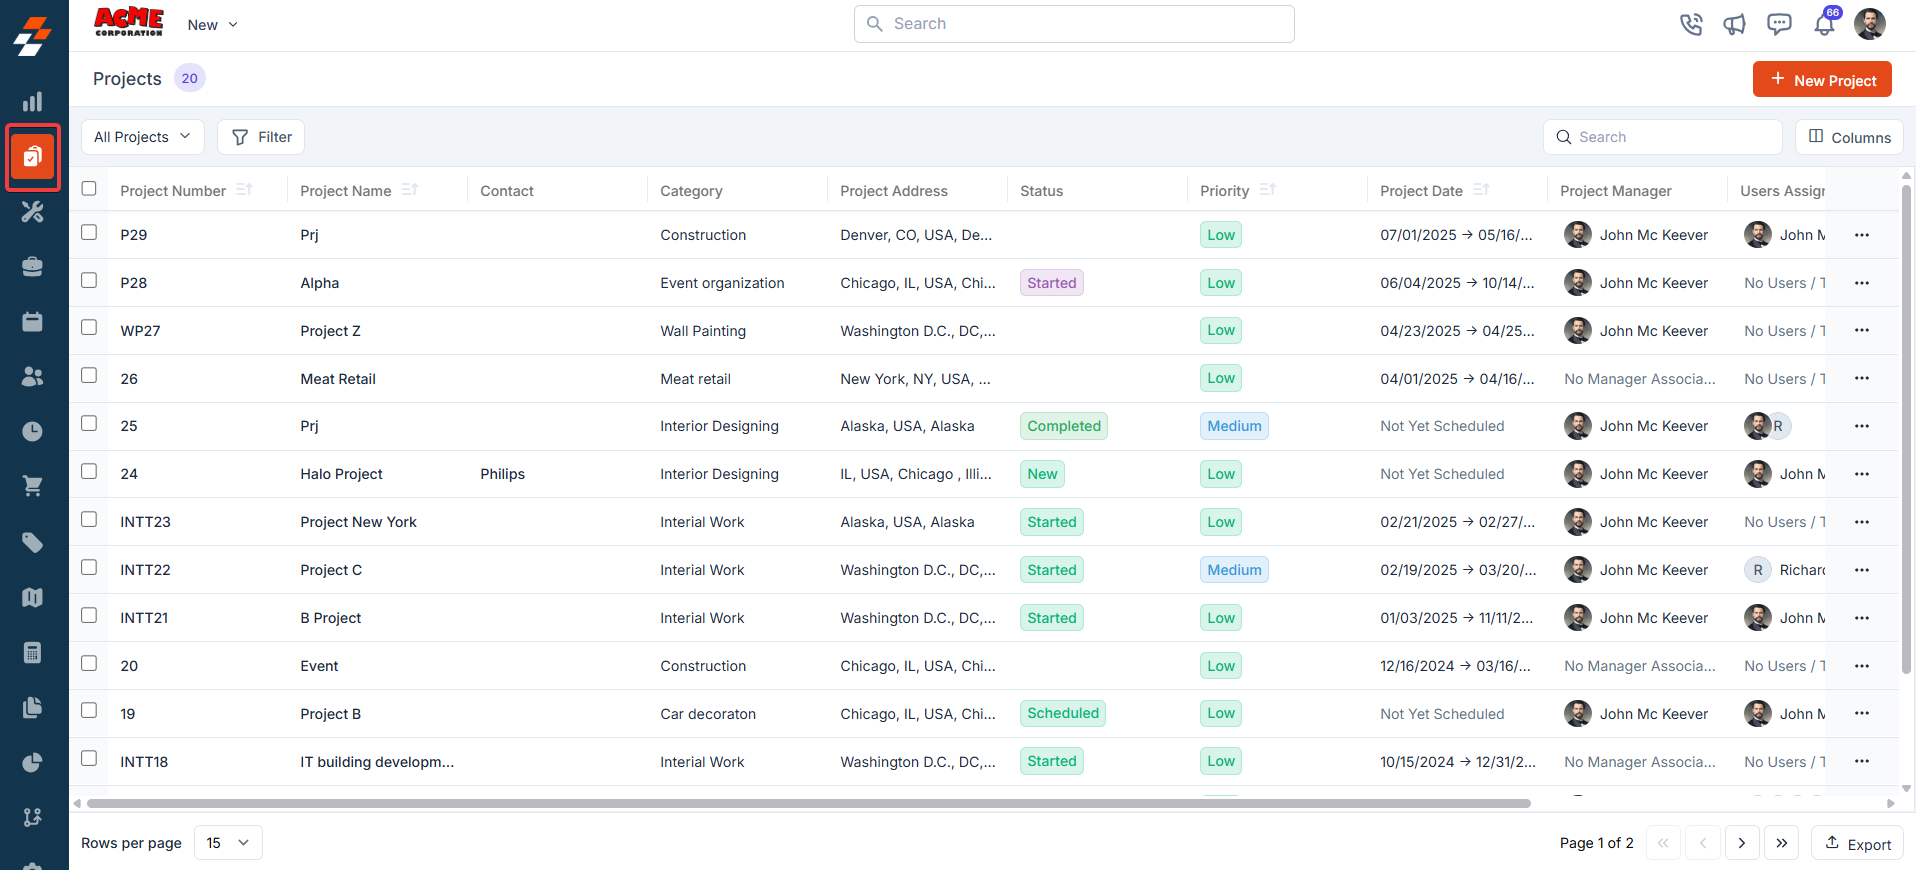
Navigation: Projects -> Projects listing page
- Click the “Projects” icon in the left navigation menu. You can view the list of projects in columns such as project name, customer, category, project address, status, and so on.
Exploring the listing page
The Projects Listing Page is designed to help you stay organized by providing a centralized view of all projects and enabling quick access to critical project details. The page includes several key features to streamline project management: The Project Module Listing Page layout in Zuper includes view management, column selection, views, and saving customized views. This process is performed directly on the module’s listing page. Default Listing Behavior The system retains its existing default listing behavior, ensuring that pre-set configurations or default views are preserved. When you first access the Project Module Listing Page, you’ll see the default view with columns such as Work Order Number, Project Title, Contact, Users/Teams Assigned, Category, and Service Address.Create View Configuration
Selecting Columns You can choose which columns to display to focus on relevant data: 1. Select the “Projects” module from the left navigation menu. You can view the listing page.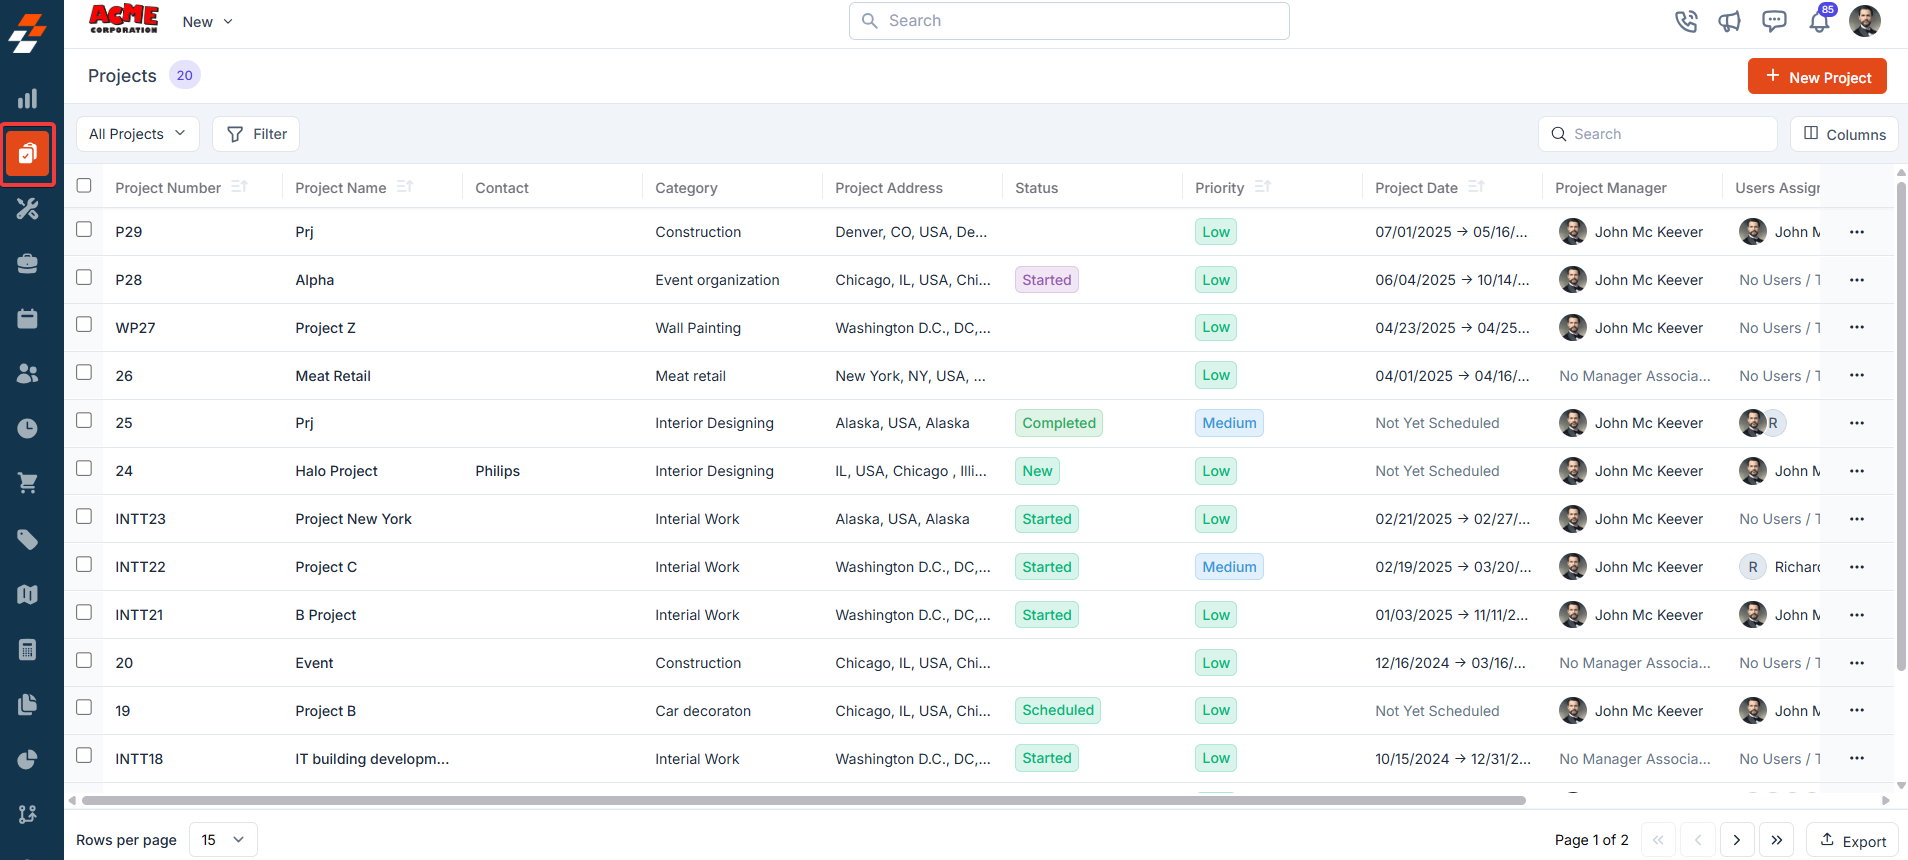
- From the “Views” list, click “+Create new view.”
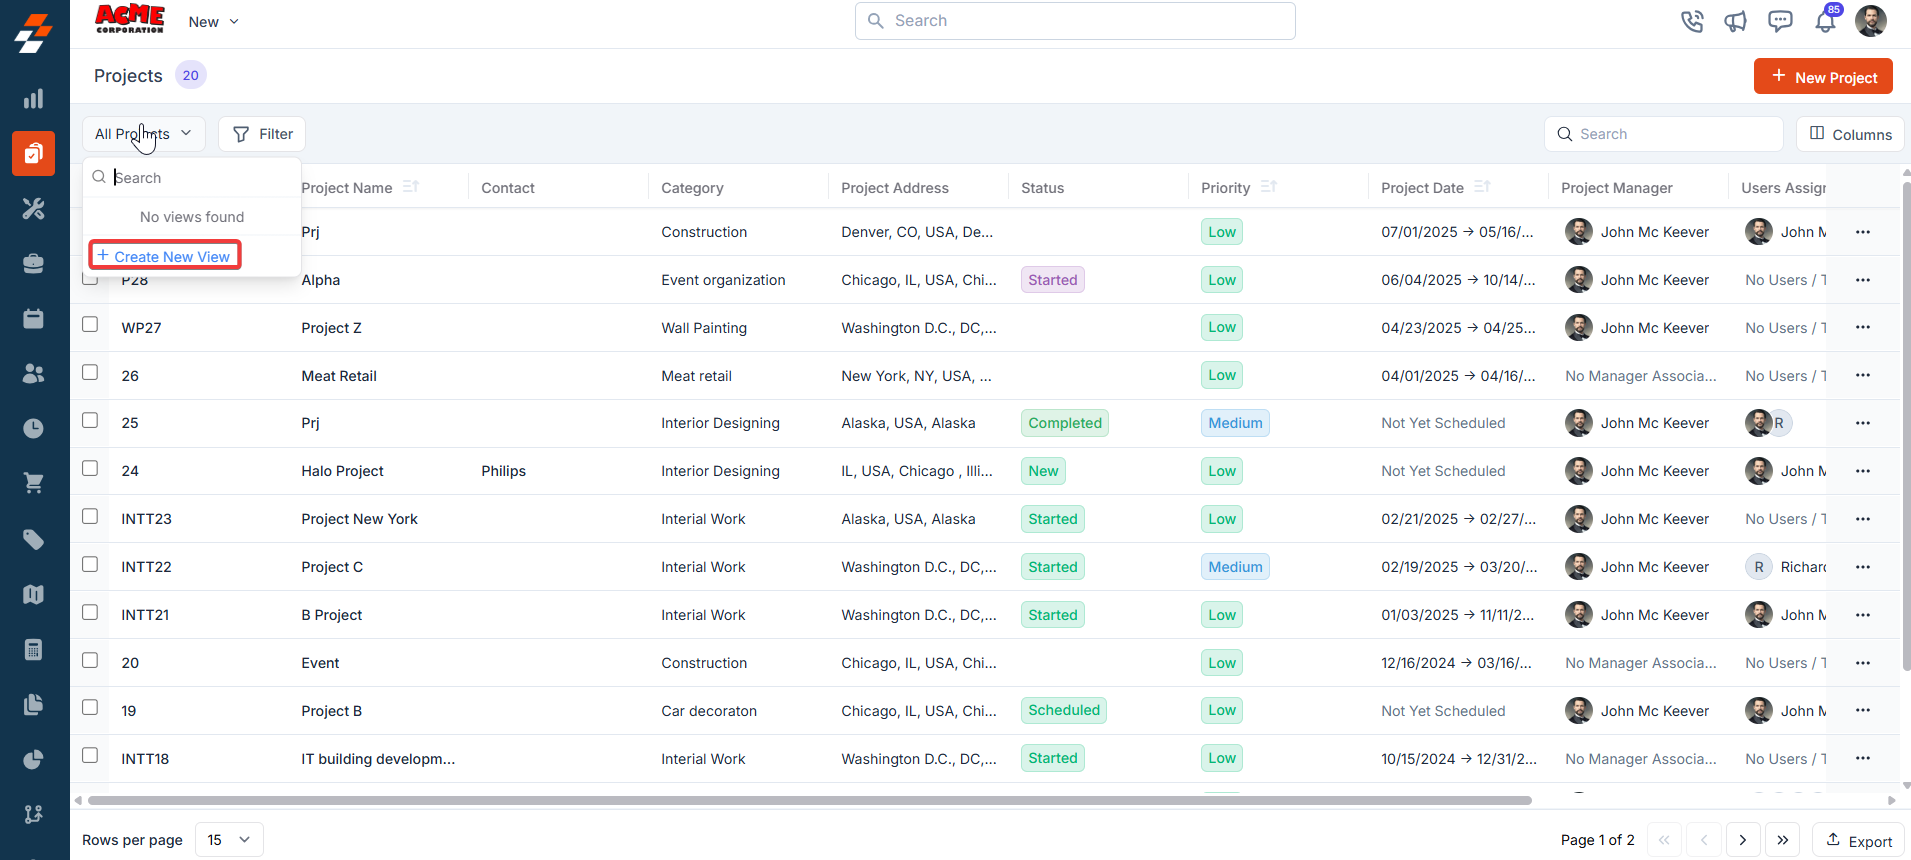
- A “Create View” dialog box appears.
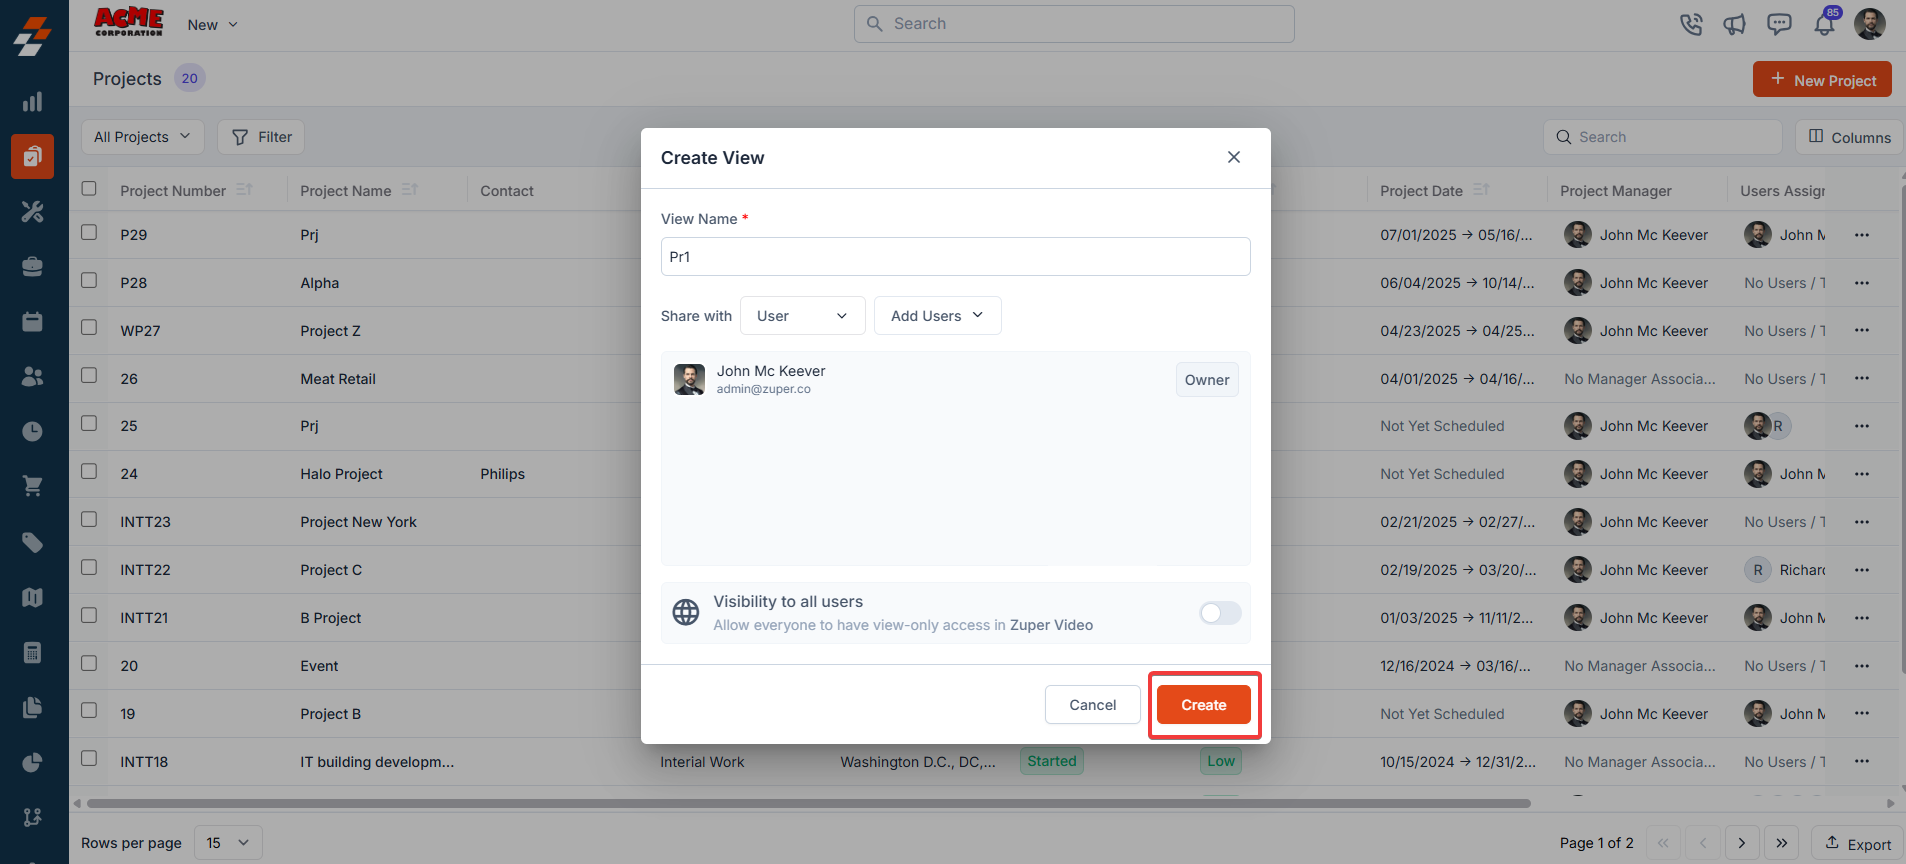
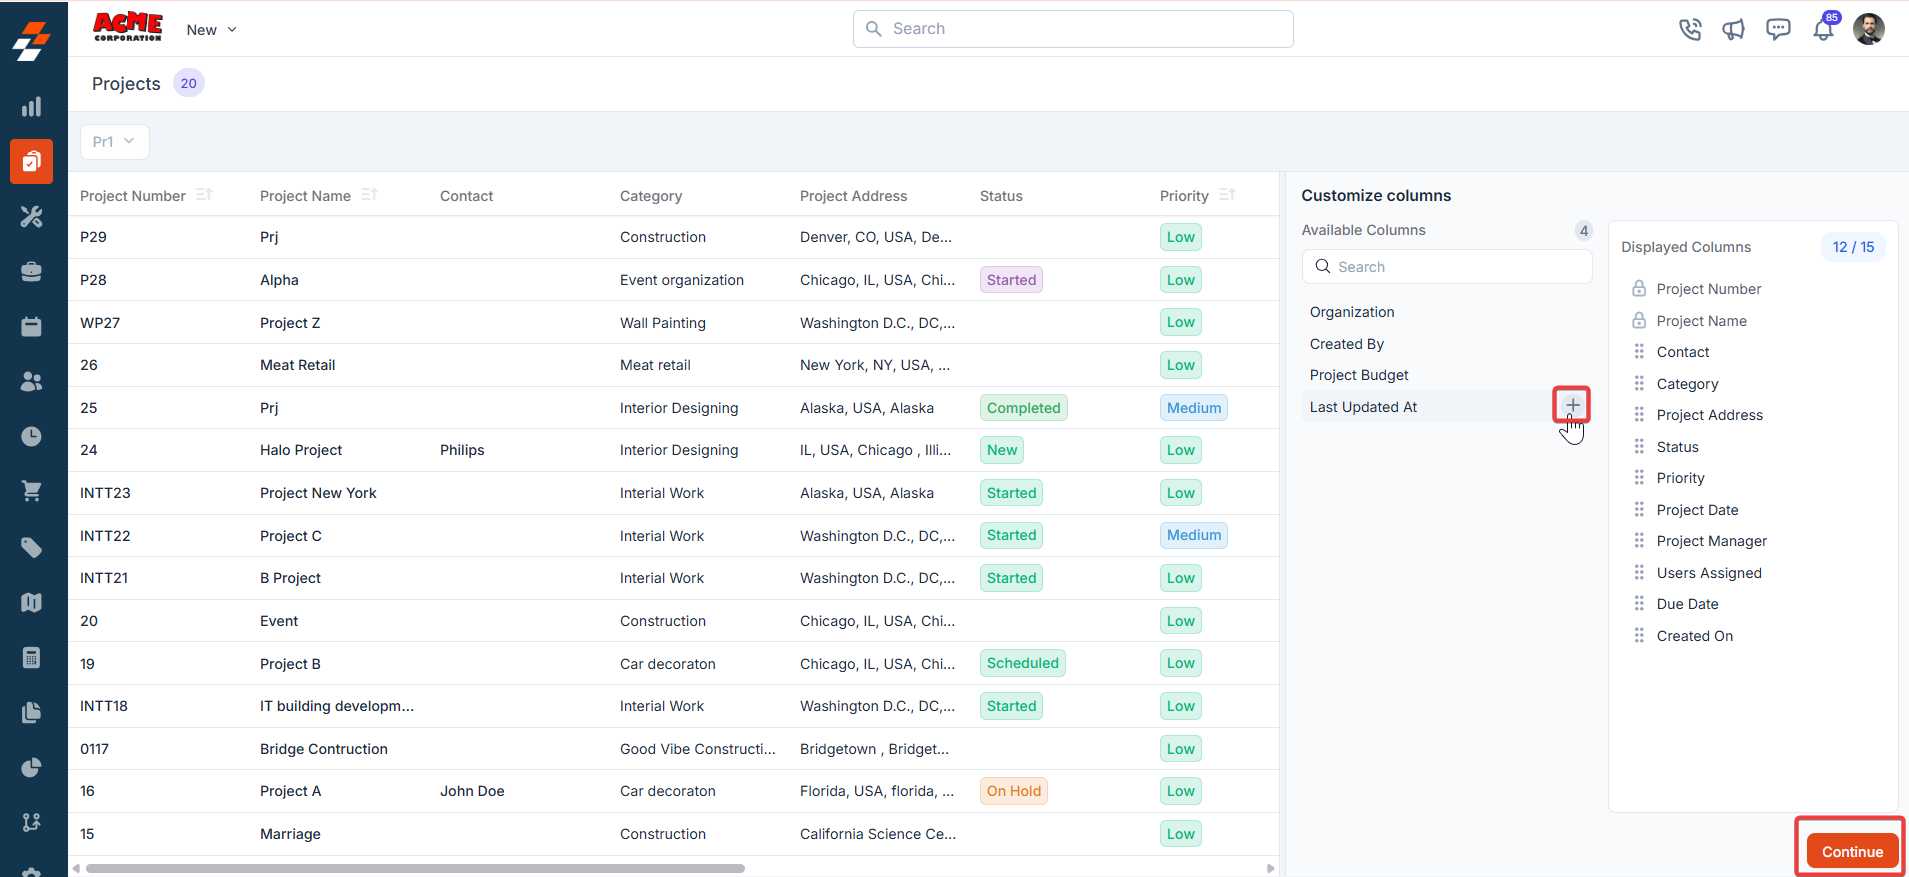
- Once you click “Create,” the Columns sidebar appears, showing “Available Columns” and “Displayed Columns.” To add a column, drag and drop it from the “Available Columns” list on the left to the “Displayed Columns” list on the right. You can click “Continue.”
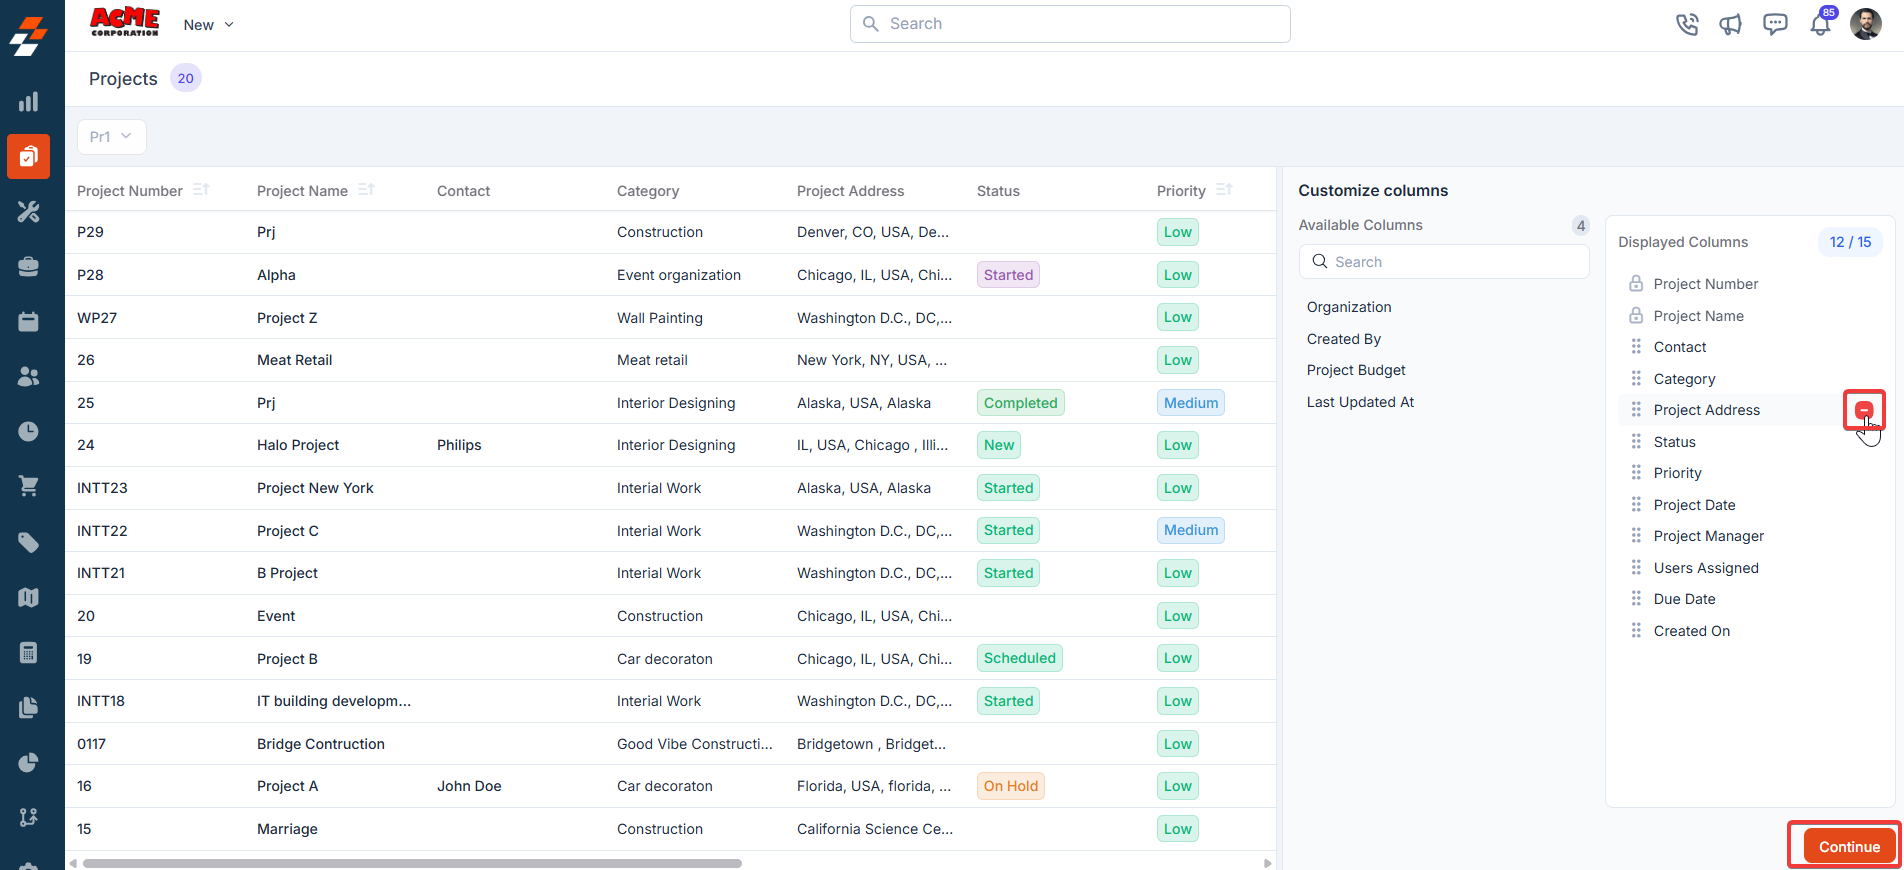
- To remove a column, drag it from the “Displayed Columns” list back to the “Available Columns” list or click the - next to the column name. Click Continue to apply the changes.
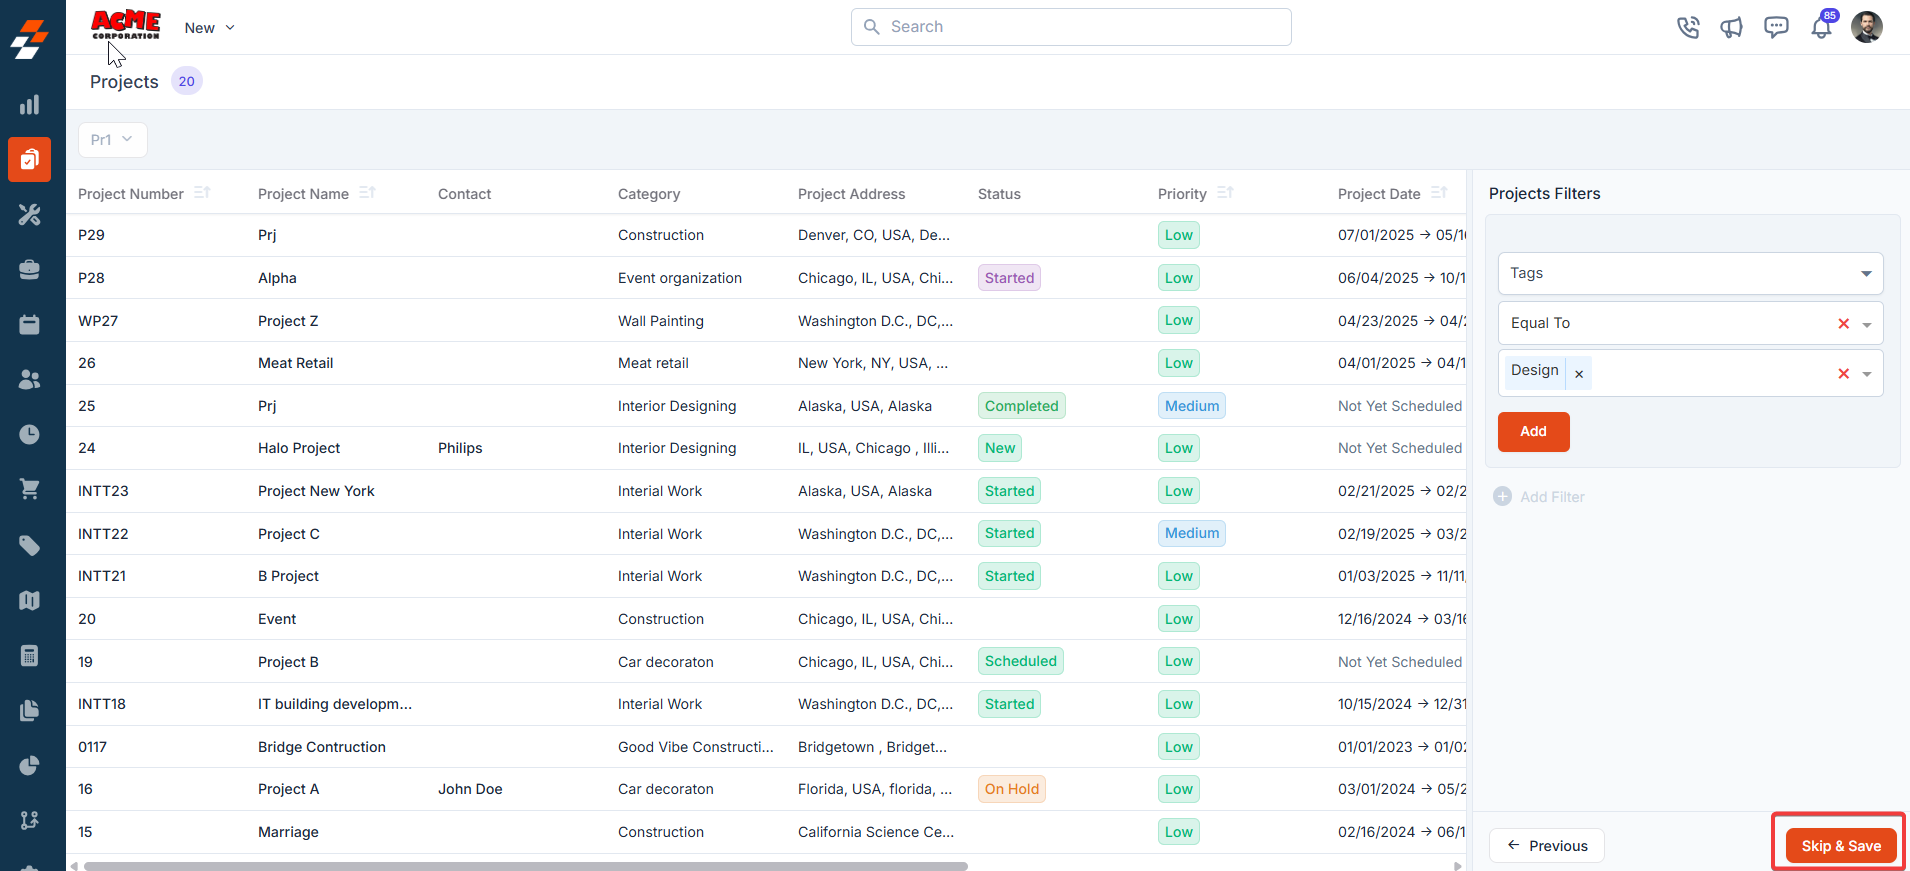
- If you wish not to add any filter, click “Skip and Save” to create the view.
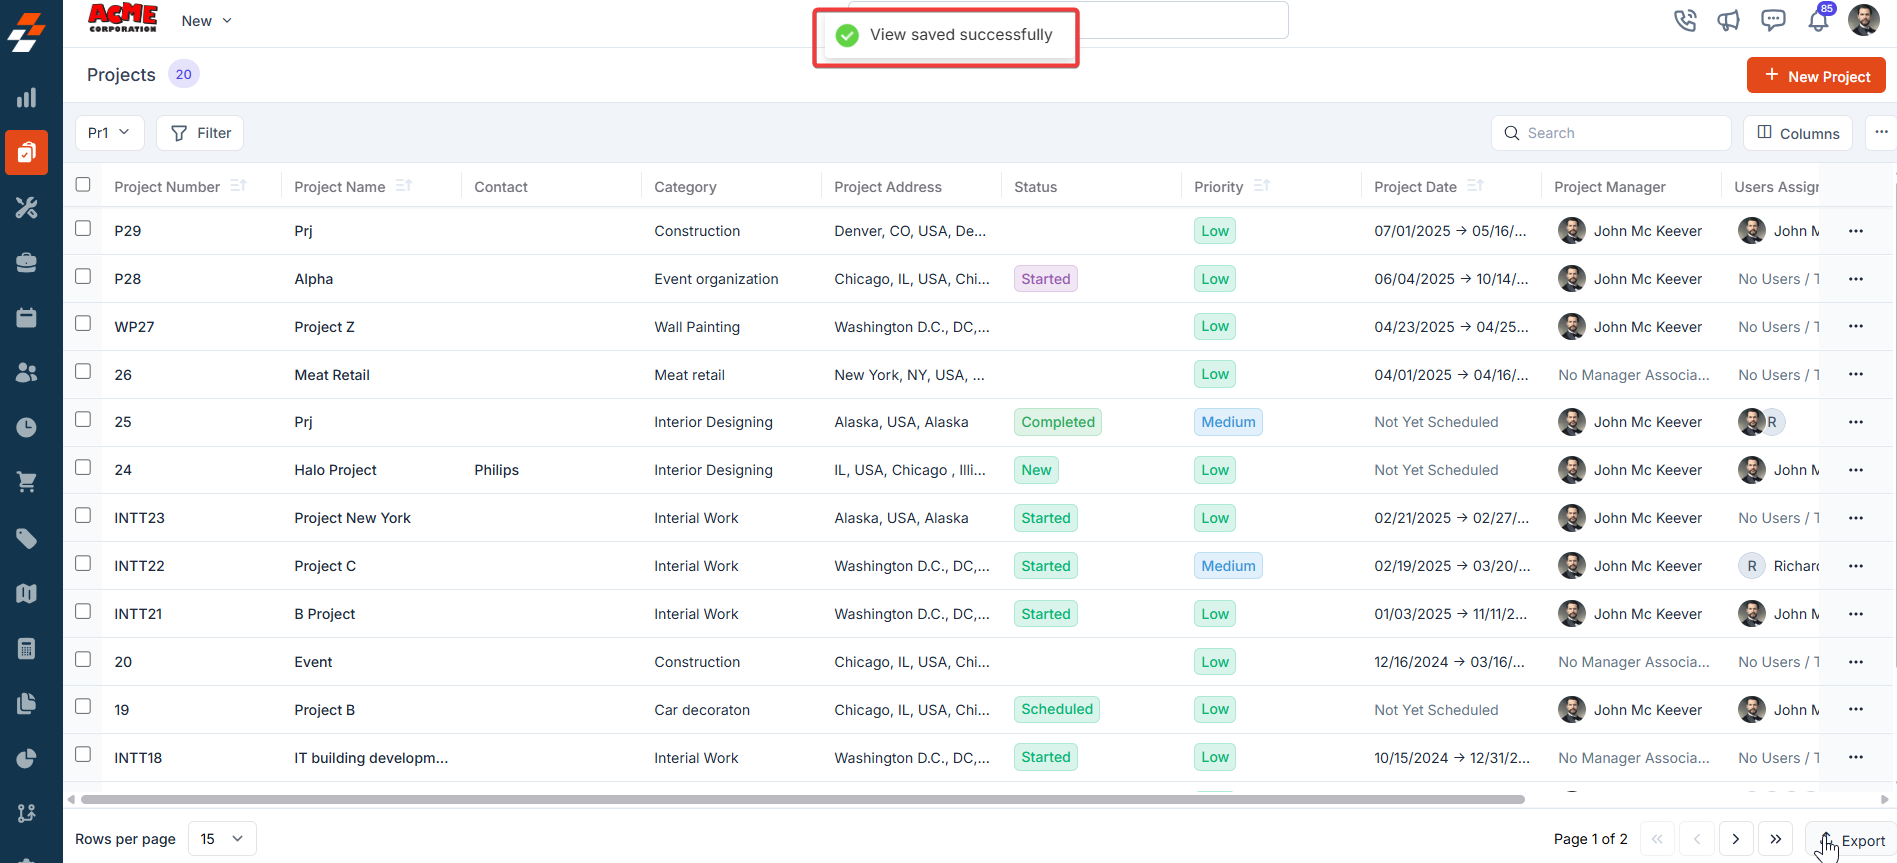
- The view is saved successfully.
Applying filters
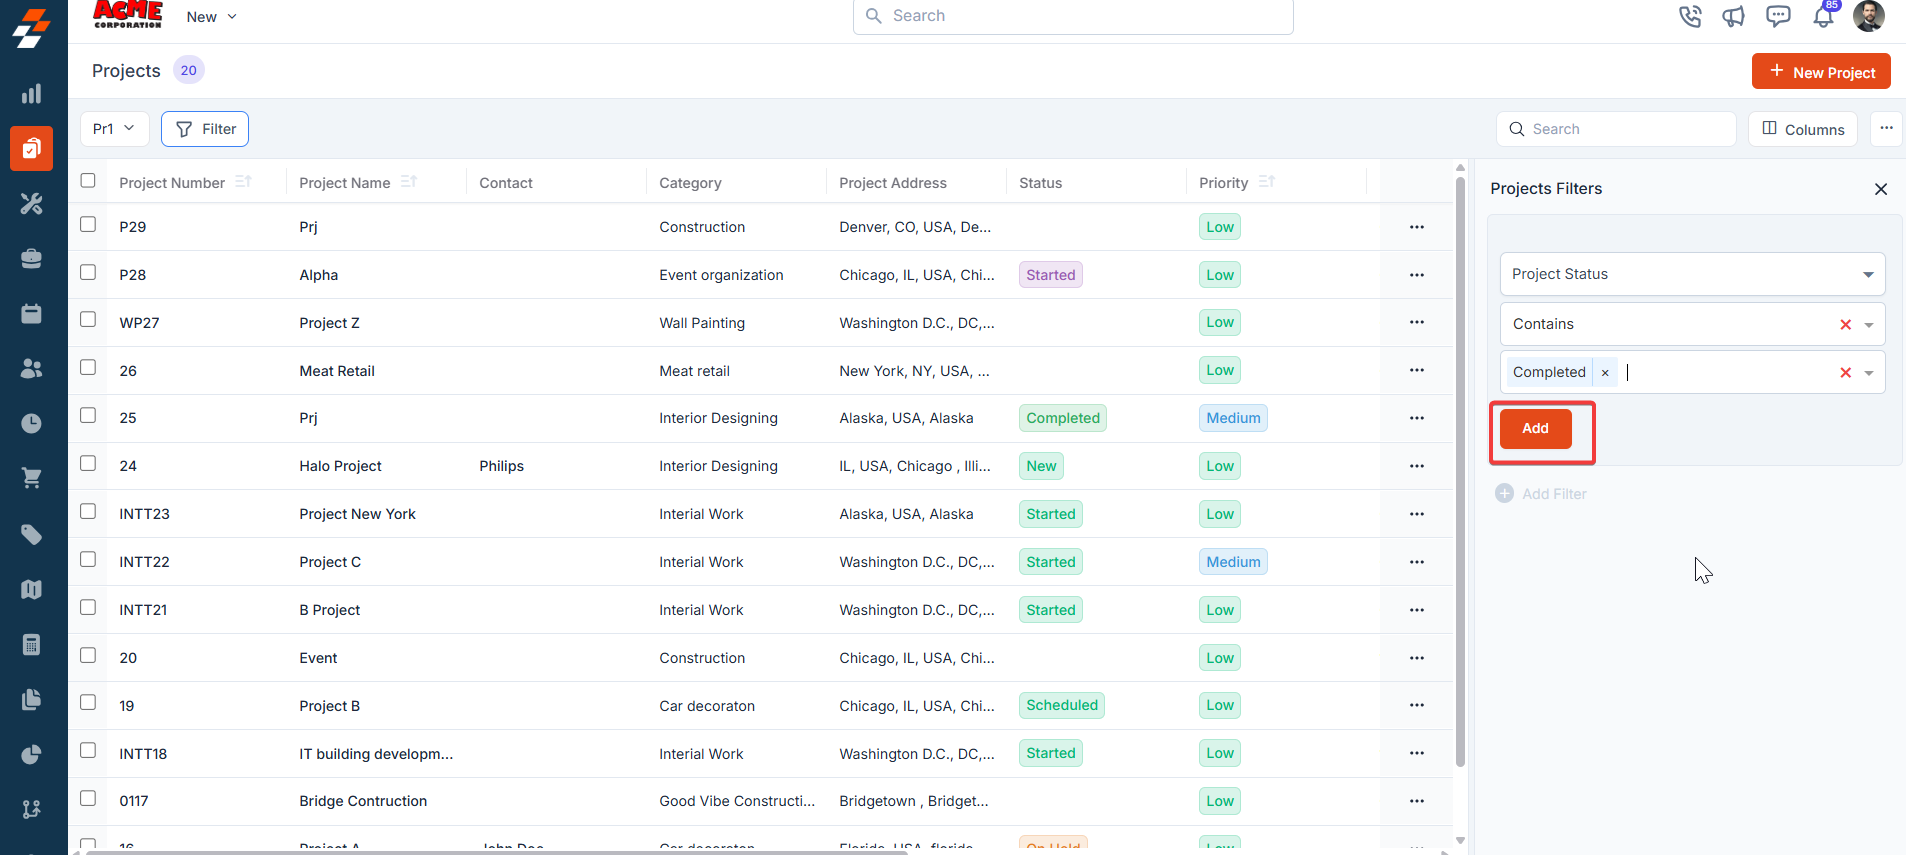
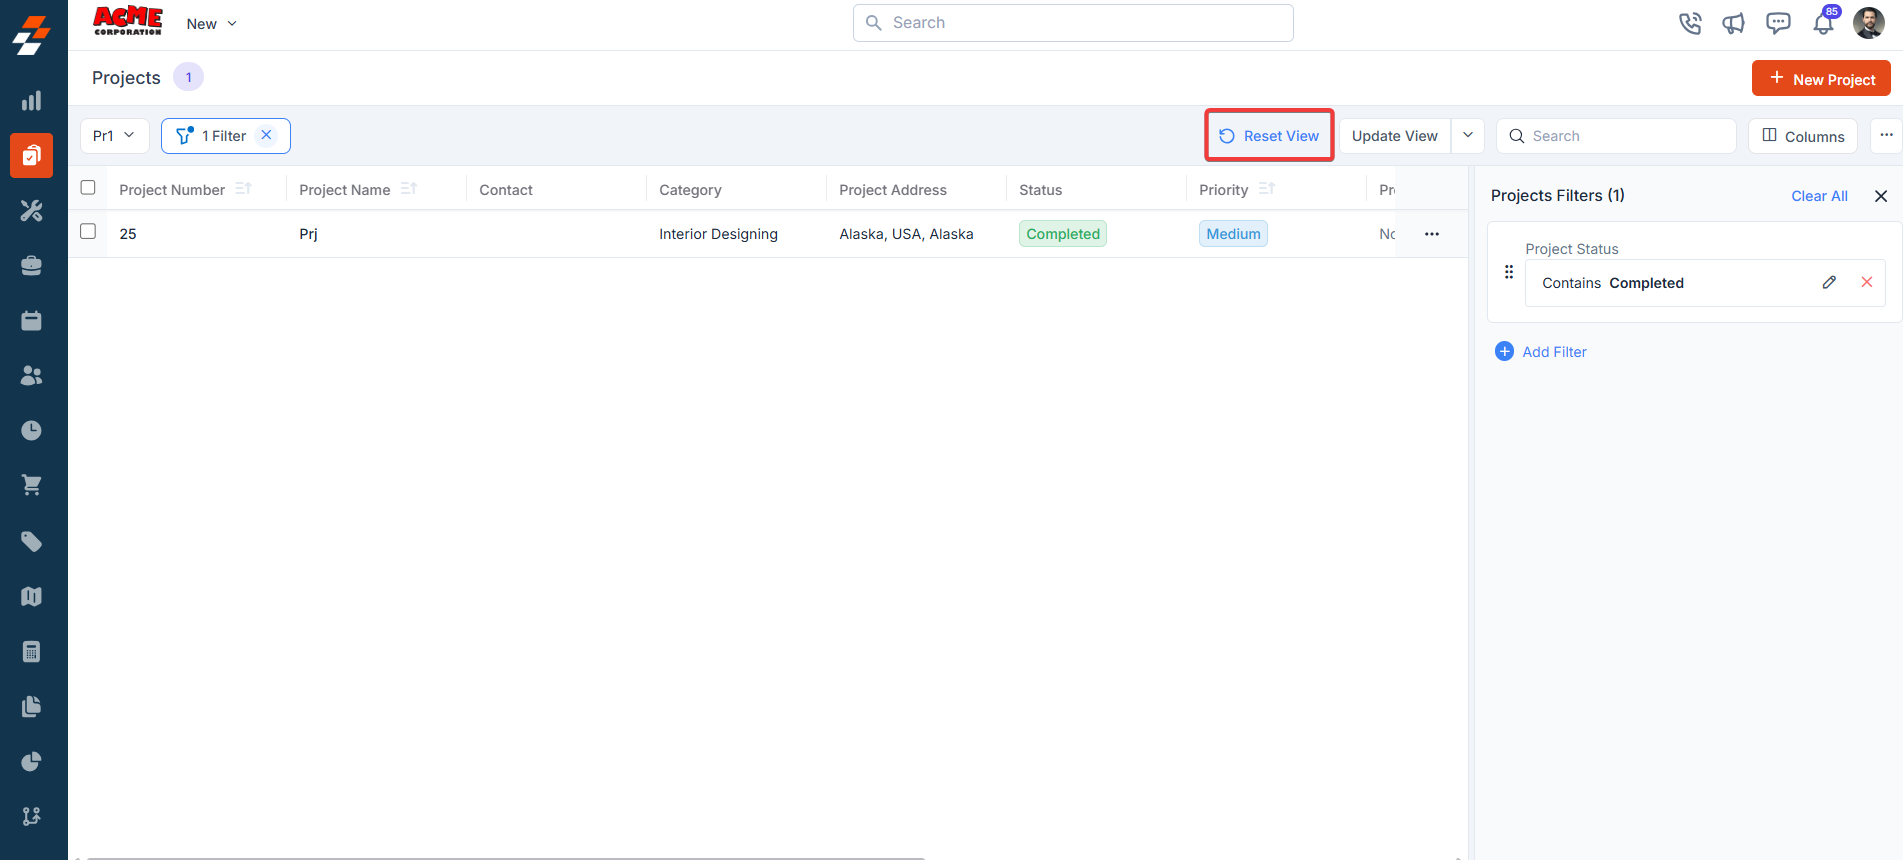
The Filter feature lets you refine your view by applying multiple filters based on available attributes. For example, you can select an attribute like “Project Status Type,” choose conditions such as “Equal to,” “Contains,” or “Does Not Contain,” and choose the desired value. Once the filter is applied, the results will update to show only the Projects that meet your criteria, making it easier to find and manage relevant Projects.- Click “Filter” at the top left of the page. Choose the attributes you want to filter by, apply the desired conditions, and click the “Add” button to view the results.
Update view
- Click “Update View” to modify the existing view.
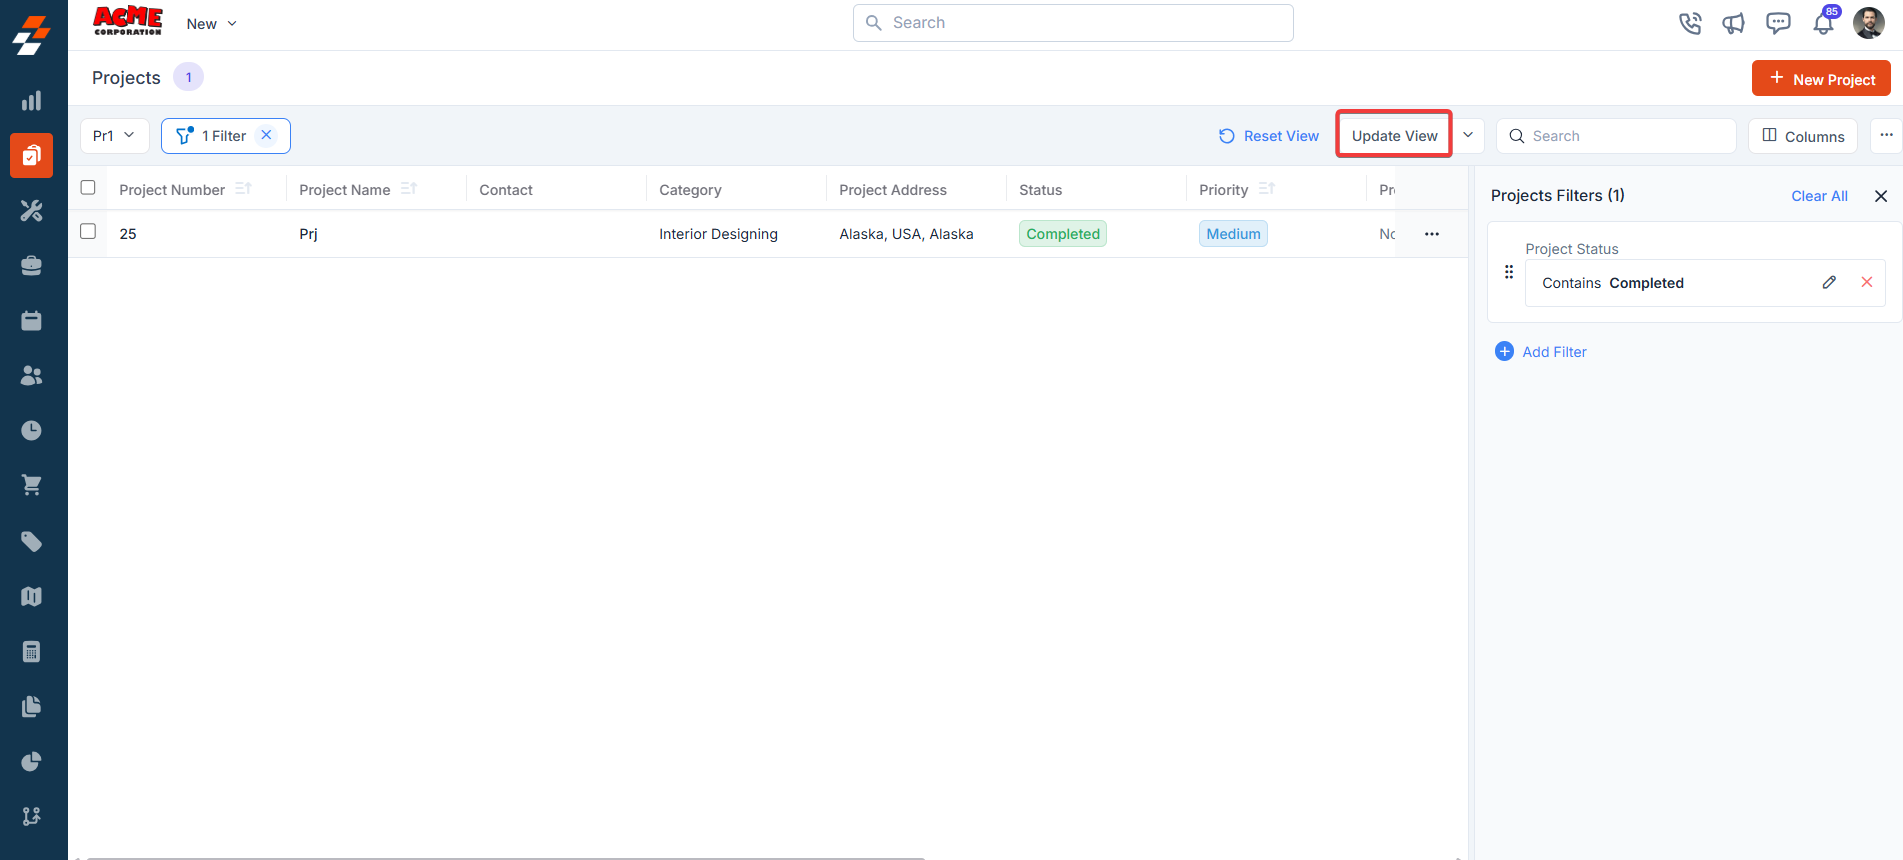
- The new view is set successfully with the filter. You can view the filter created and the filter name from the view list.
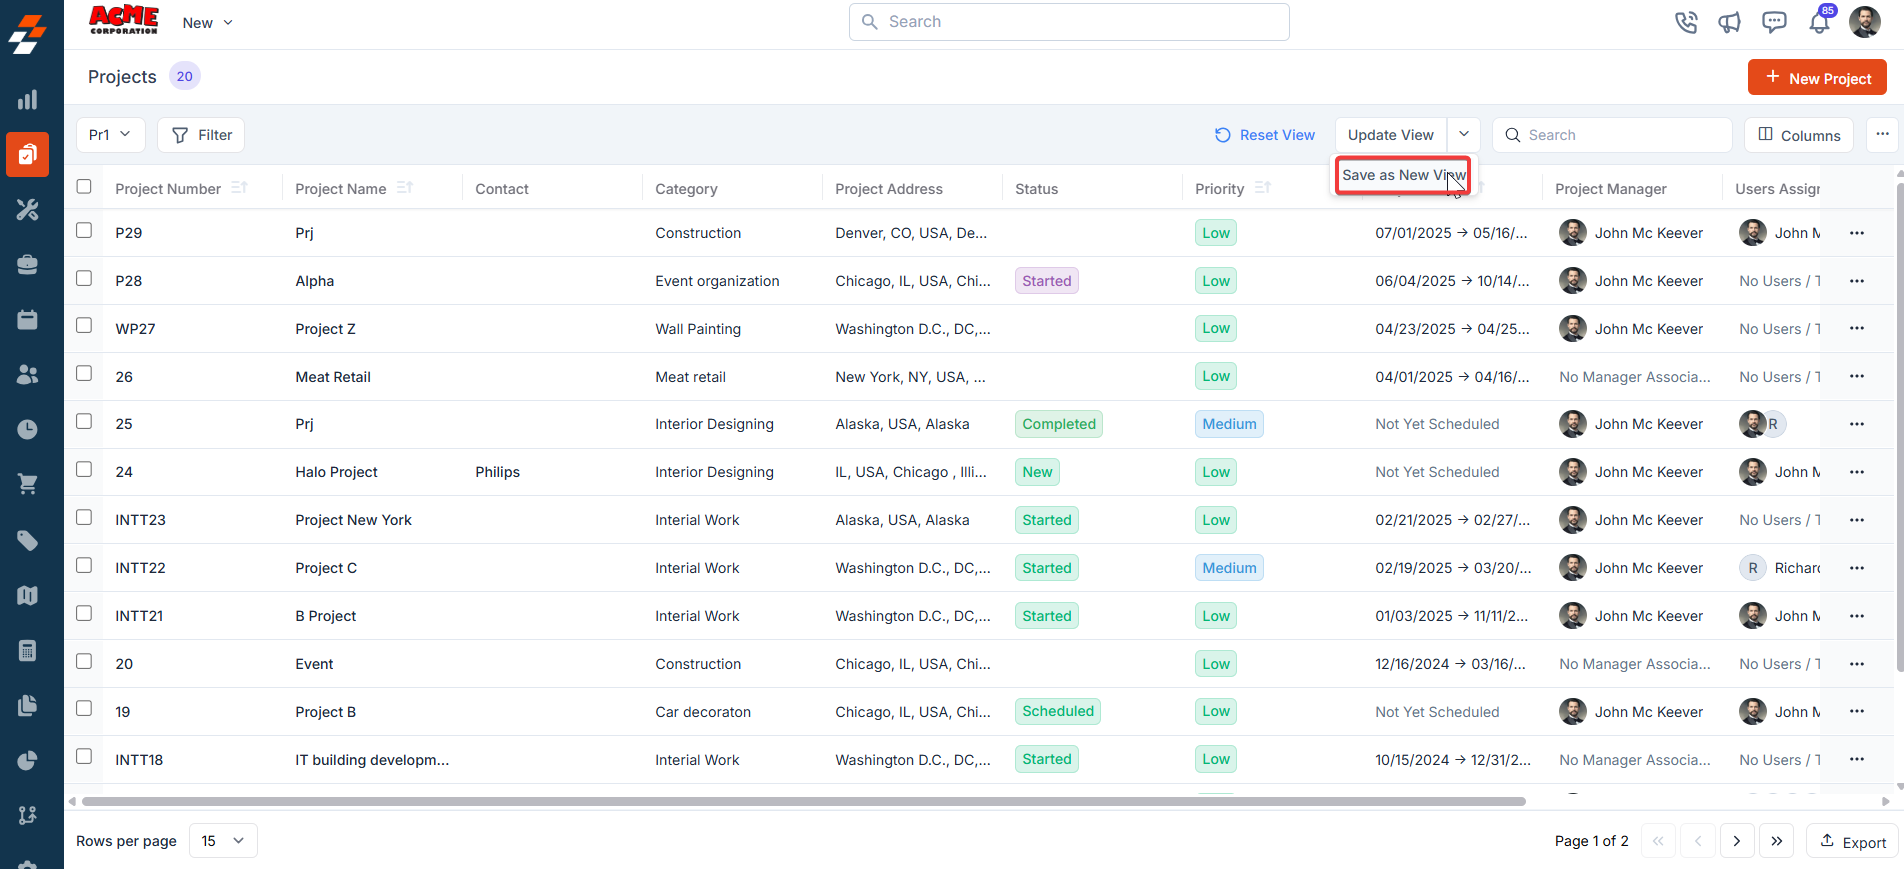
- Click the down arrow below the “Update View” to create a new view by clicking “Save as new view.”
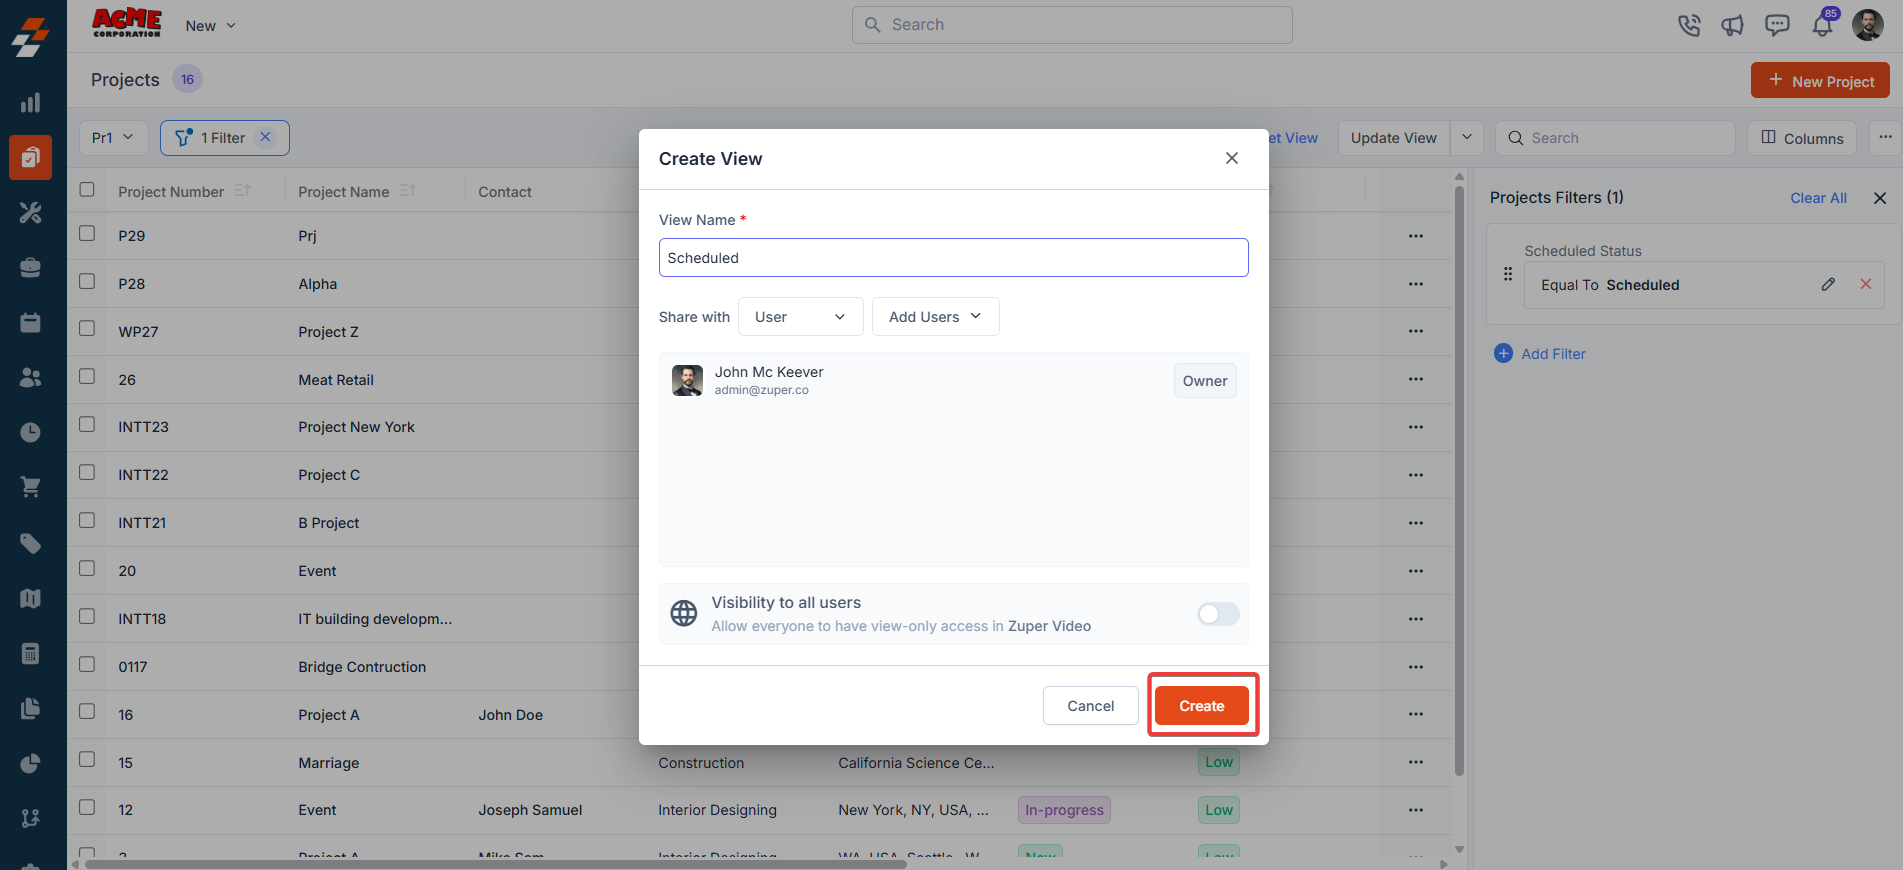
- A “Create View” dialog box appears.
- View Name (Mandatory) – Enter the view name.
- Share with - Select any one of the options (User, Team), and you can add the relevant users.
- Visibility to all users – Toggle on to make this view visible.
- Click “Reset View” to reset the current view.
Setting Permissions for Views
Edit Permissions
Users with edit permissions can modify the layout:- They can add/remove columns, reorder them, and adjust views as described above.
- If permission is given, changes can be saved as a new view or overwritten as an existing one.
View Permissions
Users with view-only permissions can see the layout but cannot make changes:- They can view the customized columns and filters but cannot edit them. To ensure consistency for viewers, they can save them as a new “View.”
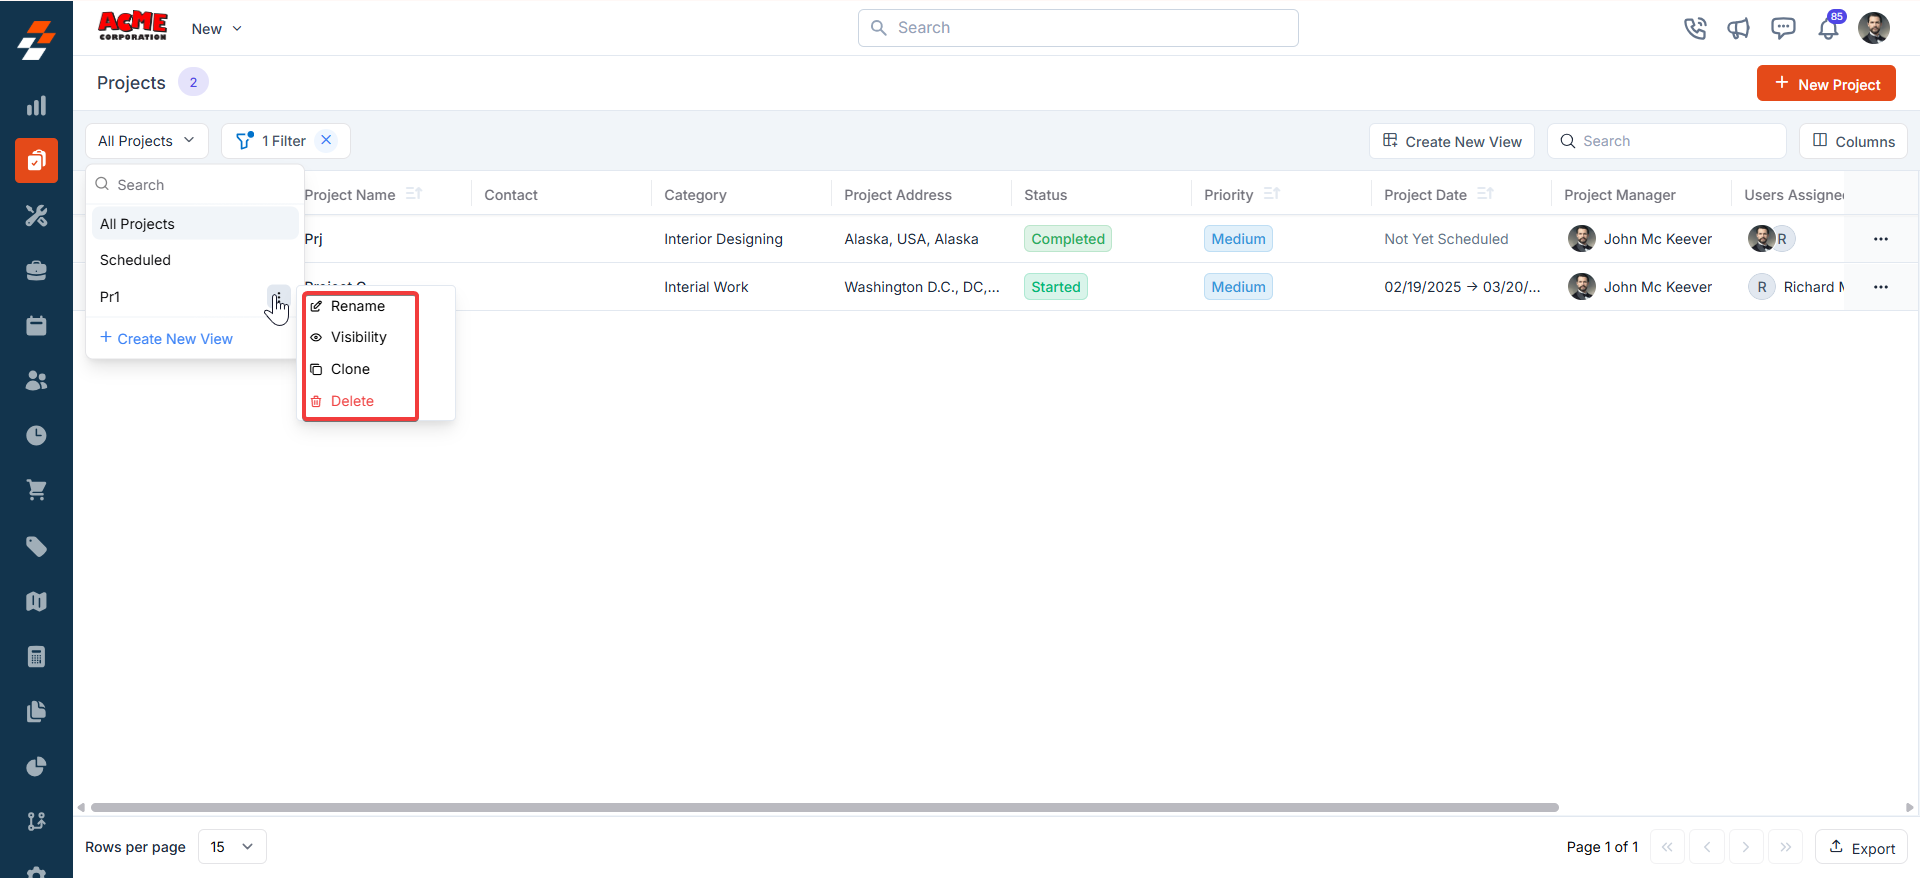
Make changes to the view
- Rename: This option allows you to change the view’s name (e.g., from “Prj” to something else).
- Visibility: This lets you adjust who can see the view. Options include sharing with a user or team or keeping it private (“Only Me”), as well as toggling visibility for all users in Zuper (as shown in the “Create a View” dialog in prior images).
- Duplicate: This function creates a copy of the “Prj” view, allowing you to modify the duplicate without affecting the original.
- Delete: Removes the view entirely. Since this is a custom view, deleting it would revert the listing to the default view or another saved view. Only the created user can delete the view.
Associating tasks with a Project
You can associate tasks with a project to manage deliverables, timelines, and team responsibilities. Each task represents a step toward completing the overall project. You can assign, reorder, and update tasks directly from the project’s Tasks section. To learn how to create and manage them, refer to the Associating Tasks with Jobs and Projects section.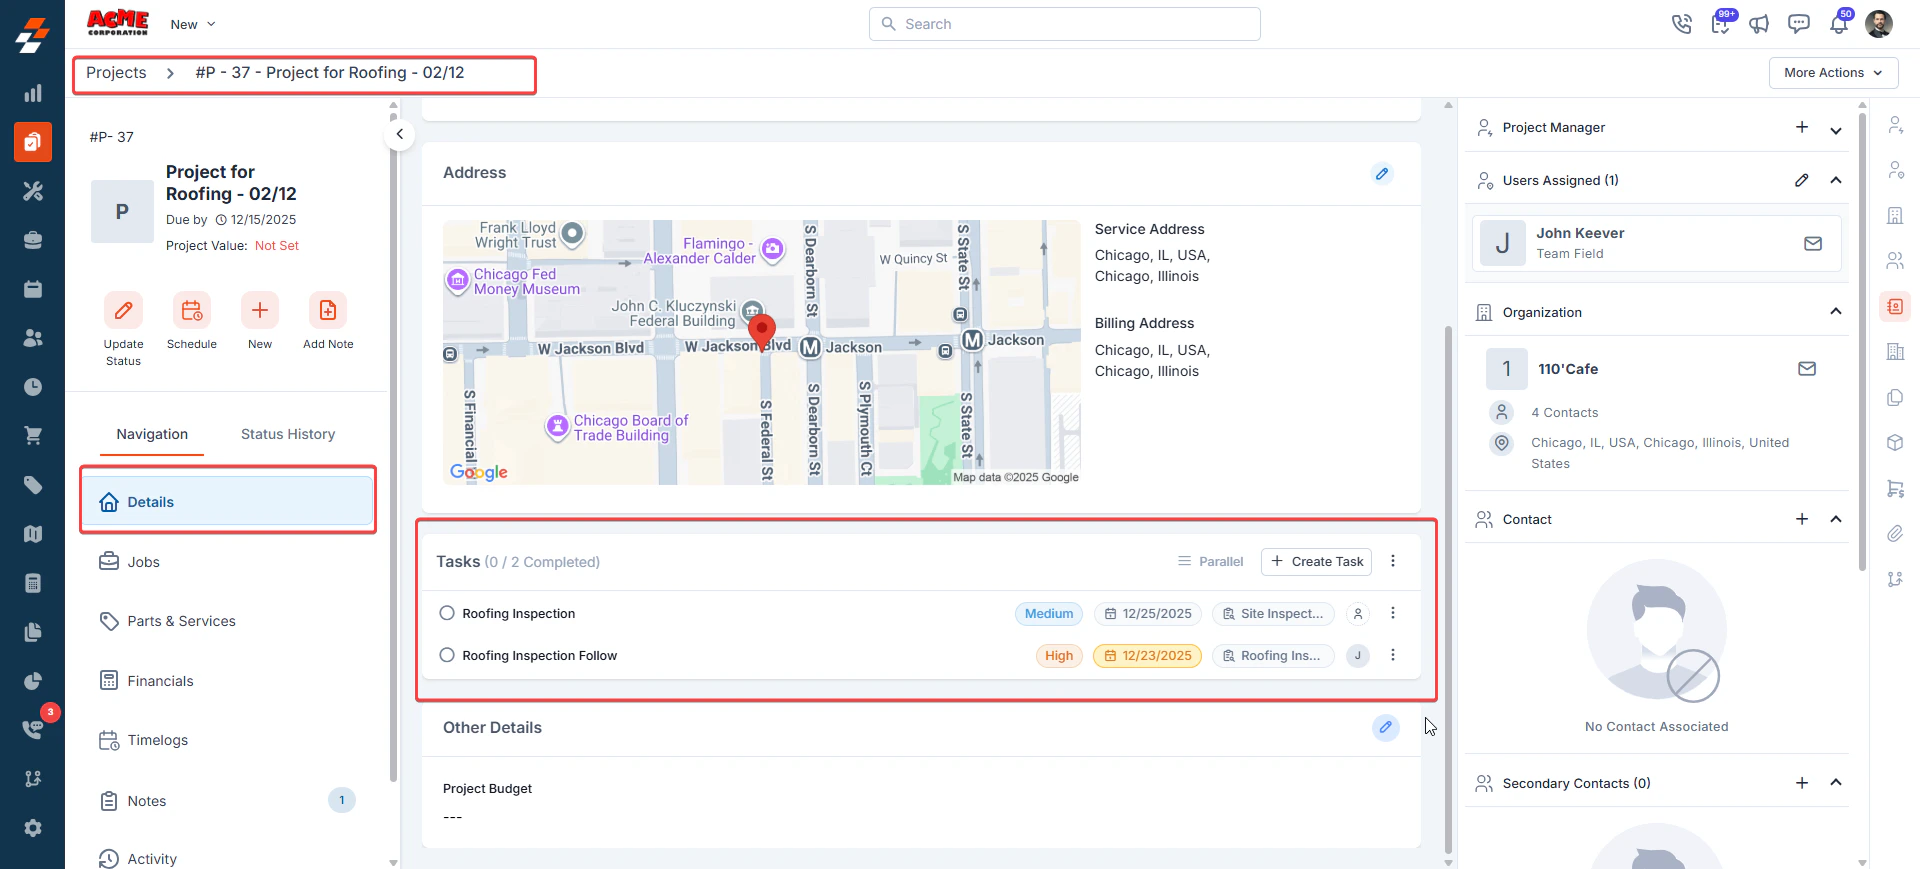
Pinned filters
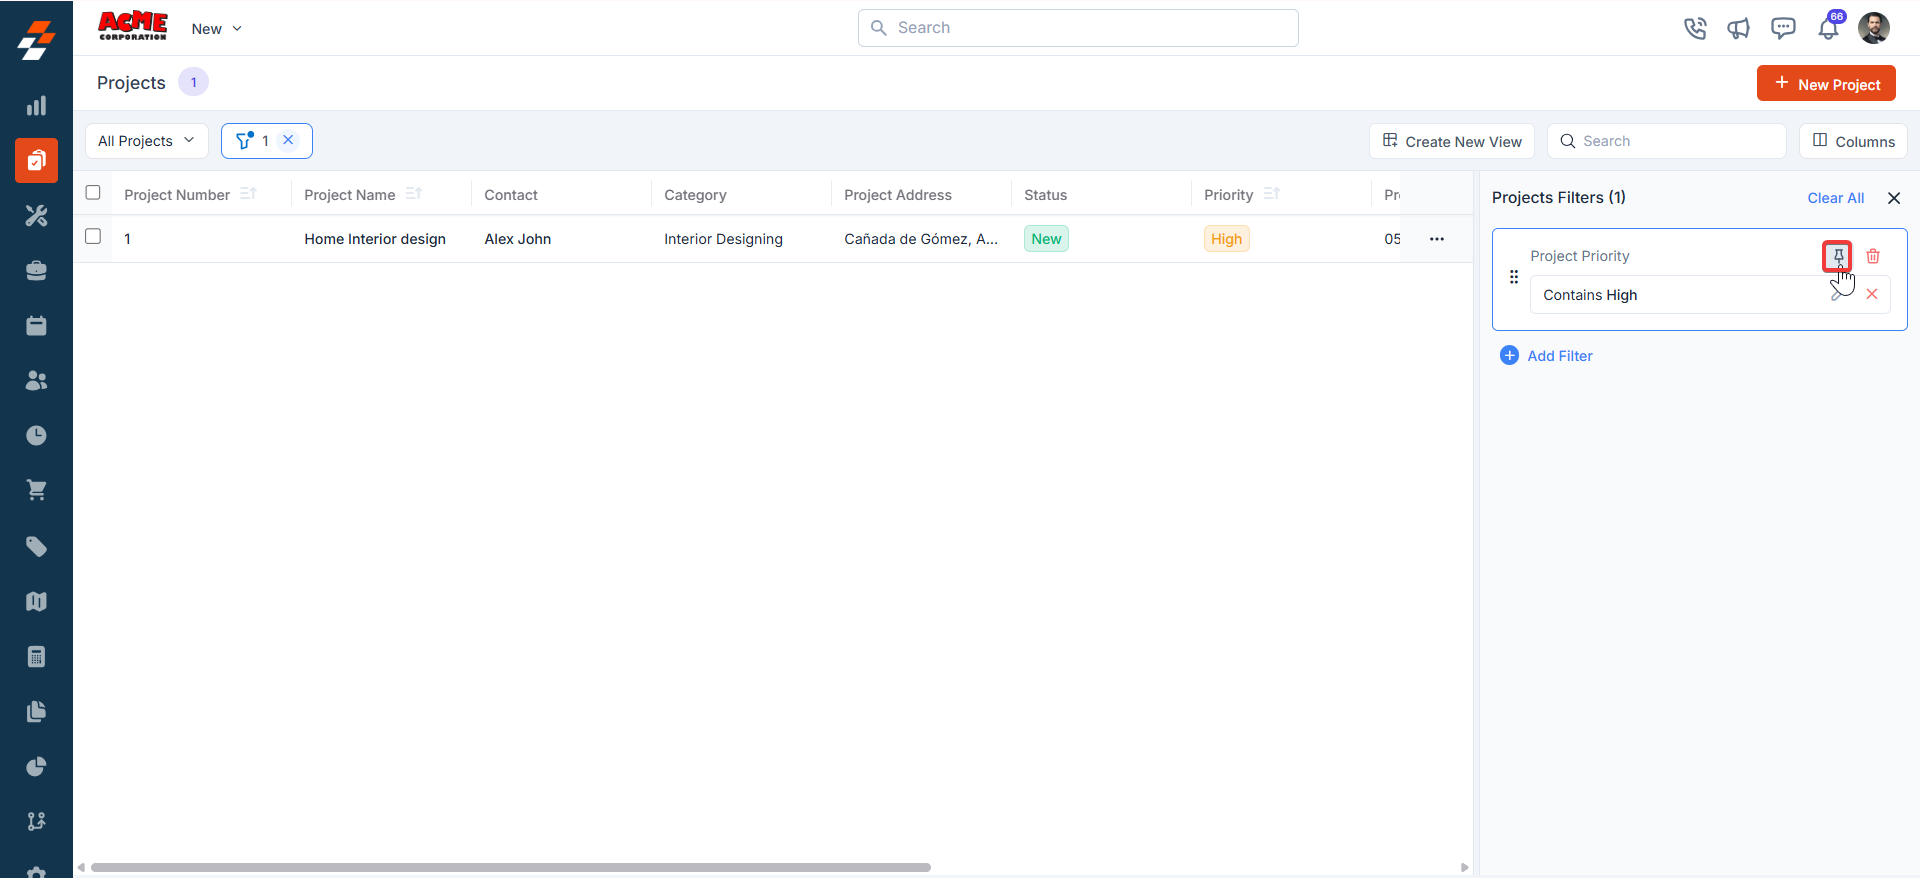
Zuper’s Projects module lets you use pinned filters to streamline your filter experience. Pinned filters keep your most-used criteria readily accessible for quick application. Pin up to 3 filters in any module.Navigation: Projects -> Filters ->Pinned Filter
- Select the “Projects” module from the left navigation menu.
- Once your filters are set, click the Pin Filters button in the dialog box to save them as pinned.
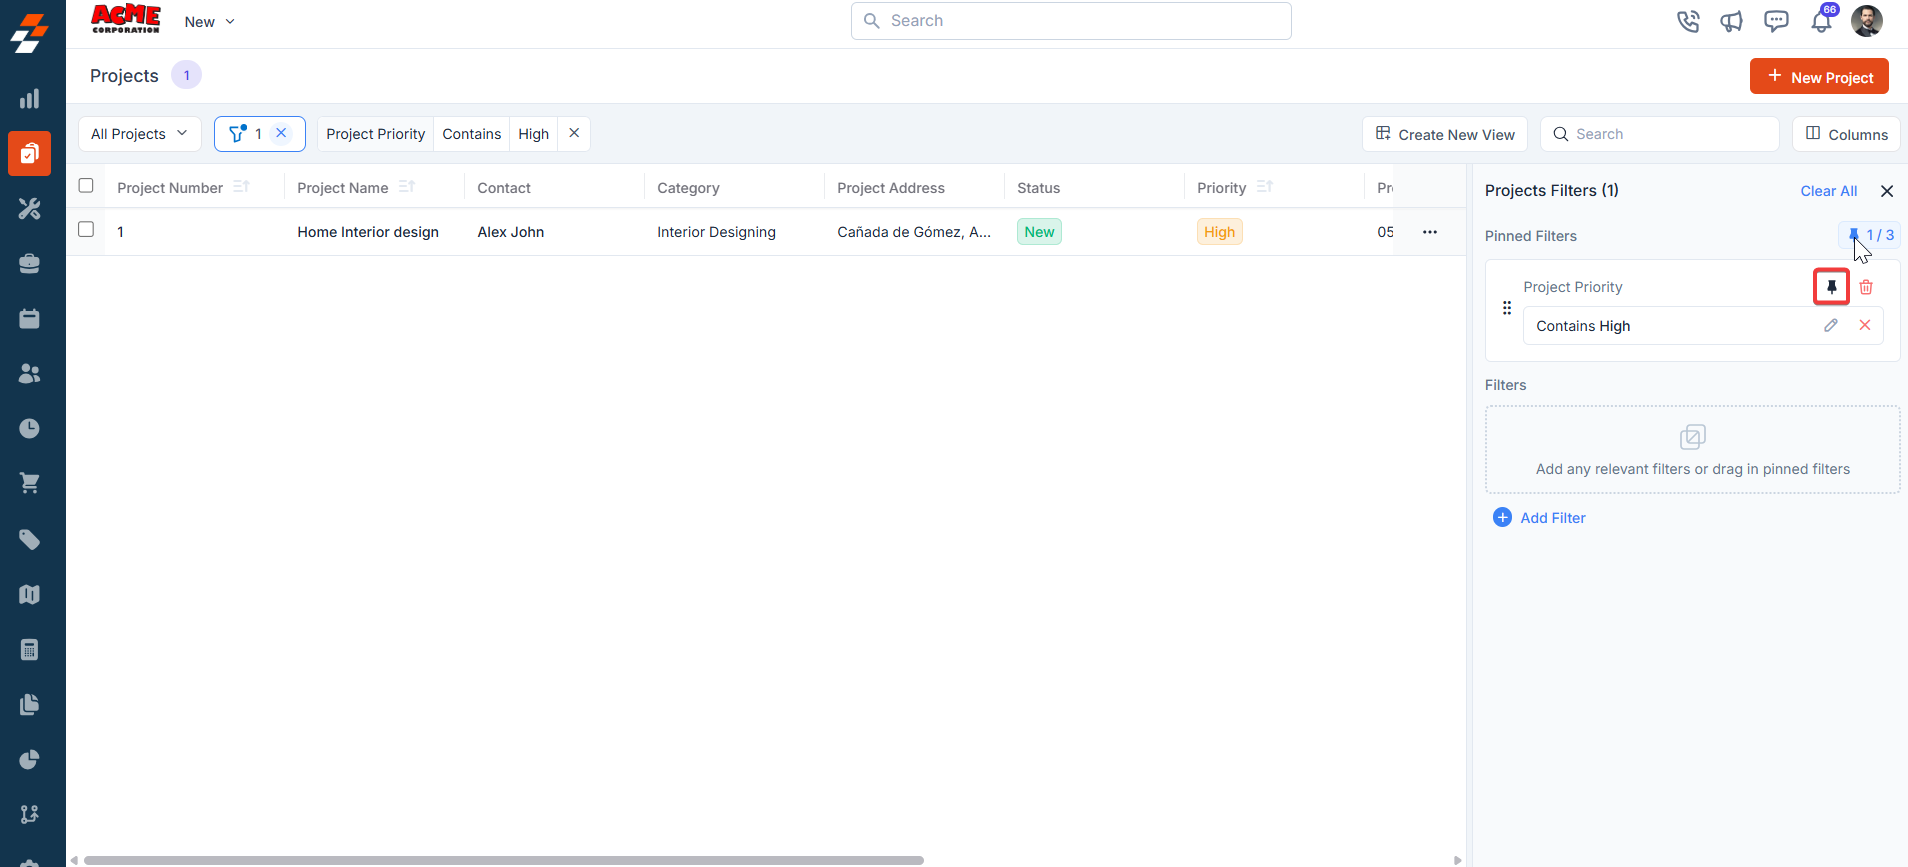
- Pinned filters appear in the dialog box’s “Pinned Filters” section, allowing you to apply them with one click in future sessions.
- To Unpin the filter:
- To unpin, select a pinned filter and click Remove.
- To apply pinned or default filters, open the dialog box and select them.
- Use Clear All to remove active filters.
Managing project details
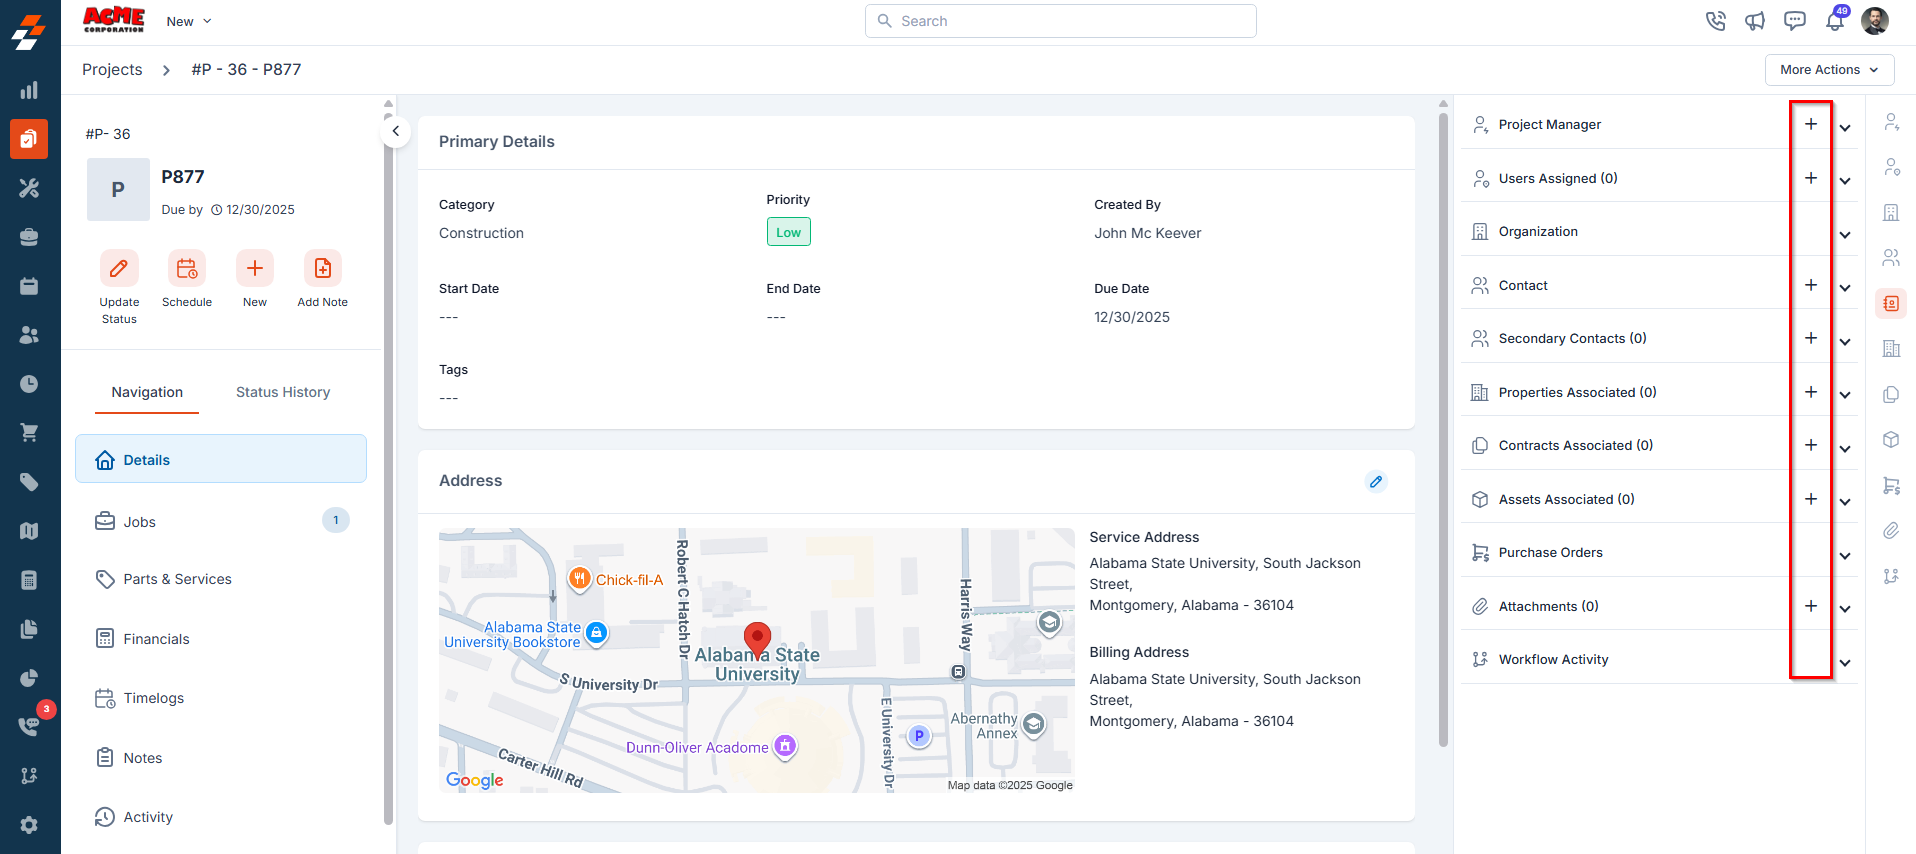
Once a project is created or accessed from the listing page, the Project Details Page serves as your central hub for managing its lifecycle. The details page has a three-column layout, providing quick access to information and actions within each panel access to view information such as project details, associated notes, parts & services, jobs, and activities.Left Panel
Update status
Update status
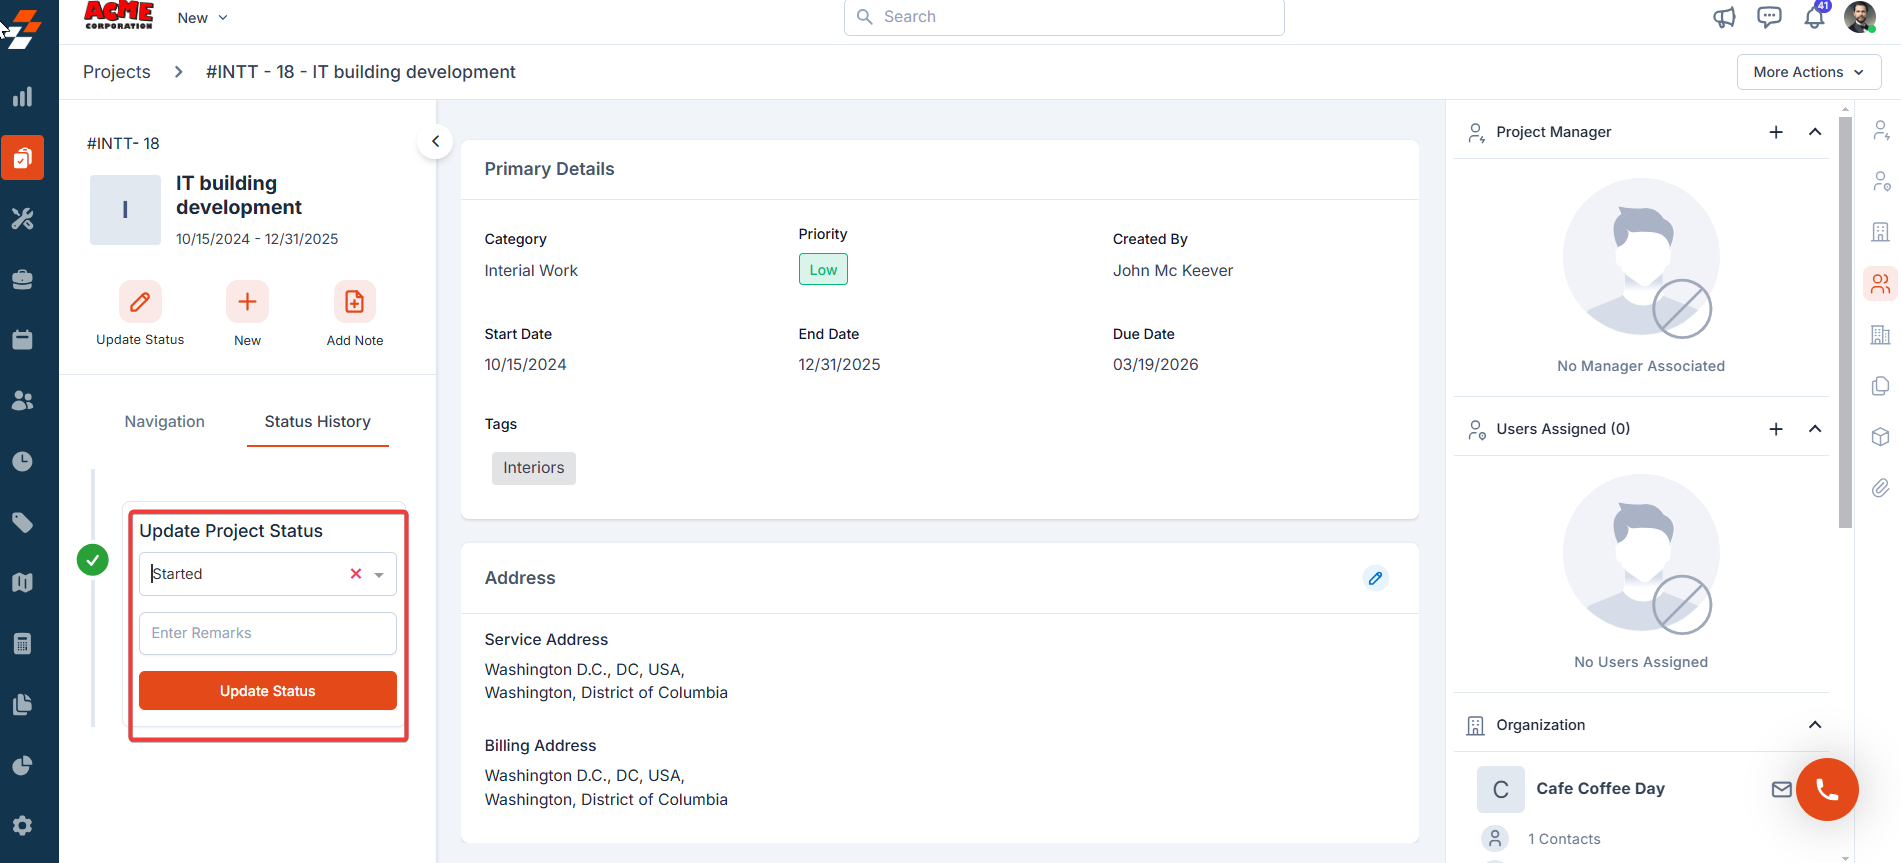
Project statuses are stages/checkpoints within a project that field technicians and other back-office users, such as dispatchers and supervisors, can update.
-
Click the “Update Status” button on the quick action bar. Choose the status you want to update from the “Update Status” dropdown.
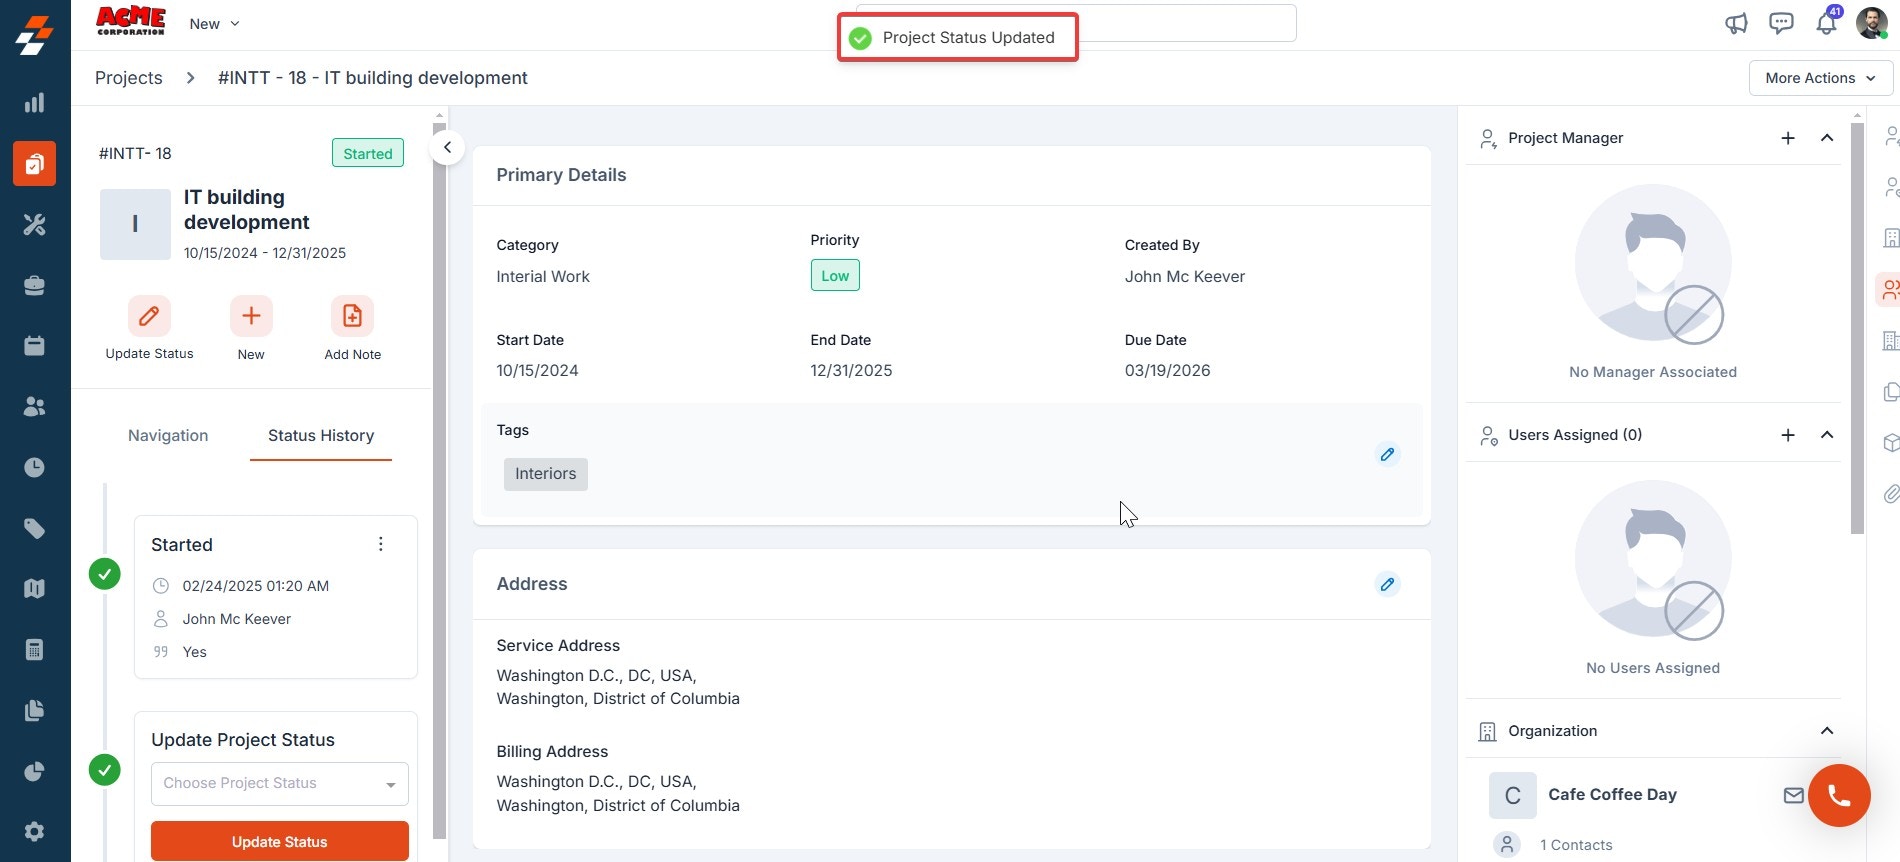
-
The status is updated successfully.
Create new job
Create new job
Use the “+ New” button to create a new quote, proposal, invoice or job for the project, if required. 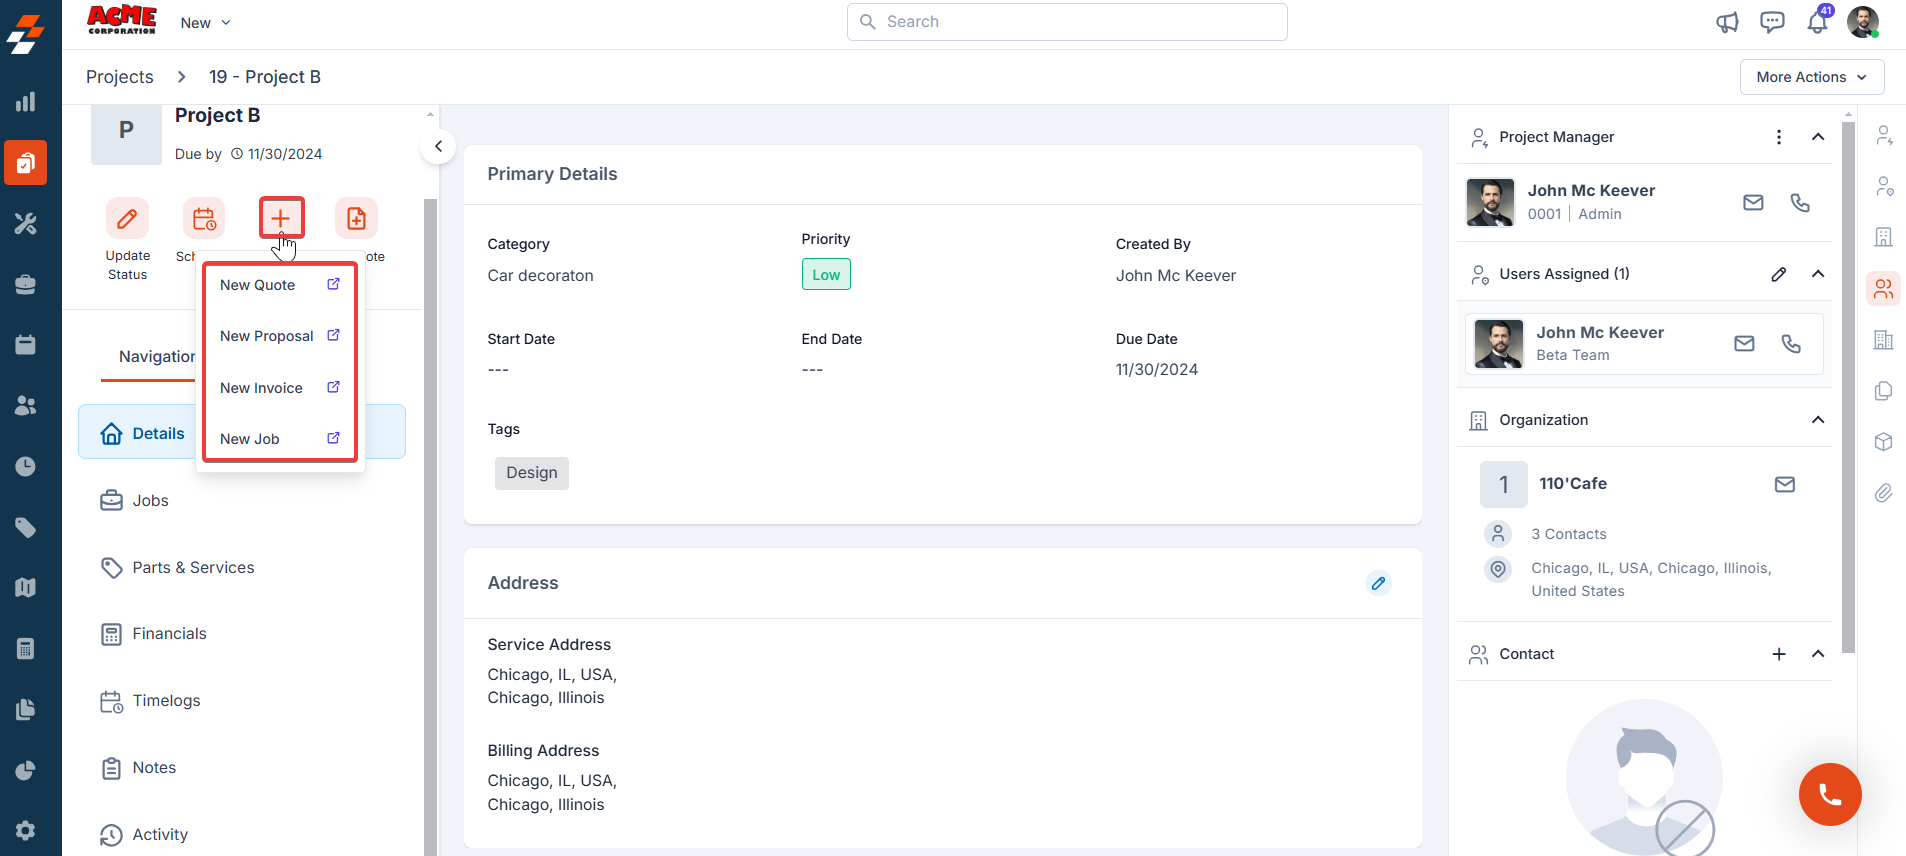
Add Note
Add Note
Use the ”+ Add Note” button to create a new note. Notes are comments or information added to a contract over its course. Your notes can be anything ranging from a simple text reminder to an image of the item service and video or document. All added notes can be viewed under the Notes Section. 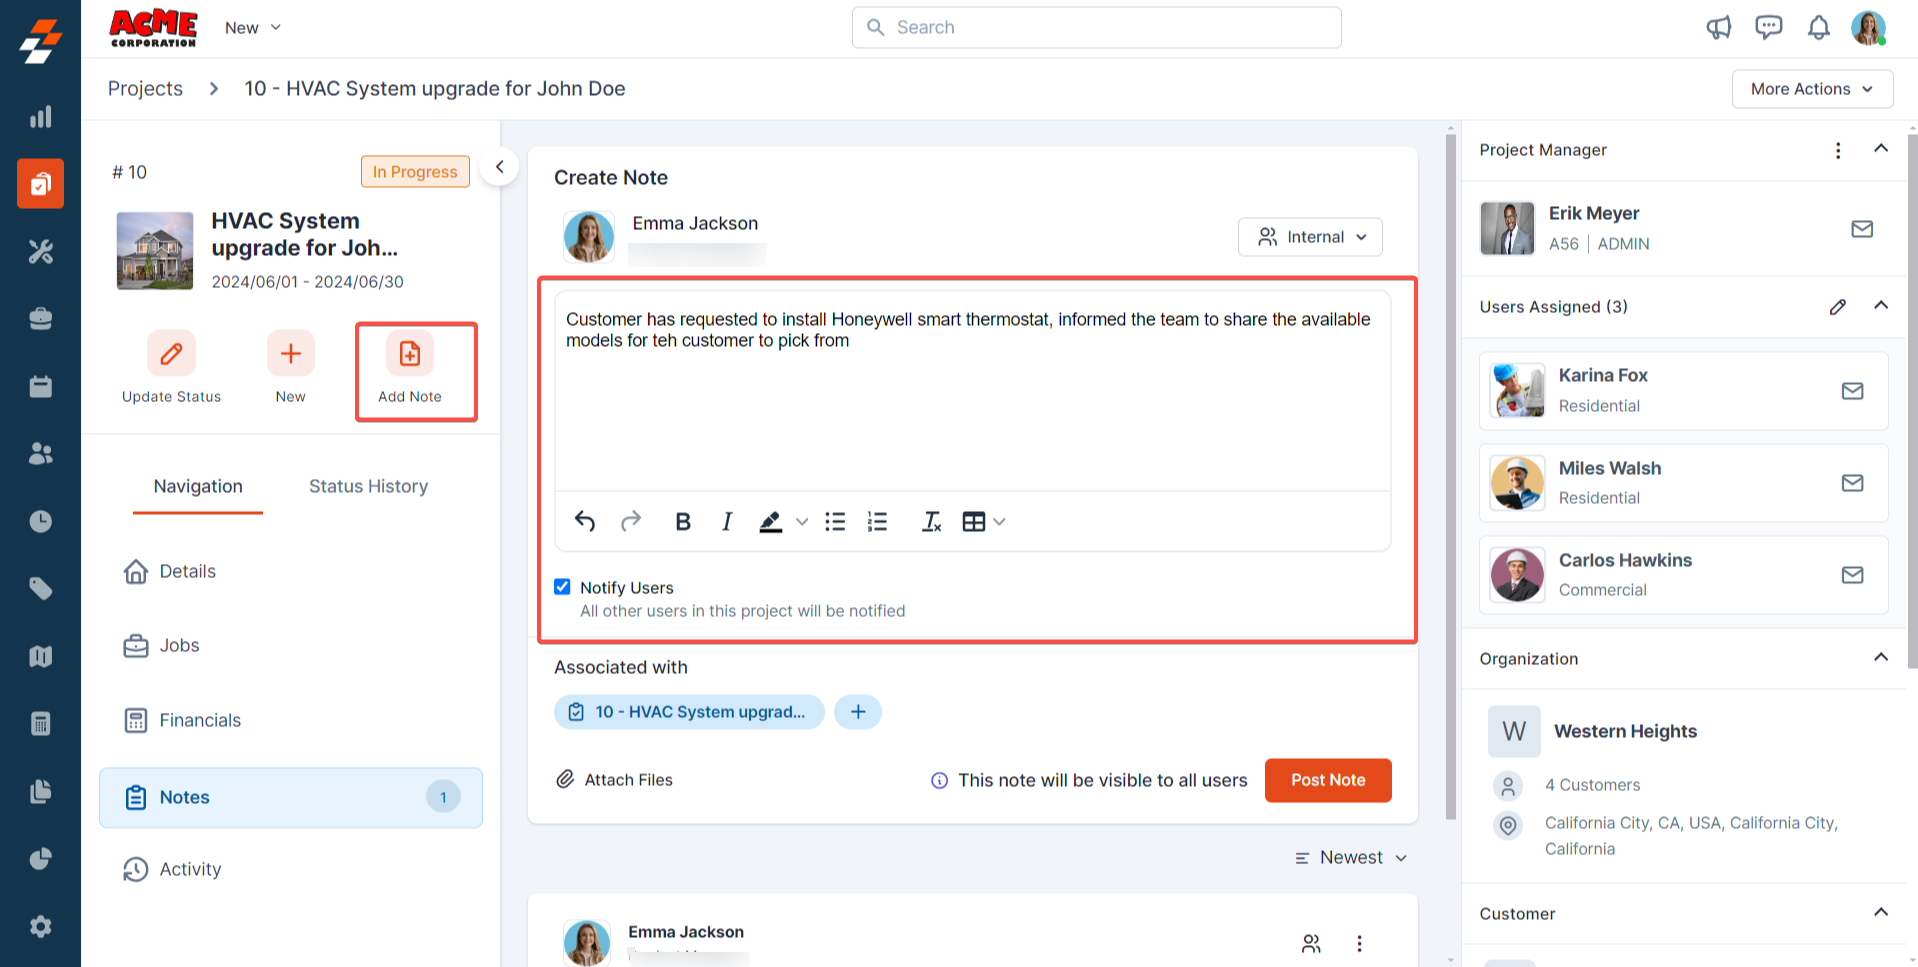
Navigating menu
Navigating menu
Using the navigation menu, you can navigate to the various sections of the project, including Details, Jobs, Financials, Notes, and Activity. 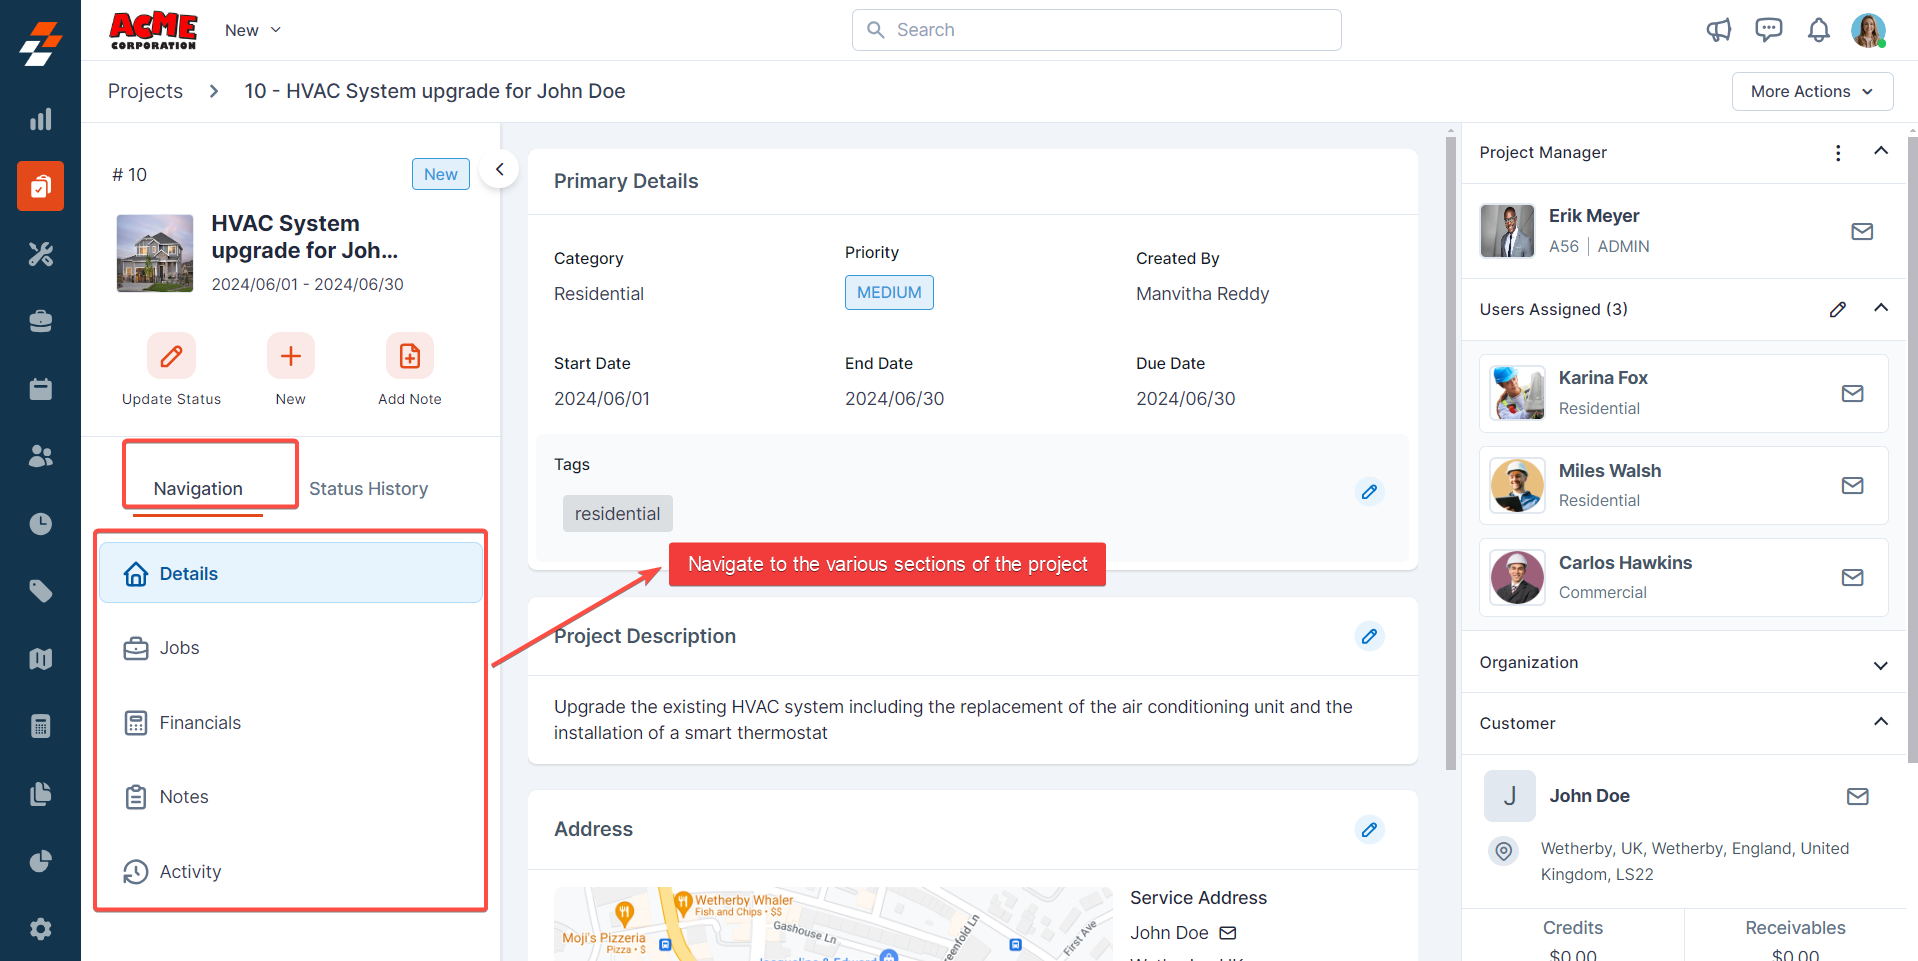
Financials
The Financial Summary in Projects provides a consolidated view of Quotes, Invoices, and Commission values, giving you a clear snapshot of overall project financial performance.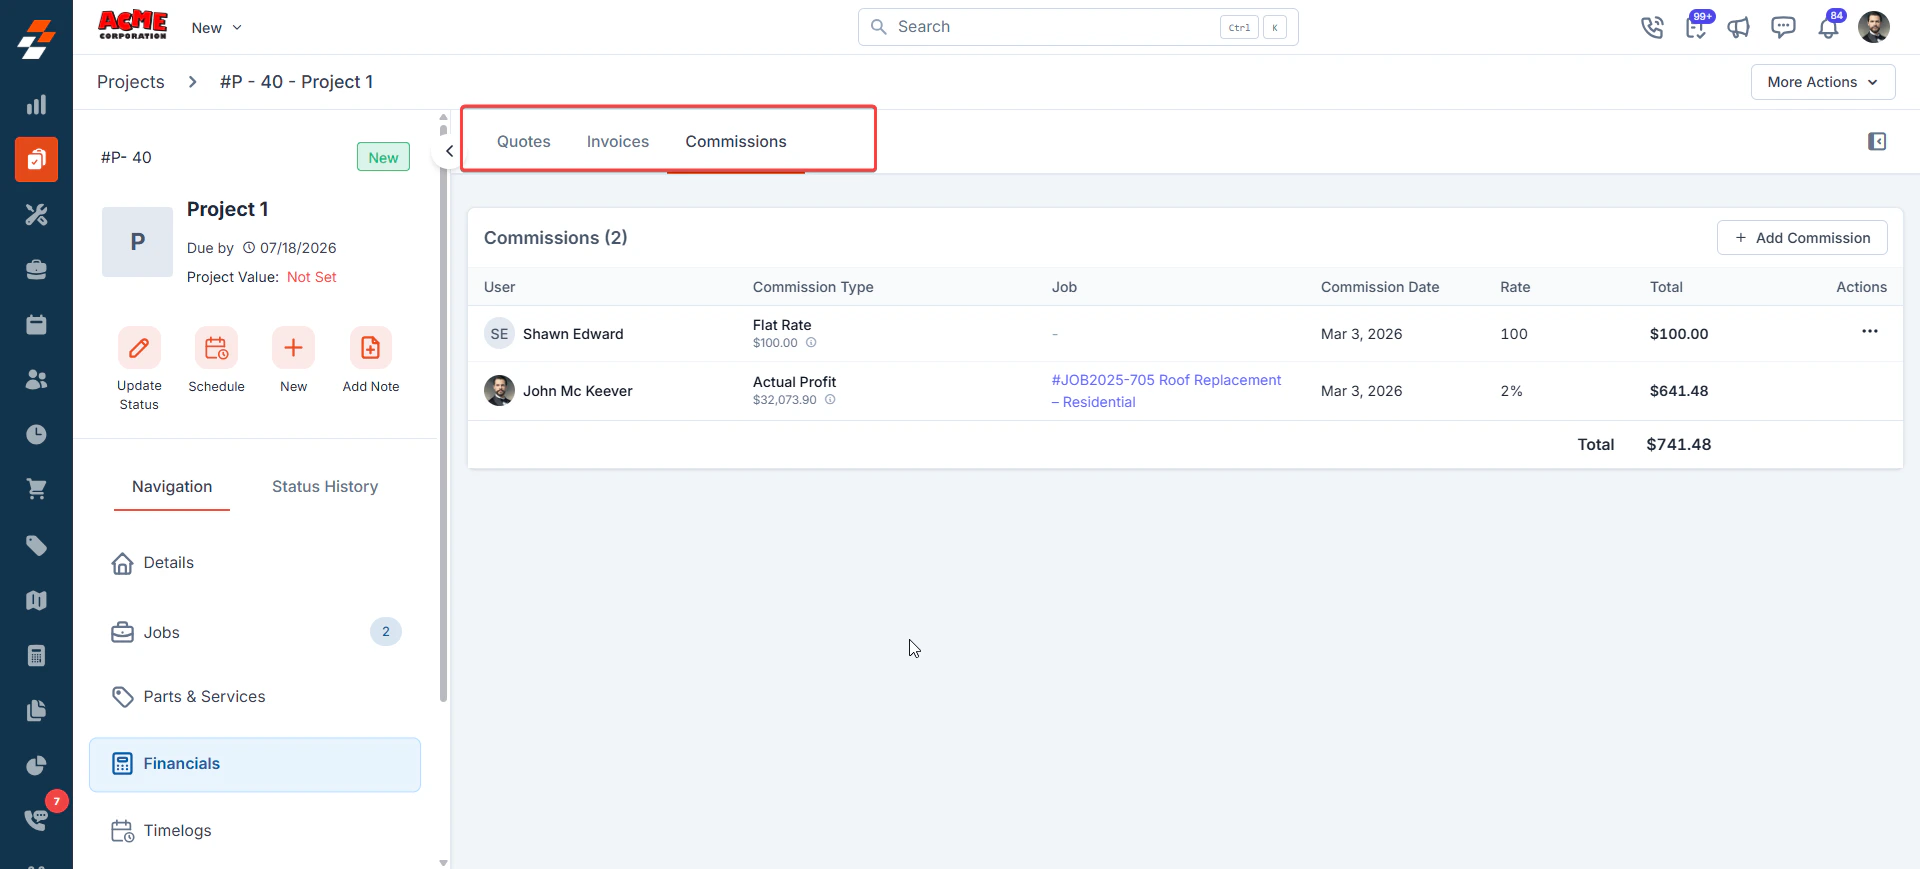
Project Gallery
The Gallery in Projects includes all Jobs module features and automatically pulls in images and videos from related jobs.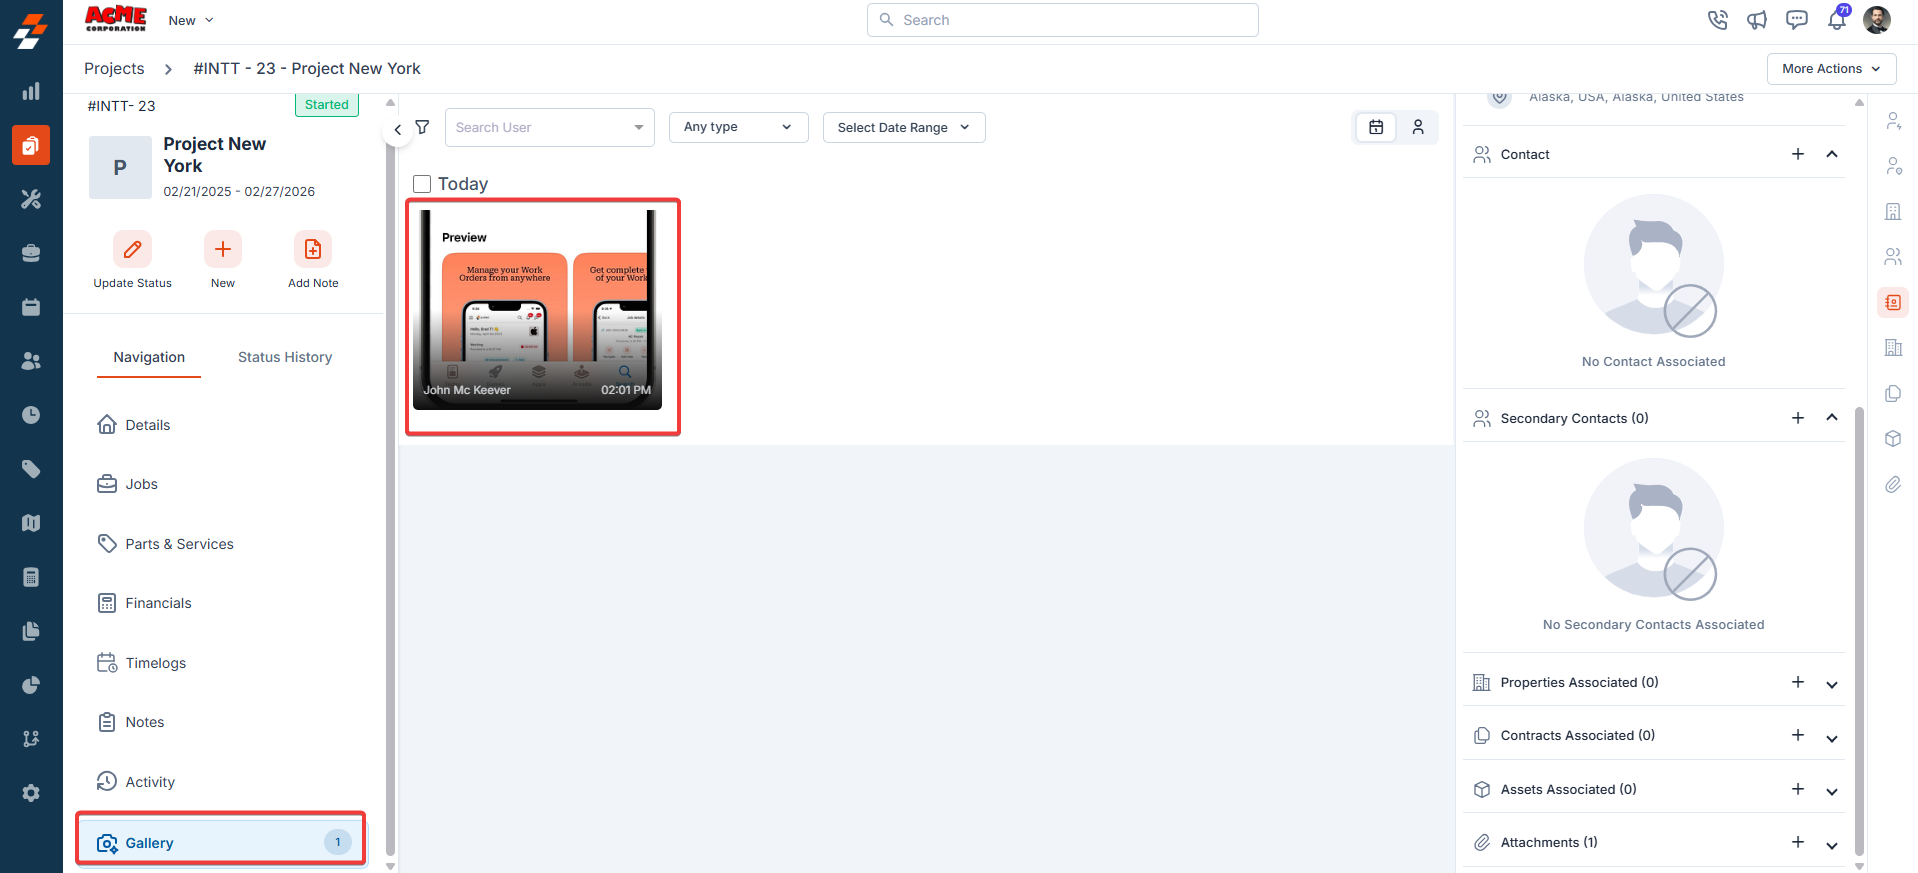
To enable this gallery feature: Settings -> Organization Settings -> Job Settings -> Enable Job GalleryThis will enable the project’s gallery as well.
Right panel
In the right panel, view the organization or contact information associated with the project and manage its links to various modules, such as properties, assets, contracts, purchase orders, and more. To associate a module, click the “+” icon next to the desired module.Note: Purchase orders will only appear when the project includes an existing job that has an active PO linked to it.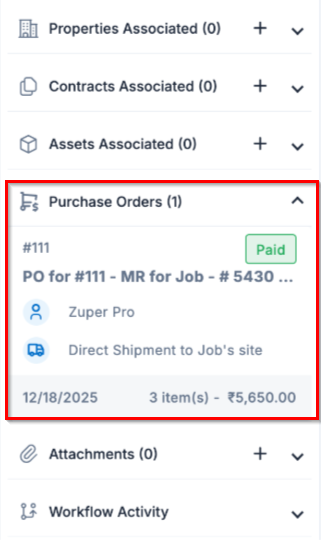
More actions
Managing projects doesn’t stop at viewing details—you can perform various actions such as printing, sharing, editing, cloning, or deactivating the project as needed.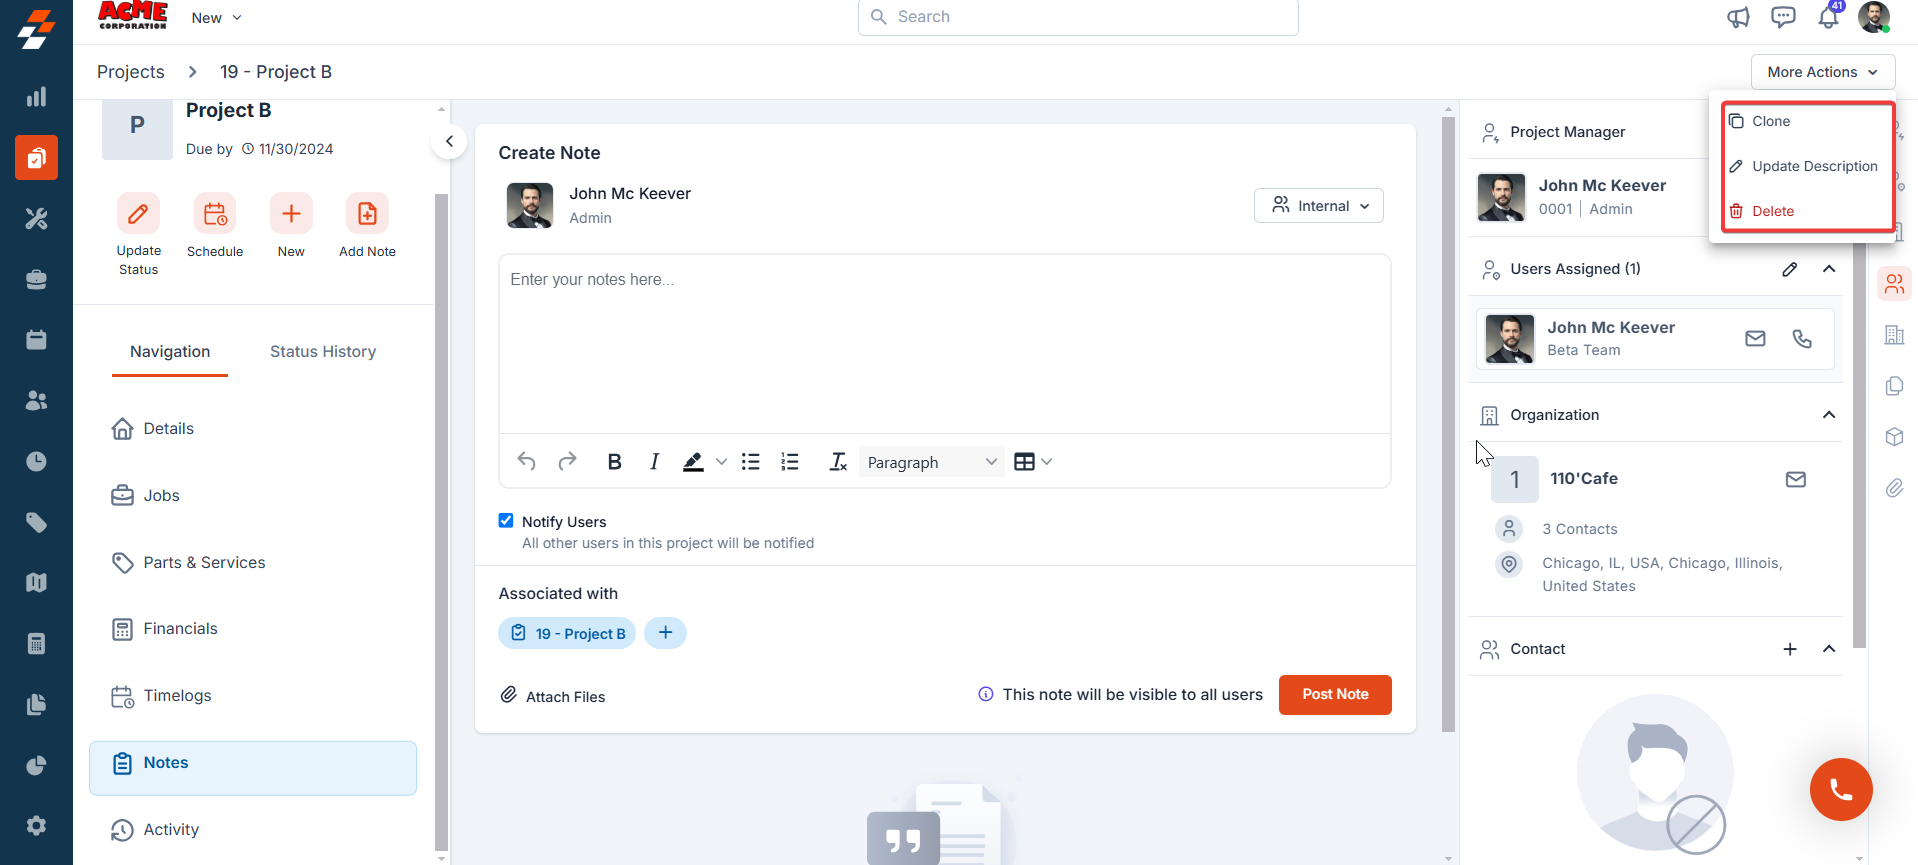
Clone
Clone
The Clone option lets you quickly create a replica of an existing project, saving time. Click “More Actions” at the top right corner of the page and select “Clone.” The current project details will be duplicated onto a new project page, where you can make any necessary edits before saving.
Update Description
Update Description
To modify any existing project details, click “More Actions” at the top right corner of the page and select ‘Update Description”
Delete Project
Delete Project
Click “Delete” under More Actions and provide your confirmation. The project is deleted successfully.