- Calculate from Time and Material
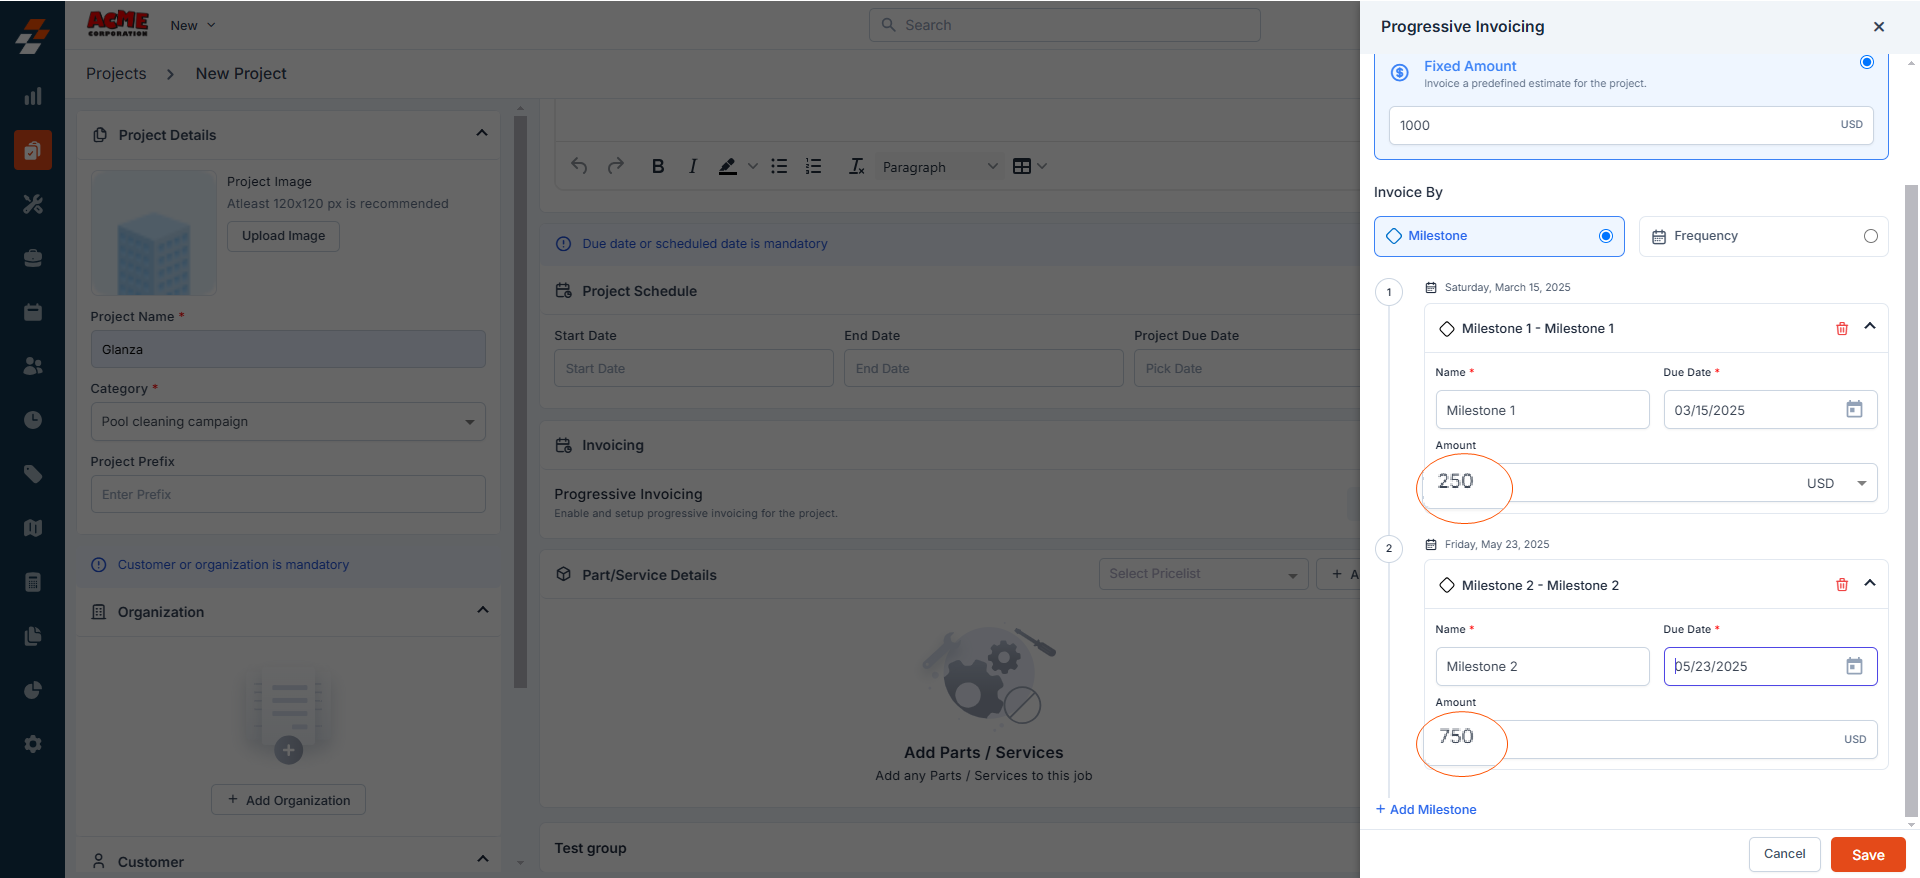
- Fixed Amount
- Milestone-Based Invoicing
- Frequency-Based Invoicing
Note: Progressive invoicing is optional and should be used only when billing your customers throughout the project based on milestone completion or a predefined schedule.
Steps to set up progressive invoicing
You can set up progressive invoicing in either of the following ways:- During project creation.
- After creating a project.
During project creation
Navigation: Projects -> + New Project -> Invoicing (Setup)
- Select the “Projects” module from the left navigation menu. You can view the list of projects that have been created already on the projects listing page.
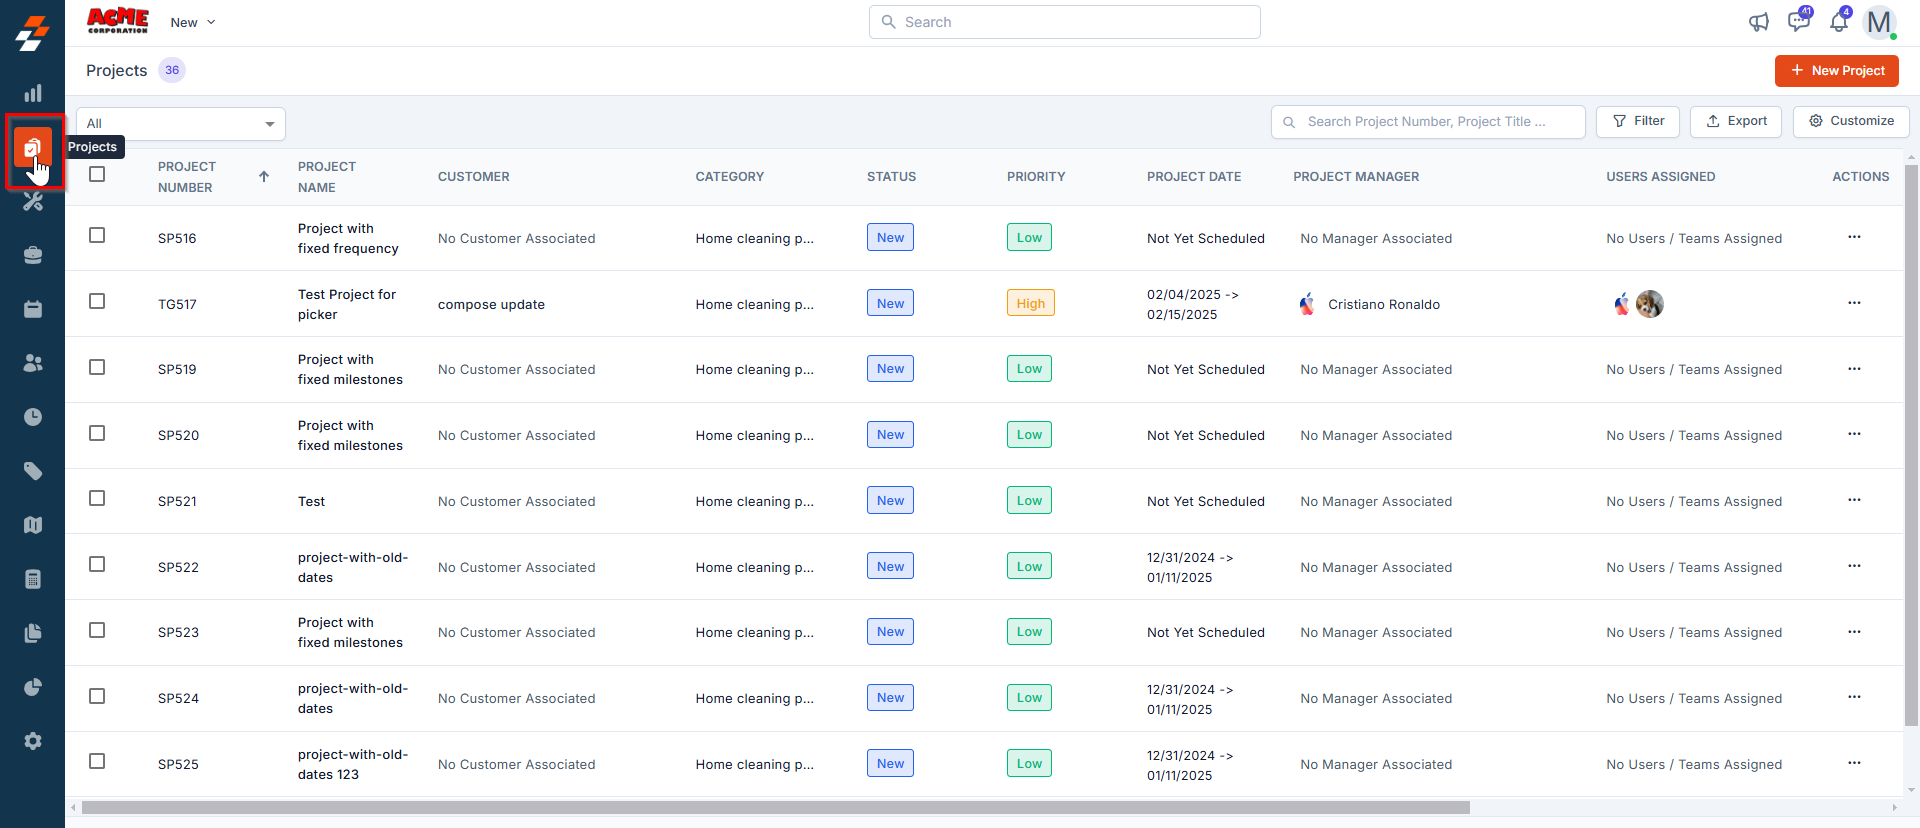
- Click the “ + New Project ” button at the top right corner of the page to create a new project.
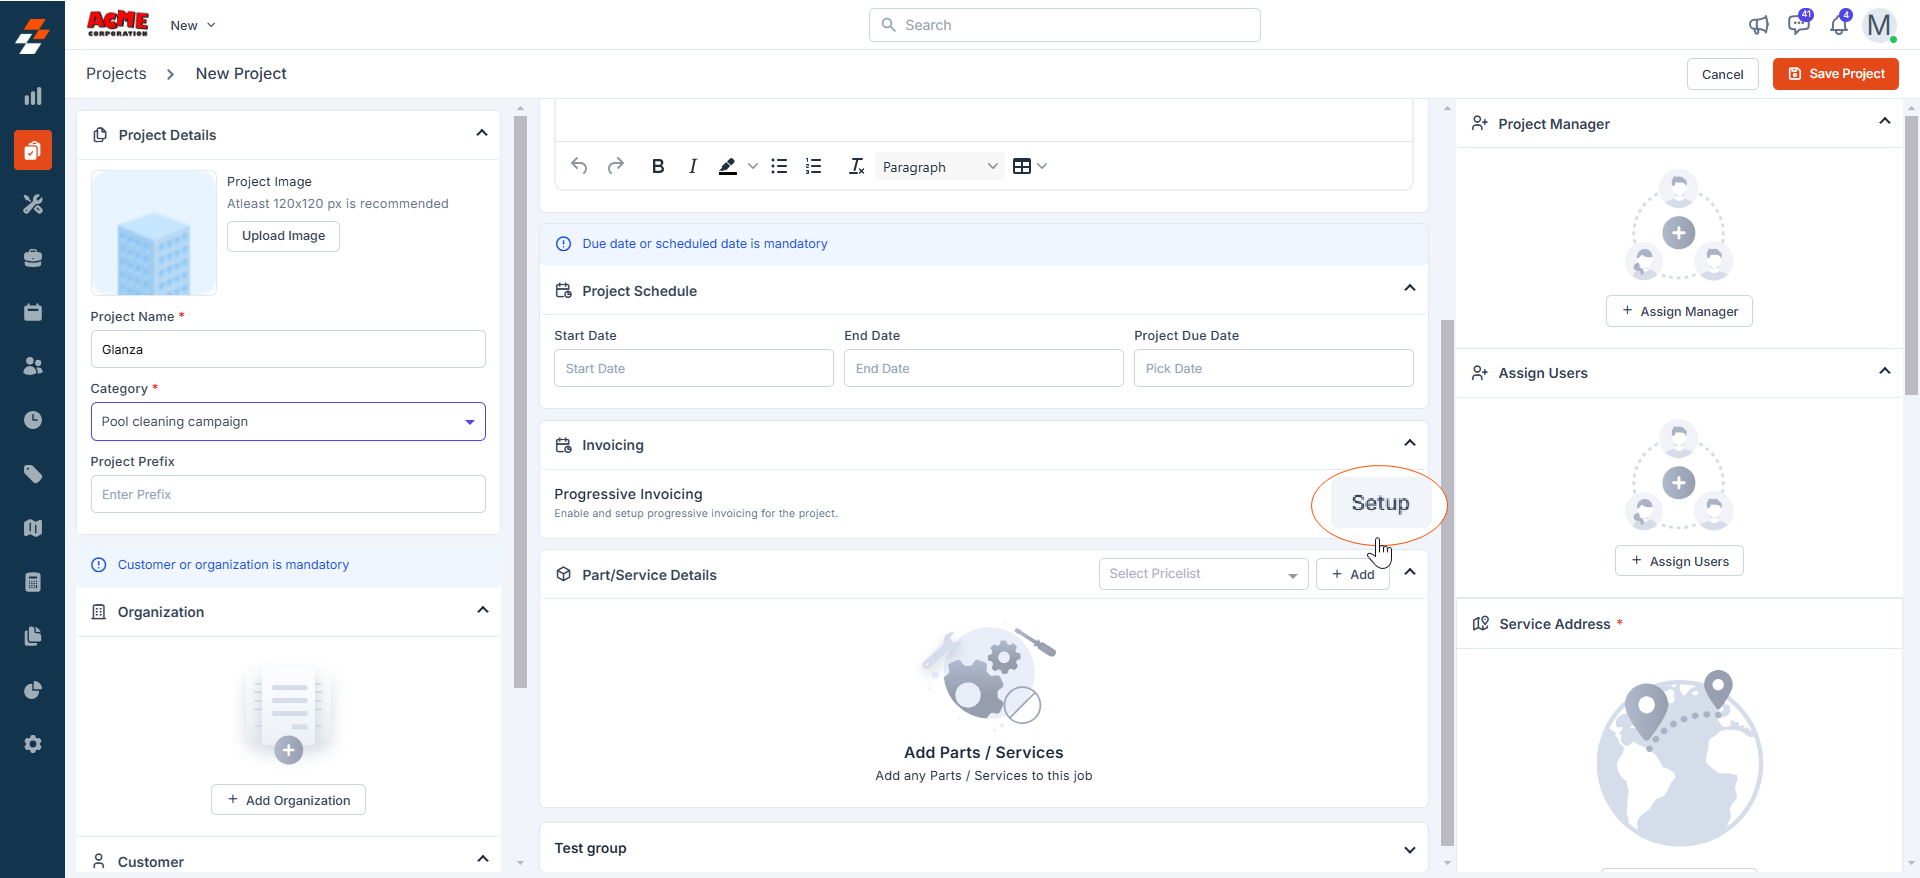
- On the new project creation page, click the “Setup” button in the invoicing section. A new progressive invoicing setup page appears.
Choose how to generate the invoice amount
Select one of the following options for progressive invoicing: Calculate from Time and Material Choosing this option automatically calculates the invoice amounts based on the actual material costs included as line items in the completed jobs (i.e., sell prices of the parts and materials used by the job/s) within a project at each stage. Fixed Amount Choosing this option allows you to set an actual estimate or quotation of the project in USD and bill it in stages, regardless of the number of completed jobs, their status, or the parts and services used.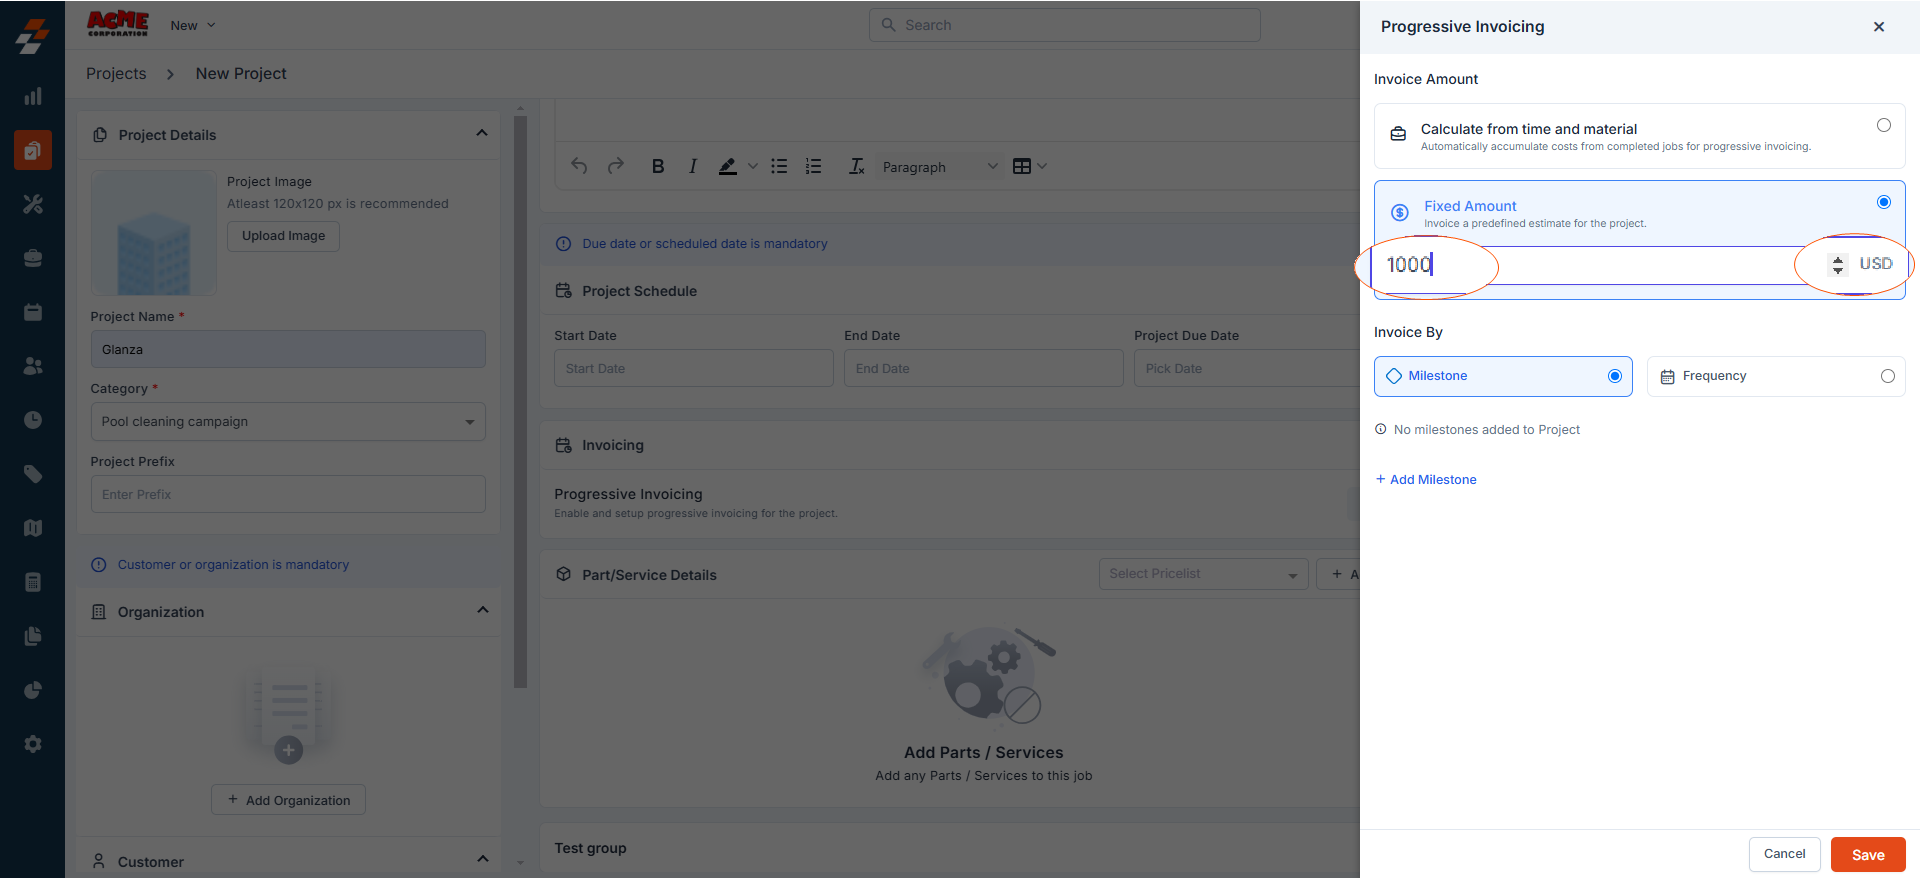
Choose when to generate the invoice
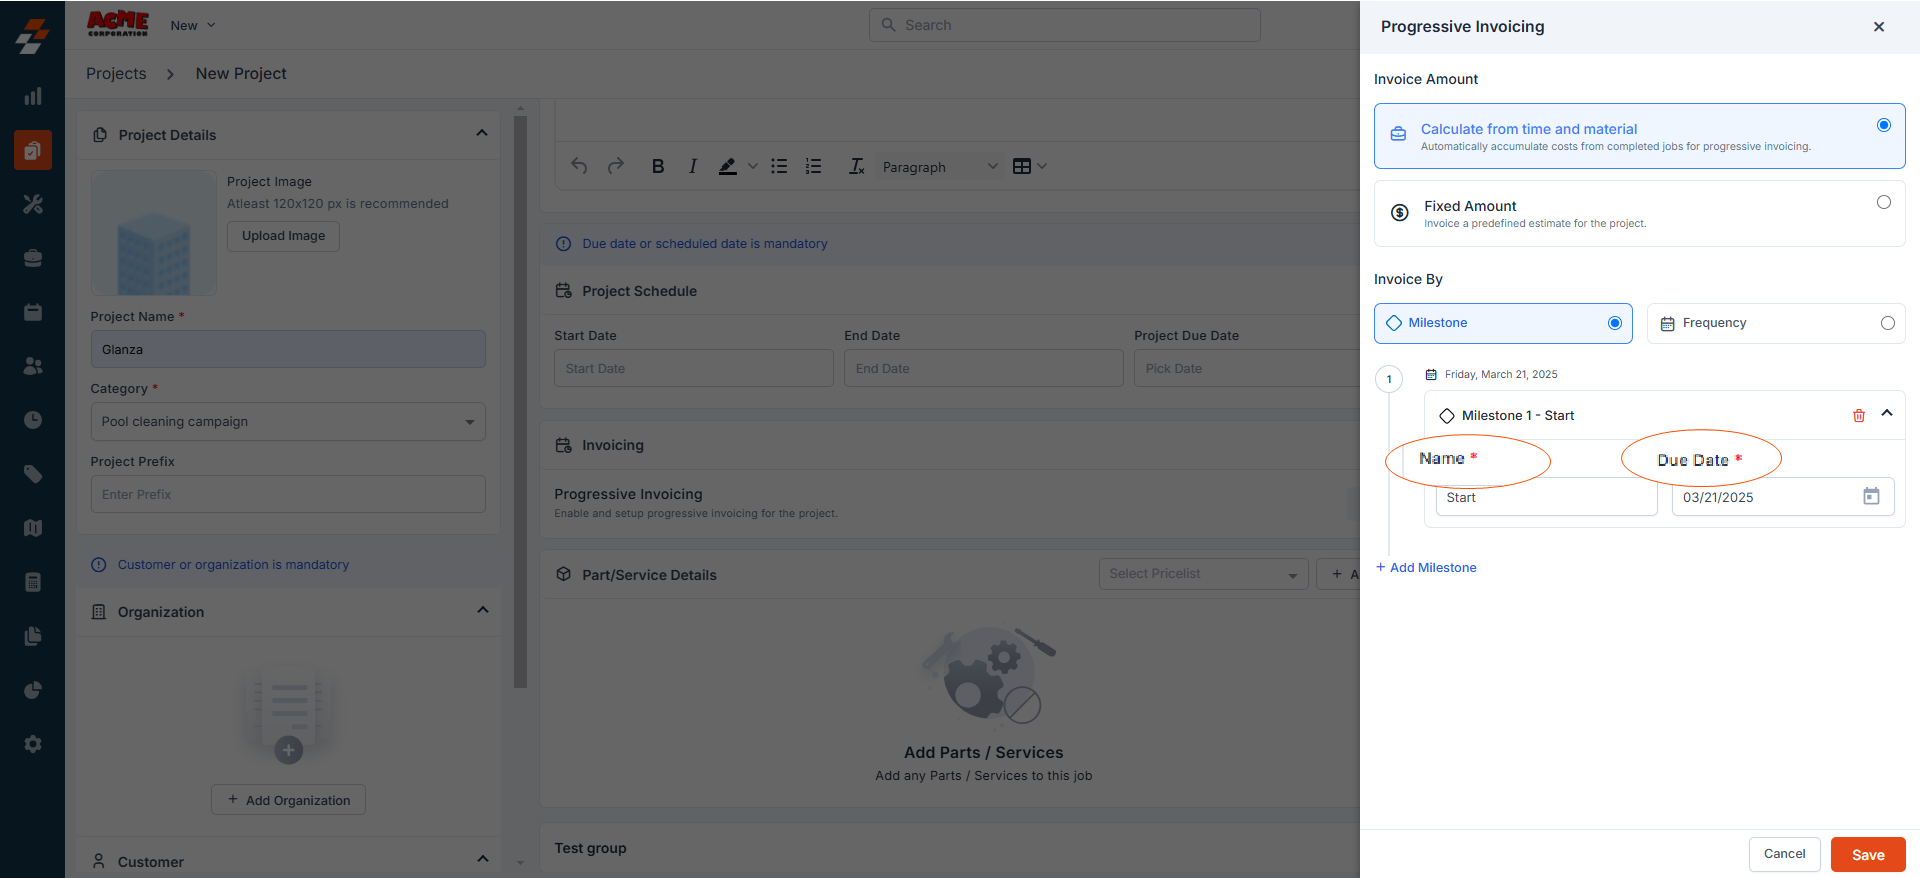
Select when you would like invoices to be generated: Milestone This option allows you to generate invoices upon reaching a specific milestone in a project, ensuring that billing aligns with the project’s progress. To use this option, follow these steps:Note: To save time and streamline the process, you can create a milestone directly during project creation rather than first creating a project and selecting milestones later.
- Click the ” + Add Milestone ” button.
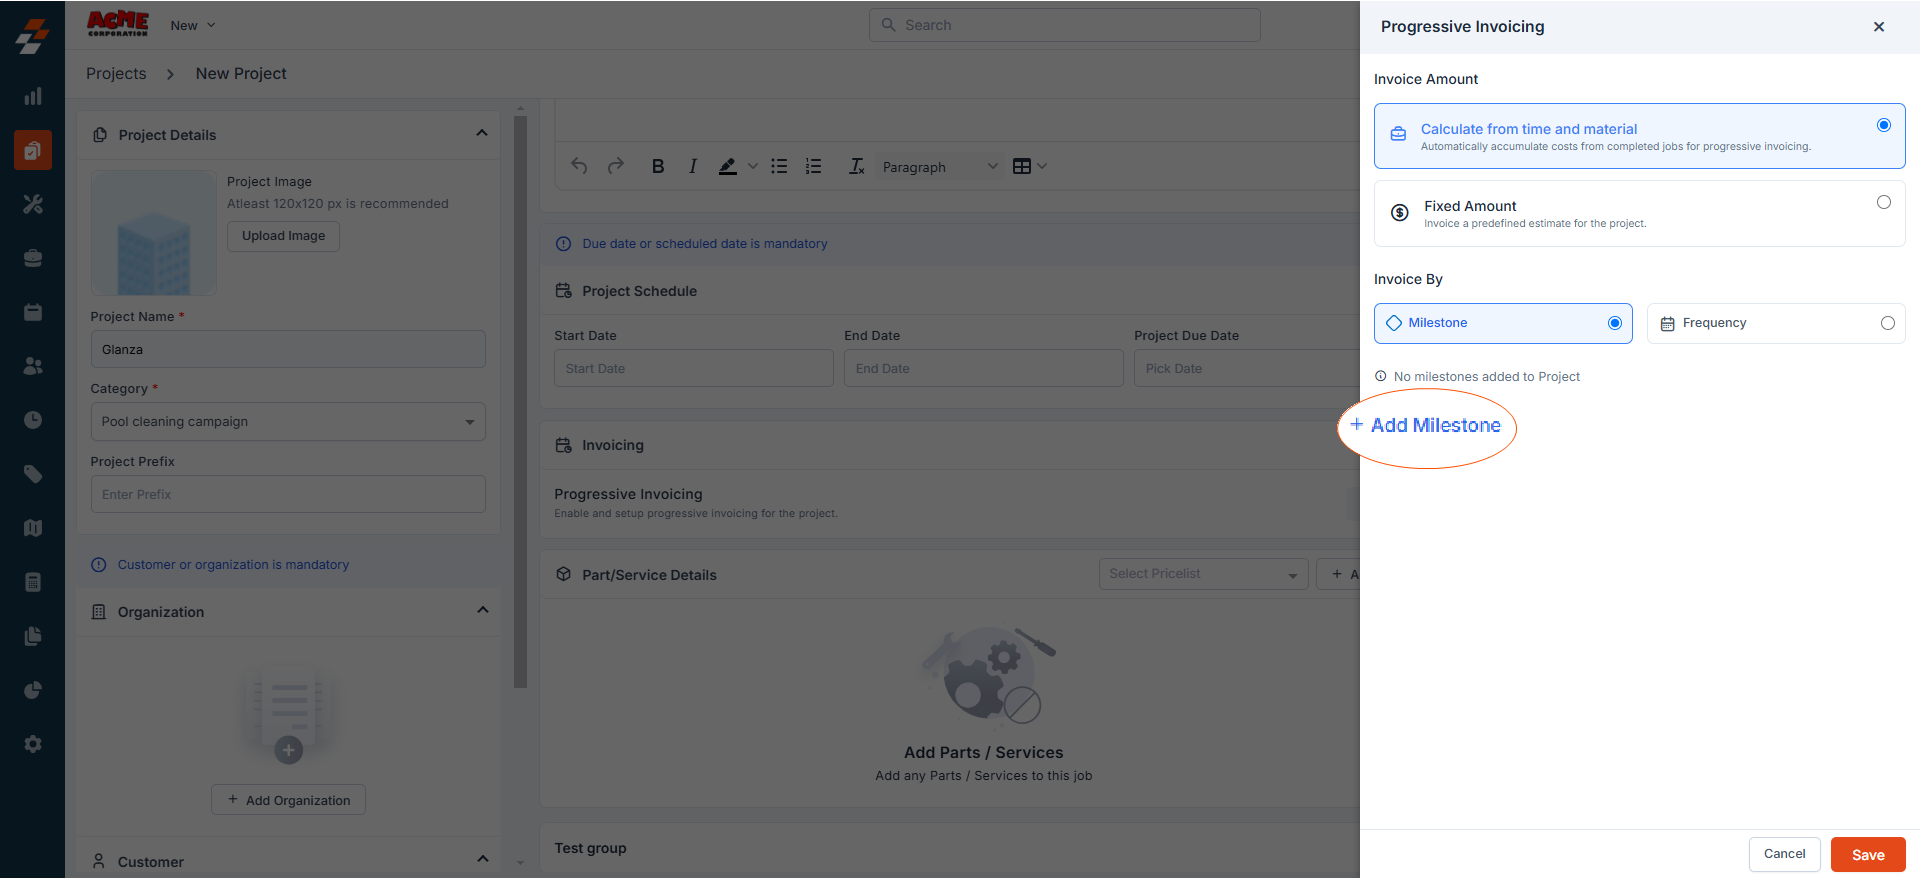
- Enter the milestones “Name” and “Due Date.” The due date you specify here is the date the invoice will be generated (saved as a draft), with the amount calculated based on your selected invoice amount generation option.
How Invoice Amount Generation Methods Impact Milestone-Based Invoicing
How Invoice Amount Generation Methods Impact Milestone-Based Invoicing
- When you select the “Calculate from Time and Material ” option, the amount will be calculated automatically based on the actual material costs (i.e., sell prices of the parts and materials) included as line items in the completed jobs within the project up to the specified milestone due date.
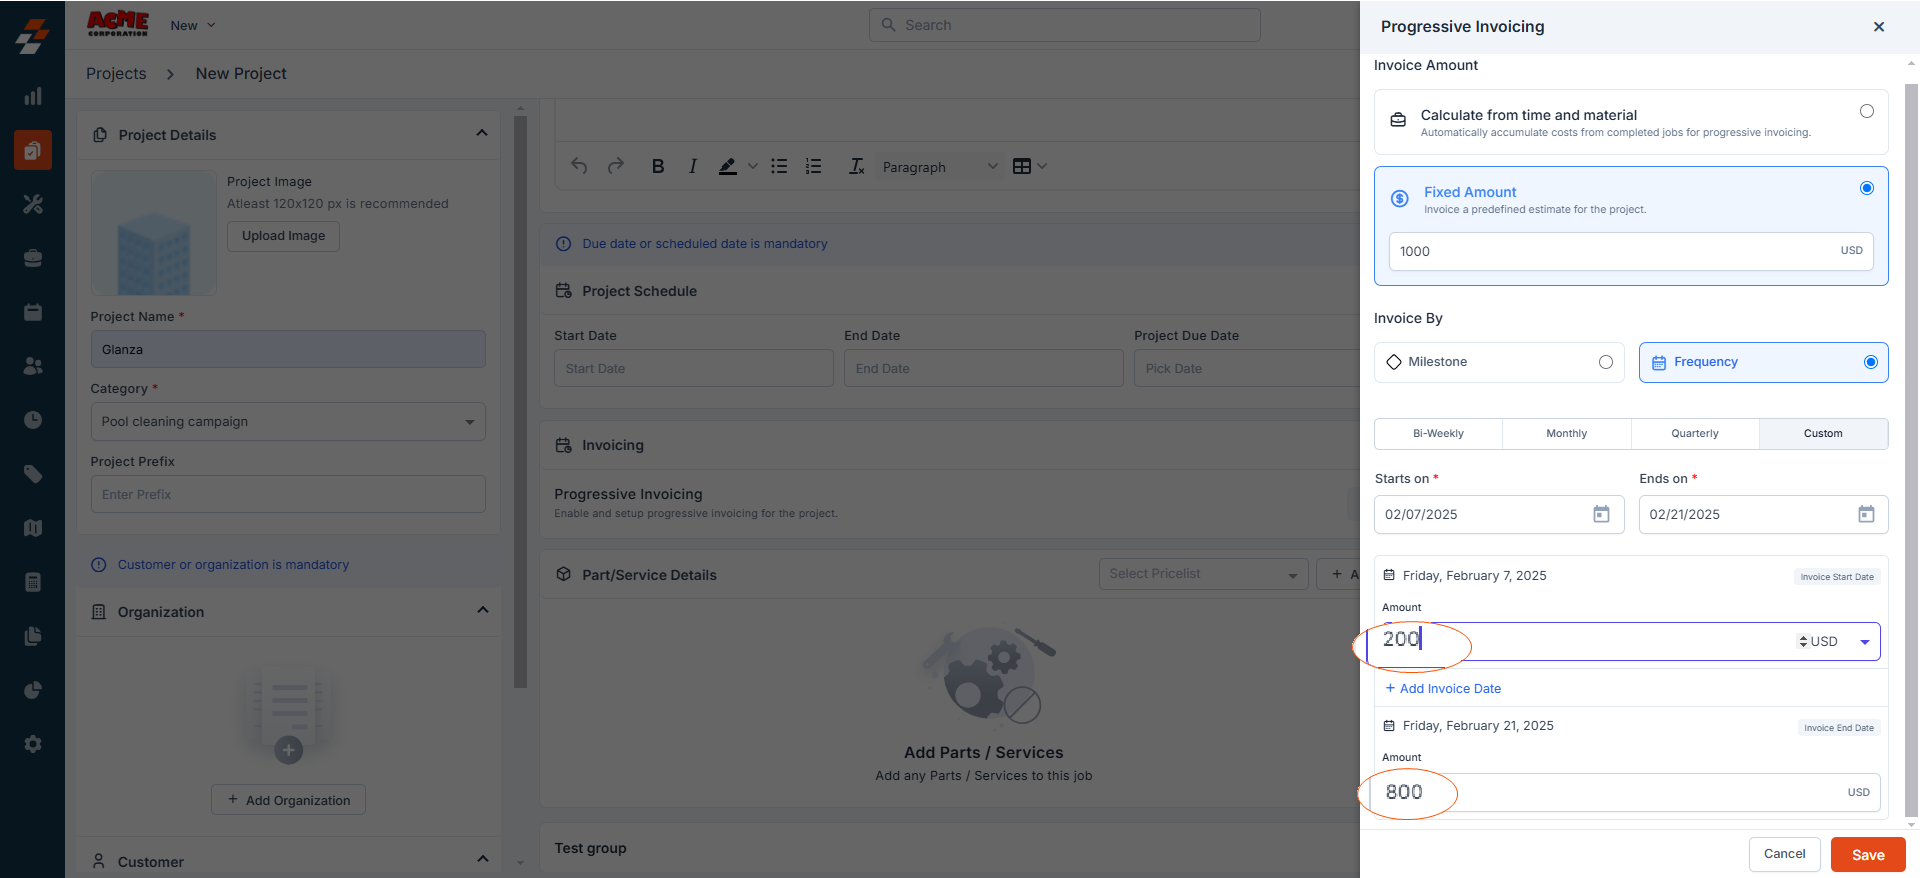
- If you select the “ Fixed Amount ” option, you must specify a full estimate or the portion of the amount (in USD) to be collected upon reaching the first milestone. The remaining amount will automatically carry over to the next milestone(s). So, when a milestone’s due date is reached, the specified amount is included in the invoice, which is generated regardless of job completion status, progress, or parts and services used up to that milestone.
Note: These milestones will then be added to the “Not added to any phase” section in both the Gantt and List Views of the project’s job section. You can then drag and drop the milestones into the appropriate phases.
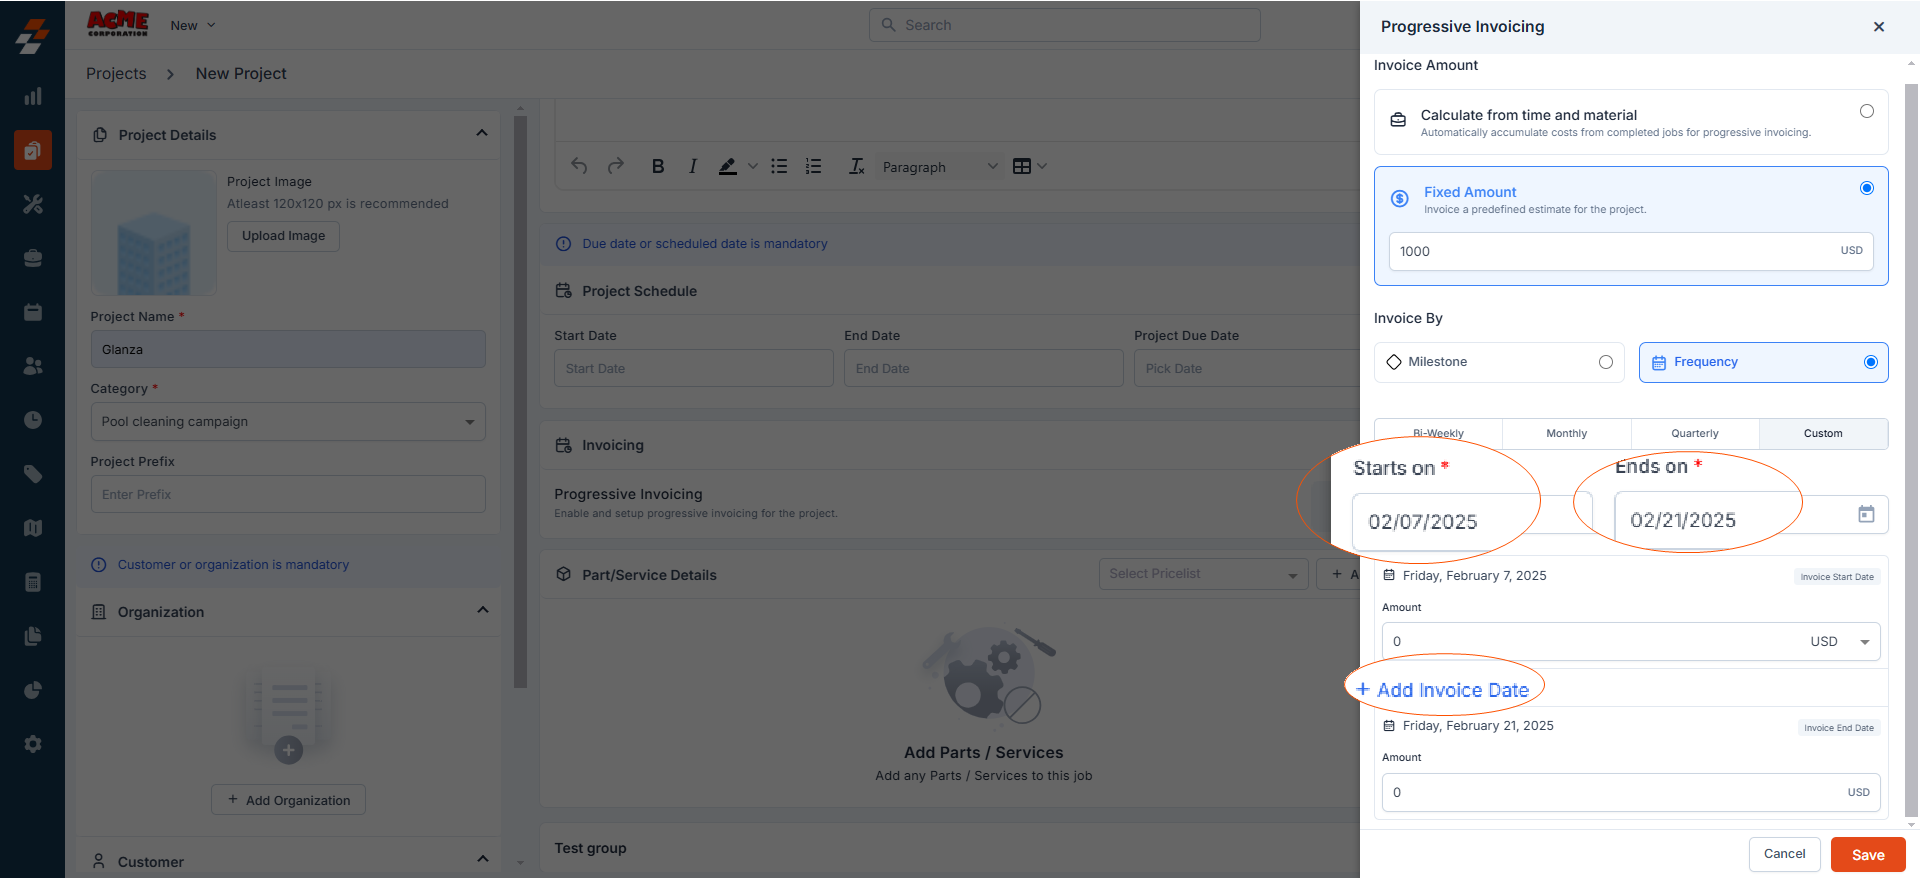
- Choose the “Frequency” option. You will be prompted to select a billing frequency: Bi-weekly, Monthly, Quarterly, or Custom.
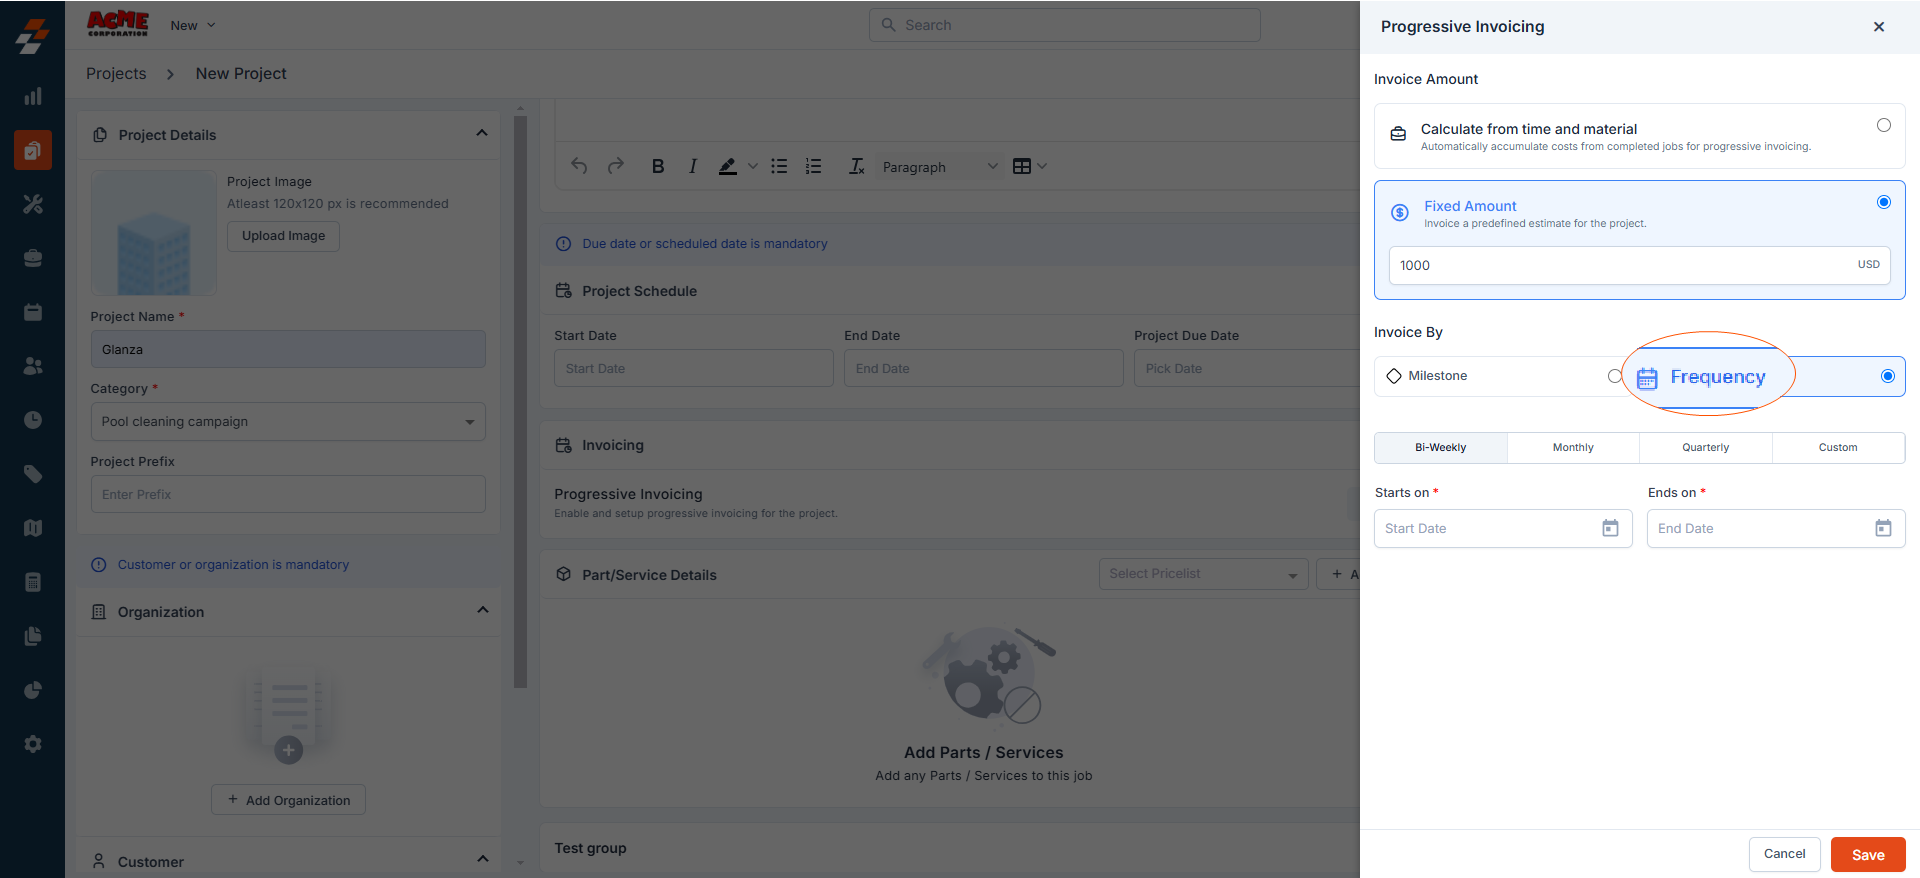
If the frequency selected is Bi-weekly, Monthly, or Quarterly
If the frequency selected is Bi-weekly, Monthly, or Quarterly
Specify the invoice start and end dates in the “ Starts on ” and “ Ends on ” fields. The system will automatically calculate the billing dates within the specified range based on the chosen frequency and generate invoices (saved as draft).
If the selected frequency is Custom
If the selected frequency is Custom
Specify the invoice start and end dates in the “Starts on ” and “Ends on” fields. These will be the invoice start and end dates (i.e., the overall range during which invoices will be generated). Within this period, you can select additional specific dates from the calendar to generate invoices by clicking the “+ Add Invoice Date” option. This allows for more flexibility in scheduling invoice generation. You also have the ability to delete any invoice dates you’ve added or add new ones as needed.
- After selecting the frequency, the system will automatically generate draft invoices on the specified dates, with the amount calculated based on your selected invoice amount generation option.
How Invoice Amount Generation Method Impact Frequency-Based Invoicing
How Invoice Amount Generation Method Impact Frequency-Based Invoicing
- When you select the “Calculate from Time and Material ” option, the amount will be calculated automatically based on the actual material costs (i.e., sell prices of the parts and materials) included as line items in the completed jobs within the project up to the specified due date.
- If you select the “Fixed Amount” option to generate the invoice amount, you’ll be prompted to specify the full estimate or the portion of the amount in USD to be collected for the first billing date. The remaining amount will automatically carry over to the next billing date(s). So, when the billing frequency date is reached, the specified amount will be included, and the invoice will be generated regardless of the number of jobs completed, their status, or the parts and services used up to that date.
- Click the “Save” button to confirm your progressive invoicing setup.
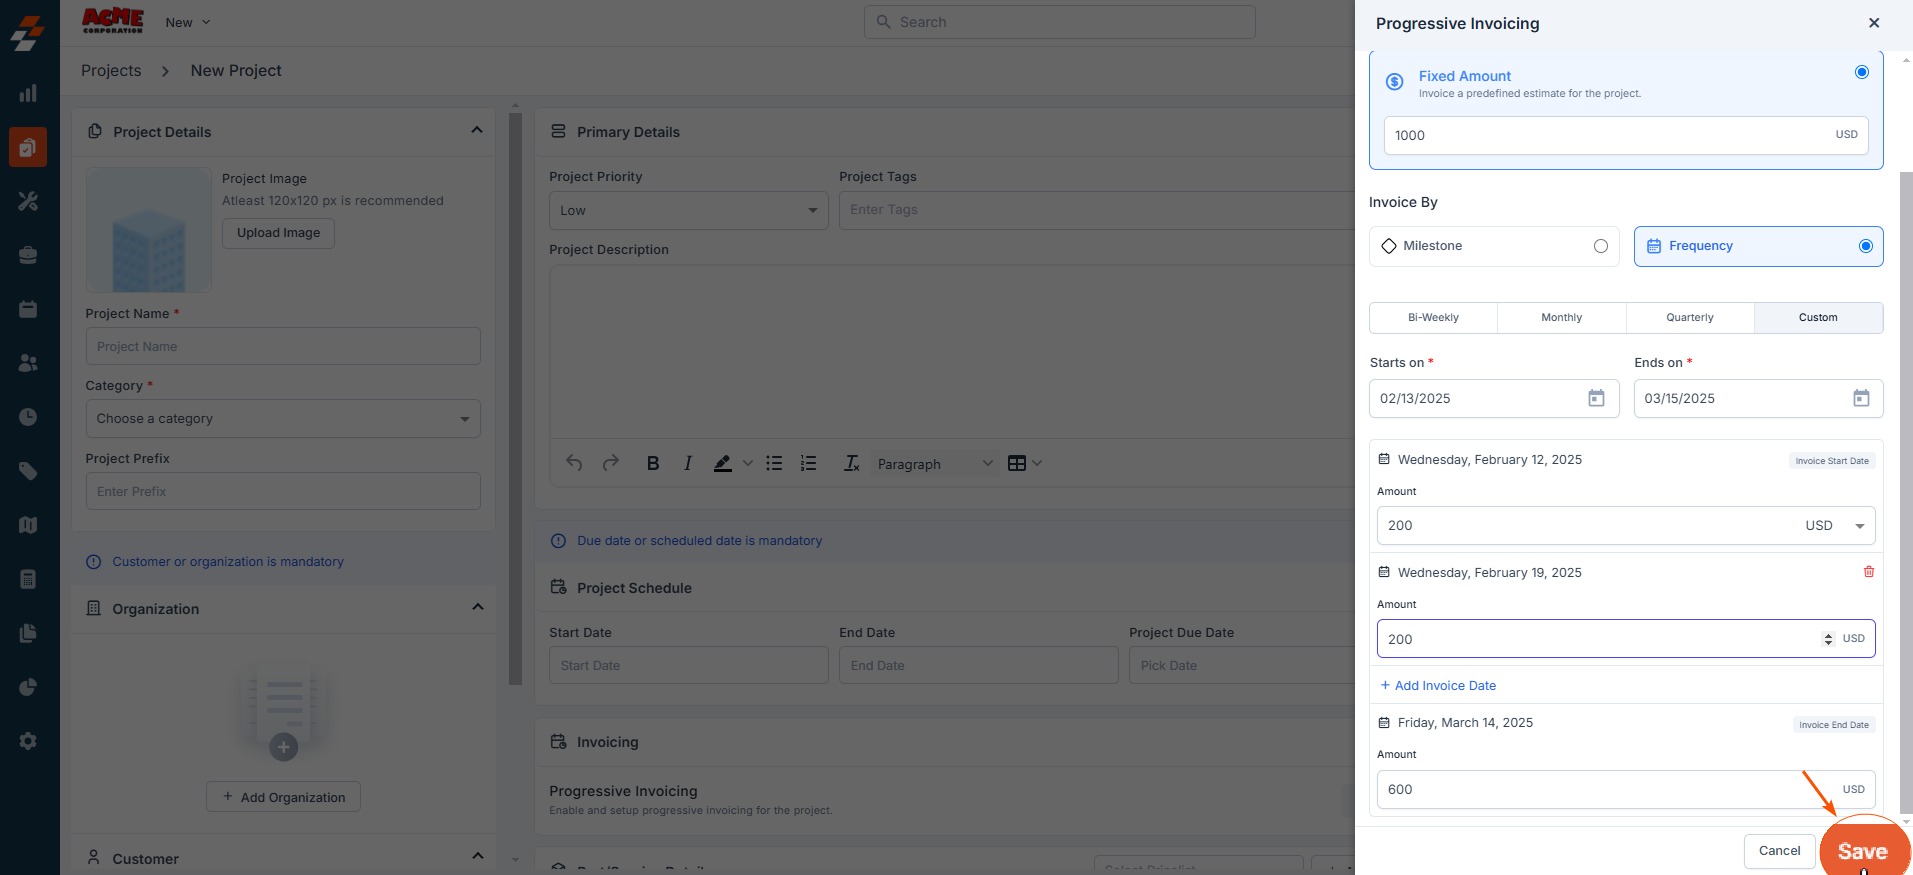
Note: The sum of the portions allocated to each invoice should equal the total project amount. If these specified portions do not add up to the total project amount, the system will not allow you to save the setup.
After creating a project
Navigation: Projects -> Project details page -> Financials -> Invoices -> Configure -> Progressive invoicing
- Select the “Projects” module from the left navigation menu. You can view the list of projects that have been created already on the projects listing page.

- From the listing page, select any project for which you want to set up progressive invoicing. You will be redirected to the selected project details page. Select “Financials” on the left panel under “Navigation.”
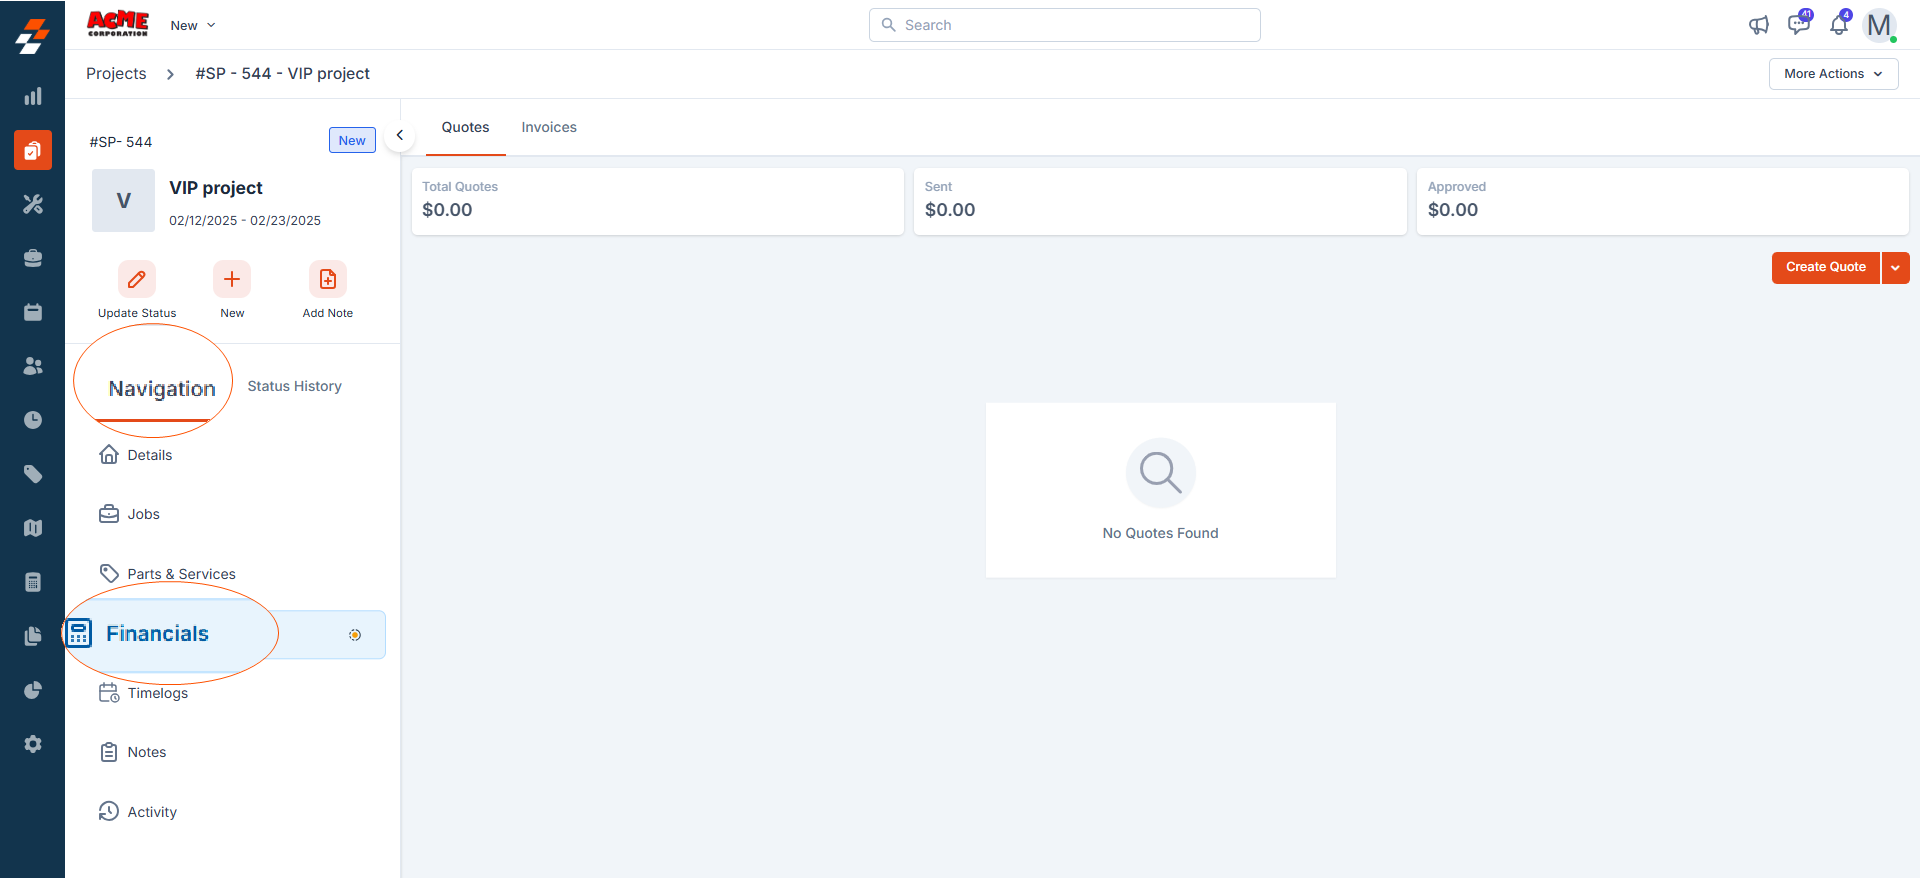
- On the financials listing page, switch to “Invoices,” click the “Configure” button at the top right and choose “Progressive Invoicing.”
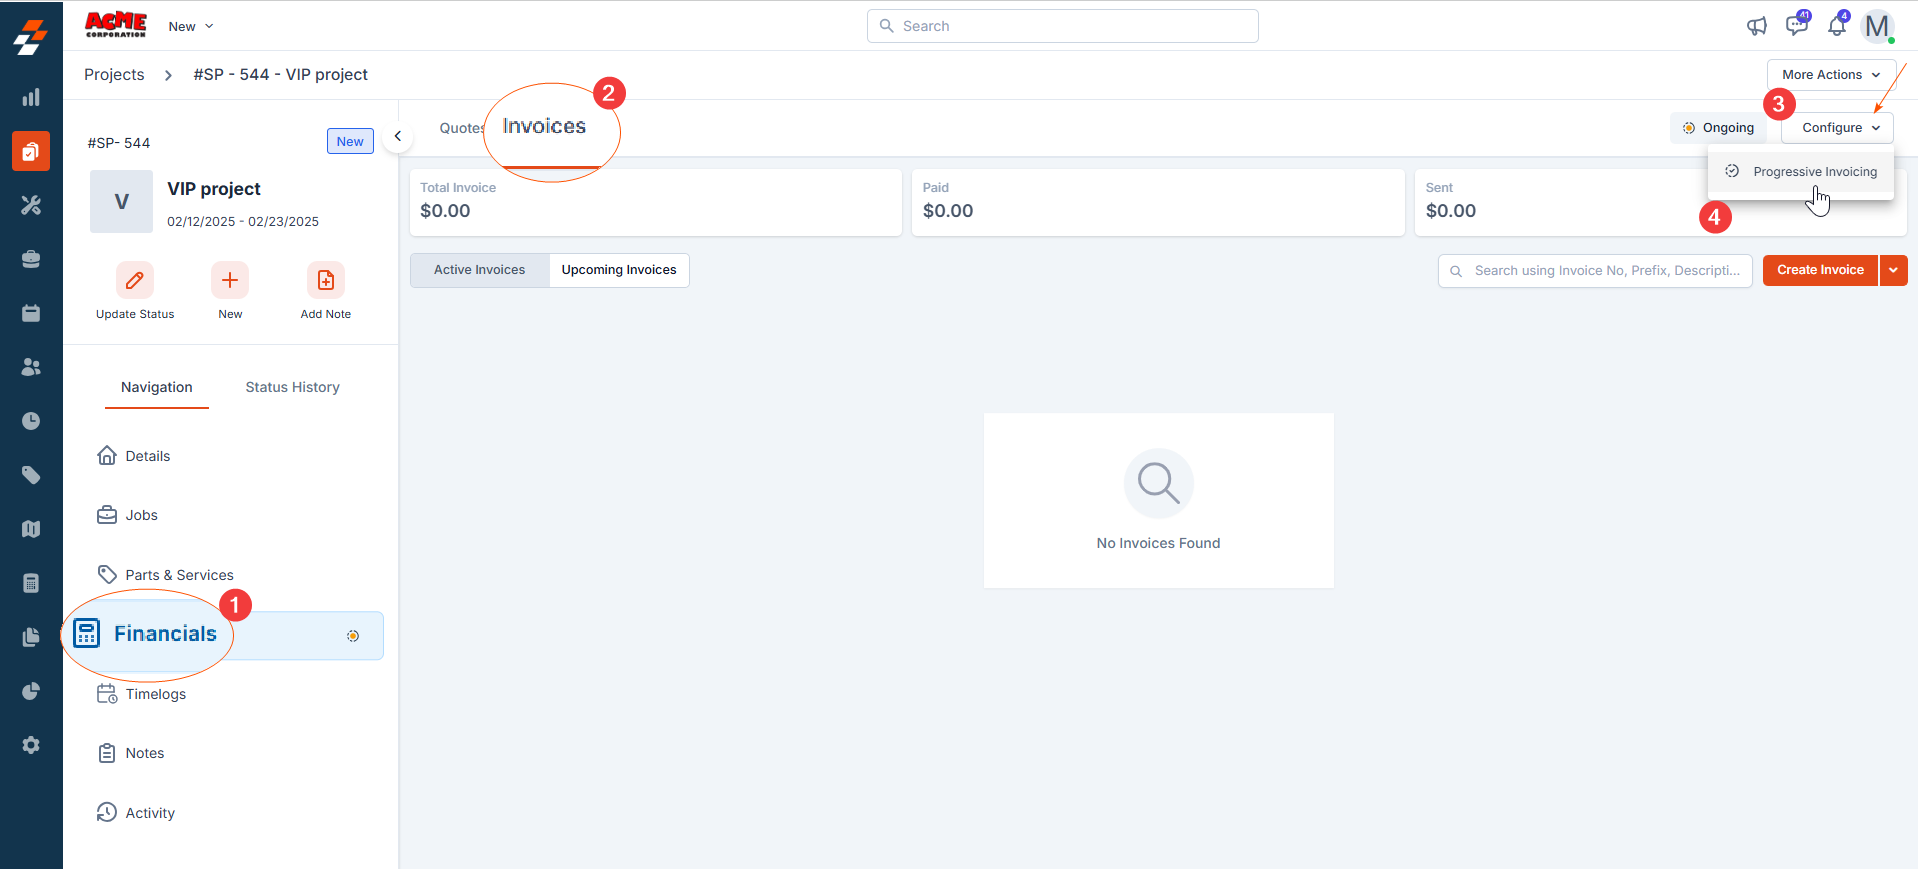
- Choose how you want to generate the invoice amount for progressive invoicing (either Calculate from Time and Material or Fixed Amount ). For more details, see the section above.
- Choose when you would like to generate invoices (either Milestone or Frequency ). For more details, see the section above.
Note: If you select the milestone option when setting up progressive invoicing for an existing project, you can view the list of previously created milestones.
- Select the milestones at which you want invoices to be generated.
- Once selected, invoices will be generated (saved as drafts) on each milestone’s due date, with the amount calculated based on your chosen invoice amount generation method.
Accessing Invoices generated through progressive invoicing
- After setting up progressive invoicing, you can view the progressive invoices by navigating to Financials >> Invoices >> Upcoming Invoices section on the web. To indicate ongoing progressive invoicing within a project, a progressive invoicing icon will also appear next to “Financials” on the project details page, as shown below:
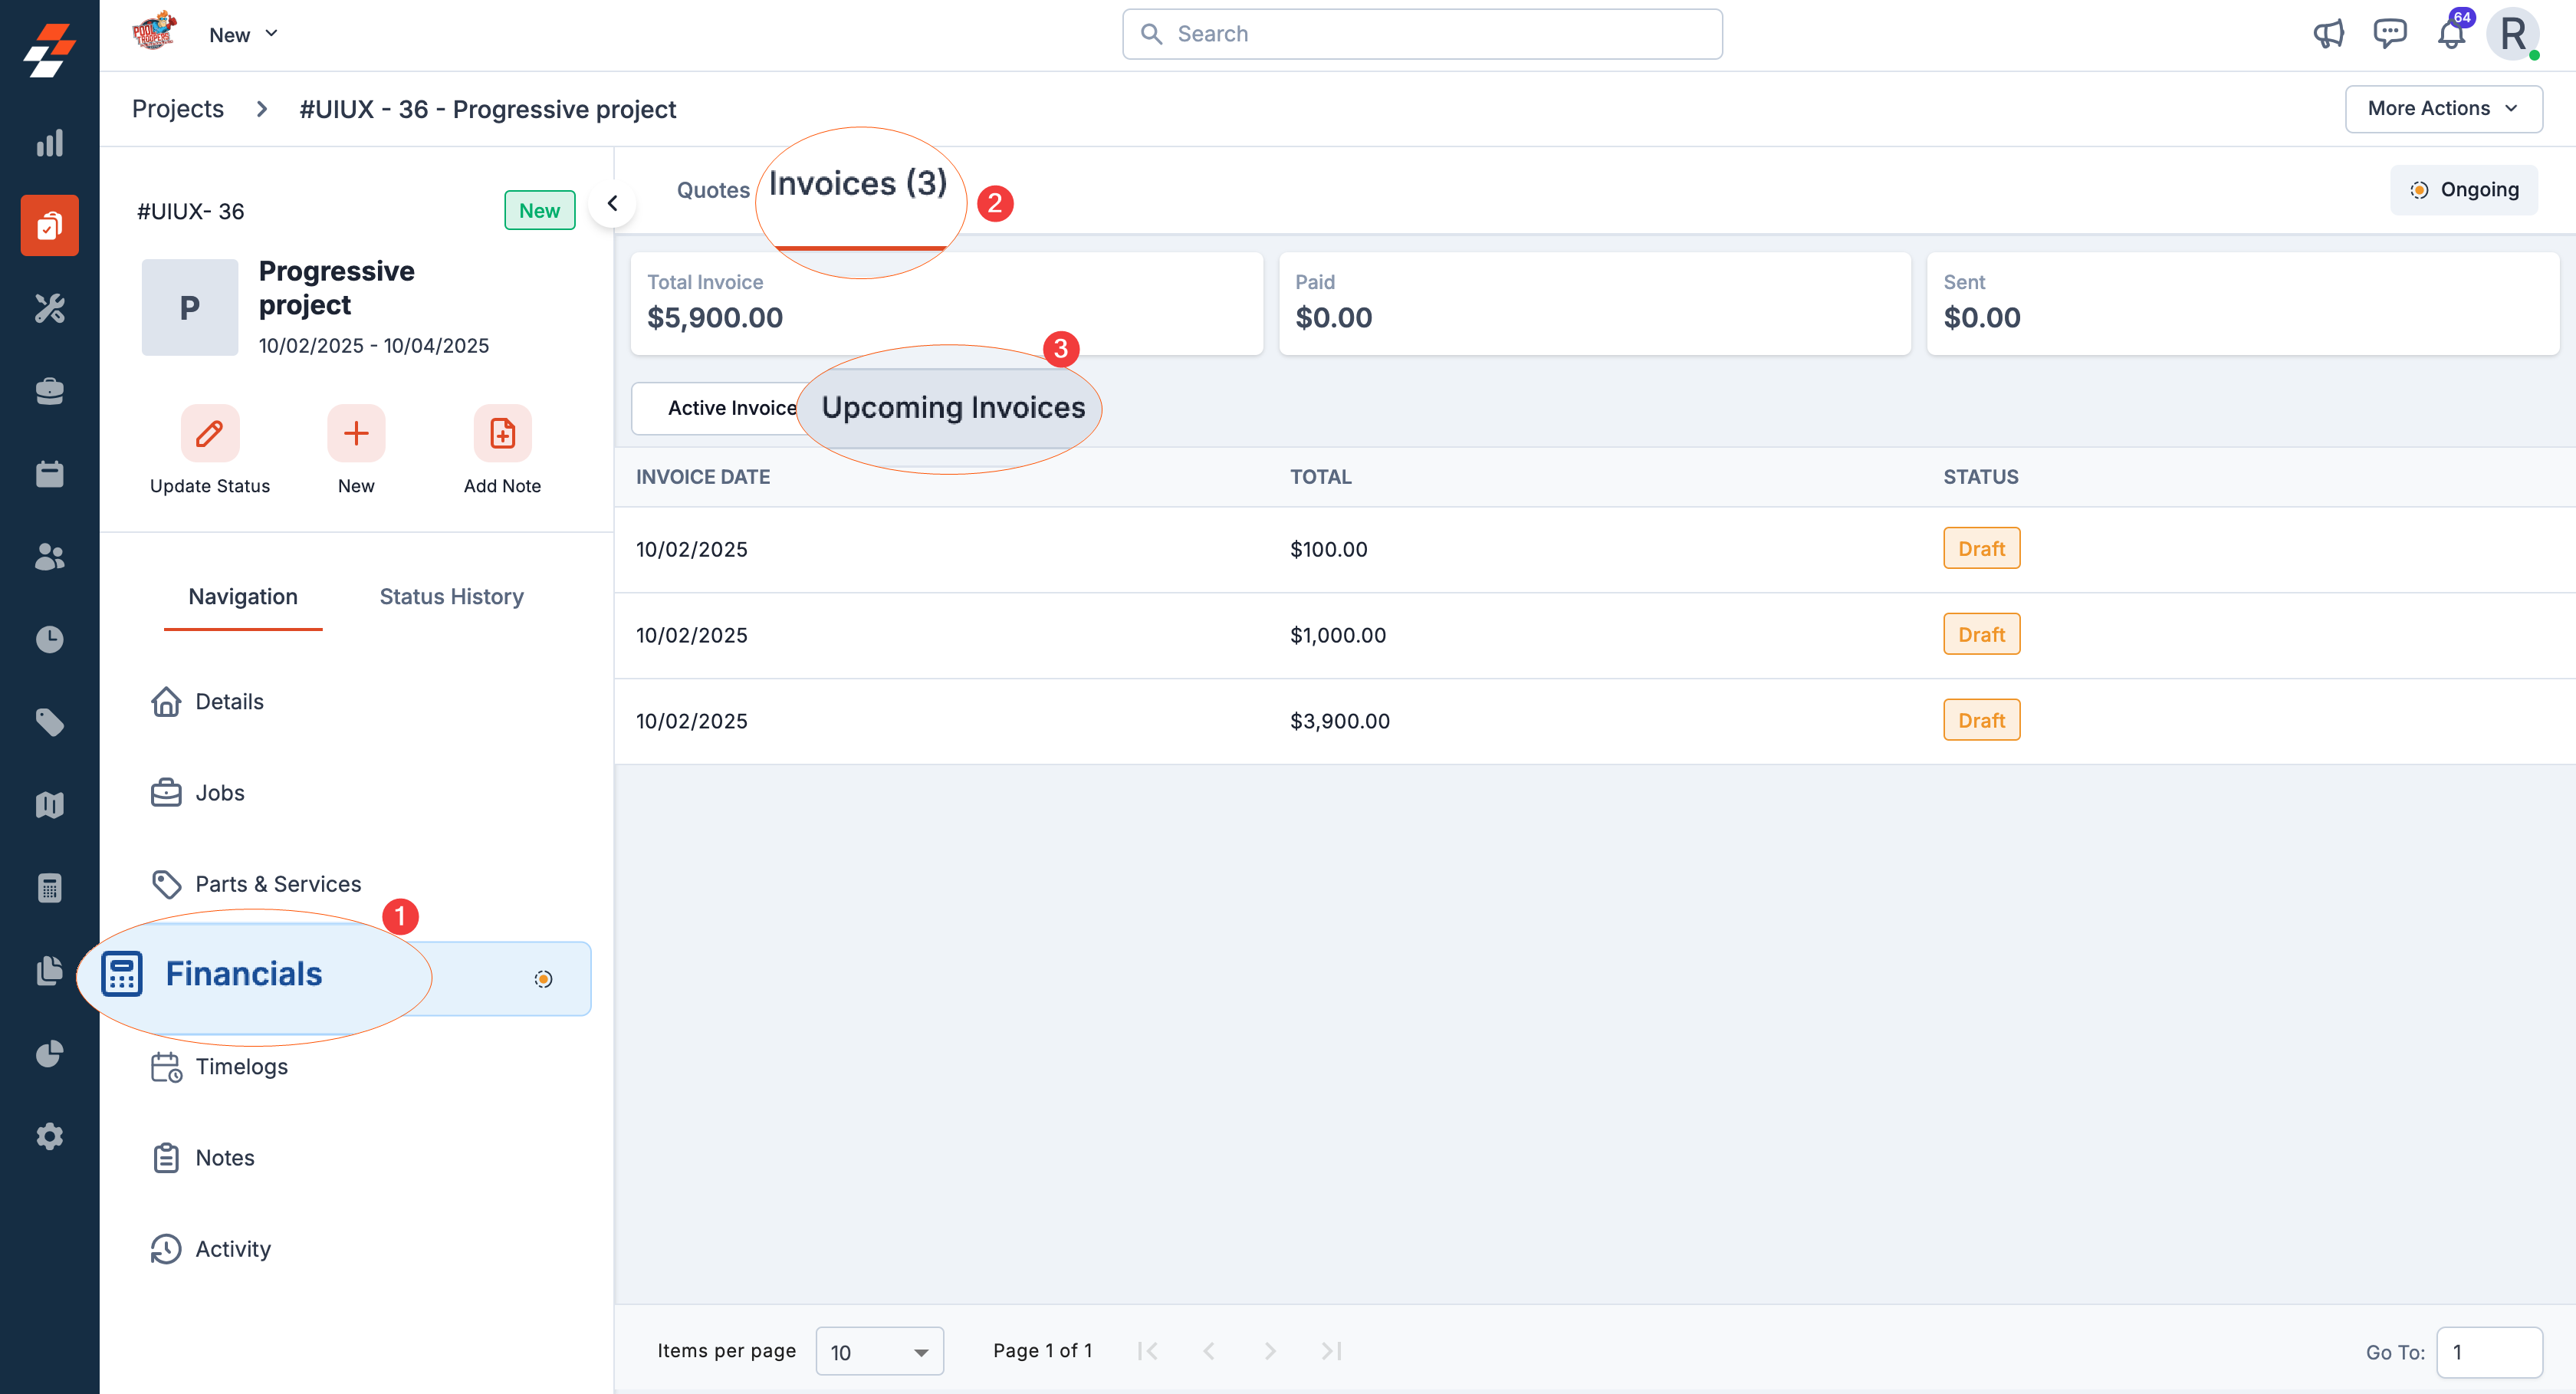
Note: You cannot click to view the details of the upcoming invoices. These are displayed only to indicate the dates of the upcoming invoices for the project, as they have not yet been generated. Once an invoice is generated on the estimated date, it will be saved as a draft.You can then review and make any necessary changes before sending it to the customer. The due date will be determined based on the payment term selected at the organization level.
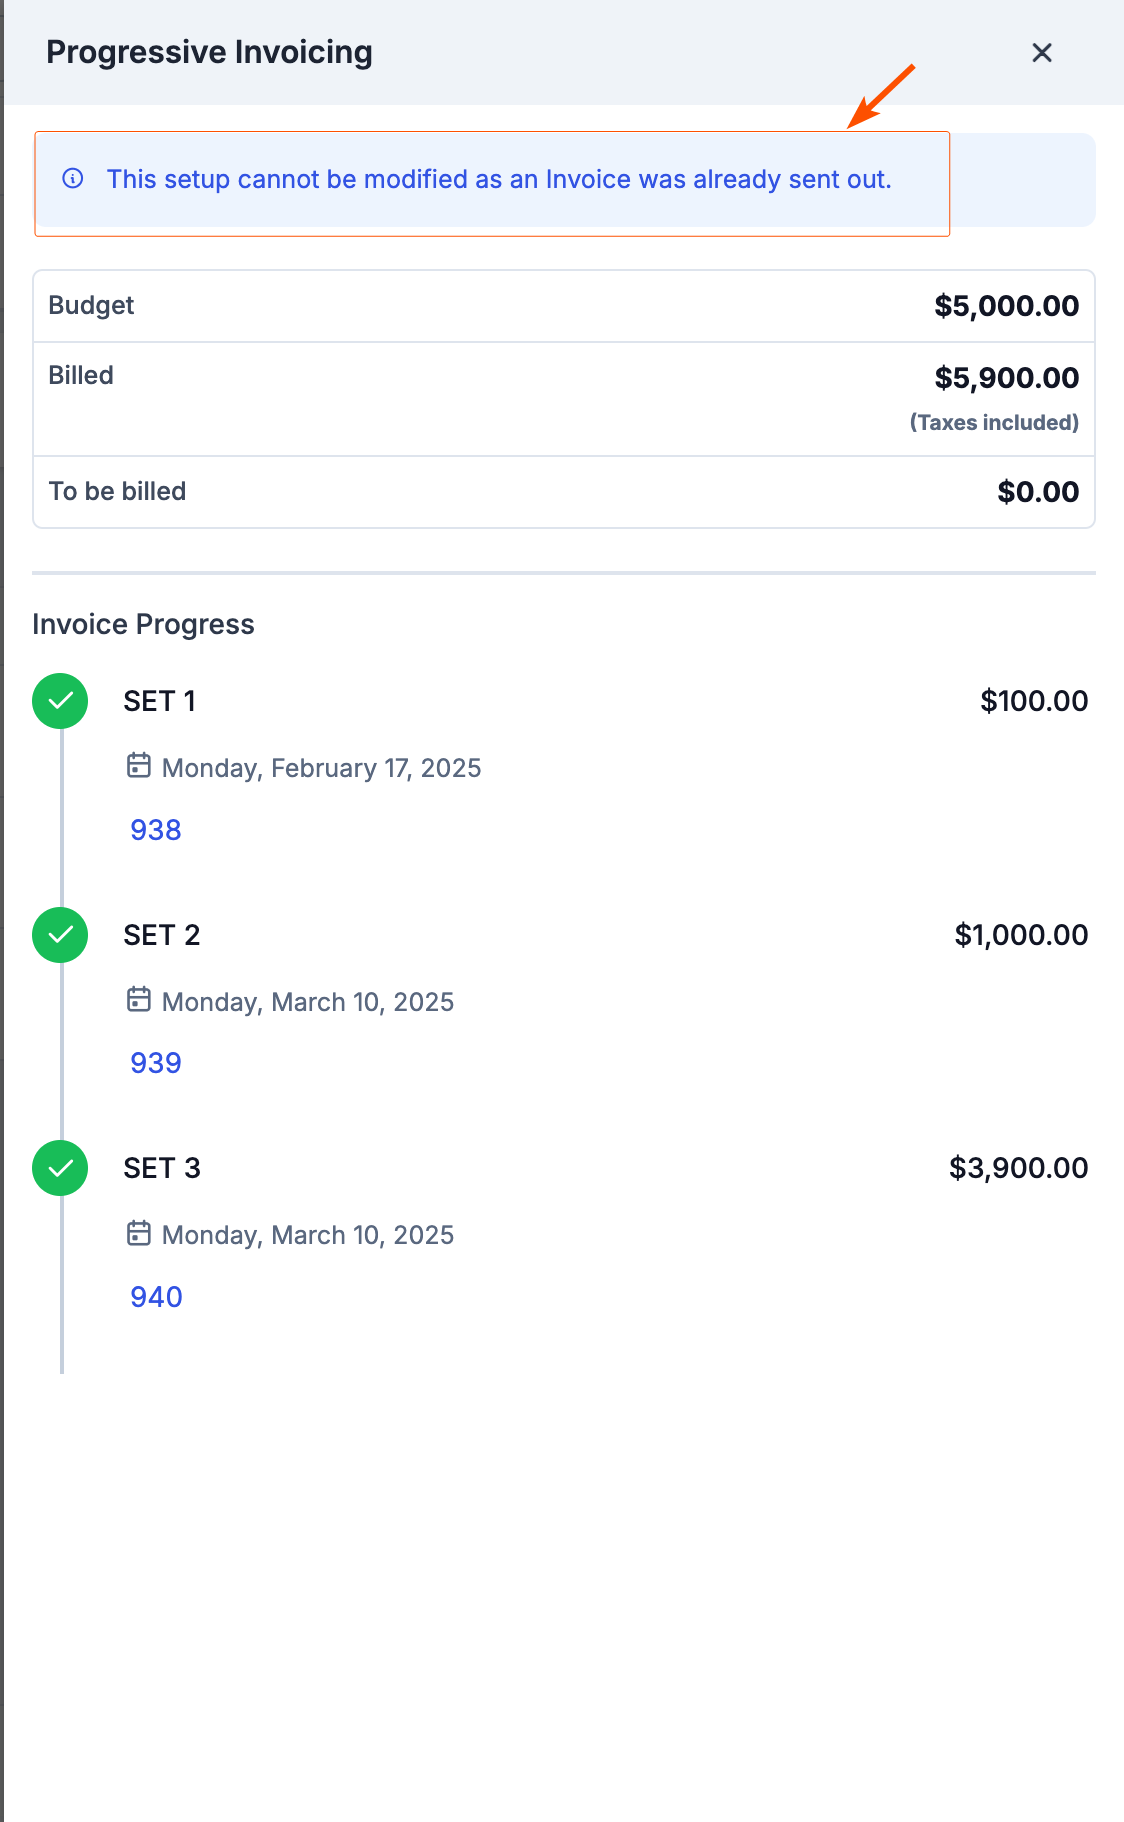
- To view the progress of the invoices generated through progressive invoicing, click “Progressive Invoicing” under “Configure” in the financial section.
- If the Fixed Amount option is selected, you’ll see details like the budget, billed amounts, and amounts to be billed.
- If the Calculate from Time and Material option is selected, invoice amounts are automatically calculated based on material costs from completed jobs, and actuals won’t be displayed.
Important: Once the first invoice from the progressive invoicing setup is sent and paid by the customer, the setup can no longer be modified.