Navigation: Accounting ->Invoices -> Invoices listing page -> Invoice Details
Accessing the Invoices listing page
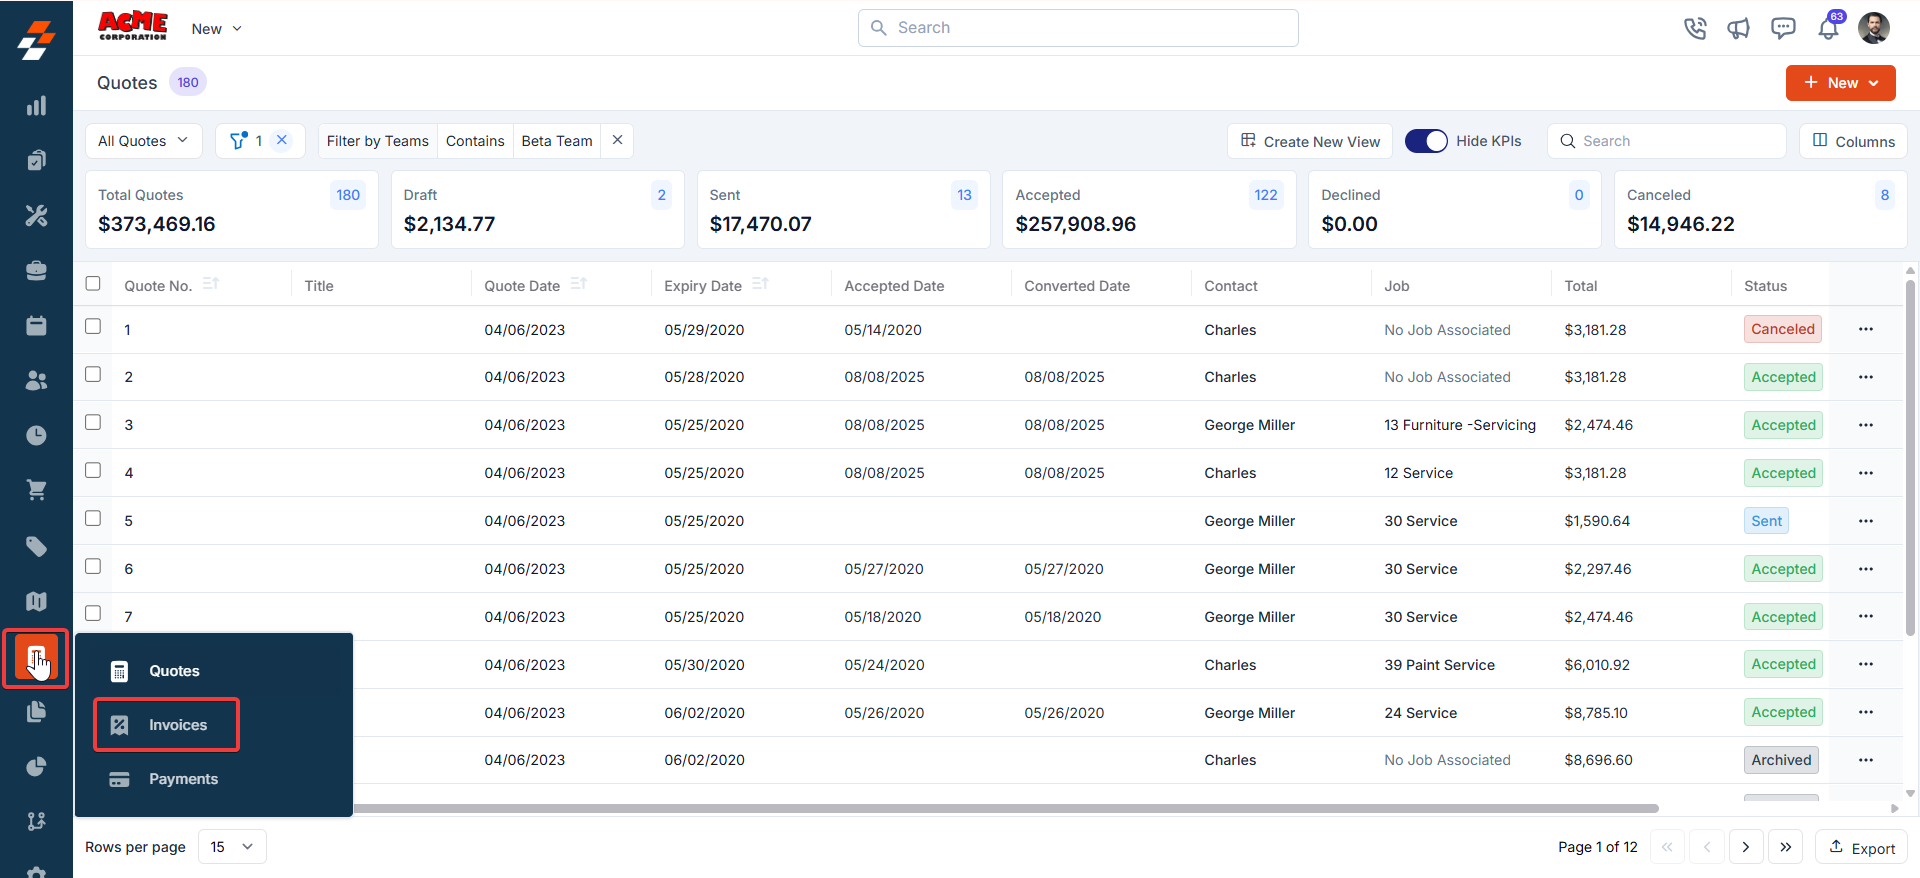
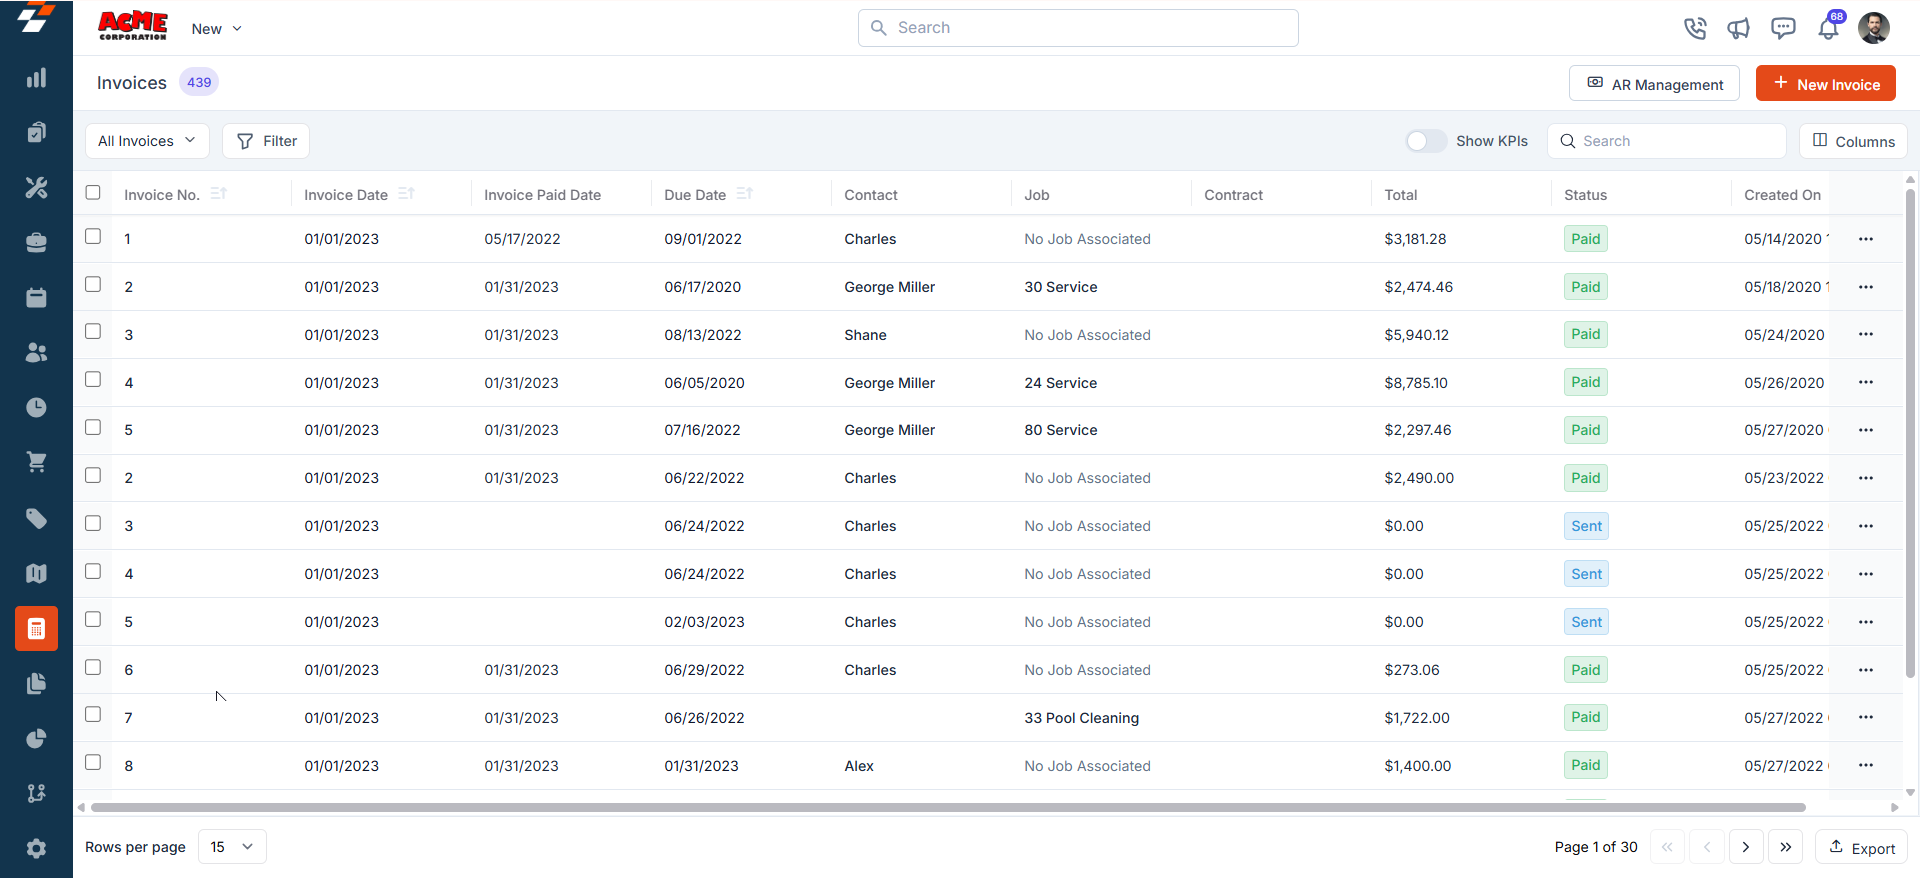
- Select the “Accounting” module from the left navigation menu and choose “Invoices.” You will land on the invoices listing page.
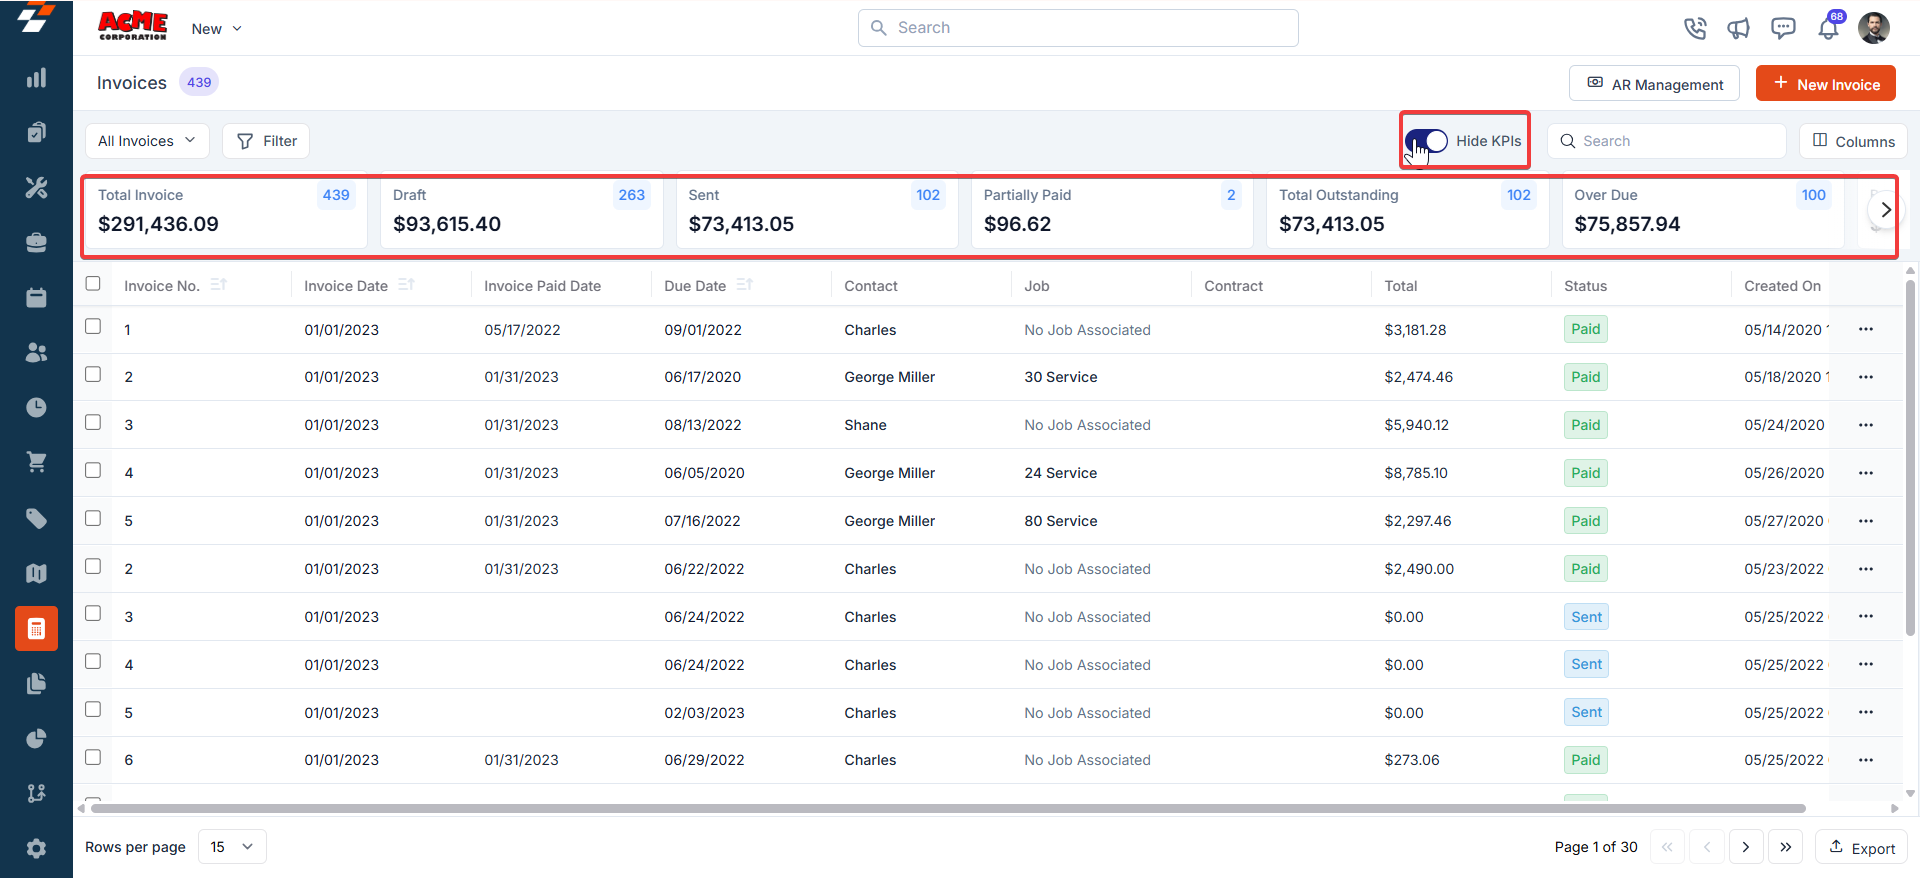
- On the Invoices Listing page, you can view an overview of existing invoices, including Invoice No., Invoice Date, Due Date, and more, based on the period selected at the top right corner of the page.

Exploring the listing page
The invoices listing page is designed to help you stay organized and quickly access the information you need. Summary Cards: On the top of the listing page, you’ll see summary cards displaying high-level information about your invoices. Each card highlights details such as:- Total number of invoices
- Sent, paid invoices, and their total value
- Overdue, Partially Paid, and Bad Debt.
Invoice Listing Views
Customize the Invoices listing by adding/removing or reordering columns, then Update View to overwrite or save it as a new view. Control visibility and sharing. Update View- Click Update View to modify the current view after changes.
- Use the dropdown beside Update View → Save as new view.
- Enter the View Name (mandatory), choose Share with (User/Team) and add users, toggle Visibility to all users, and click Create.
- Click Reset View to restore the current view to the default.
- Edit: Add/remove/reorder columns; save as new or overwrite existing views.
- View-only: Apply views but can’t edit; can Save as new view to copy without altering the original.
- Manage view: Rename, adjust Visibility (Only Me/User/Team or global toggle), Duplicate, or Delete (creator only; reverts to default/another saved view).
Not all columns in the invoice listing support sorting. Columns such as Organization can be added to your view, but do not support click-to-sort. To narrow invoices by organization, use the Filter option and select Organization as your filter criterion. You can pin this filter for quick access across sessions. For more details, see Pinned filters.
Pinned filters
Zuper’s Invoices module lets you use pinned filters to streamline your filter experience. Pinned filters keep your most-used criteria readily accessible for quick application. Pin up to 3 filters in any module.Navigation: Accounting ->Invoices -> Filters -> Pinned Filters
- Select the “Accounting” module from the left navigation menu and choose “Invoices.”
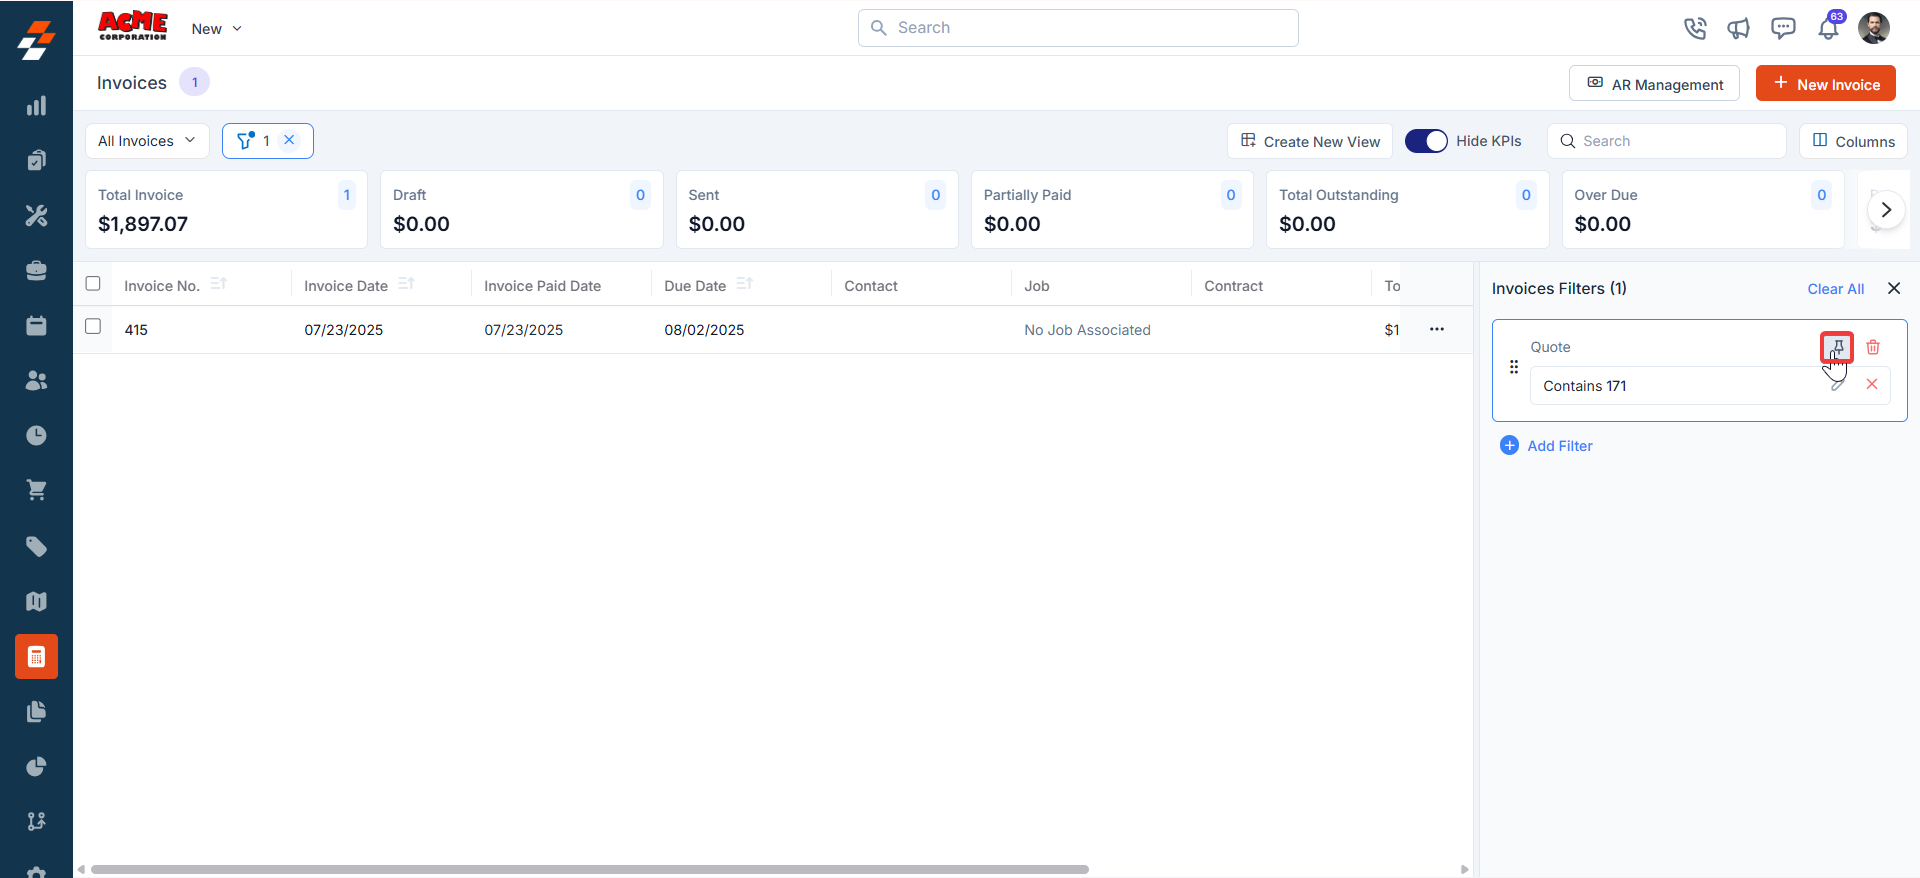
- Pin Filters for Quick Access
- Once your filters are set, click the Pin Filters button in the dialog box to save them as pinned.
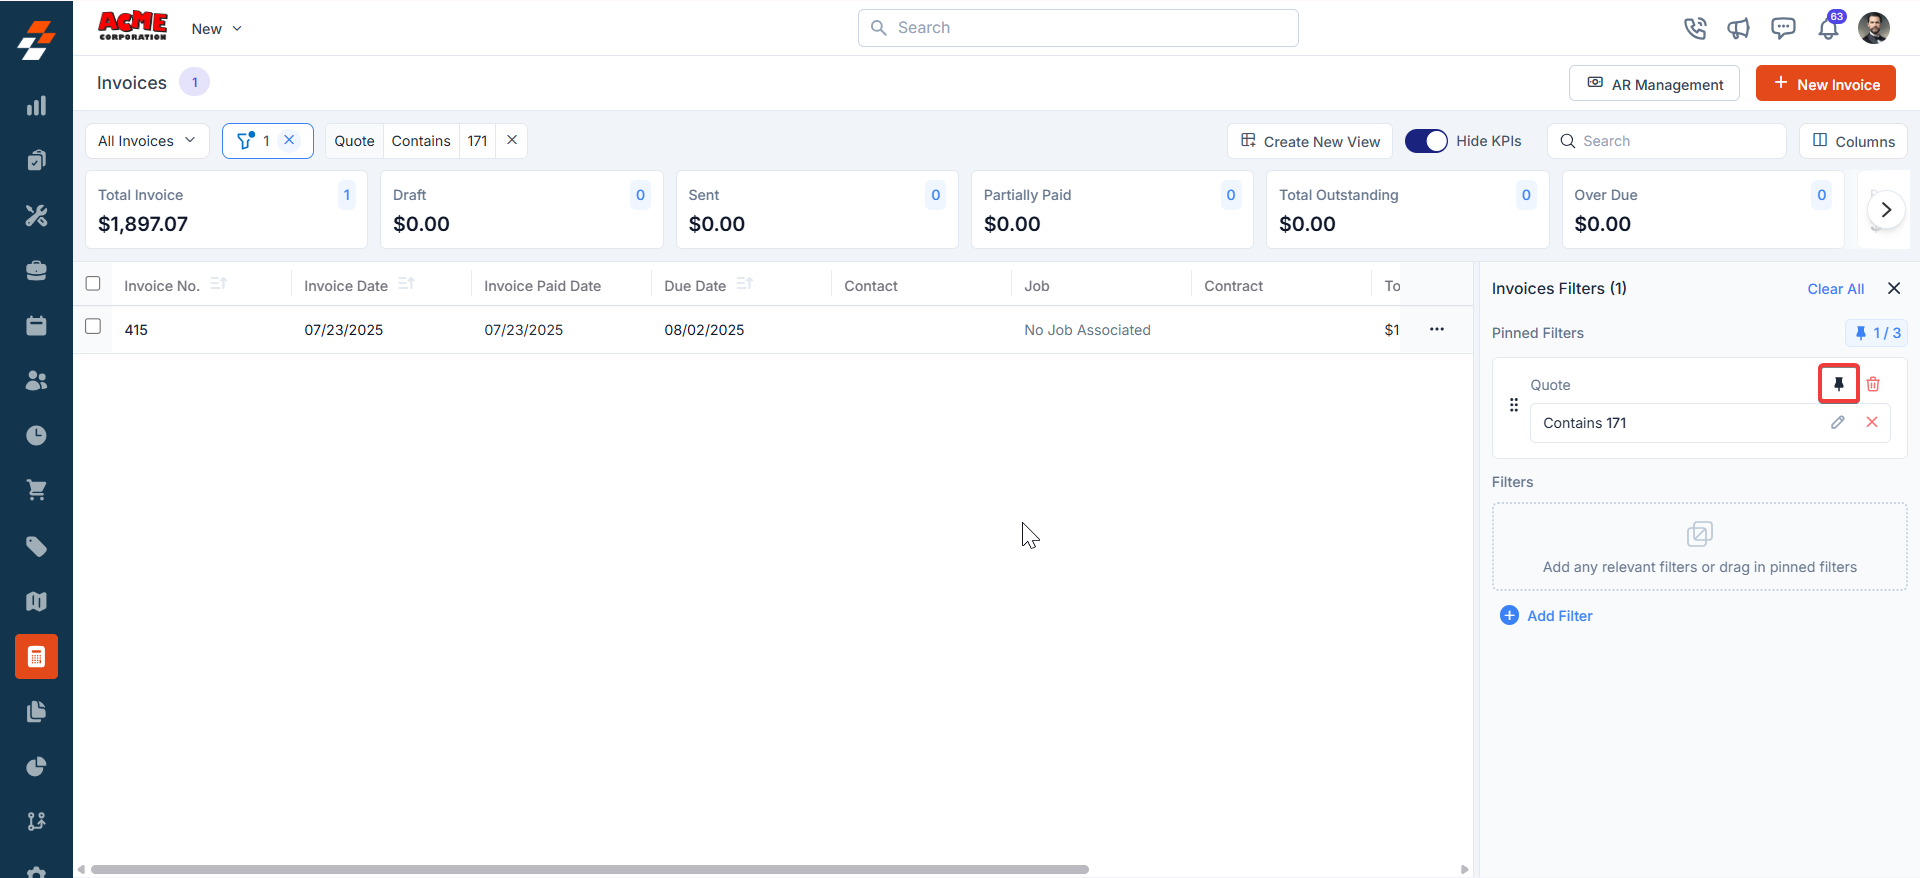
- Pinned filters appear in the dialog box’s “Pinned Filters” section, allowing you to apply them with one click in future sessions.
- To Unpin the filter:
- To unpin, select a pinned filter and click Remove.
- To apply pinned or default filters, open the dialog box and select them.
- Use Clear All to remove active filters.
- After filtering, click an Invoice Number or Invoice Title to view and manage details.
- Item/service changes within an invoice apply only to that specific invoice and will not be added to the master list.
Managing invoice details
Once an invoice is created or accessed from the listing page, the Invoice Details Page becomes your central hub for managing its lifecycle. The page follows a two-column layout—the left panel displays primary details, while the right panel provides contextual insights and quick actions for efficient invoice management.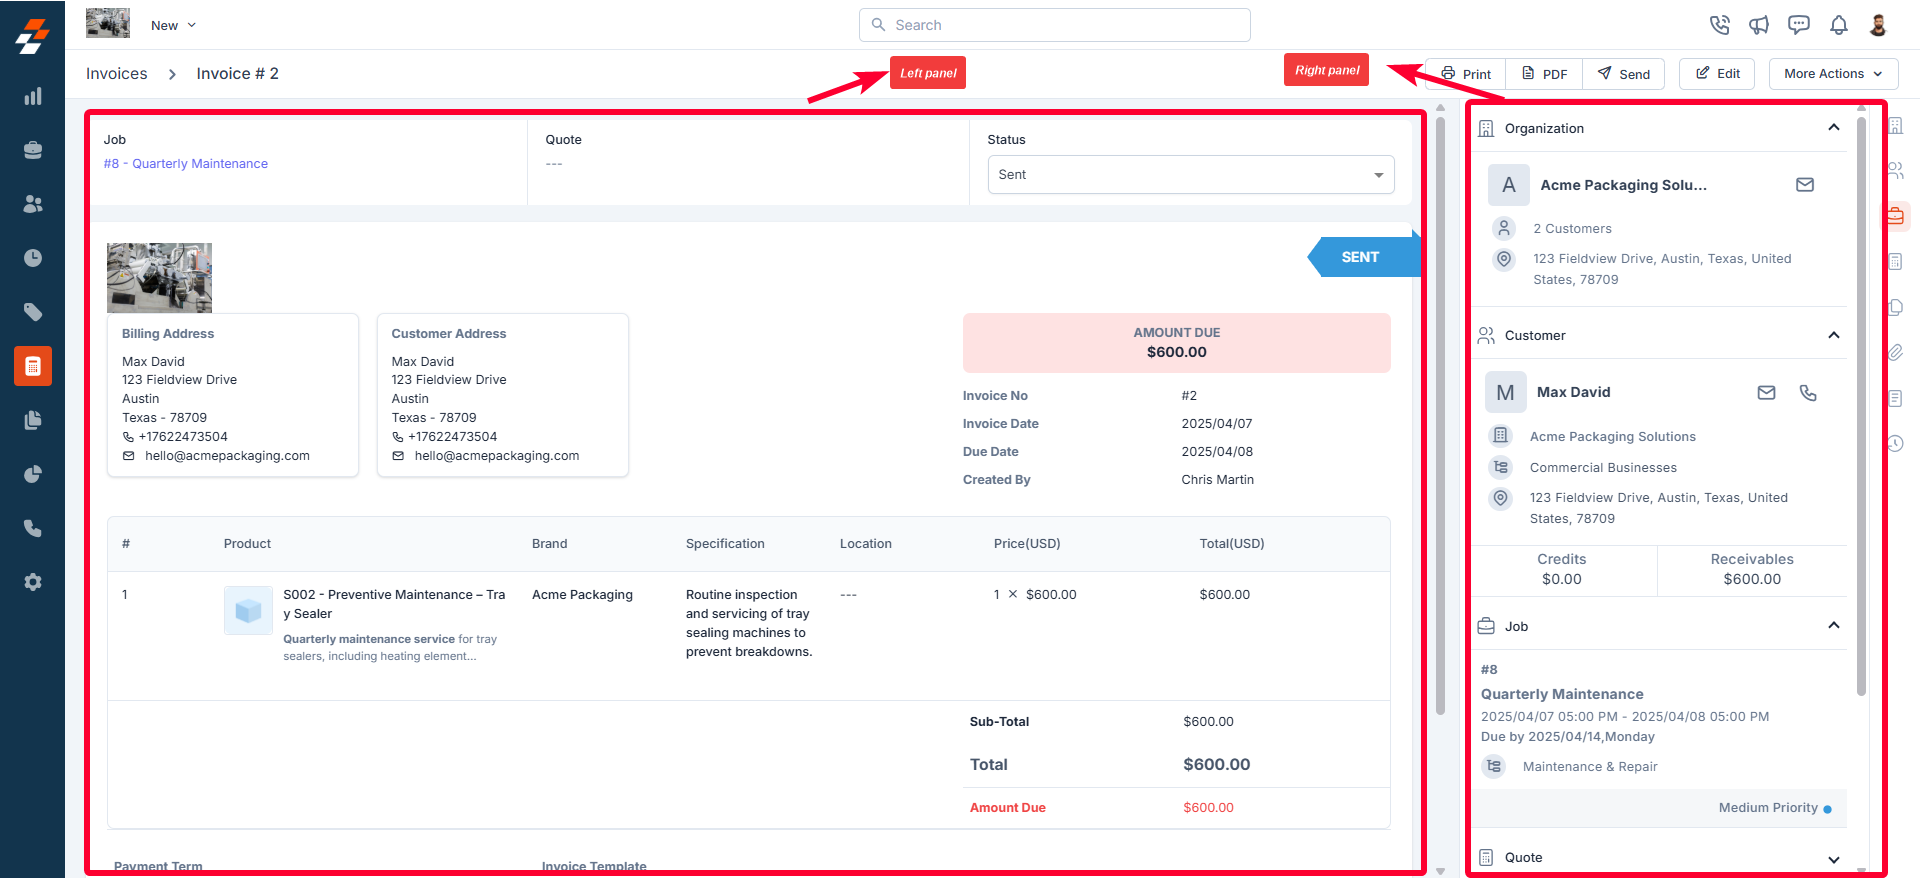
Left Panel
The left panel is the primary section where details are displayed. It includes the following elements- Customer information: You can view the billing details of the customer, including address and contact person’s details.
- Associated Records: View the Job and Quote linked to the invoice.
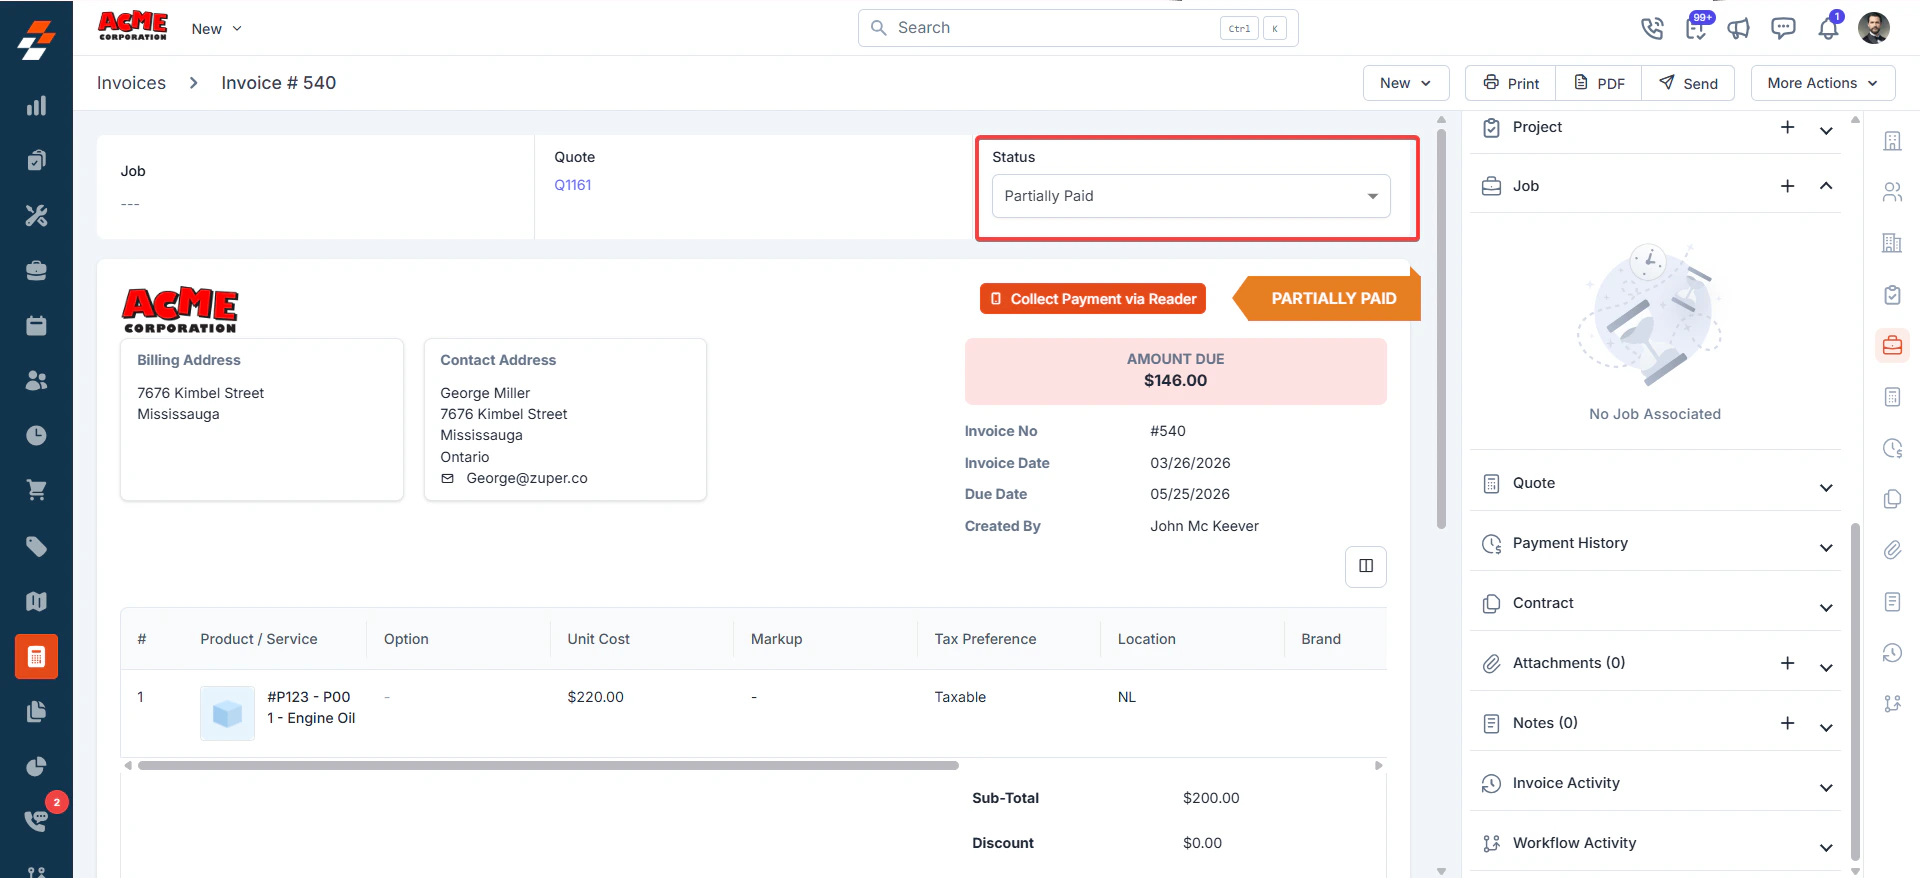
- Invoice Status: Check and update the invoice status as needed.
- Addresses: Access the Billing Address and Customer Address.
- Invoice Details: View key invoice information such as Total Invoice Amount, Invoice No., Invoice Date, and Due Date.
- View Parts Consumed: Review the parts used for job completion, along with any applicable taxes, discounts, and payment terms.
Right Panel
The Right Panel provides contextual information and quick actions related to the invoices. It is divided into collapsible sections for better organization: Organization and Contact- Organization: Displays the company name and location associated with the invoice.
- Contact: Displays the main contact person’s details, including their address, contact information, and credits & receivables.
- Payer information — The name of the person or organization that made the payment.
- Date and time — The exact date and time when the payment was recorded.
- Payment method — The mode of payment used, for example, credit card, bank transfer, or cash.
- Payment status — The current status of the payment: Success, Pending, Failed, or Voided.
Note: The invoice status is not updated immediately when a refund is initiated. The Partially Paid status will appear on the invoice only after the refund has been successfully transmitted to the customer’s bank account in real time.
More Actions
Managing invoices doesn’t stop at viewing details. You can take various actions to keep things moving. Things you can do are: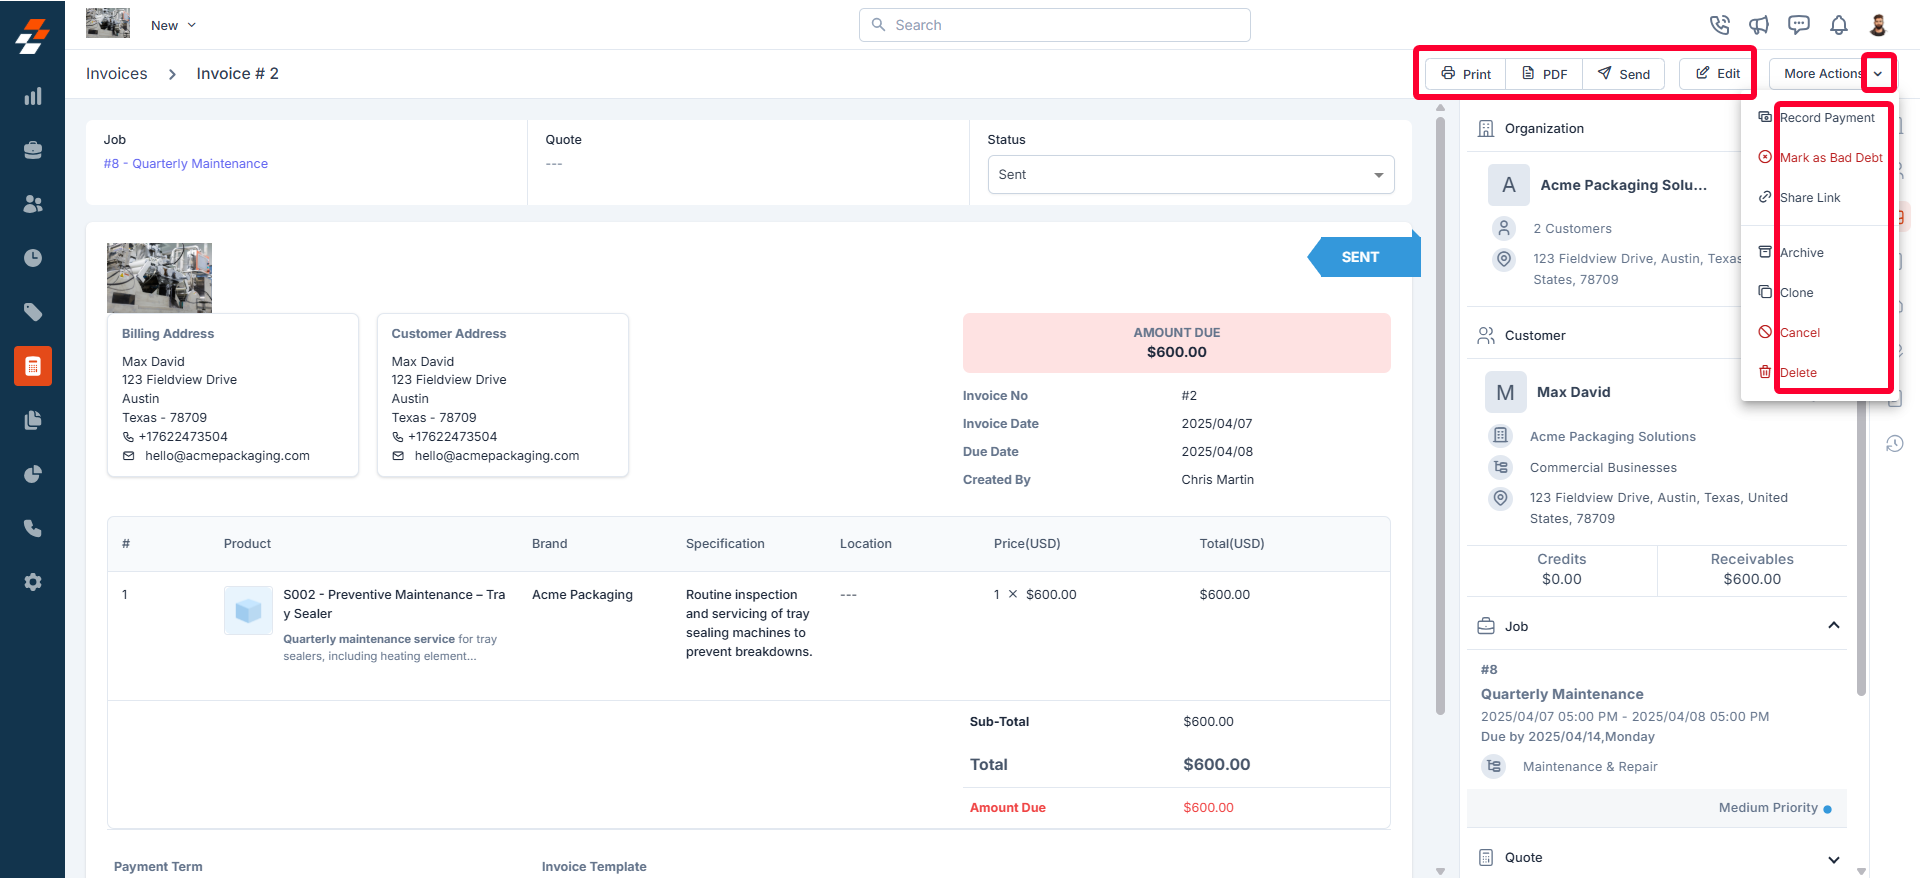
New Job Creation
New Job Creation
To create a new job directly from the invoice to address additional service requests or follow-ups, use the “New” button at the top right of the details page.For step-by-step instructions on how to create a new job, see the Creating a new job article.
Note: If a job is already associated with the invoice, the “New” button will not be visible. Instead, you can view the associated job under the Job section.
Print Invoice
Print Invoice
Use the “Print” button at the top right of the page to generate a physical copy of the invoice for record-keeping or customer reference.
Download Invoice
Download Invoice
To download or share the invoice as a PDF document, use the “PDF” button.
Email Invoice
Email Invoice
To email the invoice directly to the customer, use the “Send” button at the top right of the details page.
Email attachment size limit When sending a quote by email, attachments are included directly in the email up to a combined size of 20MB. If the total attachment size exceeds 20MB, Zuper automatically converts attachments to inline download links in the email body rather than sending them as attachments. Recipients can still access the files by clicking the links, but the files will not appear as standard email attachments.Workaround: If you need attachments to be delivered as standard email attachments, ensure the total size of all attached files is under 20MB before sending. Consider compressing large files or splitting them across multiple sends if needed.
Edit Invoice Details
Edit Invoice Details
To modify invoice details if any updates are required, use the “Edit” button at the top right of the page.
Record Payments
Record Payments
To log received payments and update the invoice status, click the “More Actions” button at the top right corner of the page and select “Record Payment.” For more details, see the Recording Payments article.
Mark as Bad Debt
Mark as Bad Debt
If an invoice remains unpaid after being sent to the customer, you can mark it as bad debt for accounting purposes. To do this, click the “More Actions” button at the top right corner of the page and select the “Mark as Bad Debt” option.
Share Invoice/Payment Link
Share Invoice/Payment Link
Archive/Cancel/ Delete
Archive/Cancel/ Delete
You can also archive an invoice to retain its record while moving it to archives. If the invoice is no longer valid, you can cancel it. If removal is necessary, you can permanently delete the invoice using the desired options under the “More Actions” button.