Navigation: Accounting -> Invoices -> Invoice Listing Page -> Invoice Details -> More Actions-> Record Payment
To Record a Payment
- Navigate to the Invoice Details page of the invoice where you want to manually log the payment received.
- Click the “More Actions” button at the top right corner.
- Select “Record Payment” from the dropdown menu.

- A dialog box will appear where you need to enter the payment details.
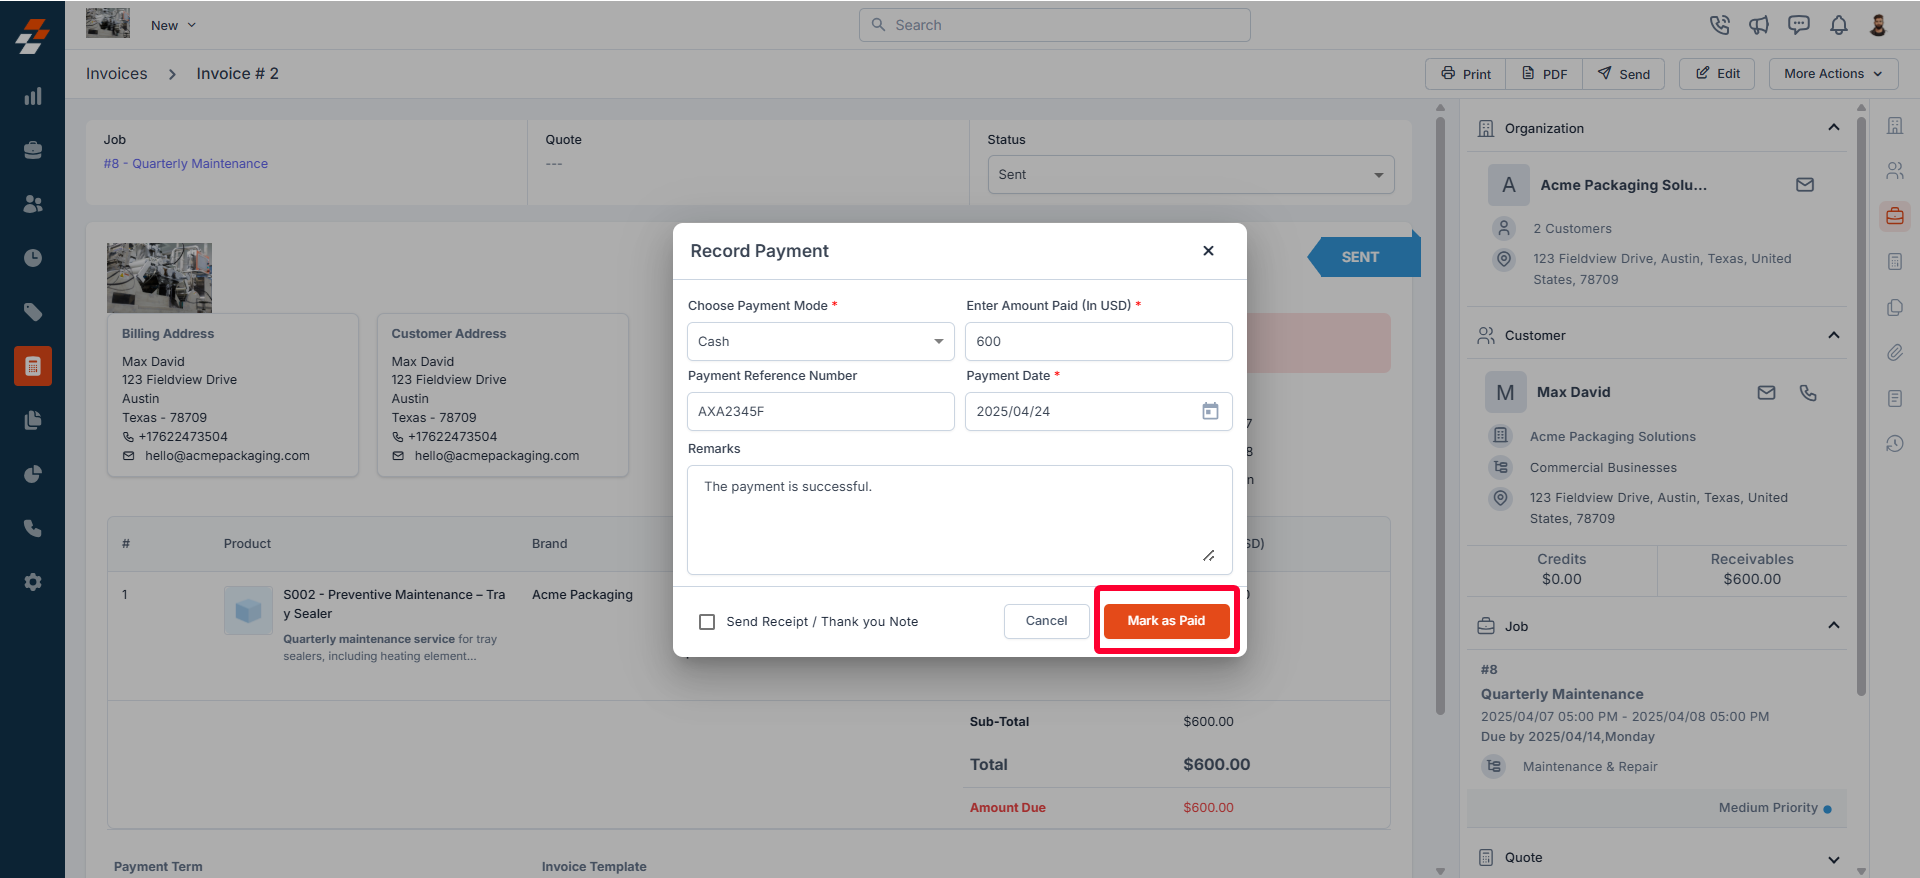
- Choose Payment Mode (Mandatory): Select the method used for the transaction. This includes Card, Bank Transfer, Check, Zuper Pay, Offline Cash, and Other third-party payment apps.
- Enter Amount Paid (In USD) (Mandatory): Specify the exact amount received from the customer.
- Payment Reference Number: Enter a reference number associated with the payment, such as a transaction ID or check number.
- Payment Date (Mandatory): Choose the date of the payment using the date picker.
- Remarks: Add any additional notes related to the payment, if necessary.
- Send Receipt / Thank You Note: Check this box if you want to send a confirmation receipt or thank you message to the customer.
- After entering the necessary details, click the “Mark as Paid” button to successfully record the payment. Once the payment is recorded, the invoice status will update accordingly, reflecting the recorded transaction and ensuring the customer’s commitment is accurately tracked.
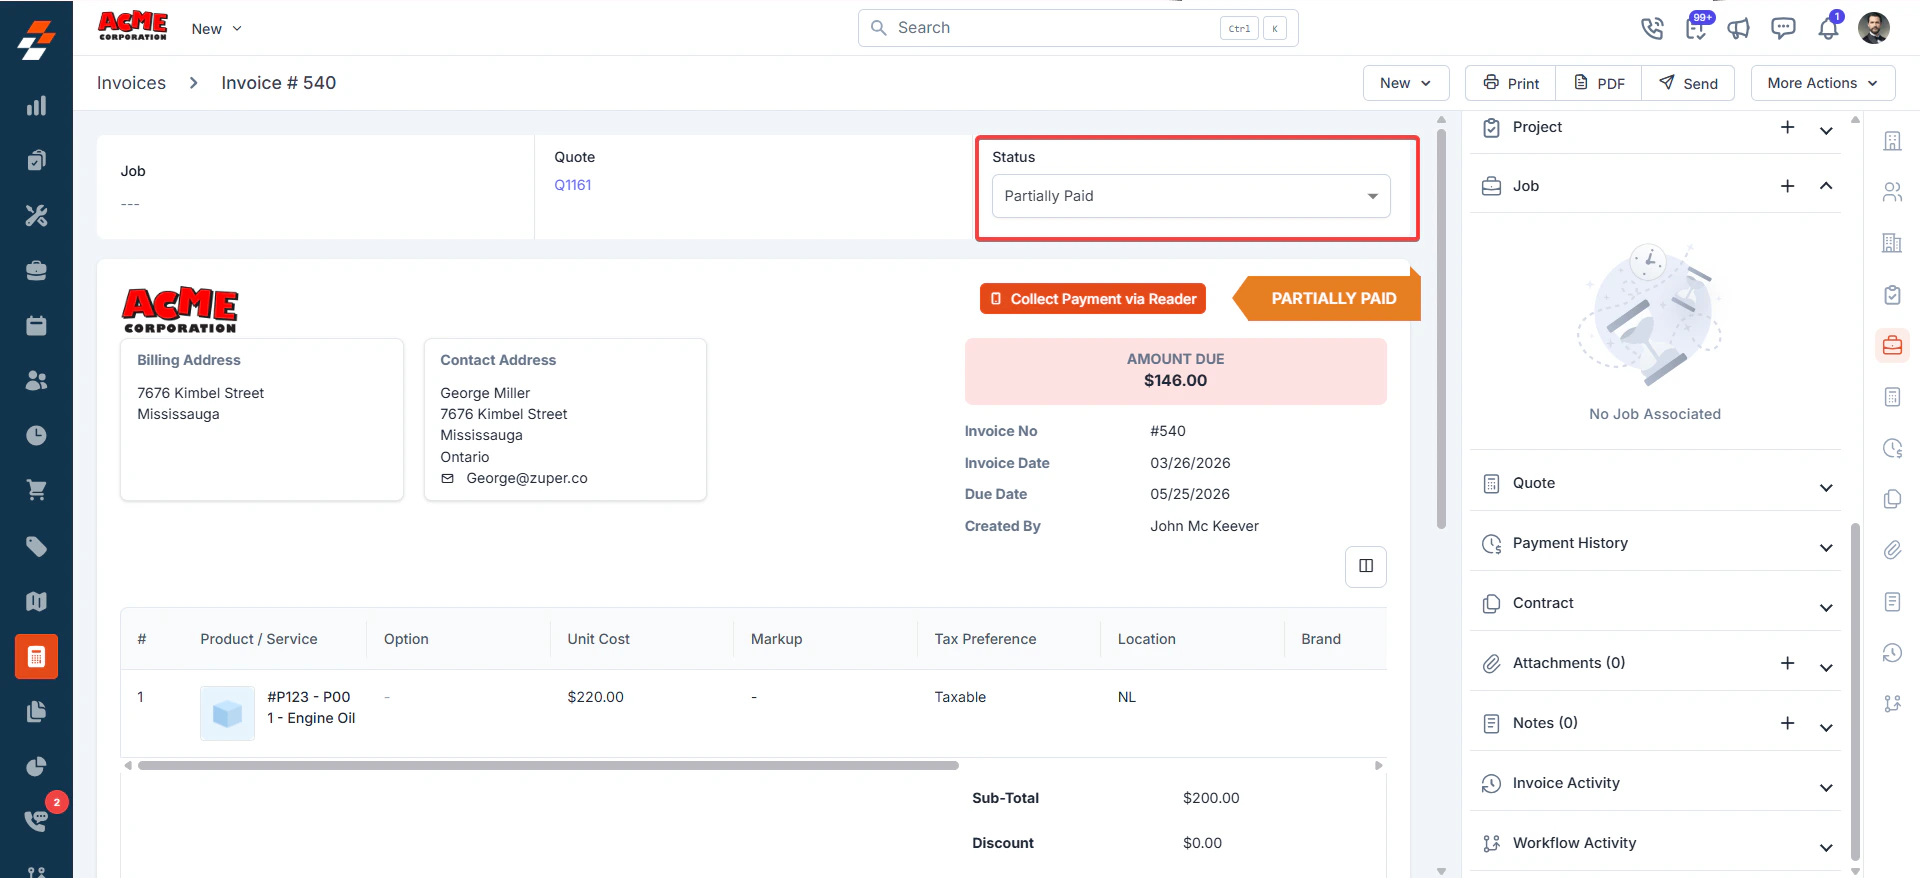
Note: The invoice status is not updated immediately when a refund is initiated. The Partially Paid status will appear on the invoice only after the refund has been successfully transmitted to the customer’s bank account in real time.
Voiding a payment
When a payment has been recorded by mistake or entered with incorrect details, you can void it. Voiding cancels the payment record on that invoice and restores the outstanding balance. The invoice status updates automatically to reflect the change.Note: Voiding applies only to payments recorded manually in Zuper — for example, cash, check, or bank transfer. For payments processed through Zuper Pay, you need to issue a refund instead. See Issuing refunds for steps.Navigation: Accounting → Invoices → Invoice Details → Payment History
- Select the Accounting module from the left navigation menu and choose Invoices.
- Select the invoice that contains the payment you want to void.
- On the Invoice Details page, go to the Payment History section in the right panel.
- Locate the payment you want to void.
- Select the context menu (three-dot icon) next to the payment.
- Select Void.
- A confirmation dialog appears. Select Confirm to void the payment.
Deleting a payment mode
You can delete a payment mode from Zuper when it is no longer in use. Deleting a payment mode removes it from the list of available options across all invoices and quotes. This action cannot be undone.Note: Deleting a payment mode from Settings is different from voiding a payment on an invoice. Voiding cancels a specific payment transaction. Deleting a payment mode removes the payment method itself from your Zuper configuration.Navigation: Settings → Modules → Quotes & Invoices → Payment Modes & Terms
- Select Settings from the left navigation menu.
- Under Modules, select Quotes & Invoices.
- Select Payment Modes & Terms.
- Under Payment Mode, locate the payment mode you want to delete.
- Select the context menu (three-dot icon) next to the payment mode.
- Select Delete.
- A confirmation dialog appears. Select Delete to permanently remove the payment mode.