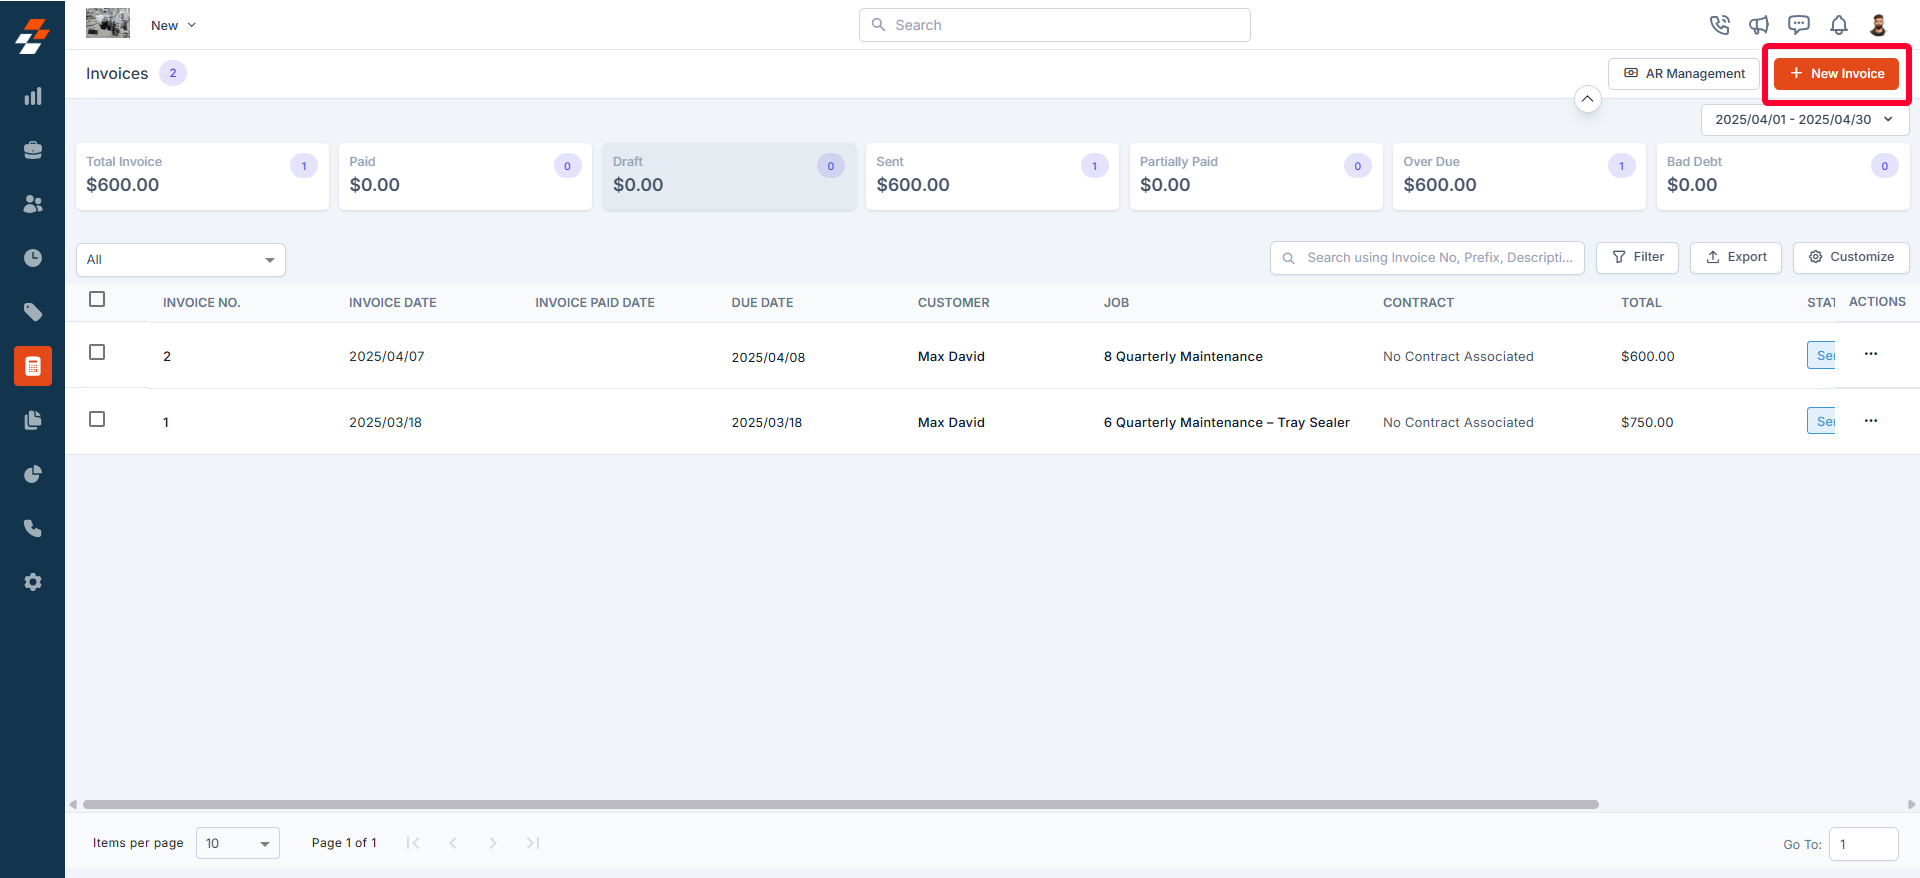
Navigation: Accounting ->Invoices —> + New Invoice
- Select the “Accounting” module from the left navigation menu and choose “Invoices.”

- On the Invoices listing page, you can view an overview of existing invoices, including the invoice number, invoice date, due date, status, and more.
- Click the “+ New Invoice” button at the top right corner of the page. A new Invoice creation page will appear.
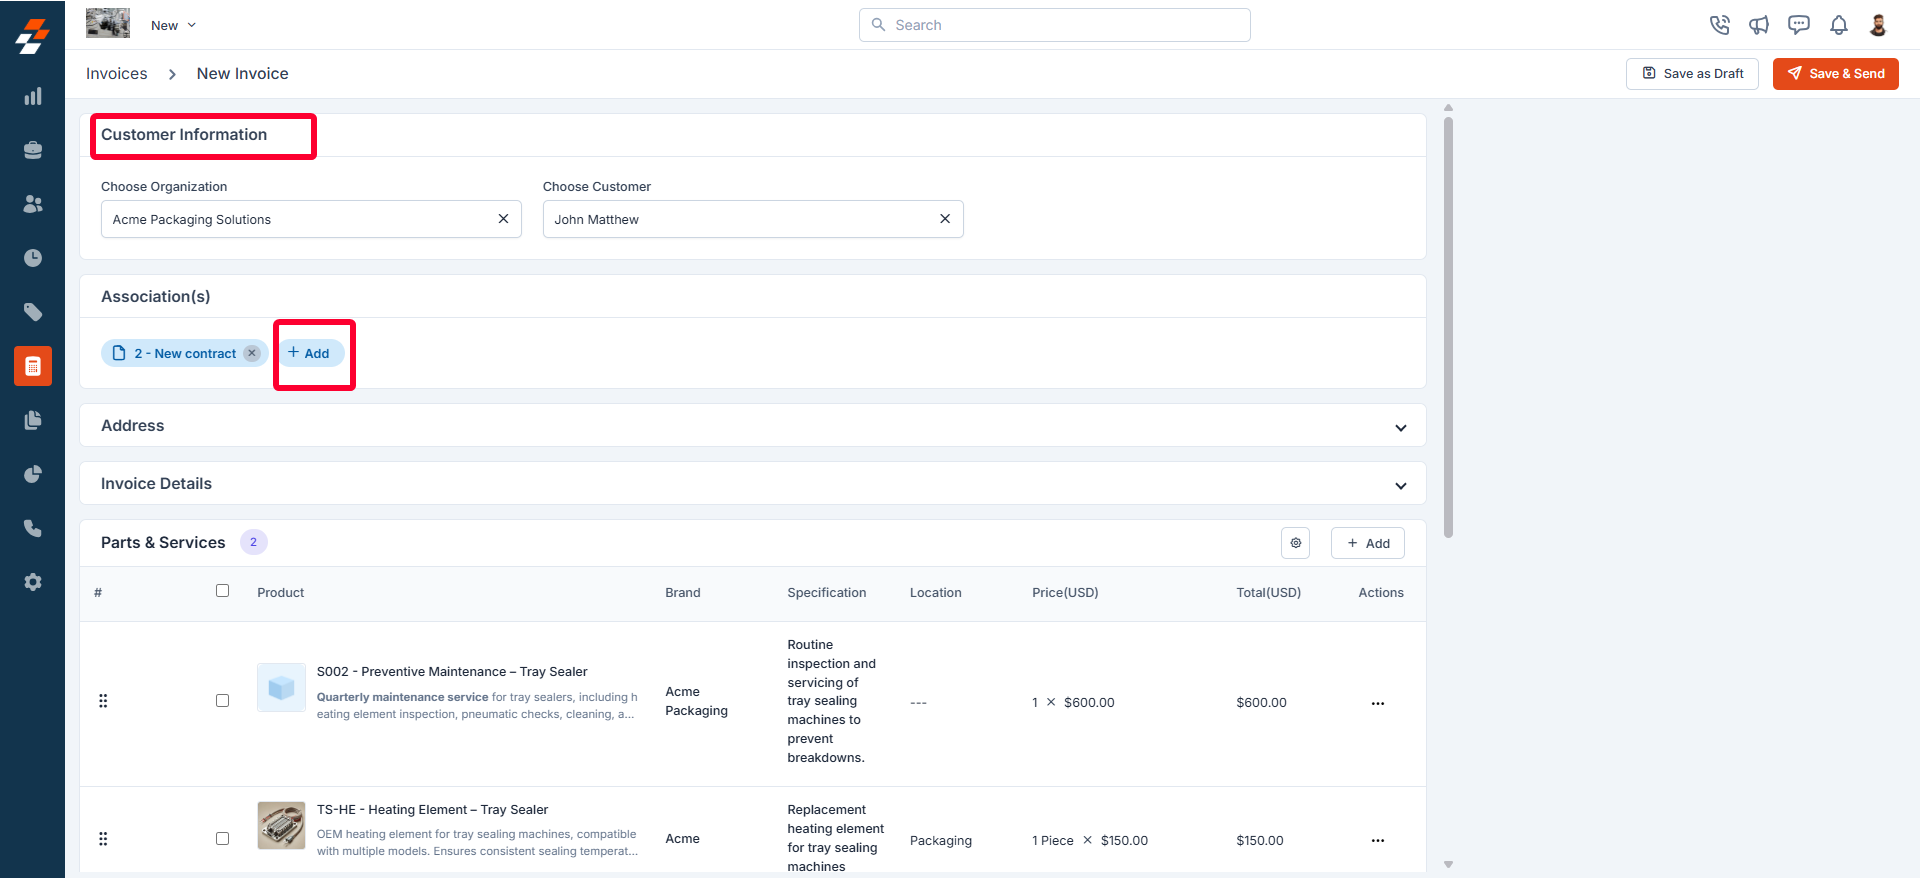
- Select “Customer,” “Organization,” or “Property” to associate with the invoice.
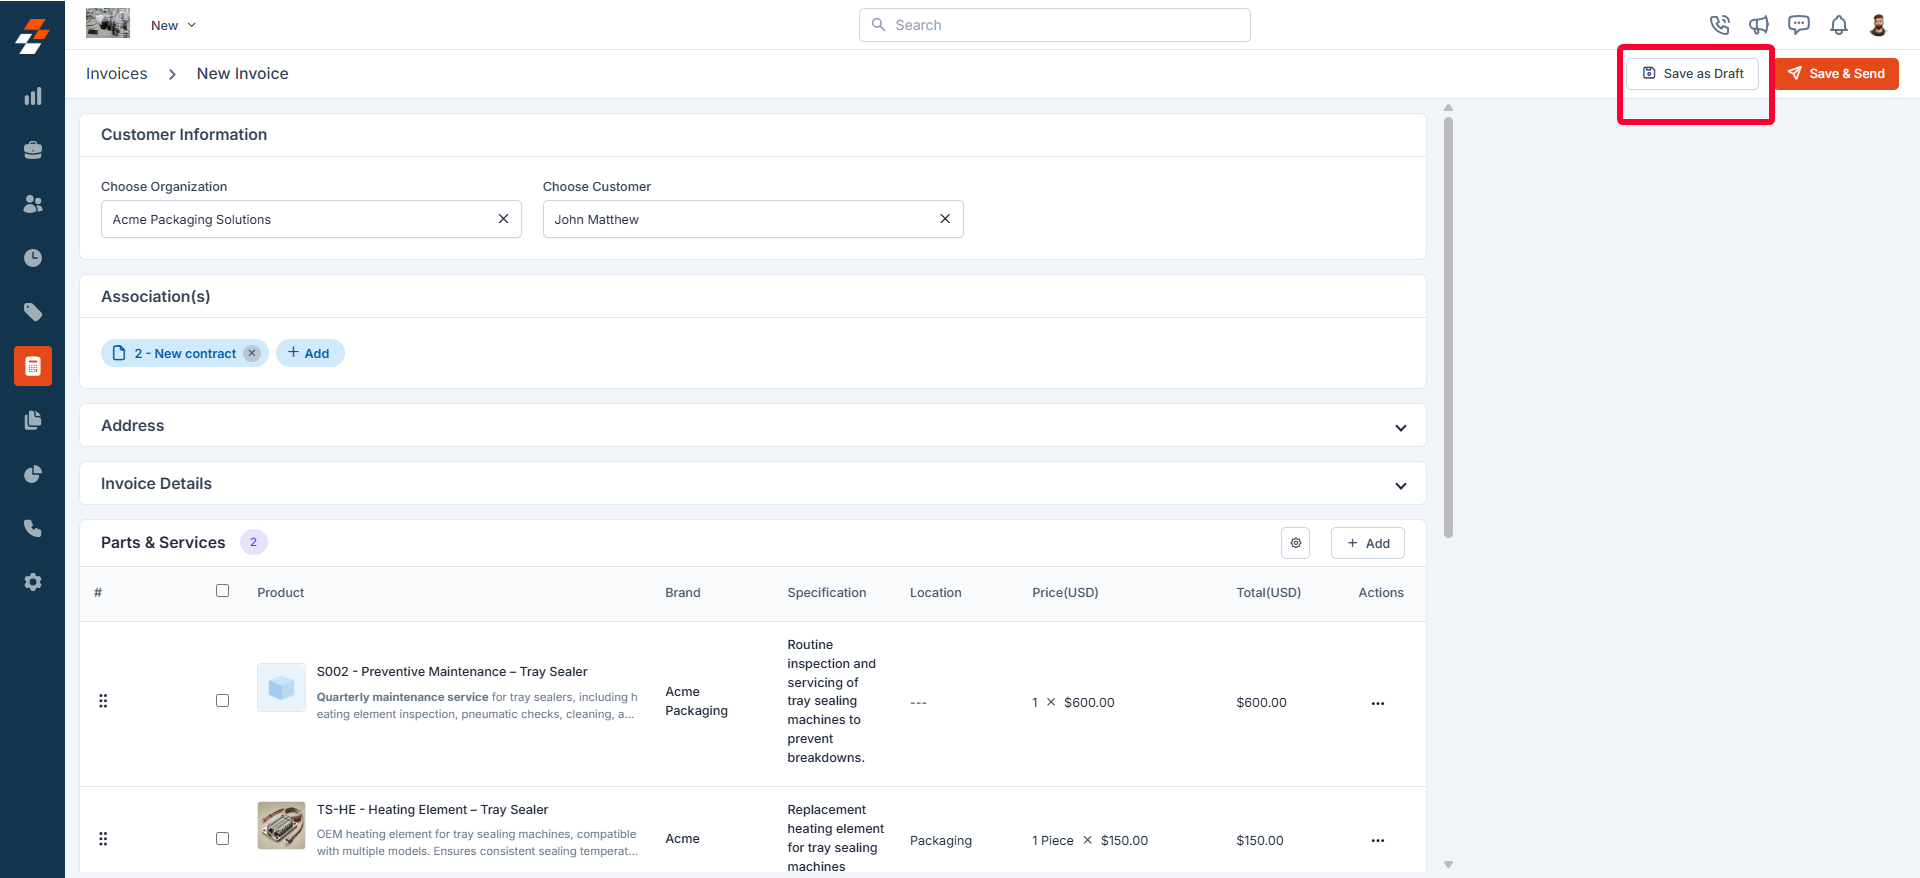
- Click ”+ Add” to associate the various modules, such as Job, Property, Quotes, and Project, with the invoice.
- A side panel will appear. Select the required module and click the “Proceed” button.
- The billing and service contact details are automatically populated based on the selected customer or organization.
- Fill in the mandatory fields in the Invoice Details section:
- Invoice Date
- Payment Term
- Due Date
- Invoice Template
- Click ”+ Add” in the Parts & Services section and select an option to add parts, products, or services to the quotation, such as Line Item, Bundle, Section, Item Group, or Custom Line Item.
Note: When you add a non-billable item directly to an invoice, the cost of that item will be included in the total. This ensures that non-billable items are tracked when manually added to the invoice. However, if you include a non-billable item in a transaction (such as a job or contract) and later convert that document into an invoice, the non-billable item will not appear on the invoice. This is because non-billable items are excluded from the billable total.
Updating markup for Parts, Products, and Services
Updating markup for Parts, Products, and Services
After adding parts, products, and services, you can edit or update the Markup value and its discount by following these steps:
- Locate the line item in the list of added parts, products, or services.
-
Click the icon next to the item you want to update.
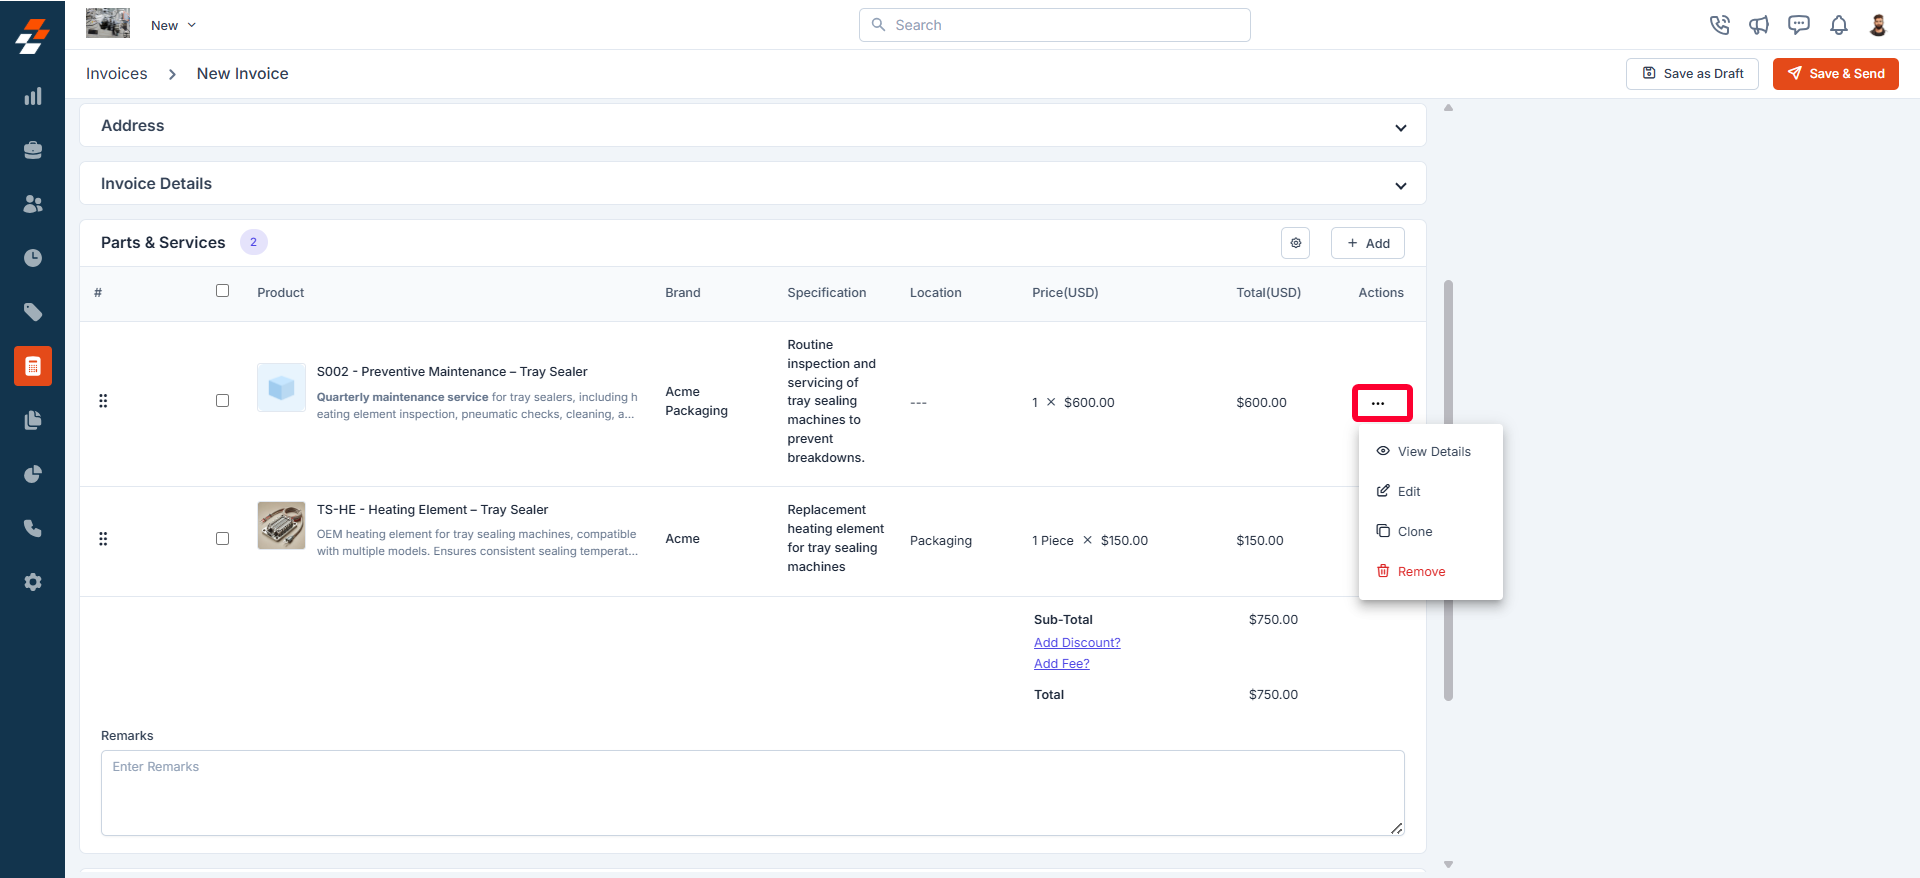
- Choose the Edit option. An Edit Line Item pop-up will open.
-
Adjust the markup type to Flat (+),Percentage (%), or Multiplier (x) based on your requirement and enter the desired value for the selected markup condition.
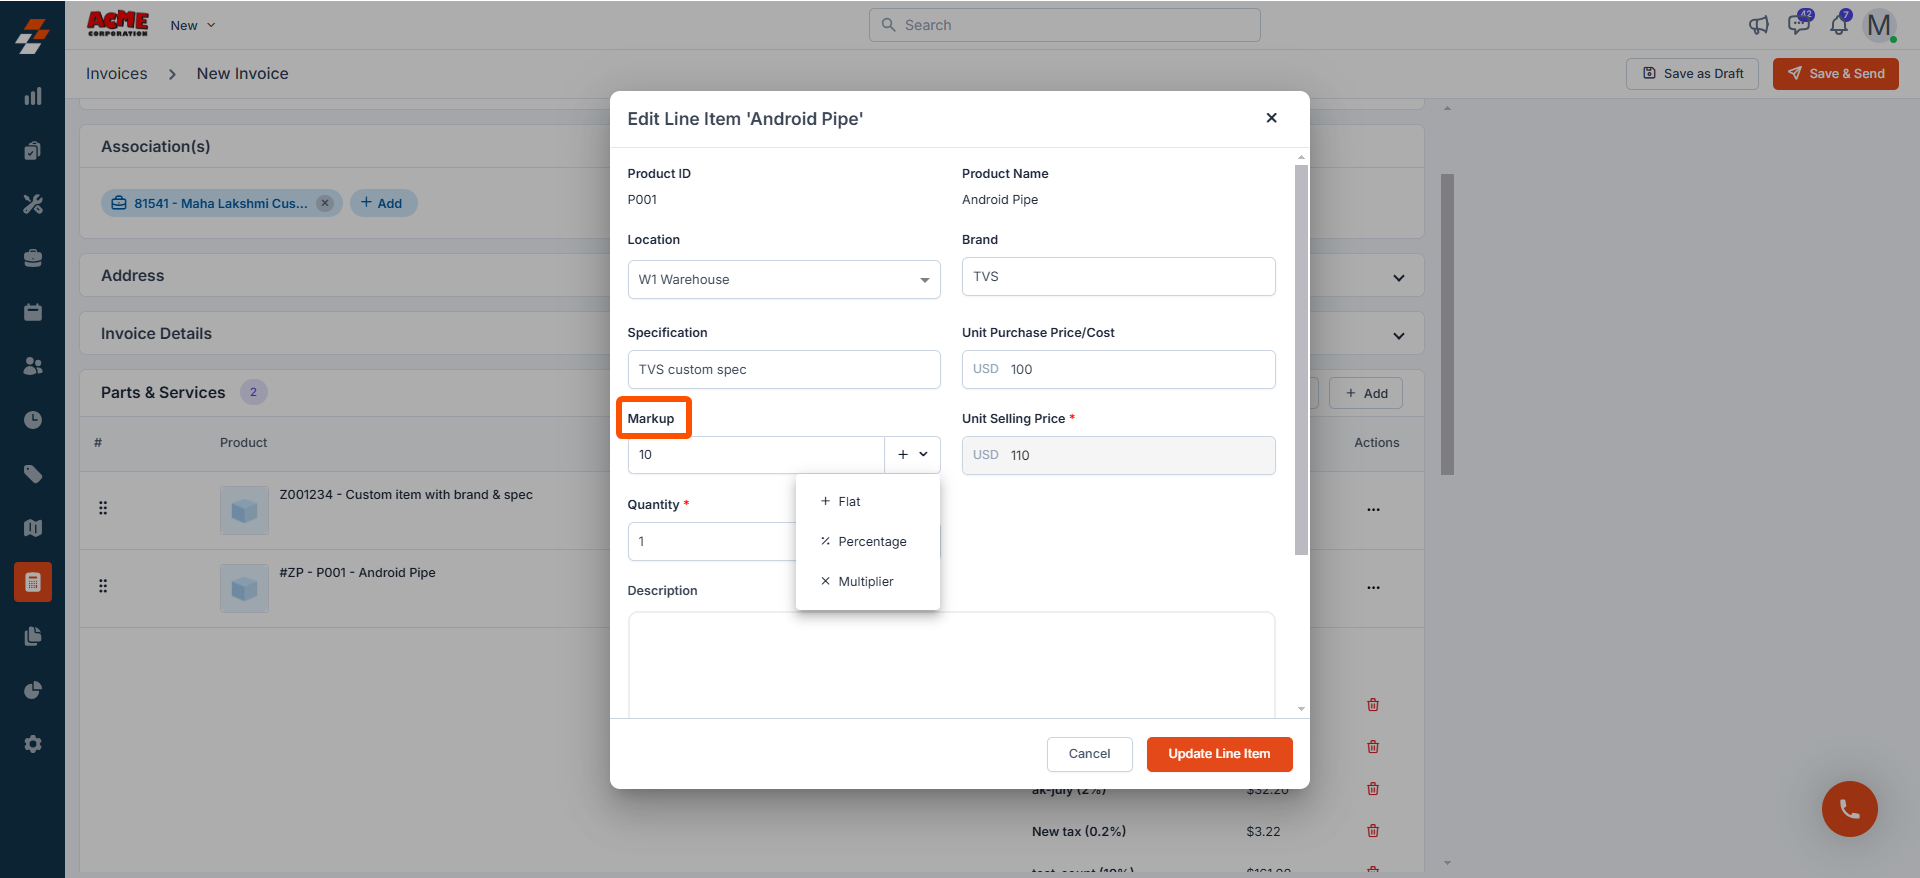
- Click Update Line Item to apply the changes.
- If Track Serial Number is enabled and Mandate Serial No is turned on in Settings, you must need to enter a serial number before proceeding.
- After adding parts and services to the invoice, transactional discounts and global taxes will be applied.
Note:
- If a line item includes a custom tax, transactional discounts, and global taxes cannot be applied.
- Transactional-level discounts apply only when all parts and services in the quote are either fully taxable or fully non-taxable.
- Enter the details for any custom fields configured in the settings.
- Click ”+ Add Attachments” to upload any invoice-related files.
- Click “Save as Draft” in the top-right corner of the page to temporarily save the invoice. In the confirmation pop-up, click “Save as Draft” again to confirm.
- The invoice is created successfully.