Overview
Zuper’s Proposal Layouts enables you to create professional, fully customizable proposal PDFs tailored to your customers. You can start from scratch or use templates and combine editable text pages with uploaded PDFs to build multi-page proposals. This feature enables teams to present quotes, inspection data, and terms in a professional format, facilitating faster approvals.Note: Proposal Layouts is currently in Private Beta. To request access, please email our support team at support@zuper.co.
Prerequisites
- Ensure you have admin access to the Zuper workspace.
- Prepare any supporting files, such as company logos, cover images, or PDF sections (e.g., terms PDFs limited to 5MB each).
- Familiarize yourself with Zuper’s Quotes & Invoices module.
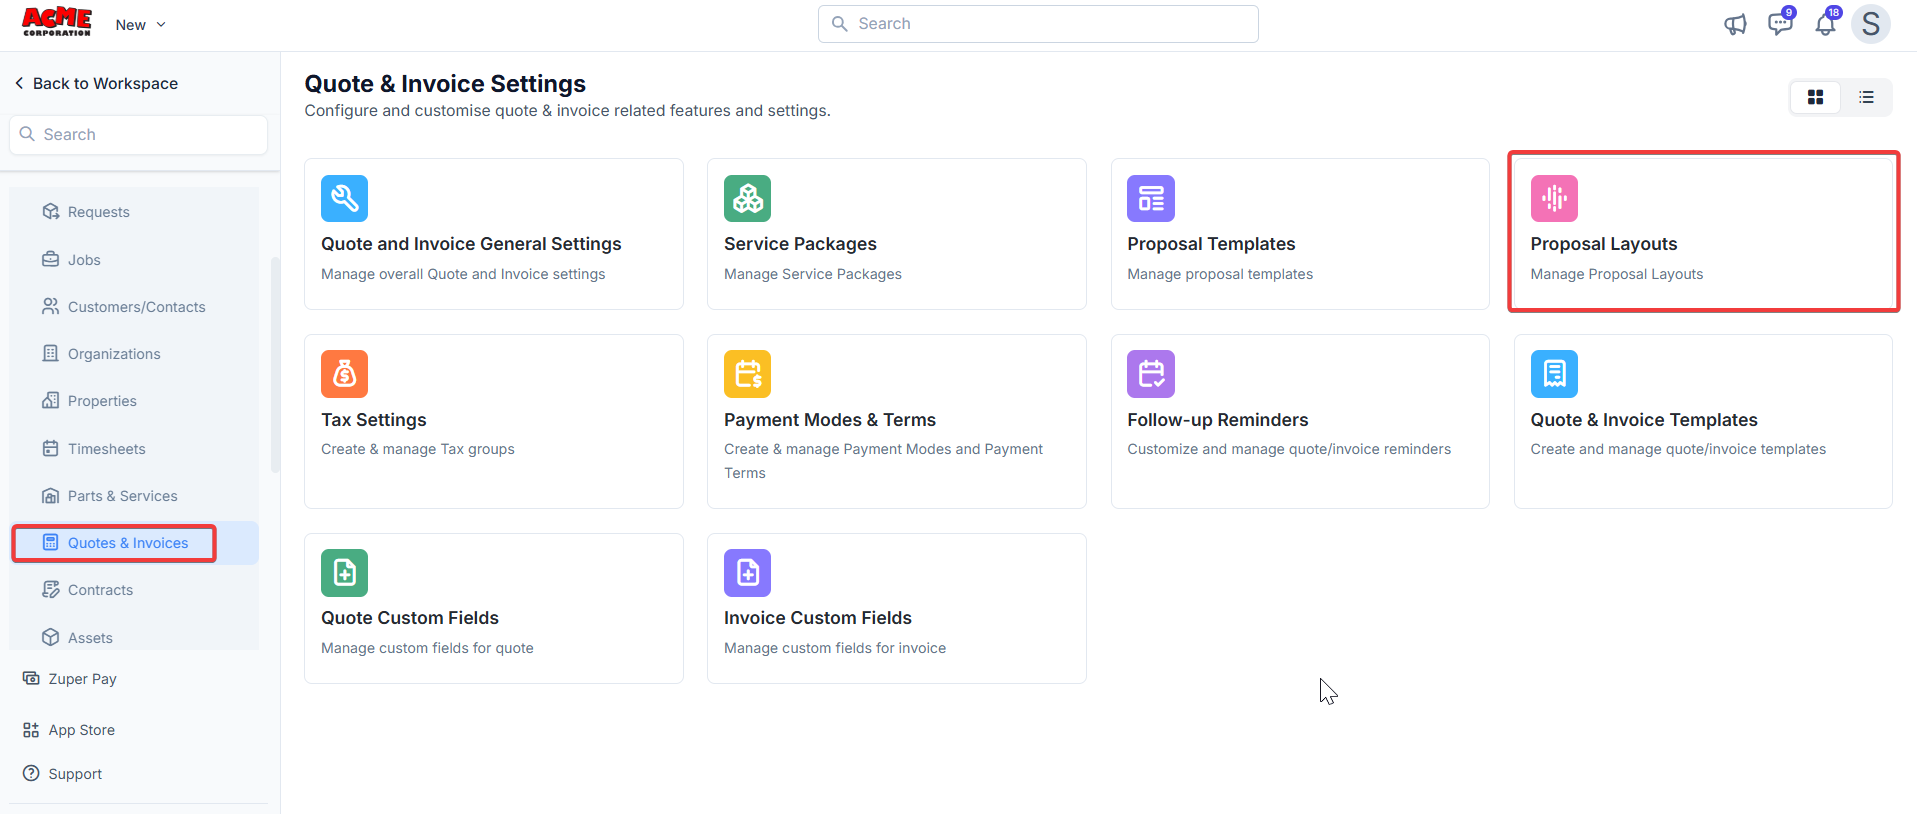
Step 1: Access Proposal Layouts Management
Before building a proposal, manage your layouts to create or edit reusable layouts.- Log in to your Zuper. Click Settings (gear icon) at the top.
Step 2: Create a New Proposal Layout
- In the Proposal Layouts screen, click + New Proposal Layout (top right).
- Choose your starting point:
- Start from Scratch: Begins with a blank canvas for full customization.
- Choose from Template: Select a pre-built template from the library.
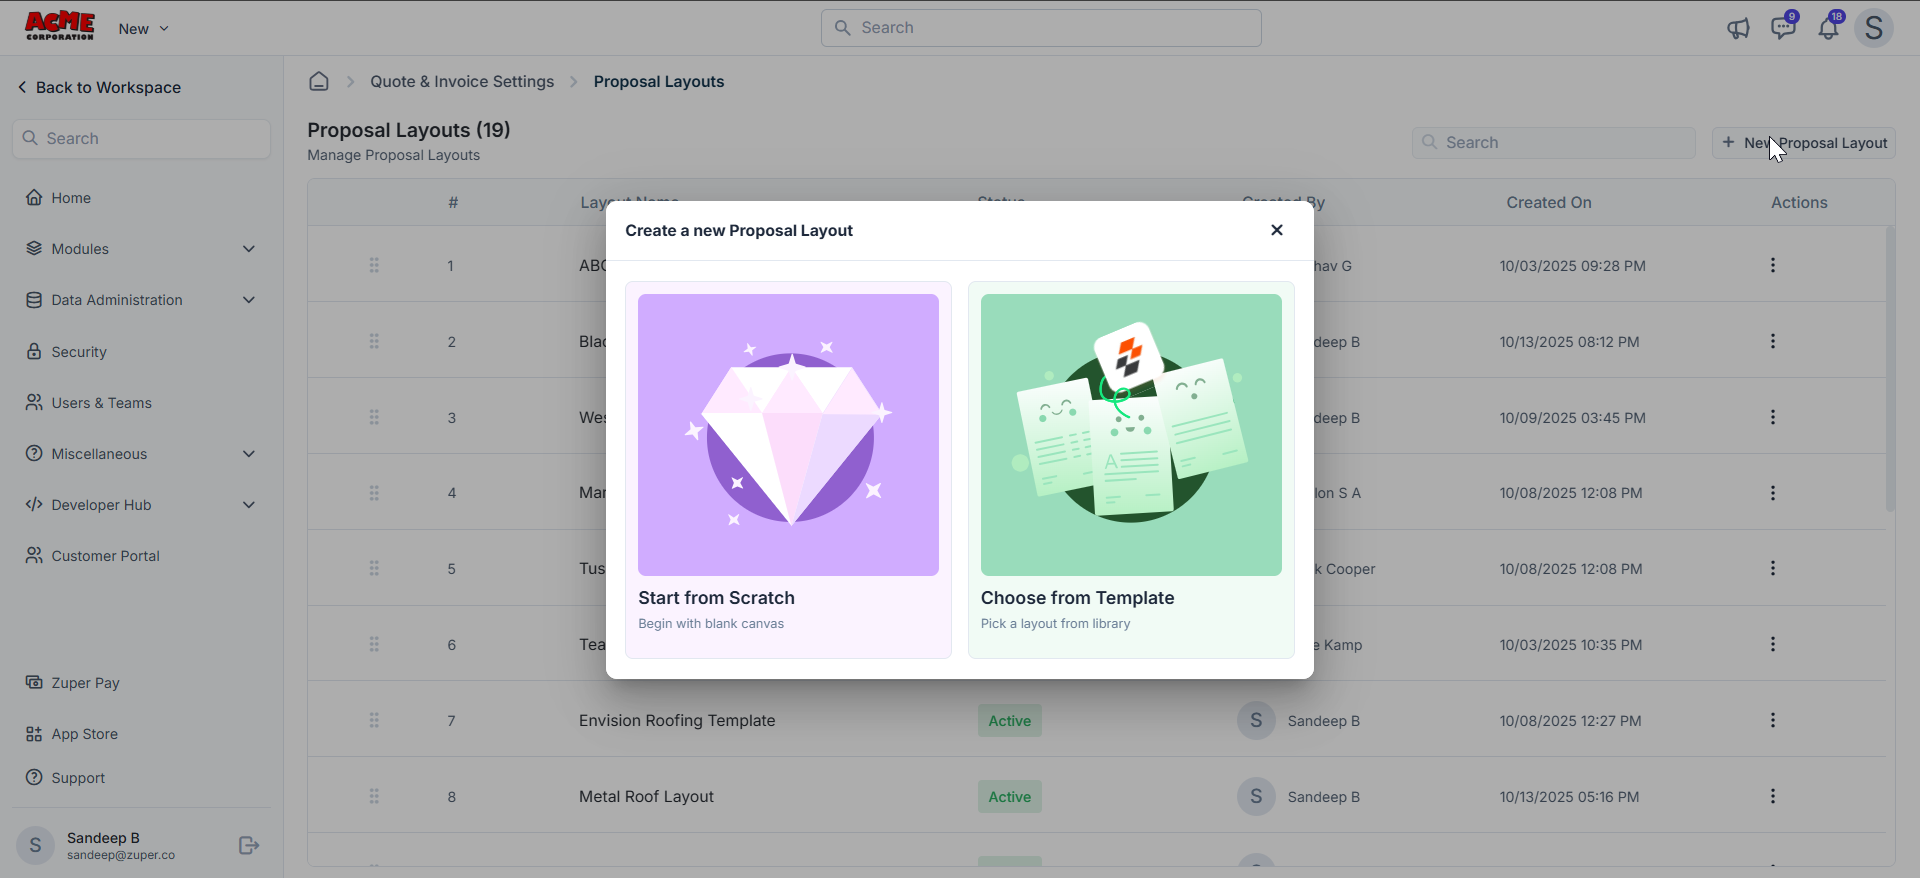
- Enter a name for your layout (e.g., “Standard Roofing Proposal”).
- Click Create to open the editor.
- You can add, rename, or reorder pages as needed (Cover page reordering is not possible).
- If you prefer not to use the default pages, you can hide the page, which will skip rendering it in the final PDF.
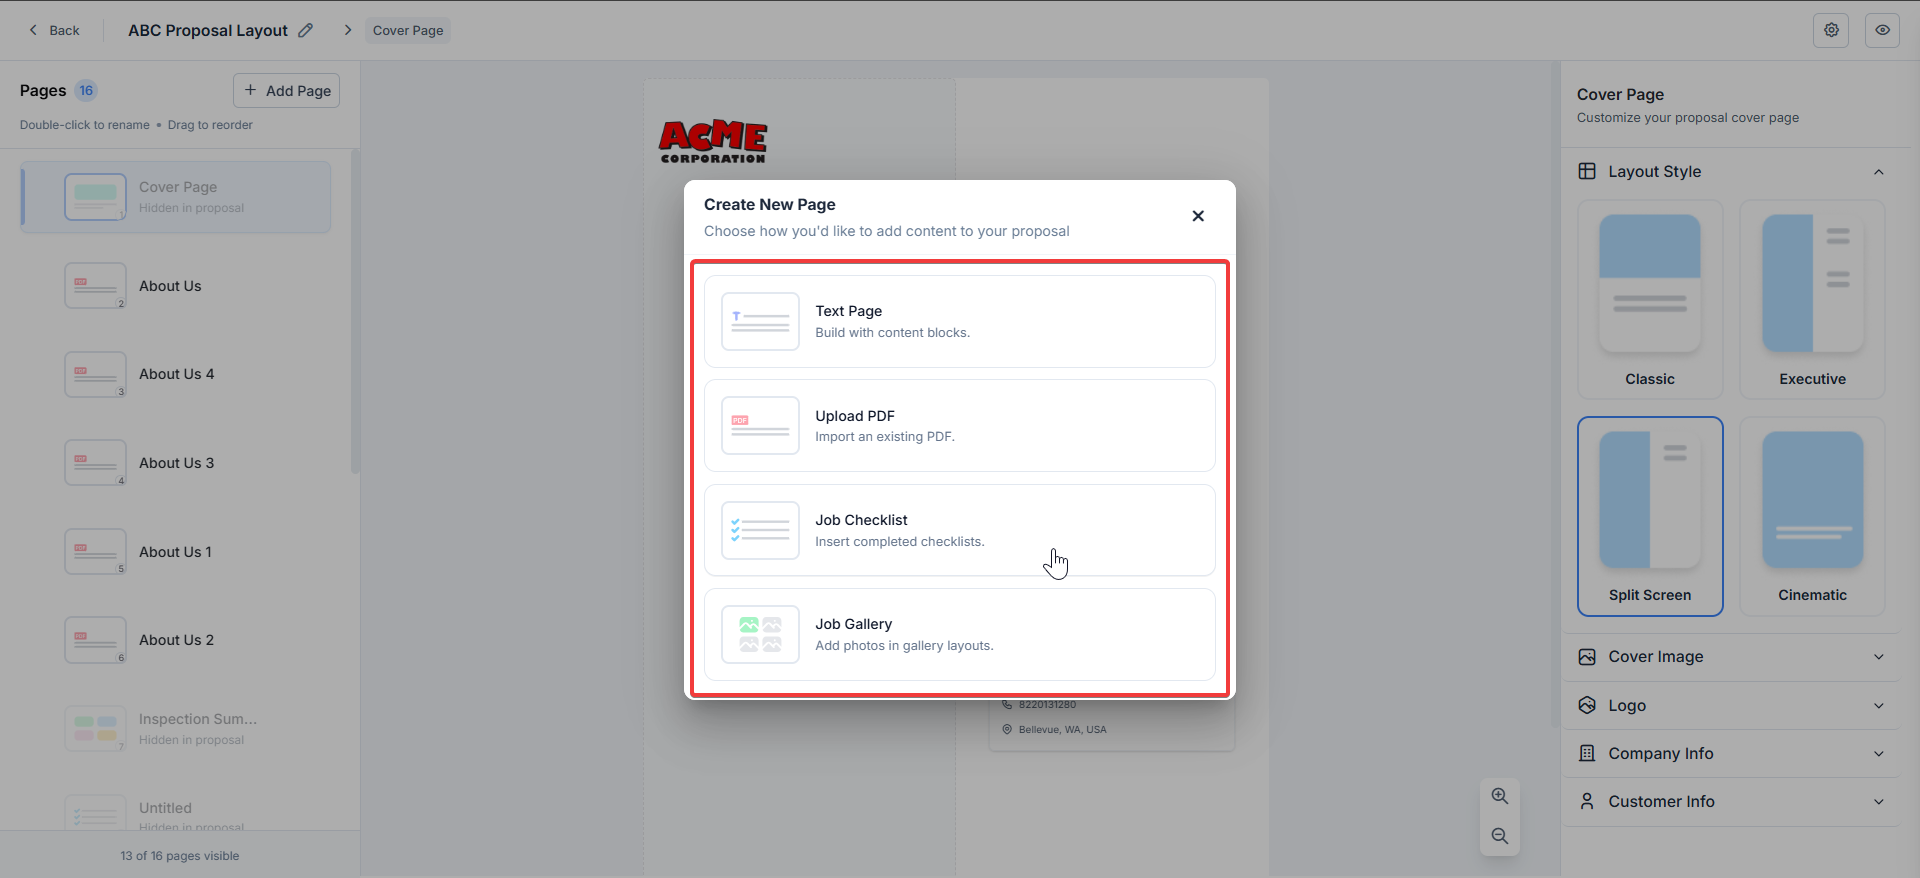
- Text Page: Create and edit content using rich text formatting.
- Upload PDF: Upload and display pre-designed PDF documents.
- Job Checklist: Pull associated checklists from the job.
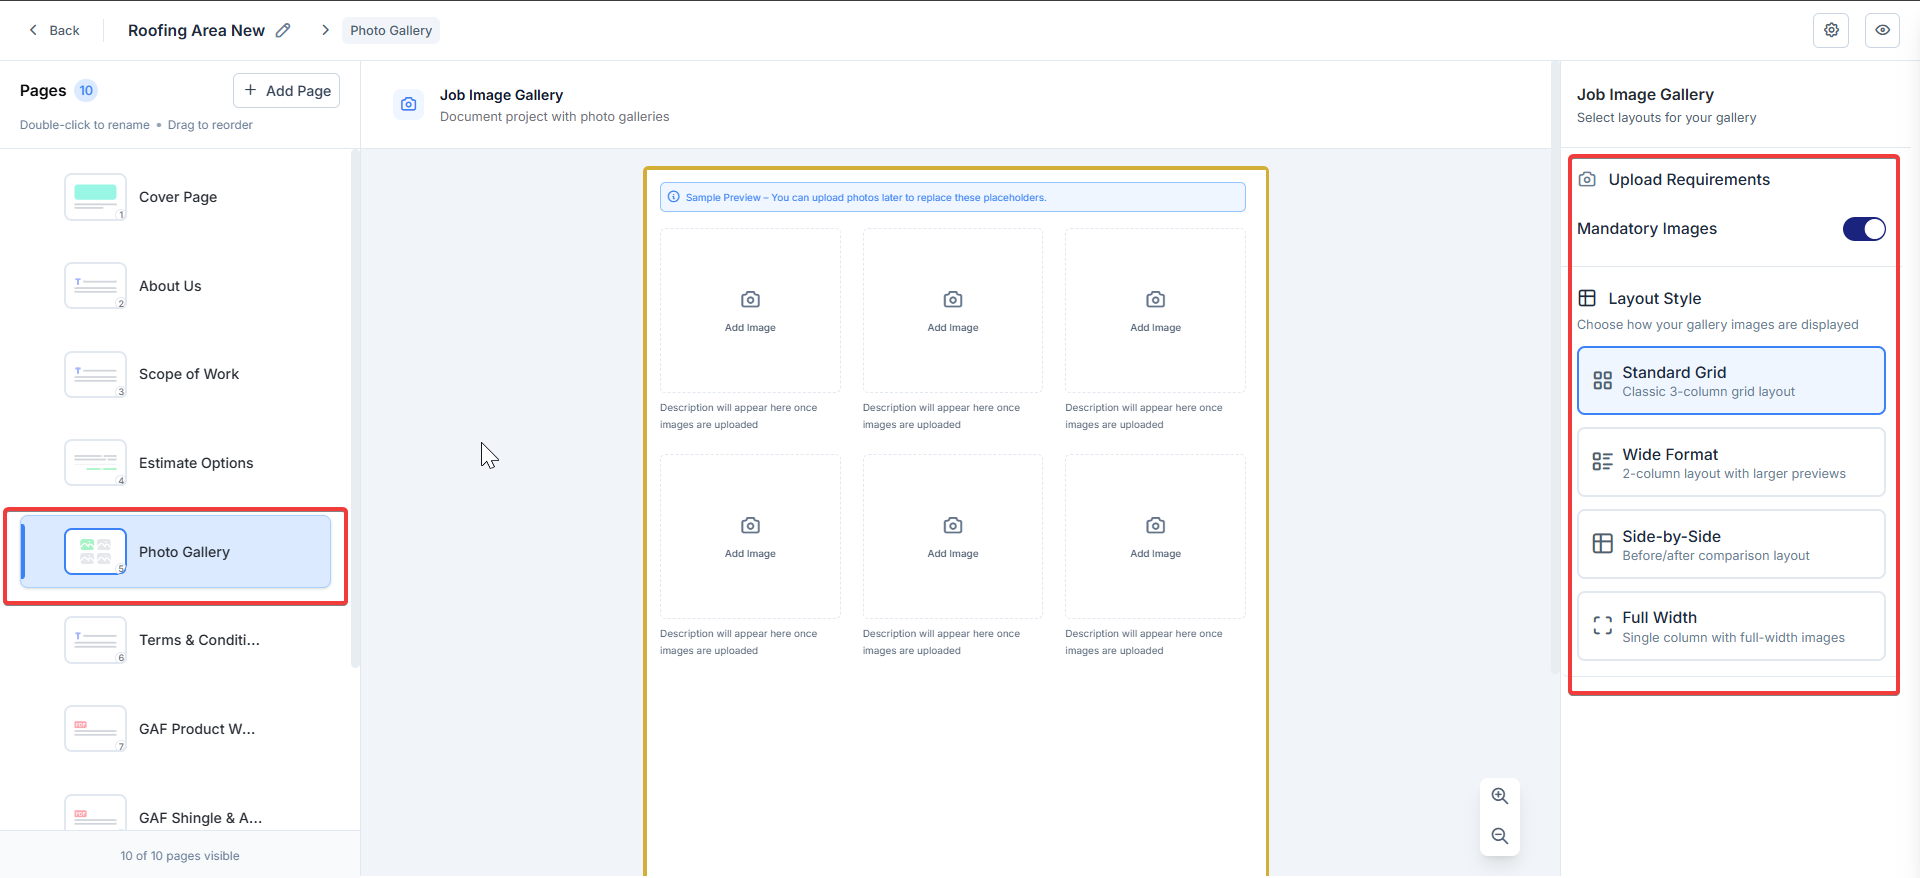
- Job Gallery: Showcase images related to the job in a visual gallery.
Step 3: Customize Pages in the Proposal Layouts
Editing Tips- Rename Pages: Double-click the page name in the sidebar or use the More icon and select Rename.
- Reorder Pages: Drag pages up or down in the sidebar. Cover Page cannot be reordered.
- Duplicate Pages: Duplicating pages is allowed except for the Cover Page and Estimate Options.
- Hide Pages: Hiding pages is allowed for all pages.
- Locked Pages: In the Proposal Layouts section, you’ll find a “Lock” page option. When enabled (locked), it locks the editing of the page’s functionality both in the Master proposal layout and proposal-level edit. Preventing ad-hoc edits during the quoting process.

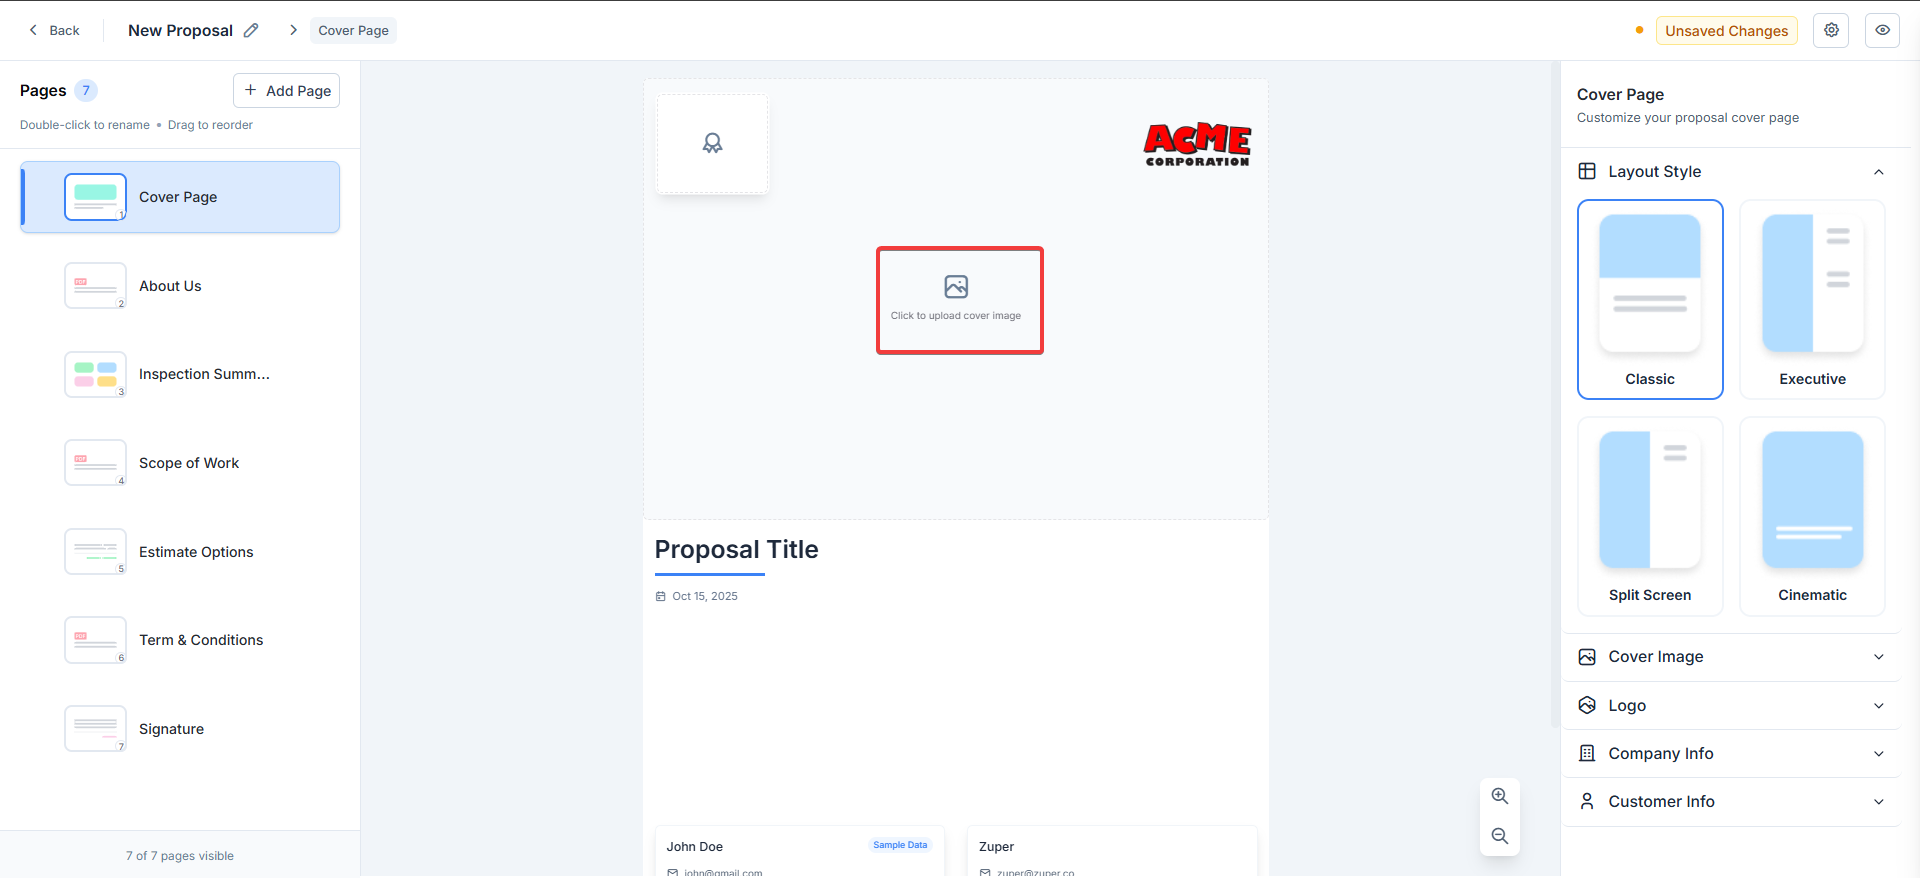
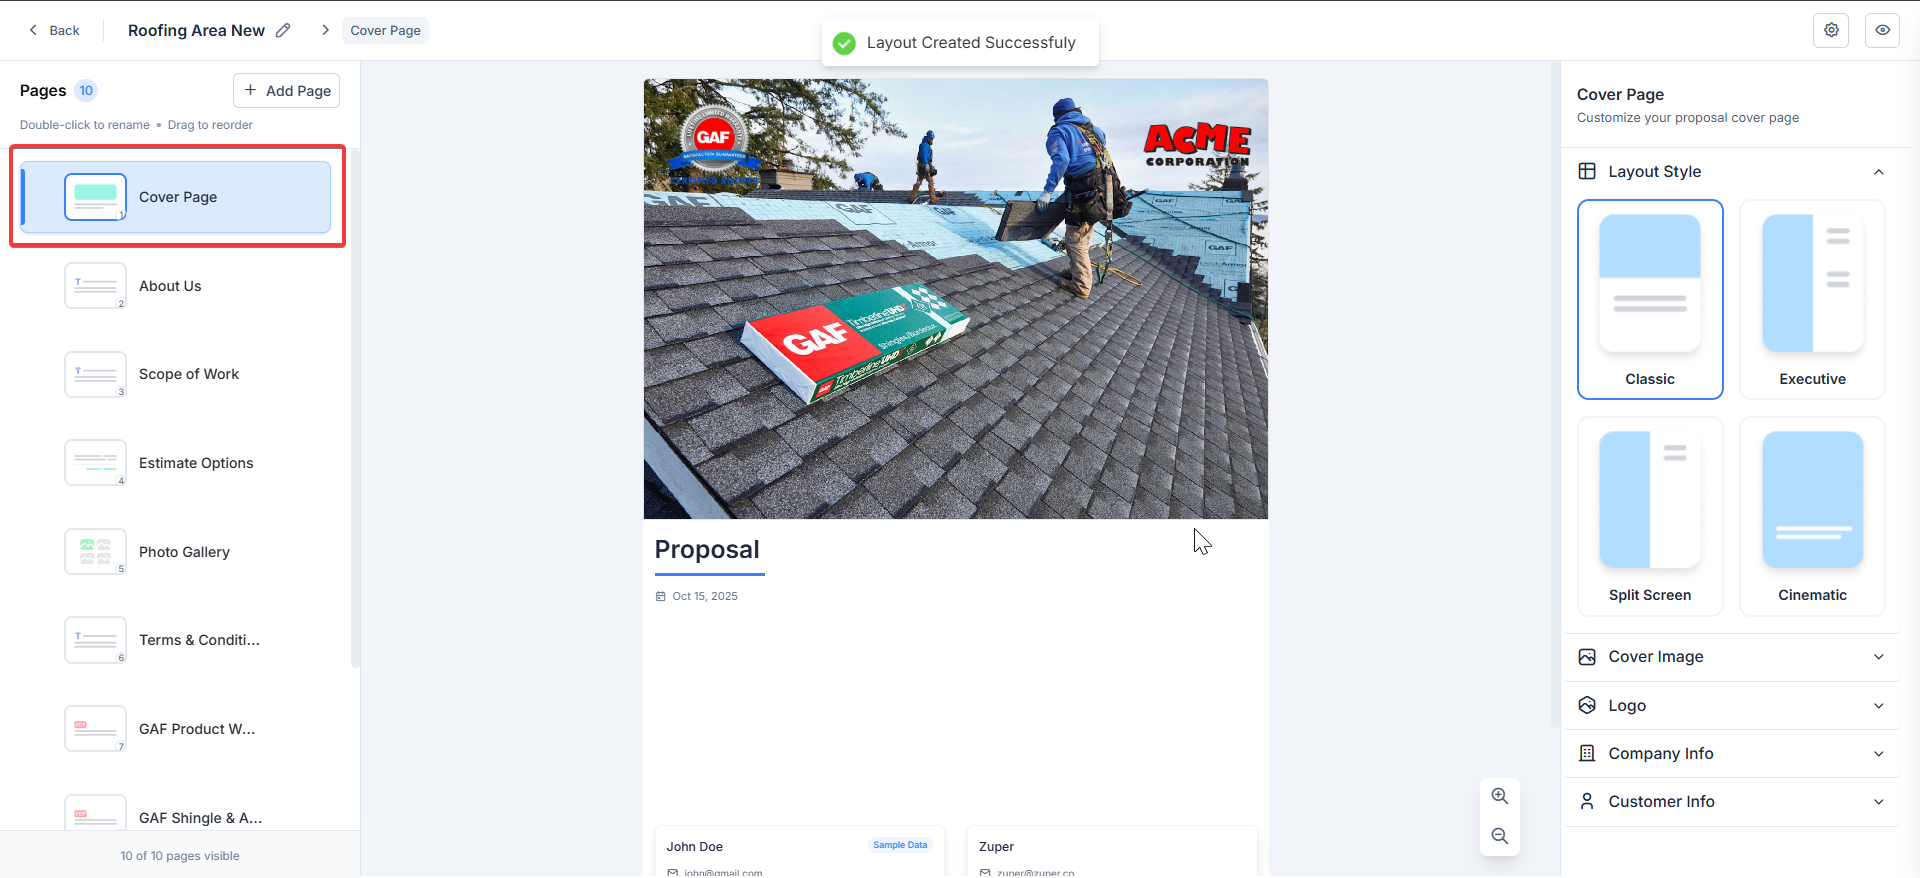
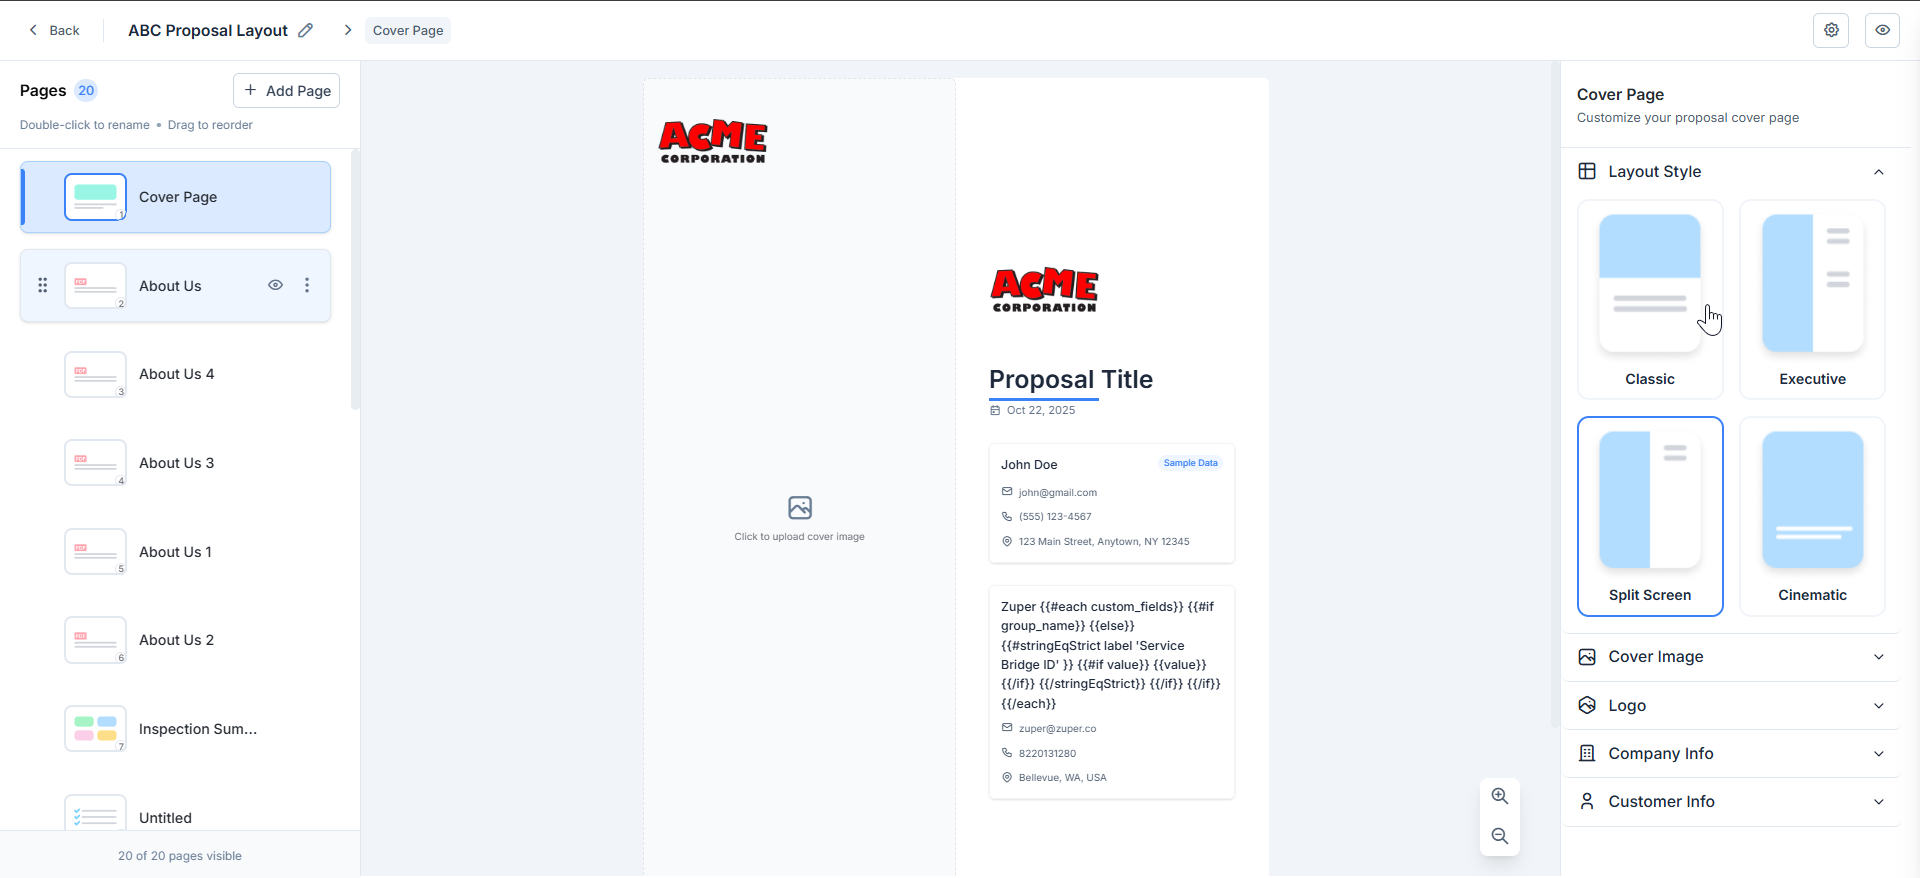
Cover Page
- We currently support only one cover page.
- On the cover page, you include branding (e.g., logo, company information) and proposal basics (e.g., title, client name, date).
- The page can be hidden or renamed, but it cannot be deleted or reordered.
- The cards will show company or sales rep information; it will be prefilled automatically, and it allows editing the same with the fixed content or dynamic content.
- The customer information can be hidden.
- If the cover page image is not added, the default image set by us will be displayed.
- Click Cover Page in the sidebar.
- Select a layout style from the right panel: Classic, Executive, Split Screen, or Cinematic.
- Upload a cover image via the placeholder (click the image icon) or from the right panel.
- Edit fields: Proposal Title: Enter a descriptive name for your proposal.
Example:Proposal for {{ customer.customer_first_name }}Date: Auto-fills with proposal date. Company /Sales Rep Info: Add logo, name (e.g., ACME Corporation), and contact details. The primary logo uses the company logo, and the secondary logo is used to upload a certificate or badge. You can use the place holders to fetch the information. Customer Info: Pulls from the service address (e.g., John Doe’s service address)
About Us
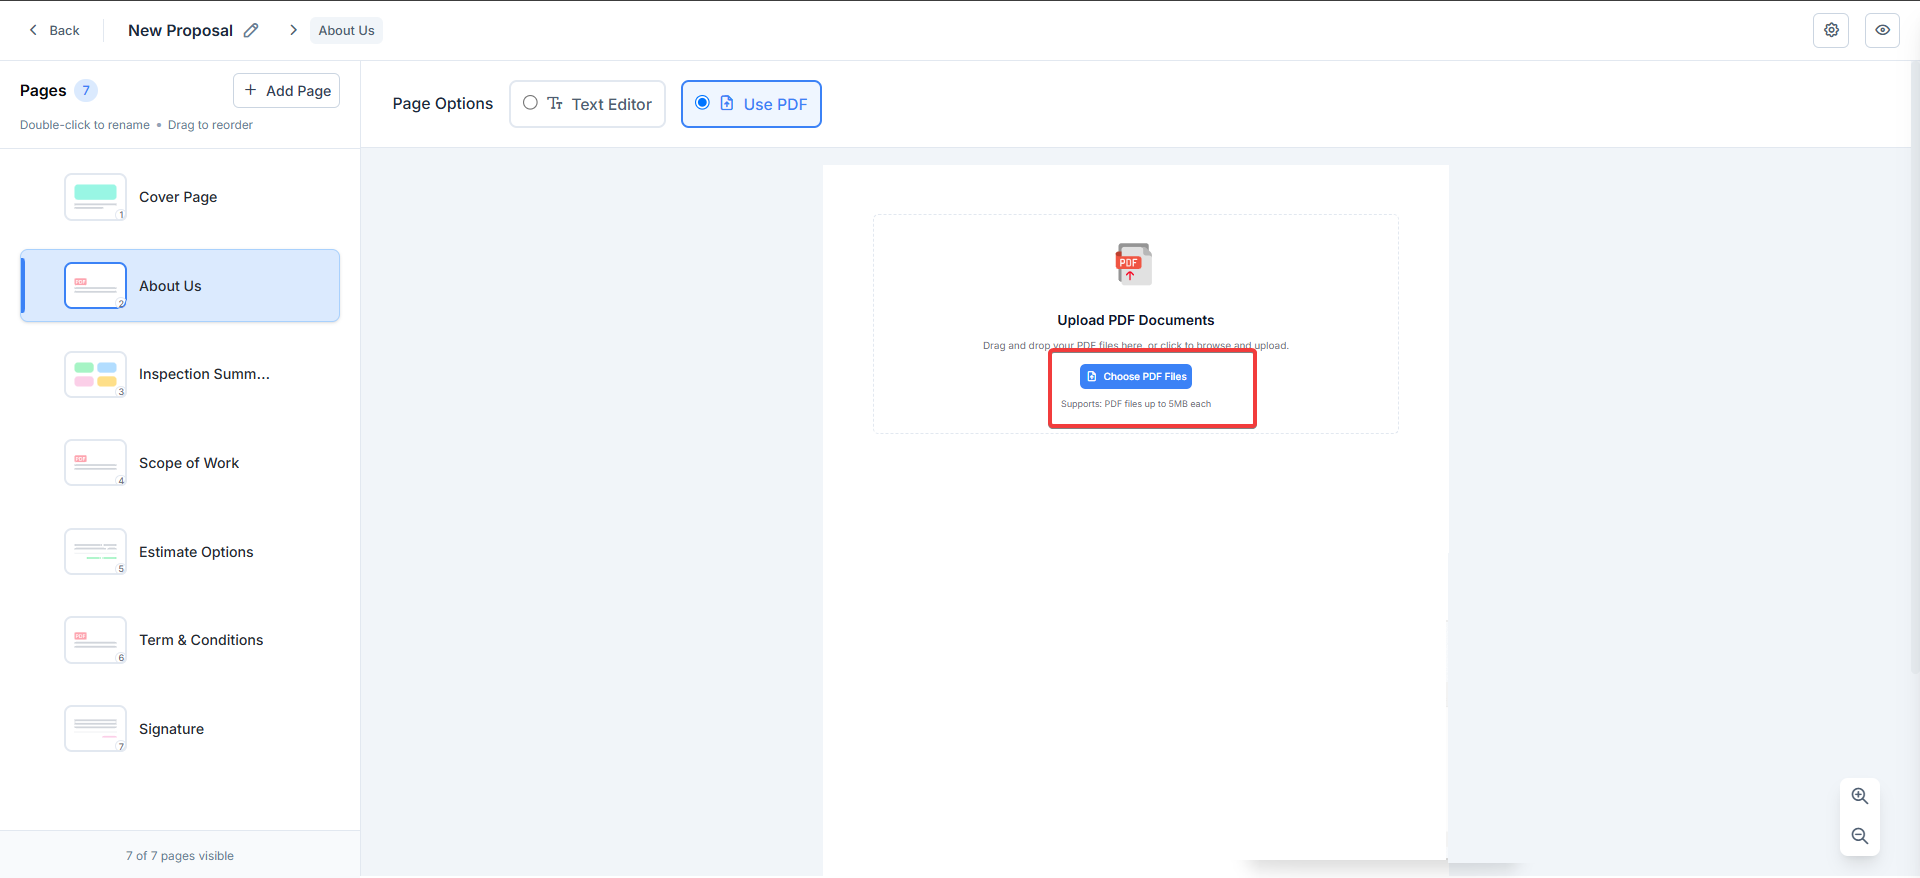
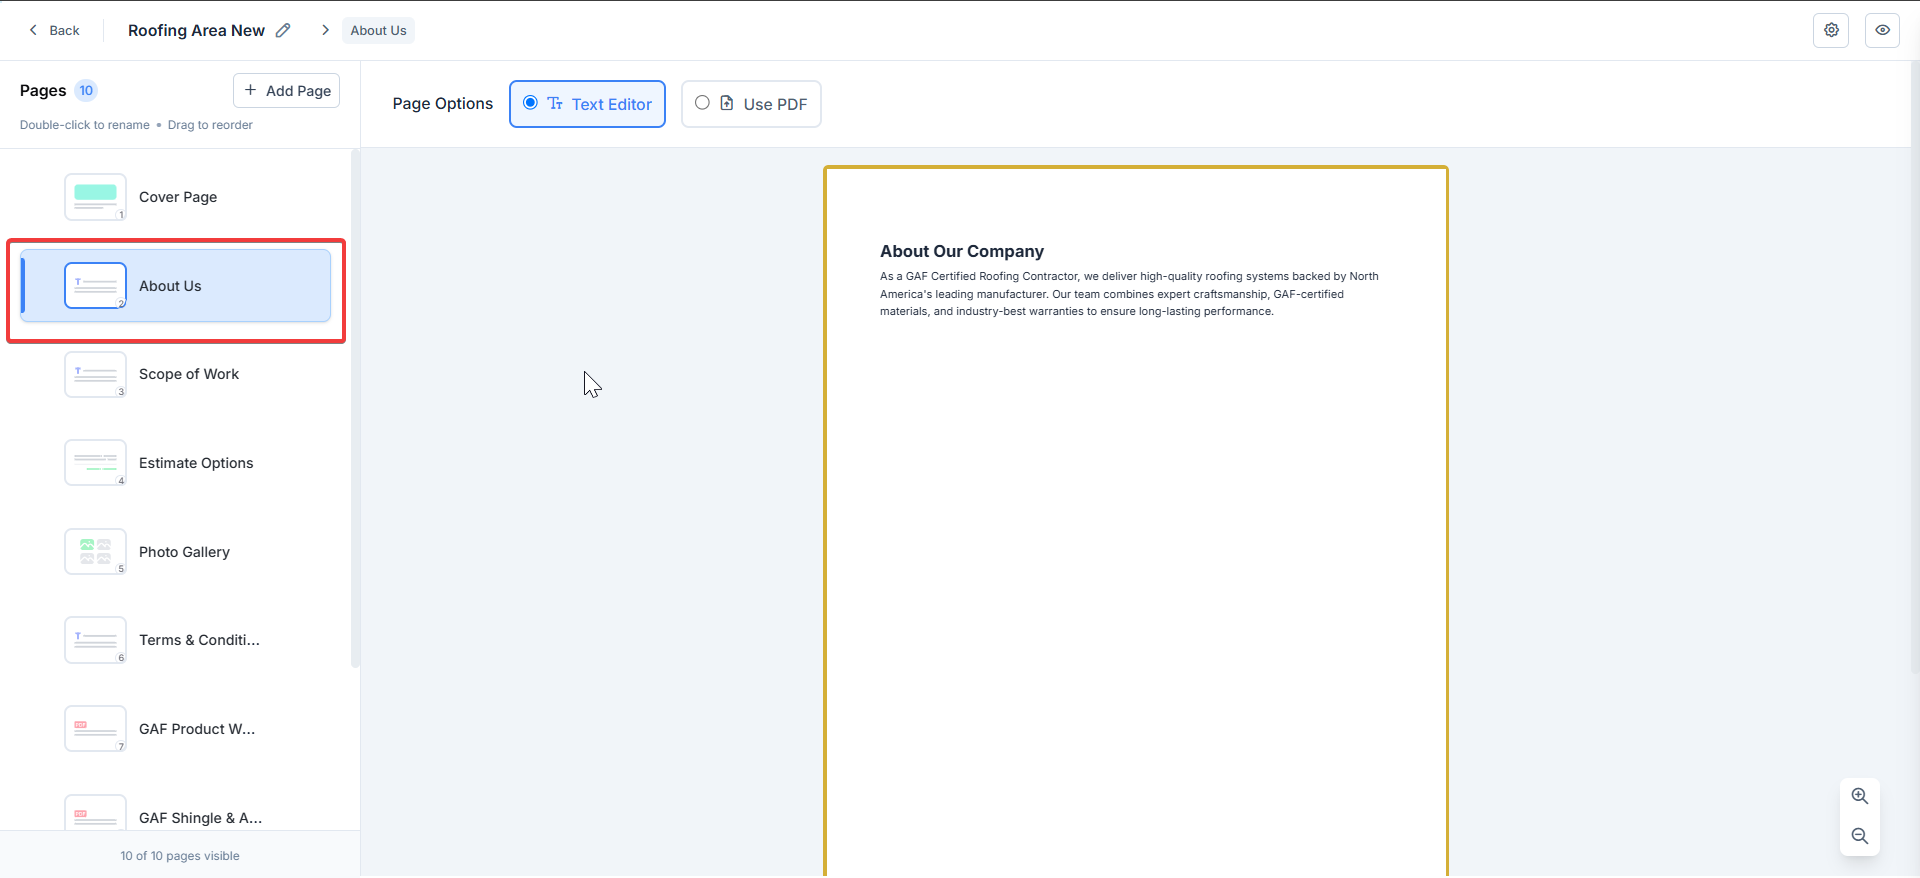
Introduce your company with text, images, or uploaded PDFs.- Click About Us.
- Use the text editor to add paragraphs about your services, history, or team (or) Toggle to Upload PDF for a pre-formatted section.
Scope of Work
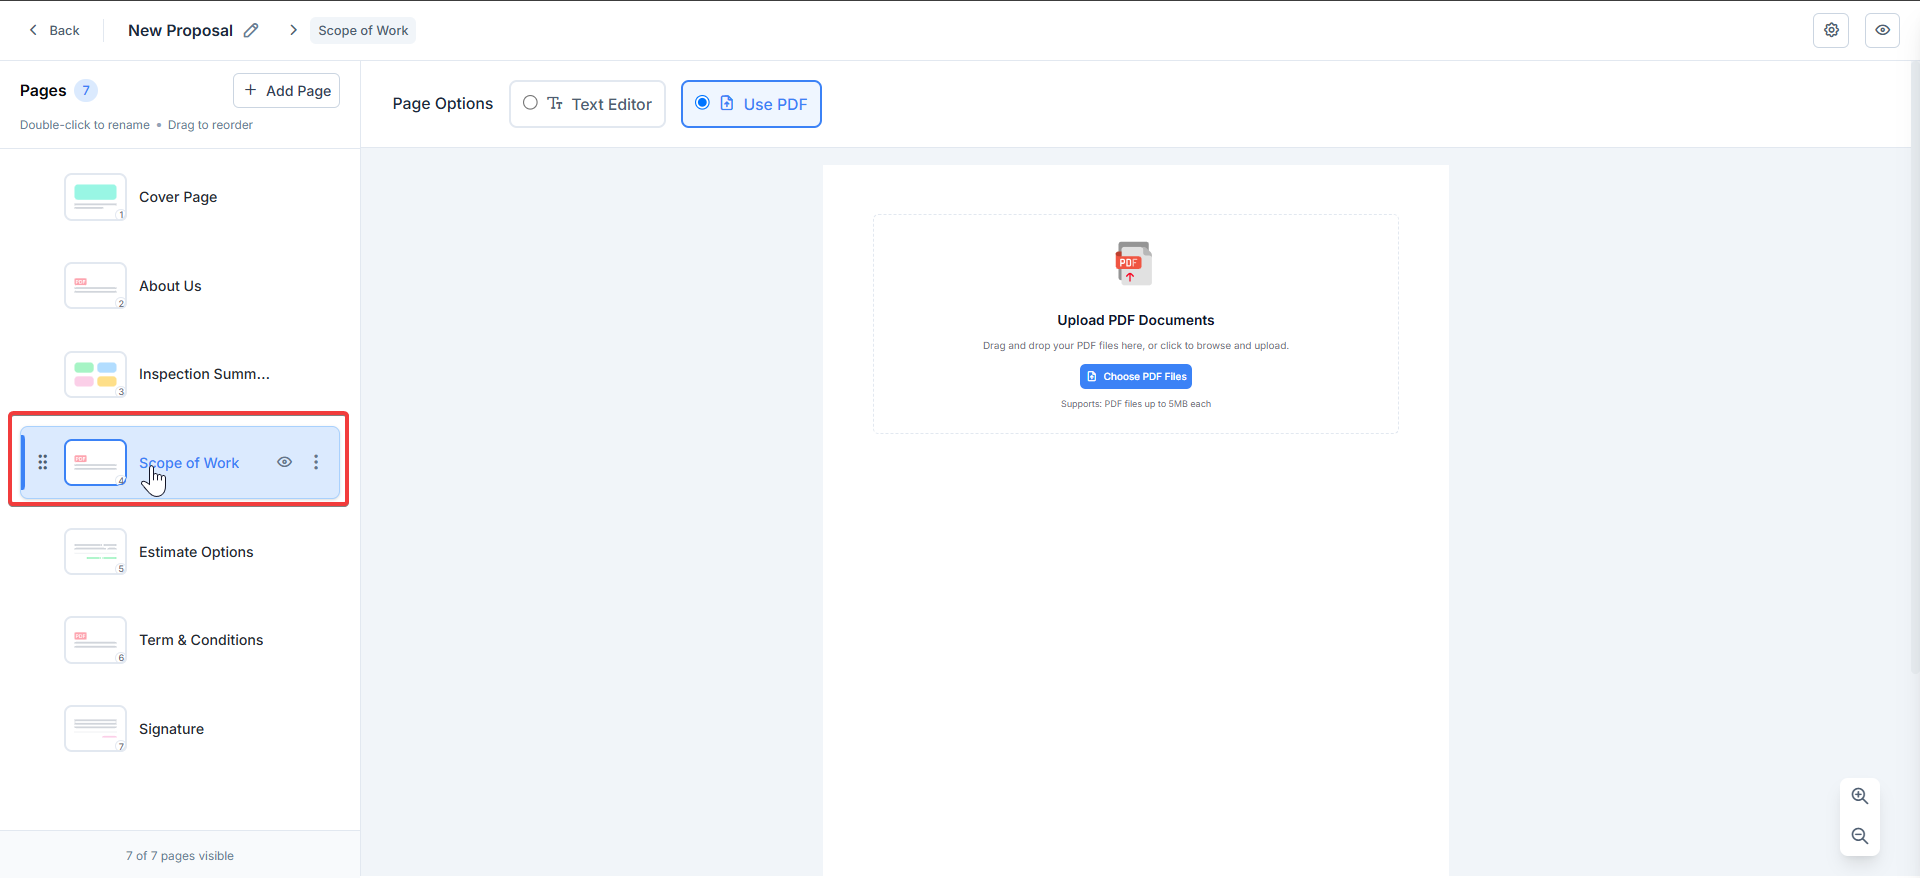
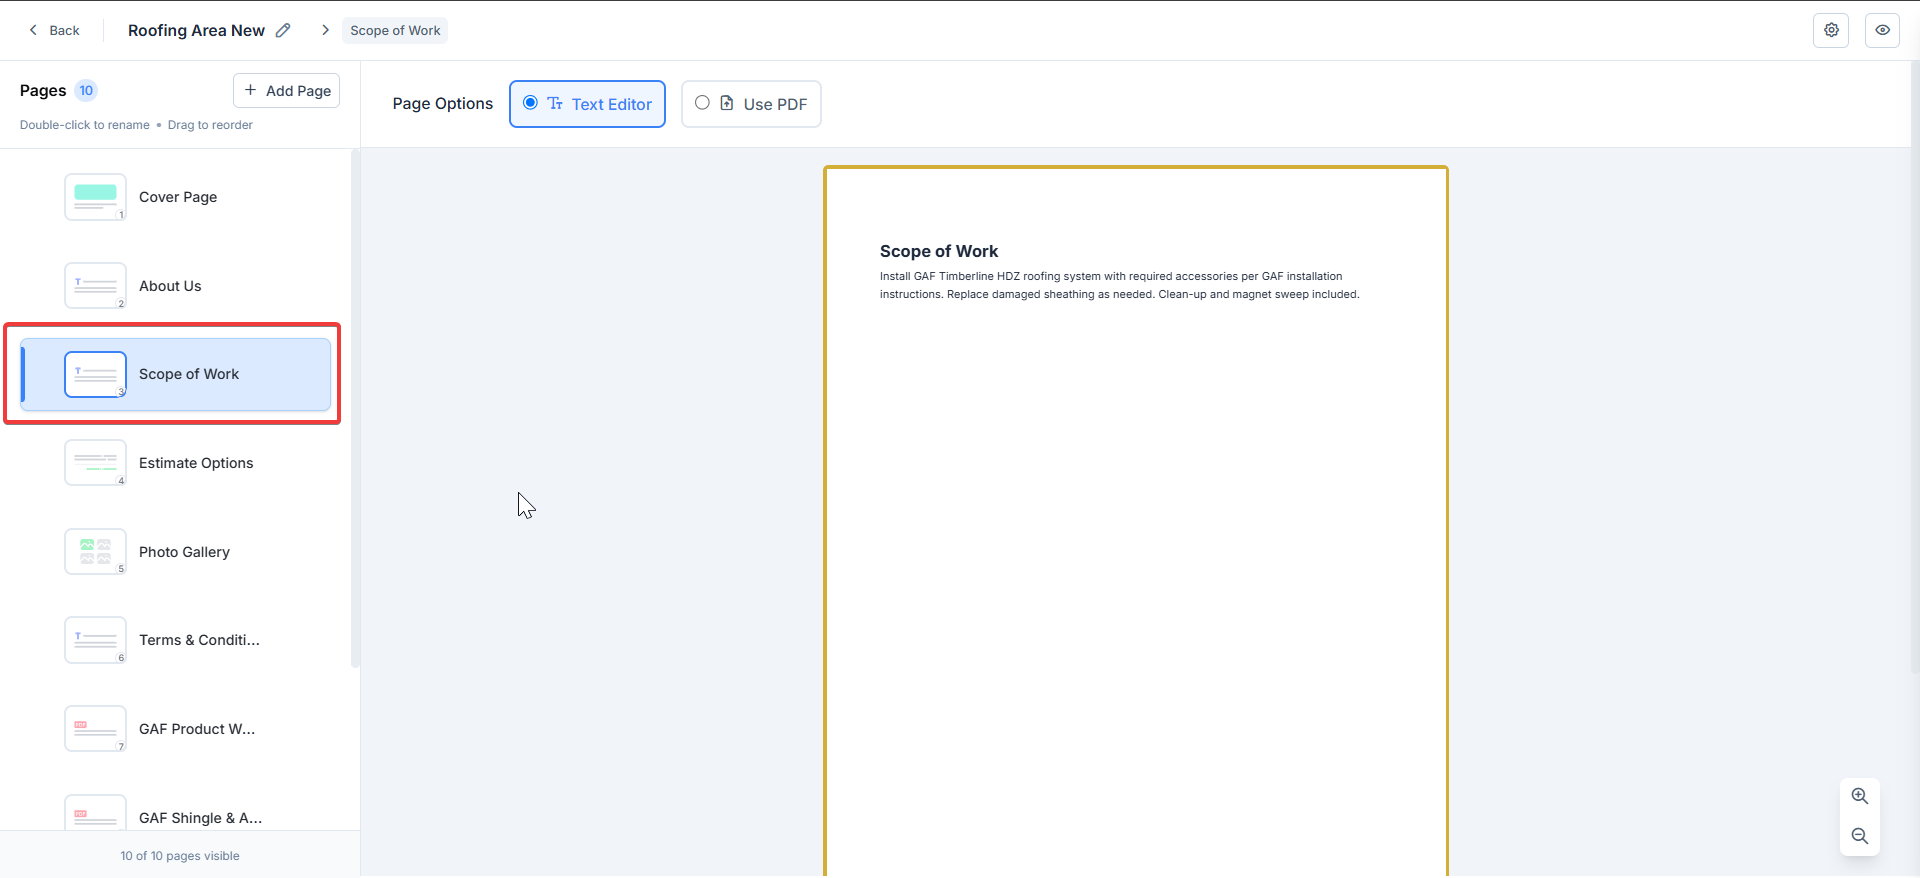
Outline project details, timelines, or requirements.- Click Scope of Work.
- Add text descriptions, bullet points, or tables via the editor, or upload PDF for detailed specs.
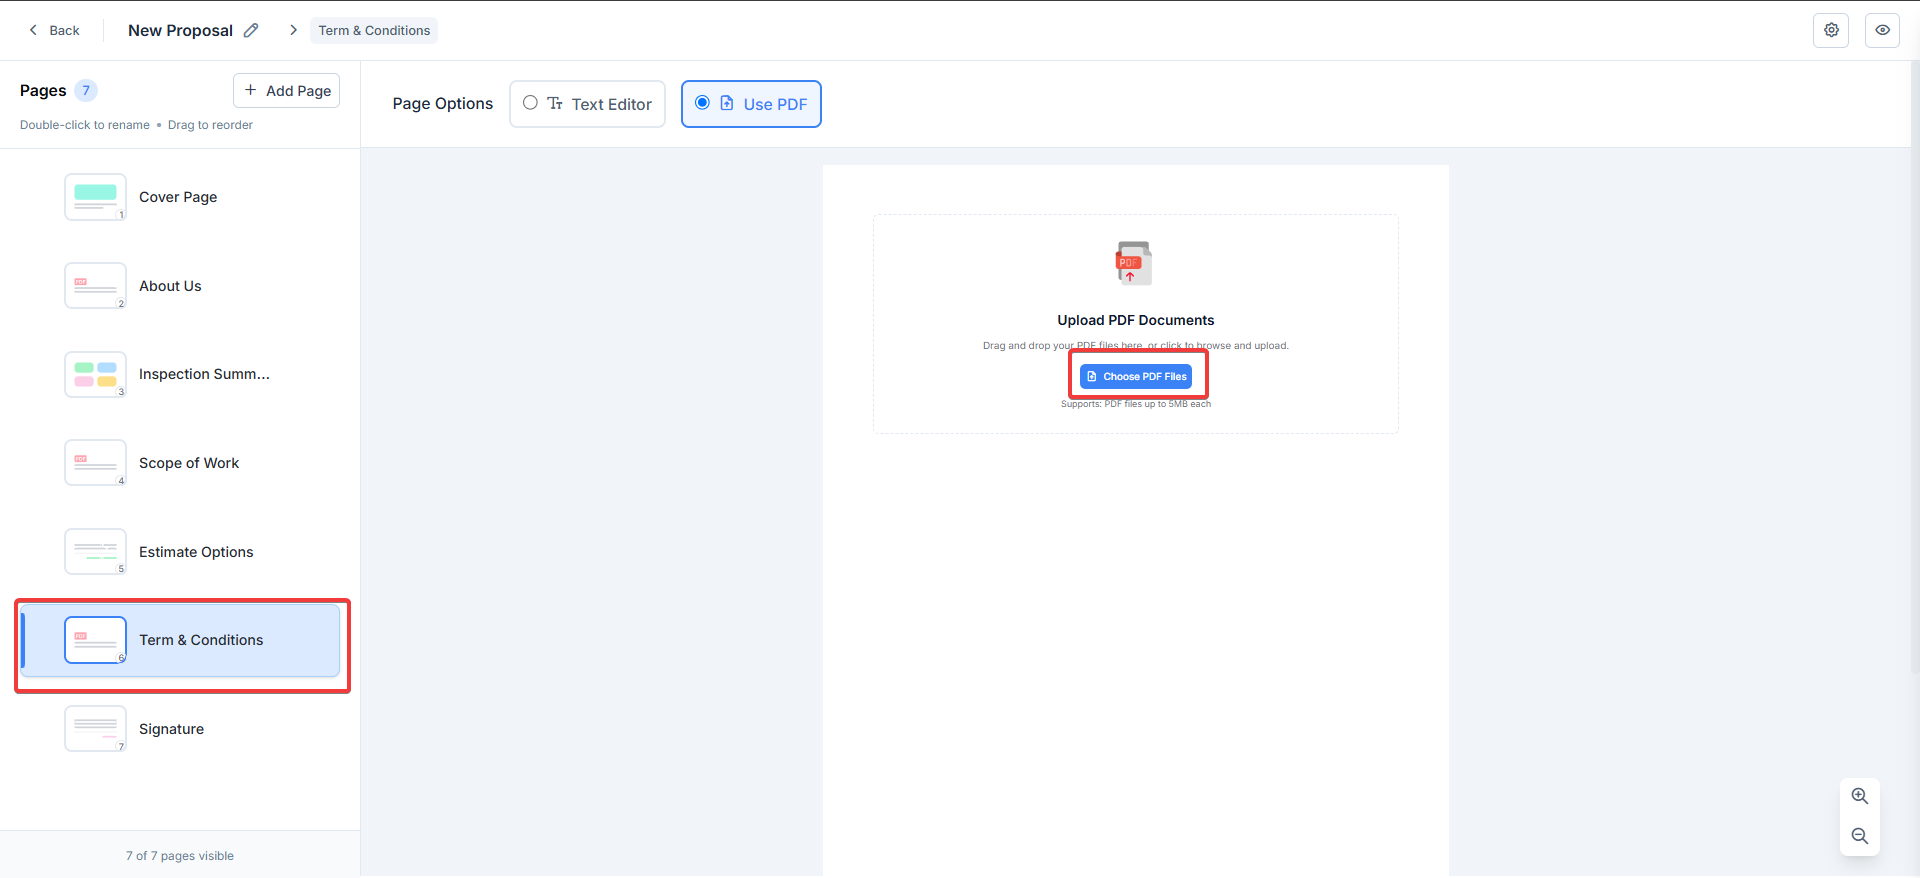
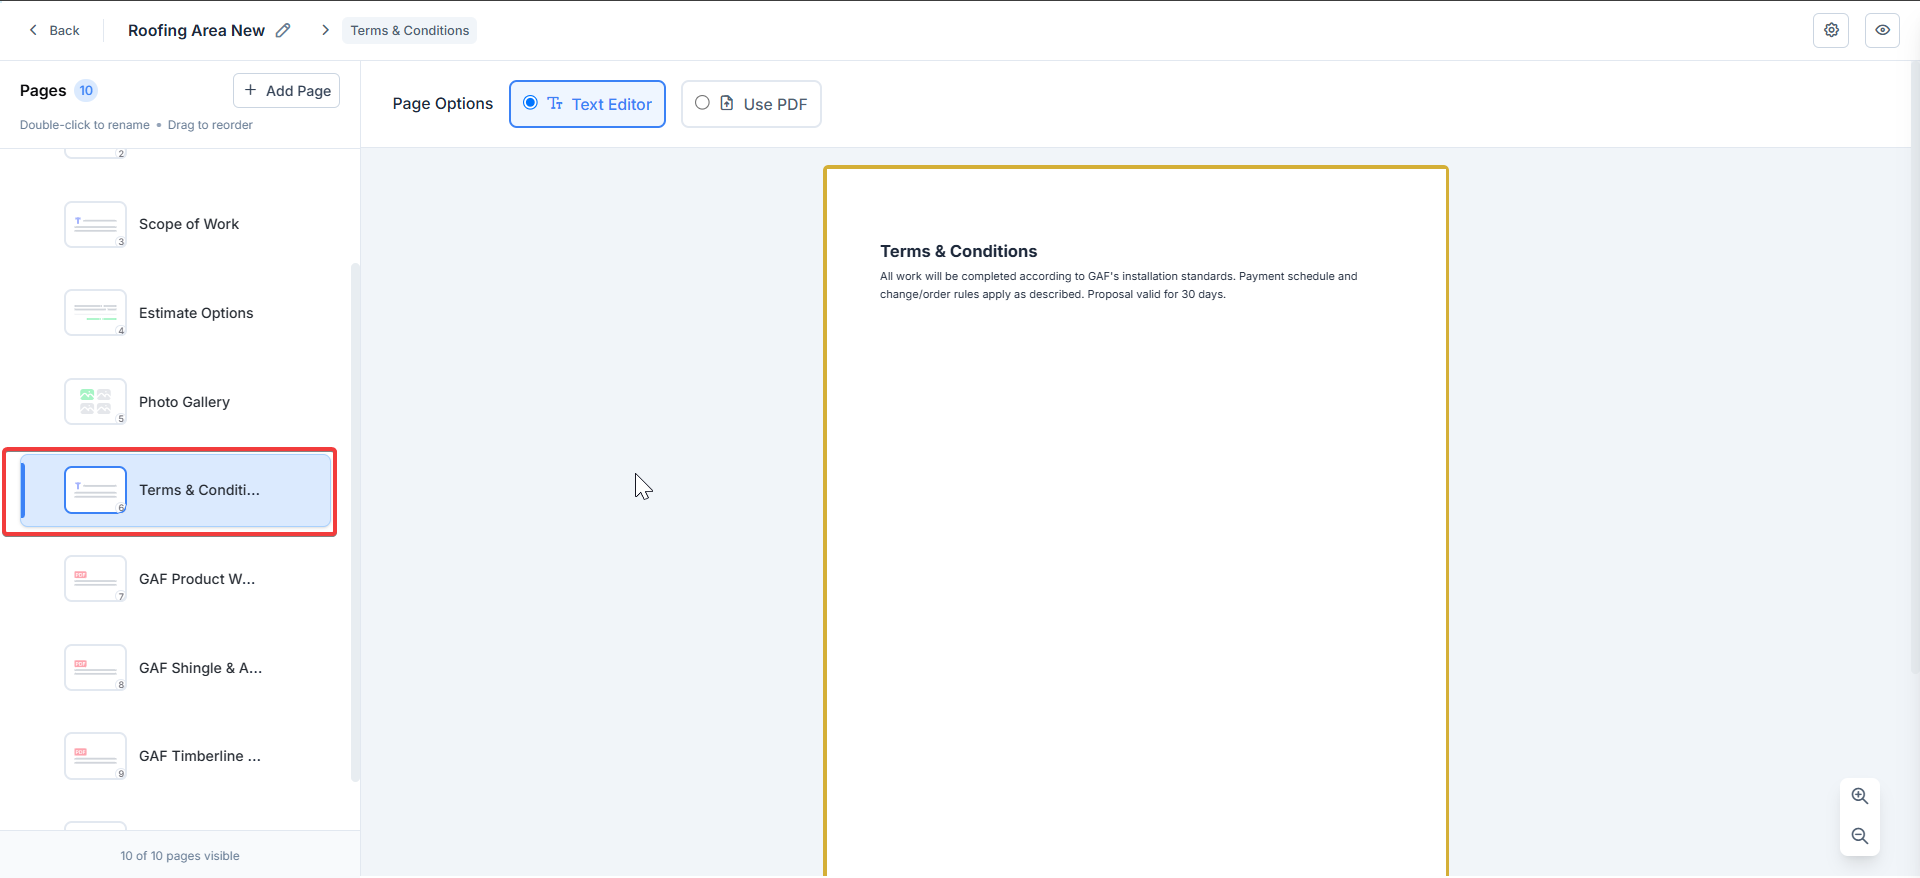
Terms & Conditions
Legal essentials: Use text or upload for compliance.- Click Terms & Conditions.
- Edit standard terms in the text editor or upload a PDF (e.g., your master terms document).
- Ensure key clauses, such as payment terms, warranties, and liabilities, are clearly defined.
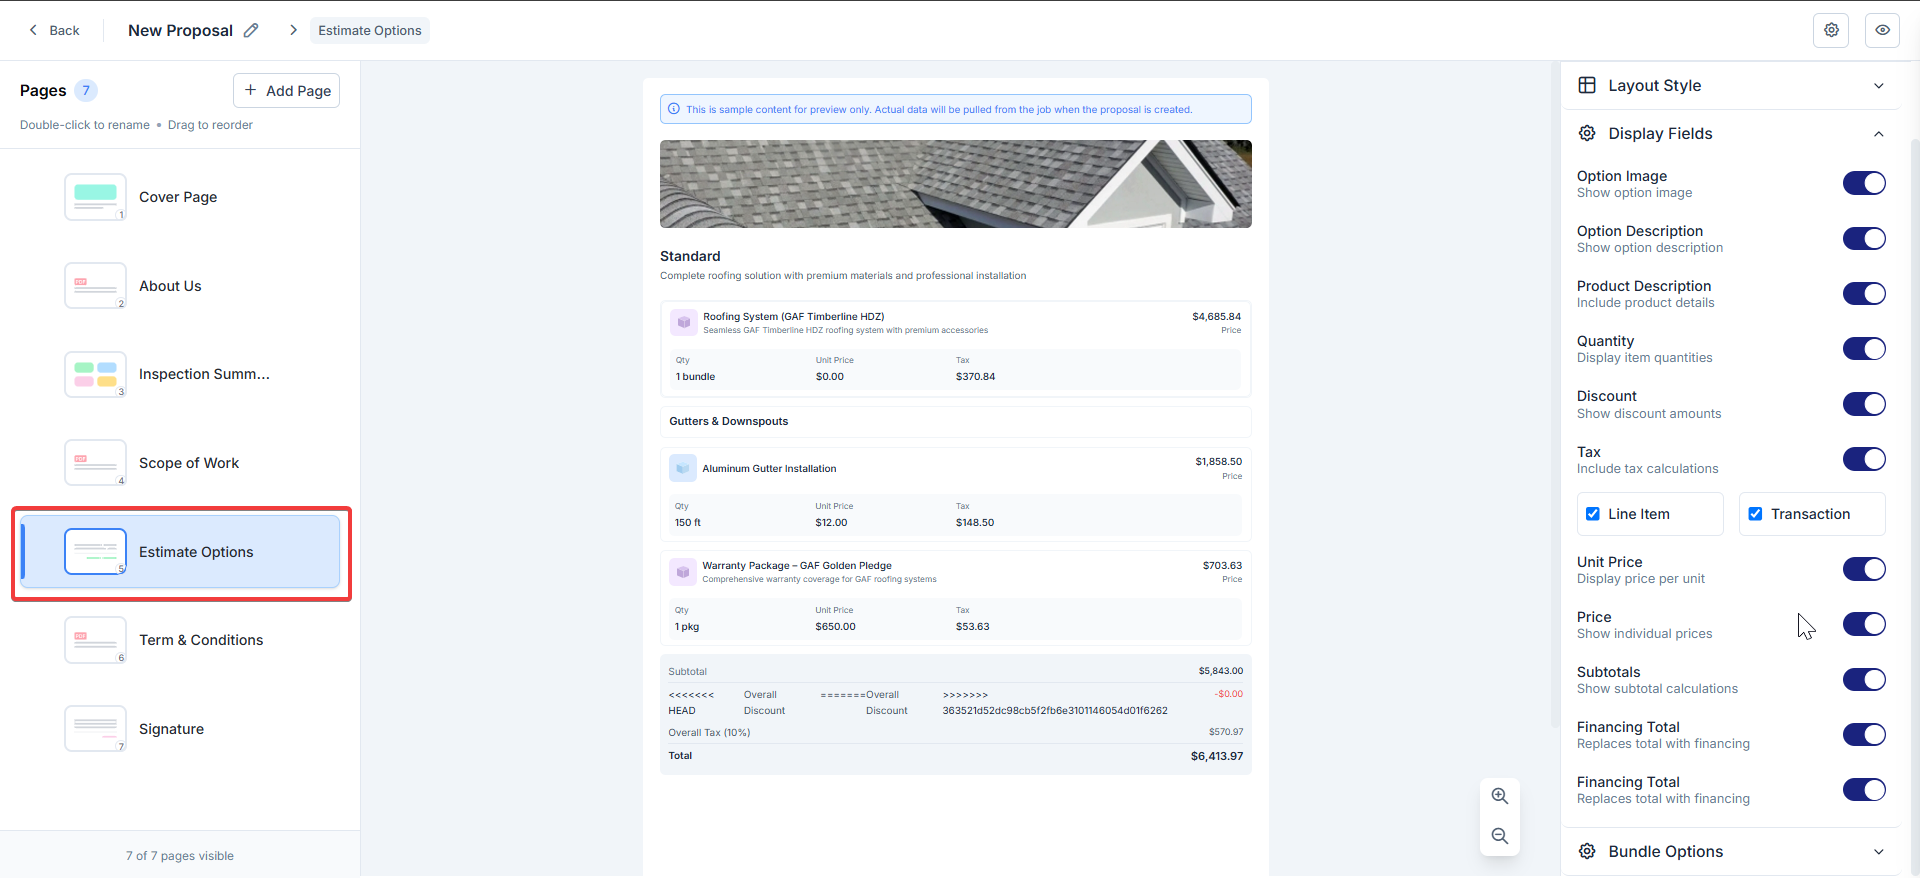
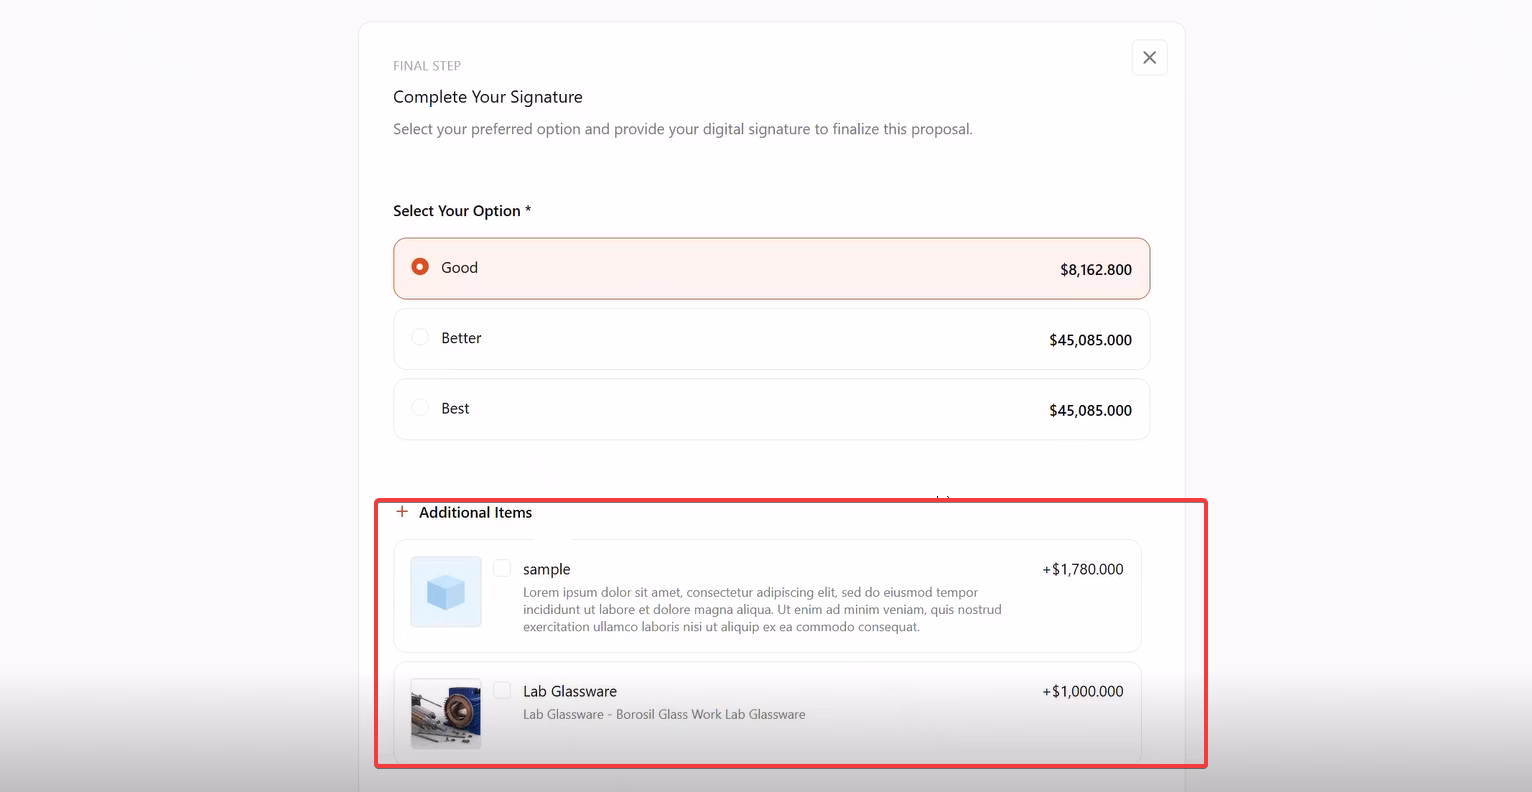
Estimate Options
Show pricing breakdowns with line items, taxes, and totals (pulls from proposal estimate options).- Click Estimate Options.
- View sample content (actual data populates on generation):
- Line items (e.g., Roofing System: $4,855.84).
- Subtotals, taxes (10%), discounts, and grand total.
- Toggle display options in the right panel:
- Show/hide images, descriptions, quantities, and taxes.
- Line Item vs. Transaction view.
- Unit prices, subtotals, or financing totals.
- Enable Bundle Options for grouping.
- Enable Add-Ons to display add-ons for the each available estimate option.

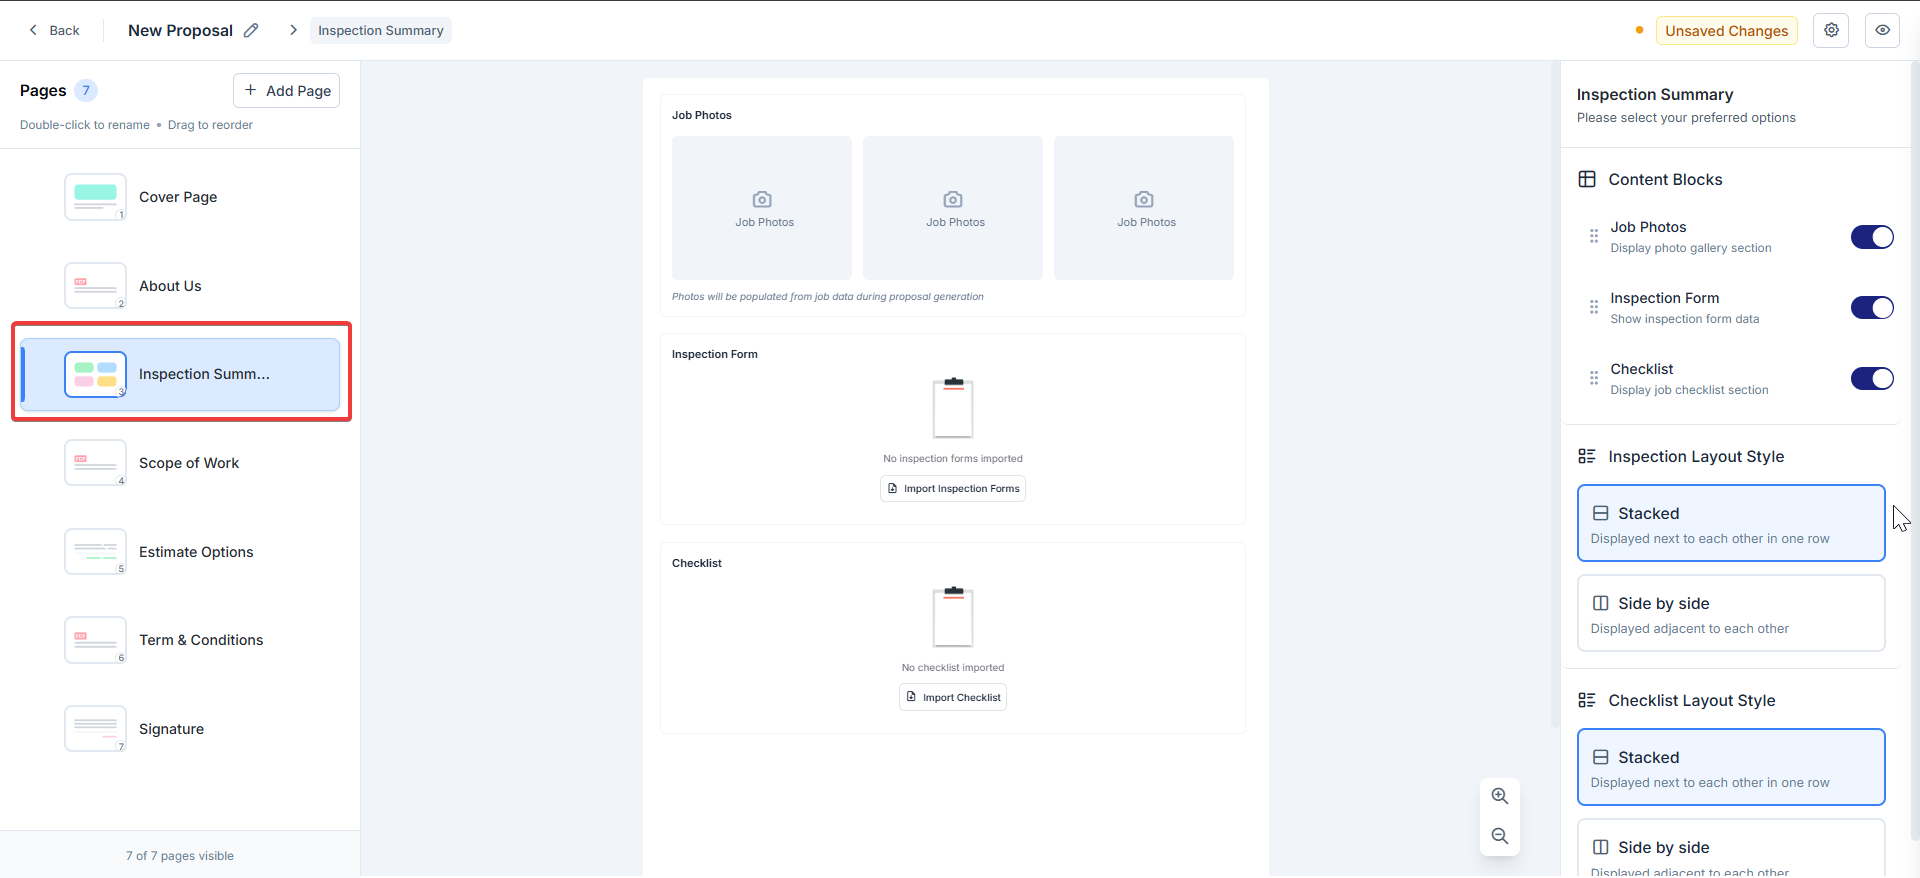
Inspection Summary
Display job photos, Inspection forms, and checklists from the linked job. The option can be enabled or disabled, and the order of sections can be rearranged.- Click Inspection Summary.
- You can reorder sections on this page, and we allow renaming of the sections.
- Job Photos: Enable the photo gallery (pulls automatically from job data). Displays 1st three photos from the job gallery by default; additional images are viewable via a public link.
- Inspection Form Data: Import forms via Import Inspection Forms (shows form fields if available). This will allow us to select the required questions from the inspection form. You can reorder the questions.
- If Service Tasks are not present, the Inspection forms will be hidden automatically.
- If one Service Task is present, the Inspection forms submission is displayed in the proposal.
- If four Service Tasks are present, all the Inspection form submissions are displayed in the proposal.
Note: If no data is imported, placeholders show “No inspection forms imported.”
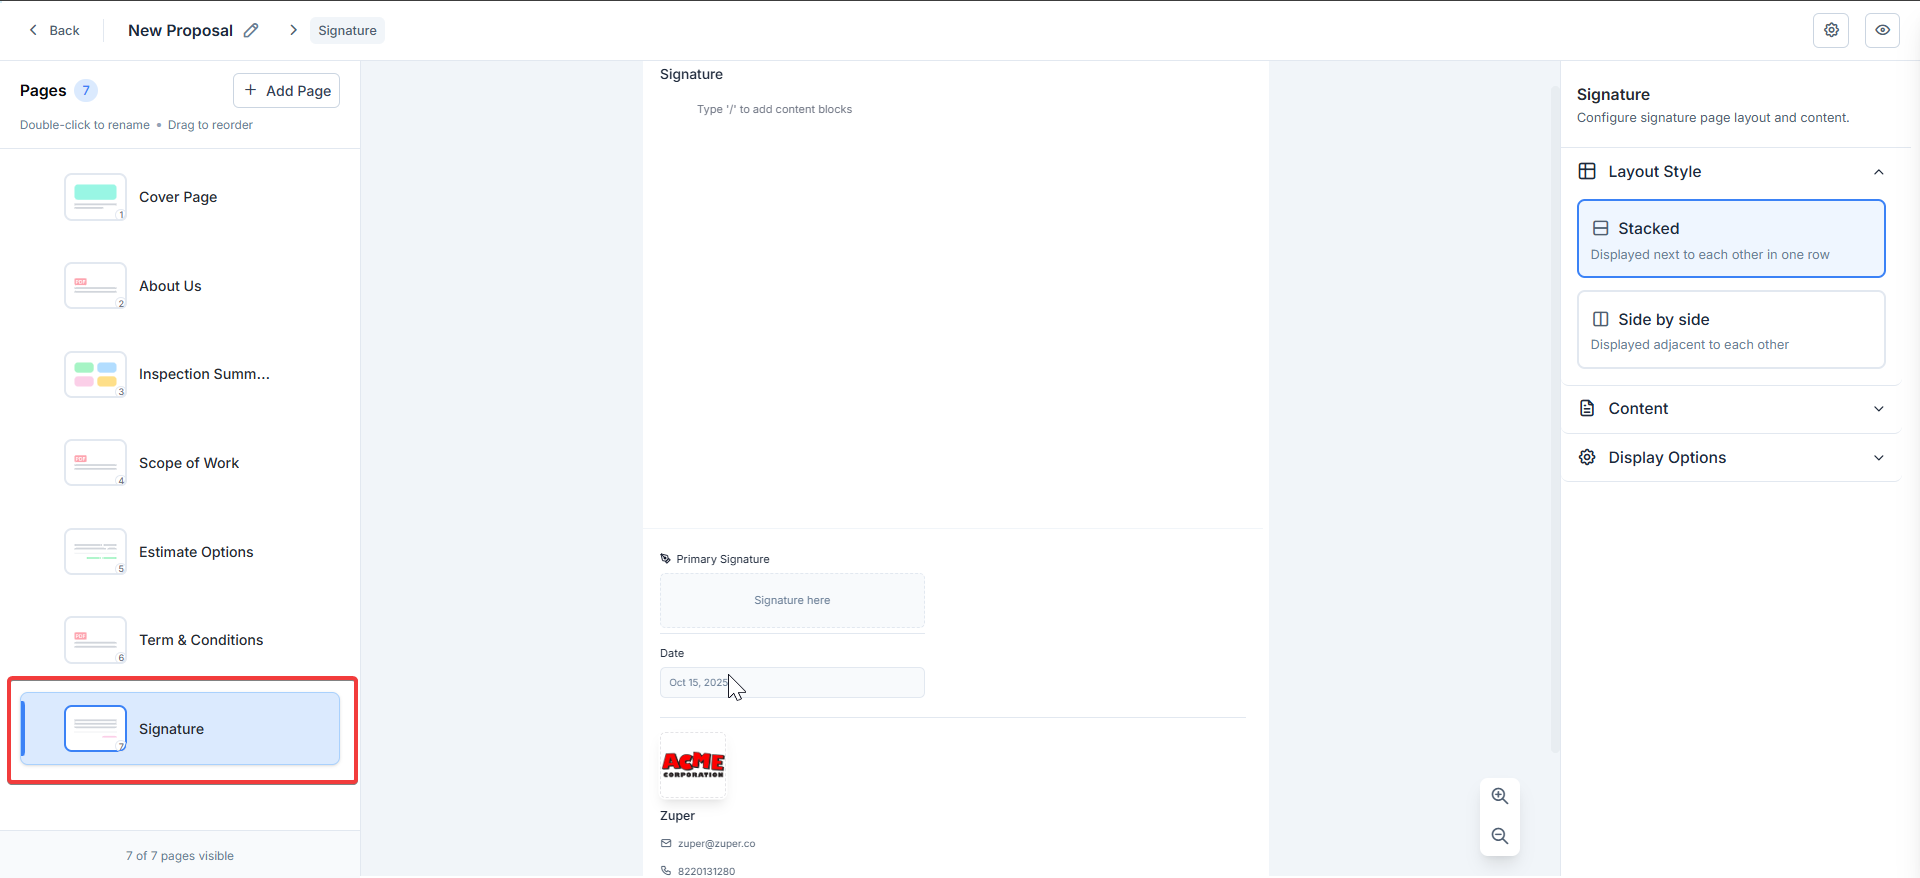
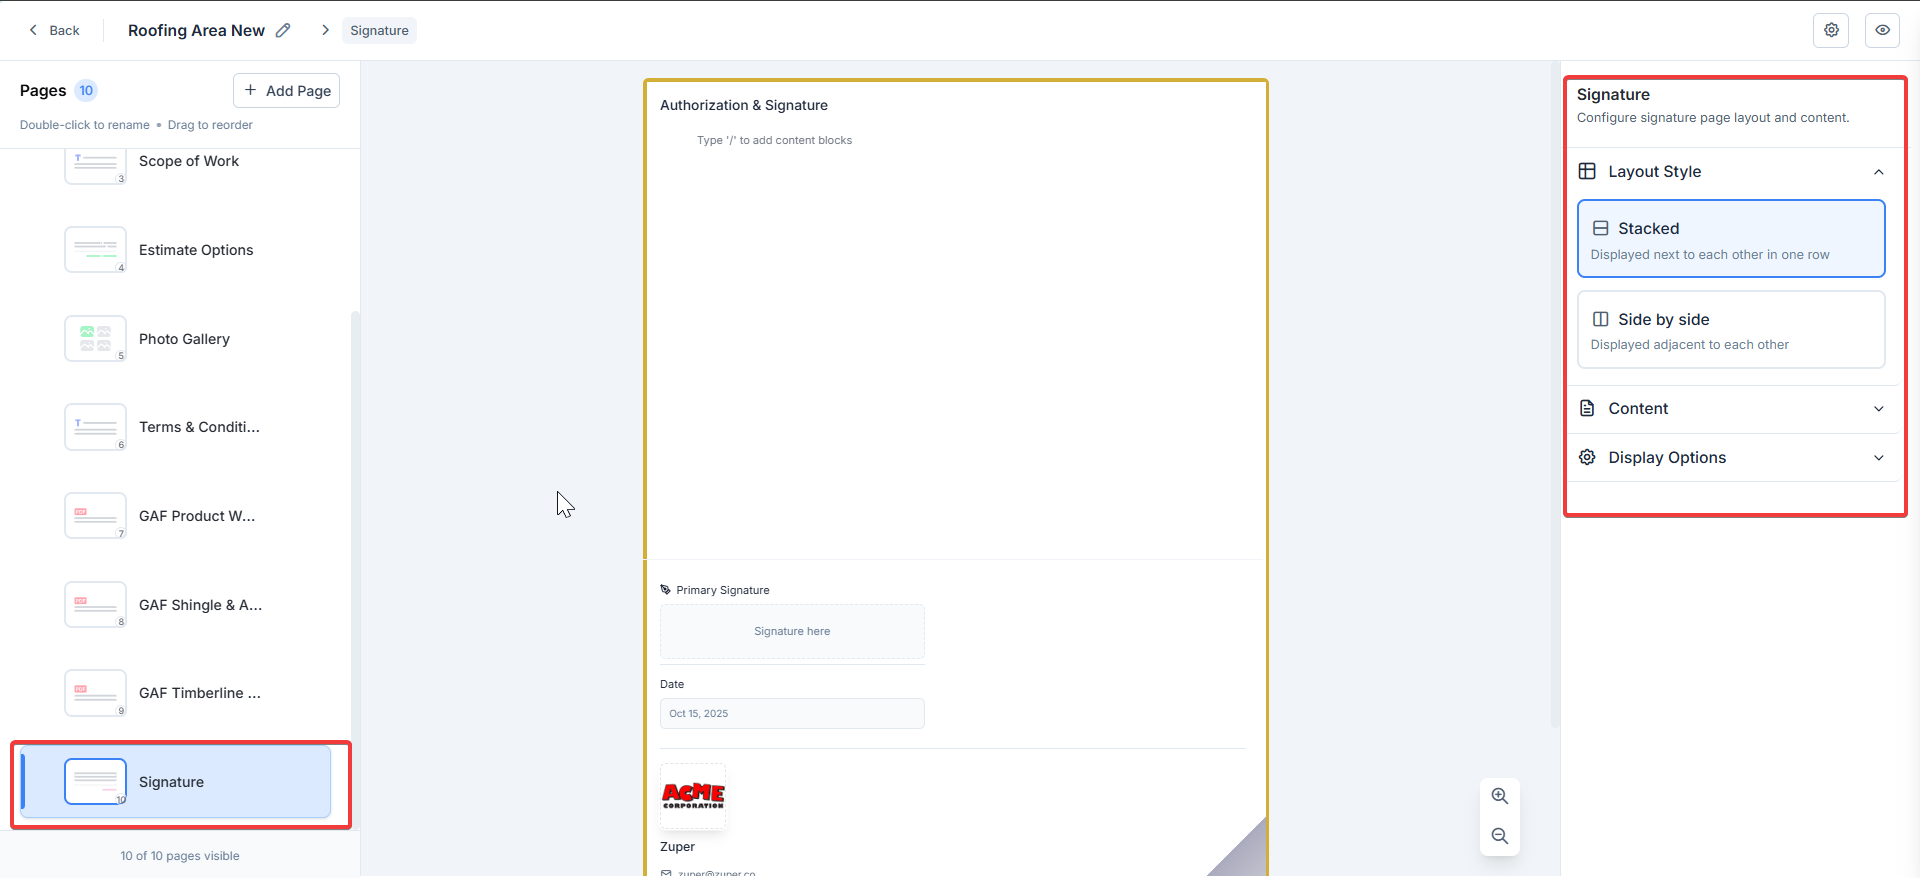
Signature
Capture customer approval with e-signature fields.- Click Signature. You can edit the title from the right panel. Space below the signature in the center pane is a text editor that allows the user to add any additional content required
- The Primary Signature block is displayed by default and static (includes date and signature).
- Set layout: Stacked (vertical fields) or Side by Side (horizontal).
- Customize display: Show company logo, address, phone (e.g., ACME Corporation, Zuper@zuper.co, 822-10380).
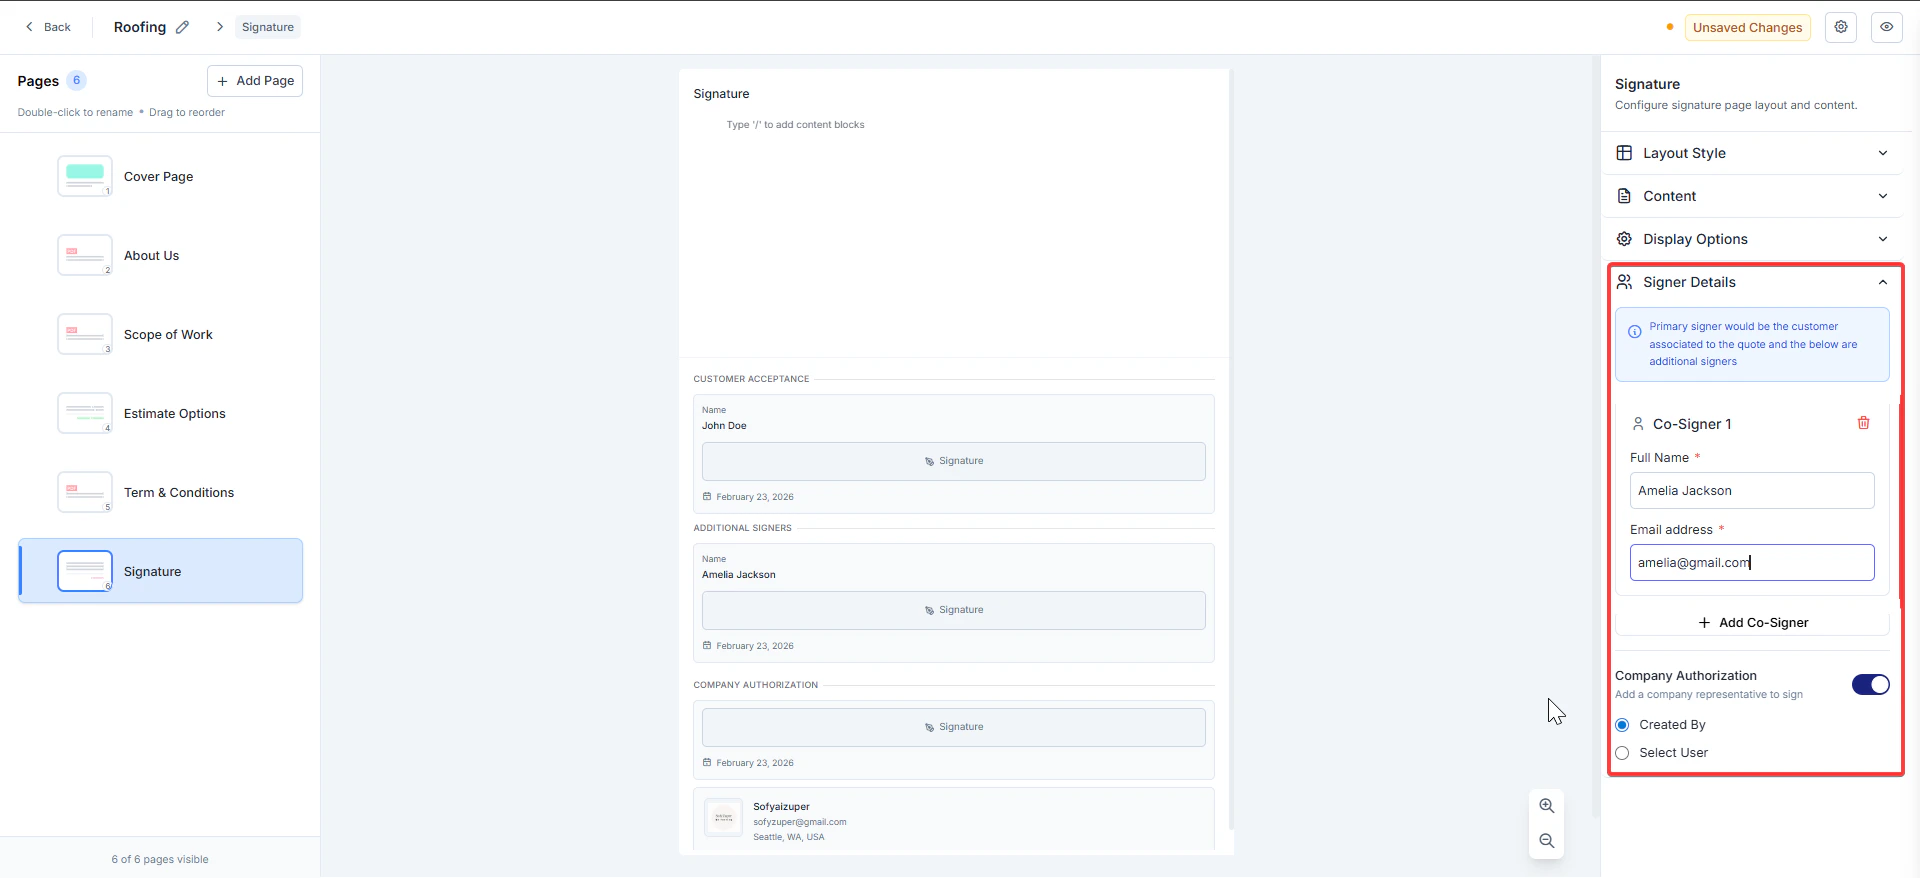
Multi-Signer (Co-Signer & Counter Signer)
Zuper Proposal Layout allows multiple signers on the proposal (primary customer + up to 3 co-signers + company authorization signer).Navigation: Settings → Quotes & Invoices → Proposal Layouts → Signature
- Primary Signer (Customer)
- Automatically set as the customer associated with the proposal.
- This appears in the Signature section in the proposal details.
- Add Co-Signers (Additional Signers)
- Right sidebar → Signer Details section.
- Click + Add Co-Signer.
- Repeat the click for every extra signer you need (You can add up to 3 signers).
Note: To templatize specific signers, such as manufacturers or warranty.
- Fill Details for Each Co-Signer. Each co-signer block has two required fields:
- Full Name.
- Email address (this is where the signature request will be sent).
- Company Authorization (Counter Signer)
- Toggle Company Authorization ON.
- Choose:
- Created By (The person who created the proposal) or
- Select User (Pick any other specific user in your Zuper account).
Custom Pages
The custom page allows you to add four different pages. Text Page, Upload PDF, Job Checklist, and Job Gallery. Text Page – Add additional text pages, add your content, and modify the title. (It is a block editor.) PDF Upload – You can upload the PDF within the 5 MB limit.Note: You can create up to 10 pages, combining both the Text editor and PDF.
- Here, you can set whether mandatory images should be enabled or not and configure the layout.
- If the Mandatory Images option is enabled, sending or generating the proposal PDF without images will be restricted.
- It is recommended to add at least one image while editing the proposal PDF layout within the Proposal details page.
- This settings option enables you to select multiple checklists, each mapped to a single job category per page.
- For each checklist page, you can select multiple checklist statuses from that specific job category and choose the various checklist questions to pick the ones you need.
- If you need to include statuses from another job category, add a new page.
- The selected checklists will automatically render when the proposal is sent.
Present Proposal & Options
You can present or share the proposal with your customer and enable them to select the available options/attributes for each item within the chosen estimate option, as long as the item has options configured and Customer Selection is enabled in the Part/Product configuration. Before signing and accepting the proposal, customers can choose their preferred options for each applicable line item. The selected options are recorded in the accepted quote and automatically carried forward to any Invoice or Purchase Order (PO) created from it, ensuring accurate tracking and reducing manual errors.
Edit Proposal Layout
Navigation: Quotes —> Proposal —> Edit Proposal Layout
- The edit proposal layout opens the proposal layout edit page. Here, you can edit the proposal layout specific to this current proposal and send it directly to the customer.
- While sending the proposal PDF, it will be sent as an attachment.
- The customer will accept the proposal, and you have the option to view the quote PDF or proposal PDF from the quote module.
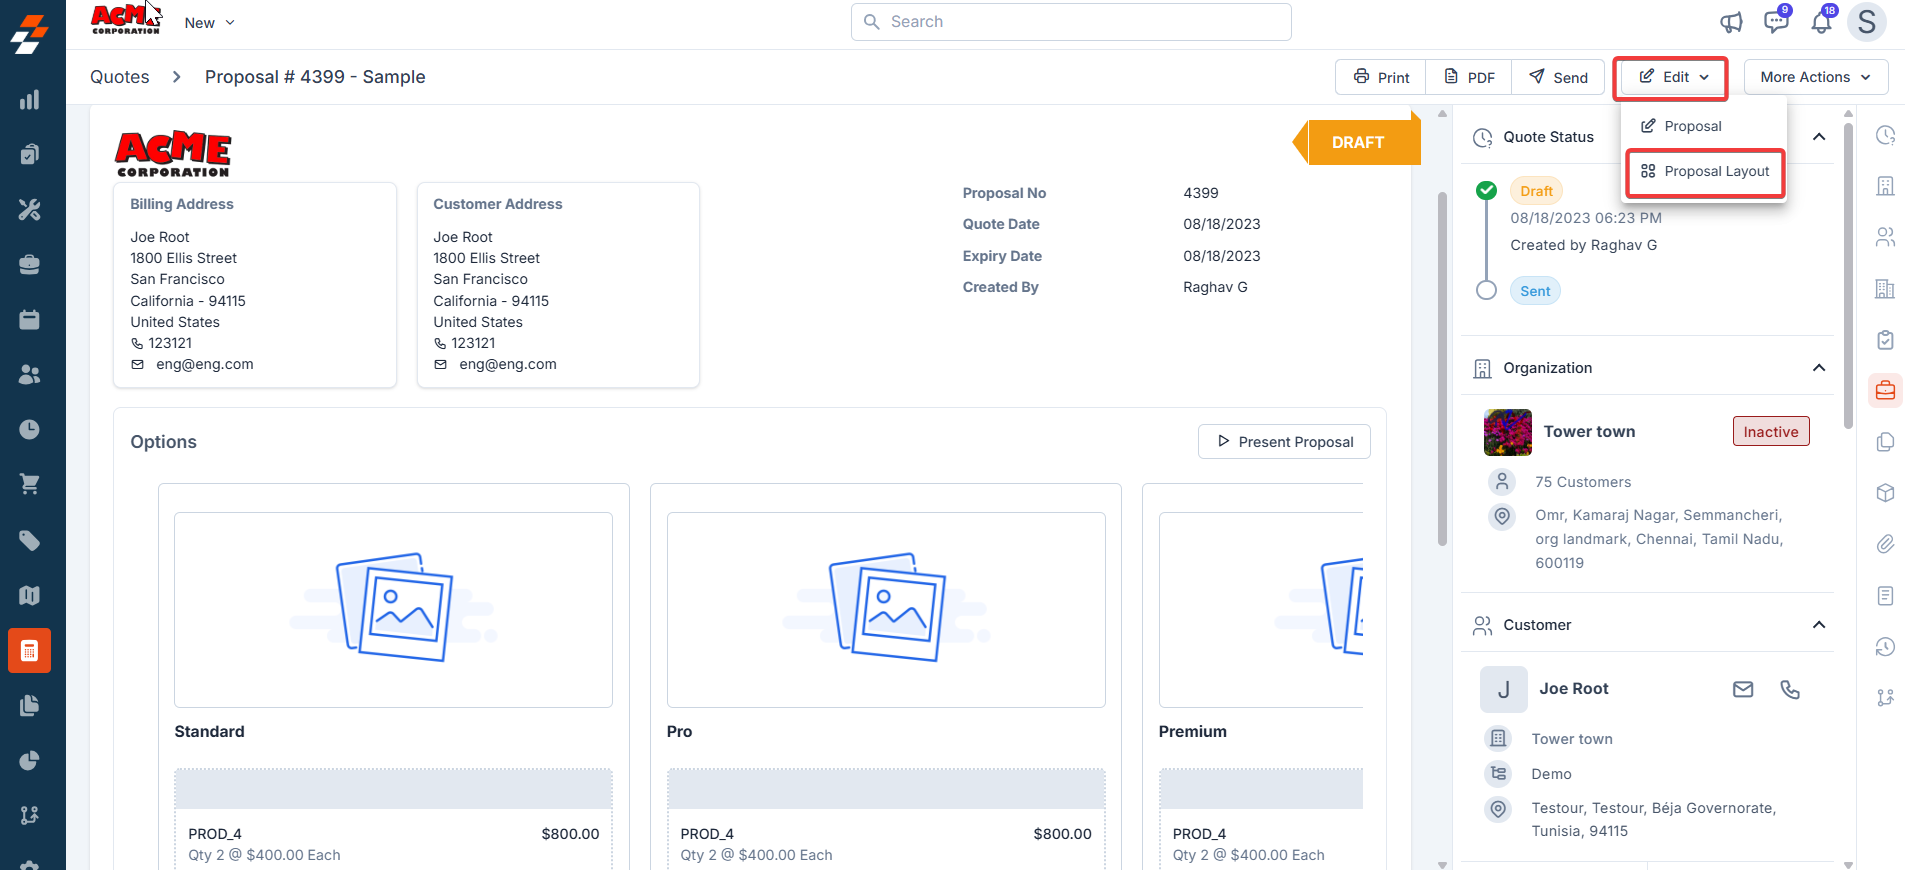
Note: You can choose the “Default Proposal Layout” from Quote and Invoices General Settings.
Add-ons
Add-ons let you include optional products or services specific to each proposal option that are not part of the primary items. These are displayed under the Additional Items section of the proposal. When the proposal is presented to the customer, they can select their preferred estimate option. Based on the selected option, the relevant Add-ons will be displayed. The customer can choose the Add-ons they would like to include, and the total proposal value will be recalculated in real time accordingly. Once finalized, the customer can review the updated estimate and provide their approval by signing the proposal. When to Use Add-ons Use add-ons when you want to:- Include optional or supplementary items.
- Add accessories or warranty or AMC packages.
Limitations:
- The PDF upload size should not exceed 5 MB.
- You can create up to 20 proposal layouts only.
- For custom pages, text pages, or PDF pages, you can create up to 10 pages only as a combined limit.
FAQs – Zuper Proposal Layouts
1. What are the Proposal Layouts used for? The Proposal Layouts help you create professional, multi-page proposals for clients. It combines editable text, uploaded PDFs, pricing details, inspection summaries, and electronic signatures into a single document. 2. What’s the maximum size for uploaded PDF files? Each uploaded PDF file must be 5 MB or smaller. Larger files will fail to upload—compress the file or save it as a standard PDF before retrying. 3. How many proposal layouts can I create? You can create up to 20 proposal layouts within your Zuper workspace. 4. How many custom pages can I add? You can add up to a combined limit of 10 pages (limitations apply per proposal layout). Additional pages must be deleted or merged before adding more. 5. Can I reorder or rename pages in a proposal layout? Yes. You can rename or reorder any page except the Cover Page, which cannot be deleted or reordered. 6. Why aren’t my job-related pages/data showing in the proposal? This usually occurs when the proposal isn’t linked to a job or when the required job details are missing. Verify that all job fields are completed and linked correctly. 7. Can I include inspection forms and job photos? Yes. Use the Inspection Summary section to import job photos, inspection forms, and checklists. 8. What happens if I don’t add a cover image? If a custom cover image isn’t added, a default cover image provided by Zuper will appear automatically. 9. How can I edit a proposal layout for a specific proposal? Go to Quotes → Proposal → Edit Proposal Layout. This allows you to modify the layout for that proposal without changing the master layout. 10. What file formats are supported for uploads? Only standard PDF files are supported for upload in the PDF pages. Image uploads are supported in the text editor. 11. Can I preview how the proposal looks on mobile devices? Yes. Use the preview option to check the formatting on both desktop and mobile views, ensuring the content displays correctly before sending. 12. Are e-signatures legally binding? Yes. Zuper’s e-signature feature complies with digital signature standards, making signed proposals legally valid agreements once accepted by clients. 13. How can I reuse an existing layout for new proposals? Open the desired layout in Proposal Layouts, duplicate it, rename it for the new job, and make any necessary edits. This ensures your original layout remains unchanged.Best Practices
- Keep PDFs Lightweight and Optimized
- Compress uploaded PDFs before adding them (file size must be ≤ 5MB).
- Avoid embedding unnecessary images or scanned pages that inflate file size.
- When possible, use the text editor instead of uploading large sections of PDF.
- Use Merge Tags for Dynamic Content
- Incorporate merge tags like
\{{ customer.customer_first_name }}or\{{ quote.quote_number }}to automatically populate customer and quote details. - This ensures data accuracy and reduces the time required for manual editing.
- Structure Information Logically
- Follow the recommended sequence: Cover → About Us → Inspection → Scope → Estimate → Terms → Signature.
- Keep technical or detailed documents in uploadable PDF sections rather than long text blocks.
- Use bullet points and tables to improve readability.
- Test Before Sending
- Use the Preview option to confirm layout, image quality, and text alignment across devices.
- Double-check for placeholder text (e.g., “No inspection forms imported”) and replace it with actual content.
- Validate that totals and taxes display correctly in the Estimate Options section.
- Maintain Legal and Compliance Standards
- Keep your Terms & Conditions page updated with your latest legal clauses.
- Include payment terms, warranty details, and liability disclaimers clearly.
- Use e-signature fields appropriately, and only authorized signers should be listed.
- Optimize for Customer Experience
- Keep proposals concise, limit to 8–10 pages for easy client review.
- Add visual elements such as inspection photos and job galleries to enhance inspection photos and job galleries for credibility.
- Use the Cinematic or Split Screen cover layout for modern, professional visuals.