Navigation: Settings -> Modules -> Quotes and Invoices - > Quotes and Invoices General Settings
Quotes and invoices general settings
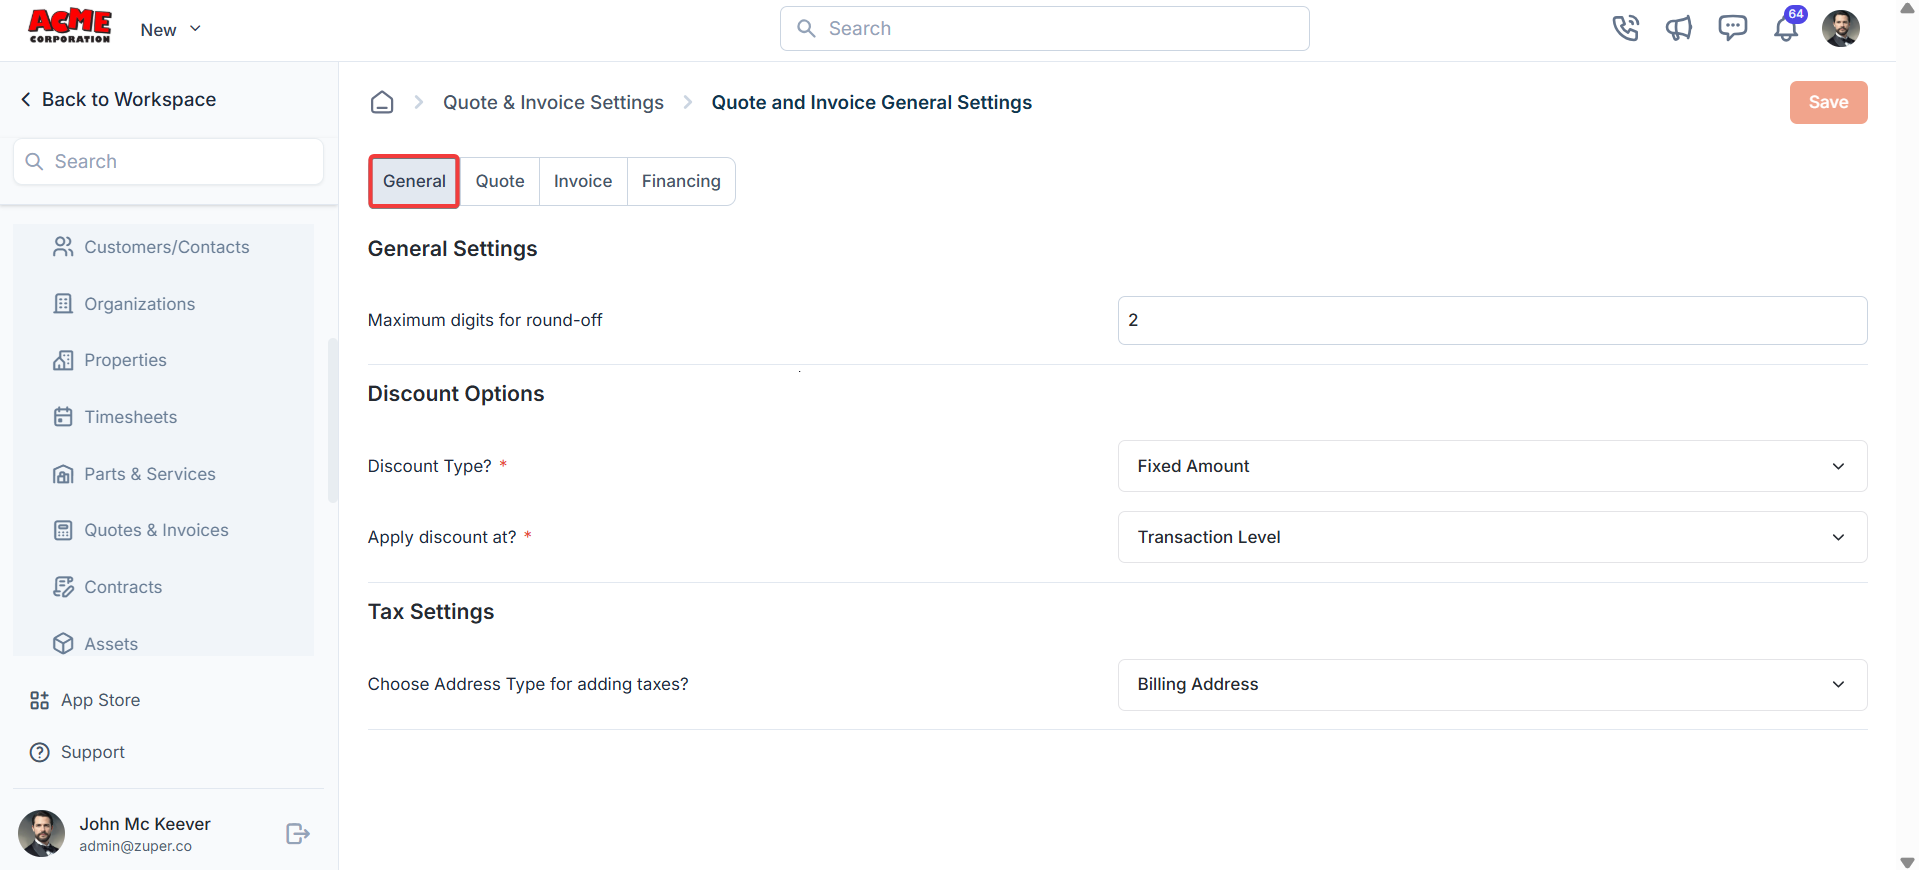
- Select the “Settings” module from the left panel. Under the “Modules,” choose the “Quotes & Invoices.” Select the “Quote and Invoice General Settings.”

General tab
The General tab allows you to configure settings for quotes and invoices.- Maximum Digits for Round-off: Set the number of decimal places for rounding off amounts.
- Discount Type: Choose the default discount type (Fixed Amount or Percentage).
- Apply Discount at: Select the level at which discounts are applied (Transaction Level or Line-Item Level).
- Choose Address Type for Adding Taxes: Specify which address type to use for tax calculations (Billing Address or Service Address).
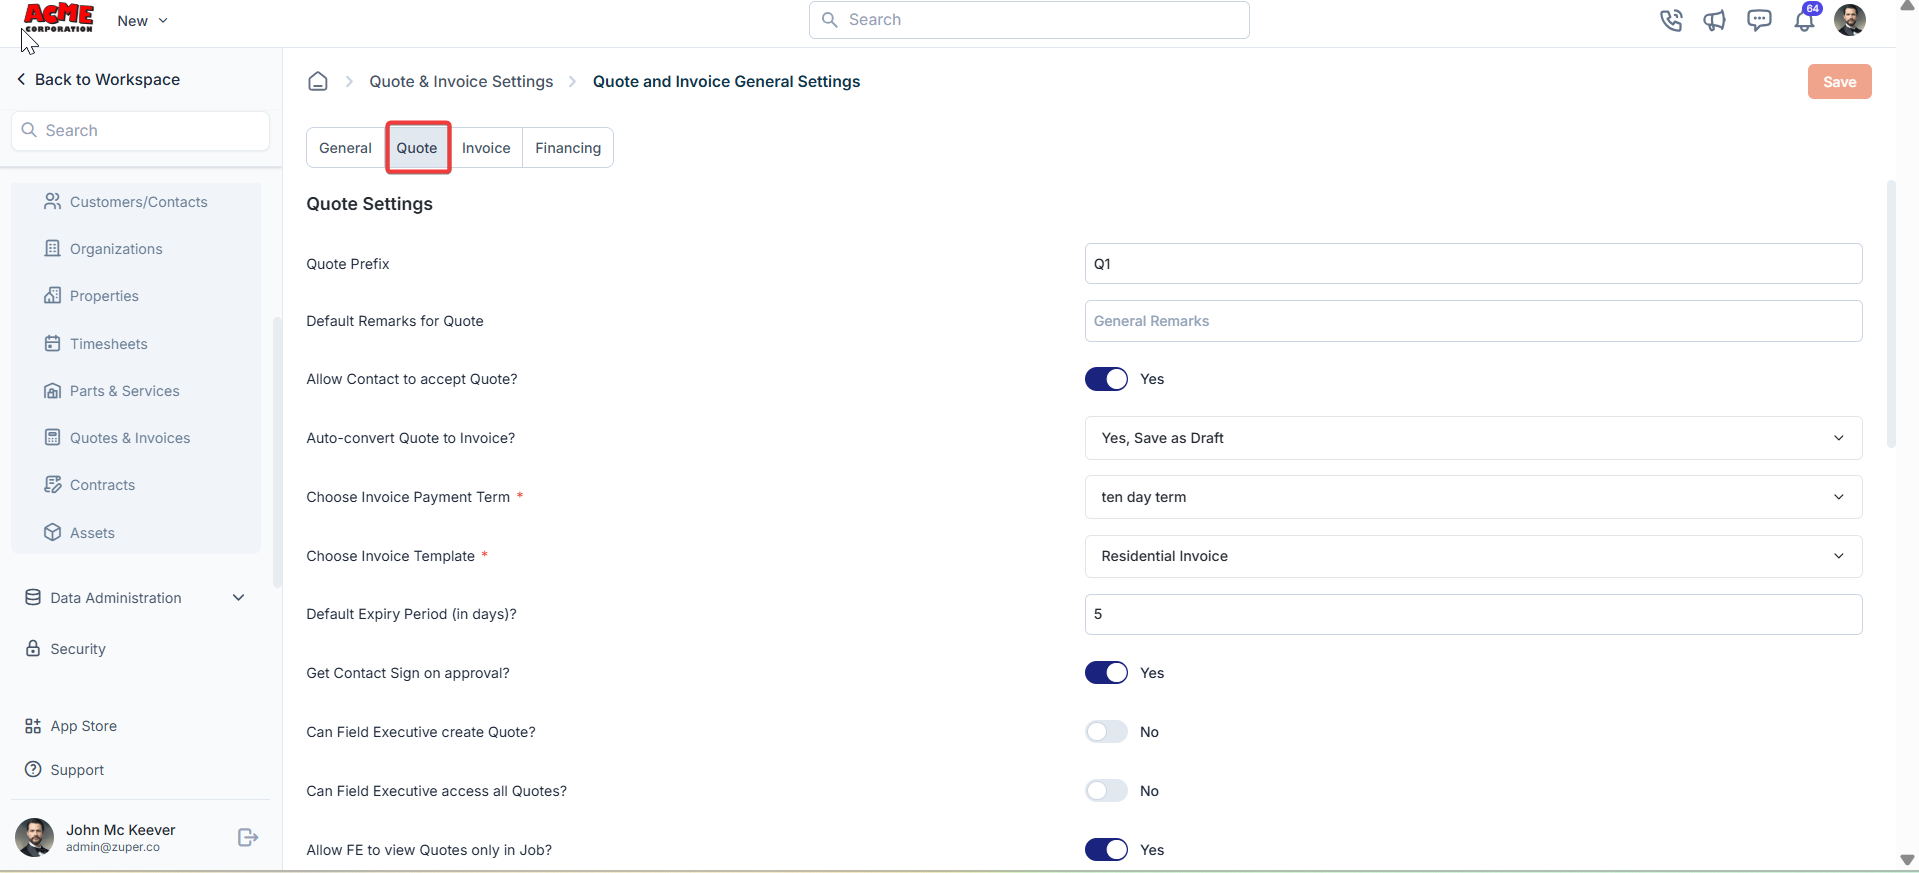
Quote tab
The Quote tab lets you customize settings specific to quotes.- Quote Prefix: Define a prefix for quote numbers.
- Default Remarks for Quote: Add default remarks that will appear on all quotes.
- Allow Contact to Accept Quote?: Enable or disable the option for contacts to accept quotes directly (Yes/No).
- Auto-convert Quote to Invoice?: Choose whether to automatically convert a quote to an invoice upon acceptance (Yes, Save as Draft | Yes, Save and Send, or No).
- Choose Invoice Payment Term: Set the default payment term for invoices generated from quotes (e.g., 10-day term).
- Choose Invoice Template: Select a default invoice template for quotes converted to invoices.
- Default Expiry Period (in days): Specify the default validity period for quotes.
- Get Contact Sign on Approval?: Decide if a contact’s signature is required upon quote approval.
- Can Field Executive Create Quote?: Allow field executives to create quotes. (Yes/No).
- Can Field Executive Access All Quotes?: Allow field executives to access all quotes (Yes/No).
- Allow FE to View Quotes Only in Job?: Restrict field executives to view only quotes associated with their assigned jobs (Yes/No).
- Allow Payment Collection?: Enable payment collection for quotes (Yes/No).
- Allow Sending Payment Link to Contact?: Allow sending payment links to contacts for quotes (Yes/No).
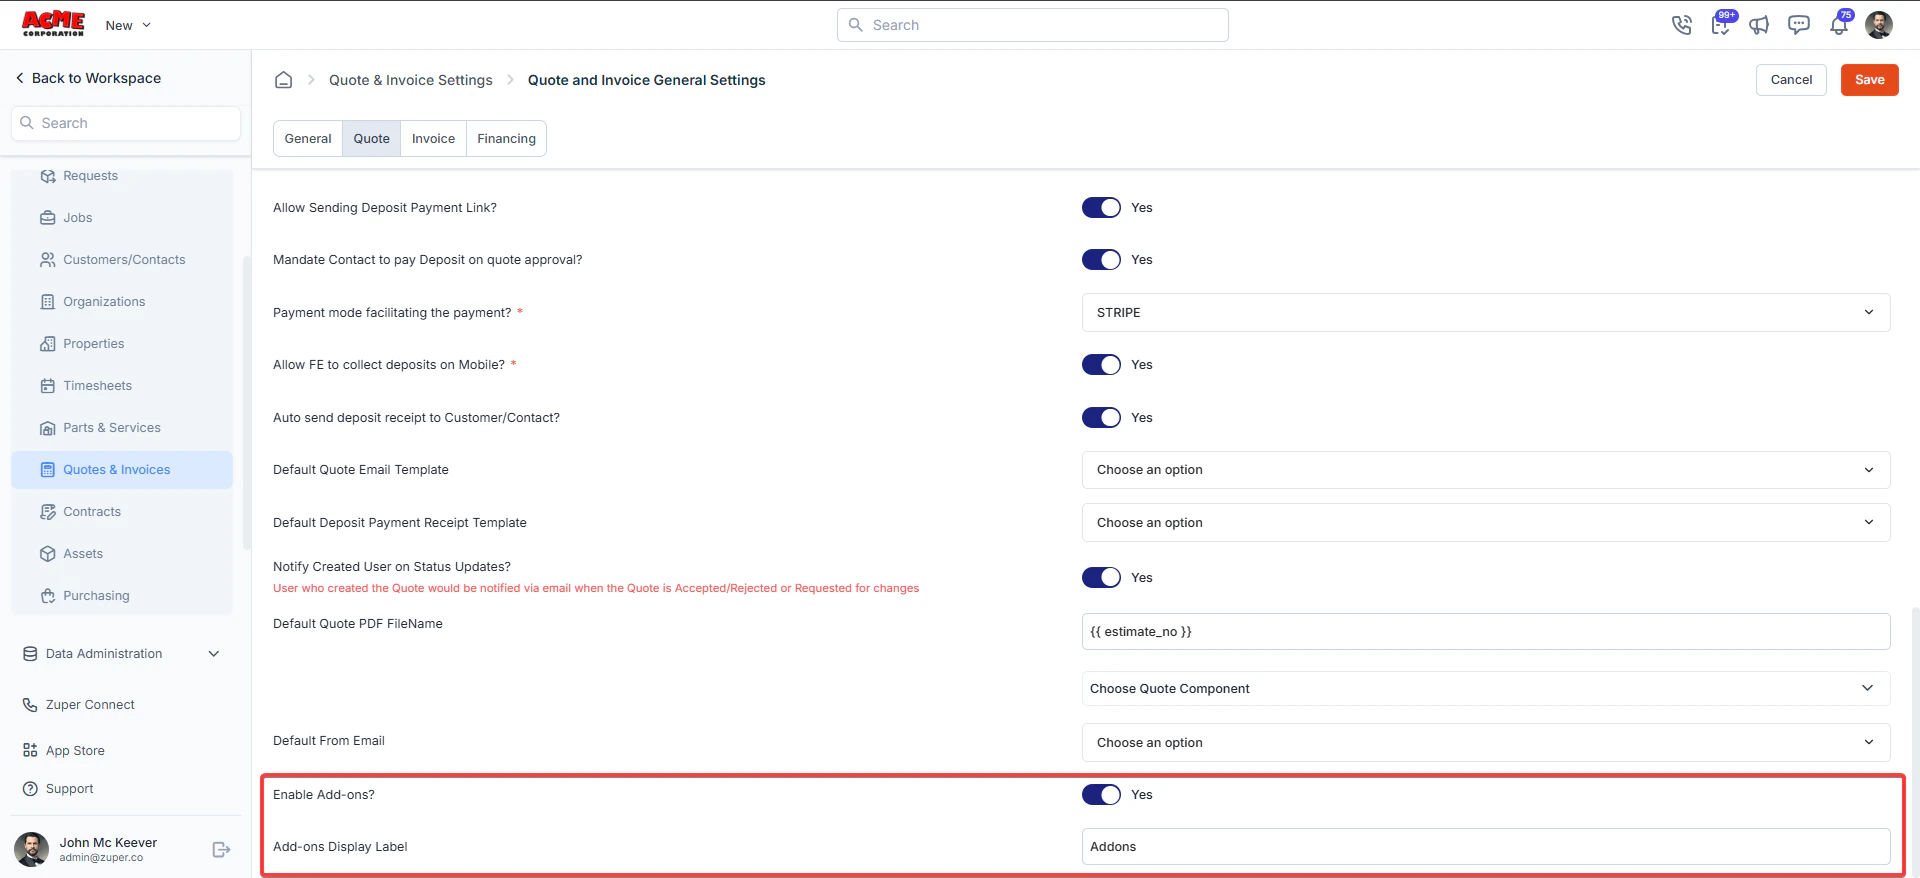
- Mandate Contact to Pay Deposit on Quote Approval?: Require contacts to pay a deposit upon approving a quote (Yes/No).
- Payment Mode Facilitating the Payment: Select the default payment mode.
- Allow Field Executive to Collect Payment?: Allow field executives to collect payments for quotes (Yes/No).
- Notify Created User on Status Updates?: Notify the user who created the quote about status updates (e.g., Accepted/Rejected/Requested for Changes) (Yes/No).
- Default Quote PDF Filename: Set the default filename format for quote PDFs.
- Choose Quote Component: Select components to include in quotes.
Receipt settings
- Auto Send Receipt to Customer / Contact?: Enable automatically sending receipts to contacts after payment (Yes/No).
- Default Deposit Payment Receipt Template: Select a template for deposit payment receipts.
- Default Quote Email Template: Choose a default email template for sending quotes.
Add-ons
Settings → Quotes & Invoices → Quote and Invoice General Settings → Quote tab Step 1: Enable Add-ons- Locate Enable Add-ons?
- Toggle the setting to Yes
- In the Add-ons Display Label, enter the label you want customers to see
- Example: Add-ons, Optional Services.
- This label will appear in the proposal PDF presentation.
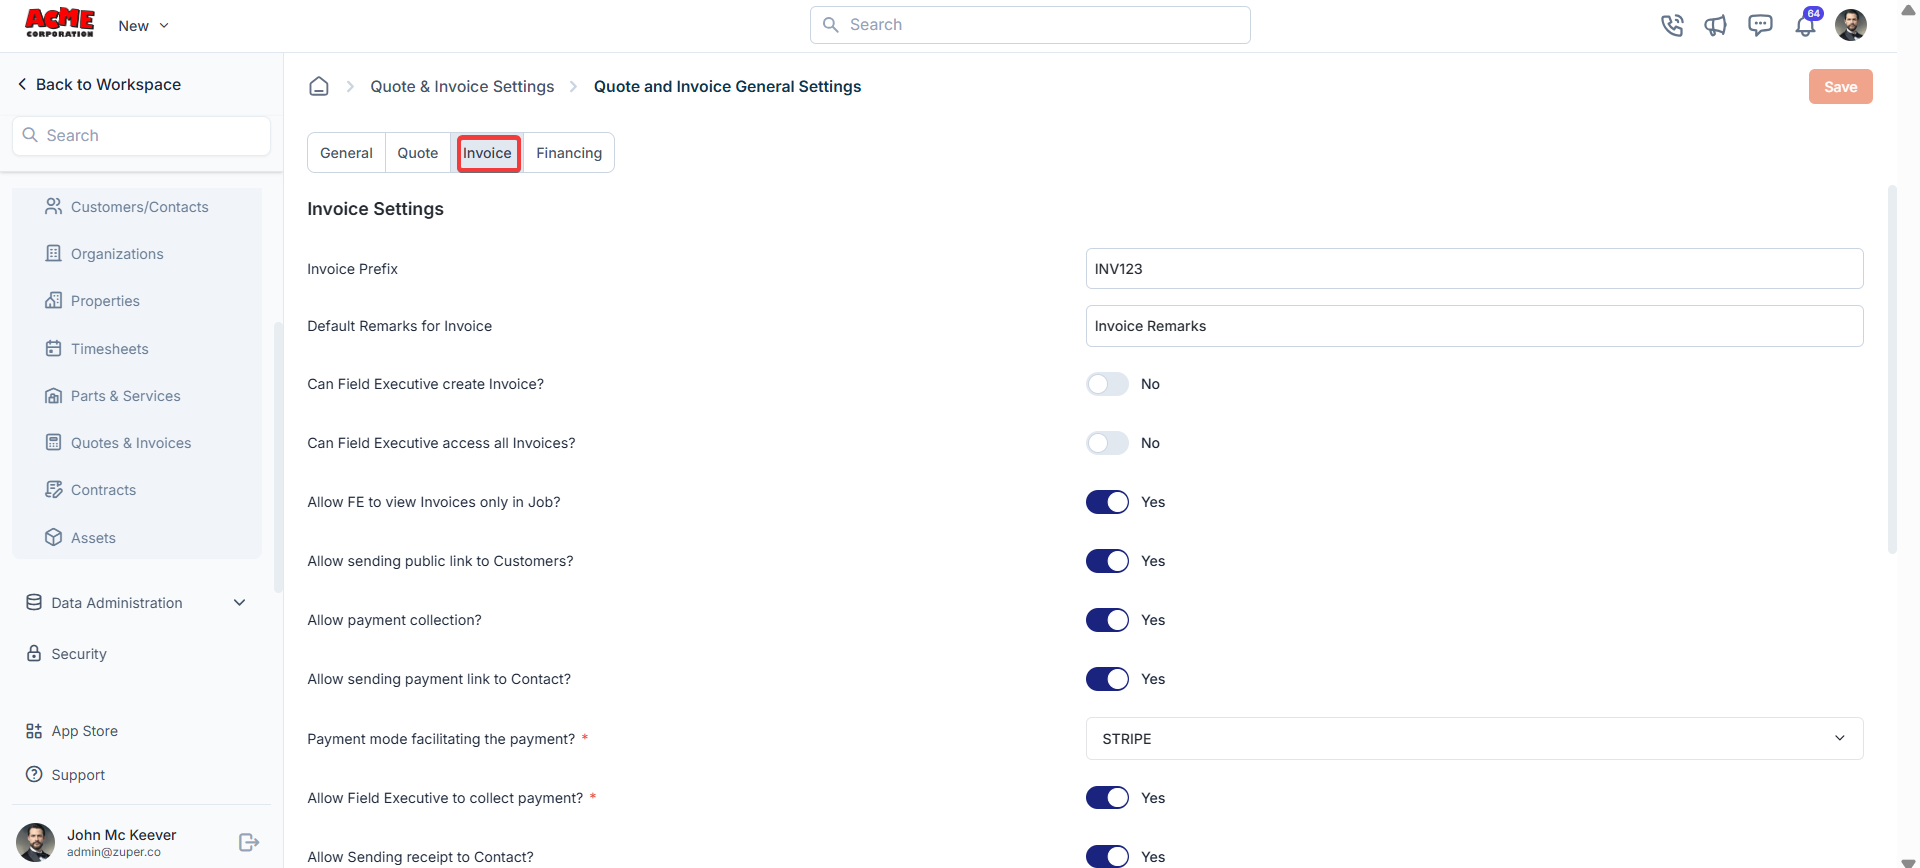
Invoice tab
The Invoice tab allows you to configure settings specific to invoices.- Invoice Prefix: Define a prefix for invoice numbers.
- Default Remarks for Invoice: Add default remarks that will appear on all invoices.
- Can Field Executive Create Invoice?: Allow field executives to create invoices (Yes/No).
- Can Field Executive Access All Invoices?: Allow field executives to access all invoices (Yes/No).
- Allow FE to View Invoices Only in Job?: Restrict field executives to view only invoices associated with their assigned jobs (Yes/No).
- Allow Sending Public Link to Customers?: Allow sending public invoice links to customers (Yes/No).
- Allow Payment Collection?: Enable payment collection for invoices (Yes/No).
- Allow Sending Payment Link to Contact?: Allow sending payment links to contacts for invoices (Yes/No).
- Payment Mode Facilitating the Payment: Select the default payment mode.
- Allow Field Executive to Collect Payment?: Allow field executives to collect invoice payments (Yes/No).
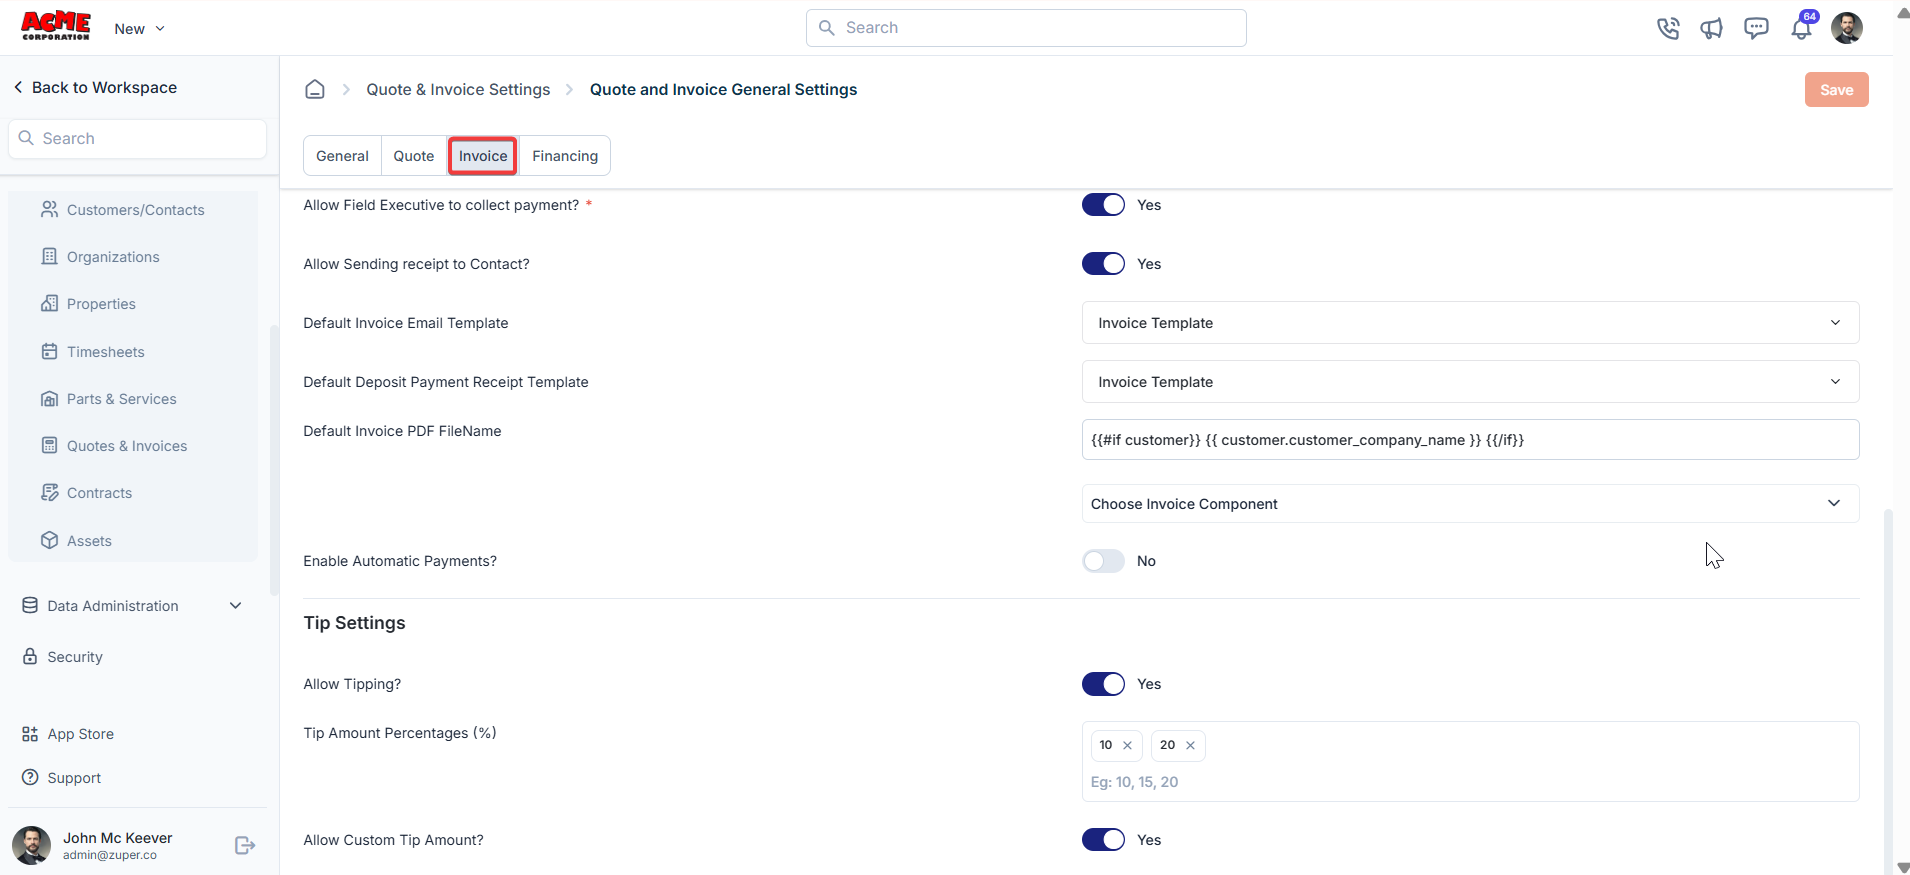
- Default Invoice PDF Filename: Set the default filename format for invoice PDFs.
- Choose Invoice Component: Select components to include in invoices.
- Enable Automatic Payments?: Enable automatic payment processing for invoices (Yes/No).
Note: The invoice template controls PDF layout, including where totals appear. Invoices with many line items may display the total close to the page header on the last page. Contact support@zuper.co for template changes. Changes apply to all invoices using that template.
Receipt settings
- Auto Send Receipt to Customer / Contact?: Enable automatically sending receipts to contacts after payment (Yes/No).
- Default Deposit Payment Receipt Template: Select a template for deposit payment receipts.
- Default Invoice Email Template: Choose a default email template for sending invoices.
- Allow Tipping?: Enable invoice tipping (Yes/No).
- Tip Amount Percentages (%): Set predefined tip percentage options (e.g., 10%, 15%, 20%).
- Allow Custom Tip Amount?: Customers can enter a custom tip amount (Yes/No).
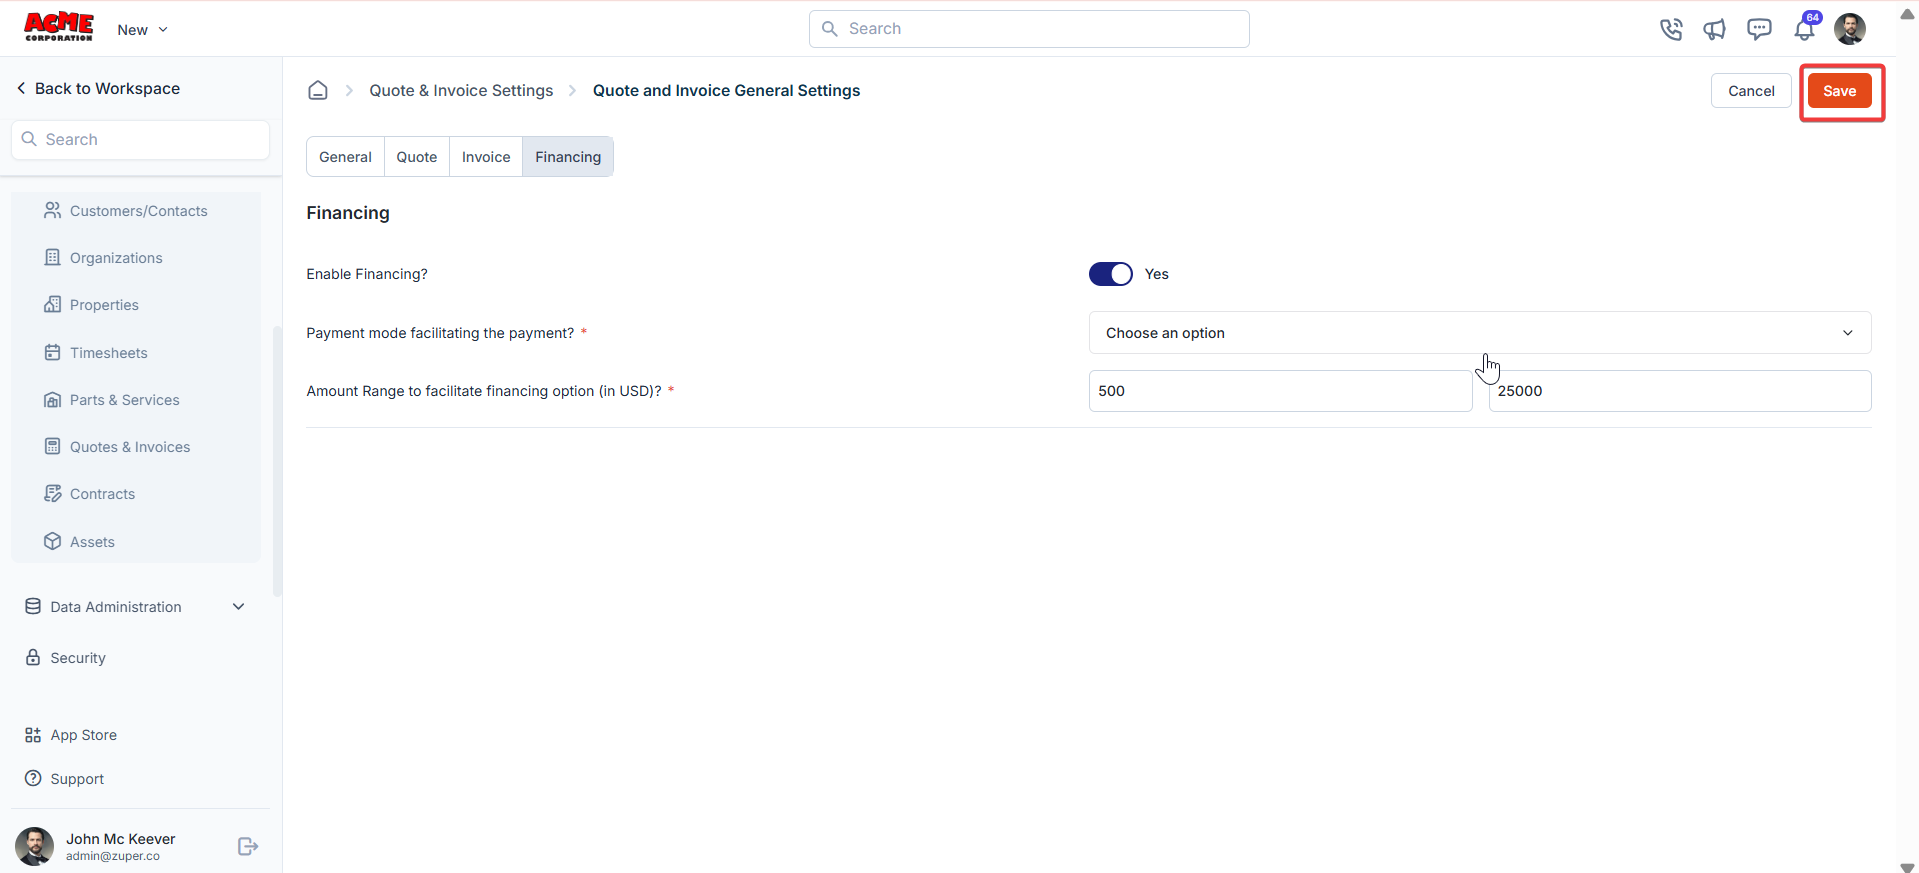
Financing tab
The Financing tab lets you set up financing options for quotes and invoices.- Enable Financing?: Turn financing options on or off (Yes/No).
- Payment Mode: Facilitating the Payment: Select the payment mode for financing.
- Amount Range to Facilitate Financing Option (in USD): Define the amount range for financing.
Service packages
Before providing an official price quote or estimate, a business or service provider may send a preliminary document or communication to a potential client. This is called a “Proposal.” It is usually used when the project or service scope needs clarification or definition before determining a specific price.Navigation: Settings -> Modules -> Quotes and Invoices -> Service Packages
- Select the “Settings” module from the left panel. Under the “Modules,” choose the “Quotes & Invoices.” Select the “Service Packages.”
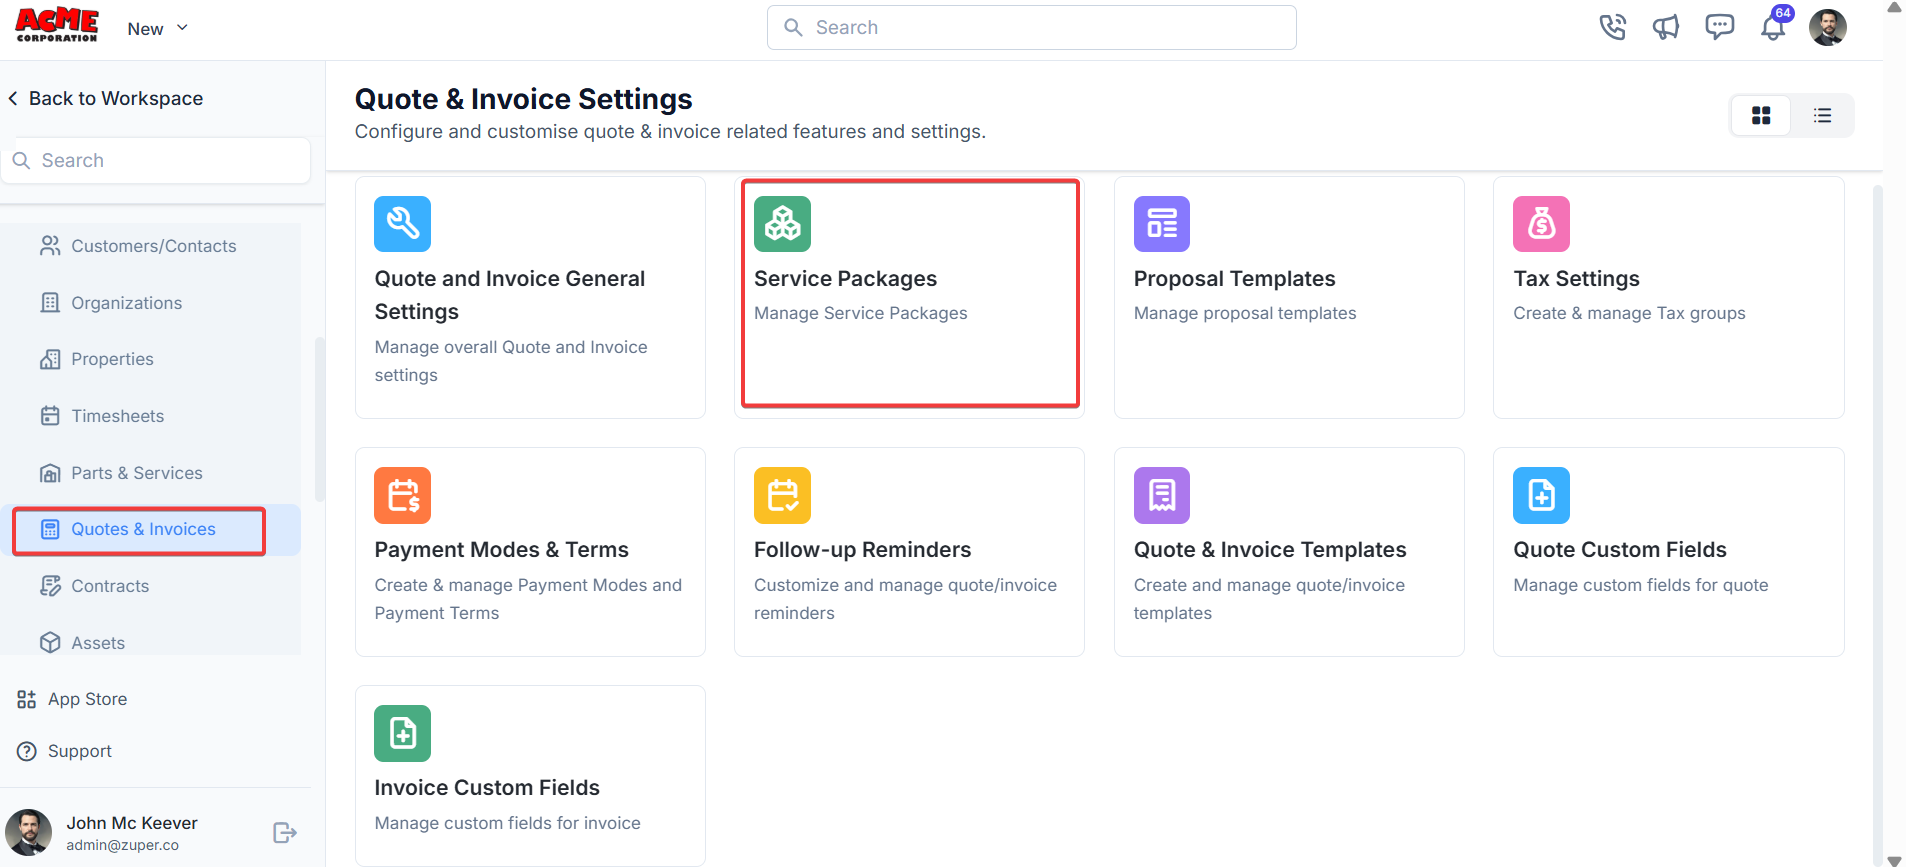
- Select the “Service Packages” and click the “+ New Package.”
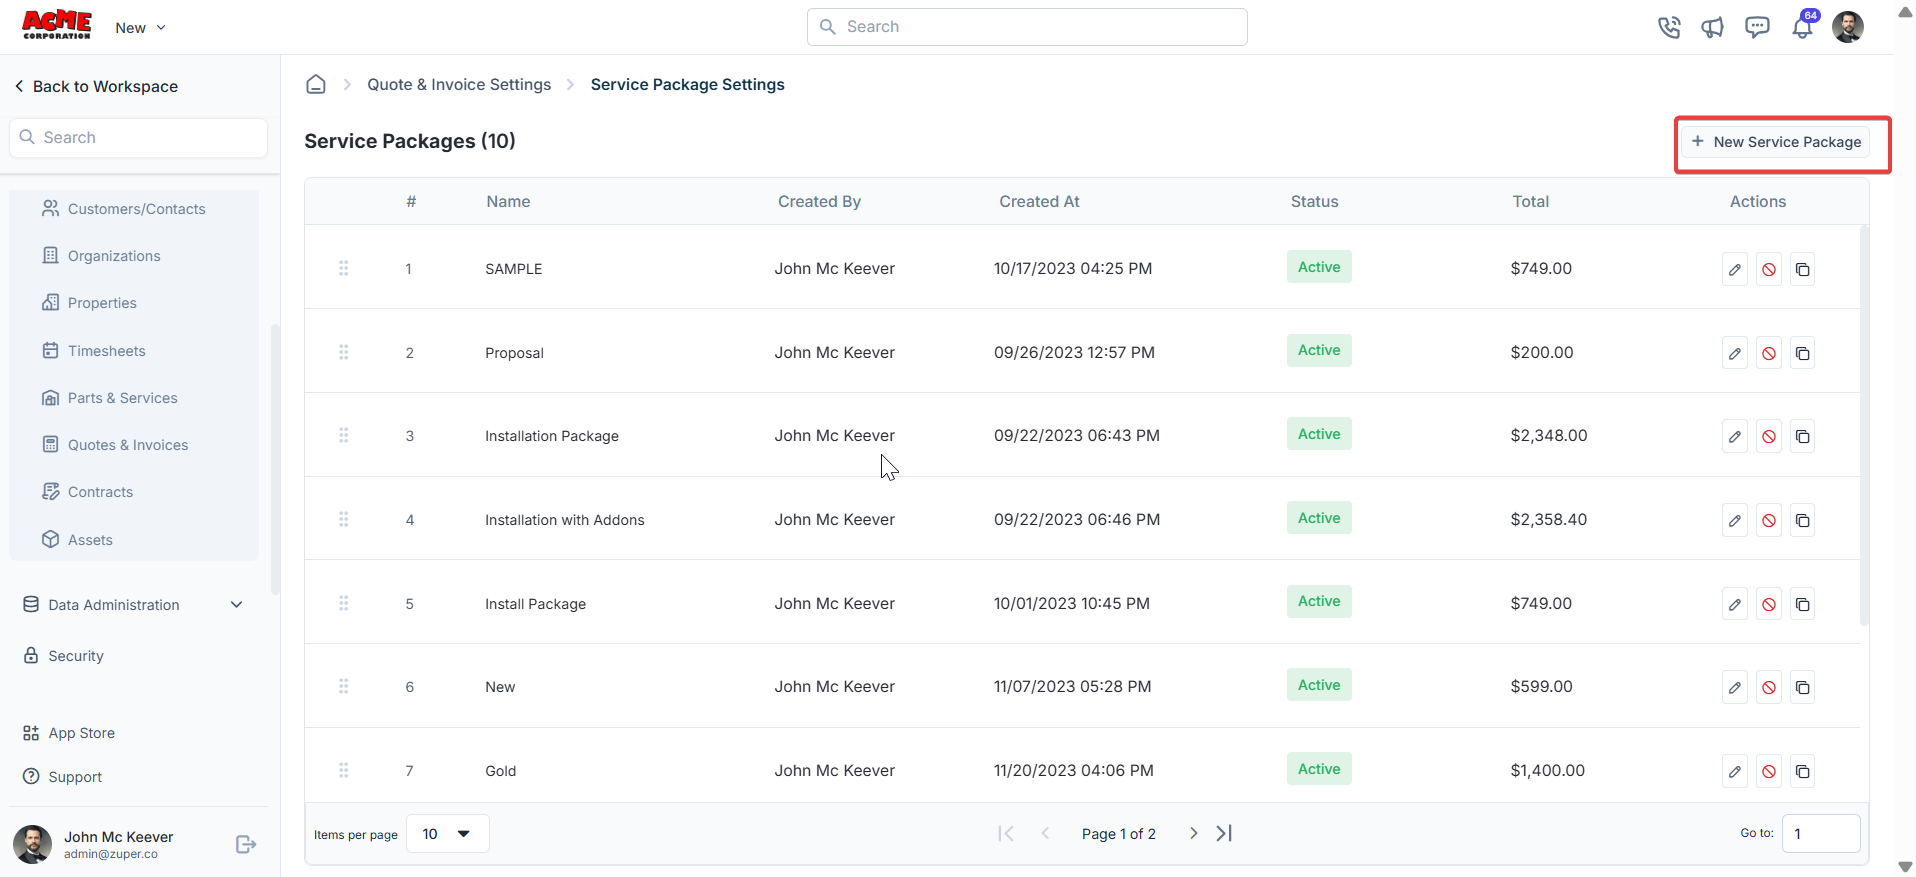
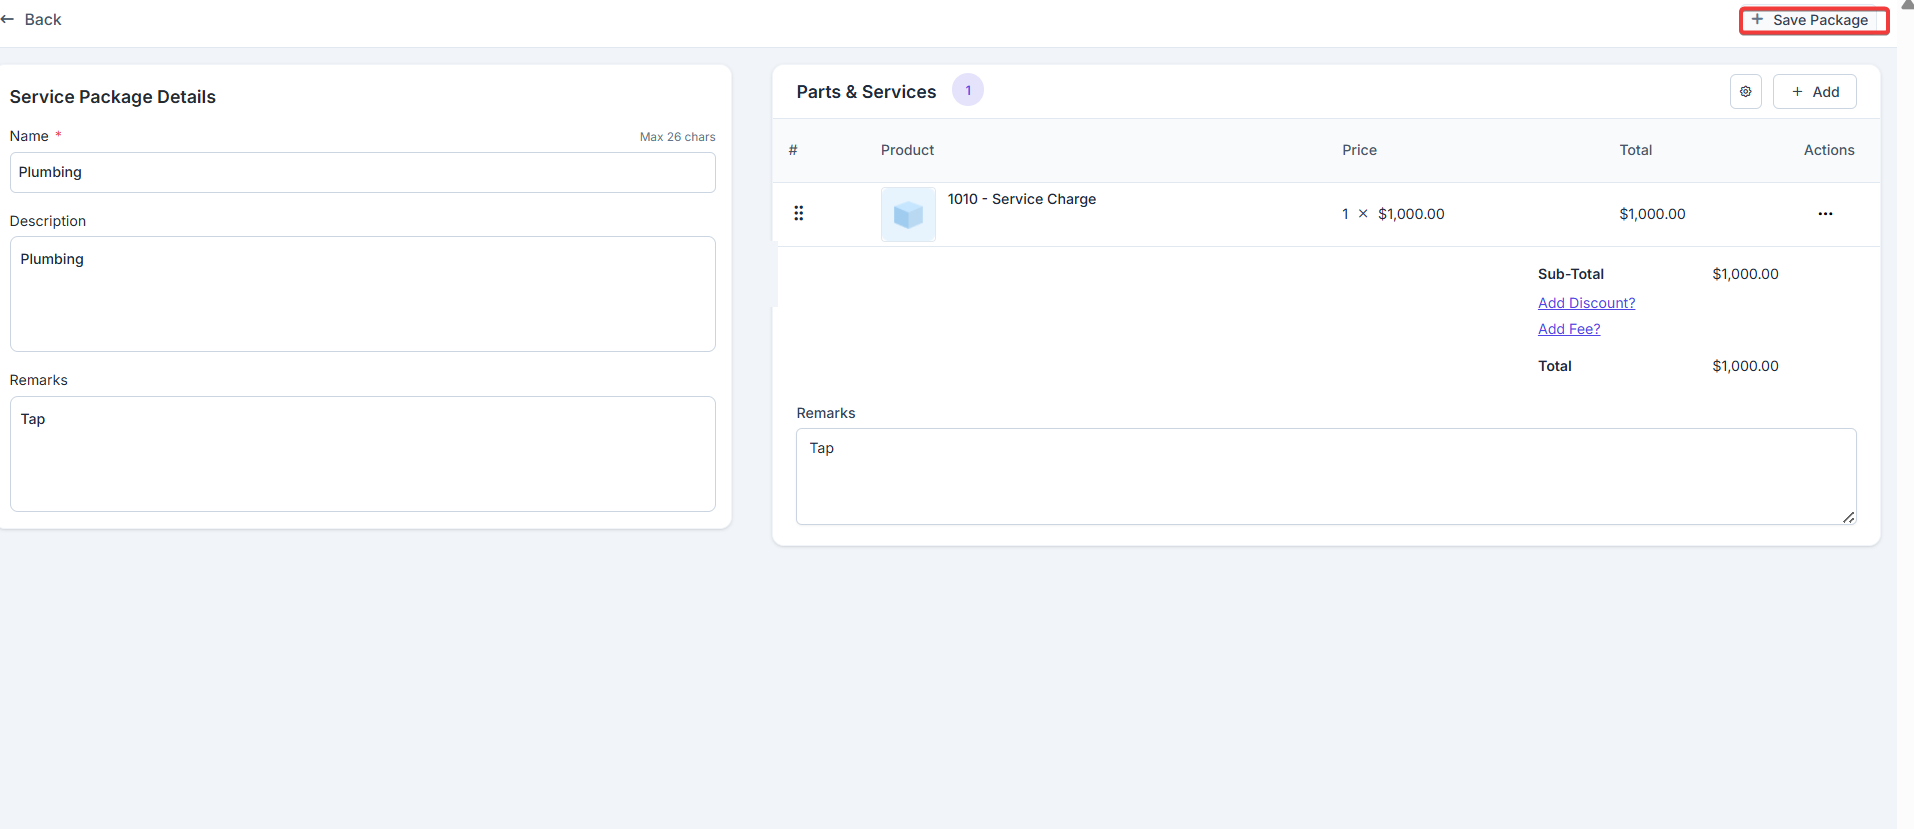
- Under the “Service Package Details” section:
- Name – Enter the name of the service package.
- Description – Enter the description of the service package.
- Remarks - Enter the remarks.
- Click the ”+ Add” button to add individual parts, products, and services.
- Alternatively, use the dropdown menu next to the ”+ Add” button to: o Add from Group: Select a predefined group of items to add to the package.
- Bundle: Add a product or service bundle. Note that bundles added here will not appear as a product type in the filter menu.
- Adjust the margin percentage to instantly recalculate markup % and the total sell price for all line items.
Tax settings
Navigation: Settings -> Modules -> Quotes and Invoices - > Tax Settings
- Select the “Settings” module from the left panel. Under the “Modules,” choose the “Quotes & Invoices.” Select the “Tax Settings.”
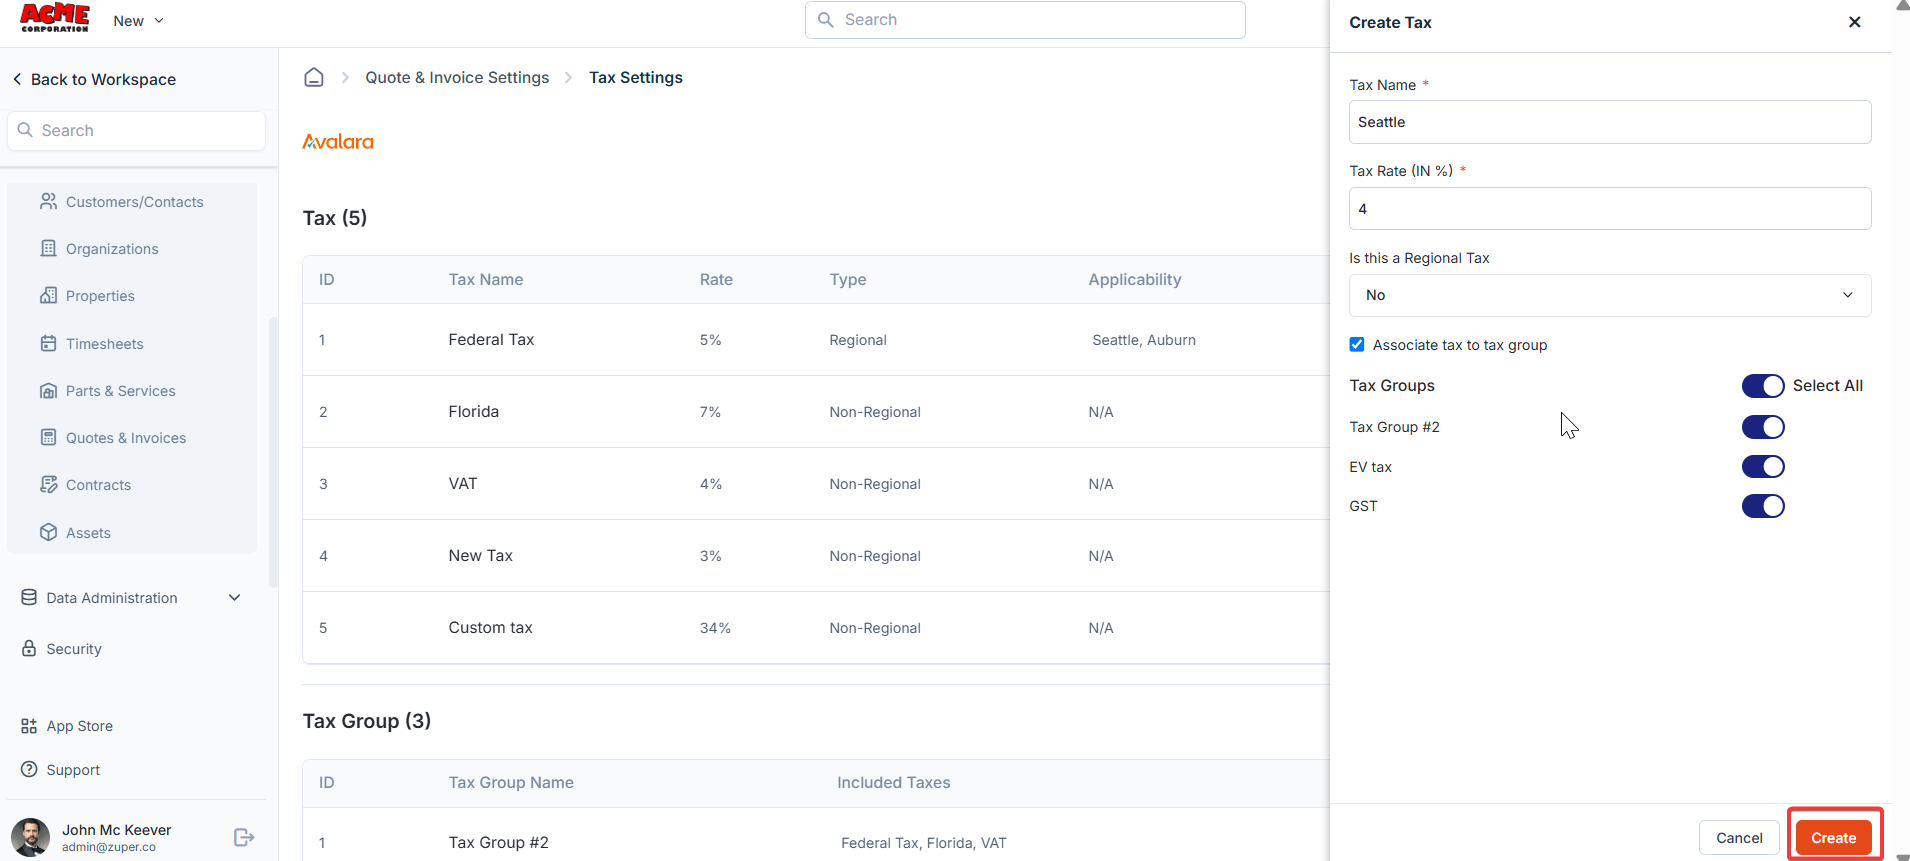
- Click “+ New Tax.”

- Tax Name – Enter the tax name.
- Tax Rate – Enter the %
- Is this a Regional tax – You can choose either “Yes” or “No” to enable/disable regional tax.
- Associate tax to tax group – Add a checkmark to link tax to the tax groups.
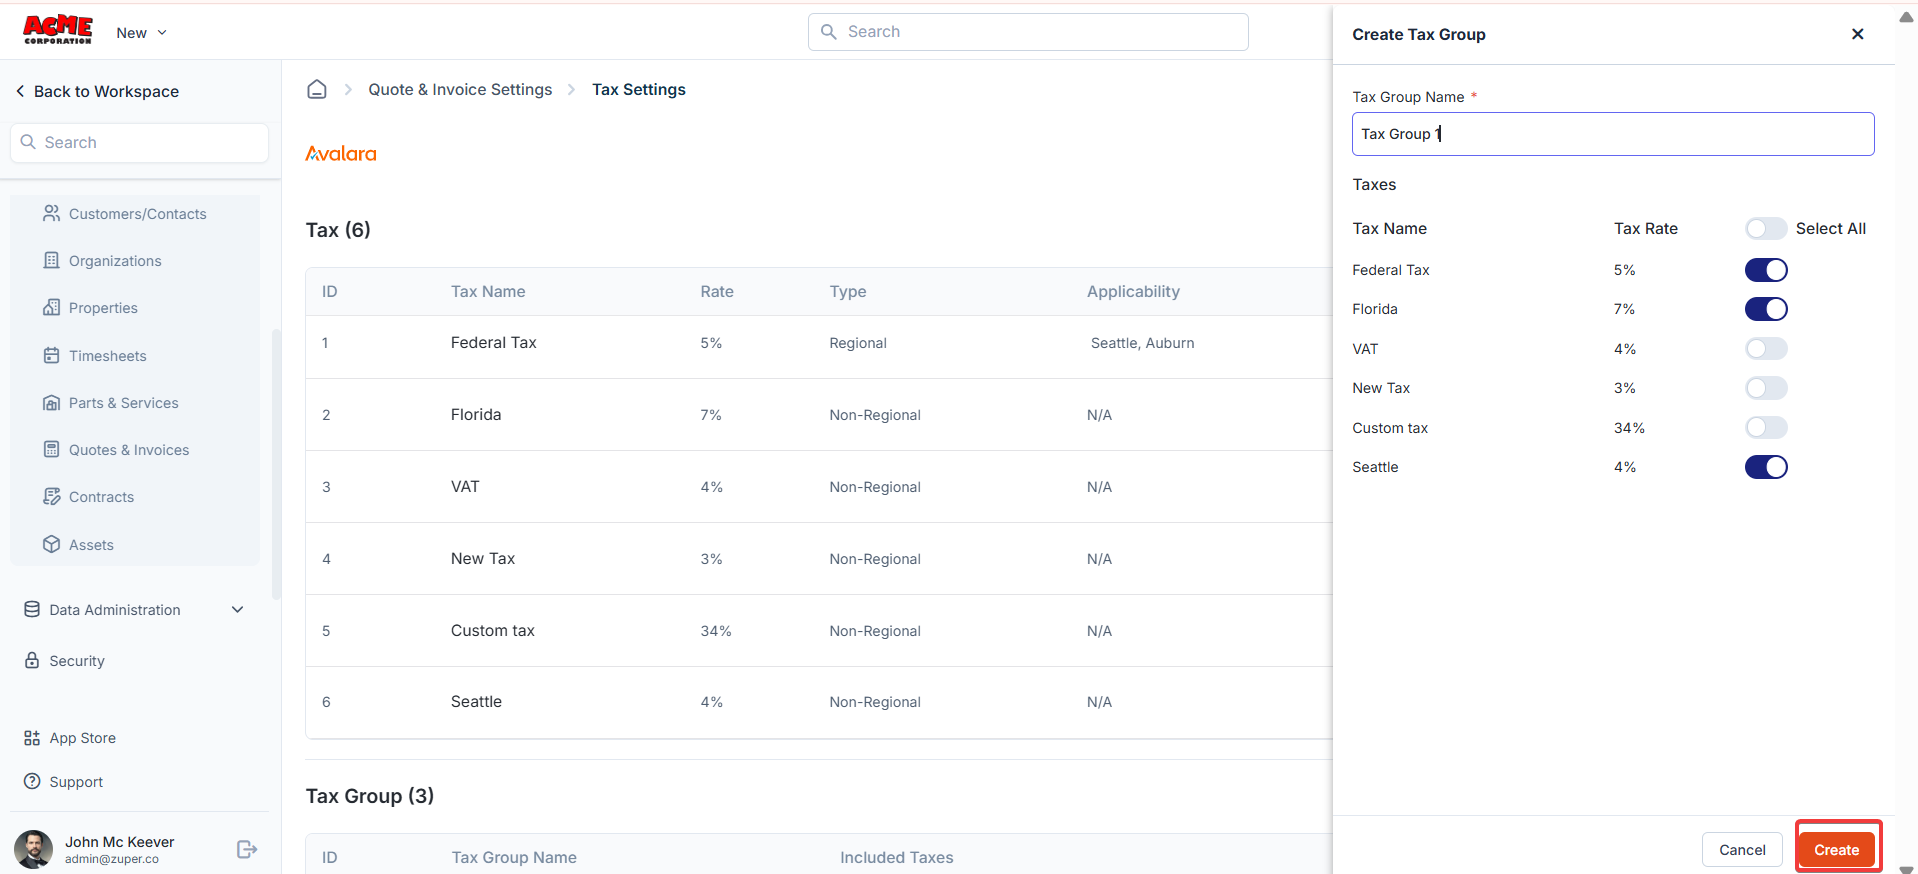
- Tax Group Name – Enter the tax group name.
- Taxes – Toggle on the required taxes.
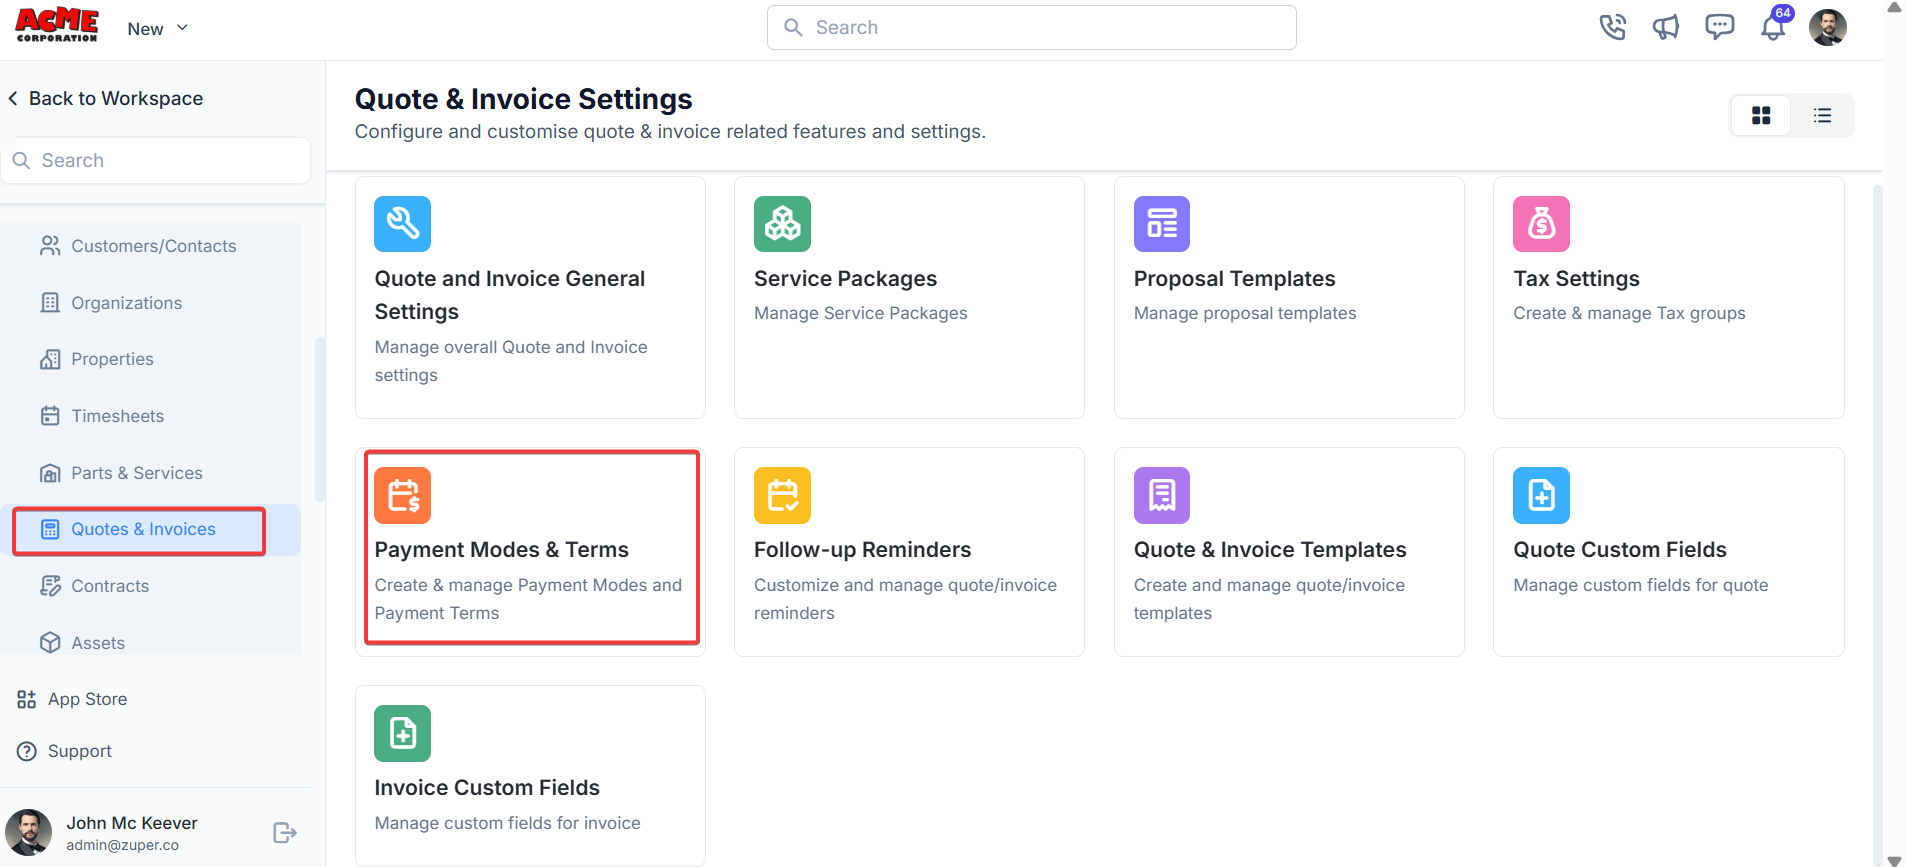
Payment modes & terms
Navigation: Settings -> Modules -> Quotes and Invoices - > Payment Modes & Terms
- Select the “Settings” module from the left panel. Under the “Modules,” choose the “Quotes & Invoices.” Select the “Payment Modes & Terms.”
- Under “Payment Mode,” click the “+ New Payment Mode .”
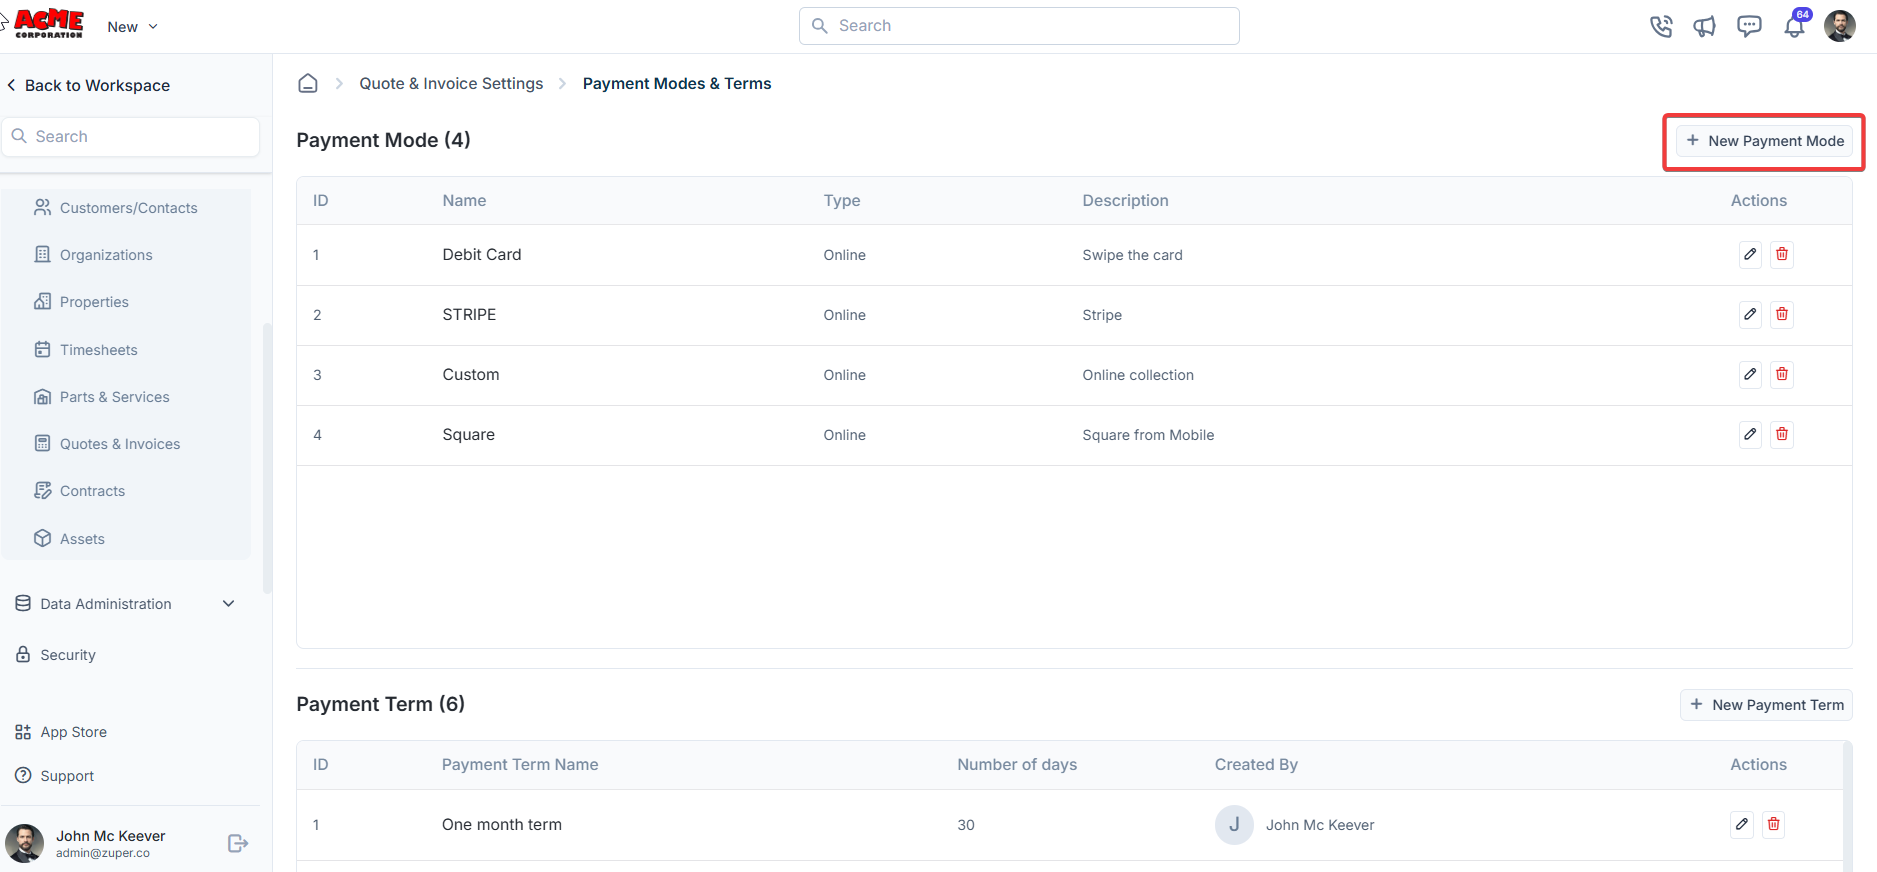
- A dialog box appears. Enter the payment mode details – Name, Type, and details.

- Under “ Payment Term,” Click “+ New Payment Term.”
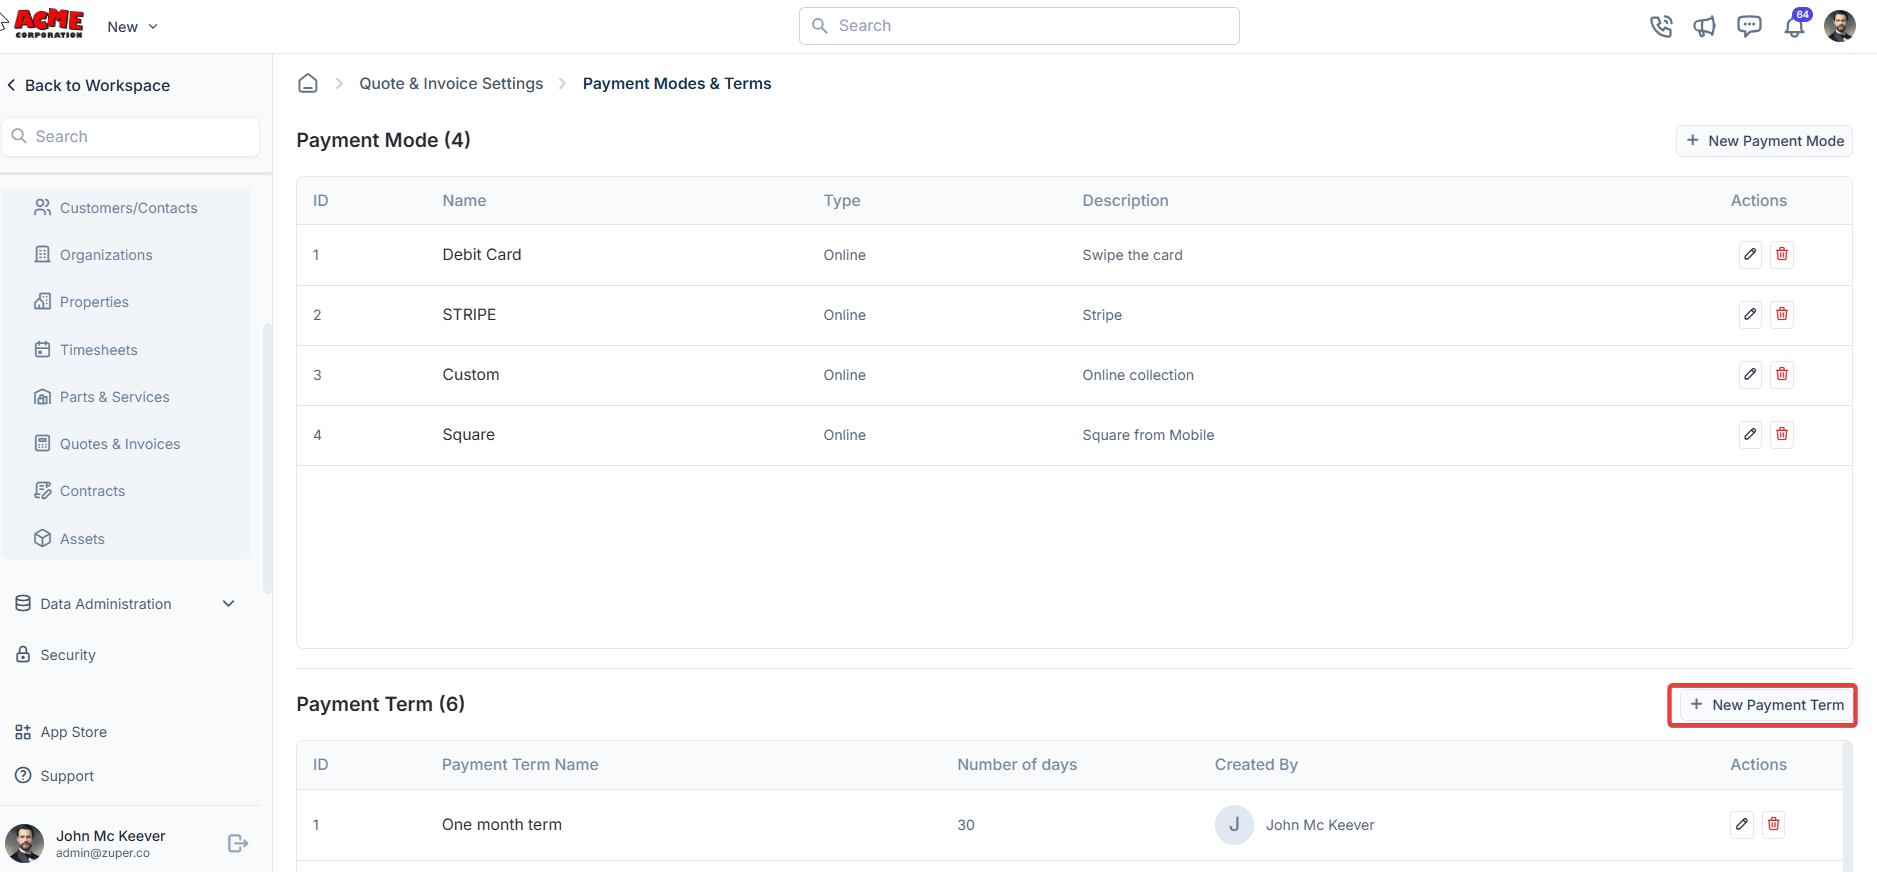
- Enter the name of the payment term and the number of days.

Follow up reminders
The users can instantly send follow-up reminders before or after a particular date via SMS or Email.Navigation: Settings -> Modules -> Quotes and Invoices -> Follow up reminders
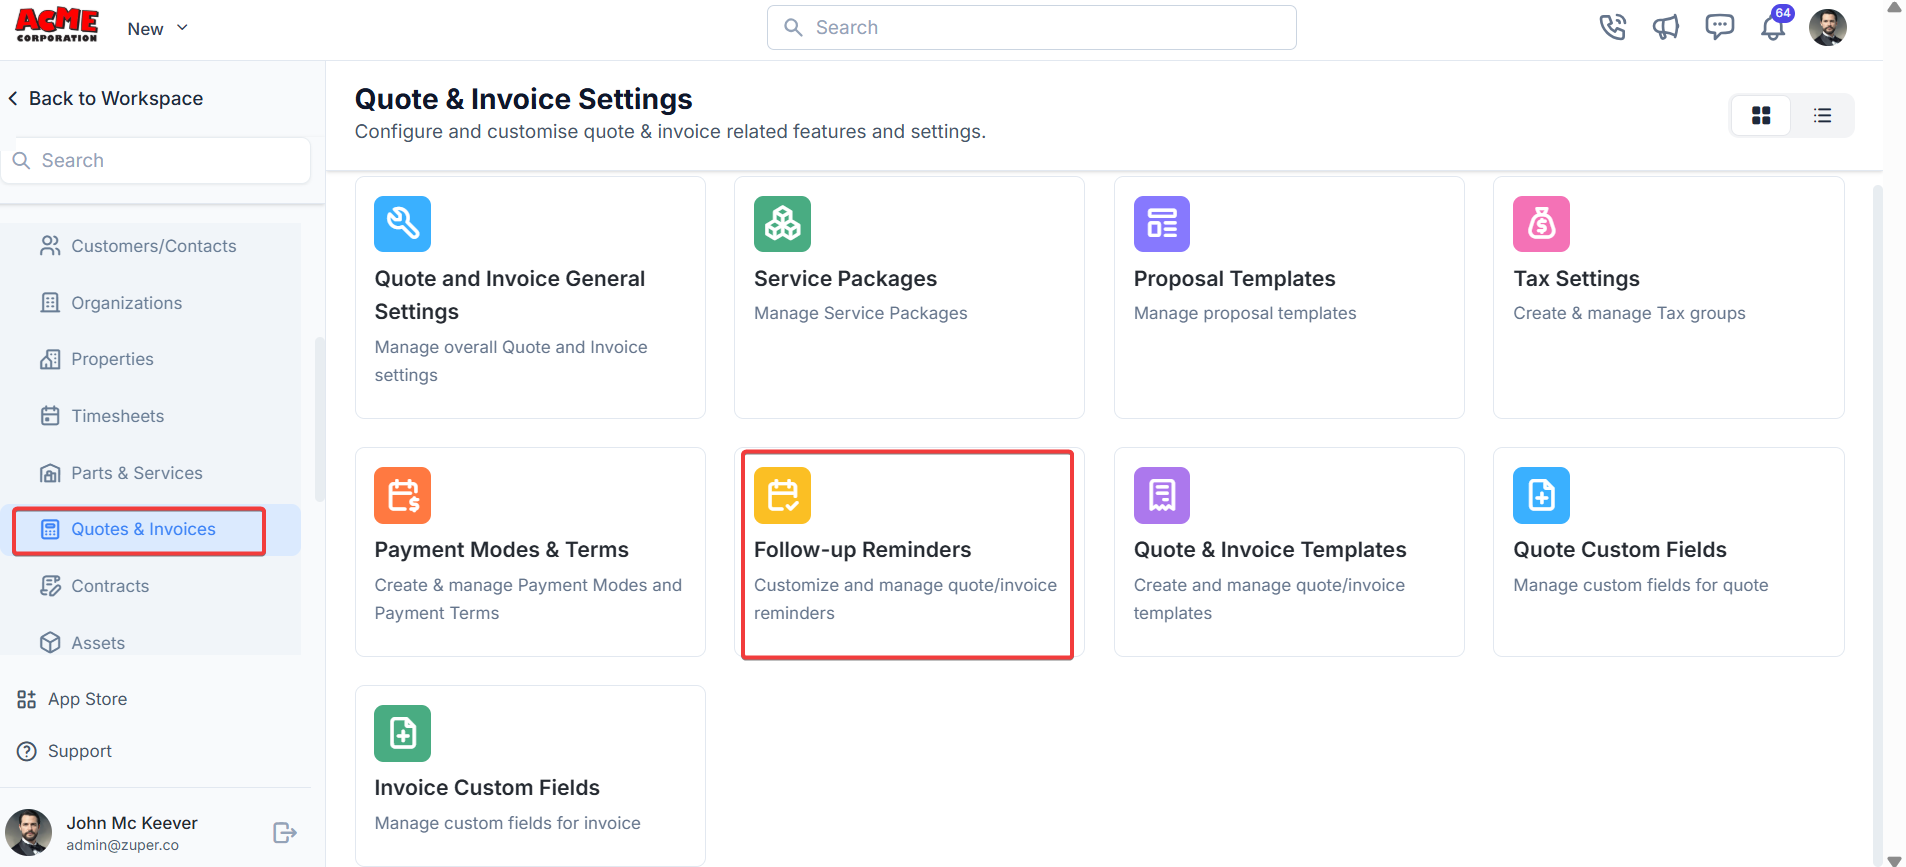
- Select the “Settings” module from the left panel. Under the “Modules,” choose the “Quotes & Invoices.” Select the “Follow-up Reminders .”
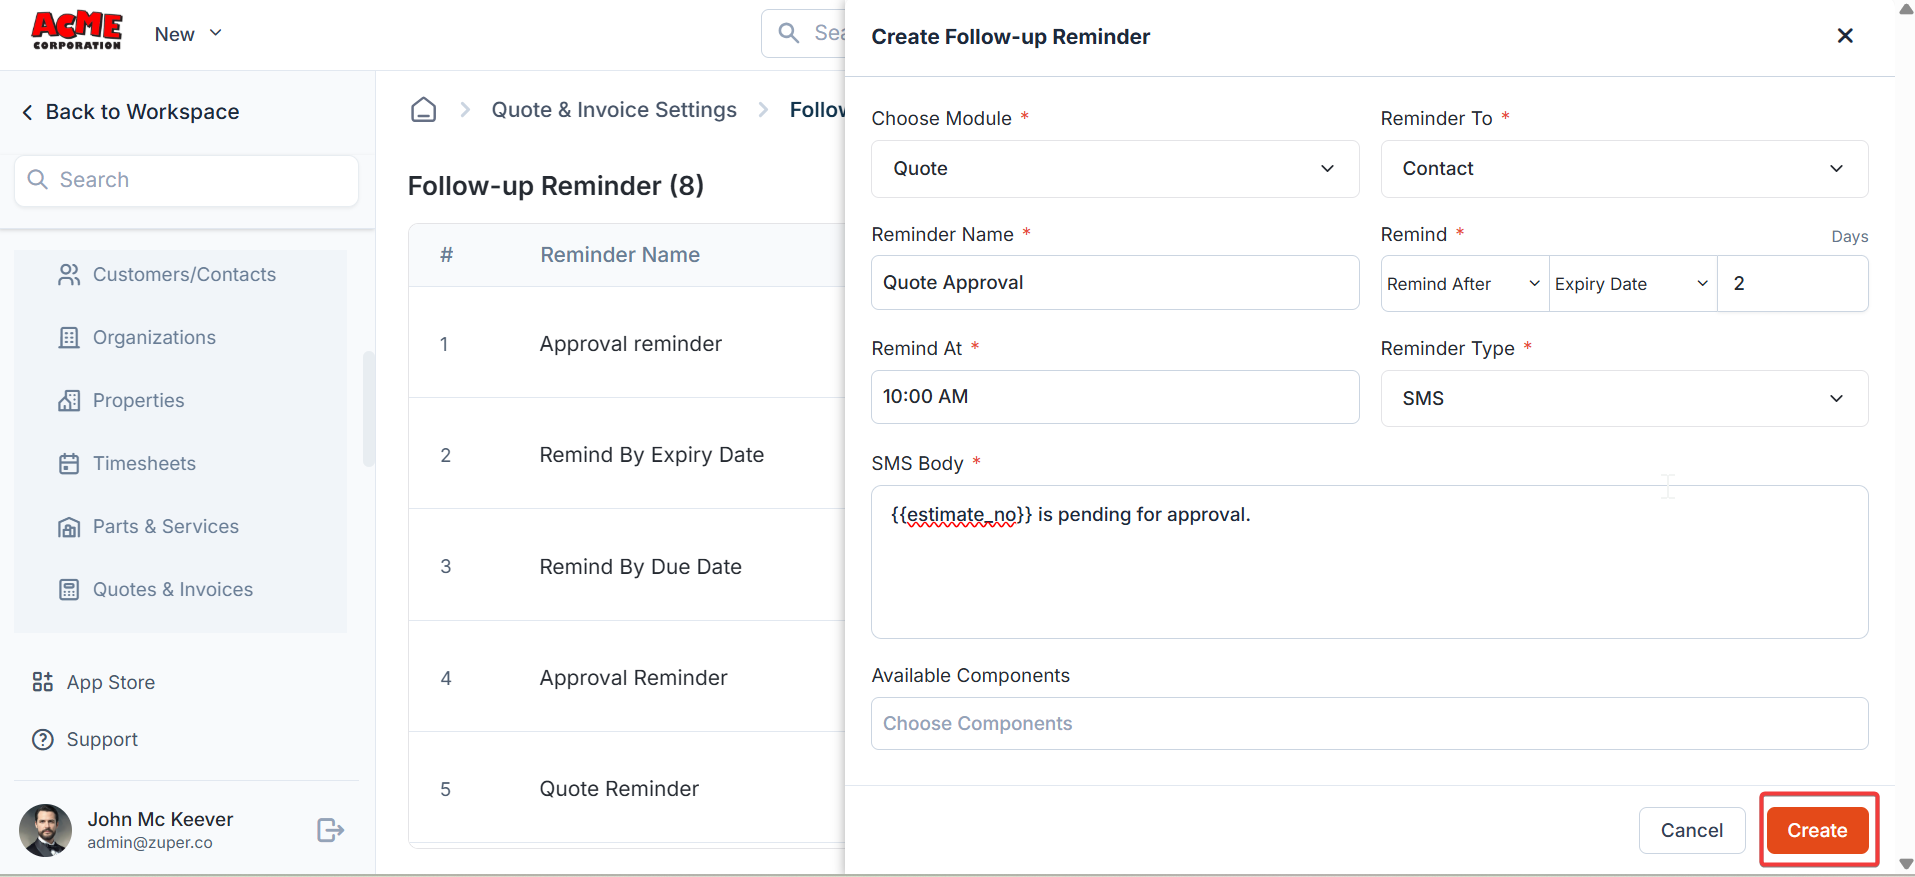
- Click “+ New Reminder” to create the follow-up reminder.
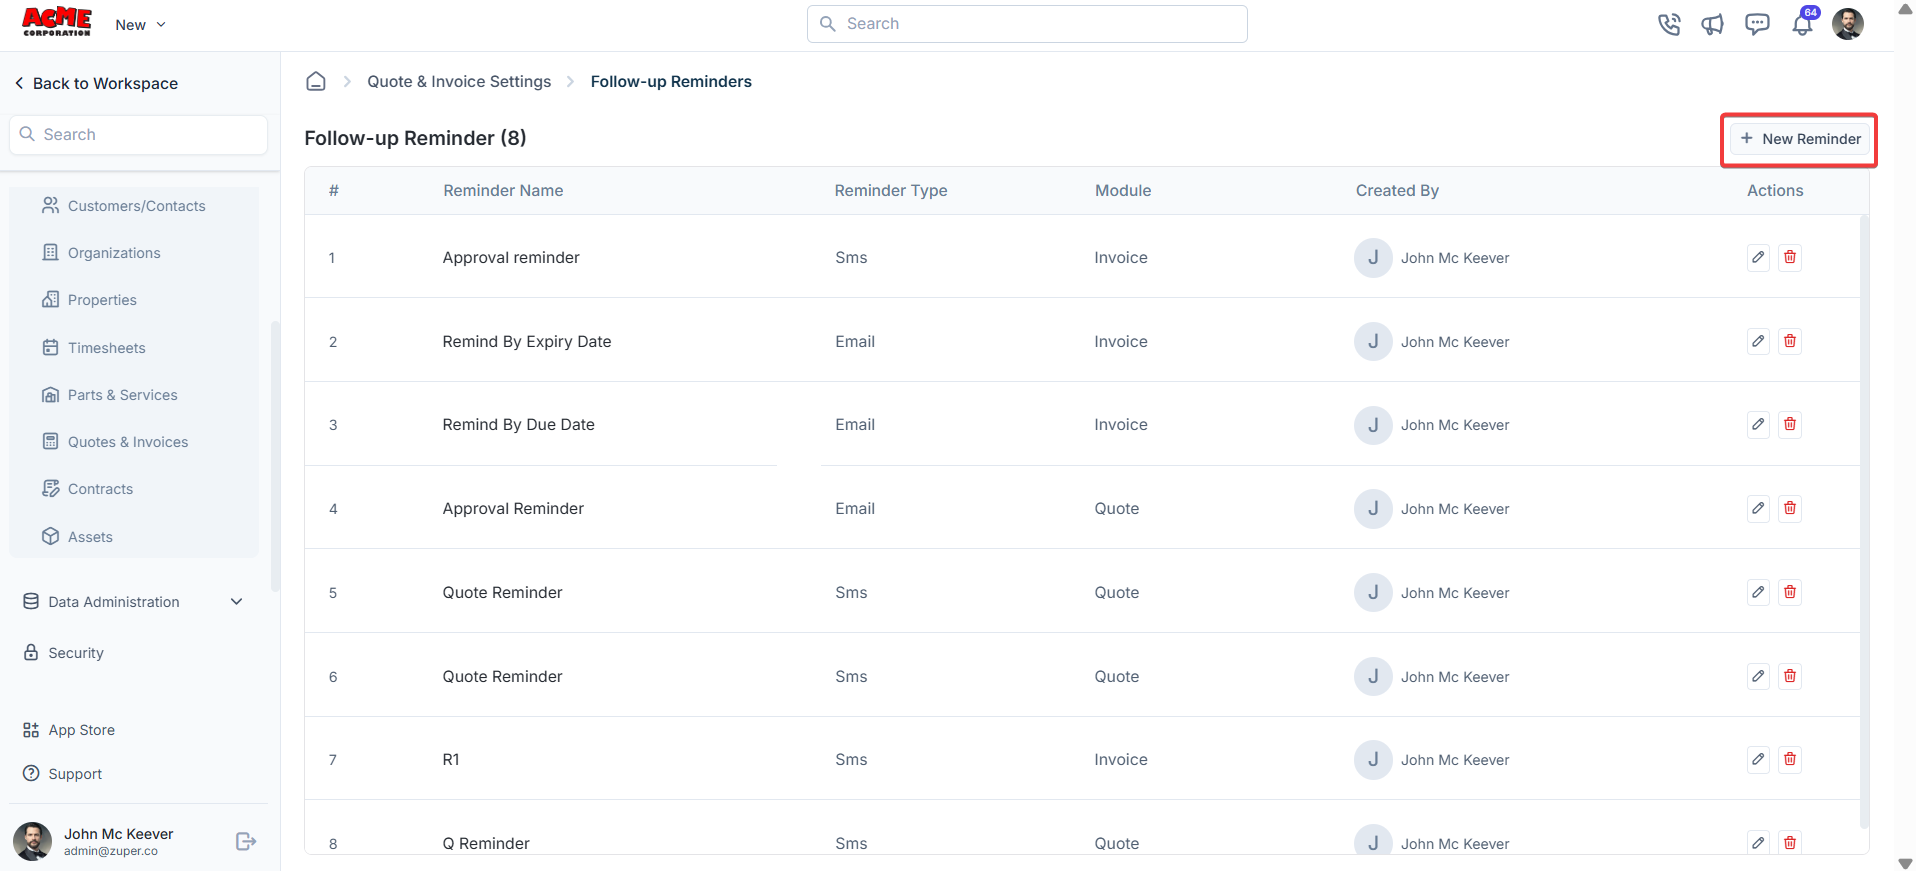
- a) Under Choose Module - Select the Module: Quotes or Invoice.
Quotes & invoices templates
The users can instantly send follow-up reminders before or after a particular date via SMS or Email.Navigation: Settings -> Modules -> Quotes and Invoices -> Quotes & Invoices Templates
- Select the “Settings” module from the left panel. Under the “Modules,” choose the “Quotes & Invoices.” Select the “Quotes & Invoice Templates.”
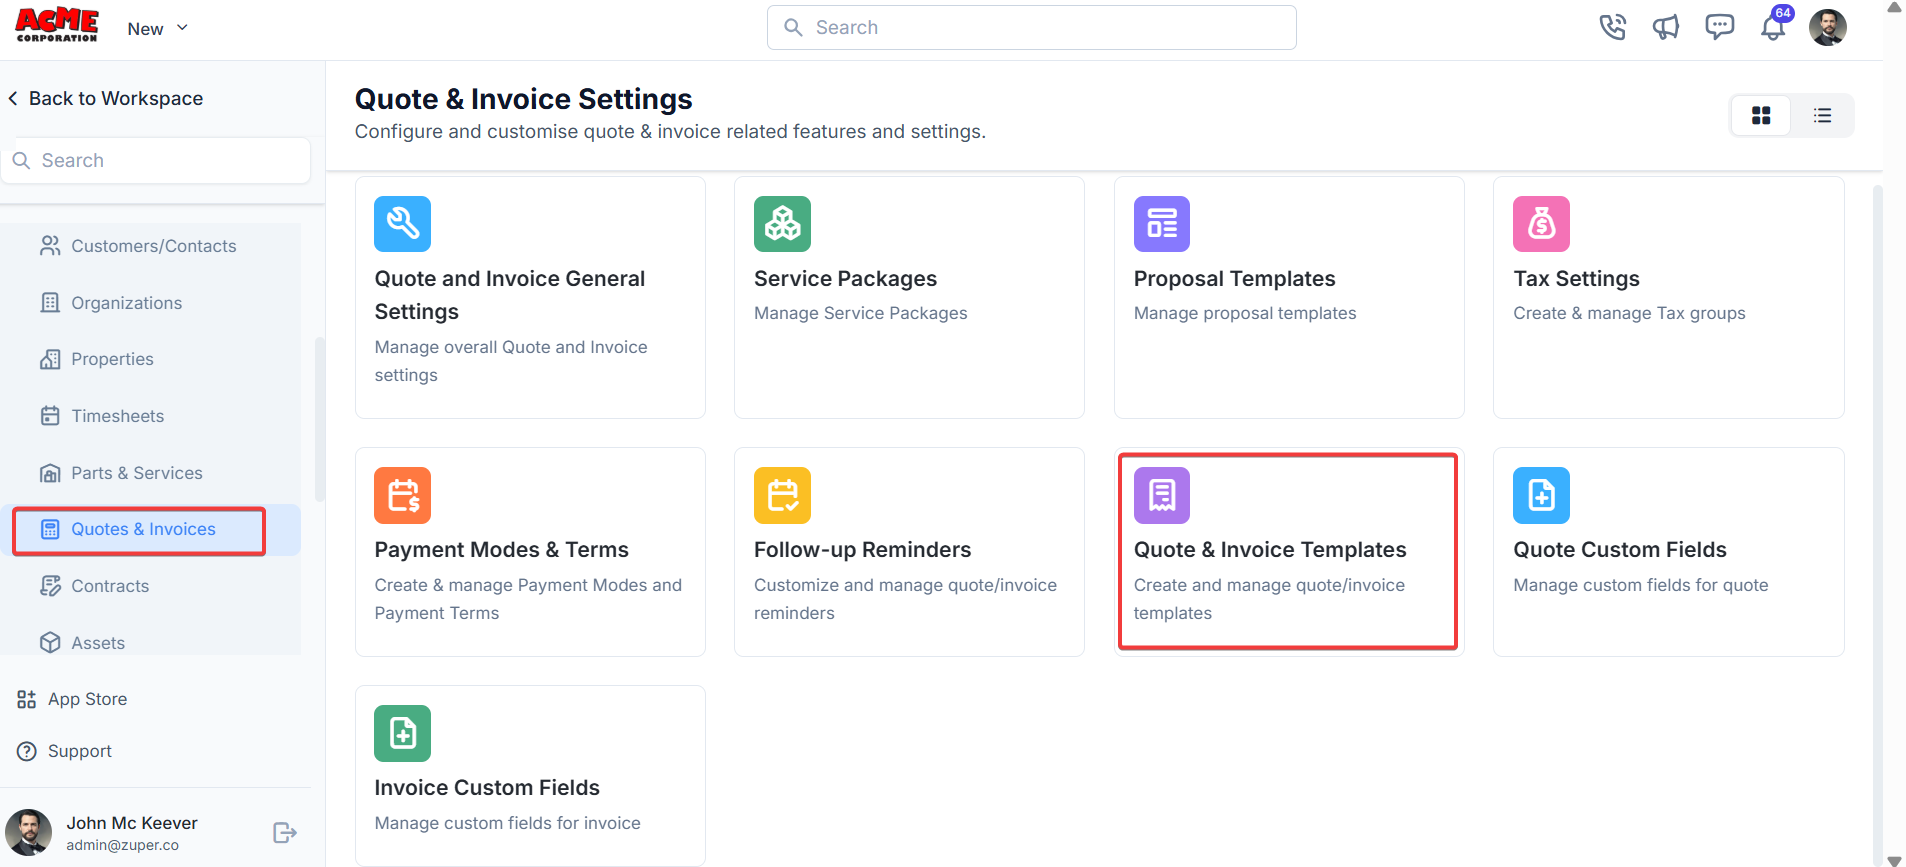
- Click “+New Template” and you can choose either “Quote” or “Invoice .”

- Fill in the template details and click “Save Template .”
How to create and customize a document template
How to create and customize a document template
Step 1 — Set template properties
Template properties control the global appearance of the PDF: its name, page size, orientation, margins, and font.- Go to Settings, then select Accounting, then select Document Templates.
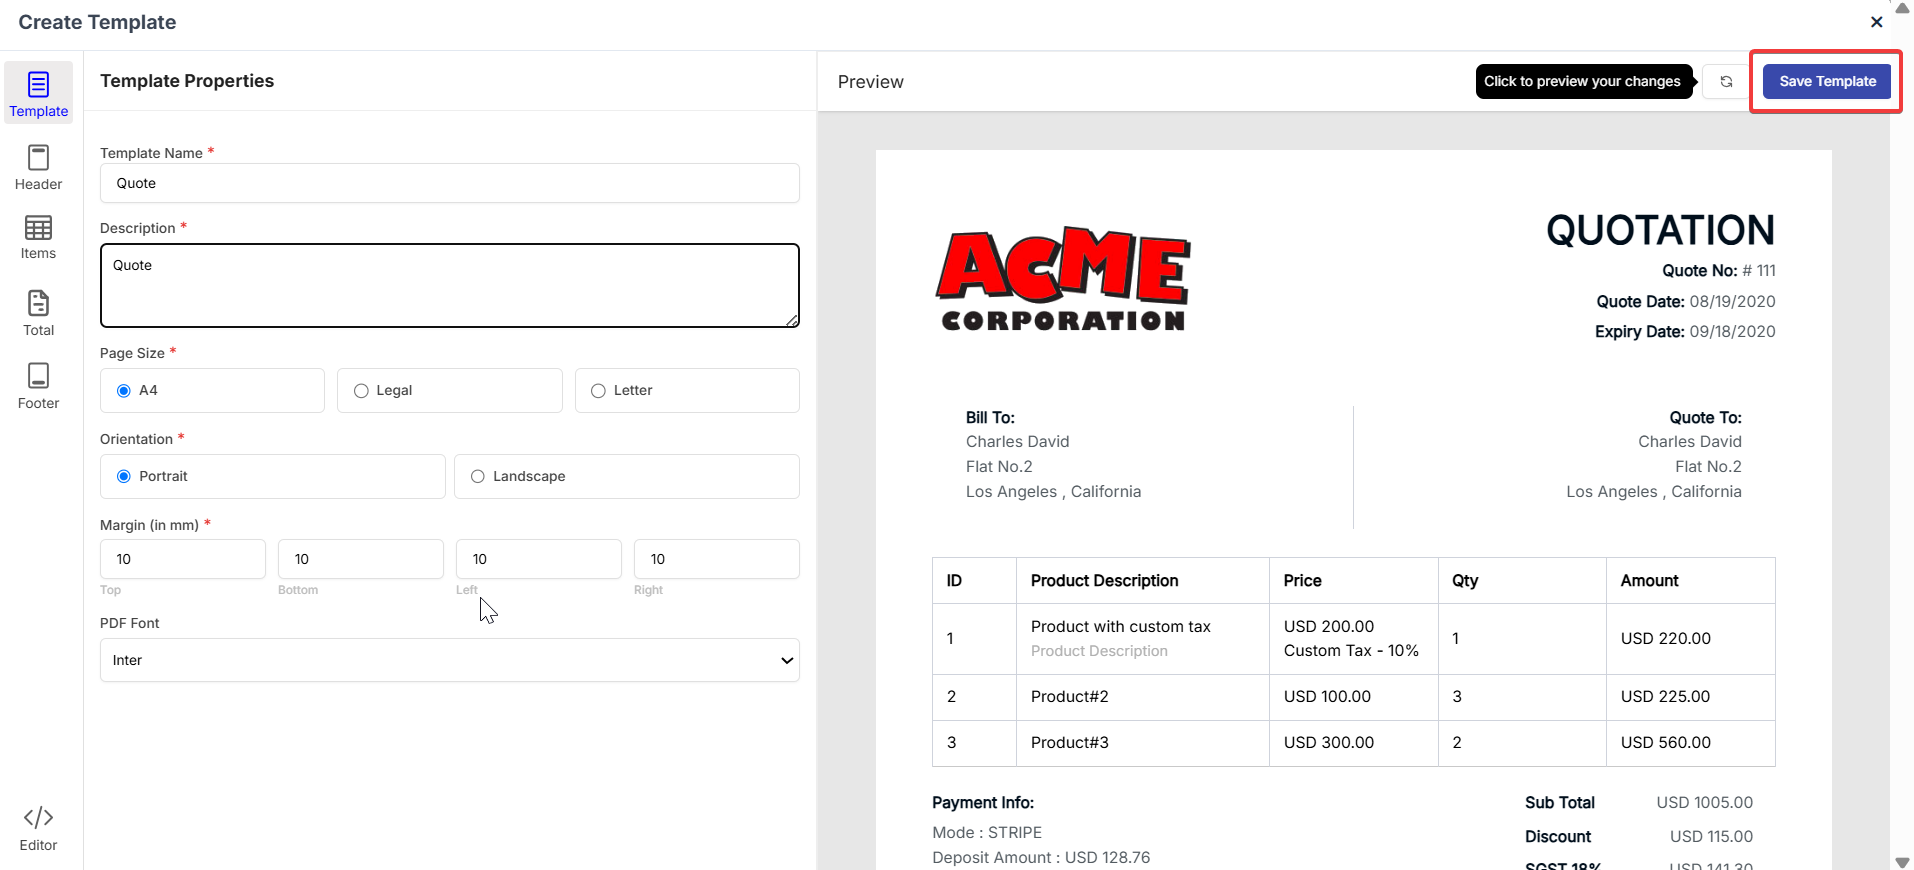
- Select + New Template. The Create Template dialog opens with the Template tab selected.
- Enter a name in the Template Name field. This field is required.
- Enter an optional description in the Description field to help you identify the template later.
- Under Page Size, select A4, Legal, or Letter.
- Under Orientation, select Portrait or Landscape.
- Under Margin (in mm), enter values for Top, Bottom, Left, and Right. The default is 10 mm on all sides.
- Under PDF Font, select a font from the dropdown. The default is Inter.
Step 2 — Configure the header
The header appears at the top of every page of your PDF. Use it to display your logo, company name, and address.- Select Header in the left sidebar.
- Select the Show Organization Logo checkbox to display your logo.
- Select Upload Your Logo to add or replace the logo image.
- Select the Show Organization Name checkbox to display your company name in the header.
- Select the Show Organization Address checkbox to display your organization’s address in the header.
- Under Logo Position, select Left, Center, or Right to control where the logo appears.
The customer’s “Quote To” address always appears on the left side of the PDF. When you enable Show Organization Address, your organization’s address appears alongside the customer’s address on the same document.
Step 3 — Customize the item table
The Item Table section controls which columns appear in the line items table, what each column is called, how wide it is, and what order the columns appear in.- Select Items in the left sidebar. The Label sub-tab is shown by default.
- For each column row, select the checkbox to show that column in the PDF, or clear it to hide it.
- Enter a number in the Width (%) field for each visible column. The widths of all visible columns should total 100%.
- Edit the Label field to rename a column heading appears on the PDF.
- Select and drag the handle (≡) on the left of any row to change the column order.
| Column | Default label | Width (%) | Shown by default |
|---|---|---|---|
| Line Item Number | ID | 10 | No |
| Item | Item | 35 | Yes |
| Rate | Price | 25 | Yes |
| Quantity | Qty | 20 | Yes |
| Discount | Discount | 20 | No |
| Amount | Total | 20 | Yes |
Step 4 — Set up the totals section
The Total section controls what appears in the summary block below the line items table — the subtotal, discounts, taxes, grand total, currency symbol position, and payment history.- Select Total in the left sidebar.
- Select the Show Total Section checkbox to include the totals block on the PDF. Clear it to hide the totals block entirely, which is useful for internal job cards.
- Select the Discount checkbox to show the discount line. Clear it to hide it.
- Select the Show Tax Details checkbox to show individual tax lines.
- Edit the Sub Total label field to rename the subtotal line as it appears on the PDF.
- Edit the Total label field to rename the grand total line.
- Under Currency Symbol, select Before Amount or After Amount to control where the currency symbol appears.
- Select the Show Payment History checkbox to include a payment history block on the PDF.
Step 5 — Add footer content
The footer appears below the totals section. Use it to include remarks, payment instructions, terms and conditions, and a signature block.Remarks
- Select Footer in the left sidebar.
- Select the Remarks checkbox to enable the remarks section.
- Edit the Label field to set the heading for the remarks section. The default label is “Important Note”.
- Enter a font size in the Font Size field.
The remarks text that appears on the PDF comes from the Remarks field on the individual quote or invoice record — not from the template itself. If the PDF shows static text instead of the remarks you entered on the quote, the template might be using a fixed text variable. Contact support@zuper.co to switch the template to a dynamic remarks variable.
Payment options
- Under Payment Options, select the Payment Options checkbox to enable this section.
- From the Online Payment Link dropdown, select Yes to include an online payment link on the PDF, or No to hide it.
- In the Add your bank details field, enter offline payment instructions.
Terms and conditions
- Select the Terms and Conditions checkbox to enable the terms section.
- Edit the Label field to set the section heading. The default label is “Terms and Conditions”.
- Enter a font size in the Font Size field.
- Use the rich text editor in the Message field to enter your terms and conditions content. The editor supports bold, italic, and bullet lists.
Signature
- Scroll to the bottom of the Footer tab.
- Select the Signature checkbox to include a signature block on the PDF.
Save your template and set it as the default
- Select Save Template in the top right corner of the builder.
- To make this the default template for all new quotes and invoices, go back to the Document Templates listing page.
- Find your template in the list, select the three-dot context menu icon next to it, and select Set as Default.
Troubleshooting Invoice PDF Formatting Issues
Troubleshooting Invoice PDF Formatting Issues
Common causes at a glance
| Cause | Symptom | Fix |
|---|---|---|
| Footer / header HTML | Text overflows, overlaps, or disappears at page edges | Simplify or remove custom HTML from the template footer/header |
| Copy-paste from Word | Random fonts, odd spacing, invisible characters | Re-type content directly in the Zuper template editor |
| Oversized or broken images | Image stretches across columns or pushes content off-page | Re-upload images within Zuper; keep width under 600 px |
| Non-web-safe fonts | Characters replaced by boxes or question marks | Use Arial, Helvetica, or Times New Roman only |
| Custom CSS / inline styles | Layout shifts unpredictably between browsers and PDF | Remove all inline style attributes from template HTML |
| Platform rendering bug | Issue persists after all above steps | Escalate to Zuper Support with reproduction steps |
Step-by-step troubleshooting tree
Work through each step in order. Stop at the step that resolves the issue.Step 1 — Confirm the issue is reproducible
- Open the affected invoice in Accounting → Invoices.
- Click the PDF button (top right) to download.
- Open the downloaded file in a standard PDF viewer (Adobe Acrobat or a browser).
- Note exactly what is wrong: overlapping text, missing sections, images out of place, blank pages.
If the issue appears only in a specific PDF viewer, try another viewer before proceeding. Some viewers render PDFs differently.
Step 2 — Try a different invoice template
- Open the invoice and click Edit.
- In the Invoice Template field, switch to the Default Invoice Template (or any other template).
- Save the invoice.
- Download the PDF again and check if the layout is correct.
- If the PDF renders correctly with a different template → the problem is in the original template. Continue to Step 3.
- If the PDF is still jumbled with any template → skip to Step 6 (platform bug).
Step 3 — Inspect and simplify footer and header HTML
Navigation: Settings → Modules → Quotes & Invoices → Document Templates
- Locate the Default Invoice Template (or the template in use) and open it for editing.
- Navigate to the Footer section.
- Switch to the HTML / source view if available.
- Look for and remove:
- Nested
<table>tags inside the footer - Inline
style=attributes with fixed widths, floats, orposition: absolute - Empty
<div>or<span>tags with no content <style>blocks embedded in the footer HTML
- Nested
- Replace the footer with plain text only — no HTML tags.
- Save the template and re-download the invoice PDF.
- If resolved → reintroduce formatting elements one at a time to isolate the offending code.
- If not resolved → continue to Step 4.
Step 4 — Remove copy-paste content from Word or other editors
Content pasted from Microsoft Word, Google Docs, or Outlook carries hidden formatting (spans, font-family declarations, and non-breaking spaces) that breaks the PDF renderer.- In the template editor, select all text in the footer, header, and any custom fields.
- Delete it entirely.
- Re-type the content directly using the Zuper text editor (do not paste).
- If you need to paste, paste into a plain-text editor (Notepad on Windows, TextEdit in plain-text mode on Mac) first, then copy from there and paste into Zuper.
- Save and re-download the PDF.
- If resolved → done. Document this in your internal process to prevent recurrence.
- If not resolved → continue to Step 5.
Step 5 — Check images in the template
- Open the template editor.
- For each image (logo, signature, watermark):
- Remove the image entirely and save.
- Download the PDF and check if the issue is gone.
- If yes — the image is the cause.
- Re-upload the image following these guidelines:
- Width: 600 px or less
- File size: under 500 KB
- Format: PNG or JPEG (avoid SVG and WebP in templates)
- Do not reference images hosted on external URLs — upload them directly into Zuper
- Save the template and re-download the PDF.
- If resolved → done.
- If not resolved → continue to Step 6.
Step 6 — Check fonts
The Zuper PDF renderer supports a limited set of fonts. Custom or system-installed fonts may render as boxes or question marks.- In the template editor, select all text.
- Change the font to Arial or Helvetica.
- Remove any
font-familydeclarations from custom HTML. - Save and re-download the PDF.
Supported fonts: Arial, Helvetica, Times New Roman, Courier New, Georgia.
- If resolved → done.
- If not resolved → continue to Step 7.
Step 7 — Escalate to Zuper Support (platform rendering bug)
If the PDF is still jumbled after completing Steps 1–6, the issue is likely a platform-level rendering bug in Zuper’s invoice PDF generation engine. This requires investigation by the product team.Before contacting Support, collect the following:- The exact name of the invoice template in use
- A screenshot or screen recording of the jumbled PDF
- The invoice number and the customer’s account name
- Confirmation of which steps above were completed
- The browser and operating system used when downloading Contact Zuper Support at support@zuper.co with the above details.
What to avoid in invoice templates
Safe practices for invoice templates:
- Use plain text for footer content where possible
- Limit HTML to basic tags:
<p>,<strong>,<em>,<br> - Use Arial or Helvetica as the font family
- Keep logo images under 600 px wide and 500 KB
- Test the PDF after every template change before sending to customers
- Use the Default Invoice Template as a baseline when troubleshooting
Frequently asked questions
The footer looks correct on screen but is jumbled in the PDF. Why?
The footer looks correct on screen but is jumbled in the PDF. Why?
The customer received a jumbled PDF by email. How do I send them a corrected version?
The customer received a jumbled PDF by email. How do I send them a corrected version?
Once the template is fixed, open the invoice, click Send, confirm the correct template is selected in the Document Template field, and resend. The customer will receive a freshly generated PDF.
My template was working before. What changed?
My template was working before. What changed?
Template rendering can be affected by recent updates to the Zuper PDF generation engine. If your template was unchanged but the output has degraded, escalate to Zuper Support (Step 7 above) and reference the approximate date the issue began.
Can I use a custom PDF template built outside Zuper?
Can I use a custom PDF template built outside Zuper?
Not directly. Zuper does not support importing externally-built PDF templates. However, you can upload a static PDF file as an attachment to the invoice, or contact Zuper Support to request a custom template build for your account.
Quote custom fields
Navigation: Settings -> Modules -> Quotes and Invoices -> Quotes Custom Fields
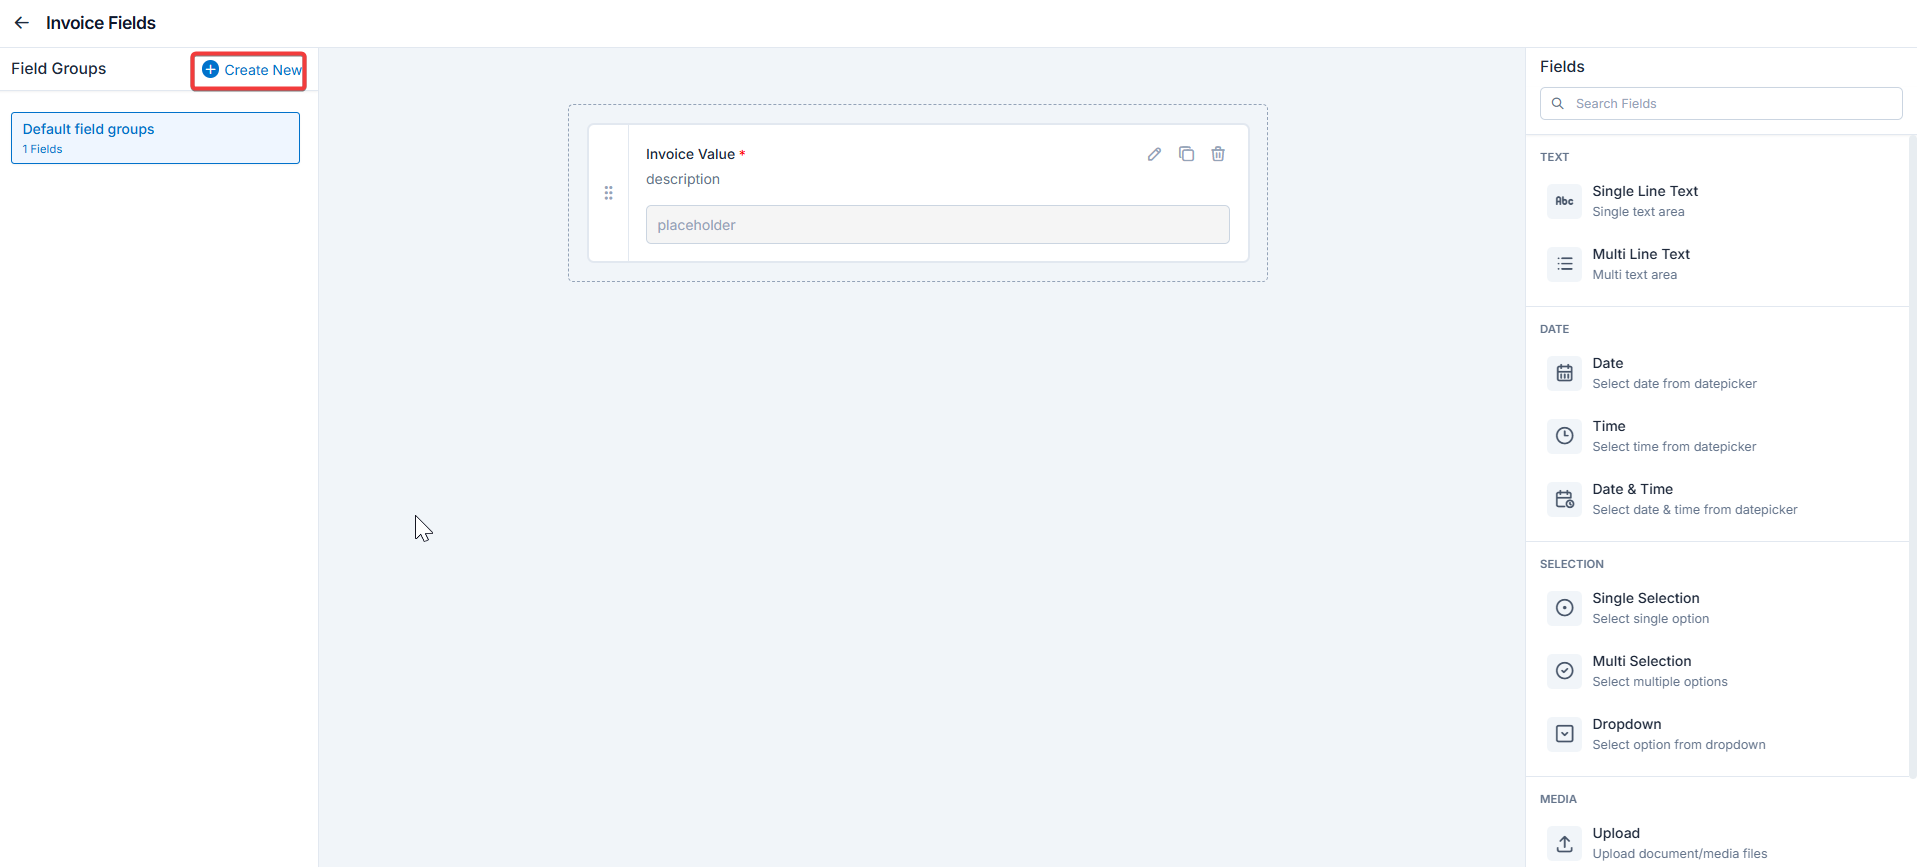
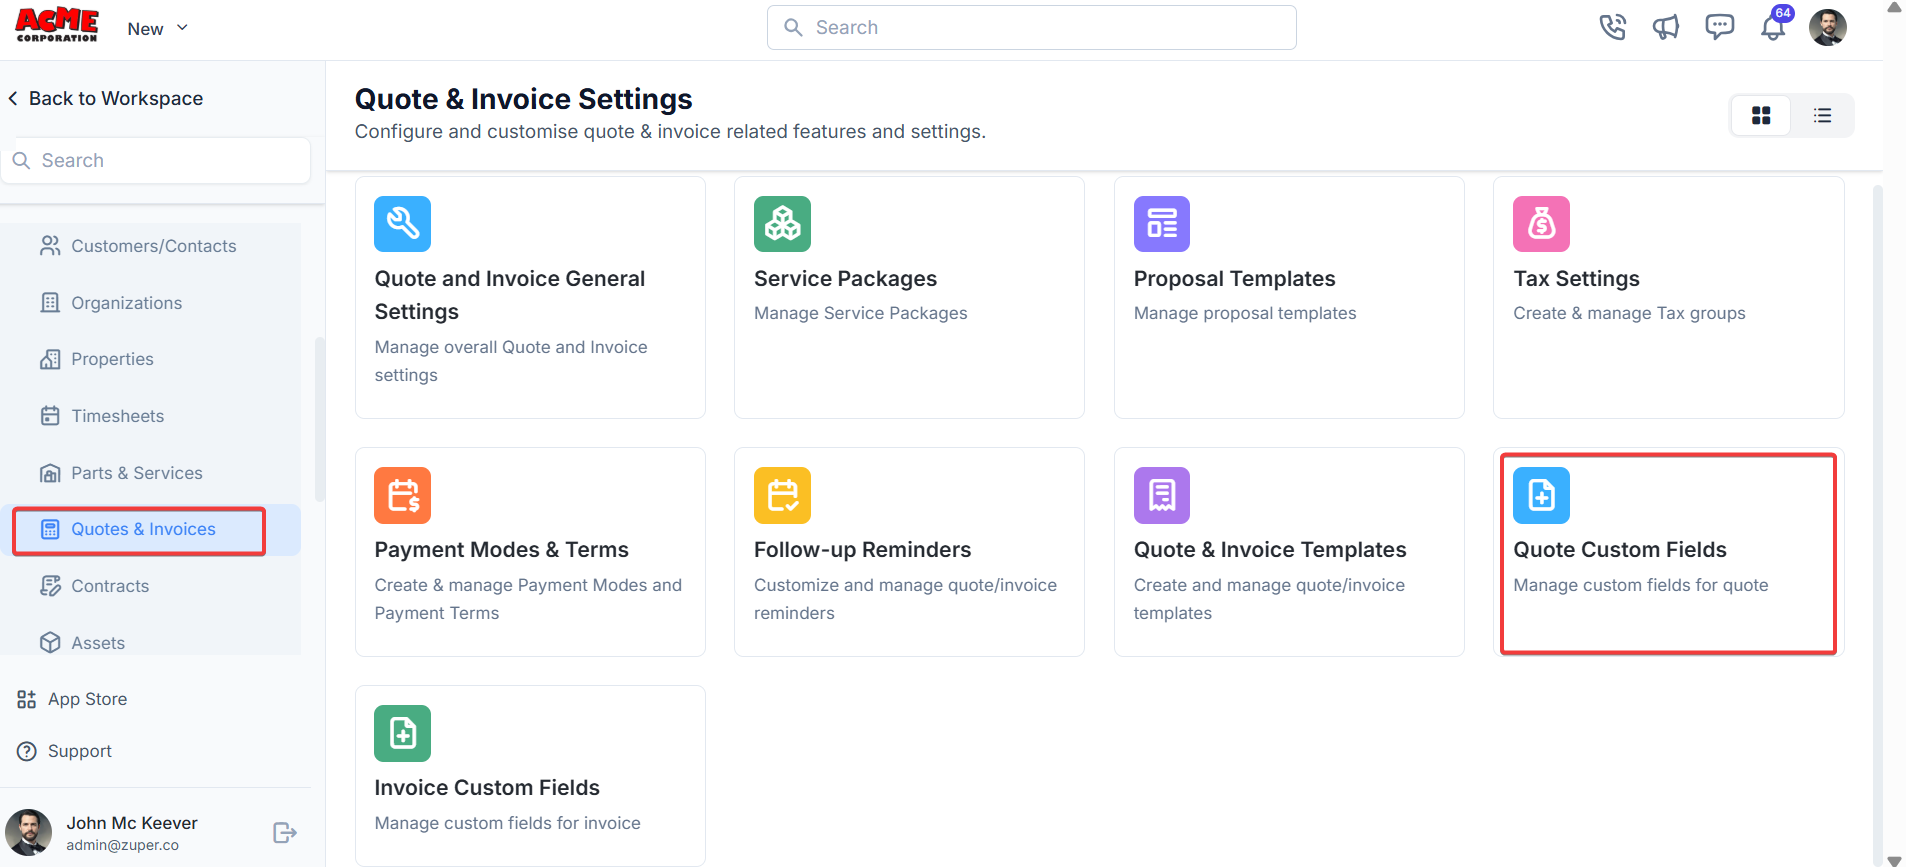
- Select the “Settings” module from the left panel. Under the “Modules,” choose the ” Quotes and Invoices.” Select the “Quotes Custom Fields.”
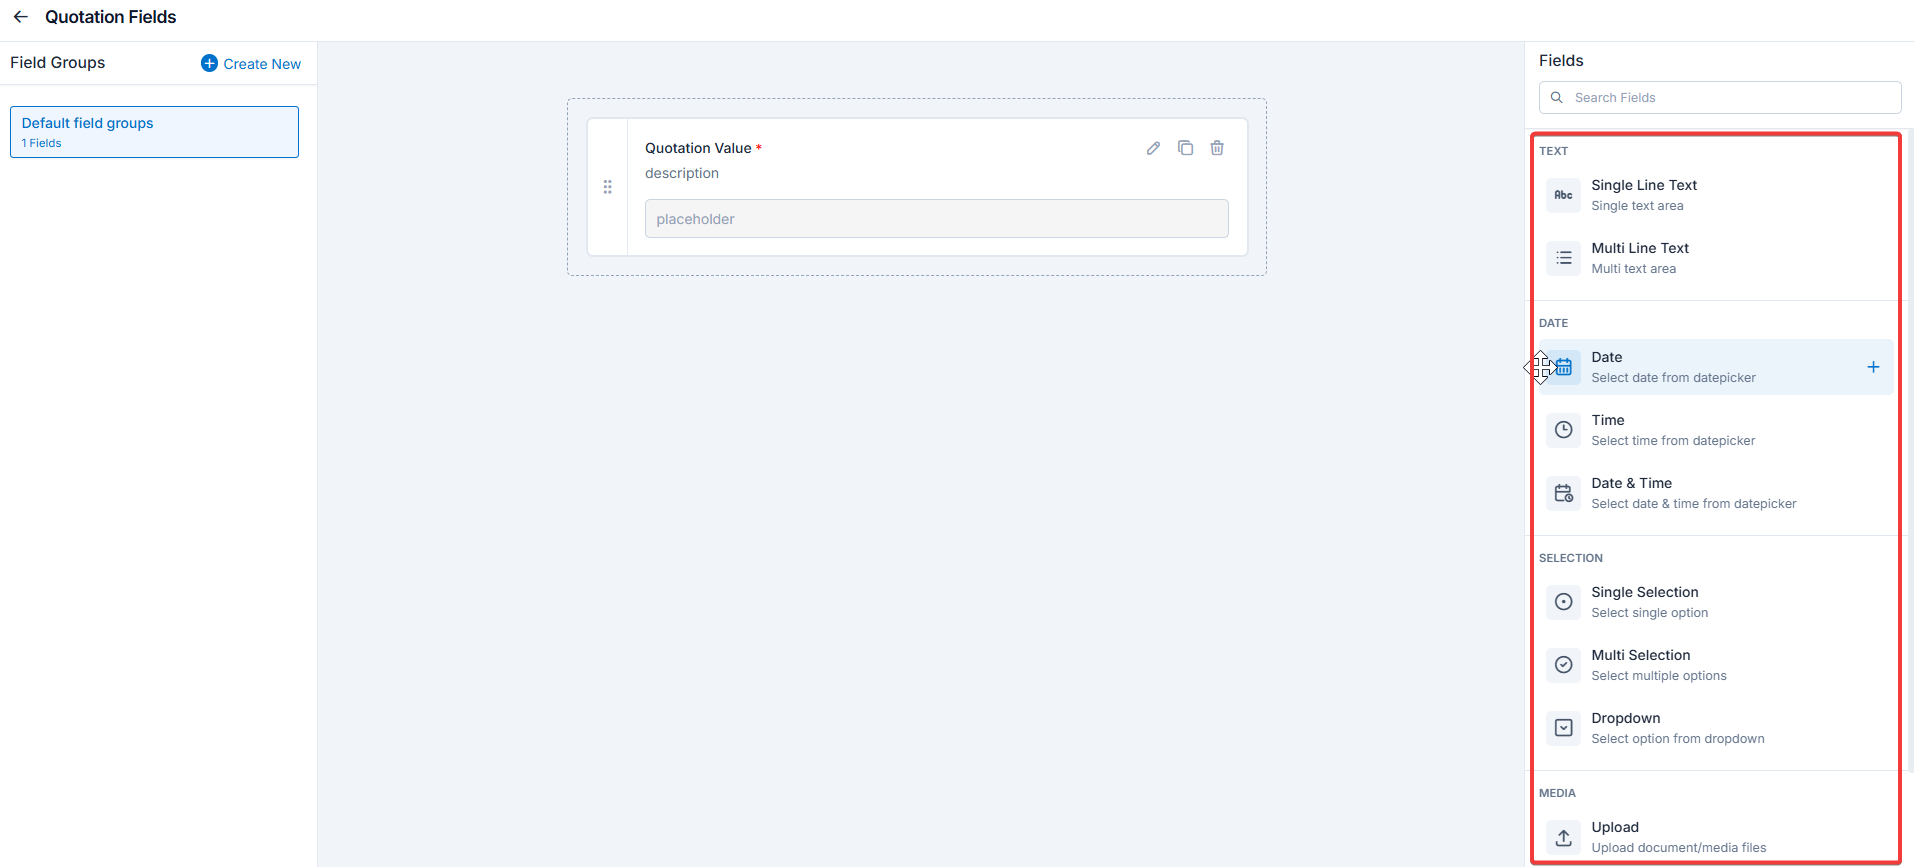
- Single-Line Input: This allows you to create a field to enter a single line of free text.
- Multi-Line Input: This allows you to create a field to enter multiple lines of free text.
- Date Input: This allows you to create a field to select a specific date from a calendar.
- Time Input: This allows you to create a field where you can select a specific time.
- Date Time Input: This allows you to create a field where both date and time can be selected.
- Single-Selection: This allows you to create a radio input Field where one of the provided options can be selected.
- Multi-Selection: This allows you to create check boxes where the provided options can be checked.
- Drop-Down: This allows you to create a drop-down field with the required list of options.
- Upload: This allows you to create a file input field to upload files.
- Look up : This allows you to create a file input field to look up the products from the parts and services module.
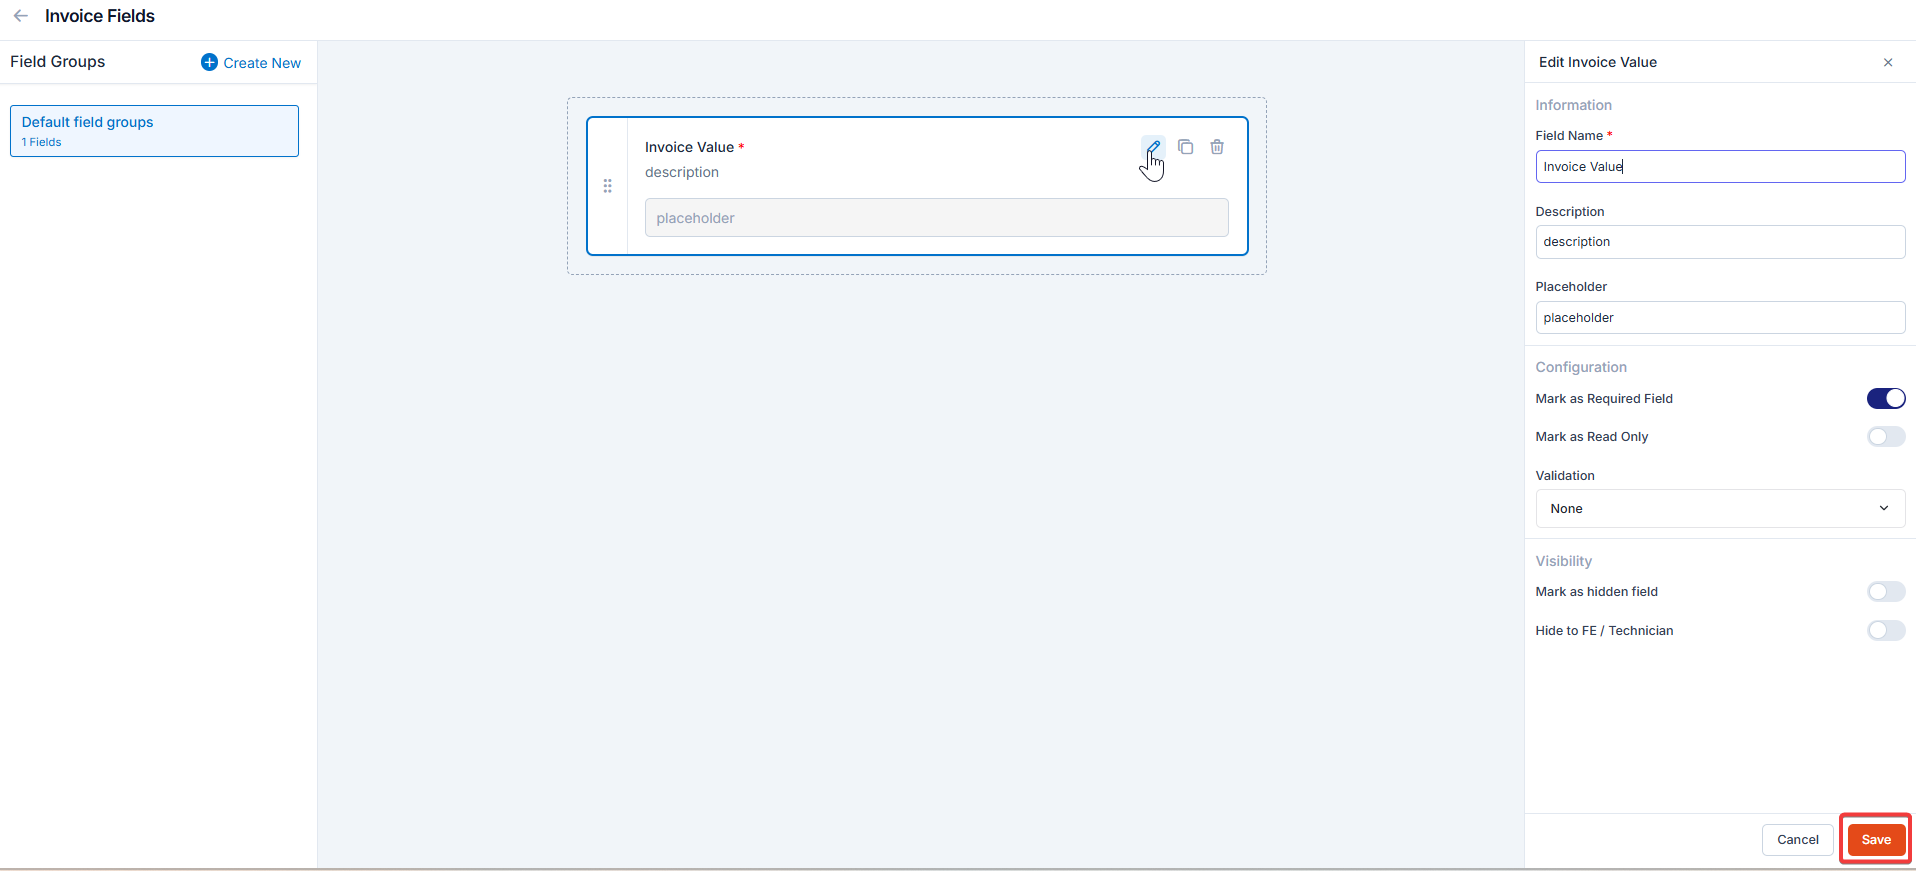
Note: You can also control the behavior and visibility of each field using the following options:
- Mark as Required Field - Makes the field mandatory to fill out before submitting the form.
- Mark as Read Only—This option makes the field non-editable; users can view the value but cannot modify it.
- Mark as hidden field- This hides the field from all users; it will not appear in the form interface.
- Hide to FE/Technician- This option makes the field invisible to technicians or front-end users during form access.

Invoice custom fields
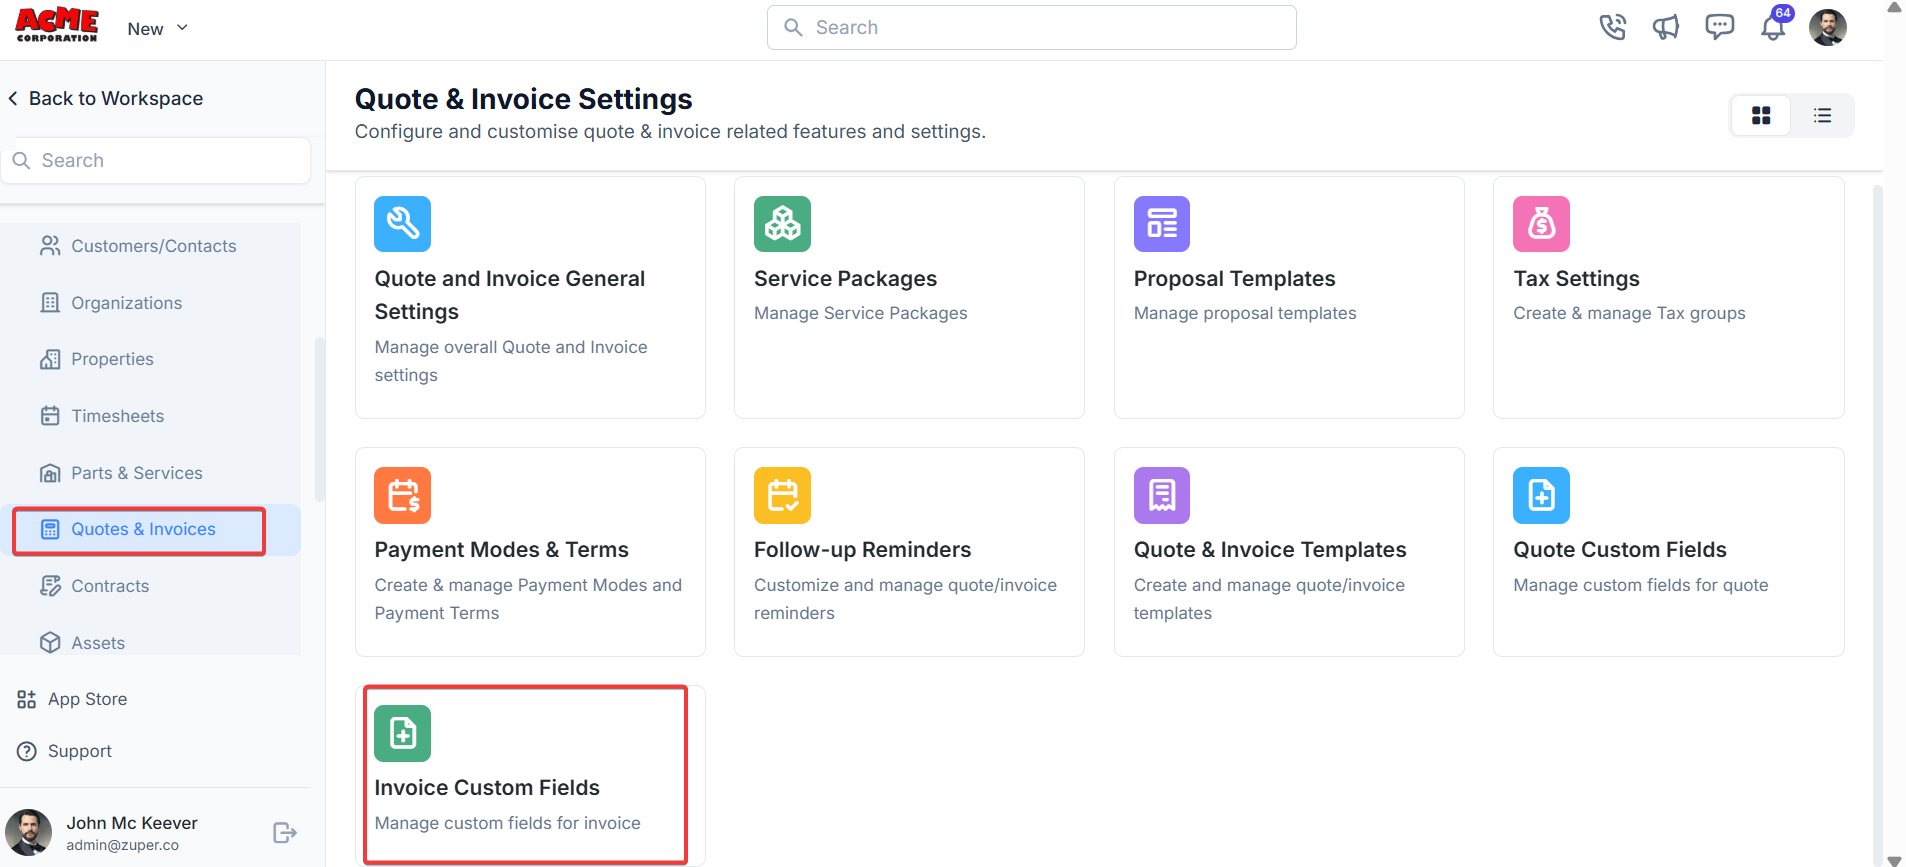
Navigation: Settings -> Modules -> Quotes and Invoices -> Invoices Custom Fields
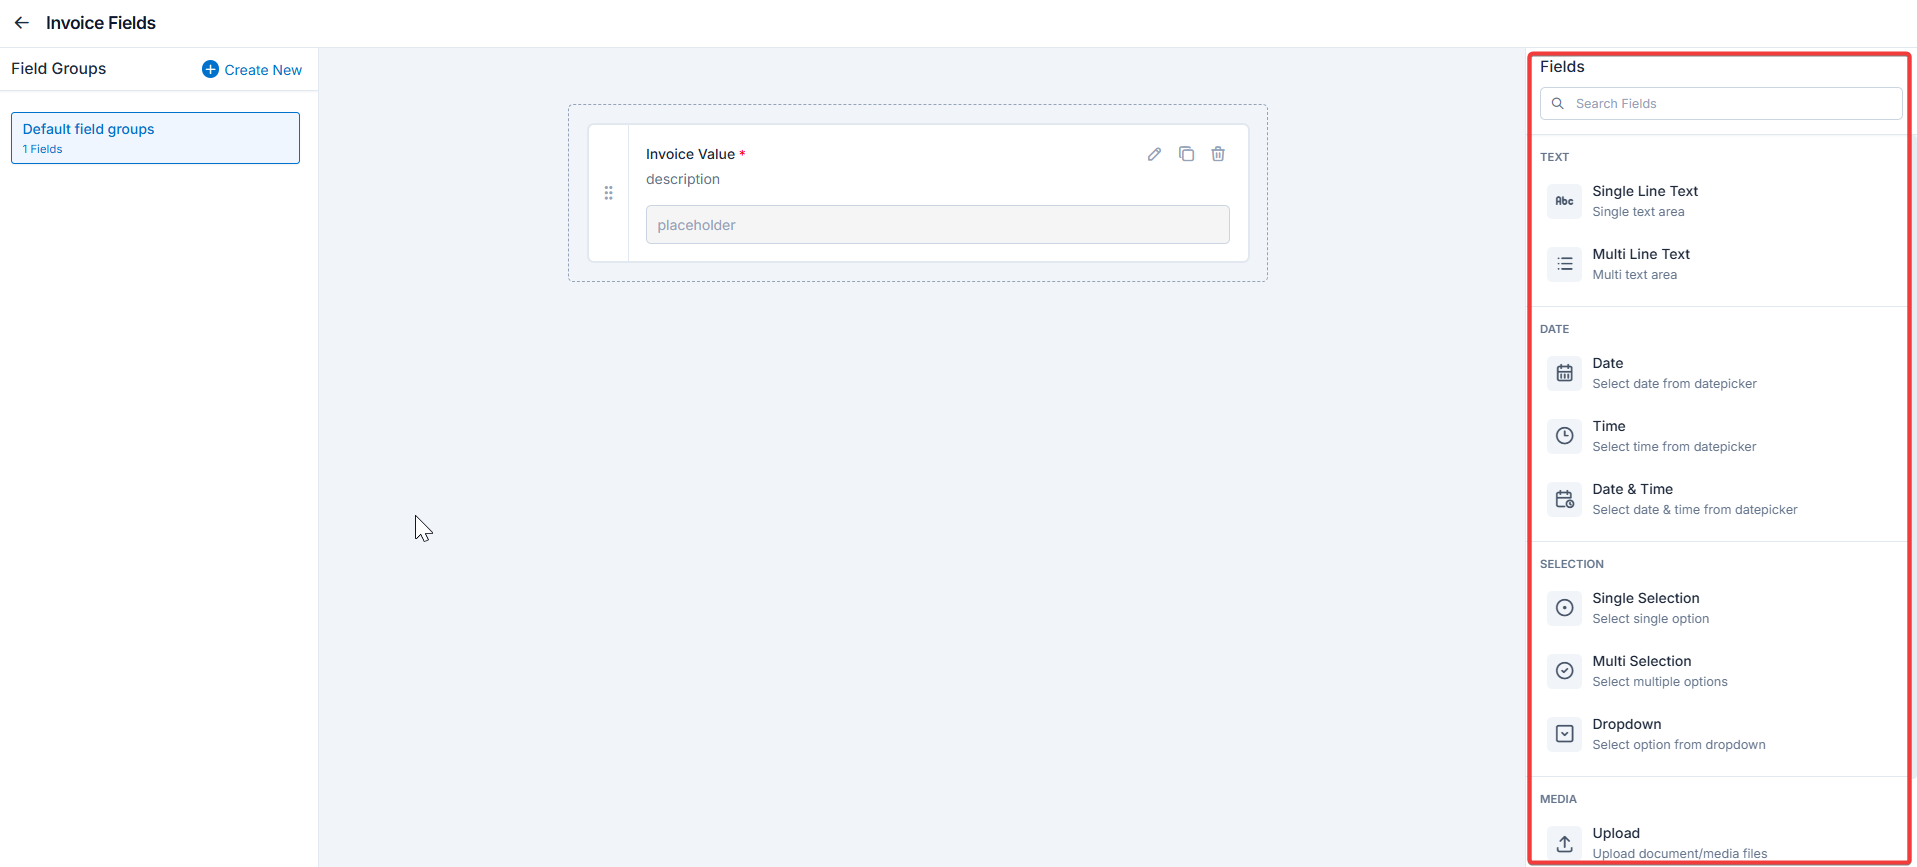
- Select the “Settings” module from the left panel. Under the “Modules,” choose the “Quotes and Invoices.” Select the “Invoices Custom Fields.”
- Single-Line Input: This allows you to create a field to enter a single line of free text.
- Multi-Line Input: This allows you to create a field to enter multiple lines of free text.
- Date Input: This allows you to create a field to select a specific date from a calendar.
- Time Input: This allows you to create a field where you can select a specific time.
- Date Time Input: This allows you to create a field where both date and time can be selected.
- Single-Selection: This allows you to create a radio input Field where one of the provided options can be selected.
- Multi-Selection: This allows you to create check boxes where the provided options can be checked.
- Drop-Down: This allows you to create a drop-down field with the required list of options.
- Upload: This allows you to create a file input field to upload files.
- Look up : This allows you to create a file input field to look up the products from the parts and services module.
Note: You can also control the behavior and visibility of each field using the following options:
- Mark as Required Field - Makes the field mandatory to fill out before submitting the form.
- Mark as Read Only—This option makes the field non-editable; users can view the value but cannot modify it.
- Mark as hidden field- This hides the field from all users; it will not appear in the form interface.
- Hide to FE/Technician- This option makes the field invisible to technicians or front-end users during form access.