General contract settings
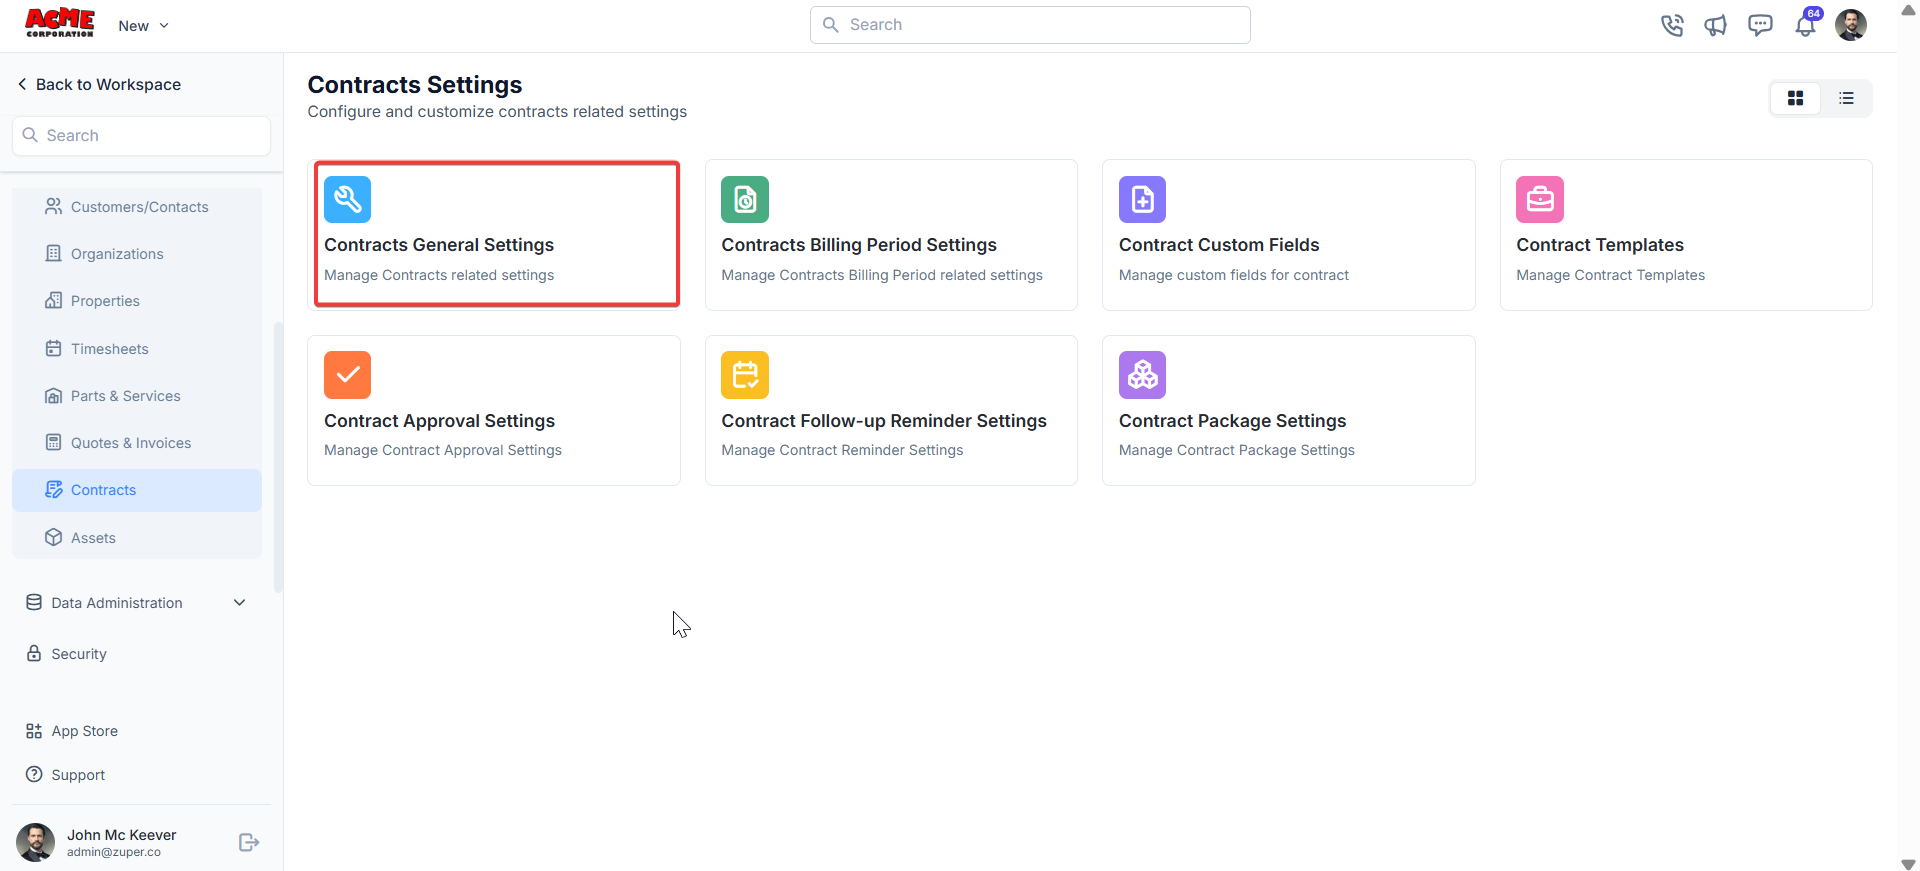
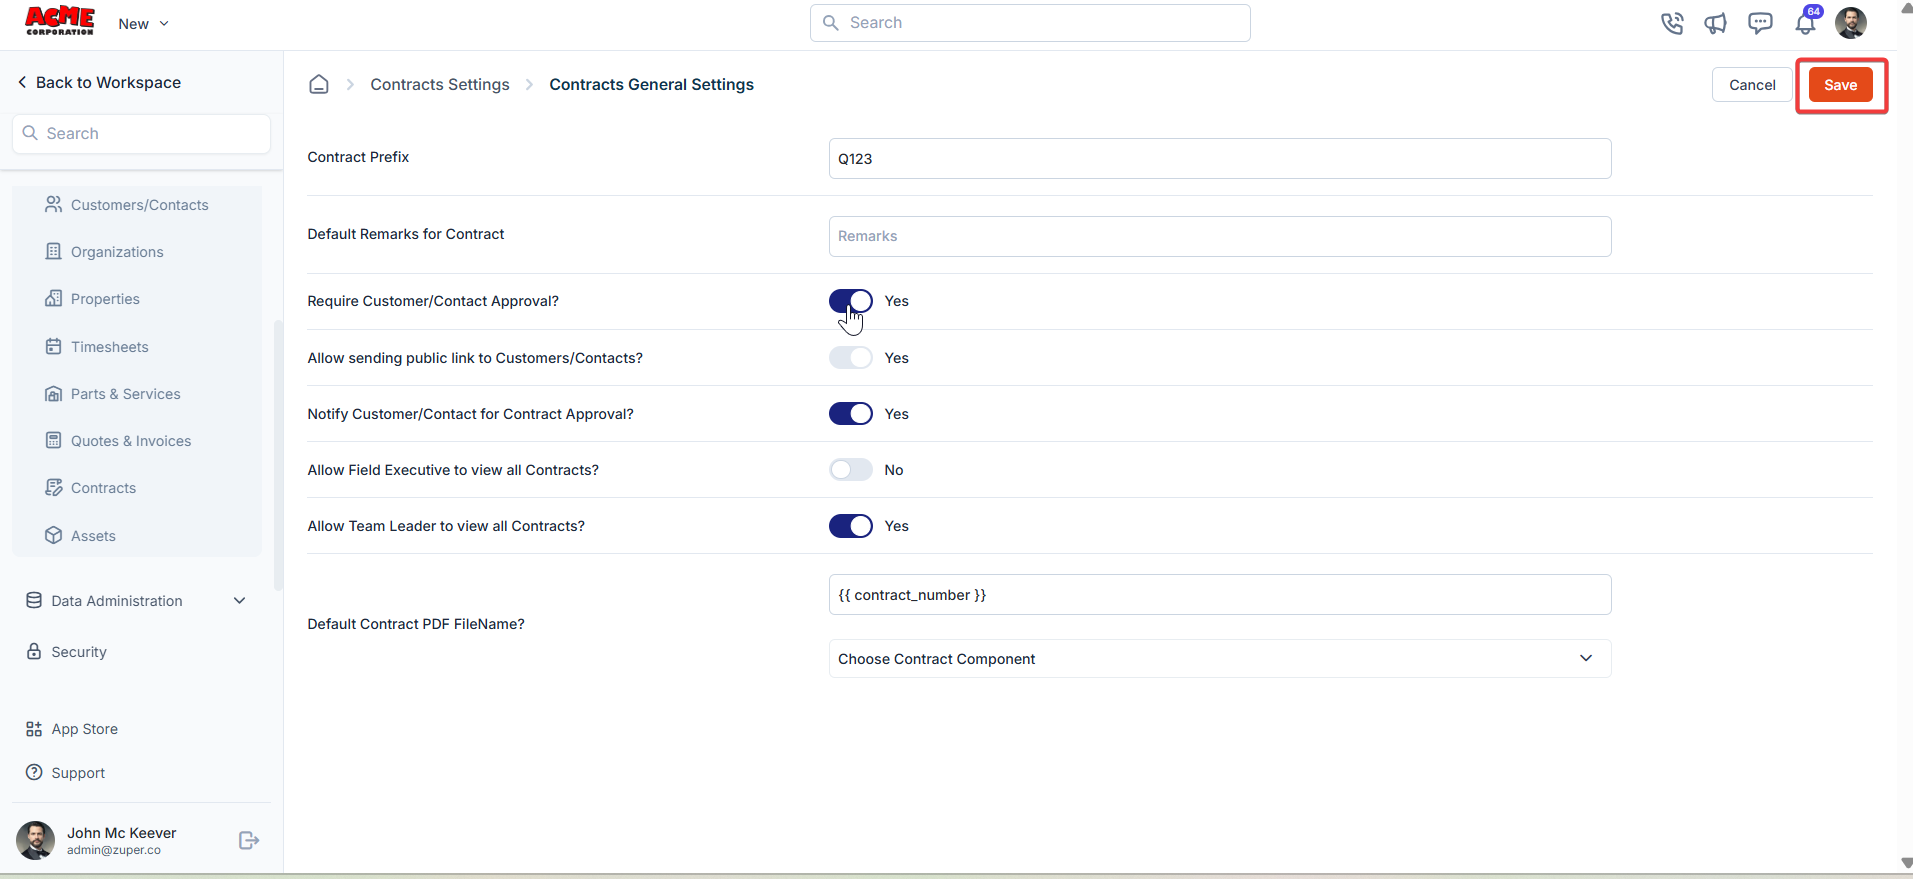
General settings allow you to define default behaviors for the contract.Navigation: Settings -> Modules -> Contracts - > Contracts General Settings
- Select the “Settings” module from the left panel. Under the “Modules,” choose the “Contracts.” Select the “Contract General Settings.”
- Enter the following details.
Contract billing period settings
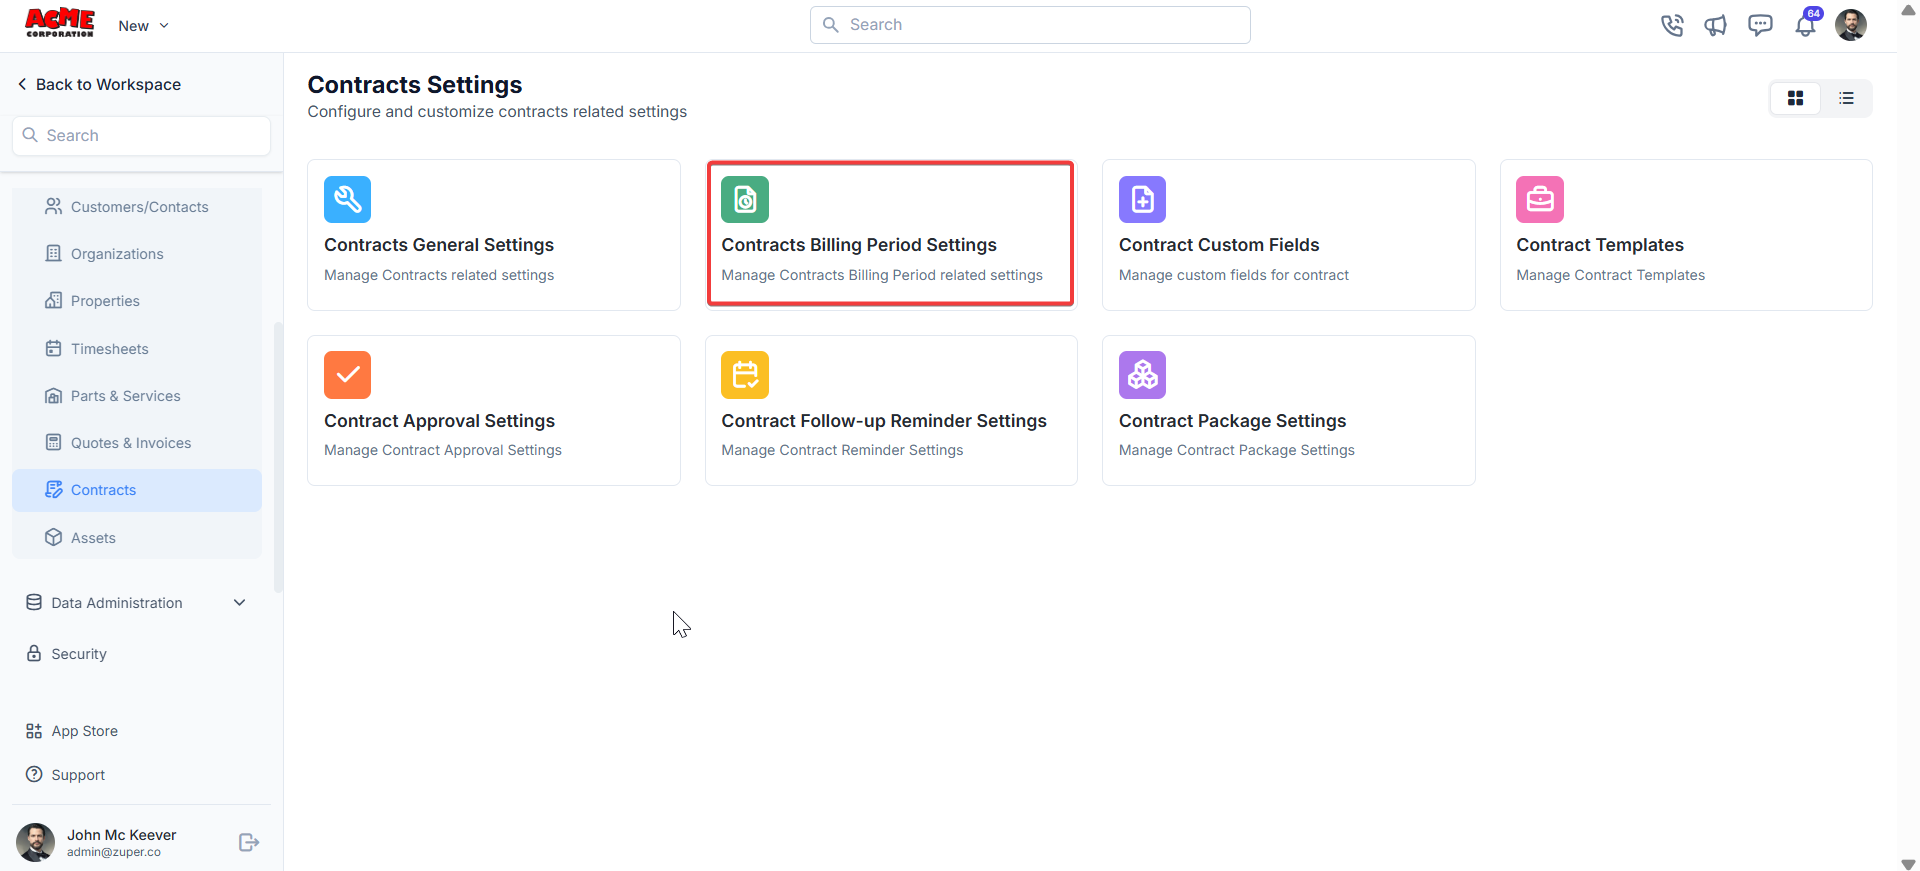
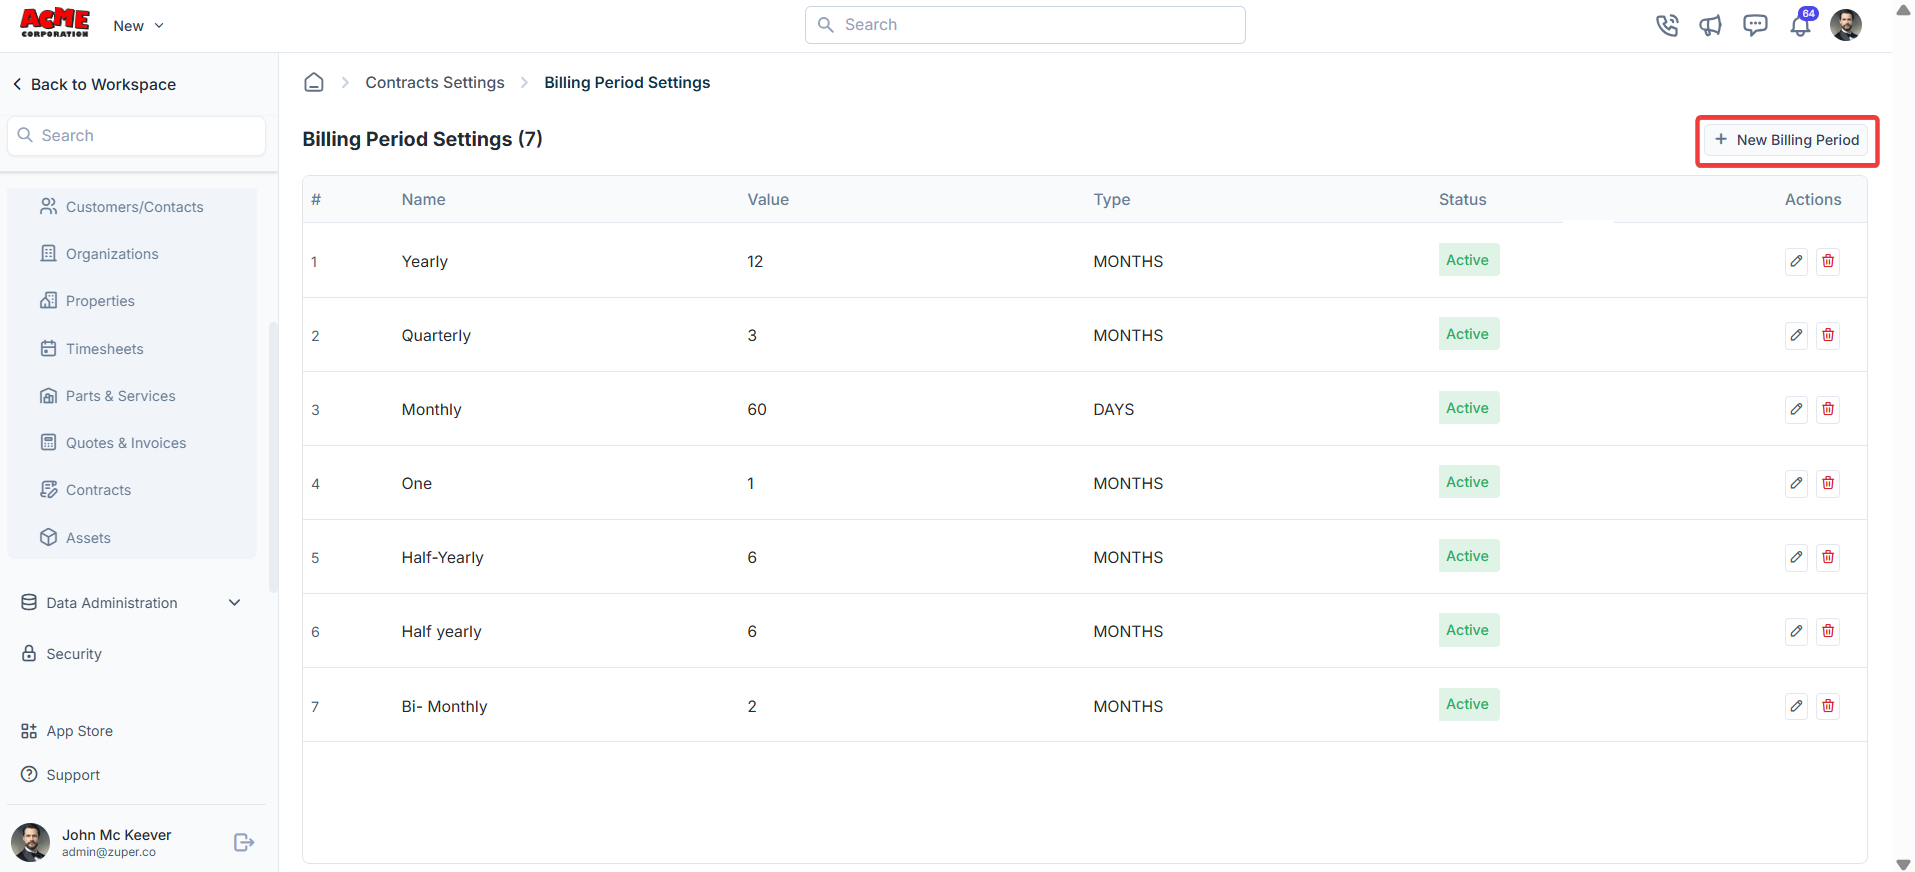
Billing periods define how frequently invoices are generated for contracts.Navigation: Settings -> Modules -> Contracts - > Contracts Billing Period Settings
- Select the “Settings” module from the left panel. Under the “Modules,” choose the “Contracts.” Select the “Contract Billing Period Settings.”
- Under billing period settings, click ”+ New Billing Period” to create the billing period.
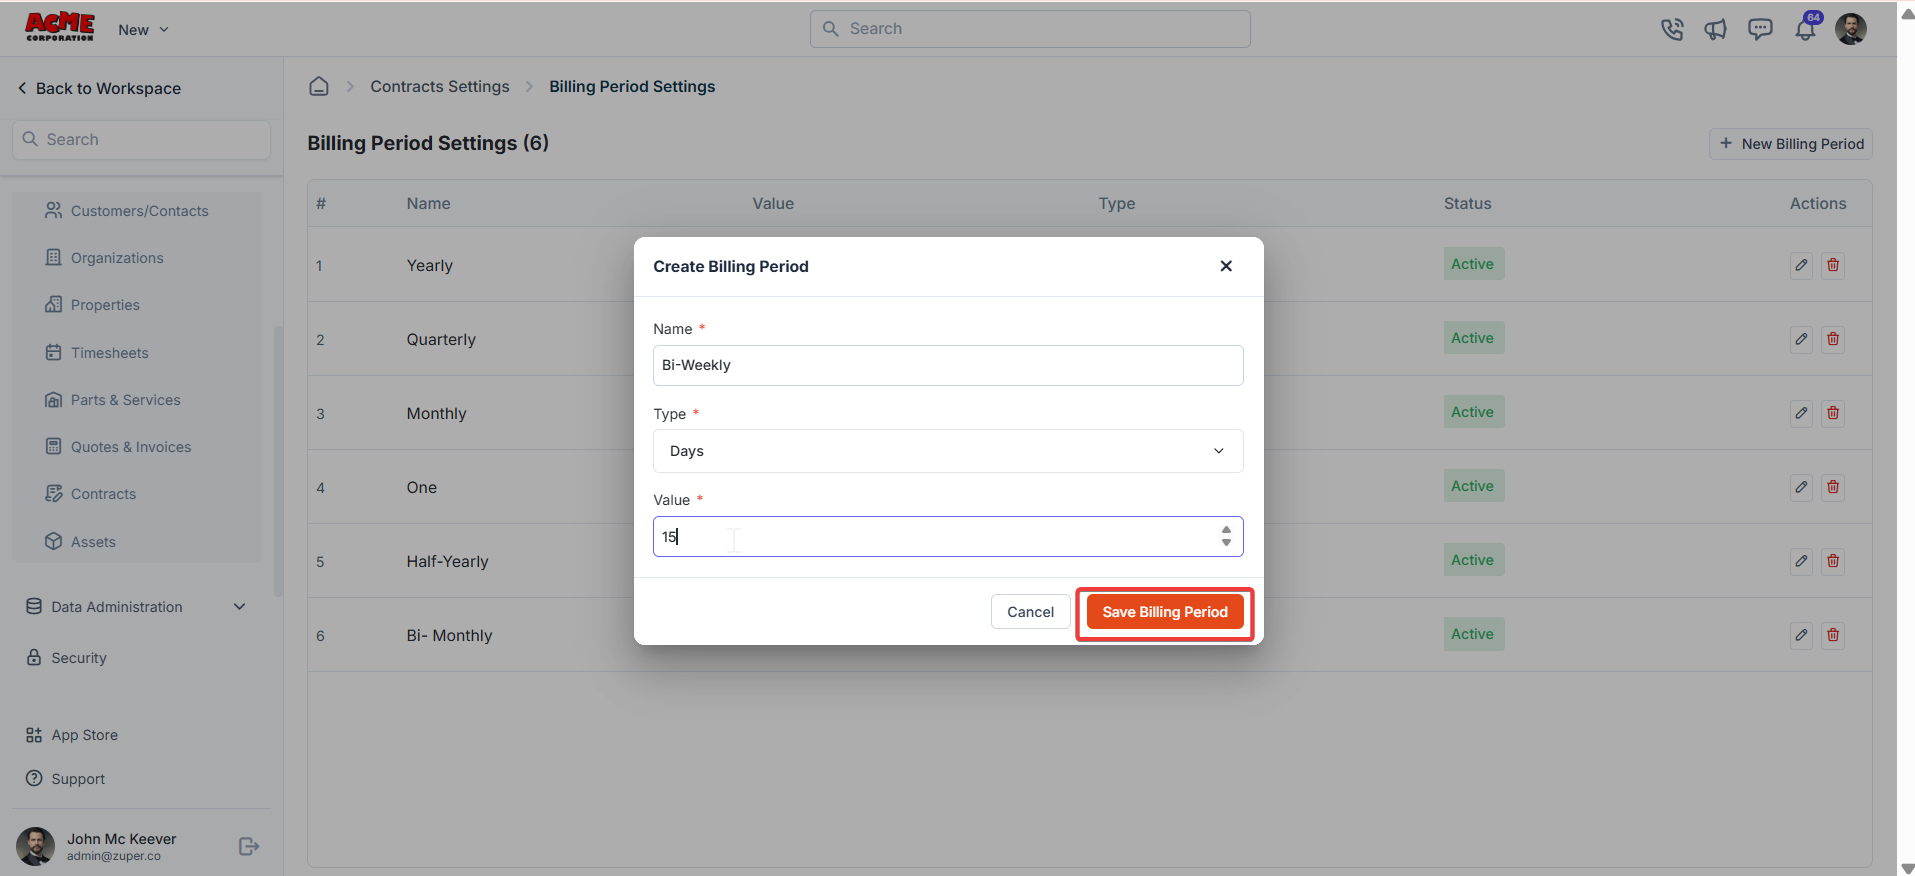
- Fill in the billing period details – Name and Value. Choose the type (Days, Weeks, Months).
Contract custom fields
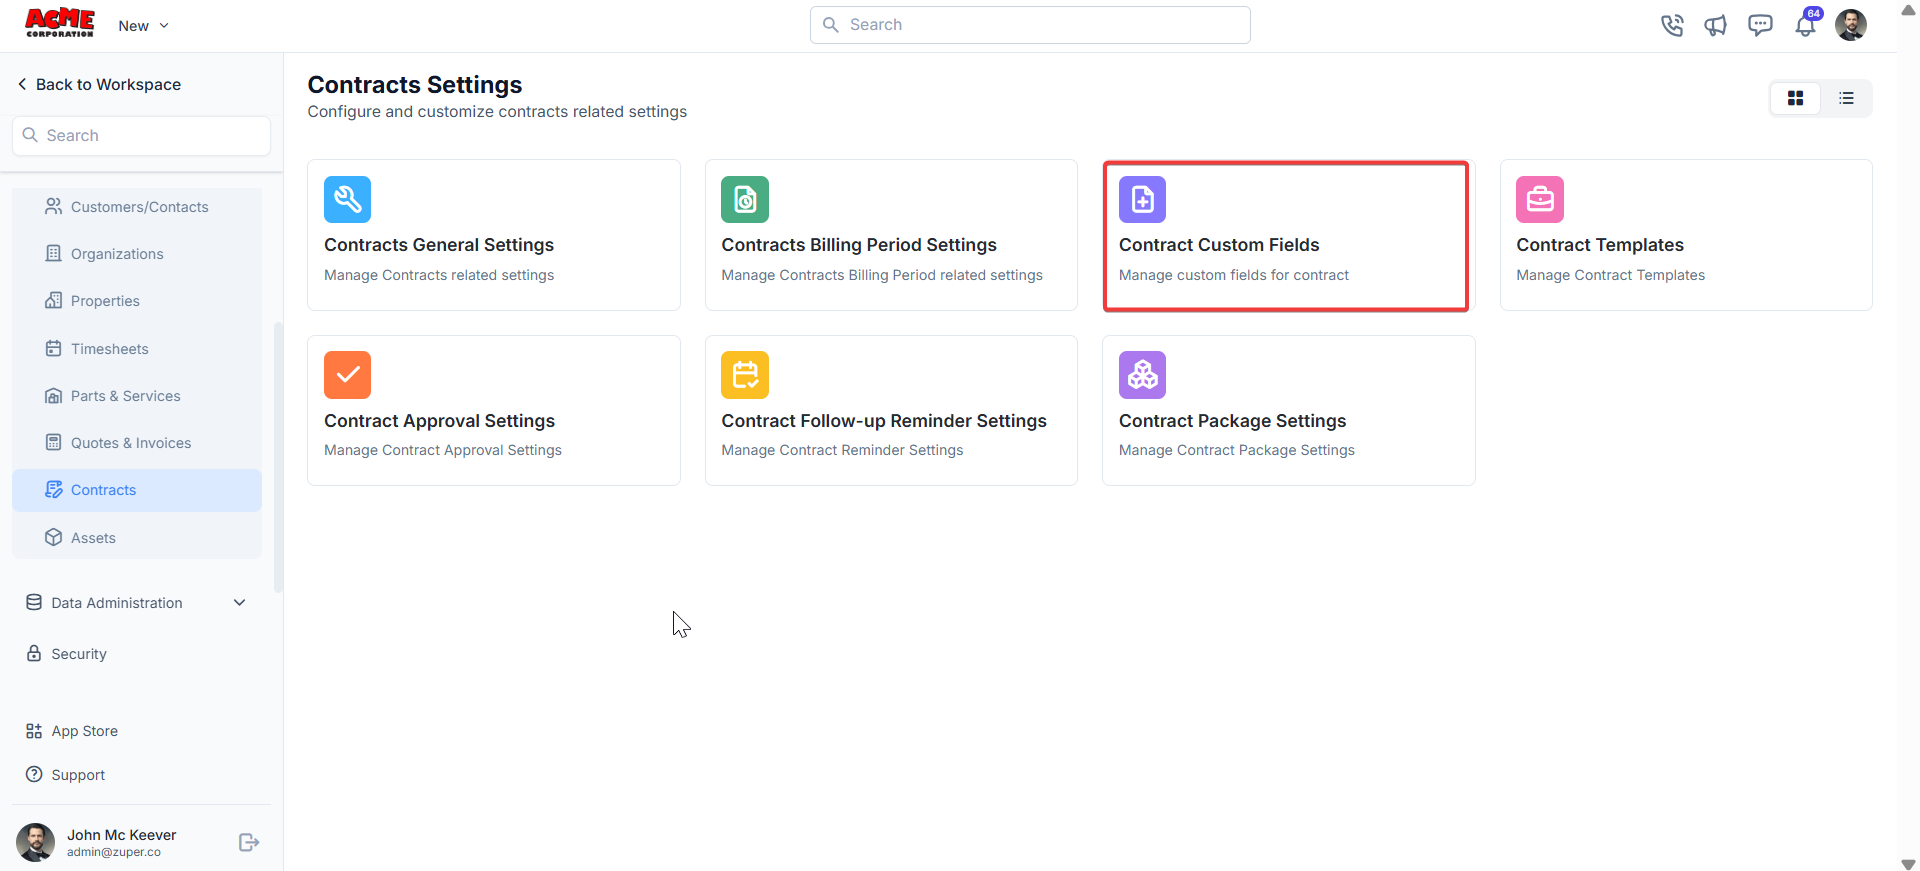
Navigation: Settings -> Modules -> Contracts - > Contract Custom Fields
- Select the “Settings” module from the left panel. Under the “Modules,” choose the “Contracts.” Select the “Contracts Custom Fields.”
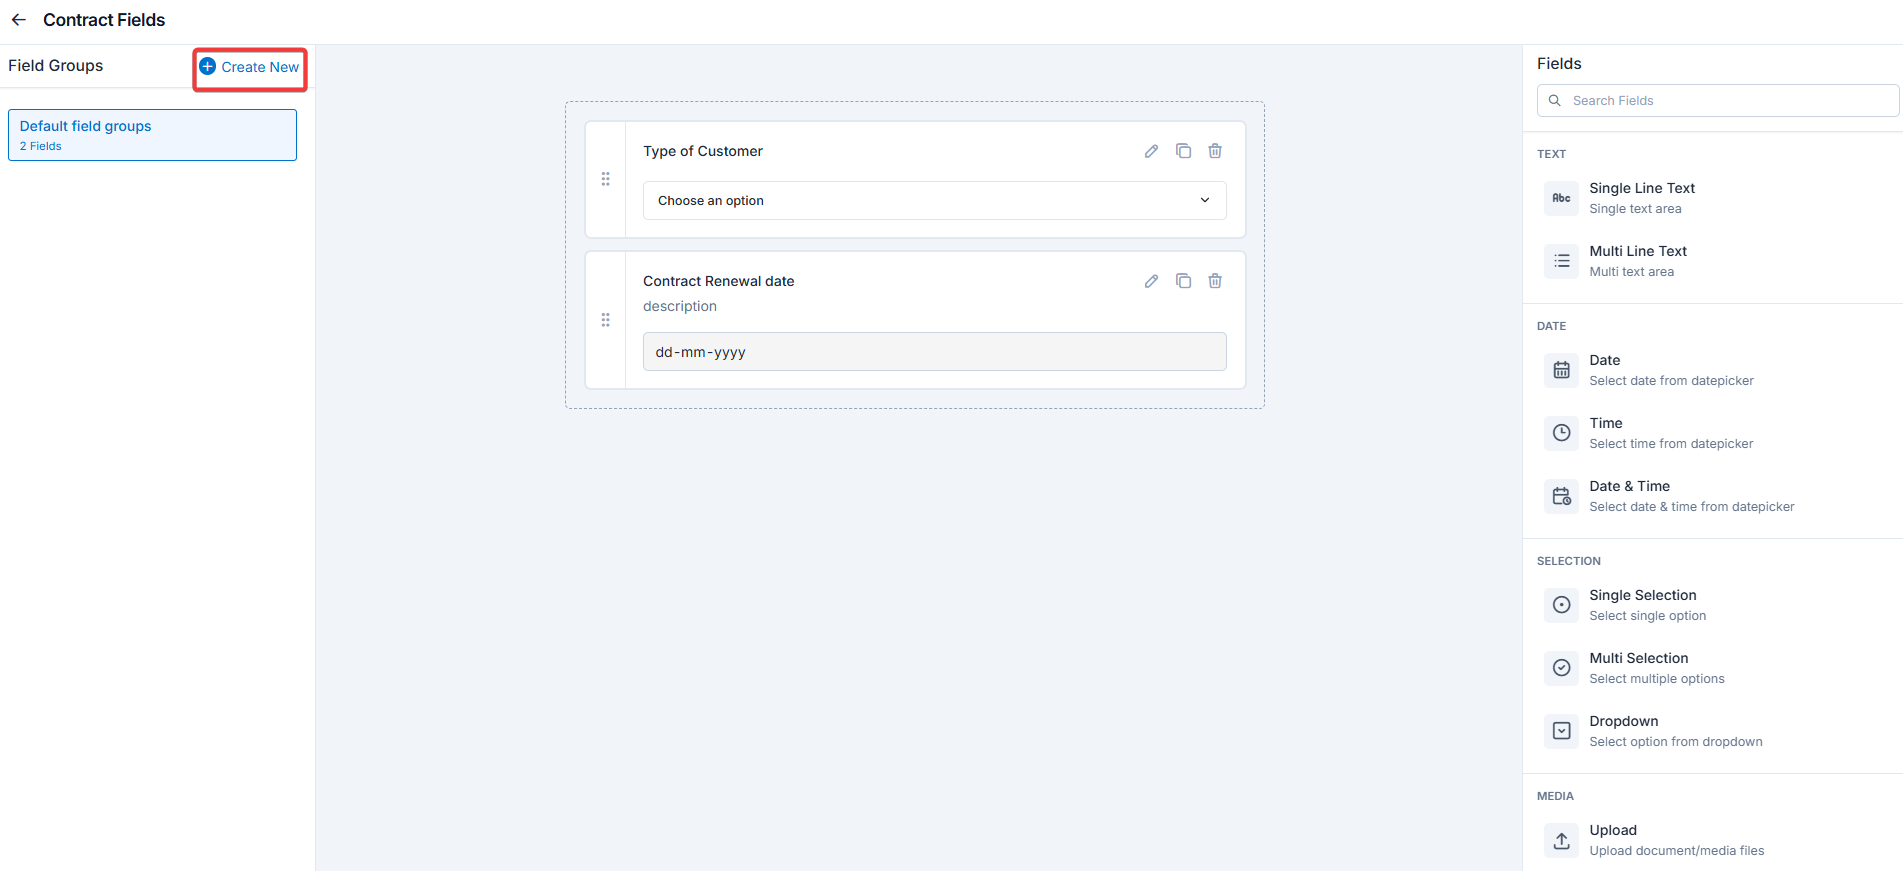
- Single-Line Input: This allows you to create a field to enter a single line of free text.
- Multi-Line Input: This allows you to create a field to enter multiple lines of free text.
- Date Input: This allows you to create a field to select a specific date from a calendar.
- Time Input: This allows you to create a field where you can select a specific time.
- Date Time Input: This allows you to create a field where both date and time can be selected.
- Single-Selection: This allows you to create a radio input Field where one of the provided options can be selected.
- Multi-Selection: This allows you to create check boxes where the provided options can be checked.
- Drop-Down: This allows you to create a drop-down field with the required list of options.
- Upload: This allows you to create a file input field to upload files.
- Look up : This allows you to create a file input field to look up the products from the parts and services module.
Note: You can also control the behavior and visibility of each field using the following options:
- Mark as Required Field - Makes the field mandatory to fill out before submitting the form.
- Mark as Read Only—This option makes the field non-editable; users can view the value but cannot modify it.
- Mark as hidden field- This hides the field from all users; it will not appear in the form interface.
- Hide to FE/Technician- This option makes the field invisible to technicians or front-end users during form access.
Contract templates
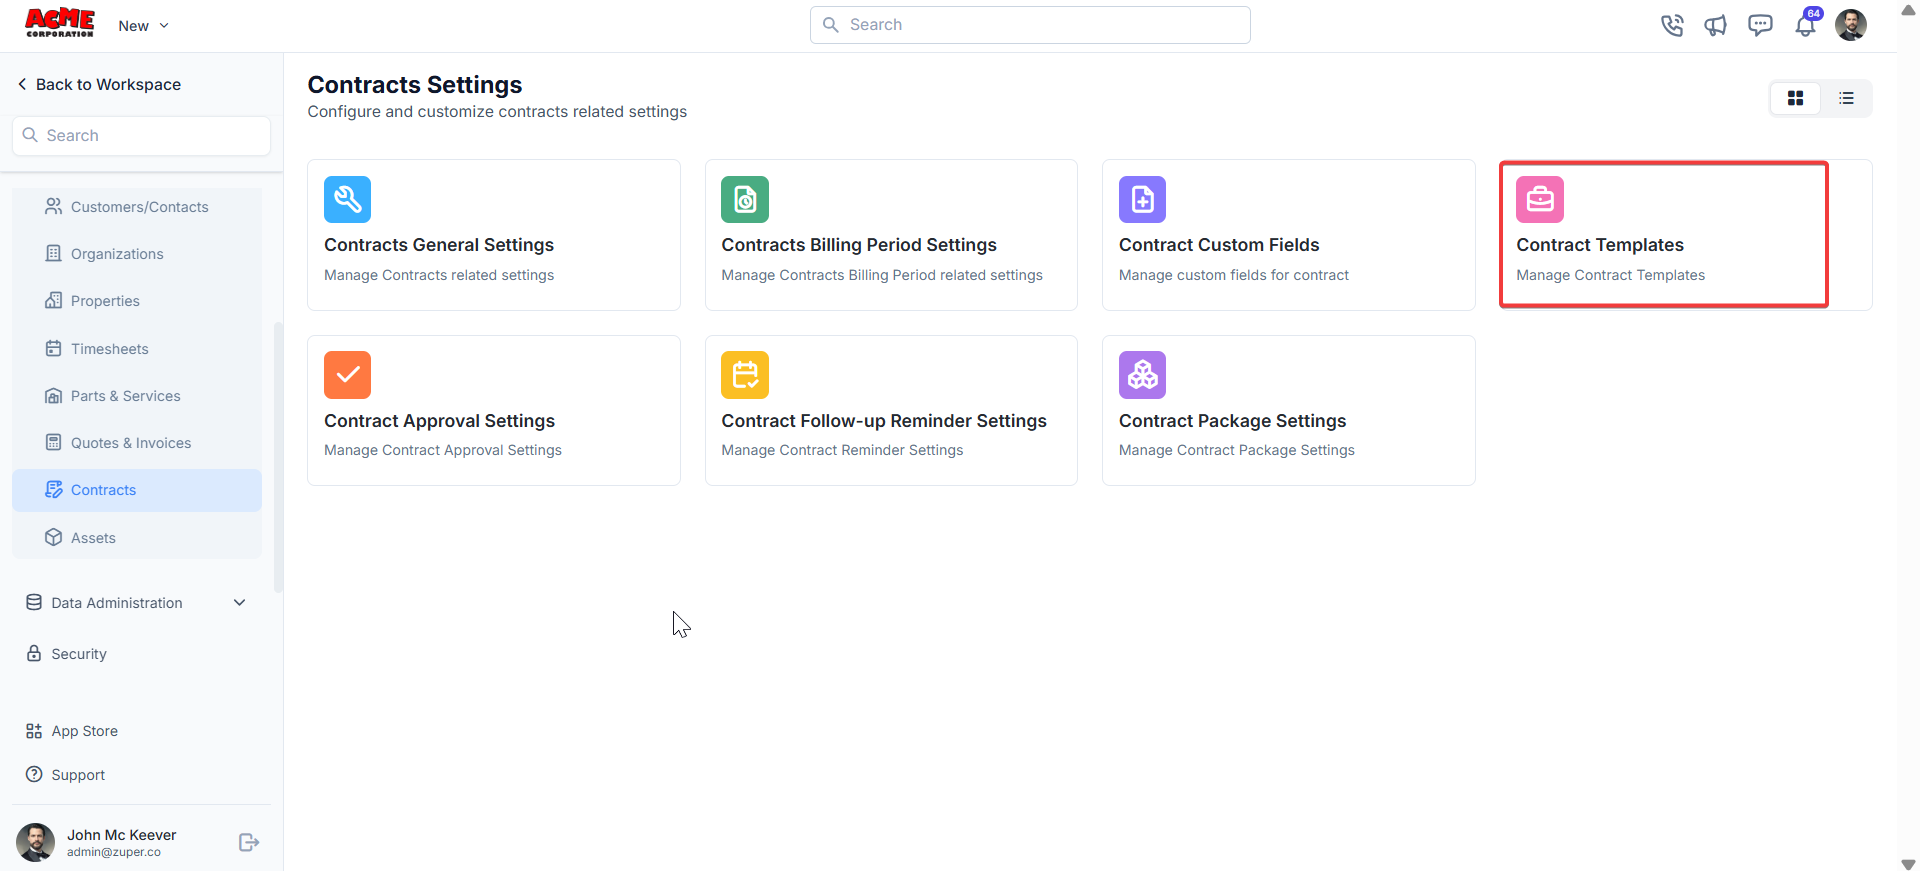
Contract templates allow you to standardize contract formats for consistency.Navigation: Settings -> Modules -> Contracts - > Contracts Templates
- Select the “Settings” module from the left panel. Under the “Modules,” choose the “Contracts.” Select the “Contract Templates.”
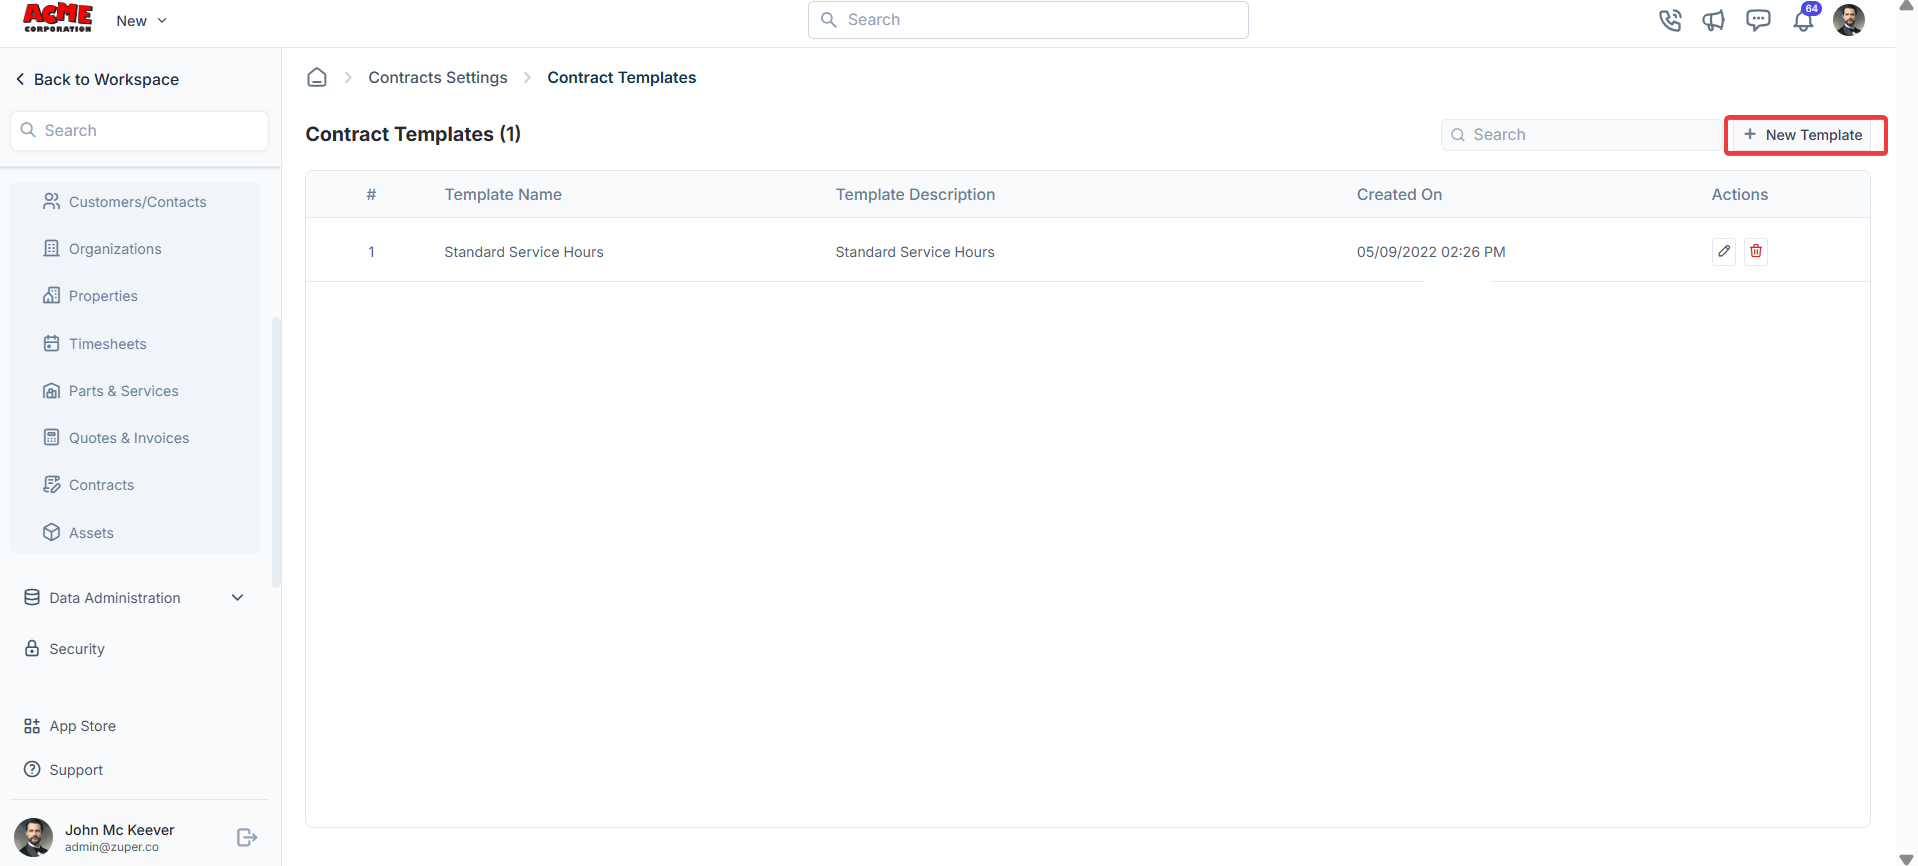
- Click ”+ New Template” to create the new template.
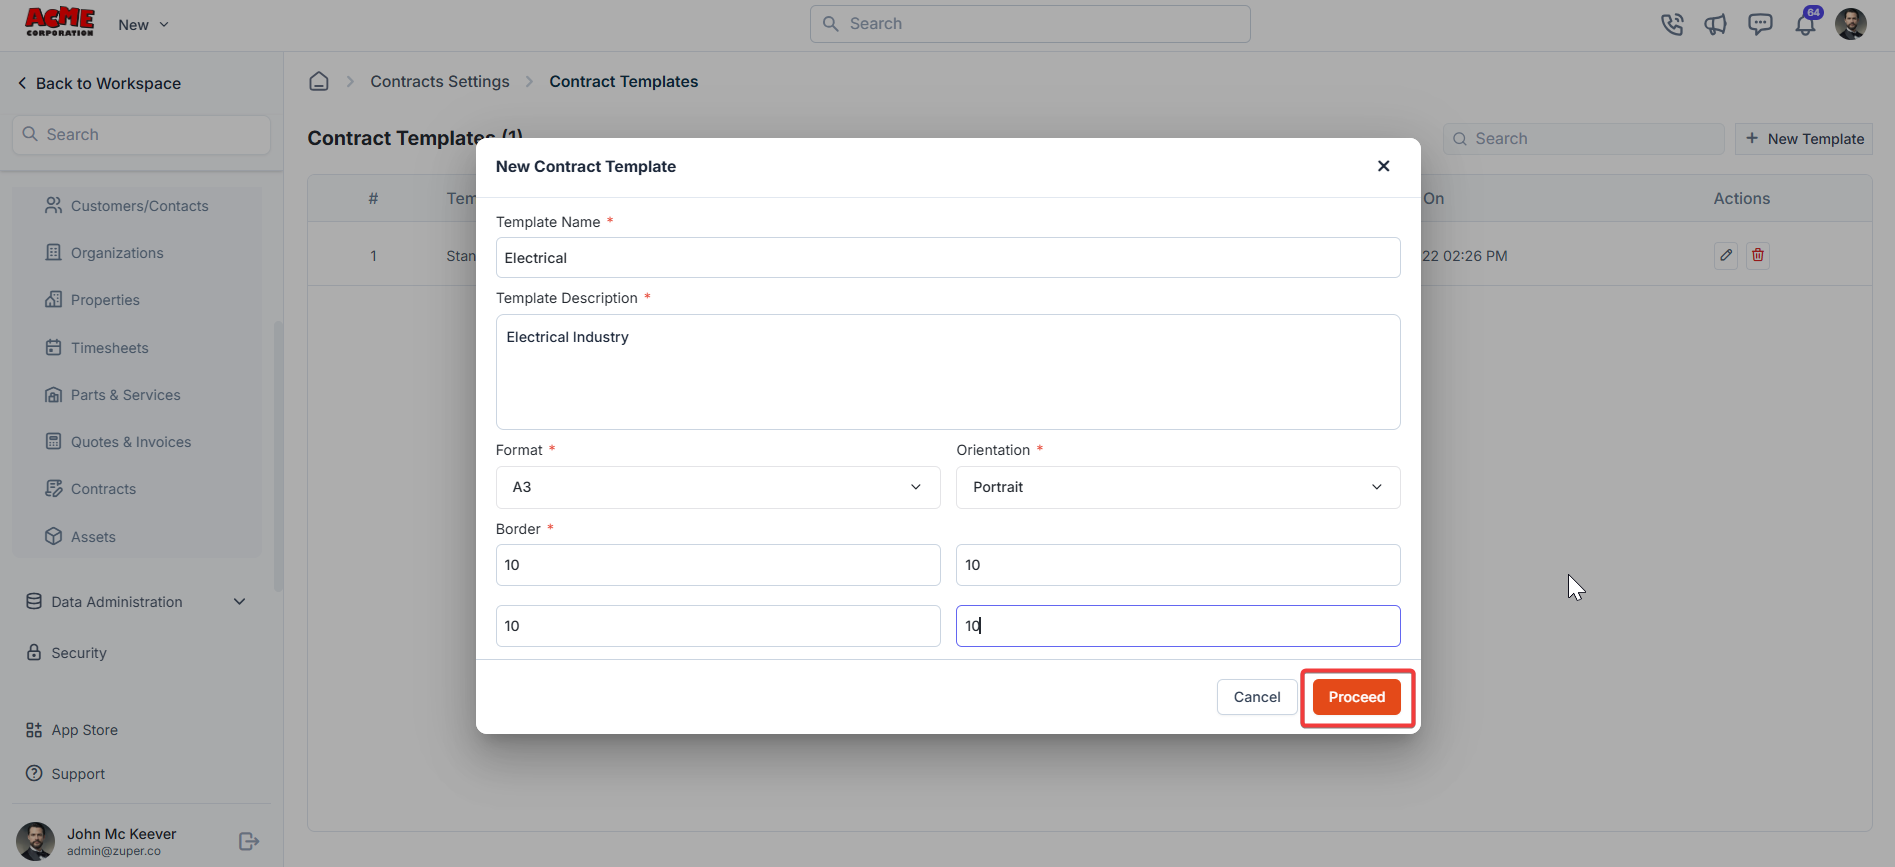
- Fill in the template details and click “Save Template.”
Contract approval settings
Approval settings control how contracts are approved within your organization.Navigation: Settings -> Modules -> Contracts - > Contracts Approval Settings
-
Select the “Settings” module from the left panel. Under the “Modules,” choose the “Contracts.” Select the “Contract Approval Settings.”

-
Navigate to Timesheet Approval to manage approval hierarchies.
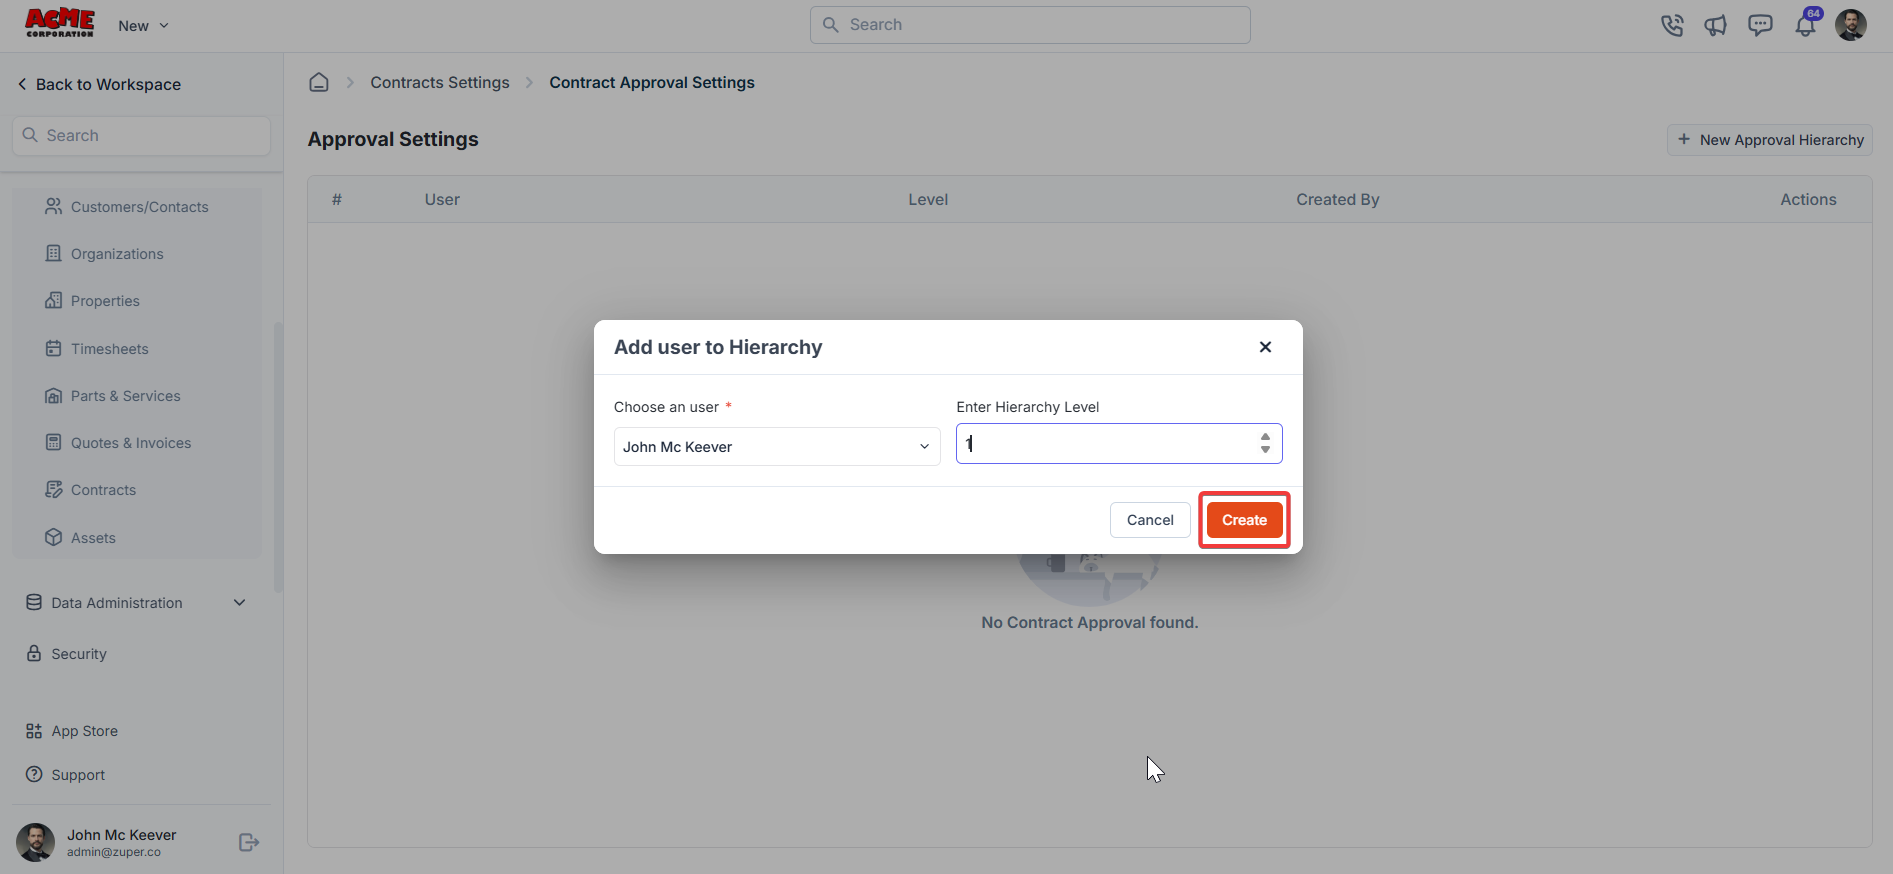
- Add a new hierarchy by clicking + New Approval Hierarchy.
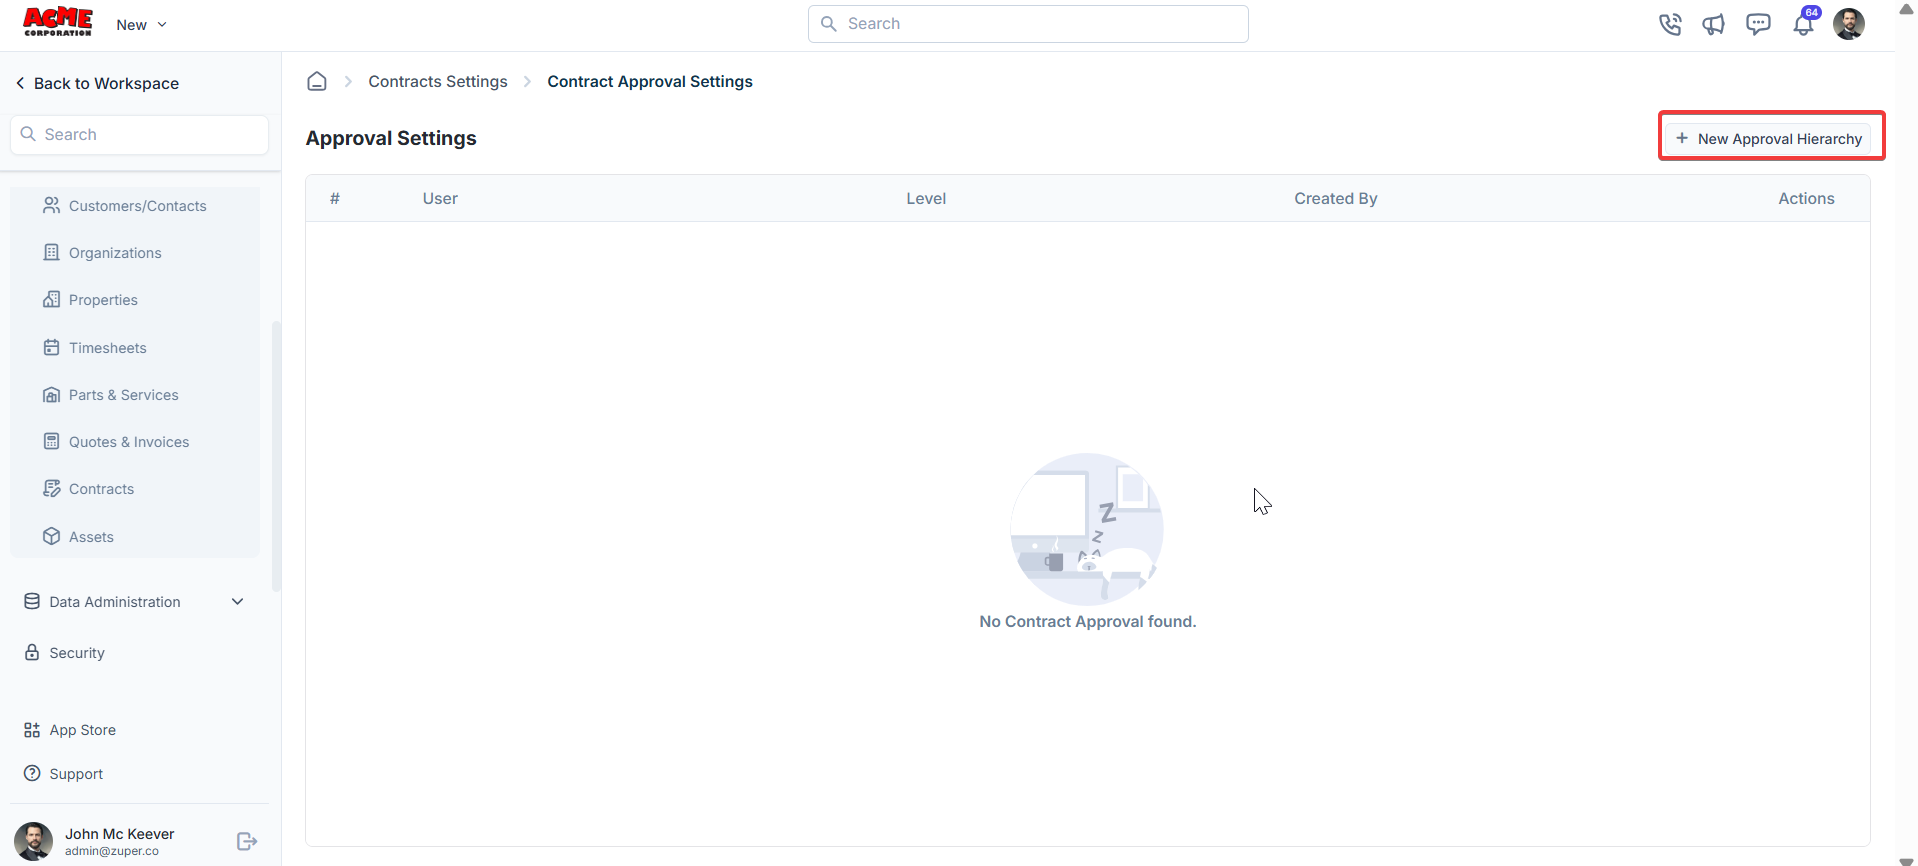
- Assign users and levels for approval (For instance, John McKeever at Level 1).
Follow-up reminders
Navigation: Settings -> Modules -> Contracts - > Contracts Follow up reminders
-
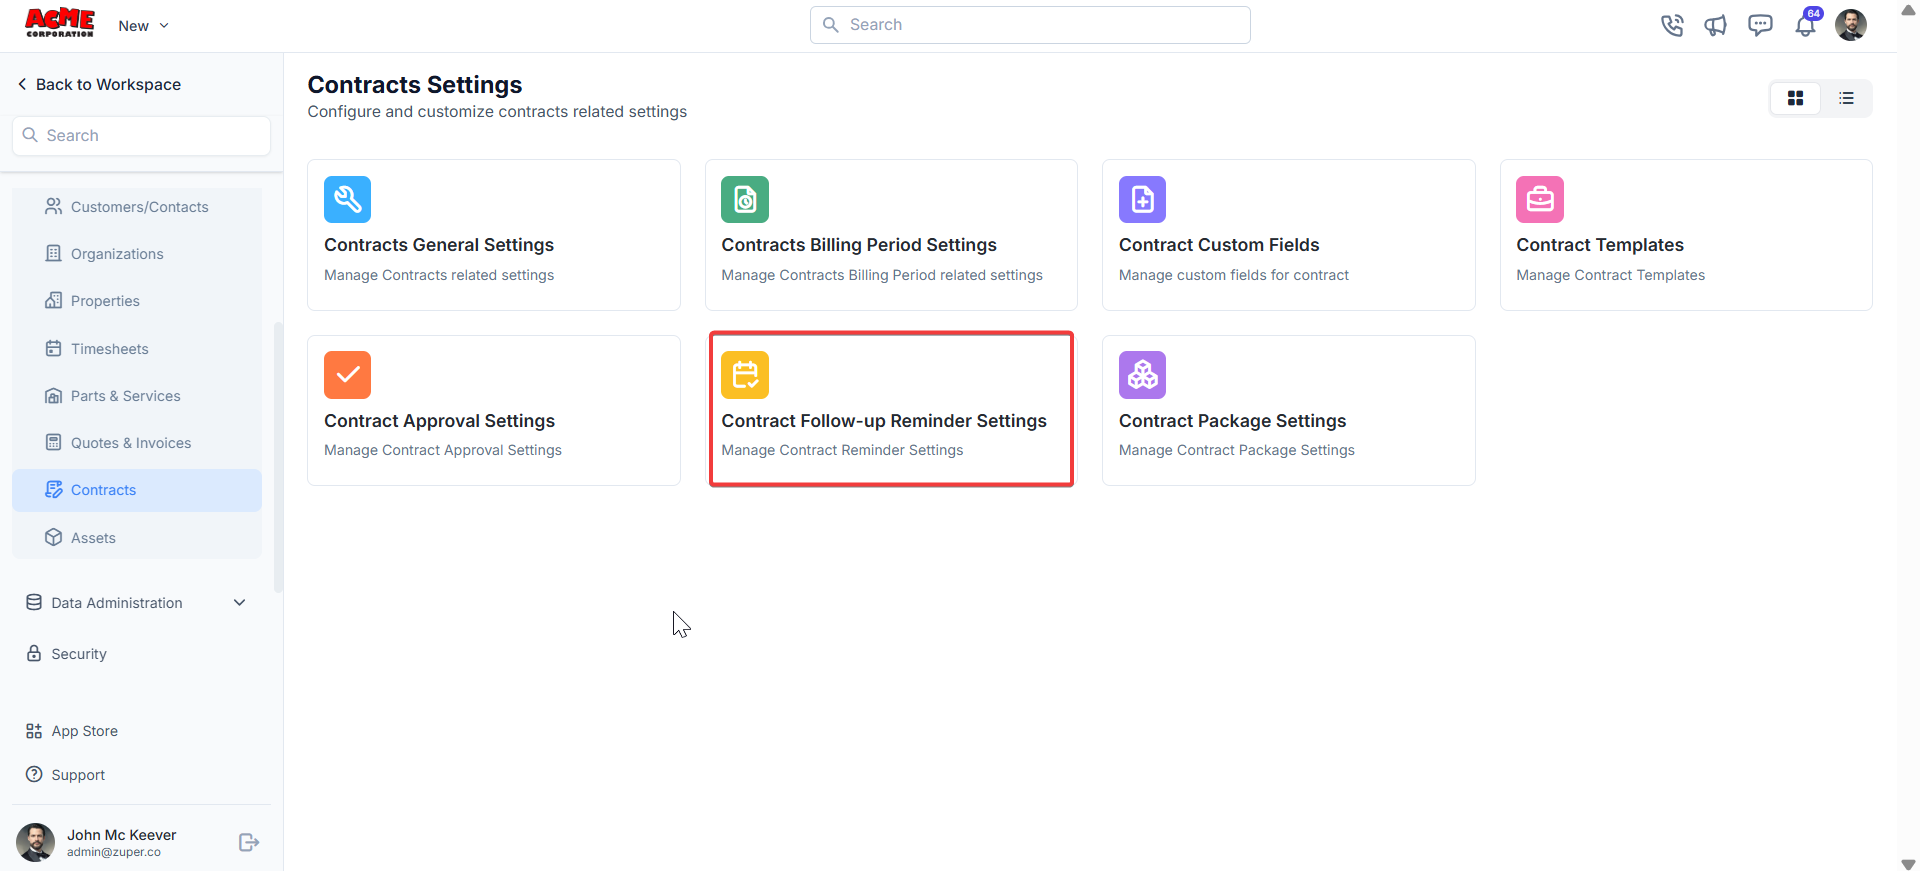
Select the “Settings” module from the left panel. Under the “Modules,” Choose the “Contracts.” Select the “Contract Follow-up Reminders .”
-
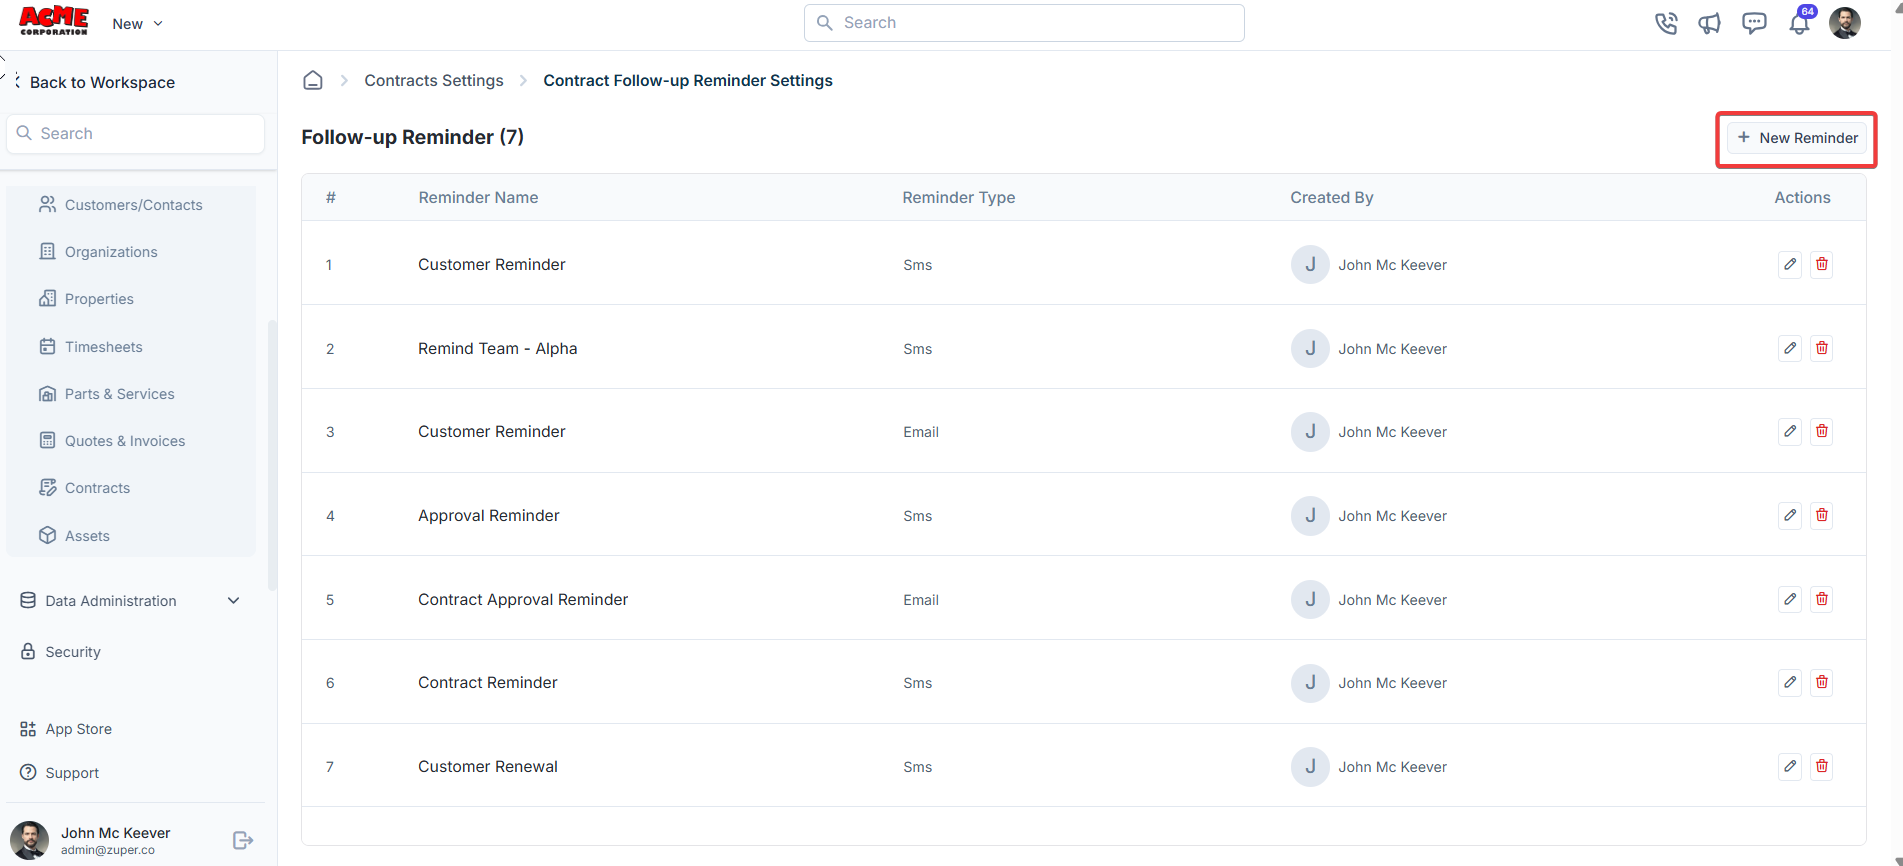
Click ” + New Reminder ” to create the follow-up reminder.
-
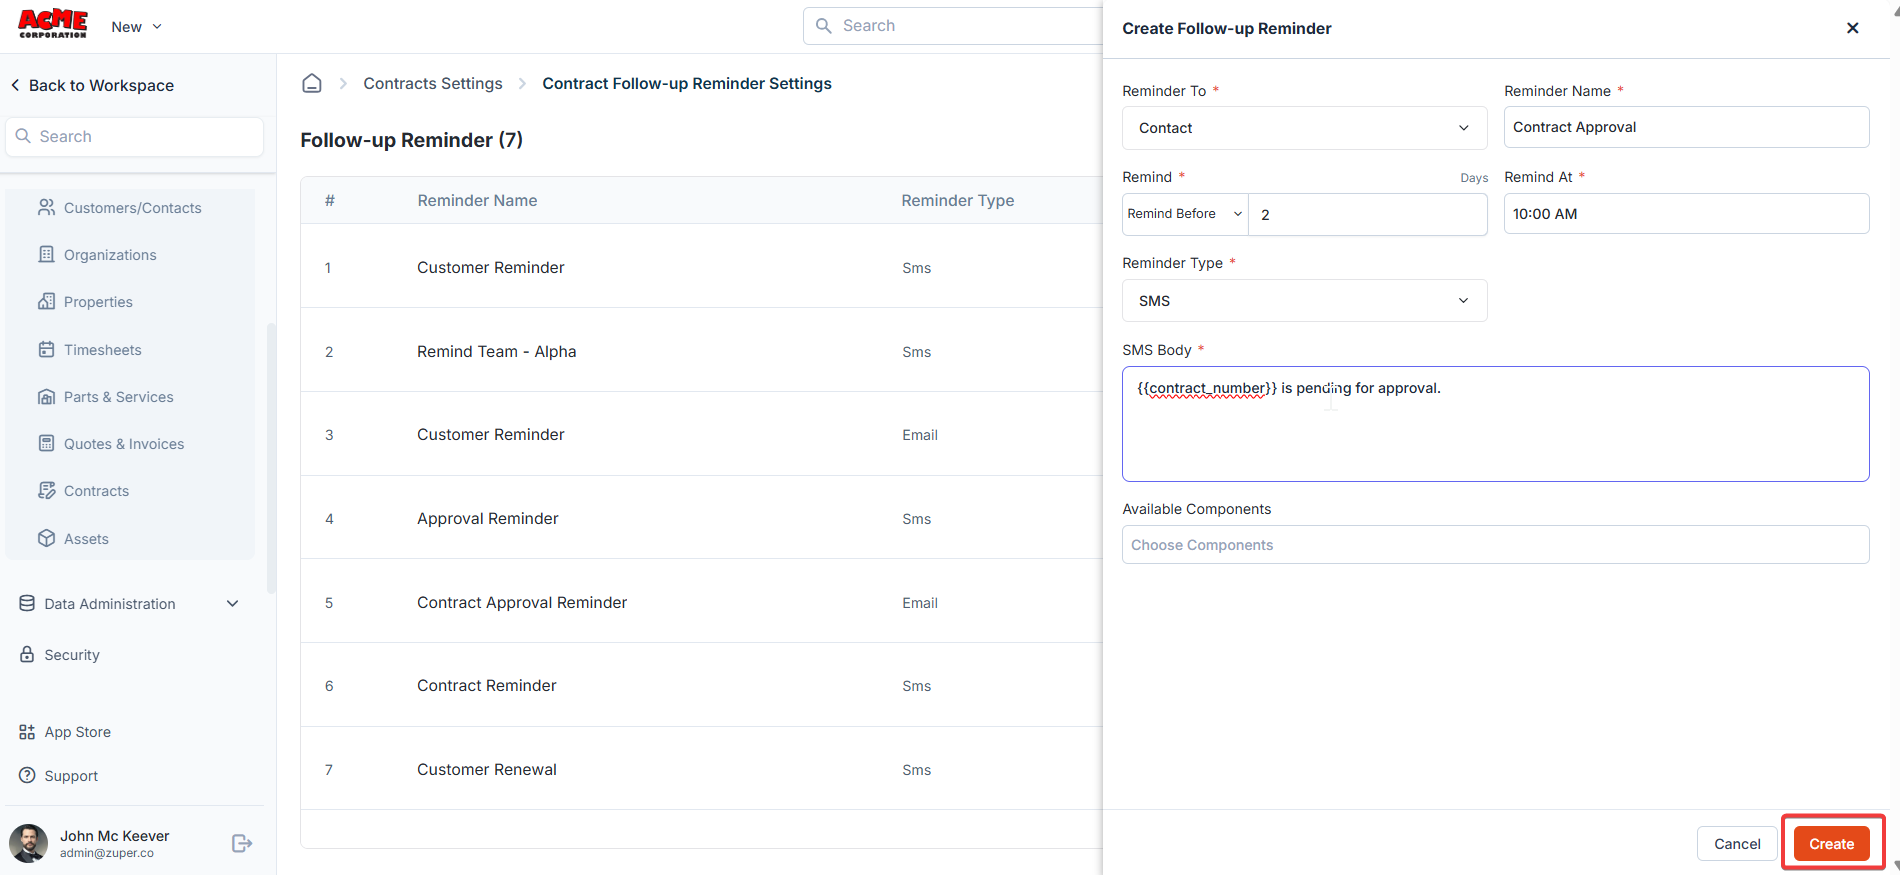
a) Under “Remind To”-The user can send a follow-up reminder to the back office and the customer. The drop-down box lists: “Customer,” “Selected Users,” and “Selected Teams.”
b) Under “Reminder Name” - Type the name for the reminder.
c) Under “Remind After / Remind Before” -The reminder can be sent “Before”
or “After.”
d) Remind At – Enter the time of the reminder.
e) Under “Reminder Type” -The reminder type can be either “SMS” or “Email.”
f) SMS Body & Available Components – Choose the available components and create the SMS body.
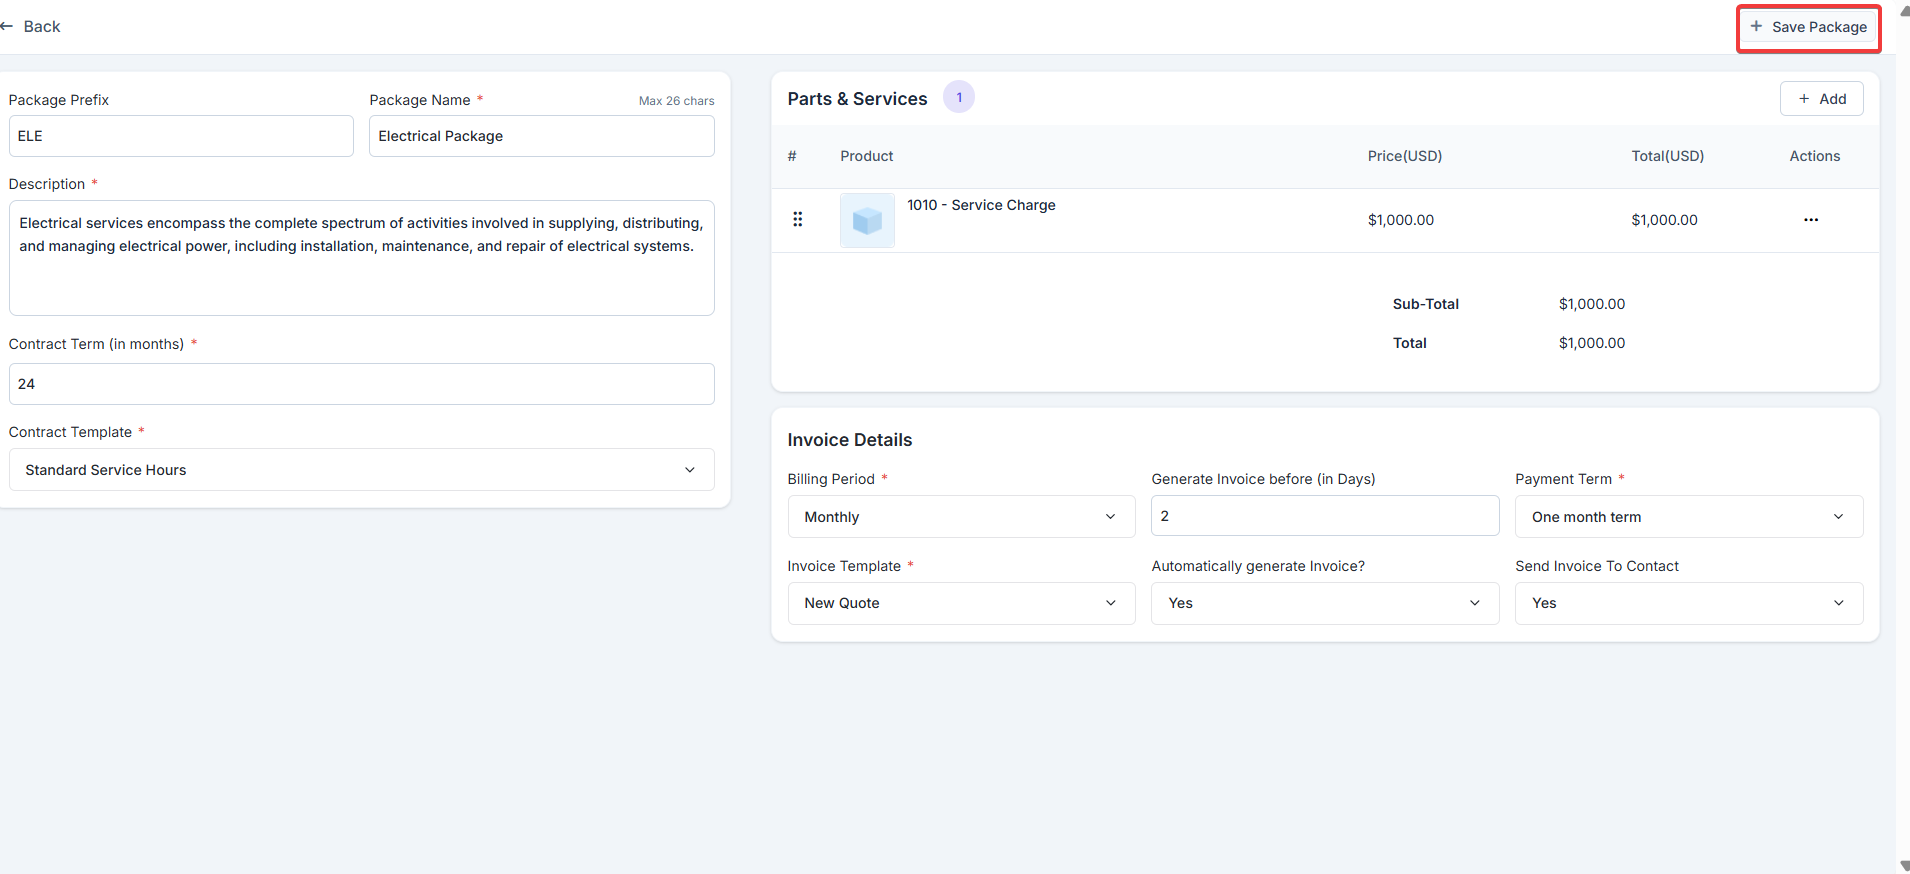
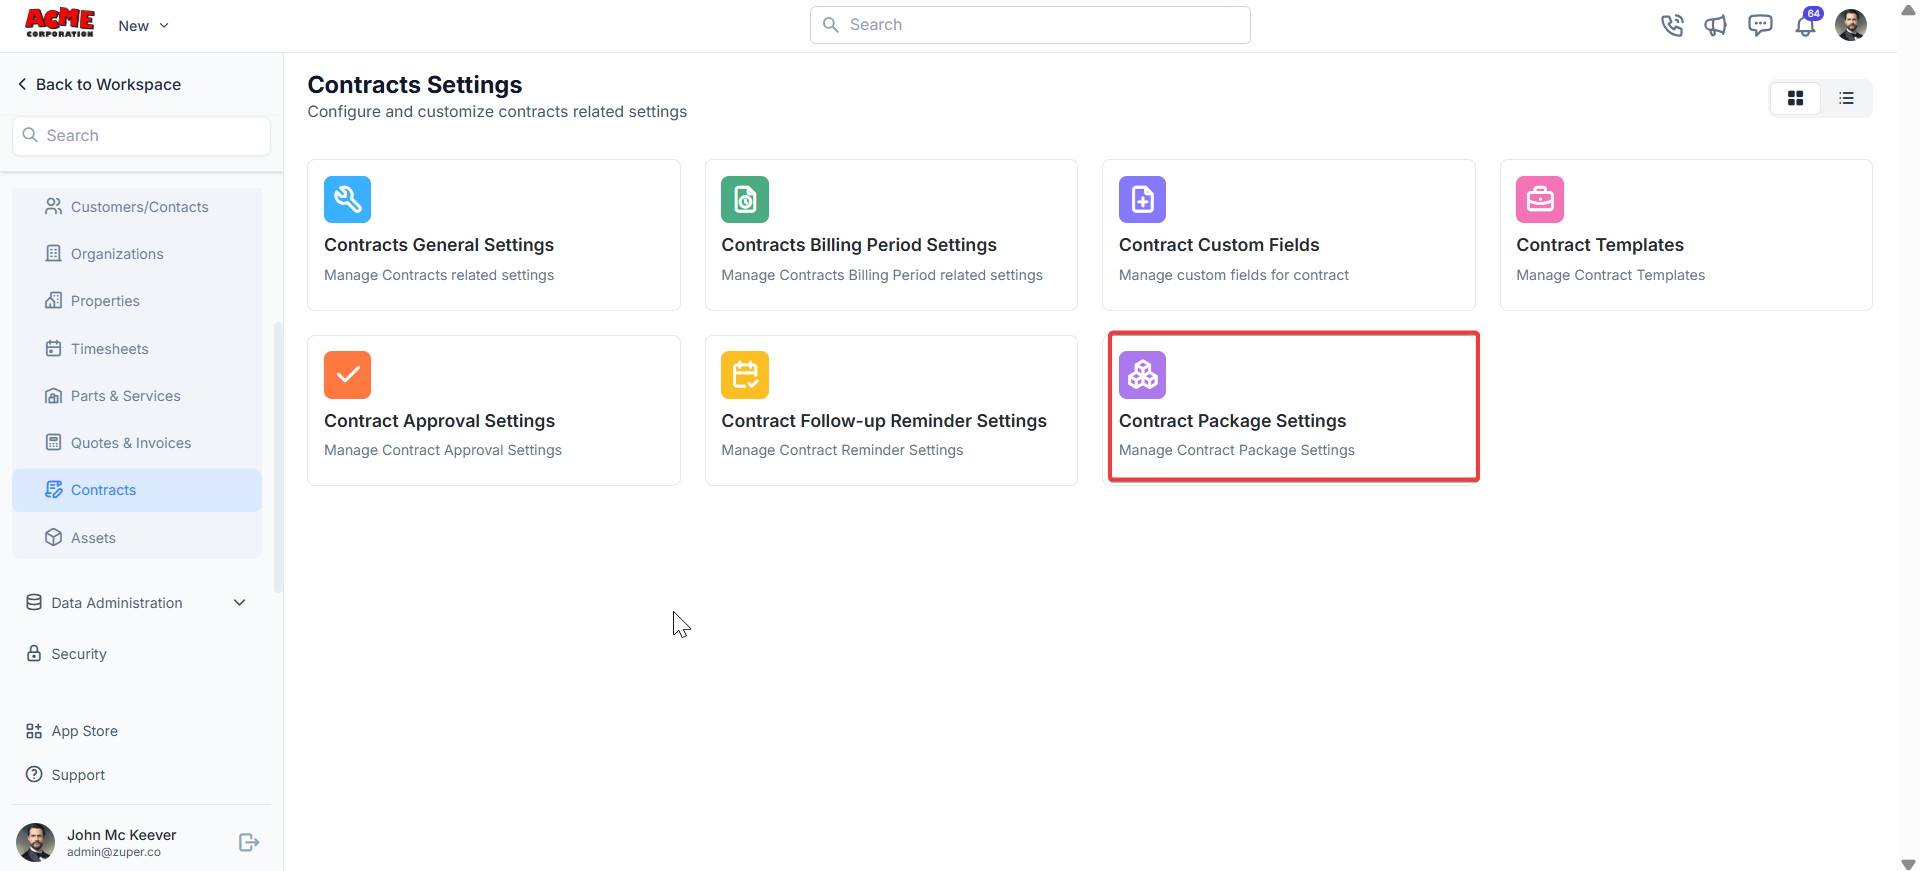
Contract packages
Contract packages allow you to bundle multiple contracts, templates, and settings into a single package for streamlined management.Navigation: Settings -> Modules -> Contracts - > Contract Packages
- Package Prefix: Define a prefix for the contract.
- Package Name: Enter a name for the package.
- Description: Provide a description.
- Contract Terms: Enter the contract terms in months.
- Contract Templates: Choose the contract templates to associate with this package.
- Click the ”+ Add” button to add individual parts, products, and services. Alternatively, use the drop-down menu next to the ”+ Add” button to: Add from Group: Select a predefined group of items to add to the package. Bundle: Add a product or service bundle. Note that bundles added here will not appear as a product type in the filter menu.
- Billing Period: Assign a billing period from the drop-down menu.
- Generate Invoice Before Days: Enter the days before the invoice can be generated.
- Payment term: Choose the payment term from the drop-down menu.
- Invoice Template: Choose the template from the drop-down menu.
- Automatically Generate Invoice: Toggle “Yes” or “No” to turn the automatic invoice generation on or off.
- Send Invoice to Contact: Toggle “Yes” or “No” to turn the automatic invoice sending to the contact on or off.