Pre-Requisites:
API Keys: Click here to know how to create and use API keys.Installation & How to use
1. Open a new tab in your browser and once you are logged in to your Zuper Account, click your Profile Picture on the top right corner of the screen and click “App Store.”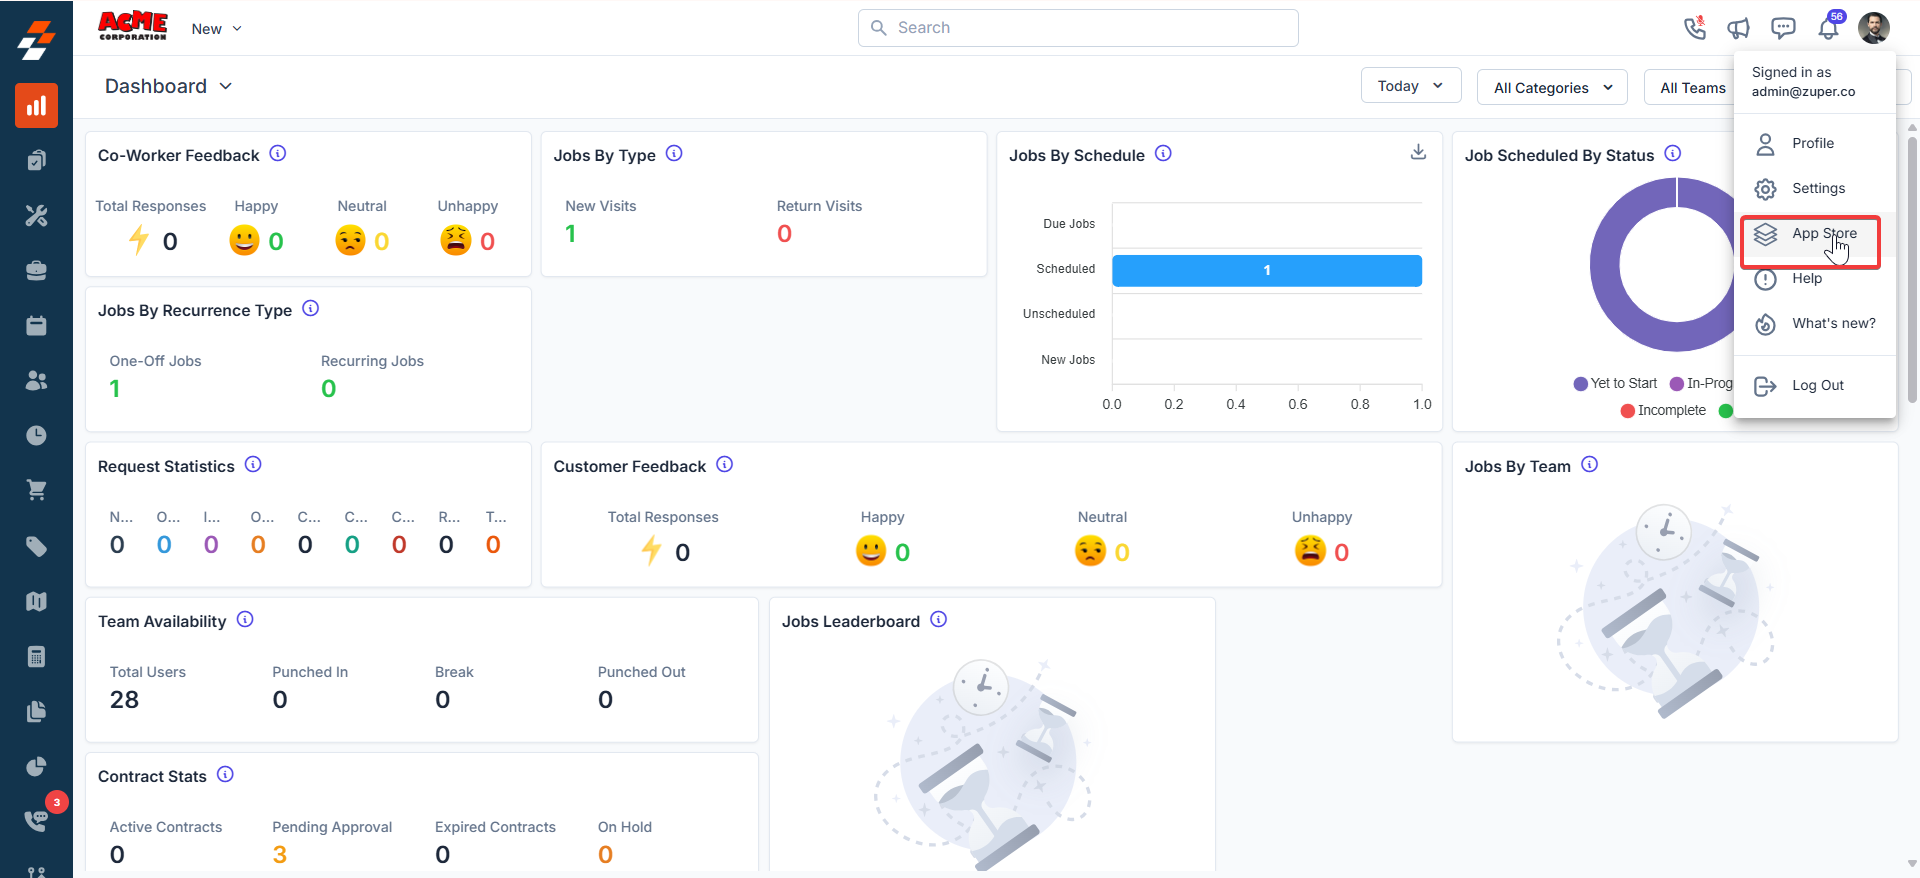
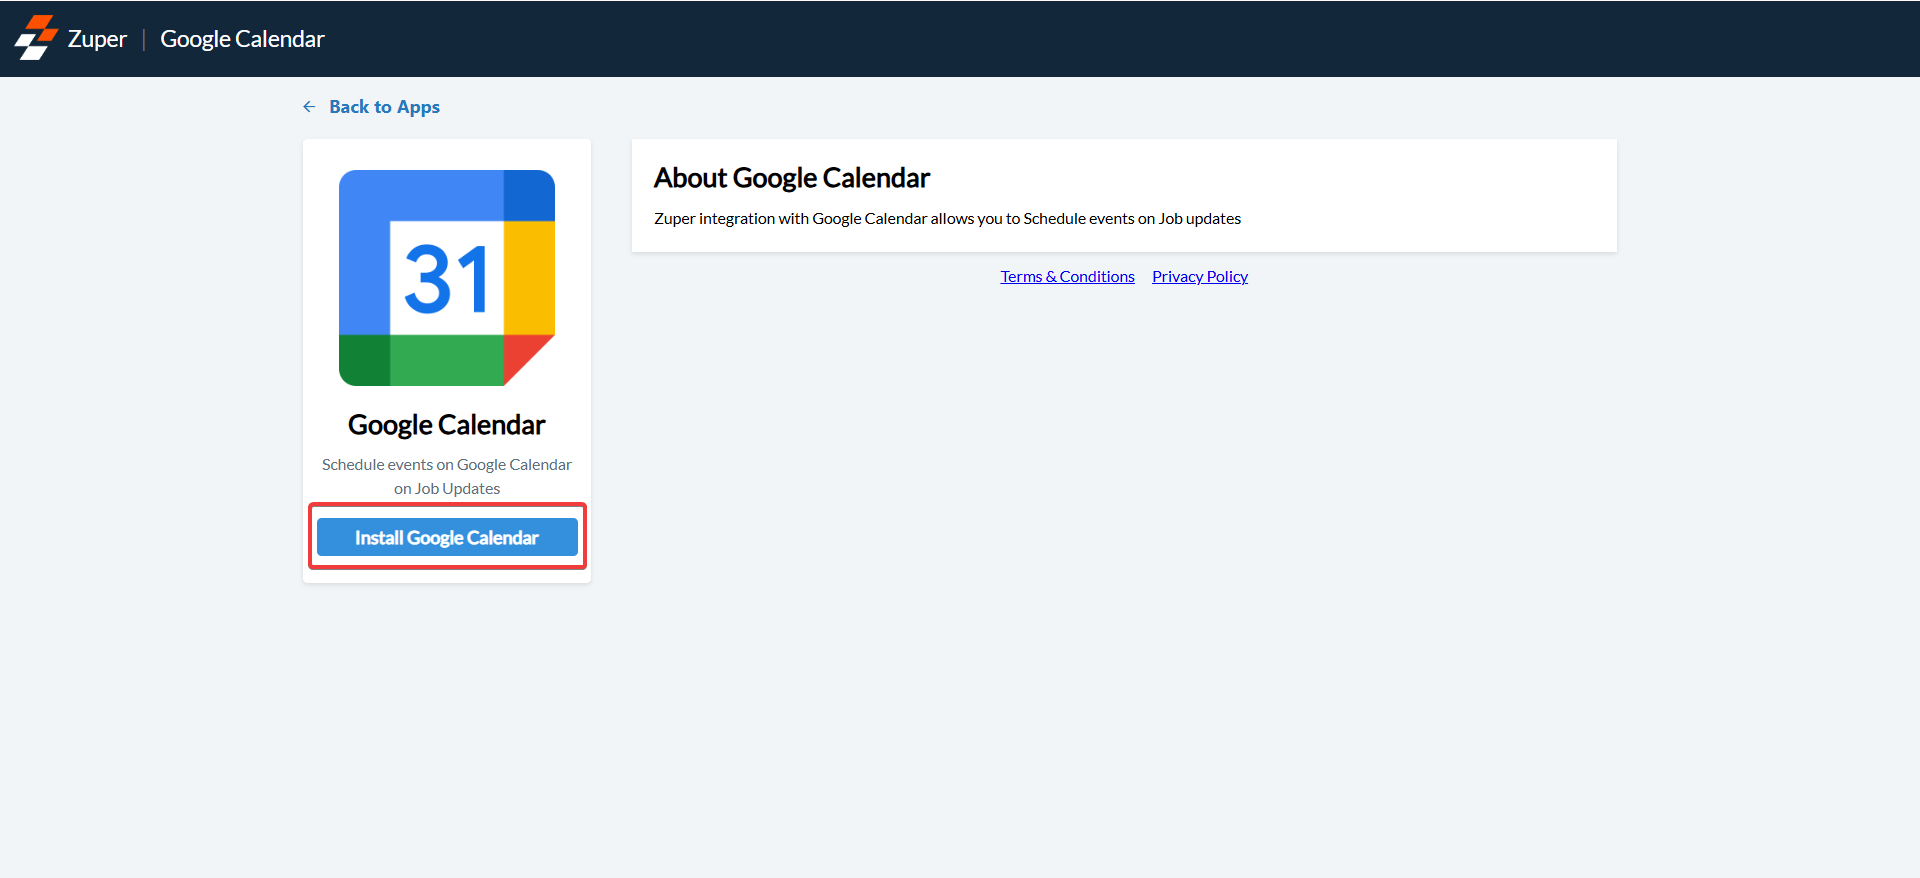
- You will be redirected to the “App Store.” Click on “Calendar” under “Browse by Category” on your left and click “Google Calendar.”

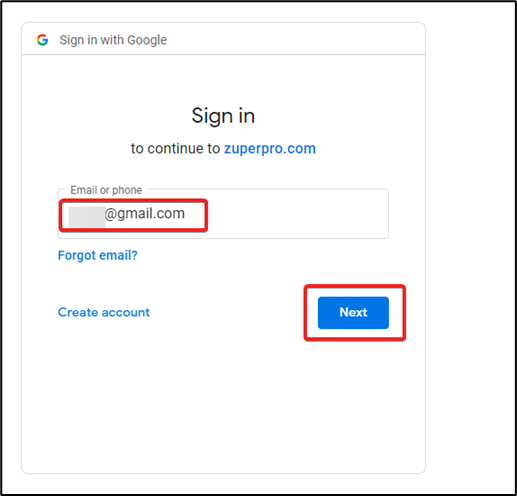
- Click on the “Install Google Calendar” button. Enter the “Email ID” and click on “Next.”
- Enter the email ID and click “Next.”
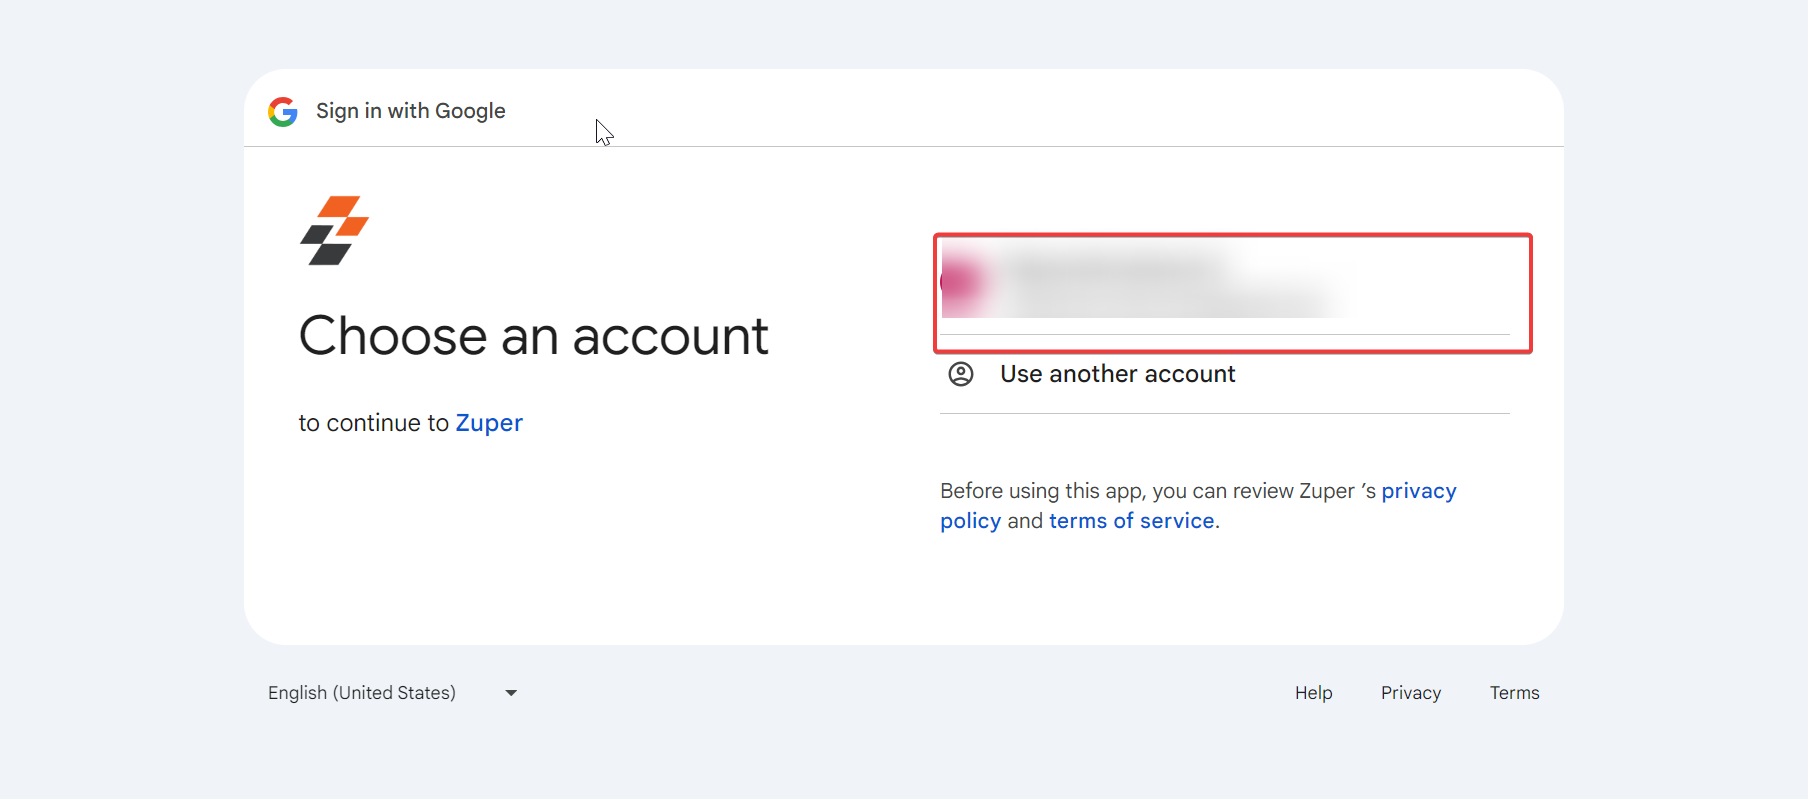
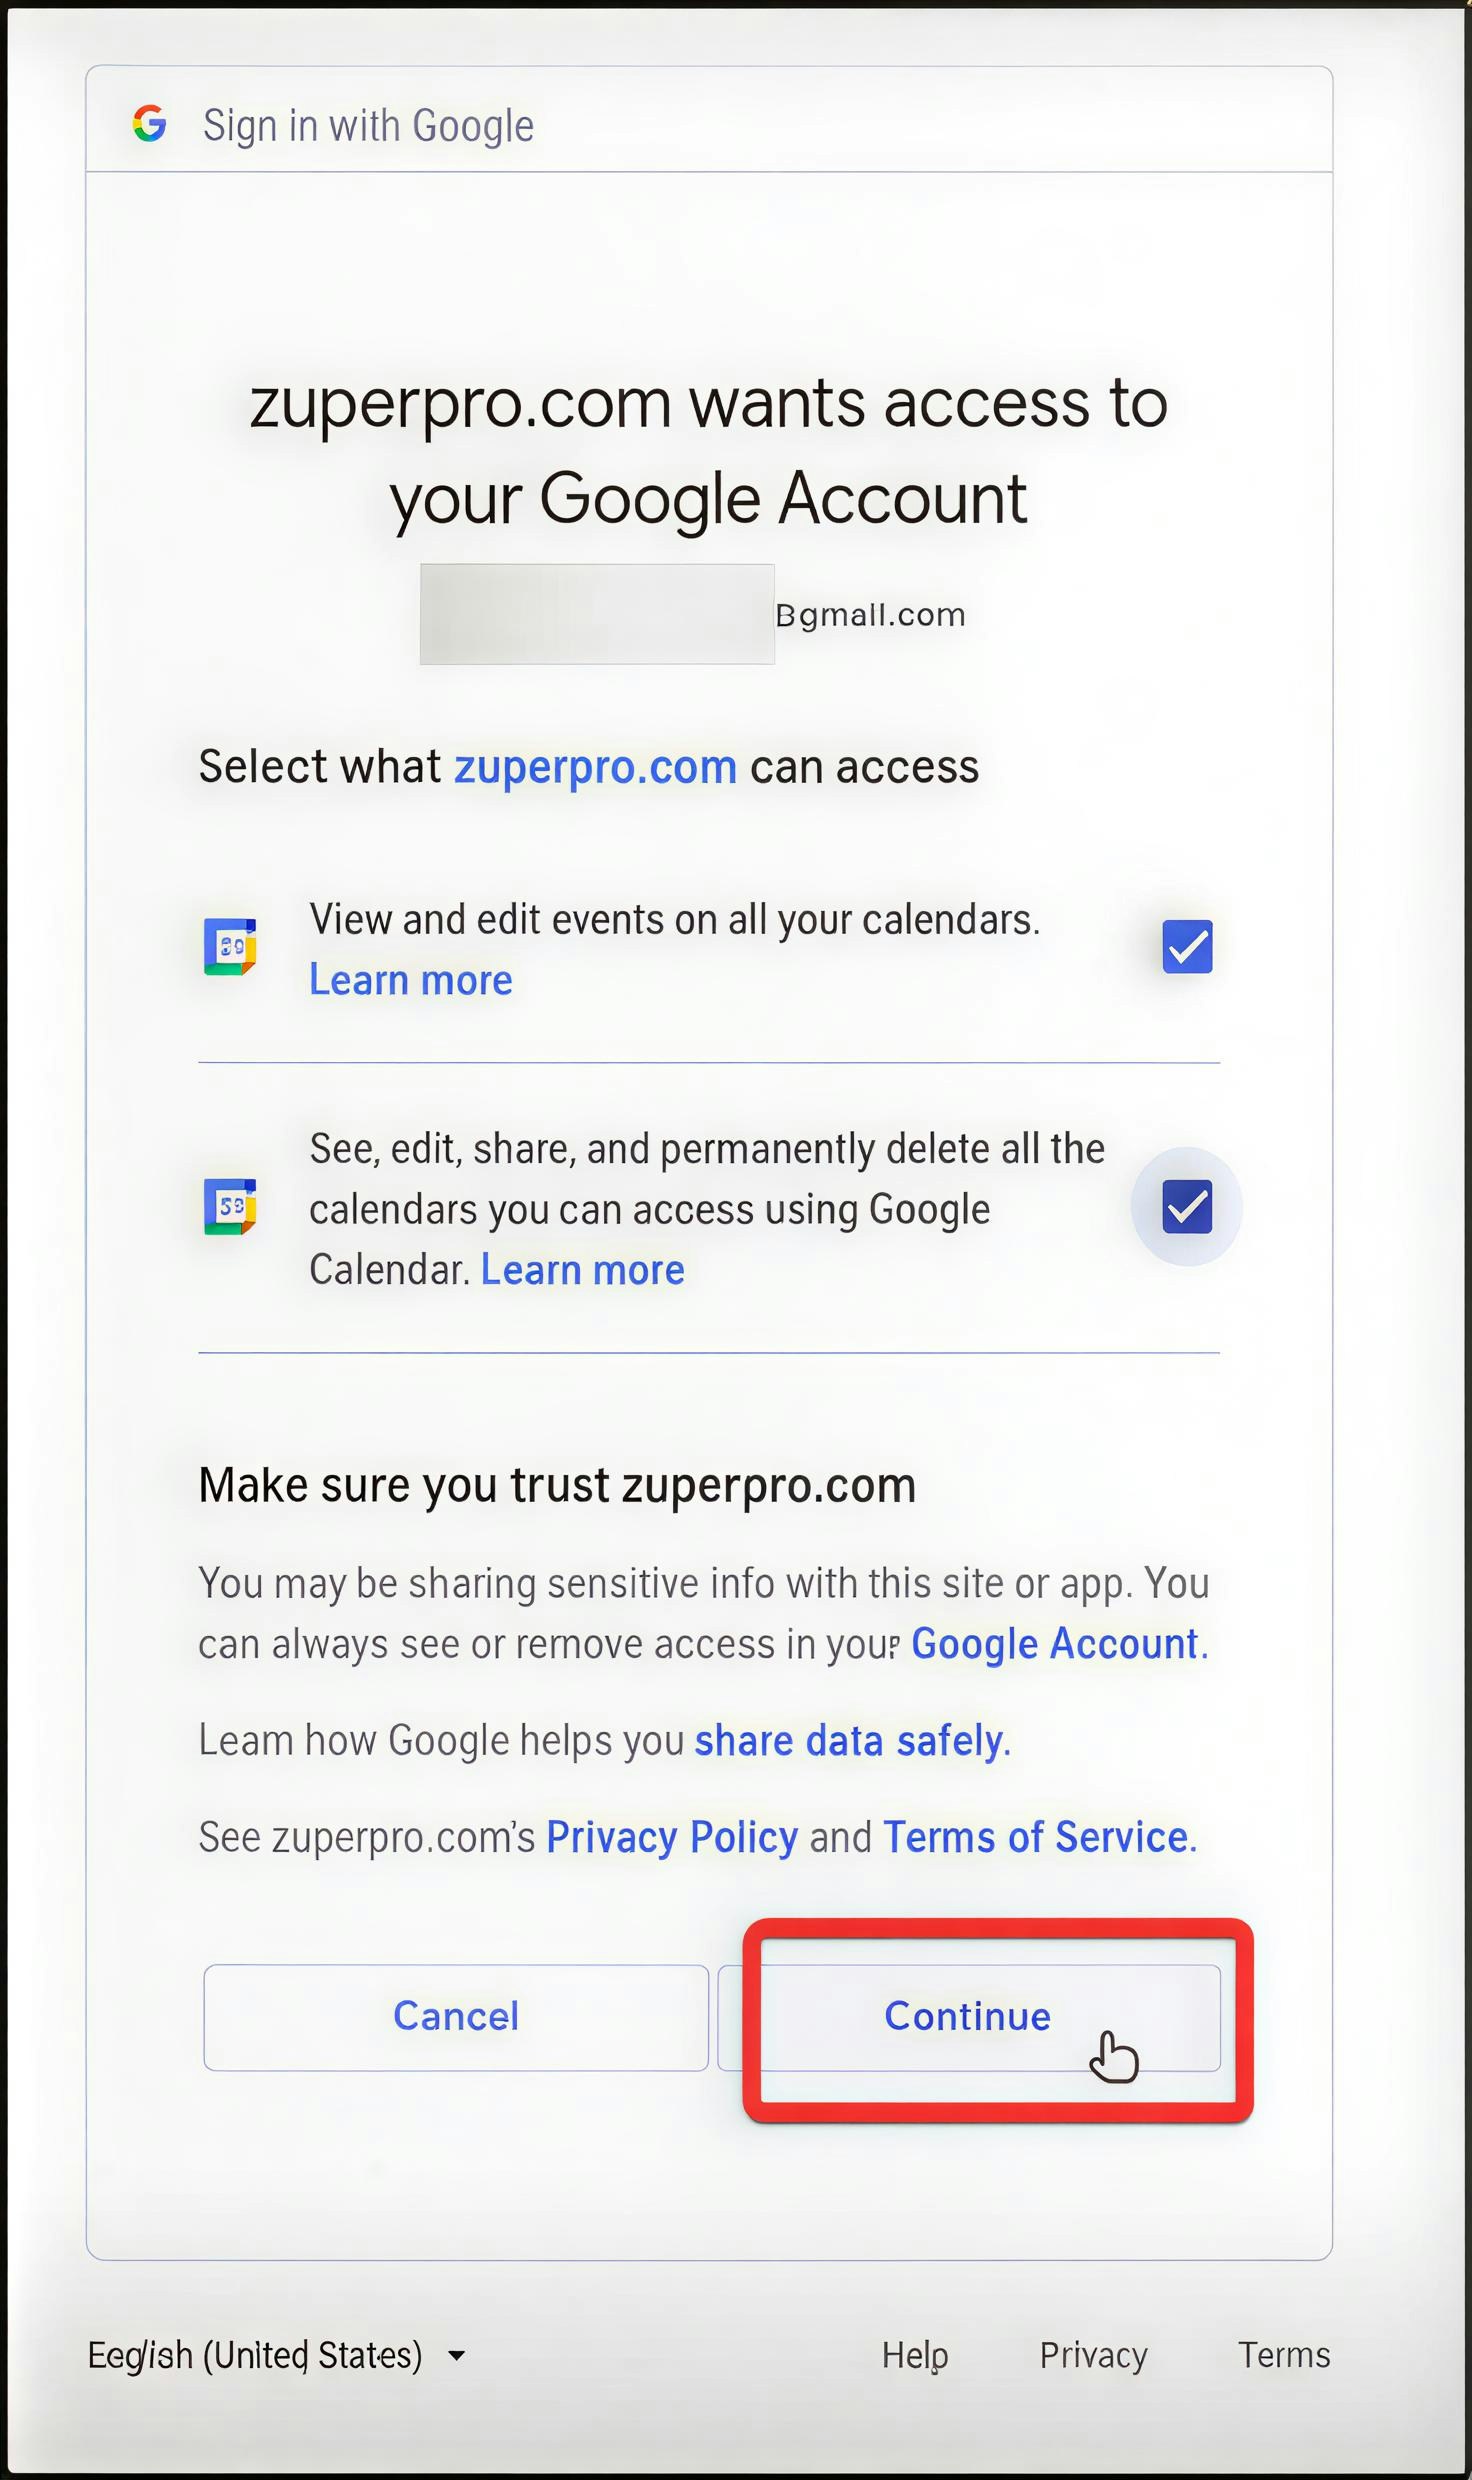
- Mark the check box to proceed with the access and click on the “Continue” button.
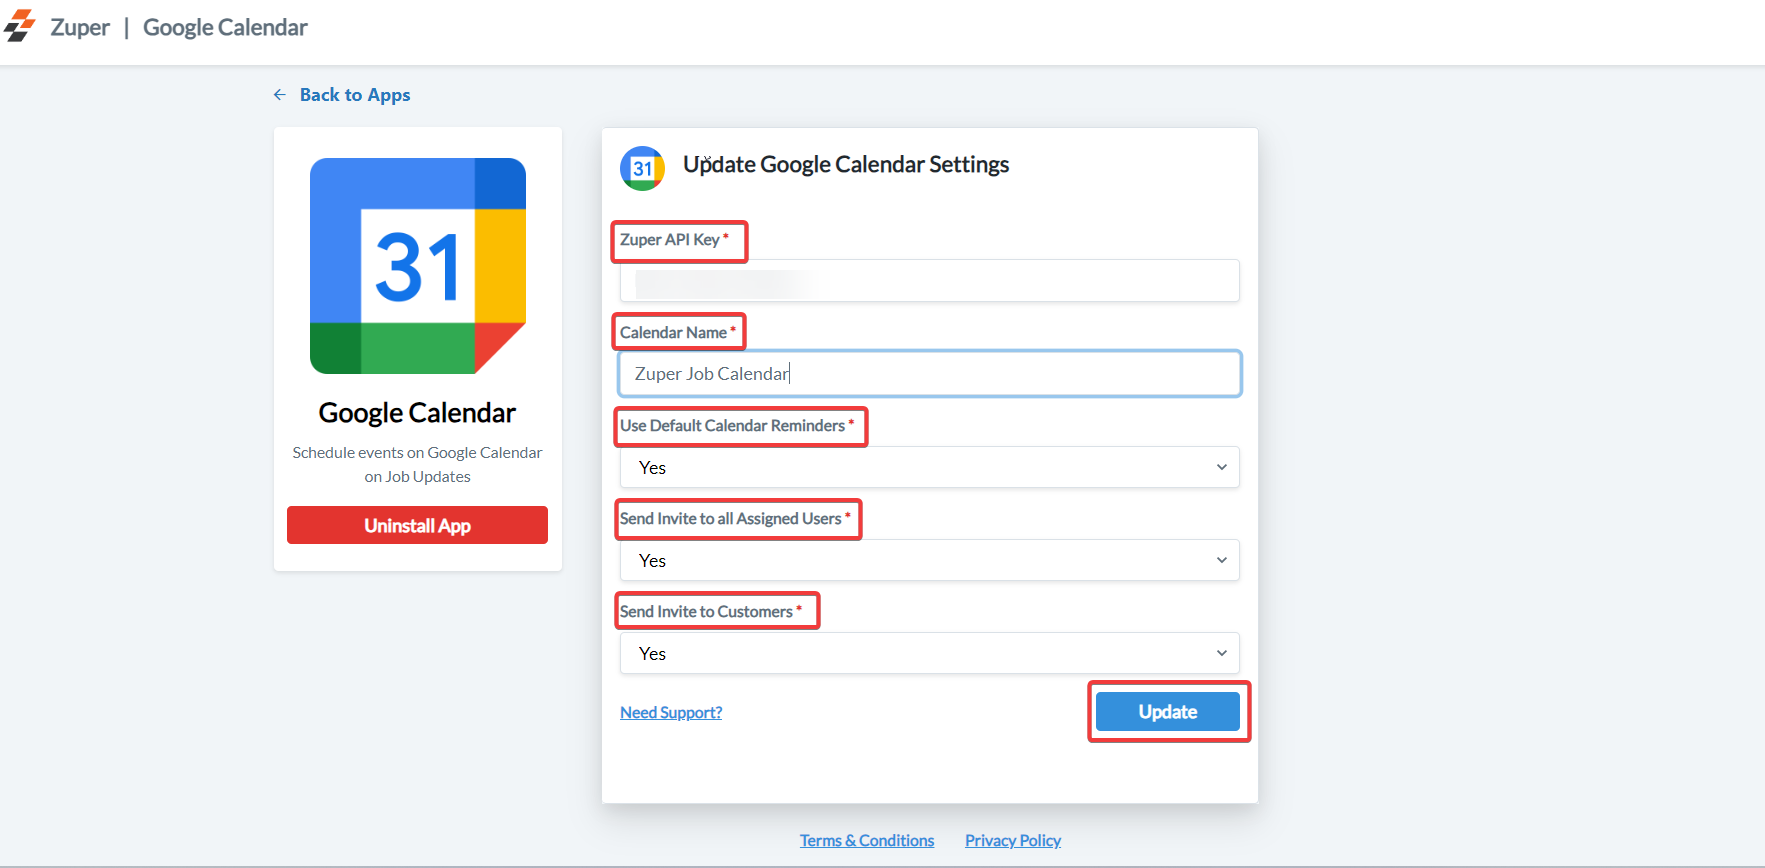
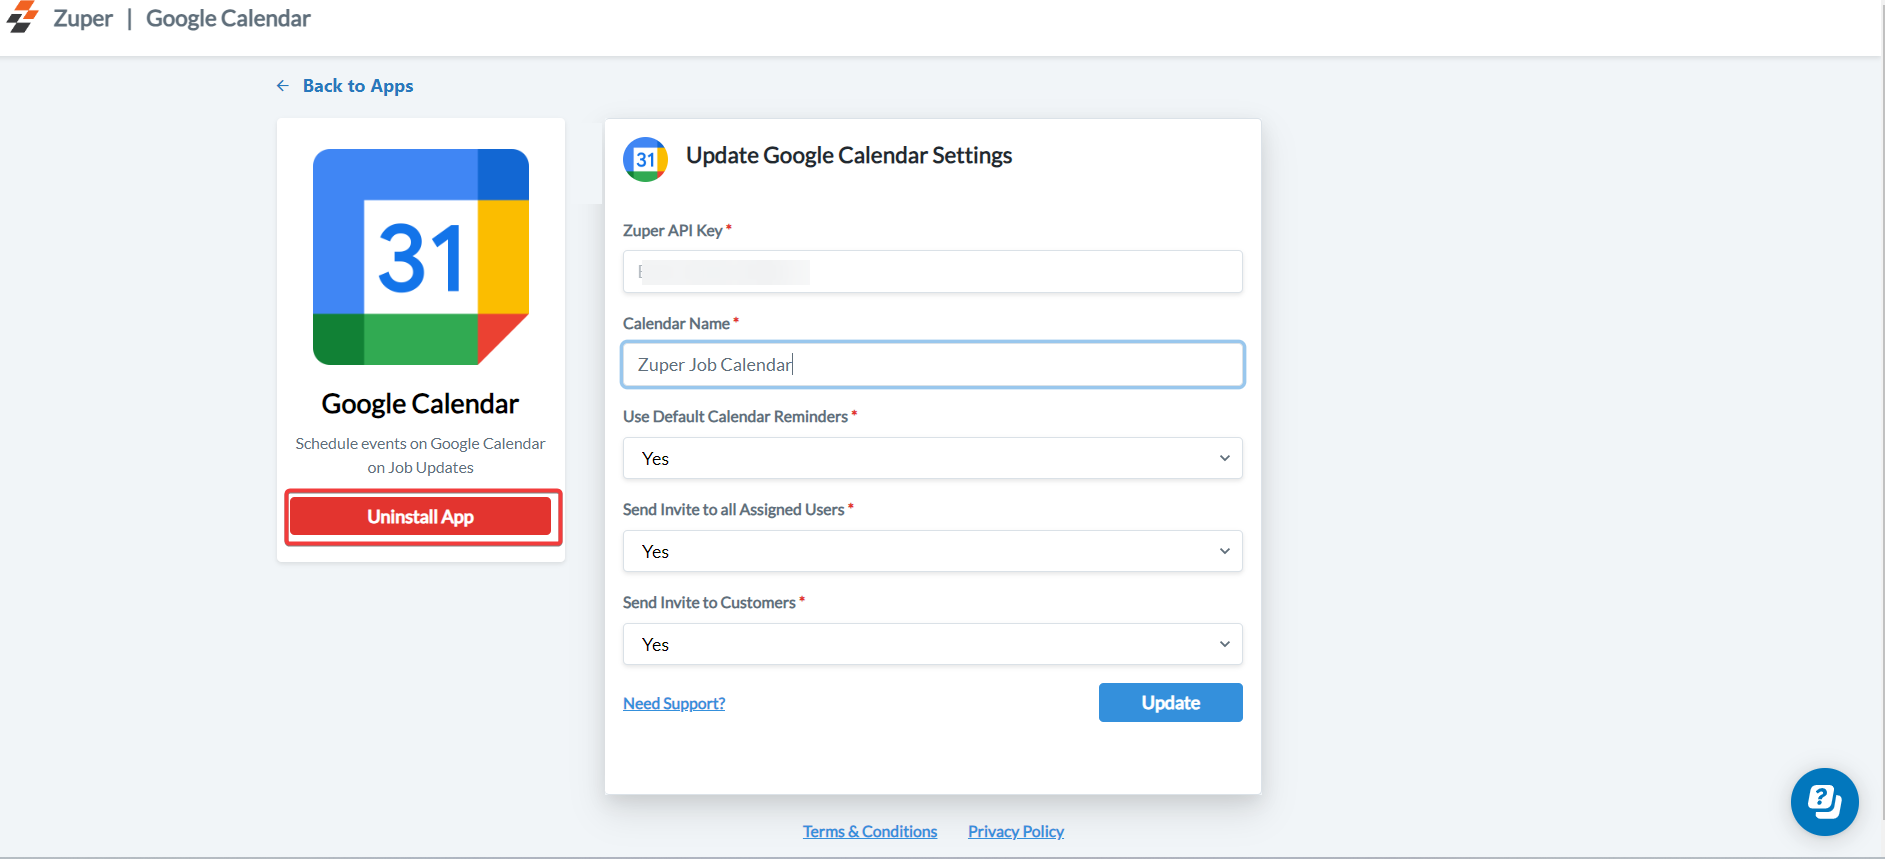
- Fill in the mandatory field details below to “Update Google Calendar Settings.”
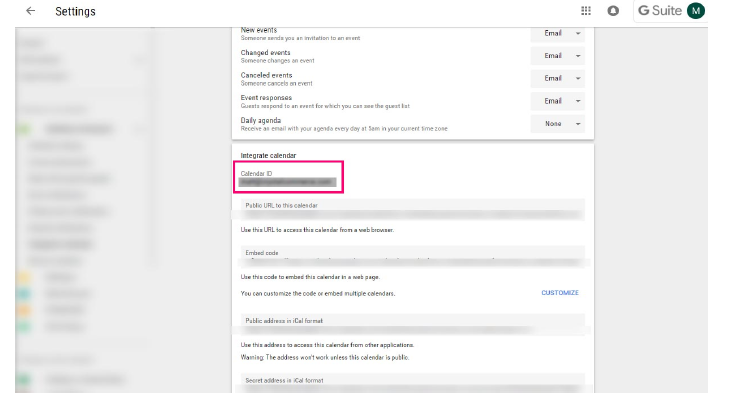
Note: The Calendar ID should be used to integrate the Primary calendar. The calendar name should be used to integrate the Secondary calendar. You can use either the primary calendar or the secondary calendar based on the scenario.
- Go to your Google Calendar.
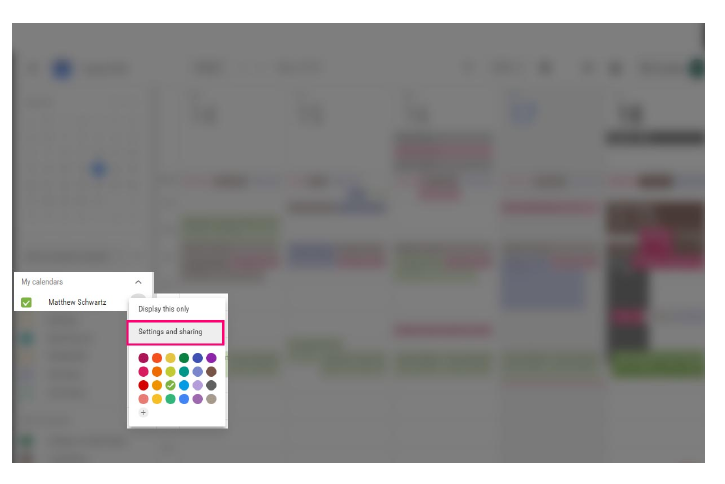
- In the Google Calendar interface, locate the “My calendars” area on the left.
- Hover over the calendar you need and click the downward arrow.
- A menu will appear. Click “Settings & Sharing”.
Note: Please ensure the Google Account you have to connect during the installation is the same as the calendar to which you are connecting.
Uninstall
1. Open a new tab in your browser and once you are logged in to your Zuper Account, click your Profile Picture on the top right corner of the screen and click “App Store.”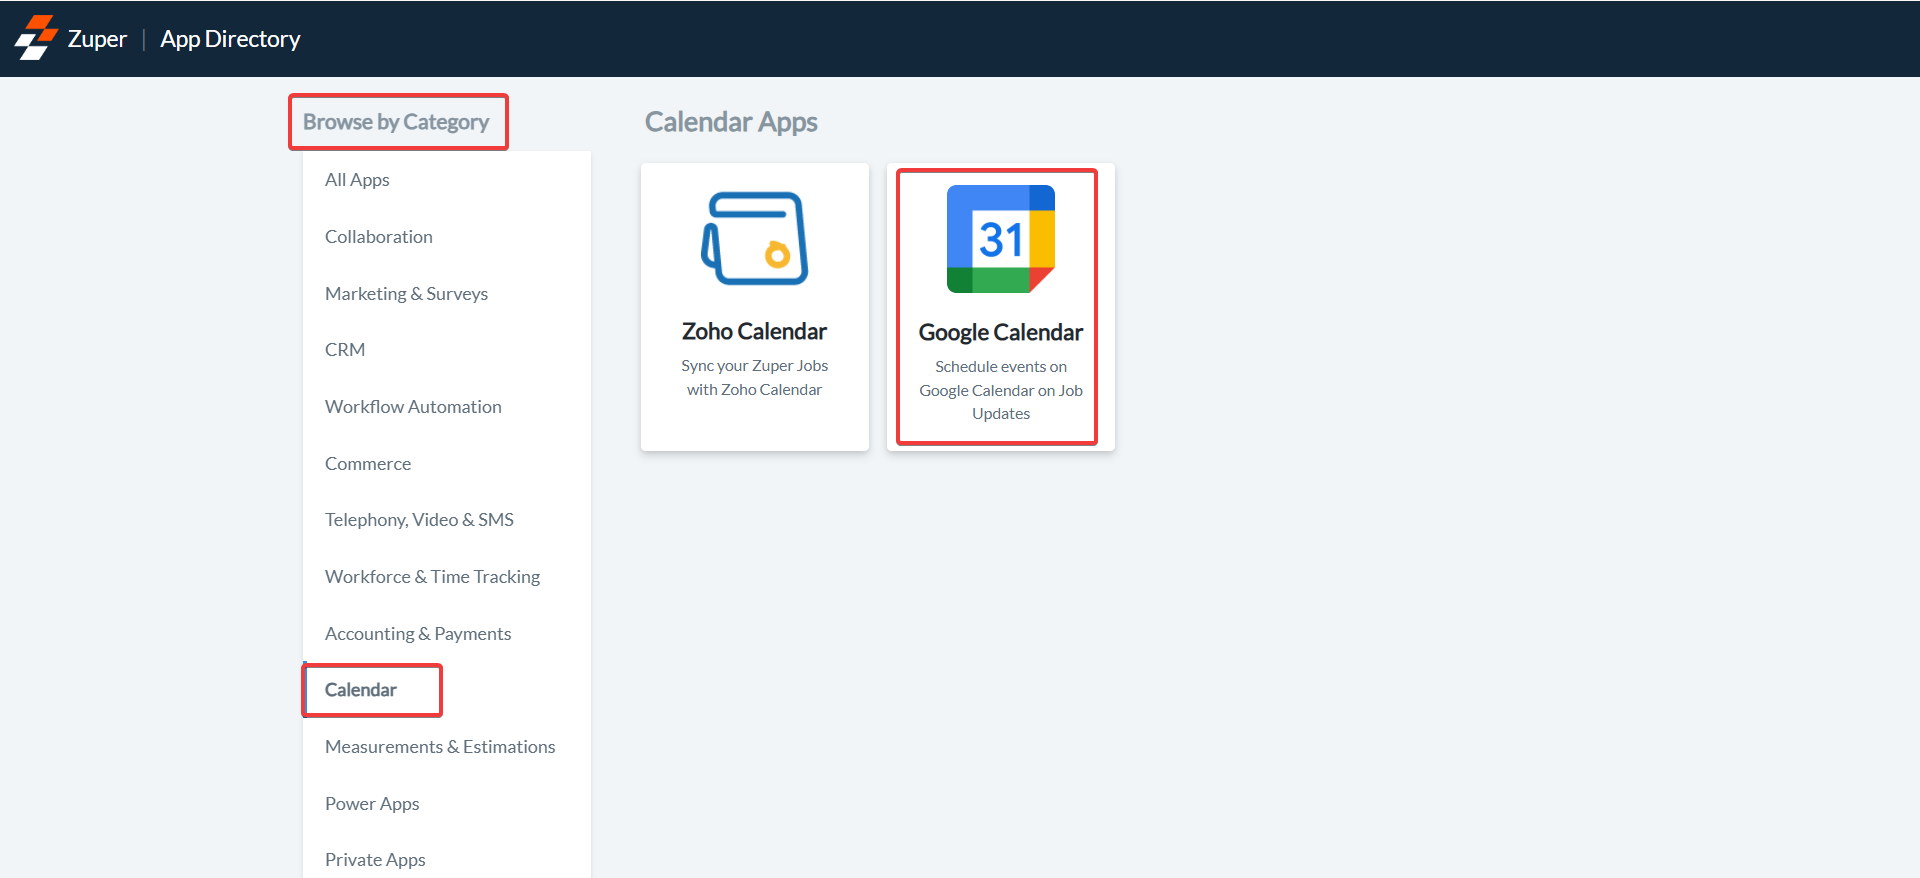
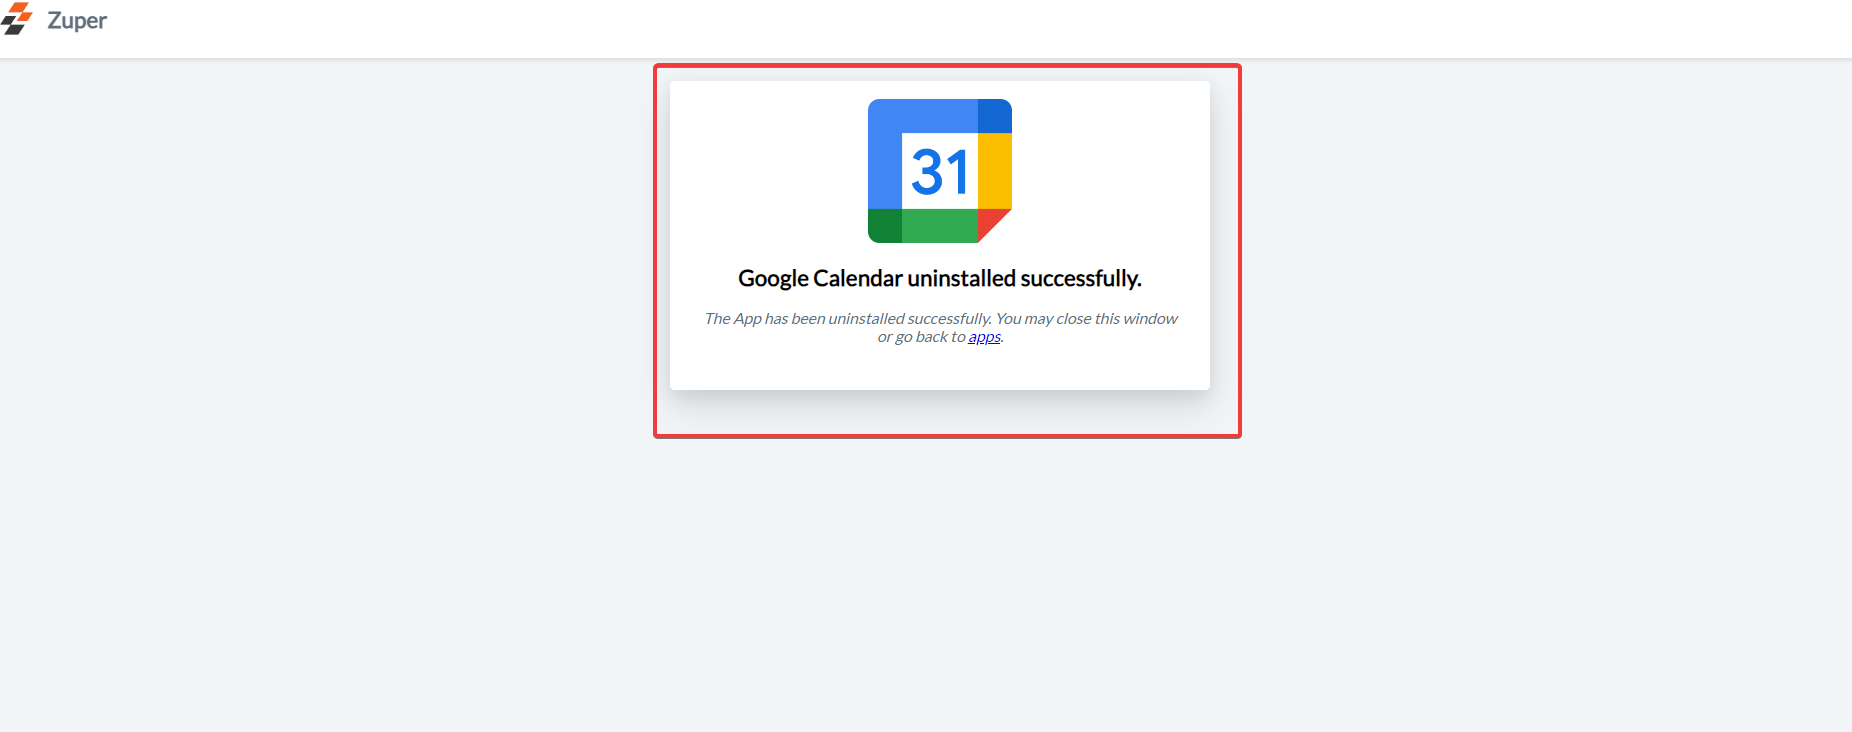
- The uninstall is successful.