Navigation:
- Settings-> Modules -> Assets -> Inspection Forms
- Assets -> Asset Listing page -> + New Asset -> Asset Inspection Form
- Jobs -> Job Listing page -> + New Job -> Asset Inspection Form
Configure an Asset Inspection Form
To efficiently associate an asset inspection form with Jobs, it is important to configure the inspection form in settings. Follow these steps:- Select Settings from the left navigation menu.
- Click Modules and choose Asset to open the Asset Settings page.
- Select Inspection Forms. The inspection forms listing page will appear.
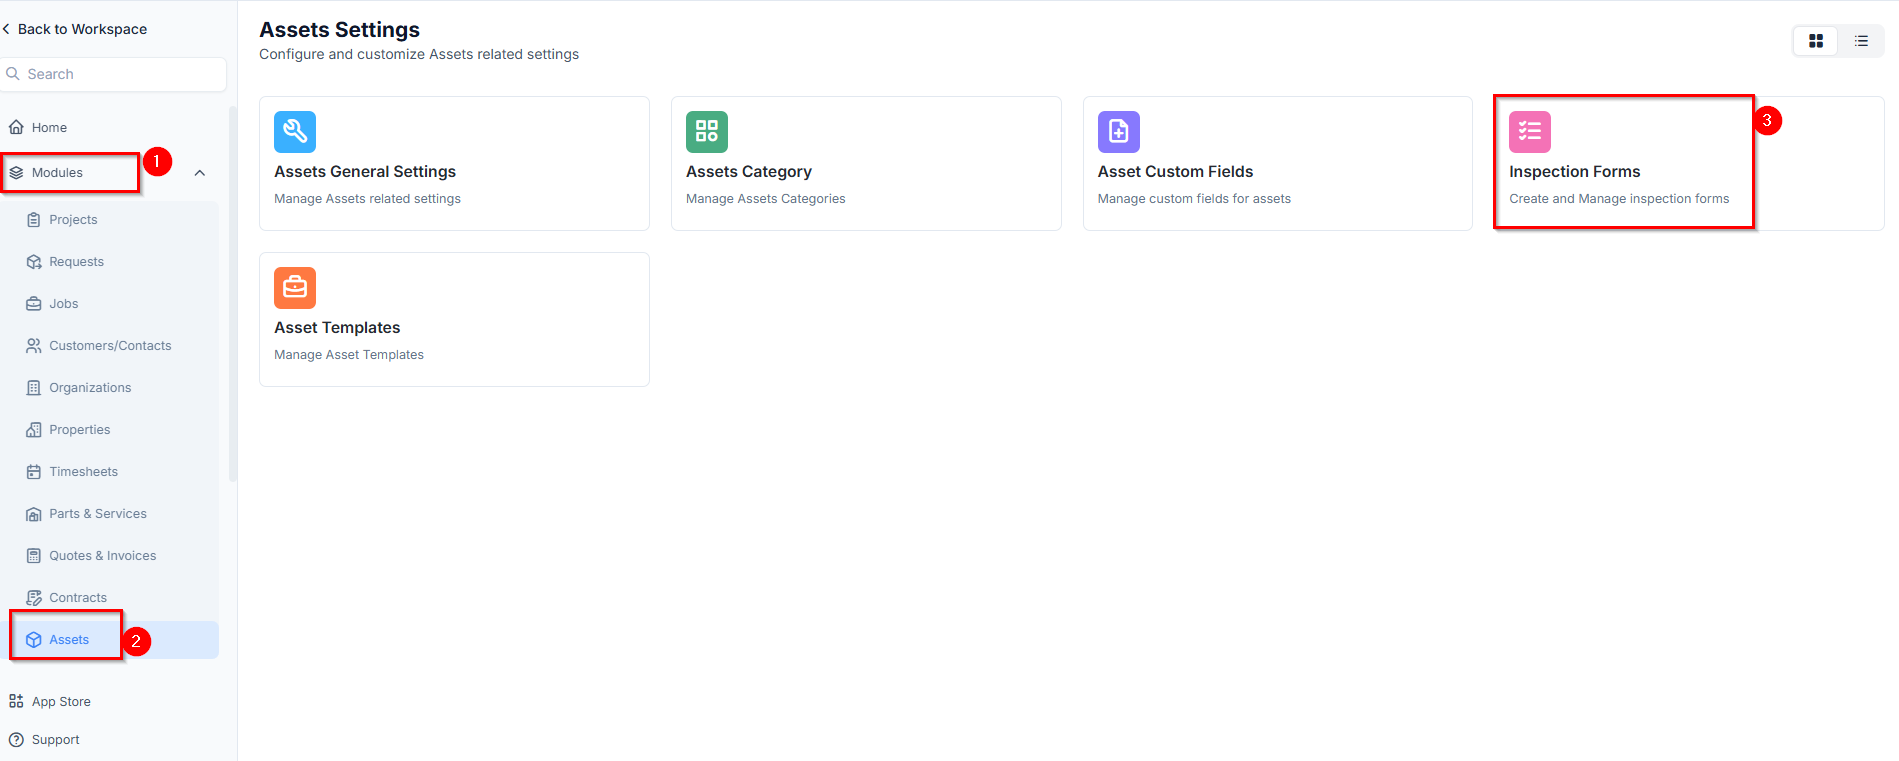
- Click + New Form to create a new inspection form.
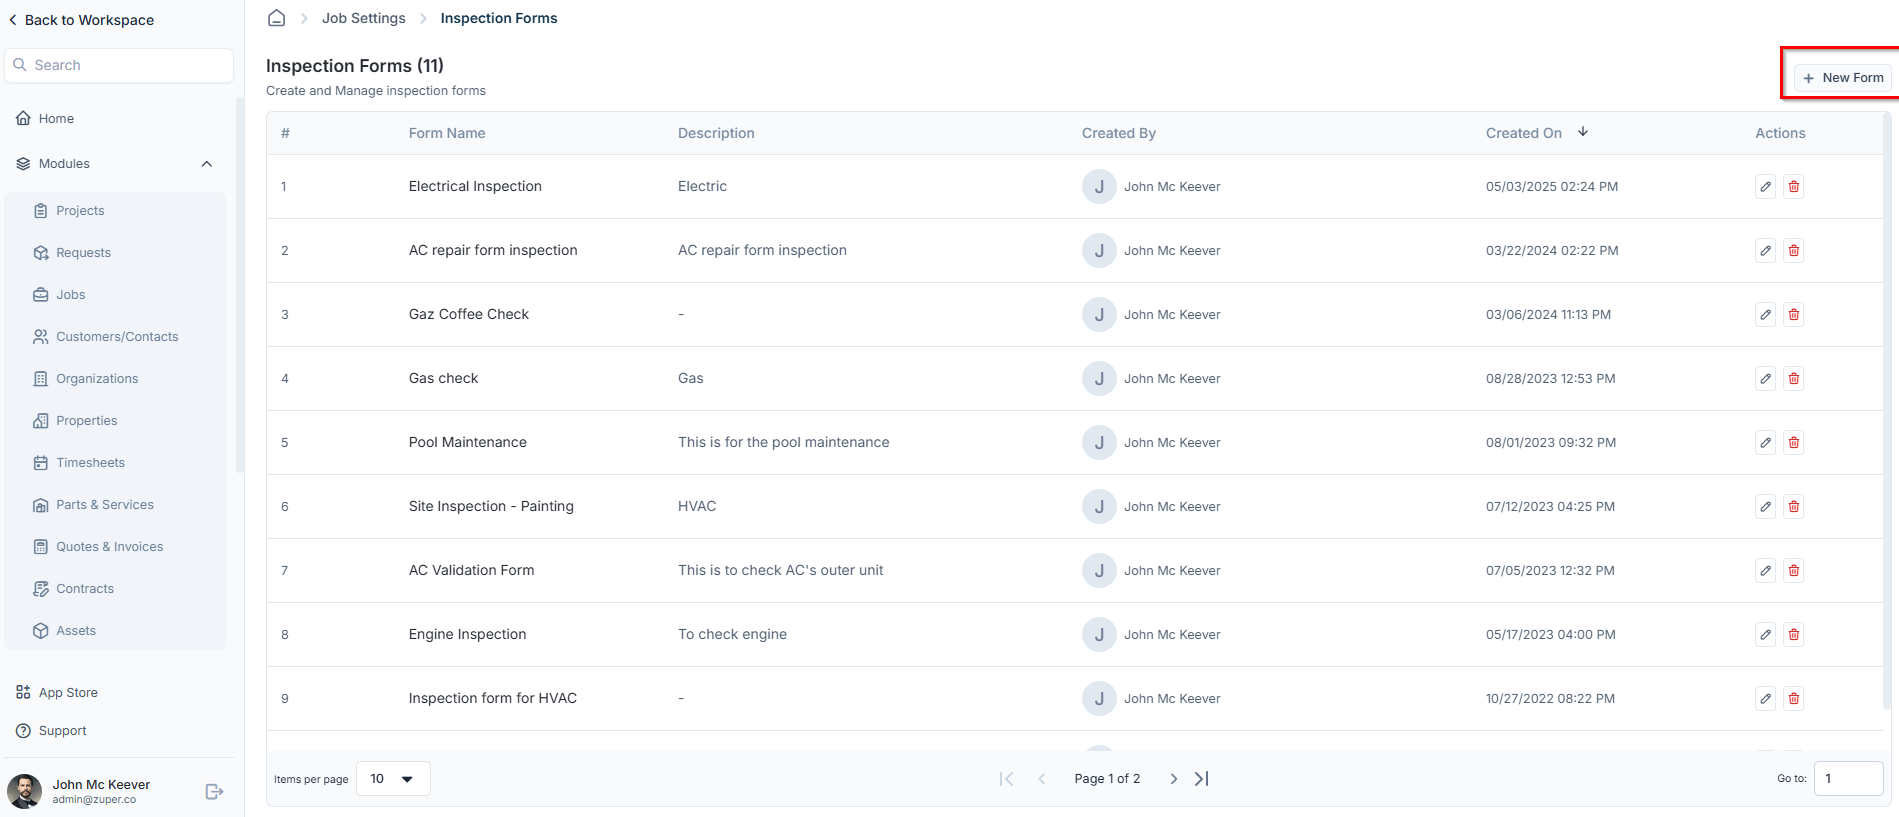
- Enter the following details and click Proceed to begin customizing the inspection form.

- Inspection Form Name (Mandatory) – Enter a name for the inspection form.
- Description – Provide a brief description of the inspection form.
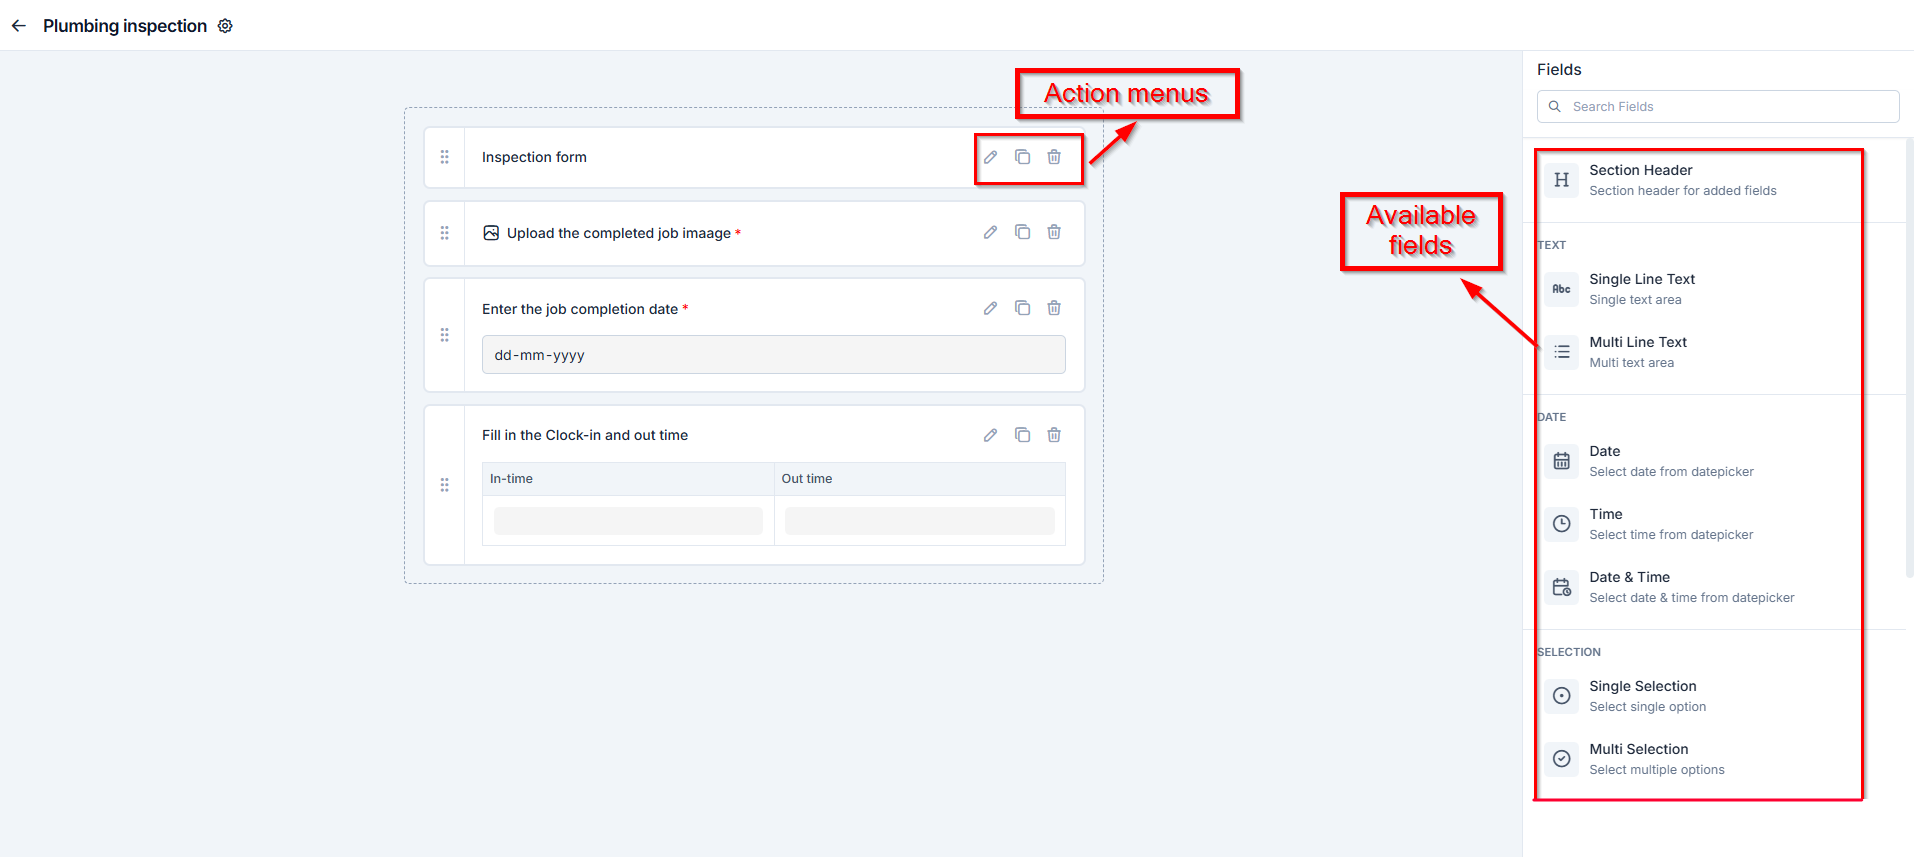
Available fields
Available fields
- Text
- Single-Line Input: This allows you to create a field to enter a single line of free text.
- Multi-Line Input: This allows you to create a field to enter multiple lines of free text.
- Date
- Date: This allows you to create a field to select a specific date from a calendar.
- Time: This allows you to create a field where you can select a specific time.
- Date & Time: This allows you to create a field where both date and time can be selected.
- Selection
- Single-Selection: This allows you to create a radio input Field where one of the provided options can be selected.
- Multi-Selection: This allows you to create check boxes where the provided options can be checked.
- Drop-Down: This allows you to create a drop-down field with the required list of options.
- Media
- Upload: This allows you to create a file input field to upload files.
- Single Image: This allows you to upload a single image as input.
- Multi Images: This allows you to upload multiple images in one field.
- Barcode Scan: This allows you to scan and capture barcodes using a device camera or scanner.
- Misc
- Look up: This allows you to create a file input field to look up the products from the parts and services module.
- Data Table: This allows you to create a dynamic table field to input structured data in rows and columns.
- Signature: This allows you to sign directly within the form using touch or a mouse input.
Note: You can also control the behavior and visibility of each field using the following options:
- Mark as Required Field- Makes the field mandatory to fill out before submitting the form.
- Mark as Read Only- Displays the field as non-editable; users can view the value but cannot modify it.
- Mark as hidden field- Hides the field from all users; it will not appear in the form interface.
- Hide to FE/Technician- Makes the field invisible specifically to technicians or front-end users during form access.
Associate an Inspection Form with an Asset
After you have successfully configured and created a new inspection form, you can associate an inspection form with an asset in any of the following ways:Create a new asset with an Inspection Form
Create a new asset with an Inspection Form
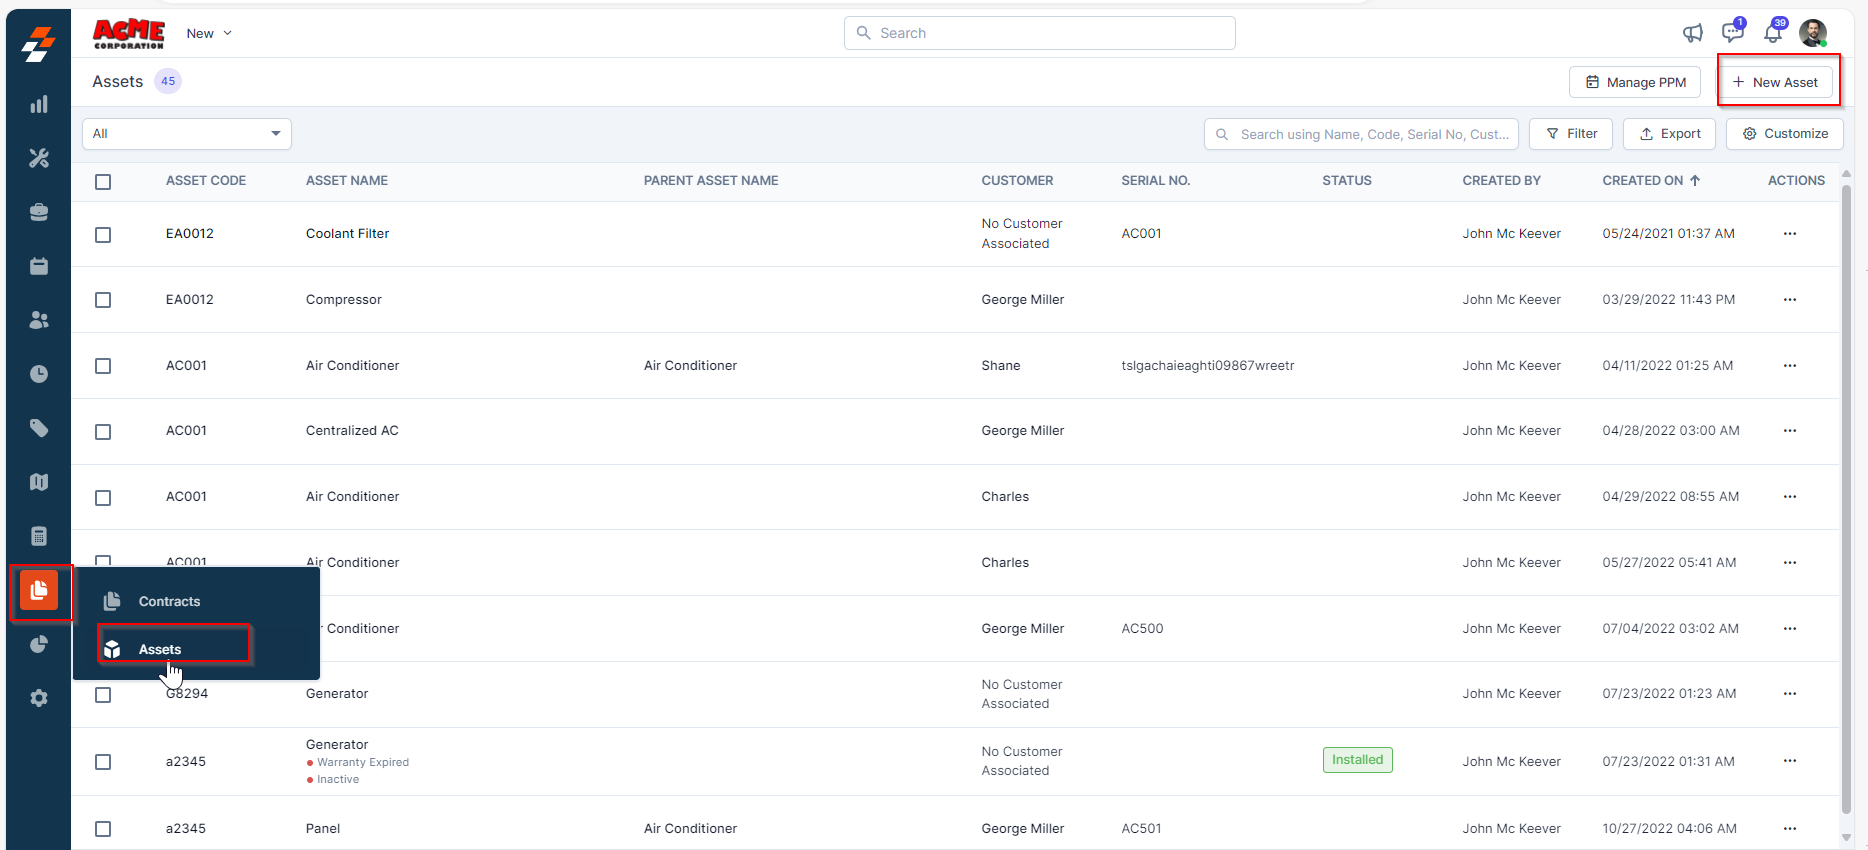
- In the left navigation menu, select Contracts and Assets Management and choose Assets.
-
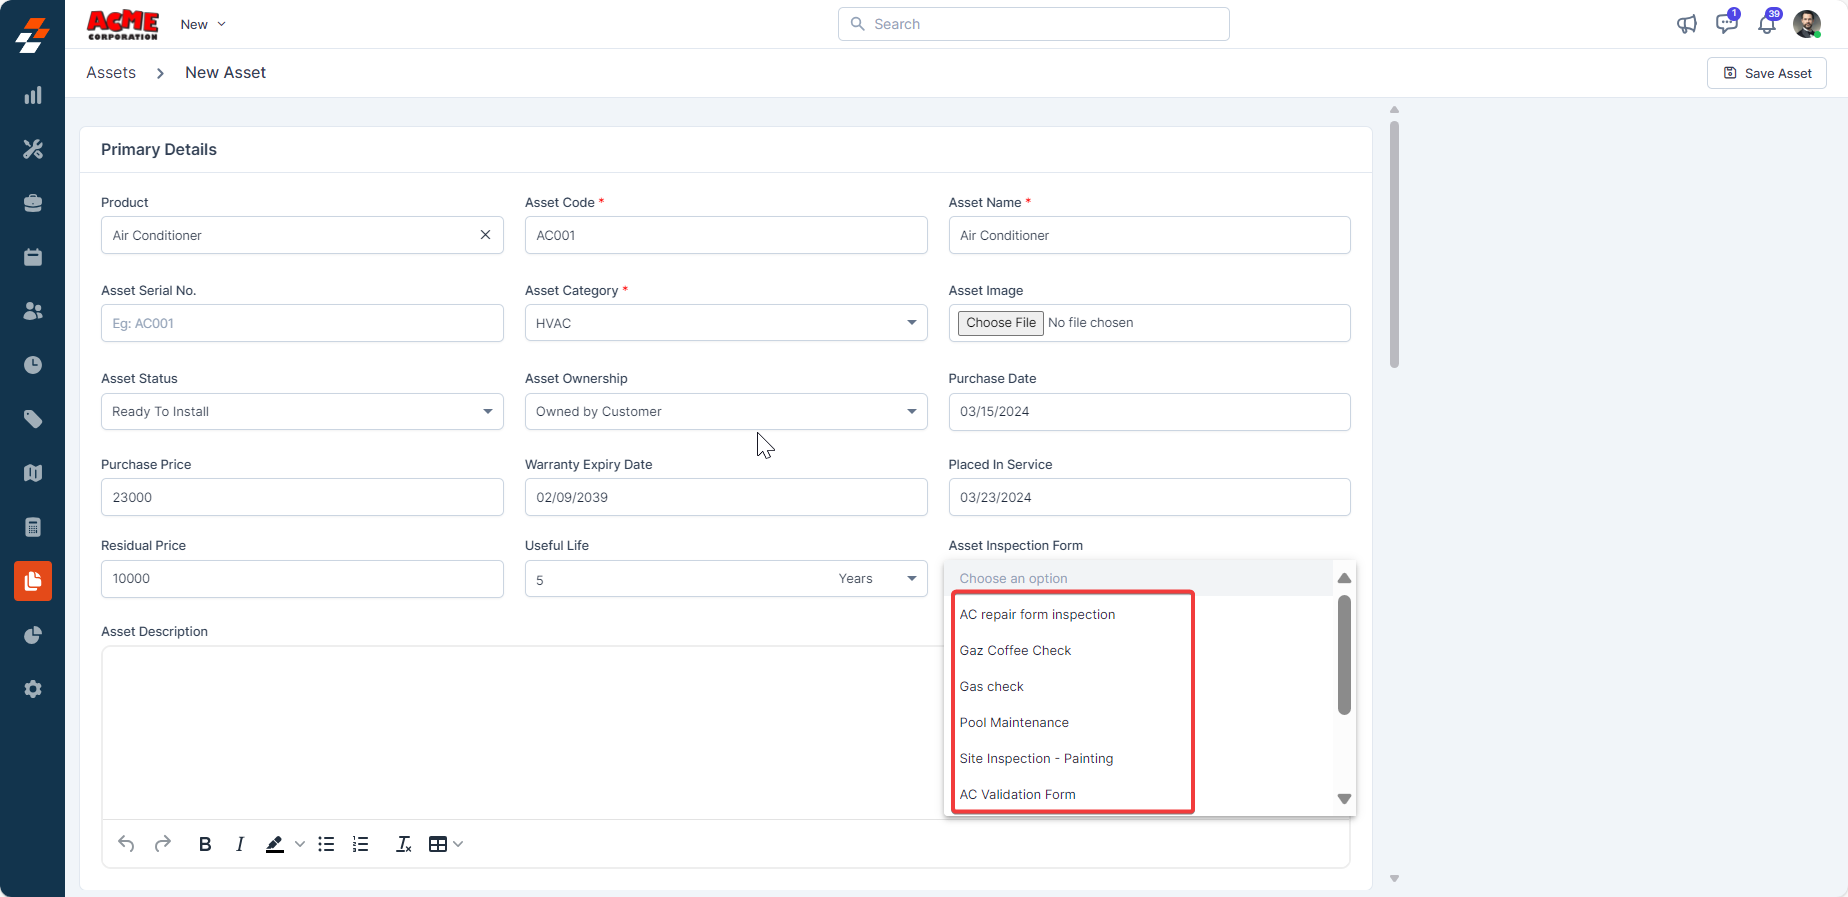
On the asset listing page, select + New Asset. The new asset creation page will appear.
-
In the Primary Details section, fill in the following information:
- Product (Mandatory) – Select the product to be assigned as an asset.
- Asset Code – Auto-generated based on the selected product.
- Asset Name – Auto-filled based on the selected product.
- Asset Serial Number – Enter a unique identifier (letters, numbers, or dashes).
- Asset Category (Mandatory) – Select the asset category.
- Asset Image – Upload an optional image.
- Asset Status – Select the asset’s current status.
- Asset Ownership – Choose Customer-owned or Company-owned.
- Purchase Date – Select the date of purchase.
- Purchase Price – Enter the asset’s purchase cost.
- Warranty Expiry Date – Select the warranty expiration date.
- Placed in Service – Enter the asset’s service start date.
- Residual Price – Enter the estimated residual value.
- Useful Life – Define the asset’s lifespan (days, months, or years).
- Asset Description – Enter optional details about the asset.
- Asset Inspection Form – Select an inspection form from the dropdown.
- Enter additional details such as Customer Information, Service Address, and Attachments.
- Select Save Asset to create the asset with the associated inspection form.
Edit an existing asset to add an Inspection Form
Edit an existing asset to add an Inspection Form
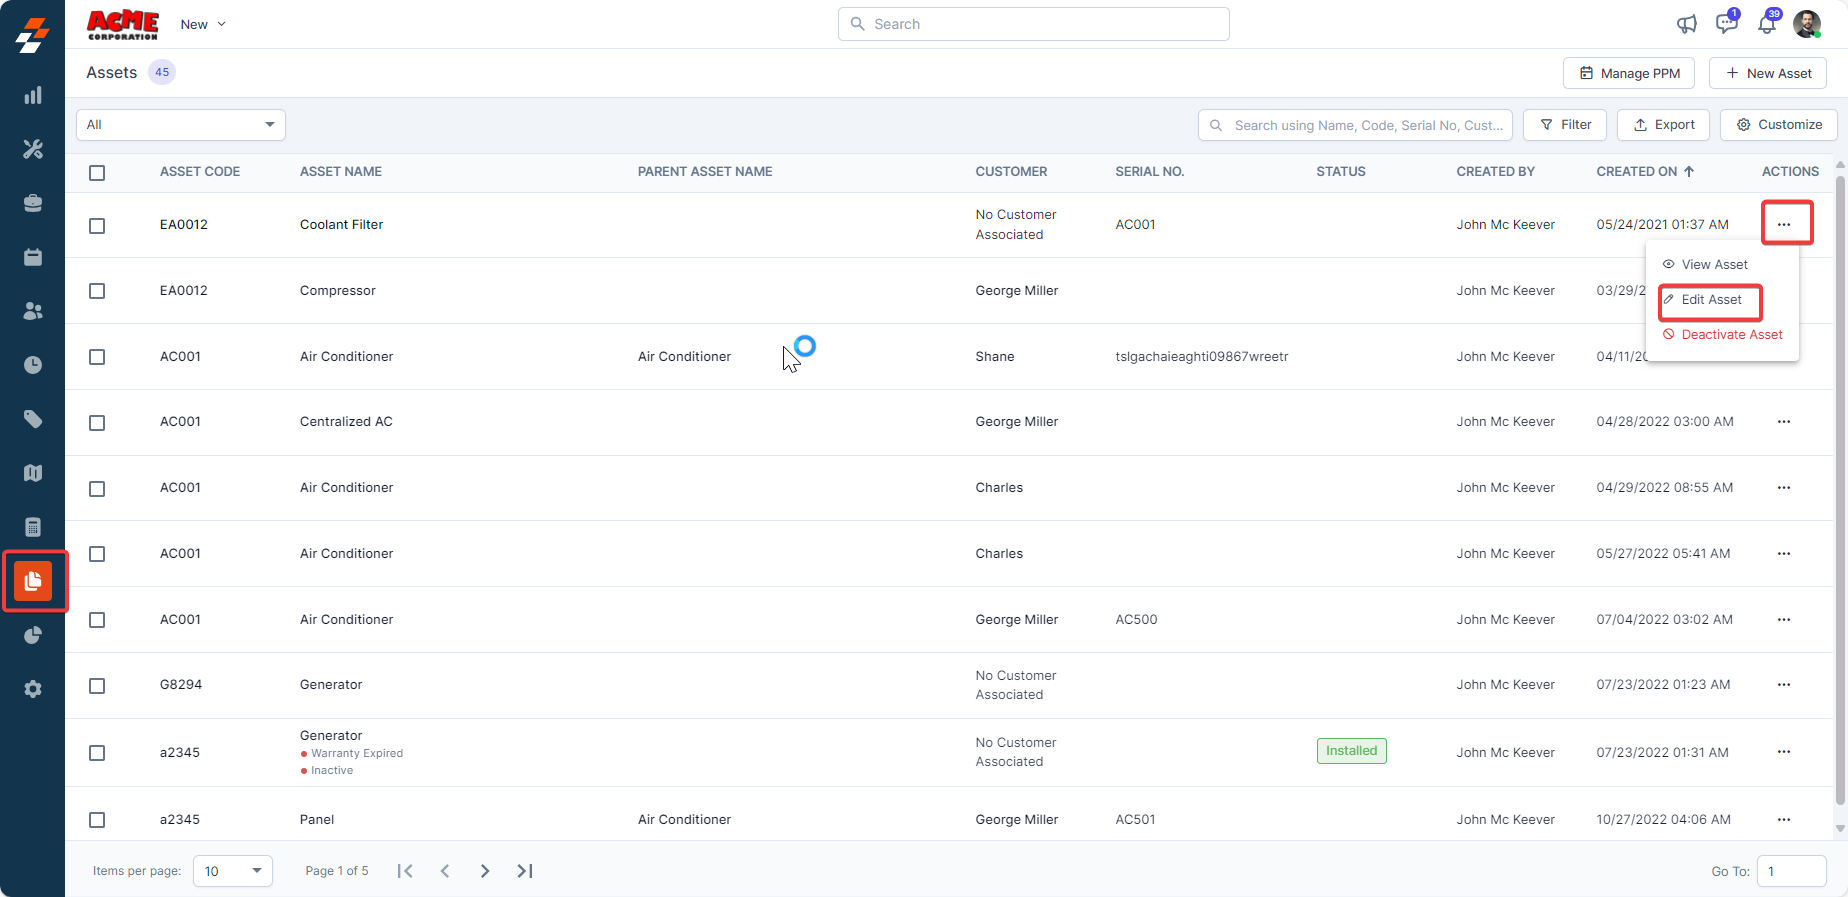
- Navigate to the Assets listing page.
- On the Asset Listing page, locate the asset you want to edit.
-
Select the ellipsis icon () next to the asset and choose Edit Asset.
- Update the asset details, including adding an Inspection Form.
- Select Update Asset to save the changes.
Associate an Inspection Form with a Job
After linking an inspection form to an asset, you can associate the asset with jobs. This ensures that field technicians complete the inspection form before marking the job as complete.Create a Job with an Inspection Form
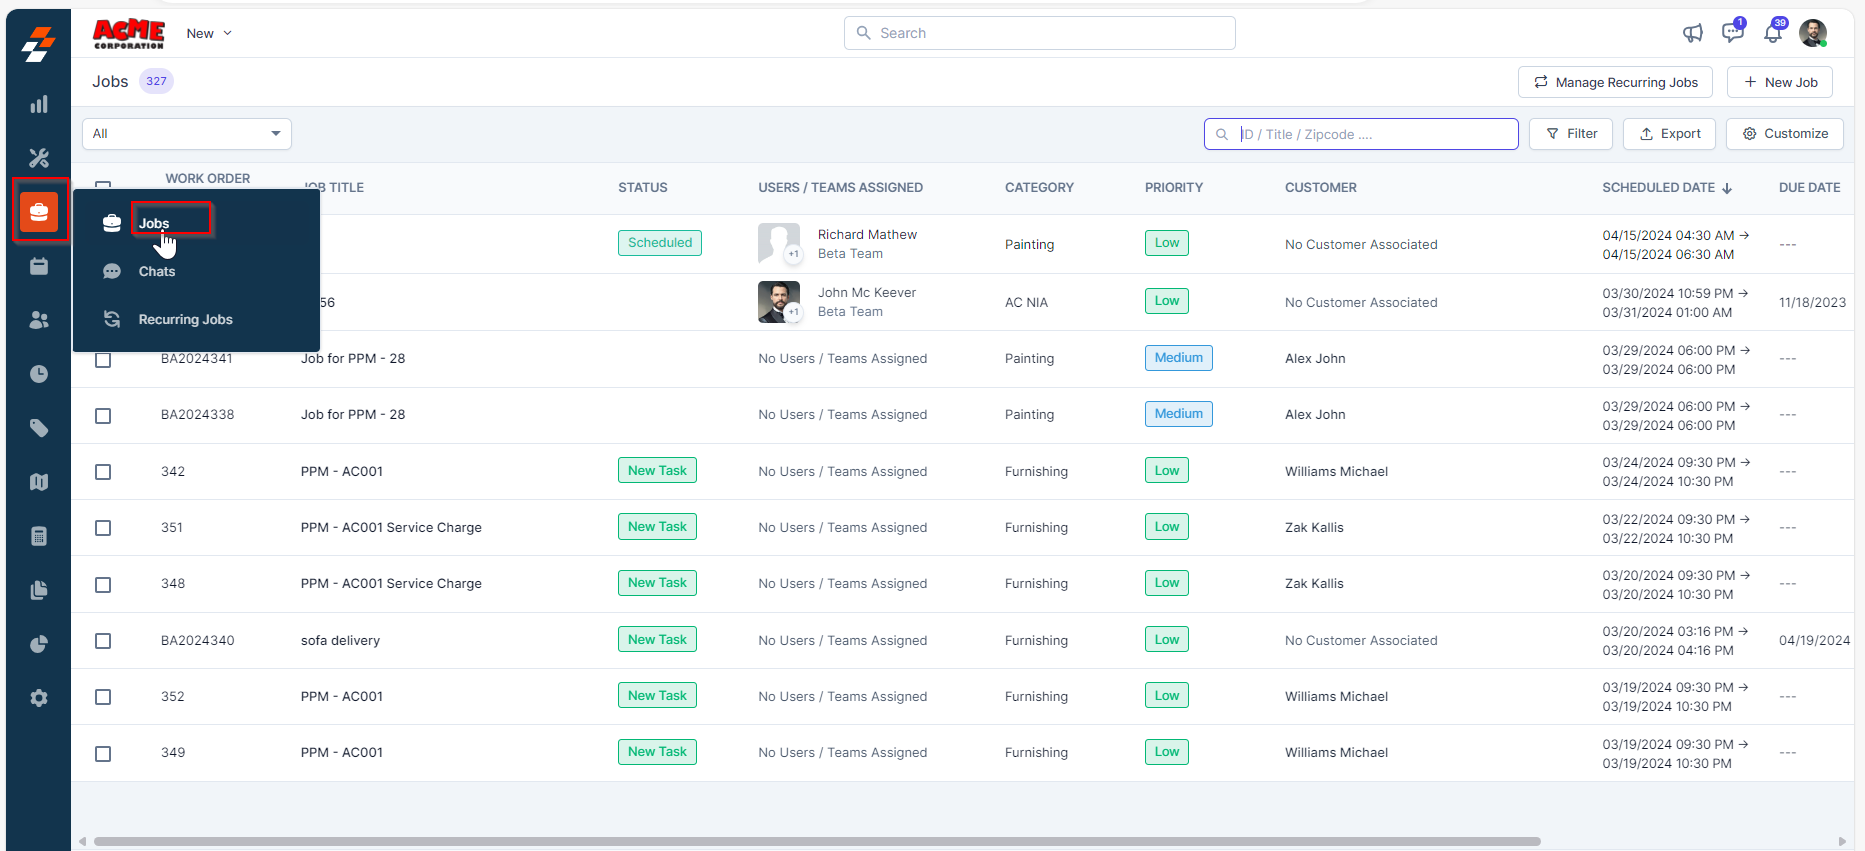
- Navigate to the Jobs module in the left navigation menu. You will land on the jobs listing page.
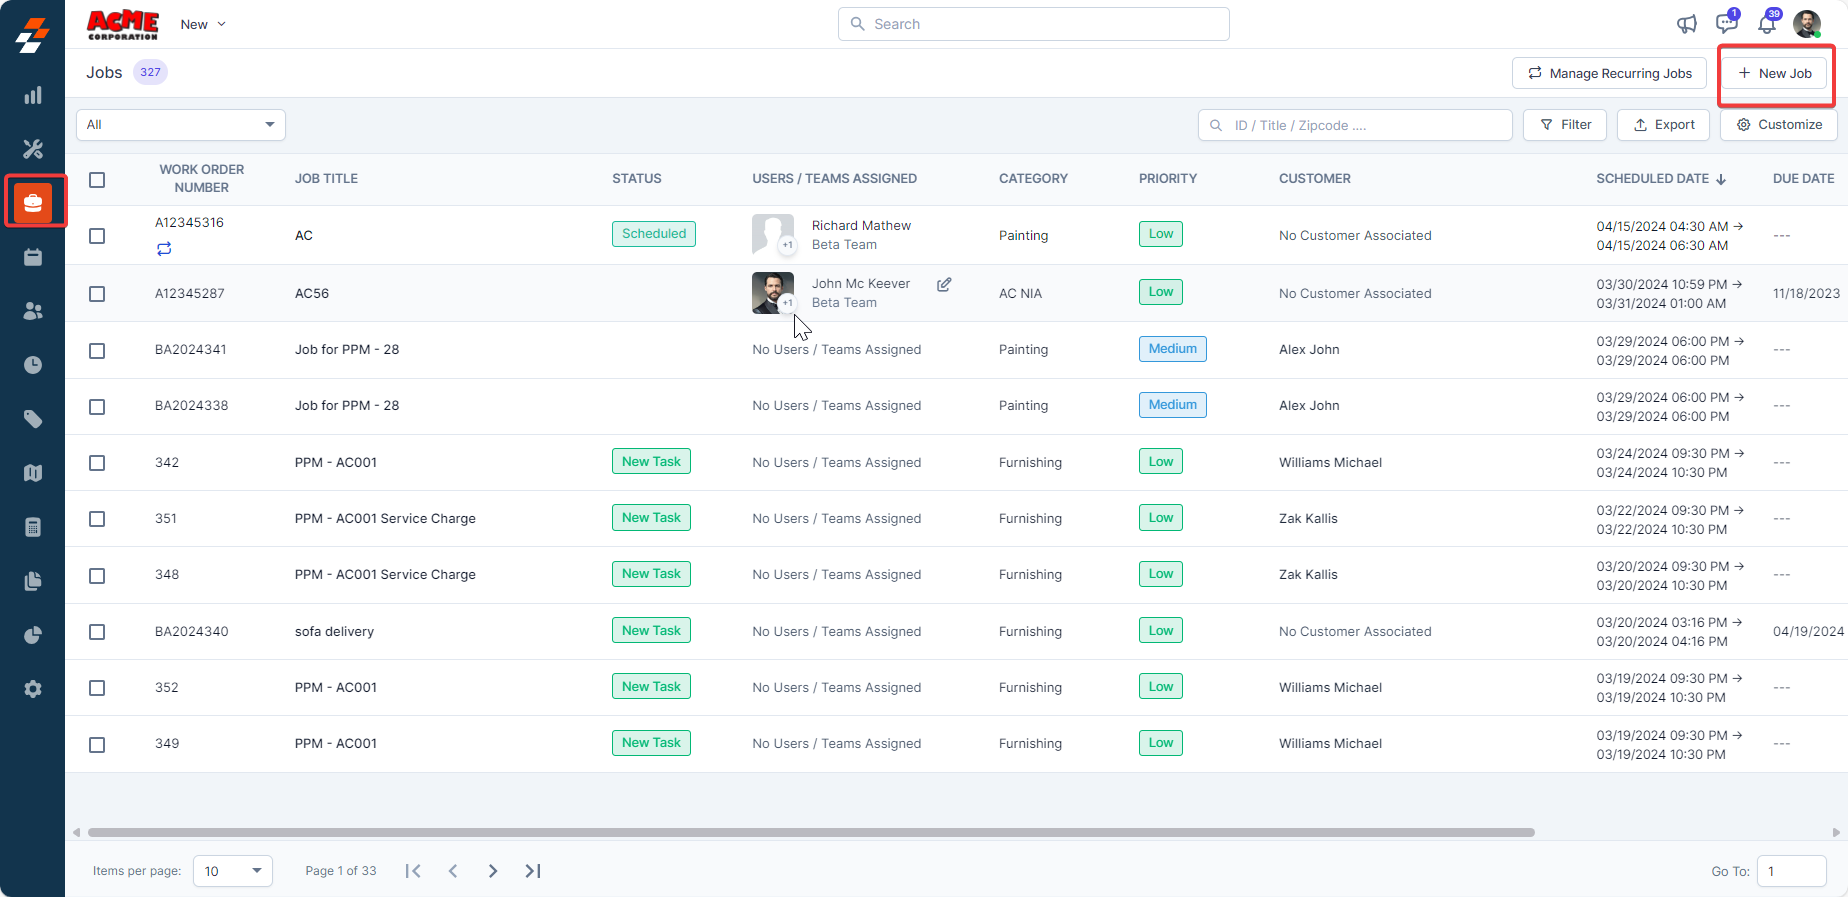
- On the Job Listing page, select + New Job.
- Enter job details such as Job Title, Job Category, Due Date, Service Address, and Customer Information.
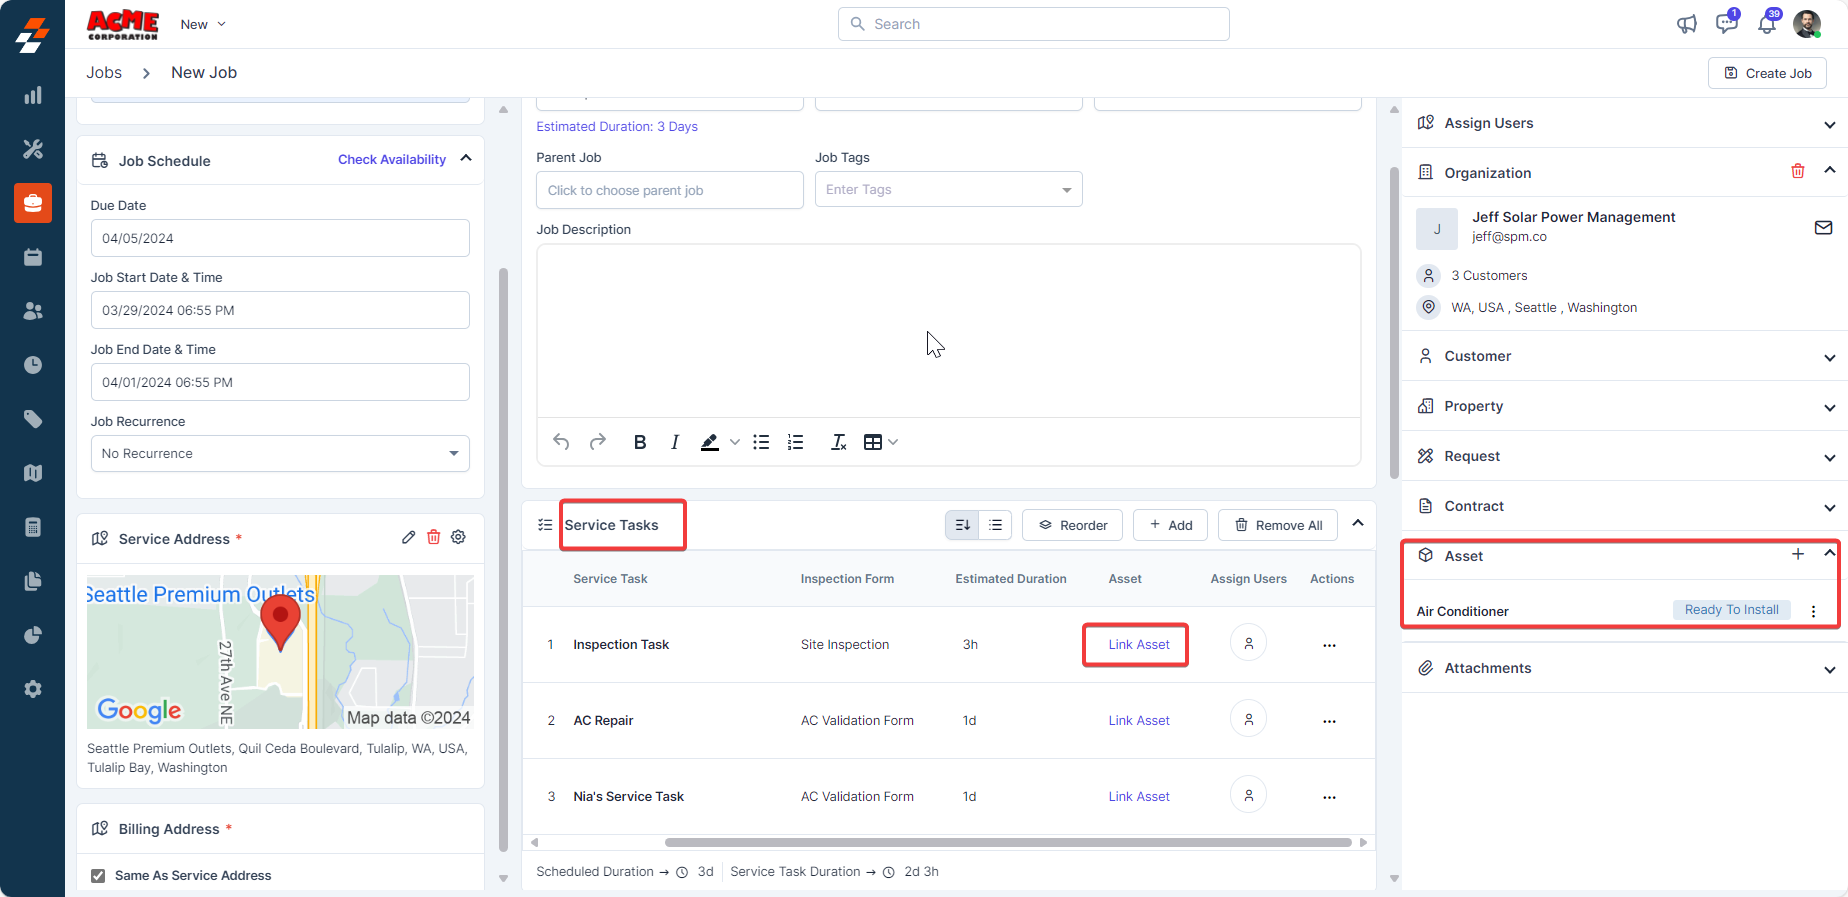
- Under Assets, select + Add Asset.
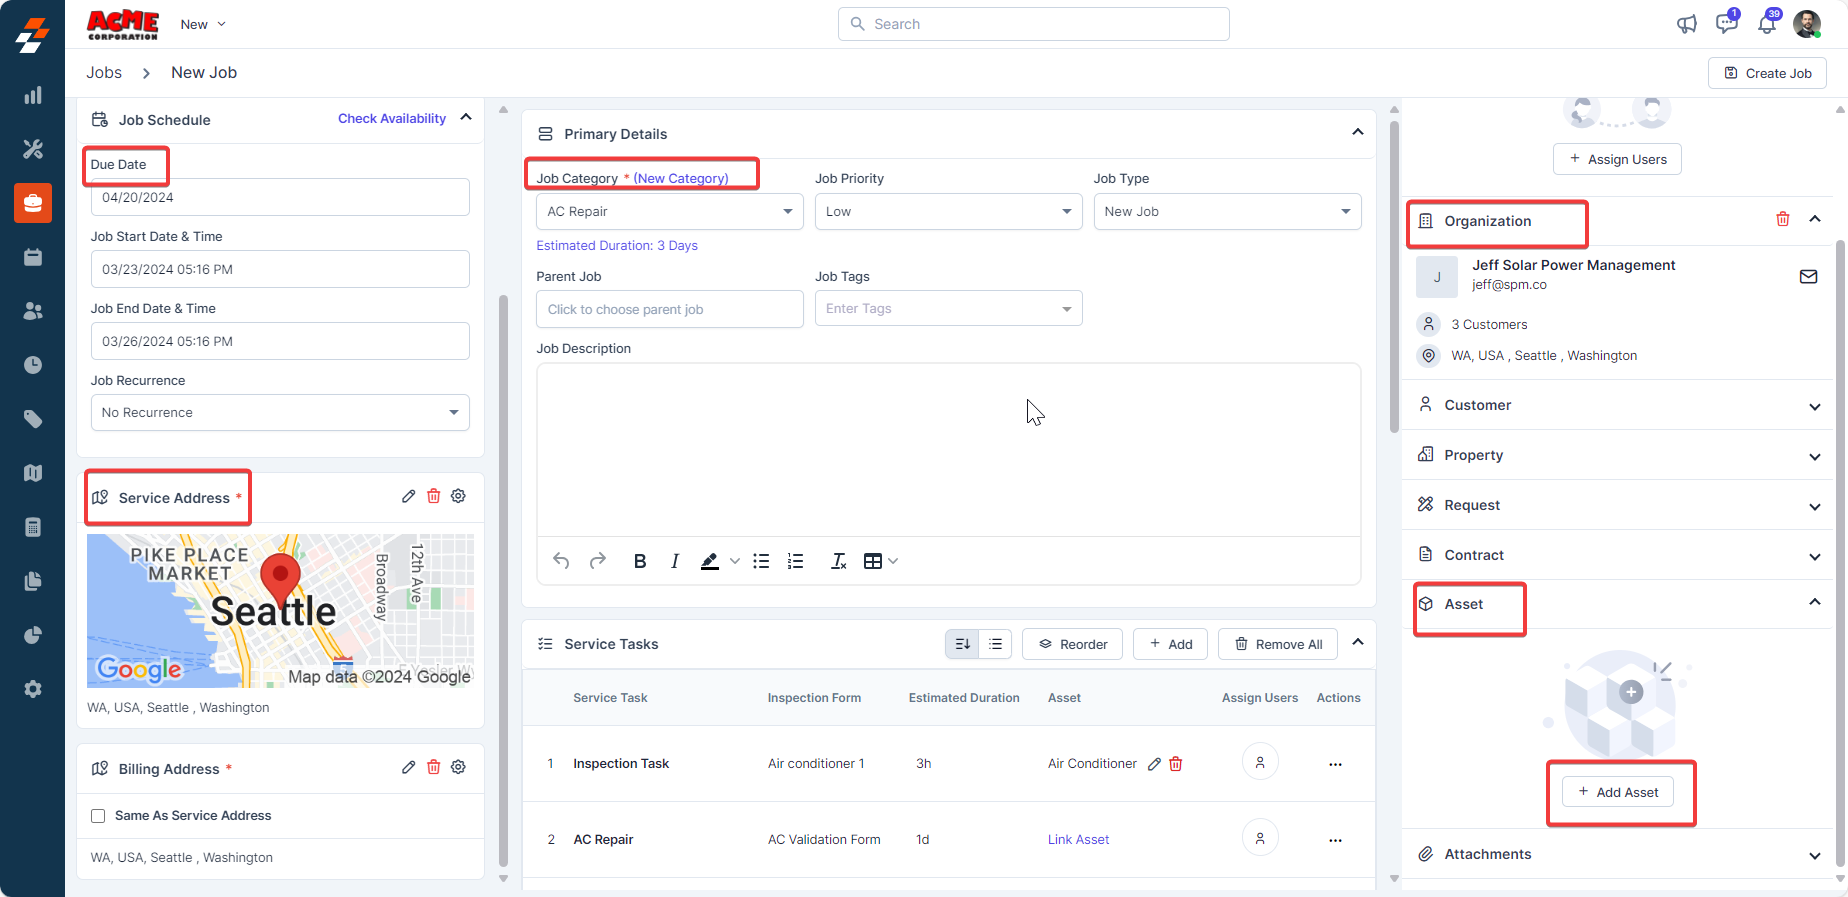
- Choose an asset that has an Inspection Form. The Asset with an inspection form will be added to the job.
- Select Create Job to save the job.
Complete an Asset Inspection Form in a Job
After creating a job with an asset inspection form, here’s how you can complete the asset inspection form in a Job.- Open the job details page.
- In the Assets Associated section, select the icon next to the asset.
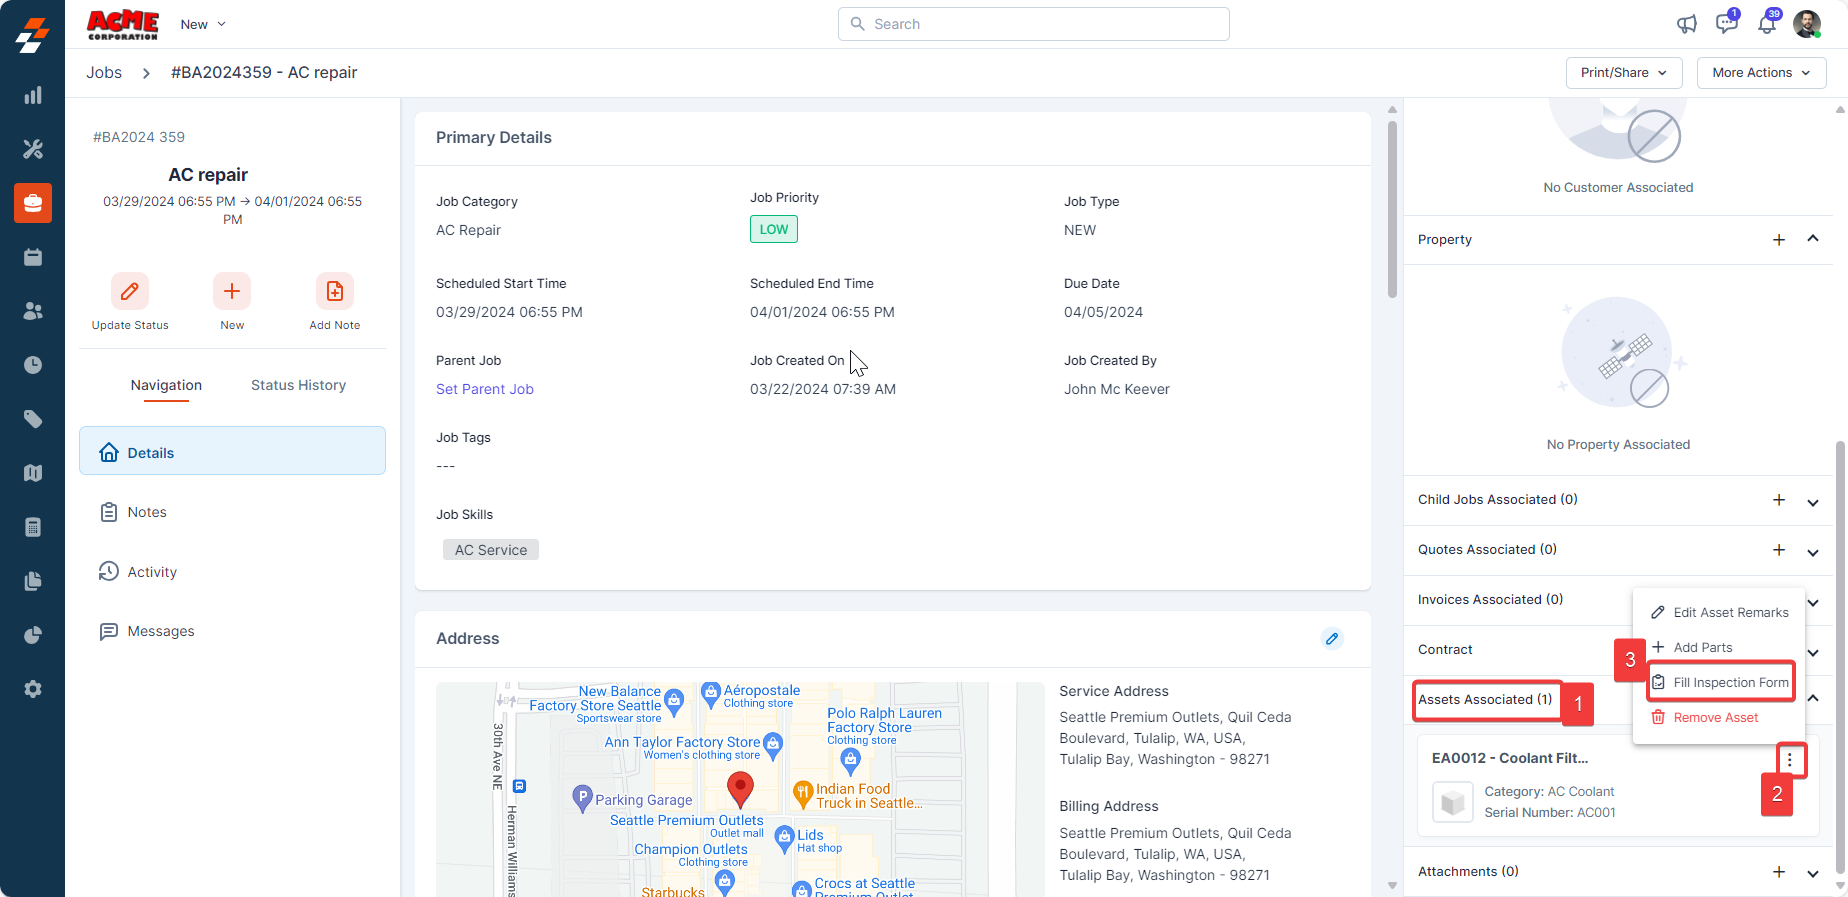
- Select Fill Inspection Form.
- Complete the form based on asset requirements and observations.

- Select Submit.