Common terms for this featureCustomers may refer to assets using different terms depending on their industry. In Zuper, the following are all equivalent:
When this article refers to assets, it includes stations, units, and service locations.
| What customers call it | Zuper term |
|---|---|
| Station / stations | Asset / assets |
| Unit / units | Asset / assets |
| Service location | Asset / property |
| Multiple stations | Multiple assets |
| One job per station | One job per asset |
| Contract covers stations | Contract covering multiple assets |
| Multi-site PPM | PPM across multiple assets or locations |
Navigation: Contracts and Assets Management module -> Assets-> Assets listing page -> Asset detail page
To create a PPM
- Select the Contracts and Assets Management module from the left navigation menu and choose “Assets.” You will view the list of assets (both active and inactive) on the asset listing page.
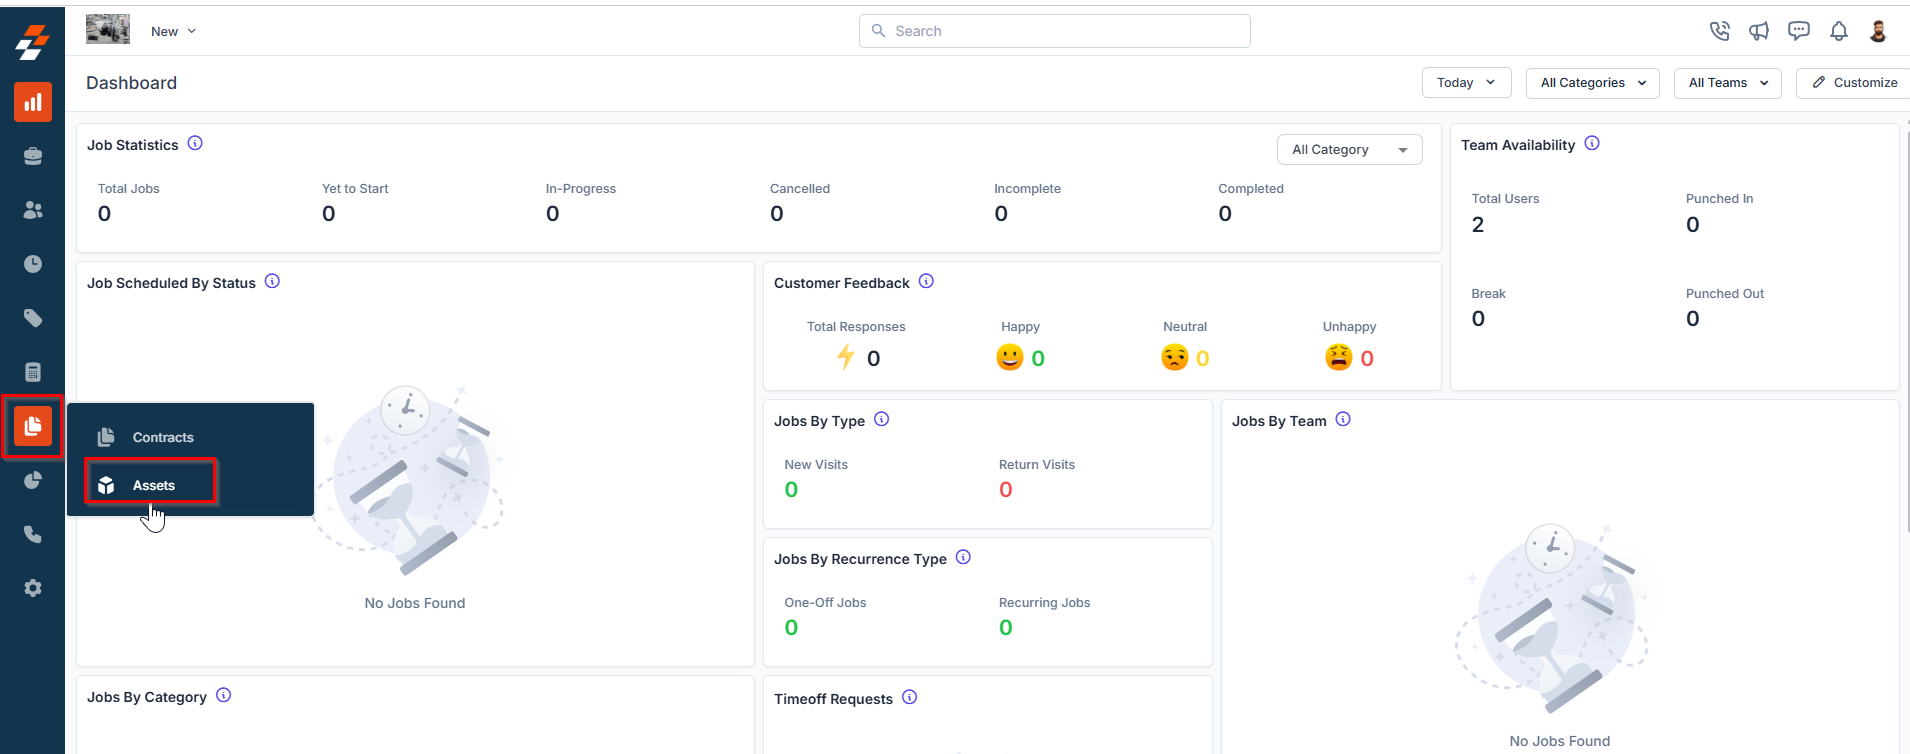
- Choose the asset for which you want to add a new PPM from the asset listing page. The selected asset details page appears.
- On the asset details page, scroll down to the PPM section in the right pane and click the** ”+**” icon. A side pane will appear, and you can create a new PPM.
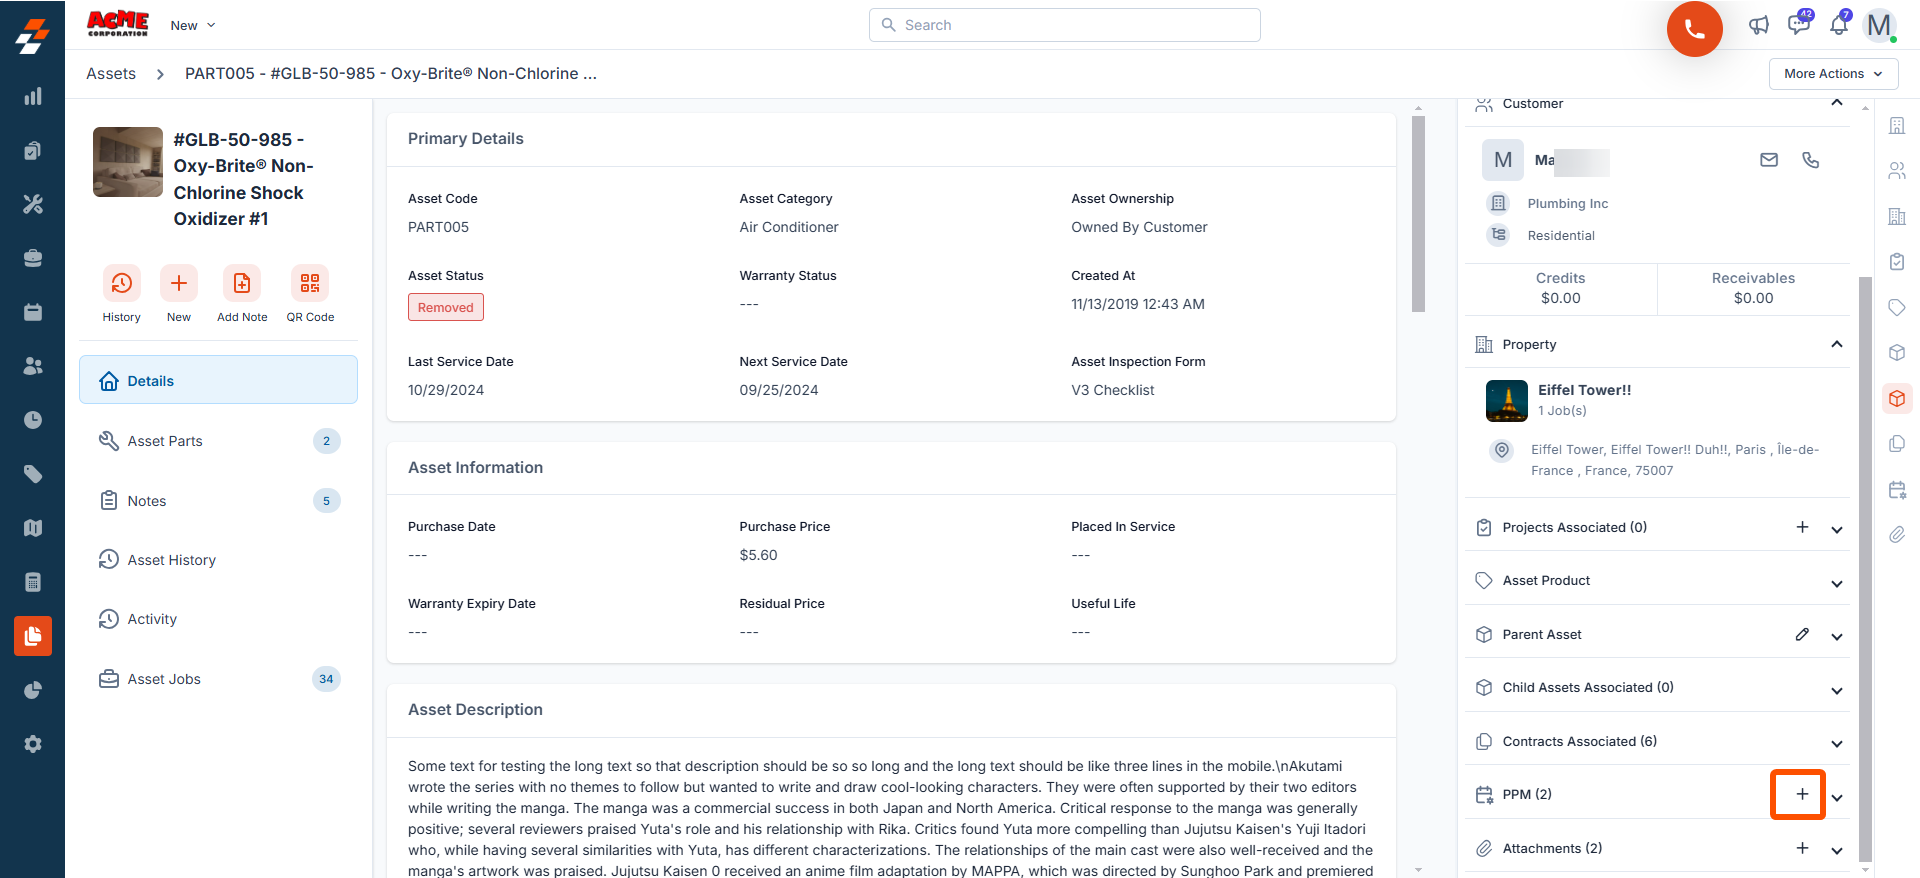
Note: To add PPM for an asset, it must be linked to an organization or customer. Unlinked assets (referred to as “Orphan” assets) will not display the + (Plus) button. You can associate the asset with an organization or customer first, then go ahead and add PPM.
Primary Details
Fill in the following primary details:- PPM Name: Enter a name for the PPM.
- PPM Description: Provide a brief description of the PPM.
- Choose Property: Select a property of an org/customer to associate with the PPM.
- Choose Asset(Mandatory): Select one or more assets for which you want to create a new PPM. You can choose assets currently associated with the contract or any other existing assets, as needed.
- Example: A service contract covers 3 water pump stations. You select all 3 assets in the Choose Asset field and enable Auto-Generate Job. Zuper creates a PPM for each asset. On the scheduled date, 3 separate jobs are auto-generated — one per station — and each appears individually in the Jobs listing.”
Note: When you select multiple assets, Zuper creates one separate PPM entry per asset. If Auto-Generate Job is enabled, each asset generates its own independent job on the scheduled date not one combined job for all assets.
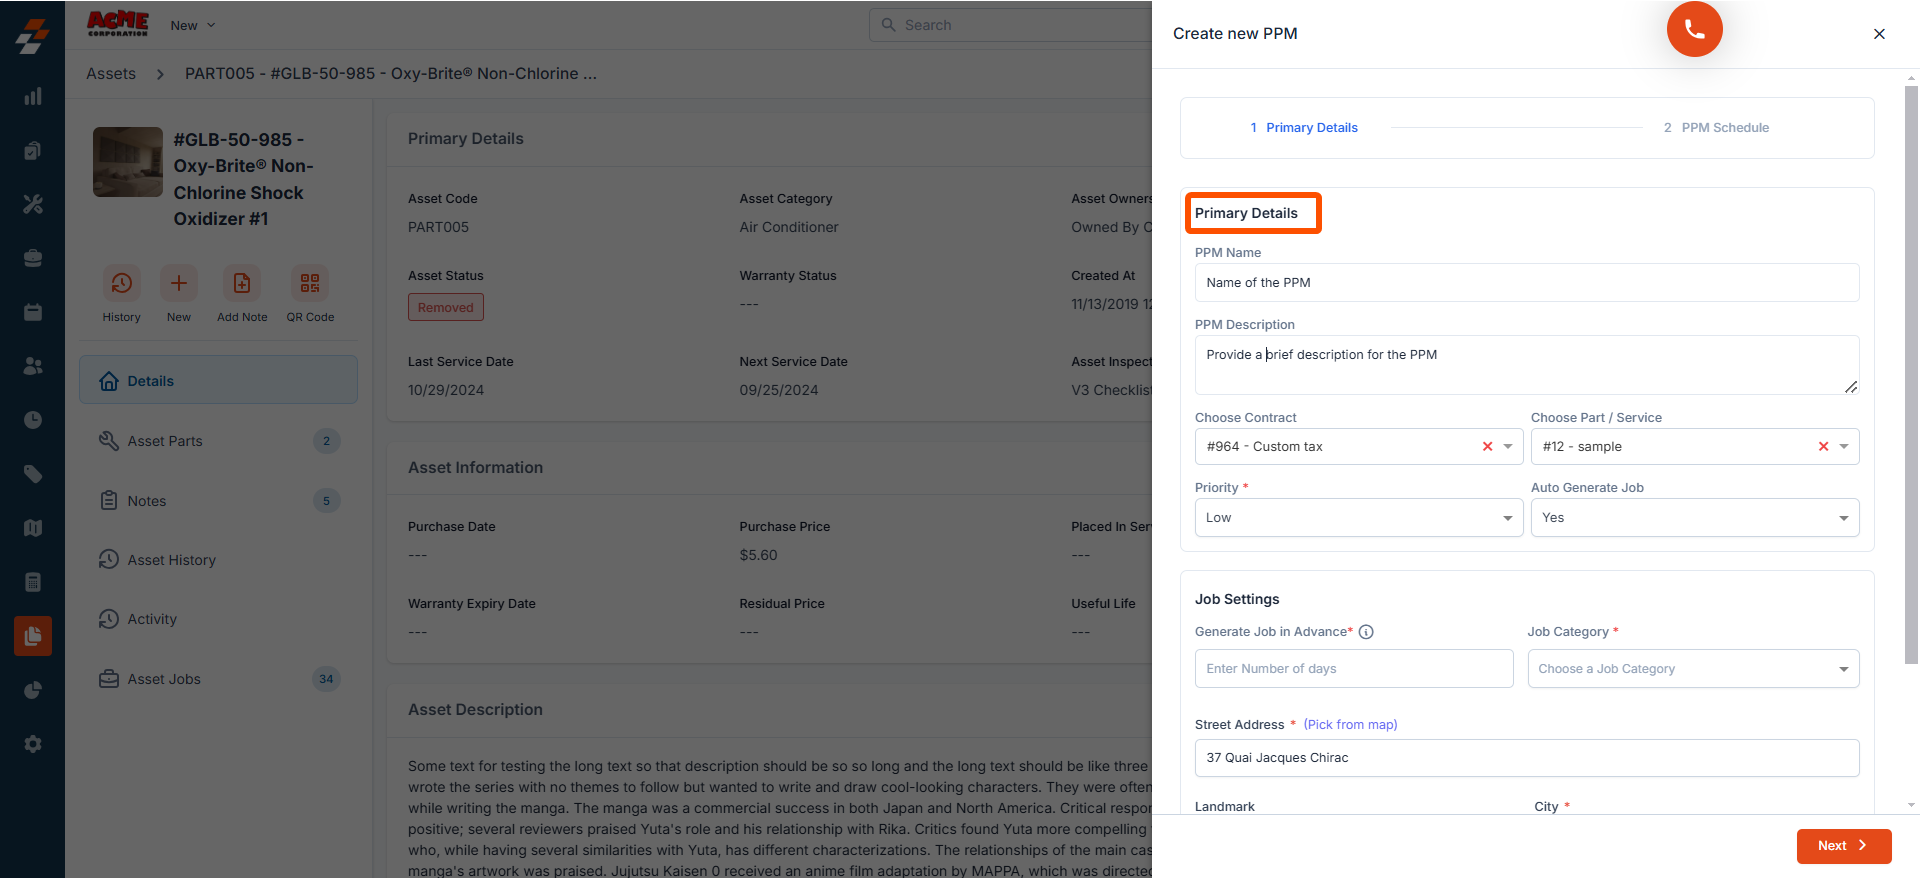
- Choose Part/Service: Select a part or service associated with the contract to include in the PPM.
- Priority (Mandatory): Select the priority from the drop-down list. Options include Low, Medium, and High.
- Auto-Generate Job: By default, it will be set to “No.” If you want to auto-generate a job based on the PPM, select “Yes.”
If selected "Yes" for Autogenerate job. Follow these steps:
If selected "Yes" for Autogenerate job. Follow these steps:
Job Settings
- Generate Job in Advance (Mandatory): Set how many days before the scheduled date the job should be created automatically.
-
Job Category: Choose the job category from the drop-down list.
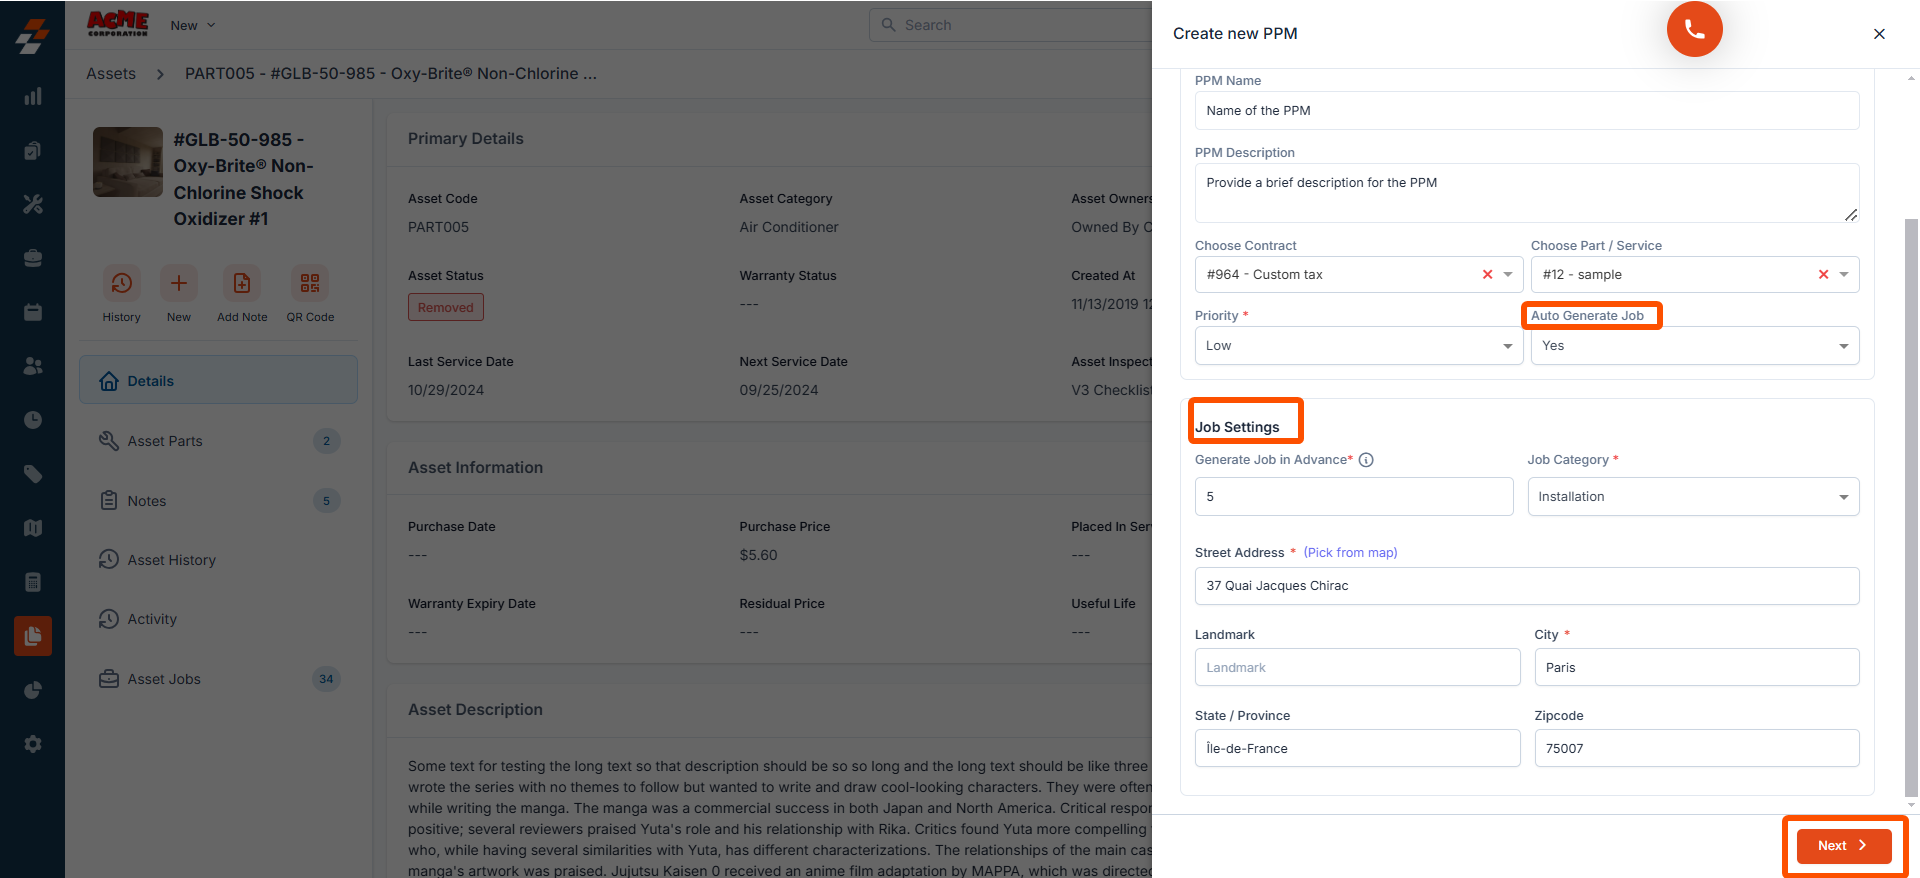
- Street Address: Click “Pick from Map” to fill in the street address information.
PPM Schedule
Provide the following details to schedule:- PPM Start Date: Select the start date of the PPM.
- PPM End Date: Select the end date of the PPM.
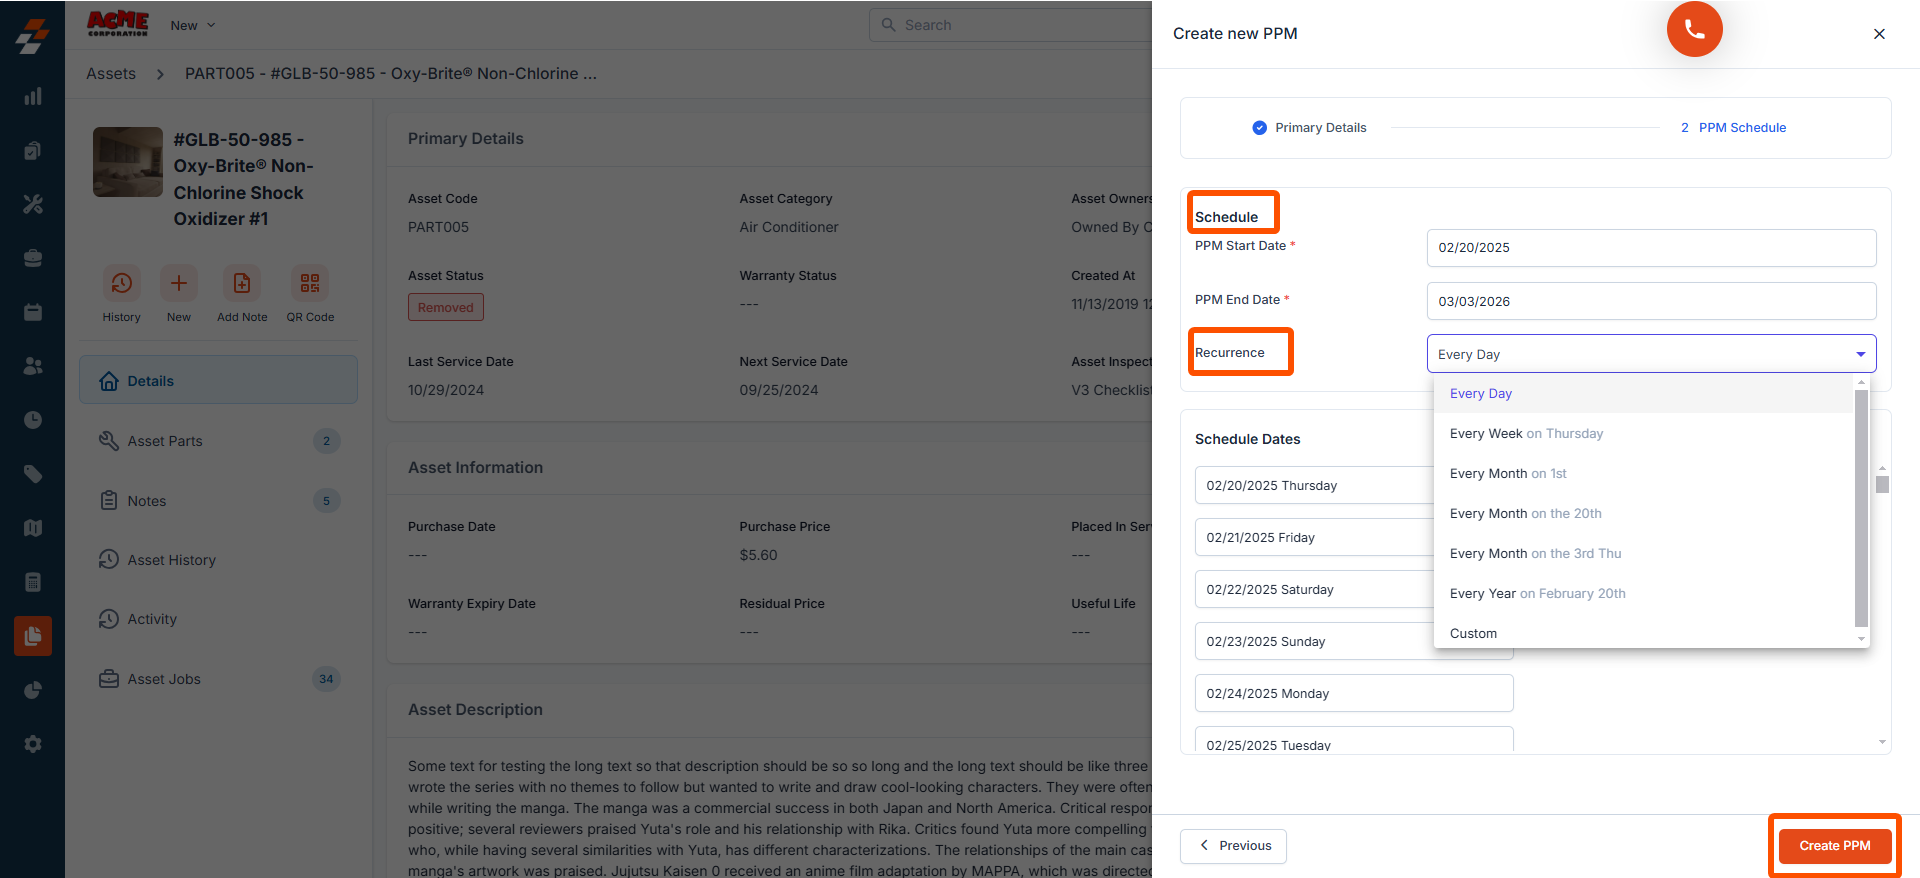
- Recurrence: Select how often this PPM should occur - Daily, Weekly, Monthly, Yearly, or Custom.
- Schedule Dates: These dates are automatically populated for upcoming schedules (service dates) based on the chosen recurrence.
Manage PPM
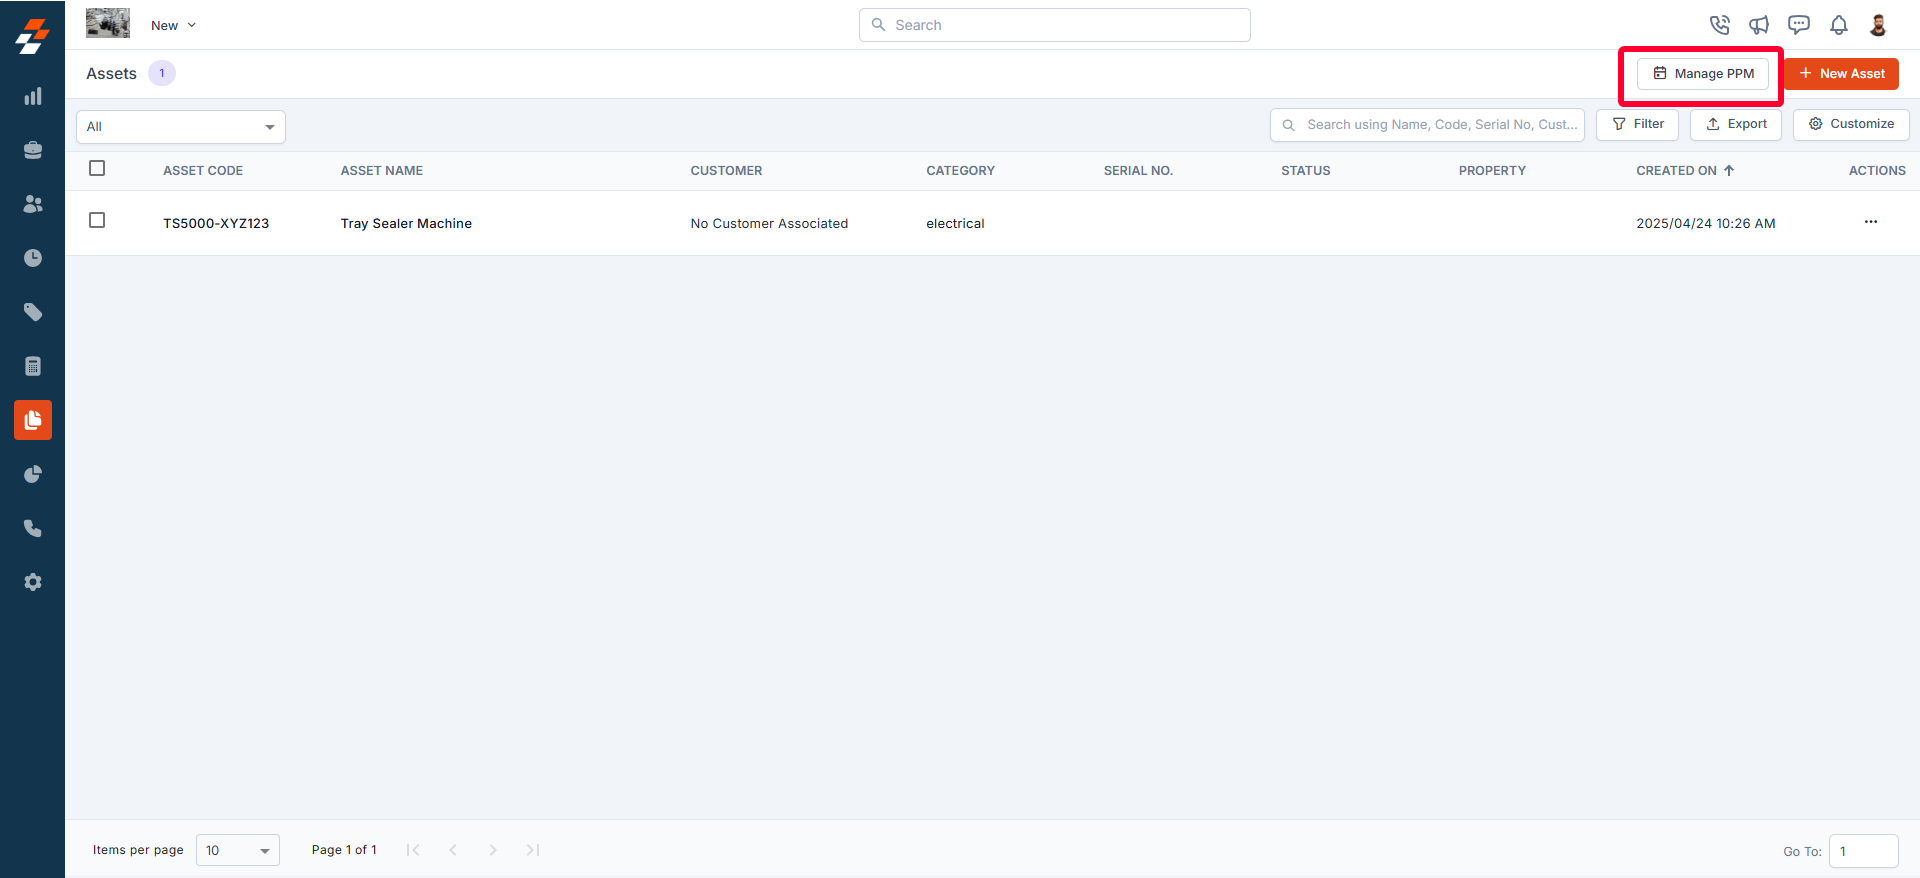
Once a PPM has been created for an asset, you can also edit or delete the PPM as needed. To manage PPM, follow these steps:- Click “Manage PPM” at the top right of the asset listing page.
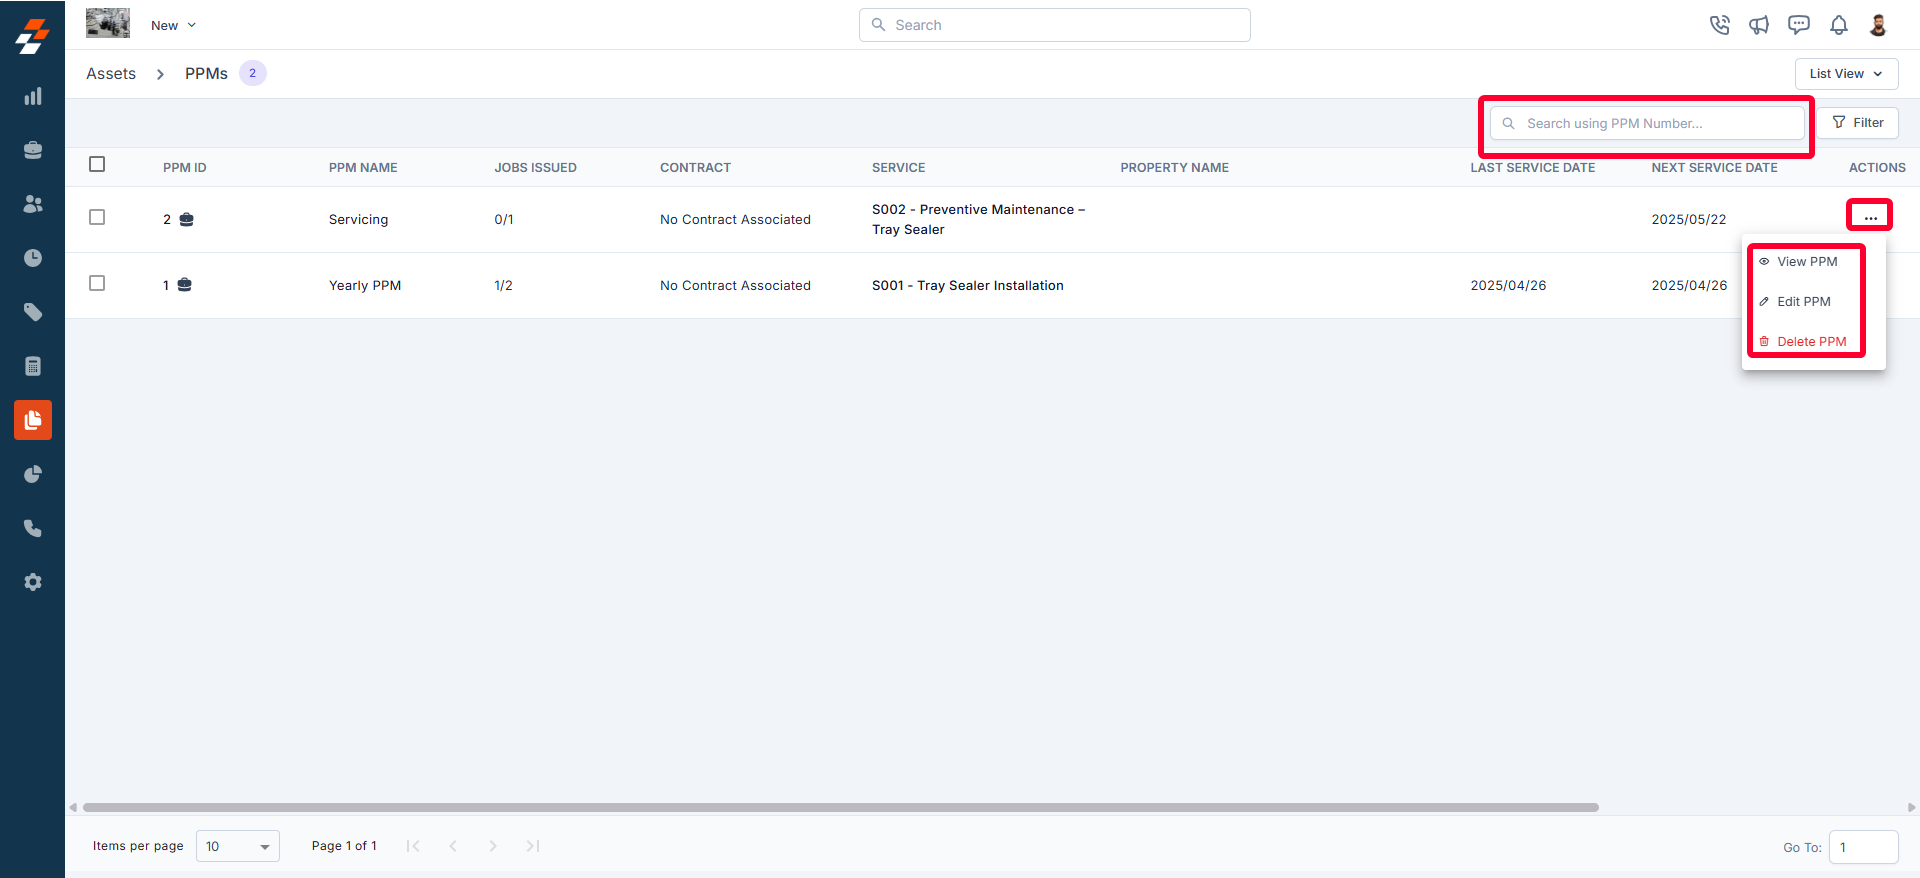
- You can access all PPMs for assets, including PPM ID, name, last service date, next service date, and more. You can also use the search bar to search and view specific asset’s PPM details.
- From there, you can view, edit, or delete PPM by using the icon under Actions.
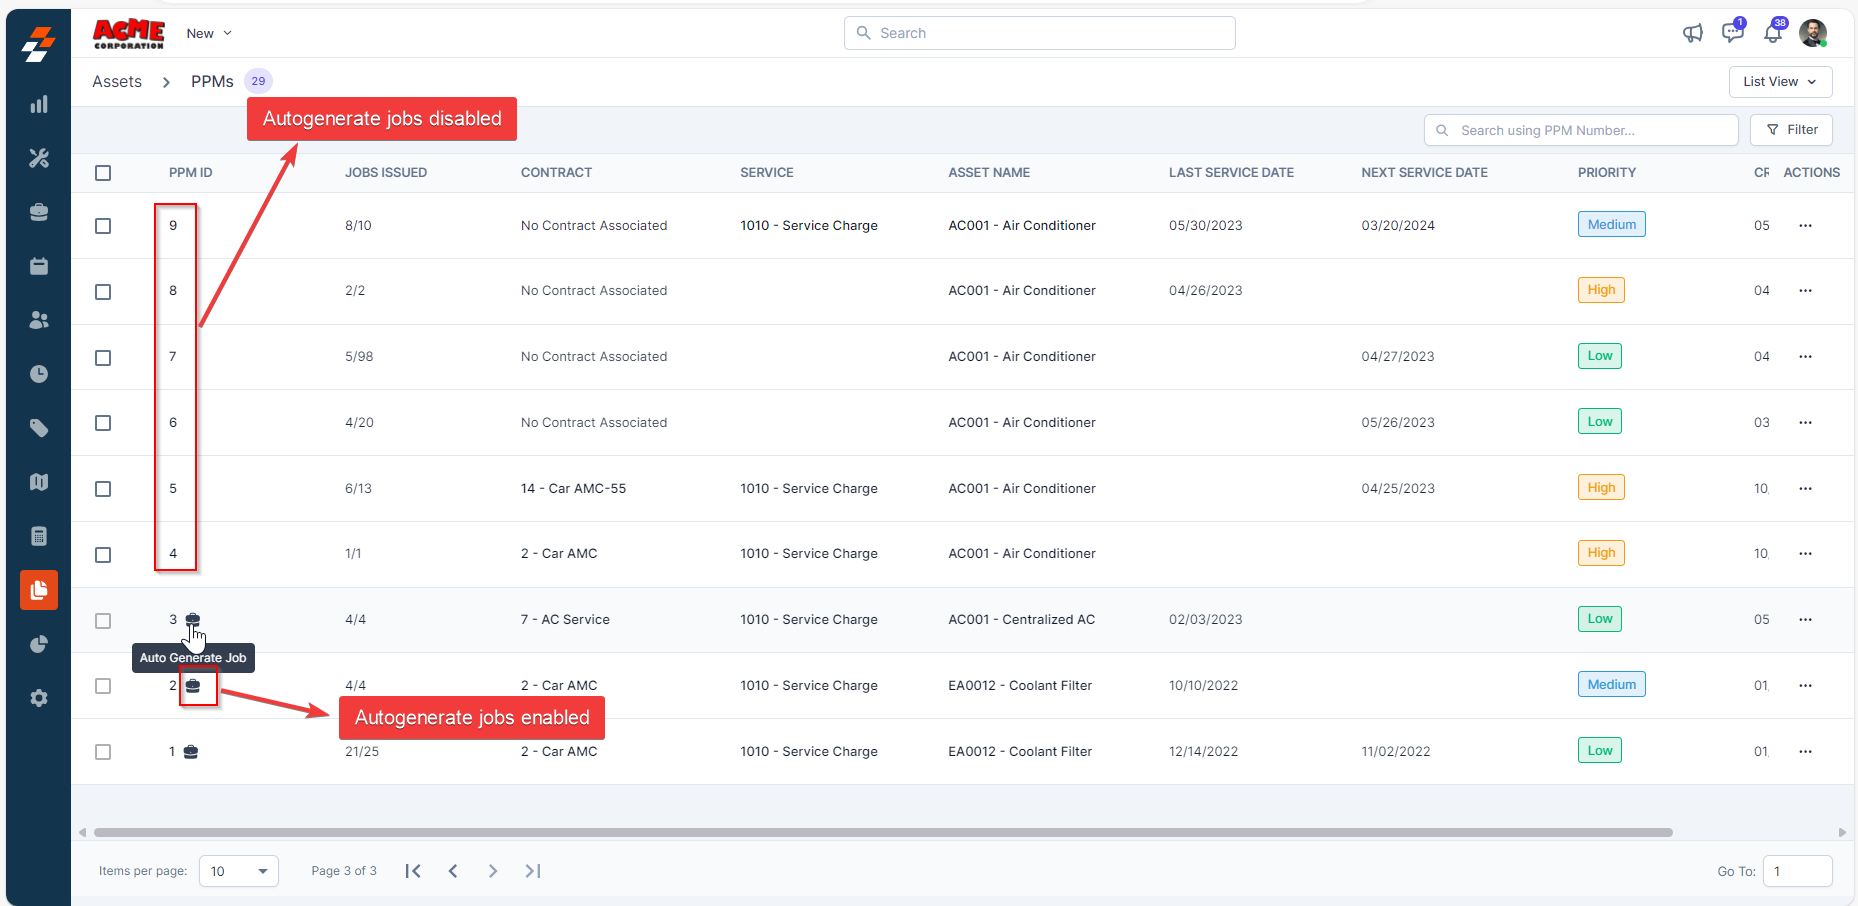
Note: The job icon next to the PPM ID indicates that a job will be auto-generated for this PPM on the scheduled dates. This is because you’ve chosen “Yes” to “Auto Generate Job” while creating a PPM.
Scheduling PPM
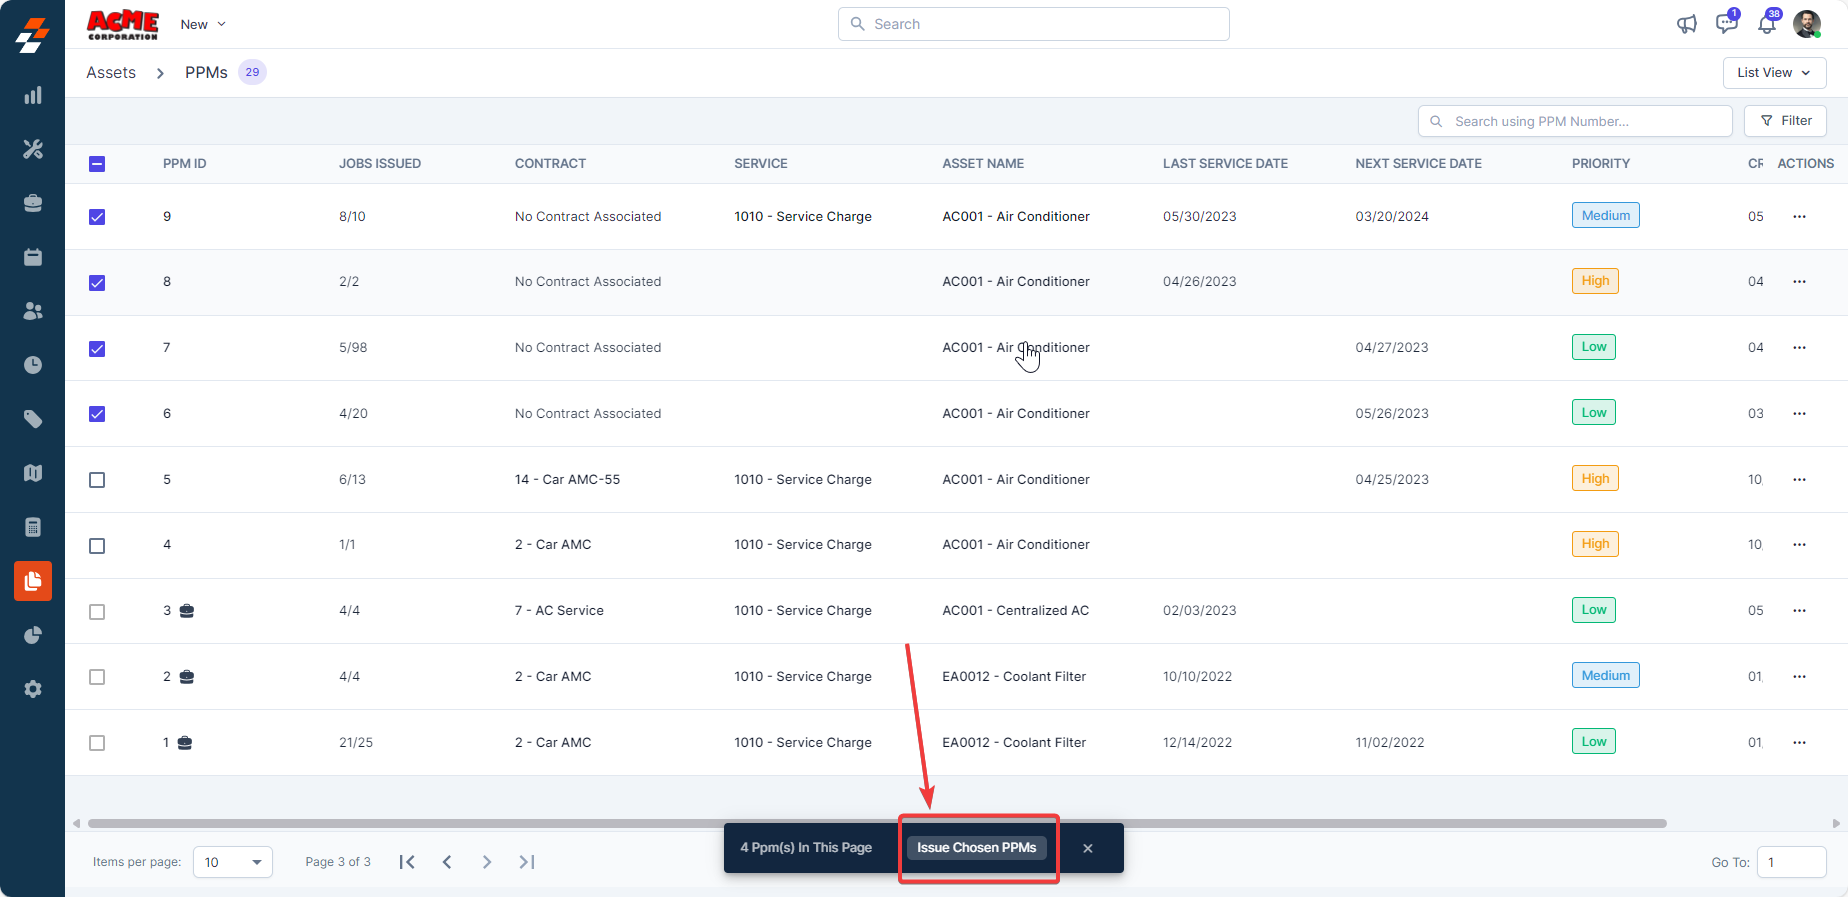
In Zuper, PPM tasks can be automatically converted into jobs for field technicians to complete on scheduled dates. However, if the autogenerate jobs option was not enabled during PPM creation, you can still manually issue PPMs as jobs. Here’s how:- On the PPM listing page, identify the PPMs that do not have autogenerate jobs enabled.
- Select the PPM(s) that need job creation. An action bar will appear at the bottom.
Note: The checkbox is enabled only for PPMs that do not have autogenerate jobs configured.
- Click “Issue Chosen PPMs”. A Preview PPMs pop-up will appear.
- Select the Job Category from the dropdown menu and set the Start Time and End Time for each PPM.

- Click “Submit” to create PPM jobs successfully.