Navigation: Request—> Request Listing page-
Request listing page
The Request Module Listing Page layout in Zuper includes view management, column selection, views, and saving customized views. This process is performed directly on the module’s listing page. Default Listing Behavior The system retains its existing default listing behavior, ensuring that pre-set configurations or default views are preserved. When you first access the Request Module Listing Page, you’ll see the default view with columns such as Request Number, Request Address, Request Date, and Request Manager.Create View Configuration
Selecting Columns You can choose which columns to display to focus on relevant data: 1. Select the “Requests” module from the left navigation menu. You can view the listing page.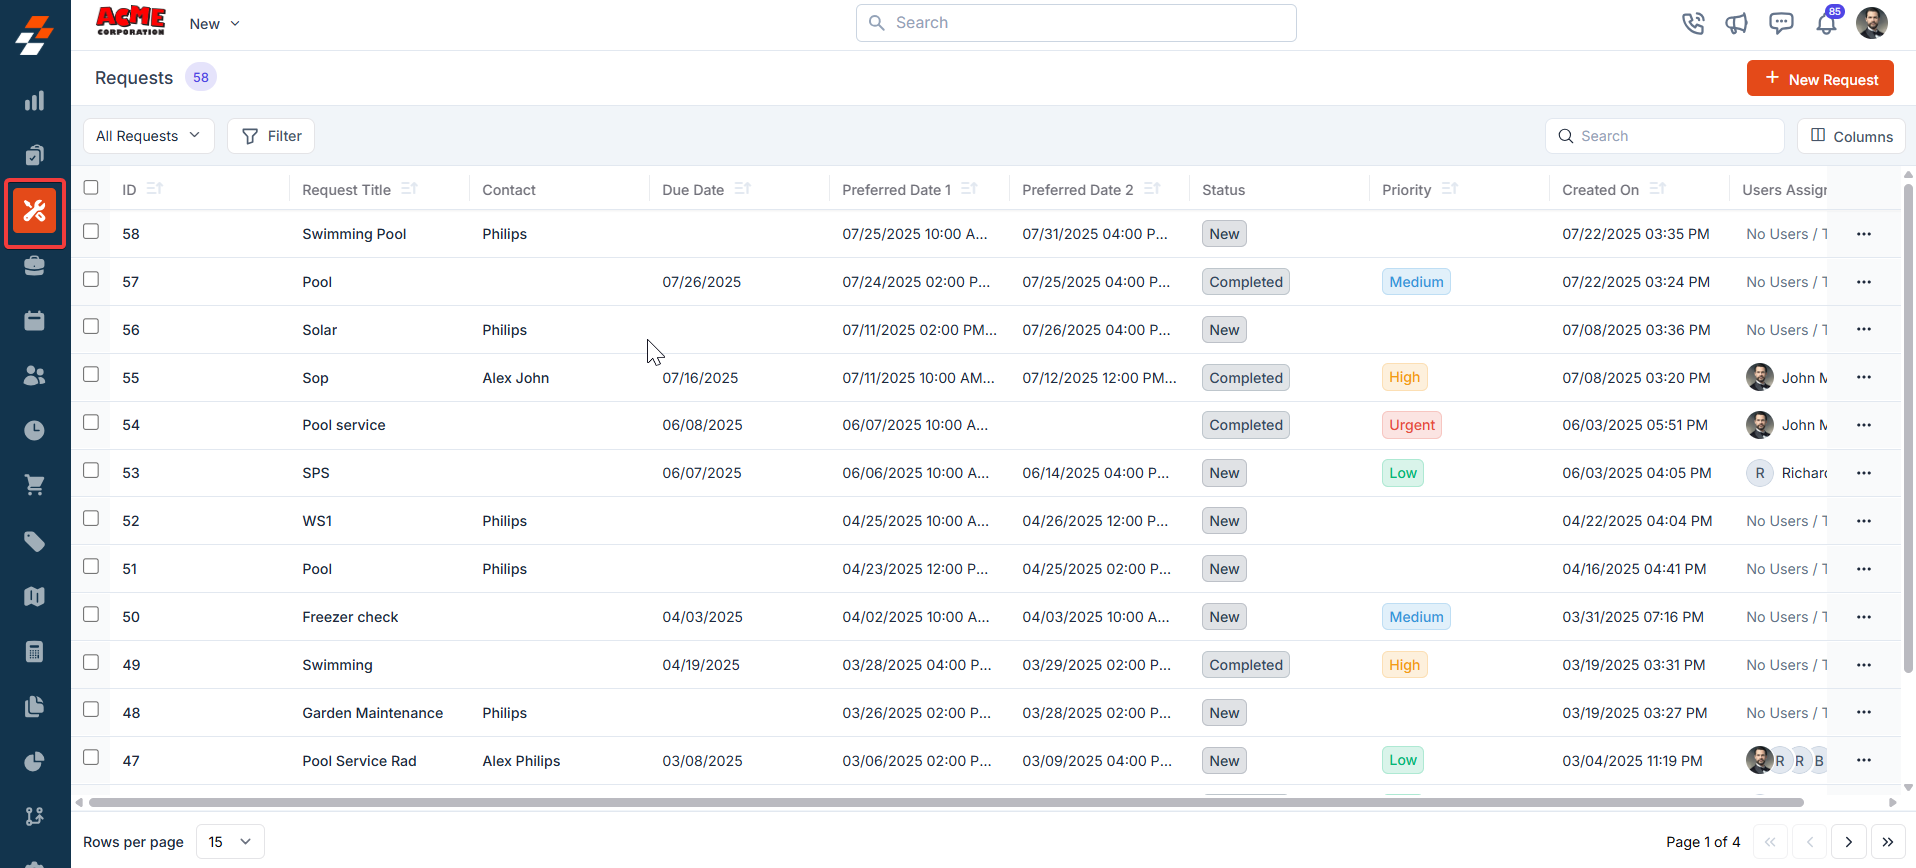
- From the “Views” list, click “+Create new view.”
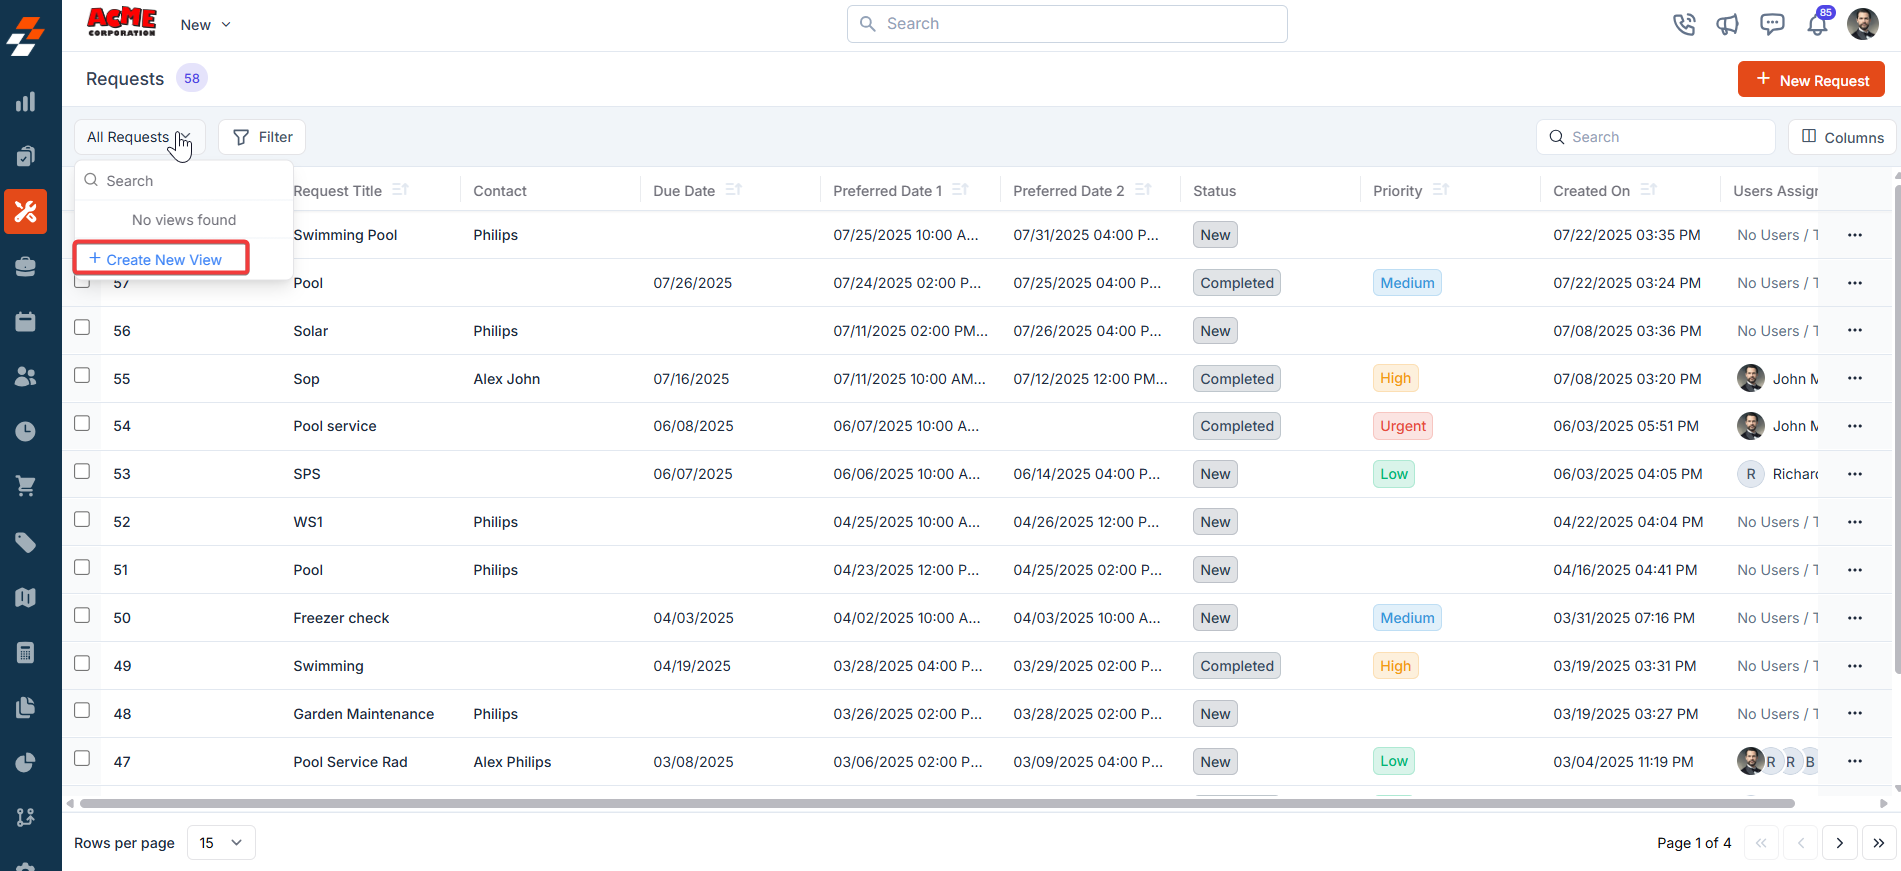
- A “Create View” dialog box appears.

- Once you click “Create,” the Columns sidebar appears, showing “Available Columns” and “Displayed Columns.” To add a column, drag and drop it from the “Available Columns” list on the left to the “Displayed Columns” list on the right. You can click “Continue.”
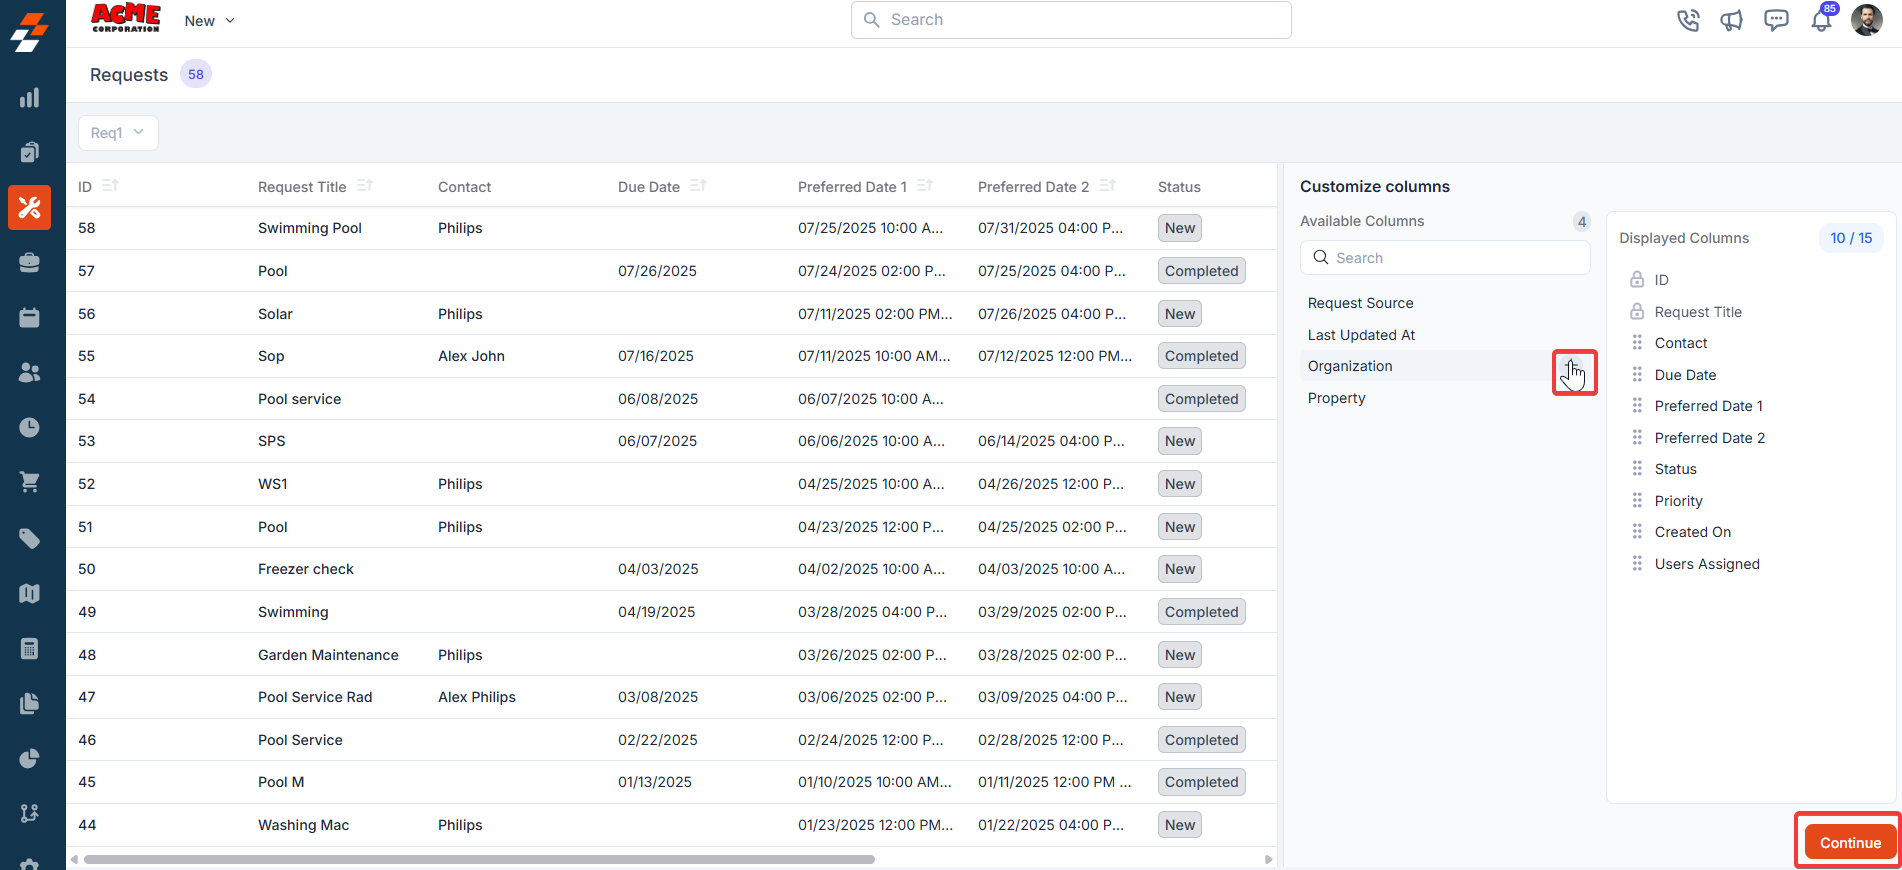
- To remove a column, drag it from the “Displayed Columns” list back to the “Available Columns” list or click the - next to the column name. Click Continue to apply the changes.

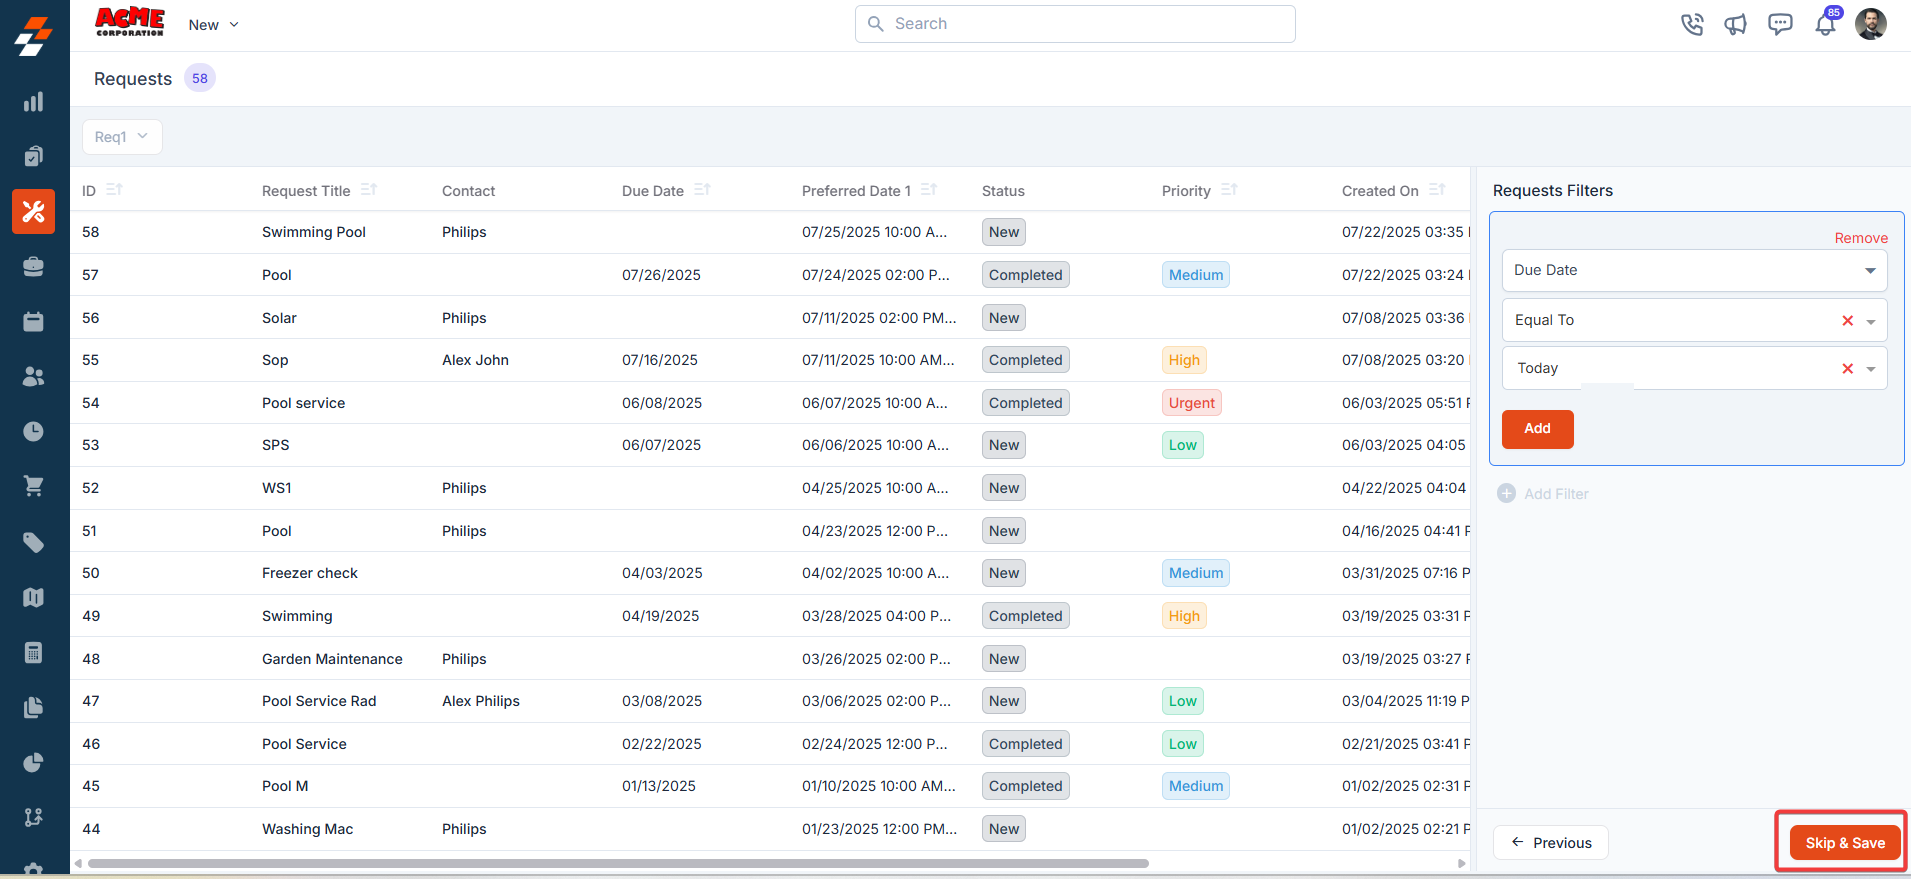
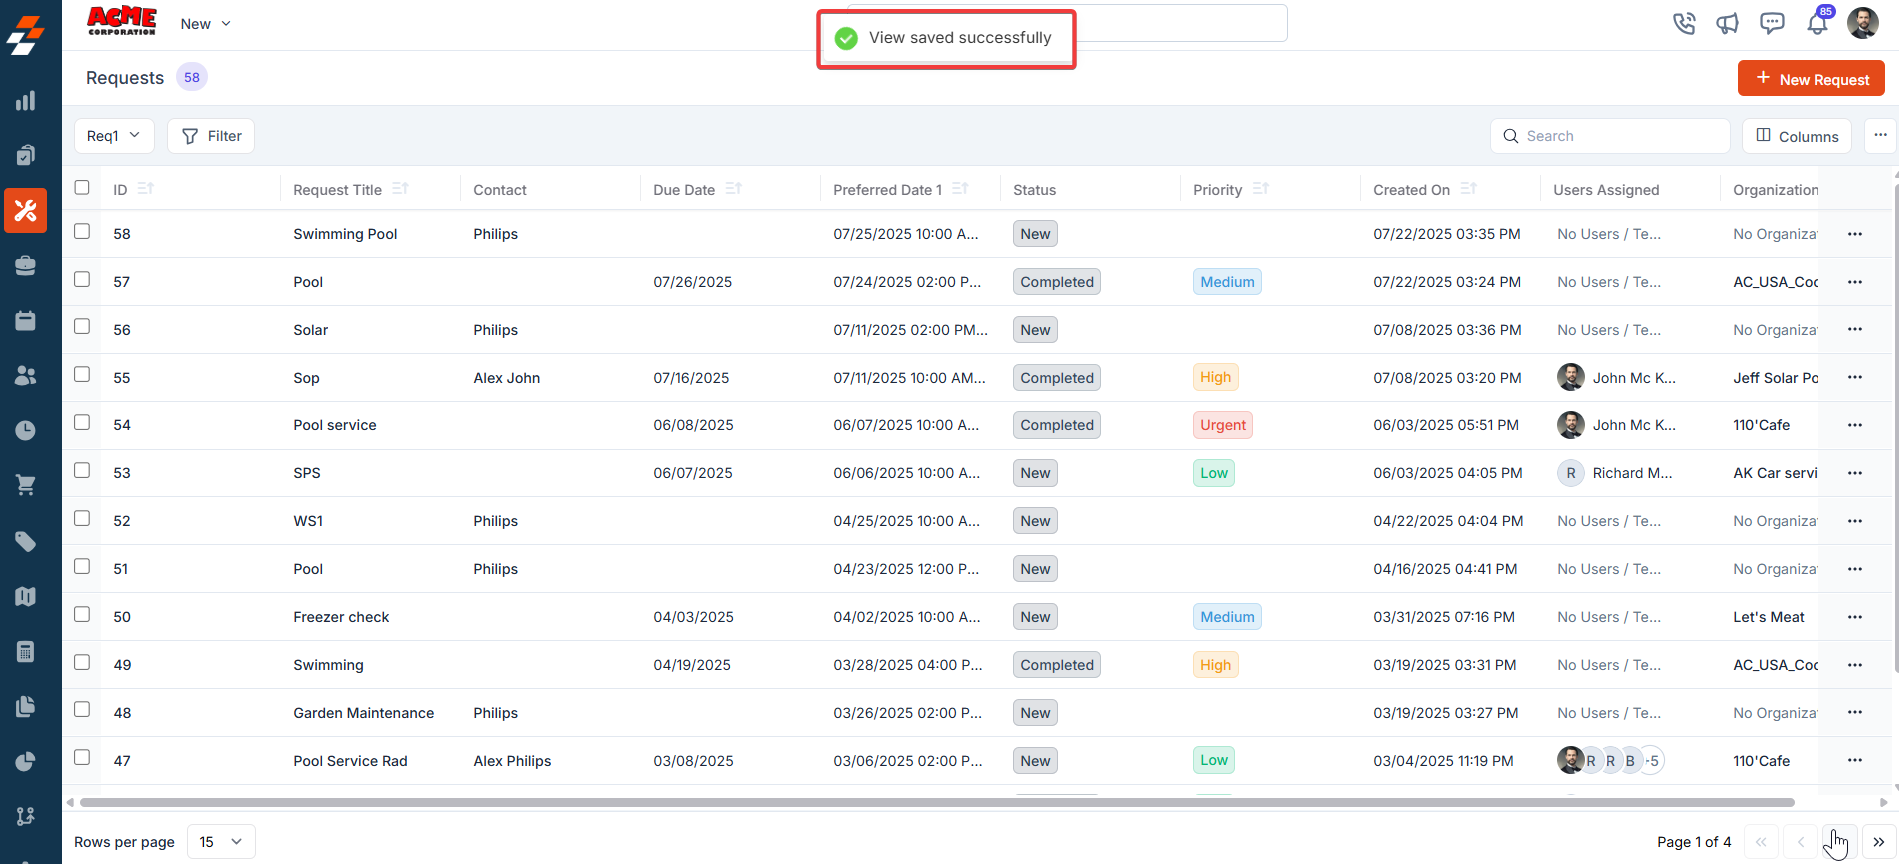
- If you wish not to add any filter, click “Skip and Save” to create the view.
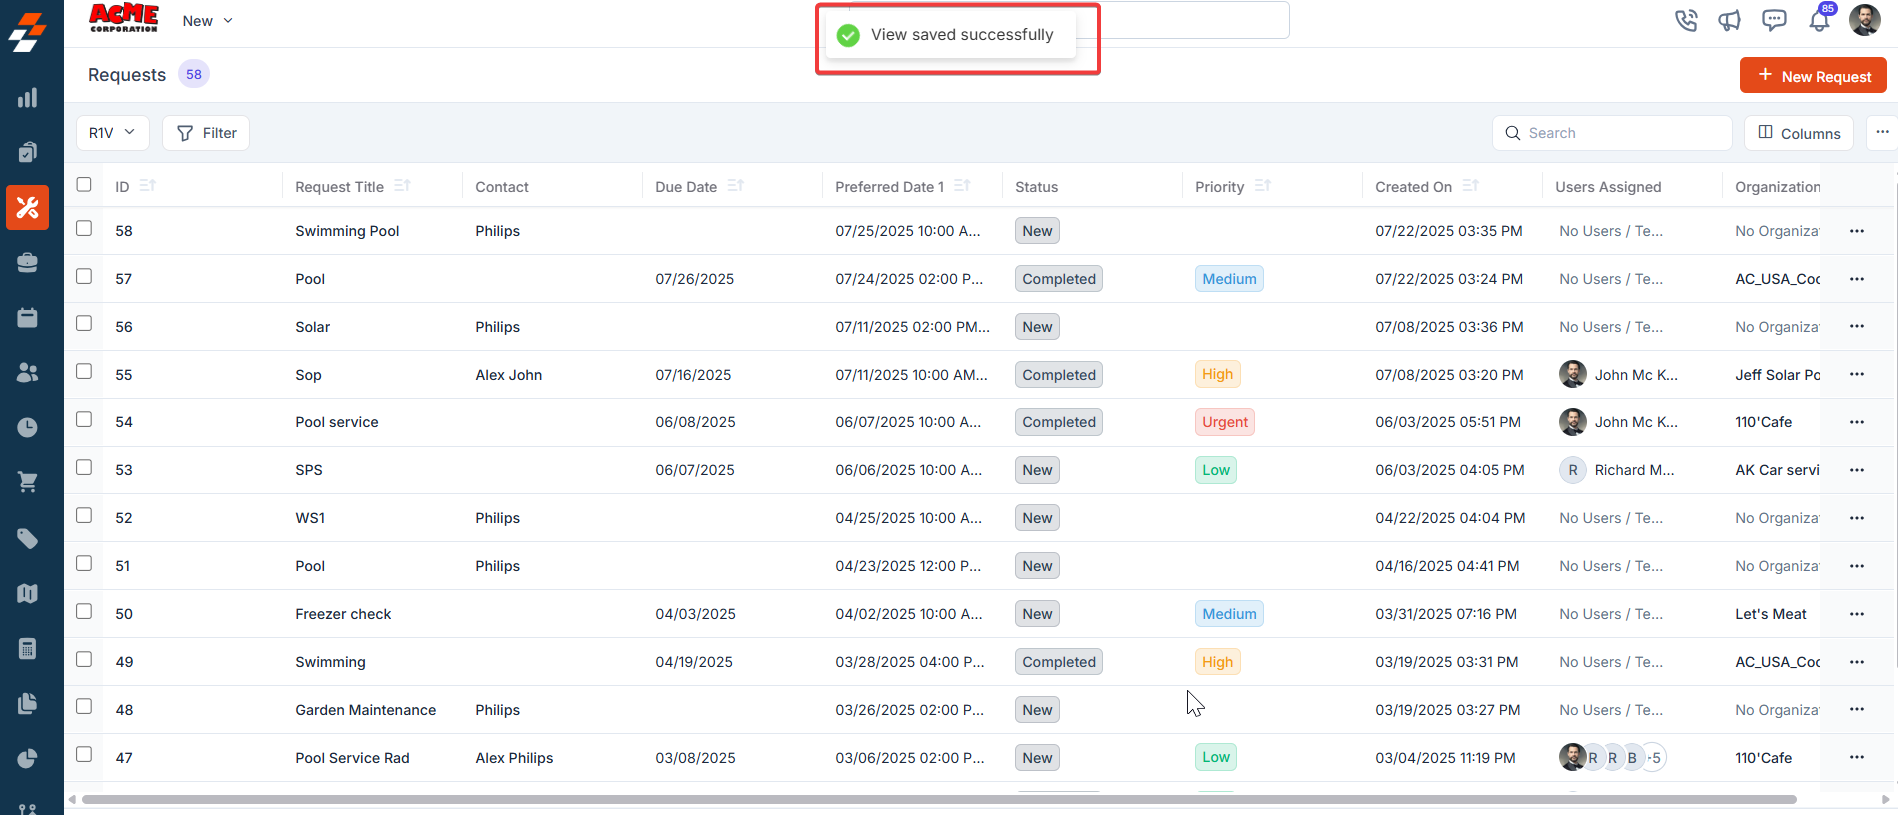
- The view is saved successfully.
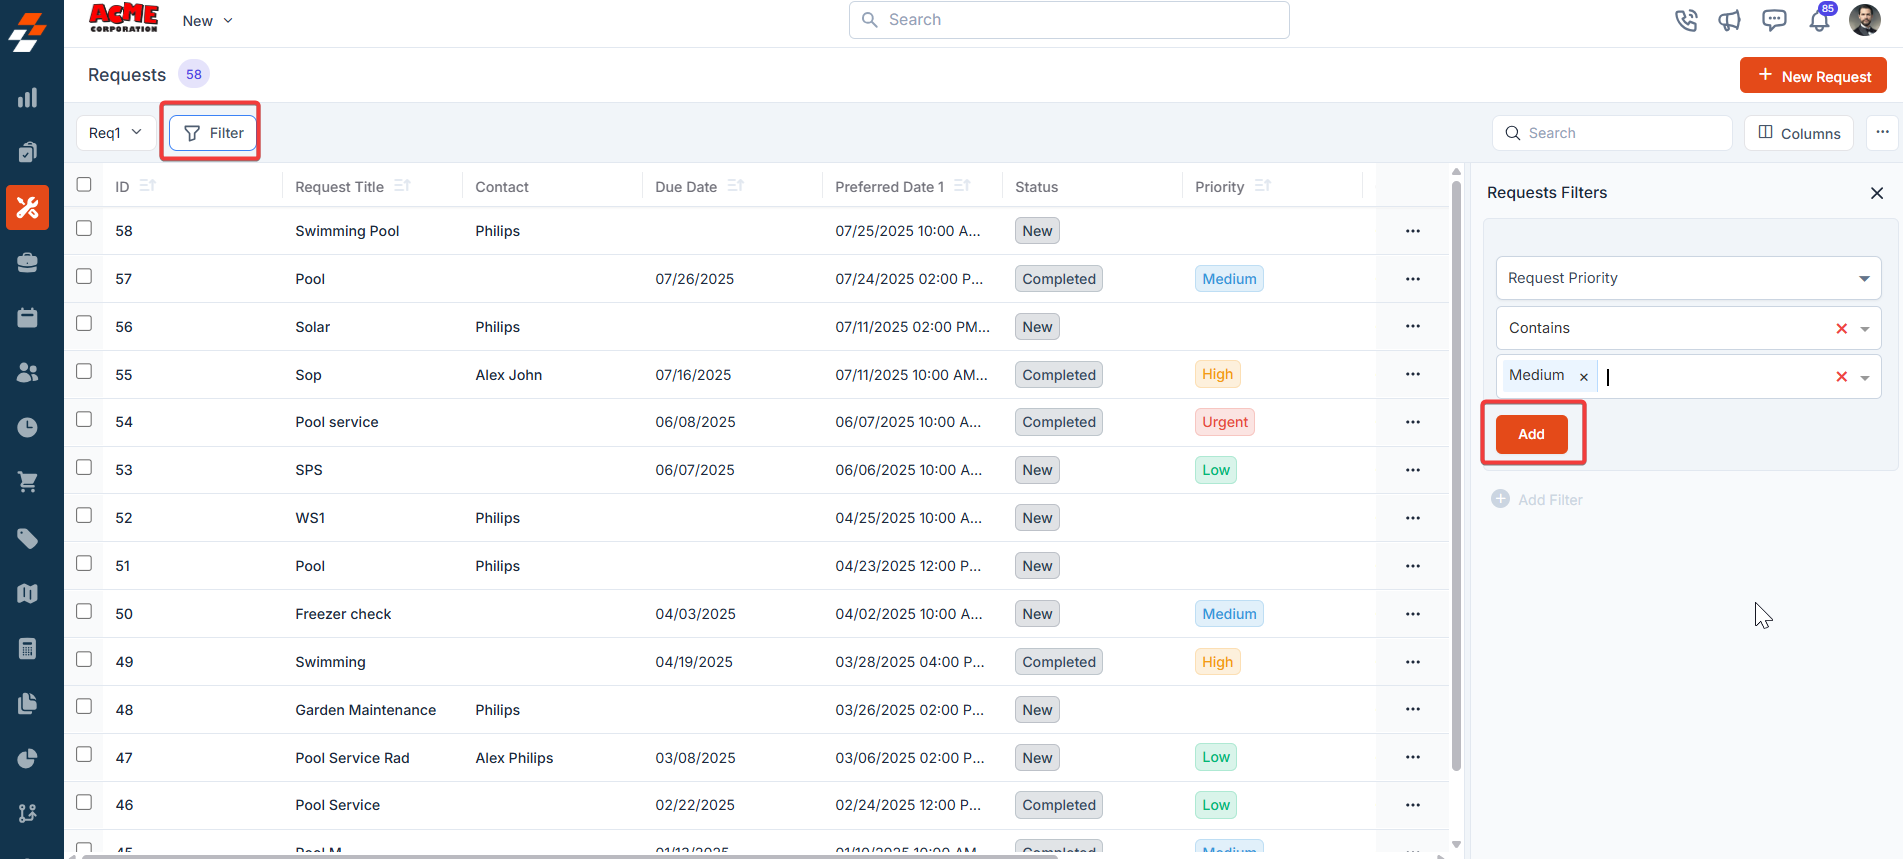
Applying filters
The Filter feature lets you refine your view by applying multiple filters based on available attributes. For example, you can select an attribute like “Request Status Type,” choose conditions such as “Equal to,” “Contains,” or “Does Not Contain,” and choose the desired value. Once the filter is applied, the results will update to show only the Requests that meet your criteria, making it easier to find and manage relevant Requests.- Click “Filter” at the top left of the page. Choose the attributes you want to filter by, apply the desired conditions, and click the “Add” button to view the results.
- Click “Update View” to modify the existing view. The new view is set successfully with the filter. You can view the filter created and the filter name from the view list.
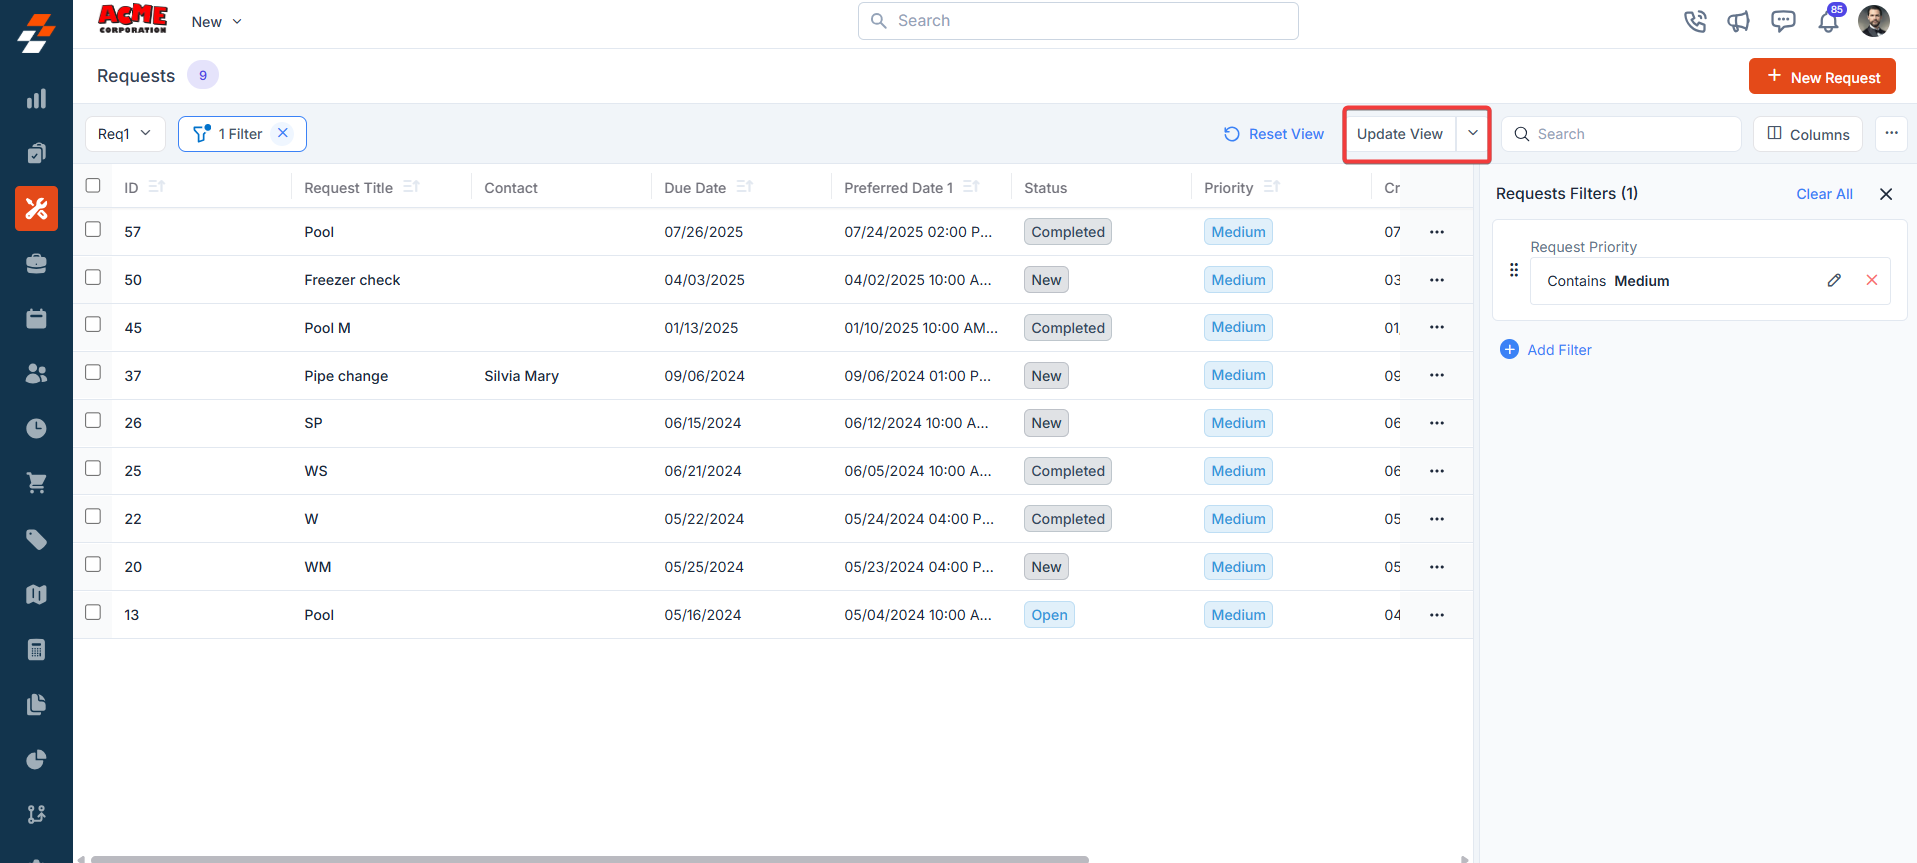
Update View
An update view allows you to modify the current display settings of the “Requests” section. After making changes, you can save the updated configuration to the existing one or use it as a new view by naming it.- Add/remove the existing columns and click “Update View” to modify the existing view.
- The view is updated successfully.
- Click the down arrow below the “Update View” to create a new view by clicking “Save as new view.”
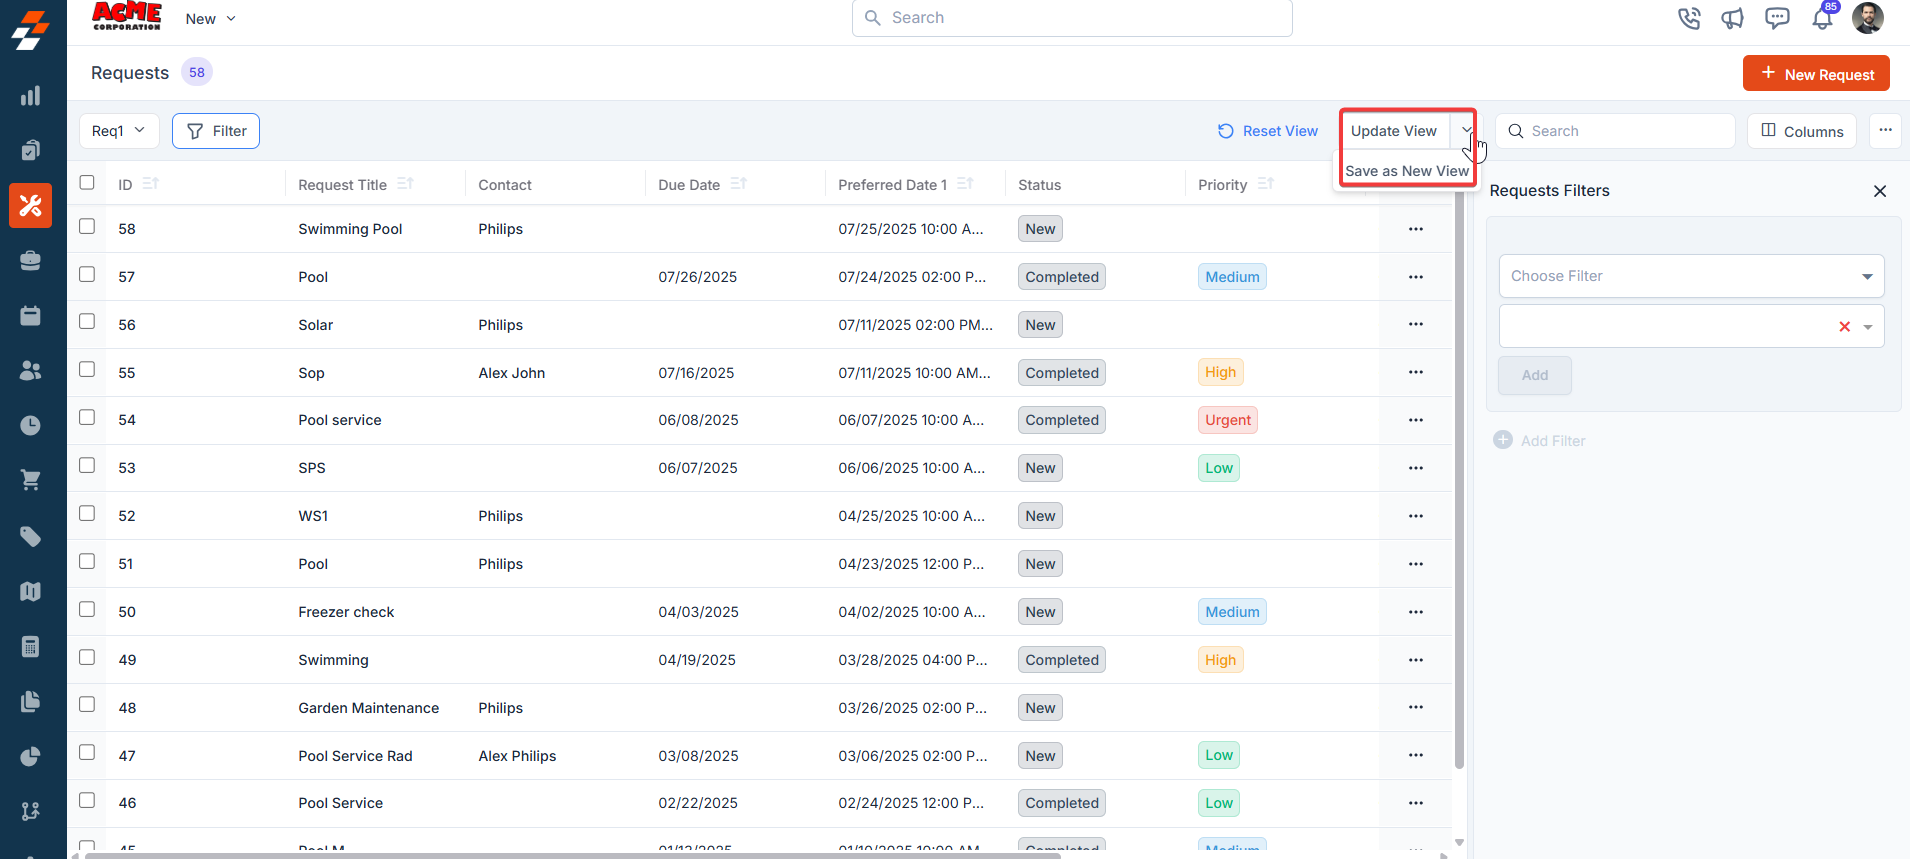
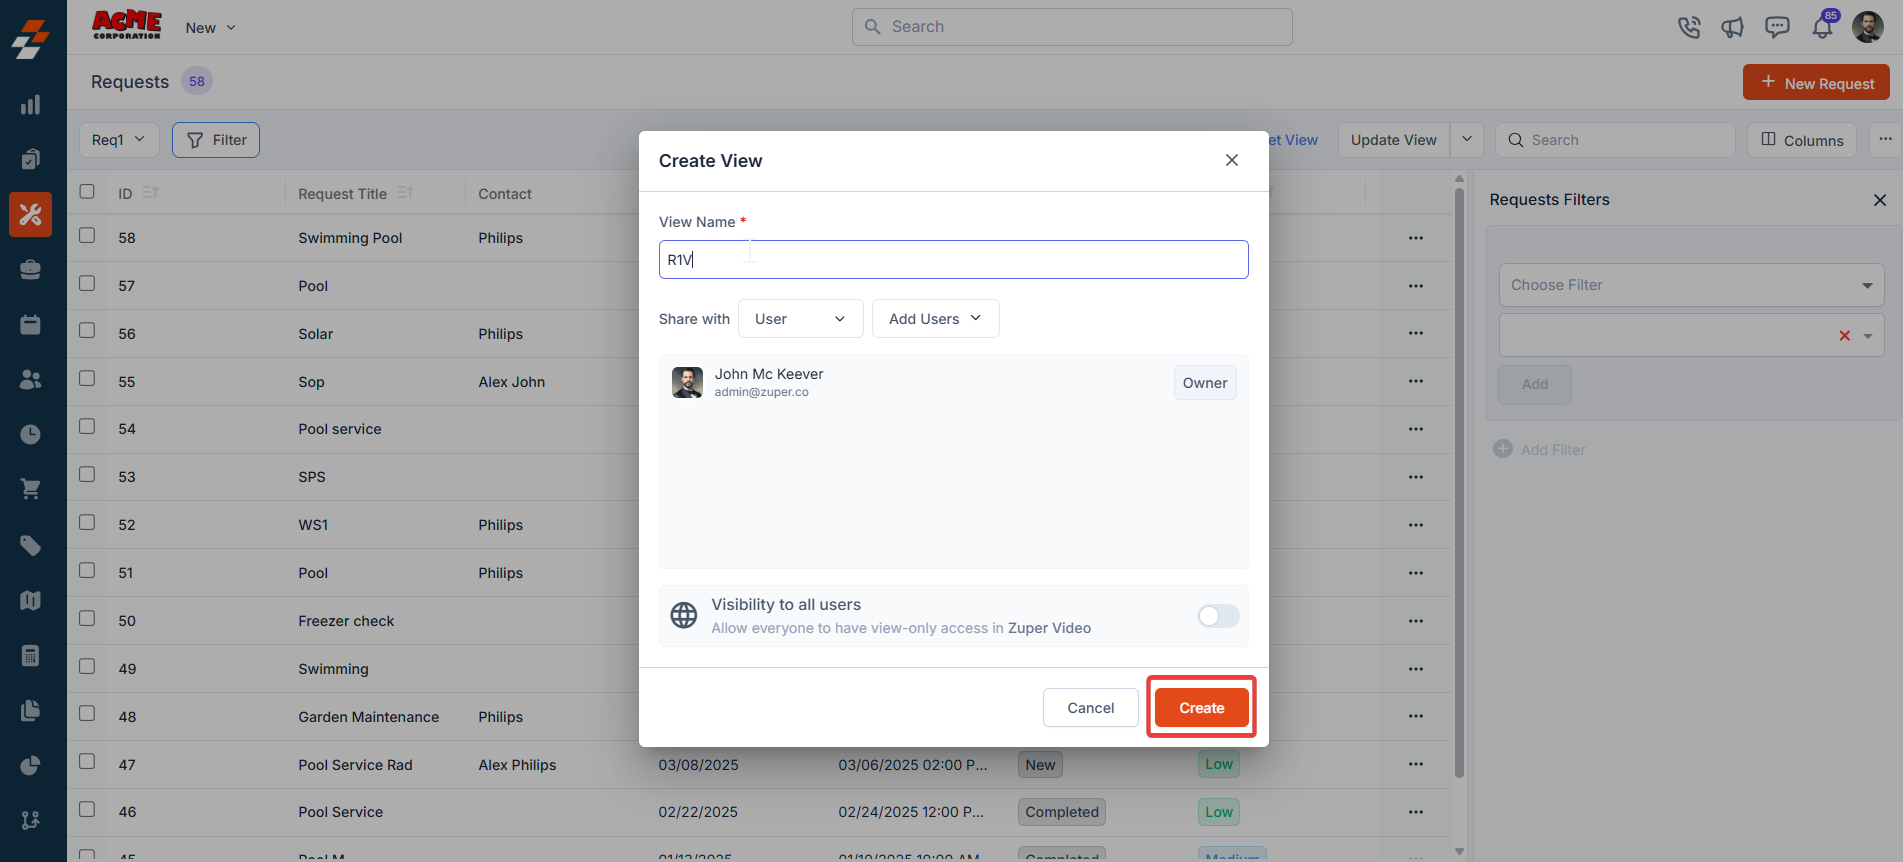
- A “Create View” dialog box appears.
- View Name (Mandatory) – Enter the view name.
- Share with - Select any one of the options (User, Team), and you can add the relevant users.
- Visibility to all users – Toggle on to make this view visible.
- Click “Reset View” to reset the current view.

- The view saved sucessfully.
Setting Permissions for Views
Edit Permissions
Users with edit permissions can modify the layout:- They can add/remove columns, reorder them, and adjust views as described above.
- If permission is given, changes can be saved as a new view or overwritten as an existing one.
View Permissions
Users with view-only permissions can see the layout but cannot make changes:- They can view the customized columns and filters but cannot edit them. To ensure consistency for viewers, they can save them as a new “View.”
Make changes to the view
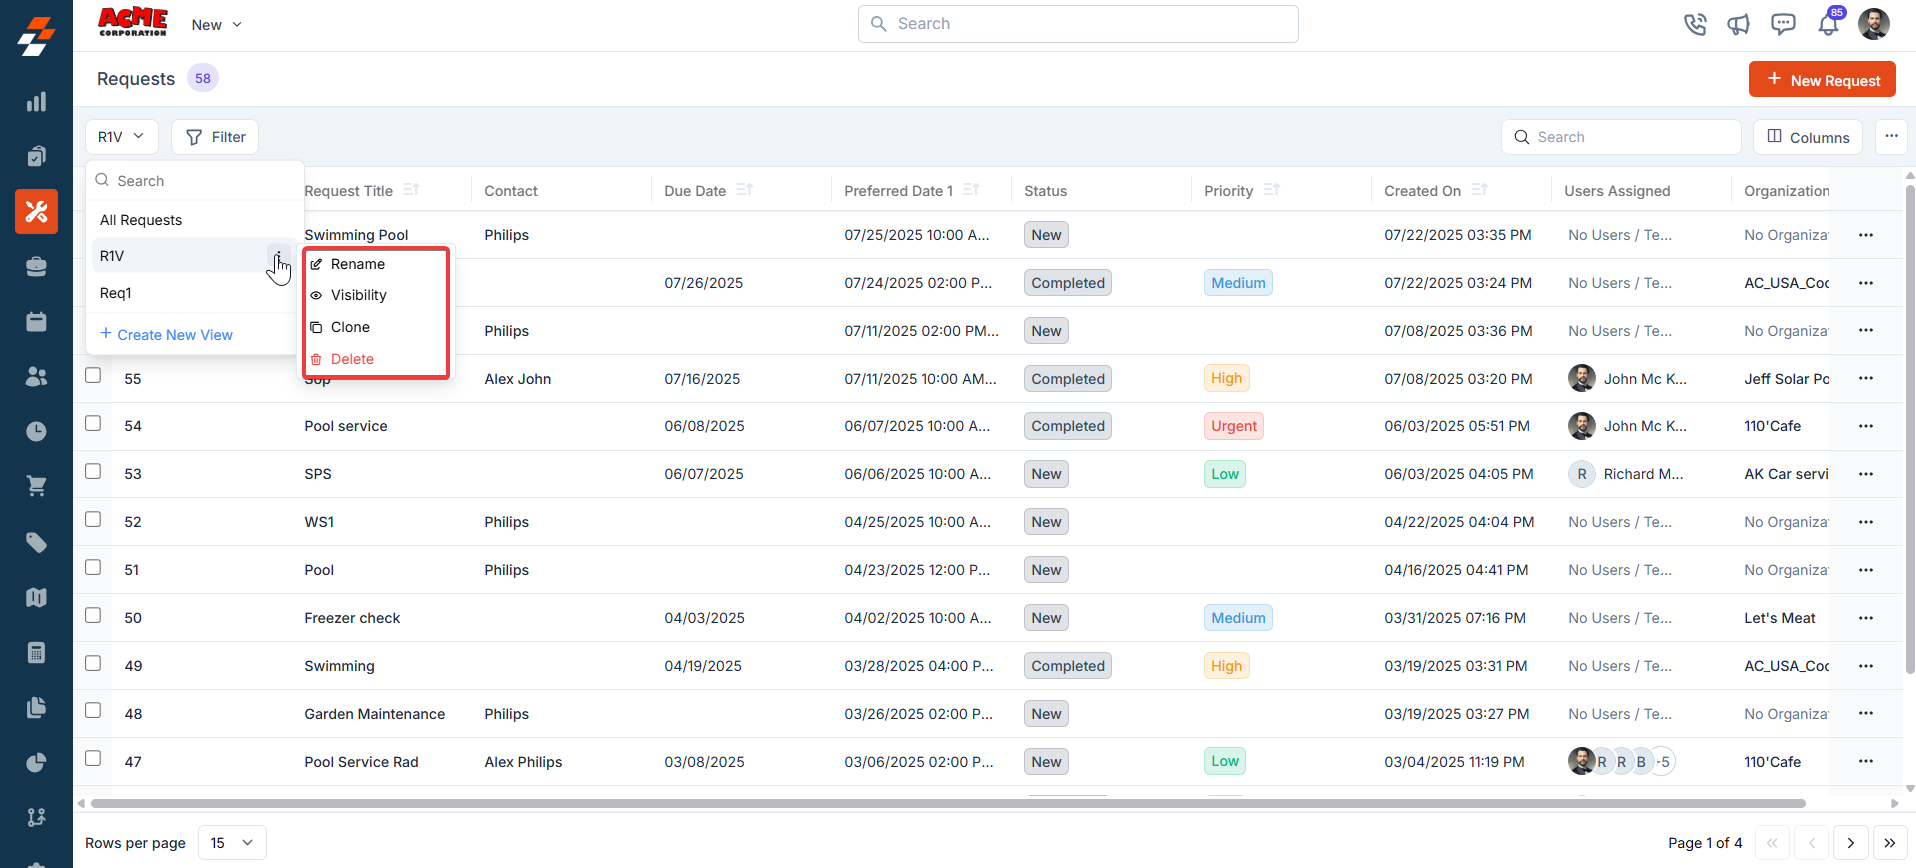
- Rename: This option allows you to change the view’s name (e.g., from “R1V” to something else).
- Visibility: This lets you adjust who can see the view. Options include sharing with a user or team or keeping it private (“Only Me”), as well as toggling visibility for all users in Zuper (as shown in the “Create a View” dialog in prior images).
- Duplicate: This function creates a copy of the “R1V” view, allowing you to modify the duplicate without affecting the original.
- Delete: Removes the view entirely. Since this is a custom view, deleting it would revert the listing to the default view or another saved view. Only the created user can delete the view.
Pinned filters
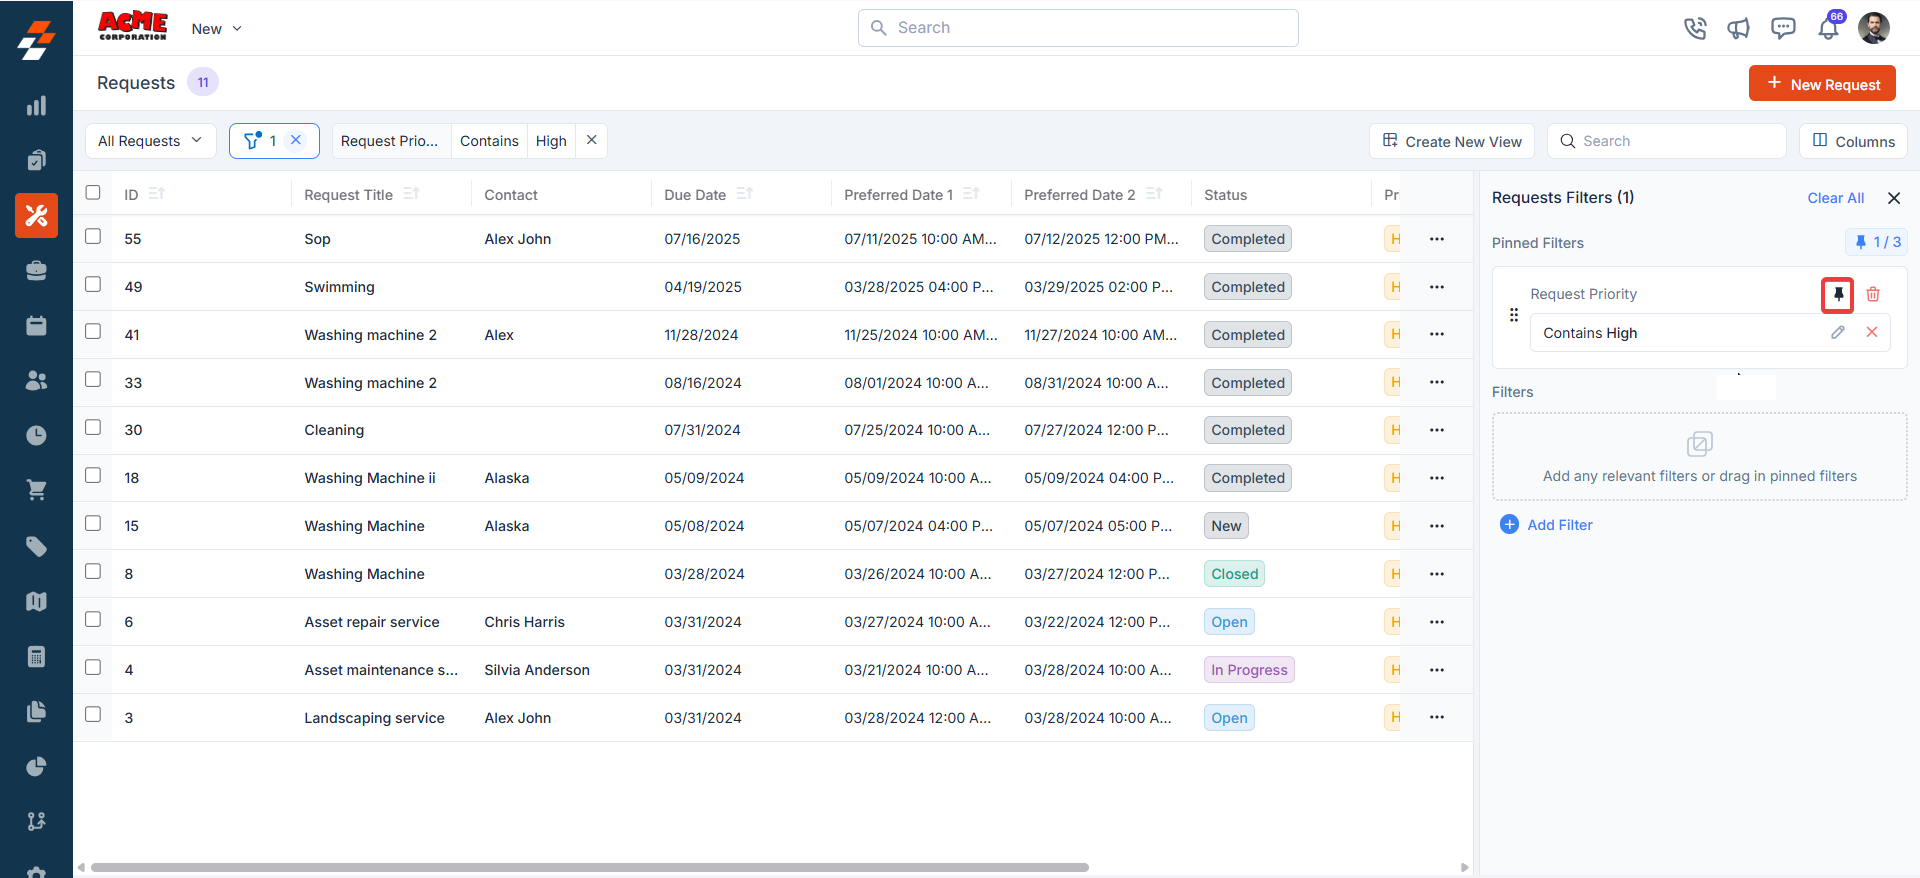
Zuper’s Requests module lets you use pinned filters to streamline your filter experience. Pinned filters keep your most-used criteria readily accessible for quick application. Pin up to 3 filters in any module.Navigation: Requests -> Filters -> Pinned Filter
- Select the “Request” module from the left navigation menu.

- Pin Filters for Quick Access
- Once your filters are set, click the Pin Filters button in the dialog box to save them as pinned.
- Pinned filters appear in the dialog box’s “Pinned Filters” section, allowing you to apply them with one click in future sessions.

- To Unpin the filter:
- To unpin, select a pinned filter and click Remove.
- To apply pinned or default filters, open the dialog box and select them.
- Use Clear All to remove active filters.
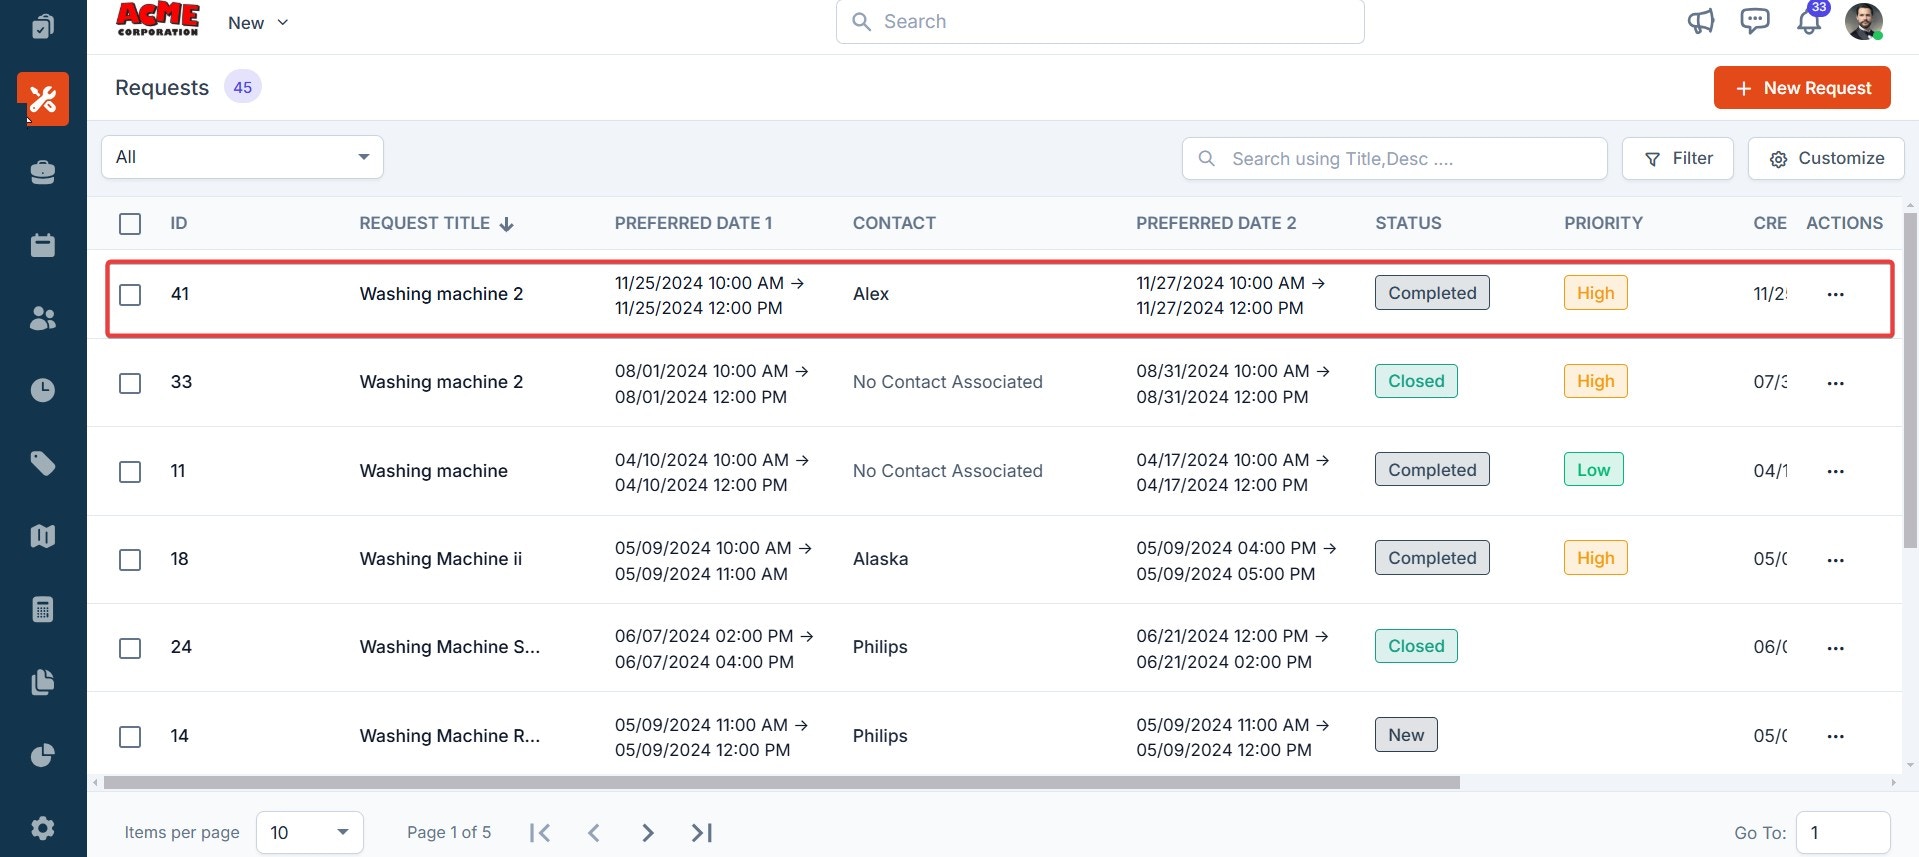
Request details page
Navigation: Request -> Request Listing page -> Click any one of the Requests -> Details page
- Select any of the “Request Title” or “Request ID” from the request listing page. The specific request details page appears.
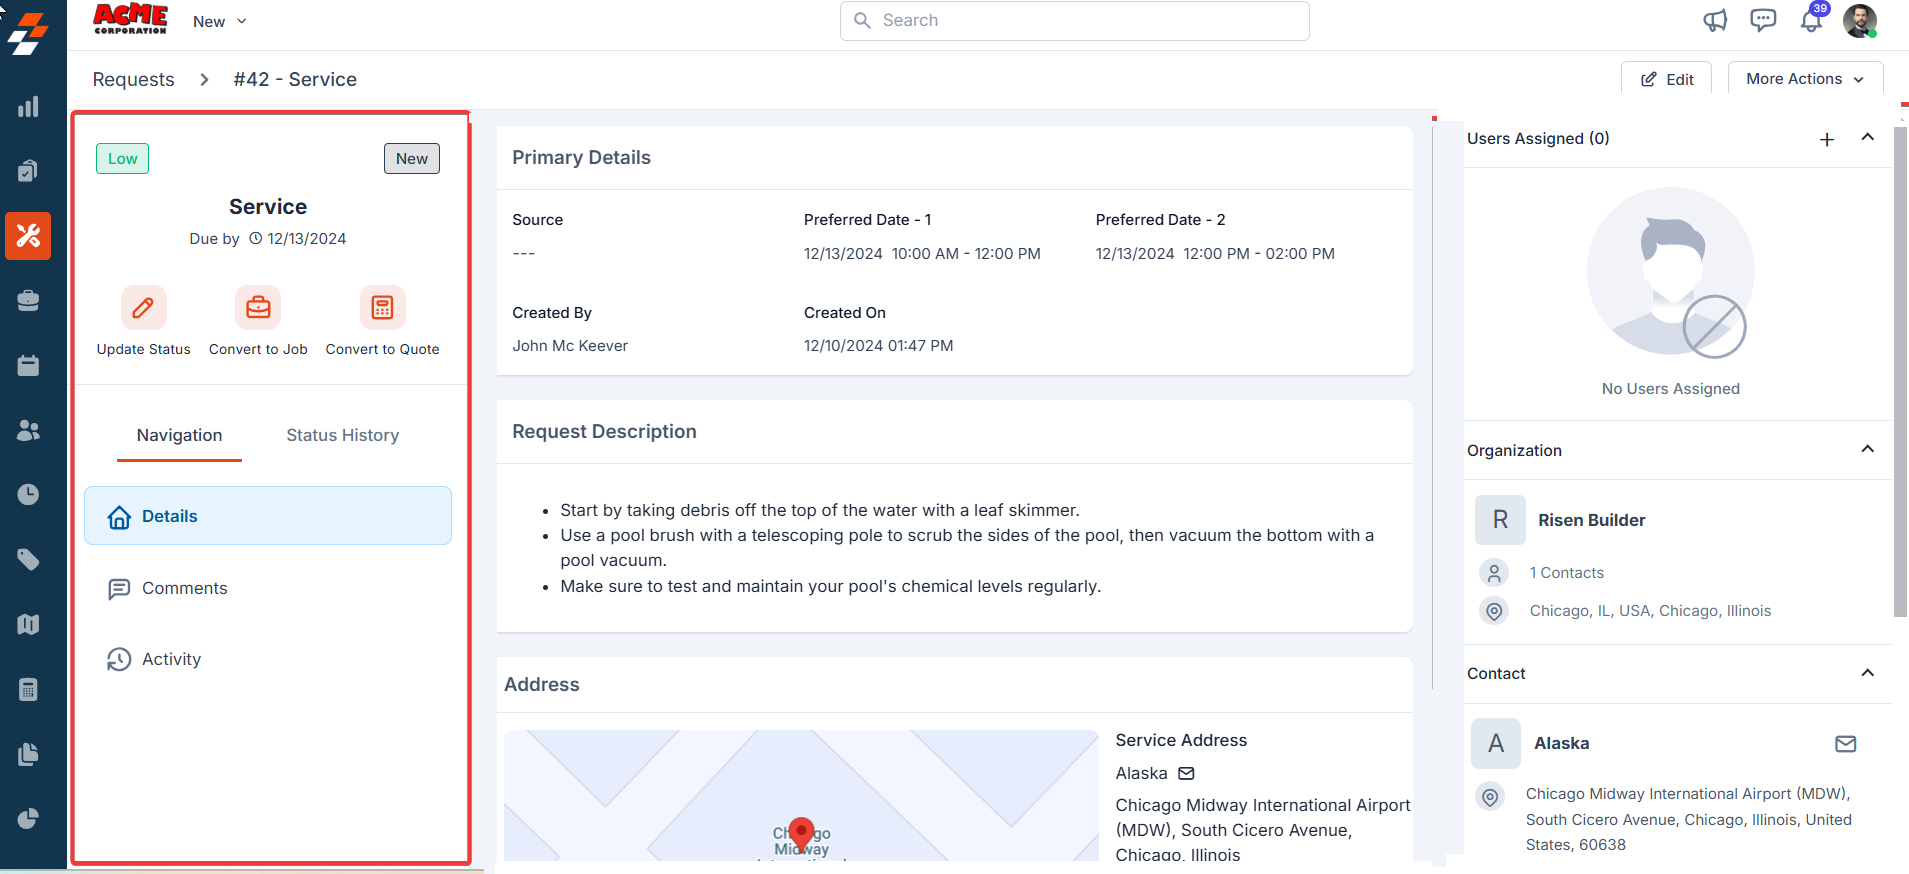
- The request details page has a three-column layout with information and actions available in each pane for quick access.
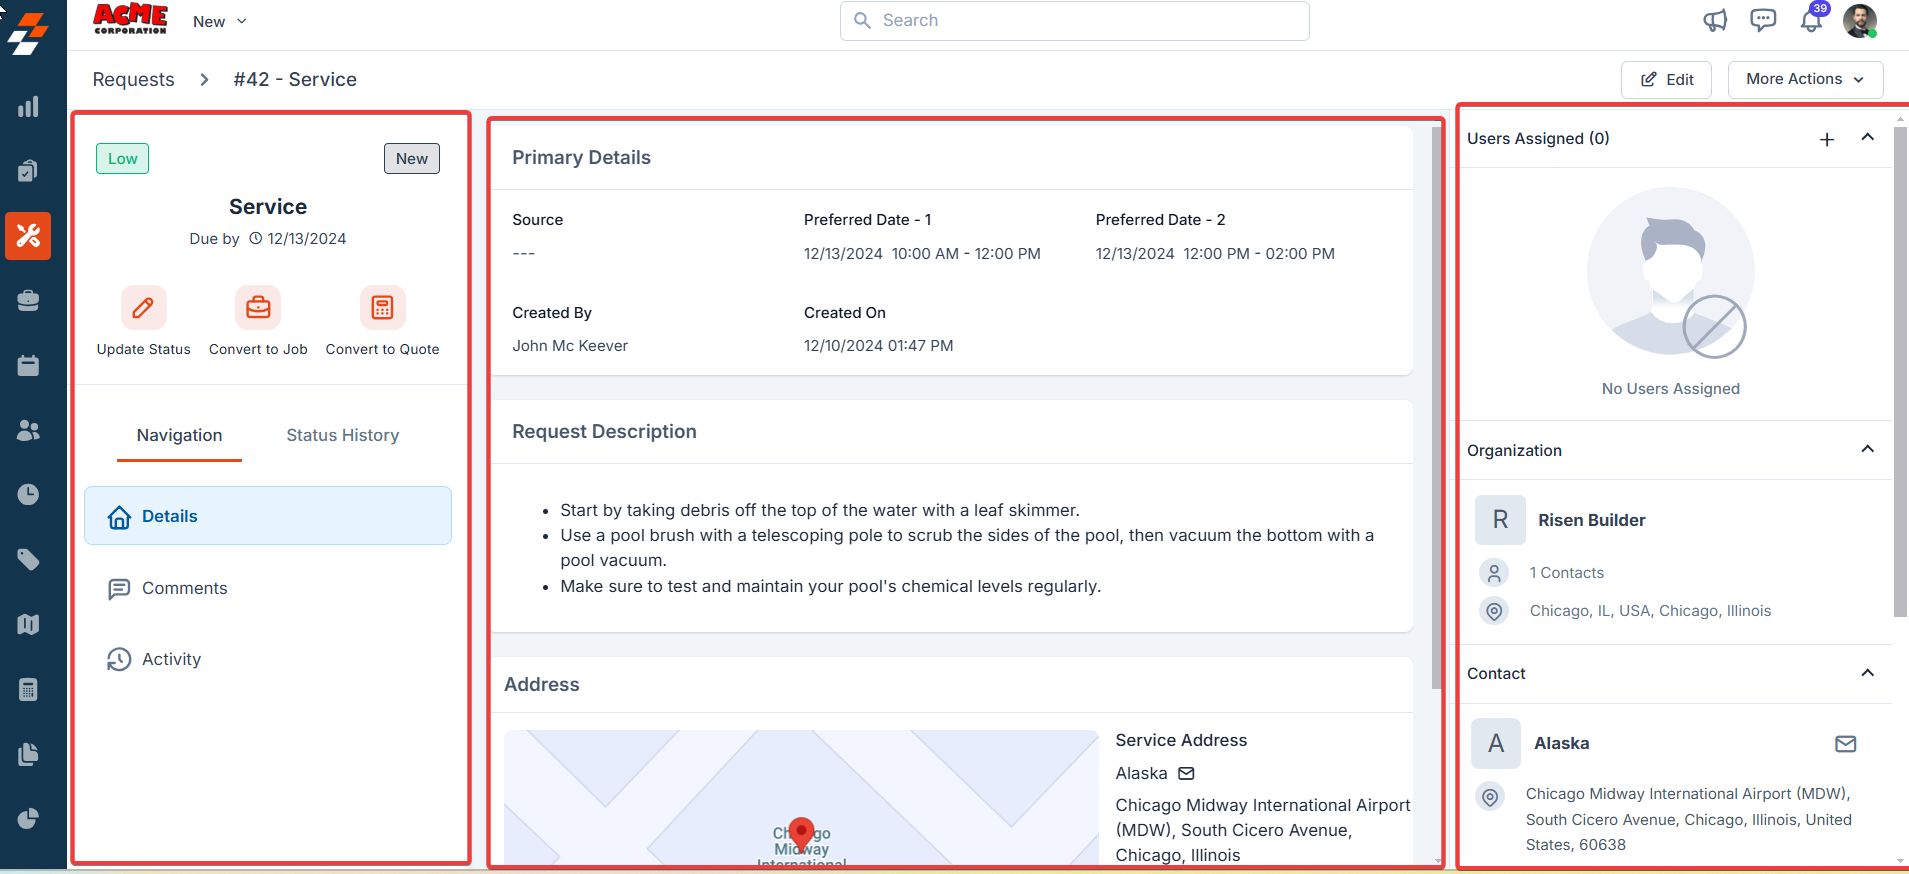
Left panel
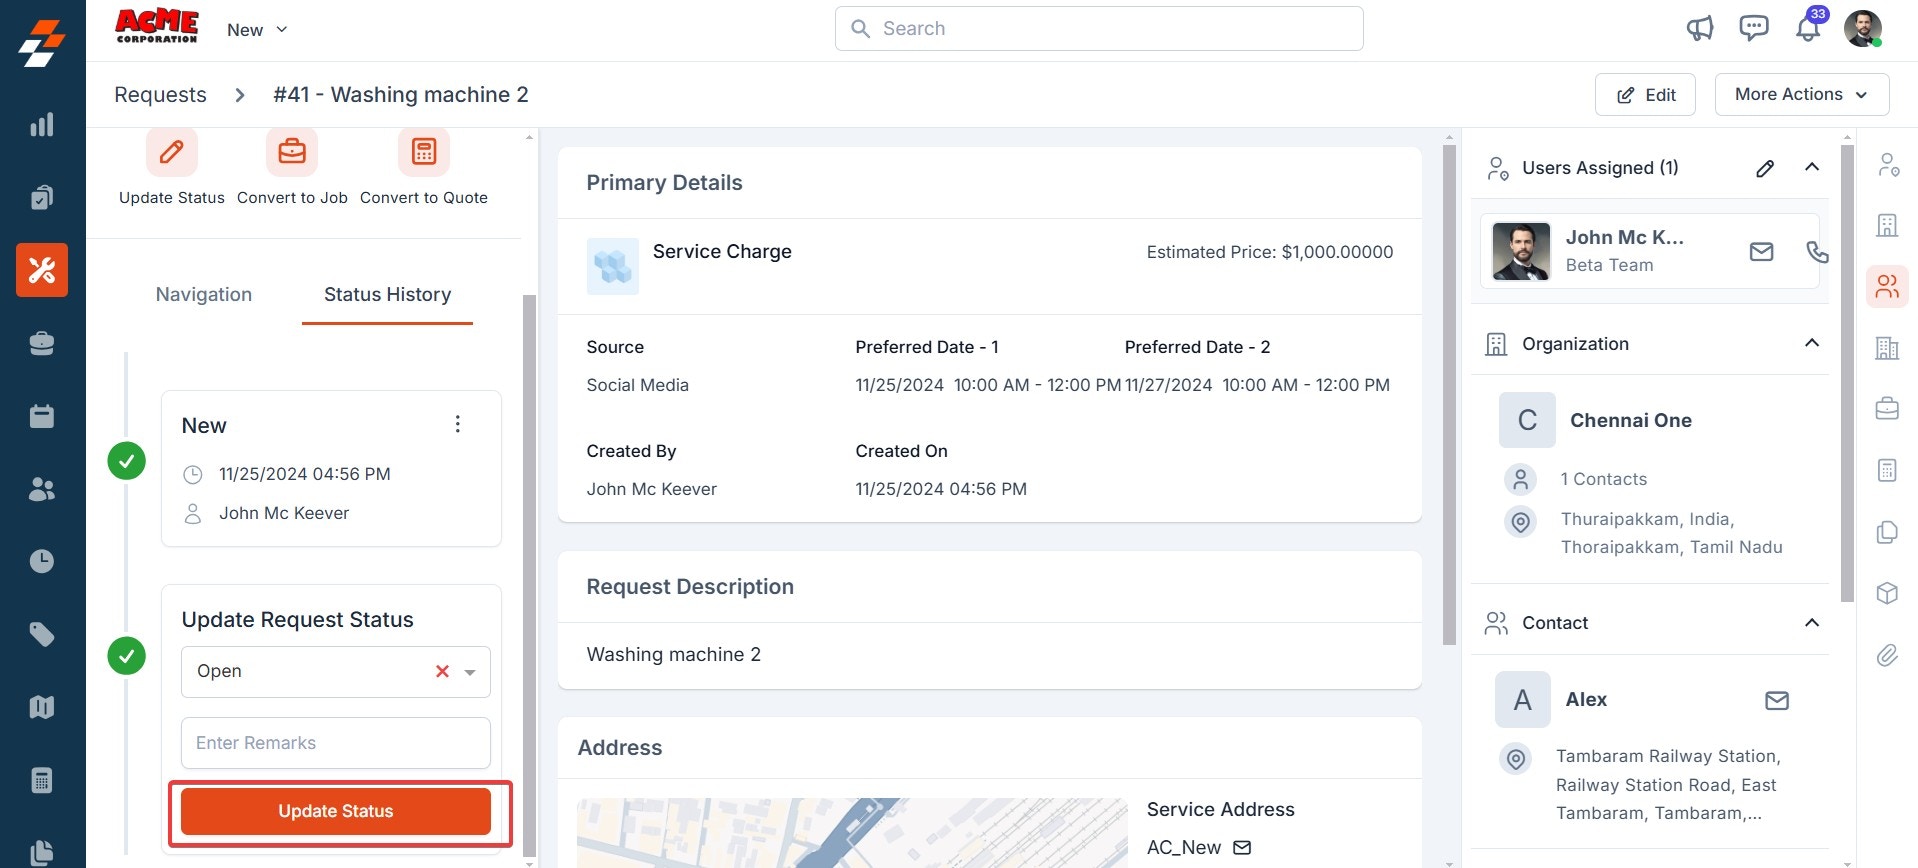
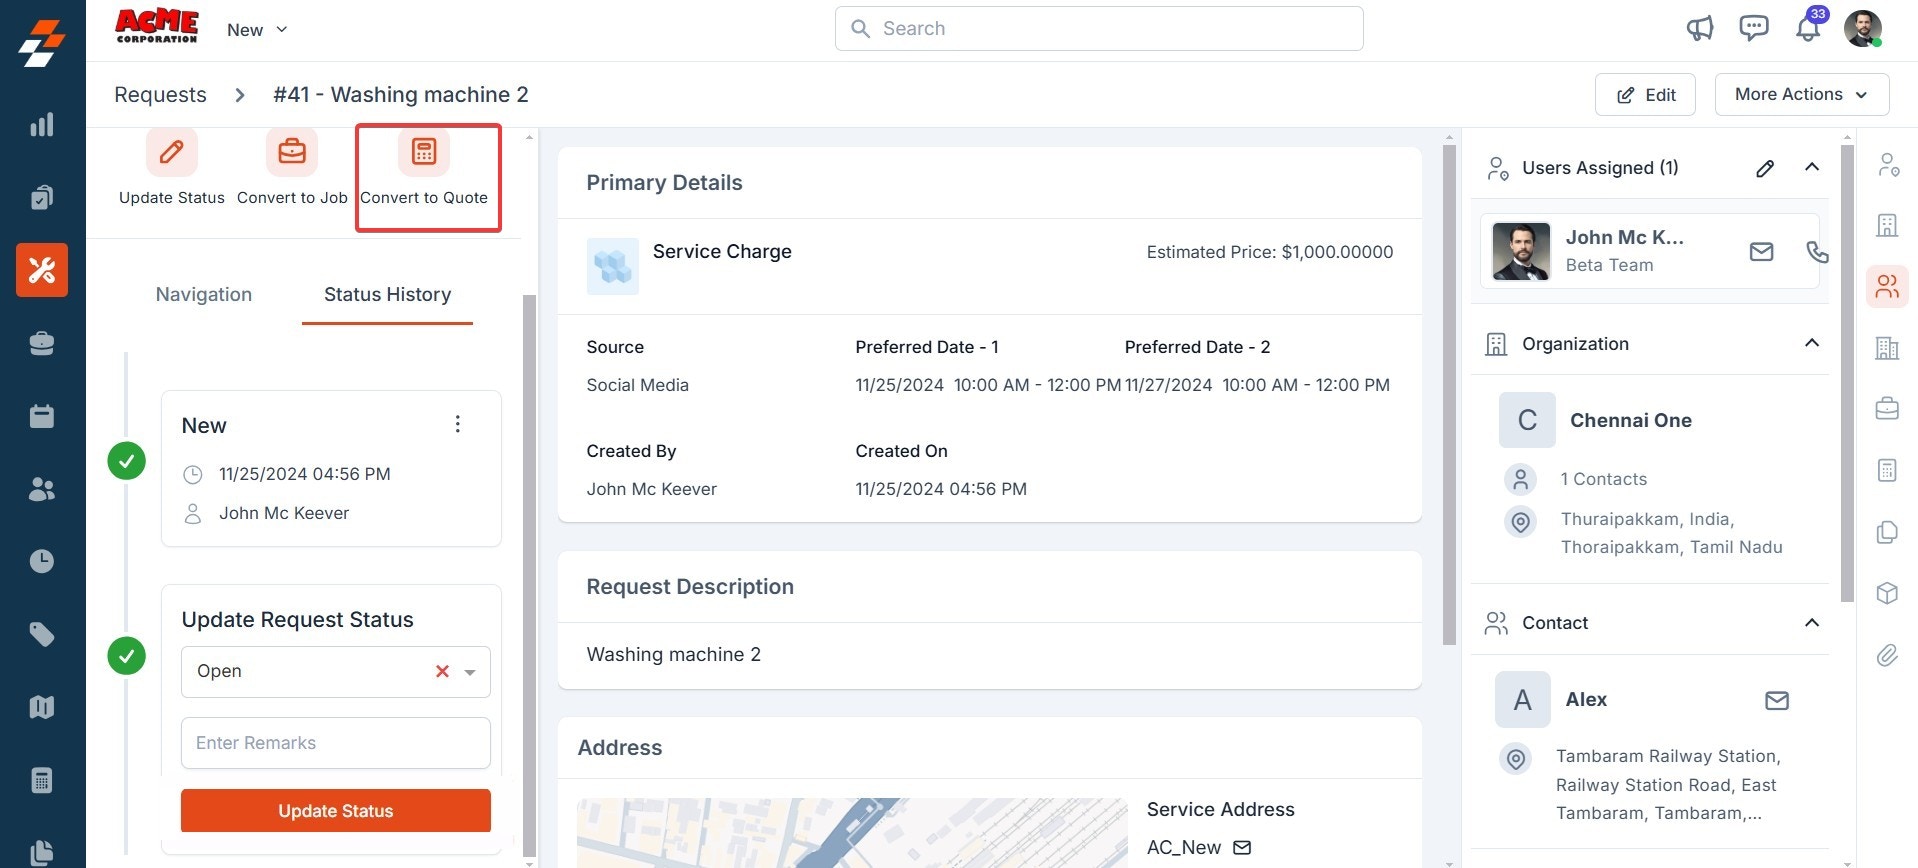
The left panel contains the service name, the due date to complete the service, priority, and its status. Following this information, you can notice the quick actions bar, which offers contextual action buttons such as Update Status, Convert to Job and Convert to Quote. Below the quick actions bar, you can find the navigation menu and the status history.Update Status
Request statuses are stages/checkpoints that field technicians and other back-office users, such as dispatchers and supervisors, can use to update the request’s progress.- Click the “Update Status” button on the quick action bar.

- Choose the current request status and click the “Update” button. The status is updated successfully.
Note: The status you configured in the request status settings will appear here.
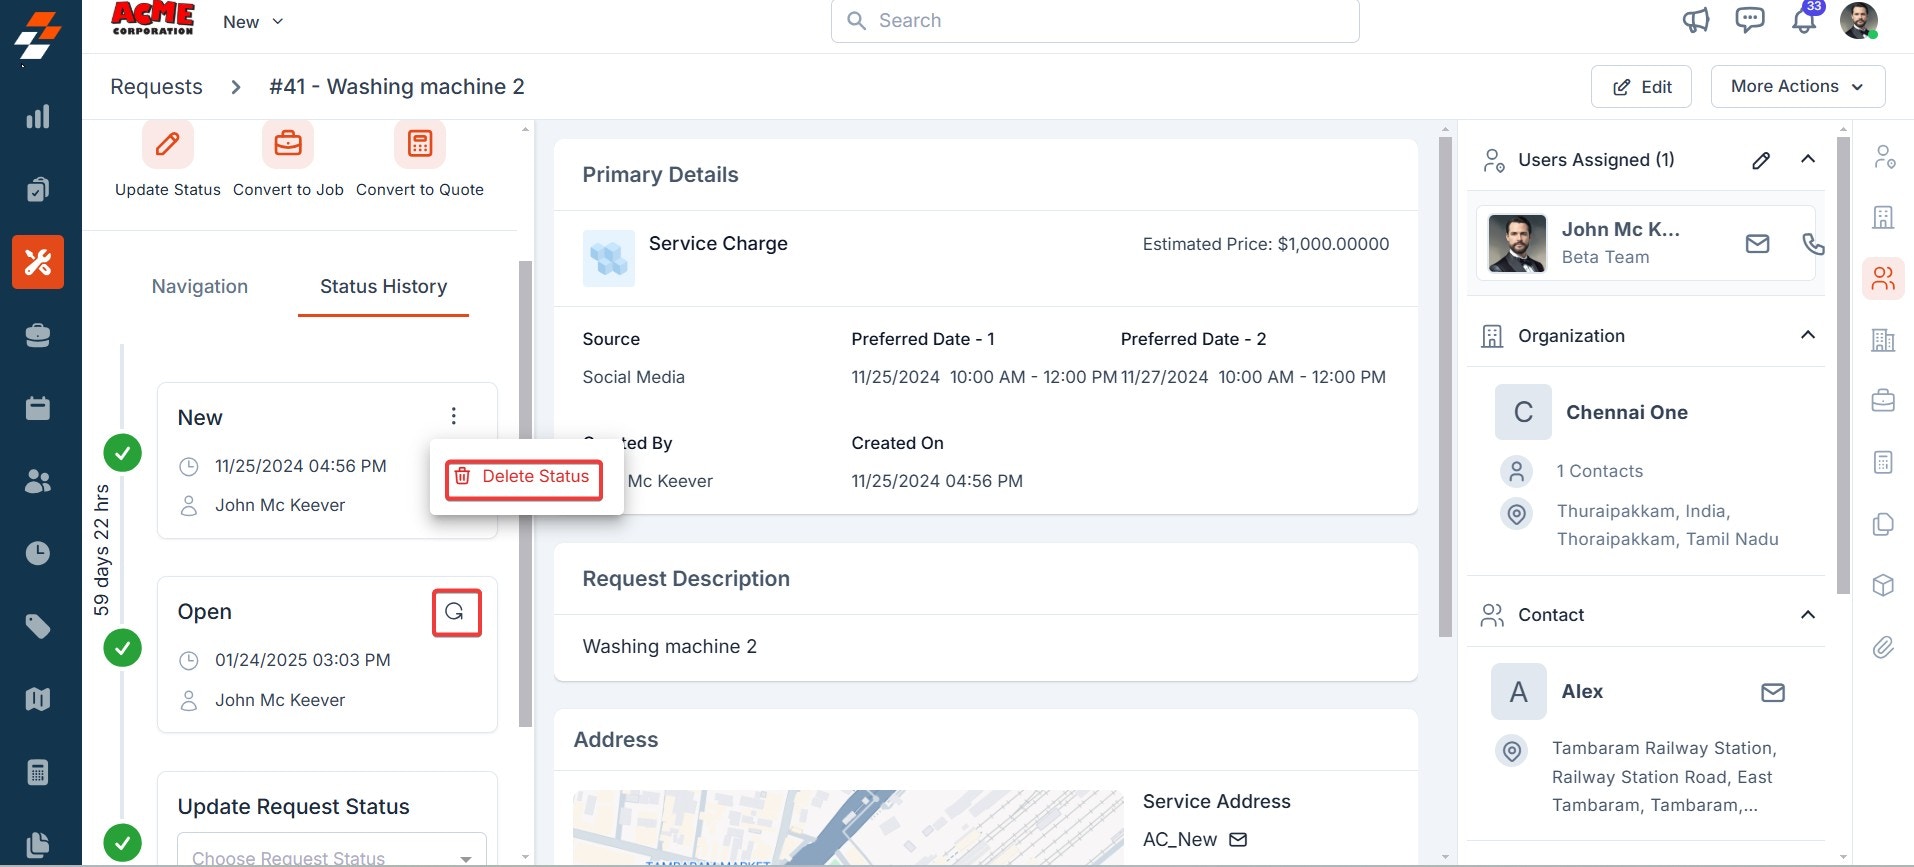
- You can then view the history of the request status from the “Status History” tab. From here, you can delete a status by clicking the kebab icon (three-dot icon) or roll back the most recent status update using the Rollback icon next to the status name.
- Click “Convert to Job” on the quick action bar at the left. To create a new job, a sidebar appears with prefilled details such as job title, job category, organization/contact name, due date, priority, and service address.

Note: Click “Create Detailed Job” at the top right corner to add more details. This will redirect you to a new page.
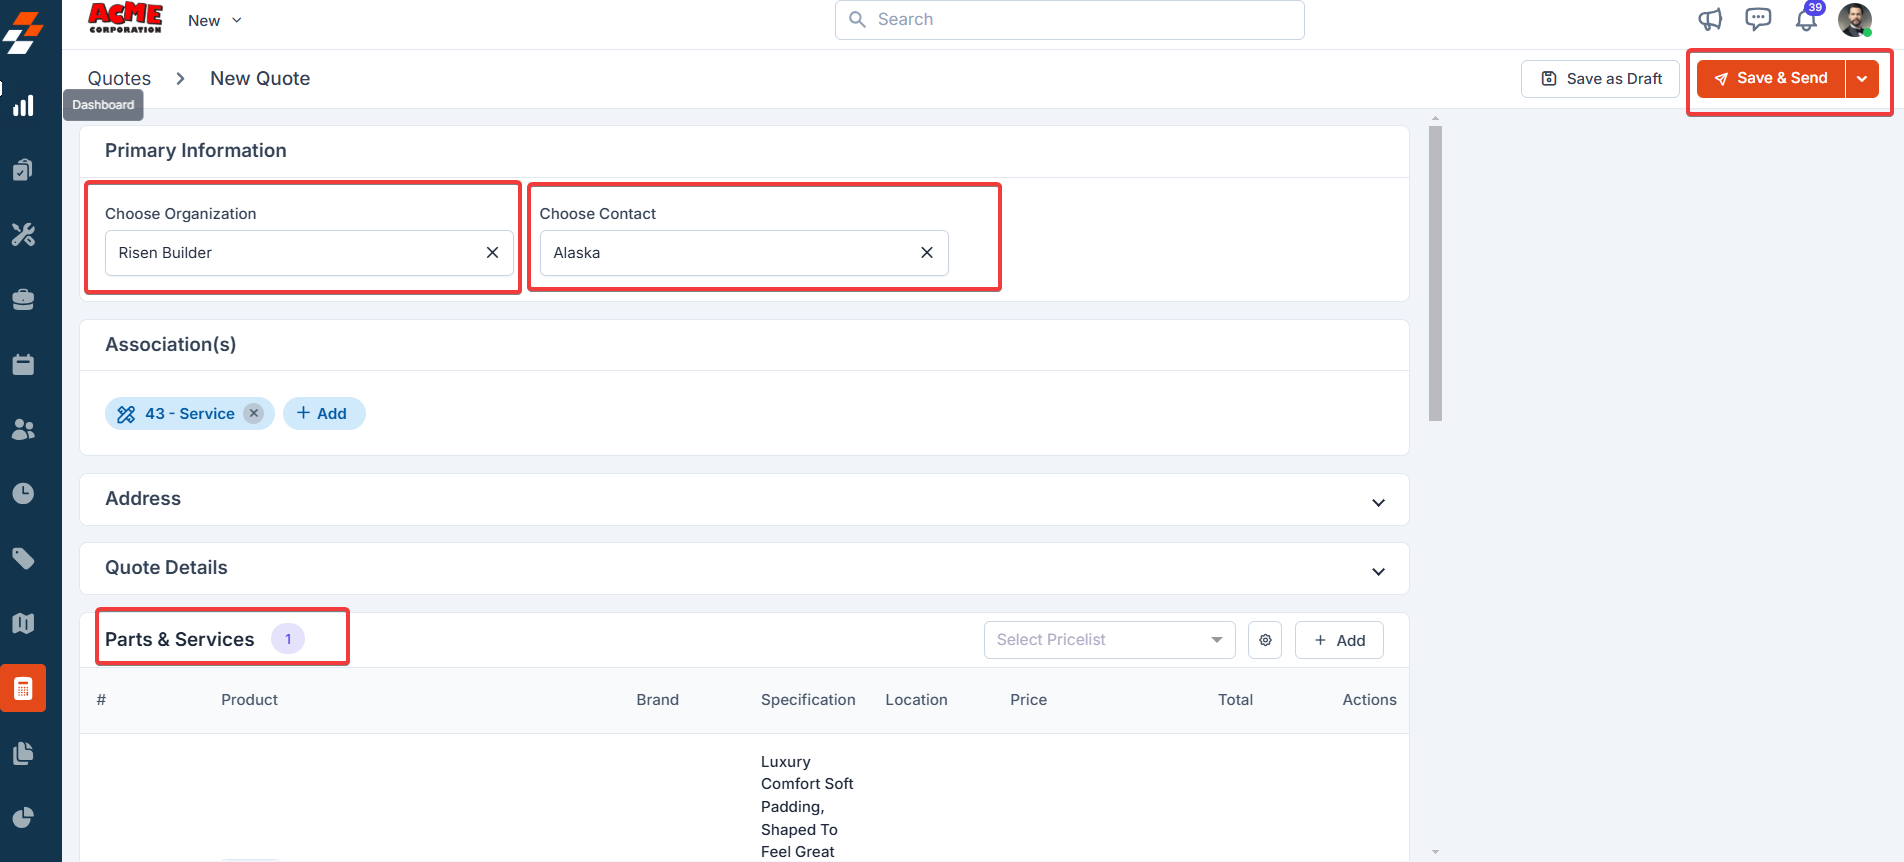
- Click “Convert to Quote” on the quick action bar at the left.
Comments
Comments can be added by both contacts and admins to a request over its course, providing additional context. The comment can be anything from a simple text reminder to an image/video or document. All comments added to a request can be viewed under the comments section in the middle pane. To add a comment, follow these steps:- Click the “Comments” option in the left navigation menu and enter your comment. To mention or tag other users, use the ”@” symbol during commenting. This allows users to directly notify or address specific individuals within a comment. To attach multimedia files, use the attachment icon.
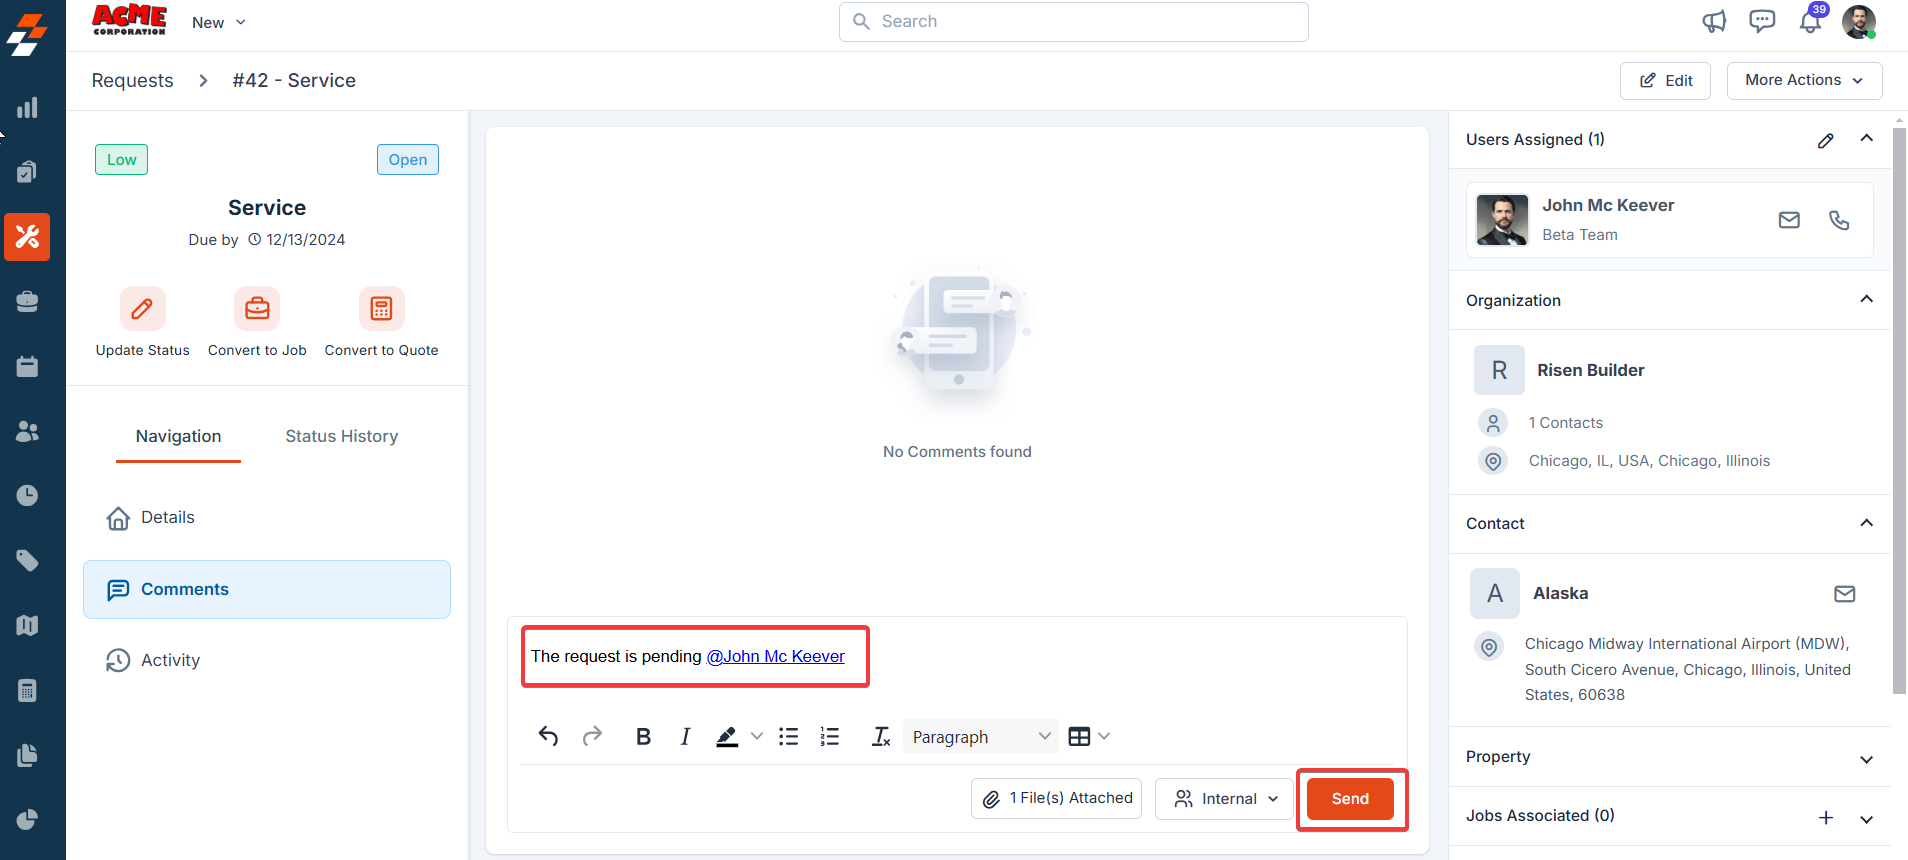
- Internal (Default): This privacy setting makes your comments visible to all the Zuper users in your account.
- Private: When you choose this, the comment will be visible only to the user who created the comment.
- Public: This will help you make the comment public to all, including the Contact.
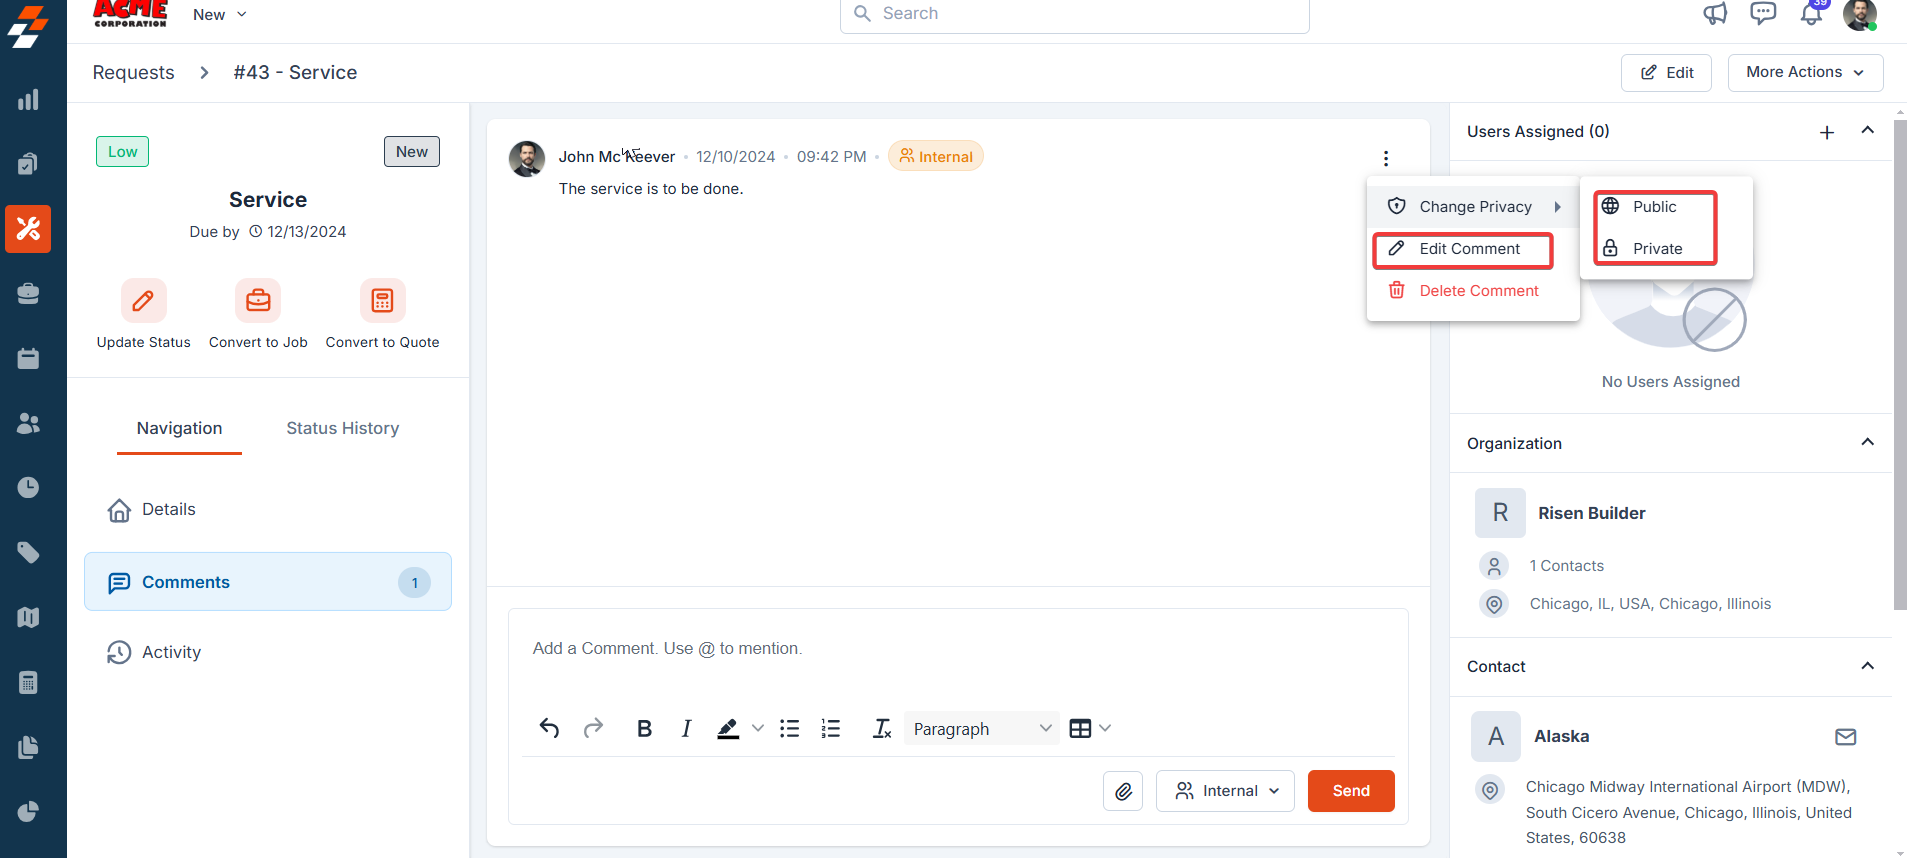
- After posting the comments, you can edit/delete them or change their privacy settings from internal to public or private by clicking the Kebab (three-dot) icon next to the comment.
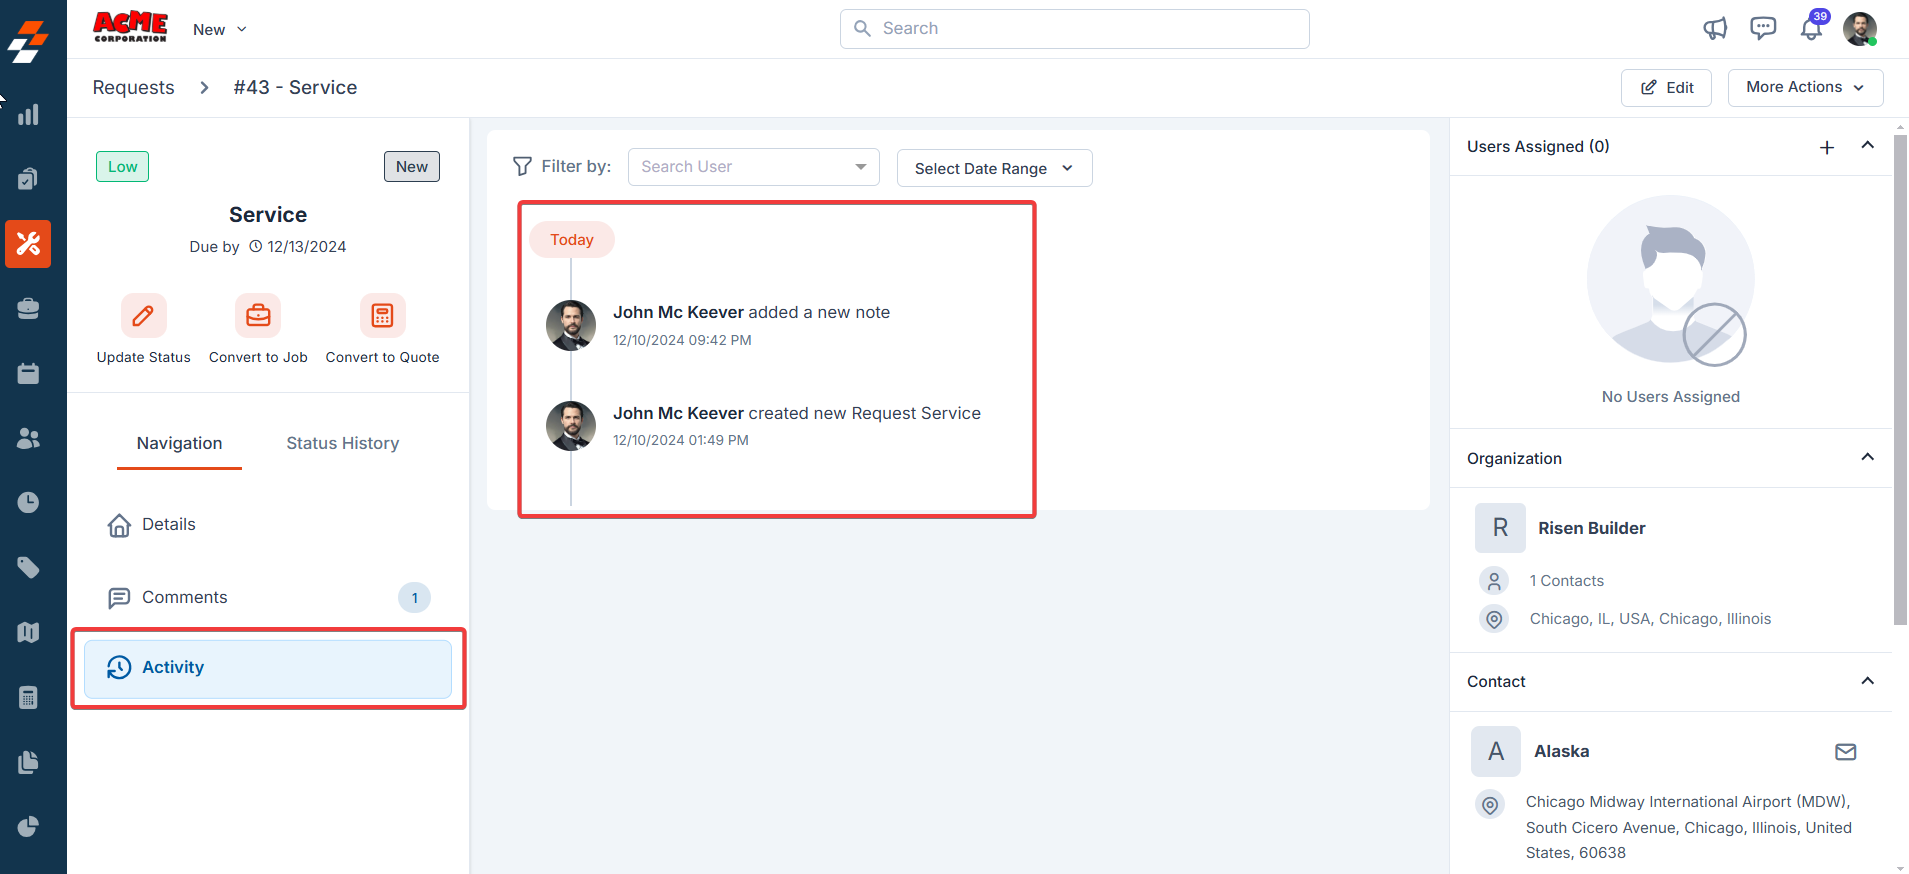
Middle panel
By default, the middle panel displays the primary details of the job. You can also view other information, such as comments and activities, when you choose them under the navigation menu. For instance, if you click “Details” in the left navigation menu, you can view the complete details of the request in the middle. The same applies to comments and activity as well.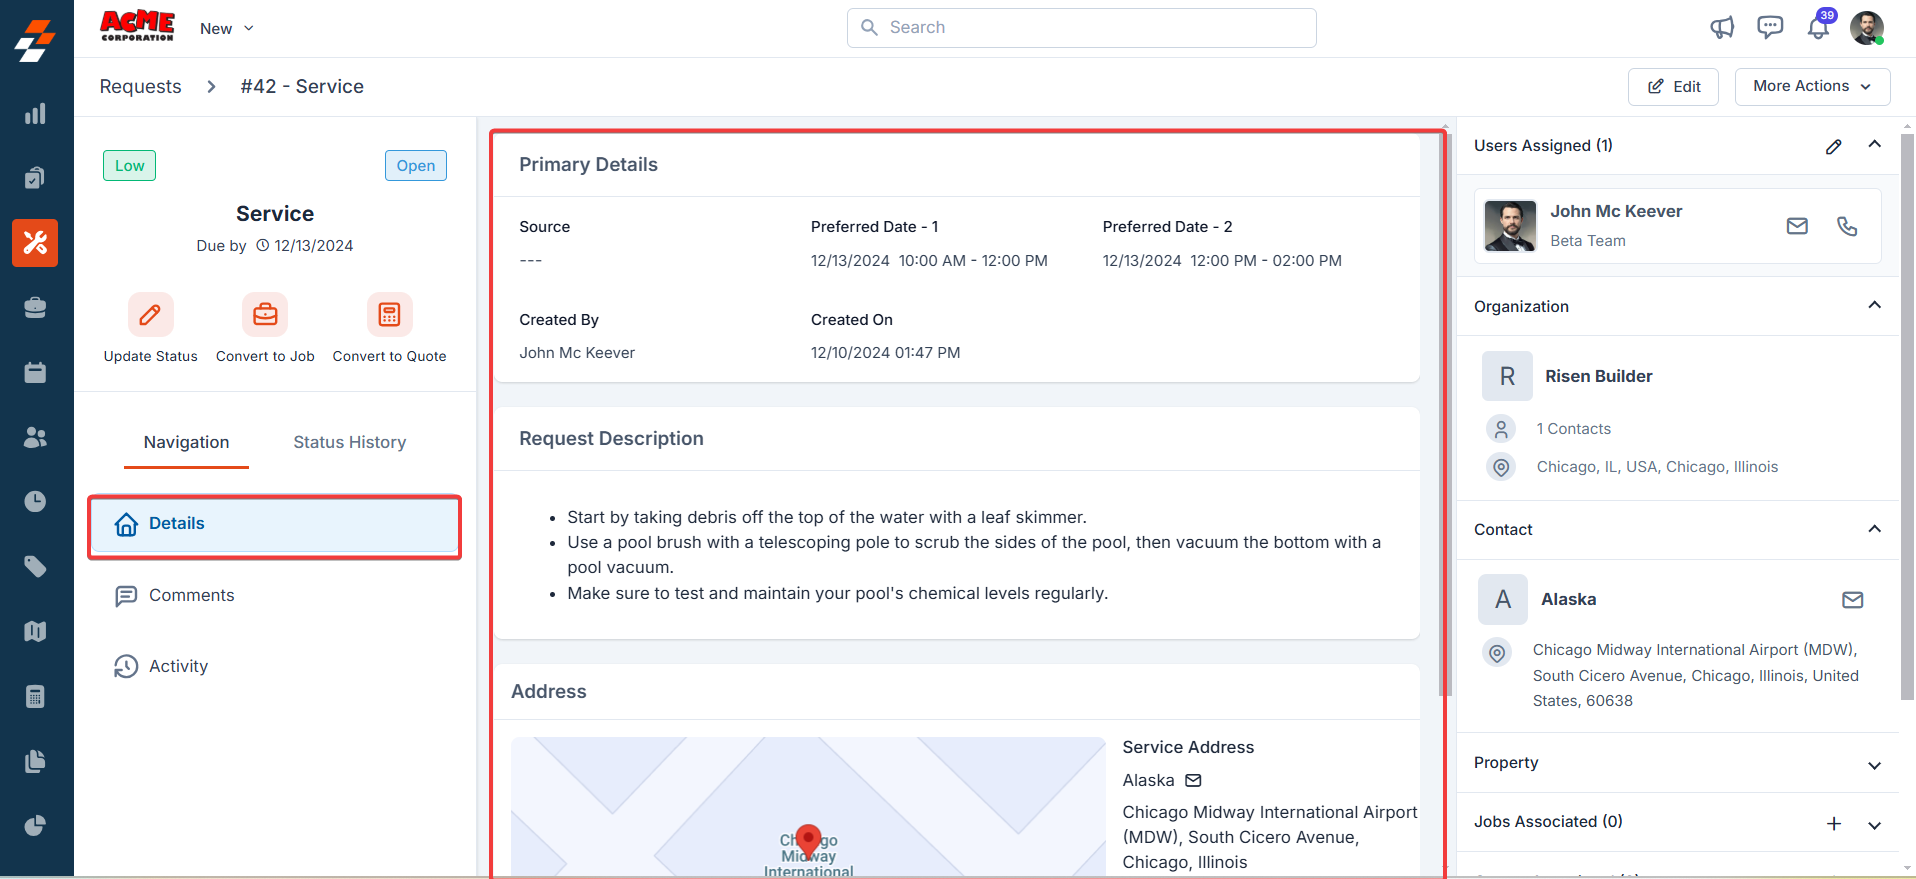
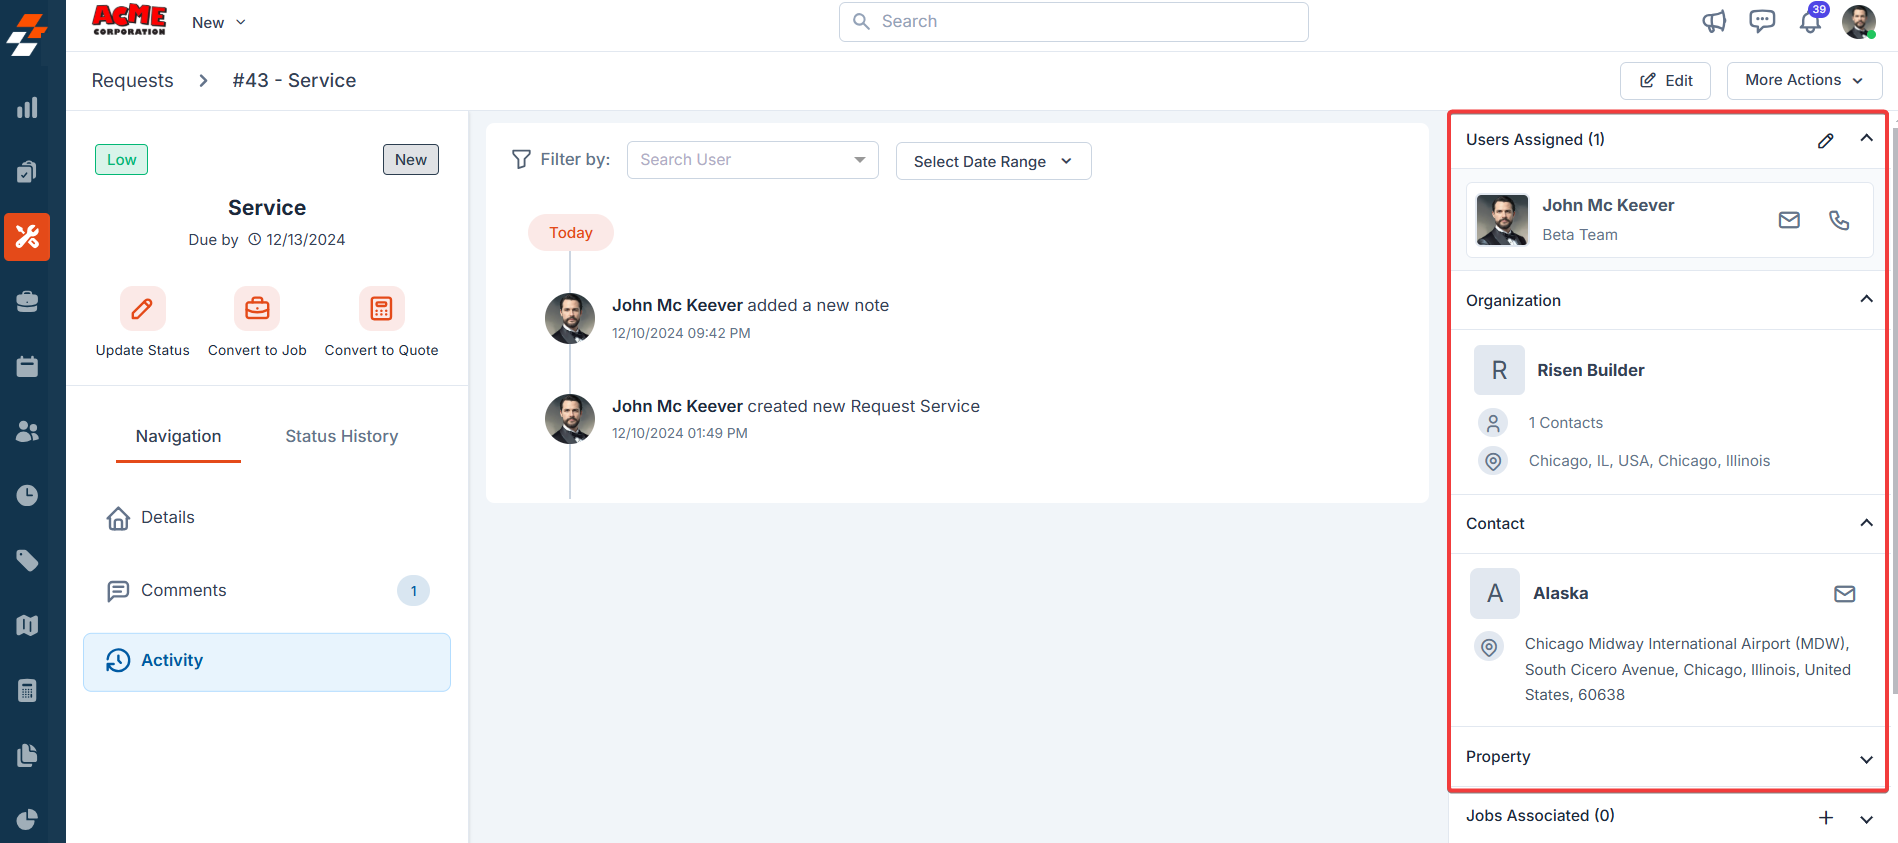
Right panel
Here, you can view the prefilled details based on the request. Additionally, you can assign users, associate contacts, property, and other records from here to quickly create a new job.Assign user
To assign a user to the job, follow these steps:- Click the “+” icon next to the “Users Assigned.”
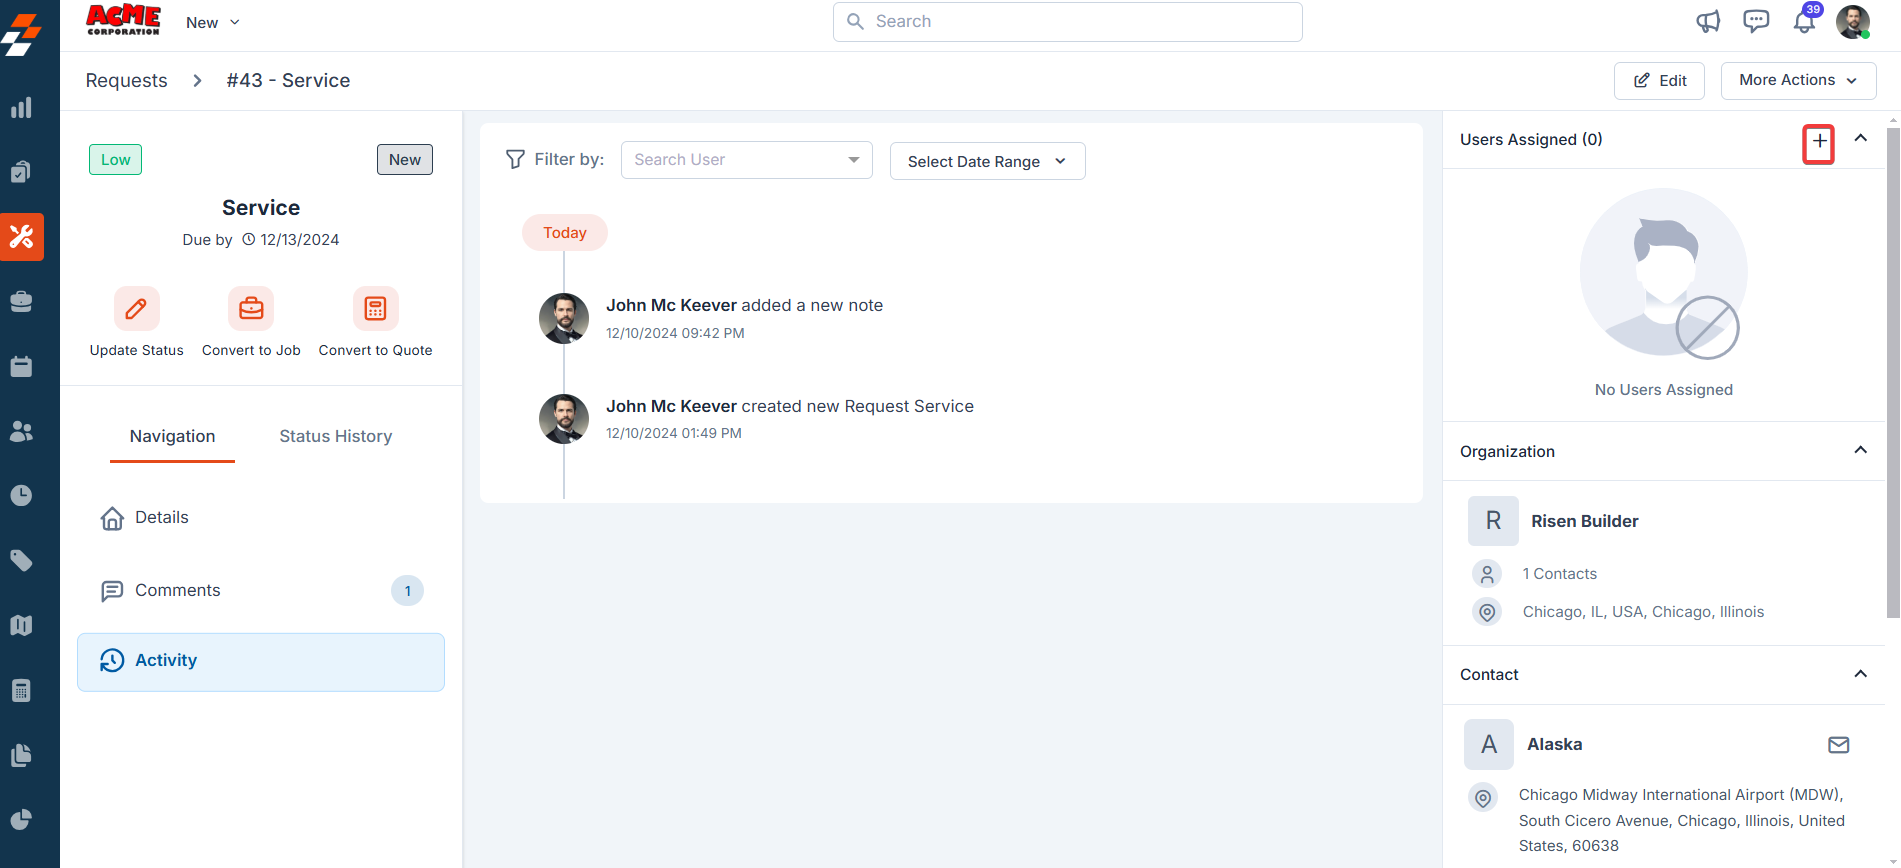
- Choose the user individually or from a team and click the assign button next to them. The user will be assigned to perform the job. You can also unassign and add new users by clicking the unassign icon. Once done, click “Update,” and the user will be assigned to complete the request successfully.
Associate job
Associate job
To associate a job, follow these steps:

- Click the “+” icon next to the “Jobs Associated.”
- Add the job details and click “Create.” To add more details to a job, click “Create Detailed Job” at the top right corner.
Associate quote
Associate quote
- Click the “+” icon next to “Quotes Associated.” A new quotation creation page will appear with prefilled details from the request.
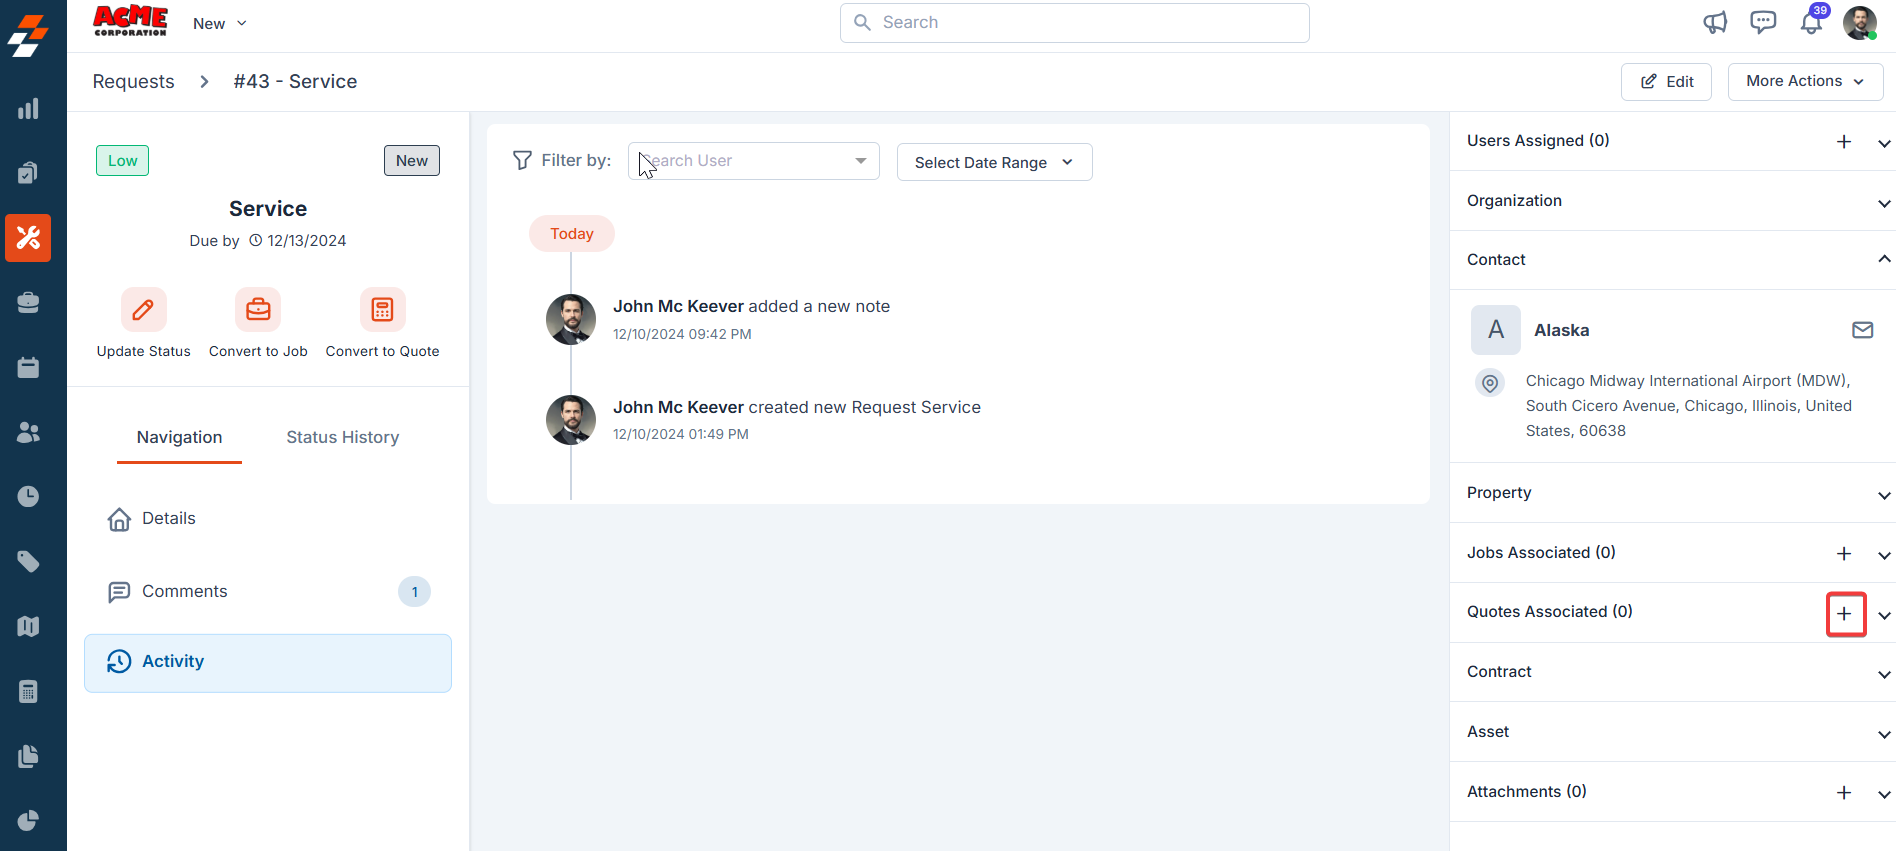
- Add other details like quote details, parts/services, and any attachments here if needed.
Attachments
You can attach an image, video, audio, PDF, DOC, XLS, or Zip file to the request for more clarity.- Click the “+” icon next to the “Attachments.”
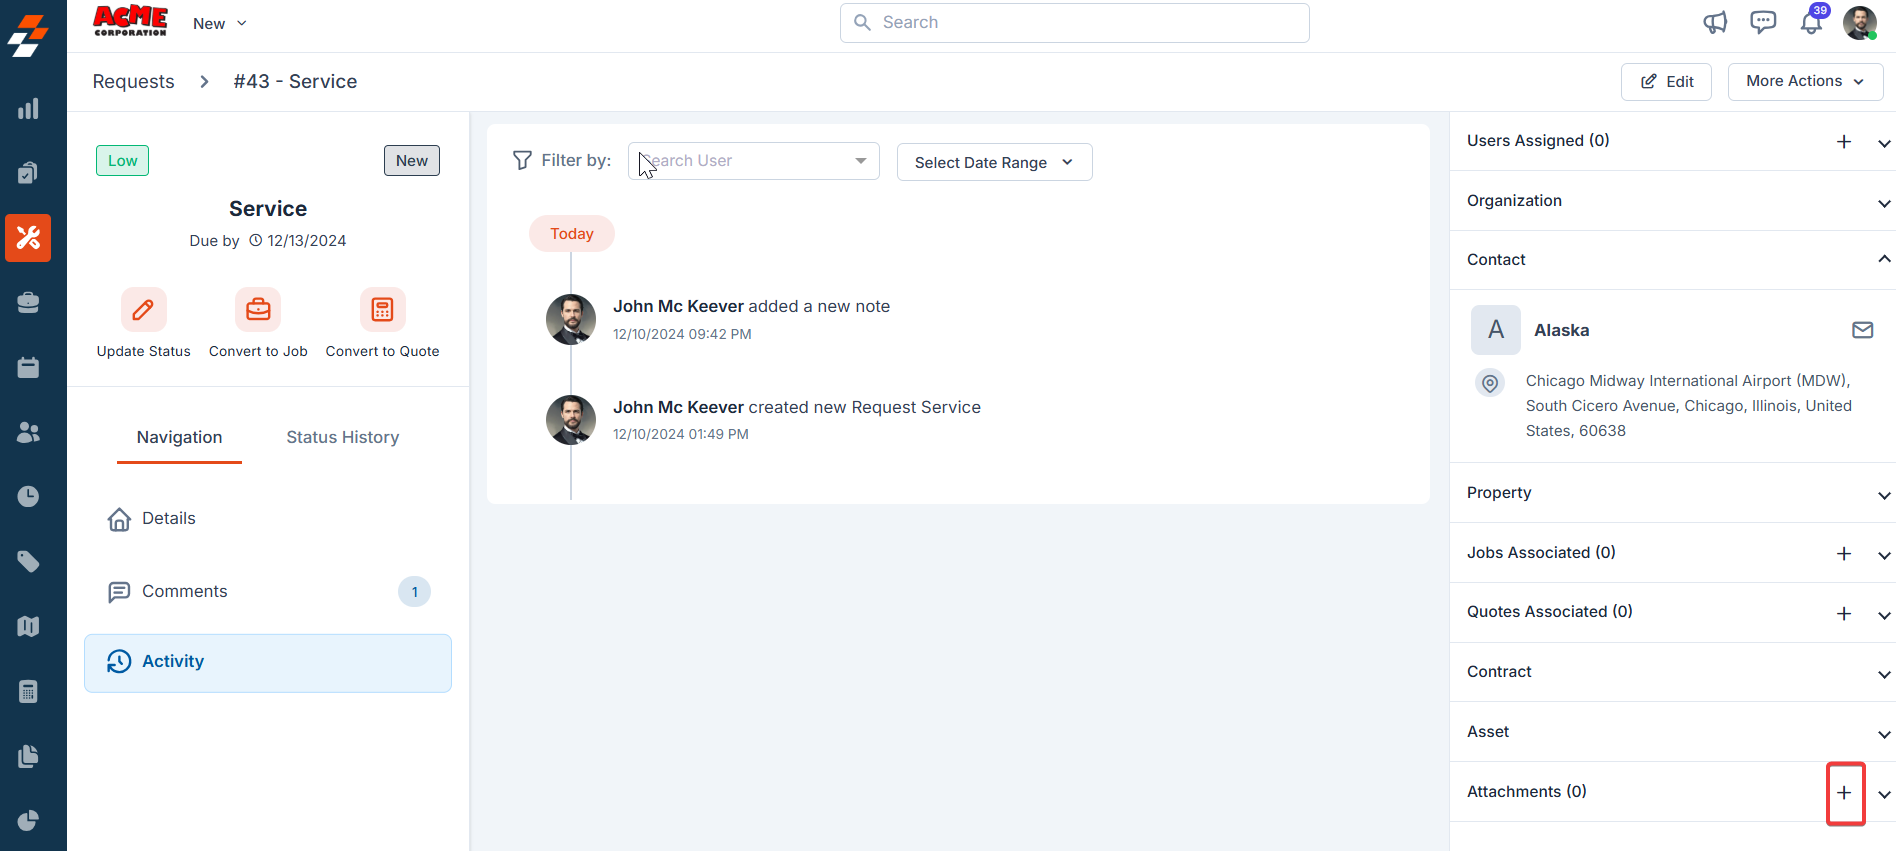
- Click or drag and drop the file from your computer. Once uploaded, click “Close”. You can also preview or remove attachments.
Note: The maximum file size should be 20 MB.
