How to connect your DEAR with Zuper?
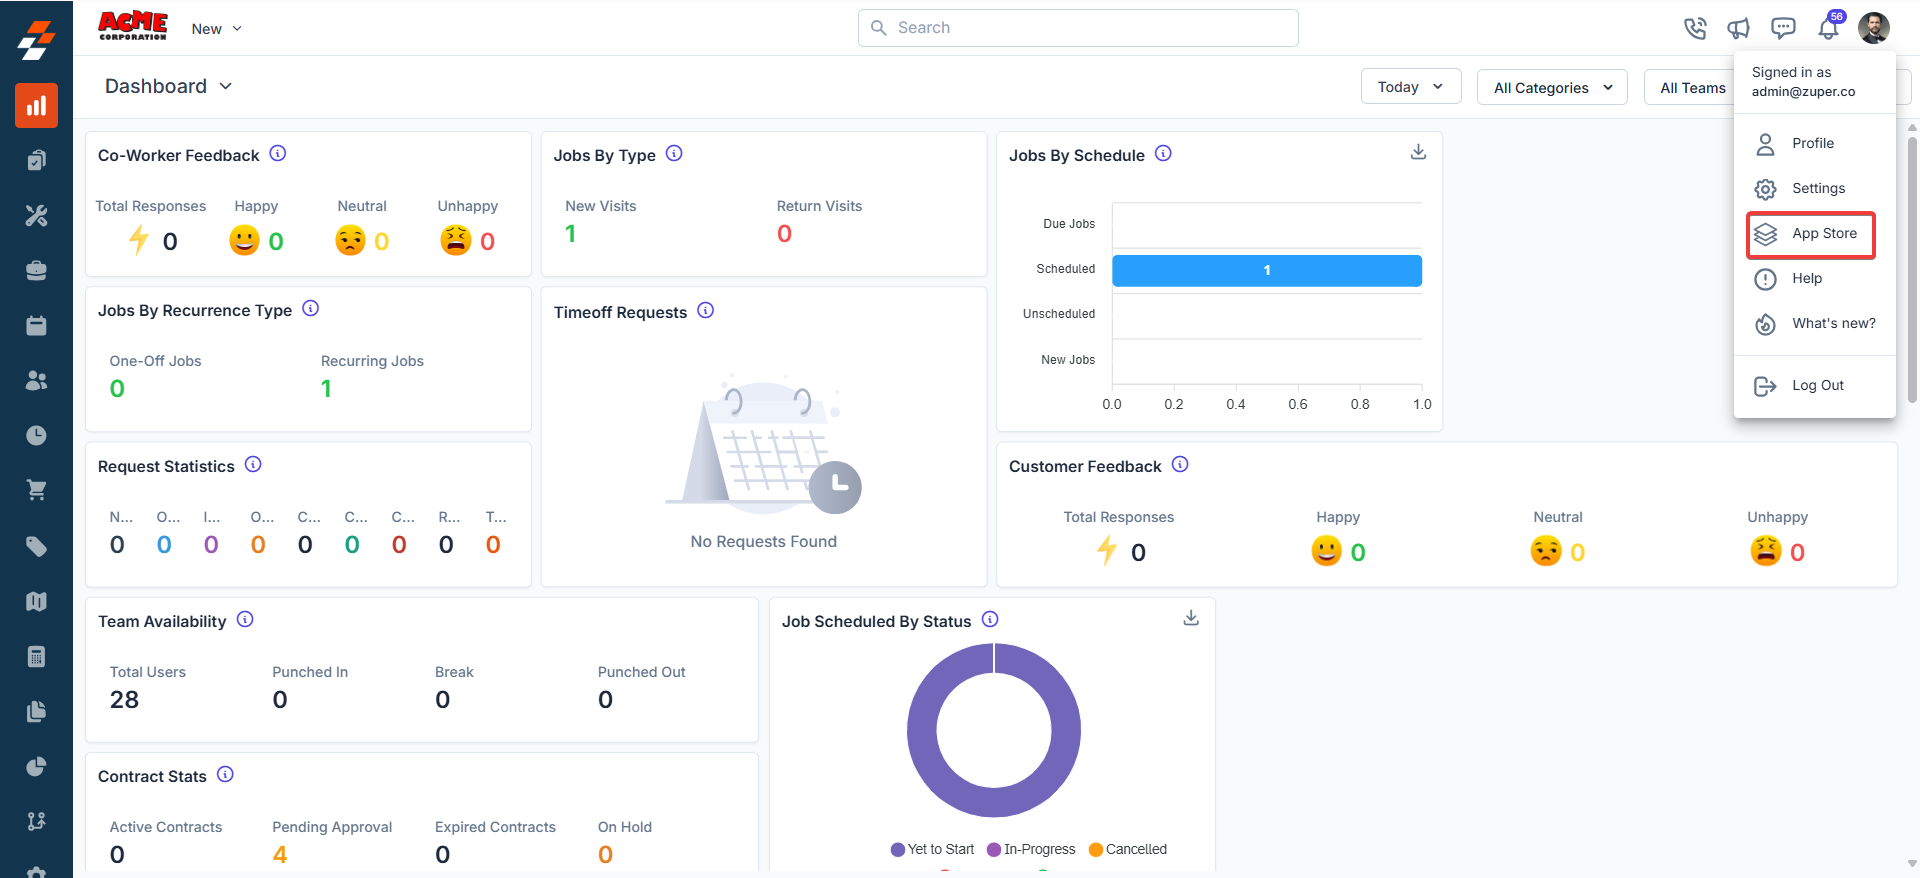
- Open a new tab in your browser and once you are logged in to your Zuper Account, click on your Profile Picture on the top right corner of the screen & click on “App Store.”
- Under the “Browse by Category,” select the “Commerce” option and choose “DEAR.”

- Click the “Install DEAR” button.

-
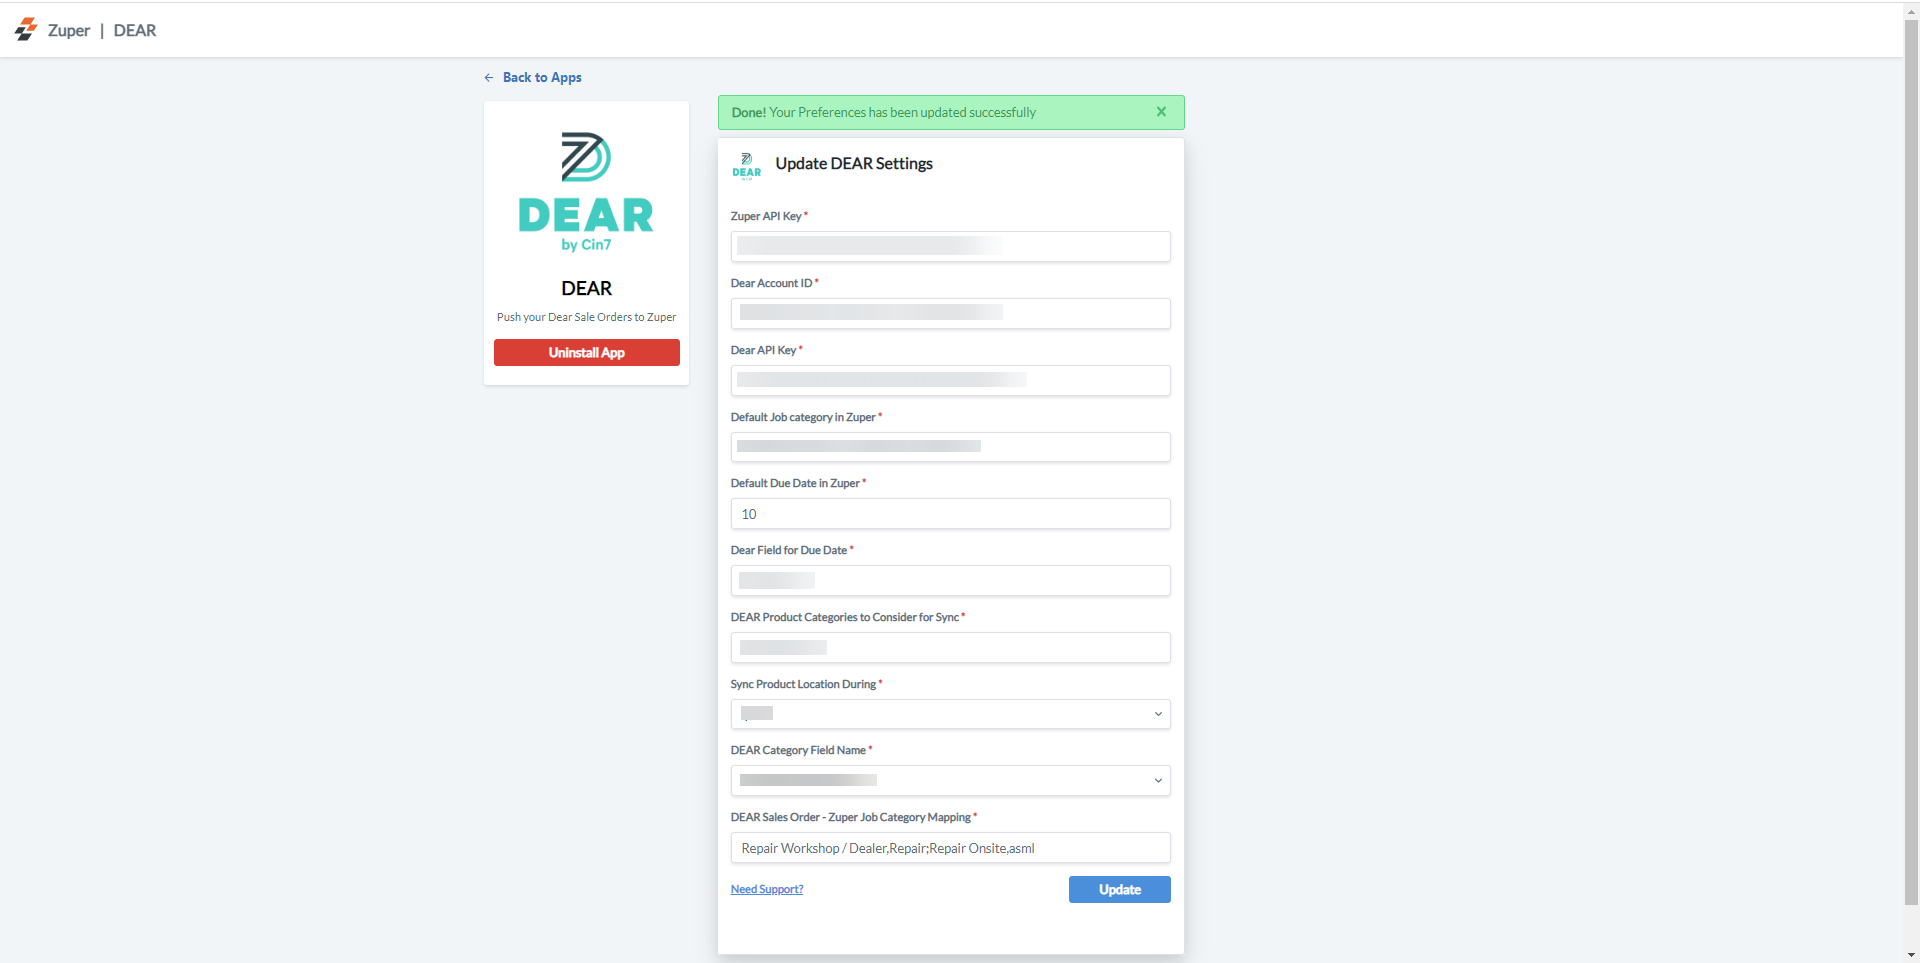
Update DEAR Settings by configuring the following details:
a. Zuper API Key (Mandatory Field) – Enter the Zuper API key (Click here: How to generate Zuper API Key). b. DEAR Account ID (Mandatory Field) – Enter the account ID of the DEAR. (You can get it from the DEAR account). c. DEAR API Key (Mandatory Field) – Enter the API Key of the DEAR. (You can get it from the DEAR account). d. **Default Job Category in Zuper (Mandatory Field) ** – Enter the default job category in Zuper (In case of any assistance, contact Zuper’s support team: email: support@zuper.co). e. Default Due Date in Zuper (Mandatory Field) – Enter the default due date in Zuper (A numerical number represents the days). f. **DEAR Field for Due Date (Mandatory Field) **- Enter the field name of the DEAR for which the Due Date is synced. g. DEAR Product Categories to Consider for Sync (Mandatory Field) – Enter the default Product Categories for Sync in Zuper based upon the product created on the DEAR. (In case of assistance, contact Zuper’s support team: email: support@zuper.co).h. Sync Product Location During (Mandatory Field) – Specify the Product location sync point. This can be either Pick, Pack, or Ship. i. DEAR Category Field Name – AdditionalAttribute 1 up to 10, Custom fields from the DEAR are captured here as AdditionalAttribute, ranging from 1 to 10. j. DEAR Sale Order – Zuper Job Category Mapping – Based on the Attribute set above, the DEAR Sale Order and Zuper Job Category Mapping happen. For instance, “Repair onsite” in DEAR is known as “Maintenance” in Zuper.Note: For the Sale order, conversion from DEAR should have at least one product categorized and defined under the above field to be converted as a Zuper job.
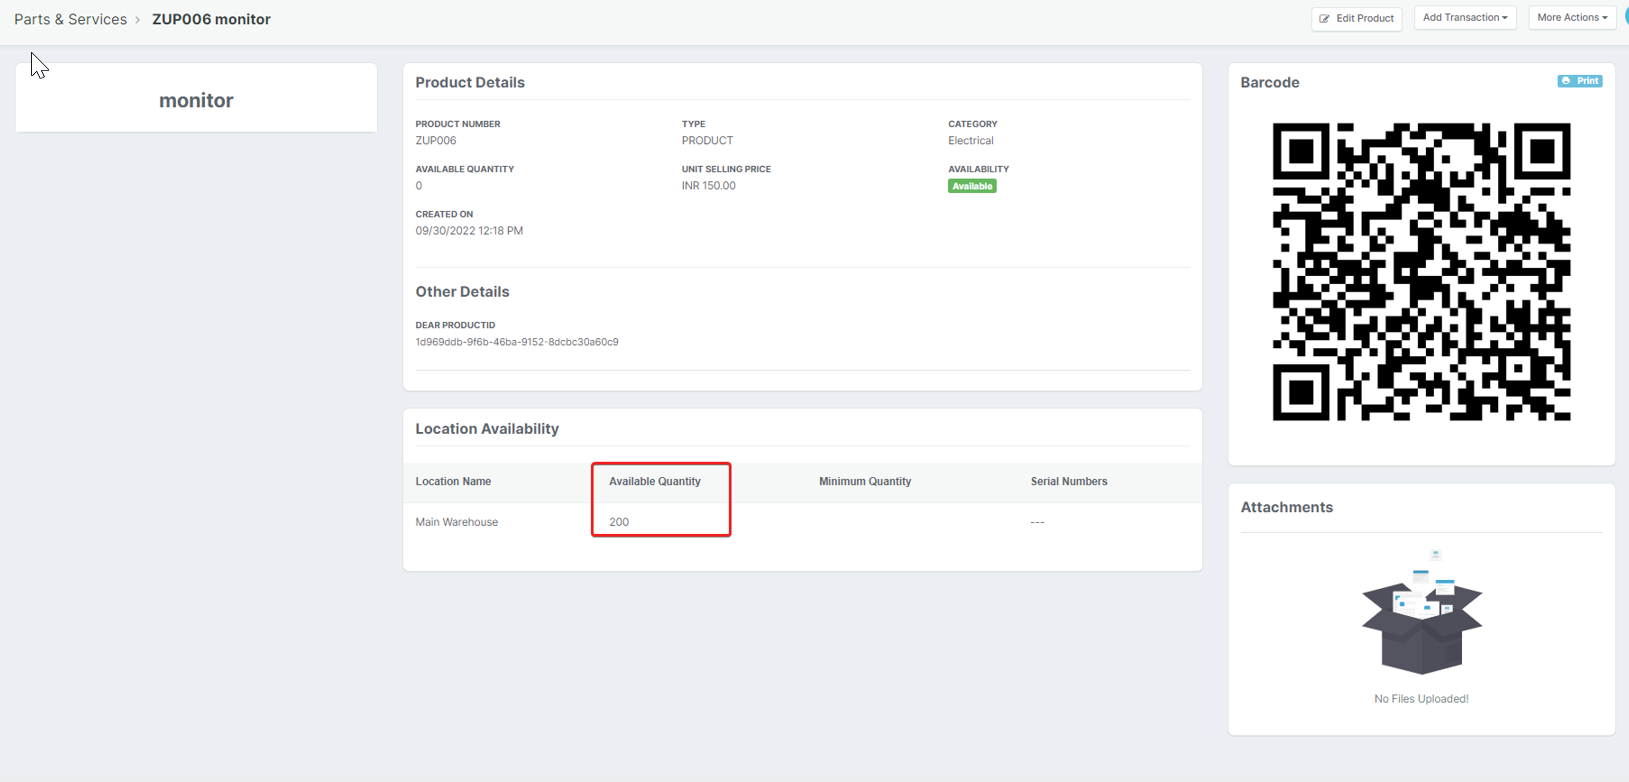
How does Zuper – DEAR Integration work?
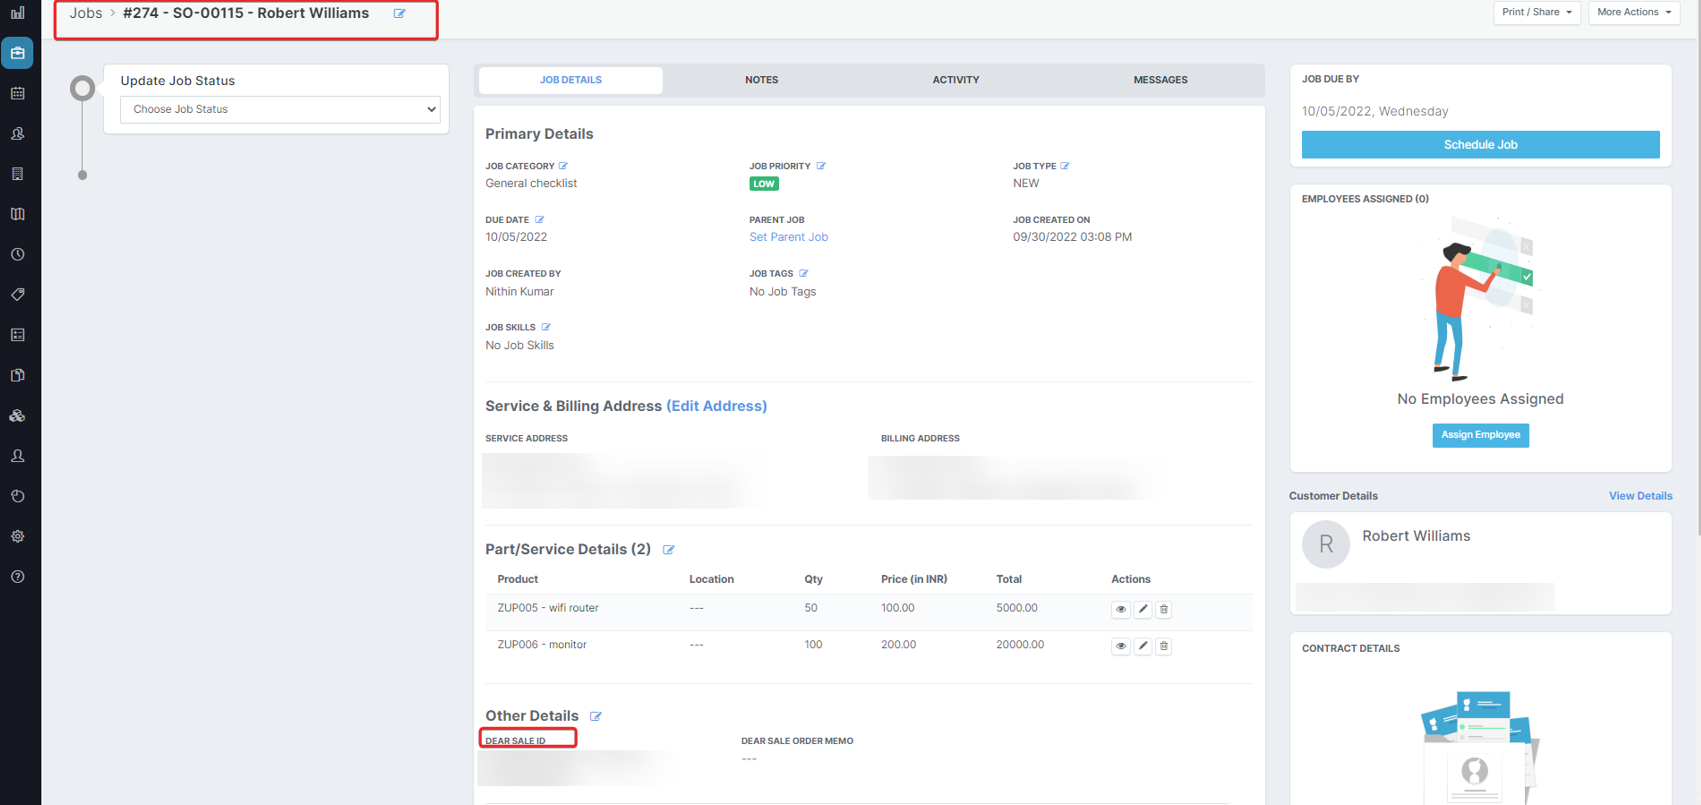
Zuper-DEAR integration is bi-directional; whenever the sale order is created and authorized by DEAR, a new job will be triggered in Zuper. The new quantity of the stocks updated in the DEAR integration will get updated as an Available Quantity in Zuper. For the products in DEAR, they are captured as “Parts and Services” in Zuper. 1. Select the “Sales” module from the left panel of DEAR and create a fresh sales order by entering the Customer details, accounting details, and shipping details, and save the draft.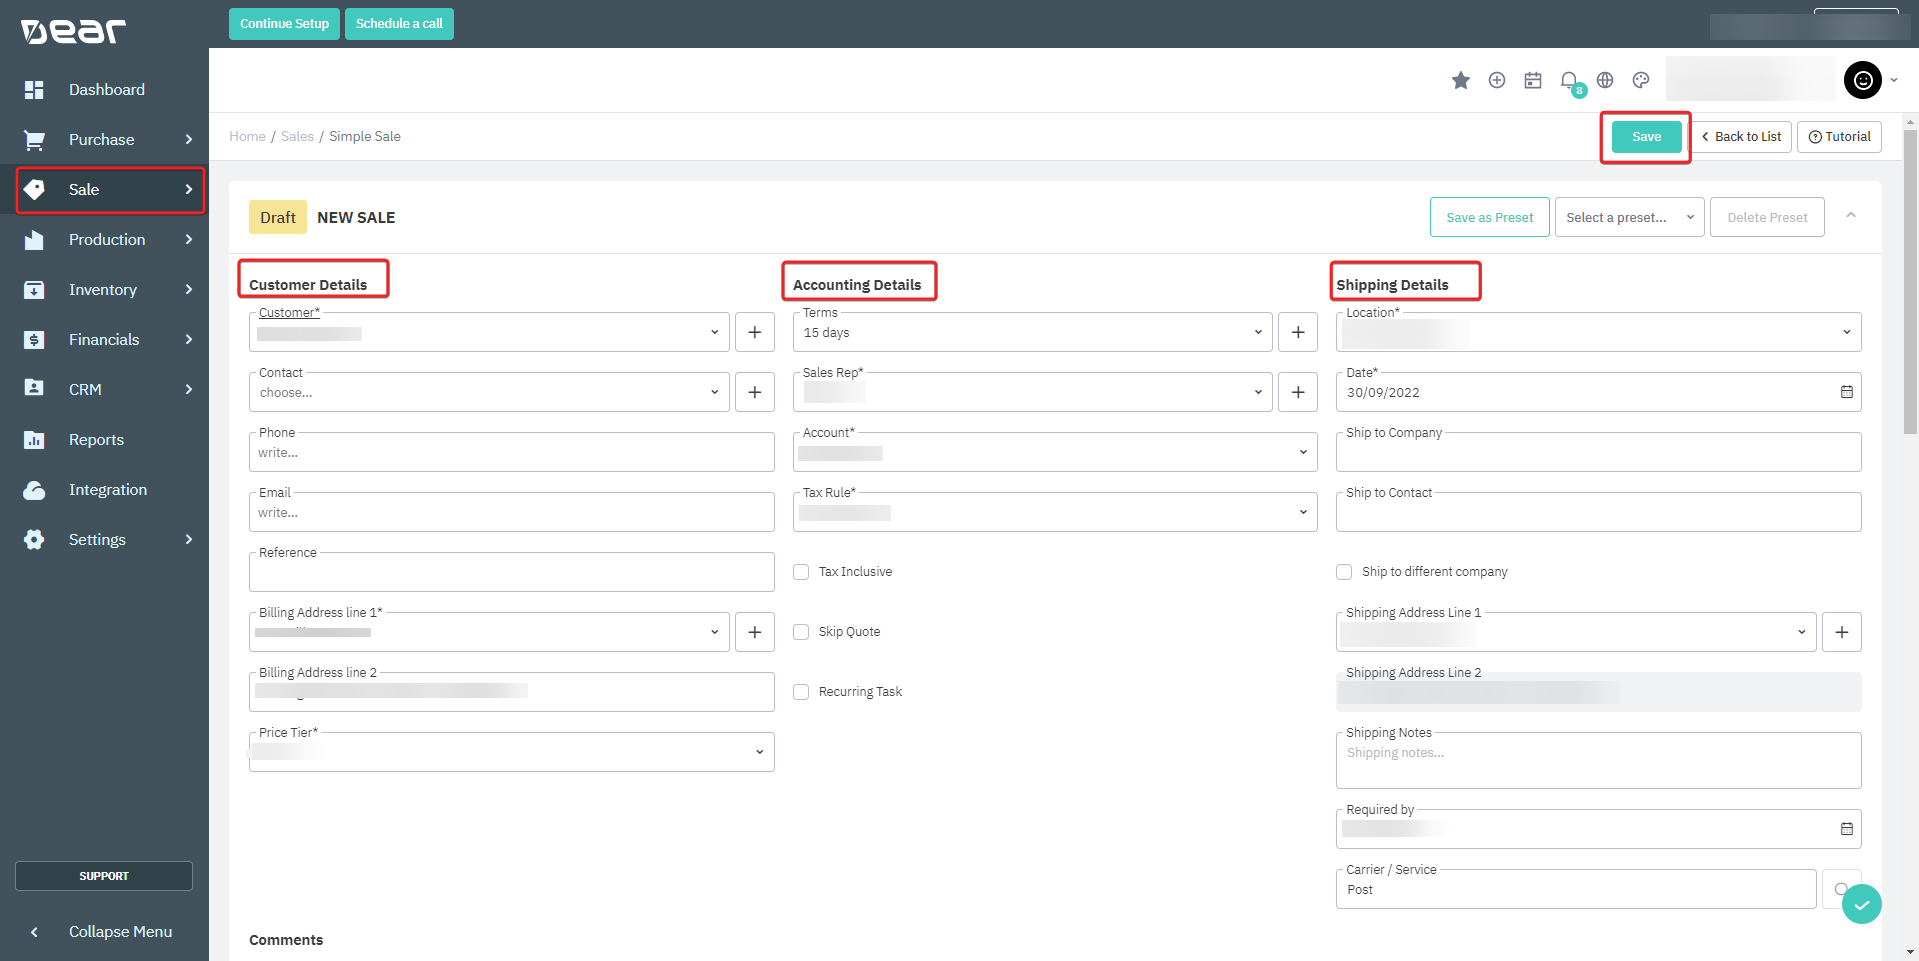
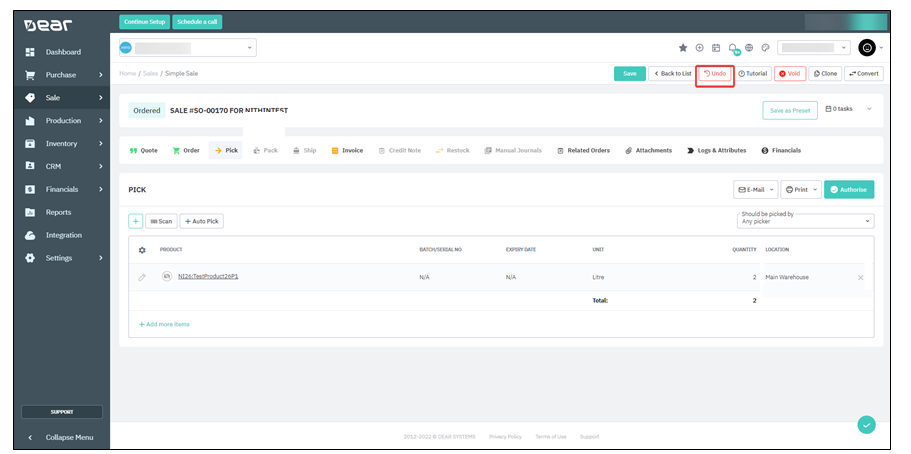
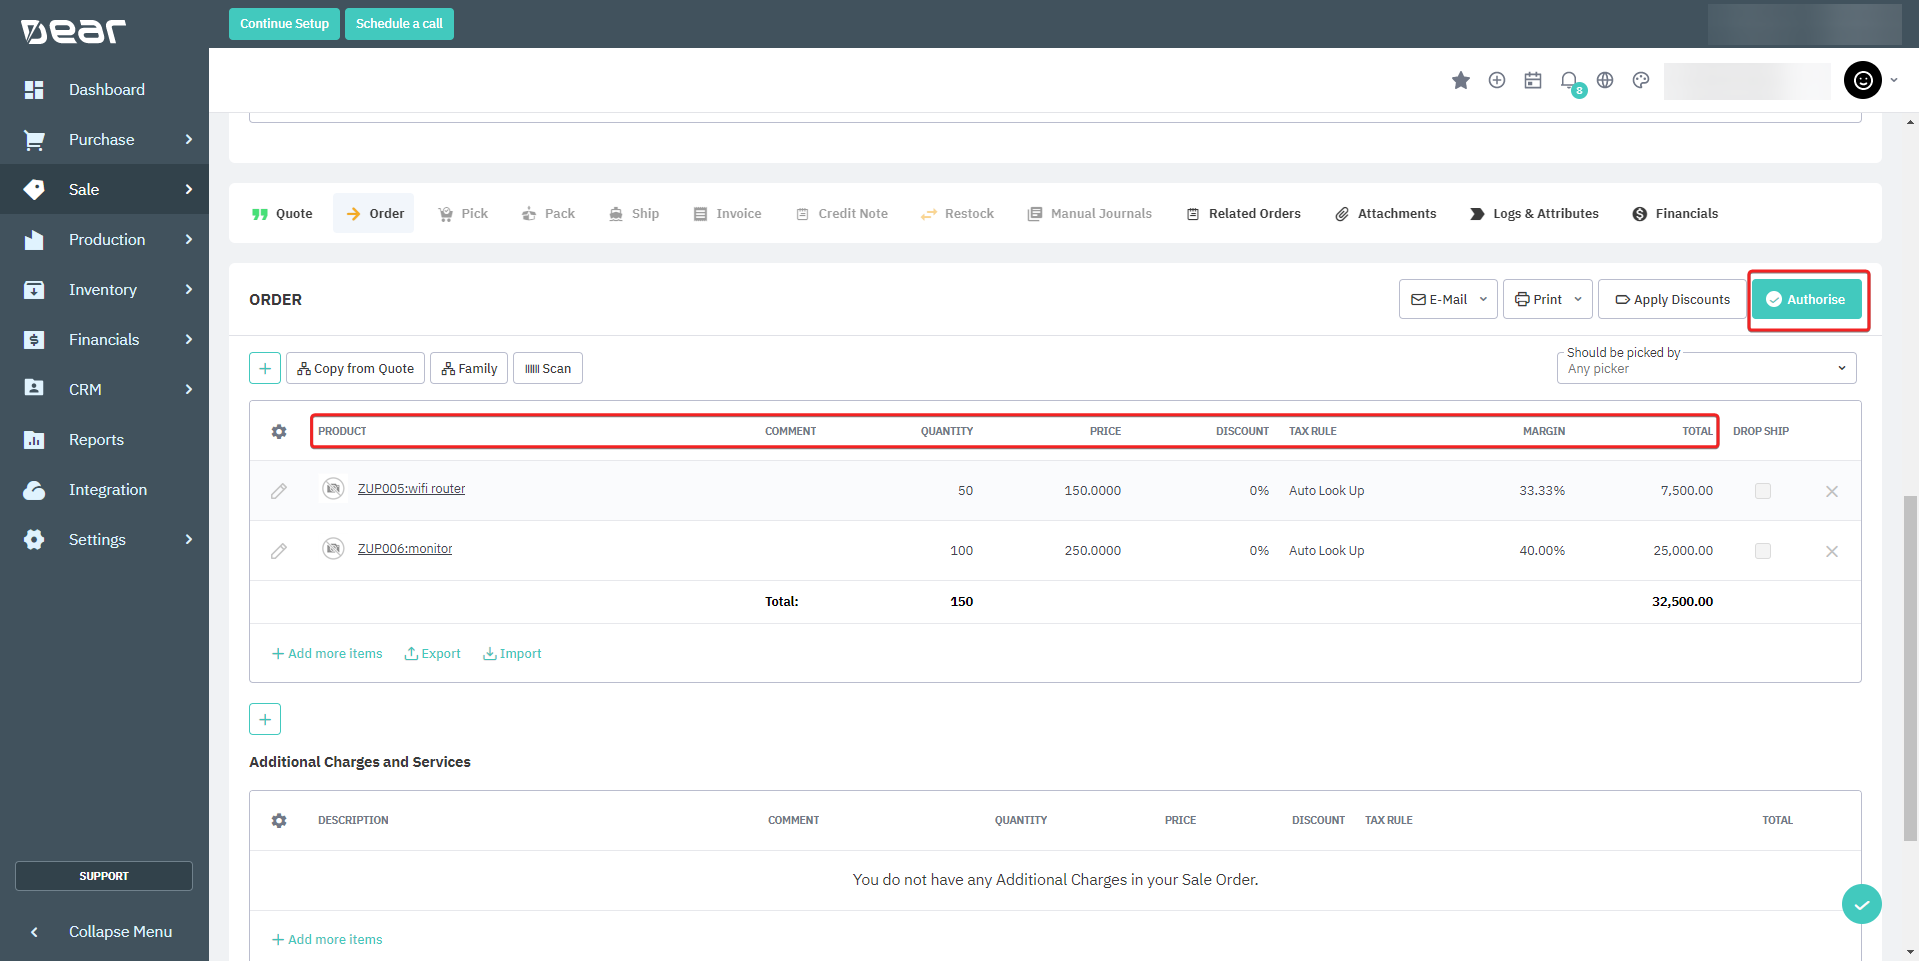
- Now add the necessary products and required details to the Quote. Once the quote is authorized and moves to the Order stage, select the “Authorize” button on “DEAR” to trigger the Job in Zuper.
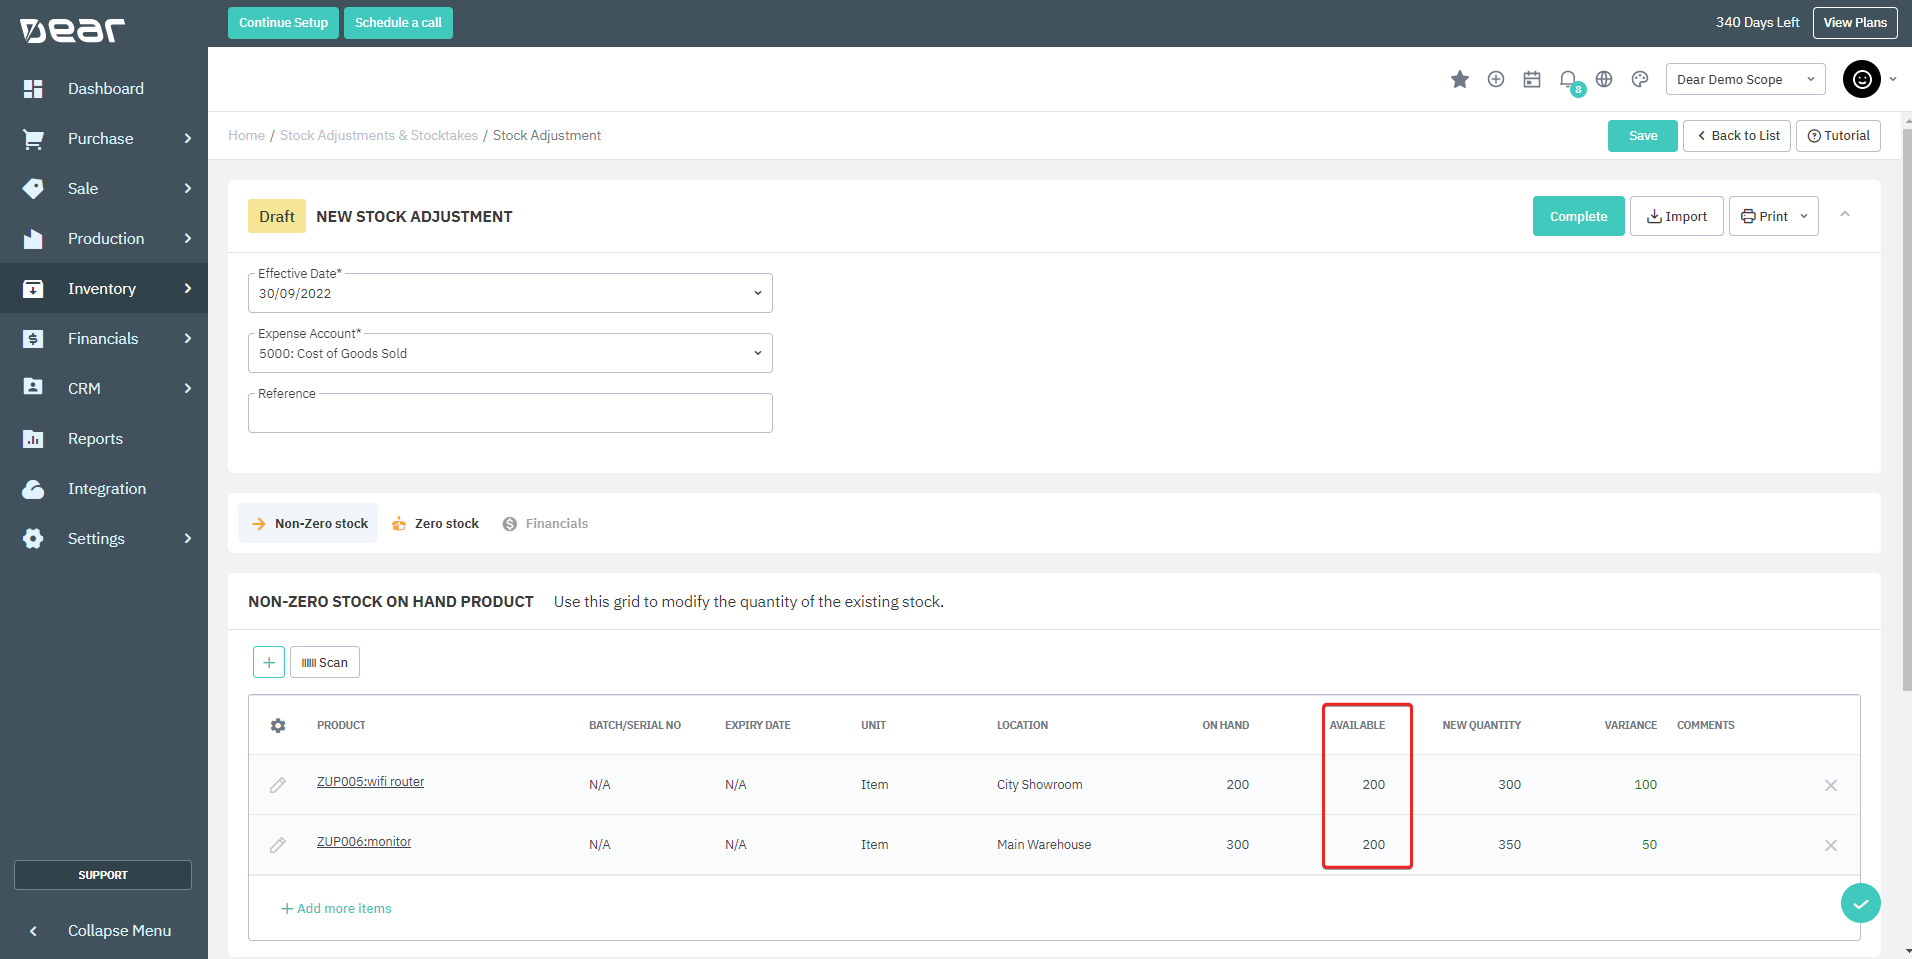
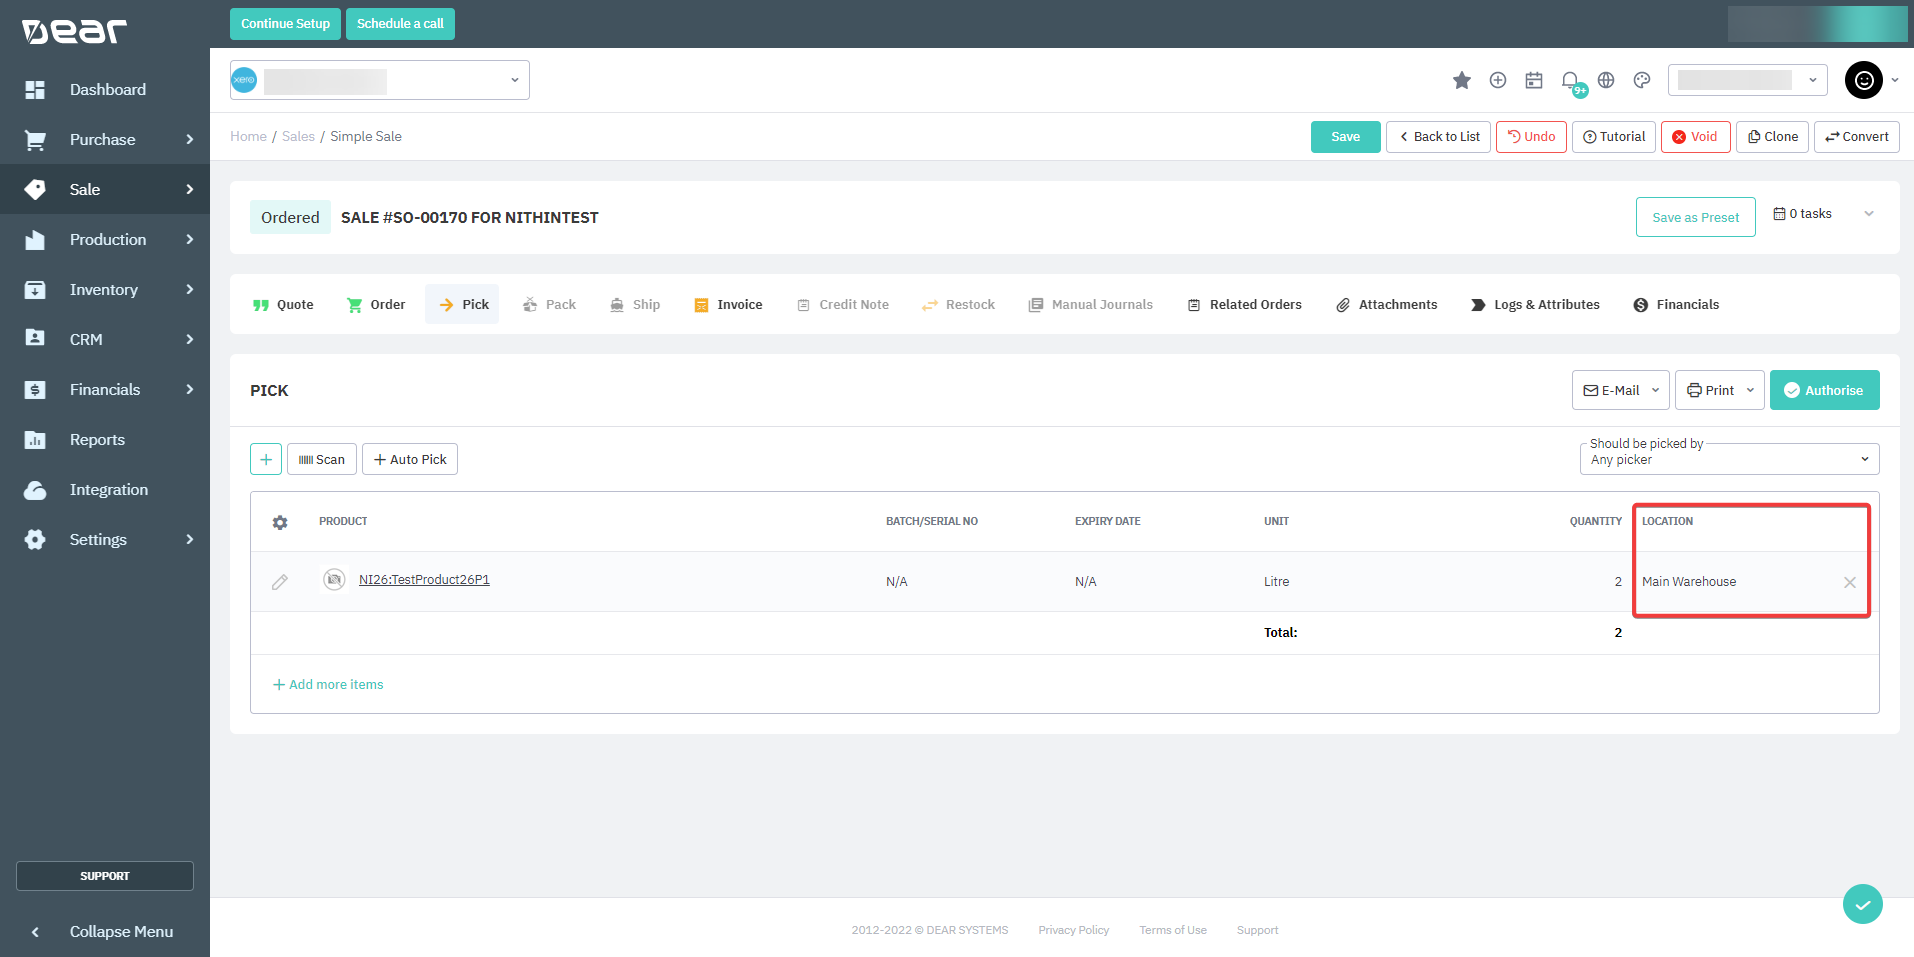
- Select the “Sales” module from the left panel of DEAR. With the new update, you can now edit the product’s location as part of Pick, Pack, or Ship actions, which will trigger a predefined webhook (installed during setup), and the location will be updated on the Zuper Job.