Overview
Quickbooks Desktop Bi-Directional Inventory sync allows you to keep all your inventory items and their quantities in sync between Quickbooks Desktop and Zuper. The records pushed from Zuper will be reflected in the web connector, and if you have enabled auto sync, the records will be synced automatically; if not, you should update the records manually.Before you get started
- You need to install the QuickBooks integration.
- Set the ‘Sync Product Masters’ configuration to ‘Yes’.
- Enable categories on QuickBooks Desktop for the bidirectional sync to function correctly.
- Since QuickBooks Desktop allows negative quantities when consumption exceeds the available stock, turn on the ‘Allow Negative Stock Balance’ setting in Zuper (Organization Settings -> Parts and Service Settings).
- In Zuper, set the ‘Choose Module to Track Consumption’ setting (Organization Settings -> Parts and Service Settings) to Invoice.
- The sync will not function properly if this setting is set to ‘Job’, ‘Quotation’ or ‘None’.
How to use
You must set the following configurations for the bidirectional sync to function correctly:- Choose Product Master (Mandatory): Selecting “Zuper” assigns it as the product master, while choosing “QuickBooks Desktop” assigns QuickBooks Desktop as the product master.
Note: To enable reverse inventory sync, ensure “QuickBooks Desktop” is selected as the product master.
- Product Minimum Quantity (Mandatory)–The minimum product quantity, entered as a numeric value, will be transferred from the corresponding QuickBooks Desktop inventory item to Zuper whenever a part or product is moved from QuickBooks Desktop with this minimum quantity applied here.
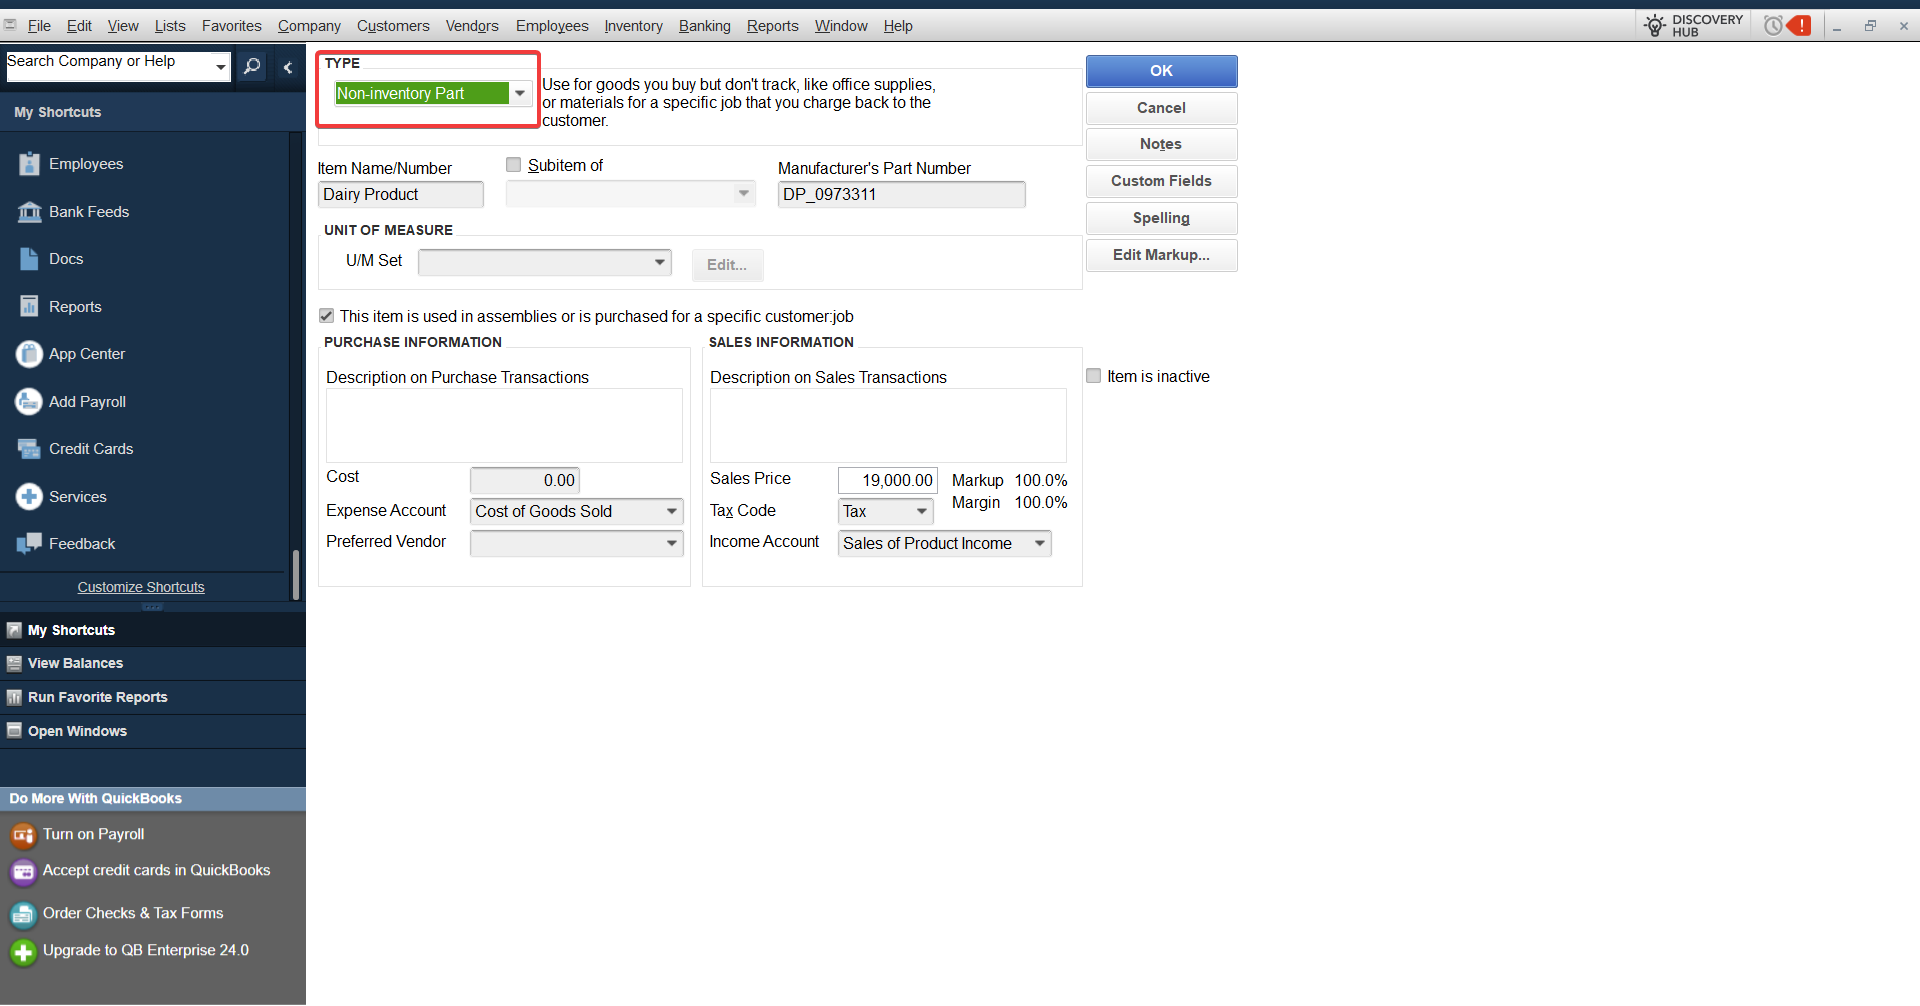
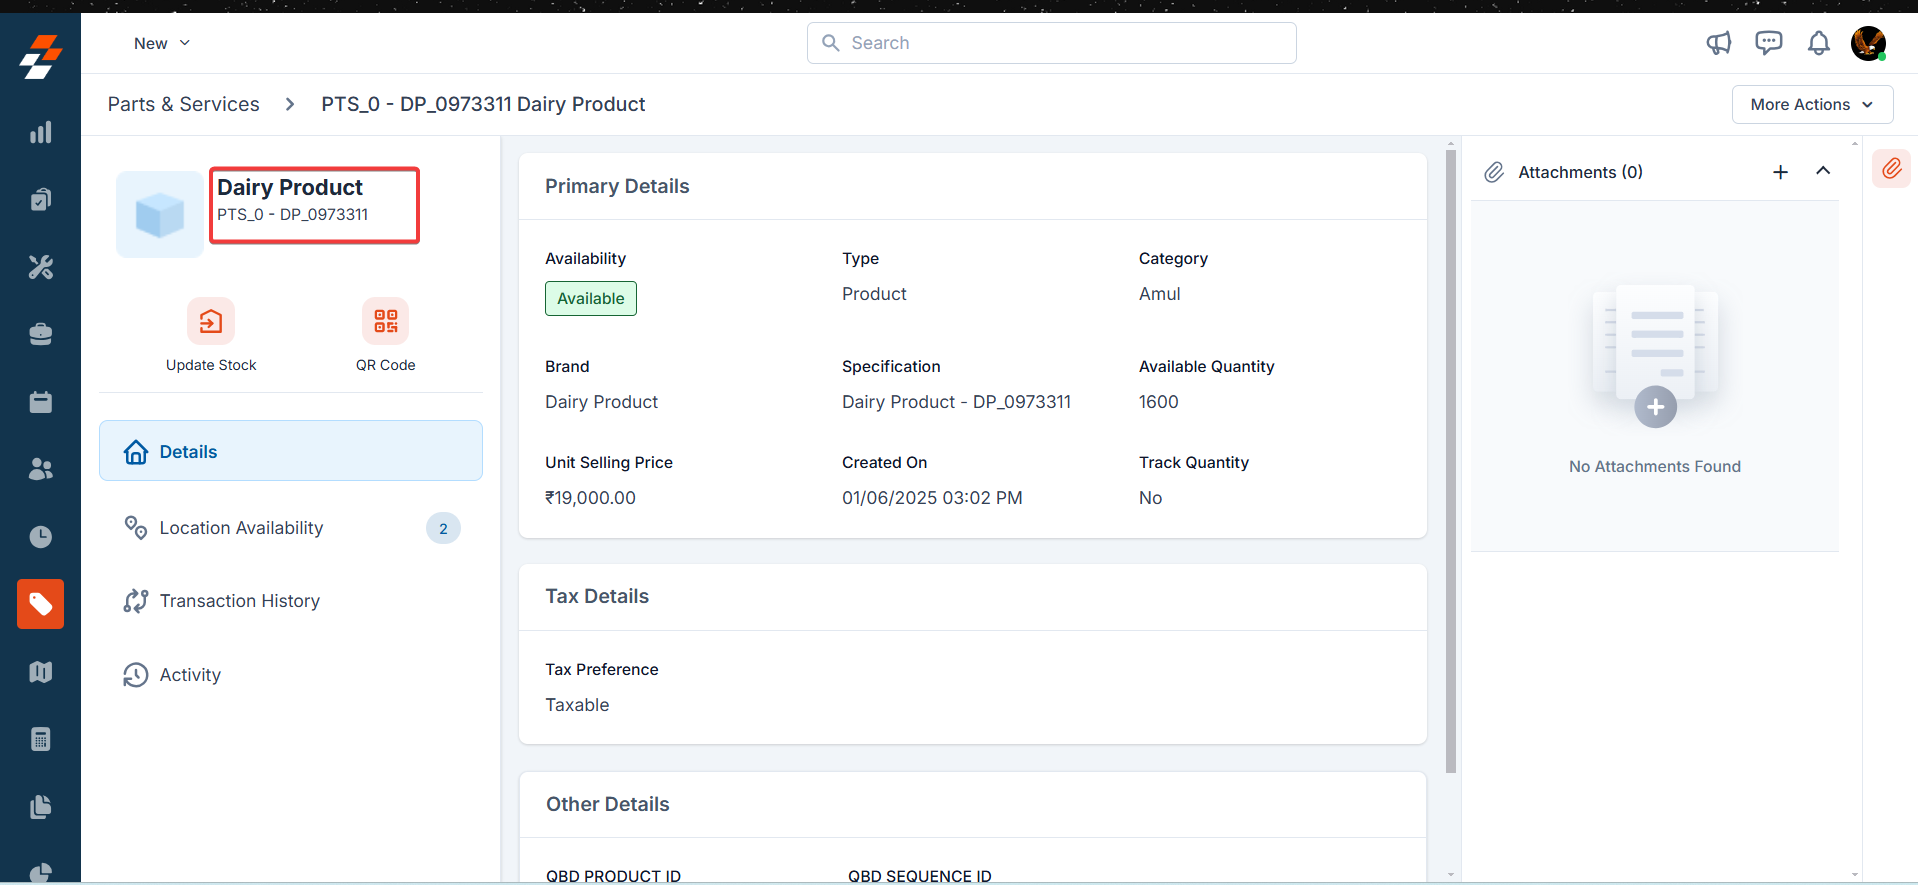
- Non-Inventory Product Quantity (Mandatory)– The non-inventory item from QuickBooks Desktop will be synced with the default product quantity in Zuper, which is the non-inventory product quantity mentioned here.
- Default Zuper Product Category (Mandatory) – Enter the default product category UID of Zuper for which the category of the QuickBooks Desktop inventory item gets synced.
- Default Zuper Product Location (Mandatory) – Enter the default product location UID of Zuper for which the location of the QuickBooks Desktop inventory item gets synced. Select the “Update” button to connect QuickBooks Desktop with Zuper.
Note: The integration will not work as expected if any “Mandatory” fields are not given properly.
Bi-directional QuickBooks Desktop – Zuper Inventory Sync
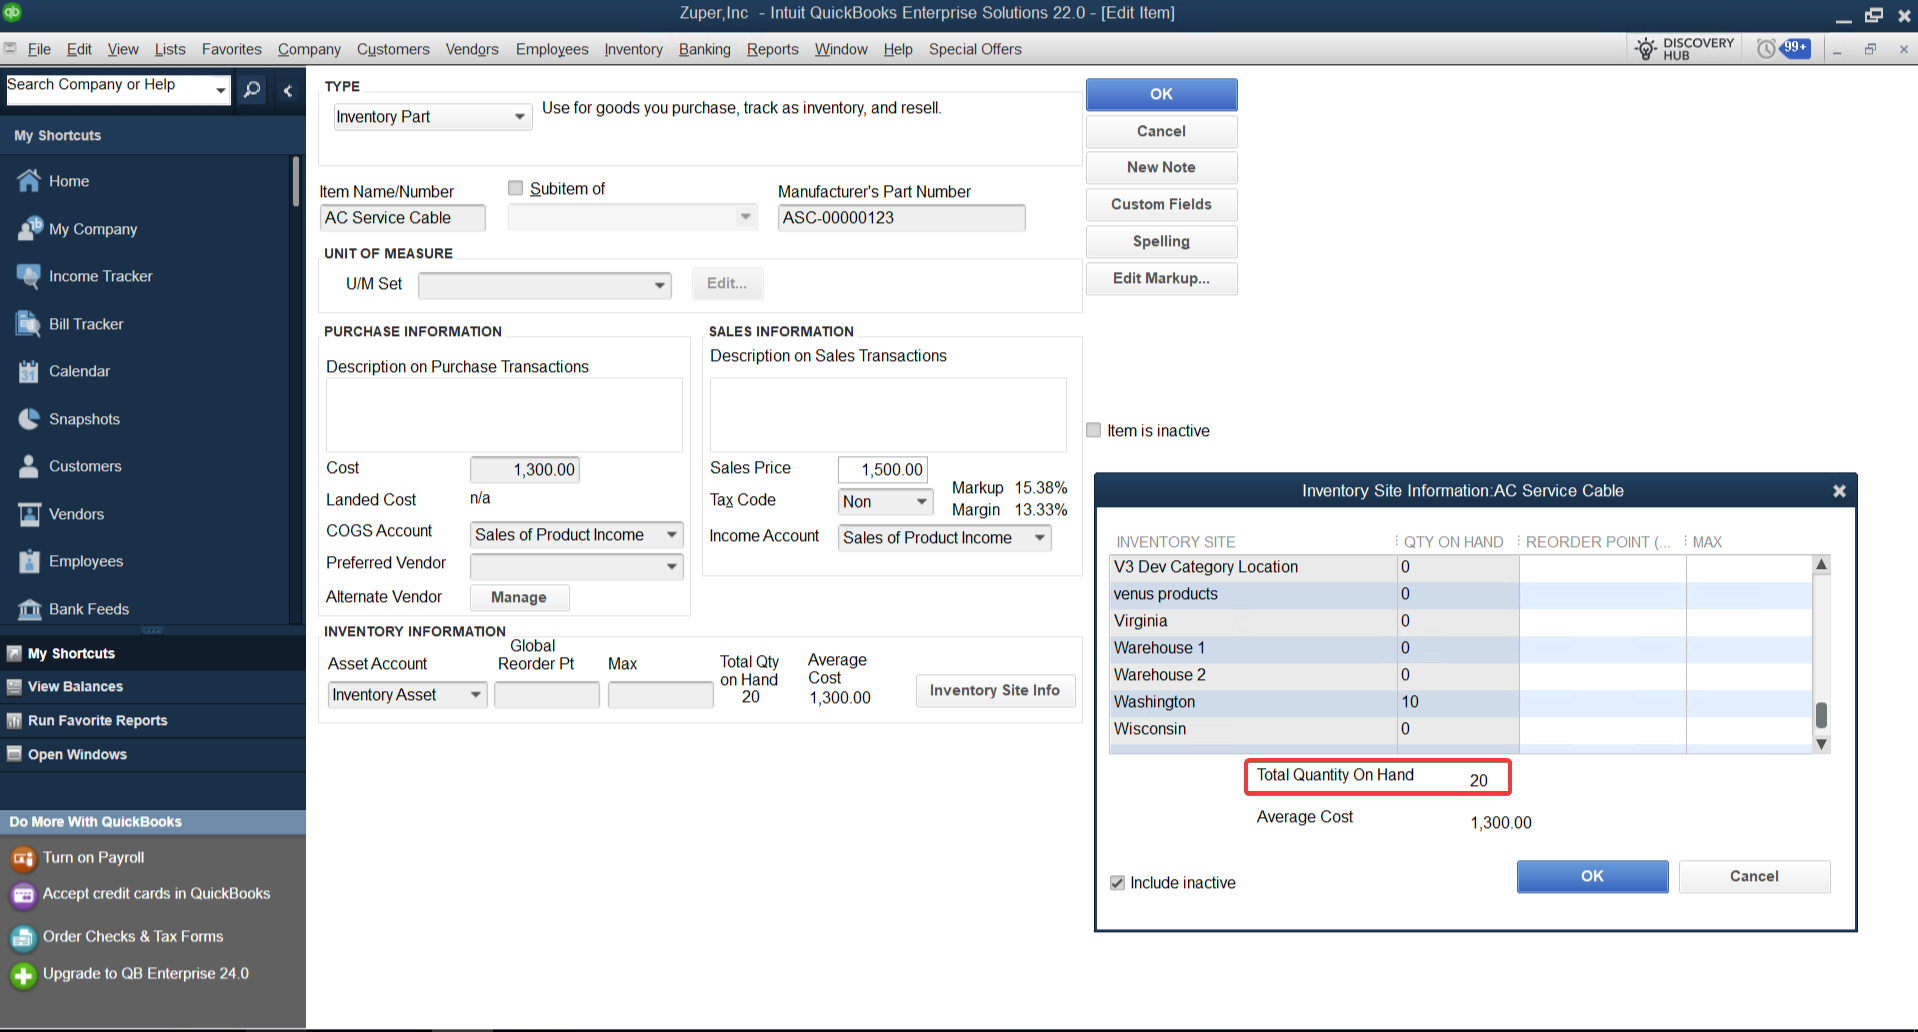
- For advanced inventory customers, inventory site information from QuickBooks Desktop will be displayed in Zuper. If a location exists in Zuper, inventory items can be transferred from QuickBooks Desktop to Zuper.
- It is important to ensure that the location master is identical in both systems, as it is case-sensitive.
- Once you configure these settings, the bidirectional sync between QuickBooks Desktop and Zuper will be established.
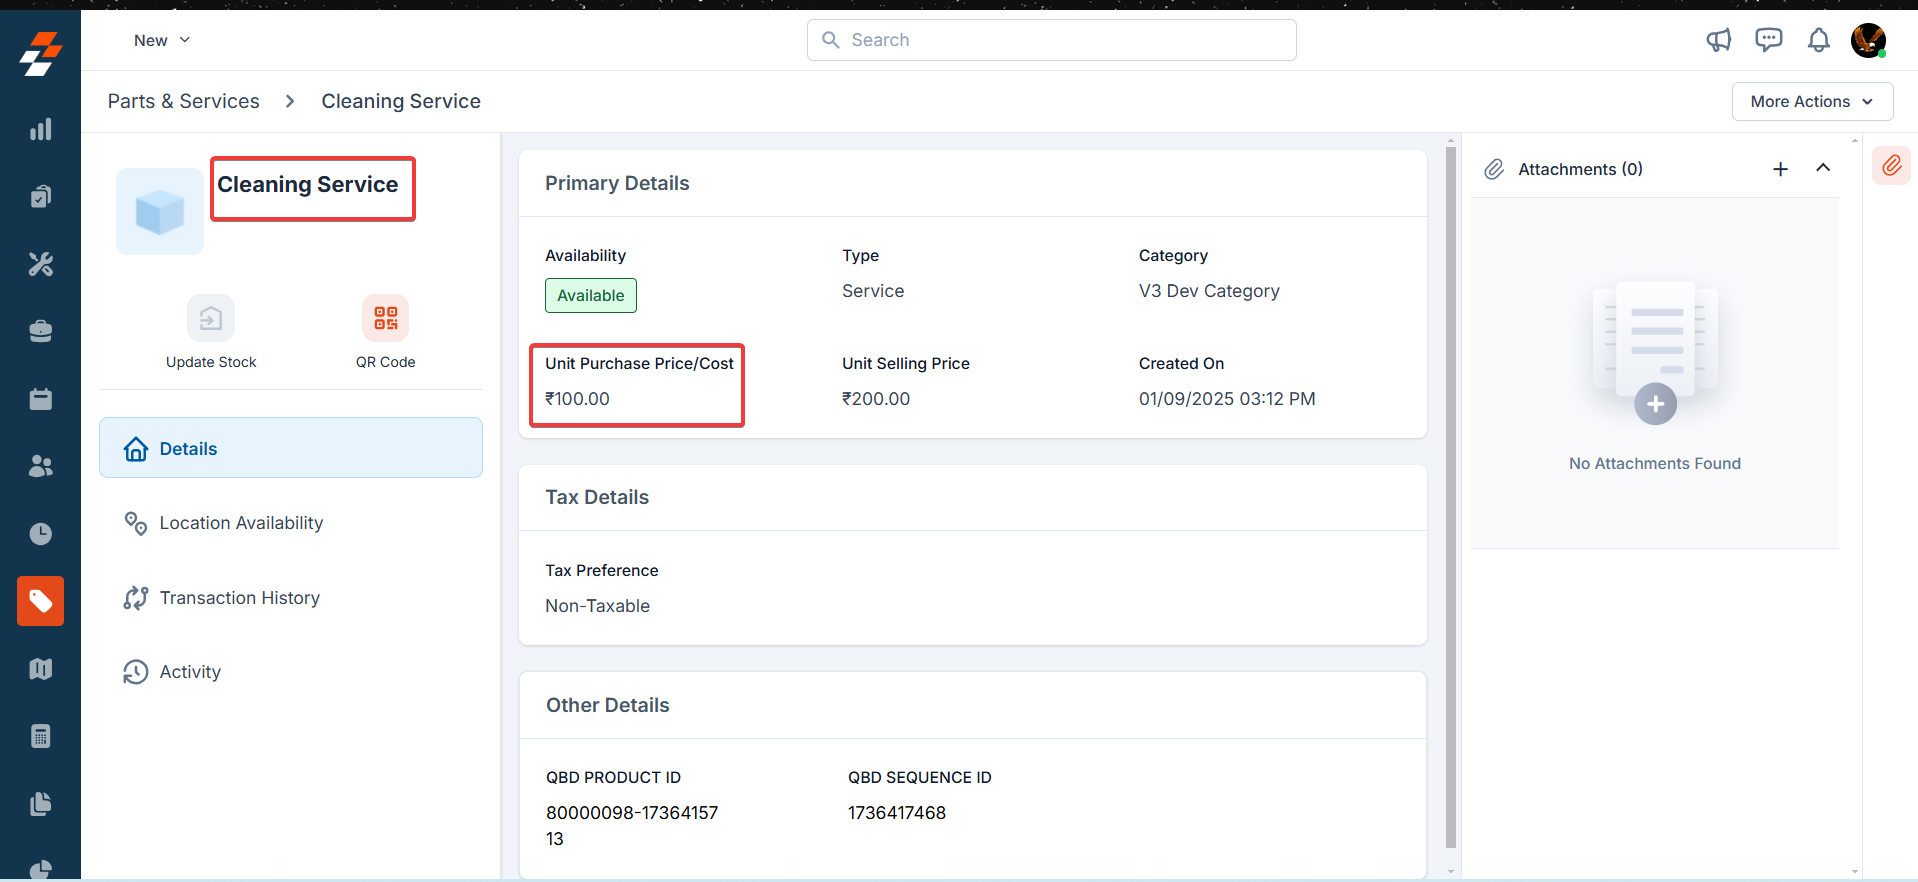
- Creating a part, product, or service on Zuper syncs with QuickBooks Desktop if ‘Zuper’ is selected as the product master.
- Similarly, if ‘QuickBooks Desktop’ is chosen as the product master, the sync happens in the reverse direction
- When a part or product is consumed in Zuper, its quantity updates in QuickBooks Desktop, and vice versa. This happens regardless of which system is set as the product master, ensuring that item quantities stay in sync between both systems.
Existing product modifications in QuickBooks Desktop and Zuper
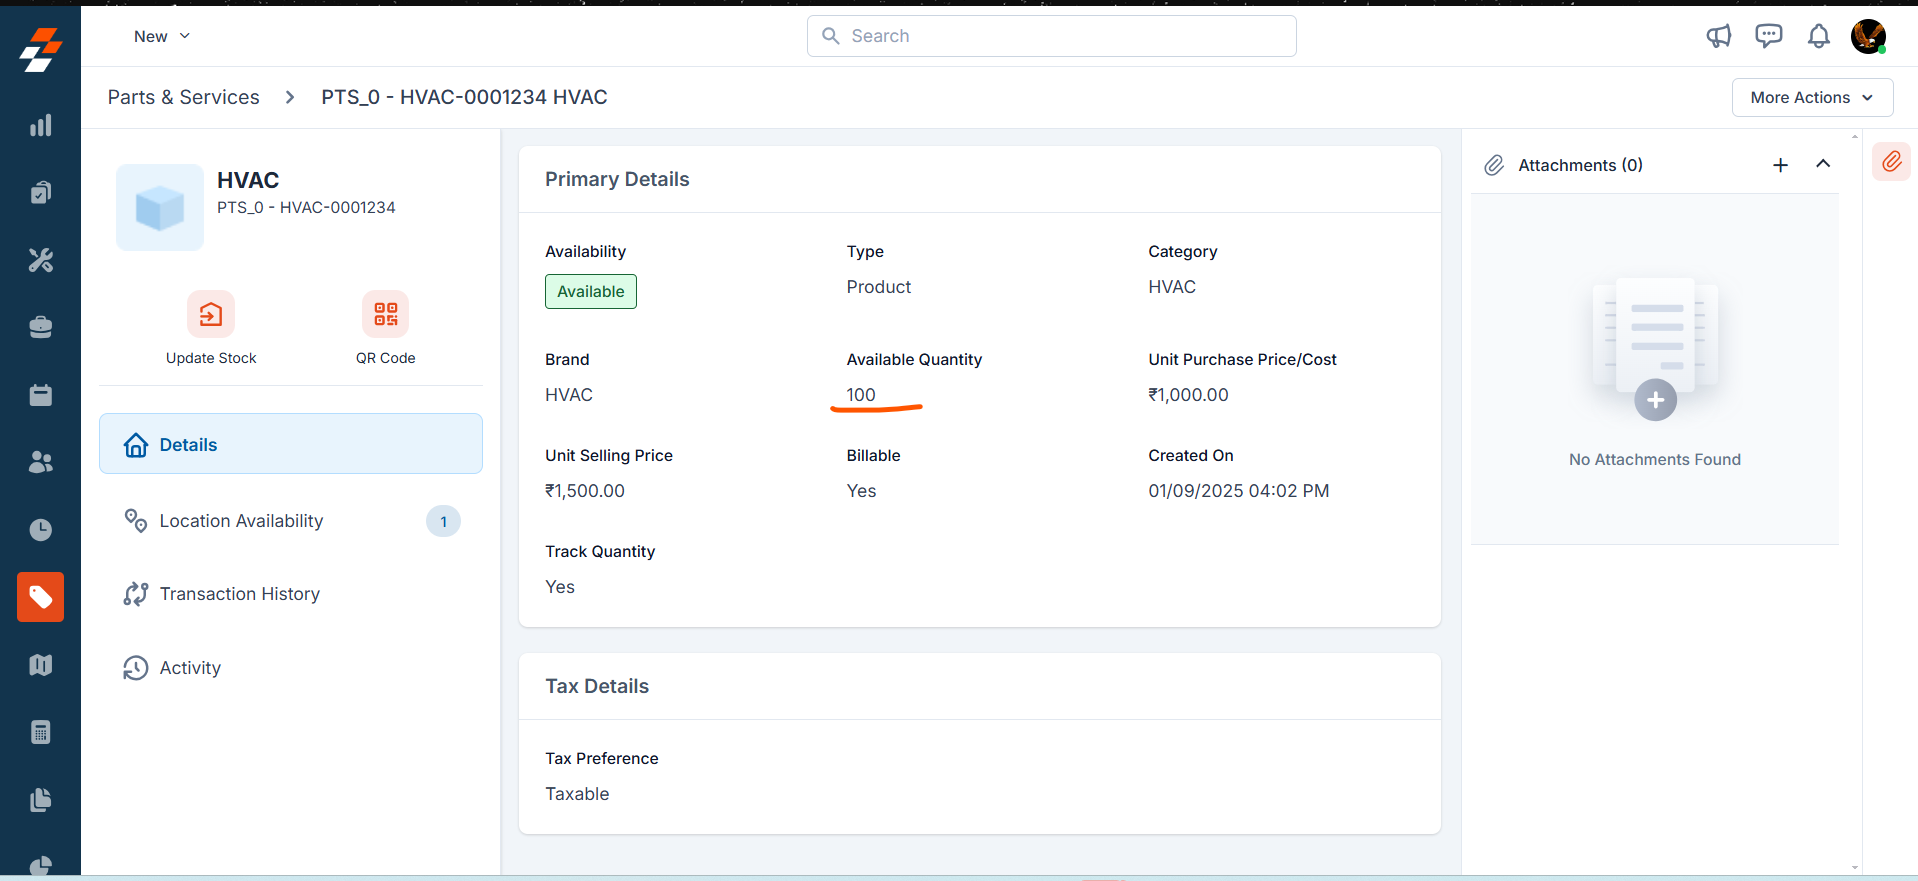
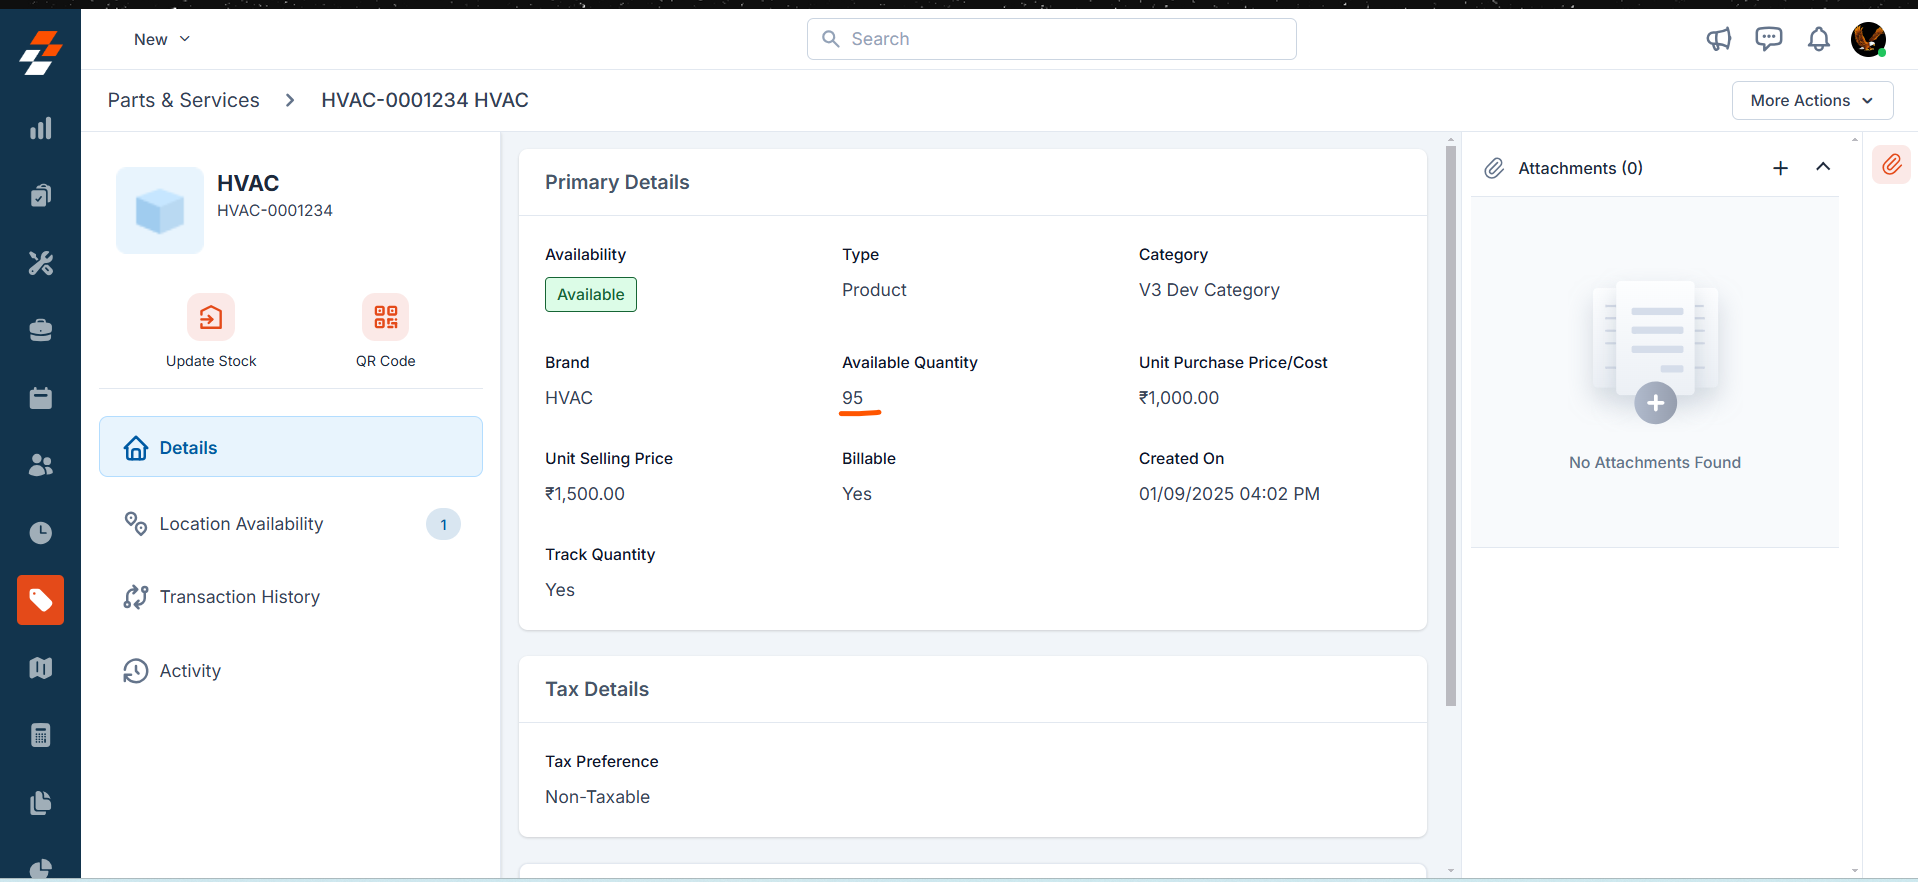
If a product with the same name already exists in Zuper and a matching product is created in QuickBooks Desktop, the product quantity in Zuper will automatically update during the reverse sync. If a product already exists in Zuper and a new product with a different name is created in QuickBooks Desktop, the new product will be added to Zuper during the reverse sync. Before count changes: QuickBooks Desktop: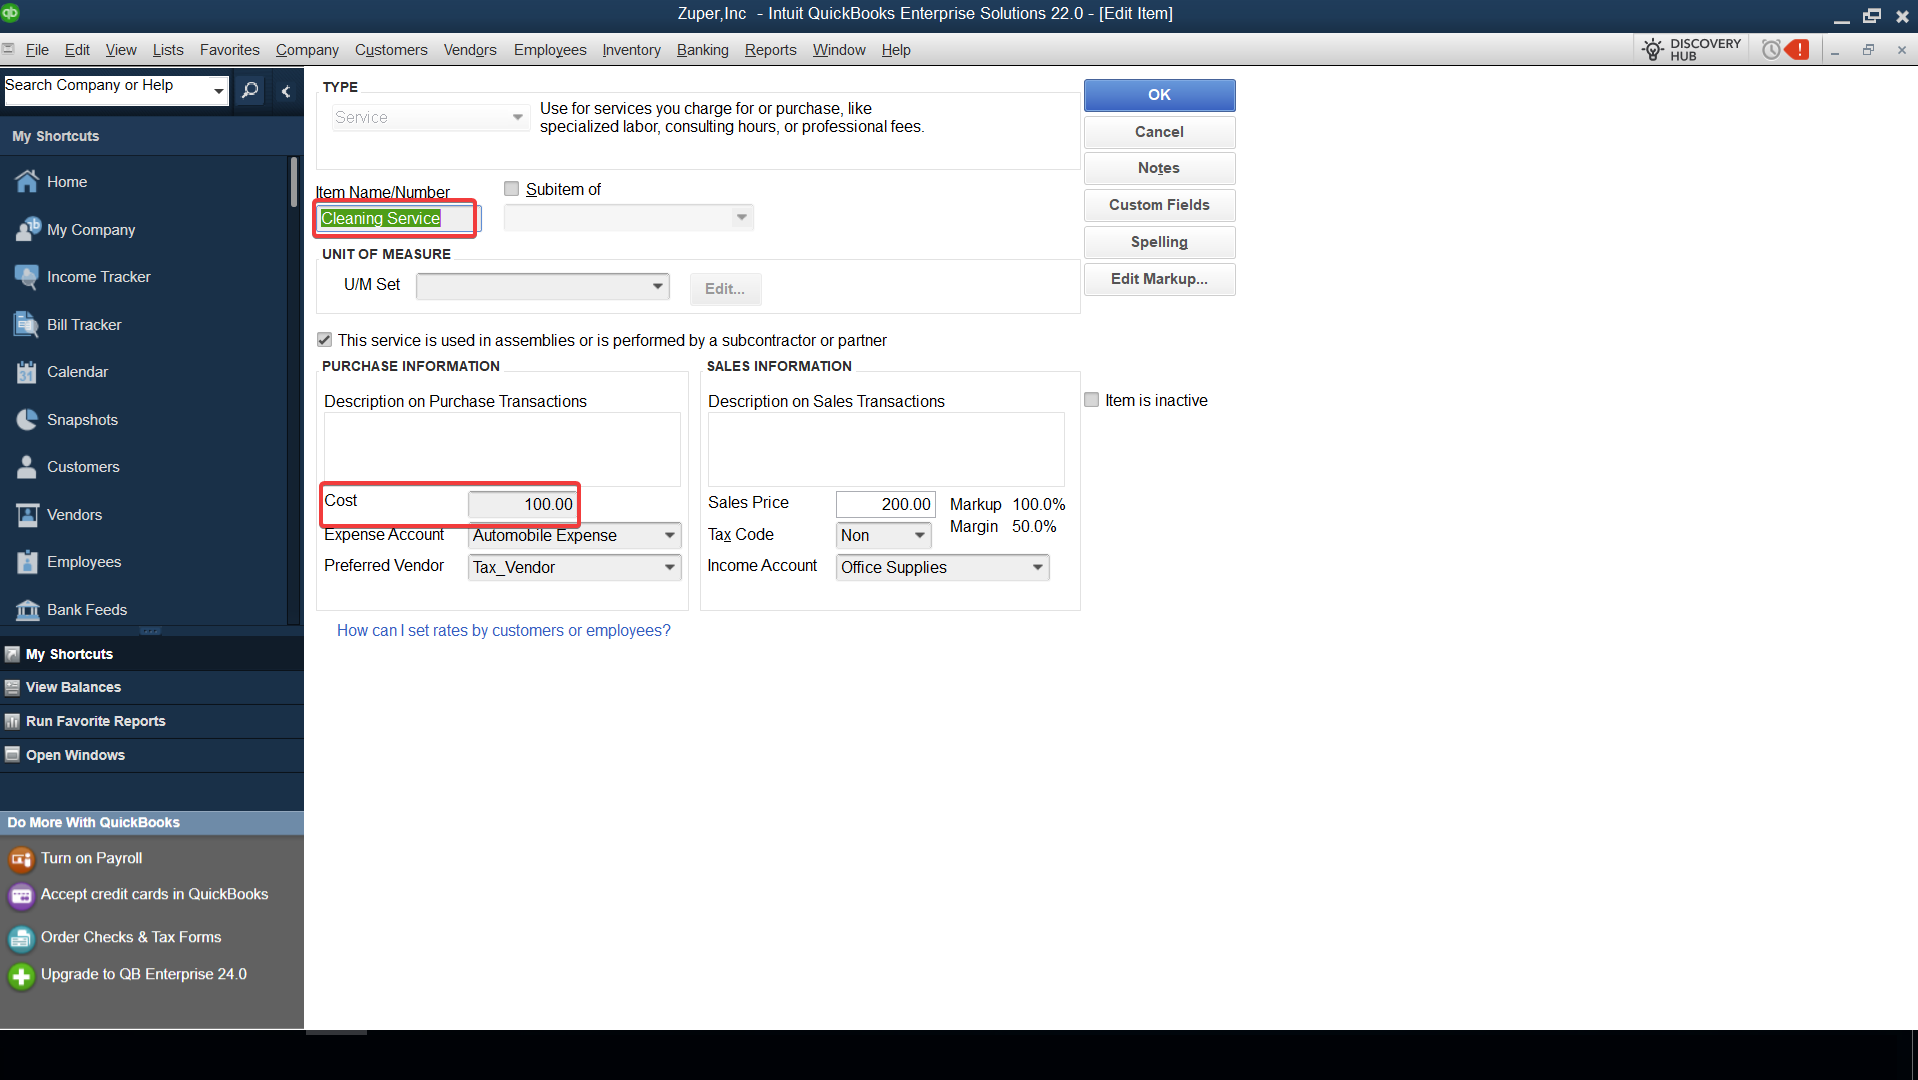
Quantity Update in QuickBooks Desktop
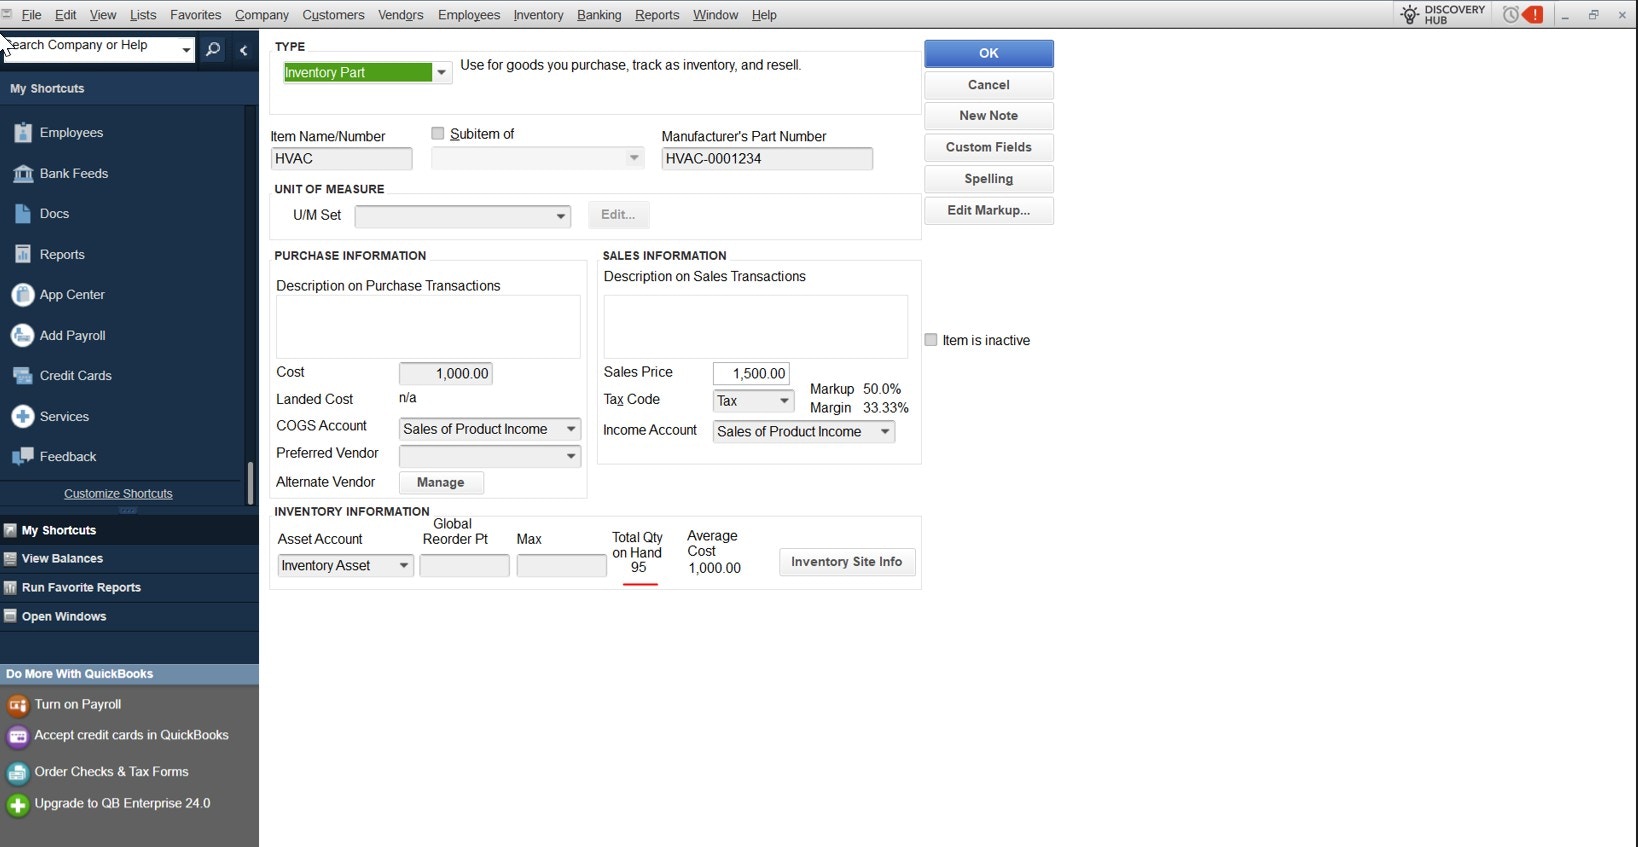
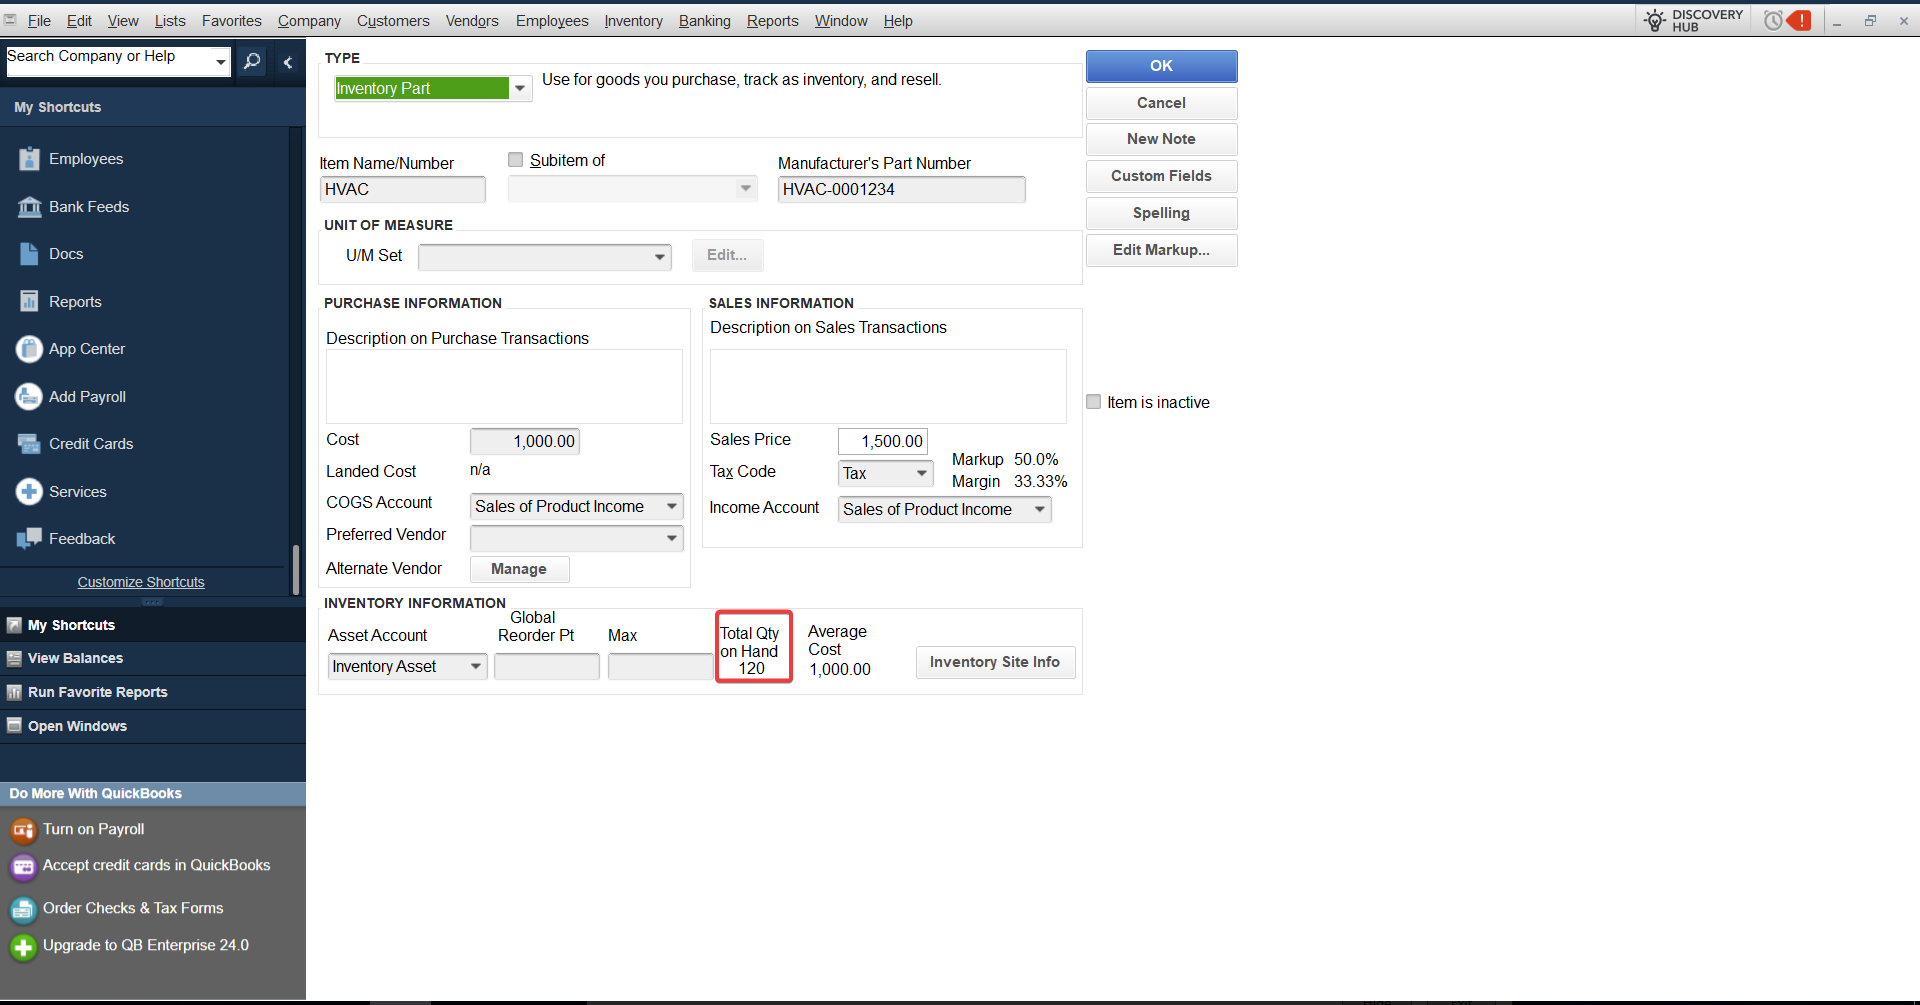
Whenever a purchase order is created or an inventory adjustment is made in QuickBooks Desktop, we sync the quantity update in Zuper. Before count changes: QuickBooks Desktop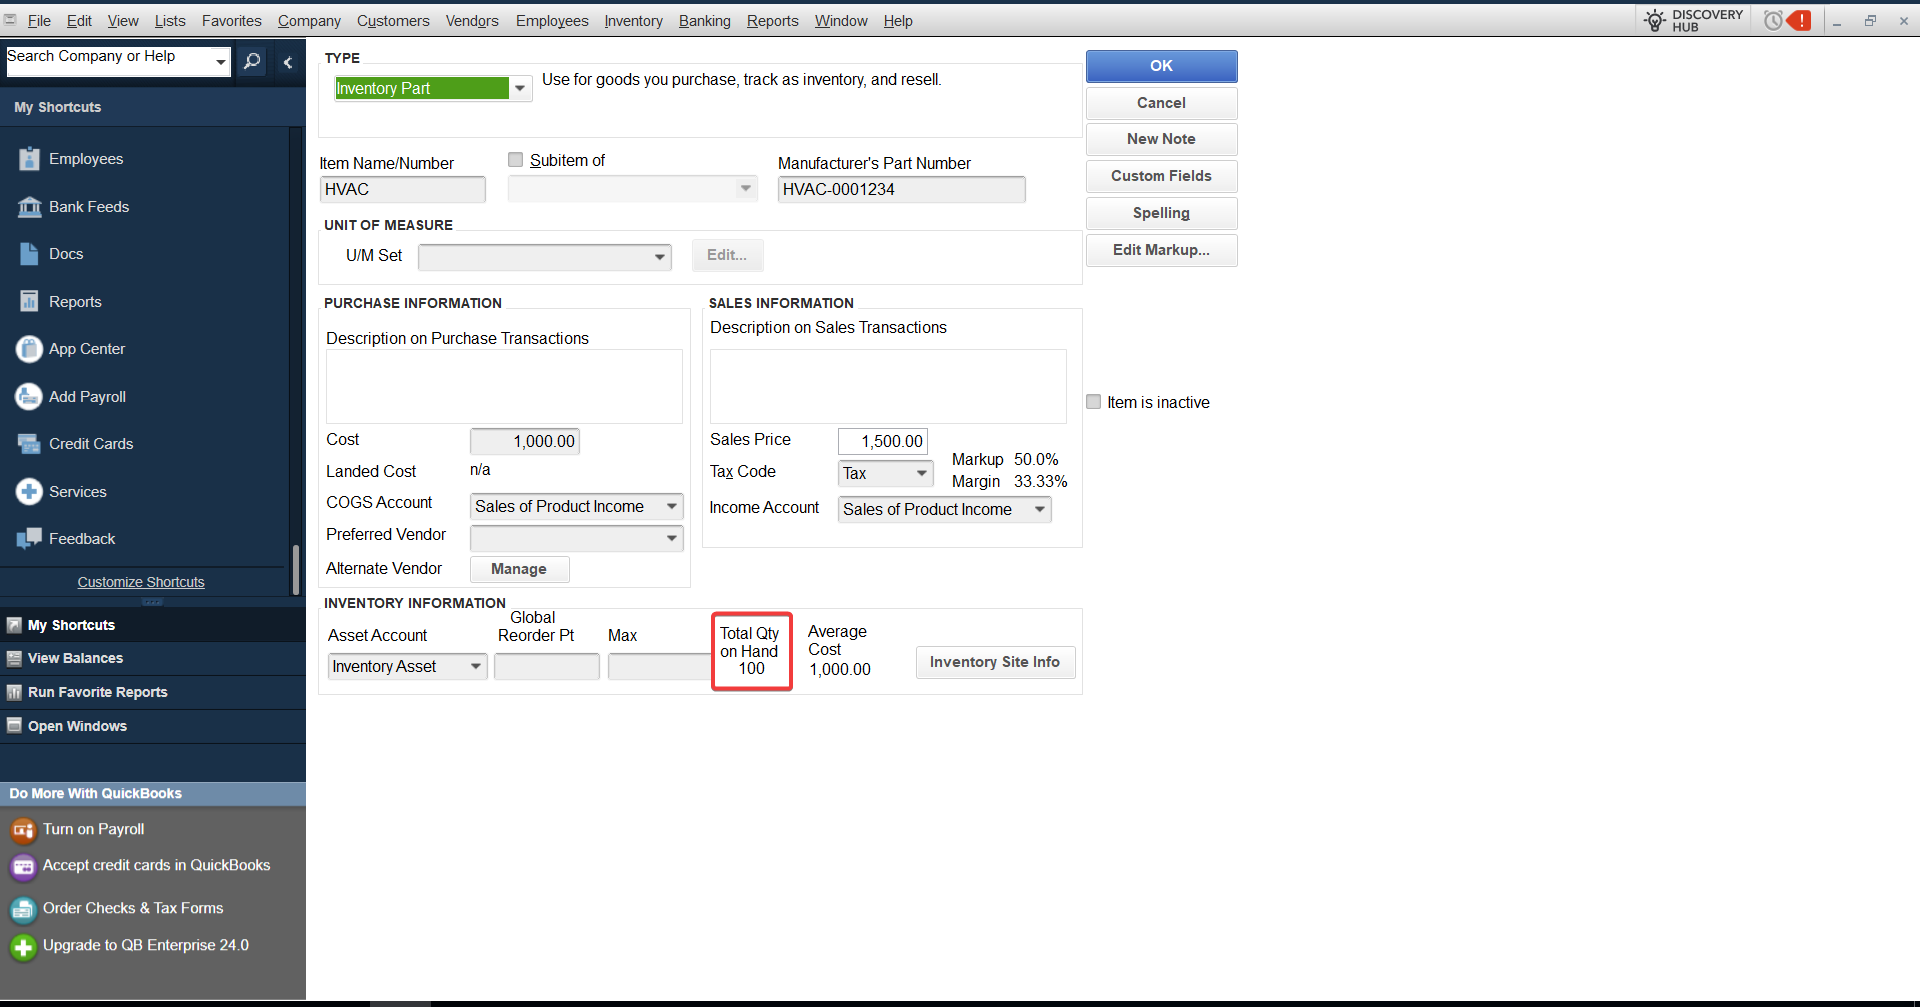

Quantity adjustment in QuickBooks Desktop
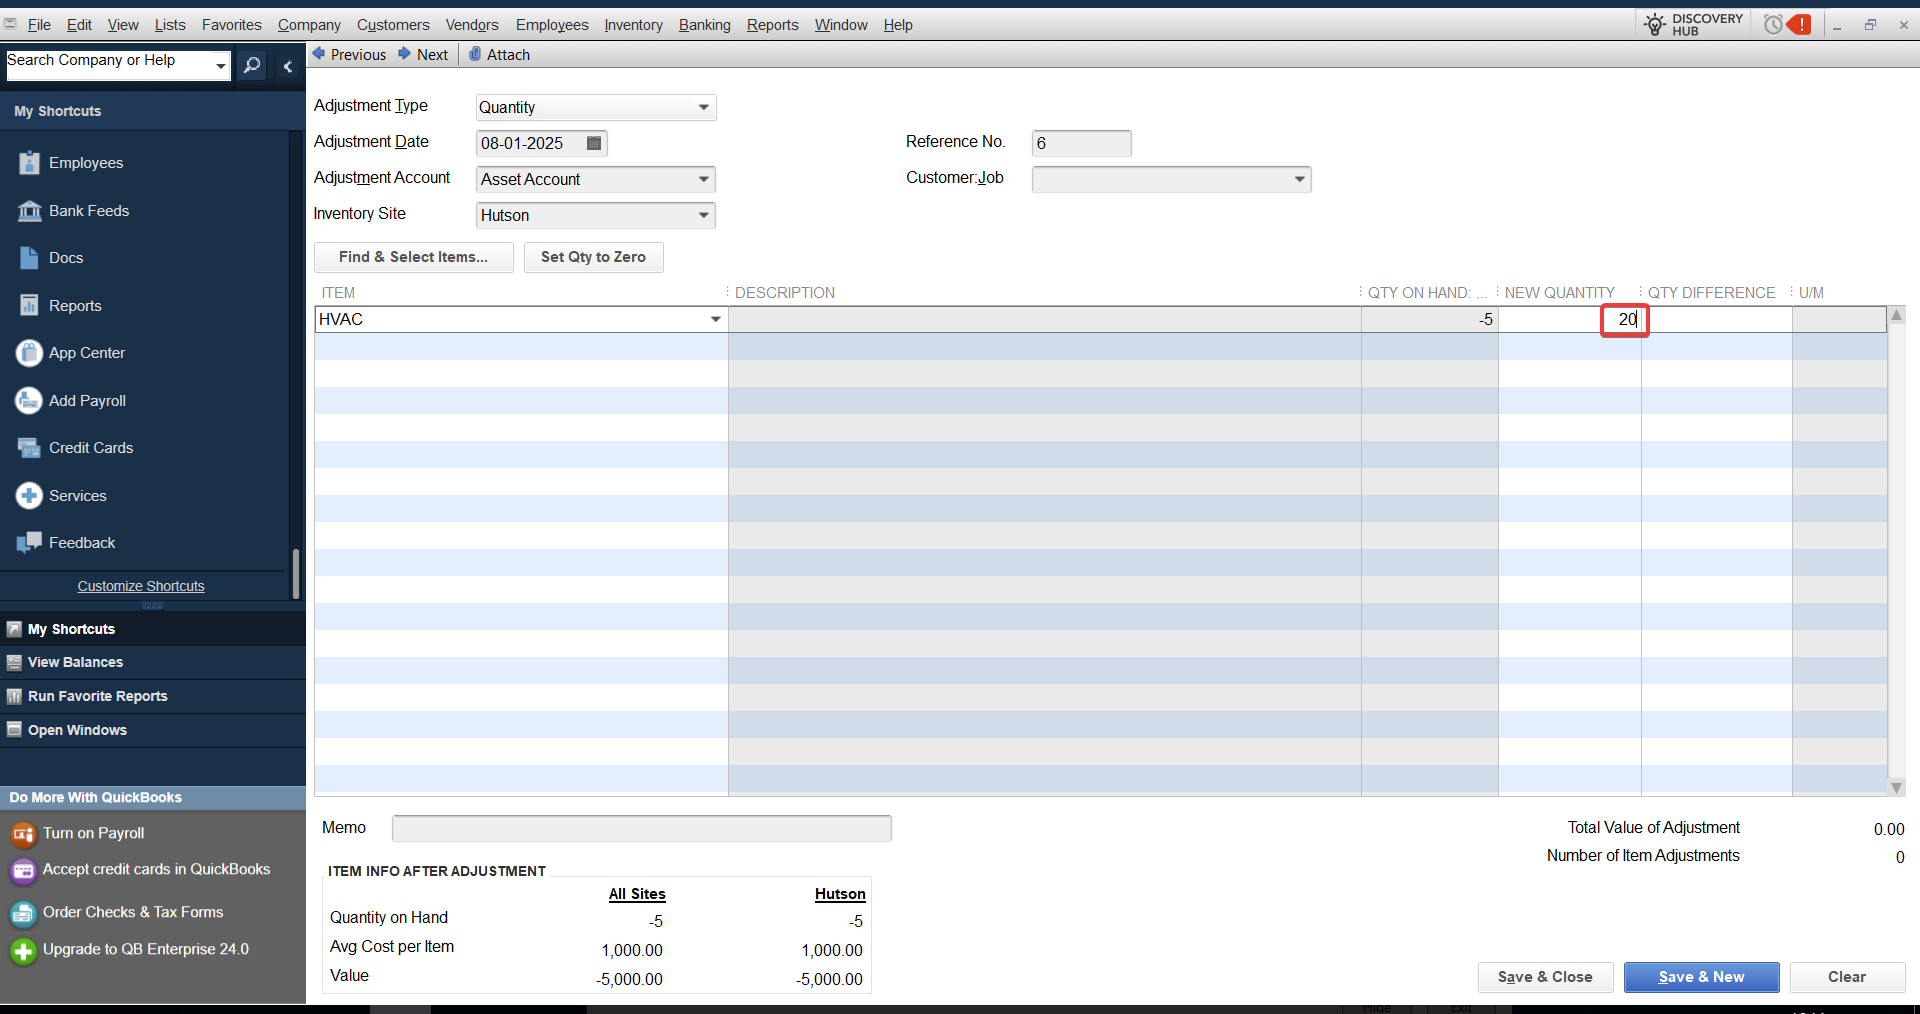
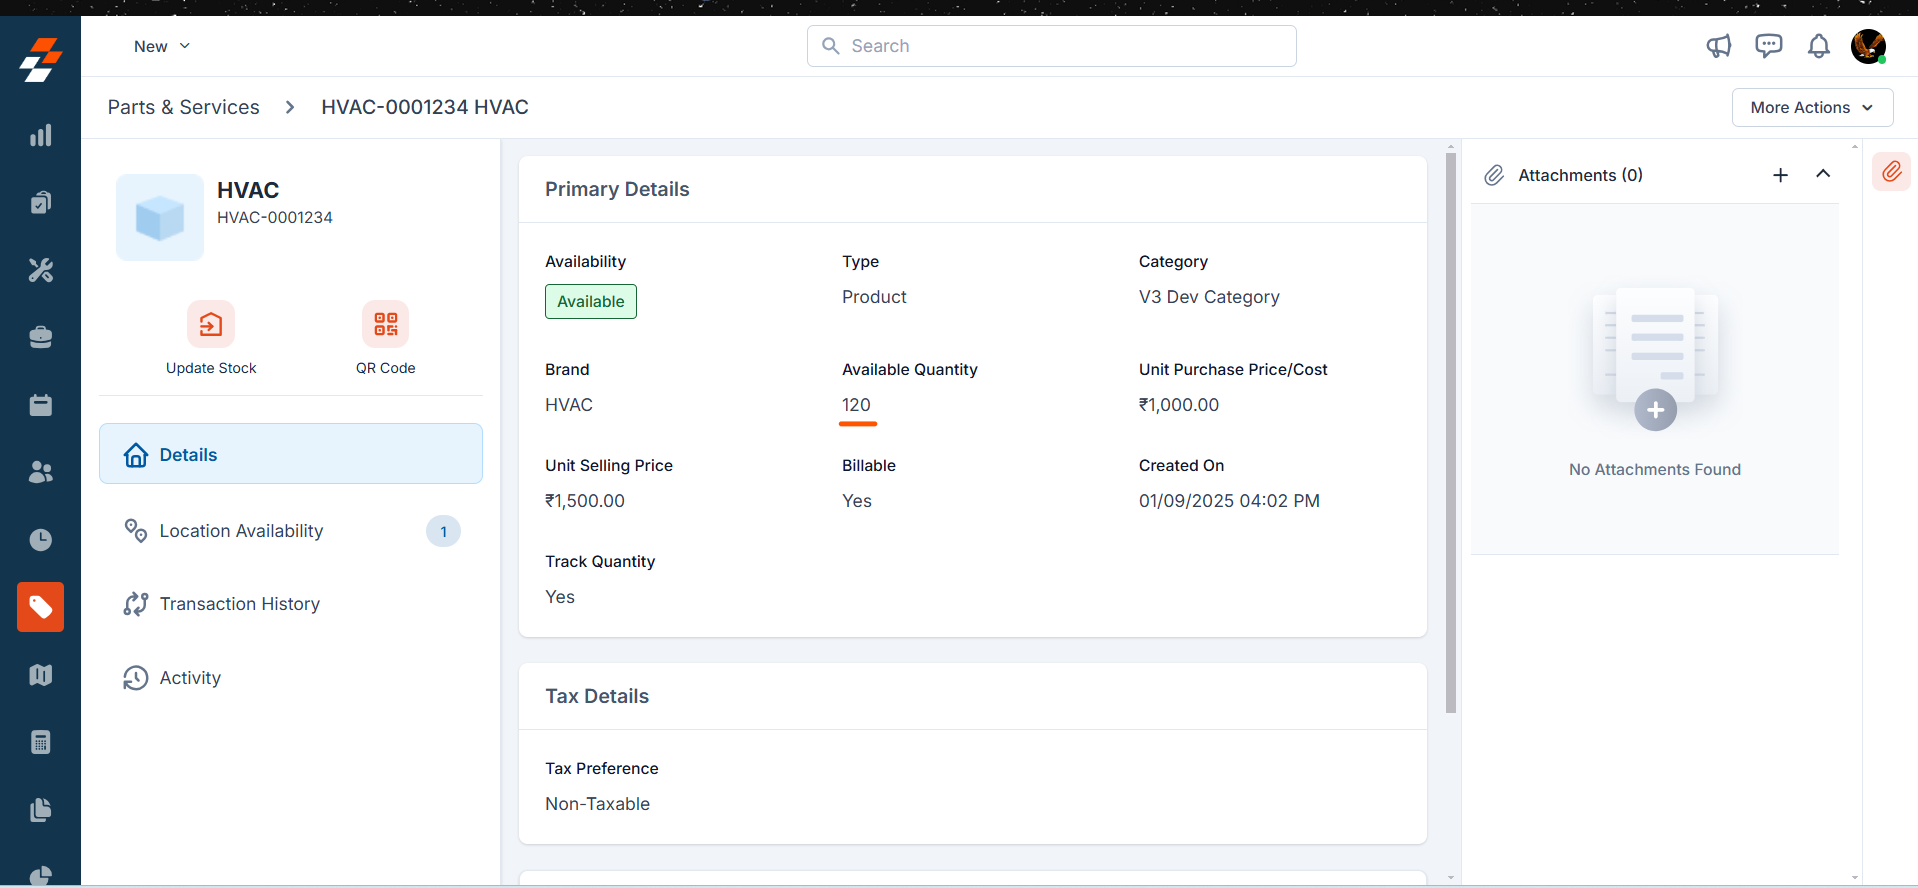
You can adjust the quantity of the purchased items. In QuickBooks Desktop, under the “Inventory,” select “Adjust Quantity / Value on Hand.” Select the adjustment type as “Quantity” and fill in other details.- If you add the quantity in “New Quantity,” QuickBooks Desktop will adjust the existing quantity of the inventory line item in Zuper.
- If you modify the quantity difference, QuickBooks Desktop will add the quantity to your existing inventory line item in Zuper.
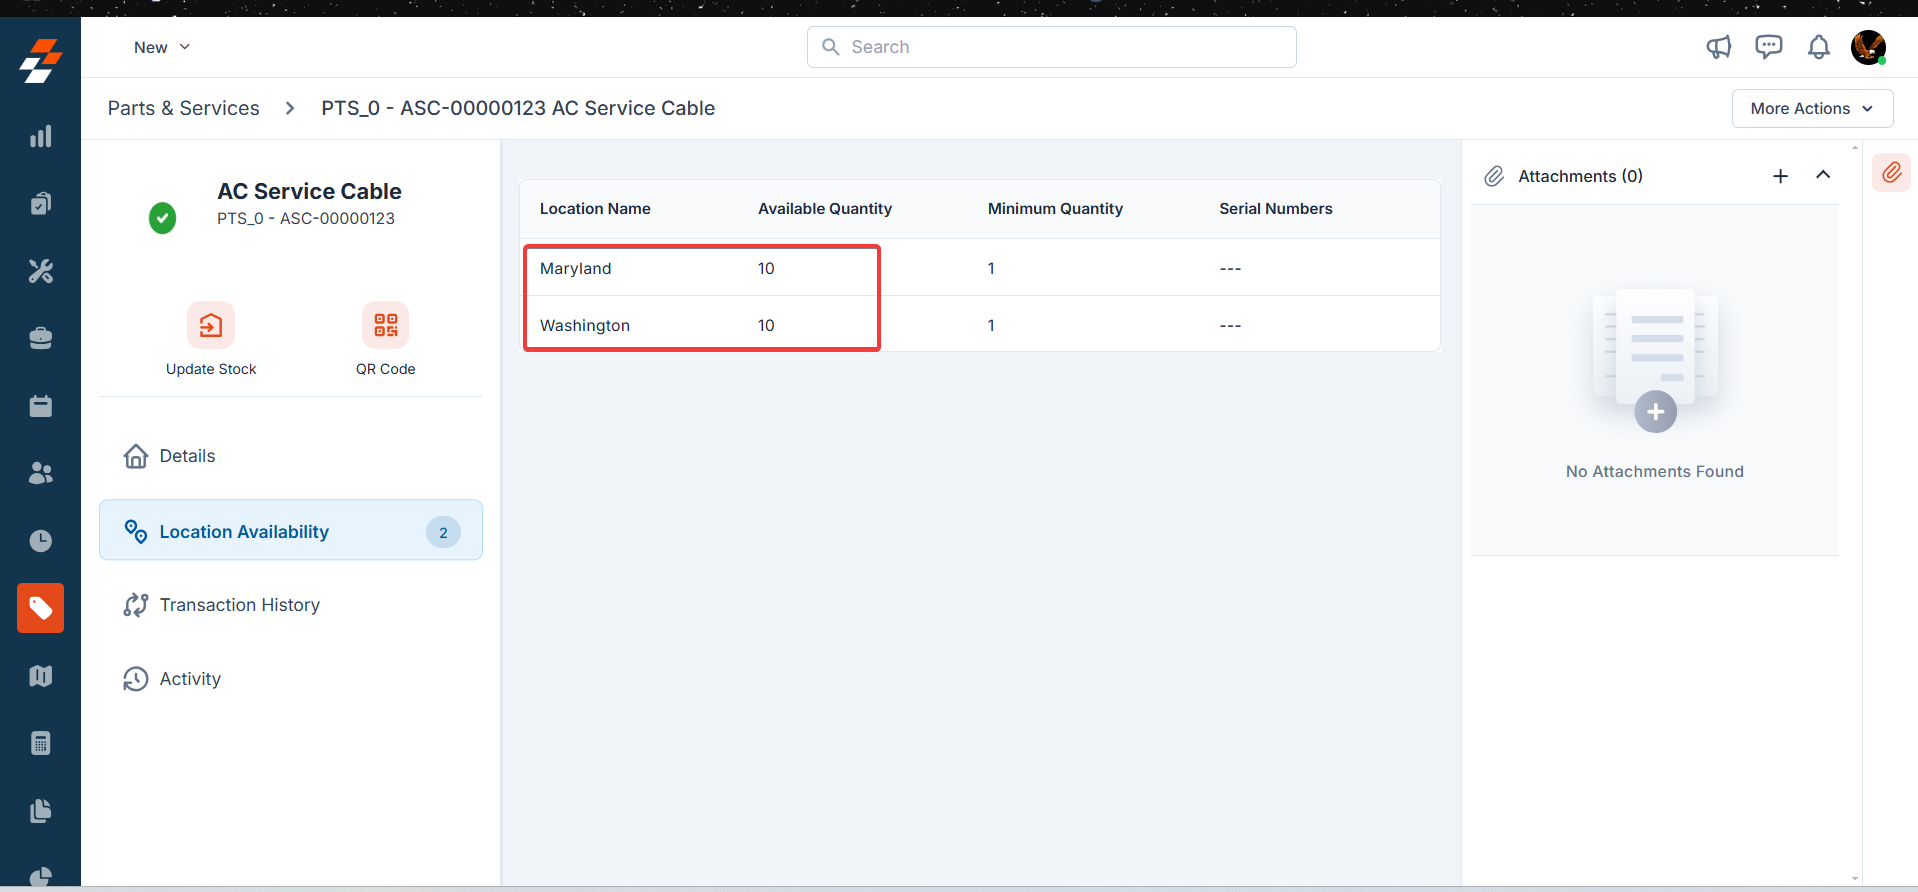
- If you add the quantity in “New Quantity” and as “New Line Item,” QuickBooks Desktop will create a new location, if available in Zuper, with the new quantity of the inventory line item in Zuper.
- If the quantity is reduced in QuickBooks Desktop, it will get decreased in Zuper at the designated location.
- If the quantity increases in QuickBooks Desktop, it will get added to the same configured location in Zuper.
- If only a single location exists in Zuper, any quantity adjustments will automatically apply to that location.
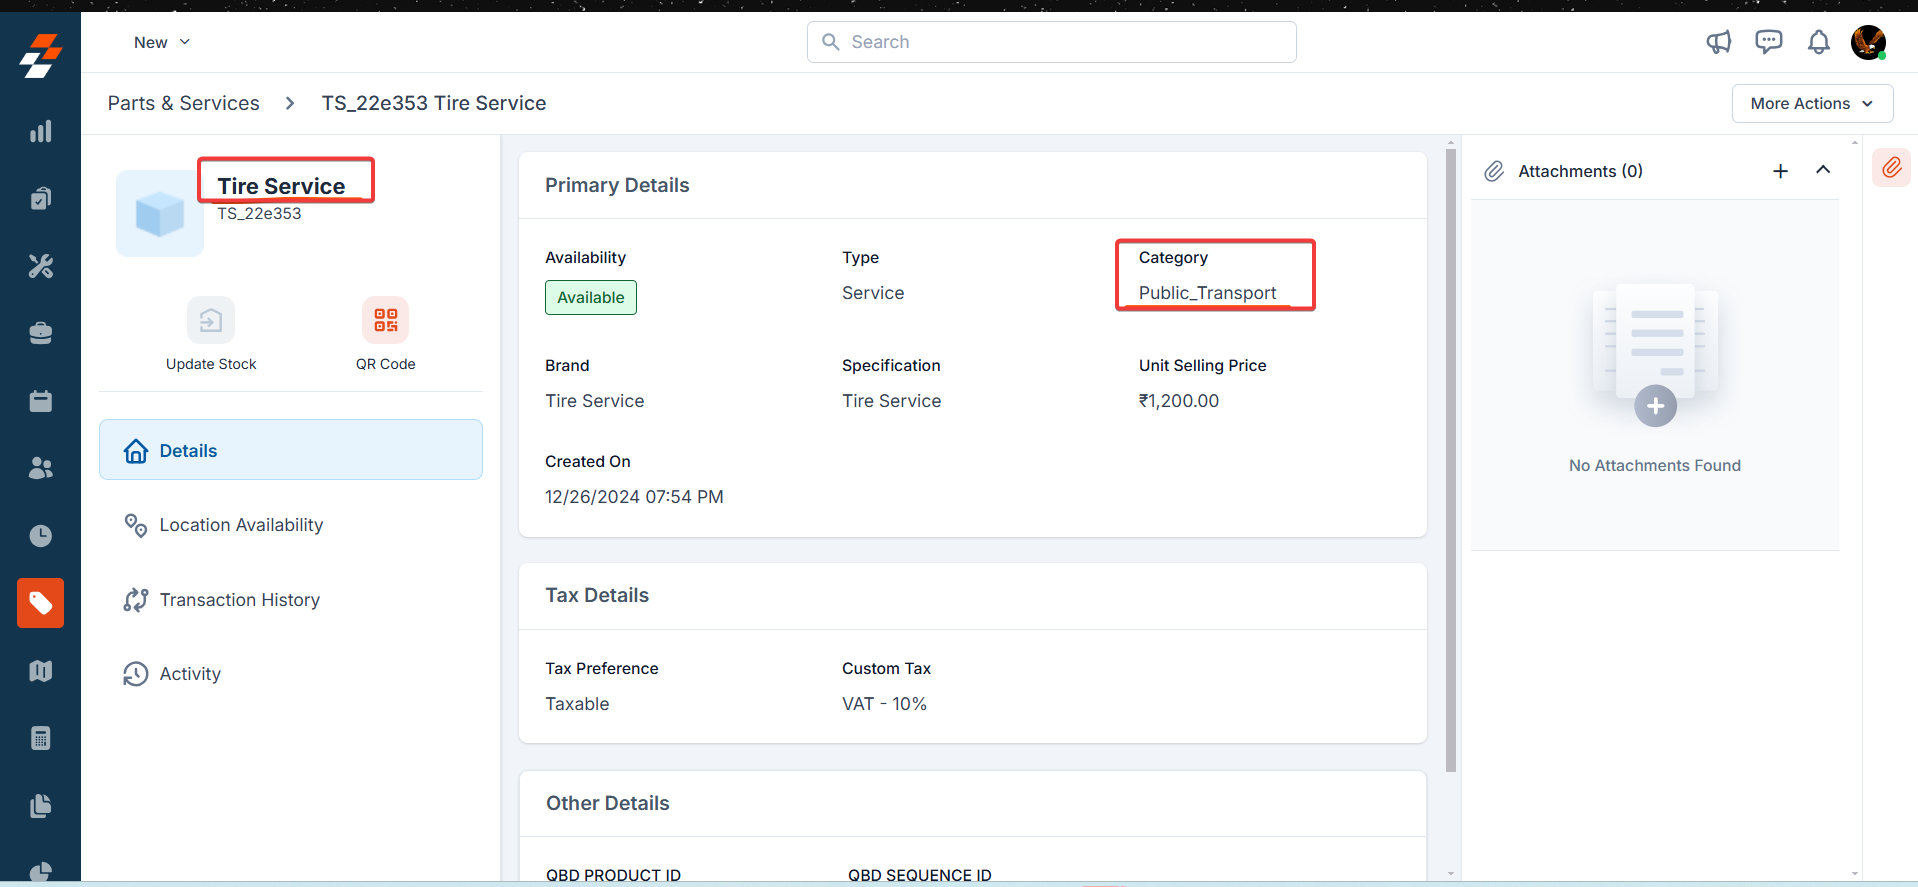
Handling service in QuickBooks Desktop
The service can be charged for the purchase, professional fees, and service charges. You can create a service item type from QuickBooks Desktop that will sync with Zuper’s service. In QuickBooks Desktop:- Navigate to Inventory and select Service as the type.
- Fill in the required fields as needed.
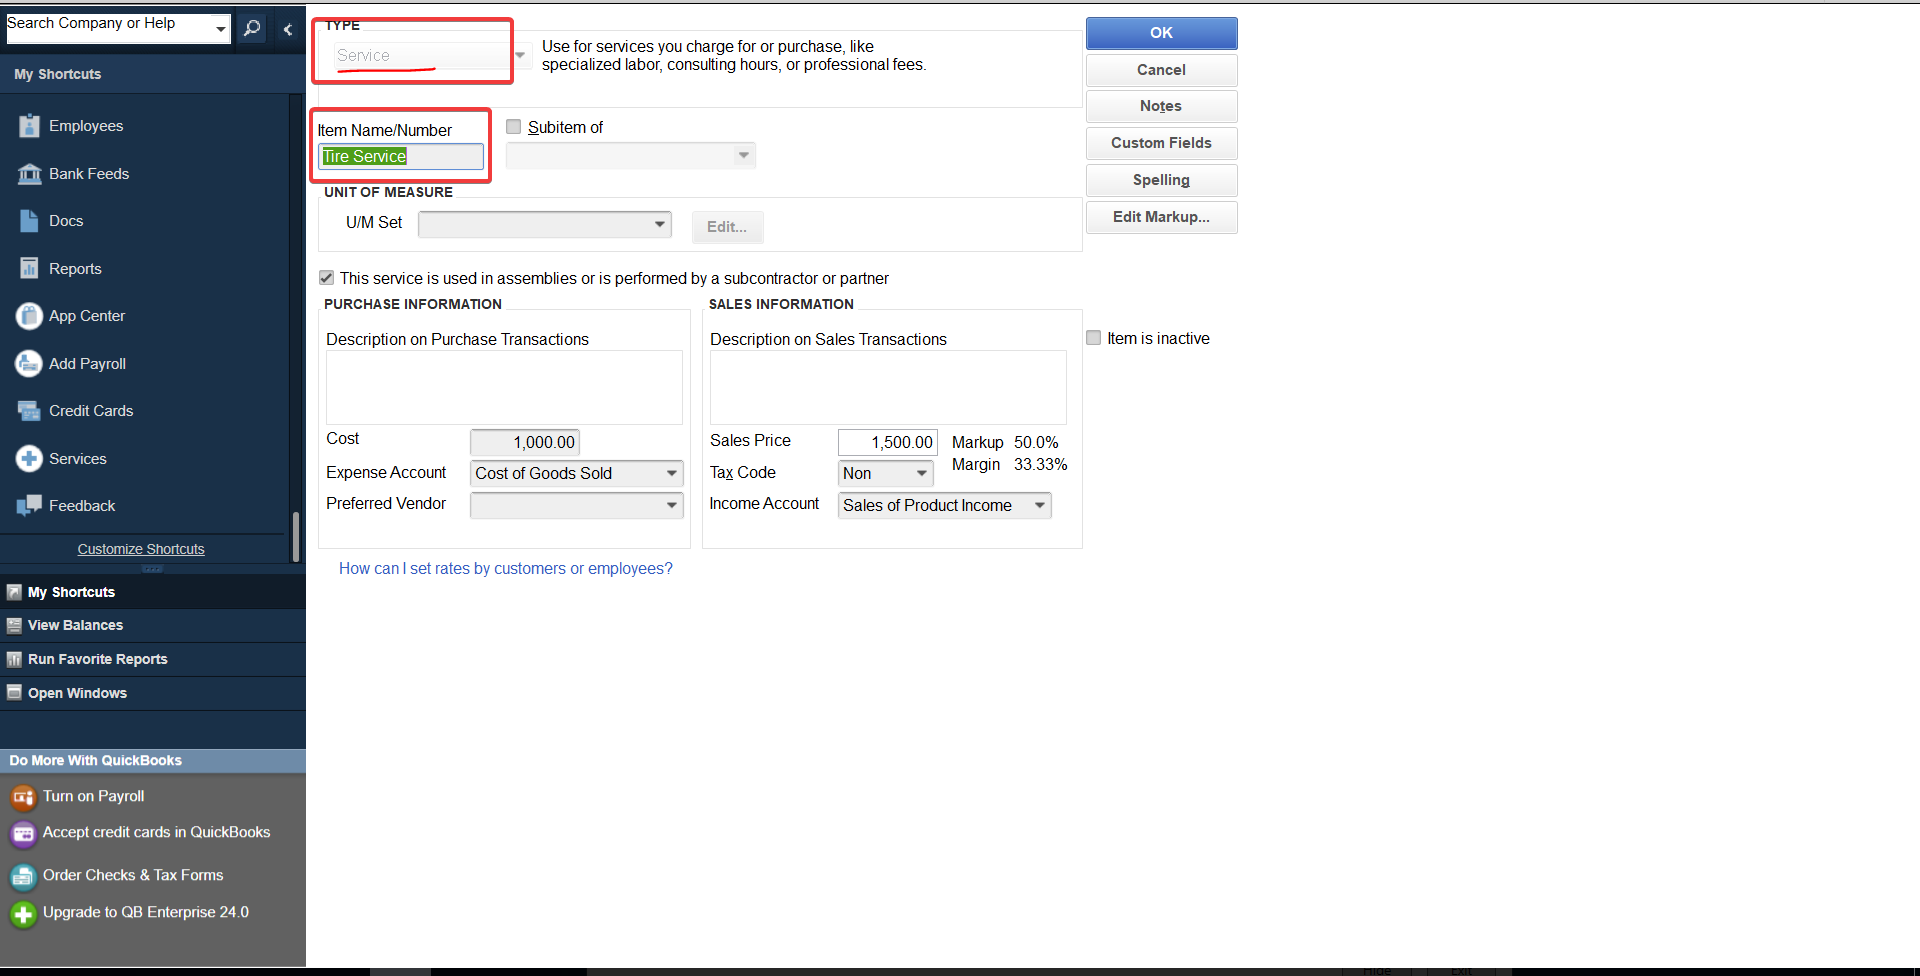
- The connector can be set to run manually or automatically to sync data between QuickBooks Desktop and Zuper.
- The Service category in Zuper is determined based on the default settings configured.
Note: Settings -> Organization Settings -> Parts and Services Settings -> Choose module to track part consumptions -> Invoice (choose invoice only).
Important points to note
- During setup, a default product category will be entered, and all products synced from QuickBooks Desktop to Zuper will be categorized under this default product category in Zuper.
- The quantity tracking only applies to Inventory items in QuickBooks Desktop and not to Non-Inventory or Service items. Transfer transactions do not affect the total product quantity across locations and do not require synchronization.
- Transfer transactions do not affect the total product quantity across locations and do not require synchronization.
- Syncing product locations from QuickBooks Desktop to Zuper is not supported. Instead for users without advanced inventory in QuickBooks Desktop, a default location will be configured in the settings to manage product locations in Zuper.