Creating a Material Request from the Material Request Module
The Material Request Module allows you to raise requests for required parts and products essential for job completion. This feature ensures that necessary materials are procured on time, linked to specific jobs or quotes, and tracked efficiently. Follow the steps below to create a material request.Step 1: Accessing the Material Request Module
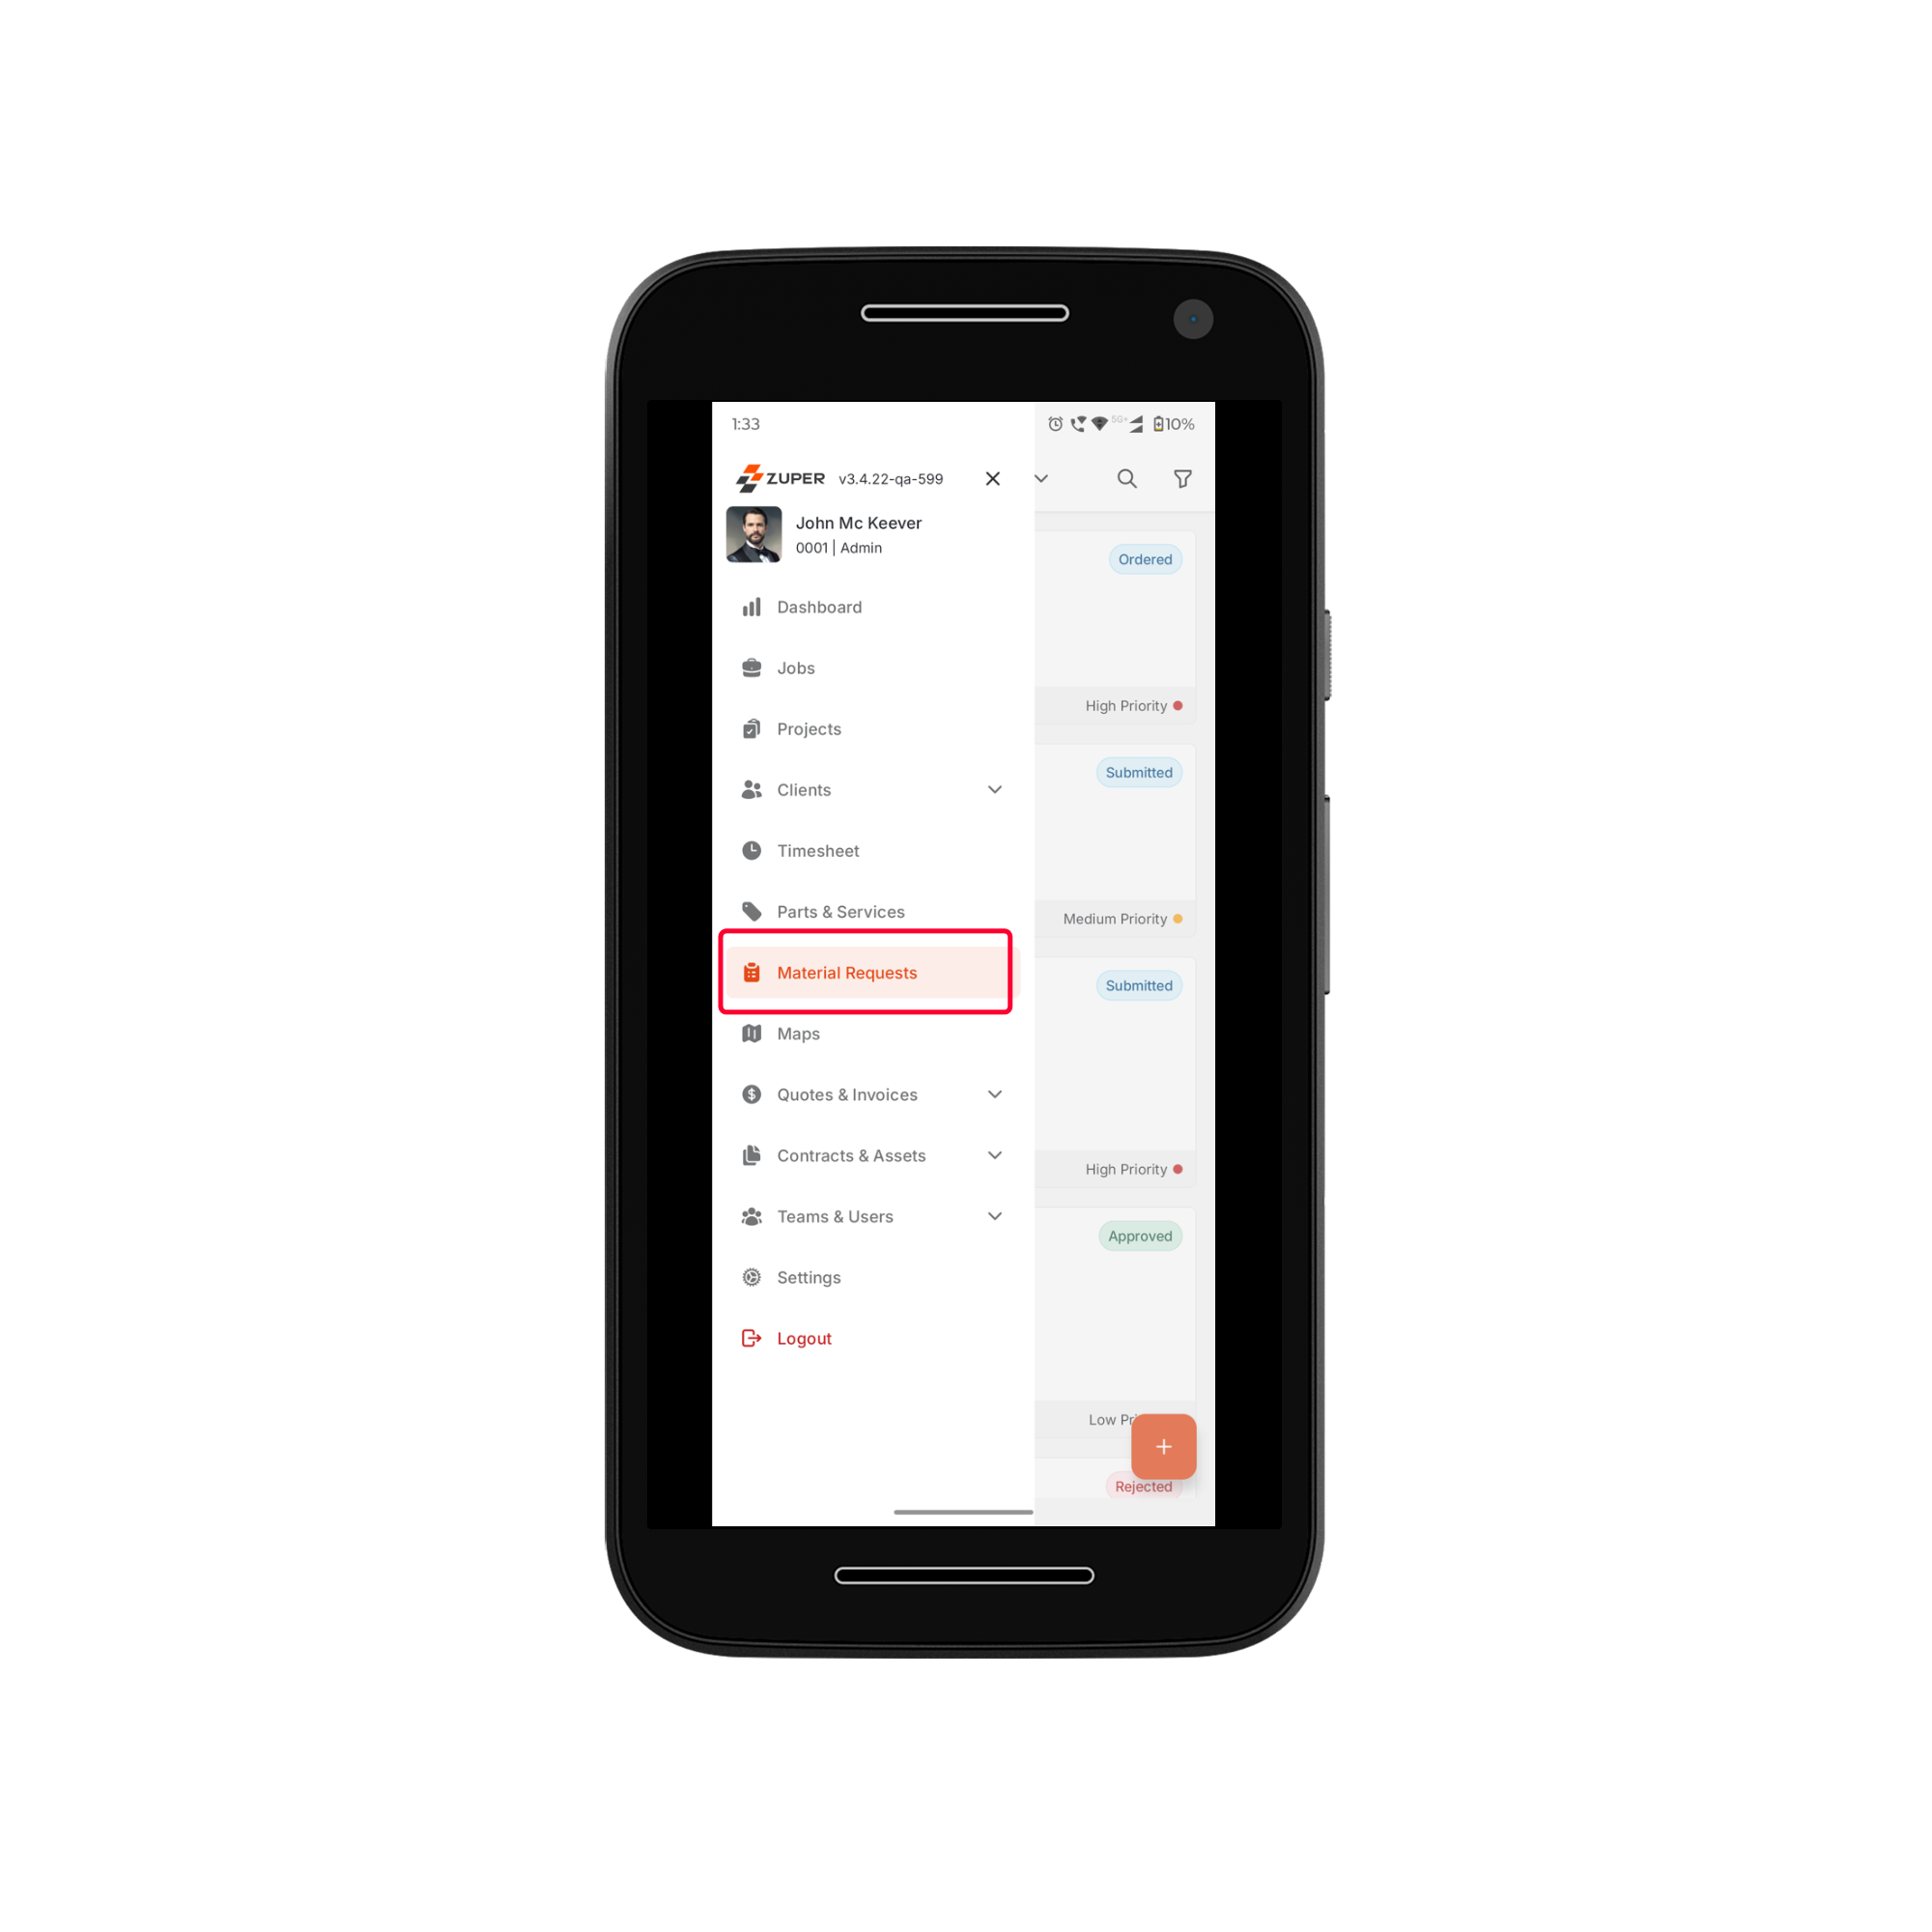
- Tap the Hamburger Menu at the top left corner of the screen and select Material Requests. The Material Requests listing page will appear.
- On the listing page, you can:
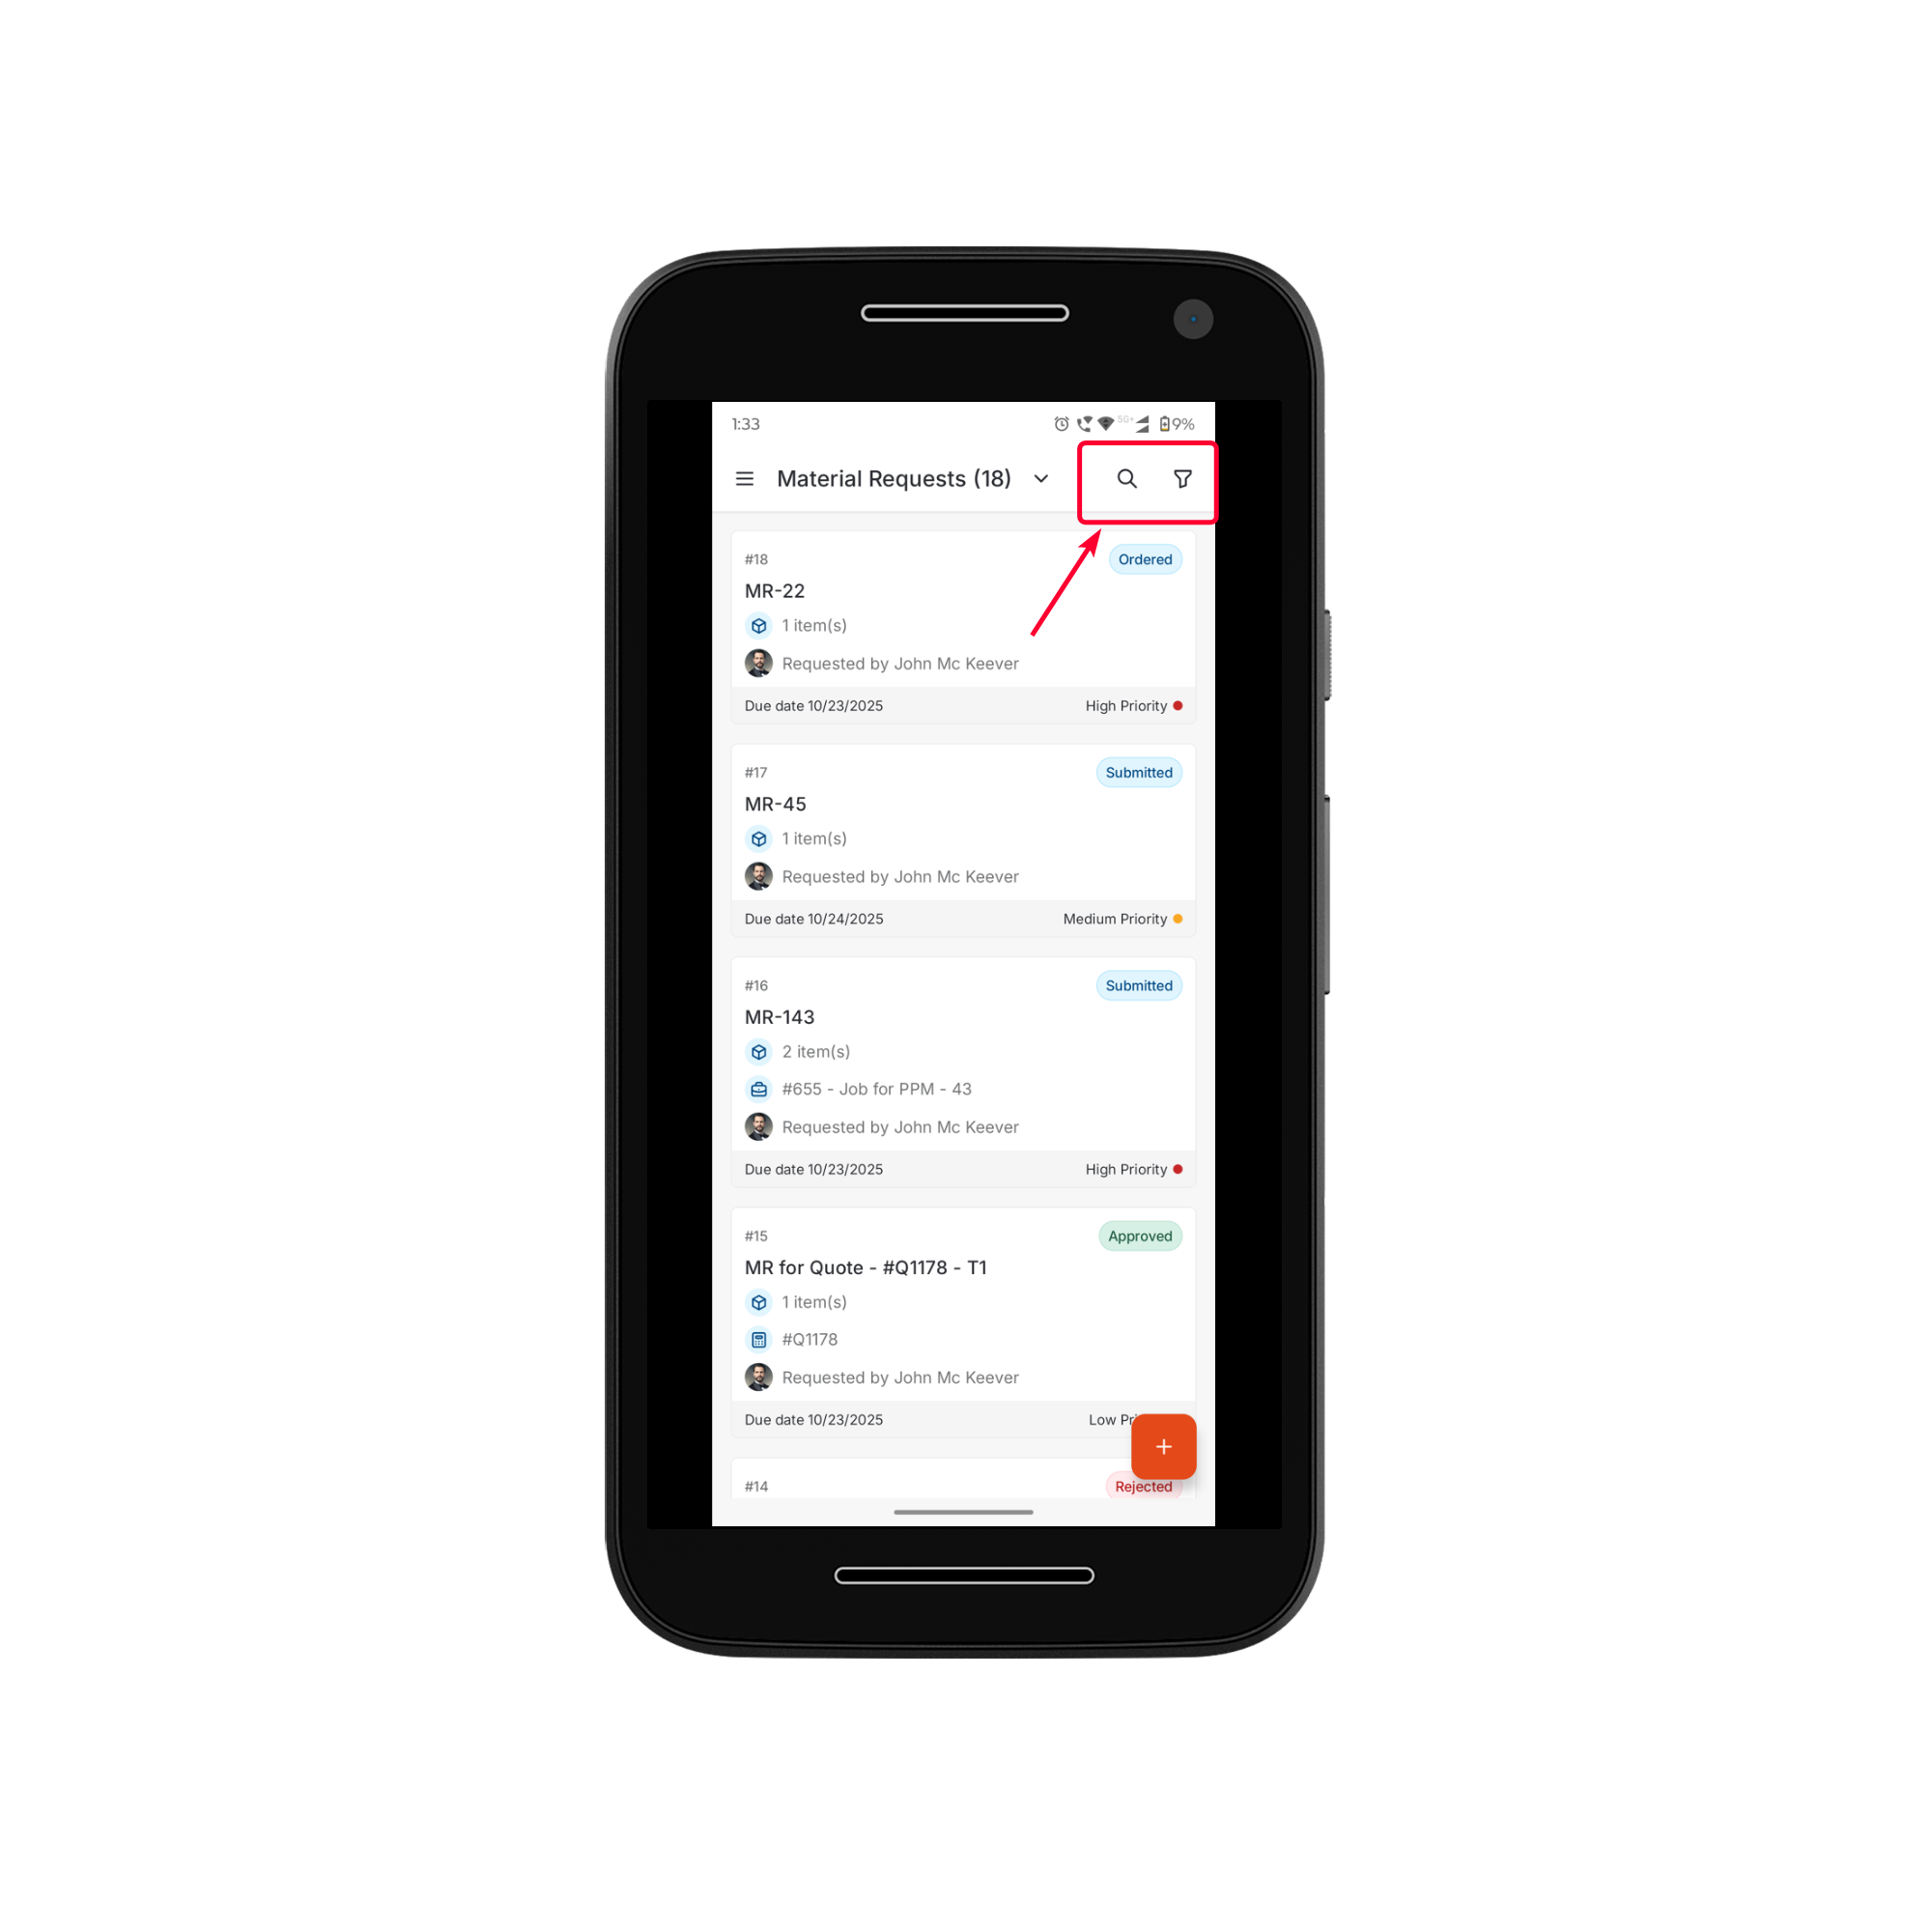
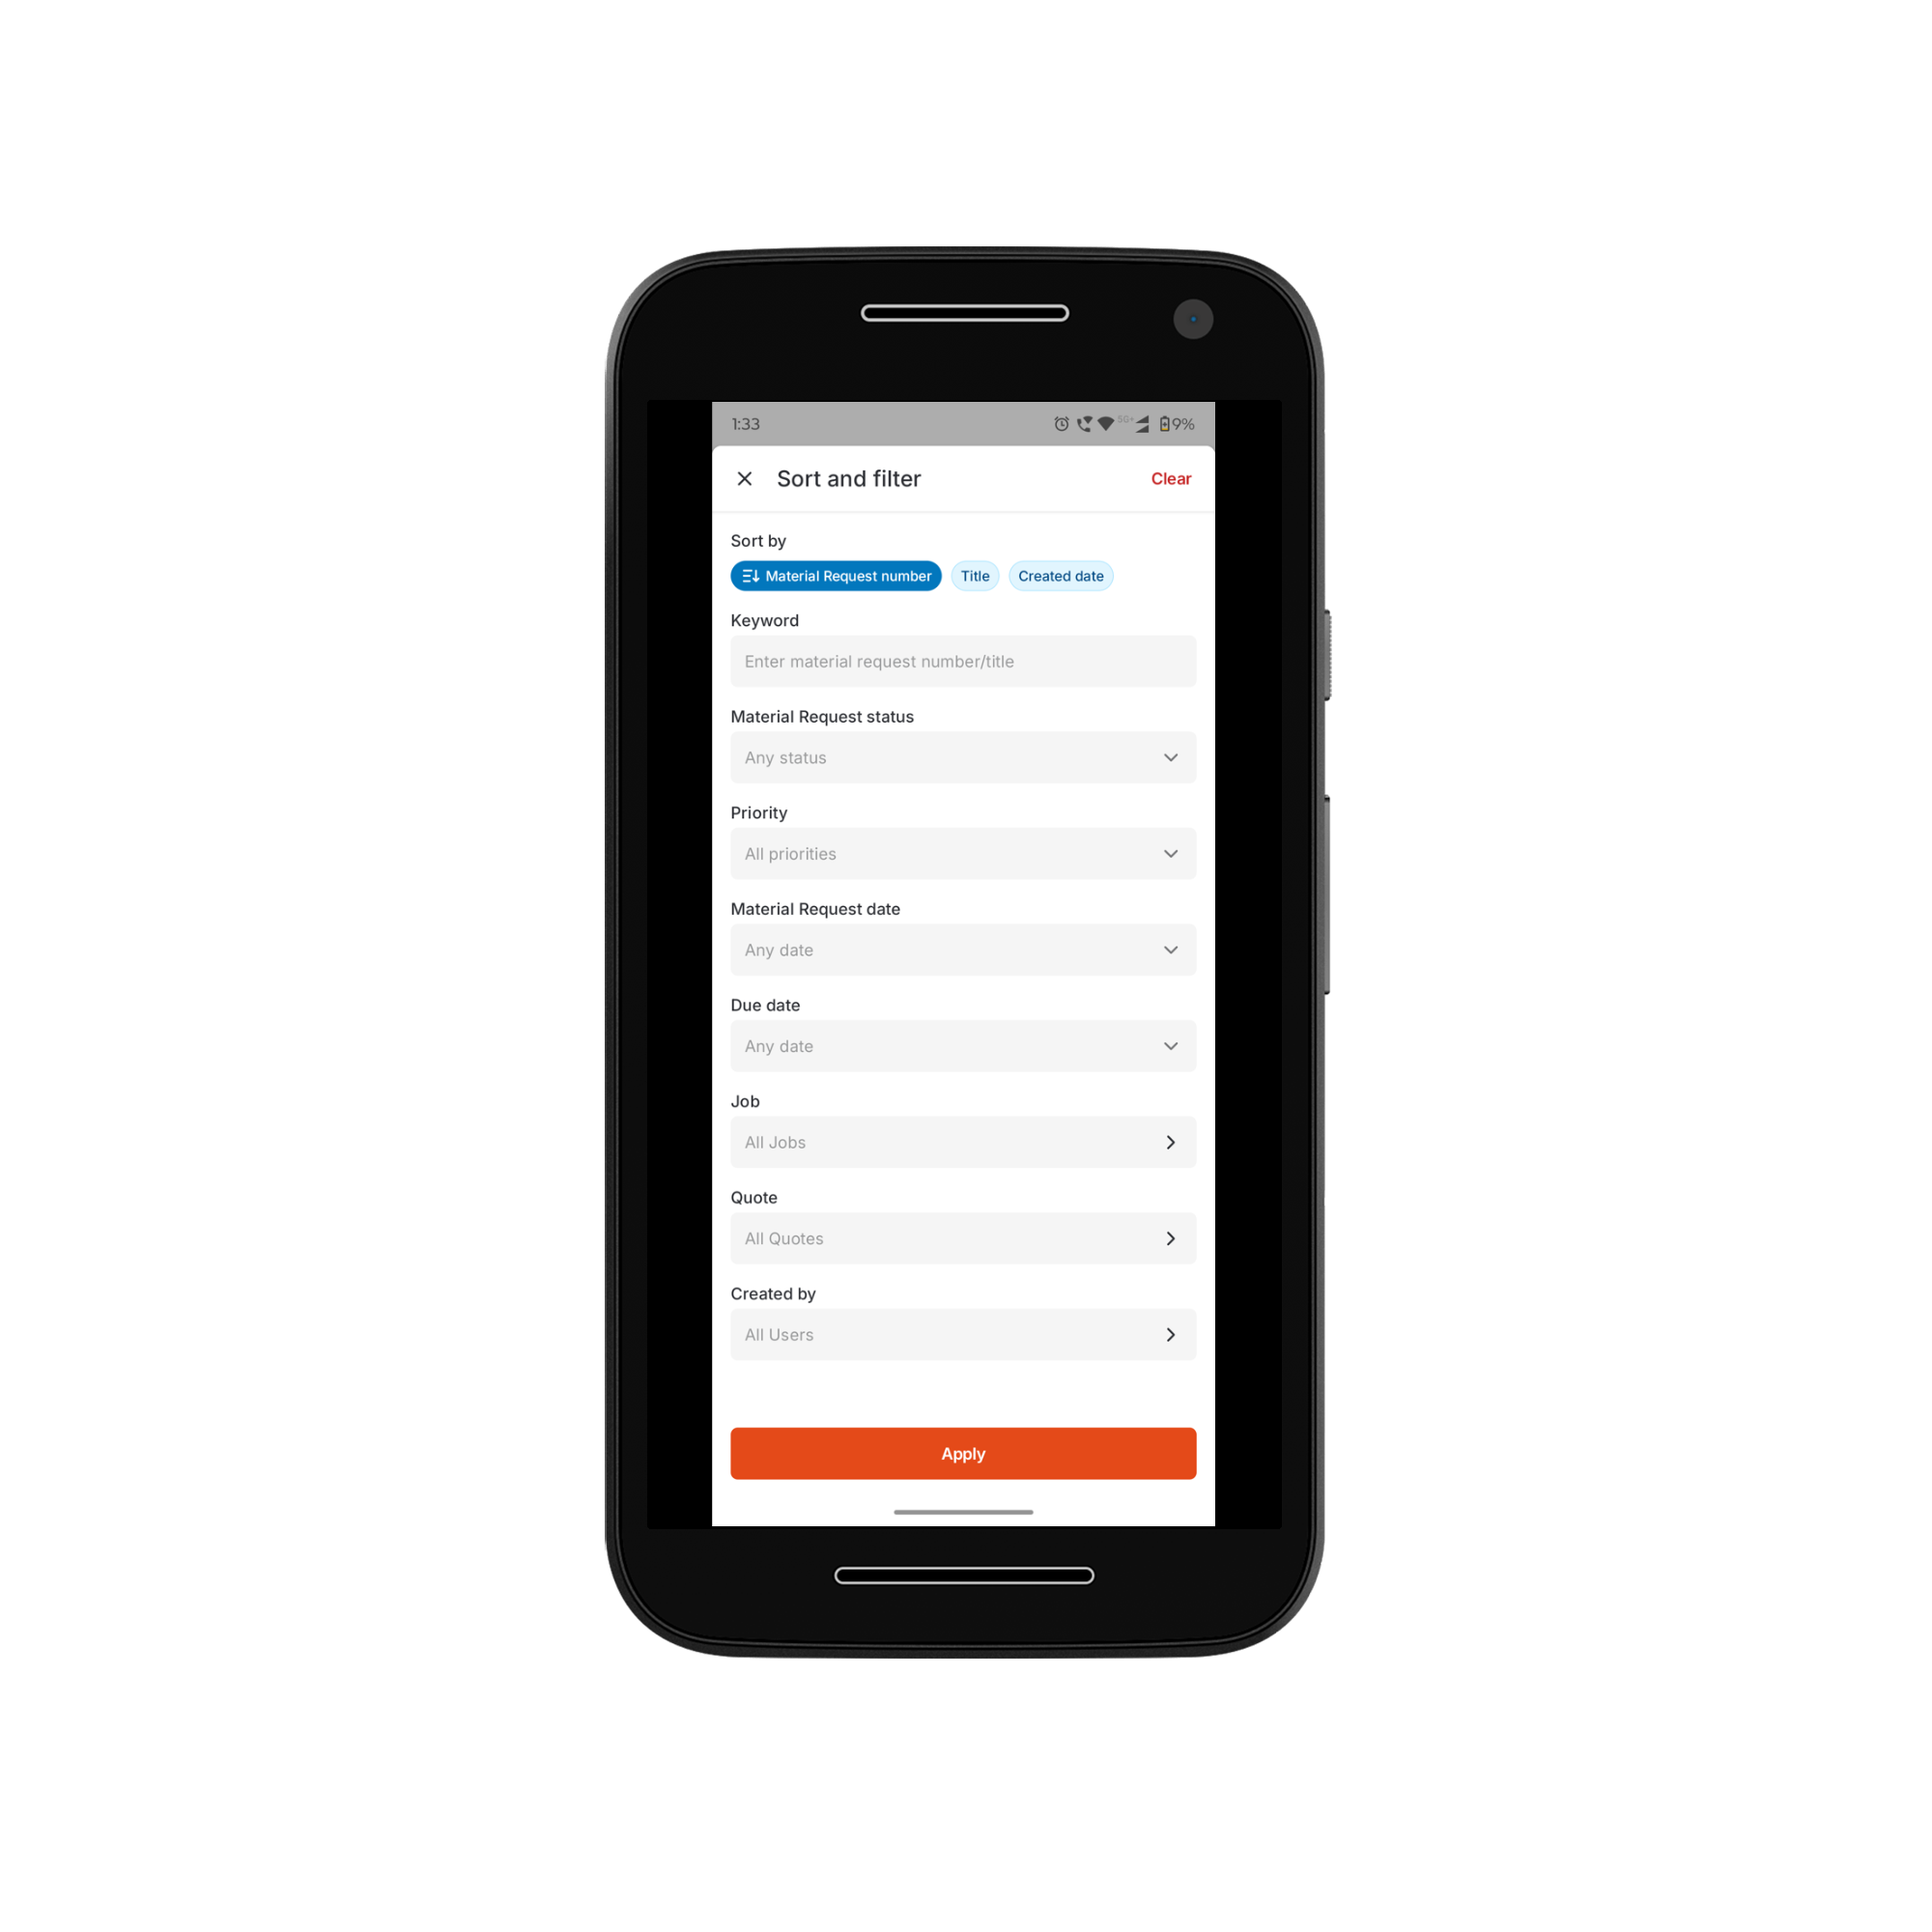
- Sort and Filter material requests based on request number, status, priority, associated job, associated quote, and more using the filter icon.
- Search by entering the material request title or number using the search icon.
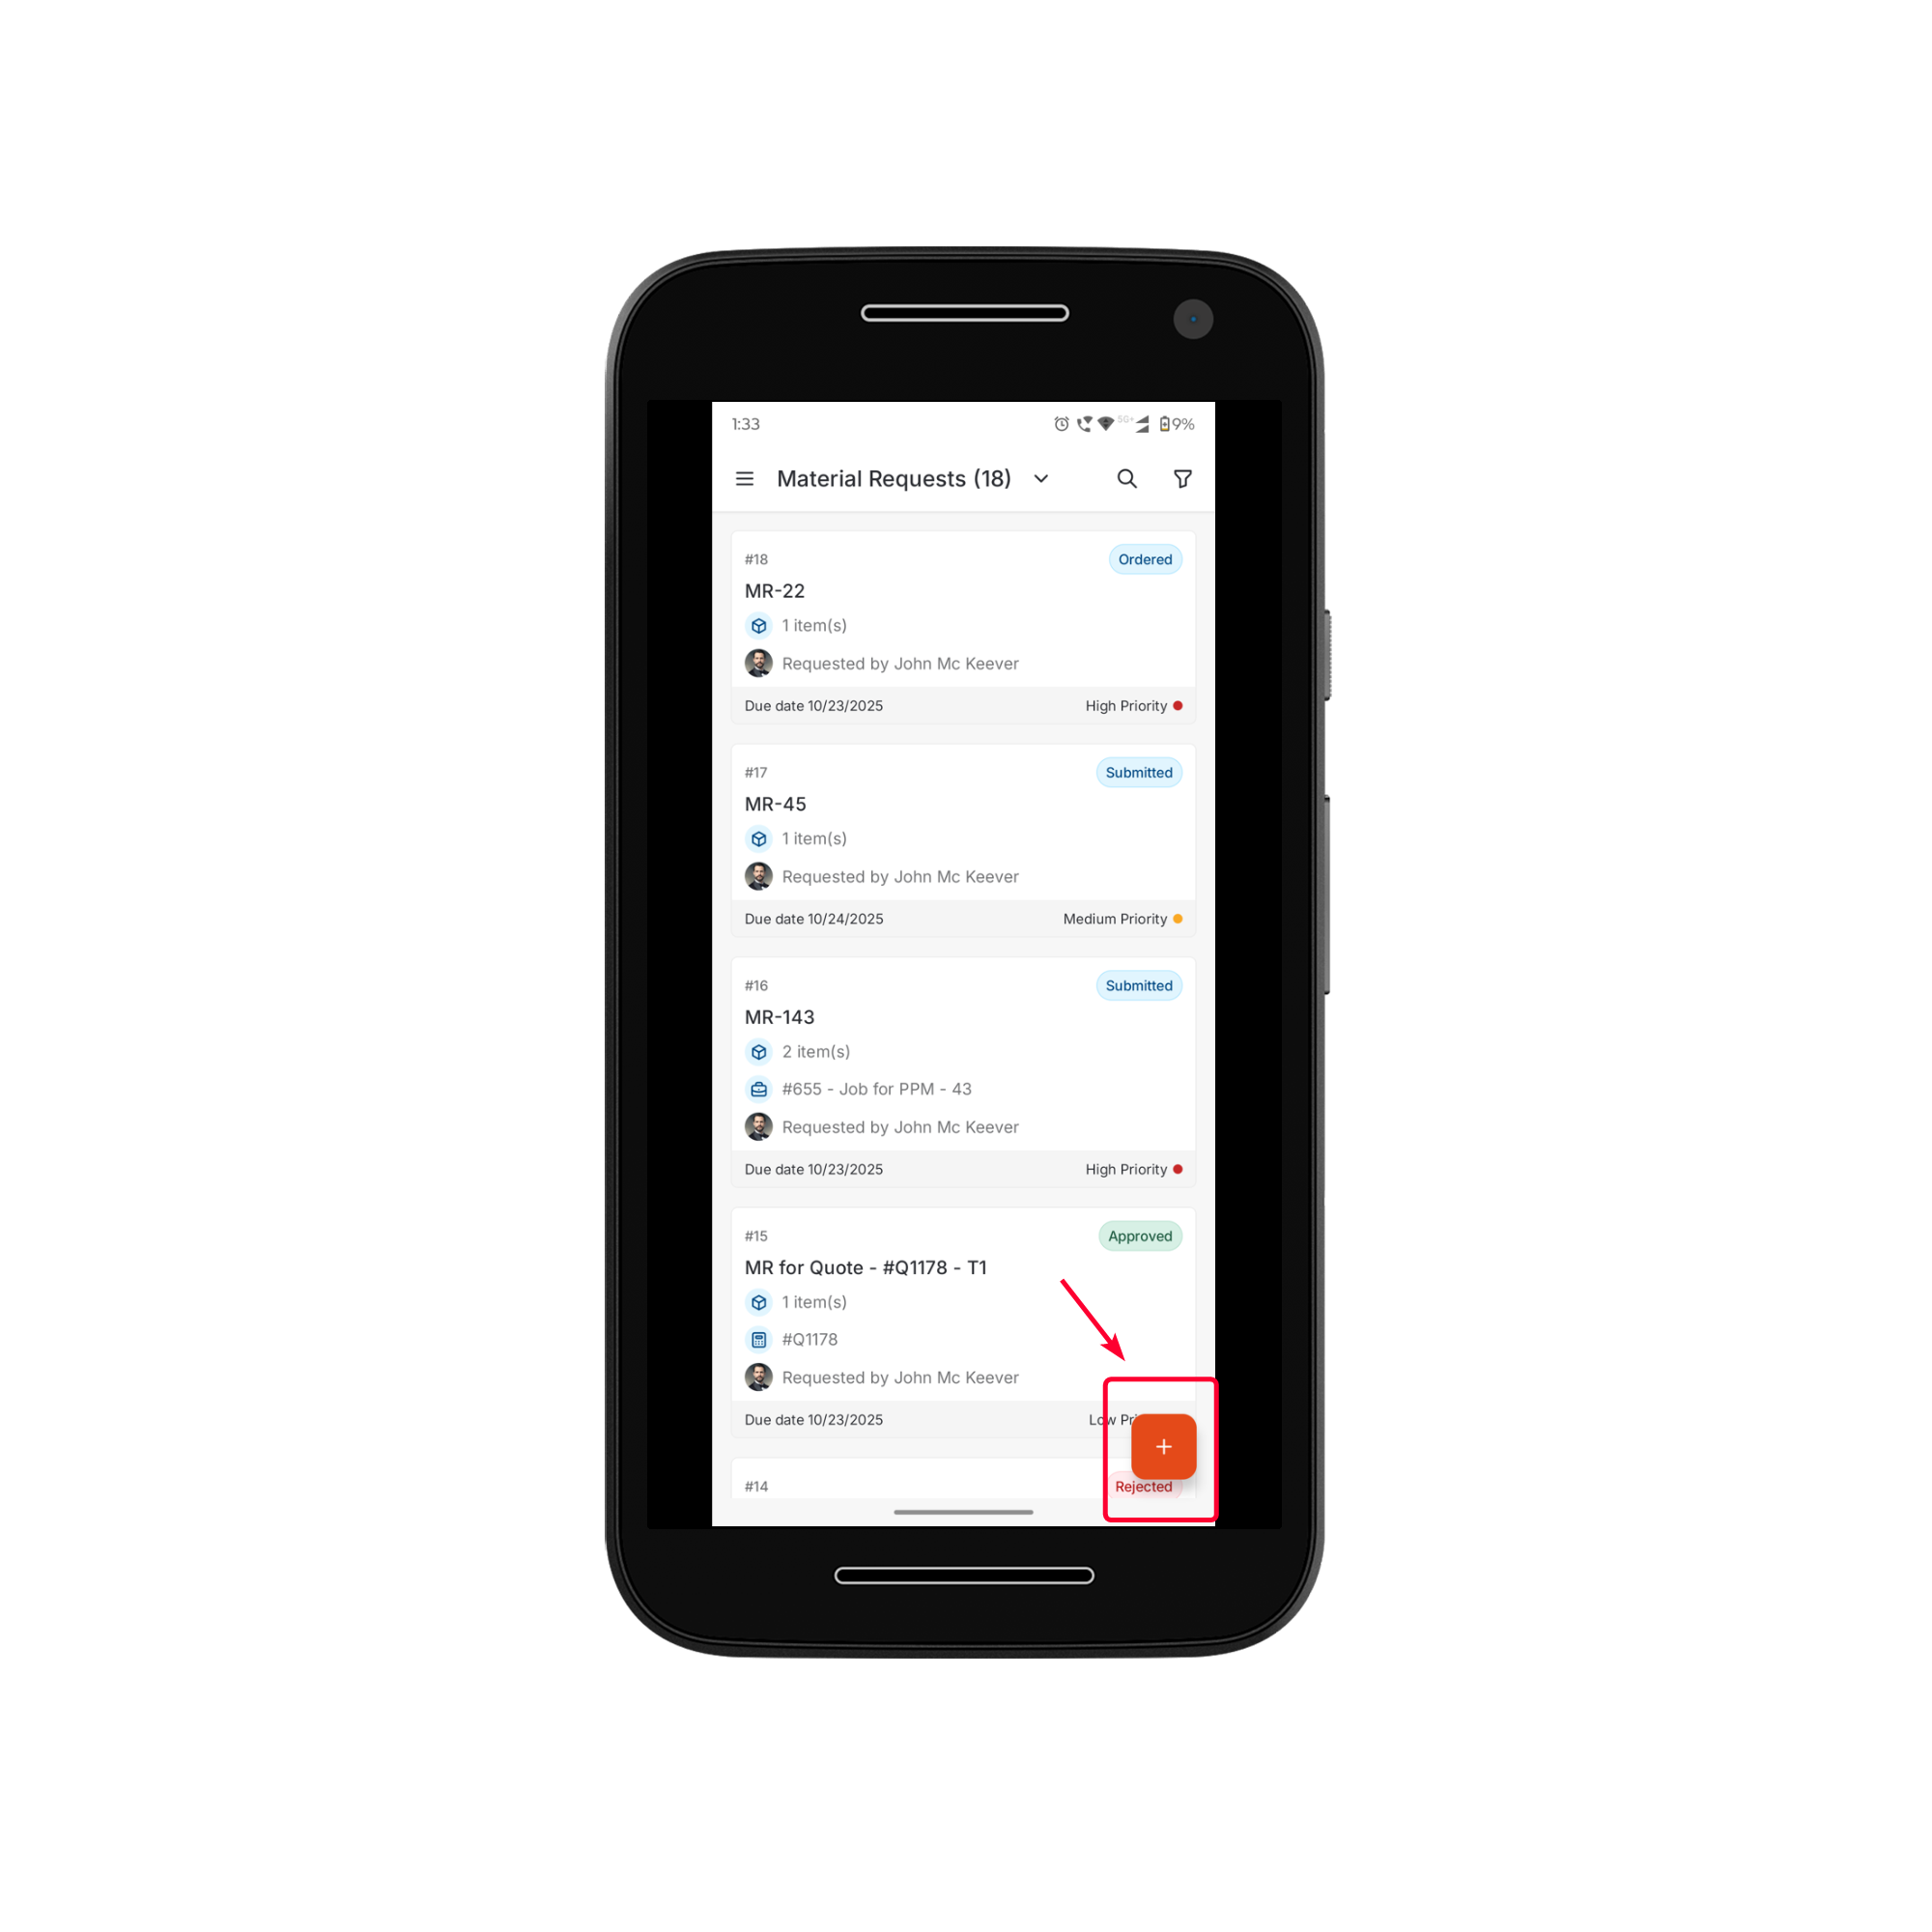
- To create a new material request, tap the “+” (Add) icon at the bottom of the page. The New Material Request Creation Page will open.
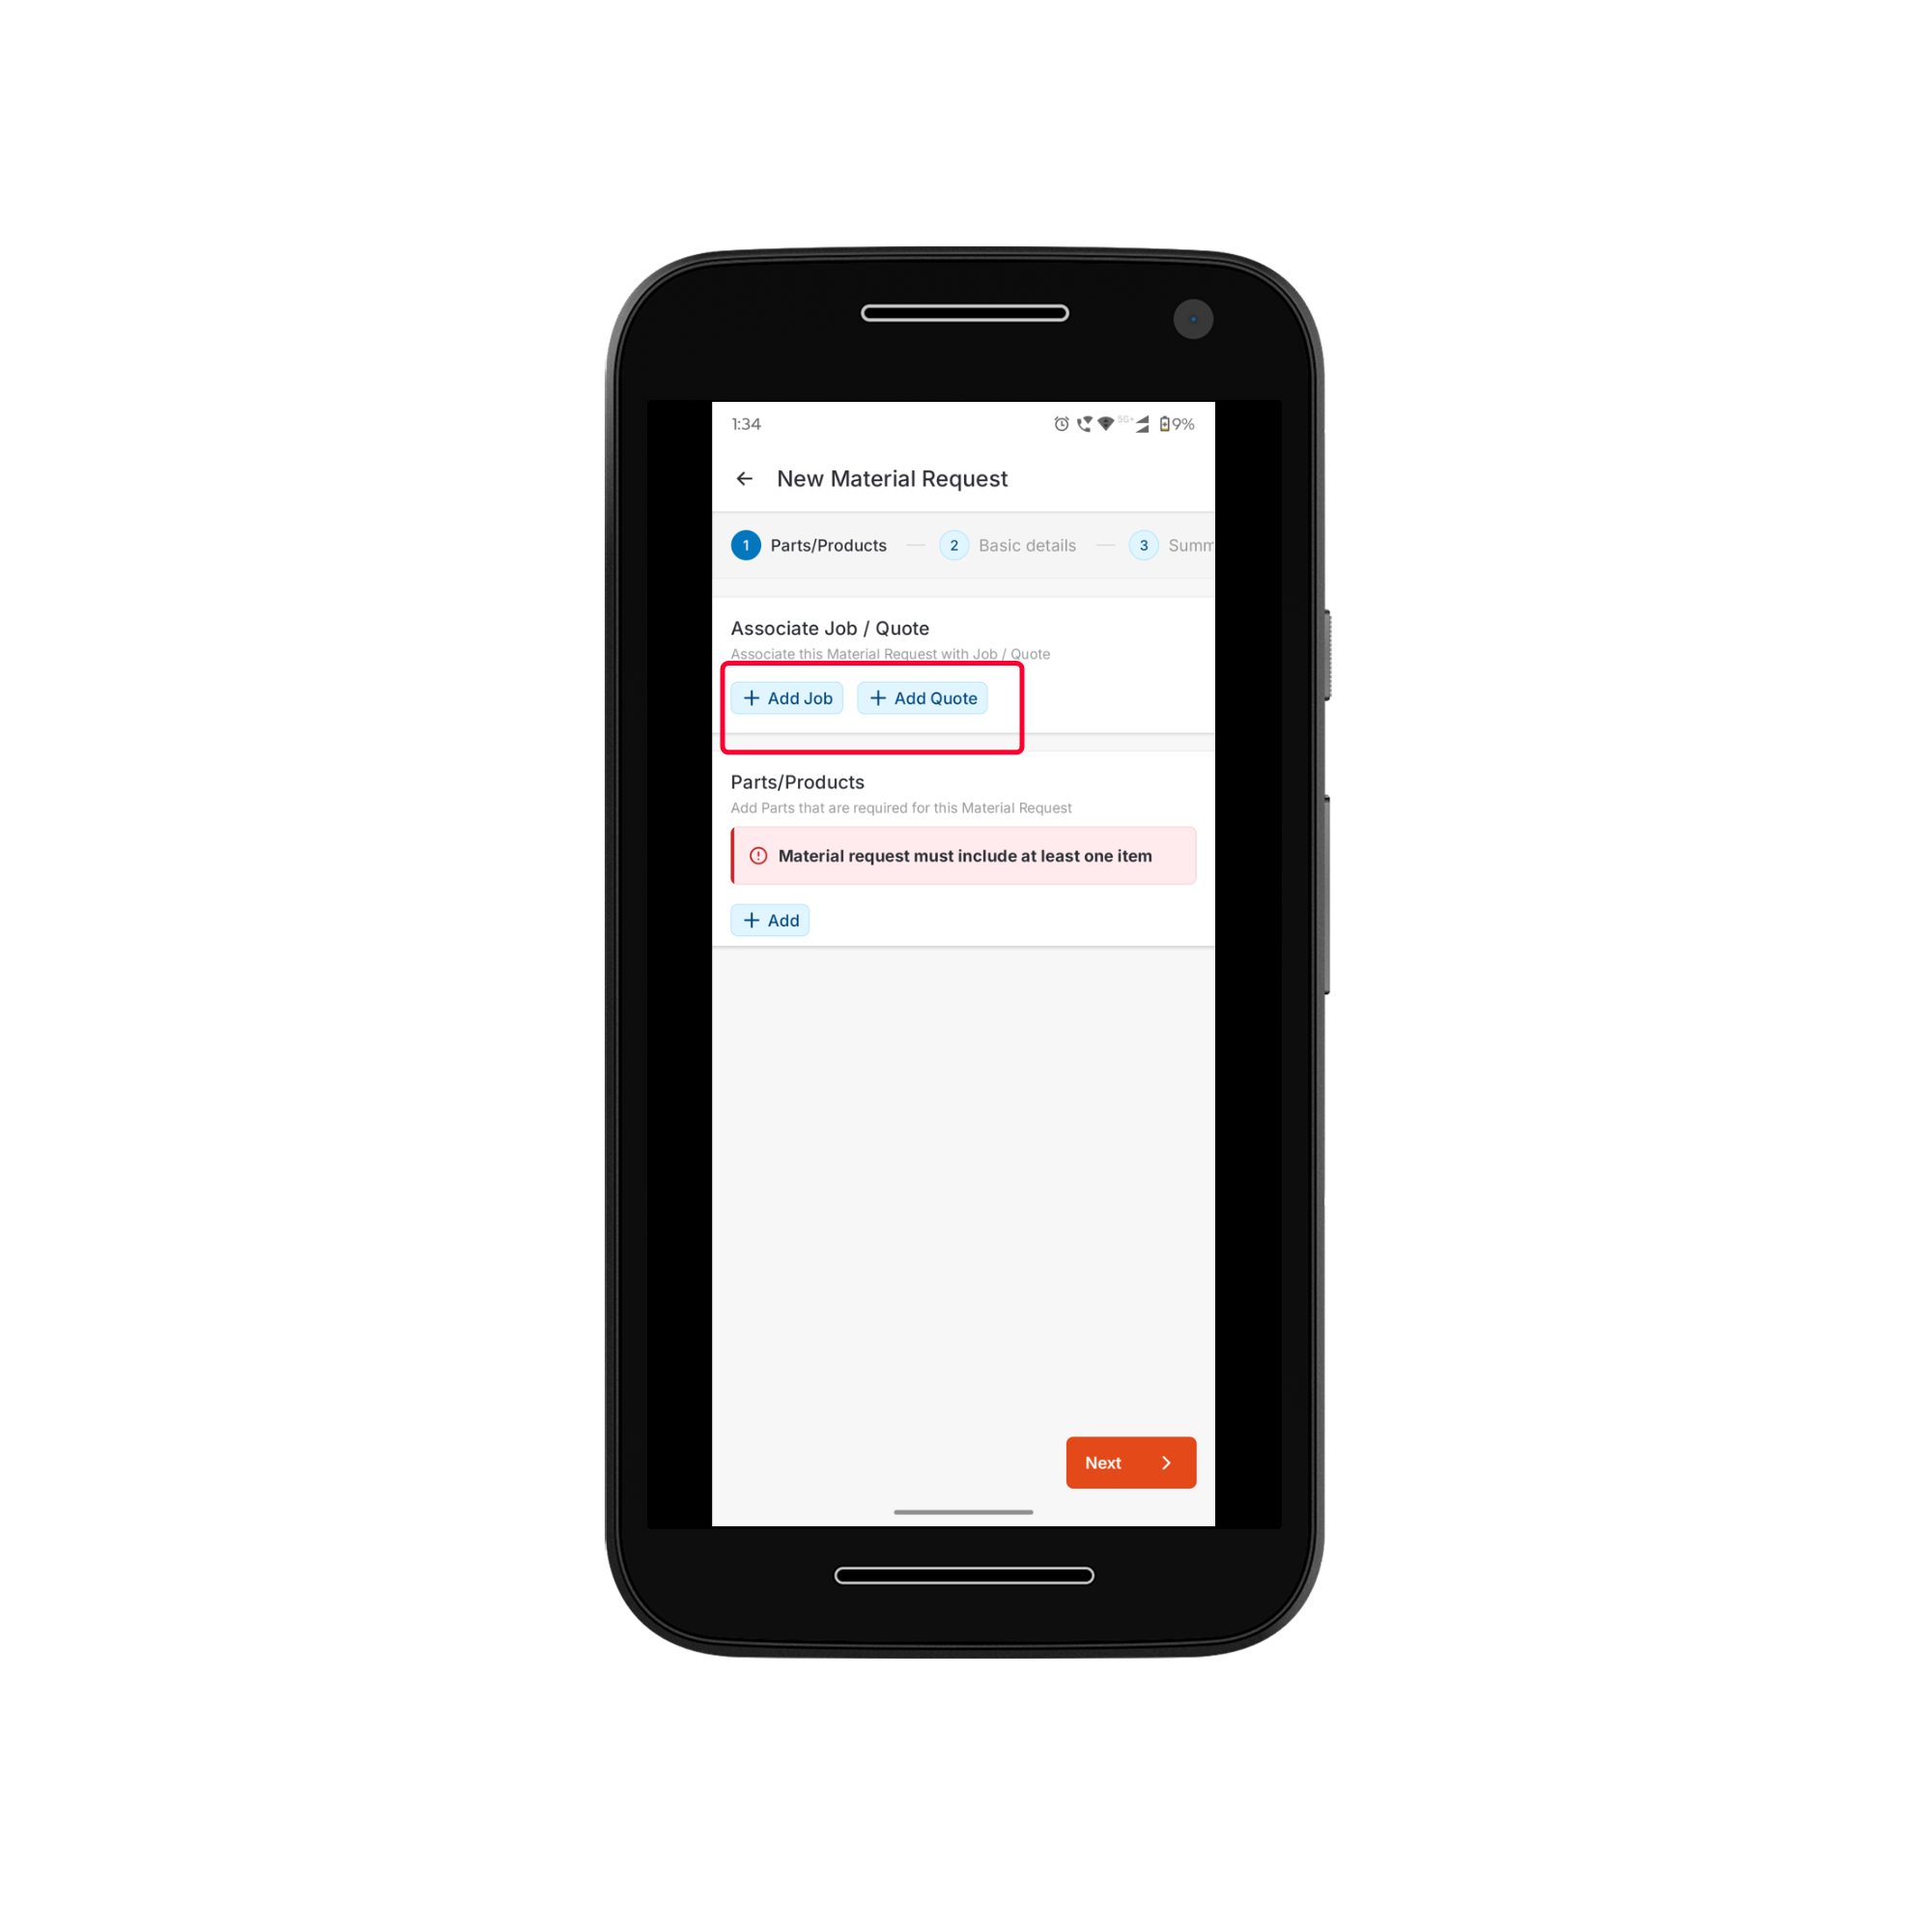
Step 2: Adding Parts and Products
The Parts & Products section allows you to define the materials required for the request. Associate Job/Quote This section allows you to link the material request to an existing job or quote.- Tap the + Add Job/Quote button.
- A list of available jobs and quotes will appear.
- Search for and select the required job or quote.
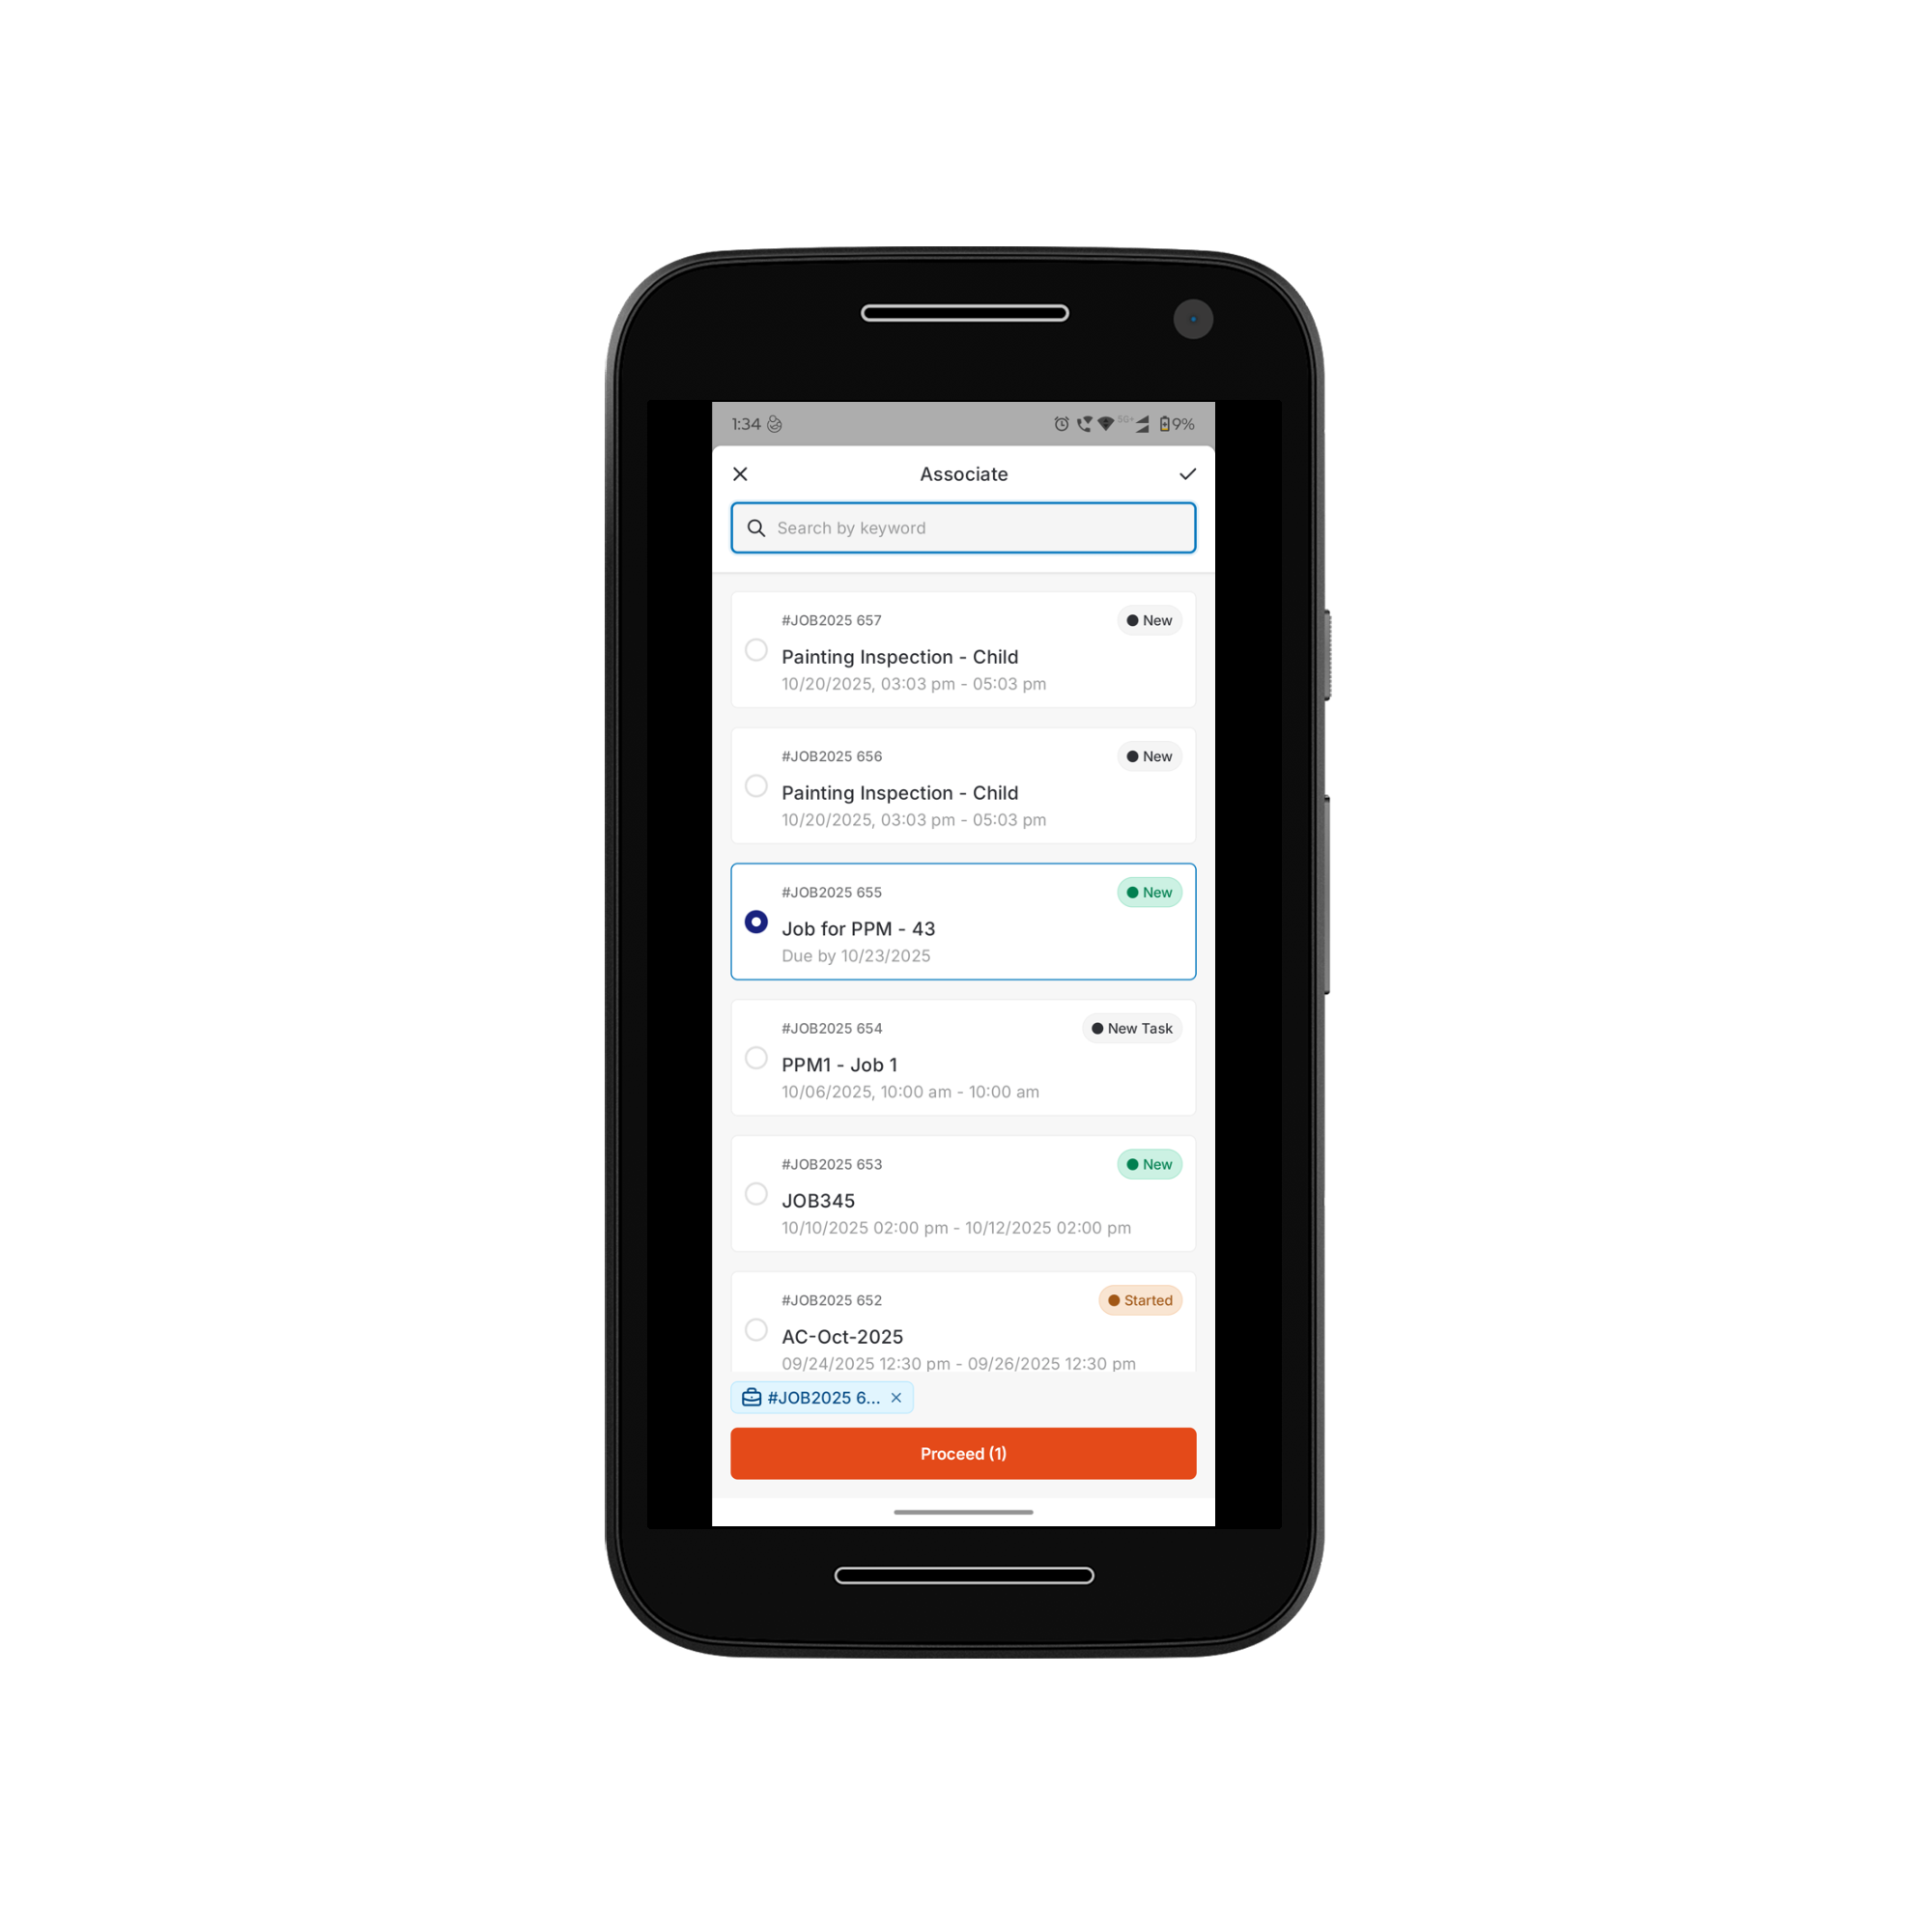
- Once selected, the material request will be associated with the chosen record, and relevant parts/products (if any) will be available for selection in the Parts & Products section.
- The associated job/quote (if applicable).
- The inventory.
- Custom line items.
To add Items from a Job, Quote, or Inventory
To add Items from a Job, Quote, or Inventory
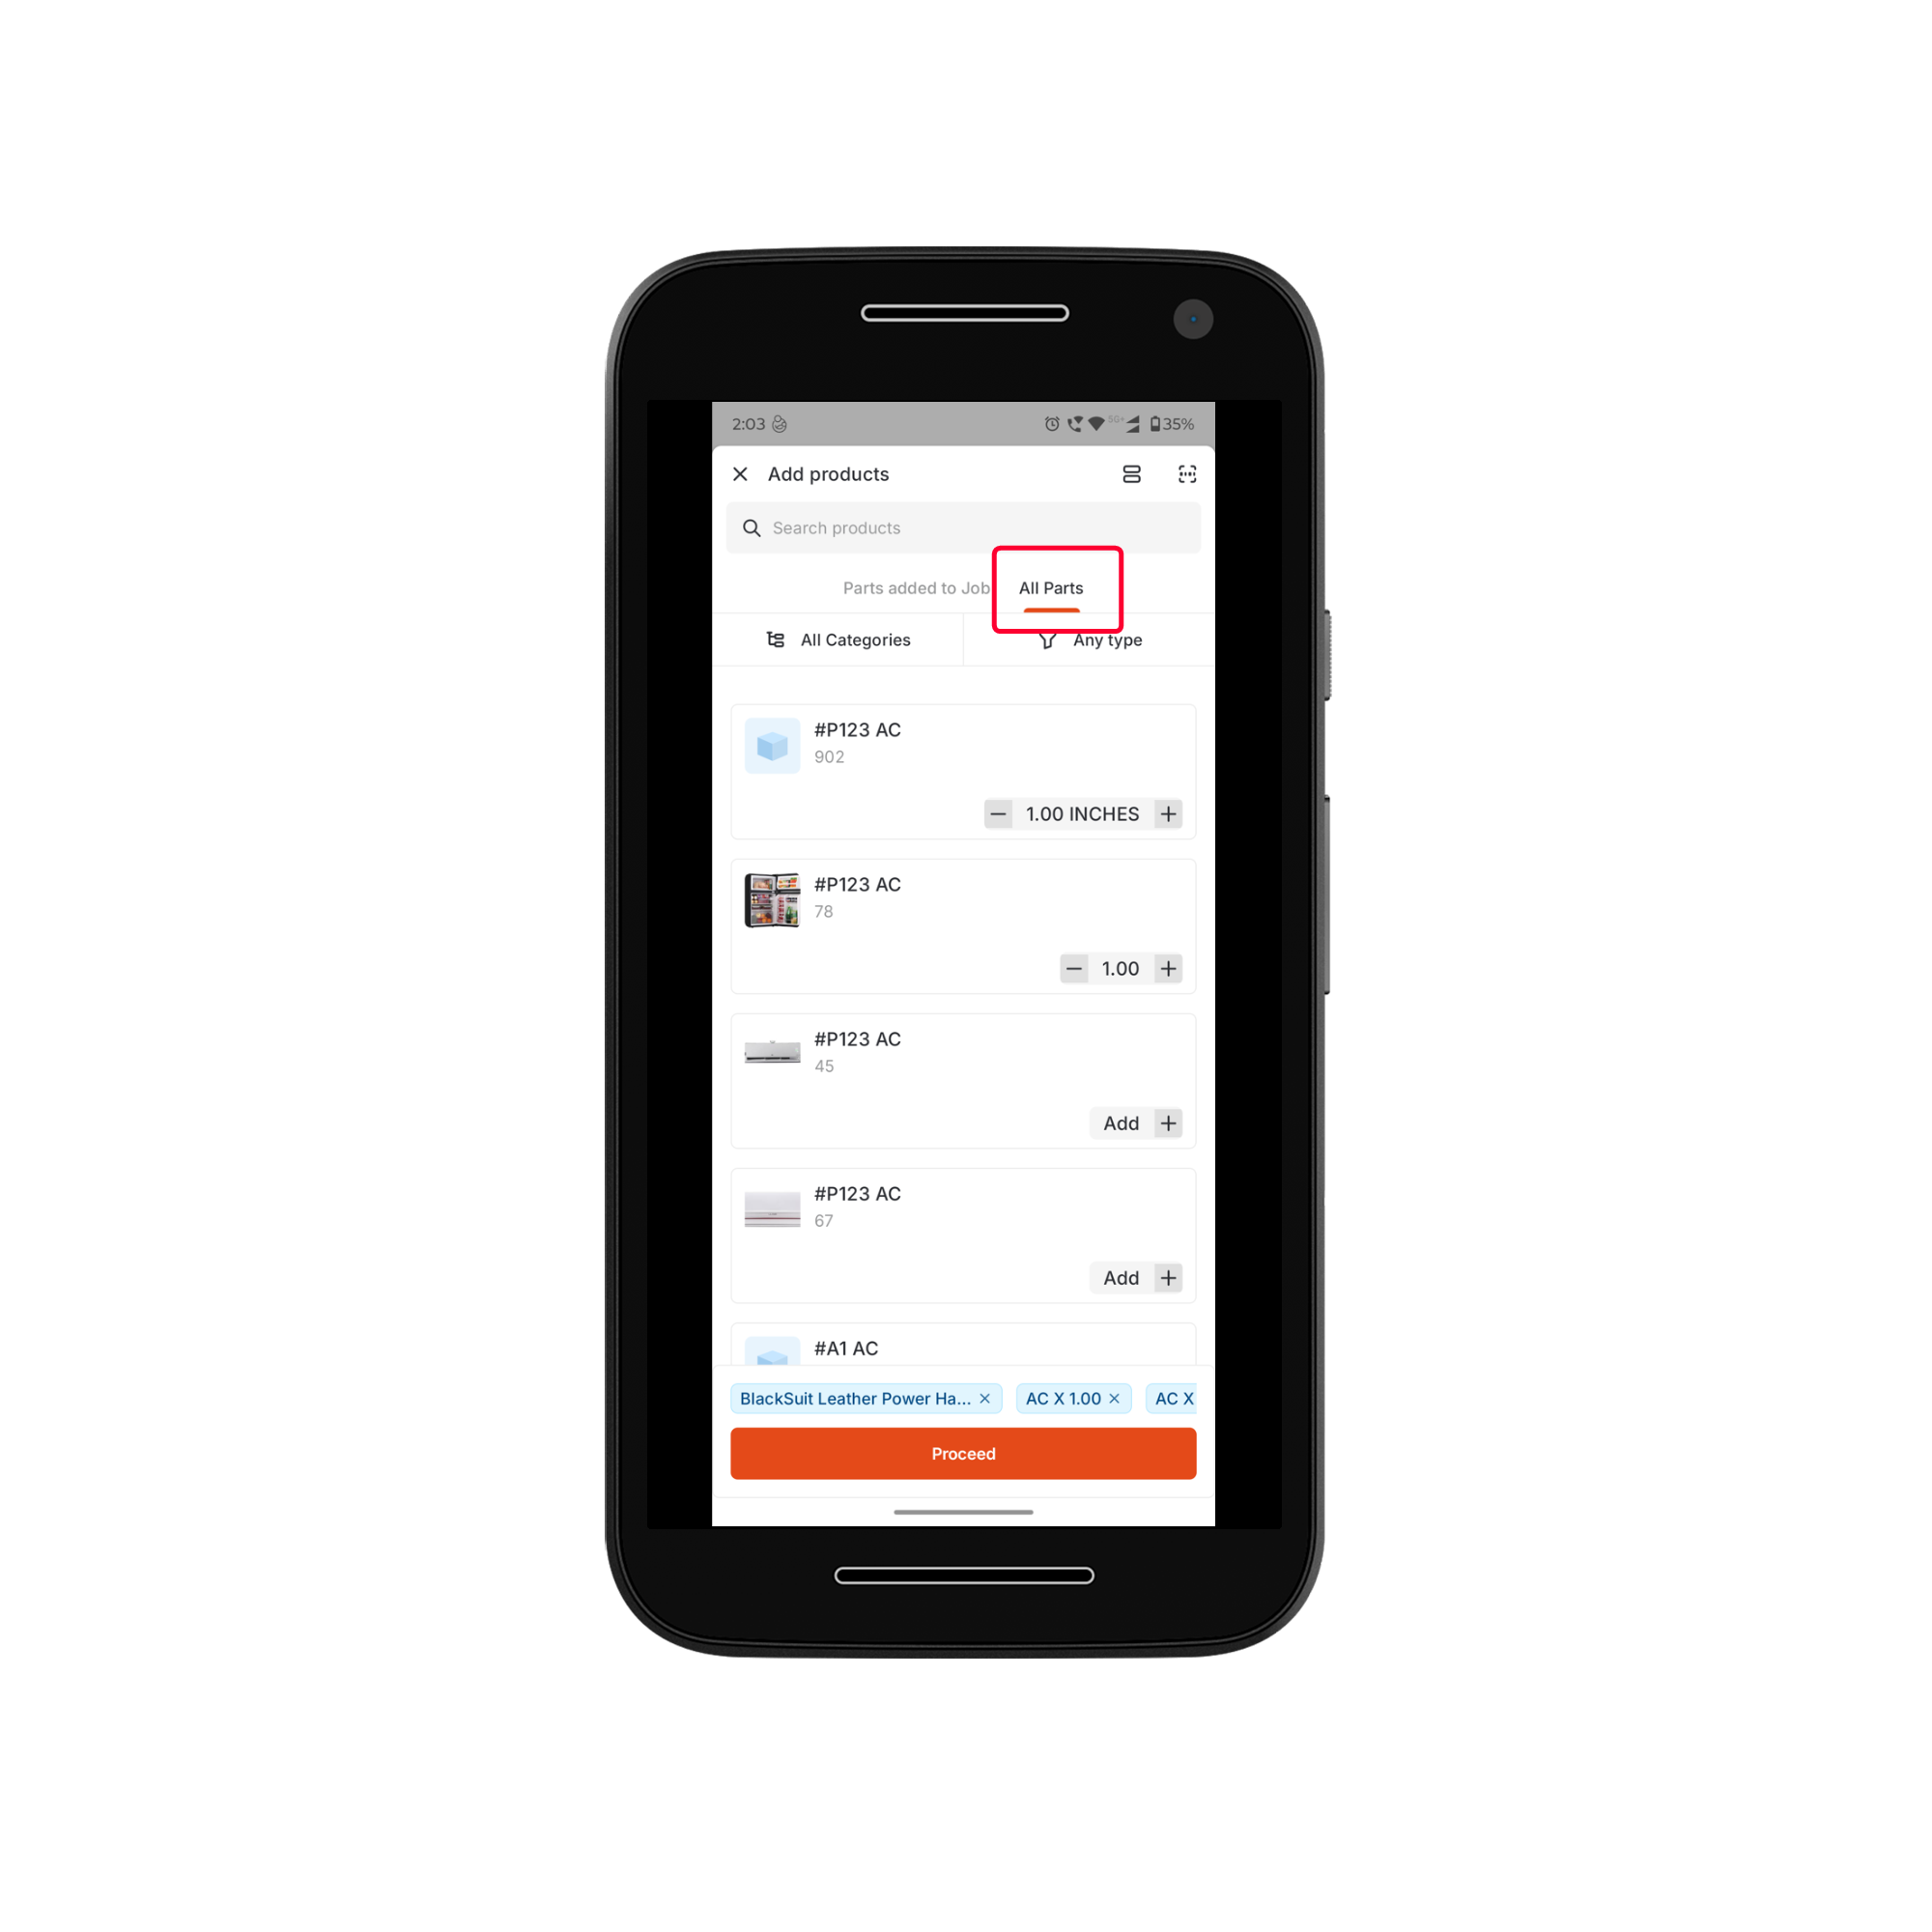
Tap the “+ Add” button and select “Add item”. The Add Products page will open, displaying two tabs: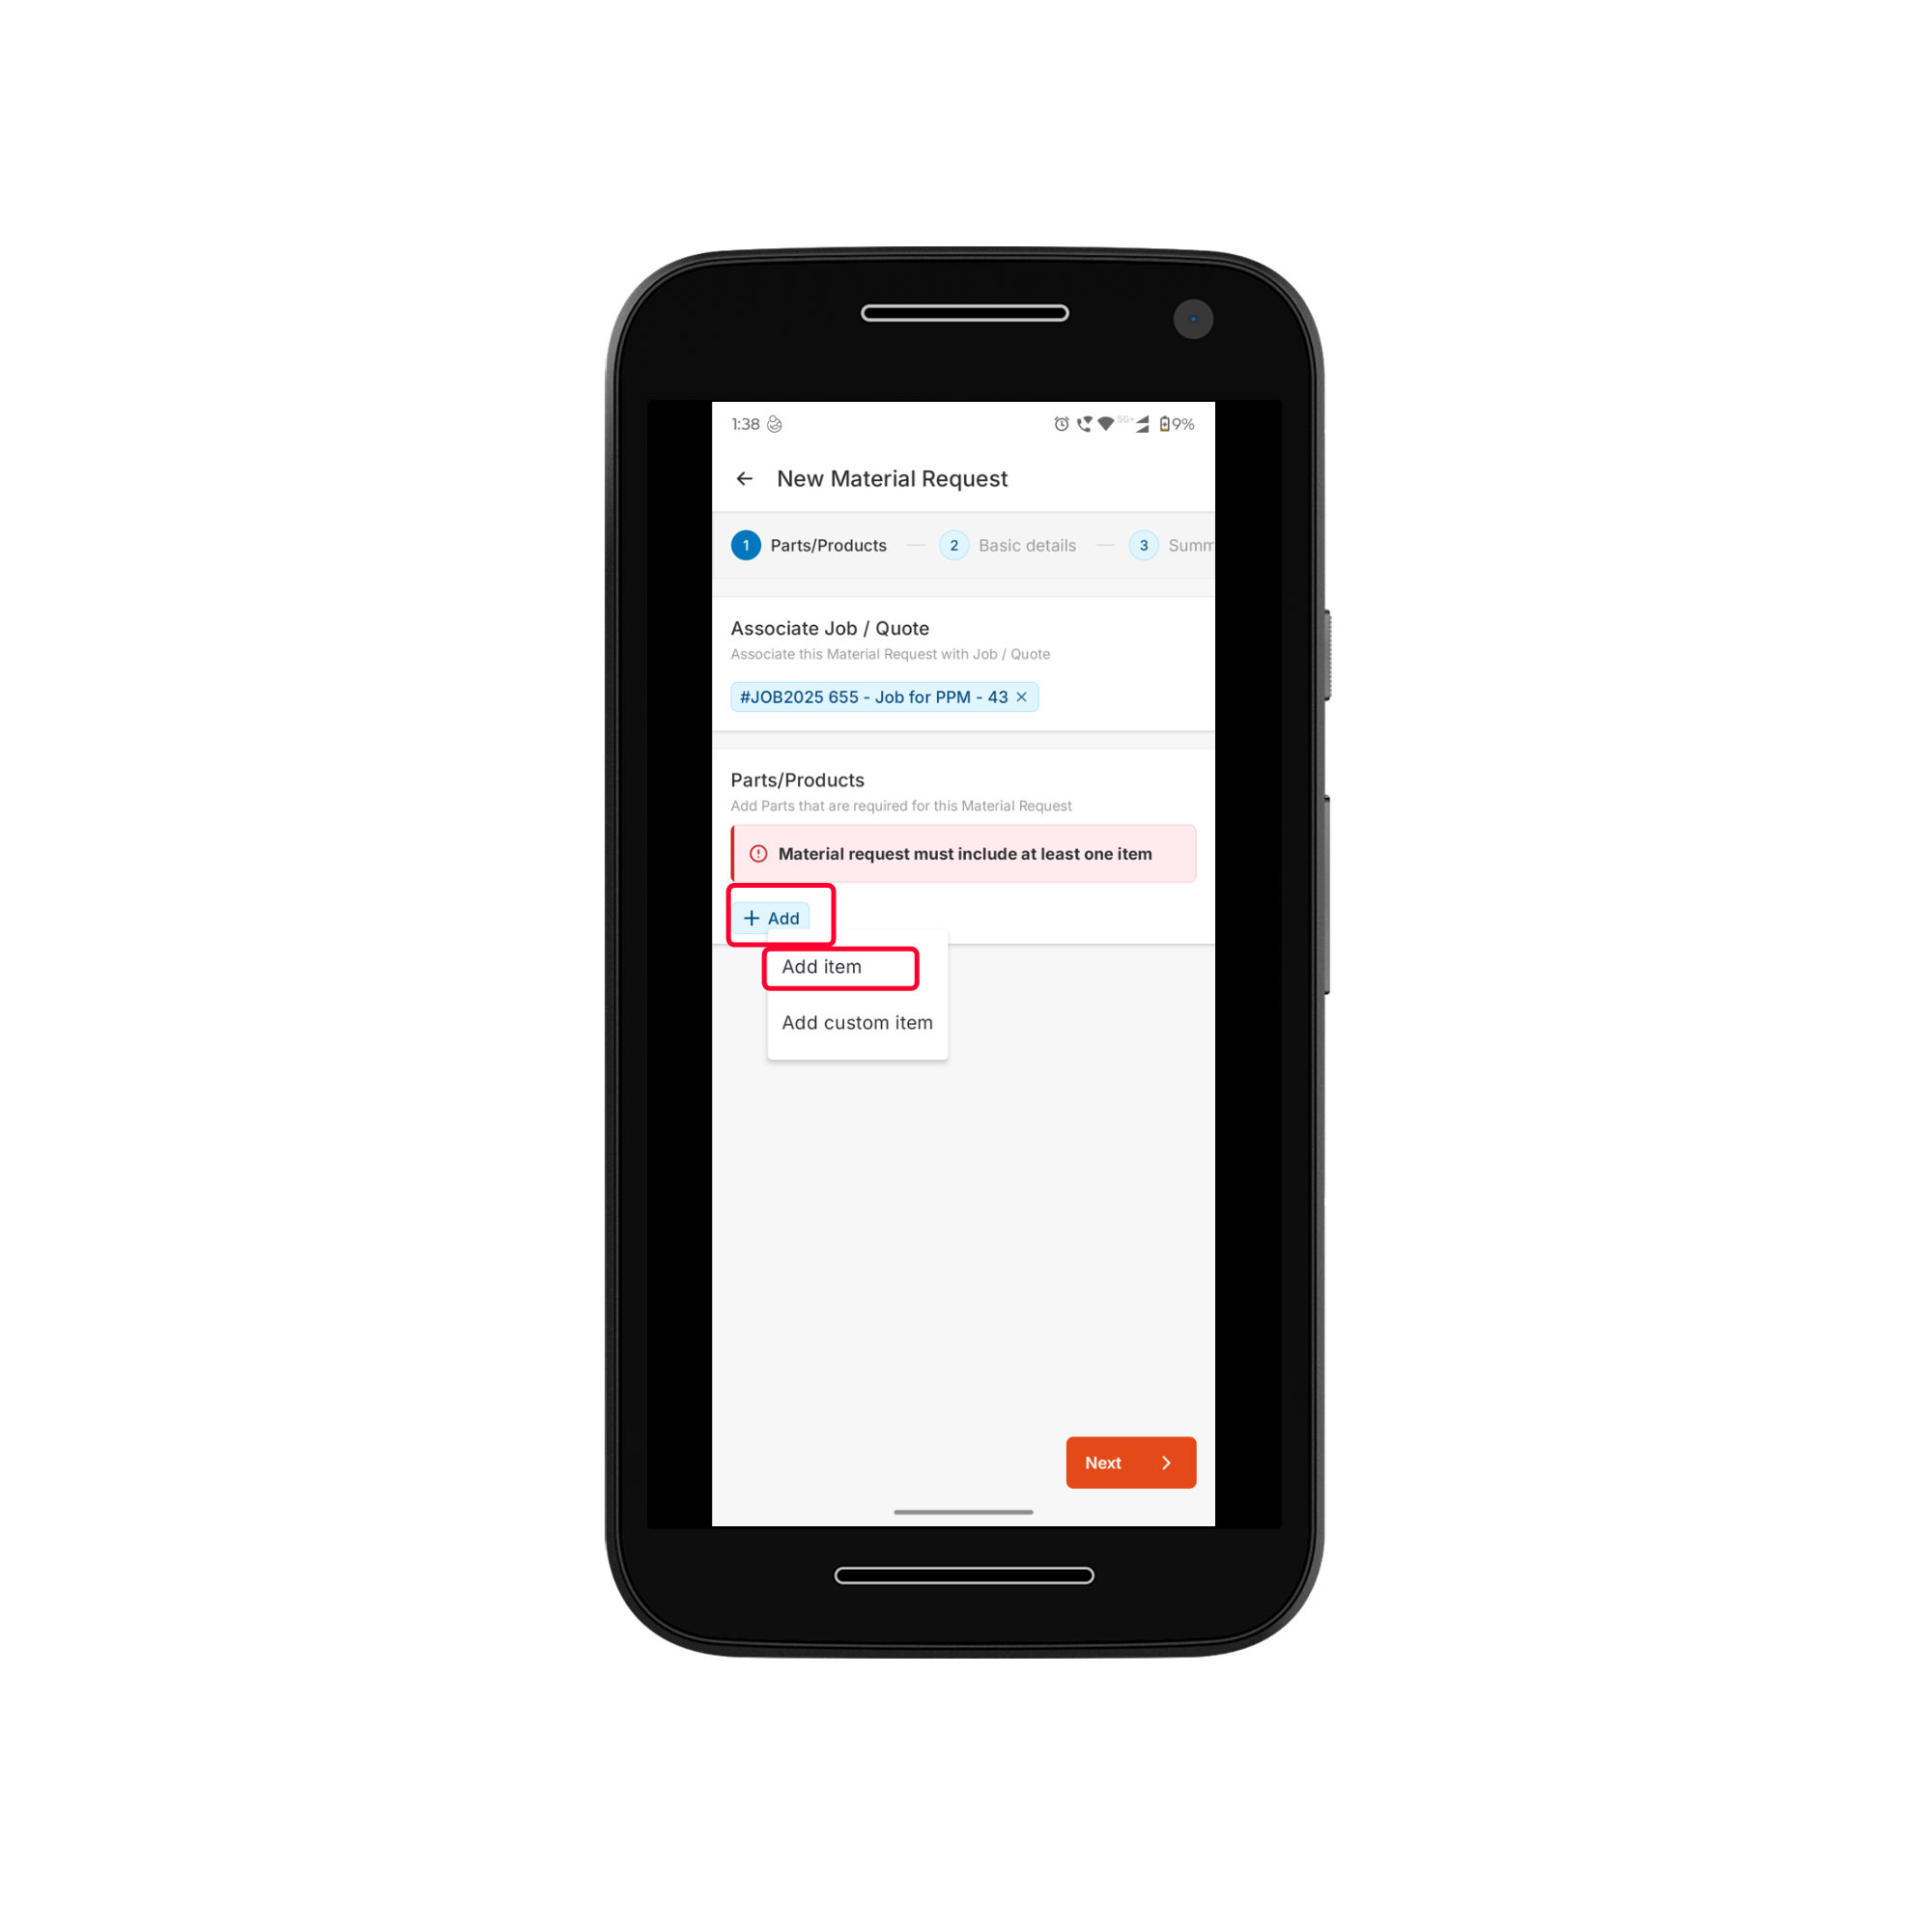
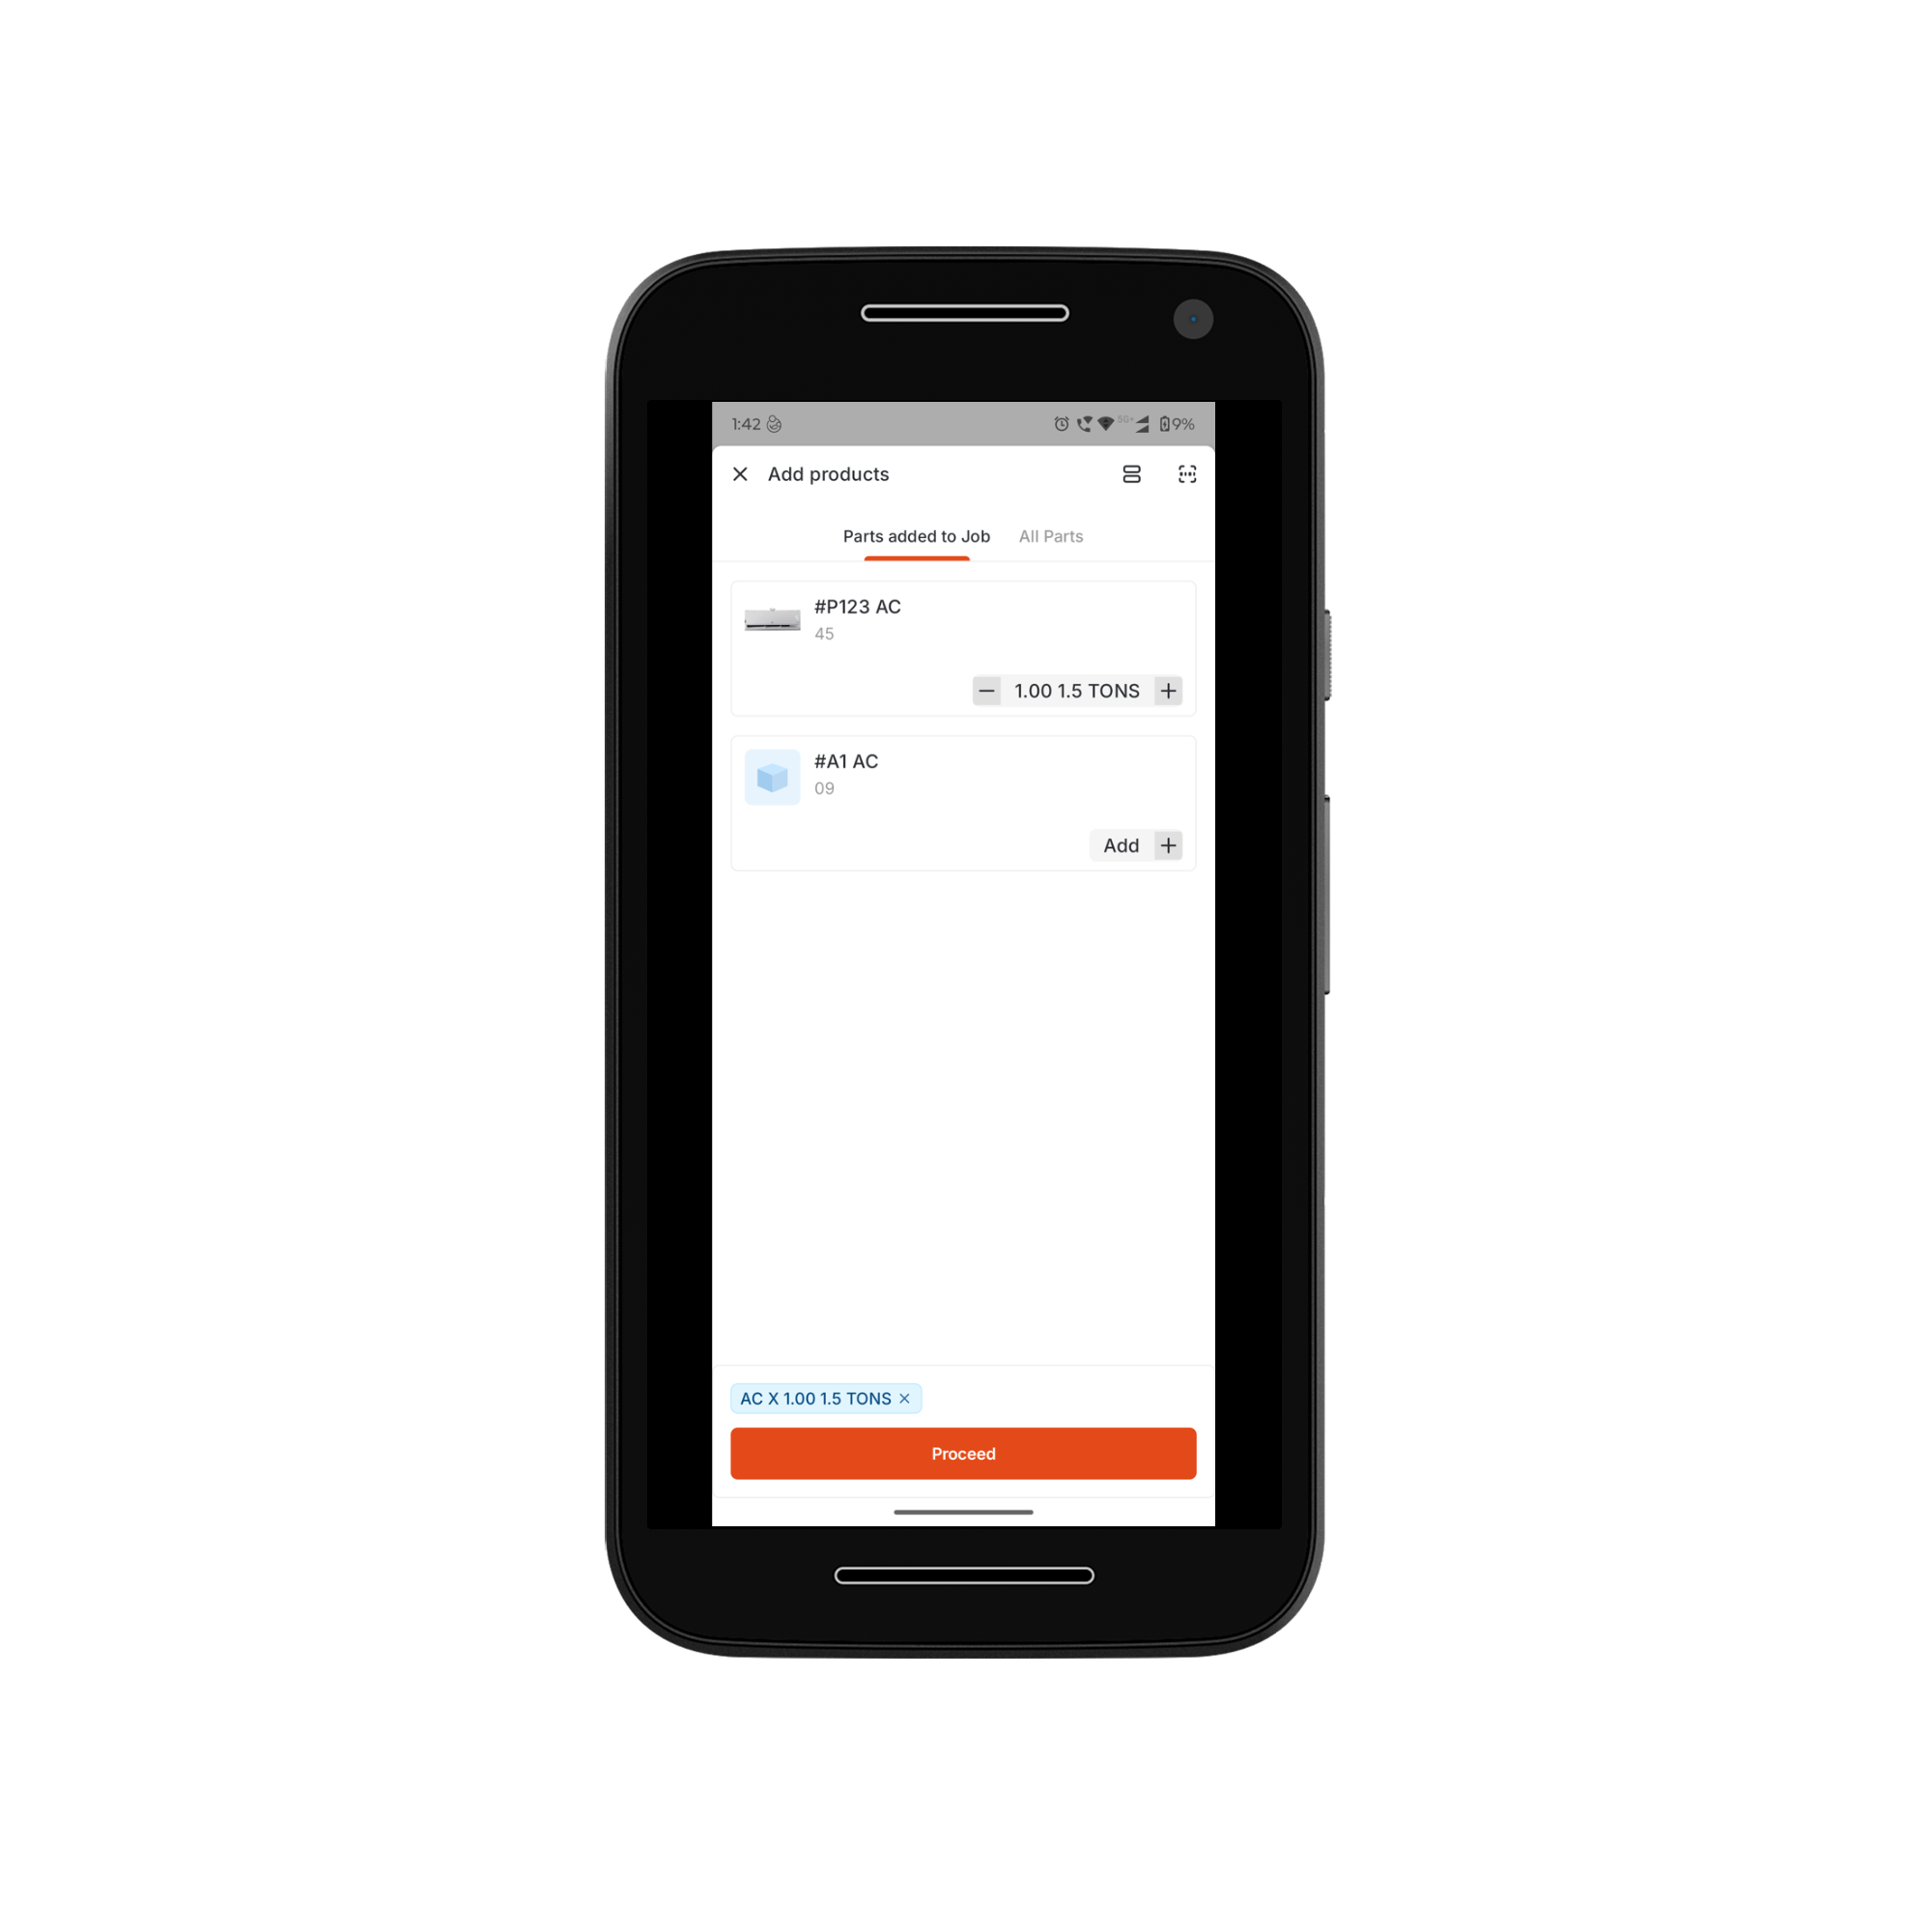
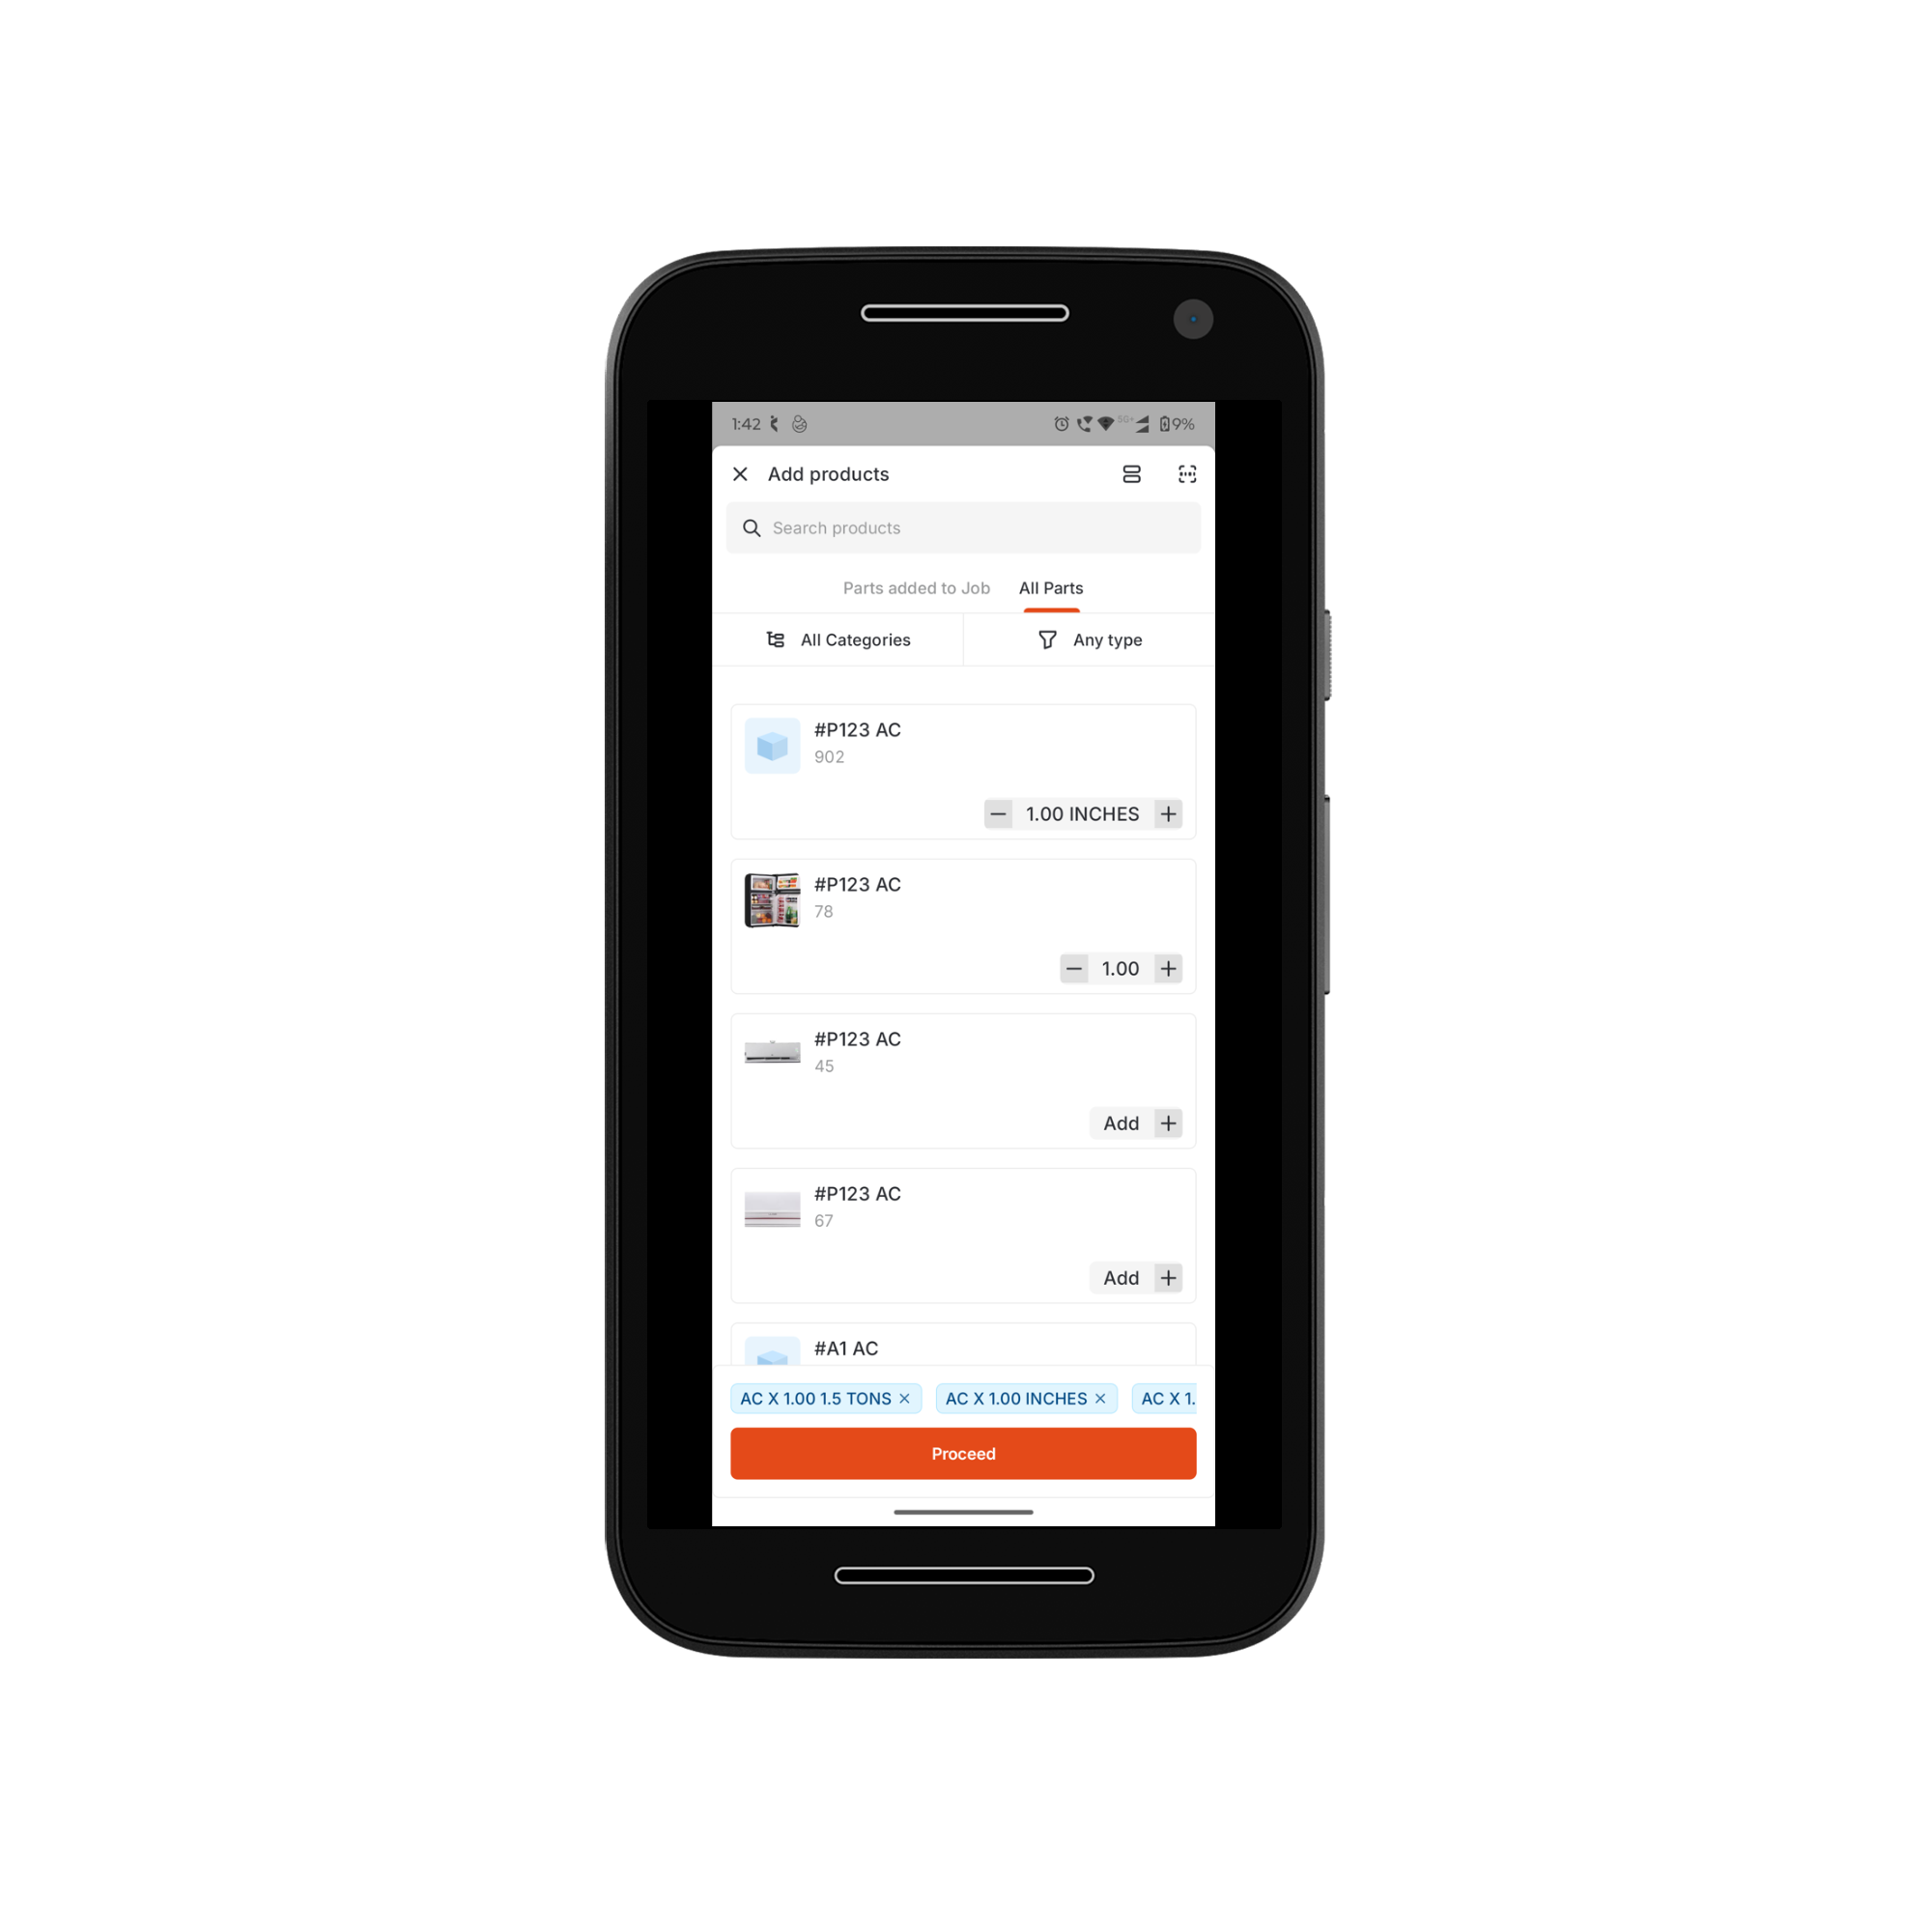
- Parts Added to Job – Lists all parts/products already associated with the job (if applicable).
- All Parts – Displays the complete inventory available for selection.
To add a custom item
To add a custom item
Tap the “+ Add” button and select “Add custom item”. The Add custom item bottom bar will appear.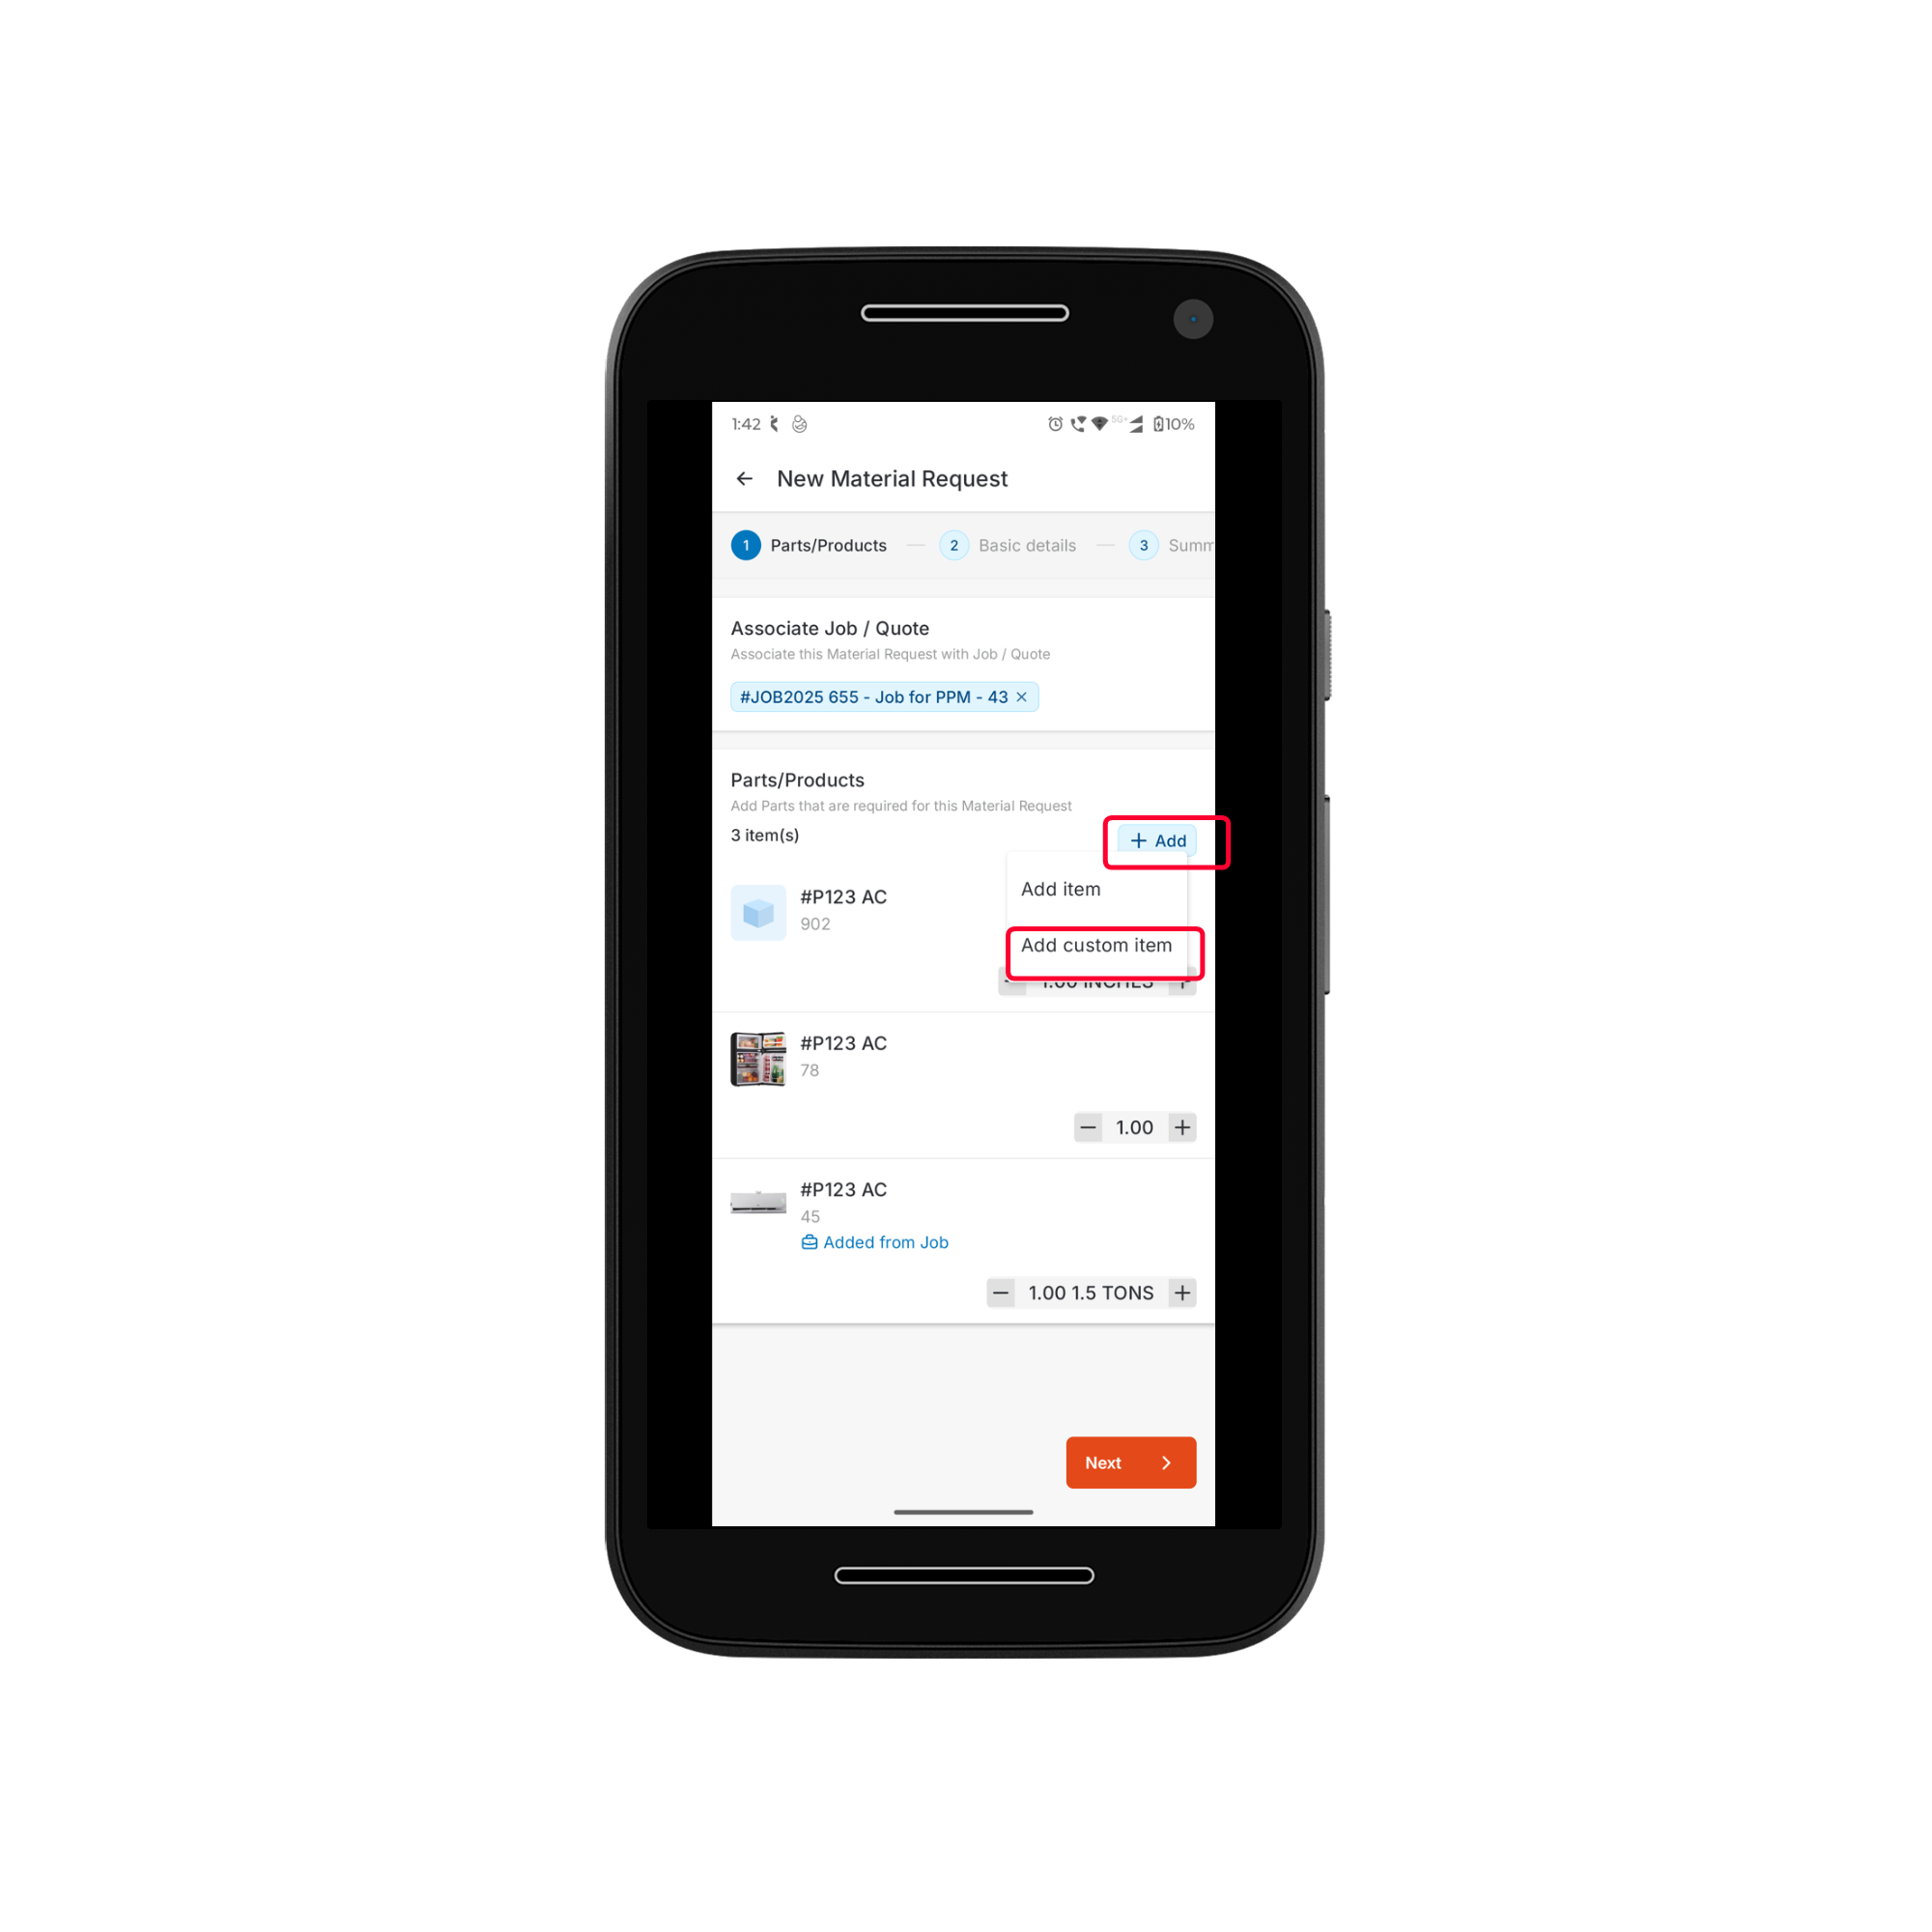
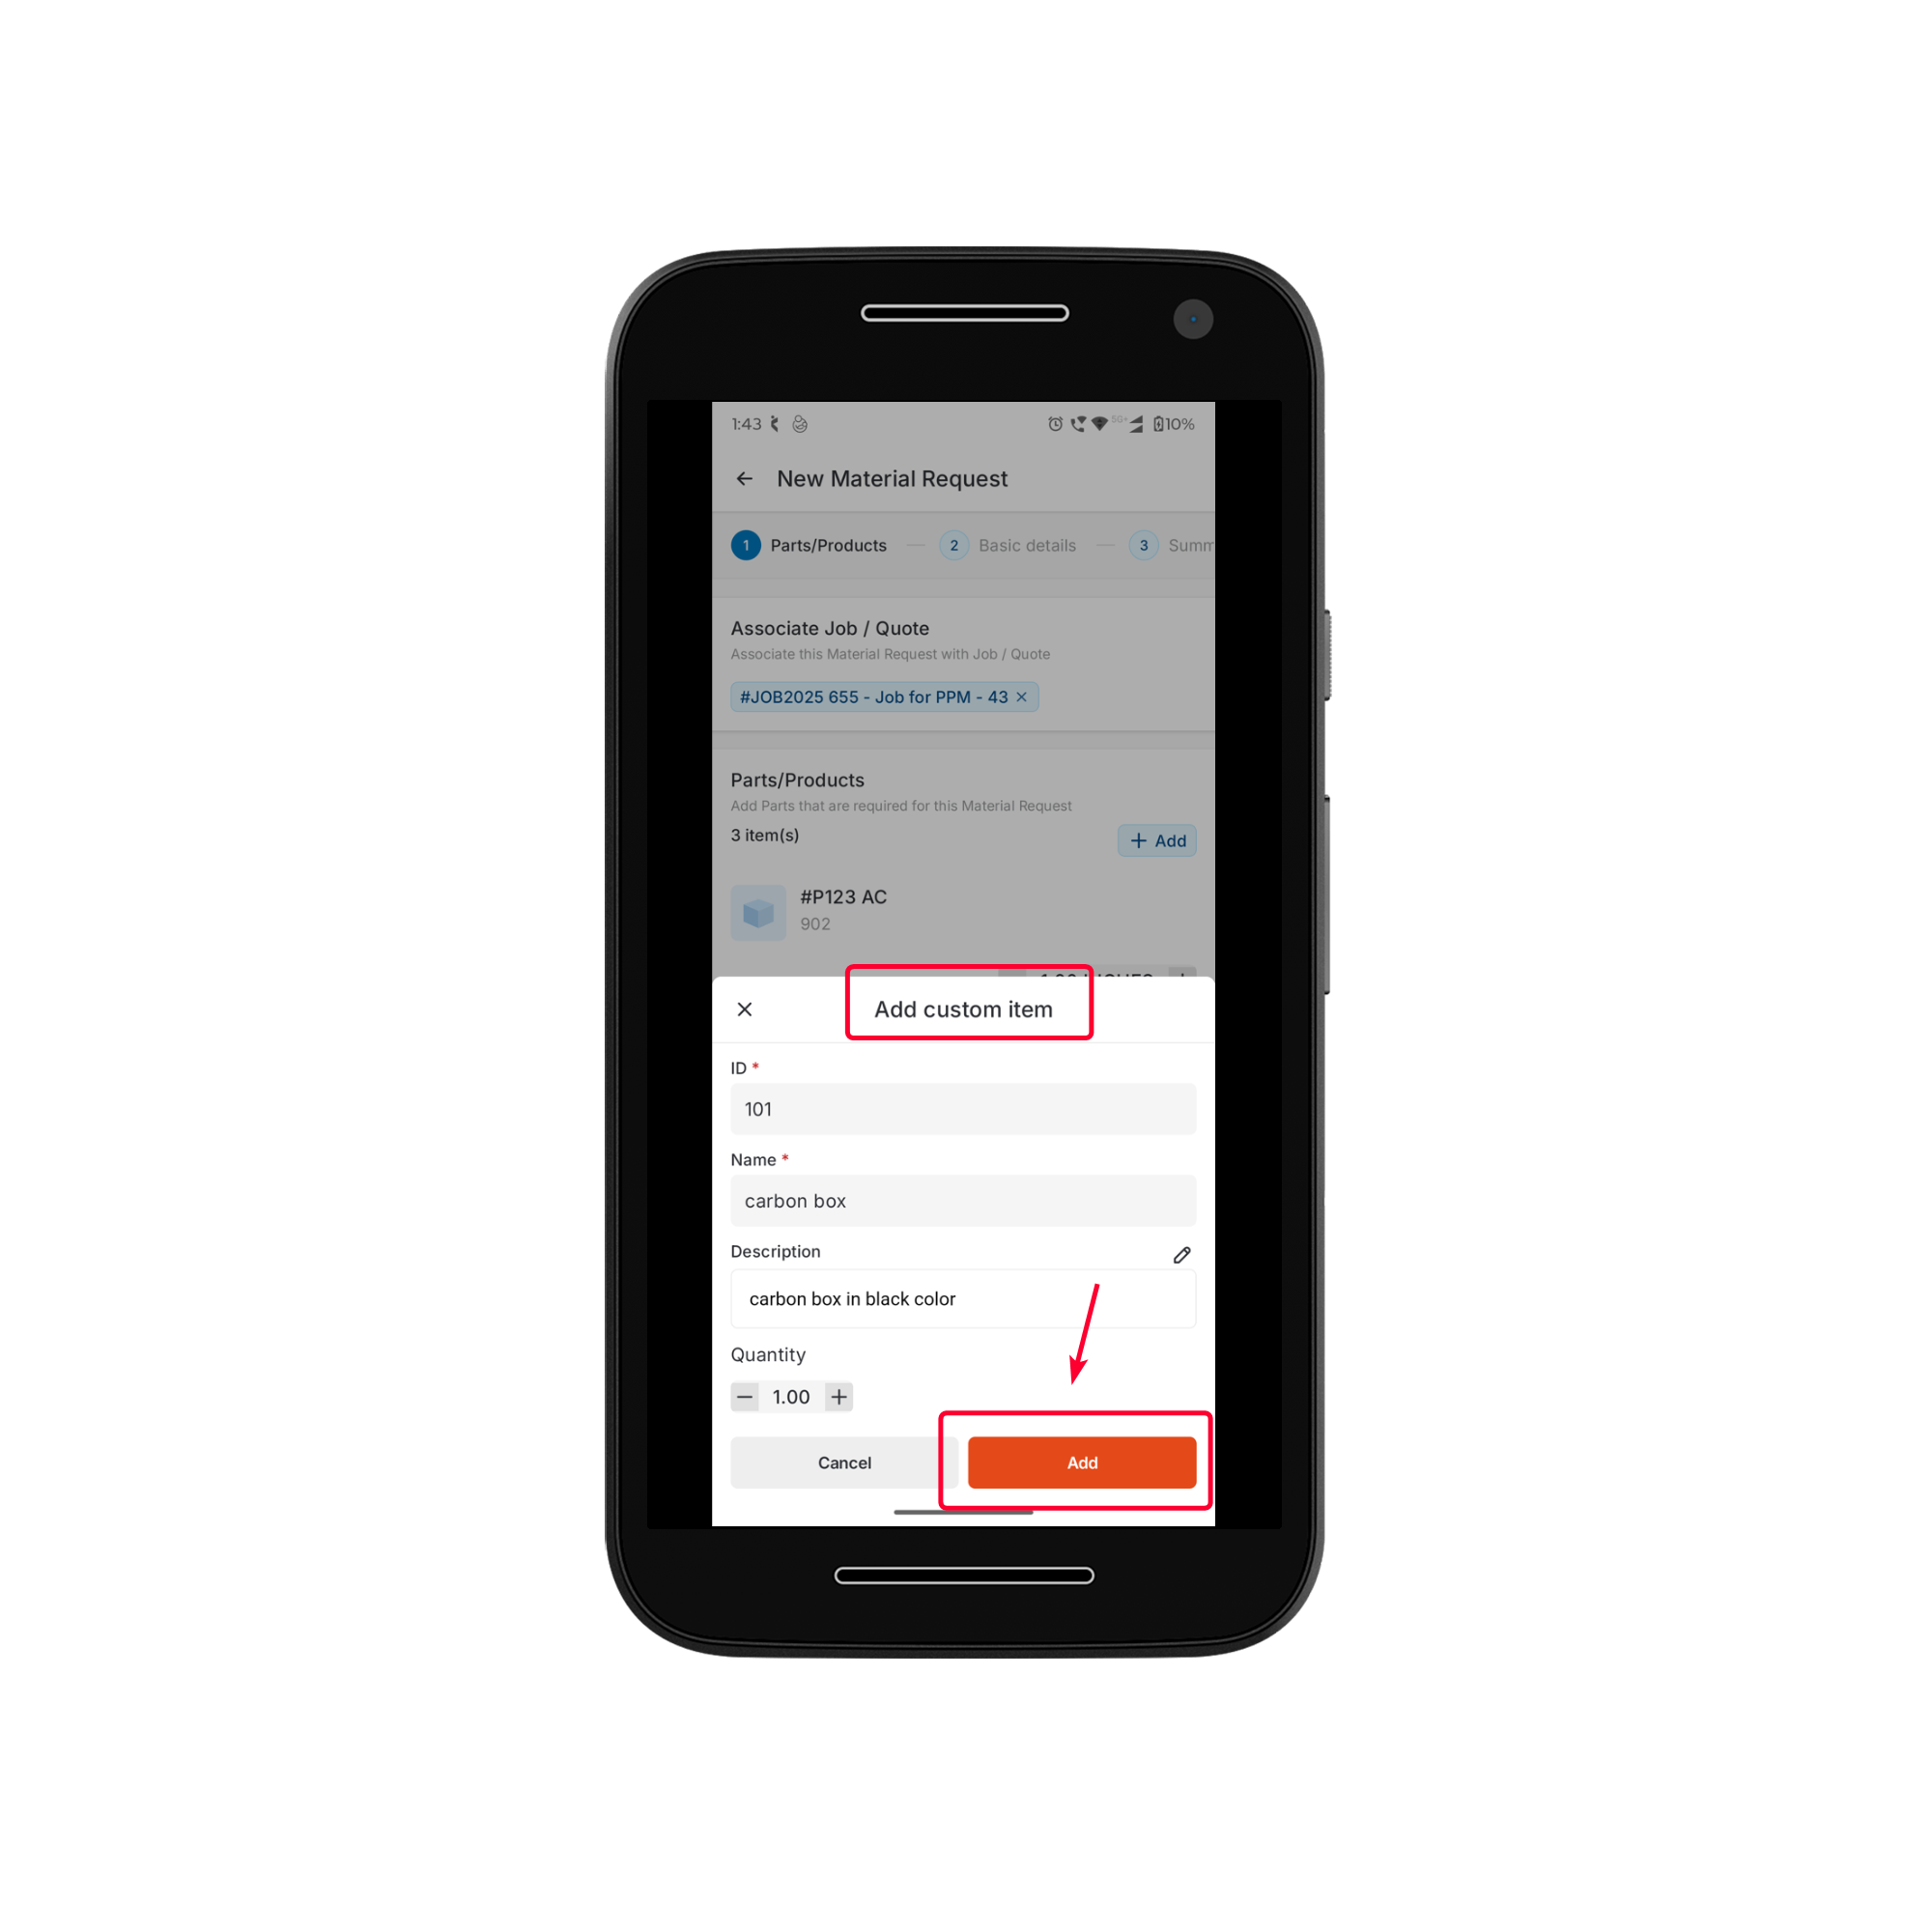
- Enter the ID, Name, Description, and specify the Quantity.
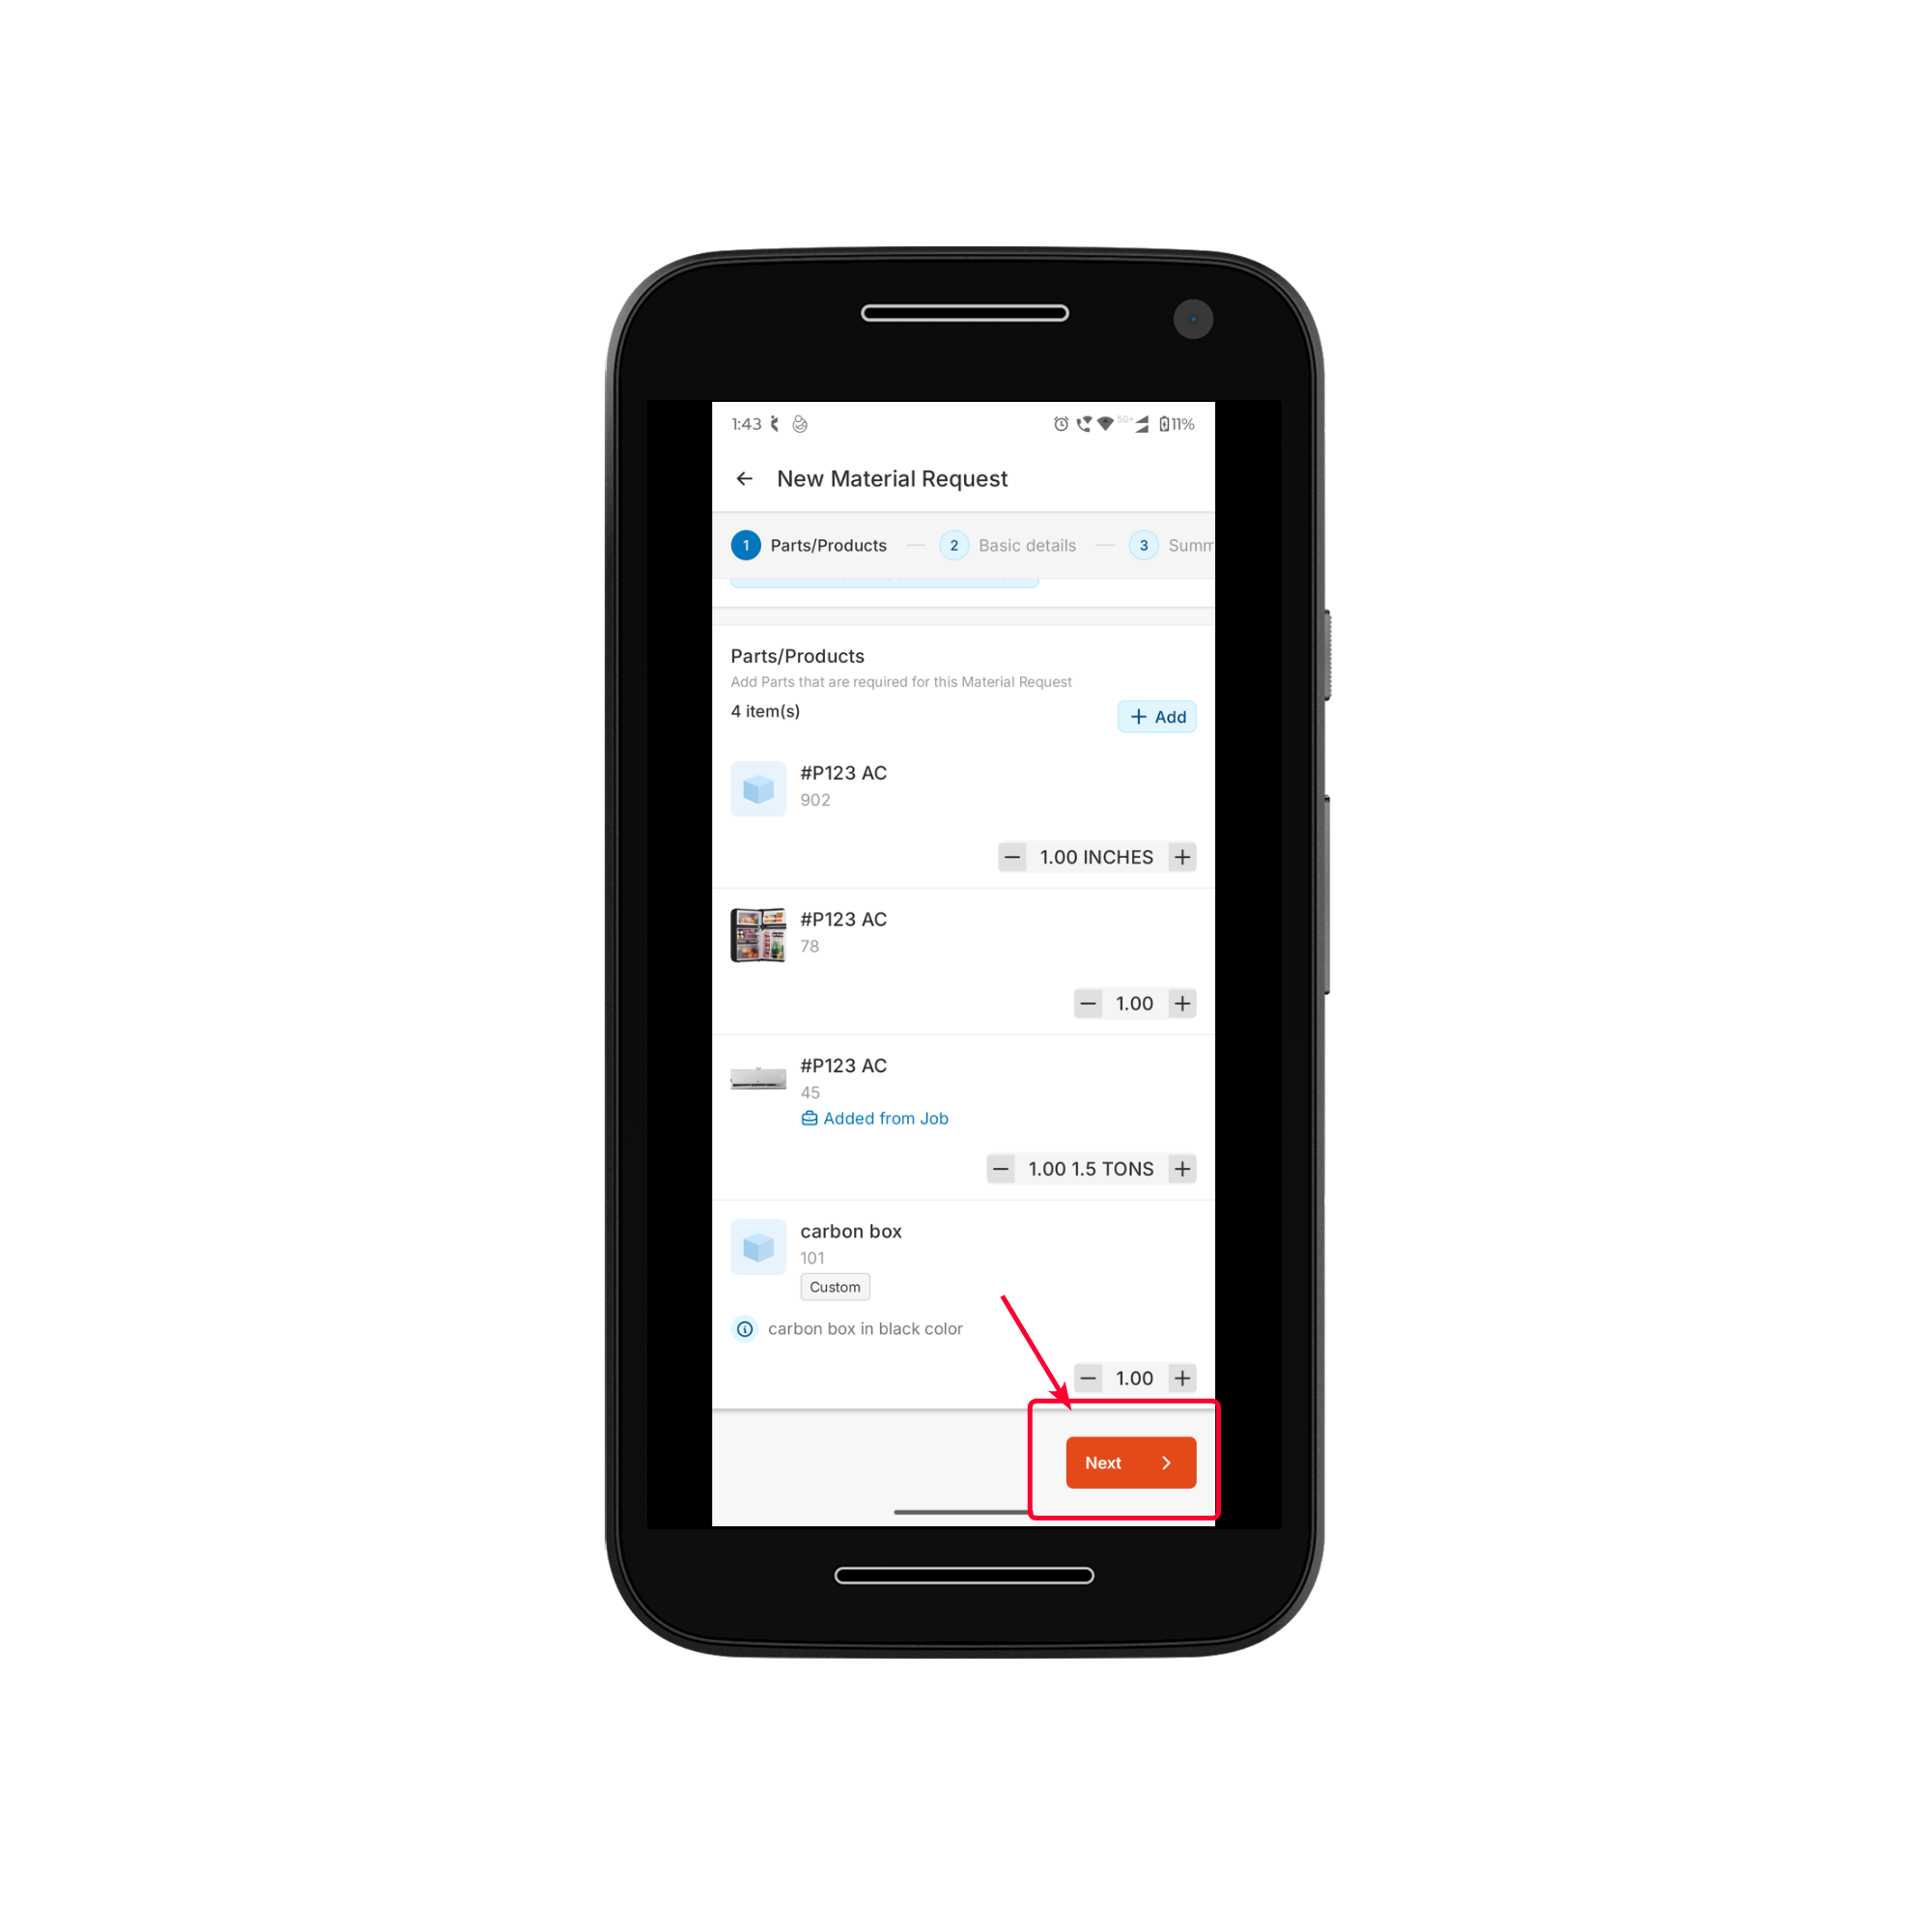
- Click Add.
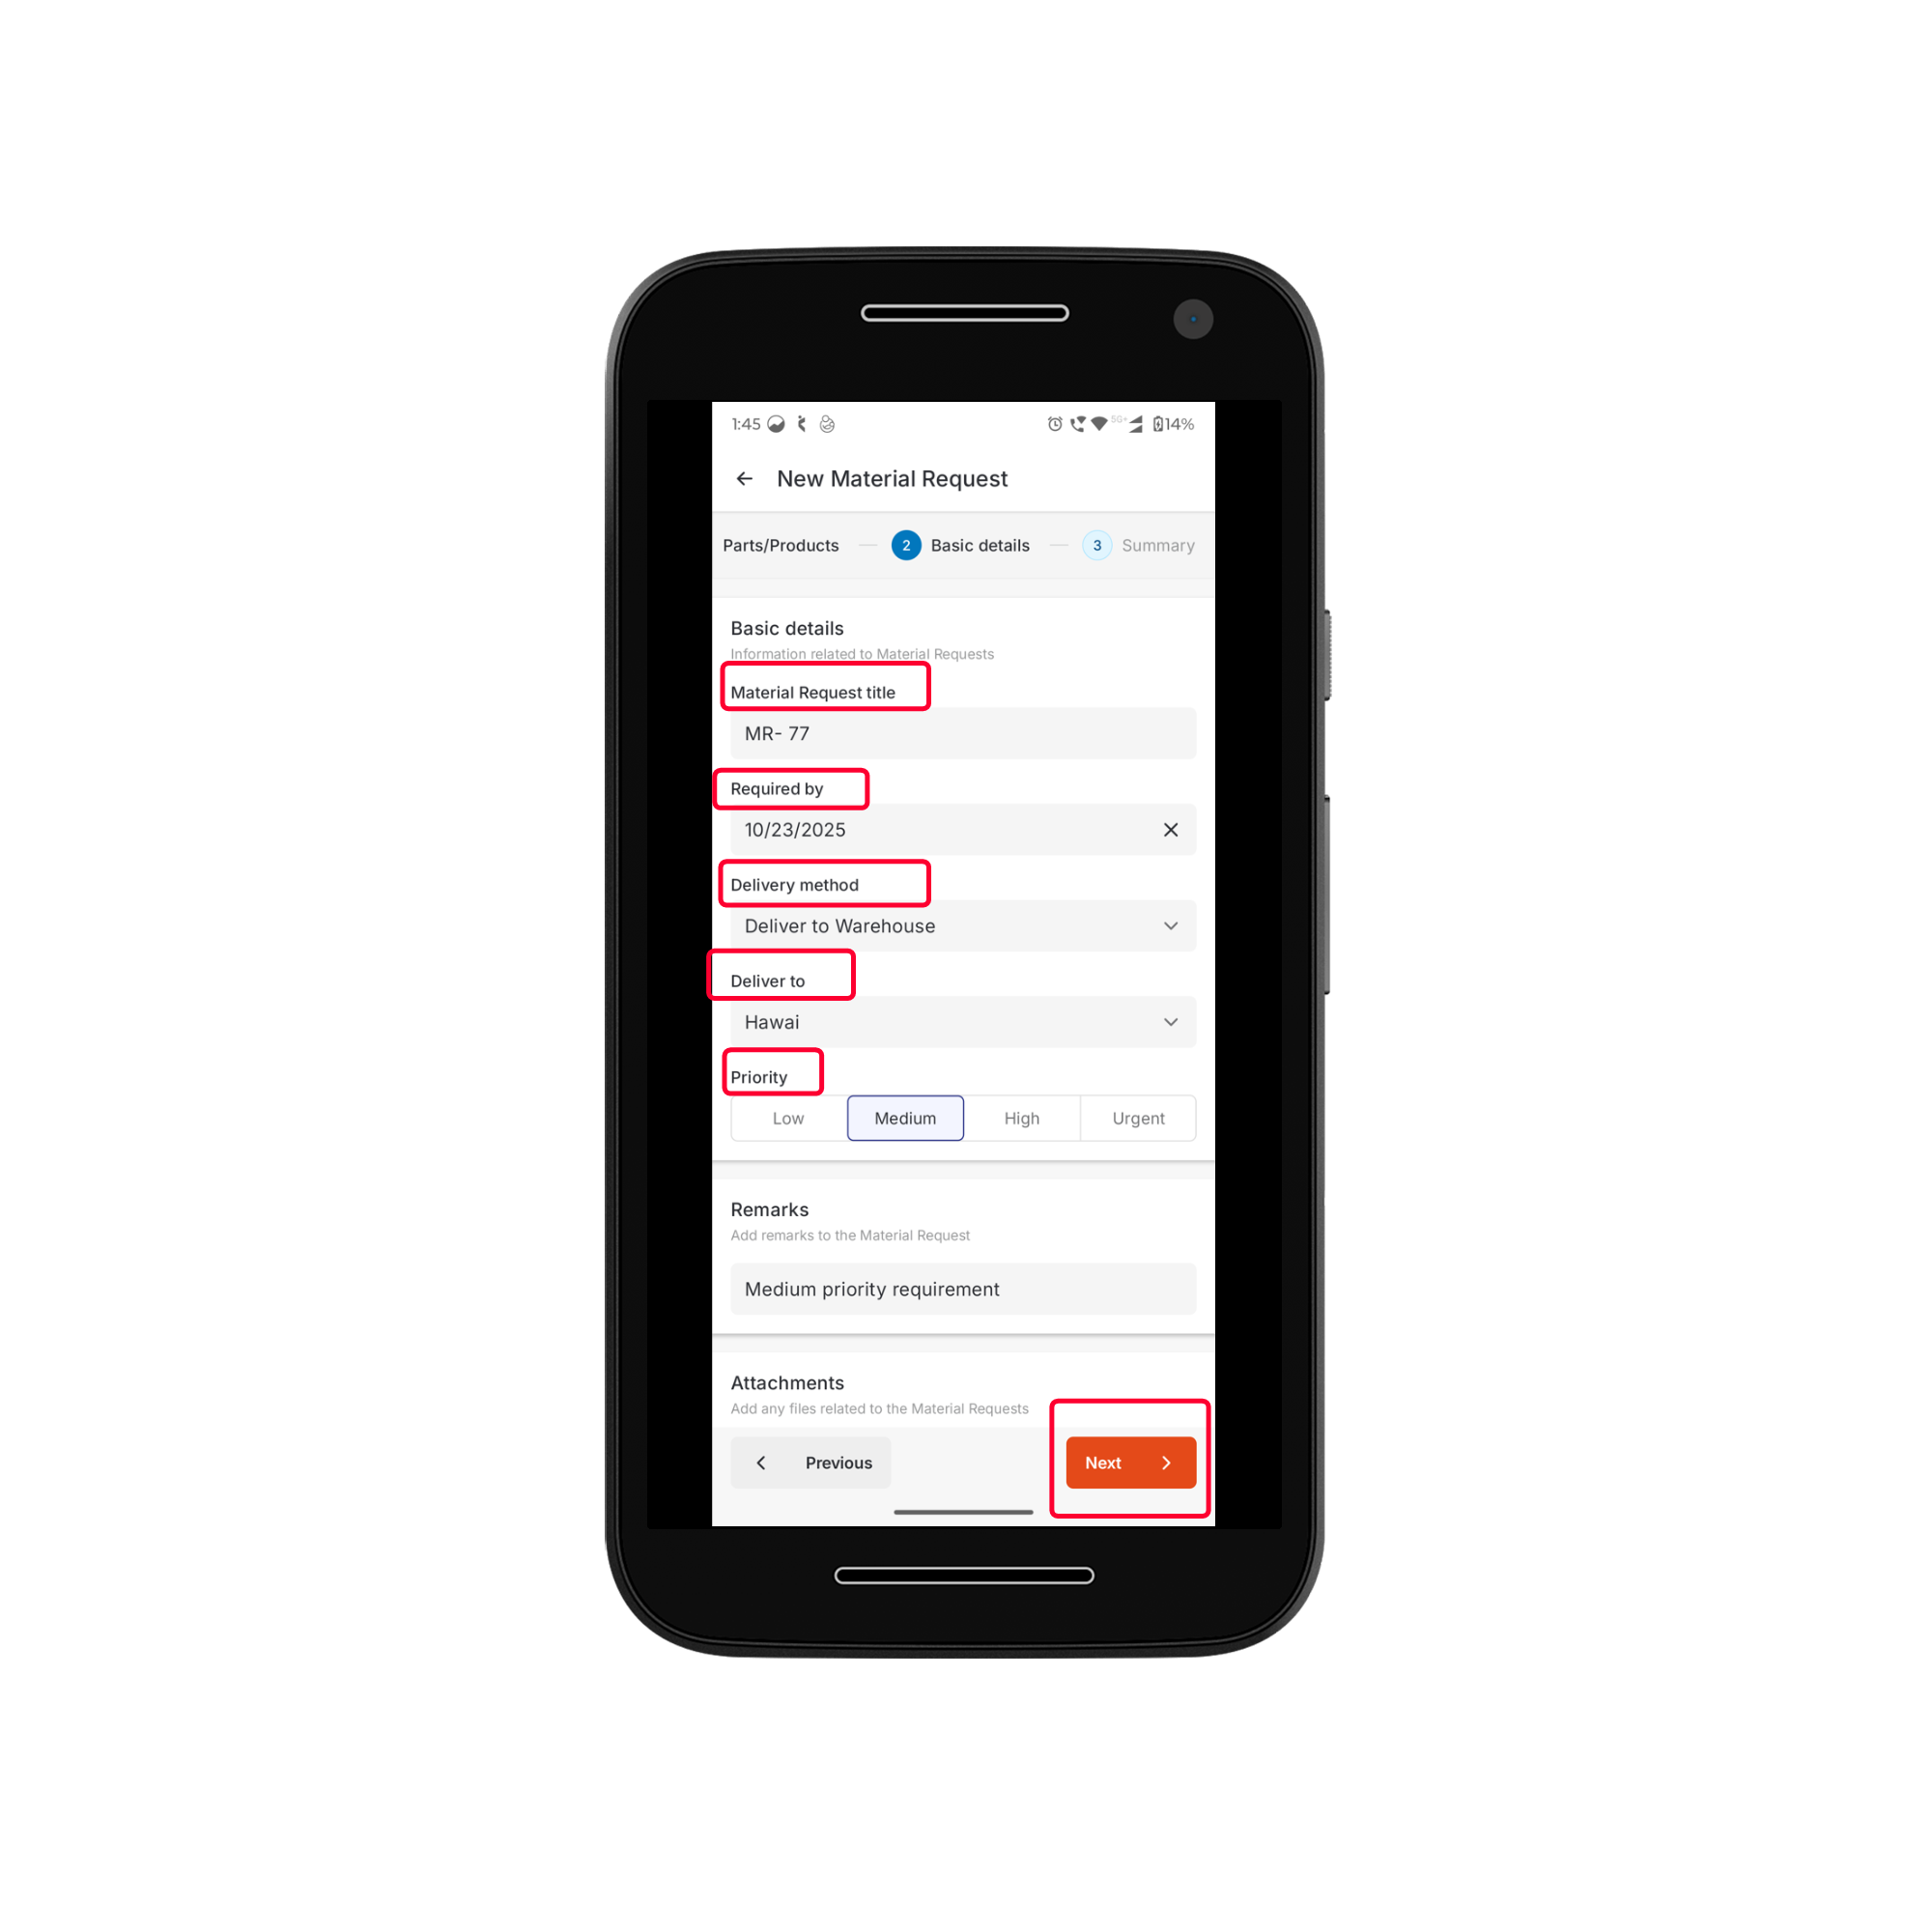
Step 3: Entering Basic Details
The Basic Details Section captures essential information related to the material request:- Material Request Title - Provide a short and descriptive title for easy identification.
- Required by - Select the date when the requested material is required.
- Delivery Method - Select how the requested materials should be delivered.
- Direct Shipment to Job’s site – Materials are shipped directly from the vendor to the customer’s job site or the field technician’s location.
- Deliver to Warehouse – Materials are shipped to your organization’s designated warehouse.
- Delivery To - When the delivery method is Delivery to Warehouse, select the warehouse location from the Delivery To dropdown to ensure accurate routing and inventory tracking.
The Delivery To field pre-populates with your preferred warehouse location if one has been configured in your organization’s settings. If the pre-populated location is not correct, tap the field and select a different warehouse from the list. If no preferred location is set or the correct warehouse does not appear, contact your administrator to update the preferred location in Settings.
- Priority – Set the urgency of the request by selecting one of the following options: Low, Medium, High, or Urgent.
- Remarks – Enter any additional comments, instructions, or special requirements related to the request.
- Attachments – Upload supporting documents, such as product specifications, reference images, or vendor-provided details.
- Other Details – Fill in any custom fields configured by your organization.
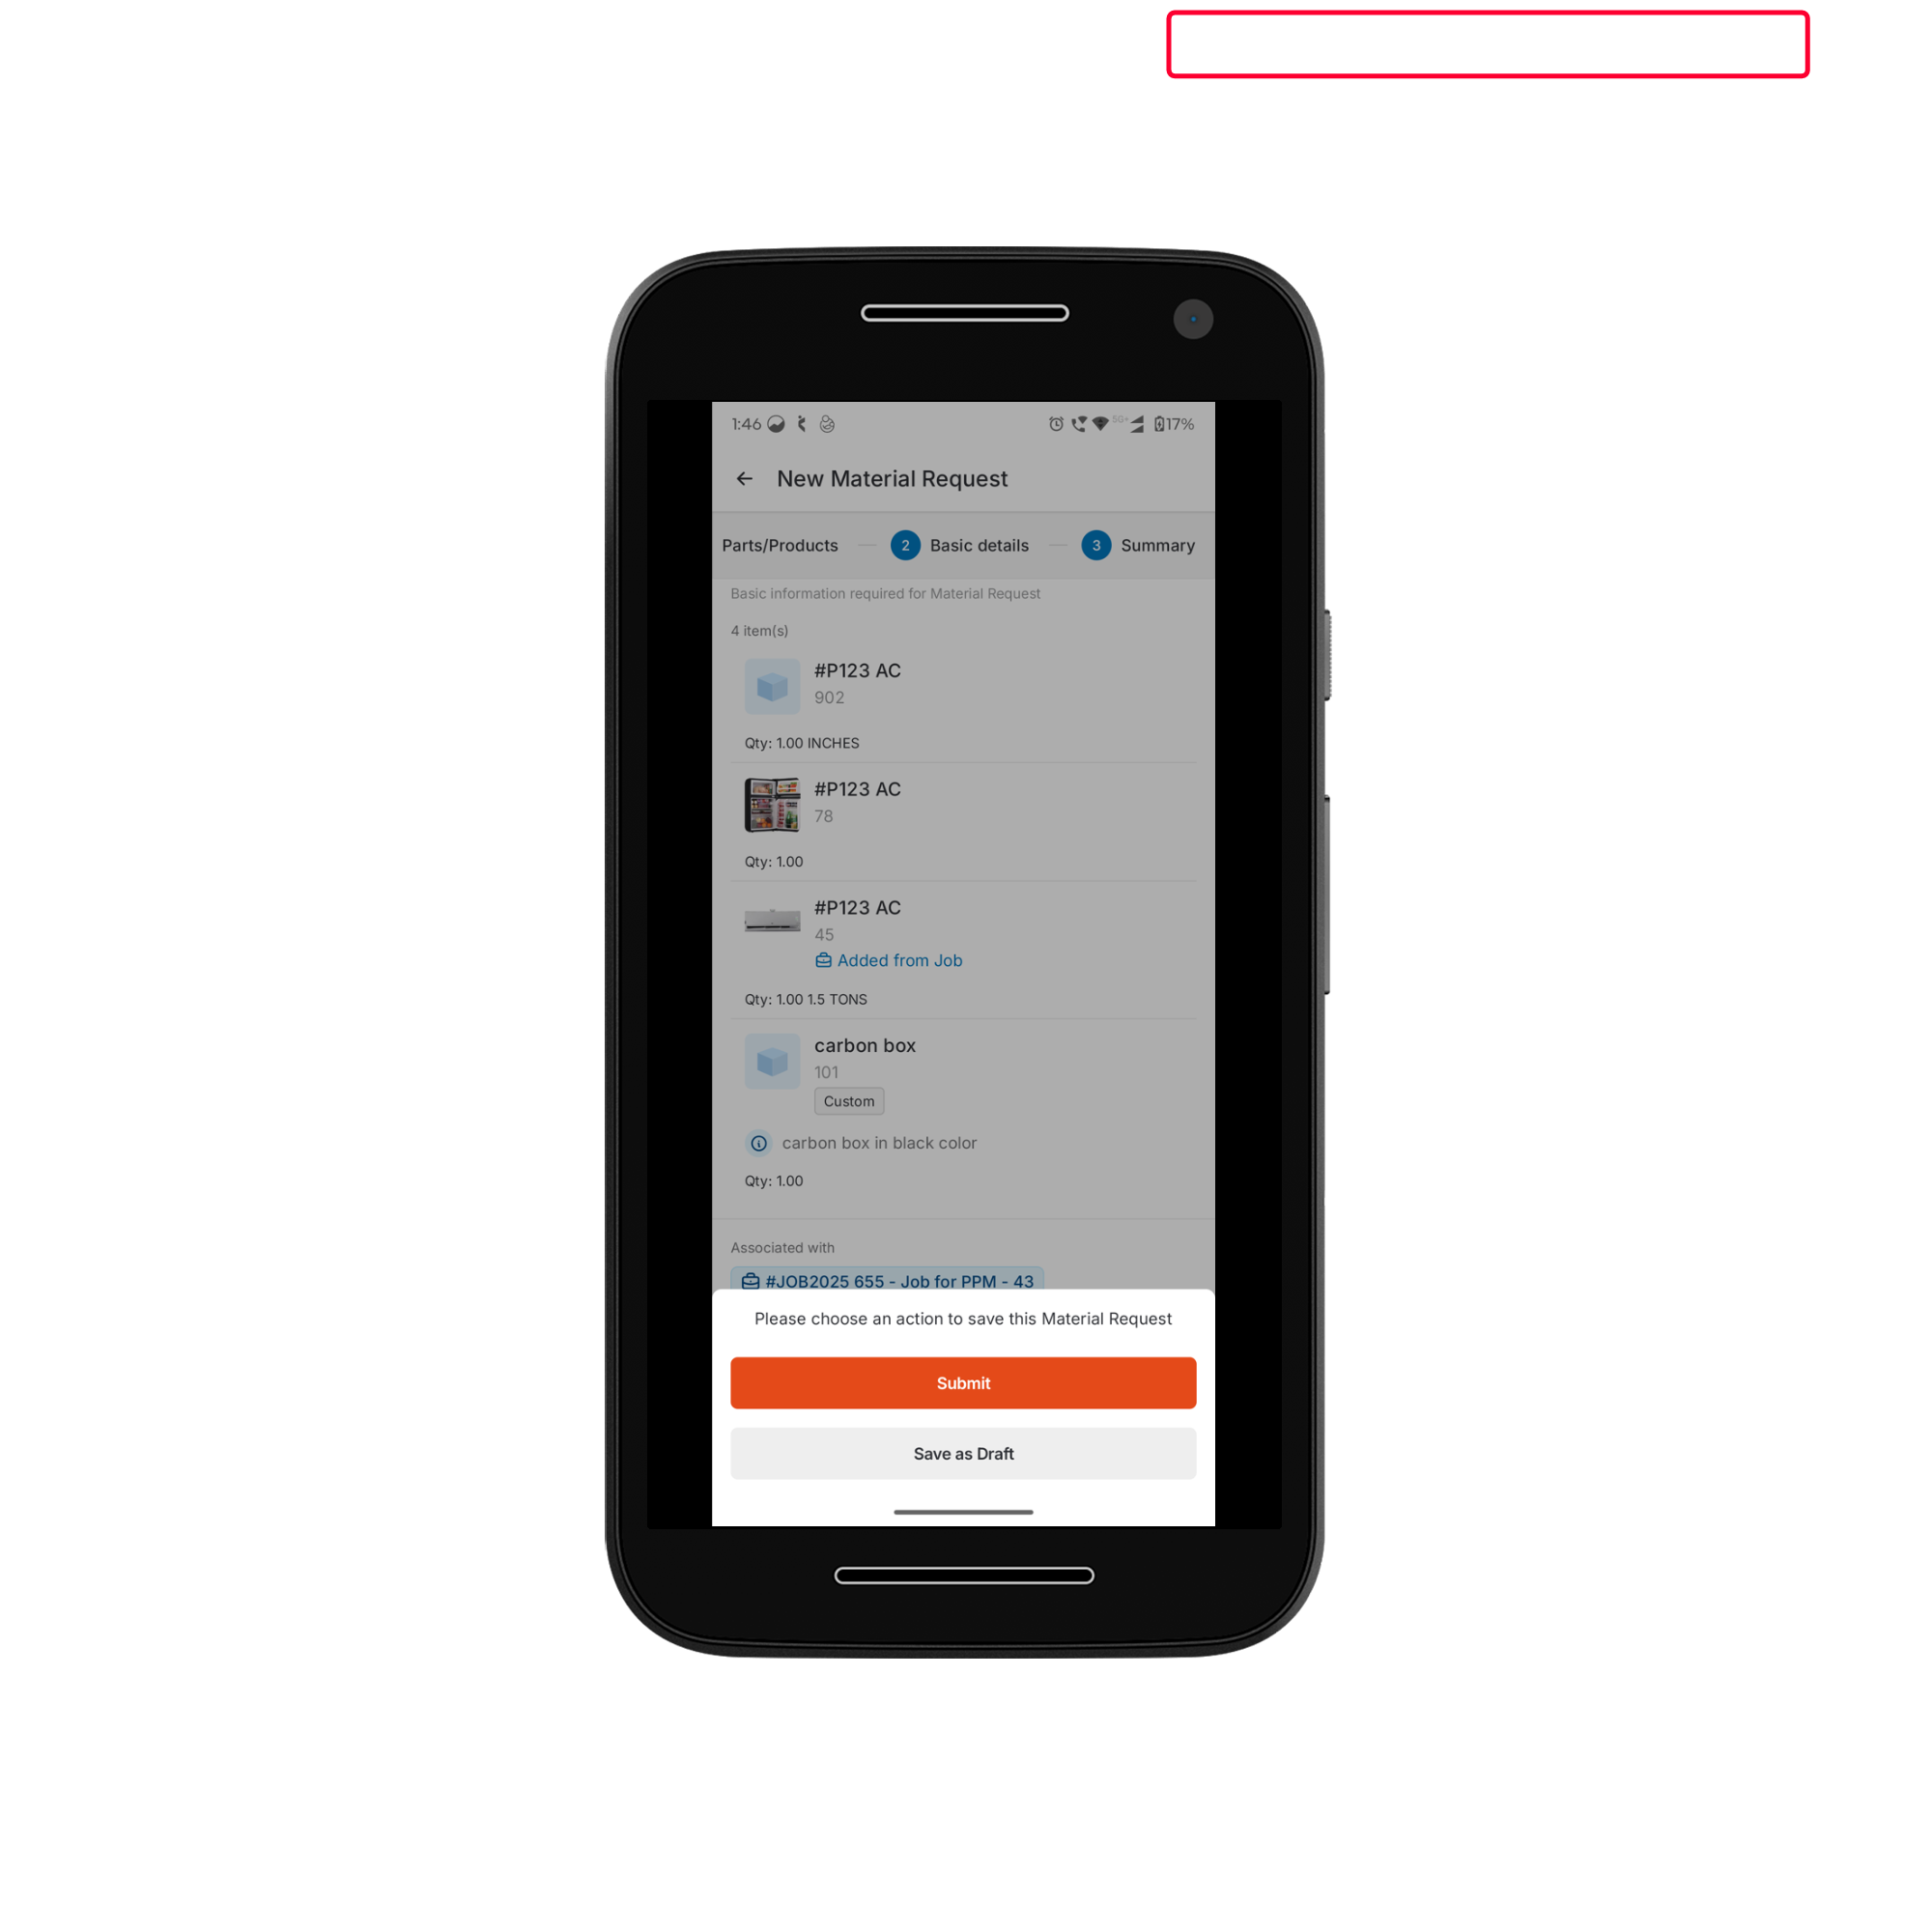
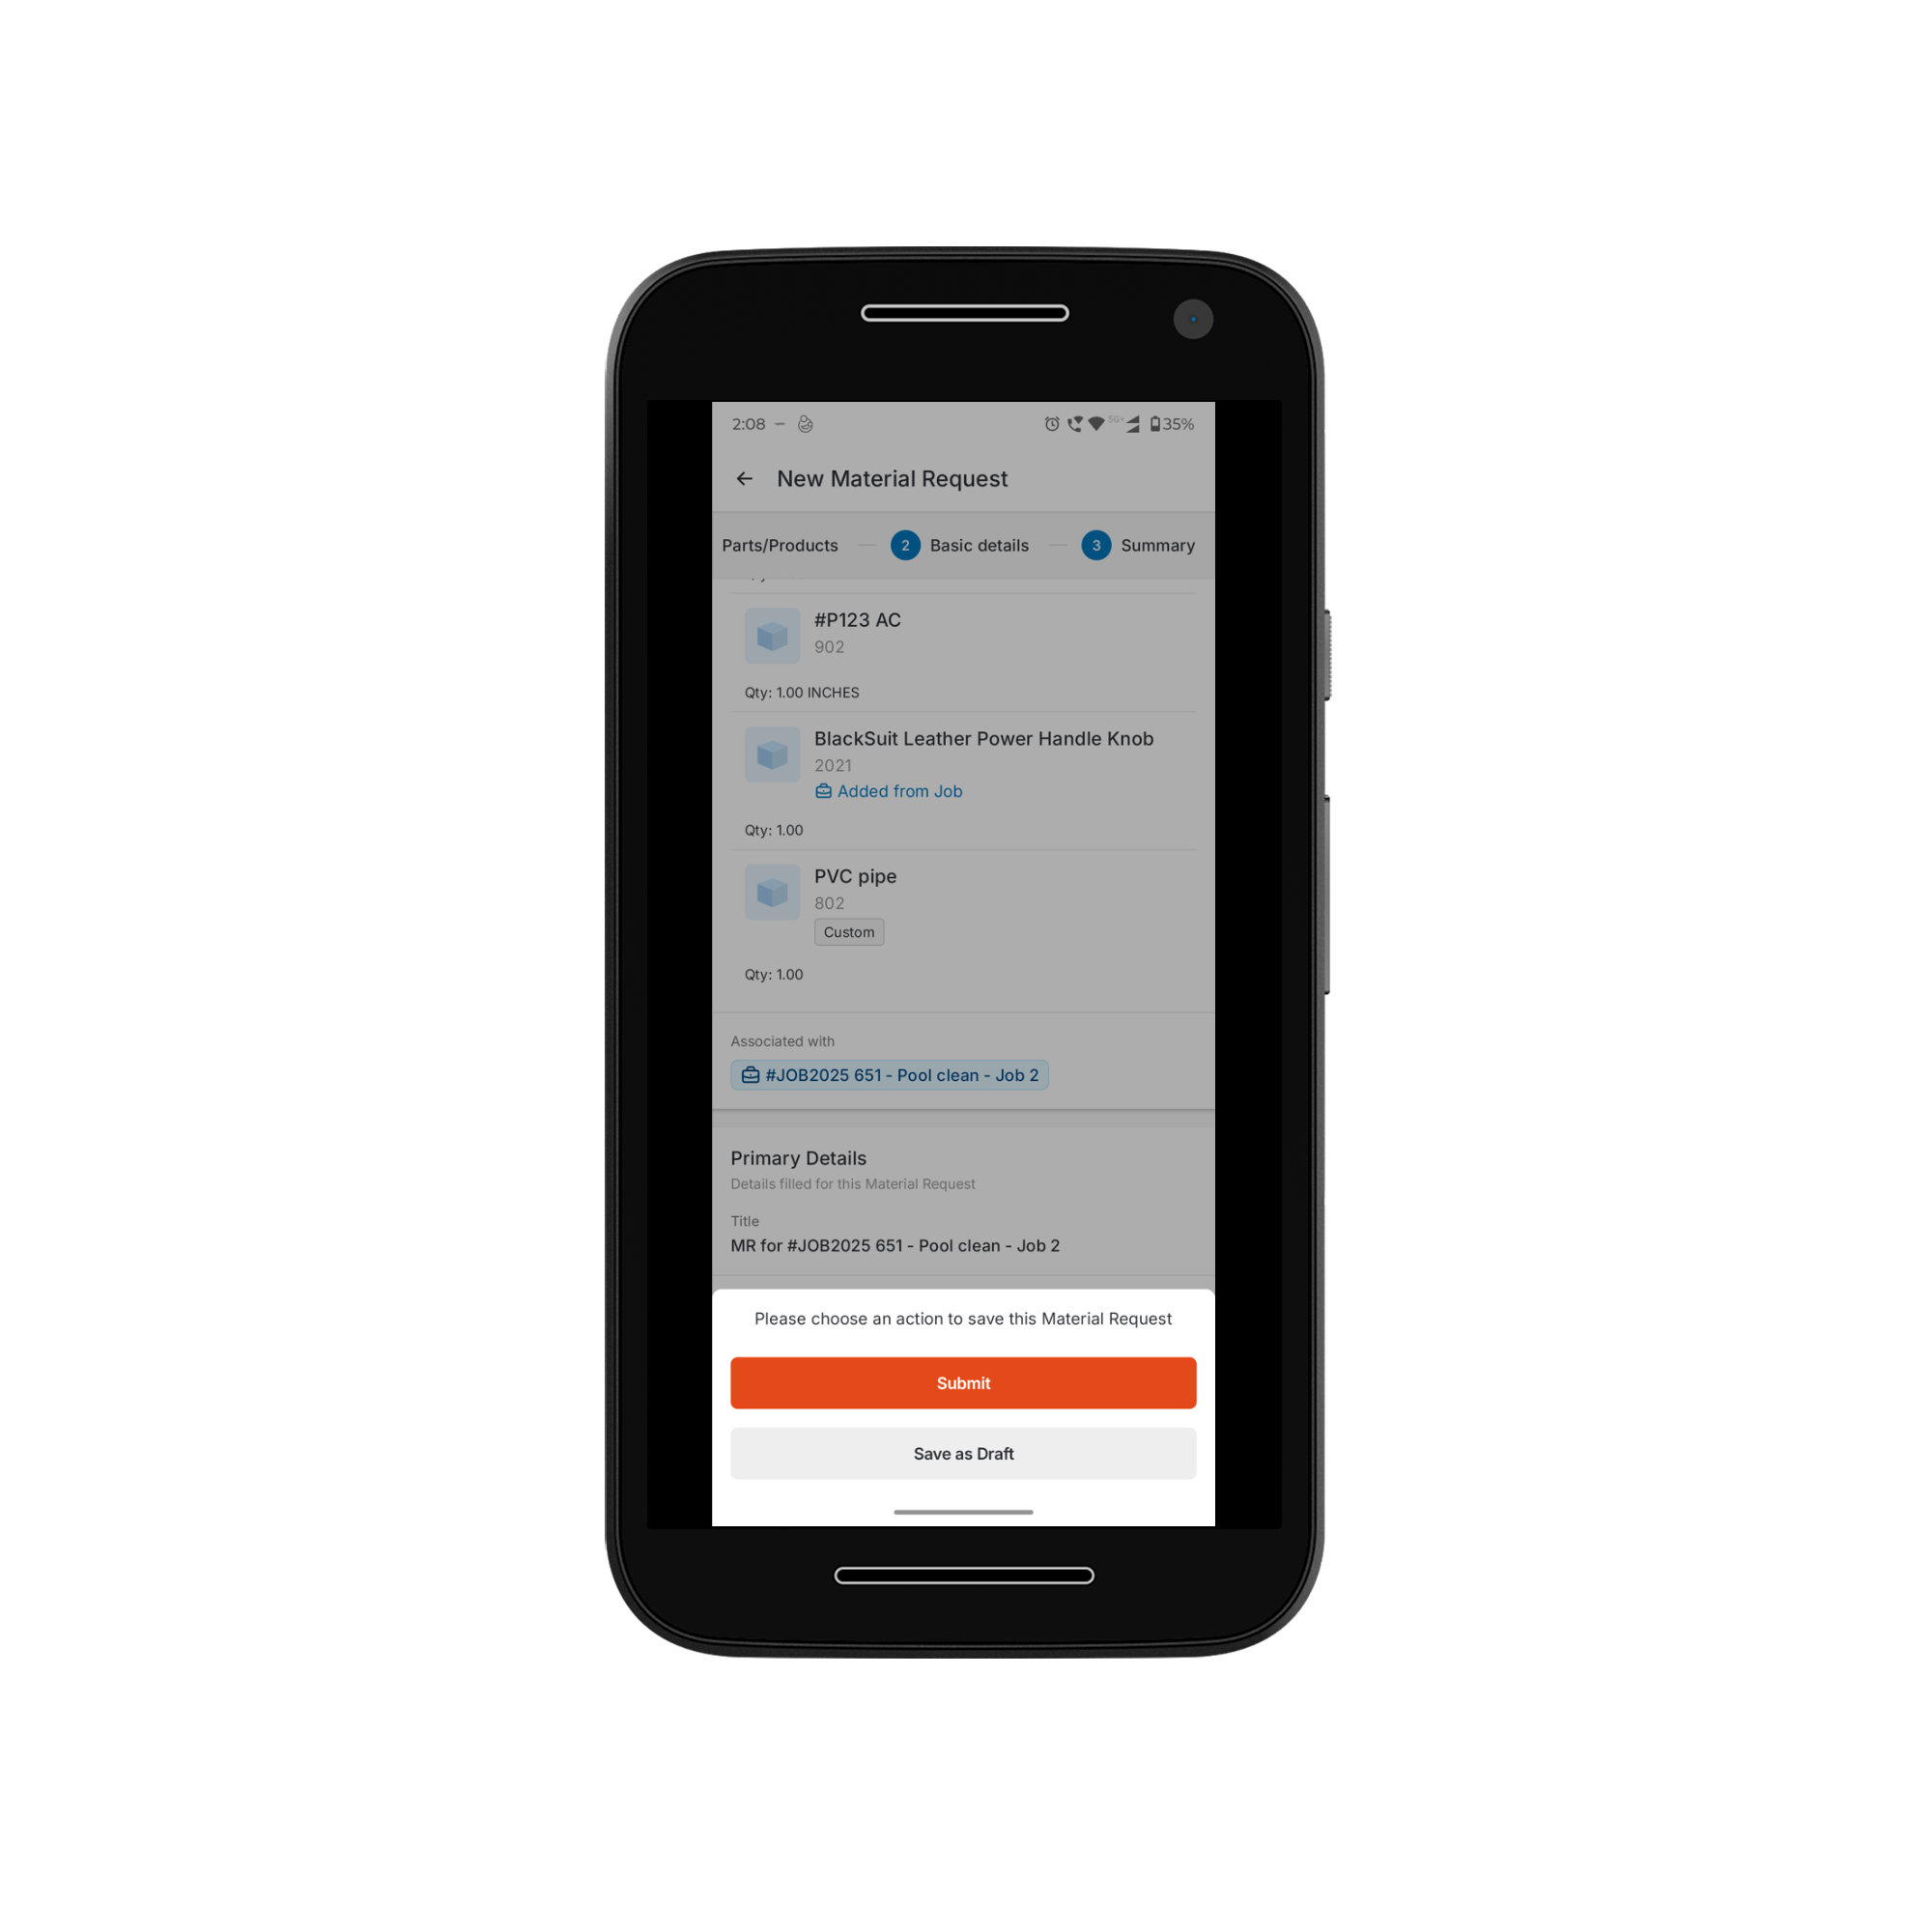
Step 4: Review Summary and Submit
- Verify all the details provided in the material request, including parts/products, and primary details.
- Click Create and select one of the following options:
- Submit: To submit the request for approval.
- Save as Draft: To save the request and complete it later.
Viewing Material Request Details
You can view detailed information about any material request from the Material Requests listing page. Each request displays key information such as its status, associated job or quote, delivery location, and linked parts or products, allowing users to track and manage material requests effectively. Steps to View a Material Request- On the Material Request Listing page, tap the Material Request you want to view.
- The request will open, displaying all associated information under the relevant sections: Details and MR Item(s).
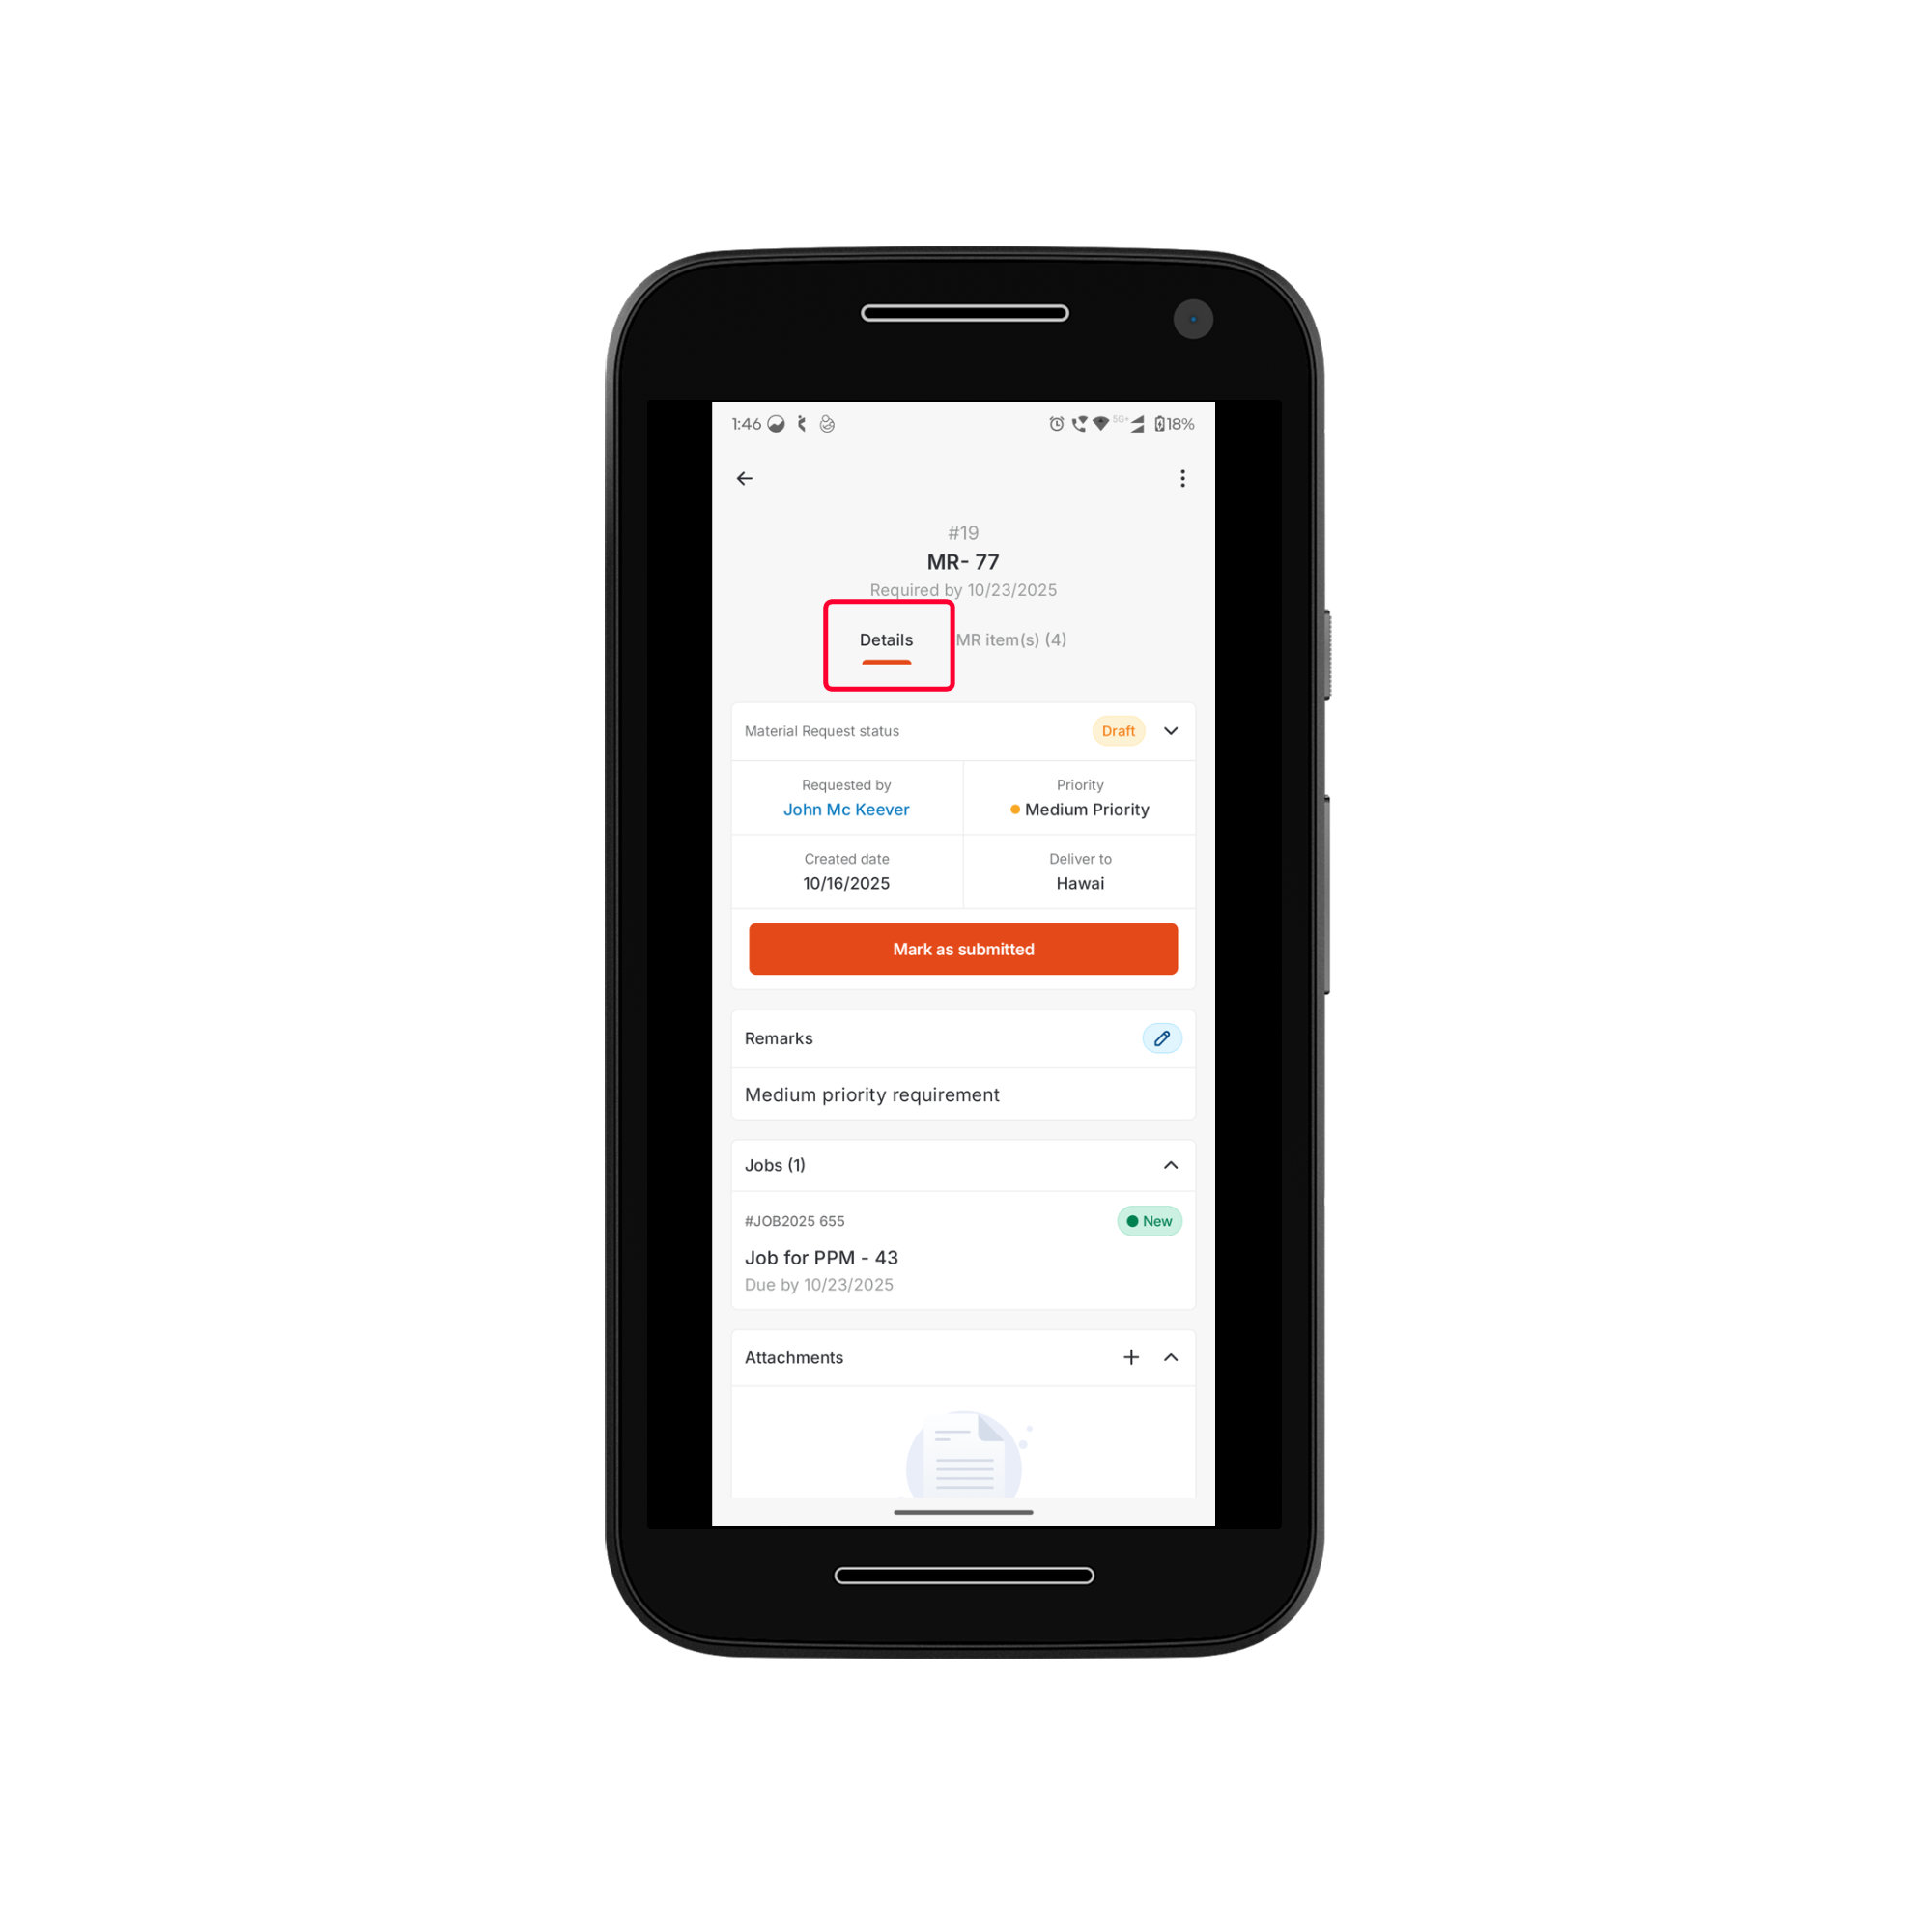
Details Section
The Details section provides the main information about the request:- Title – The name of the request for easy identification.
- Required Date – The deadline for fulfilling the request.
- Material Request Status – The current progress of the request, which can be:
- Draft – Saved but not yet submitted.
- Submitted – Sent for approval.
- Awaiting Approval – Pending approval from a supervisor or administrator (if configured).
- Accepted – Approved and in progress.
- Rejected – Declined by the approver.
- Received – Requested materials have been delivered.
- Requested By – The user who created the request.
- Priority – The urgency level assigned to the request.
- Created Date – The date the request was created.
- Delivery To – The designated warehouse location.
- Remarks – Additional notes or instructions provided.
- Job/Quote – Displays the associated job or quote along with the scheduled date and time (if applicable).
- Attachments – Any supporting documents or files linked to the request.
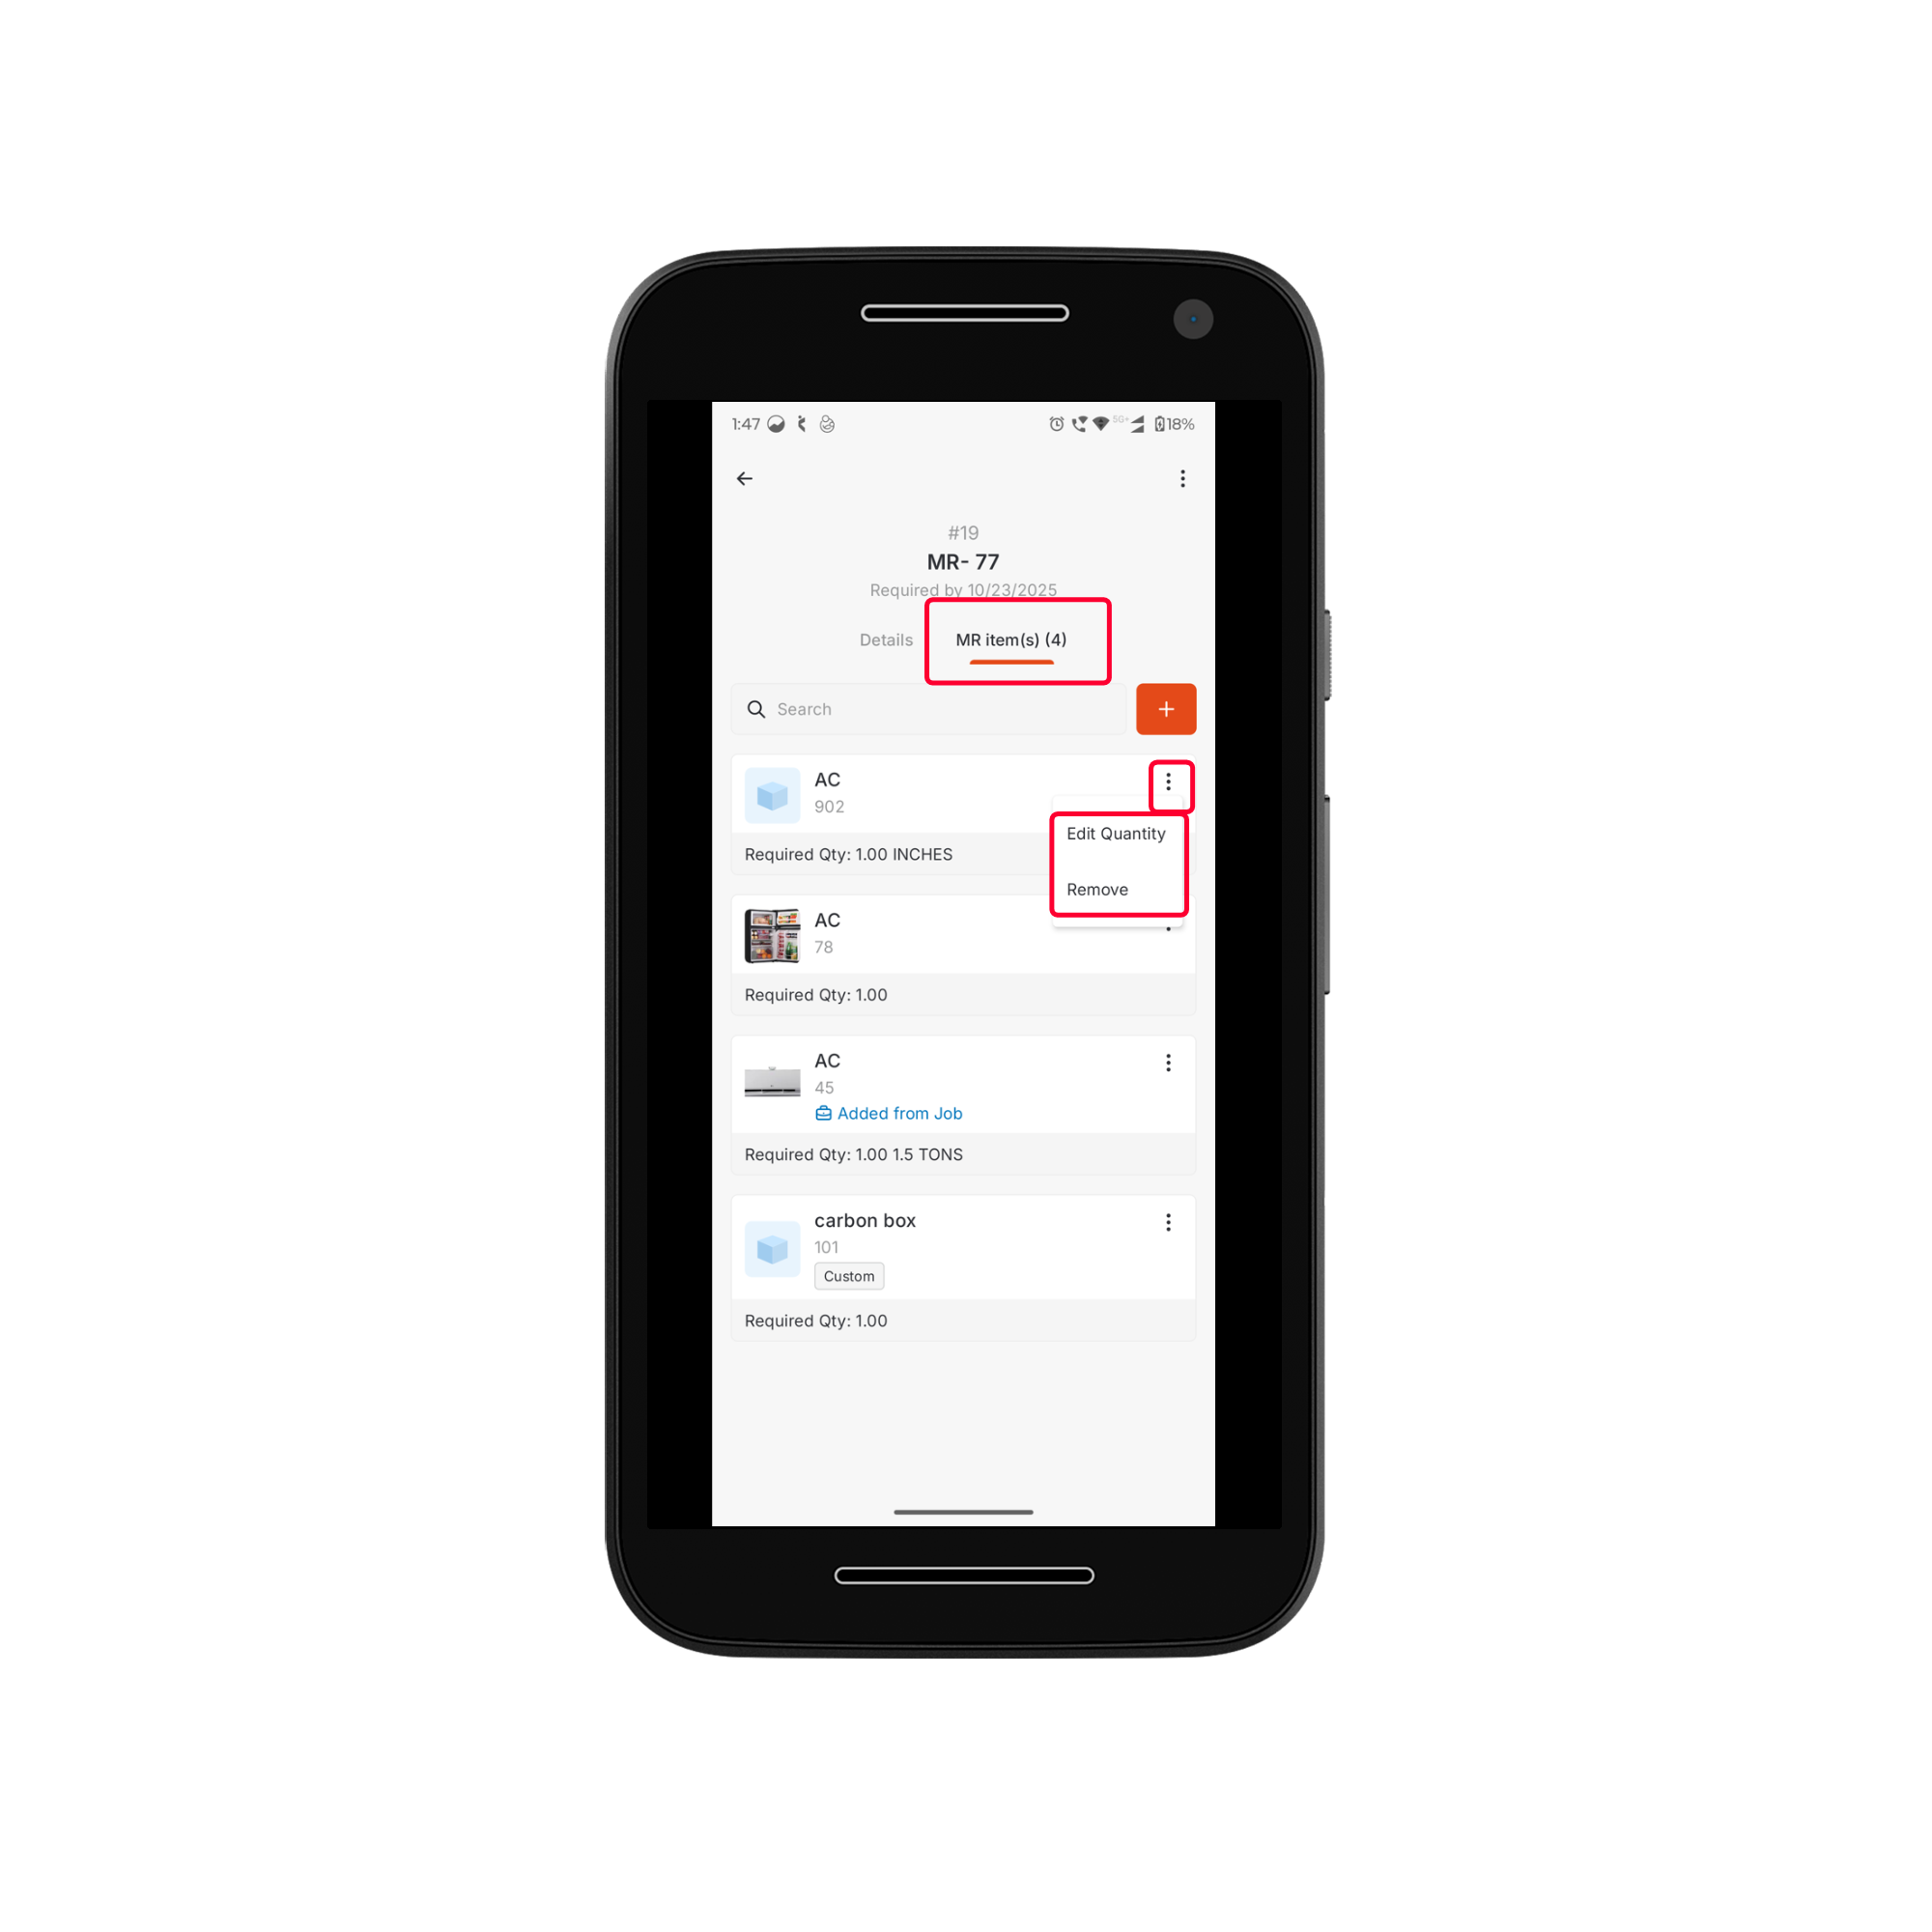
MR Items Section
The MR Item(s) section provides a complete overview of all materials associated with the request. You can review the list of items, check their quantities, and verify whether each item is custom or added from a job, quote, or inventory.- Tap the MR Item(s) tab to view all items linked to the Material Request. From here, you can edit the required quantities or remove items as needed.
Note: These actions are available only when the Material Request is in Draft status.
Additional Options
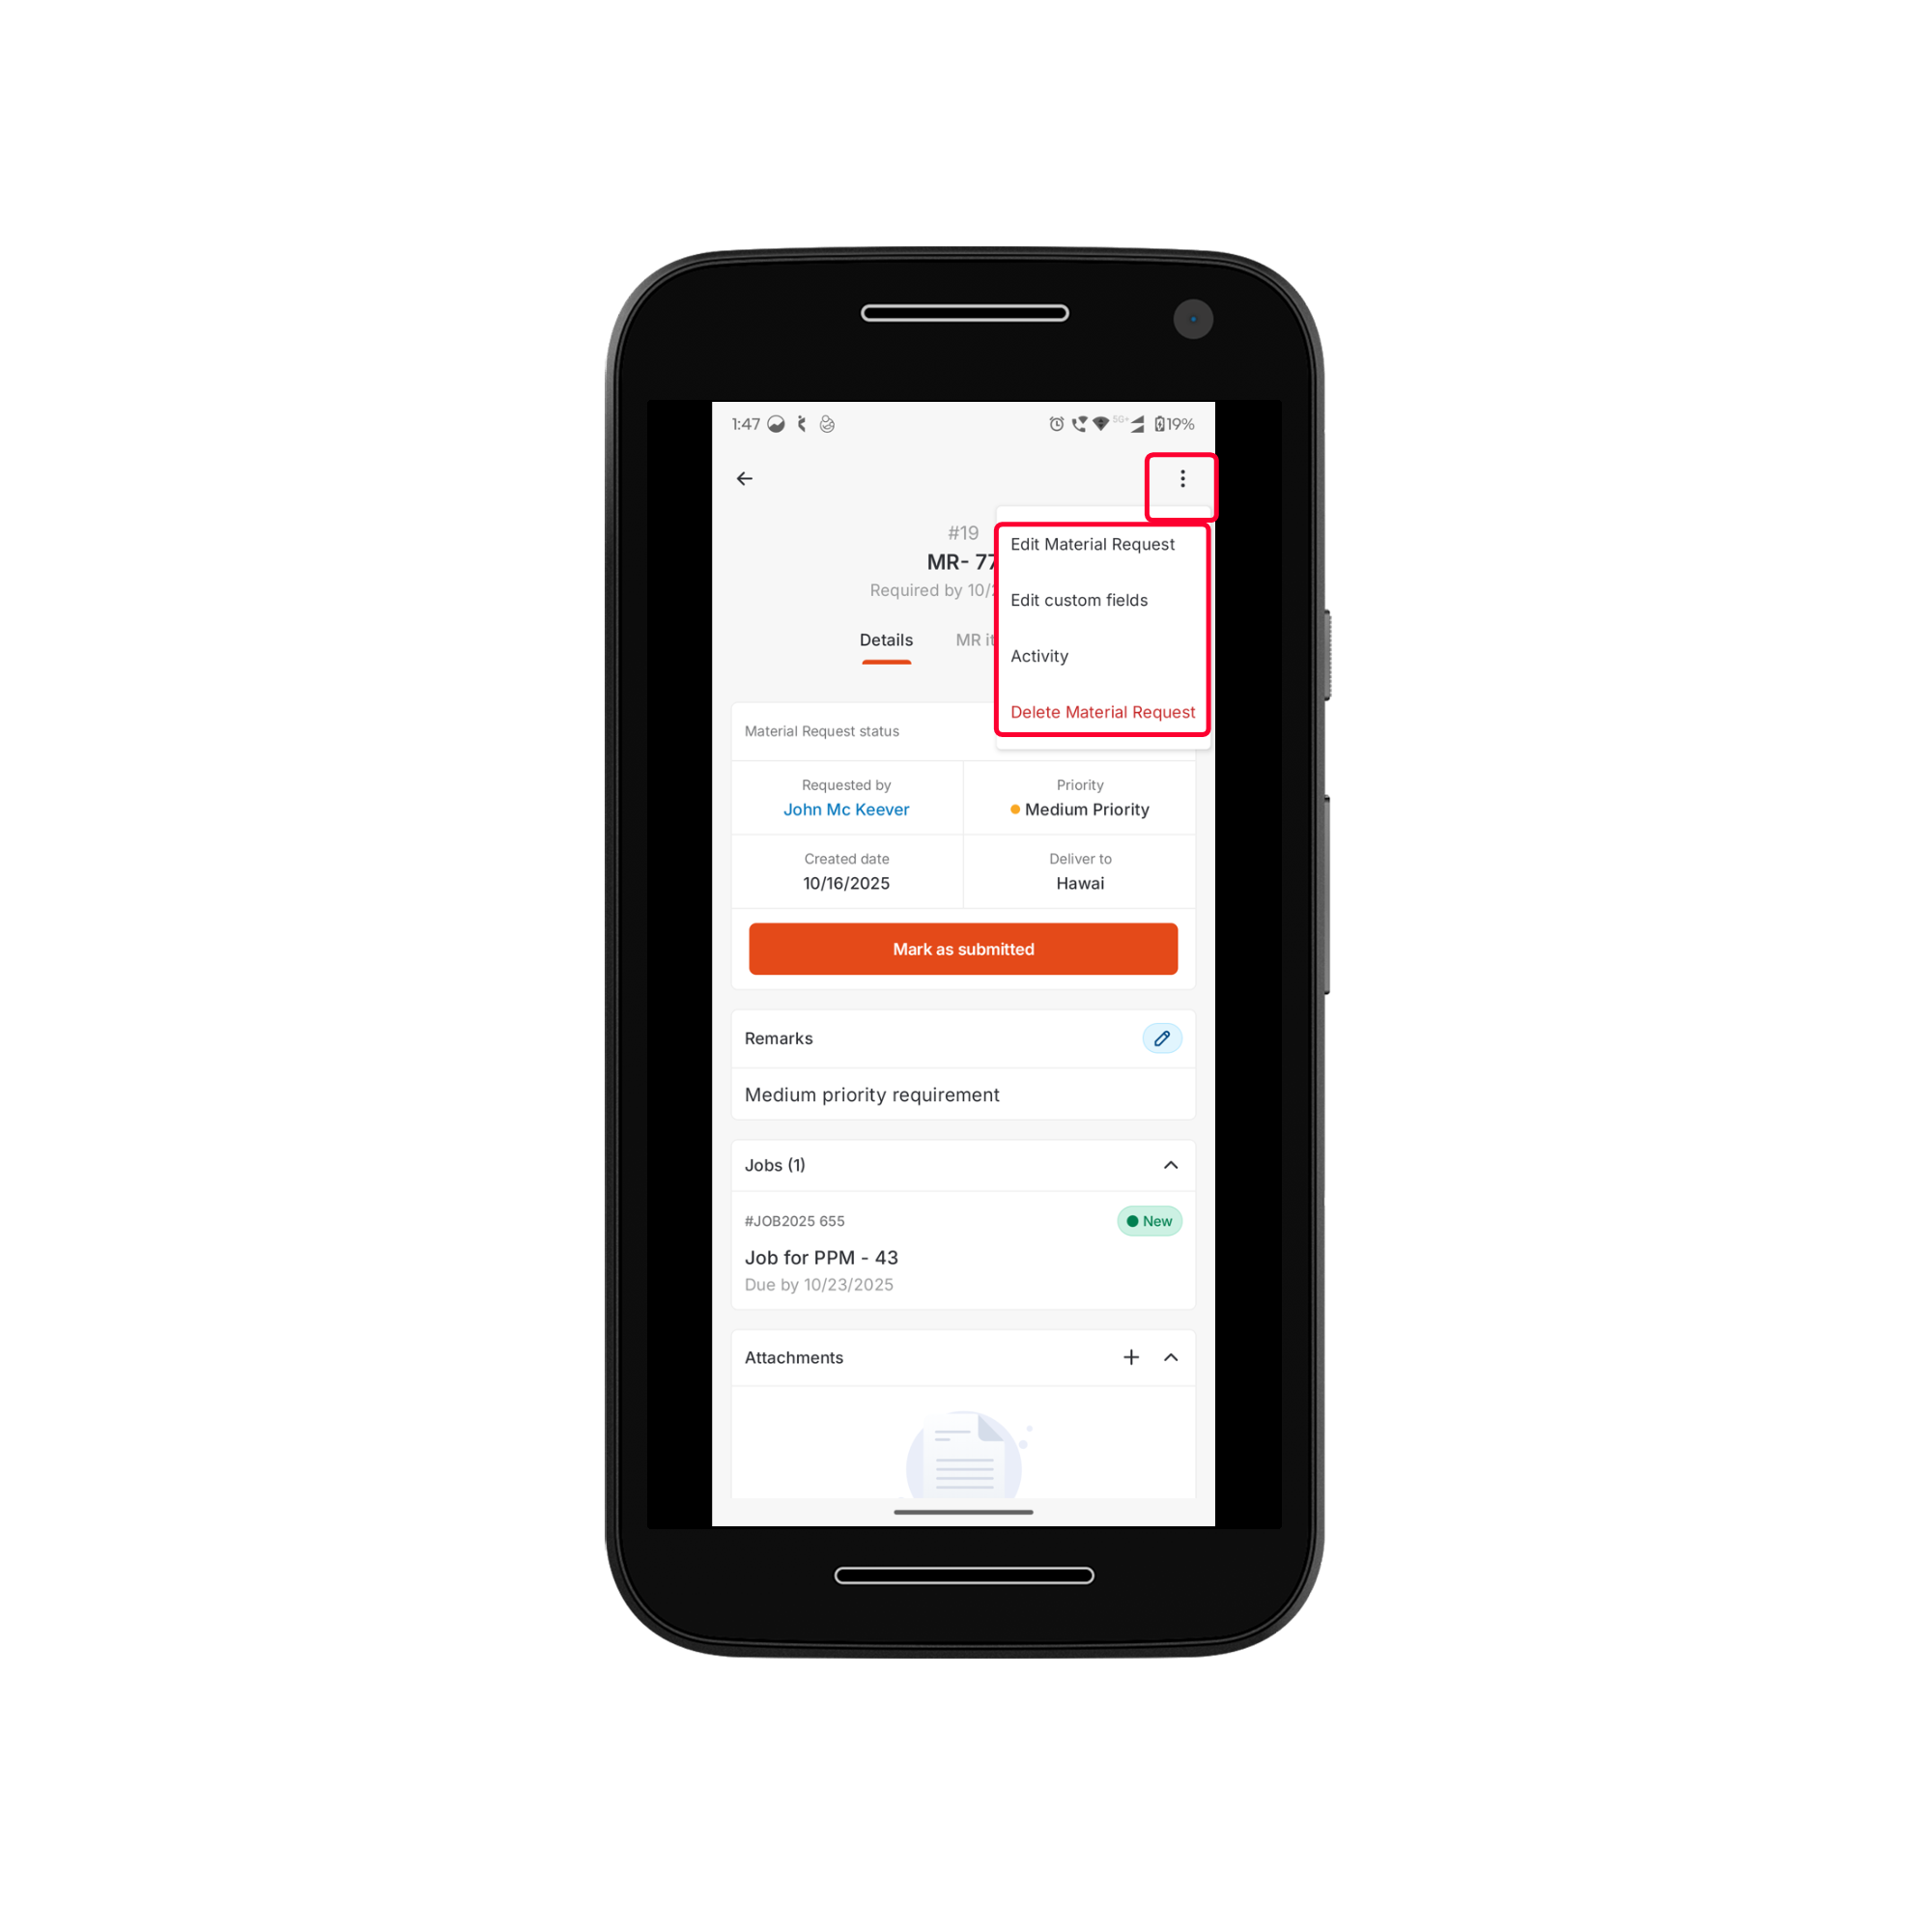
In addition to viewing details, you can perform quick actions on the selected material request without navigating away from the Details page. These options allow for efficient management and greater flexibility in handling requests. To access additional options:- Click the Kebab menu at the top-right corner of the Material Request Details page.
- From here, you can:
- Edit the material request (available when the status is Draft or Submitted).
- Manage Custom Fields associated with the request.
- View Activity History to track all updates and changes made to the request.
- Delete the material request.
Creating a Material Request from the Jobs Module
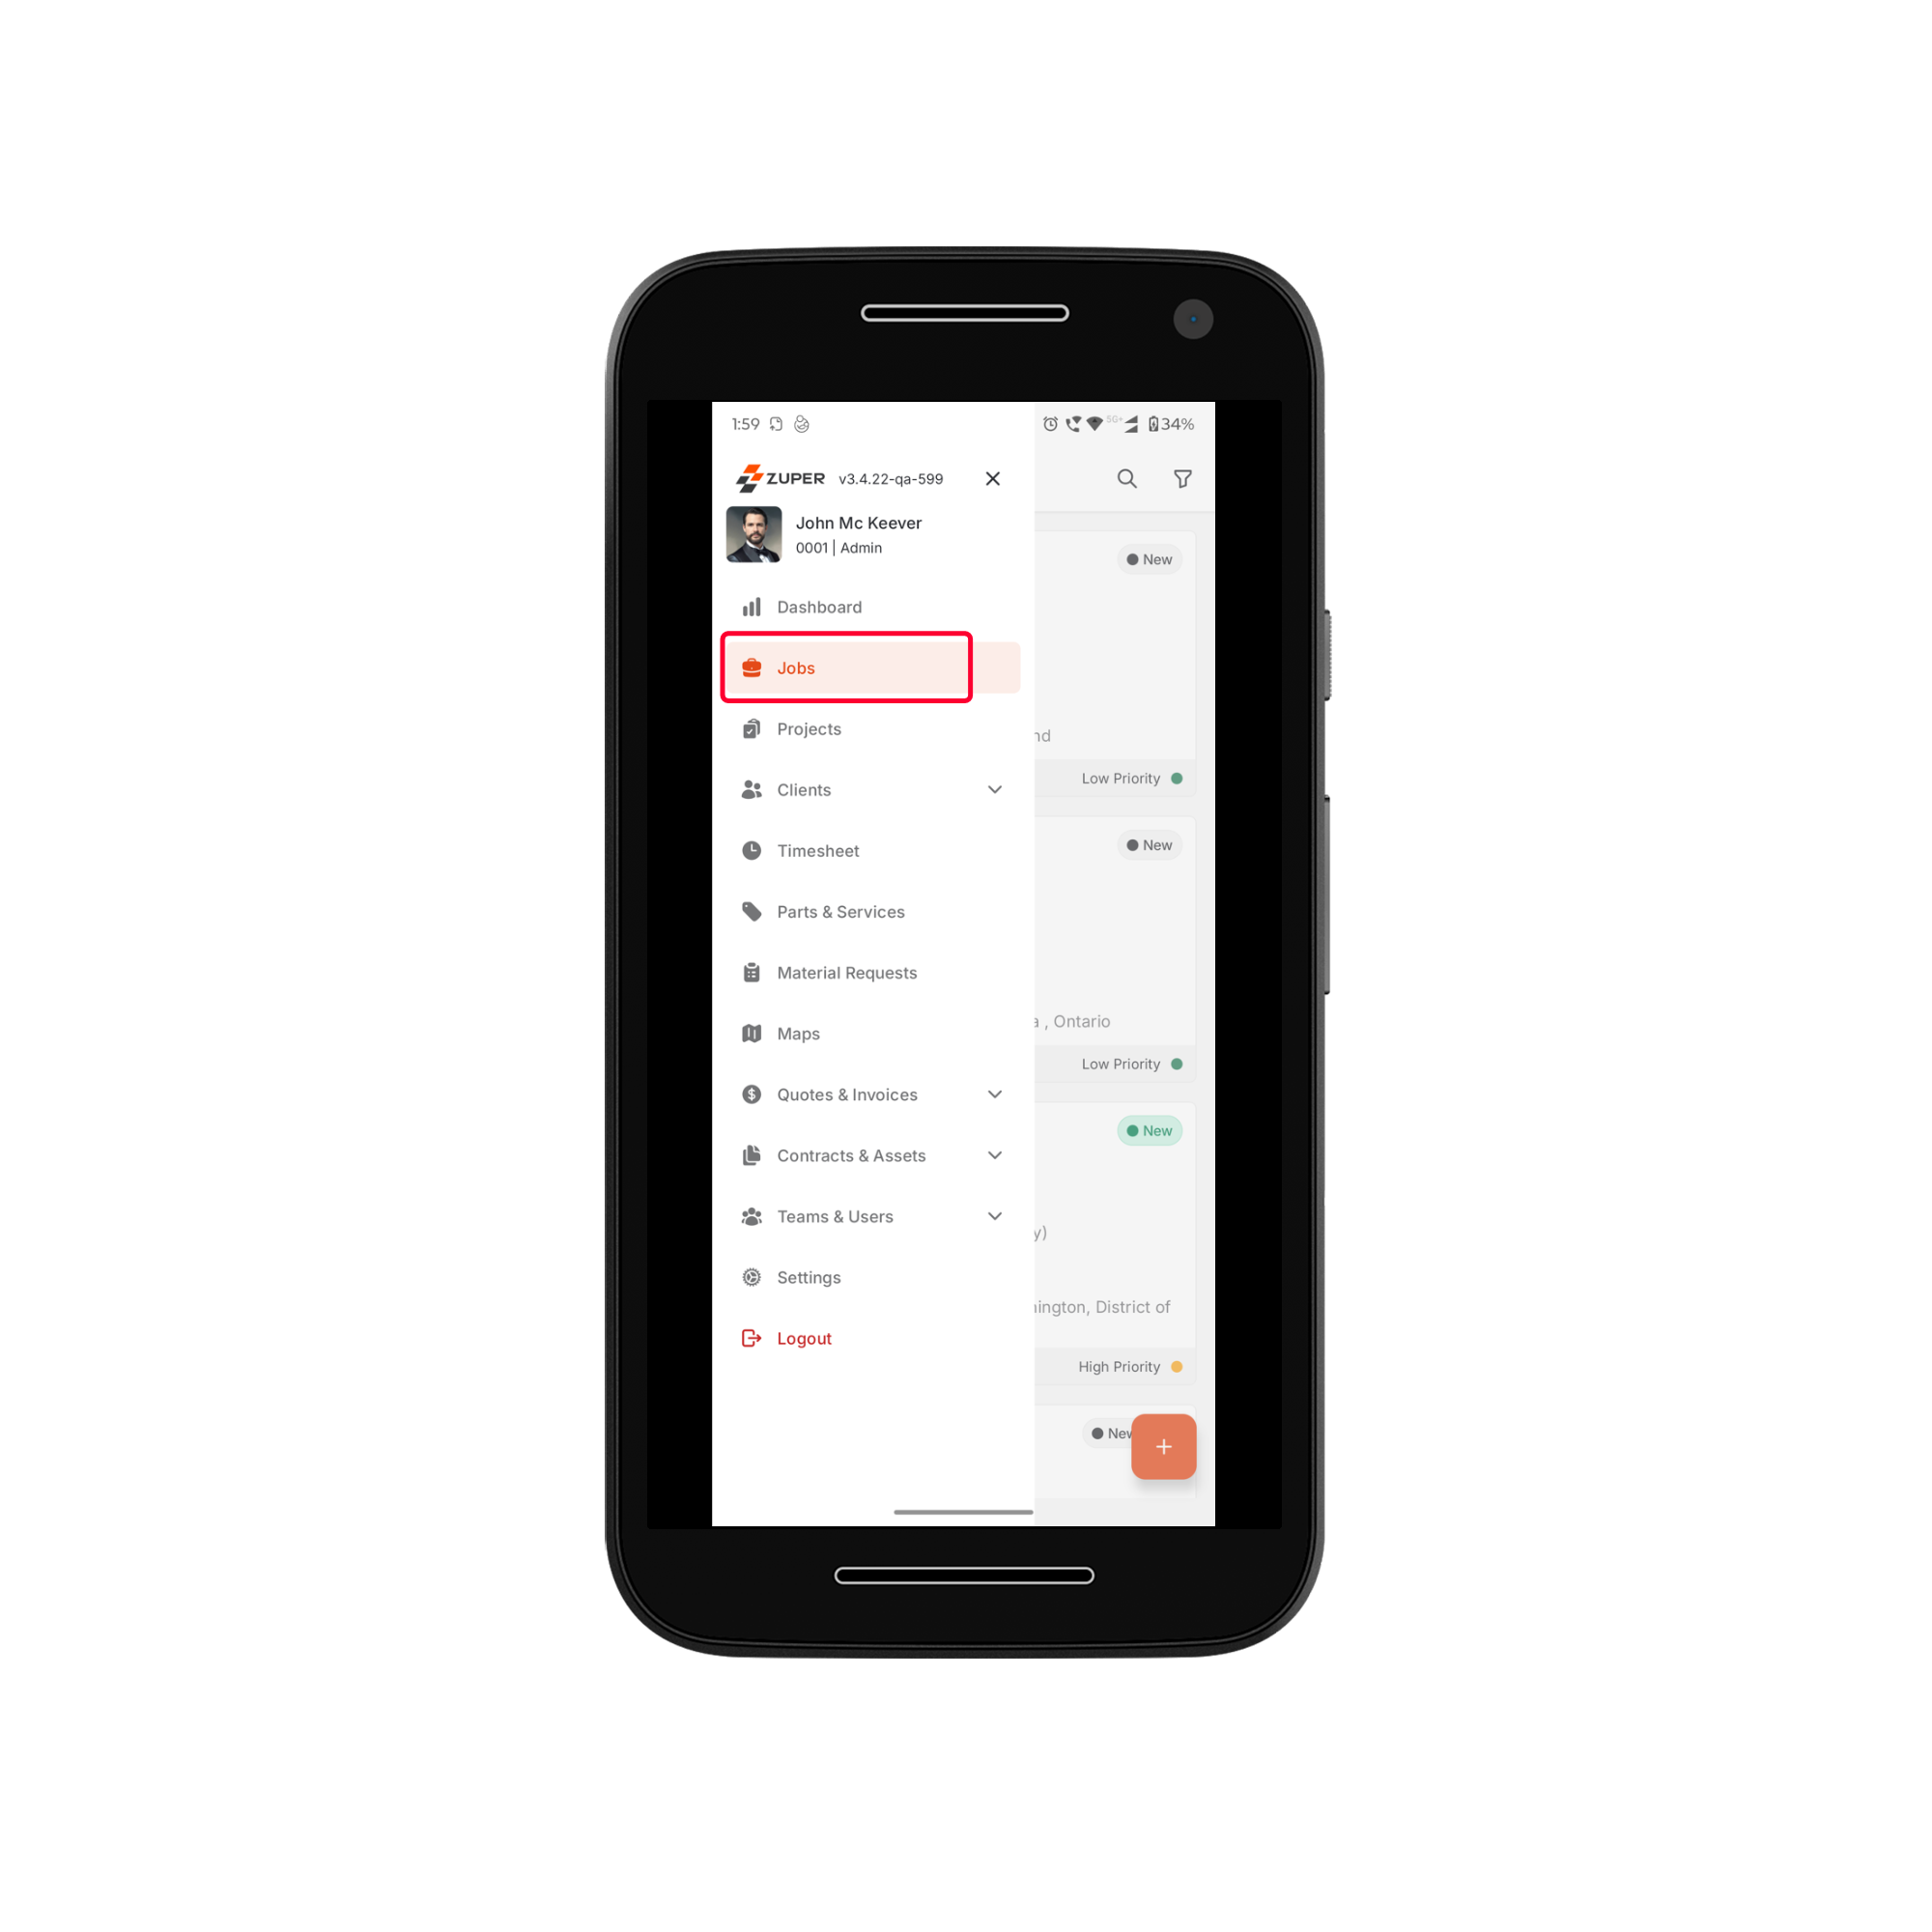
The Jobs Module allows you to raise material requests directly from an active job. This ensures that all necessary parts and products are sourced efficiently, linked with the job, and made available for seamless job execution. By creating a request within a job, the job is automatically associated with the request, reducing duplication of effort and ensuring accurate tracking. Step 1: Accessing the Jobs Module- Tap the Hamburger Menu located at the top left corner of the screen and select Jobs. The Jobs Listing Page will appear.
- From the listing page, select the job for which you need to create a material request.
- The Job Details Page will open.
- On the Quick Actions Bar, click New and select “New Material Request” from the dropdown menu.
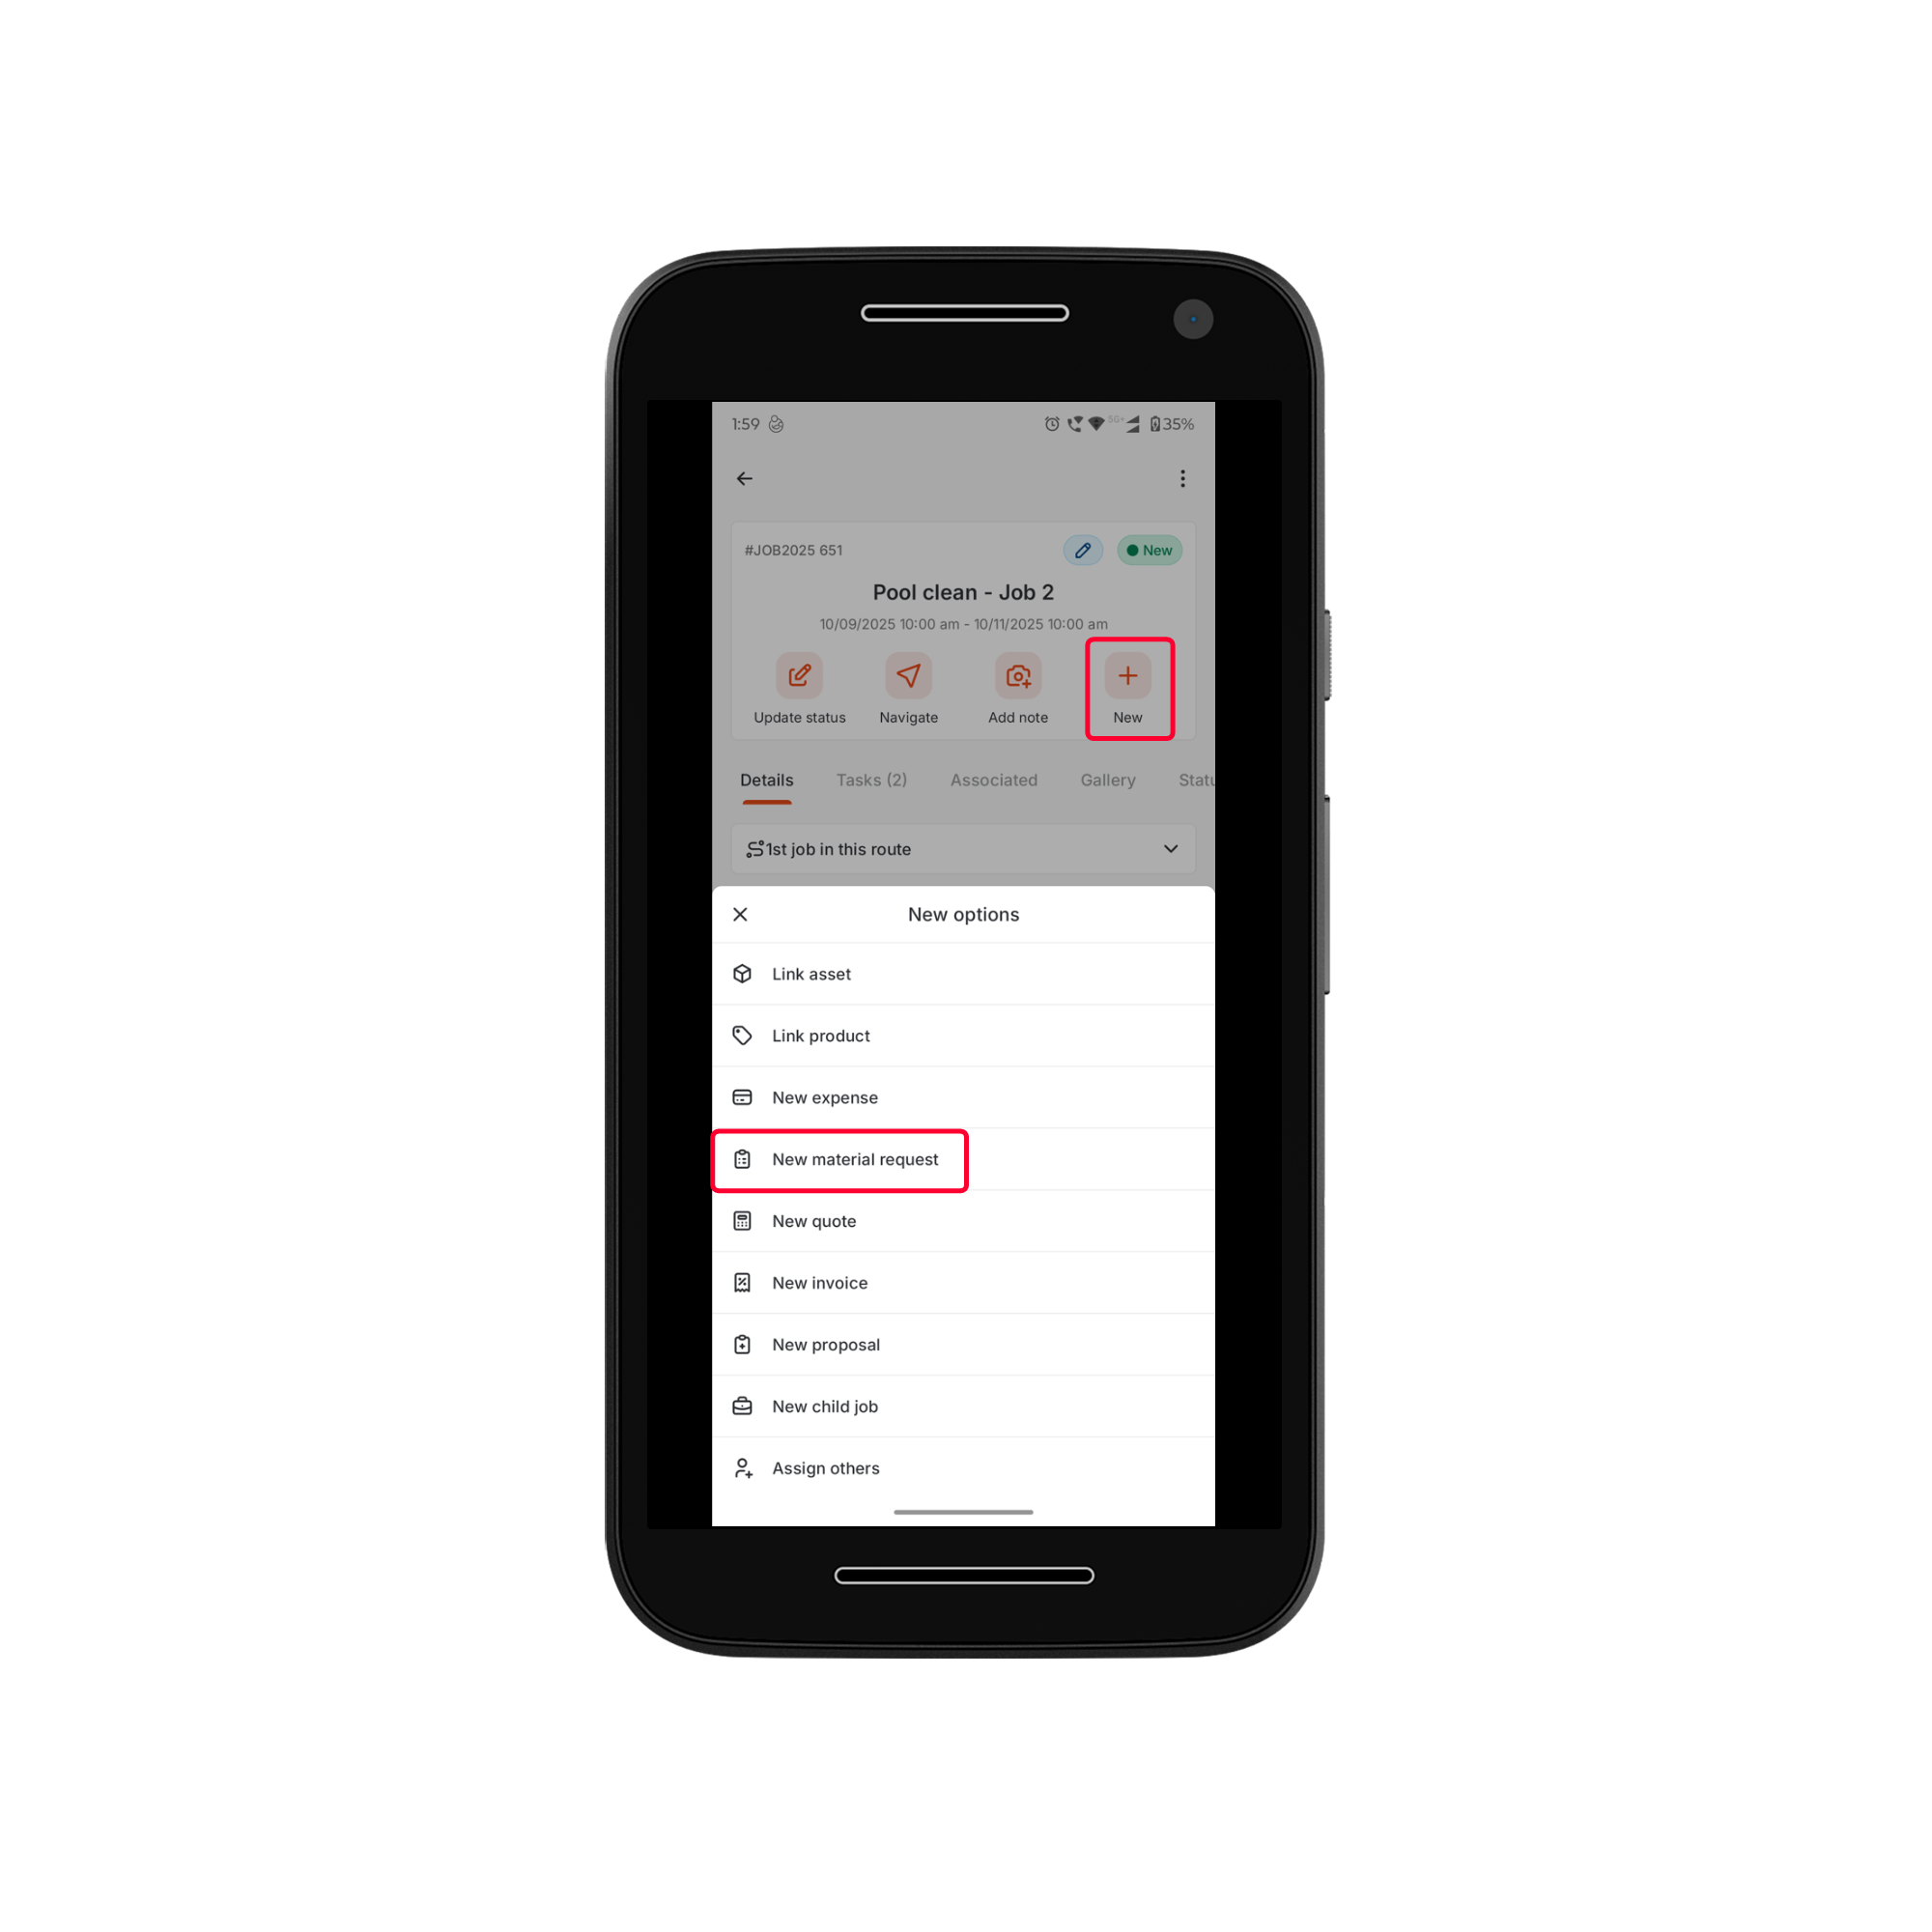
- The New Material Request Creation Page will open.
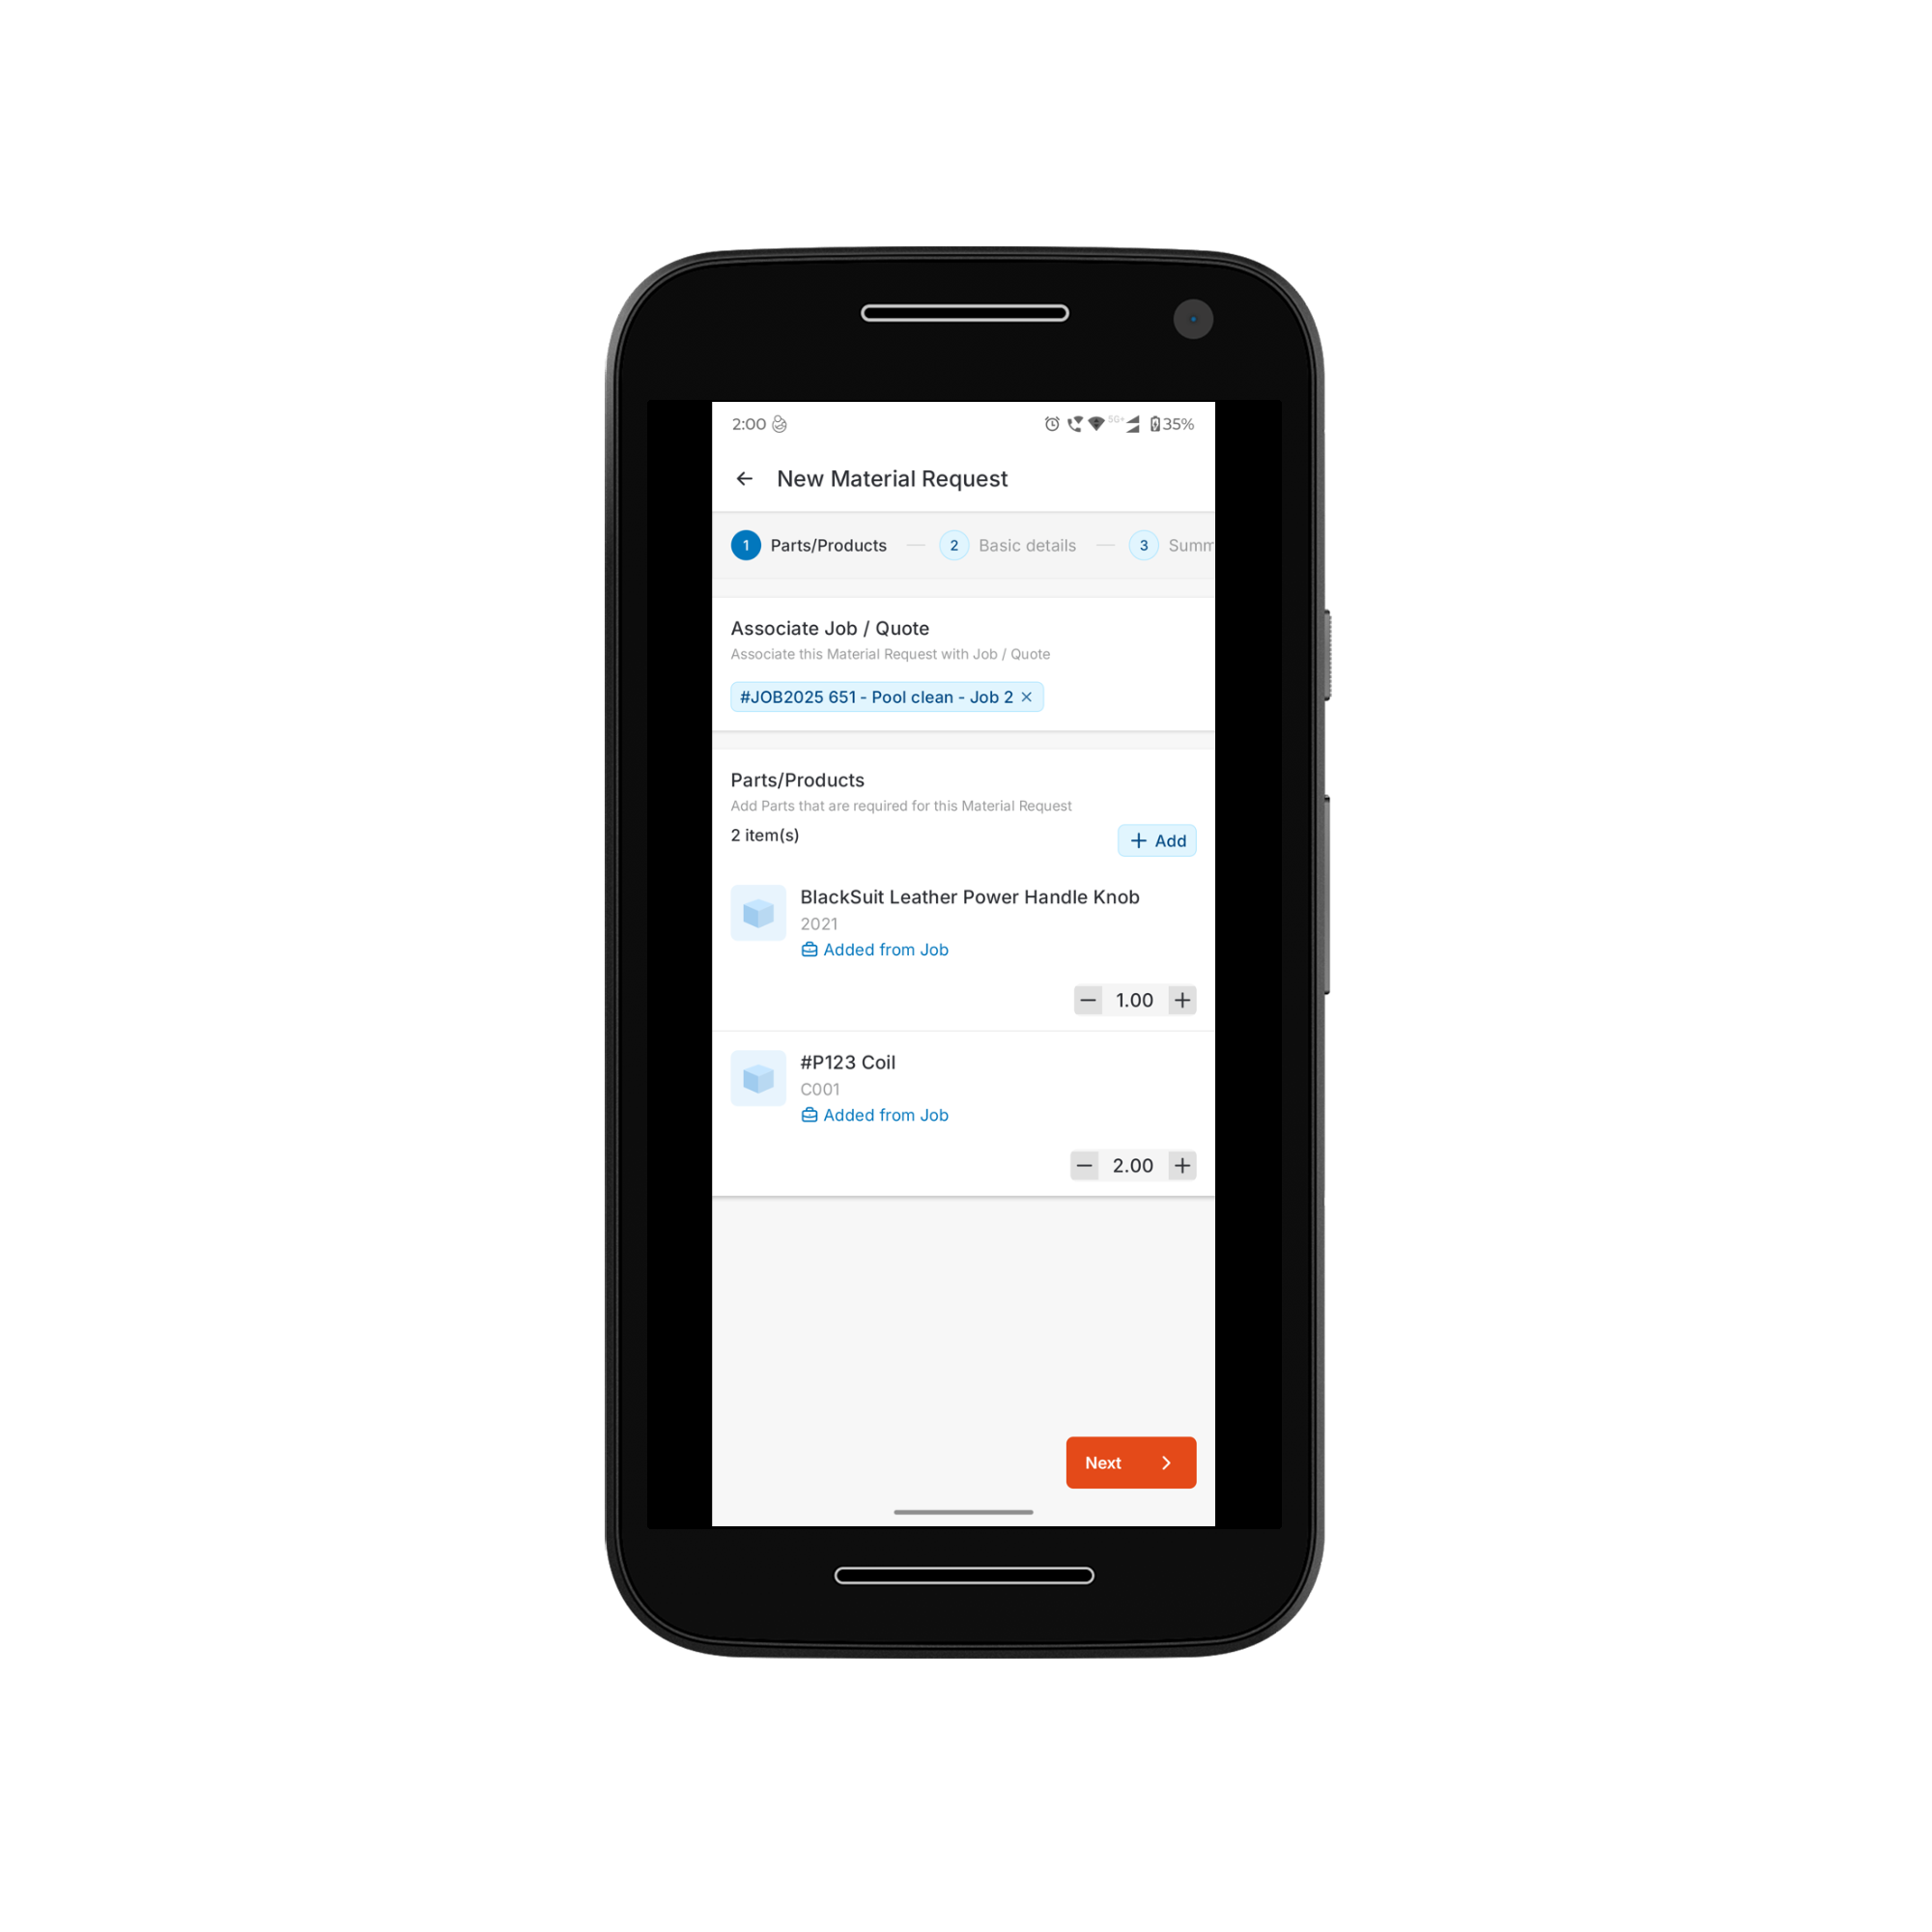
- The request will display prefilled details, including the associated job and its existing parts/products under the Parts/Products section. You can manually add or remove items as required.
- The associated job (if applicable).
- The inventory.
- Custom line items.
To add Items from a Job or Inventory
To add Items from a Job or Inventory
Tap the “+ Add” button and select “Add item”. The Add Products page will open, displaying two tabs: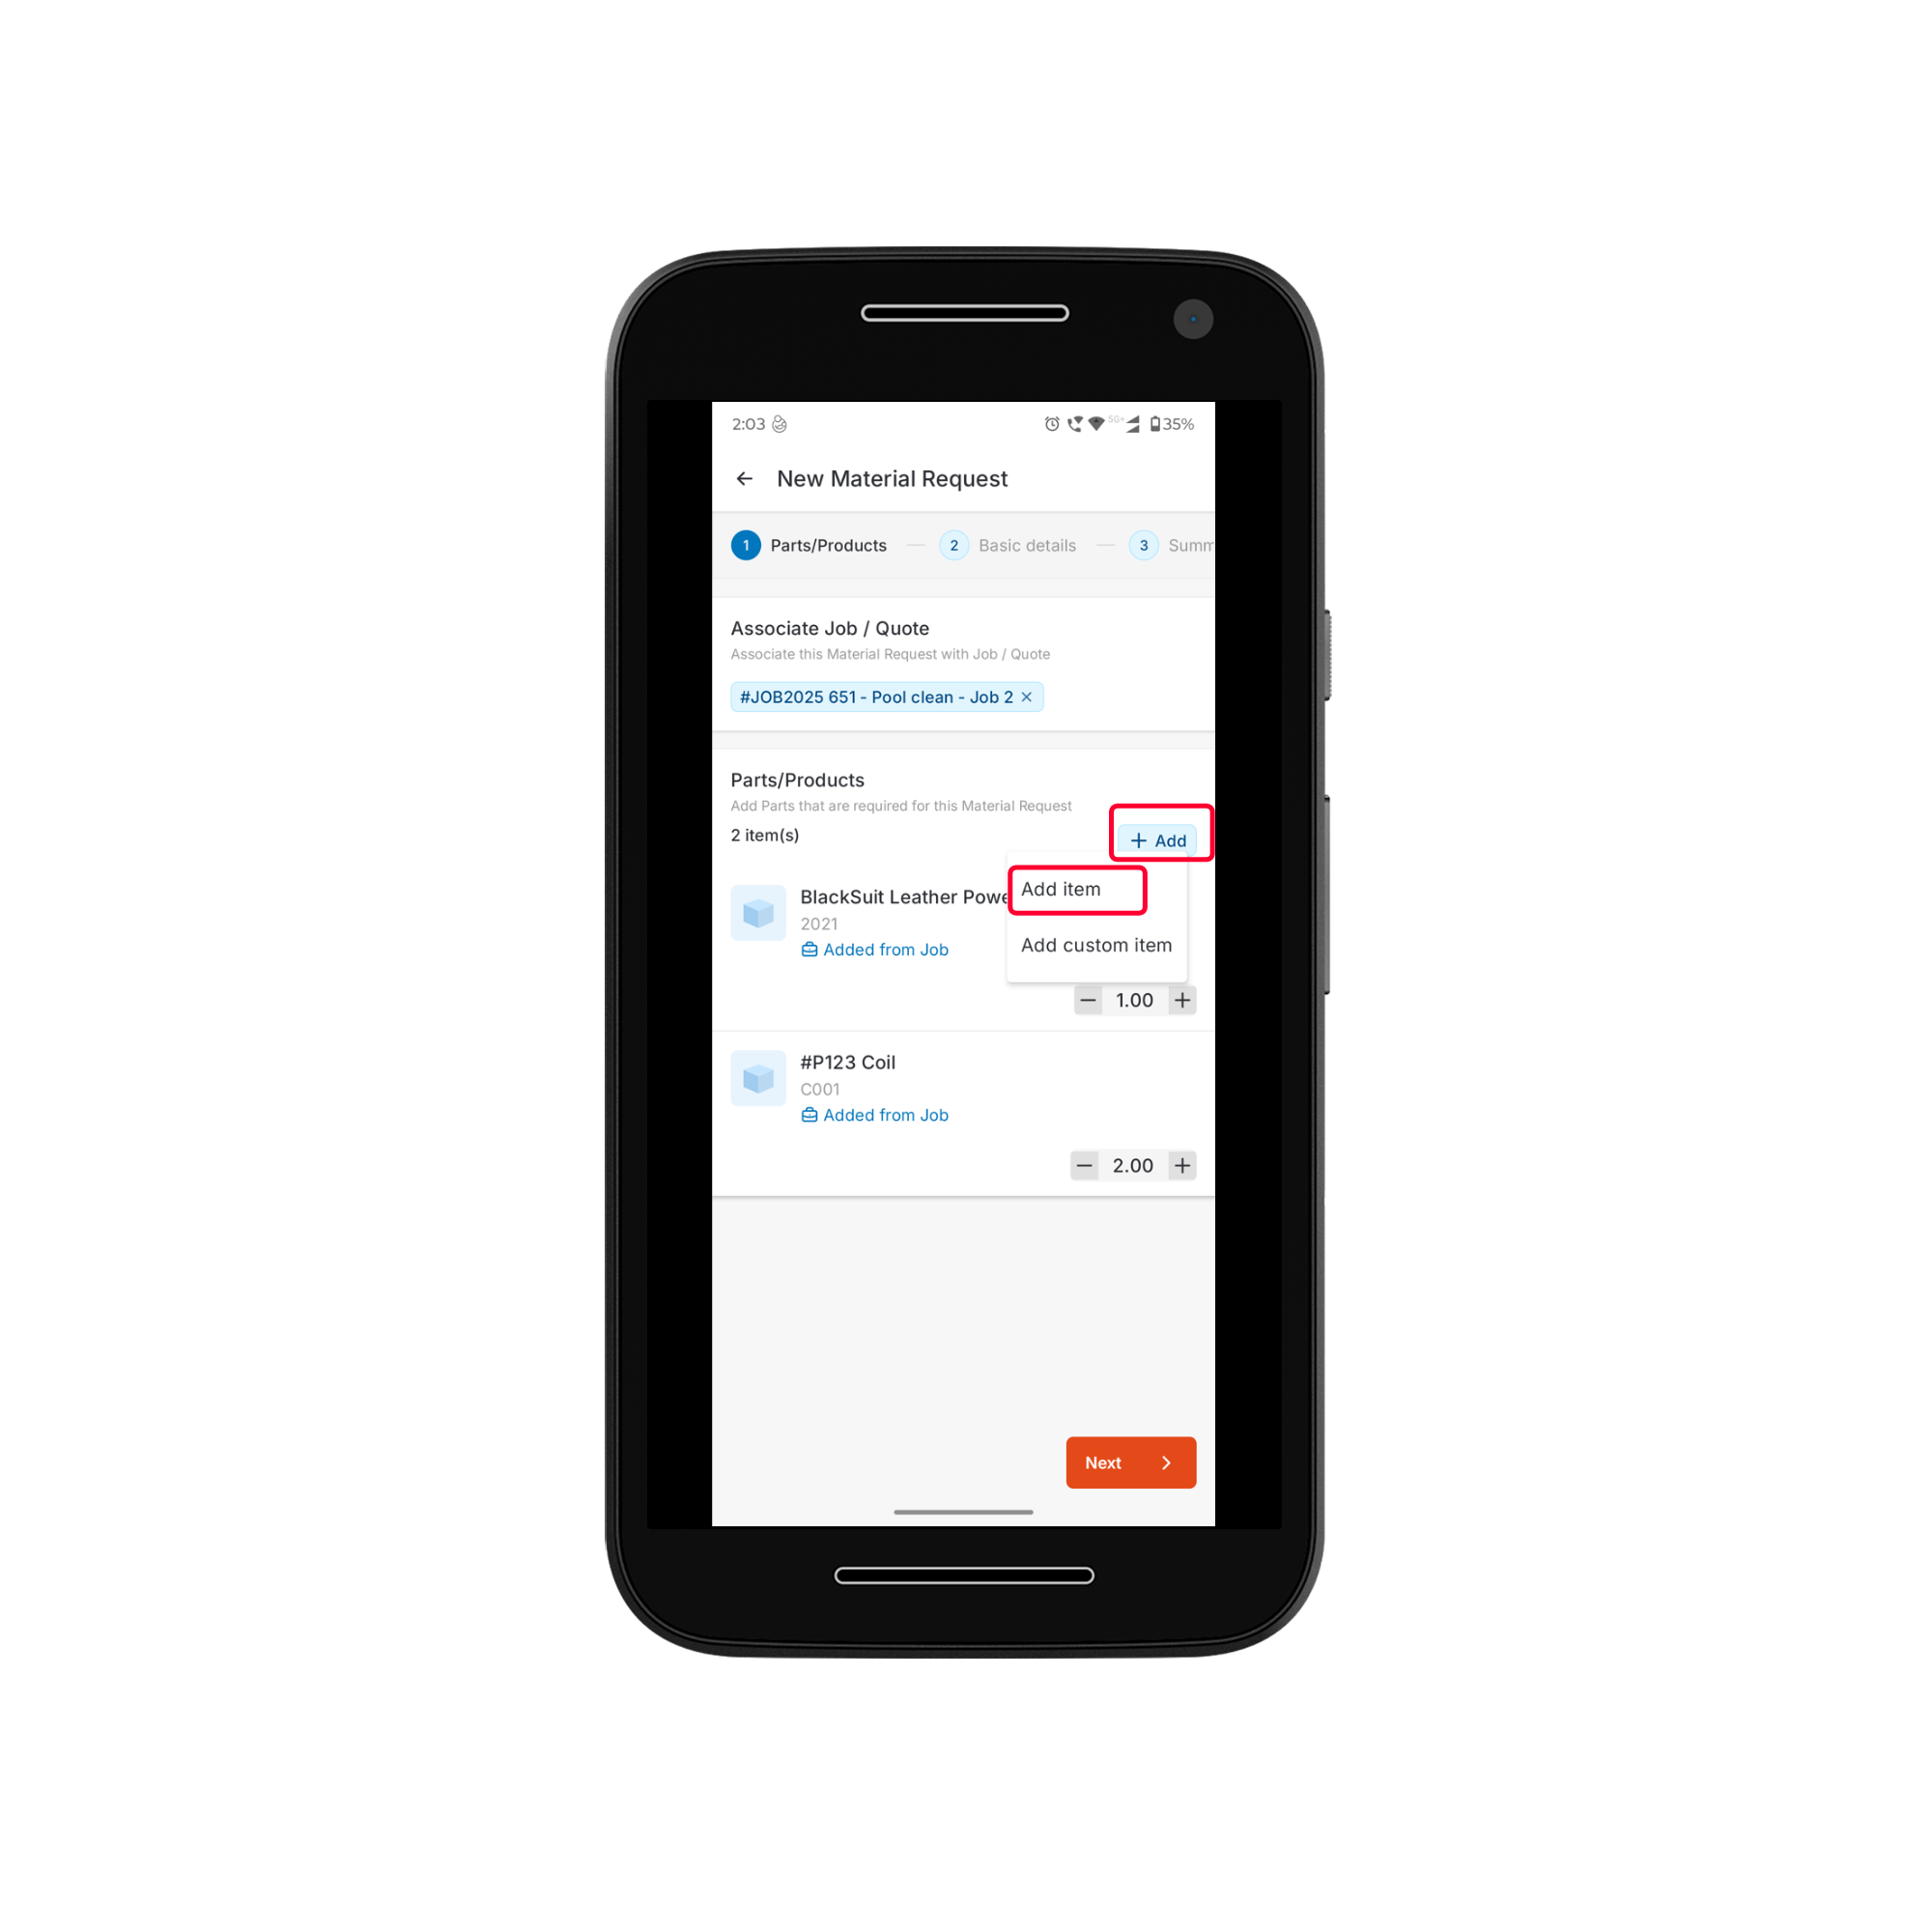
- Parts Added to Job – Lists all parts/products already associated with the job (if applicable).
- All Parts – Displays the complete inventory available for selection.
To add a custom item
To add a custom item
Tap the “+ Add” button and select “Add custom item”. The Add custom item bottom bar will appear.
- Enter the ID, Name, Description, and specify the Quantity.
- Click Add.
- Material Request Title - This field is prefilled when creating a material request directly from a job.
- Required by - This field is prefilled based on the job’s scheduled start date. If no start date is available, the due date is used instead.
- Delivery Method - Select how the requested materials should be delivered.
- Direct Shipment to Job’s site – Materials are shipped directly from the vendor to the customer’s job site or the field technician’s location.
- Deliver to Warehouse – Materials are shipped to your organization’s designated warehouse.
- Delivery To - When the delivery method is Delivery to Warehouse, select the warehouse location from the Delivery To dropdown to ensure accurate routing and inventory tracking.
- Priority – Set the urgency level: Low, Medium, High, or Urgent.
- Remarks – Enter any additional information or instructions.
- Attachments – Upload supporting documents such as specifications, images, or vendor details (if applicable).
- Other Details – Fill in any additional fields configured by your organization.

- Review all details of the material request, including parts/products and basic information.
- Click Create and choose one of the following options:
- Submit – To submit the request for approval.
- Save as Draft – To save the request and complete it later.
Viewing and Managing Material Request Details from a Job
After submission, you can track and manage material requests directly from the associated job or material request listing page. This provides real-time visibility into the request’s progress and ensures the timely fulfillment of materials. To view material requests from the associated job:- Navigate to Jobs listing page > Select a Job > Job details page > Associated Tab> Material Requests.
- A list of all material requests linked to the job will be displayed.
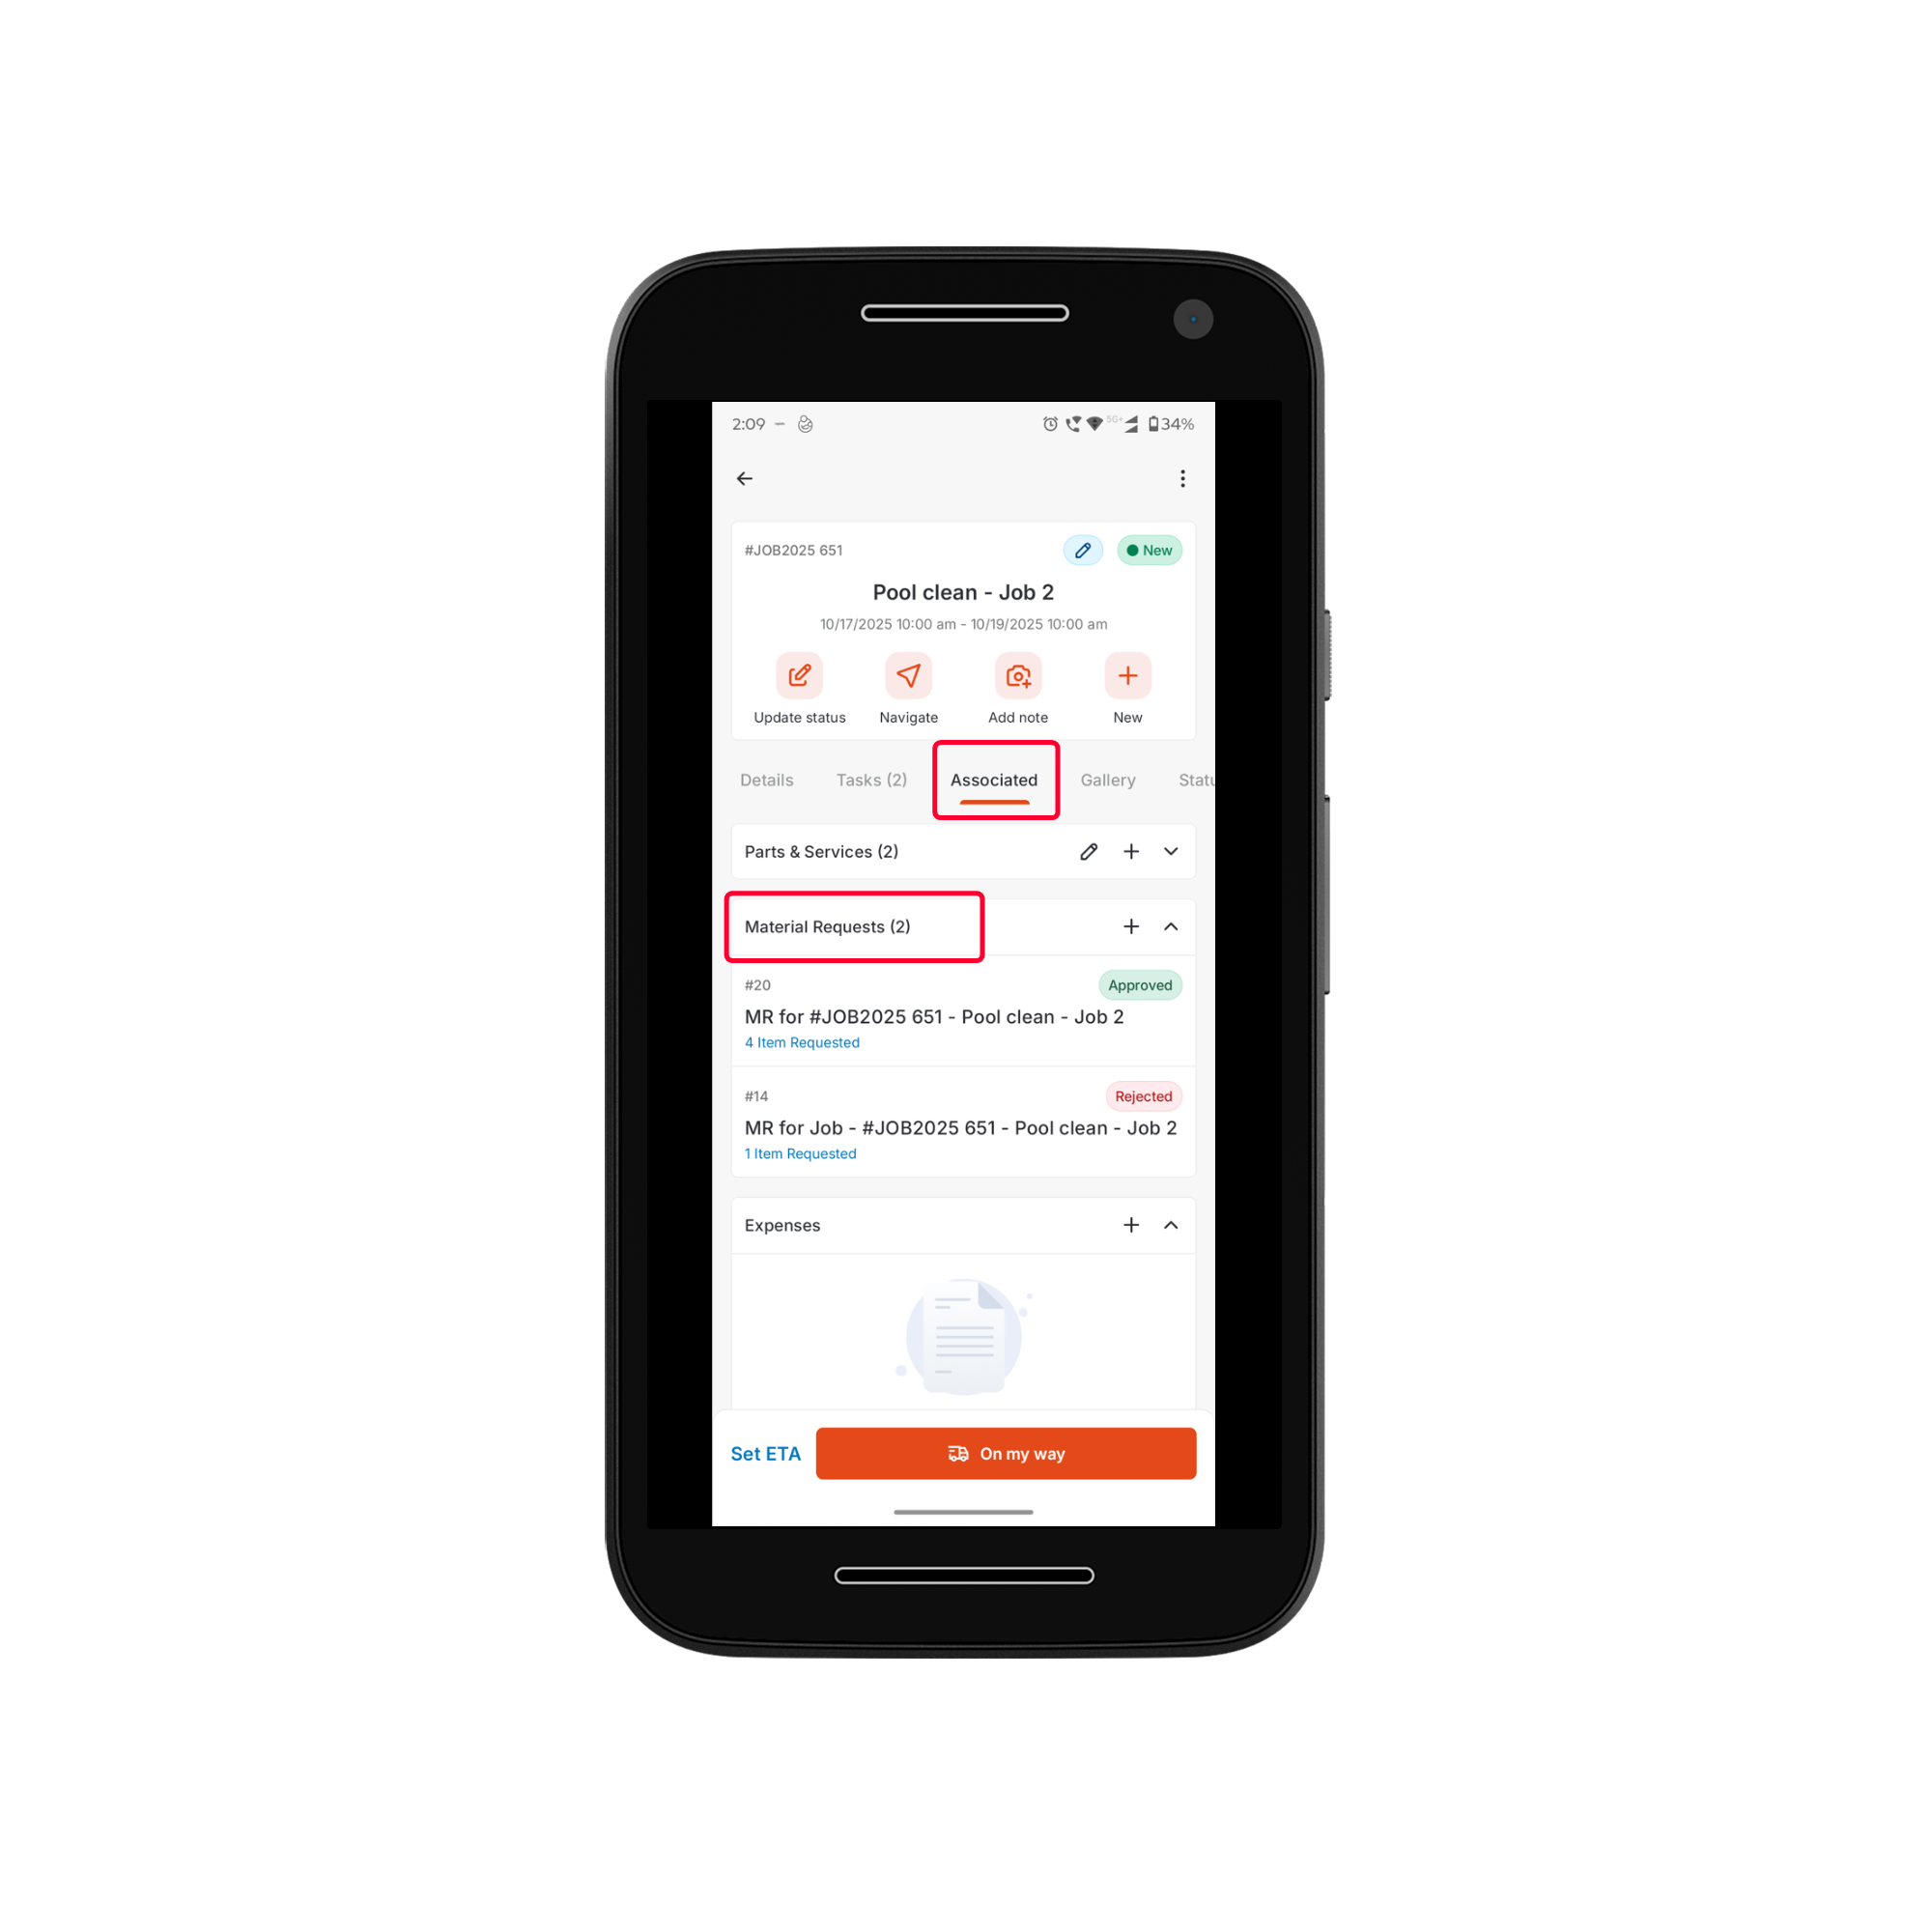
Note: The status of each request updates dynamically, reflecting its current stage in the approval and fulfilment process.
- Click a material request to open its details page for a complete view.
Material Request Statuses
Material Request Statuses
- Submitted – The request has been created and sent for approval.
- Awaiting Approval – The request is pending review and authorization from a supervisor or administrator.
- Approved – The request has been approved, and the fulfillment process is underway.
- Rejected – The request has been declined by the approver, typically due to unavailability, budget constraints, or other organizational considerations.
- Received – The requested items have been delivered, and the material request is marked as complete.
Approval and Fulfillment Process
- Once submitted, the material request is routed through the Approver Hierarchy (if configured). Authorized personnel will review and either approve or reject the request based on priority, budget, or availability.
- After approval, the fulfilment process begins, and the required parts/products are prepared for delivery.
- When the items are delivered, the status updates to Received, confirming completion.
- If the associated job is pending materials from the material request, an indication labeled “Waiting on MR” will be displayed. Similarly, if a Purchase Order (PO) is created from the material request, a “Waiting on PO” tag will be shown.
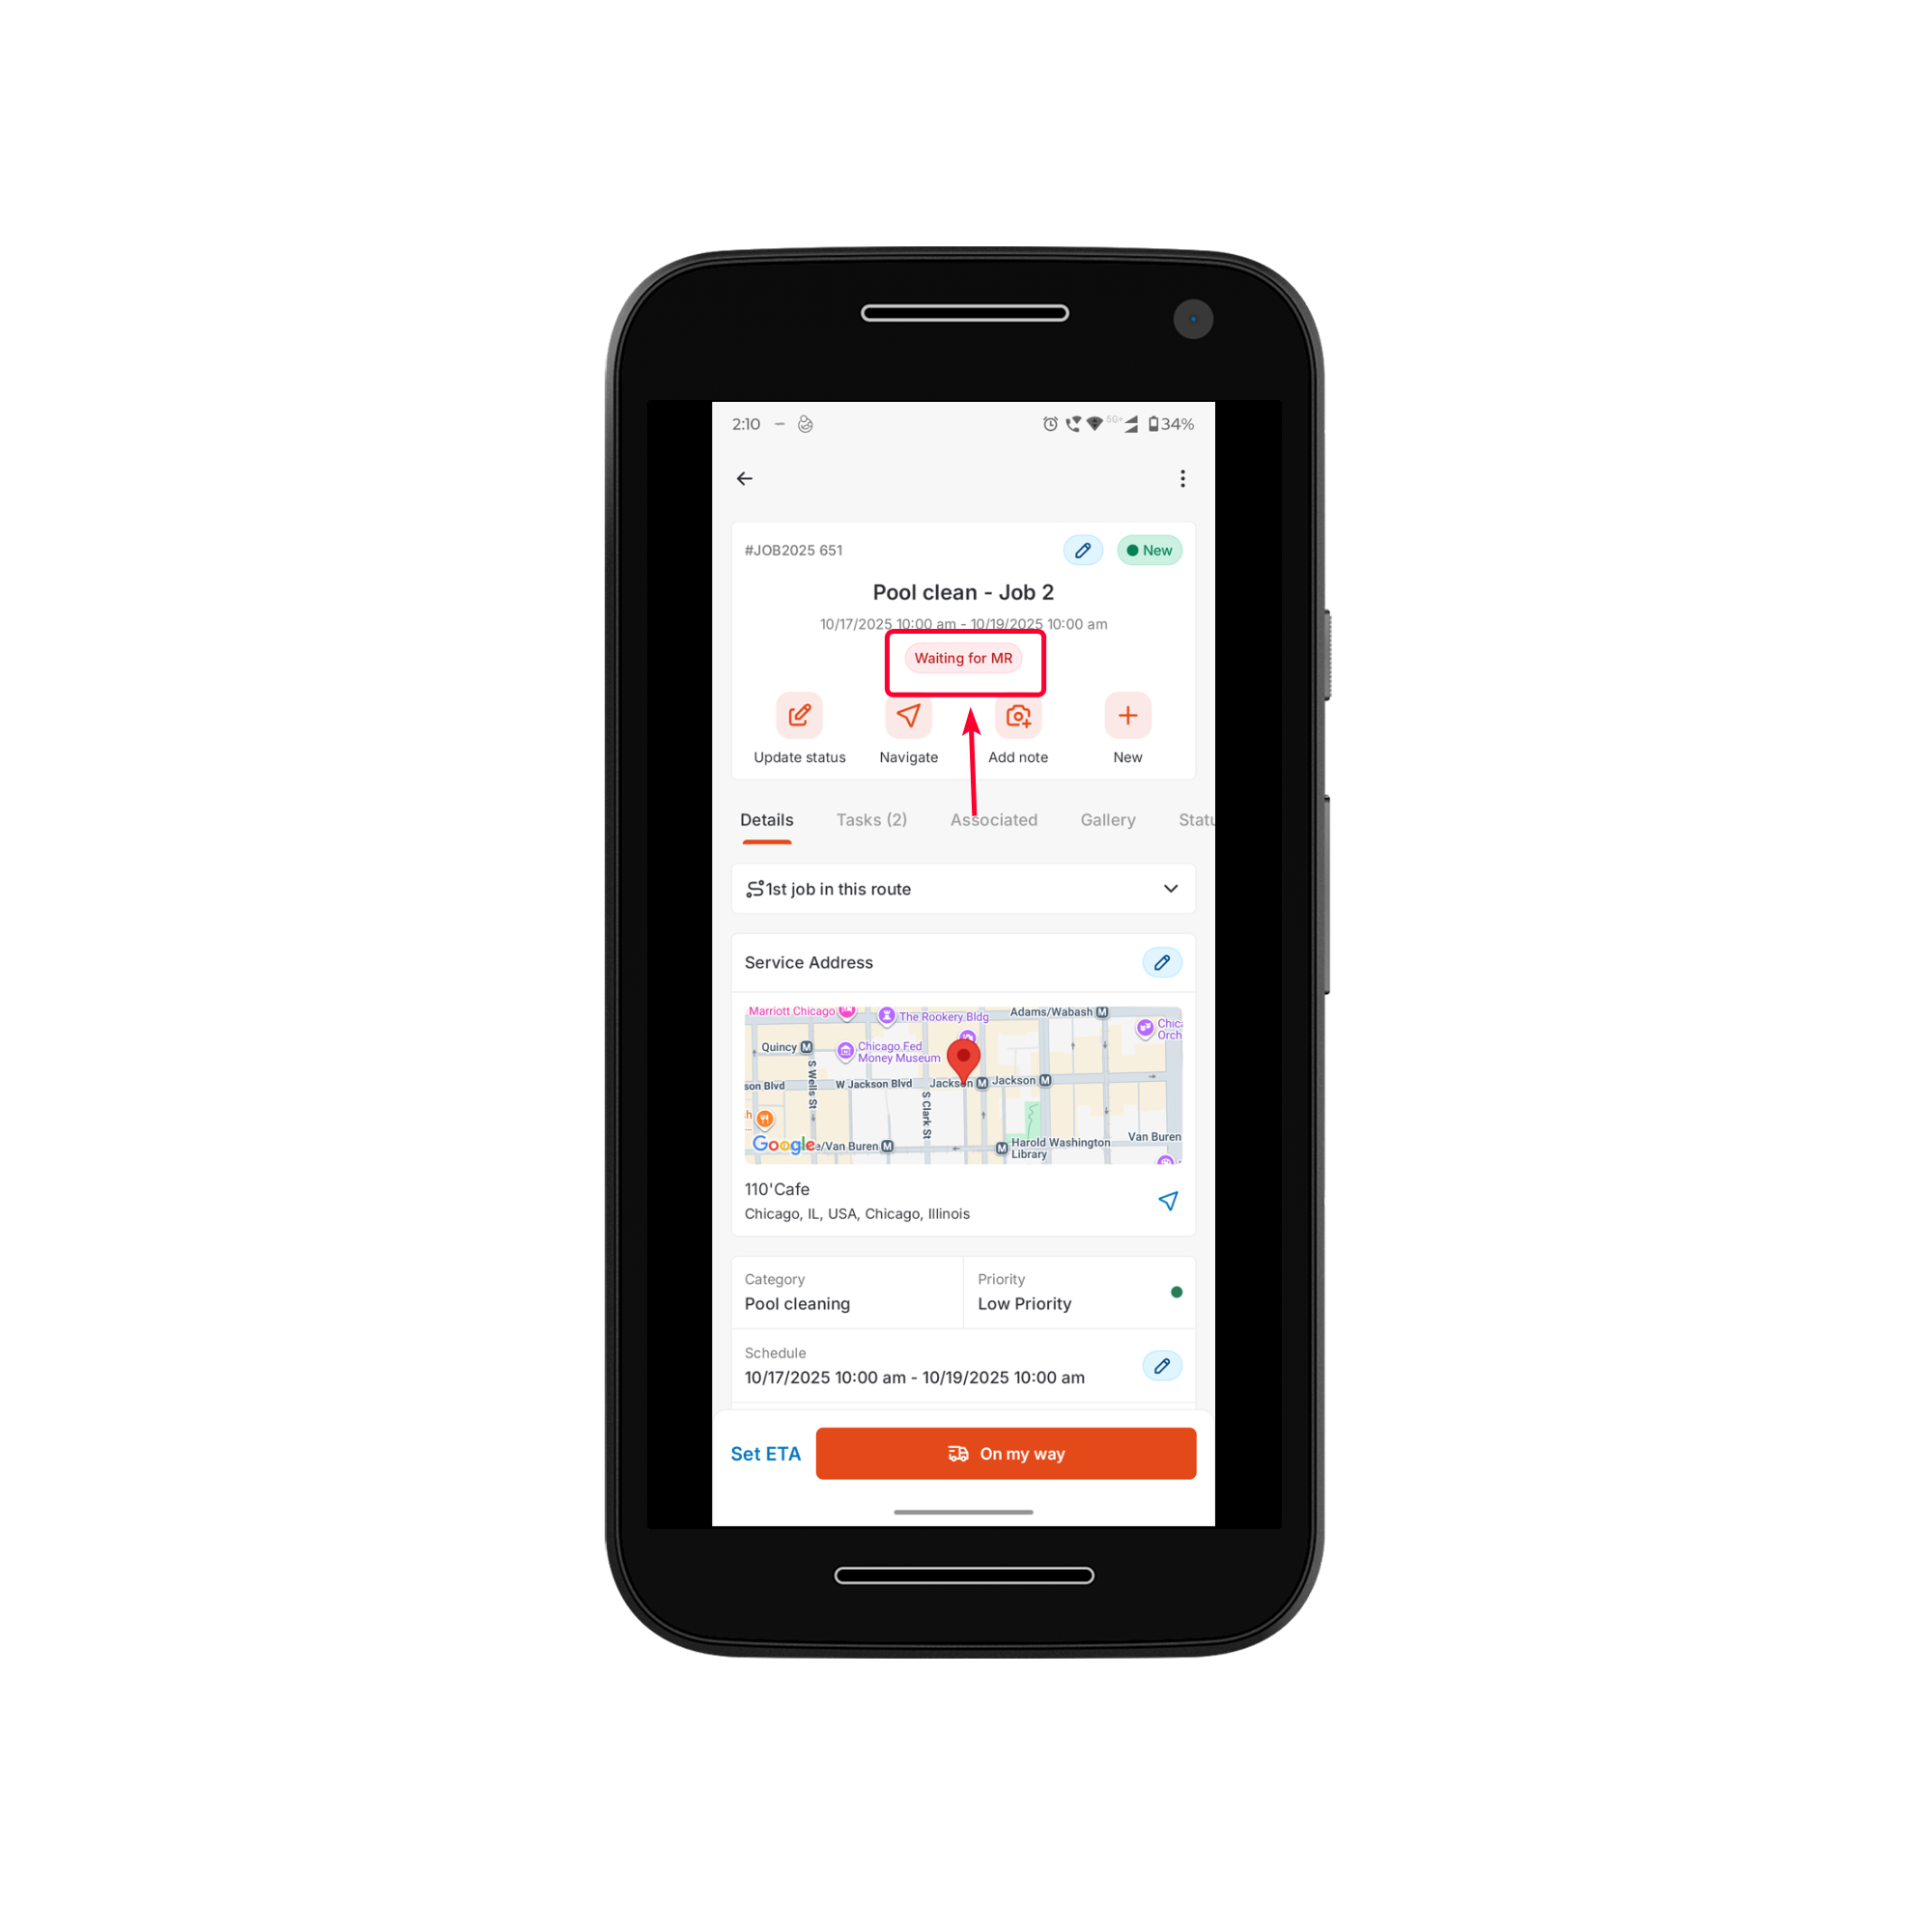
- A job cannot be marked as completed if there is an active or unfulfilled material request associated with it.
- You will only be able to close the job once the material request is either fulfilled or rejected.