

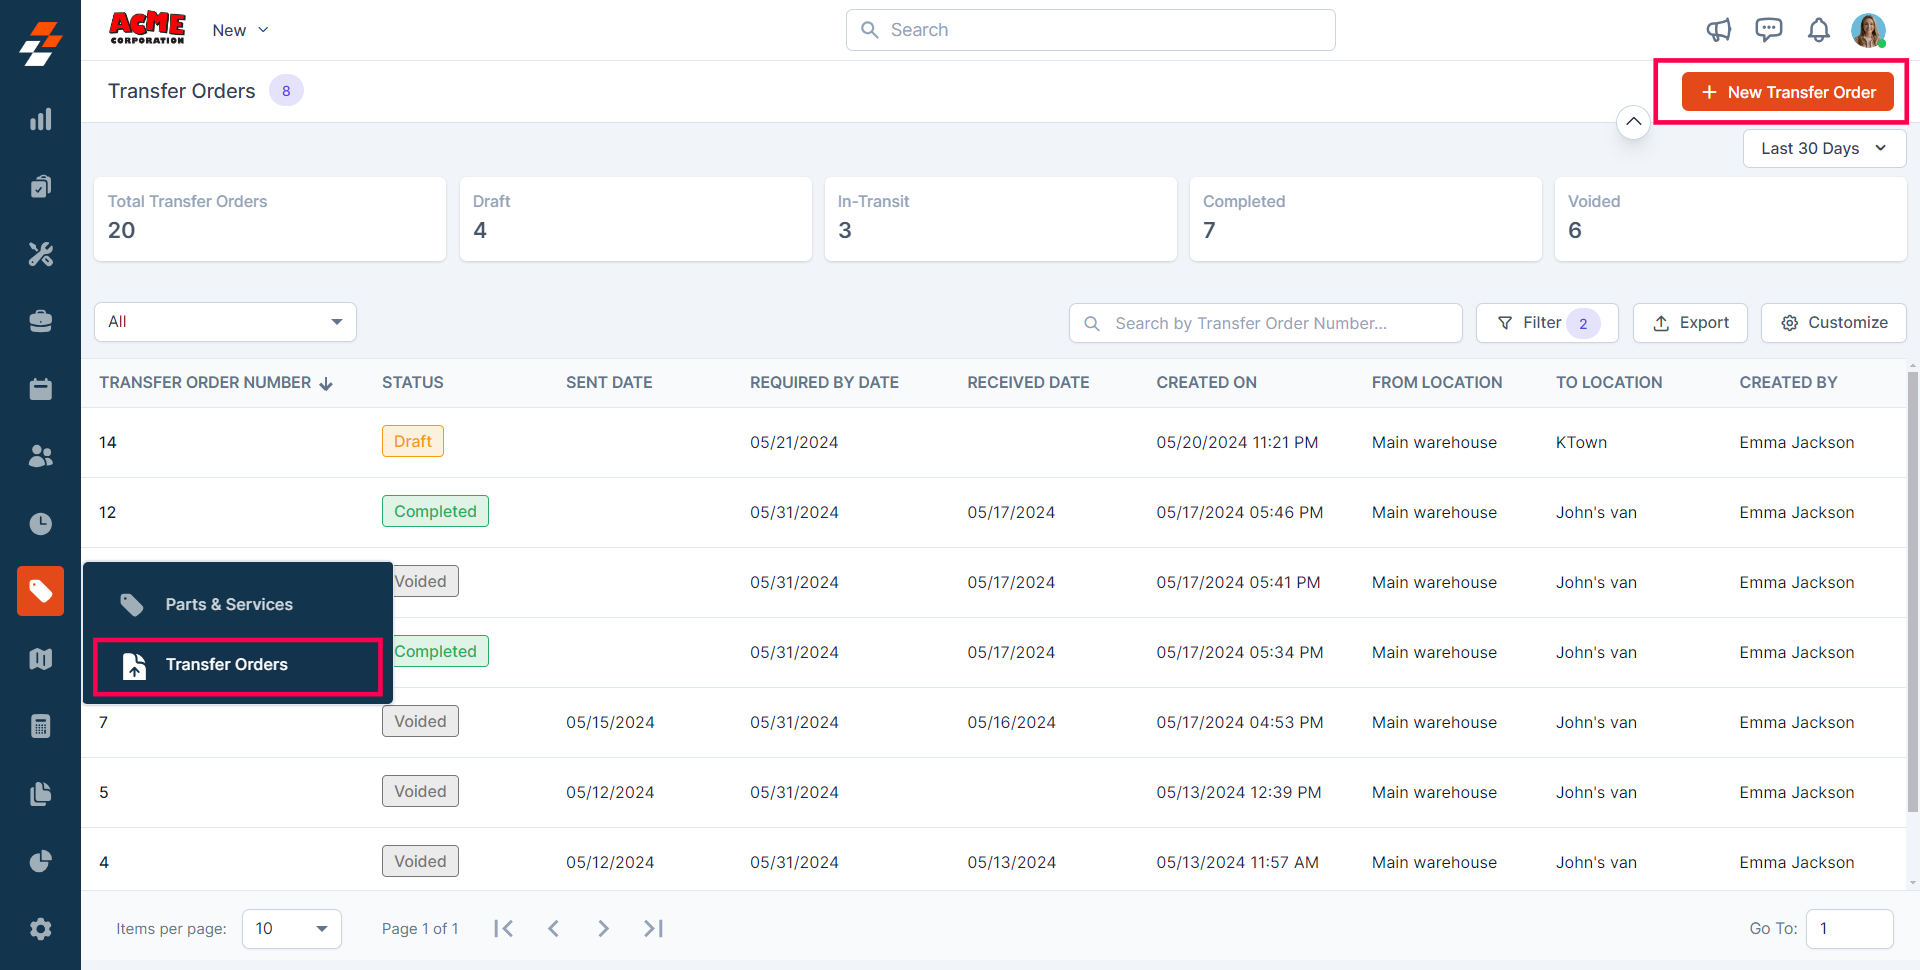
Navigation: Inventory & Pricebook -> Transfer Orders
1. Primary Details
1. From Location (mandatory): Select the location from where you want to initiate the transfer of parts and products. 2. To Location (mandatory): Select the location of the parts and products that need to be sent.Note: The “From Location” cannot be the same as the “To Location.”
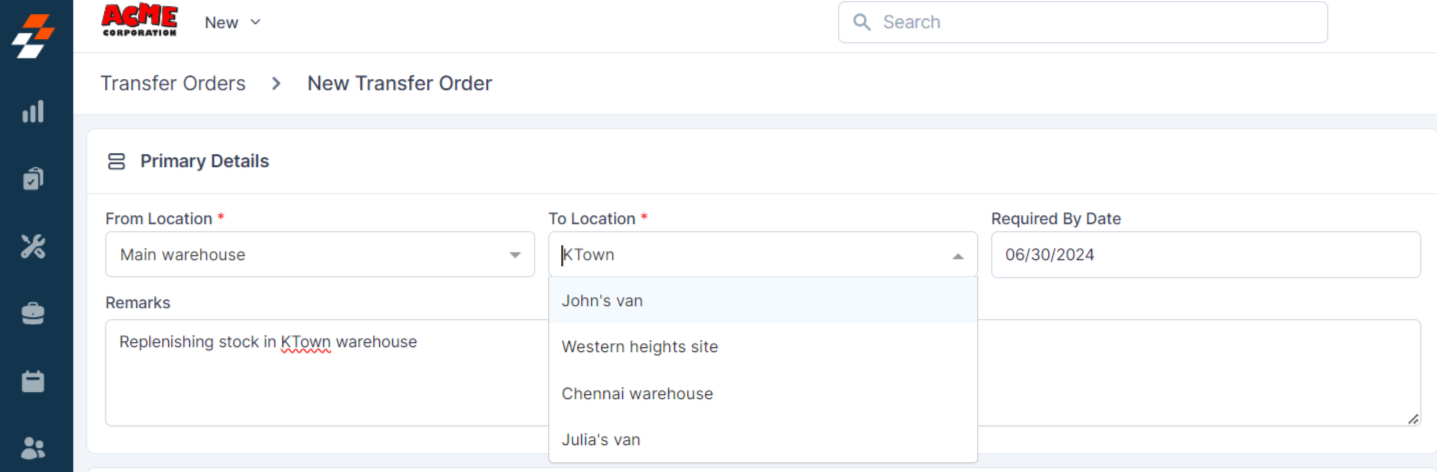
Note: The From and To locations that appear here are those configured under Product Locations under Parts & Services settings.
2. Line Items
1. You can add the Parts and Products to be transferred here. To do so, click the “+ Add” button. 2. A pop-up will appear with the existing parts and products from the chosen “From Location.”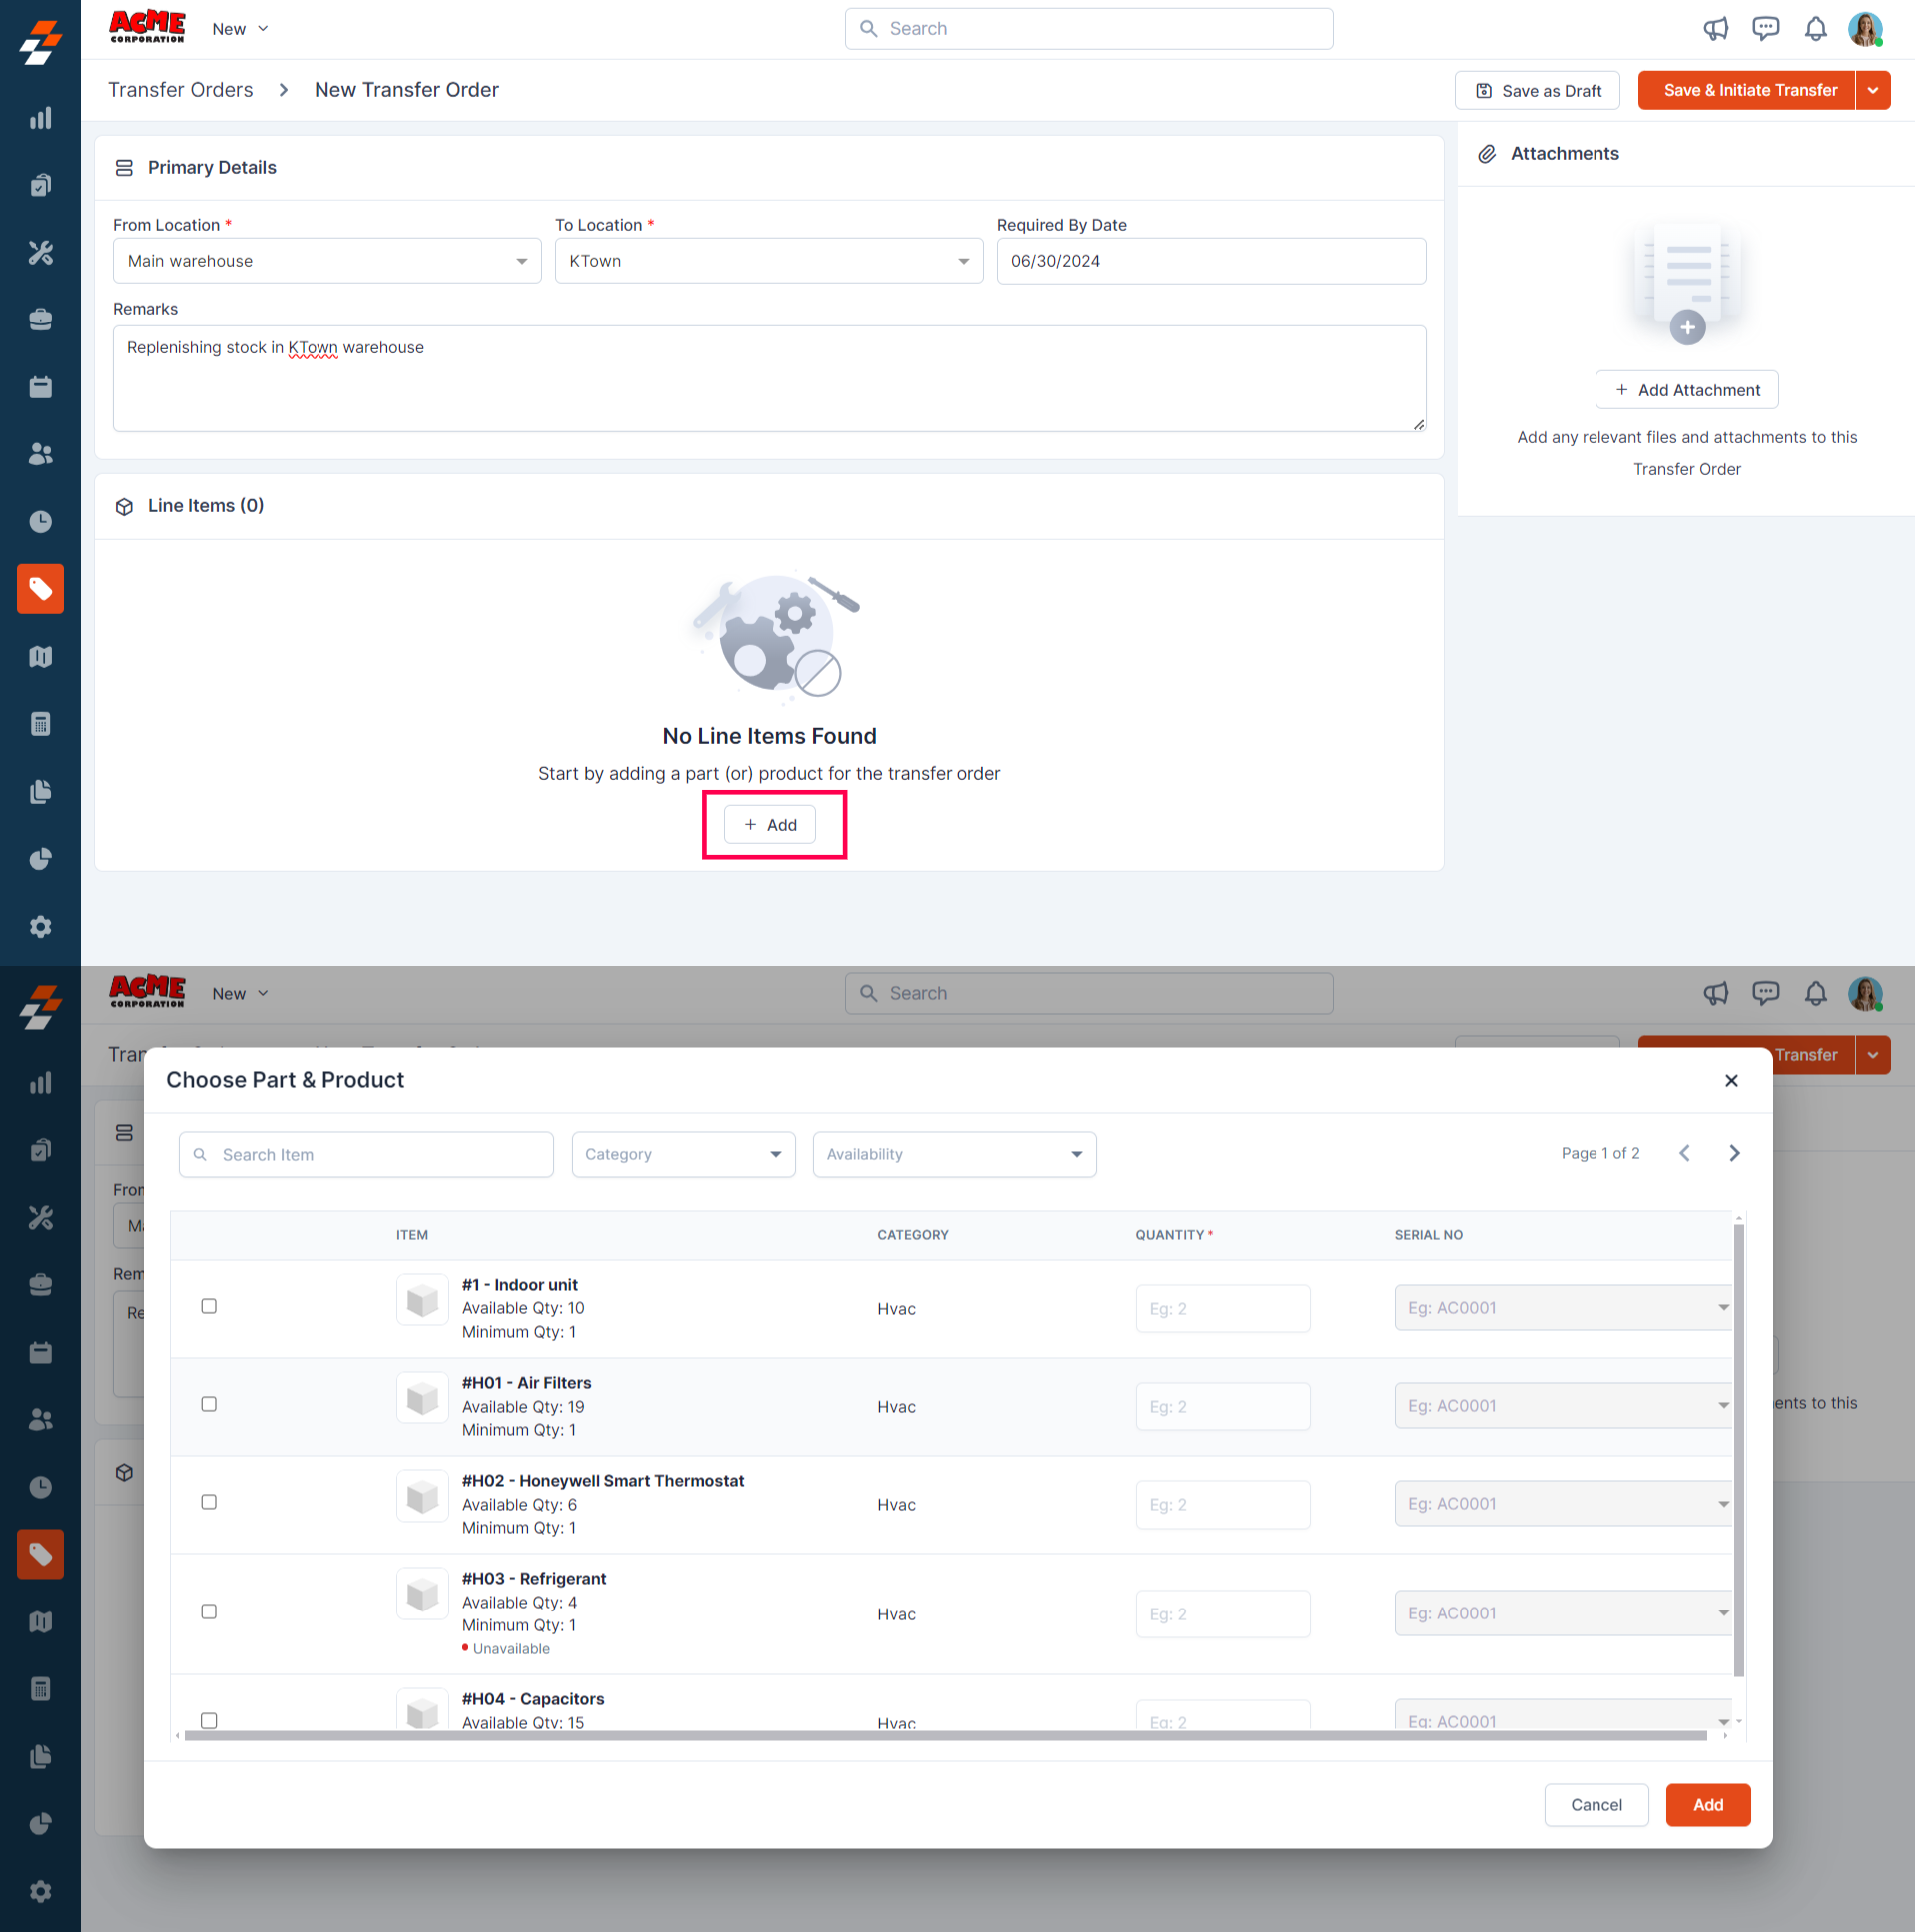
Note: You cannot add parts or products to Transfer Orders until you choose the “From” and “To” locations in the Primary Details section.
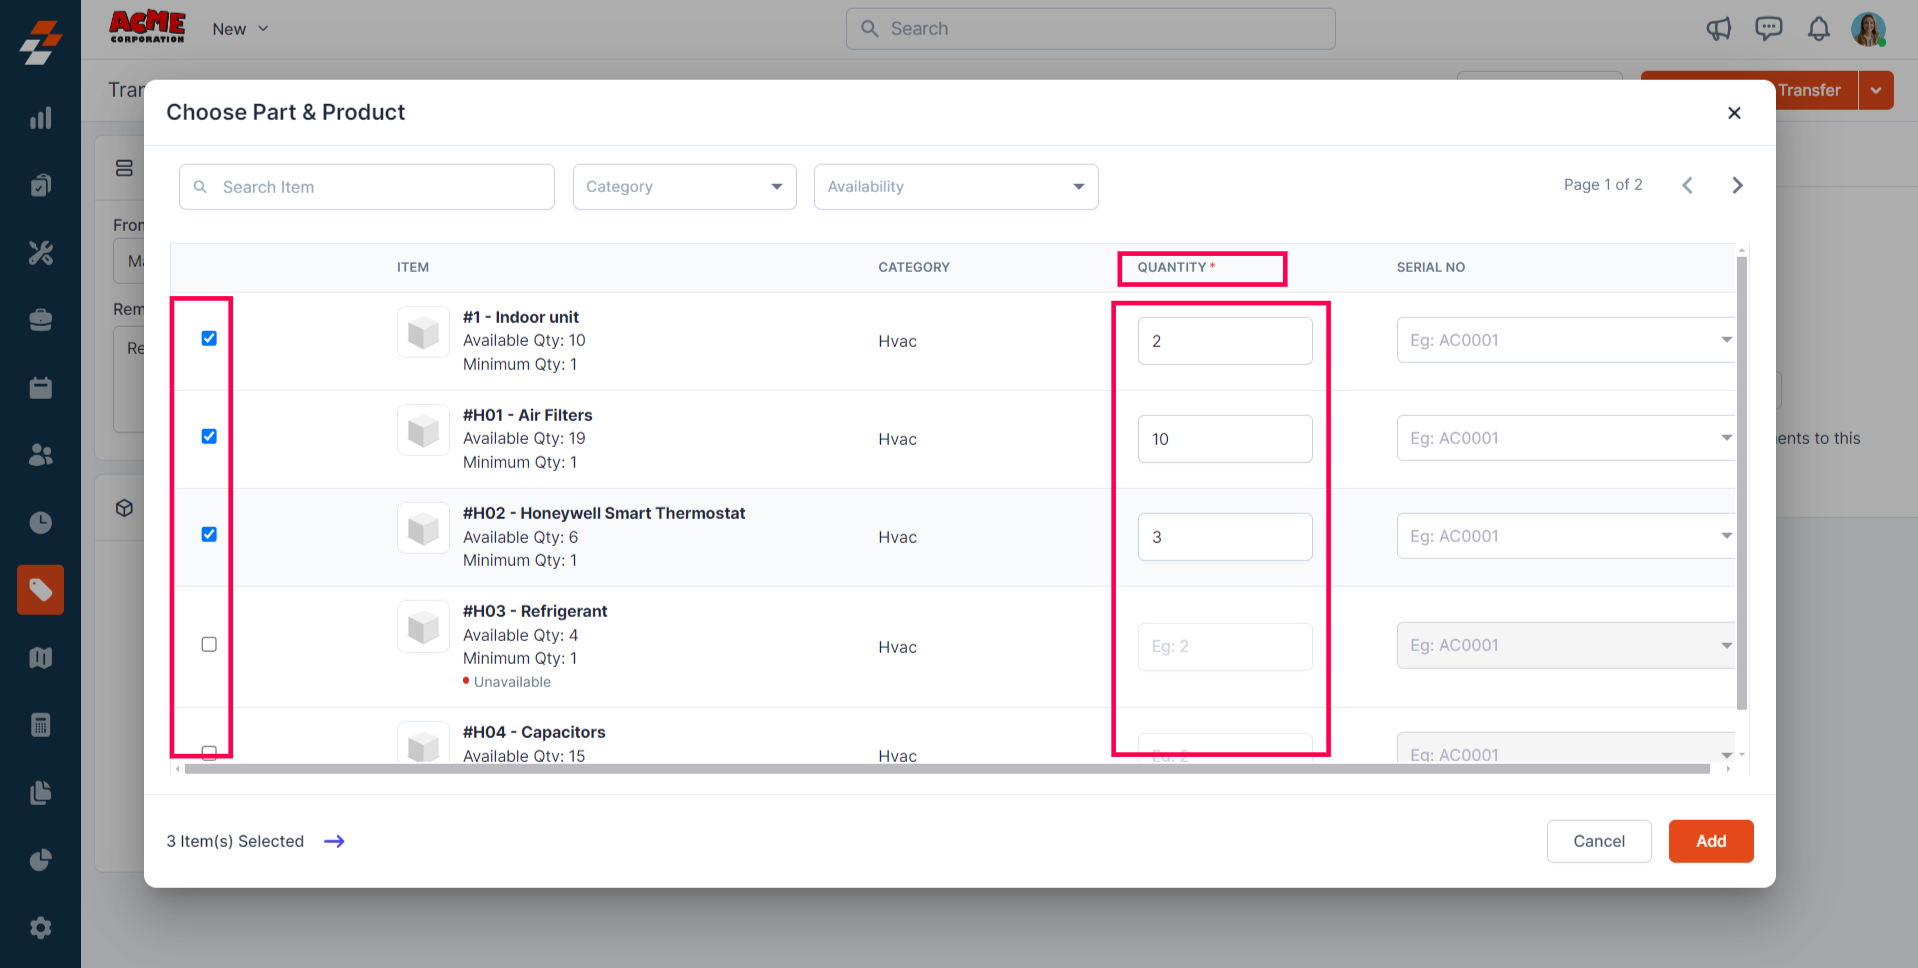
Note: You can also add serial numbers as needed for each quantity under Serial No.

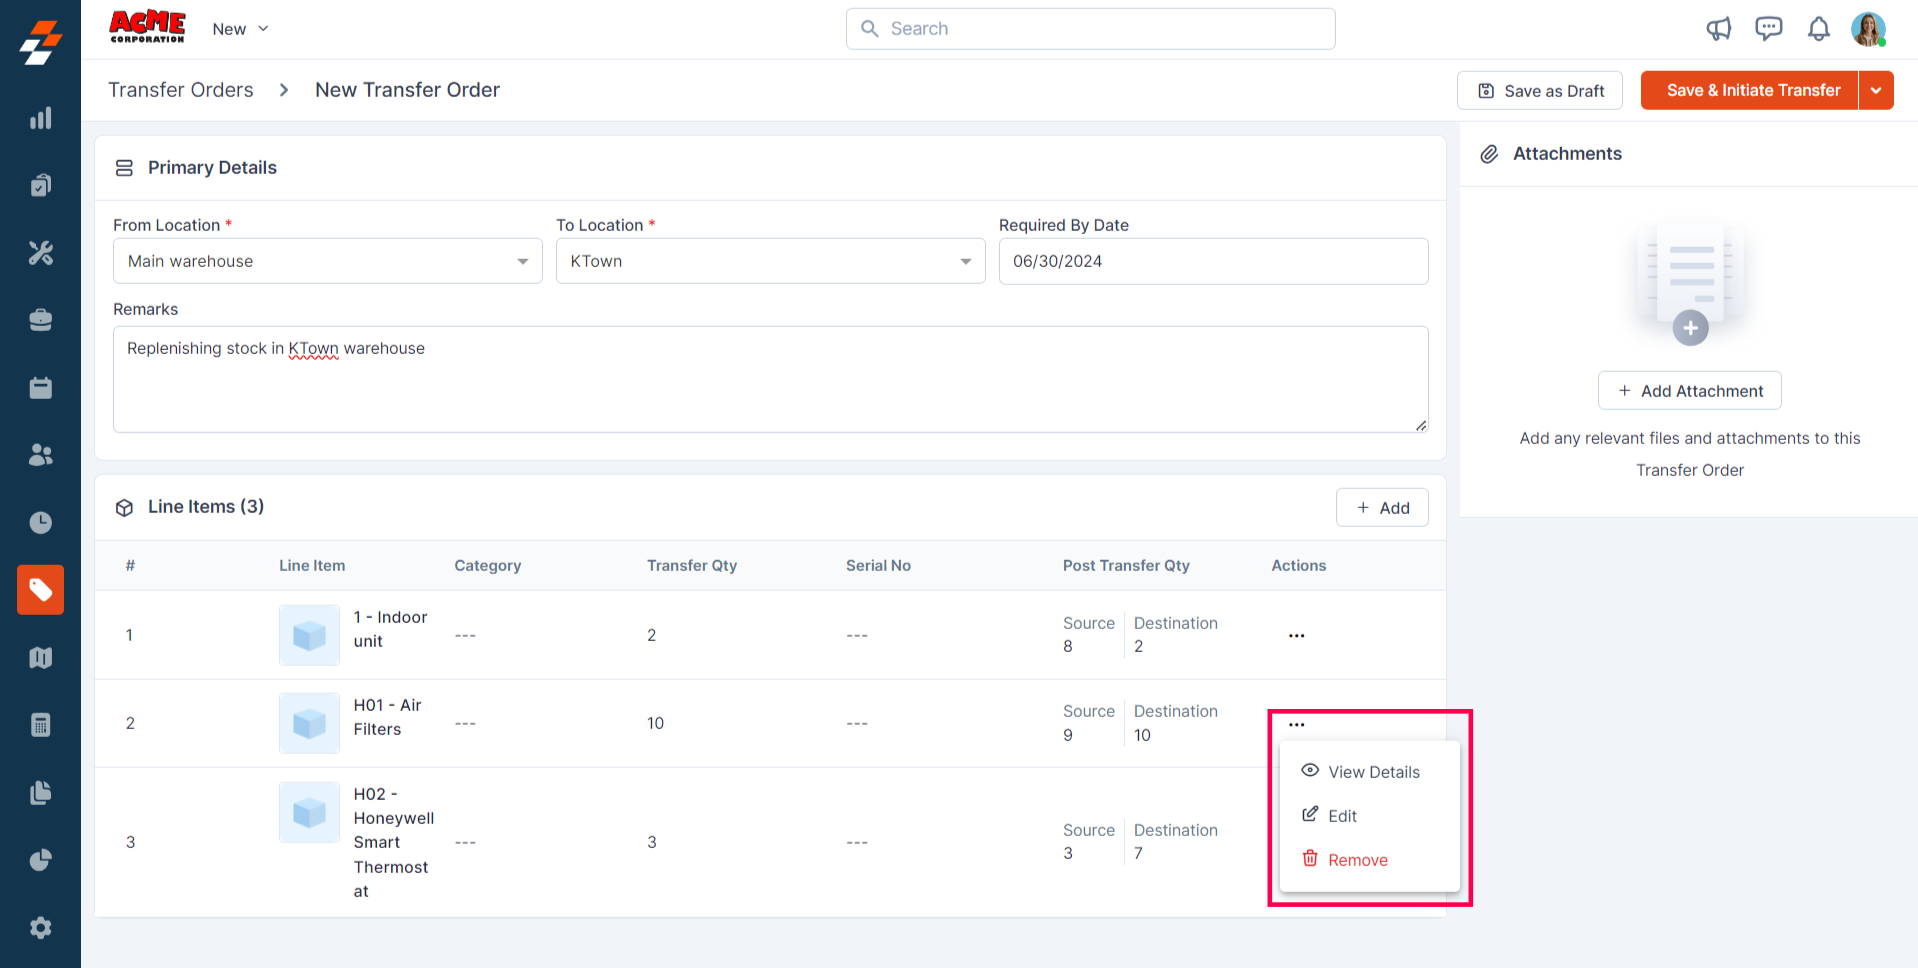
Edit Line Items
1. To edit any line item, click the “Edit” button under the Action column. A pop-up will appear, allowing you to update the selected line item.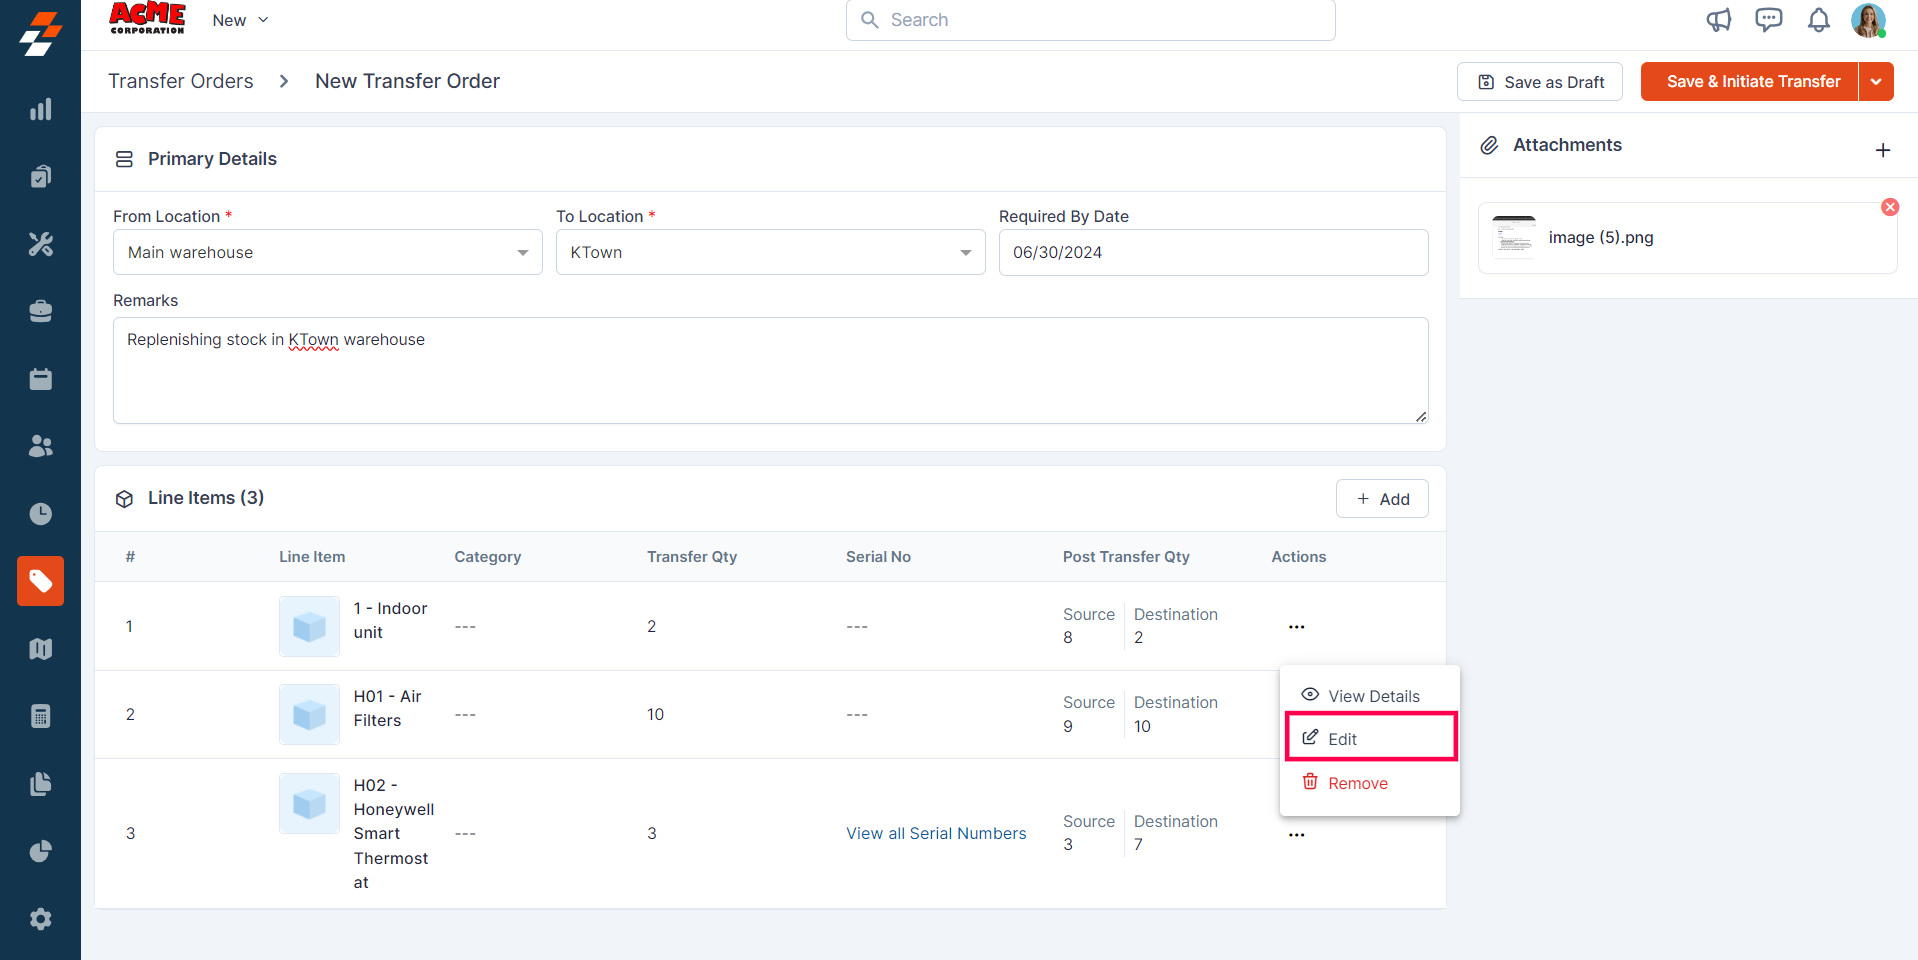
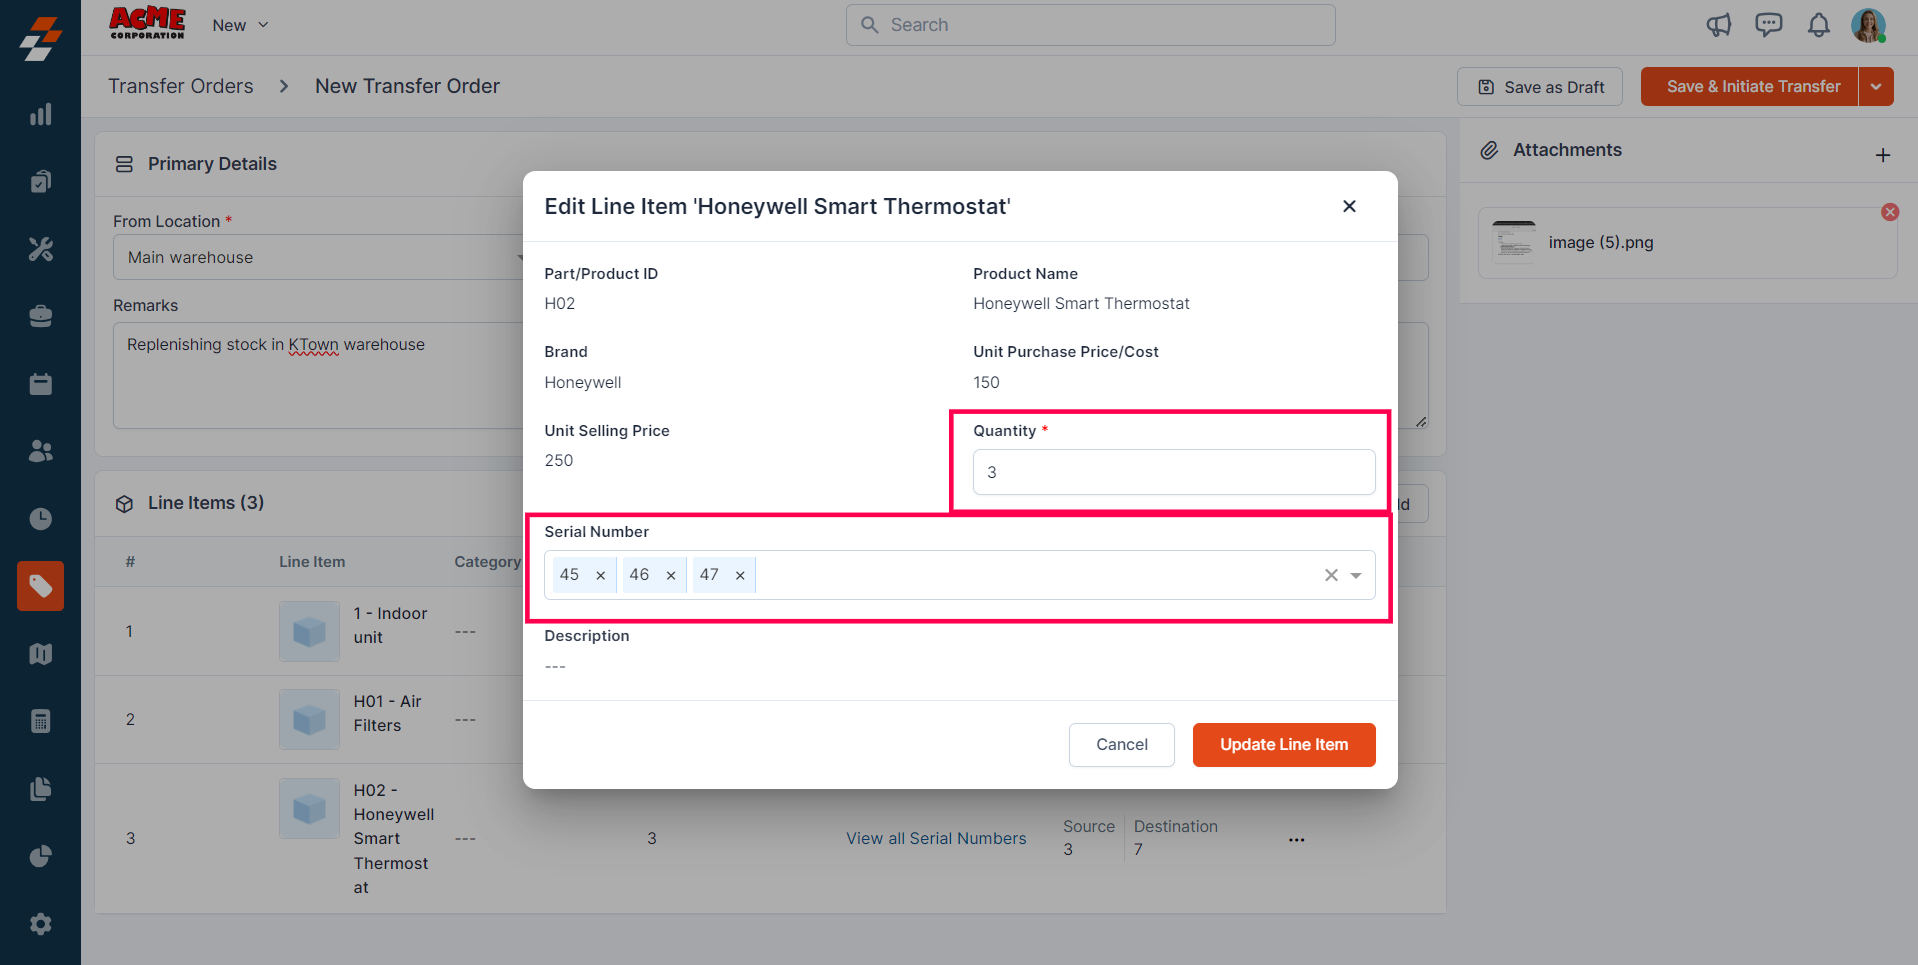
Note: When you click “Edit,” you can only update the quantity and the serial numbers of the product, not the product/parts themselves. However, you can remove part/product(s) and add new parts and products if necessary by clicking the “Remove” button.
3. Attachments
Attach files or documents related to the Transfer Order. The attachment can either be an image (supported file formats: png, jpg, jpeg, gif), video (supported file formats: mp4, avi, flv, mov, mpg, 3gp), audio (supported file formats: mp3, wav, m4a, wma), Document (supported file formats: doc, docx, xls, xlsx, txt, pdf, webp, msg, eml) that you can add to the Transfer Order for more clarity. To add an attachment, follow these steps: 1. Click “+ Add Attachment.” A pop-up appears.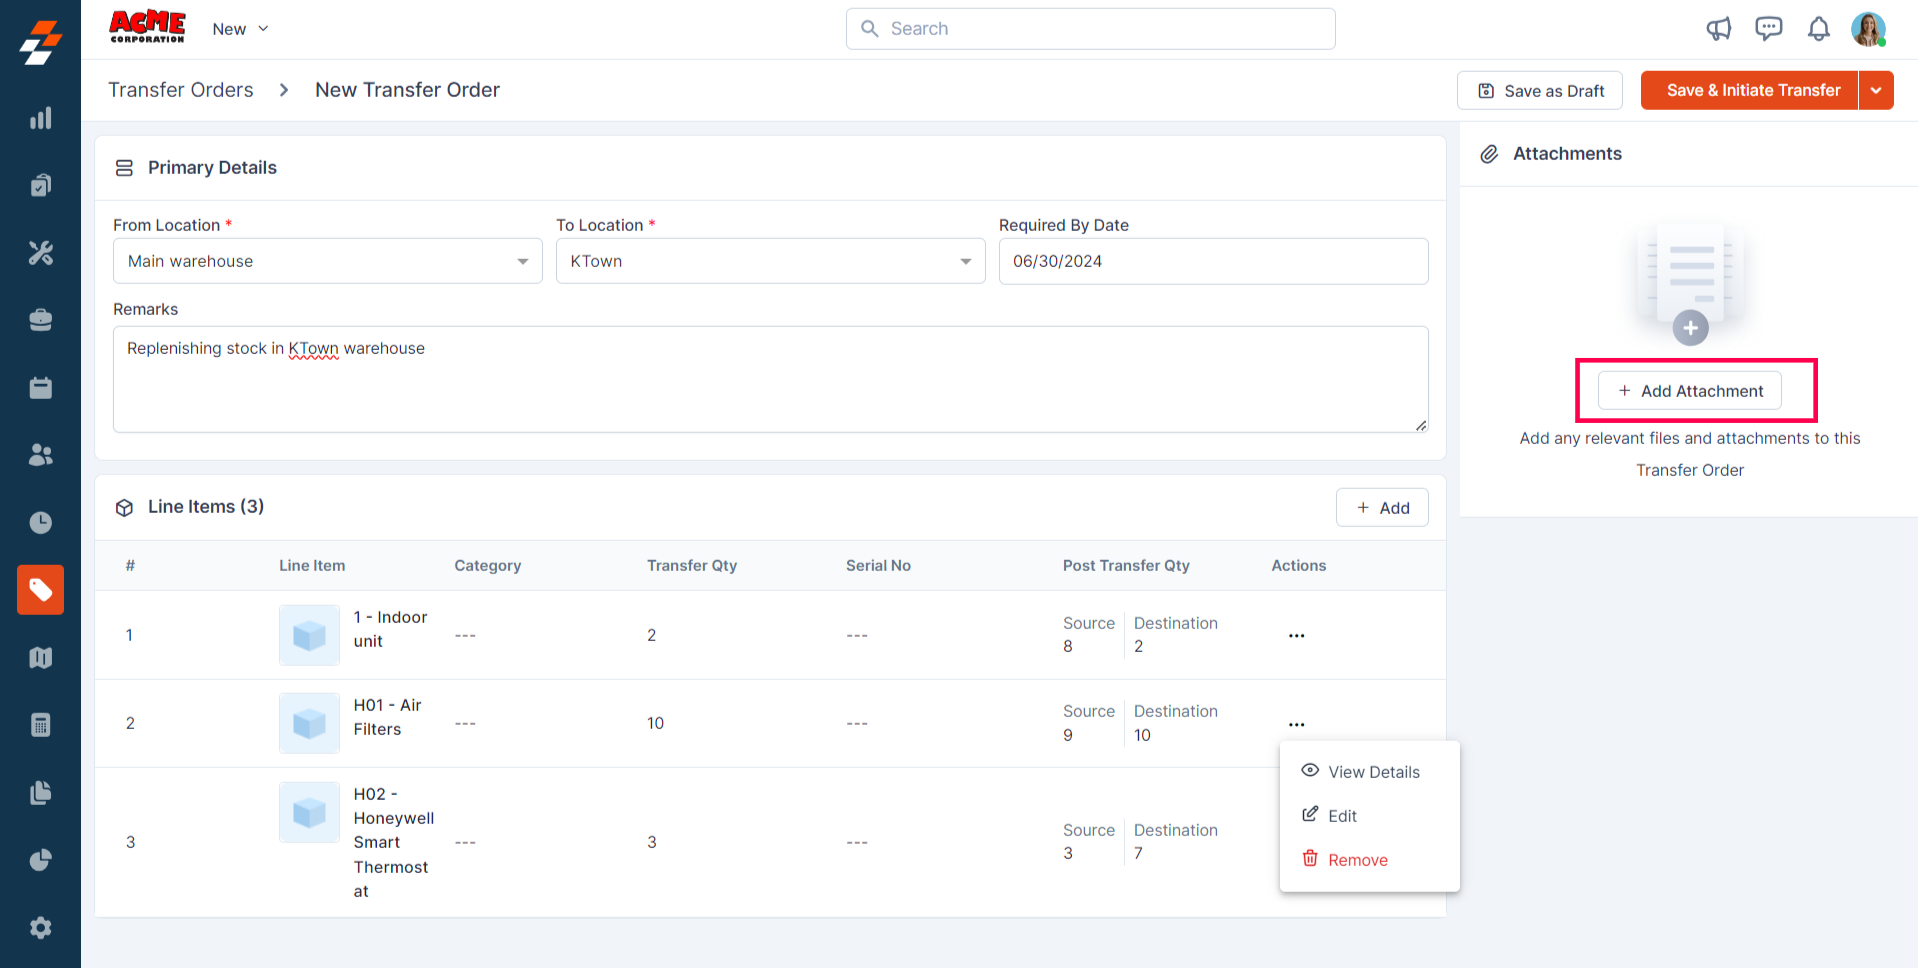

- Save as Draft
- Save & Initiate Transfer
-
Save and Complete Order
