Navigation: Inventory & Pricebook -> Pricelists -> + Create Pricelist
Create new pricelist
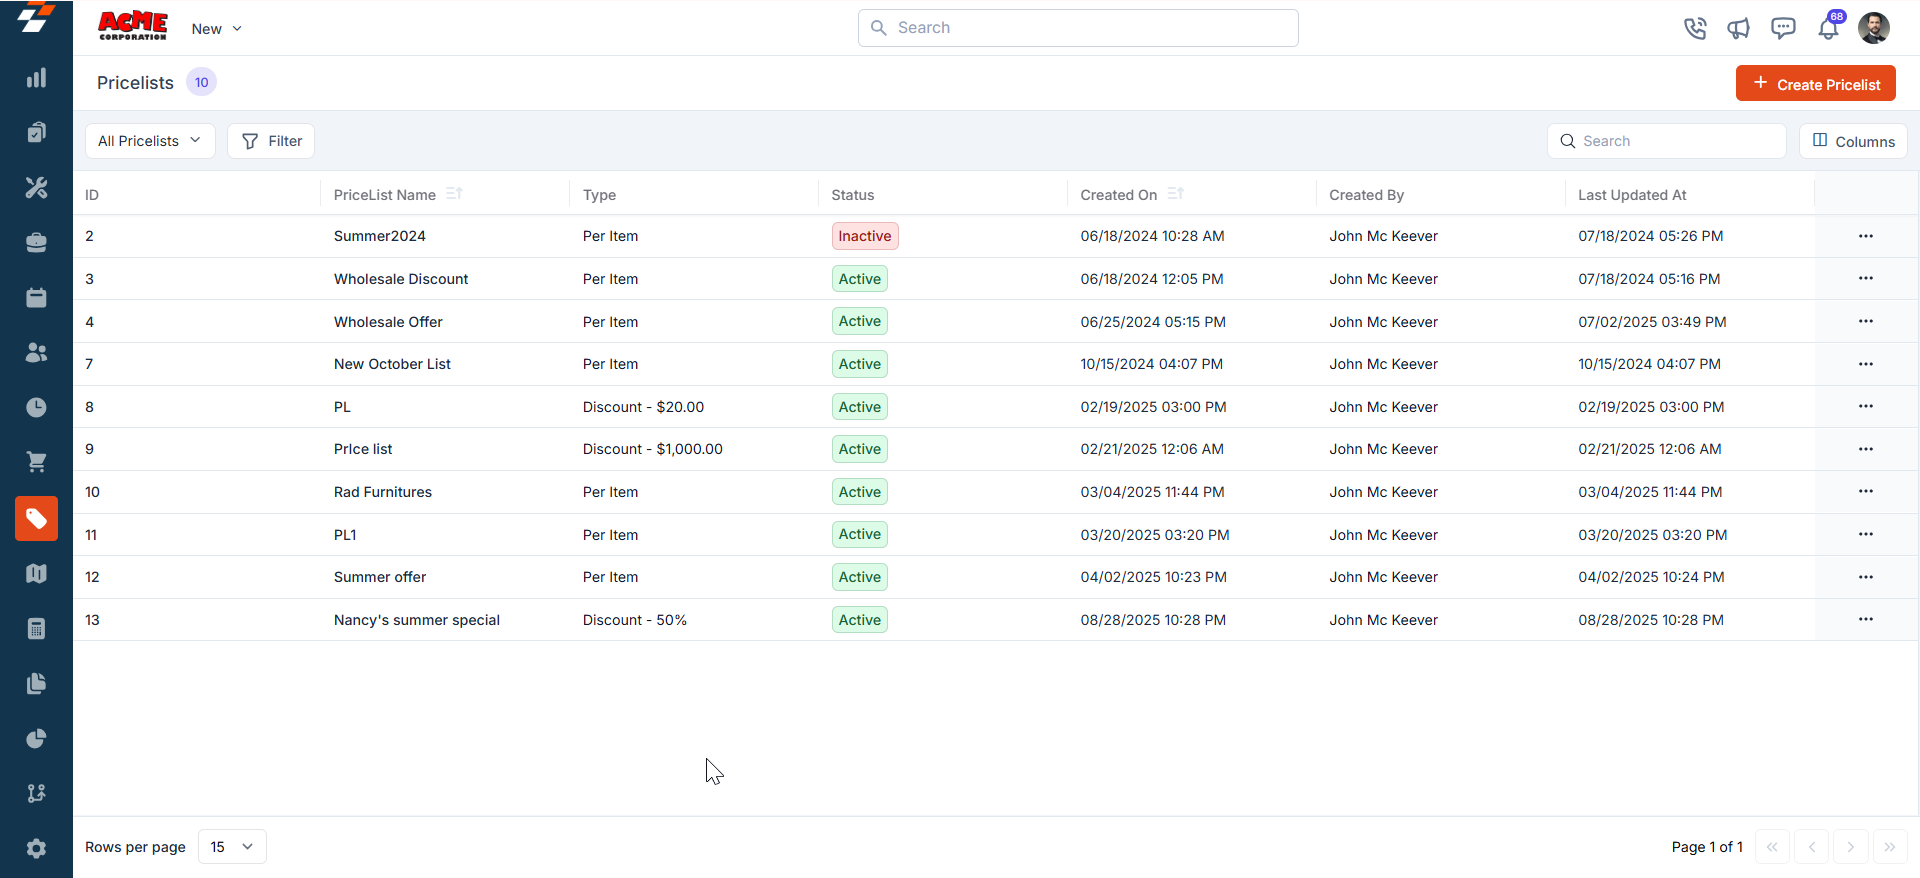
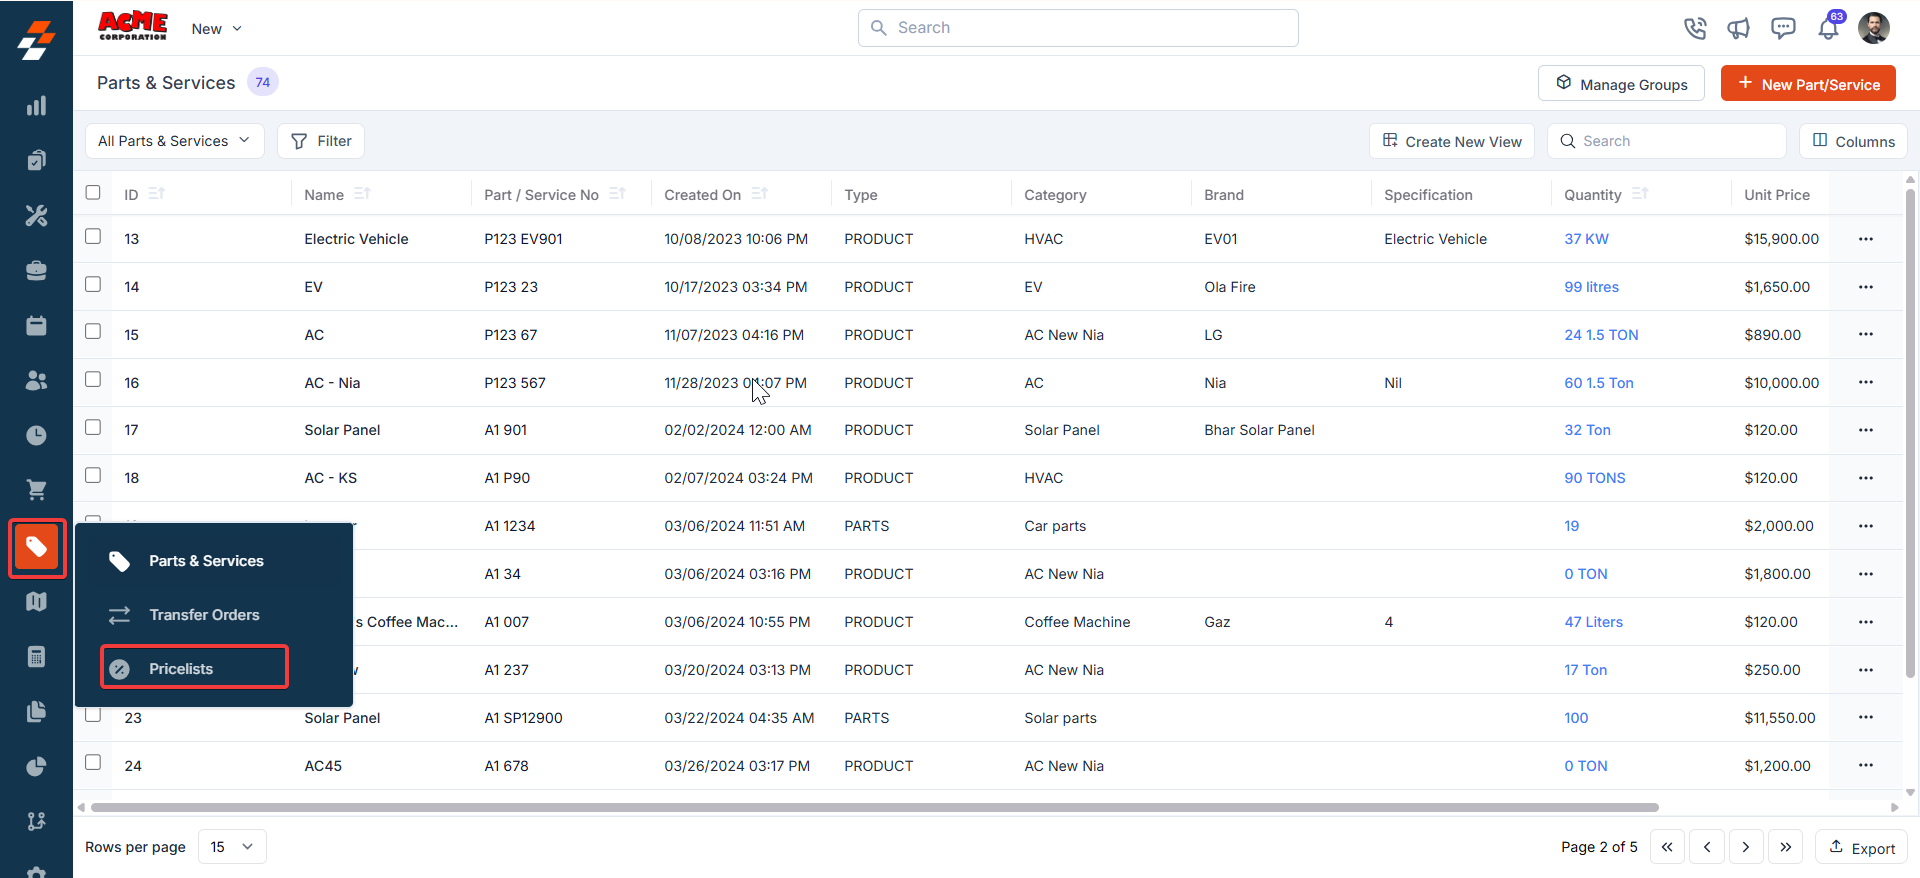
To create a new pricelist, follow these steps:- Select the “Inventory & Pricebook” module from the left navigation menu and choose “Pricelists.”
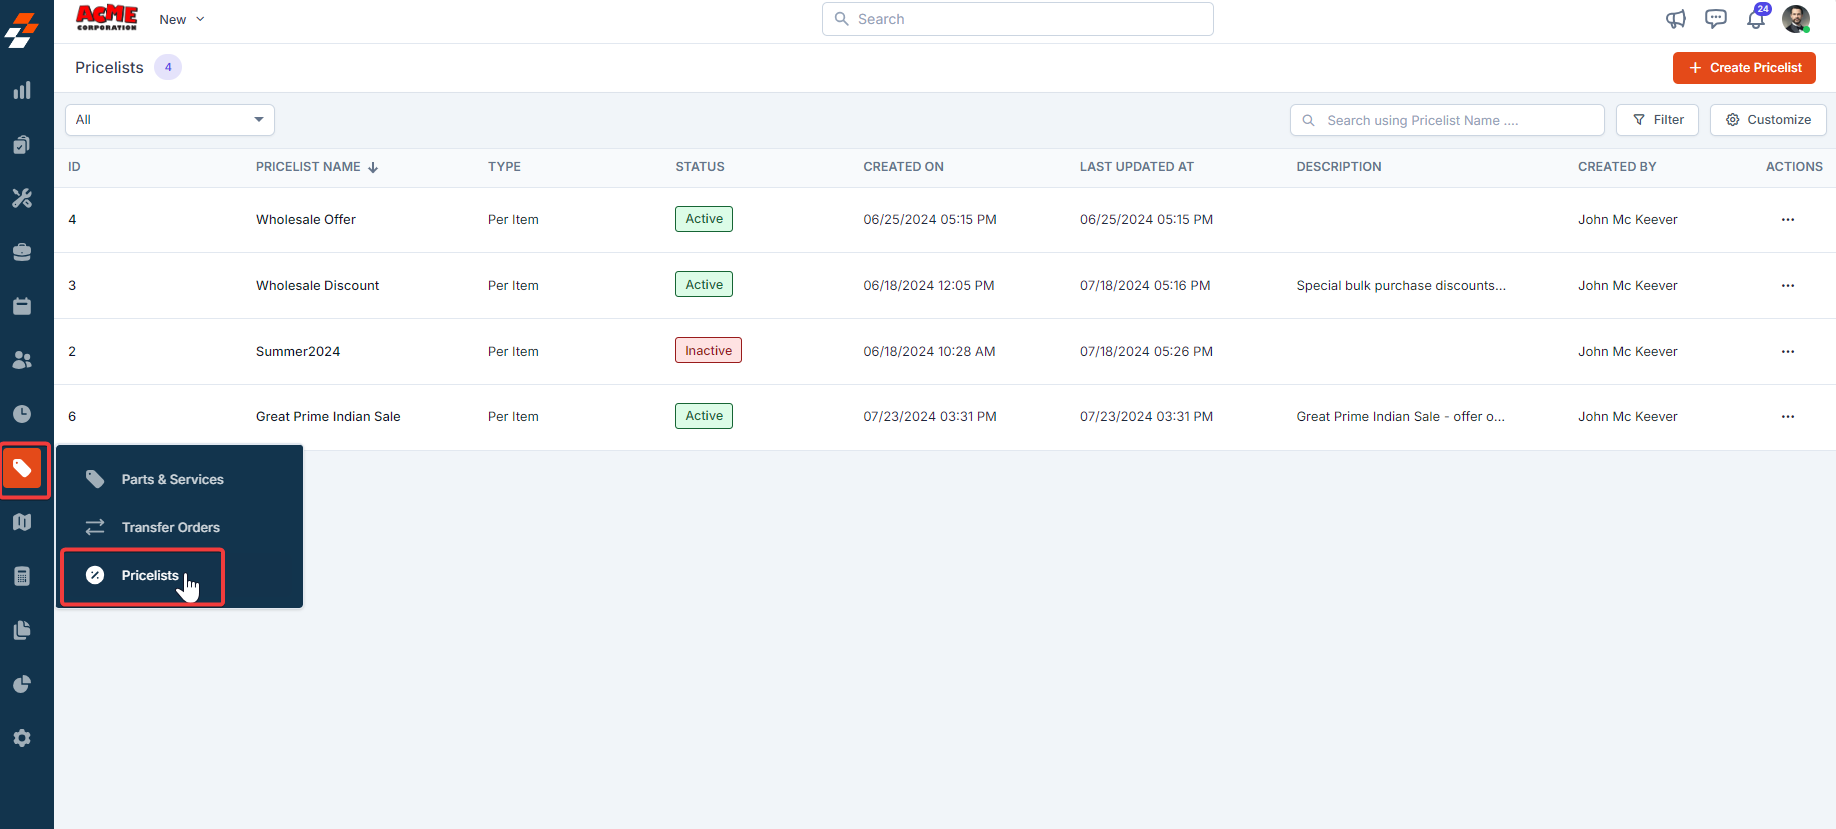
- The Pricelists listing page opens.
- Click the “+ Create Pricelist” button in the top-right corner of the page.
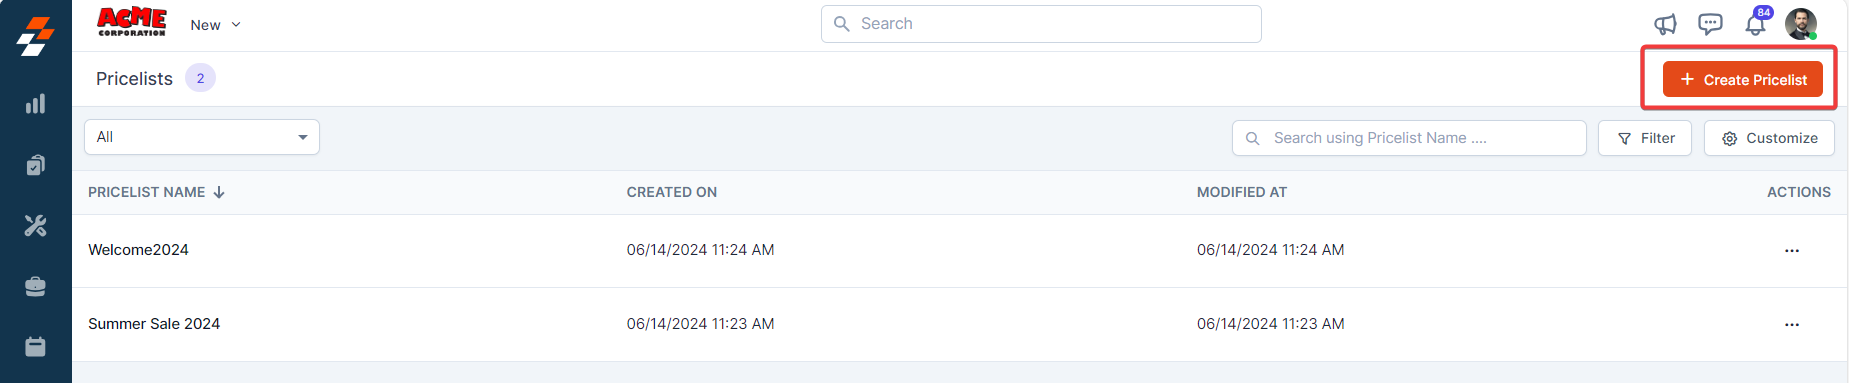
- A new Pricelist creation page appears. Fill in the following sections:
1. Primary Details section:
- Name (Mandatory): Enter a unique name for the pricelist.
- Description: Add a brief description explaining the purpose or scope of the pricelist.
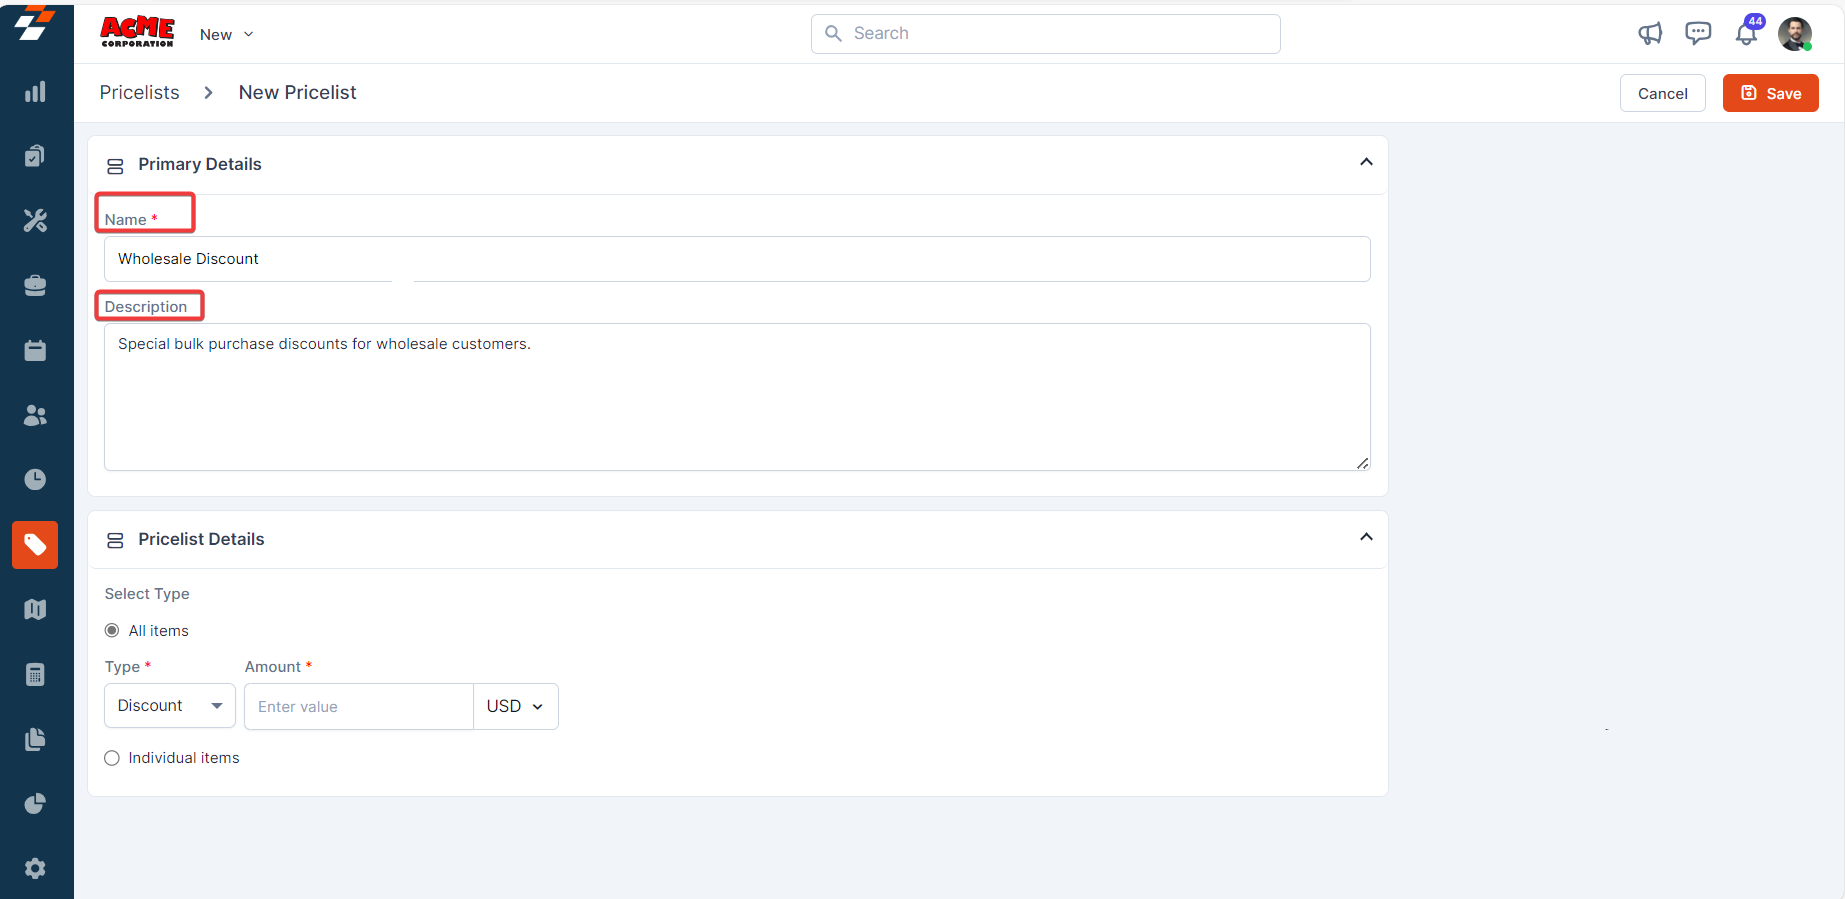
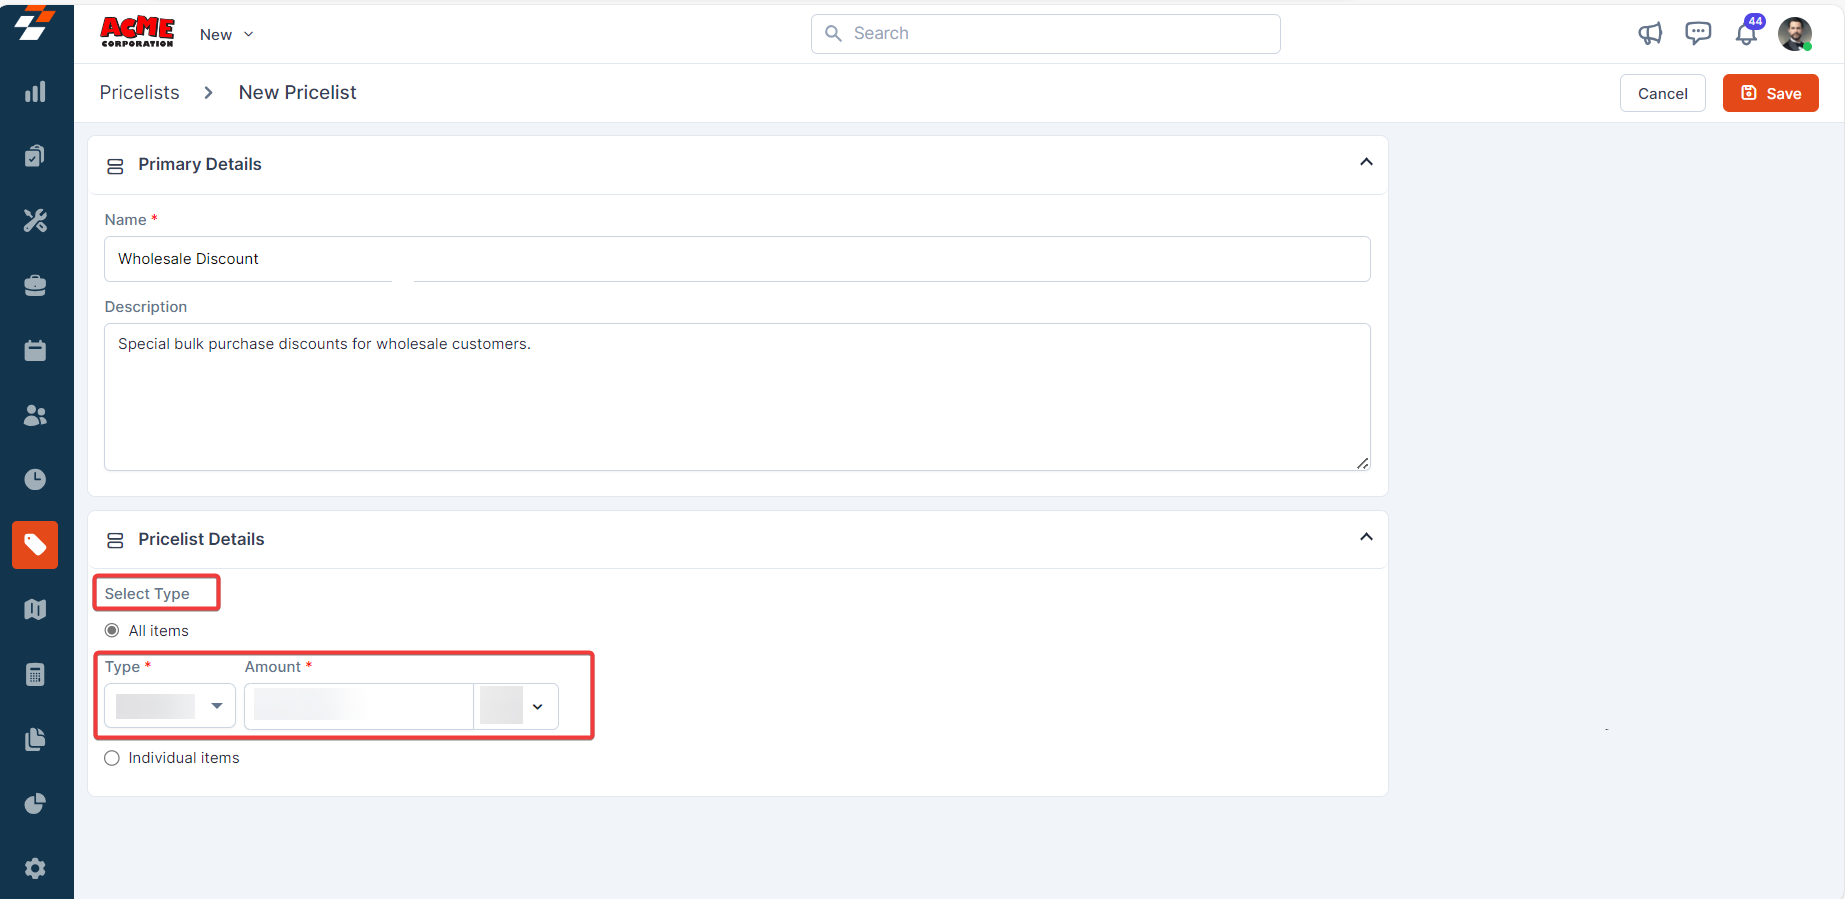
2. Pricelist Details section:
Choose the type of item, either “All items” or “Individual items.”All Items
All Items
Enter the following details:
- Type (Mandatory): Select either the “Discount” or “Margin” option.
Note: This selection applies to all parts and services when configured for all items.
- Amount (Mandatory): Enter the value.
-
Choose “USD” or “%” from the drop-down menu.
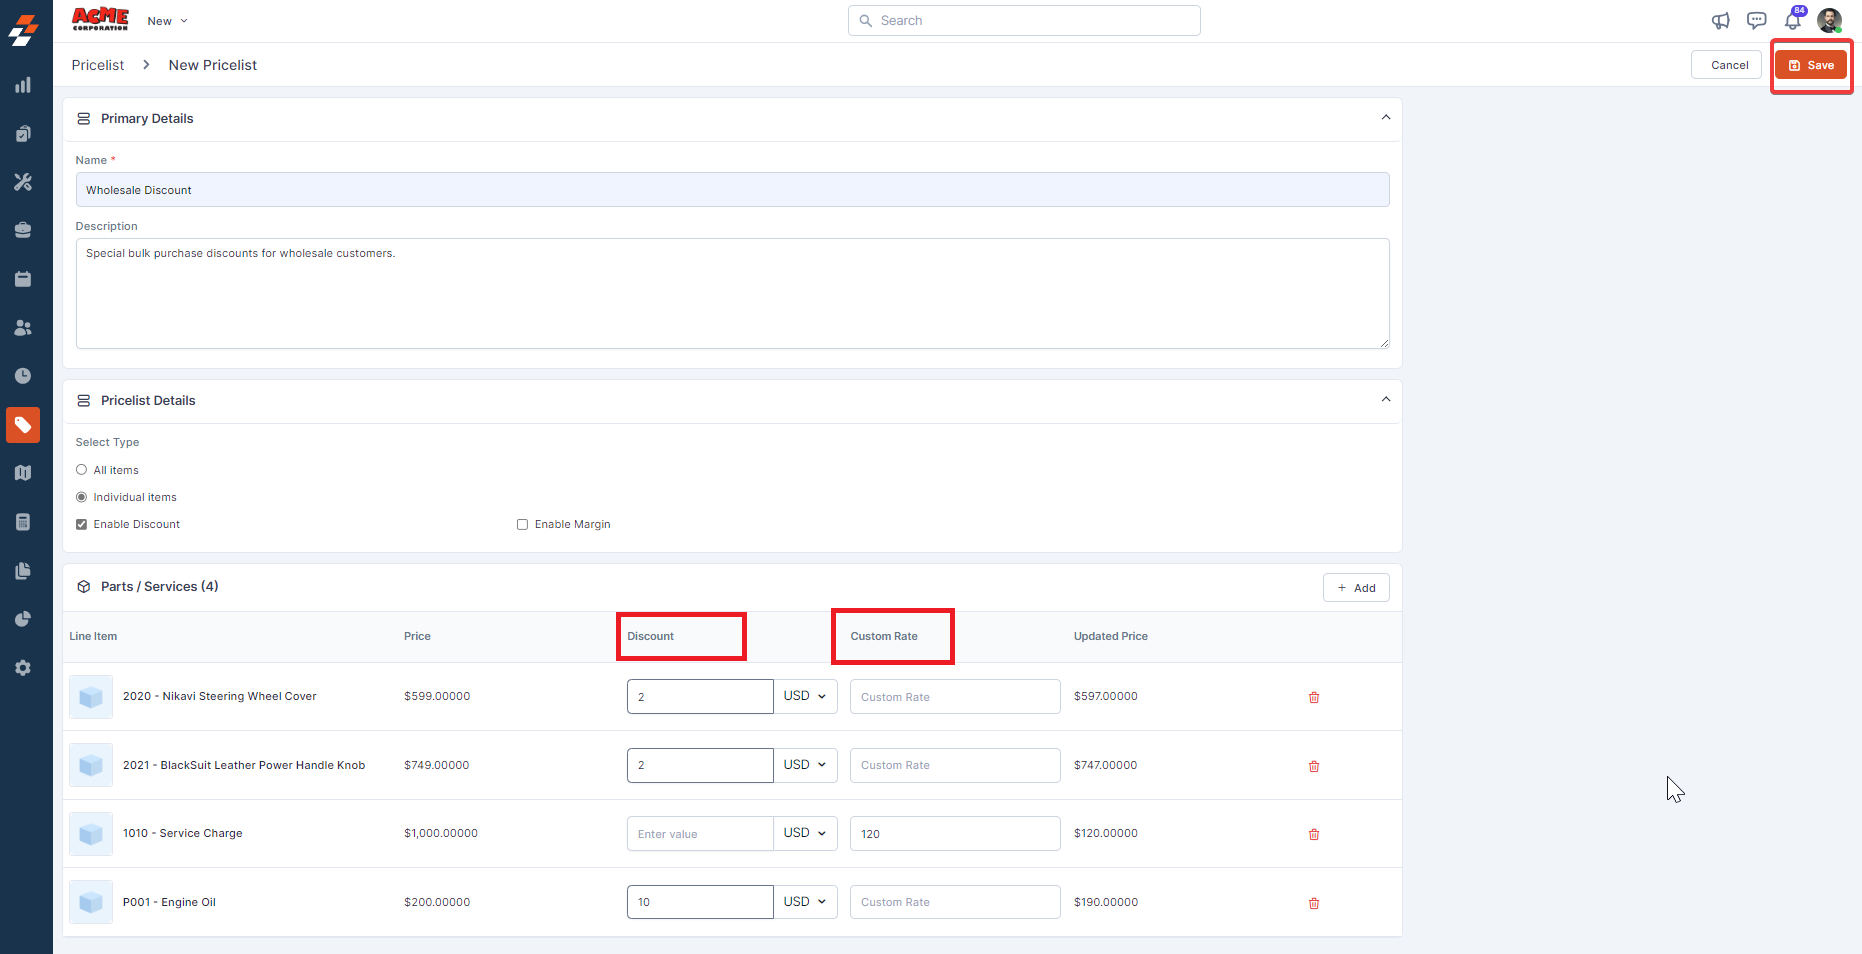
Individual Items
Individual Items
Enable the checkboxes to “Enable Discount” and/or “Margin”.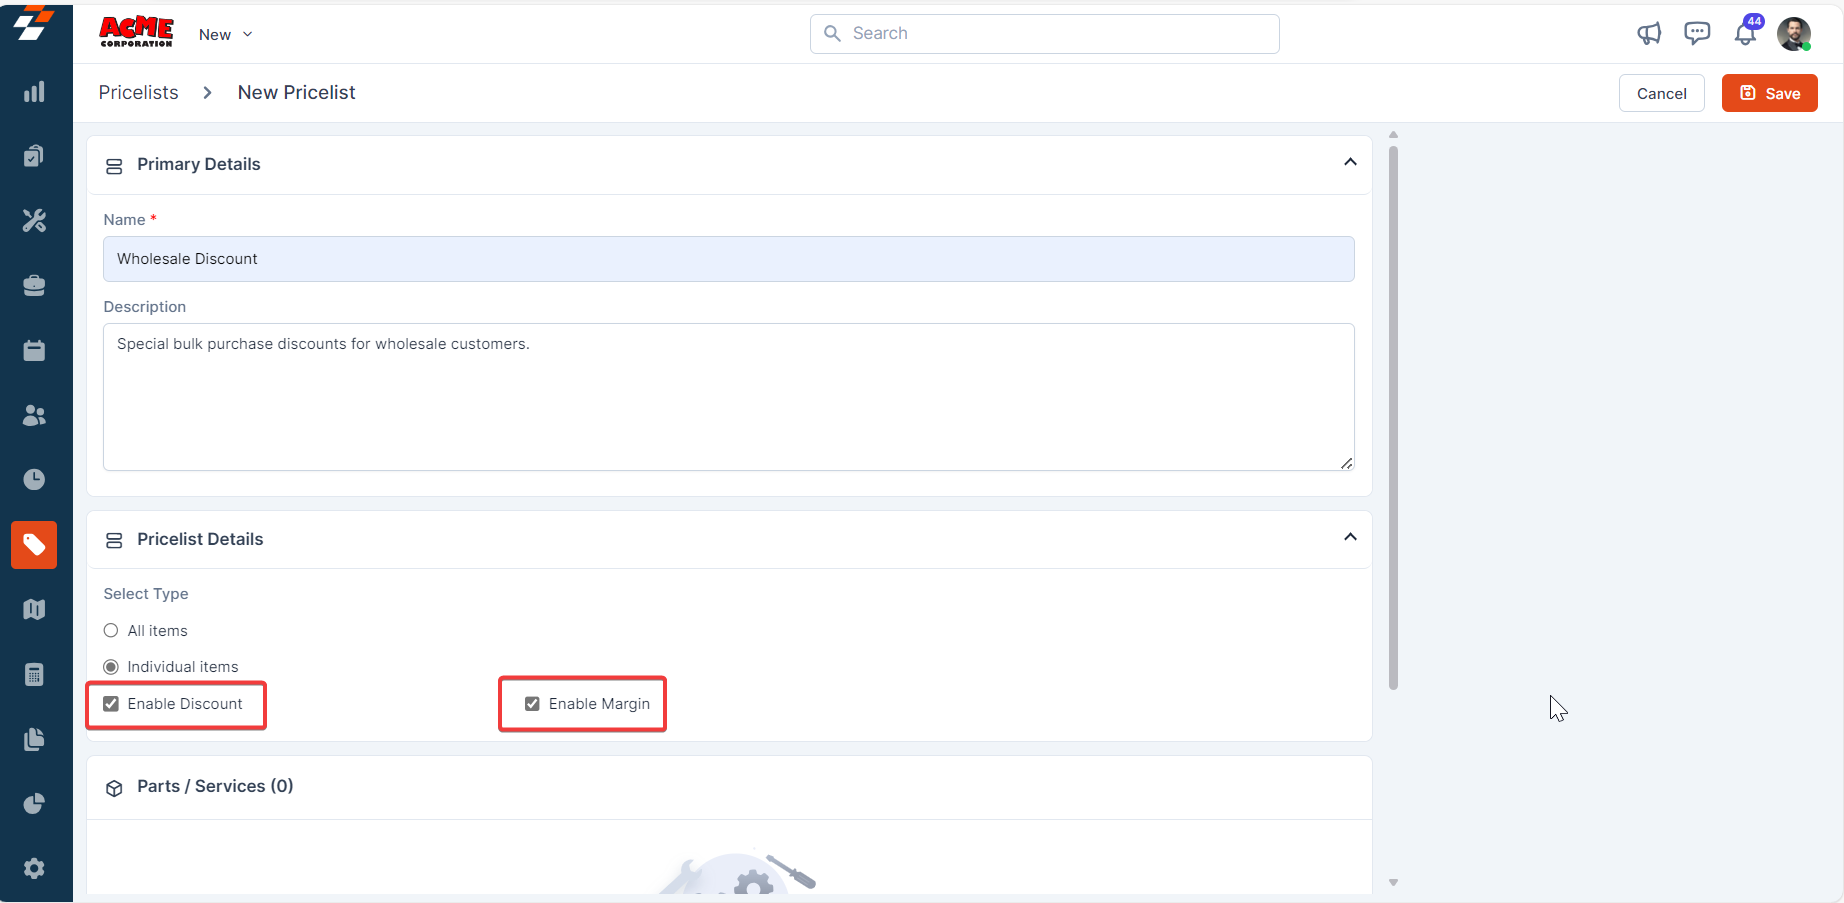
Note: You must activate the respective checkboxes during pricelist creation or editing to include a margin or discount in your pricing.
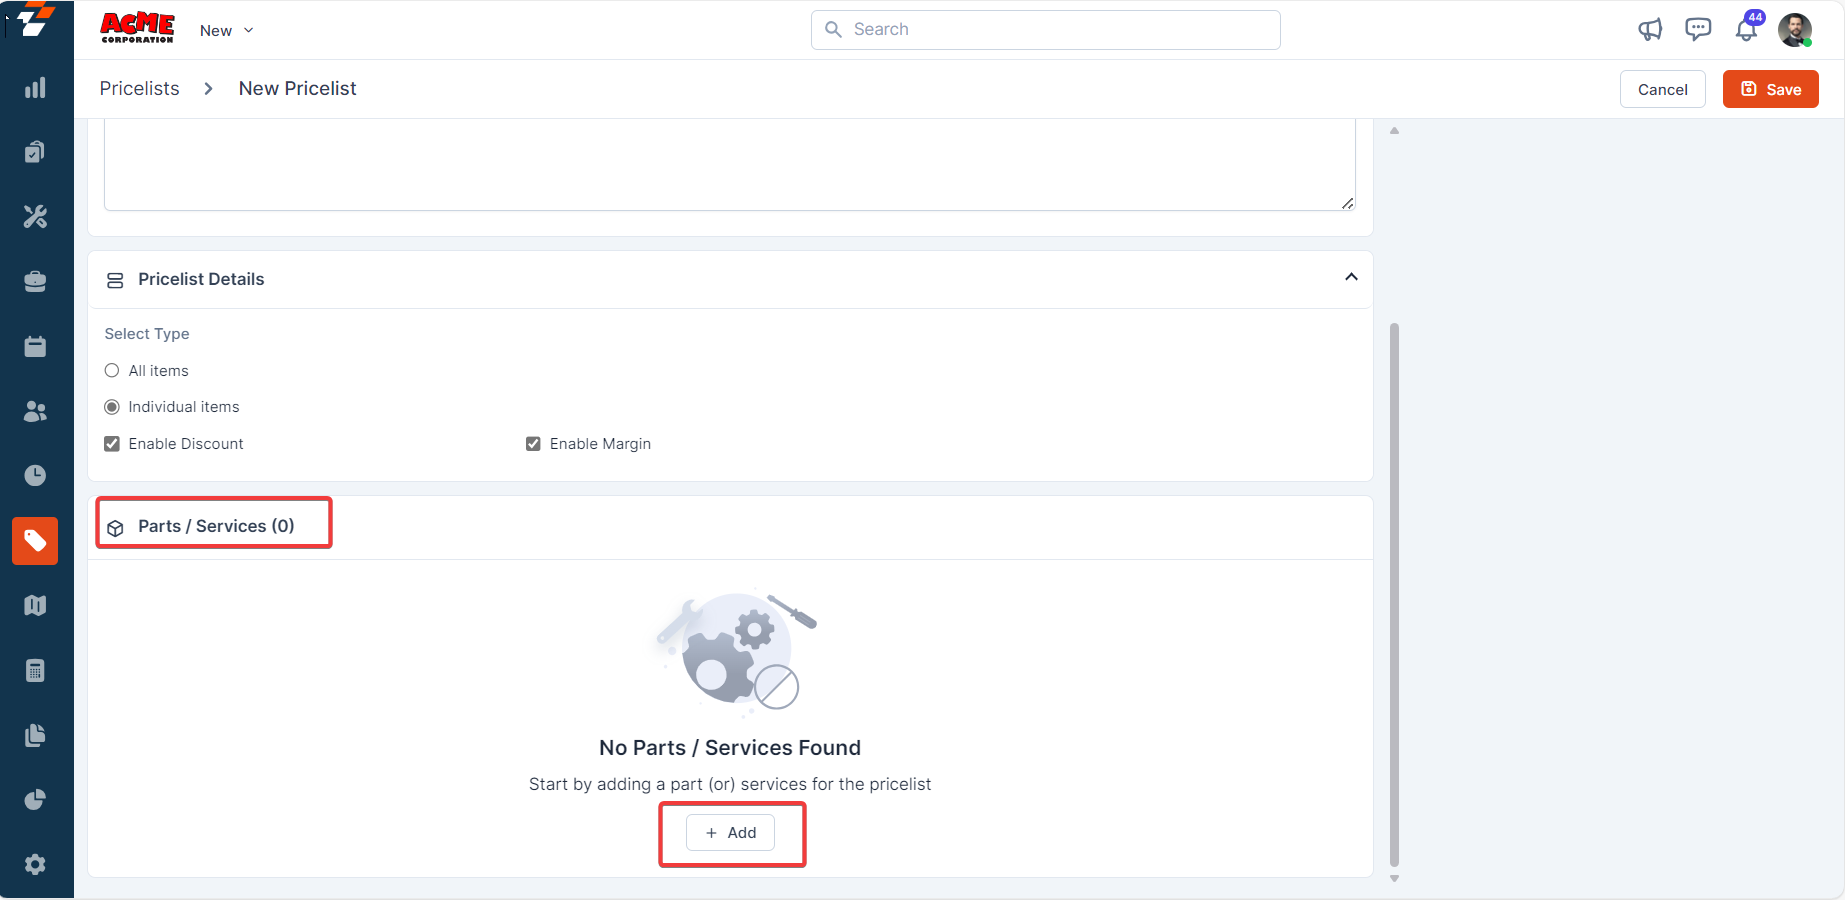
3. Parts / Services section:
- Add the relevant parts and products by clicking the “+ Add” button.
- A dialog box with the existing parts and products will appear.
- Select the part/product(s) and click the “Add” button.
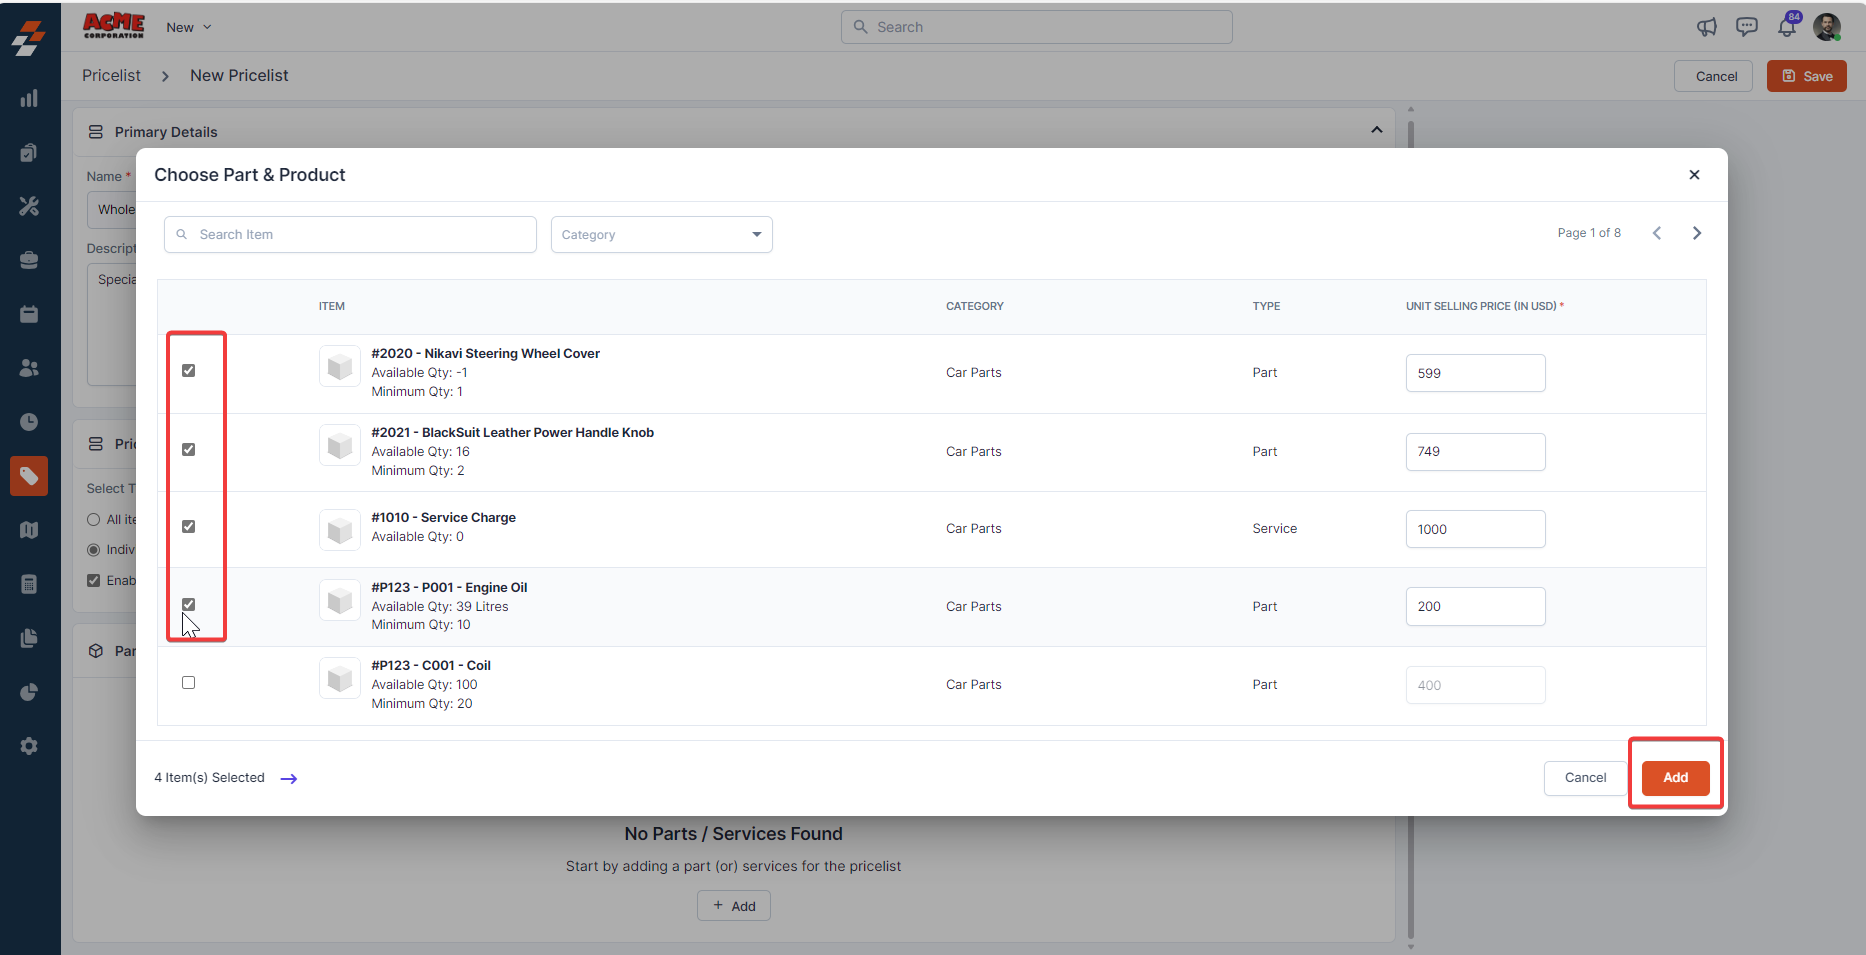
- You can specify either “Margin”, “Discount”, or “Custom Rate” for each item.
- Margin: An additional percentage or fixed amount added to the cost price of items to determine the unit selling price.
- Discount: A flat or percentage amount subtracted from the selling price you set in the master list for a part or service. The updated selling price, reflecting the applied discount, will be displayed accordingly in the Updated Price field.
- Custom Rate: A fixed rate or percentage applied to the item or service.
Note: Only one of these options, “Margin”, “Discount”, or “Custom Rate” can be selected for each item.
Edit a Pricelist
You can edit a pricelist from any one of the following pages:- From the Pricelists listing page
- From the Pricelist details page
- Select the pricelist you want to edit on the listing page.
- Click the “Ellipsis” icon under the “Action” column and select “Edit Pricelist”.
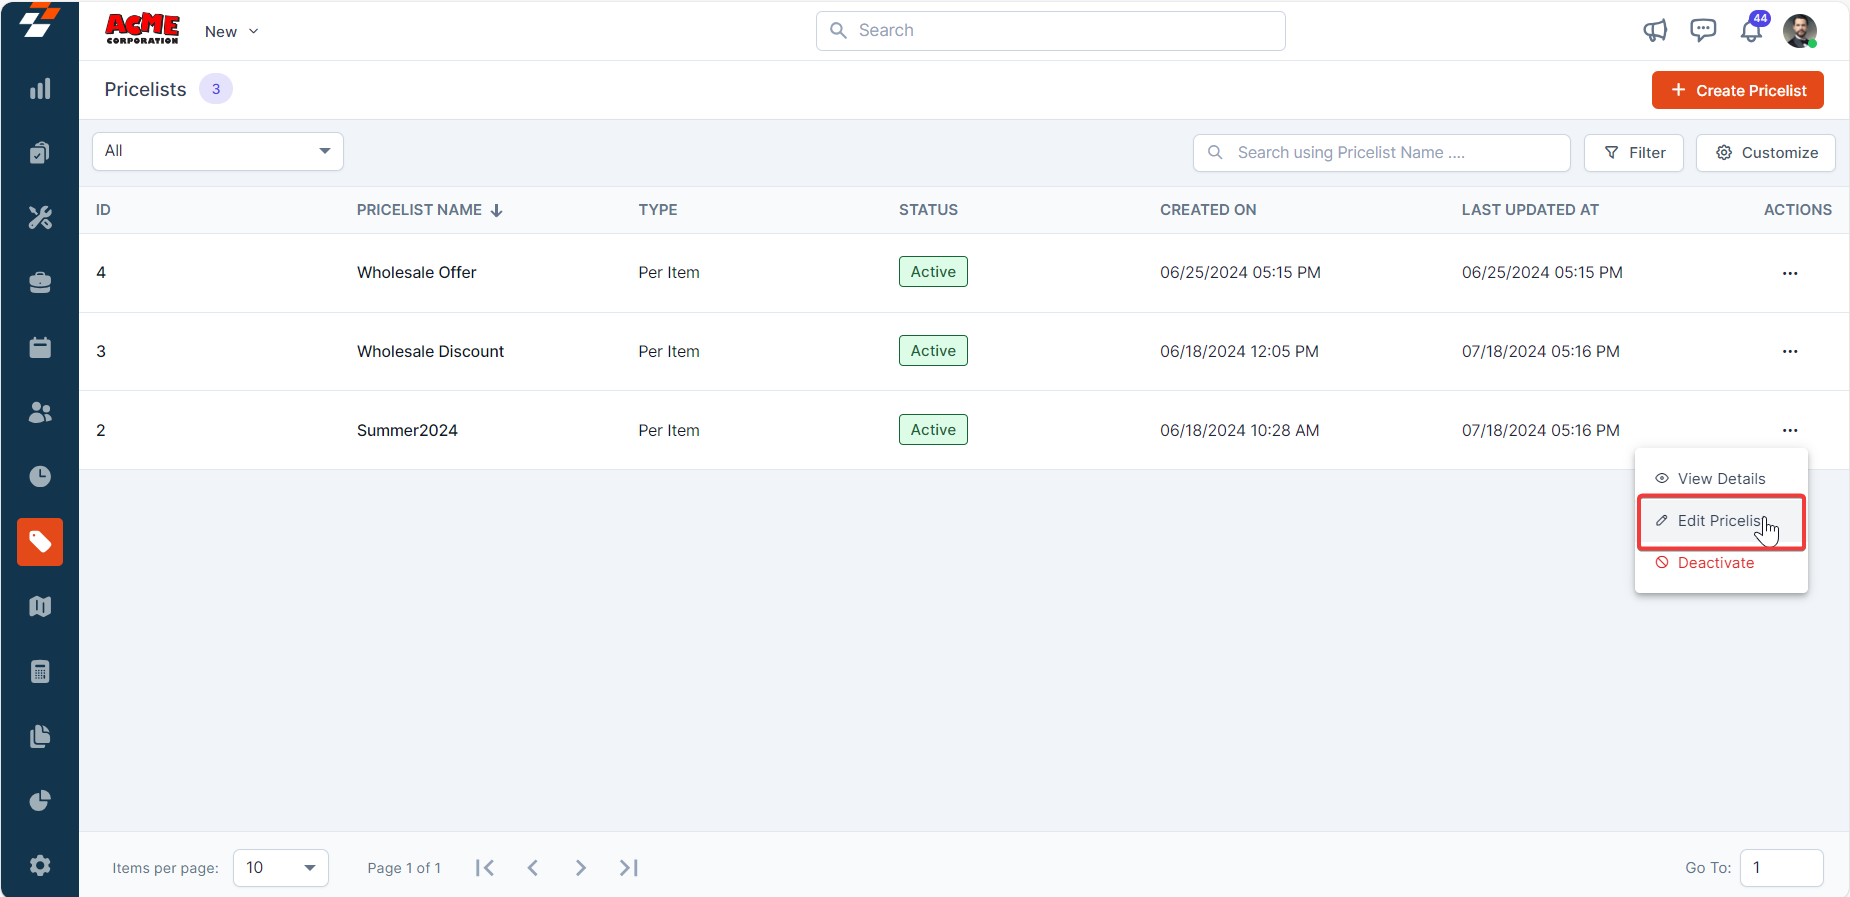
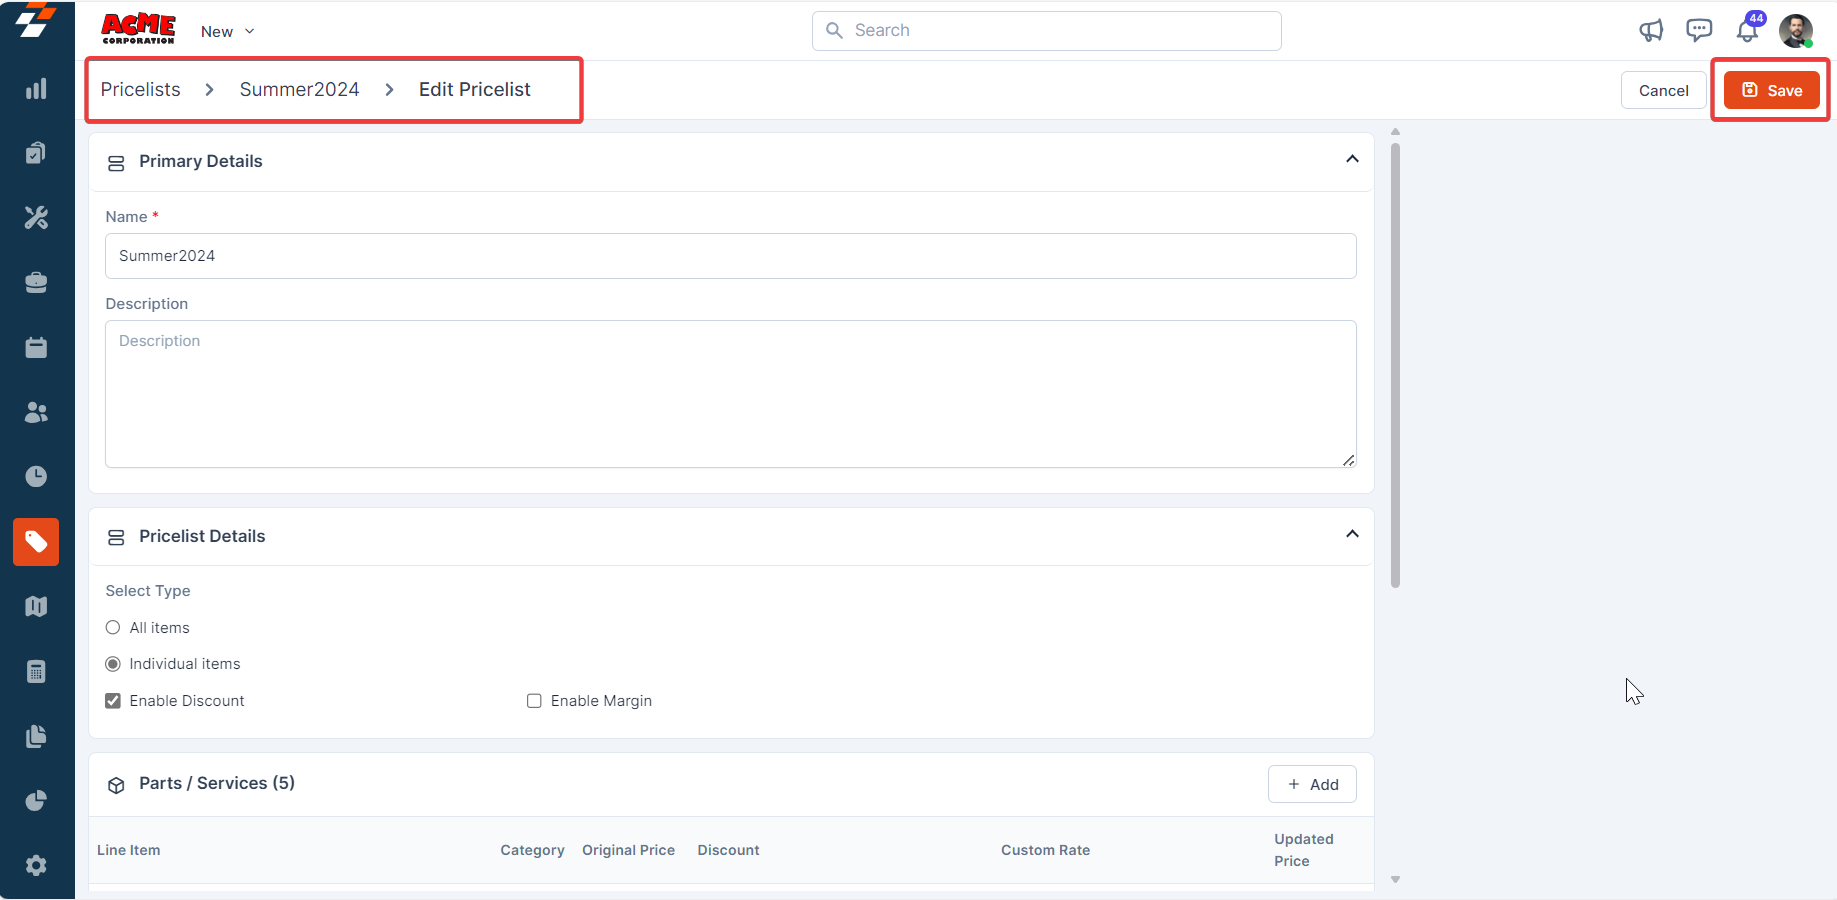
- Modify the necessary fields.
- Click the “Save” button to update the pricelist.

- Select the pricelist you want to edit.
- On the Pricelist details page, under “More Actions,” select “Edit Details.”
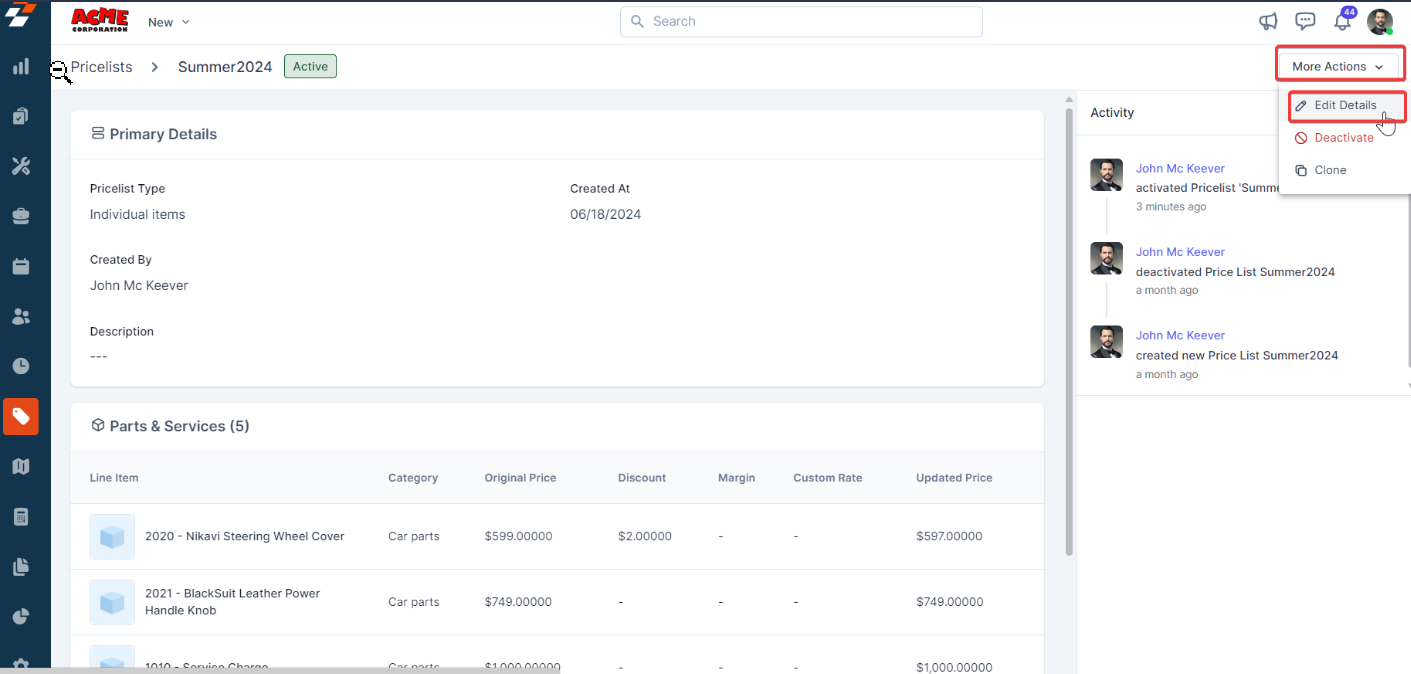
- Modify the necessary fields.
- Click the “Save” button to update the pricelist.
Deactivate/Delete a Pricelist
You can deactivate/delete a pricelist from any one of the following pages:- From the Pricelists listing page
- From the Pricelist details page
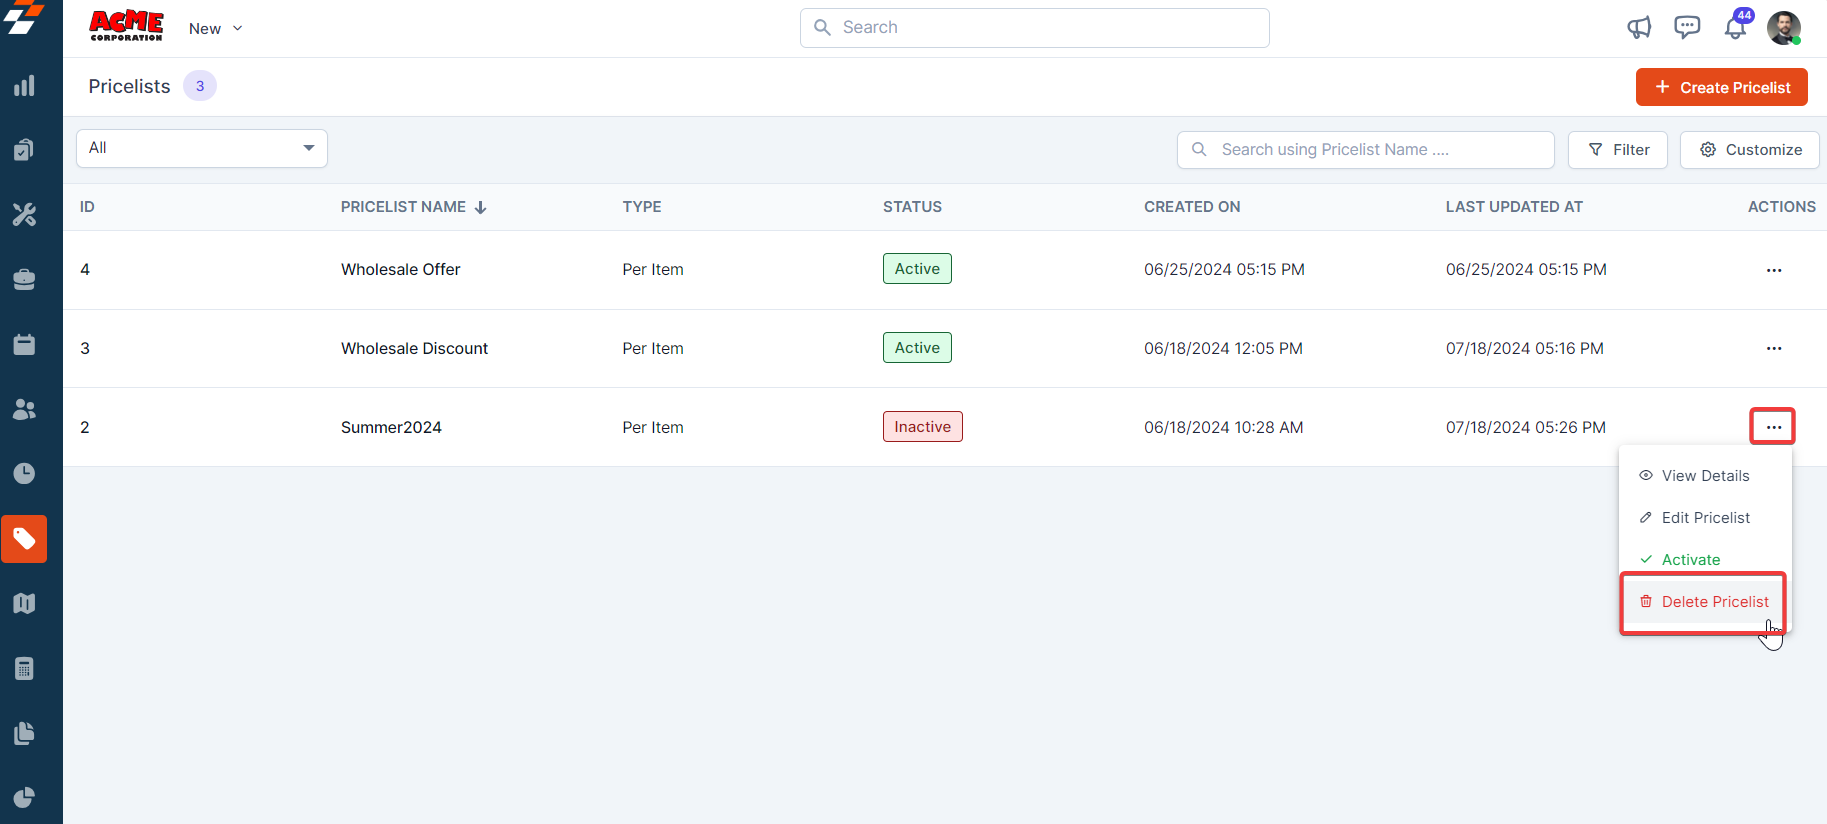
- On the Pricelists listing page, select the pricelist you want to deactivate.
- Click the “Ellipsis” icon under the “Action” column and select “Deactivate”.
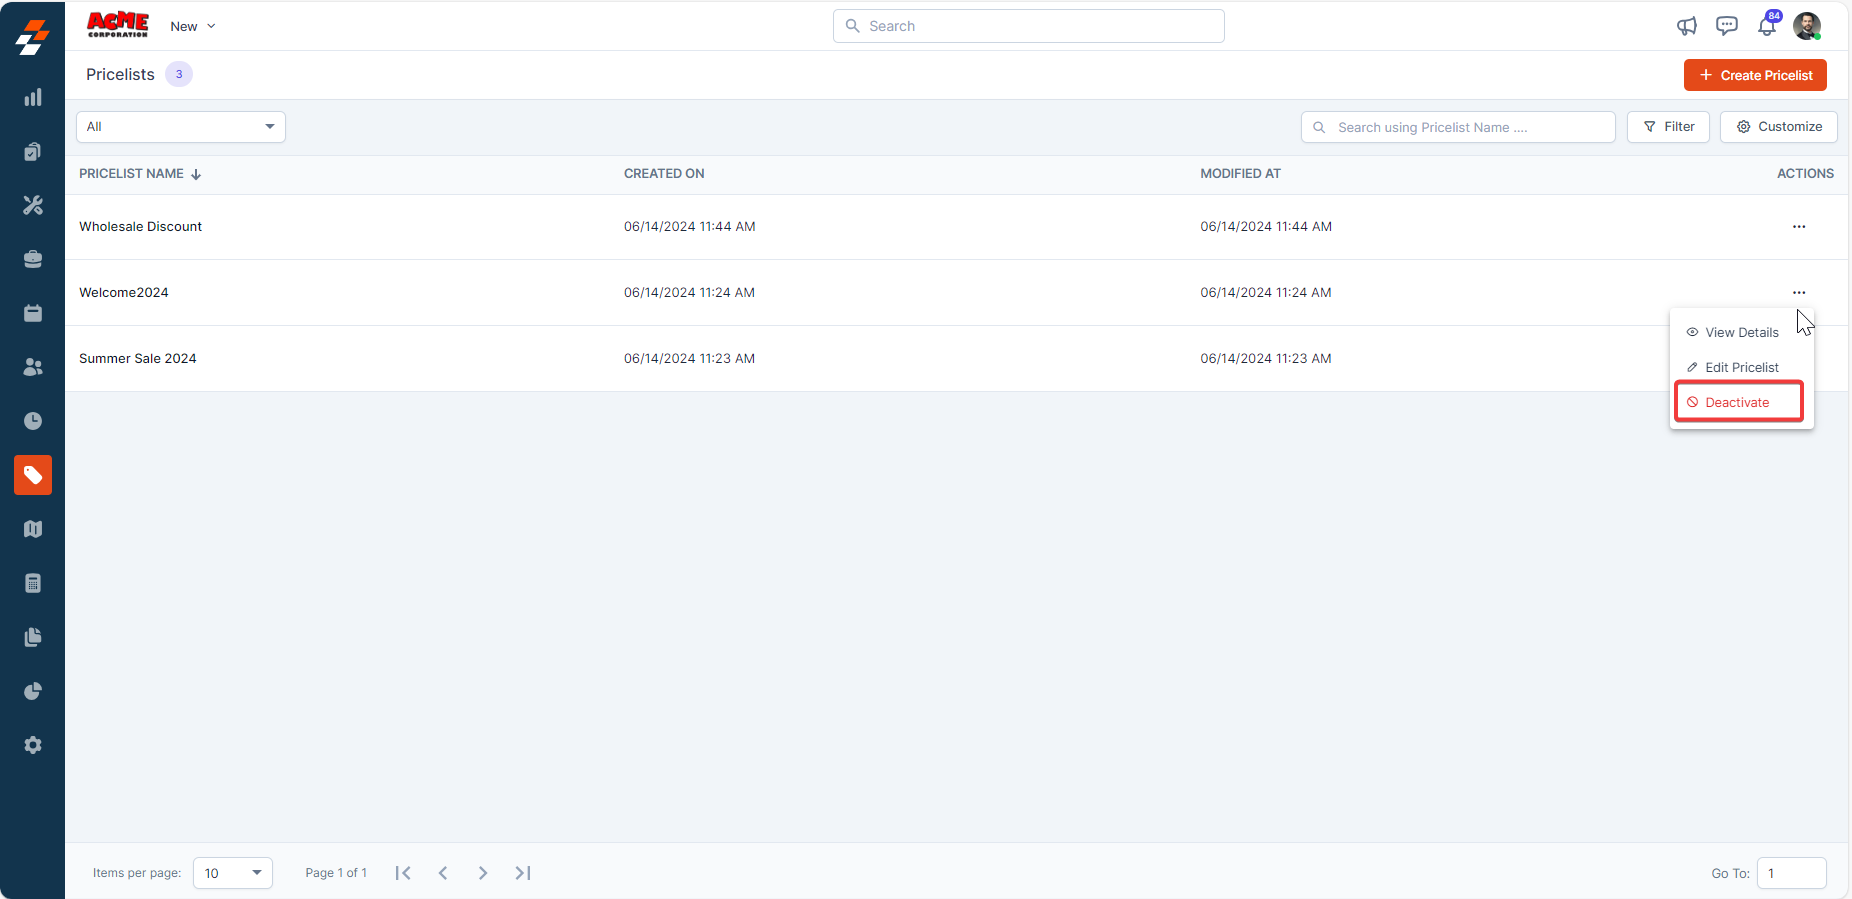
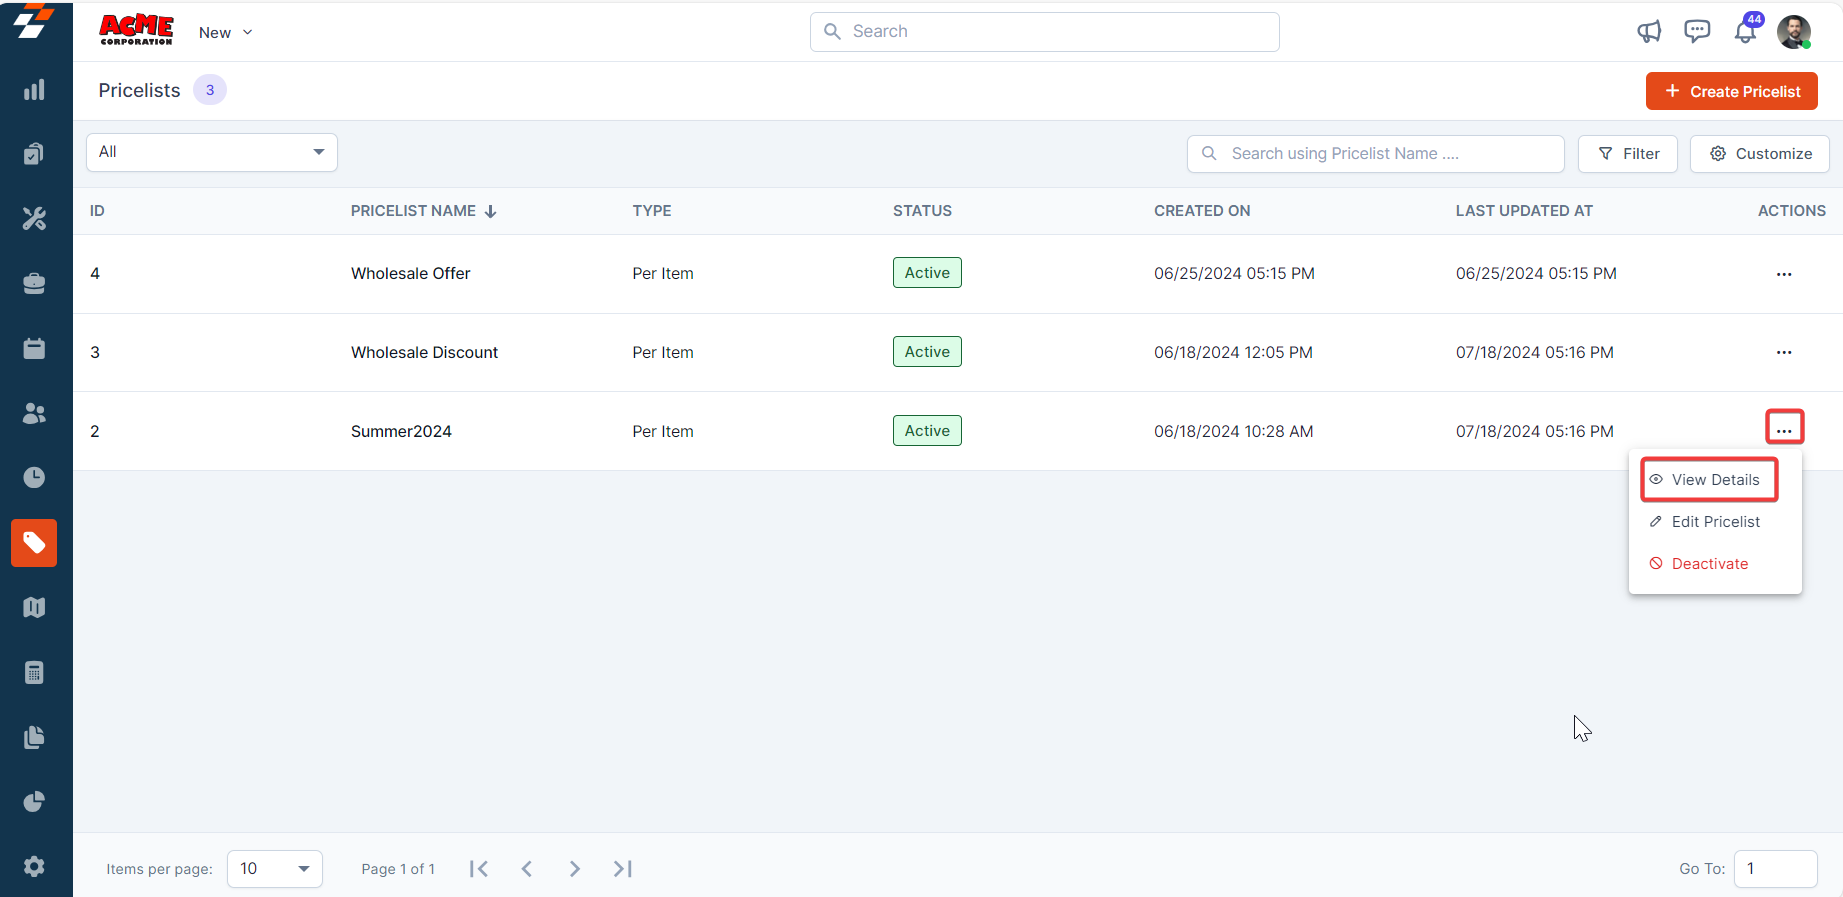
- Alternatively, you can click the “Ellipsis” icon under the “Action” column and select “View Details”.
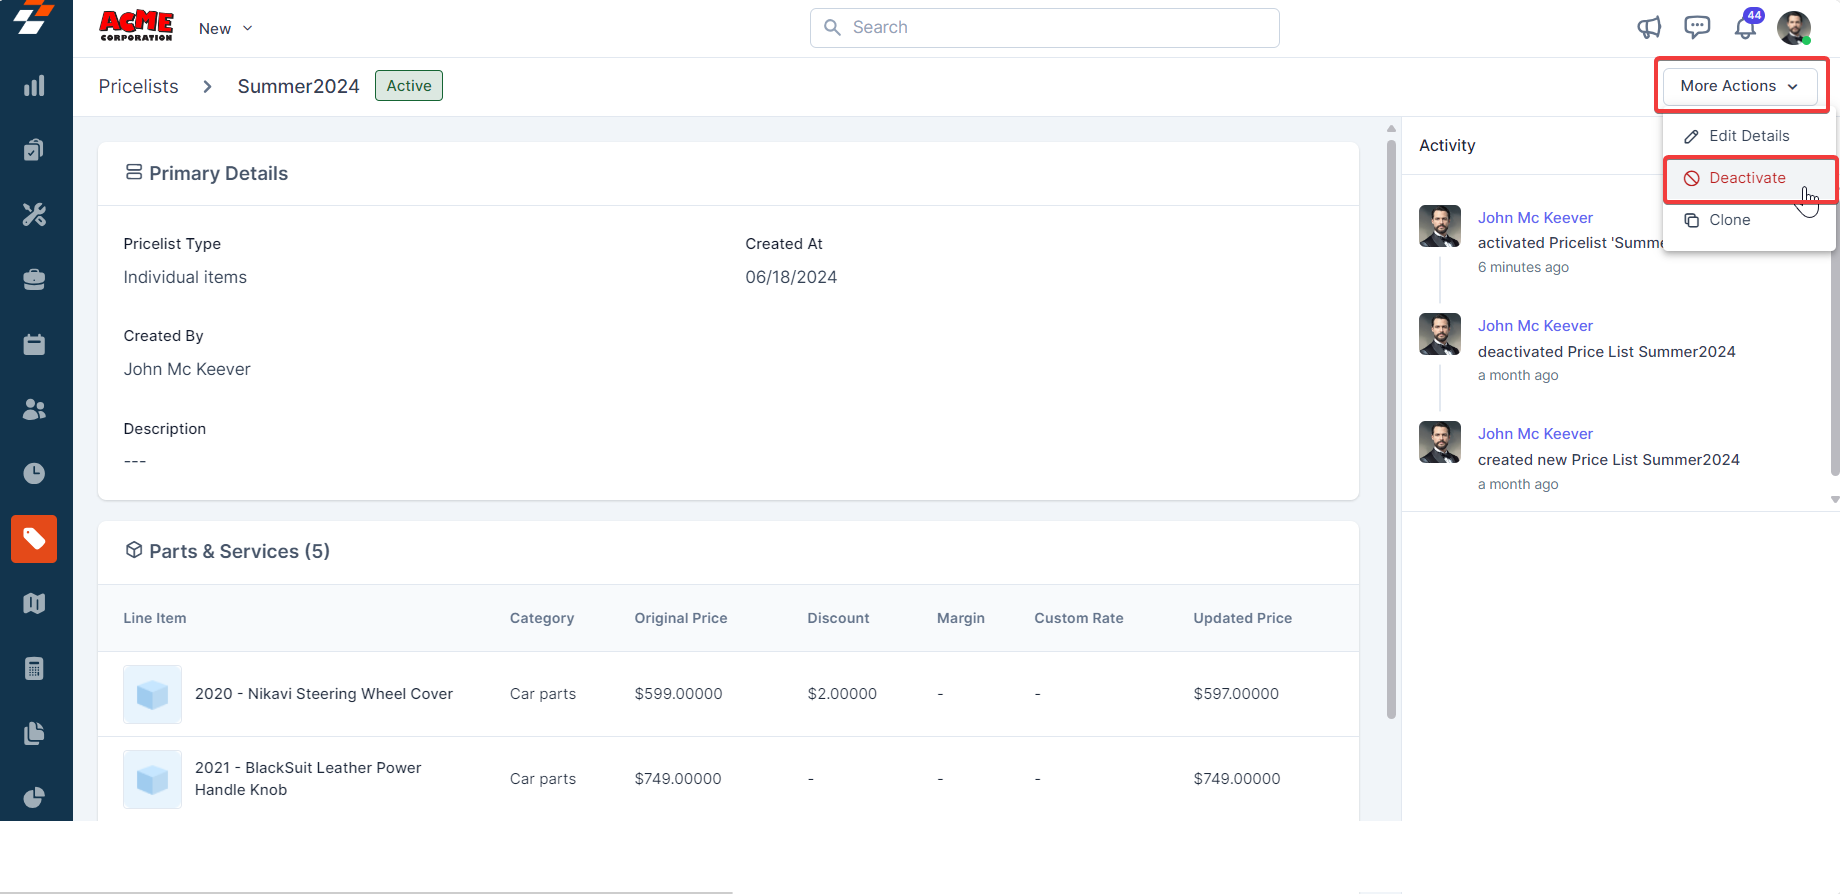
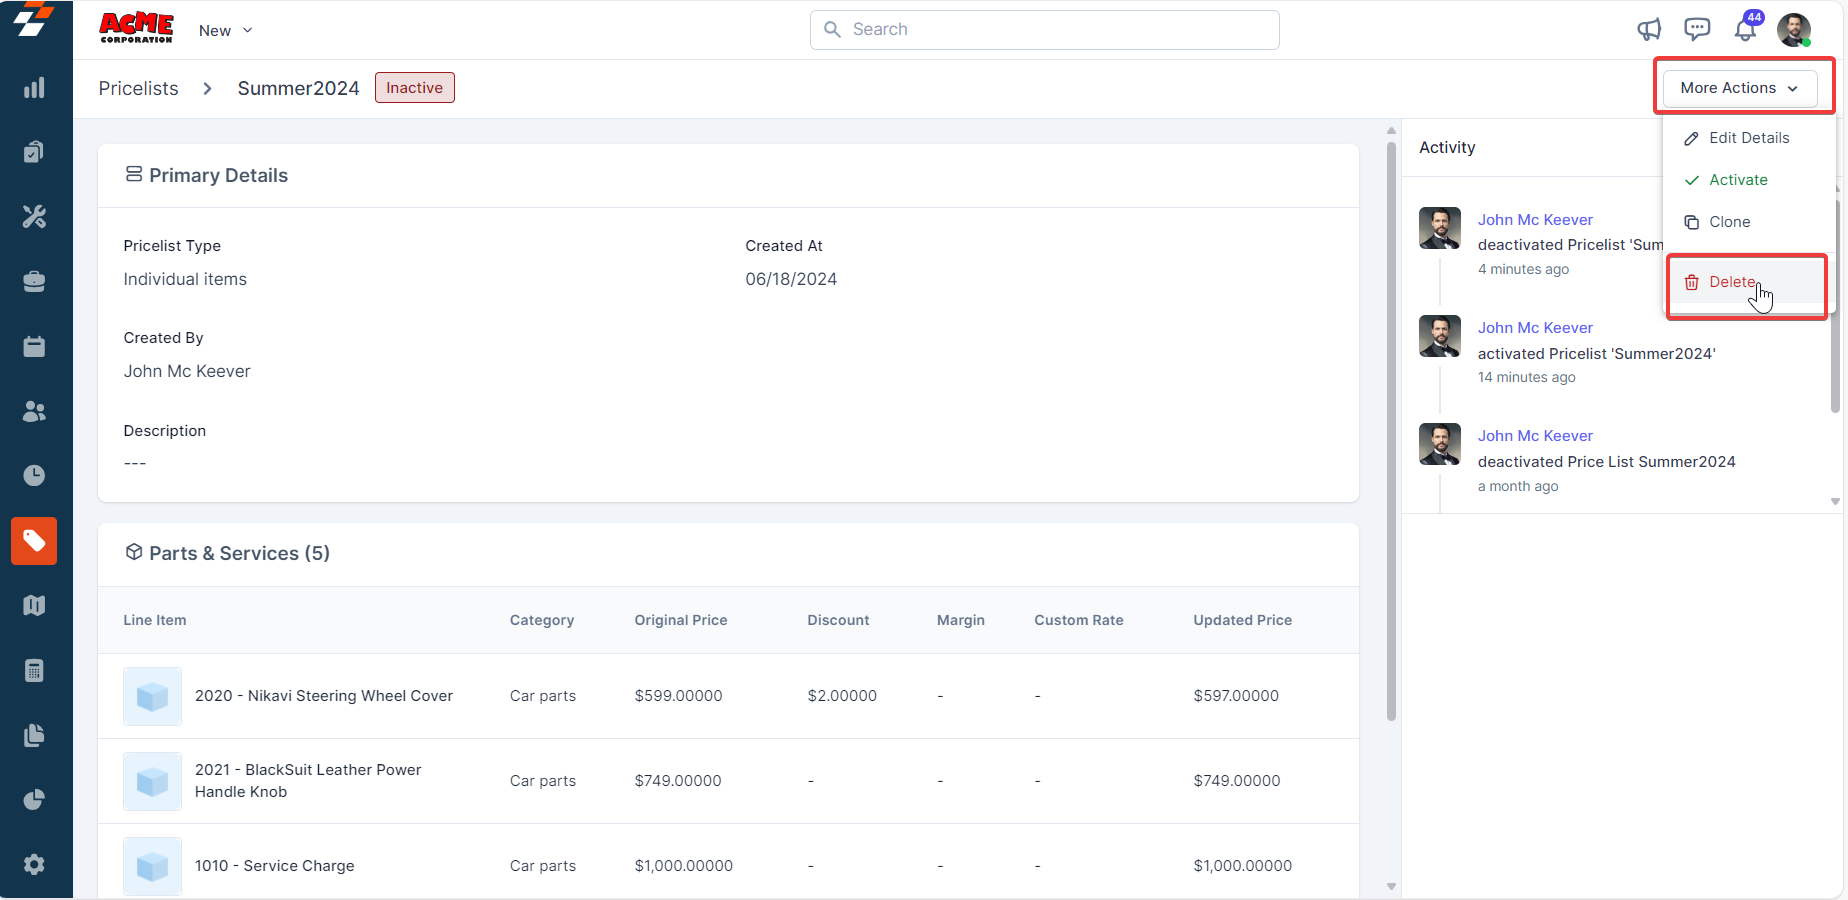
- On the Pricelist details page, under “More Actions”, select “Deactivate”.
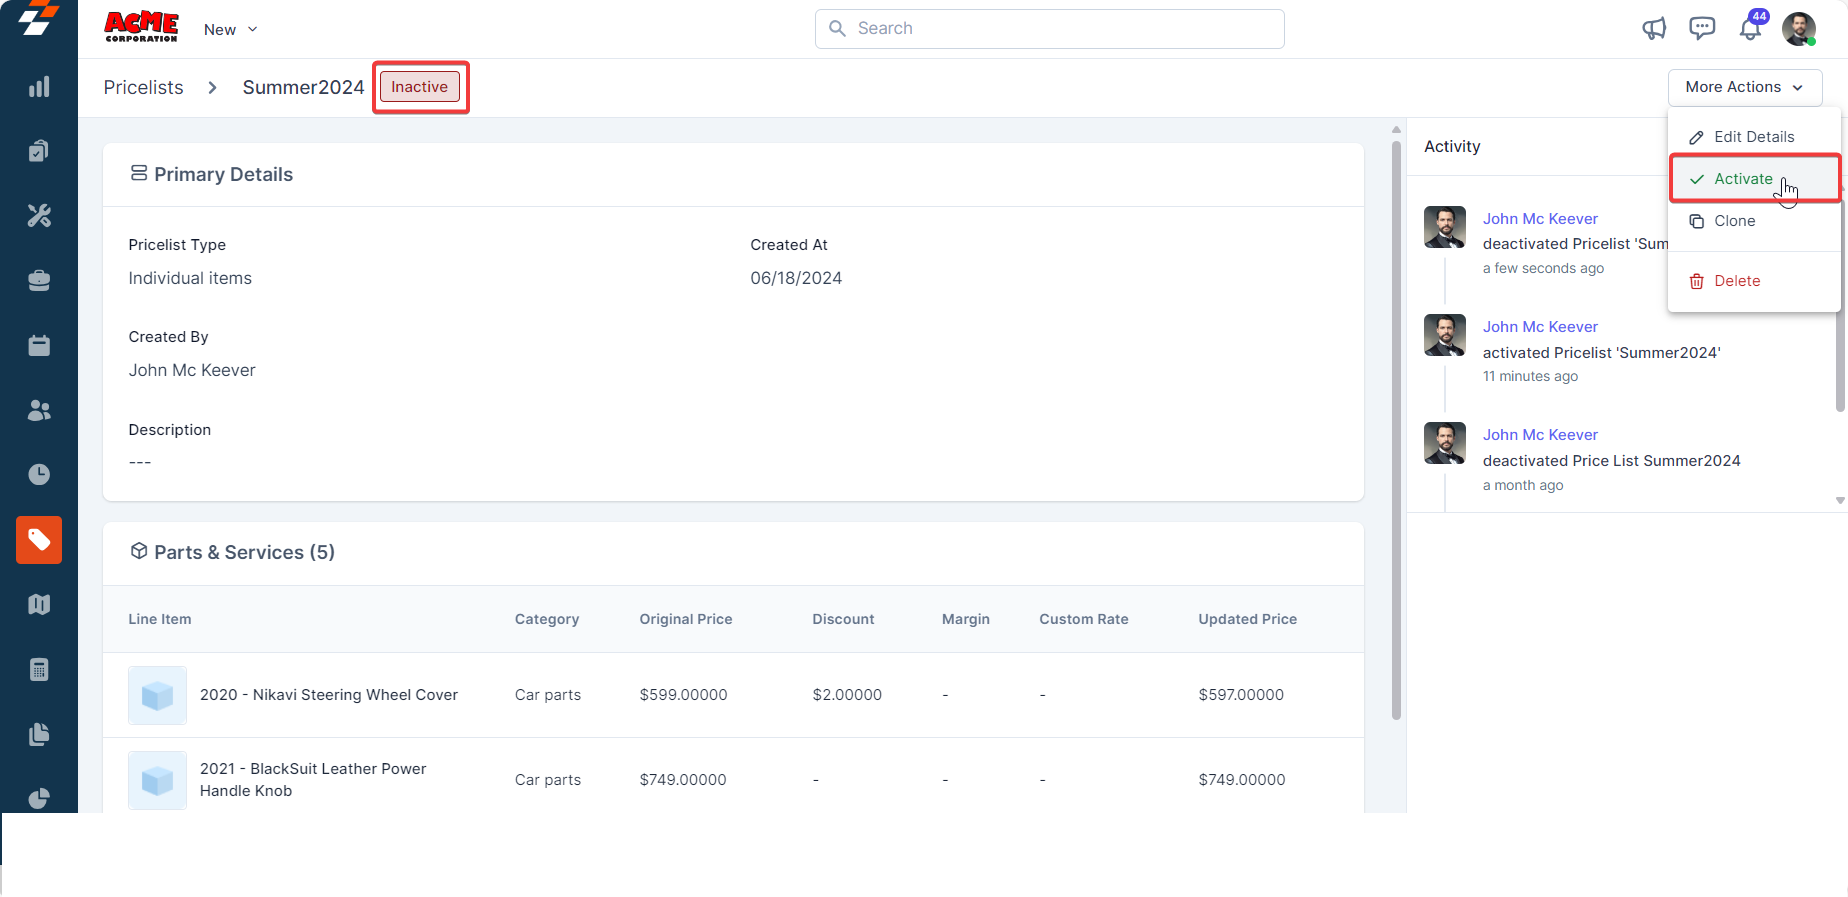
- The pricelist will be deactivated successfully. To reactivate it, click “Activate”.
- On the Pricelists listing page, select “Delete Pricelist” under “Action” to delete the pricelist.
- Alternatively, you can delete the pricelist from the Pricelist detail page.
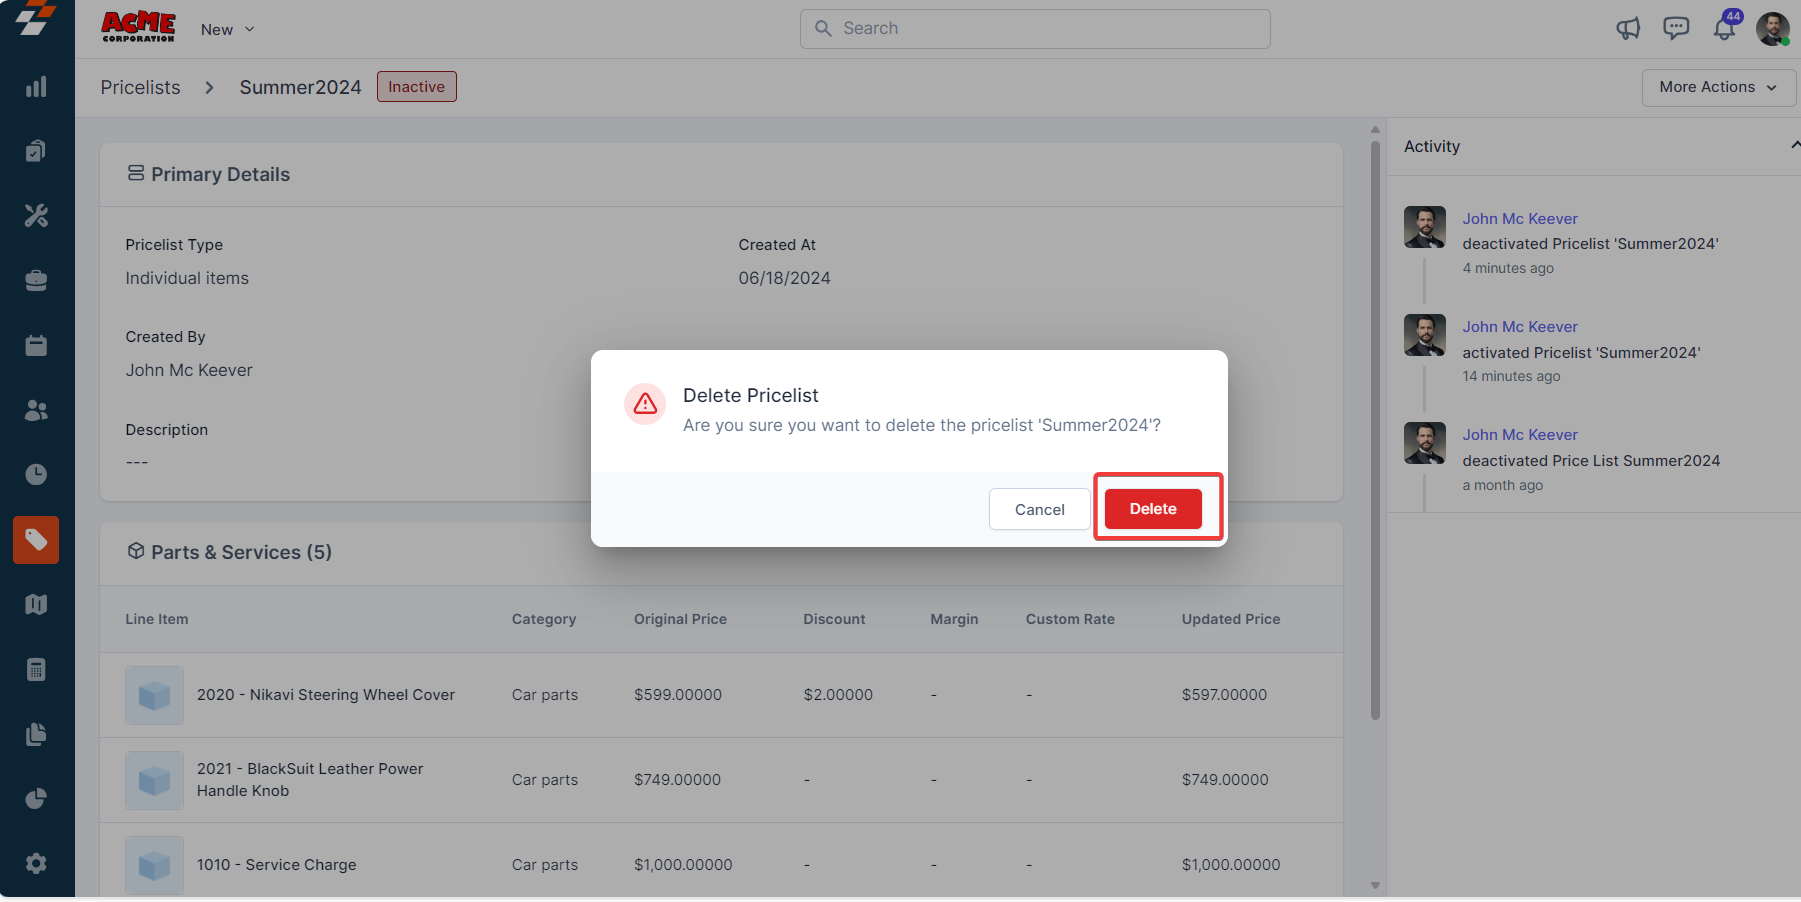
- A pop-up message will appear. Click the “Delete” button to delete the pricelist.
 So, that’s it! Whether you’re creating a pricelist, making updates, or deactivating and deleting a pricelist, these procedures facilitate streamlined pricelist management within the application, ultimately contributing to efficient operations and enhanced productivity.
Listing Views
Customize the Transfer Orders listing by adding/removing or reordering columns, then Update View to overwrite or save it as a new view. Update View- Click Update View to modify the current view after changes.
- Use the dropdown beside Update View → Save as new view.
- Enter the View Name (mandatory), choose Share with (User/Team) and add users, toggle Visibility to all users, and click Create.
- Click Reset View to restore the current view to the default.
- Edit: Add/remove/reorder columns; save as new or overwrite existing views.
- View-only: Apply views but can’t edit; can Save as new view to copy without altering the original.
- Manage view: Rename, adjust Visibility (Only Me/User/Team or global toggle), Duplicate, or Delete (creator only; reverts to default/another saved view).
- After filtering, click a Transfer Order Number or Transfer Order ID to view and manage details.
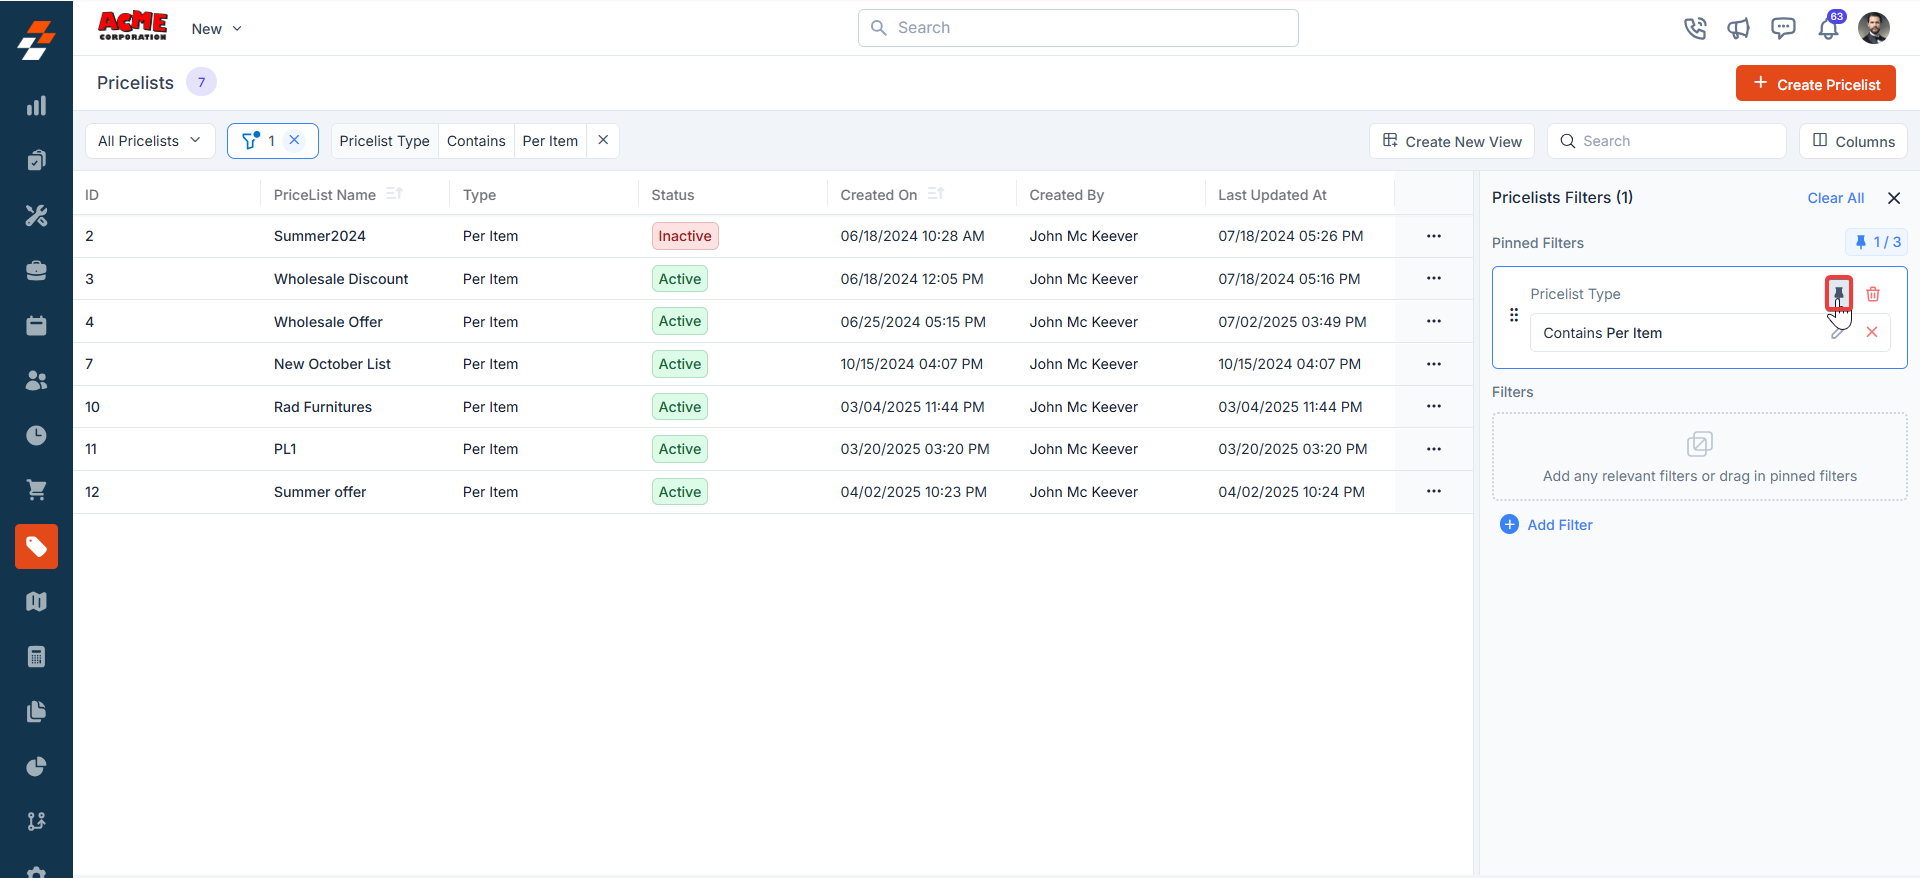
Pinned filters
Zuper’s Pricelists module lets you use pinned filters to streamline your filter experience. Pinned filters keep your most-used criteria readily accessible for quick application.Navigation: Pricelists ->Filters -> Pinned Filter
- Select the “Inventory & Pricebook” module from the left navigation menu and choose “Pricelists.”
- Pin Filters for Quick Access
- Once your filters are set, click the Pin Filters button in the dialog box to save them as pinned.
- Pinned filters appear in the dialog box’s “Pinned Filters” section, allowing you to apply them with one click in future sessions.
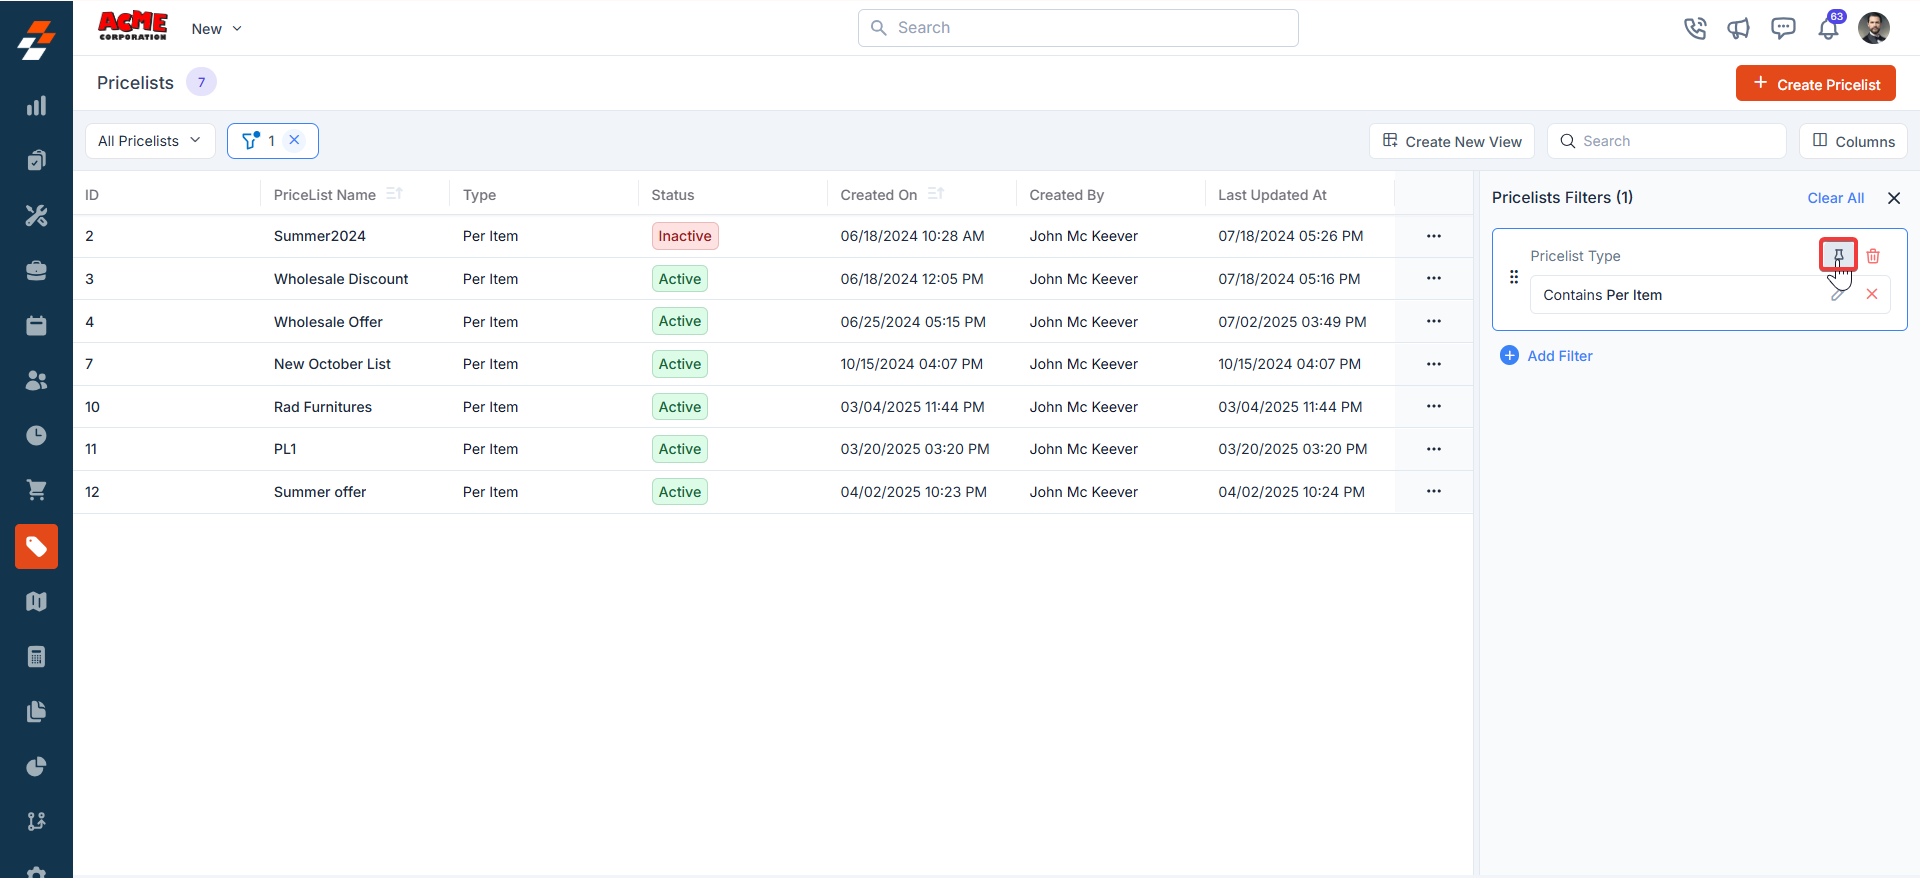
- To Unpin the filter:
- To unpin, select a pinned filter and click Remove.
- To apply pinned or default filters, open the dialog box and select them.
- Use Clear All to remove active filters.