Navigation: Contracts and Assets Management module -> Contracts -> Contracts listing page -> Contract Details
Accessing the contracts listing page
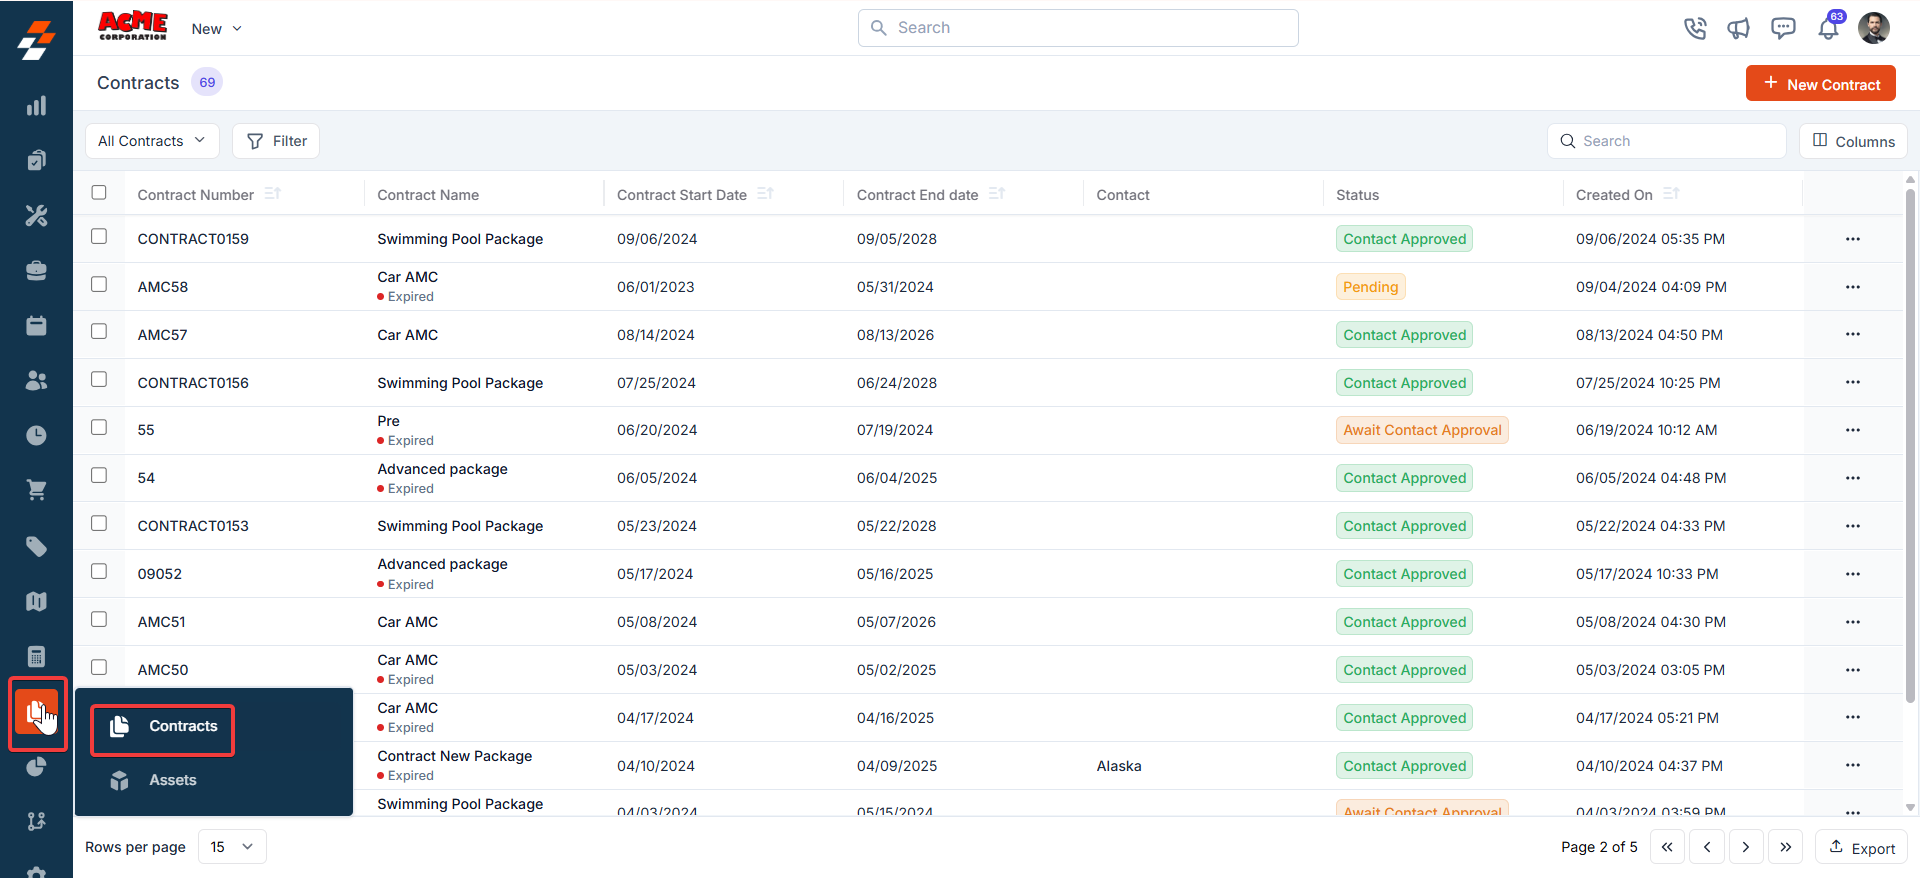
- Select the “Contracts and Assets Management” module from the left navigation menu and choose “Contracts.” You will land on the contracts listing page.
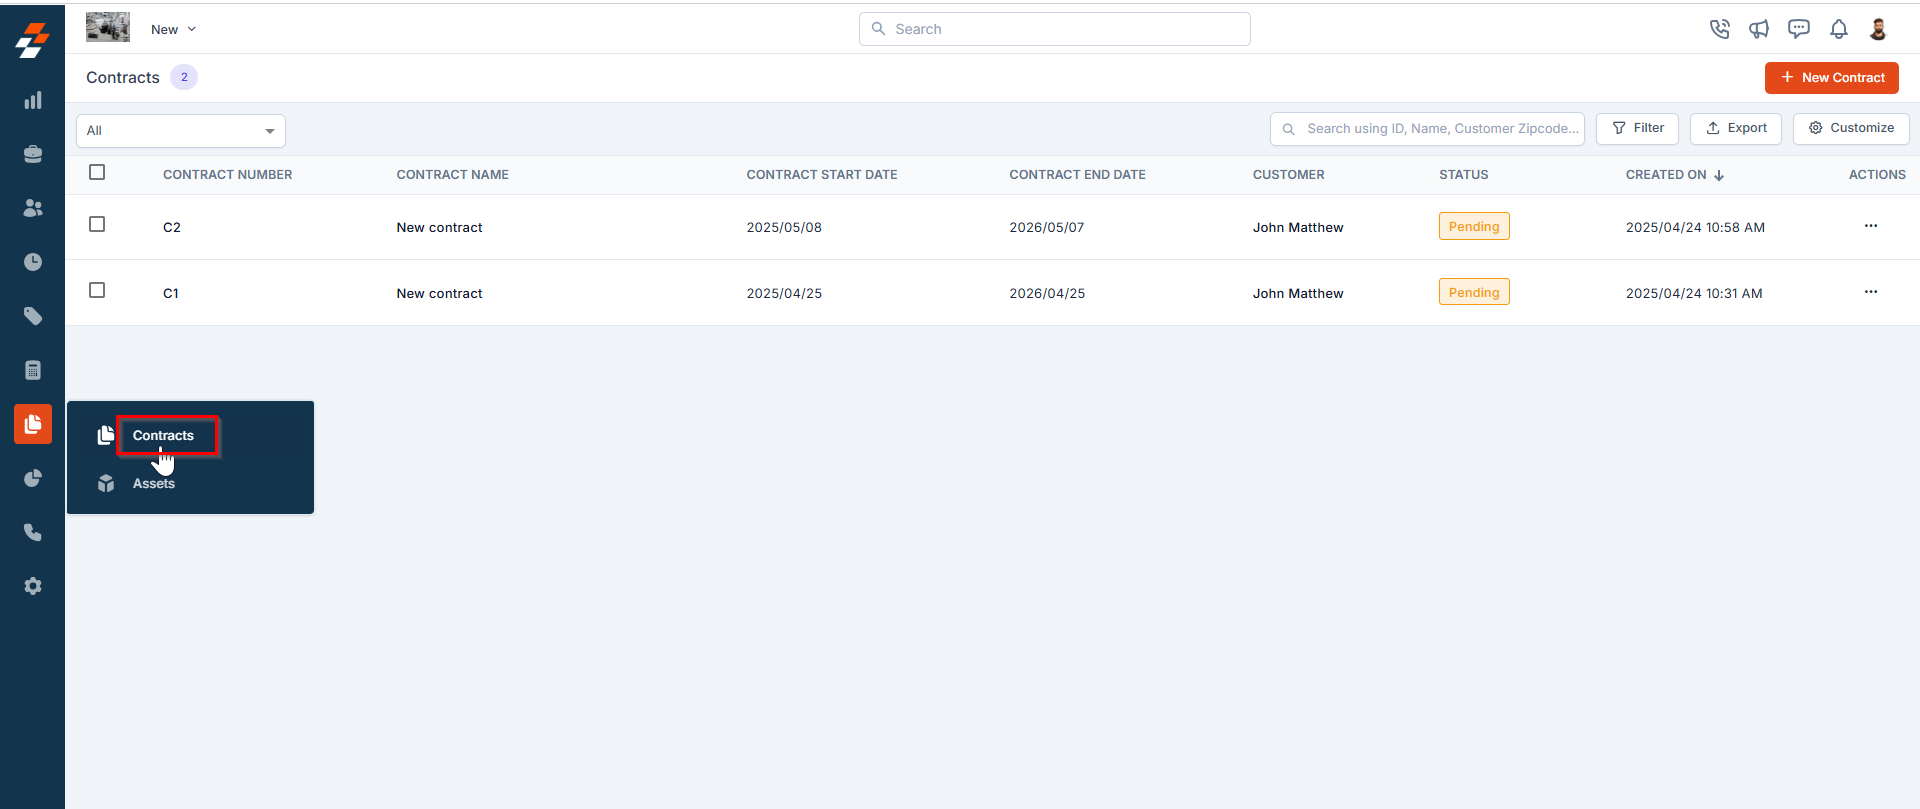
- On the contracts listing page, you can view an overview of existing contracts, including the Contract Name, Start & End Dates, Status, and more.
Exploring the listing page
Customize the Contracts listing by adding/removing or reordering columns, then Update View to overwrite or save it as a new view. Update View Click Update View to modify the current view after changes. Save as a new view Use the dropdown beside Update View → Save as new view. Create View dialog Enter the View Name (mandatory), choose Share with (User/Team) and add users, toggle Visibility to all users, and click Create. Reset View Click Reset View to restore the current view to the default. Permissions- Edit: Add/remove/reorder columns; save as new or overwrite existing views.
- View-only: Apply views but can’t edit; can Save as new view to copy without altering the original.
- Manage view: Rename, adjust Visibility (Only Me/User/Team or global toggle), Duplicate, or Delete (creator only; reverts to default/another saved view).
Pinned filters
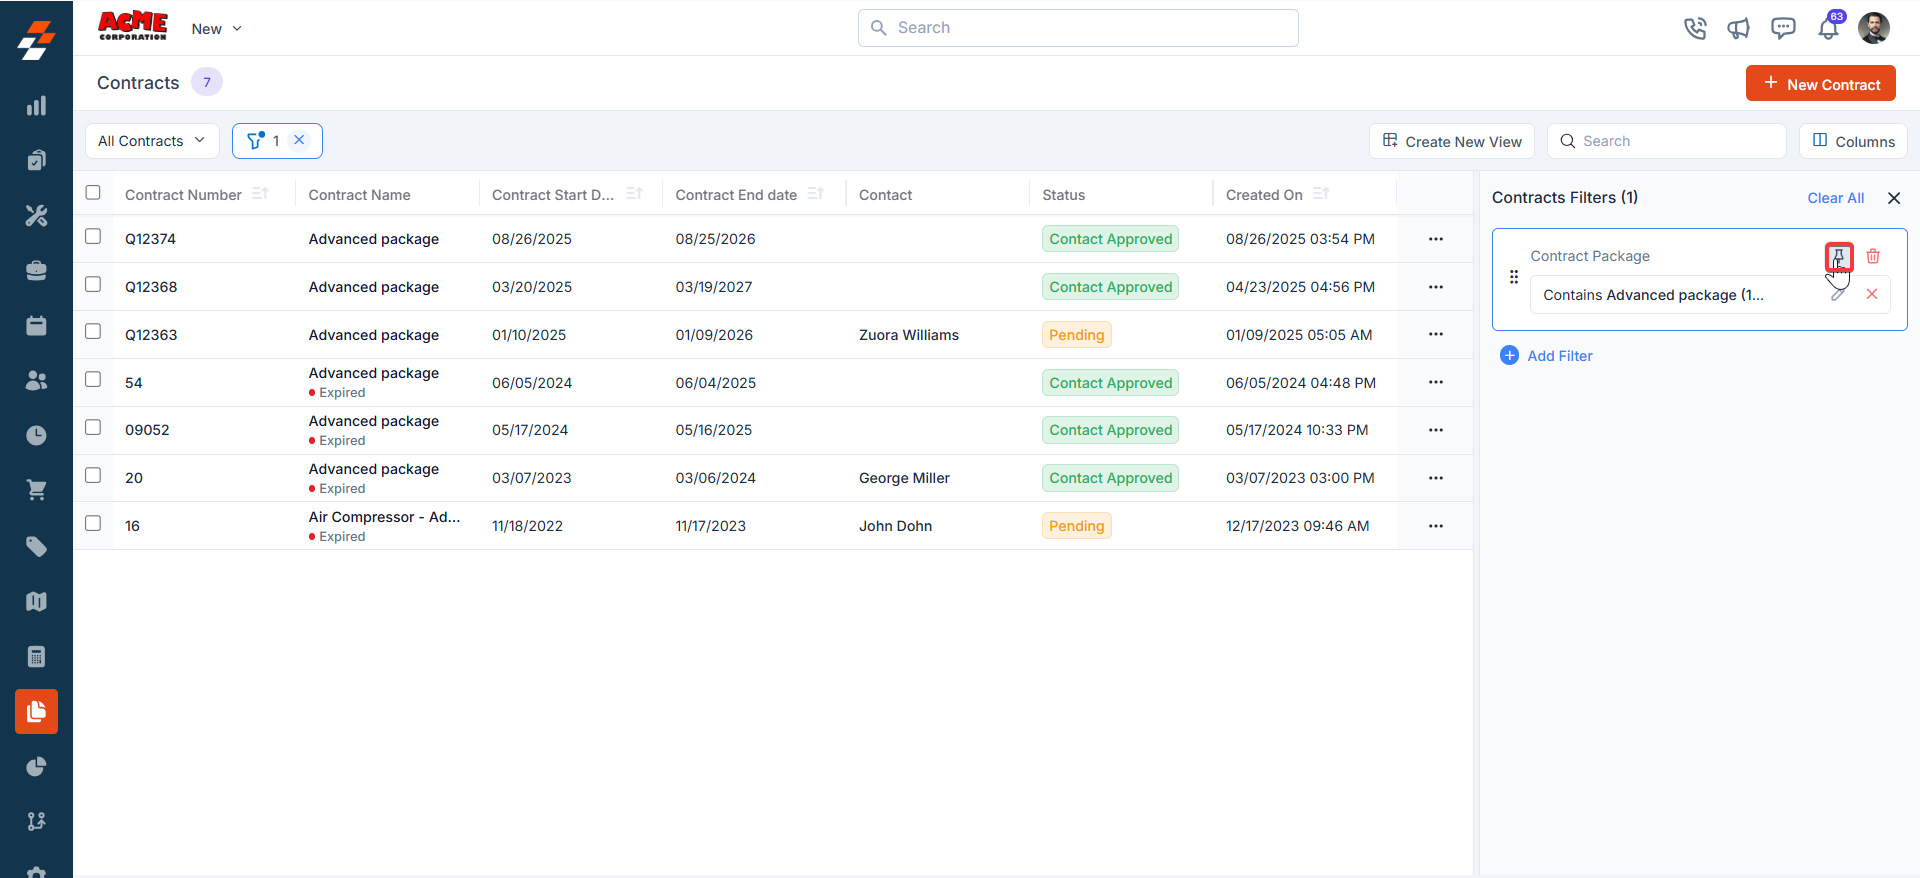
Zuper’s Contracts module lets you use pinned filters to streamline your filter experience. Pinned filters keep your most-used criteria readily accessible for quick application. Pin up to 3 filters in any module.Navigation: Contracts and Assets Management module -> Contracts -> Filters -> Pinned Filter
- Select the “Contracts” module from the left navigation menu.
- Pin Filters for Quick Access
- Once your filters are set, click the Pin Filters button in the dialog box to save them as pinned.
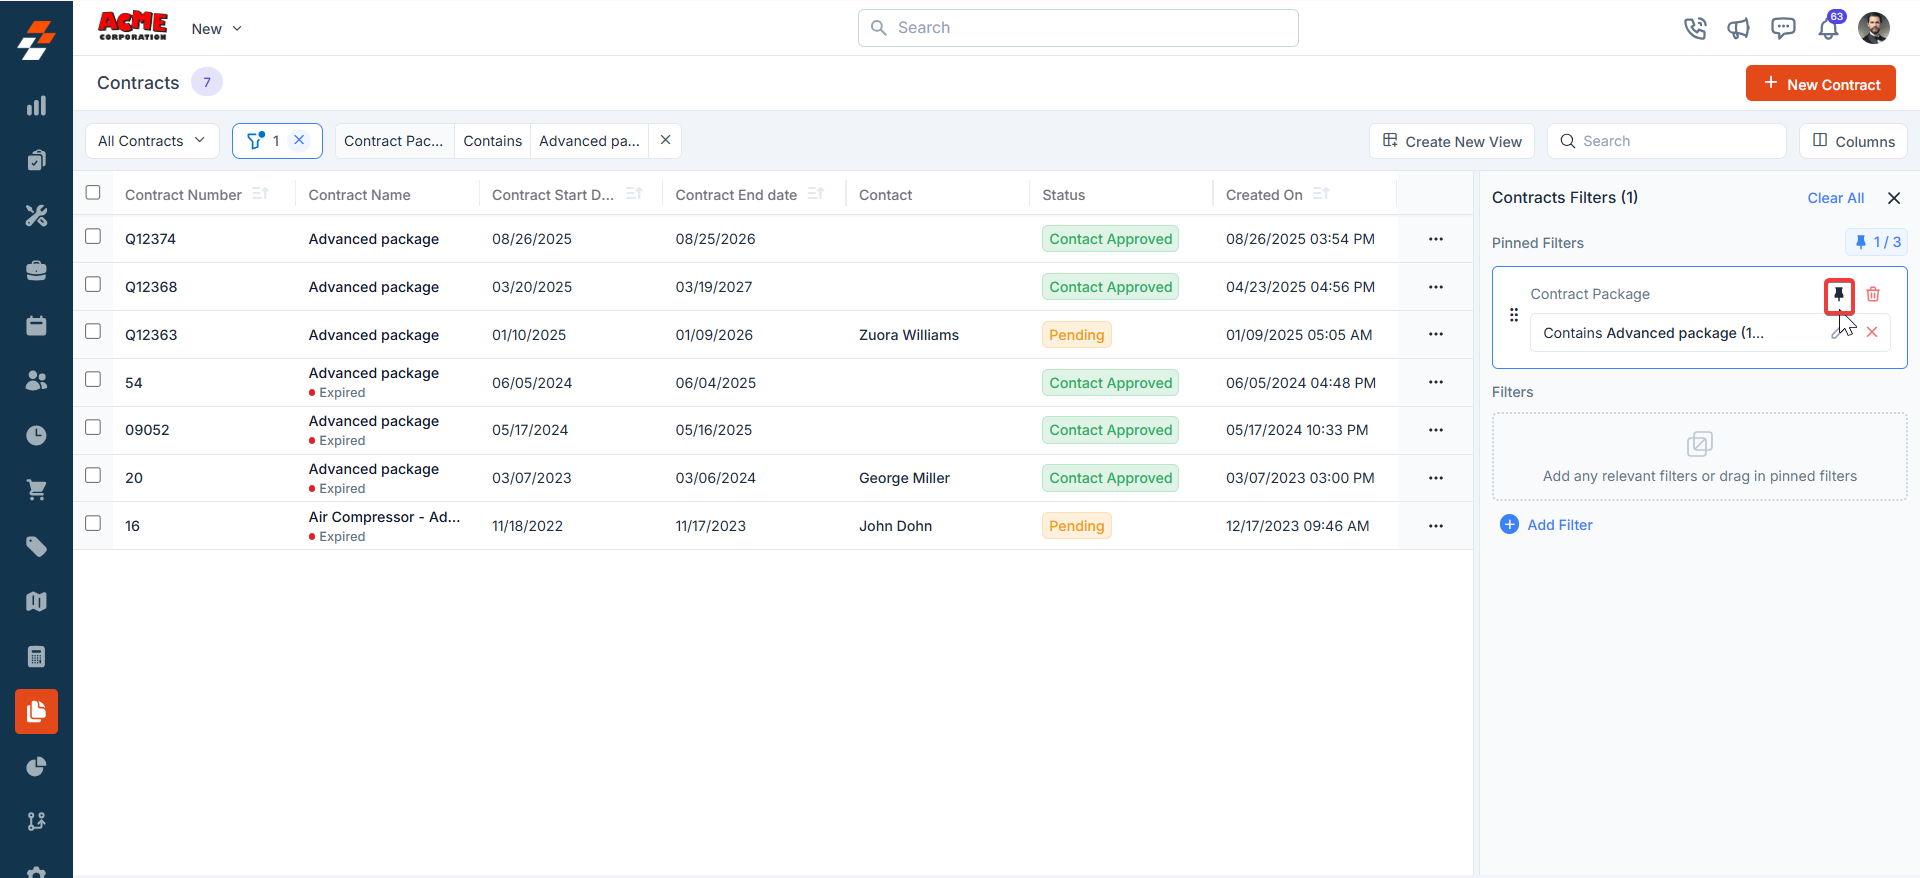
- Pinned filters appear in the dialog box’s “Pinned Filters” section, allowing you to apply them with one click in future sessions.
- To Unpin the filter:
- To unpin, select a pinned filter and click Remove.
- To apply pinned or default filters, open the dialog box and select them.
- Use Clear All to remove active filters.
Managing contract details
Once a contract is created or accessed from the listing page, the Contract Details Page serves as your central hub for managing its lifecycle. The details page has a three-column layout, providing quick access to information and actions within each panel.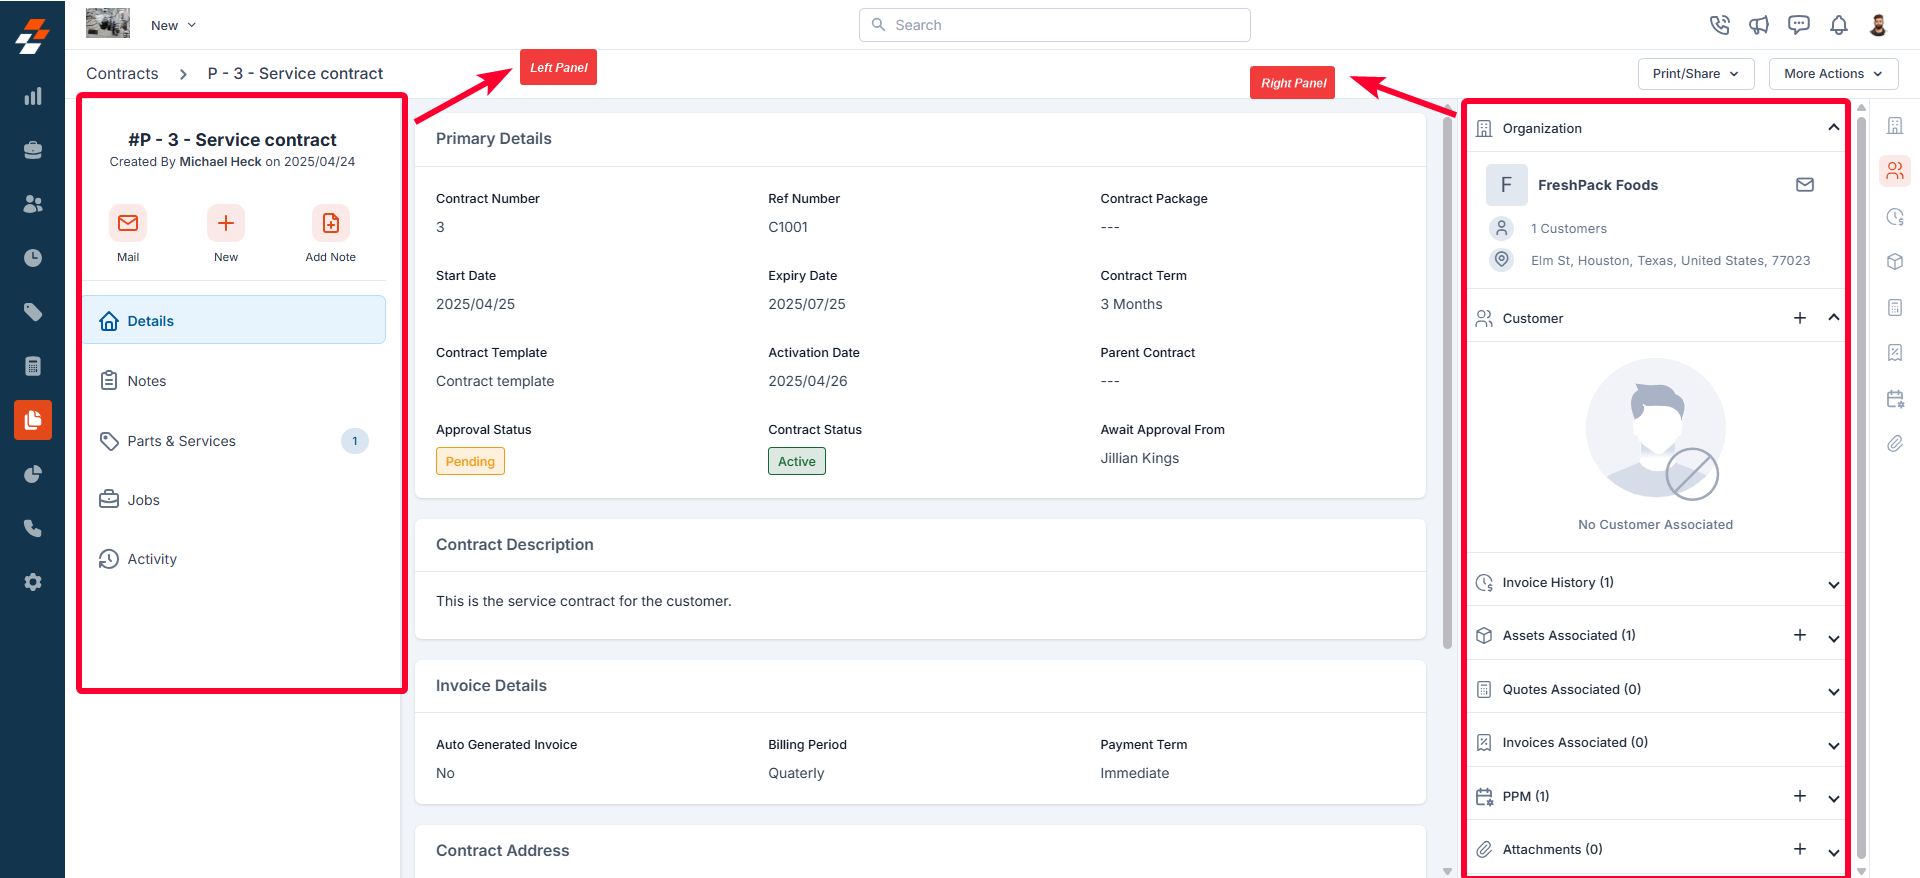
Left panel
The left panel contains contract-related details such as the contract name and number. Below this, you will find the quick actions bar, which provides contextual action buttons, including options to email the customer, add notes, and create a new job for the contract. From here, you also have quick access to view information such as contract details, associated notes, parts & services, jobs, and activities.Mail customer
Mail customer
Use the “Mail” button to view and mail the contact or the organization for whom you’re creating this contract.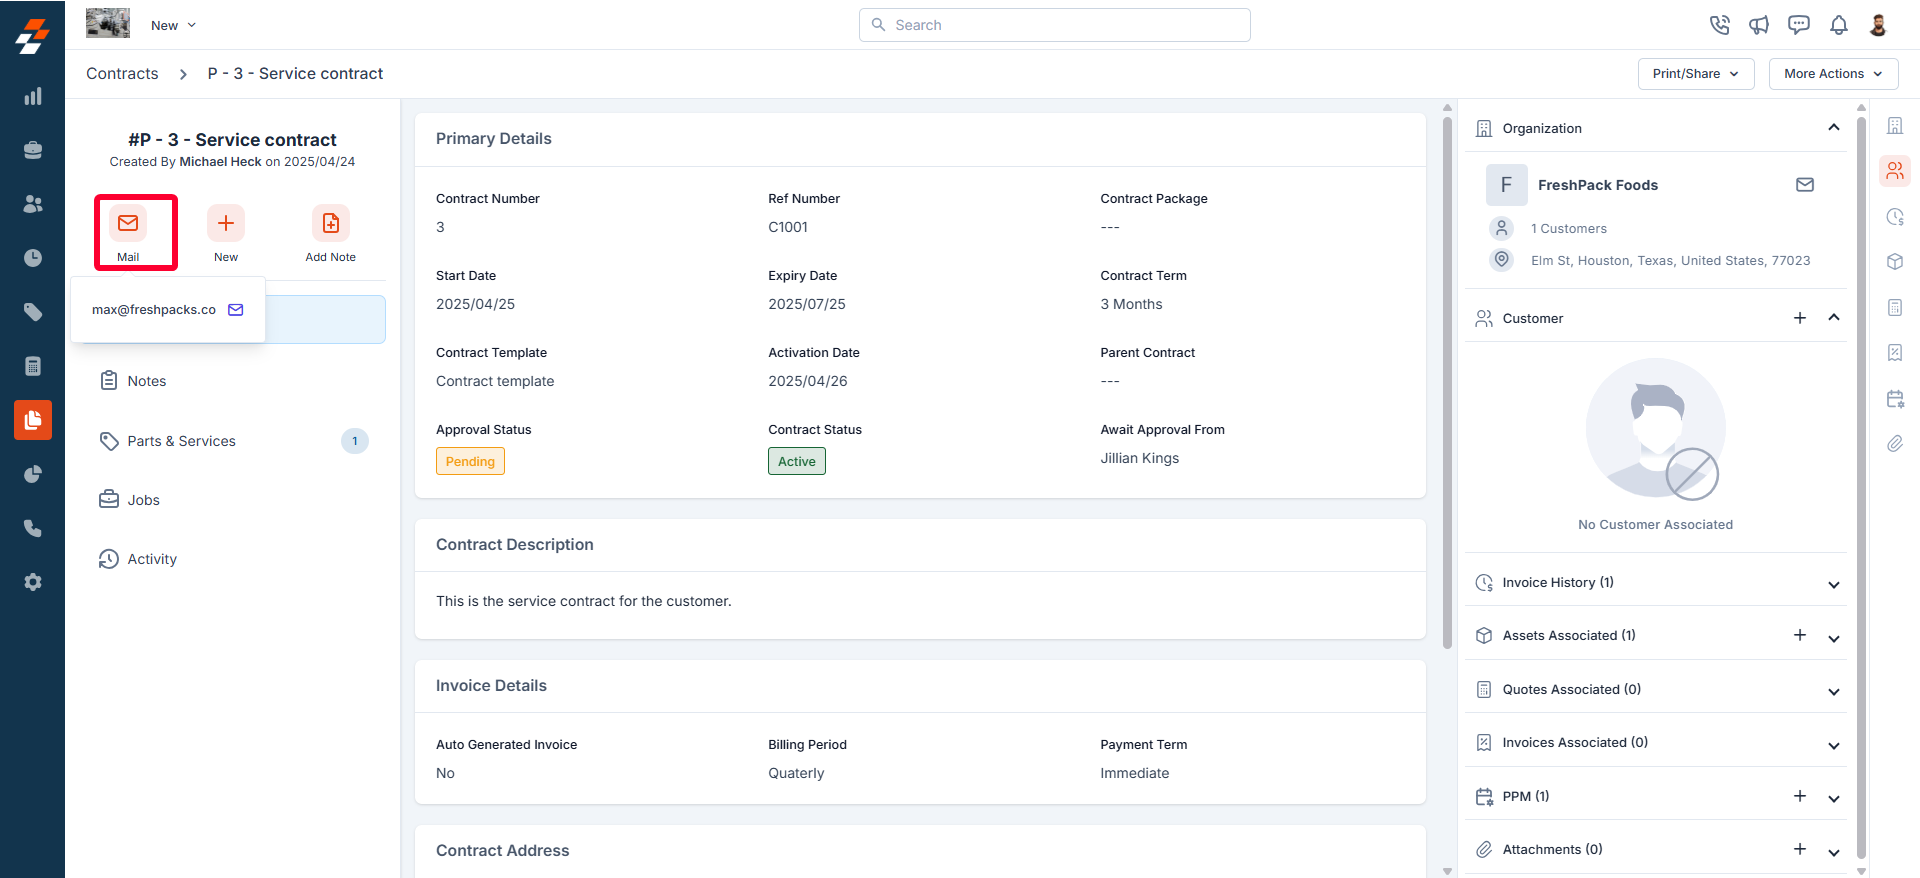
Create new job
Create new job
Use the “+ New” button to create a new job for the contract, if required. For step-by-step instructions on how to create a new job, see the Creating a new job article. 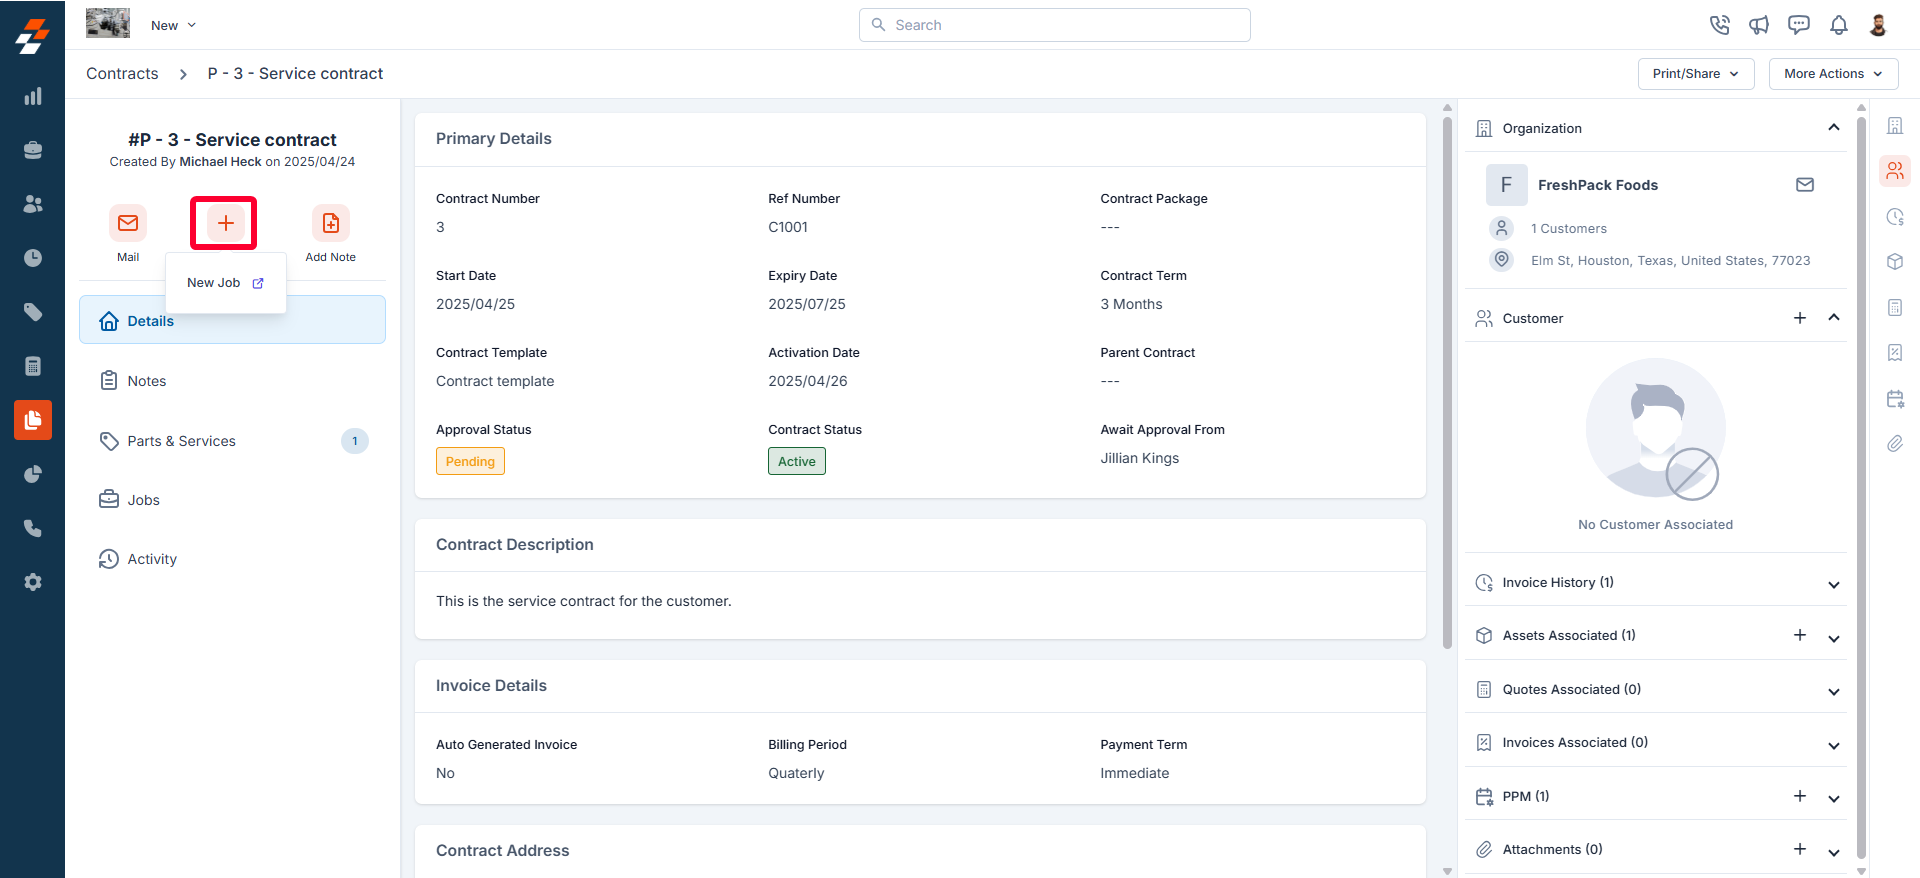
Add note
Add note
Use the ”+ Add Note” button to create a new note. Notes are comments or information added to a contract over its course. Your notes can be anything ranging from a simple text reminder to an image of the item, service, video, or document. All added notes can be viewed under the Notes Section. 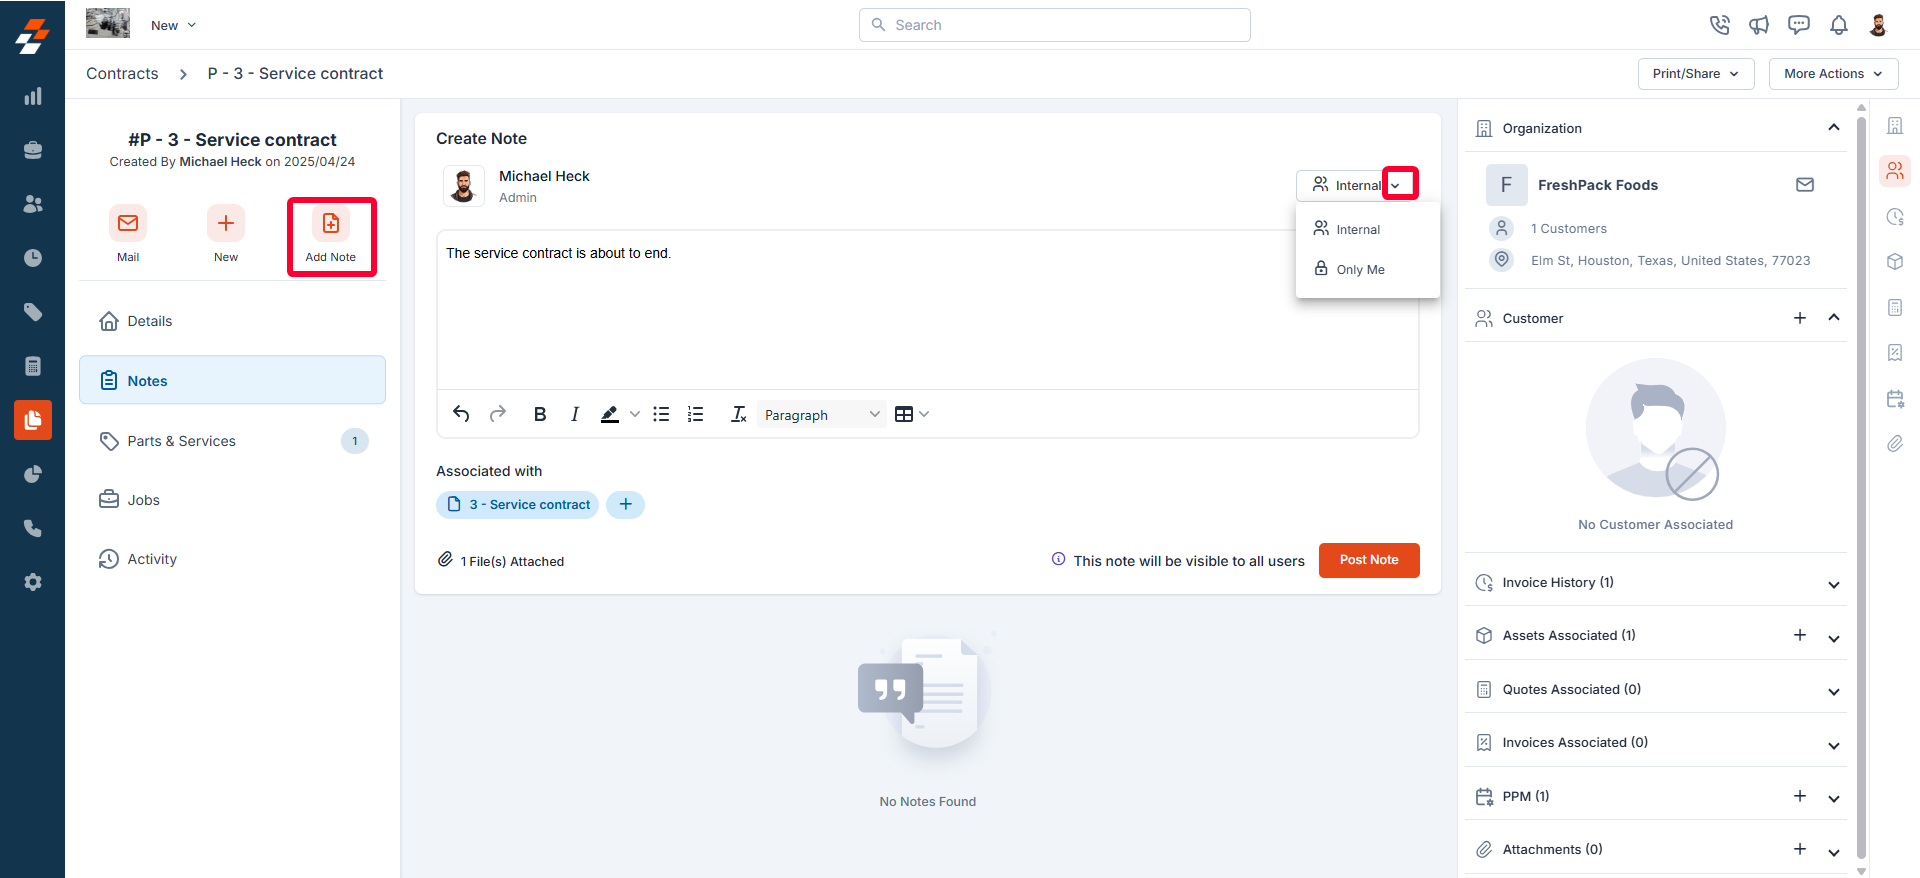
View contract details
View contract details
The contract details section provides an overview of all contract-related information, including the contract number, contract type, contract period, invoice details, contract address, and more. 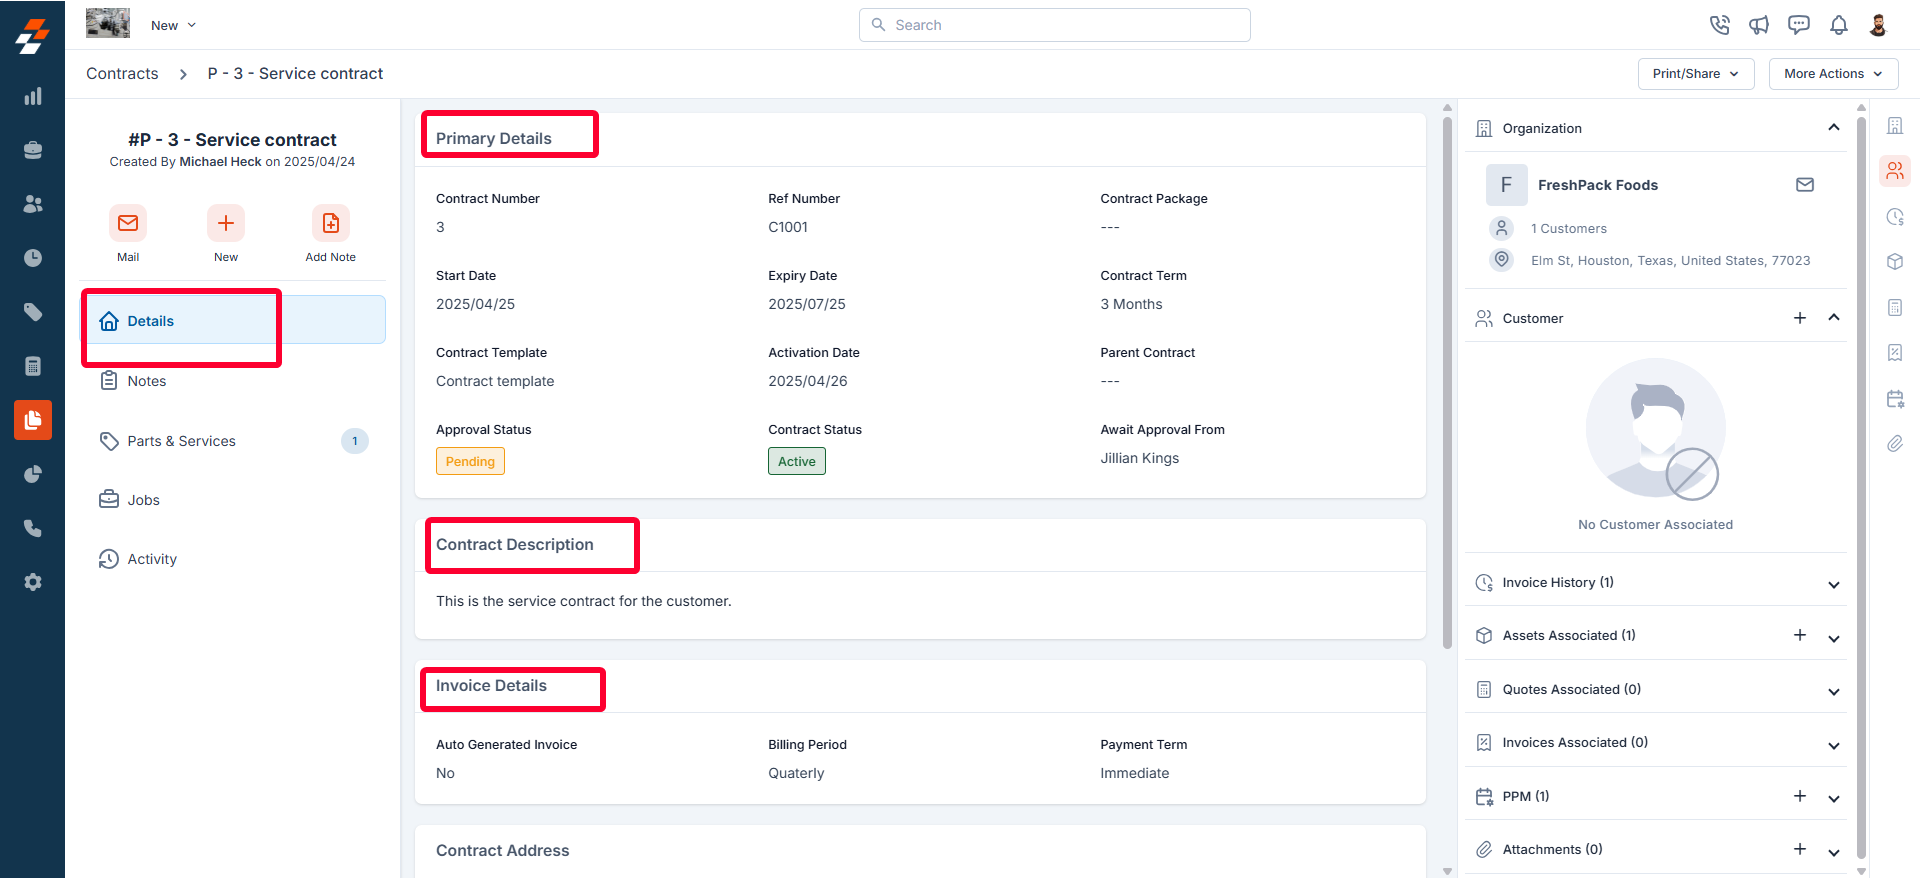
View notes
View notes
- The Notes section allows you to view, add, and manage notes related to the contract. From here, you can use the rich text editor to add any new note. To tag a user to a note, you can use @ and key in the name to tag the user.
-
You can attach multimedia files such as images, audio, video, and documents related to the contract. Use the “+” option to associate the notes with other modules such as customer, property, etc.

- You can also choose one of the following options for how you’d like the notes to be visible:
- Public - This privacy setting will help you make the note public to all, including the customer.
- Internal (Default) – This privacy setting will help you make the note visible to all your Zuper users in your account.
- Only me – This note is visible only to the user who created the note.
Note: Contract notes can be edited or deleted only by the user who created them.
View associated parts & services
View associated parts & services
This section allows you to view the parts and services associated with the contract. It provides an overview of all the items included, whether automatically populated from the contract package or manually added.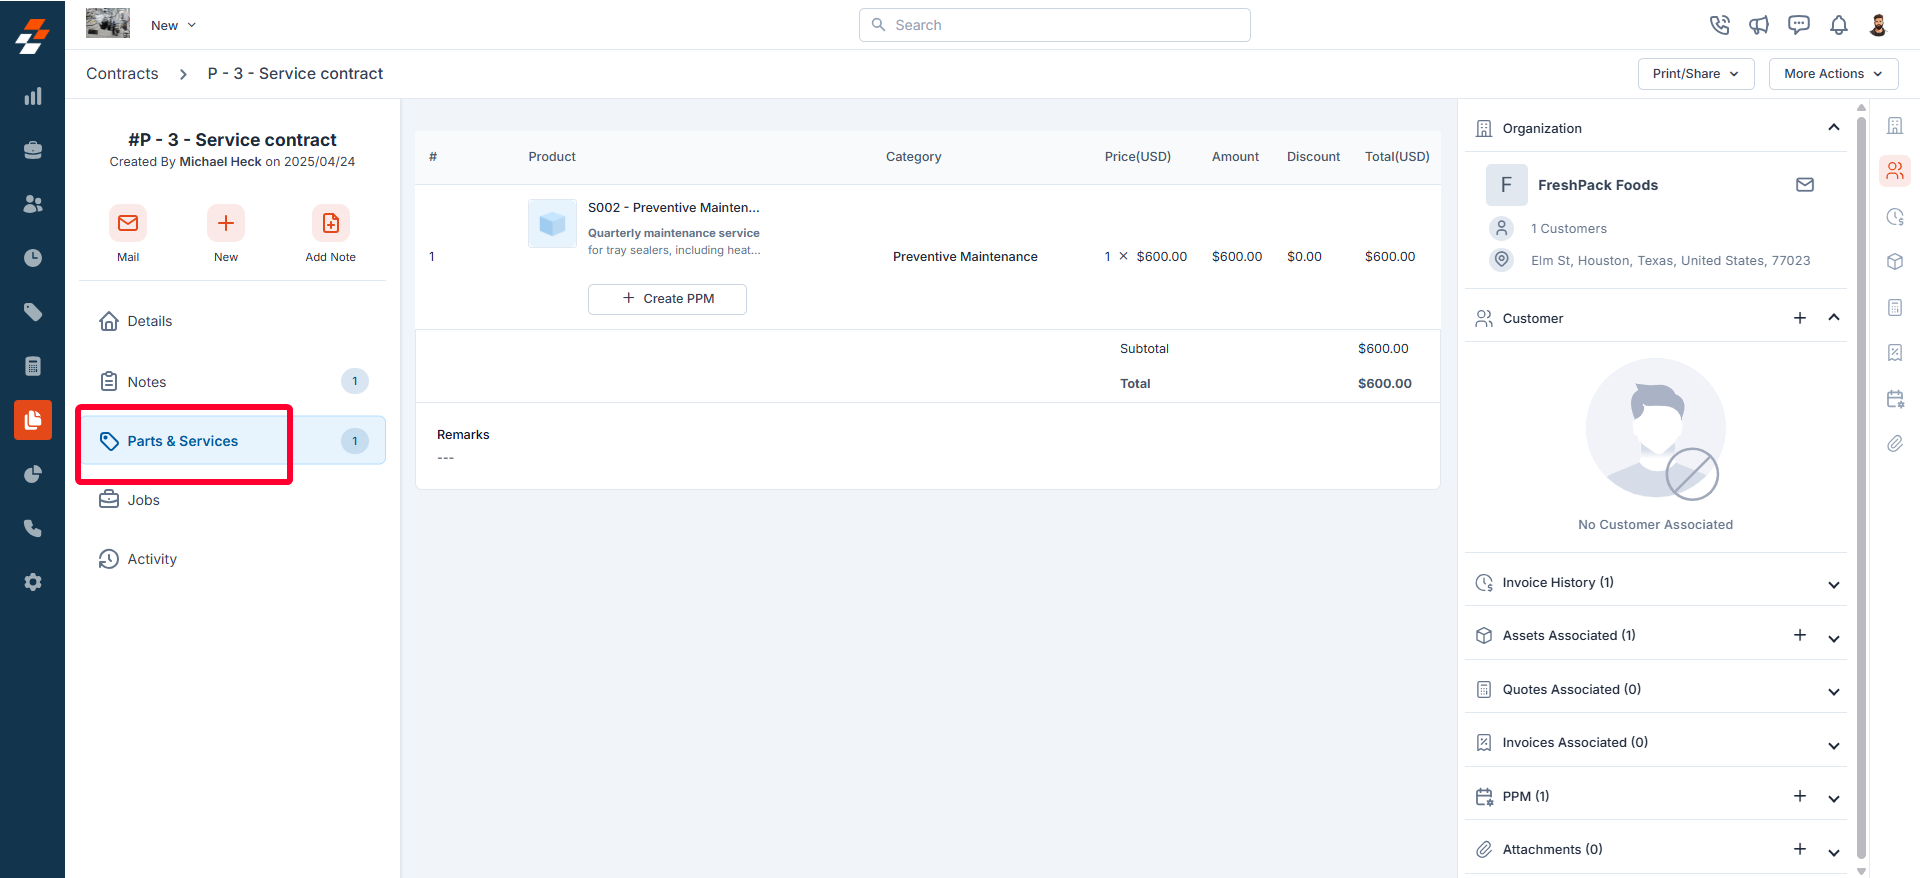
View associated jobs
View associated jobs
The Jobs section allows you to view all jobs associated with the contract. This includes both ongoing and completed jobs, providing you with a comprehensive overview of job statuses, schedule, and related details.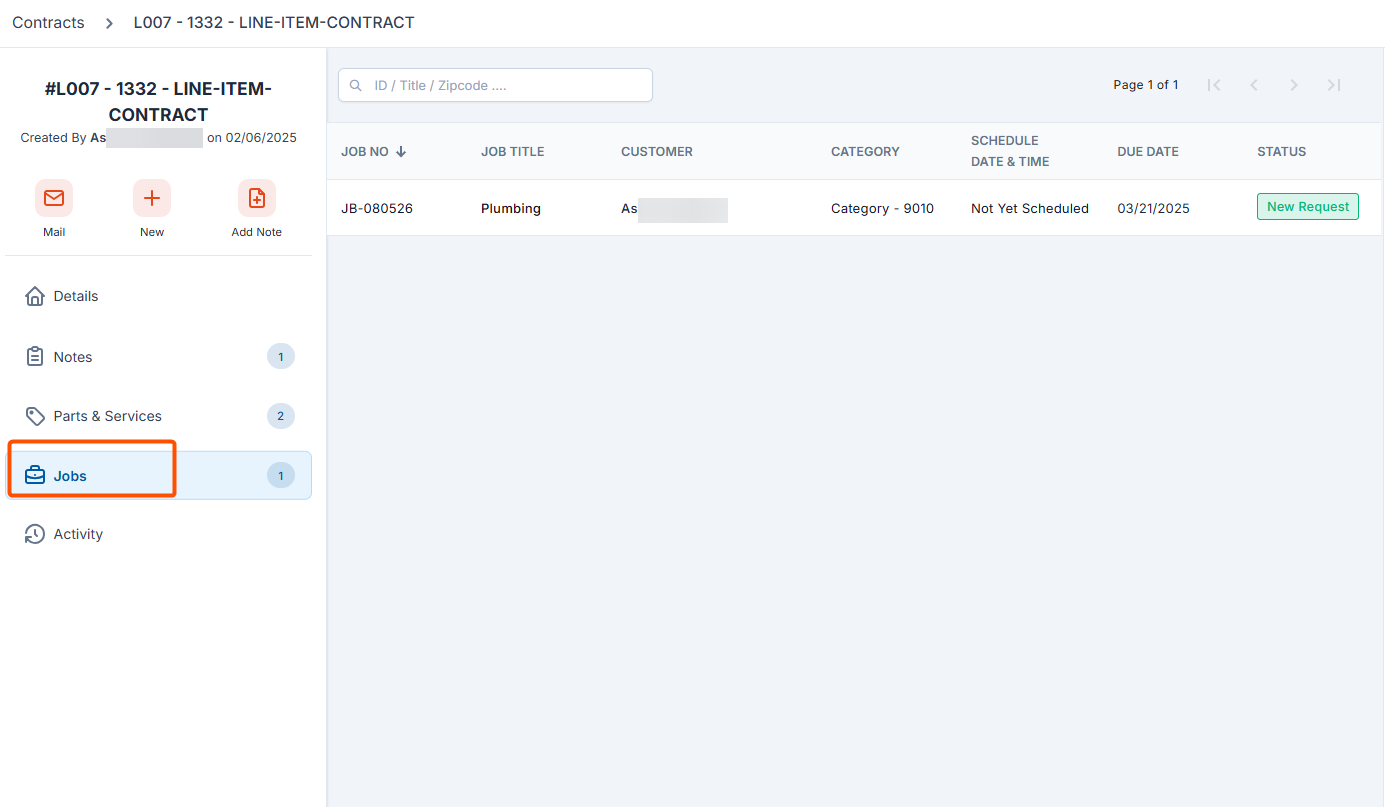
View activity
View activity
The activity section on the details page displays a log or timeline of all actions and updates related to the contract, helping you stay informed about recent changes and track the contract’s progress. 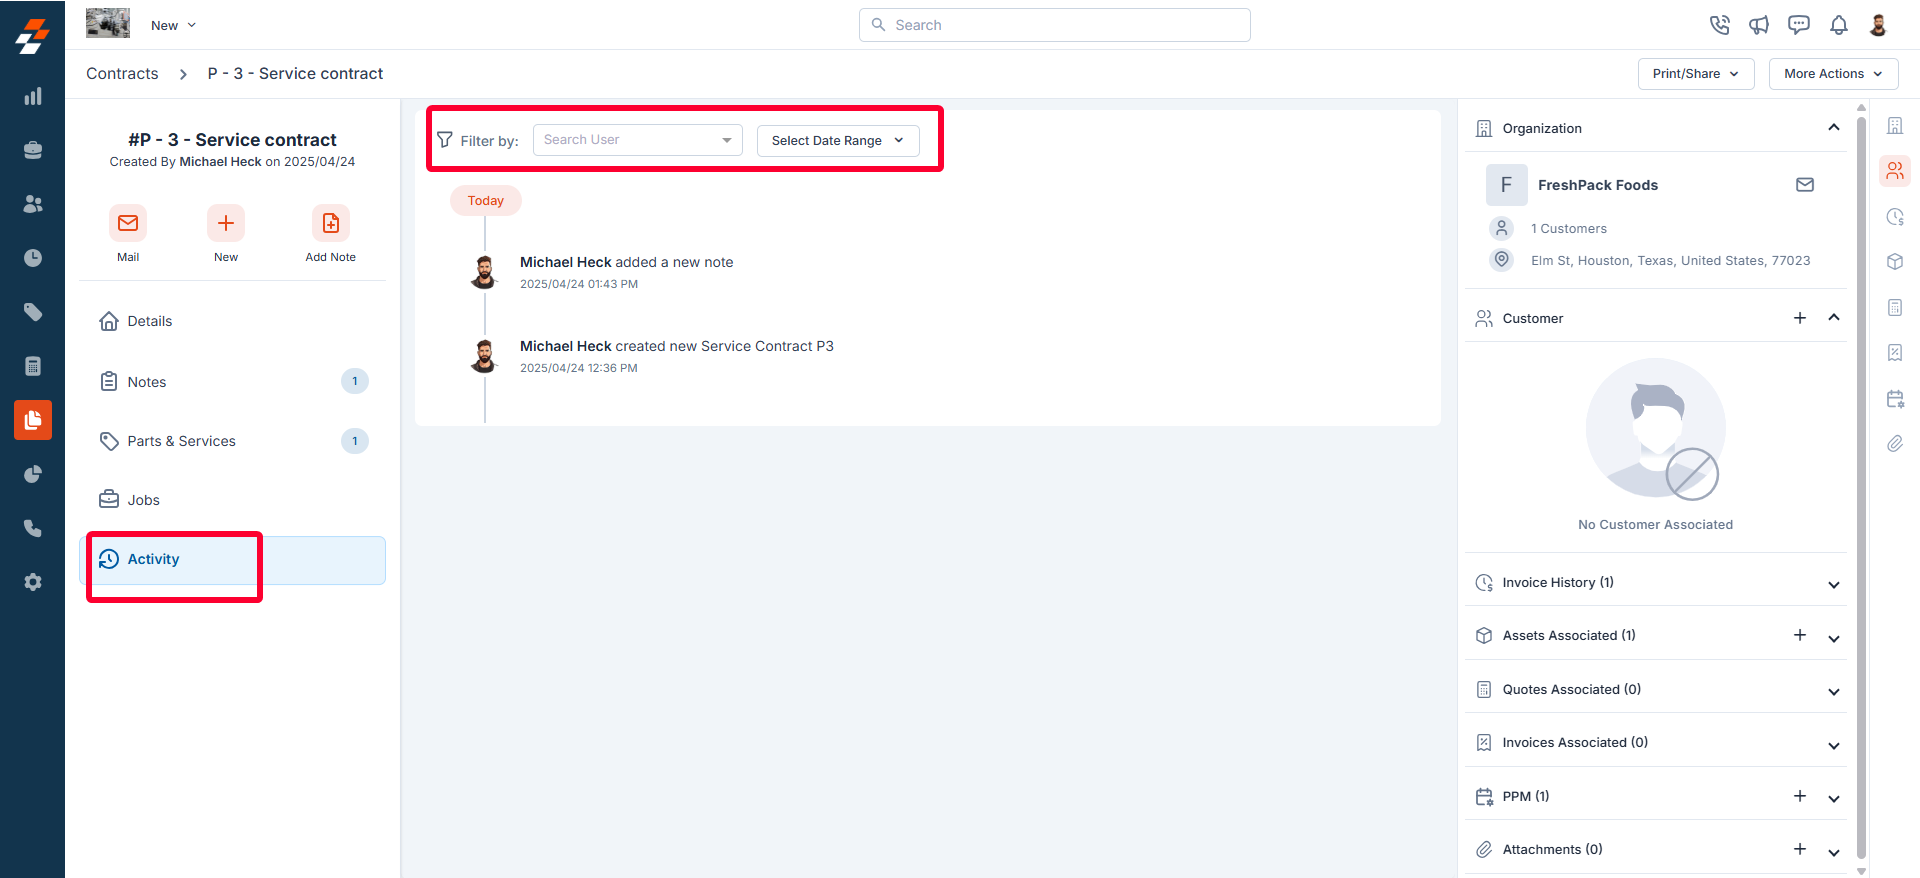
Right panel
In the right panel, view the organization or contact information associated with the asset, and manage its links to various modules, such as properties, assets, projects, organizations, and more. To associate a module, click the “+” icon next to the desired module.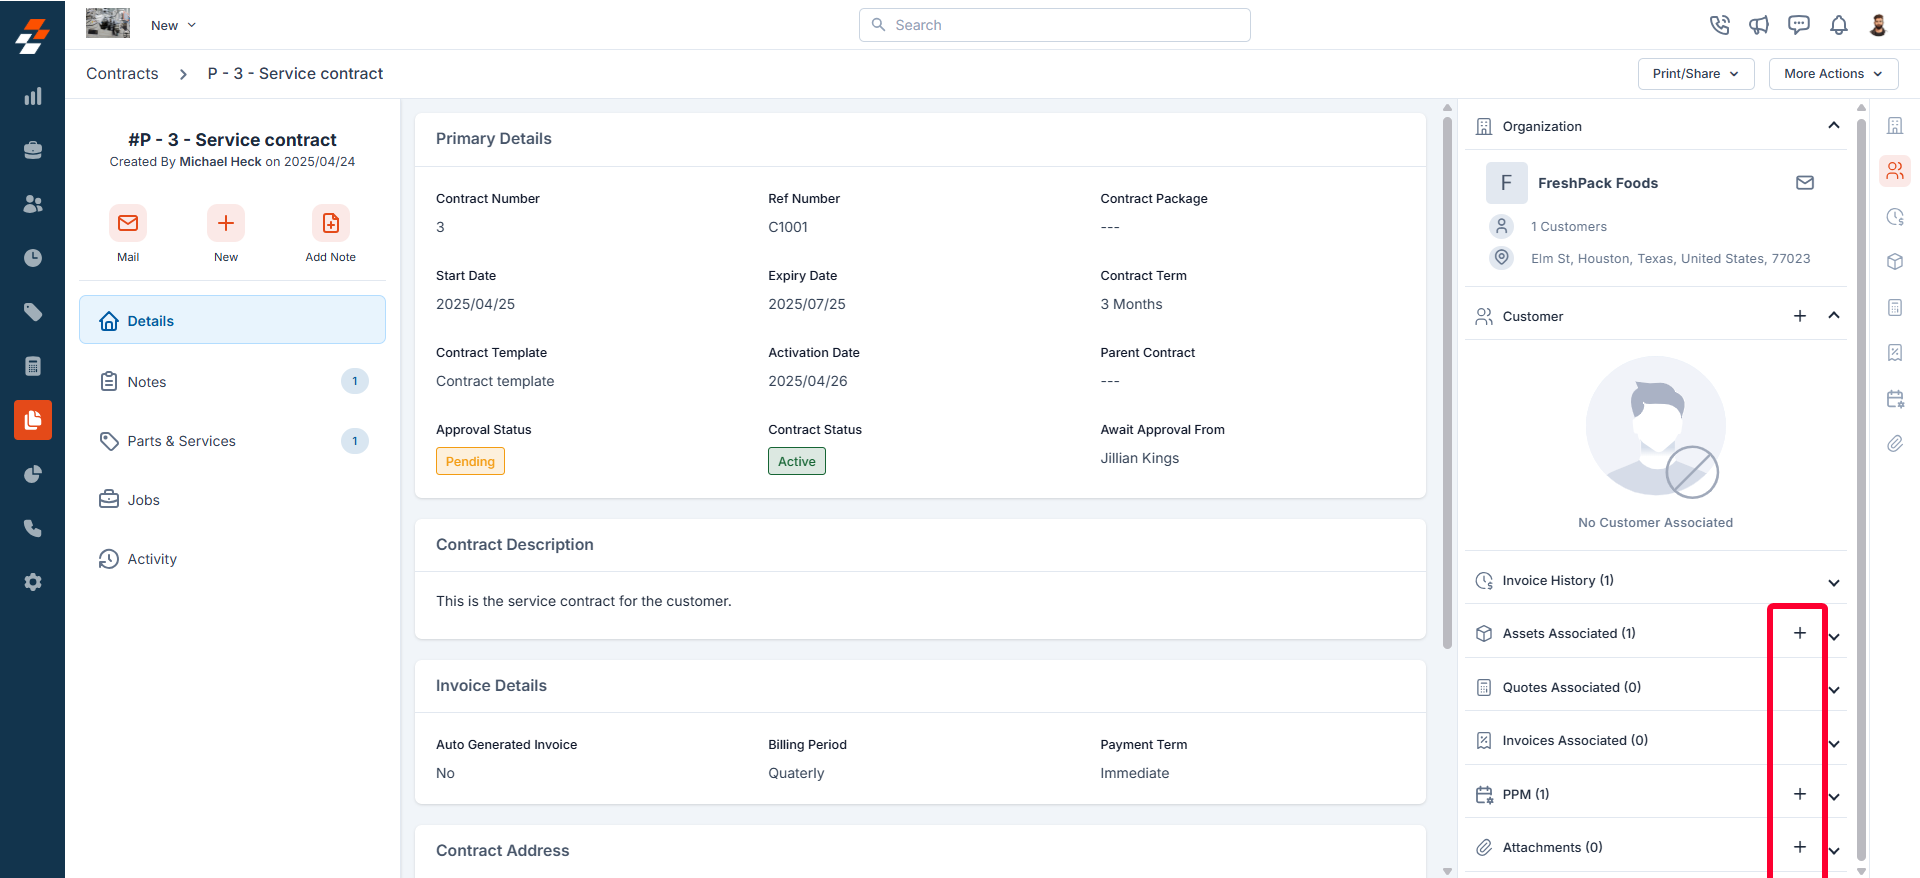
More actions
Managing contracts doesn’t stop at viewing details—you can perform various actions such as printing, sharing, editing, cloning, or deactivating the contract as needed.Print and Share
Print and Share
To print or share the contract via email, click the “Print/Share” option from the top right corner of the job details page and choose either “Print/Save as PDF” or “Share via email” option. 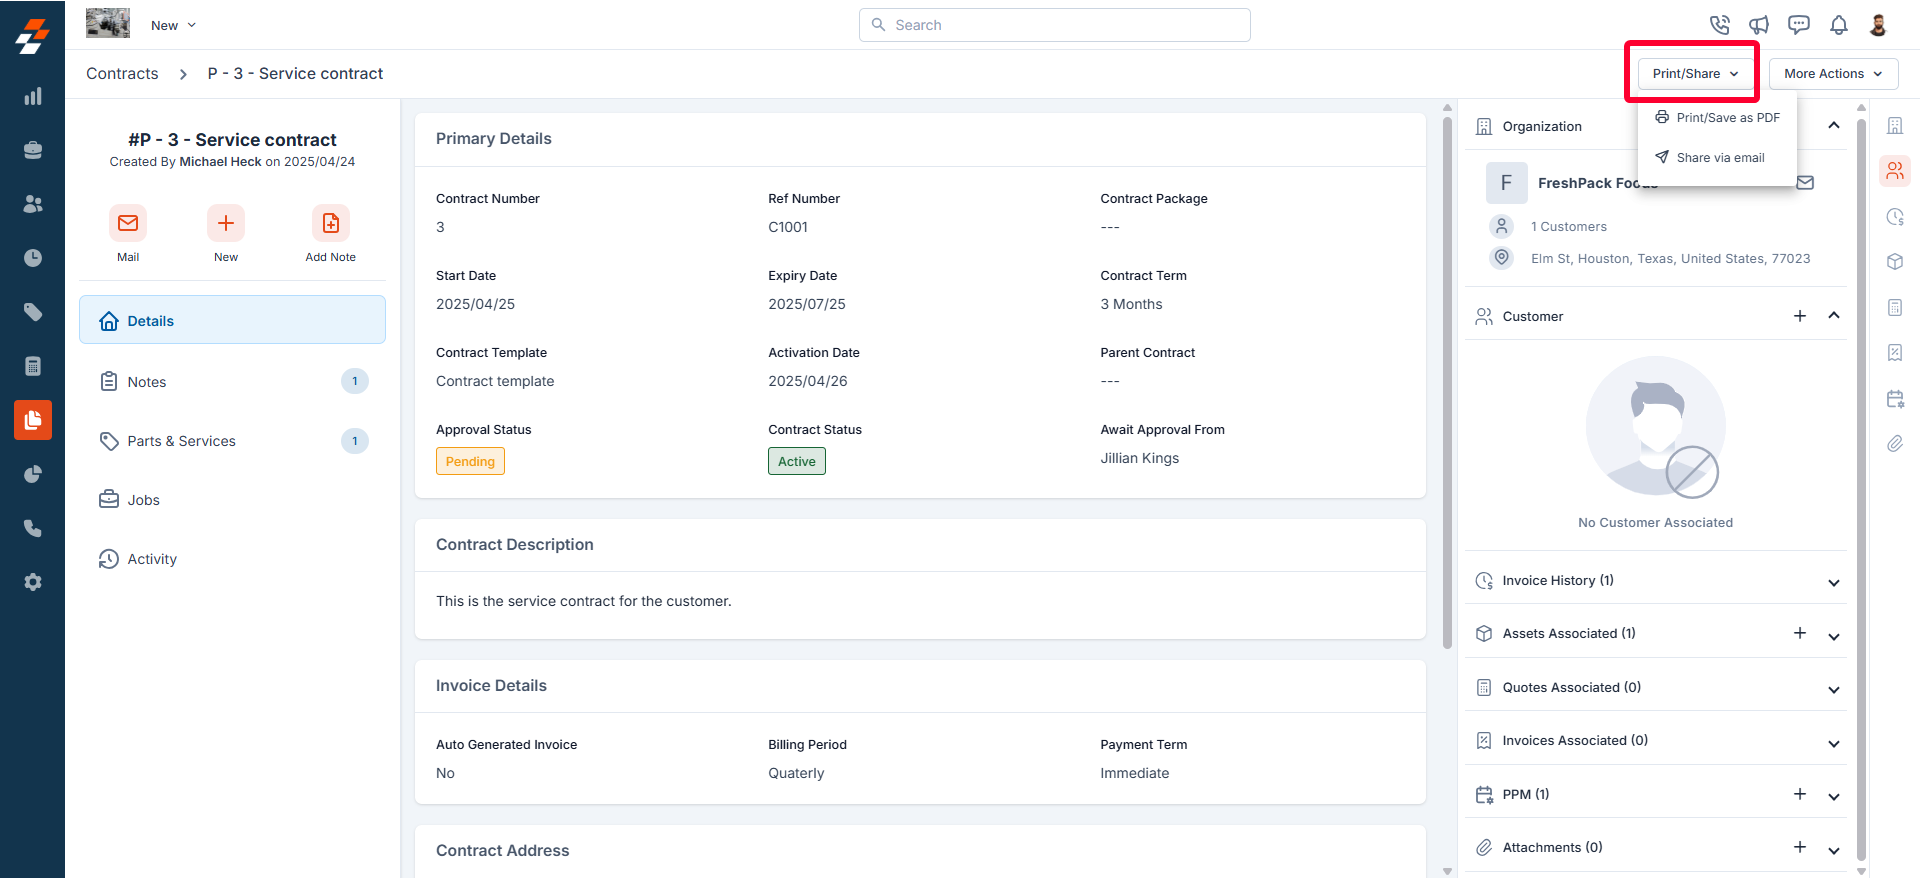
Edit contract
Edit contract
To modify any of the existing contract details, click “More Actions” at the top right corner of the page and select ‘Edit Contract.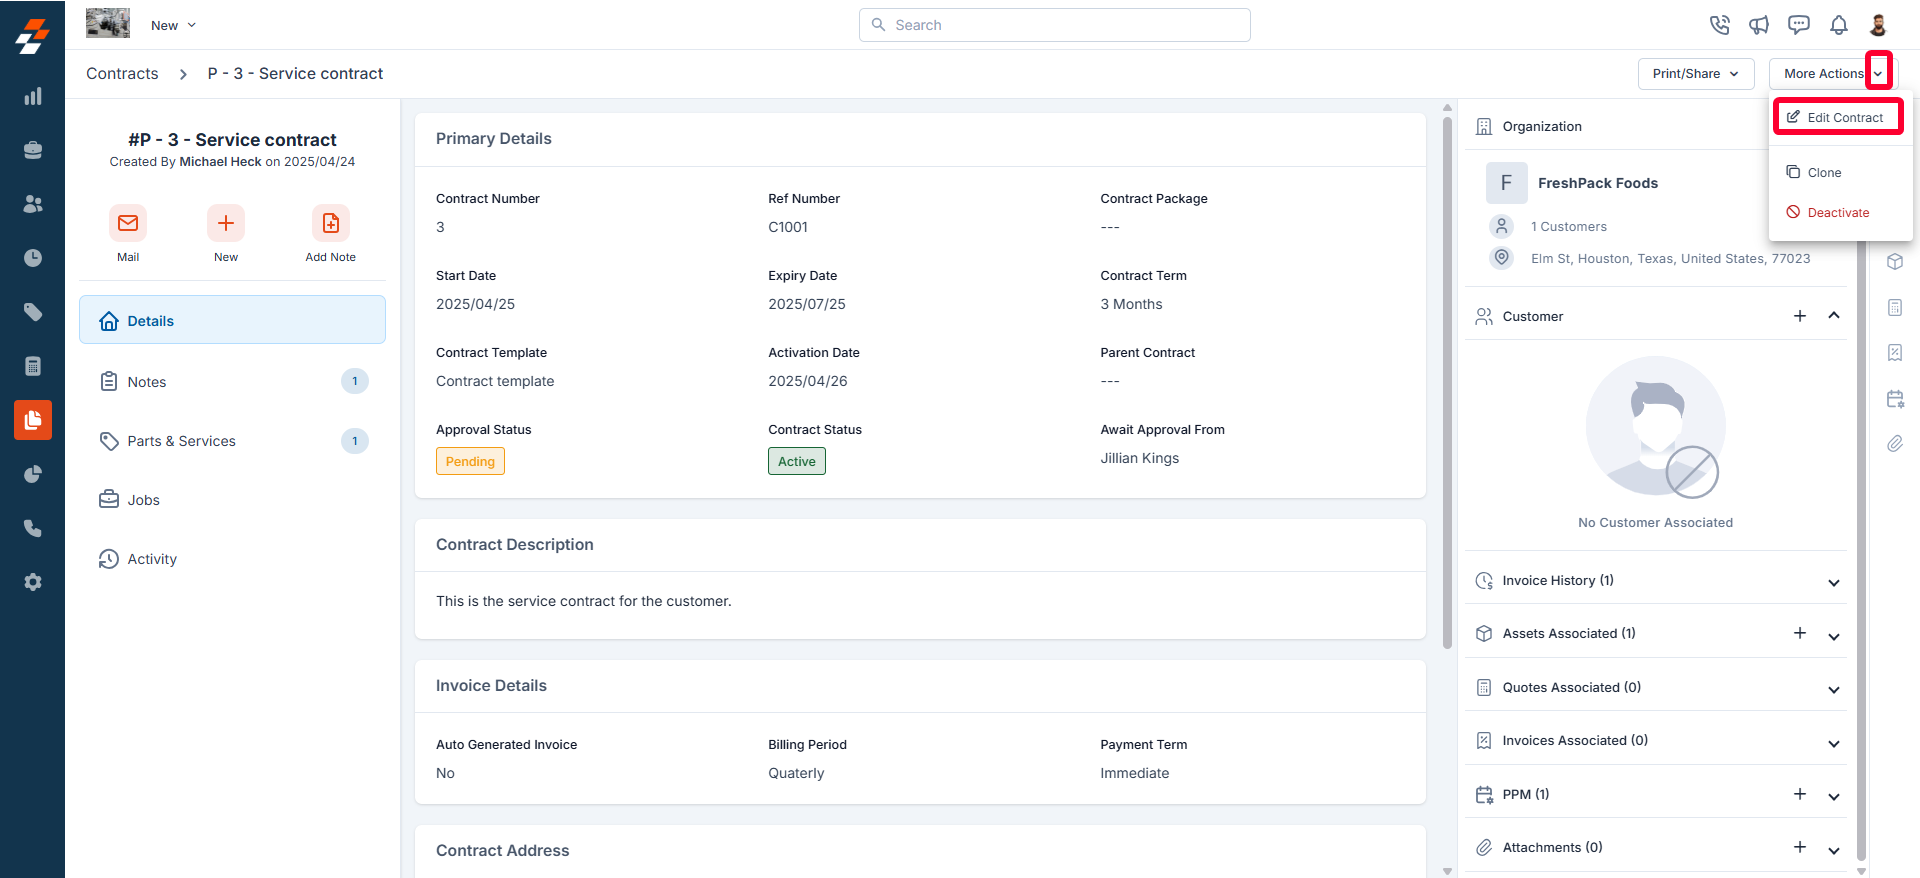
Clone existing contract
Clone existing contract
The Clone option allows you to quickly create a replica of an existing contract, saving you time. To do this, click “More Actions” at the top right corner of the page and select “Clone.” The current contract details will be duplicated onto a new contract page, where you can make any necessary edits before saving.
Deactivate contract
Deactivate contract
To deactivate/disable the contract, click “More Actions” at the top right corner of the page and select “Deactivate.” Once deactivated, you will have the option to delete it if needed.