Navigation: Contracts and Assets Management module -> Contracts -> + New Contract
To create a new contract
- Select the “Contracts and Assets Management” module from the left navigation menu and choose “Contracts.”
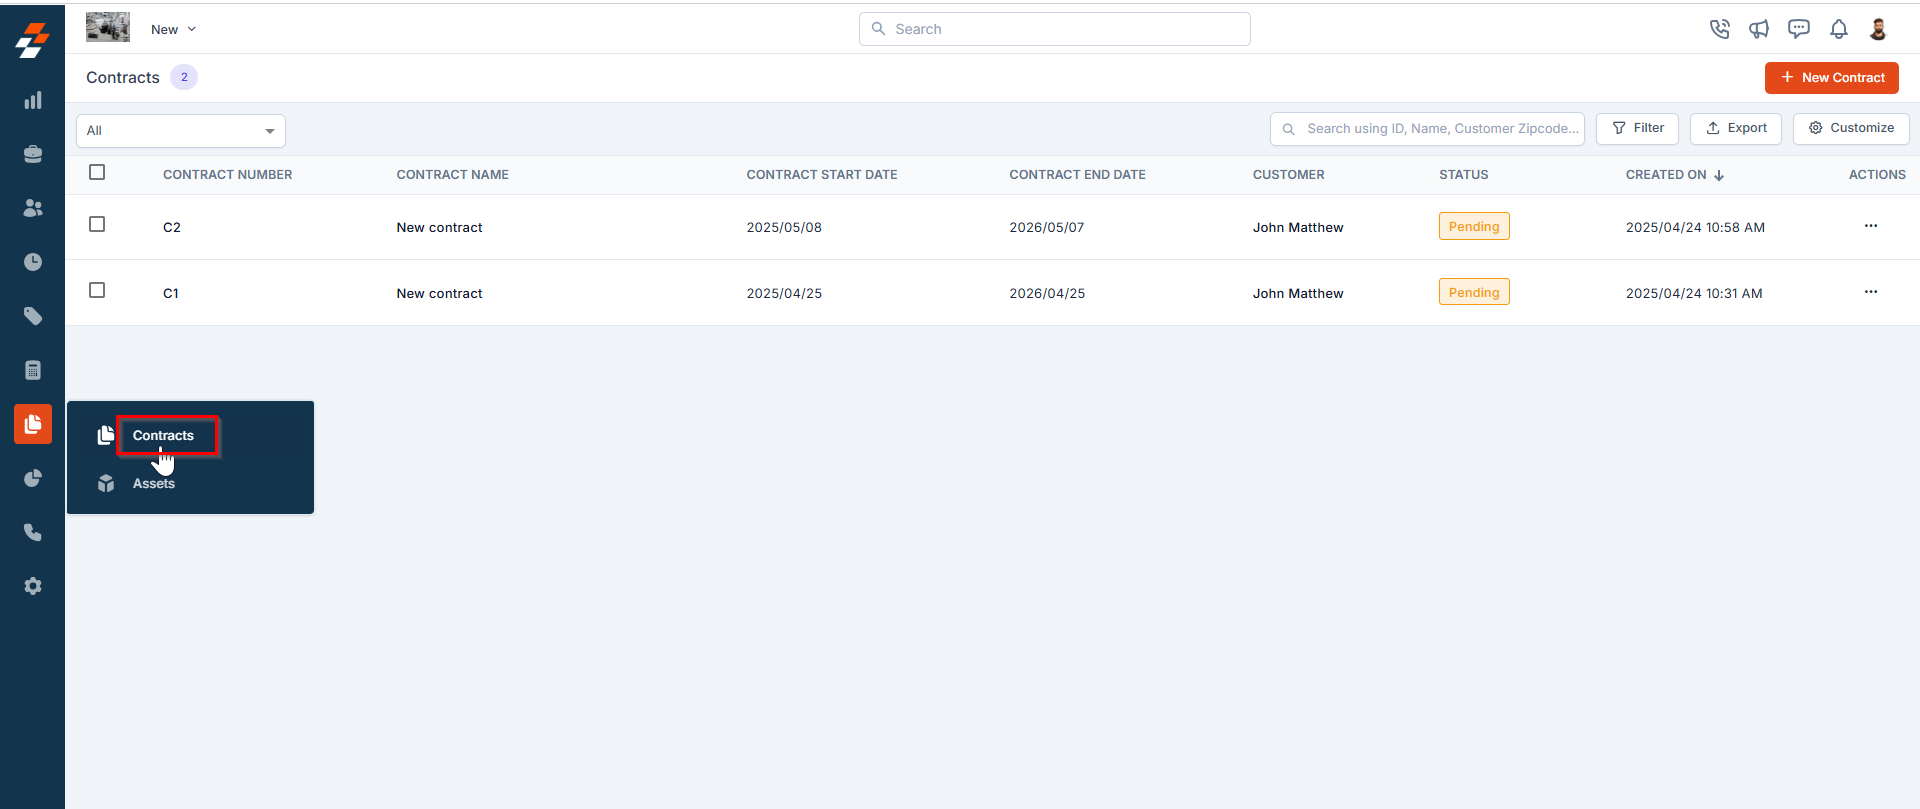
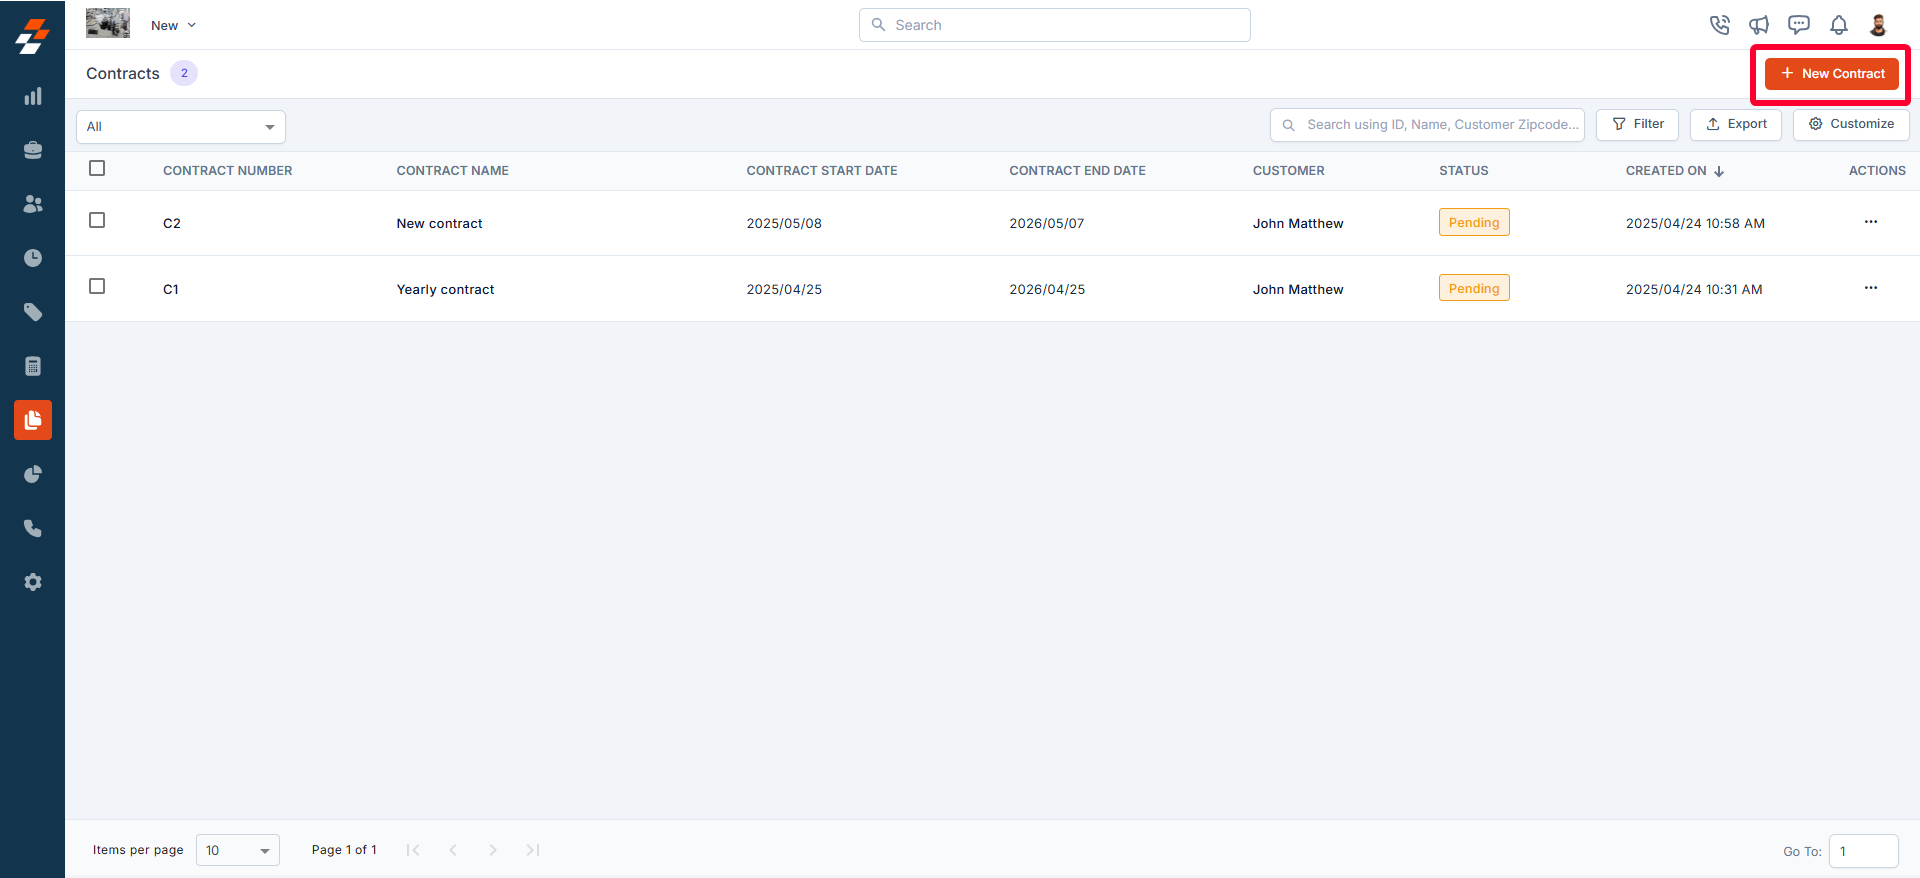
- On the contracts listing page, you will see an overview of existing contracts, including Contract Names, Start & End Dates, Status, and more.
- Click the “+ New Contract” button at the top right corner of the page to begin creating a new contract.
- The new contract creation page appears in a user-friendly three-pane layout, making data entry easier:
- Left Panel: Enter the contract details, term, and address.
- Center Panel: Add important contract information such as contract type (new/renewed), description, and associated parts & services.
- Right Panel: Associate contracts with relevant modules like customers, invoice history, properties, assets, and more.
A. Contract Details

- Contract Package: Select a package from the dropdown menu. These packages can be configured under Settings > Configuration Settings > Contracts > Contract Packages.
Note: When selecting a package, the contract period, type, and parts & services will be auto-filled based on the package details.
- Contract Prefix: Enter a prefix to help identify the contract.
- Contract Name(Mandatory): Provide a unique name to identify the contract
B. Contract Period
- Contract Term(Mandatory): Define the contract period in months.
- Contract Start Date(Mandatory): Set the start date of the contract.
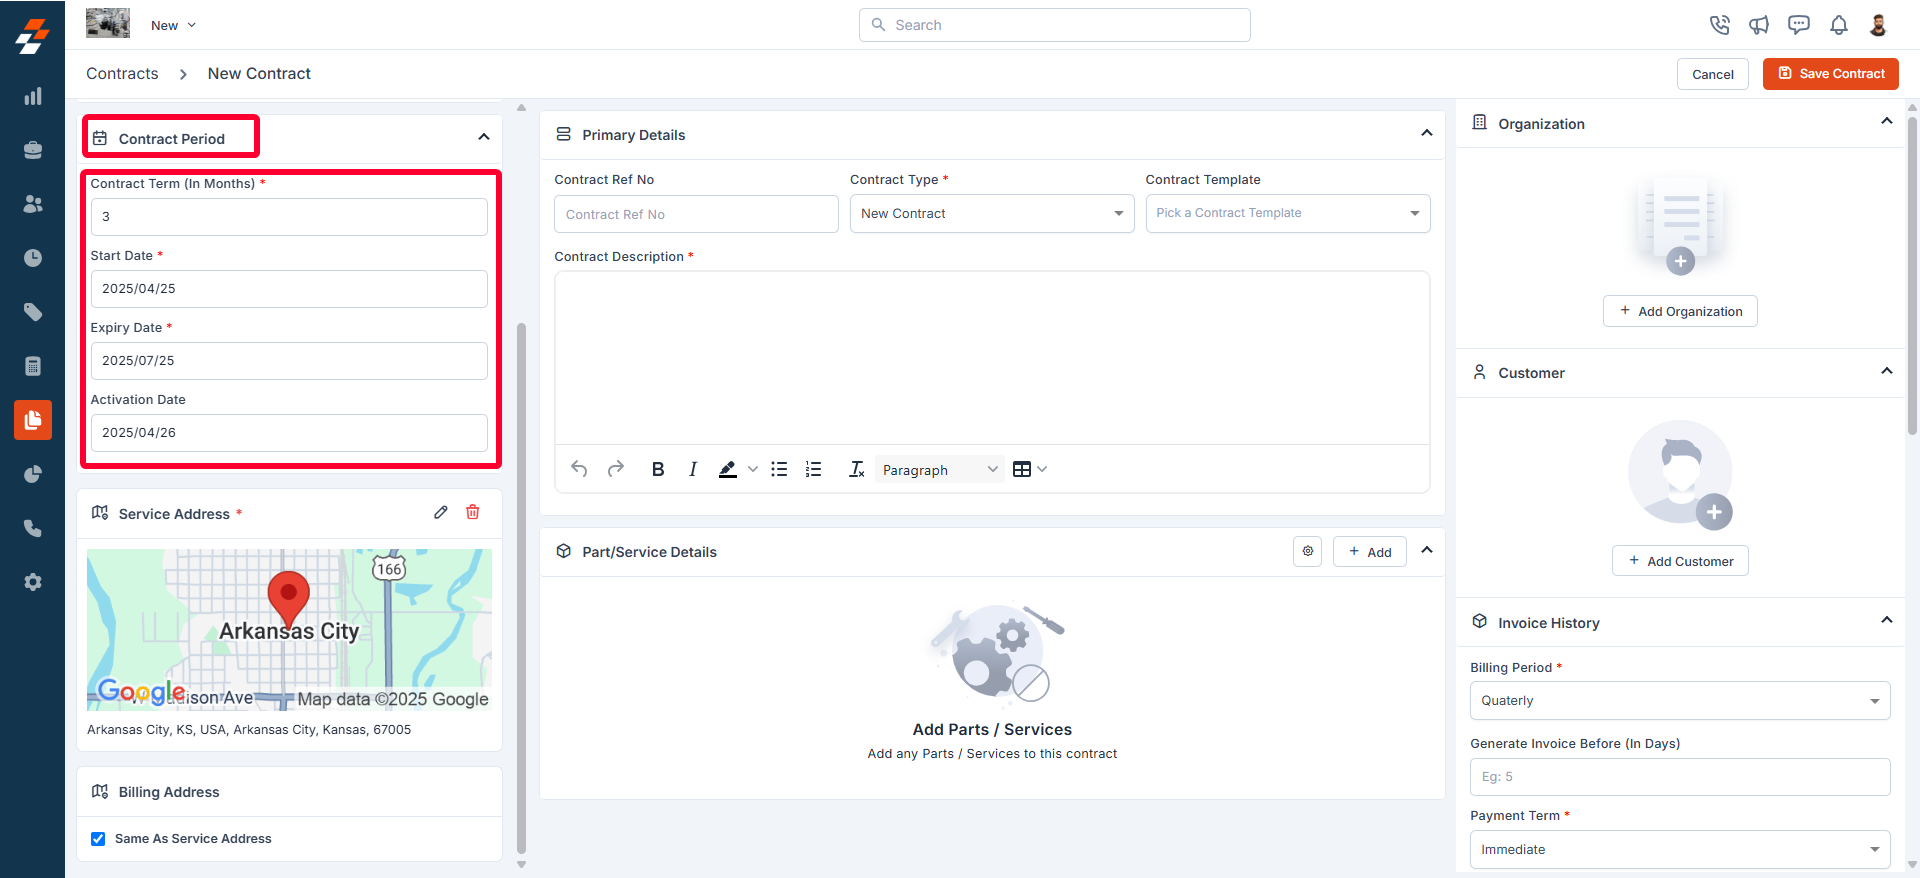
Note: Once the start date is selected, the invoice details are automatically populated based on the chosen package.
- Contract Expiry Date(Mandatory): Enter the contract’s end date.
- Activation Date: Specify the date on which the contract becomes active and its services are available to the customer. Please note that the activation date can be the same as or later than the Contract Start Date, depending on when the customer begins using the contracted services.
C. Primary Details
- Contract Ref No: Assign a unique reference number to the contract.
- Contract Type(Mandatory): Choose the contract type (e.g., New or Renewed).
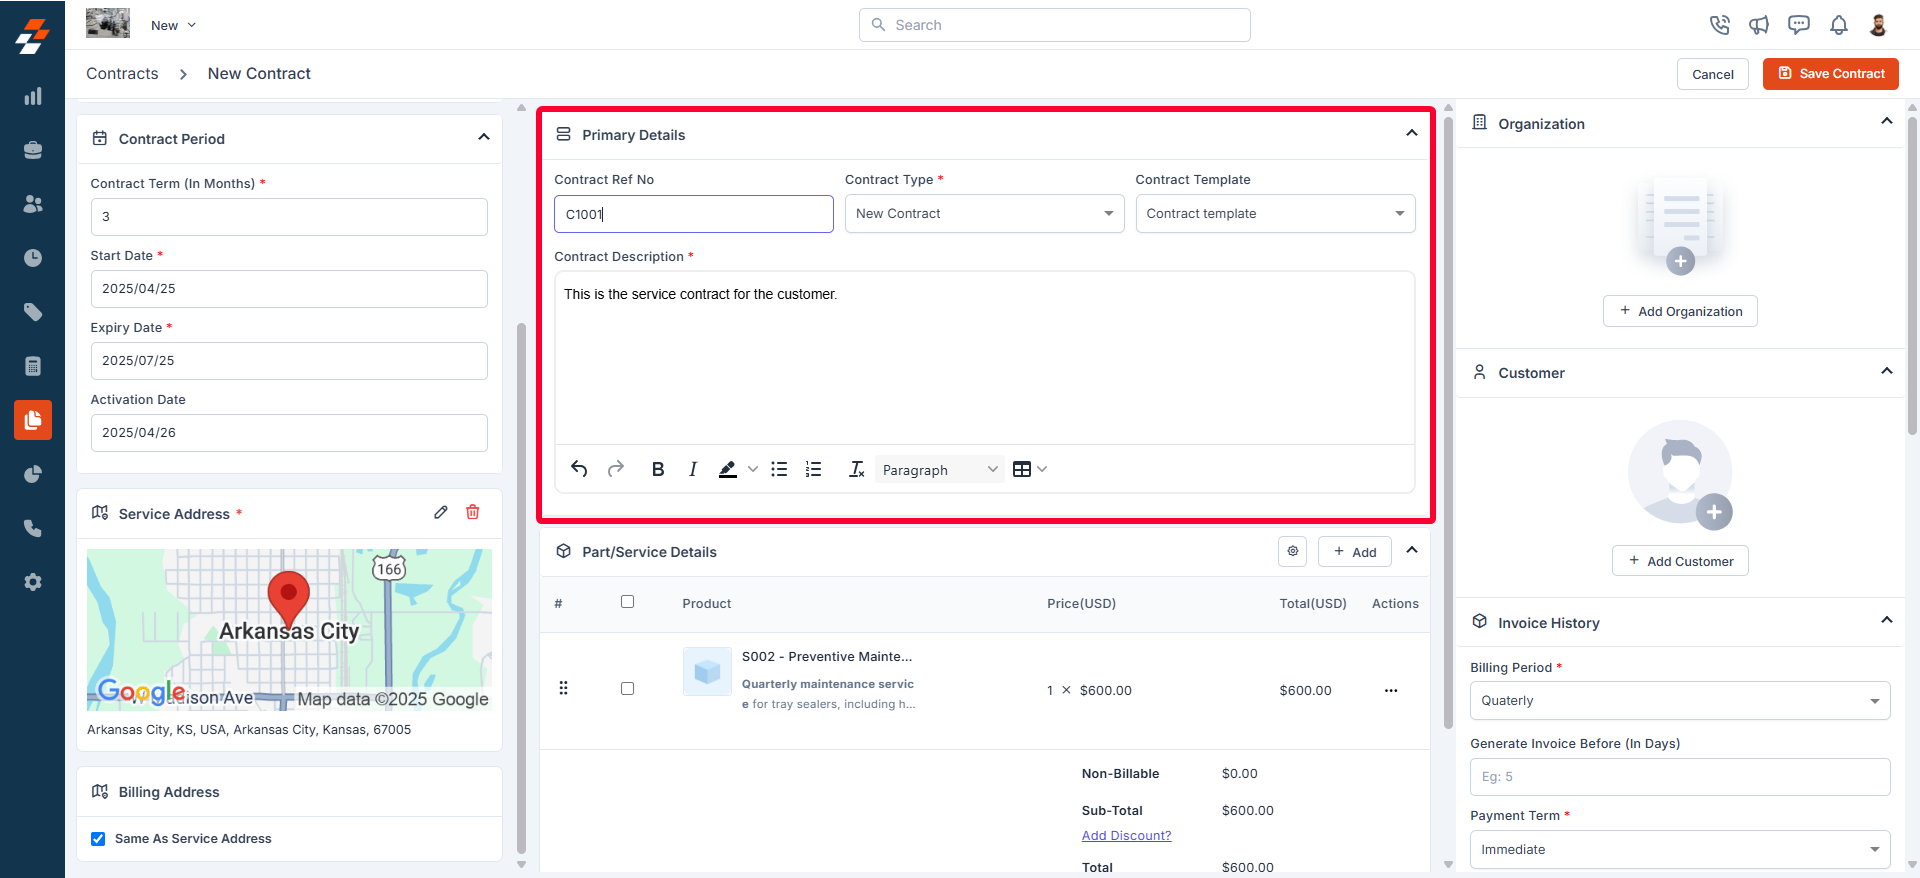
- Contract Template: Select the standard template to be used for the contract.
- Contract Description(Mandatory): Enter a brief description of the contract.
D. Part/Service Details
Parts & services will be automatically populated based on the selected contract package in the details section. Additionally, you can add items by clicking the ”+ Add” button.
Options
Choose the preferred Option for each line item in the contract parts list.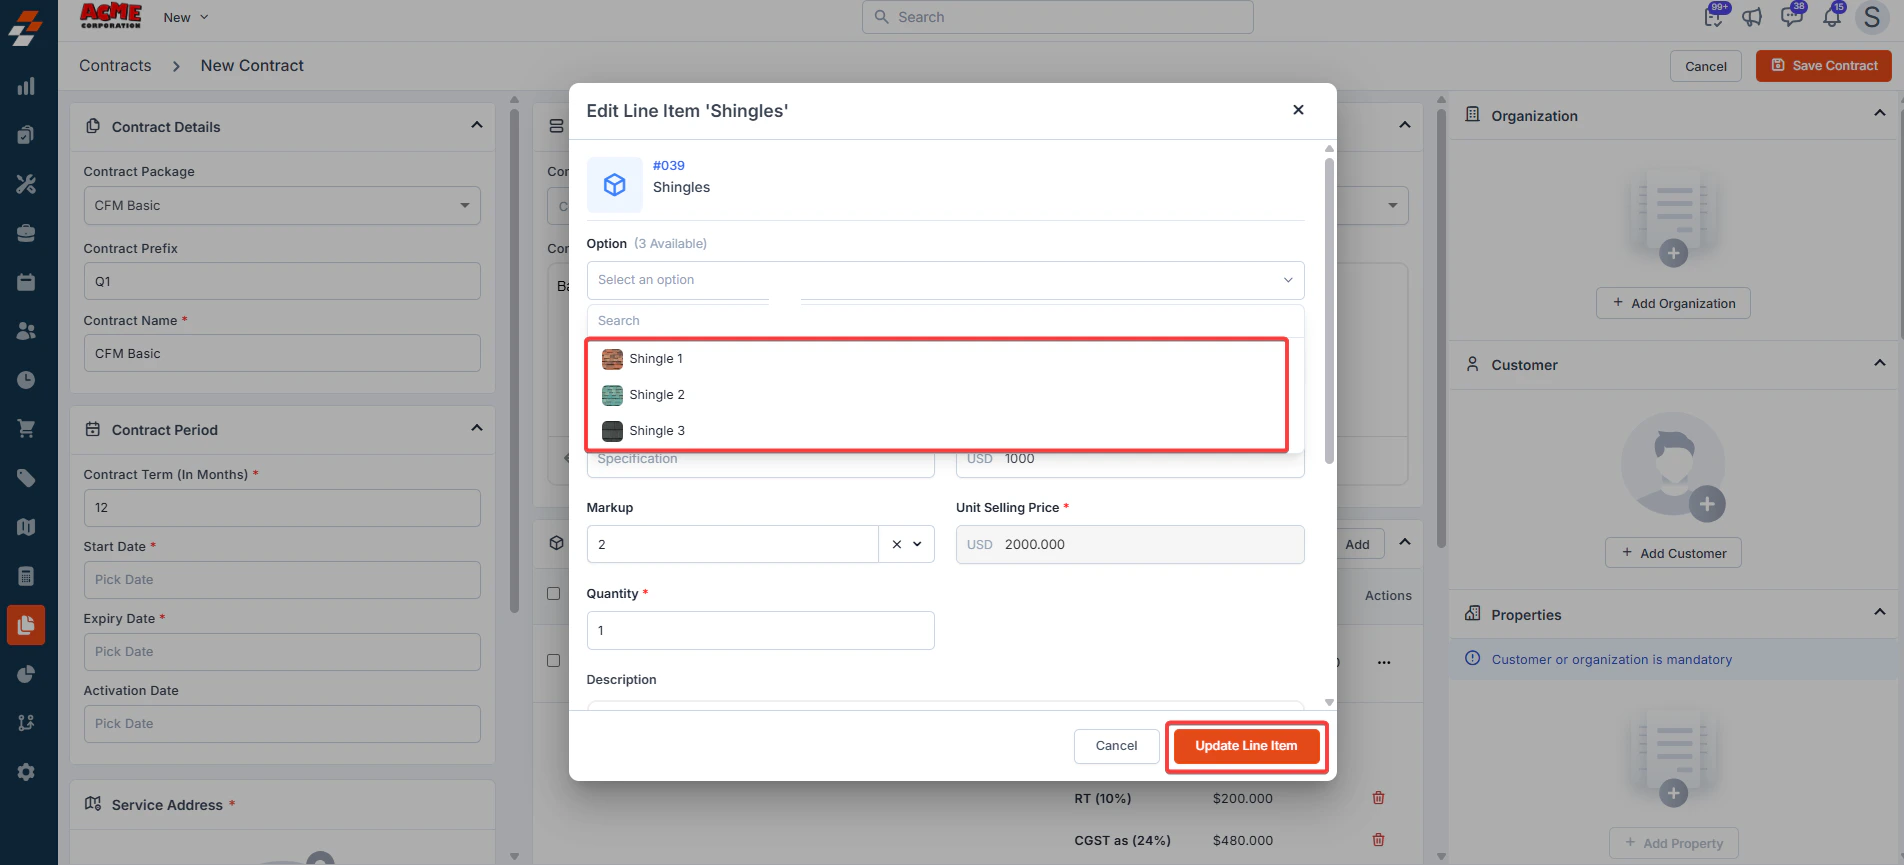
Updating Discount Type
Updating Discount Type
To update the discount amount, click the icon next to “Discount” or use the icon in the Parts & Services details section to update Discount Type Settings.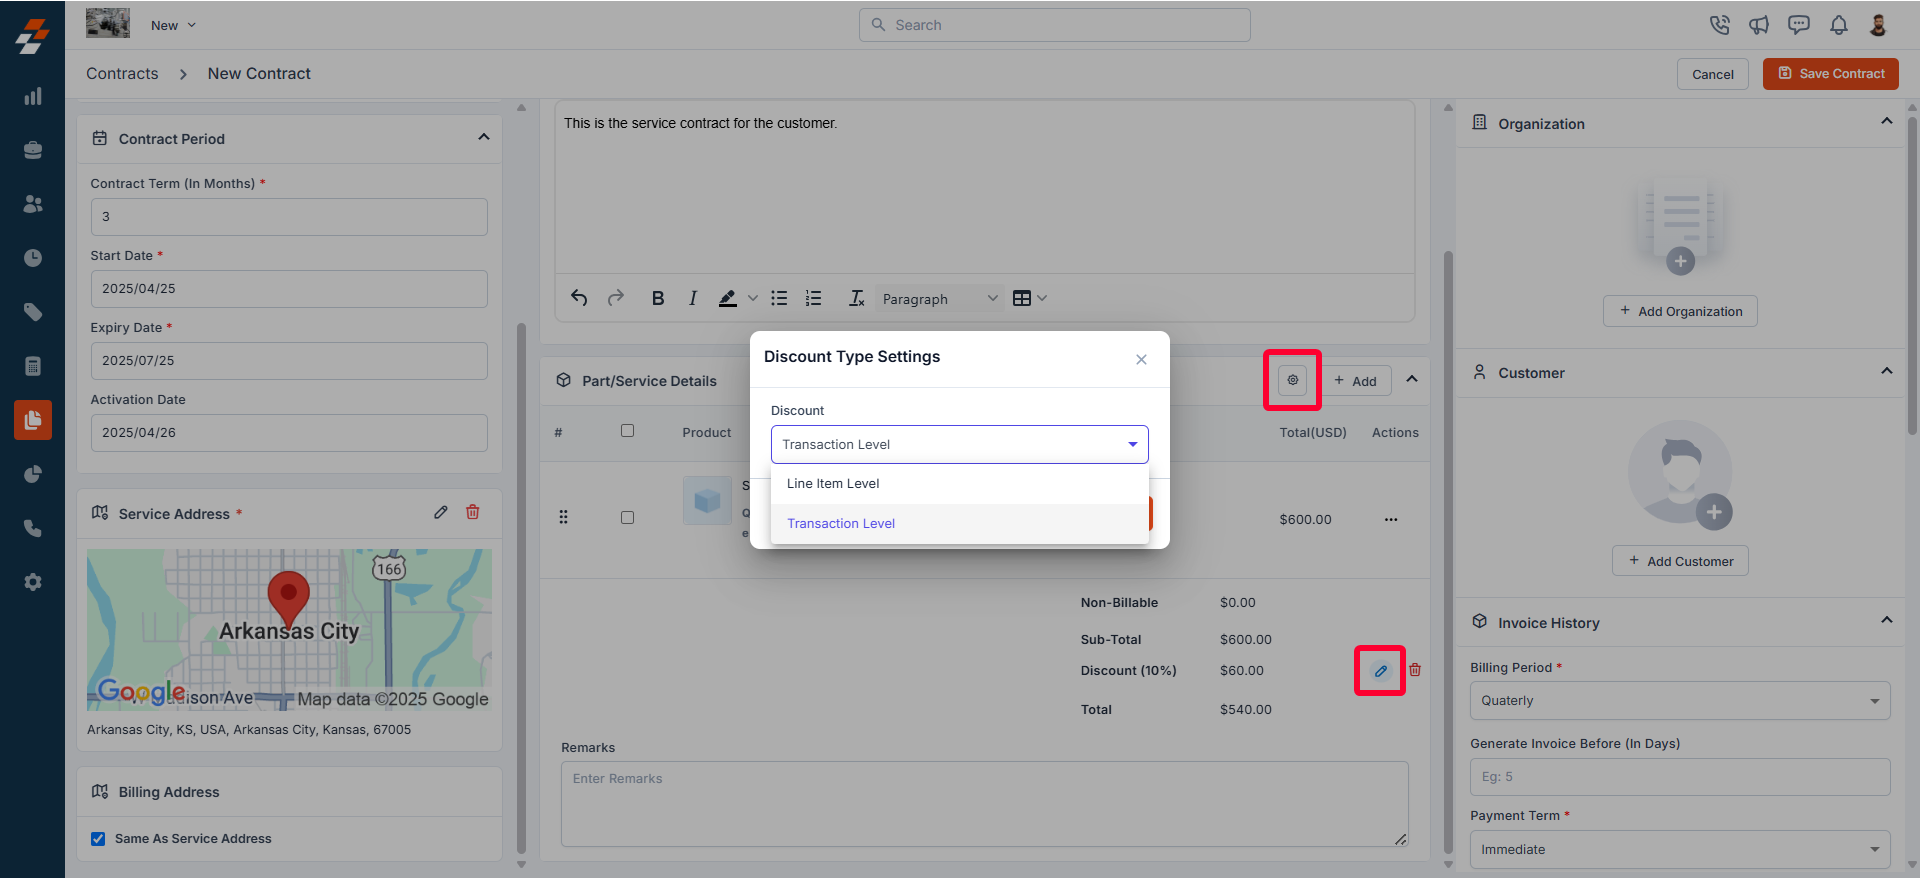
- Line-item level: Apply discounts to each individual item in the quote.
- Transactional level: Apply discounts based on the subtotal of all items in the quote.
Note: If a line item has a custom tax and the contract includes both taxable and non-taxable parts and services:
- Only line-item level discounts can be applied.
- Transaction-level discounts cannot be applied in such cases.
E. Associations
When creating a contract, you can associate various modules with the contract as needed to streamline field service operations and maintain a centralized record of all relevant information related to the contract. These associations help ensure seamless contract execution and tracking. Click the “+” icon next to each section to associate the modules, further enhancing the contract management process and keeping all pertinent information in one easily accessible location.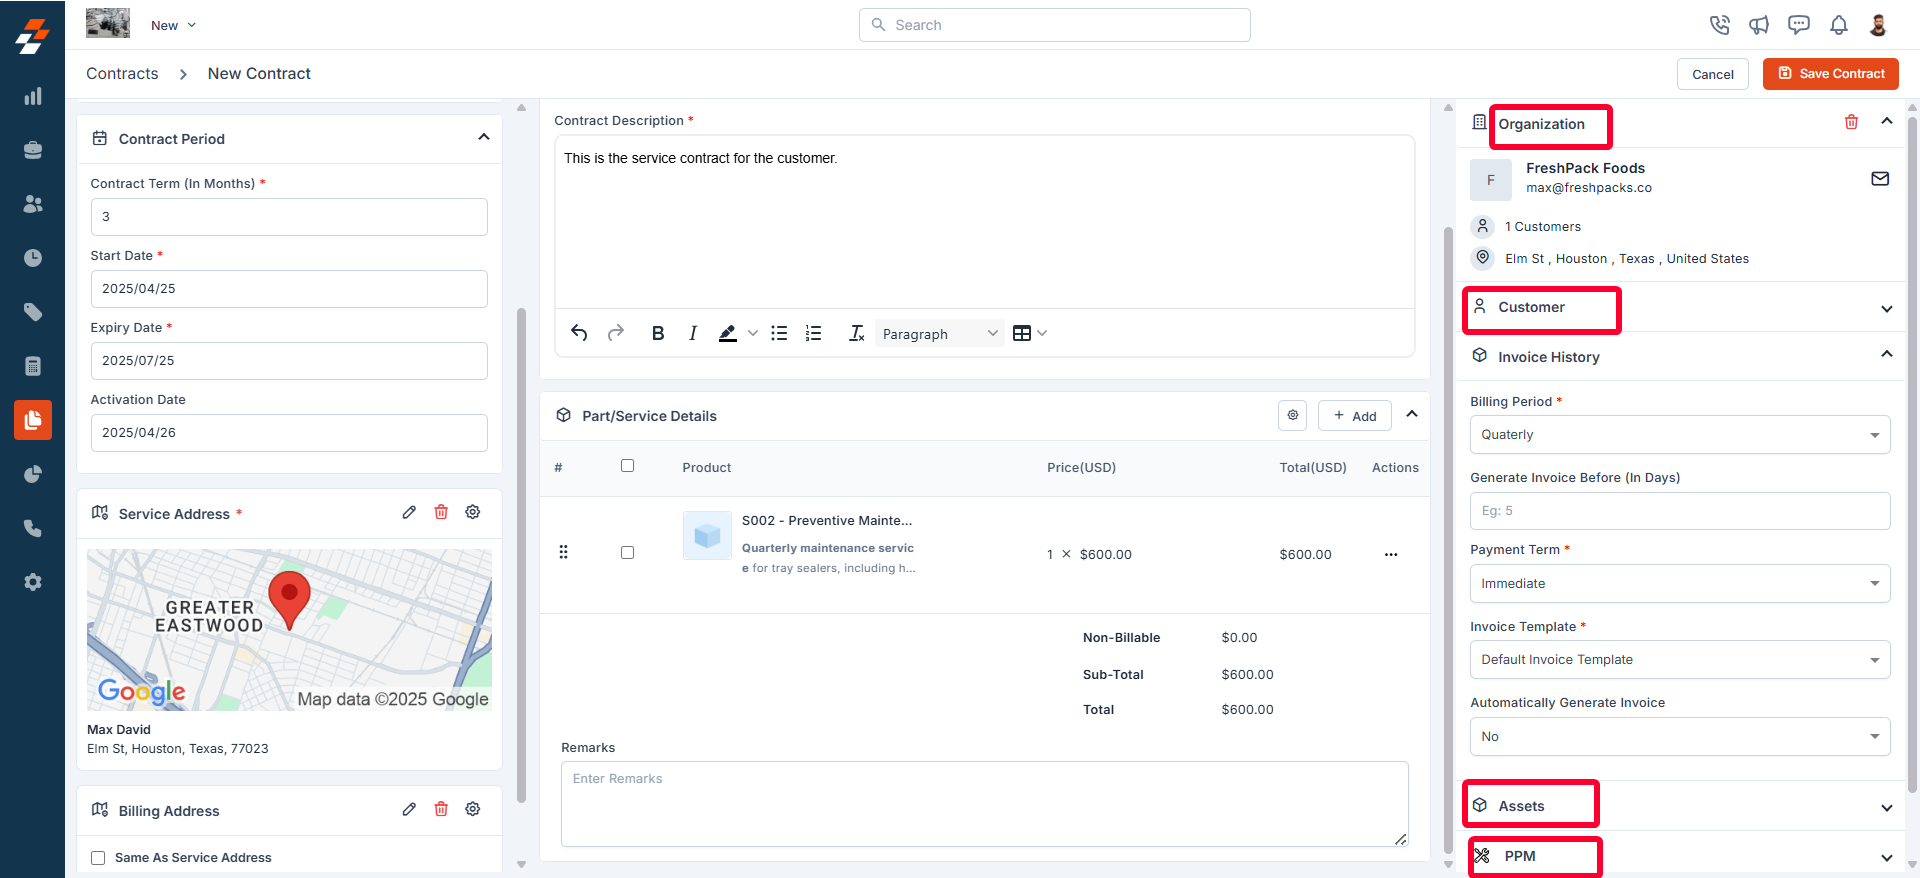
Organization/contact
Organization/contact
Associating a contact or organization with a contract, you can maintain details of businesses and key contacts linked to the contract. Based on the contact/organization chosen, the service address will be auto-filled. You can then change as needed.
Properties
Properties
Associating properties with the contract helps streamline scheduling and dispatching, ensuring technicians are assigned to the correct locations.
Projects
Projects
By associating a project with a contract, you can manage complex service agreements more effectively, ensuring that all jobs related to the project are aligned with the contract terms.
Invoice History
Invoice History
The Invoice History section provides a chronological log of all actions and updates related to an invoice. This helps maintain a clear record of changes, ensuring transparency and easy tracking of invoice modifications, status updates, and payments. During contract creation, you can set up recurring invoices for contracts.
Setting Up Recurring Invoicing for Contracts
Setting Up Recurring Invoicing for Contracts
Recurring invoicing ensures timely billing for ongoing service contracts, helping businesses maintain a consistent cash flow while reducing manual effort. To enable automated invoice generation, follow these steps:
- Billing Period: Choose the frequency of invoicing—Quarterly, Yearly, or Monthly.
- Generate Invoice Before (In Days): Specify how many days in advance the invoice should be created (e.g., 5 days before the due date).
- Payment Term: Set the payment term (e.g., Monthly).
- Invoice Template: Select an invoice template from the available options.
-
Automatically Generate Invoice: Choose Yes to enable automatic invoice creation or No for manual generation.

To view invoice history
To view invoice history
- Navigate to the Contract Details page.
- In the right panel, locate the Invoice History section.
- Here, you can see a detailed log of all actions taken on the invoice.
Assets
Assets
Associating assets with the contract enables you to track specific assets covered under the contract, ensuring that they receive the necessary maintenance and servicing. This helps manage the assets’ lifecycle and maintain optimal operational performance.
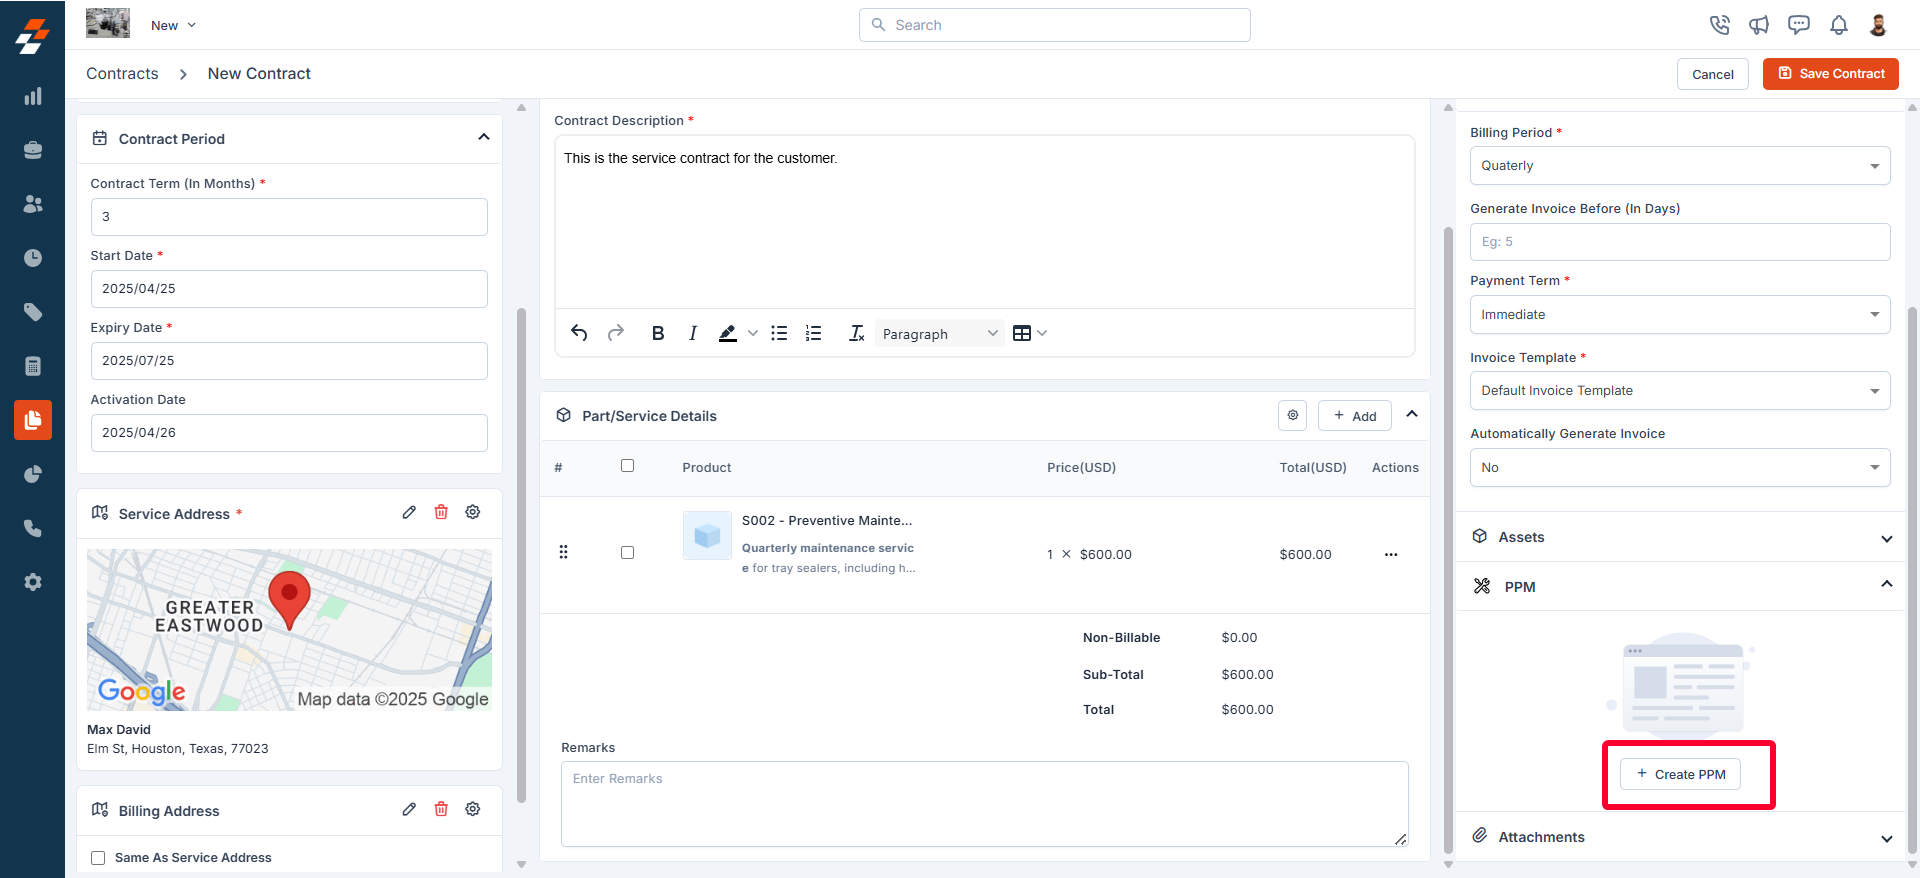
Planned Preventive Maintenance (PPM)
Planned Preventive Maintenance (PPM)
By associating PPM tasks with the contract, you can schedule recurring maintenance to prevent service disruptions. This ensures that all required preventive measures are in place, reducing downtime and extending the longevity of the equipment.
Steps to create a new PPM
Steps to create a new PPM
To create a new PPM,
Step 2: Primary Details
Fill in the following primary details:
- PPM Name: Enter a name for the PPM.
- PPM Description: Provide a brief description of the PPM.
- Choose Property: Select a property of an org/customer to associate with the PPM.
-
Choose Asset (Mandatory): Select one or more assets for which you want to create a new PPM. You can choose assets currently associated with the contract or any other existing assets, as needed.

- Choose Part/Service: Select a part or service associated with the contract to include in the PPM.
- Priority (Mandatory): Select the priority from the drop-down list. Options include Low, Medium, and High.
- Auto Generate Job: By default, it will be set to “No.” If you want to auto-generate a job based on the PPM, select “Yes.”
Step 3 (Optional): If selected "Yes" for Autogenerate job. Follow these steps:
Job Settings
- Generate Job in Advance (Mandatory): Set how many days before the scheduled date the job should be created automatically.
-
Job Category: Choose the job category from the drop-down list.

- Street Address: Click “Pick from Map” to fill in the street address information.
Step 4: PPM Schedule
Provide the following details to schedule:
- PPM Start Date: Select the start date of the PPM.
-
PPM End Date: Select the end date of the PPM.

- Recurrence: Select how often this PPM should occur- Daily, Weekly, Monthly, Yearly, or Custom.
- Schedule Dates: These dates are automatically populated for upcoming schedules (service dates) based on the chosen recurrence.
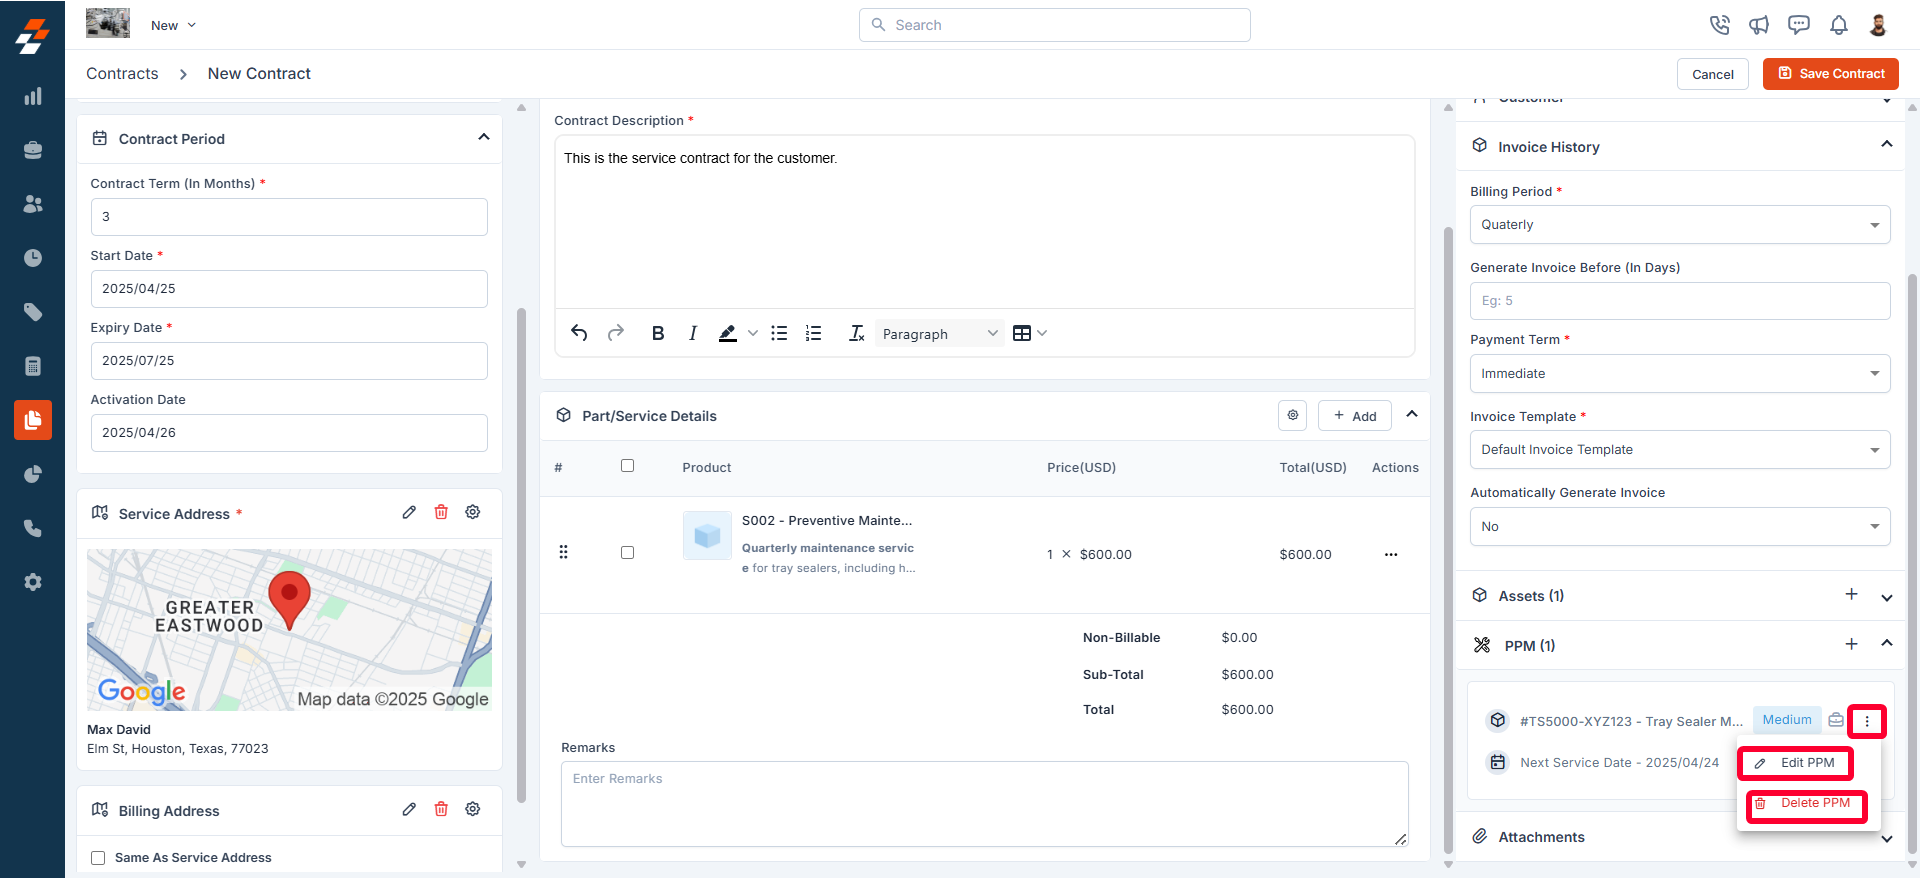
Note: You can also create a new PPM directly under the “Asset ” column after adding an asset. Once the PPM has been created and associated with this contract, you can view it under the “PPM” section.
Attachments
Attachments
Adding attachments to the contract allows you to store and manage important documents such as agreements, service reports, or manuals. This ensures easy access to vital information whenever needed, keeping all contract-related documentation organized and readily available.
- After filling in all the required details, click the “Save Contract” button at the top right corner of the page.
- A “Save Contract” dialog box appears. Click the “Create” button.”
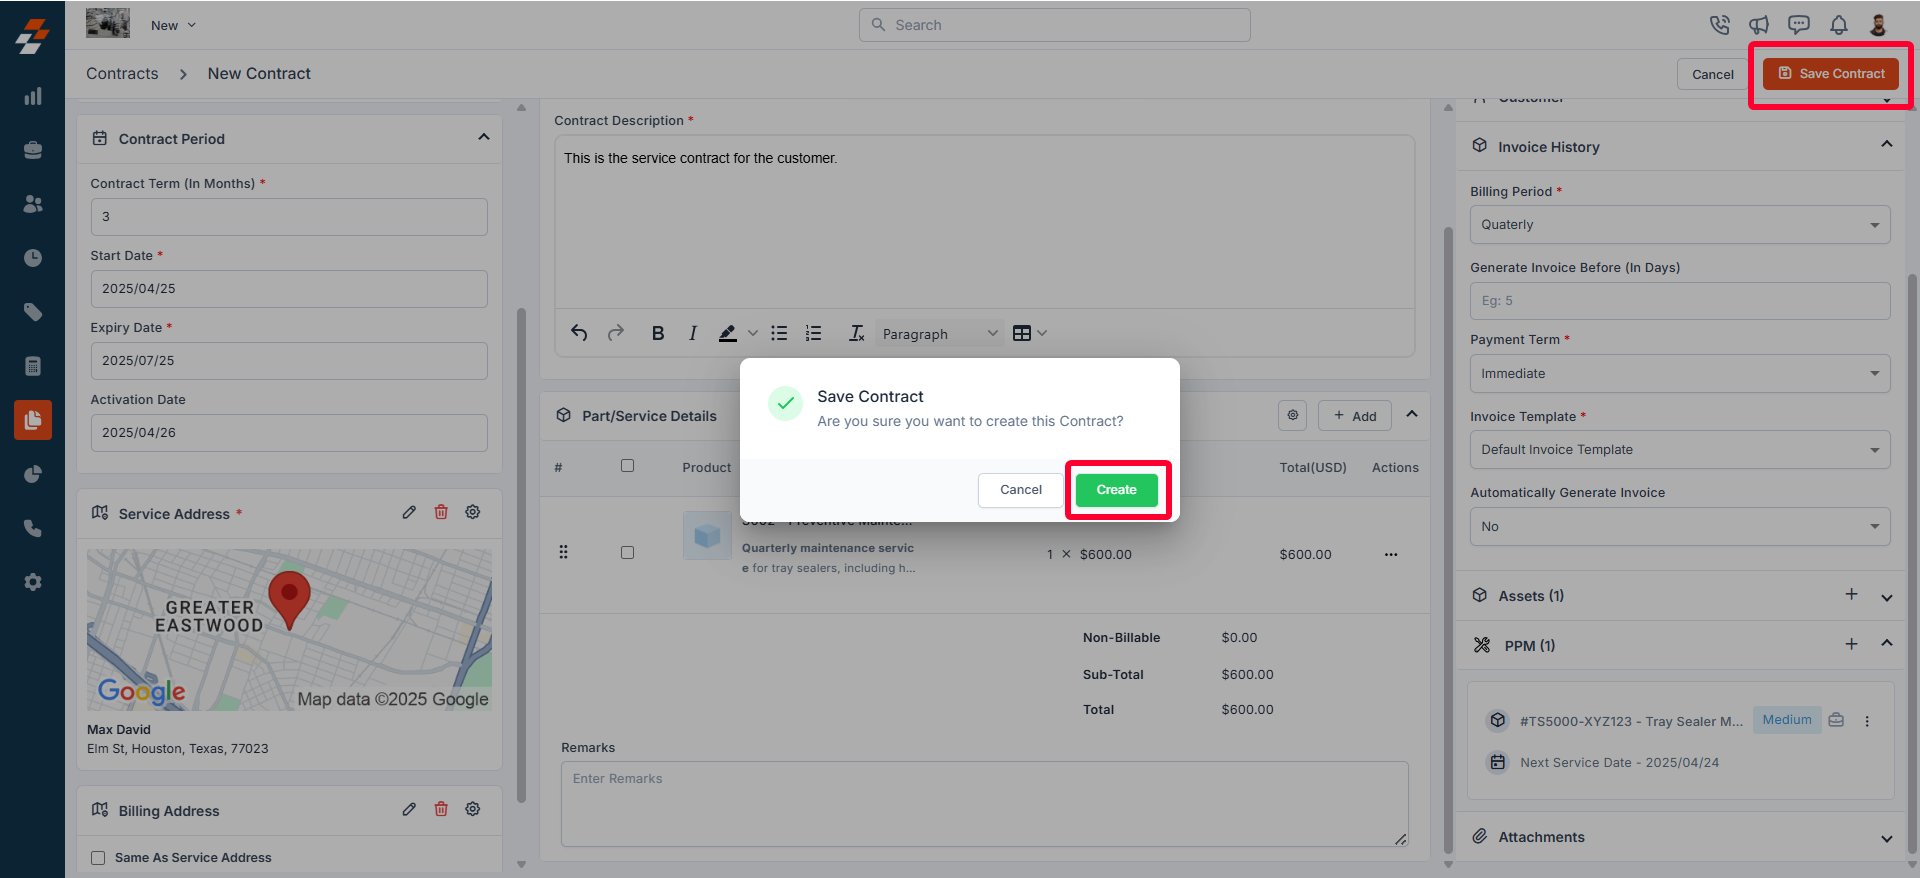
- A new contract will be created successfully.