Navigation: Clients -> Organizations -> + New Organization
-
Select the “Clients” module from the left navigation menu and choose “Organizations”.
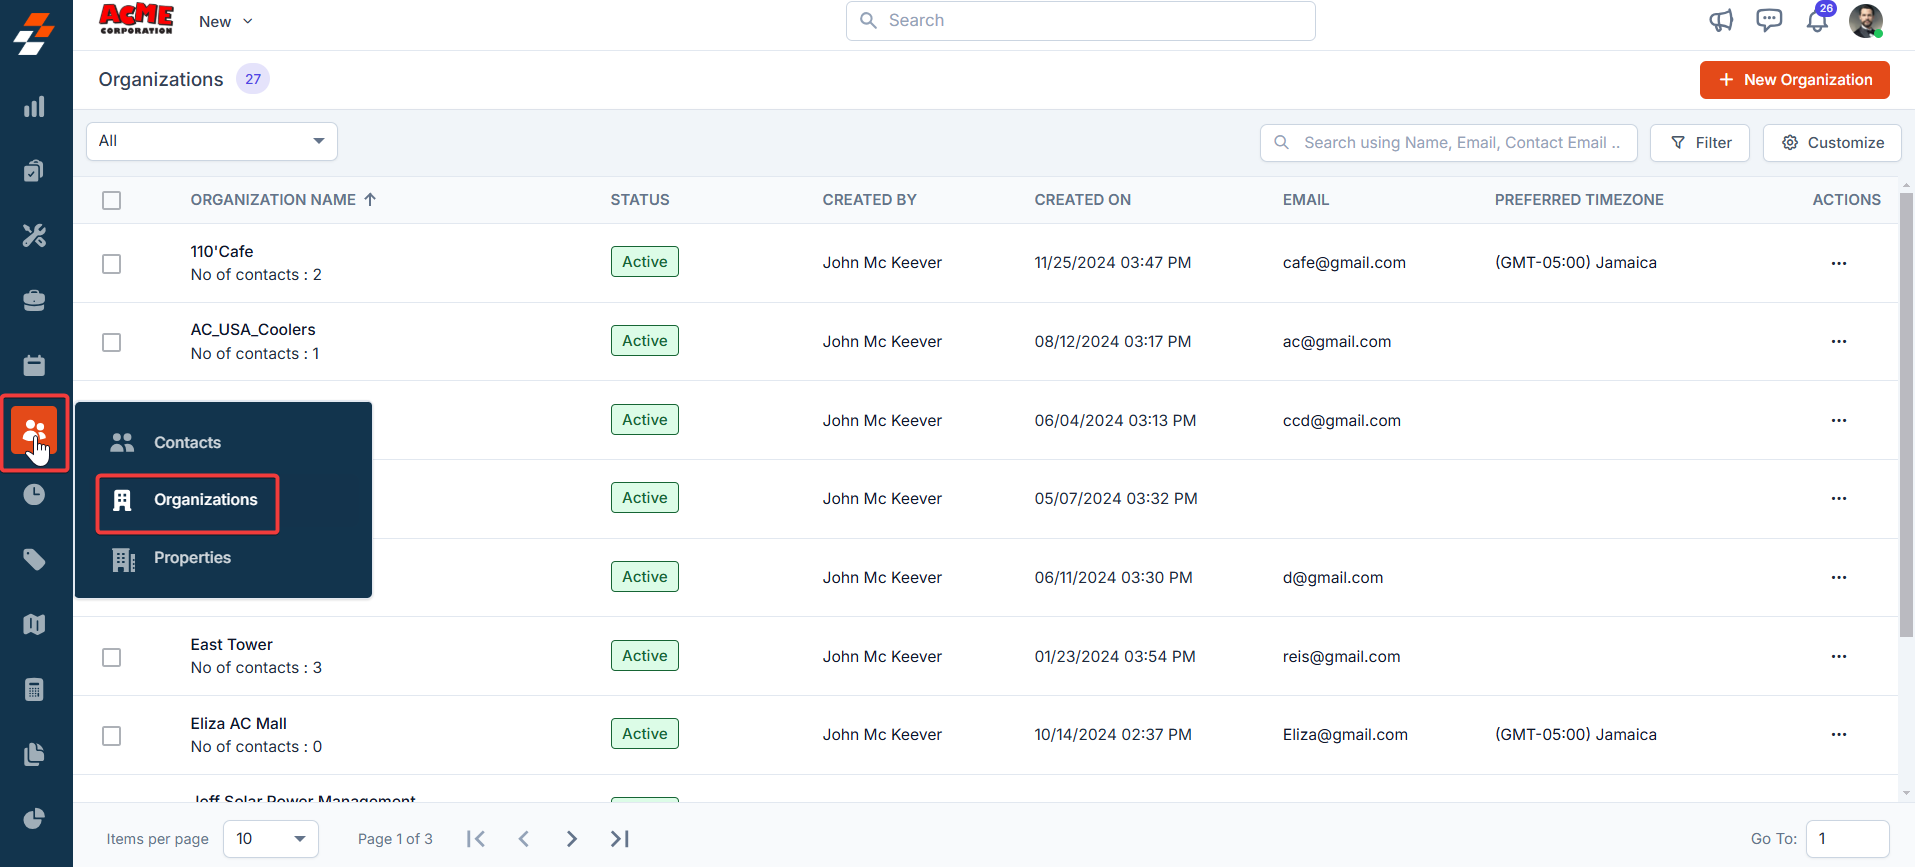
- The Organizations listing page appears.
-
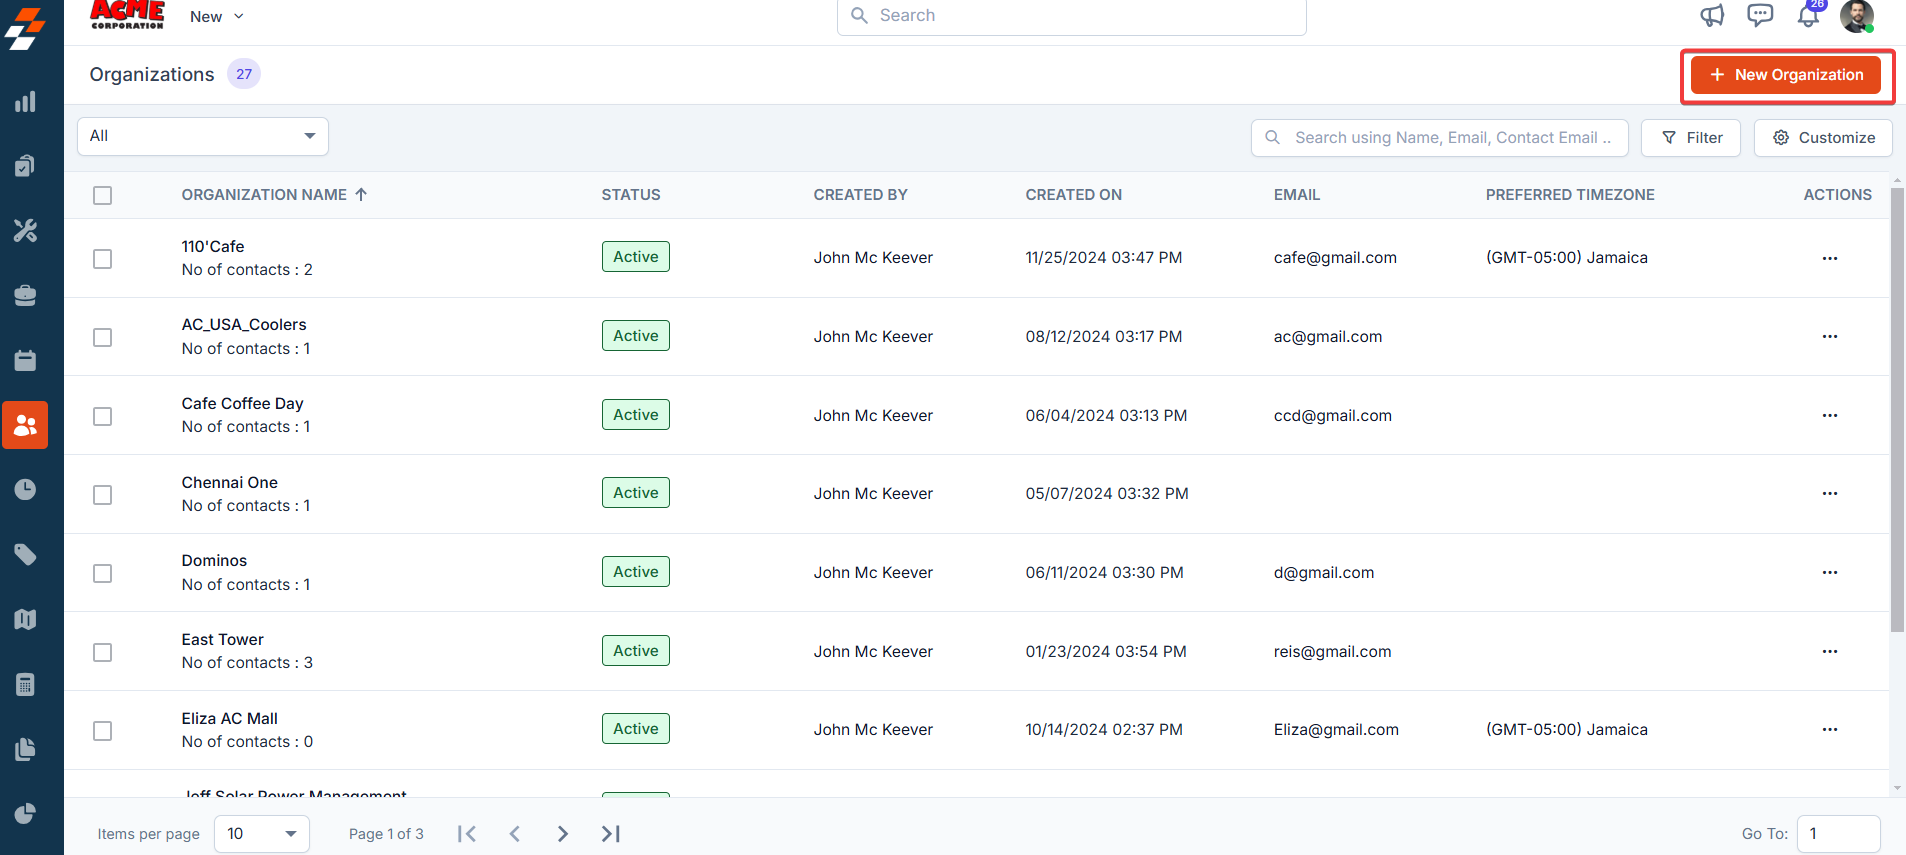
Click the ”+ New Organization” button at the top right corner of the page.
-
Fill in the following sub-sections:
-
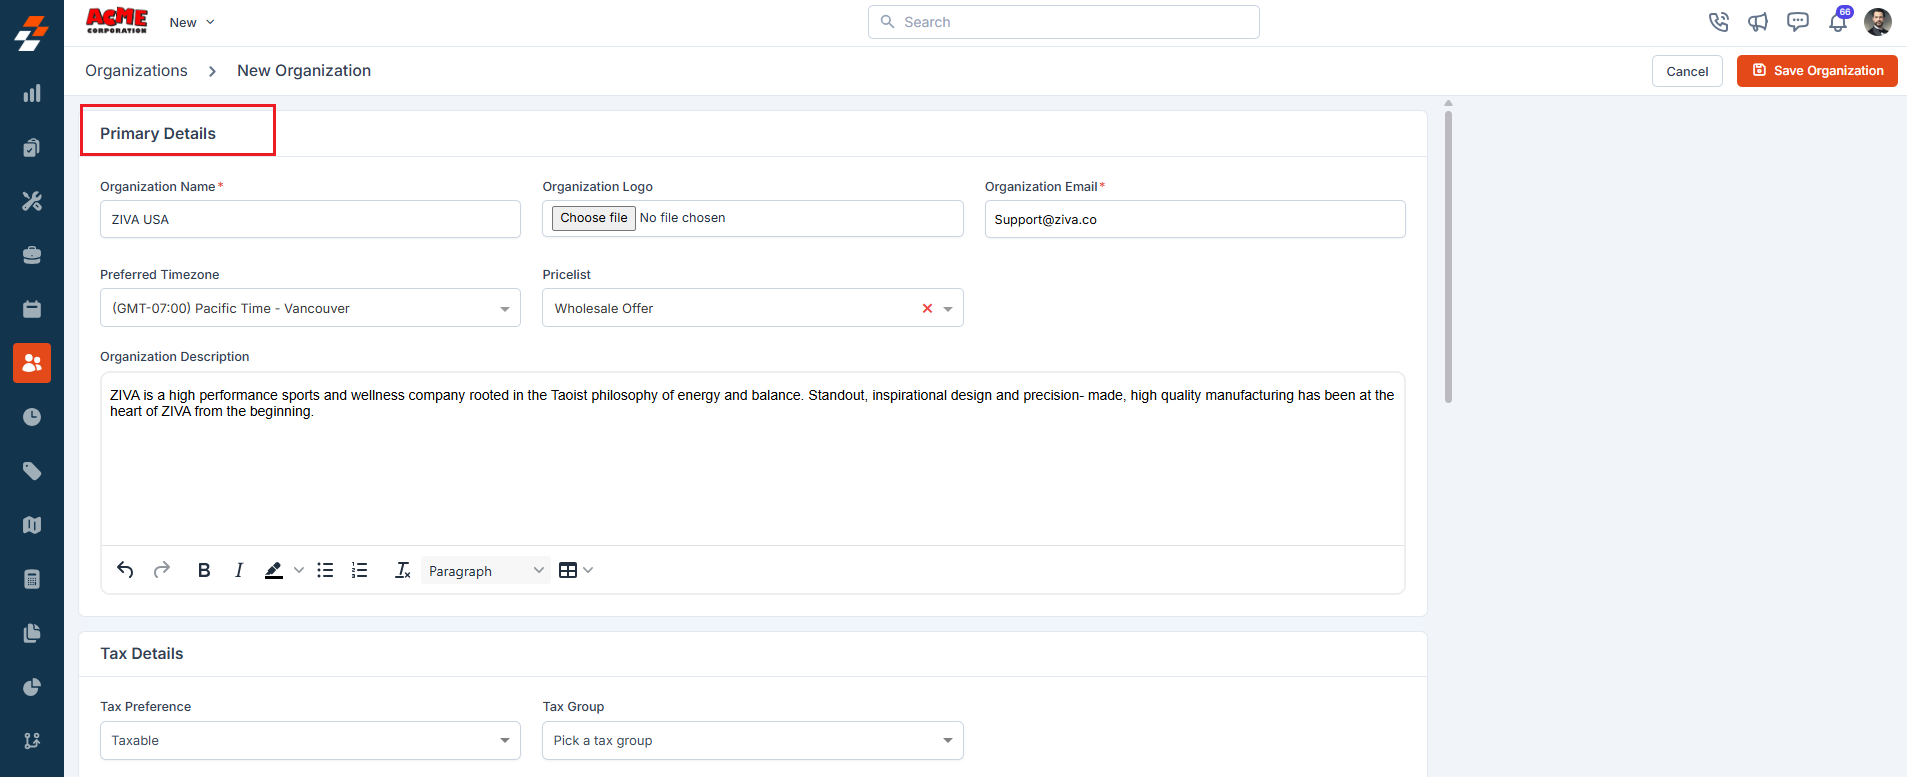
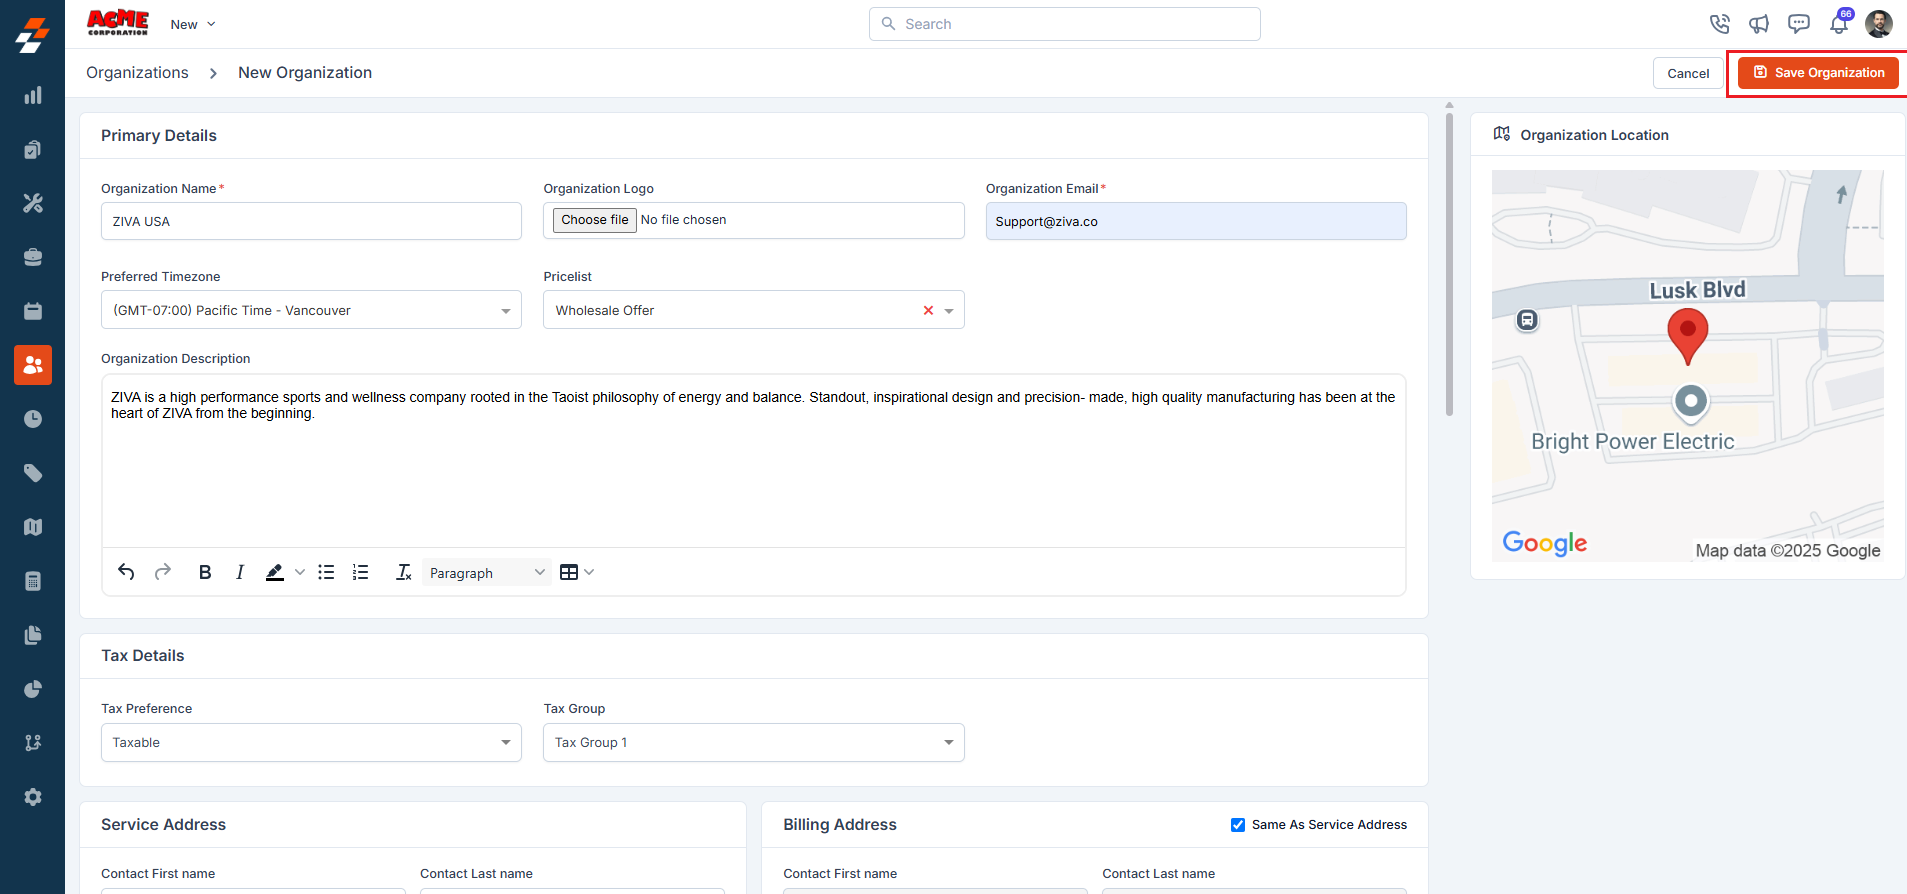
Primary Details
- Organization Name: Enter the official name of the organization.
- Organization Logo: Upload a logo to visually identify the organization in the platform.
- Organization Email: Provide the organization’s official email address. This email will be used for sending job-related notifications, invoices, and other communications.
- Preferred Timezone: Choose the timezone in which the organization primarily operates. This ensure that all time-sensitive activities, such as job scheduling, and alerts are correctly aligned with their local time.
-
Pricelist: Select the relevant price list to be applied when jobs or services are performed for this organization.
-
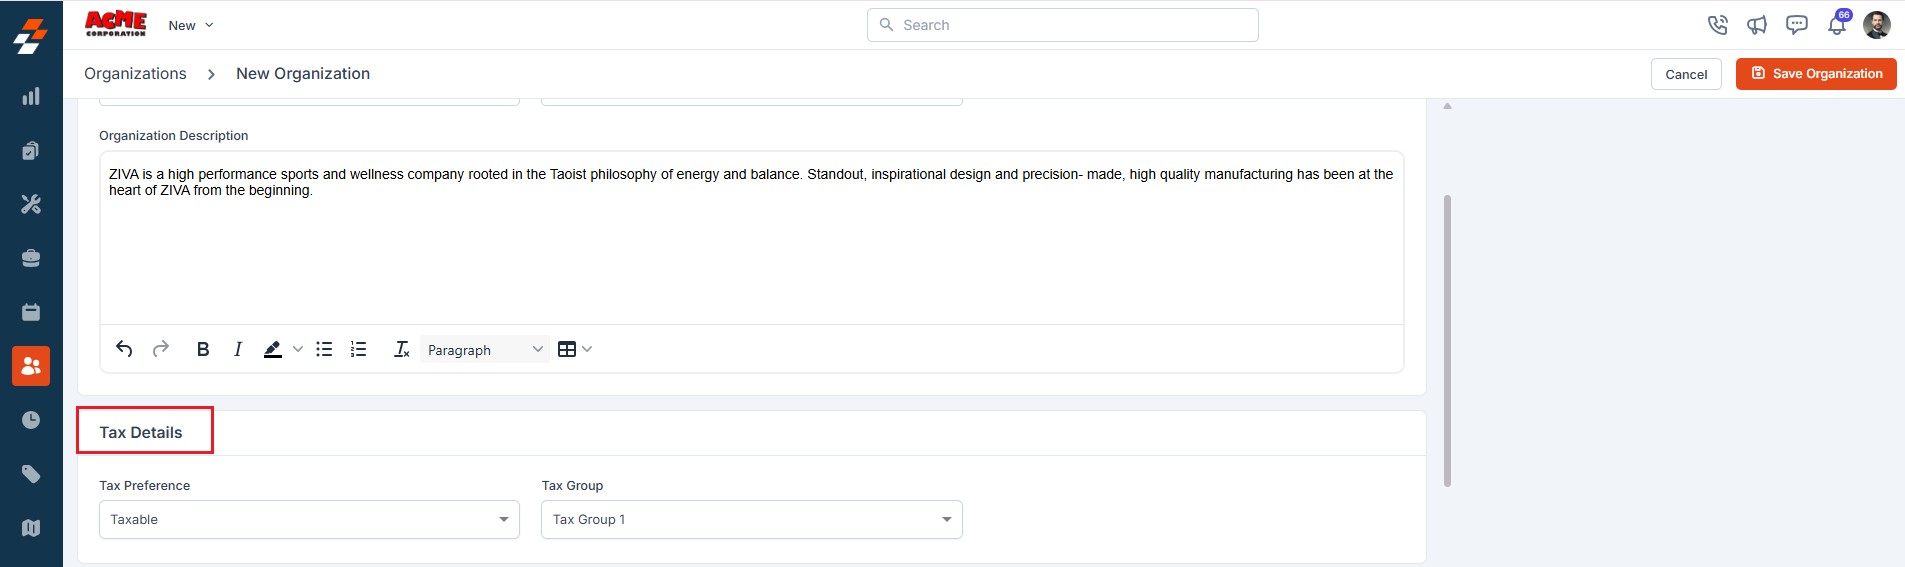
Tax Details
Choose the applicable tax settings for the organization based on your region or internal policies. These settings will automatically be applied to invoices and billing documents.
-
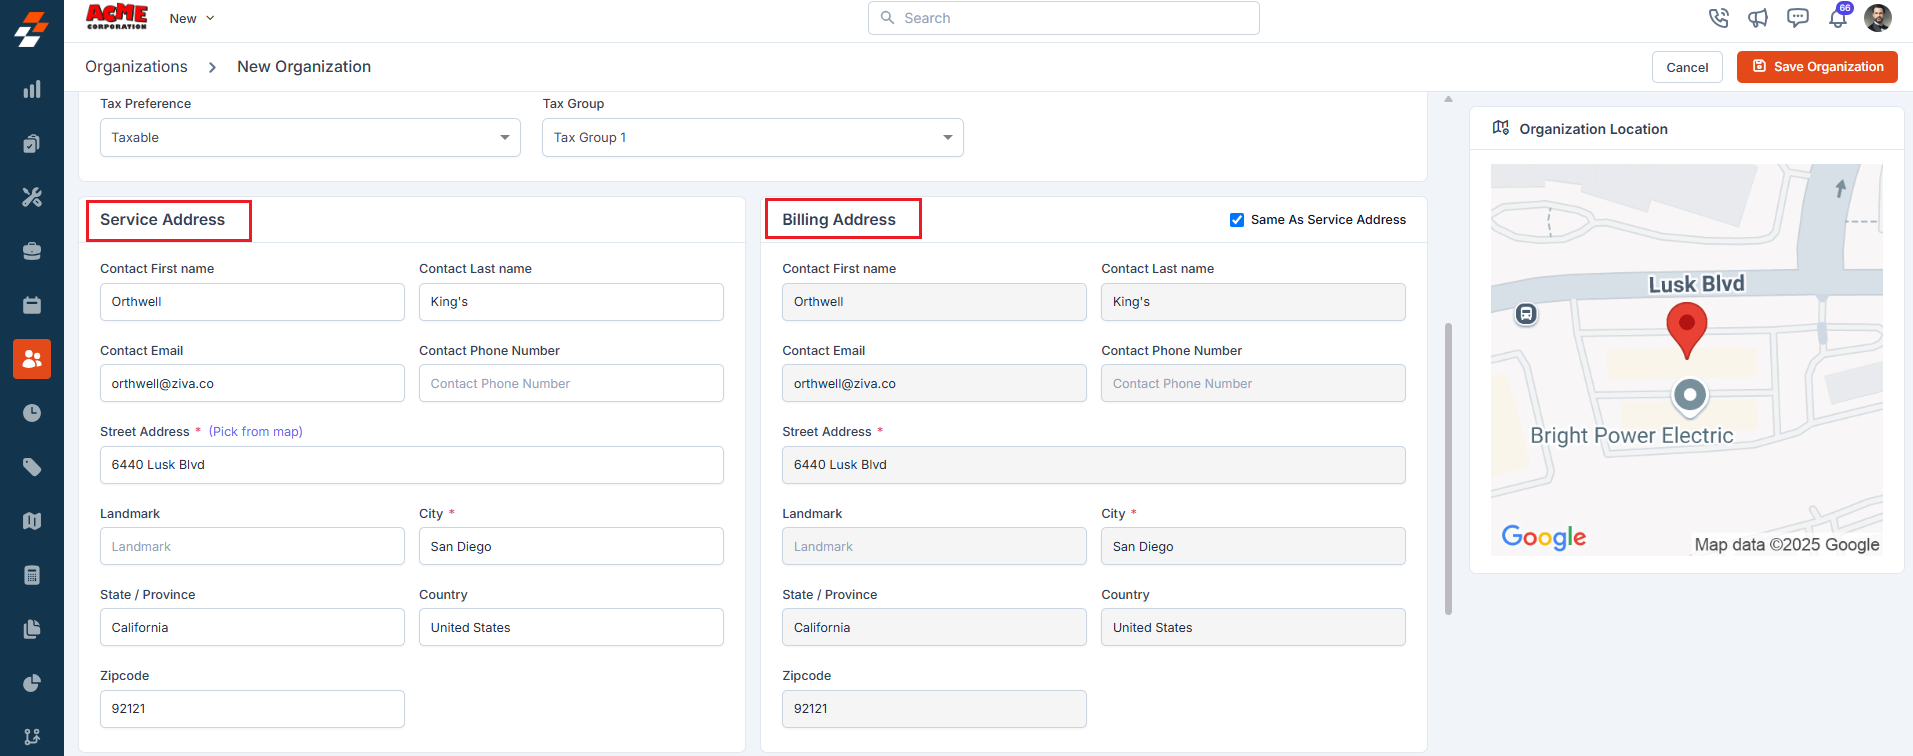
Service and Billing Address
Add the organization’s service and billing locations. You can specify these details in two ways.
- Address Entry: Type the full physical address.
-
Geo-Coordinates: Enter latitude and longitude if you want to use exact map-based positioning.
 For the most accurate location data, use the “Pick from Map” option. This allows you to pinpoint the address directly on the map interface.
Once you’ve selected the correct location, click “Use this Address” to save the information.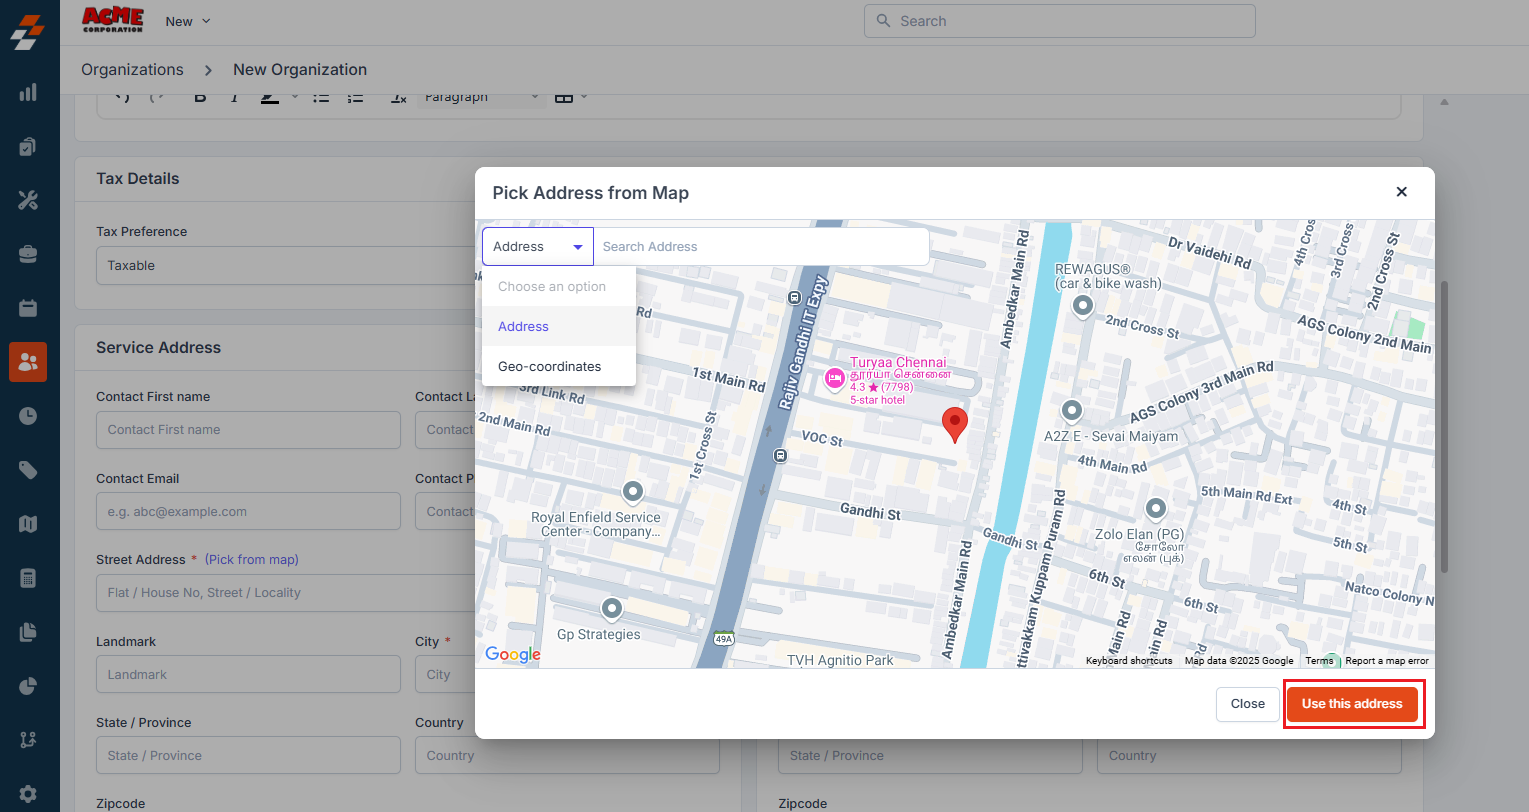
-
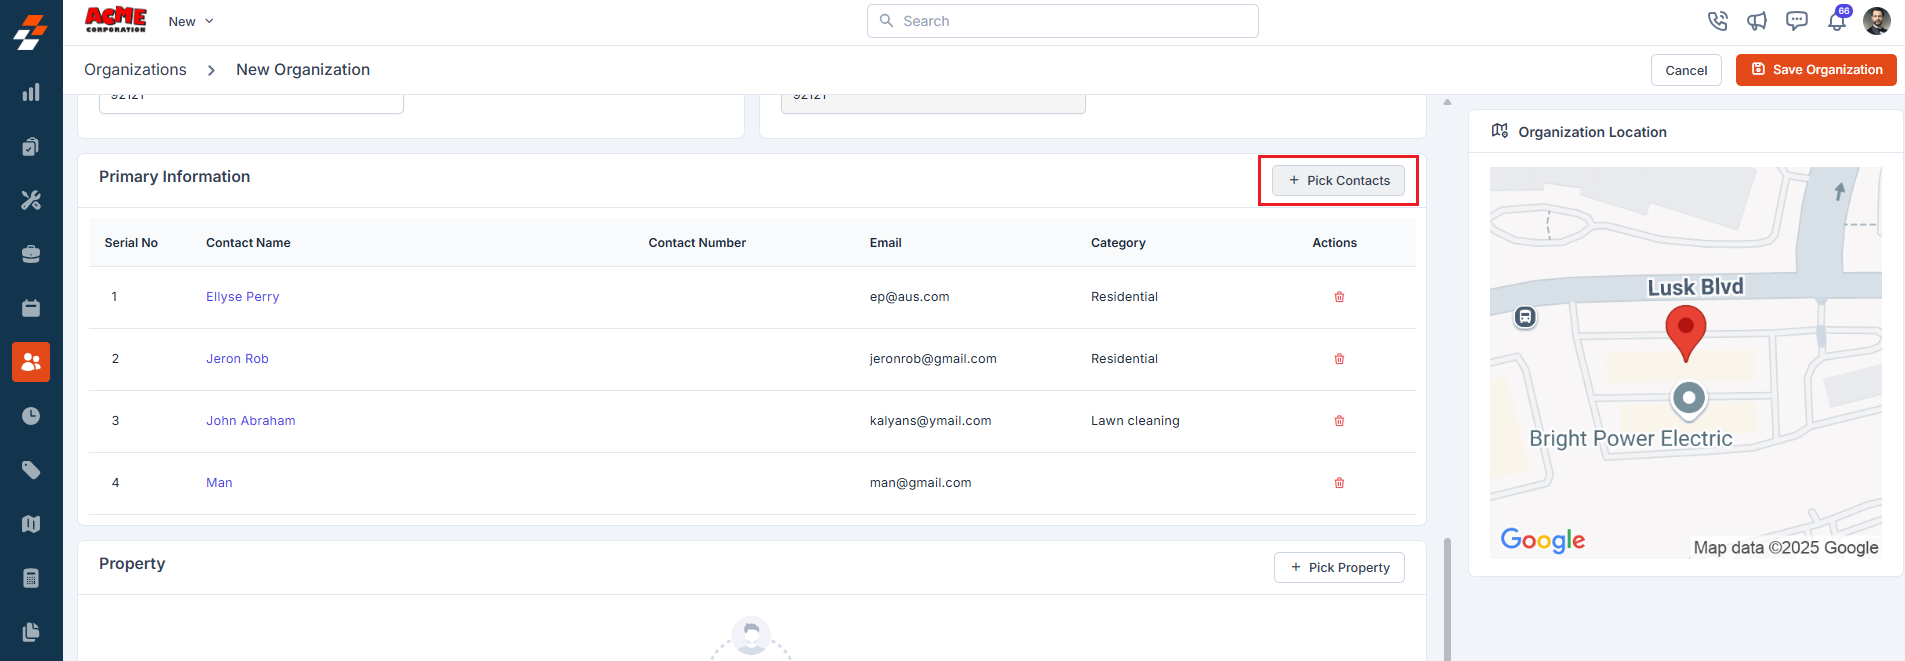
Customers/Contacts and Properties information
You can associate customers and their properties with the organization to ensure seamless tracking of service history and work orders.
To add contacts
- Click ”+ Pick Contacts” in the Primary Information section.
-
A pop-up will appear listing all available customers/contacts. Select one or more to link them to the organization.
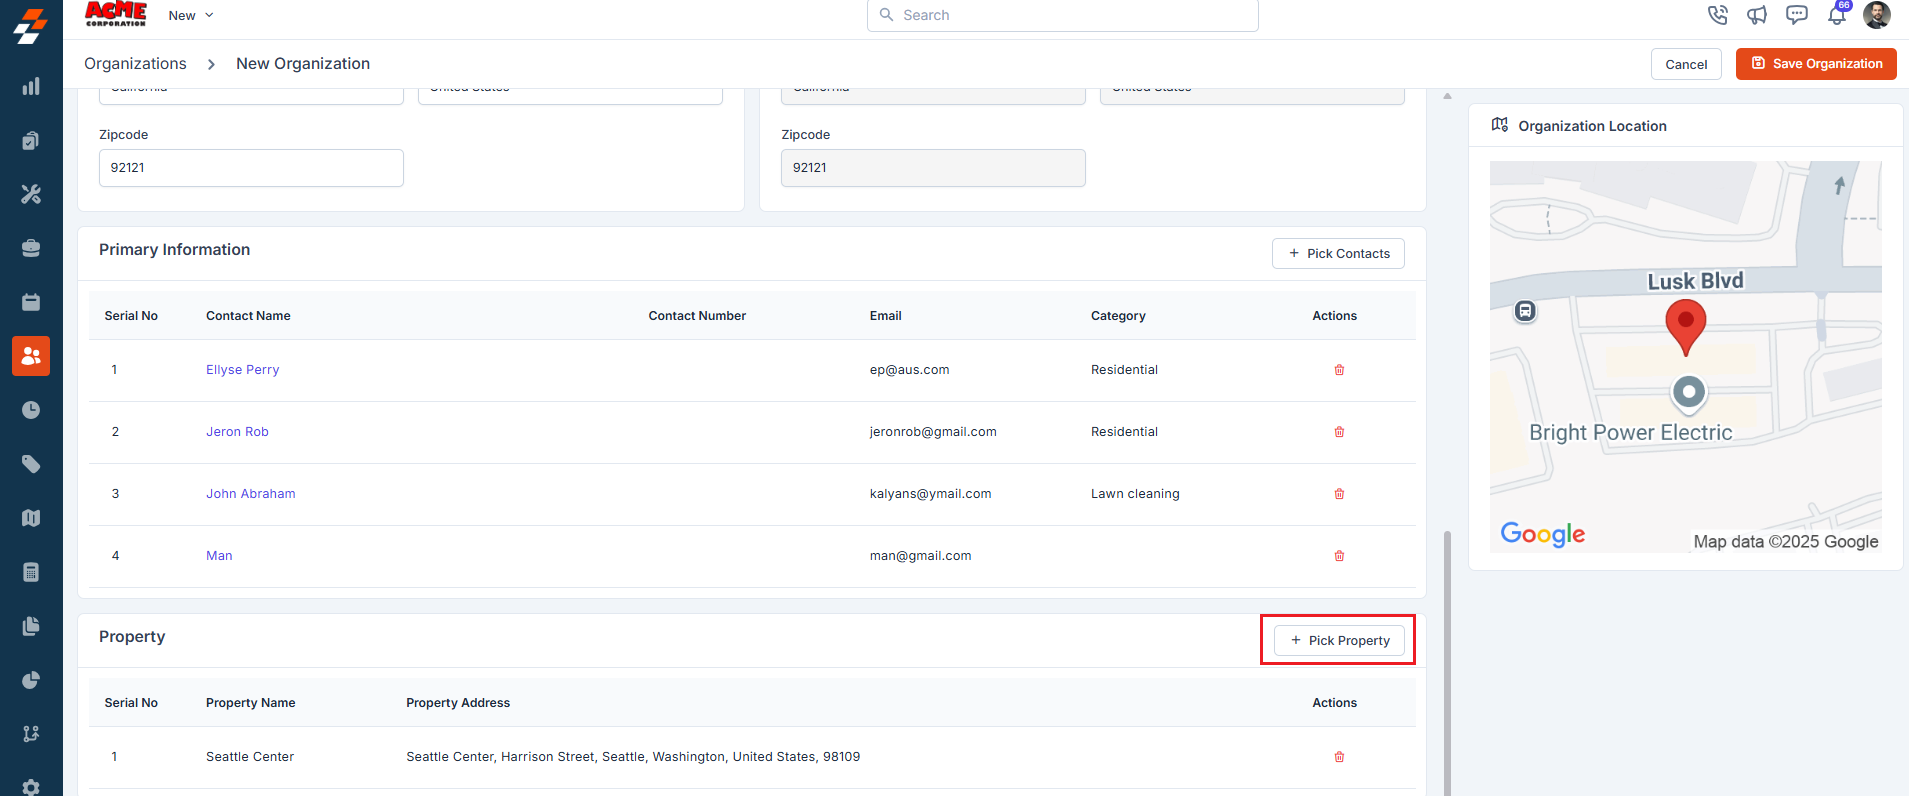
To add properties
- Click ”+ Pick Property” next to the Property section.
-
Use the pop-up to search and select the relevant properties that belong to the organization.
- Other Details If any custom fields are added under the settings, you can fill in the details here.
-
Save organization
After entering all the necessary details, click the “Save Organization” button to successfully create the organization.
-
Primary Details