Accessing the contacts listing page
Navigation: Clients -> Contacts -> Contacts listing page
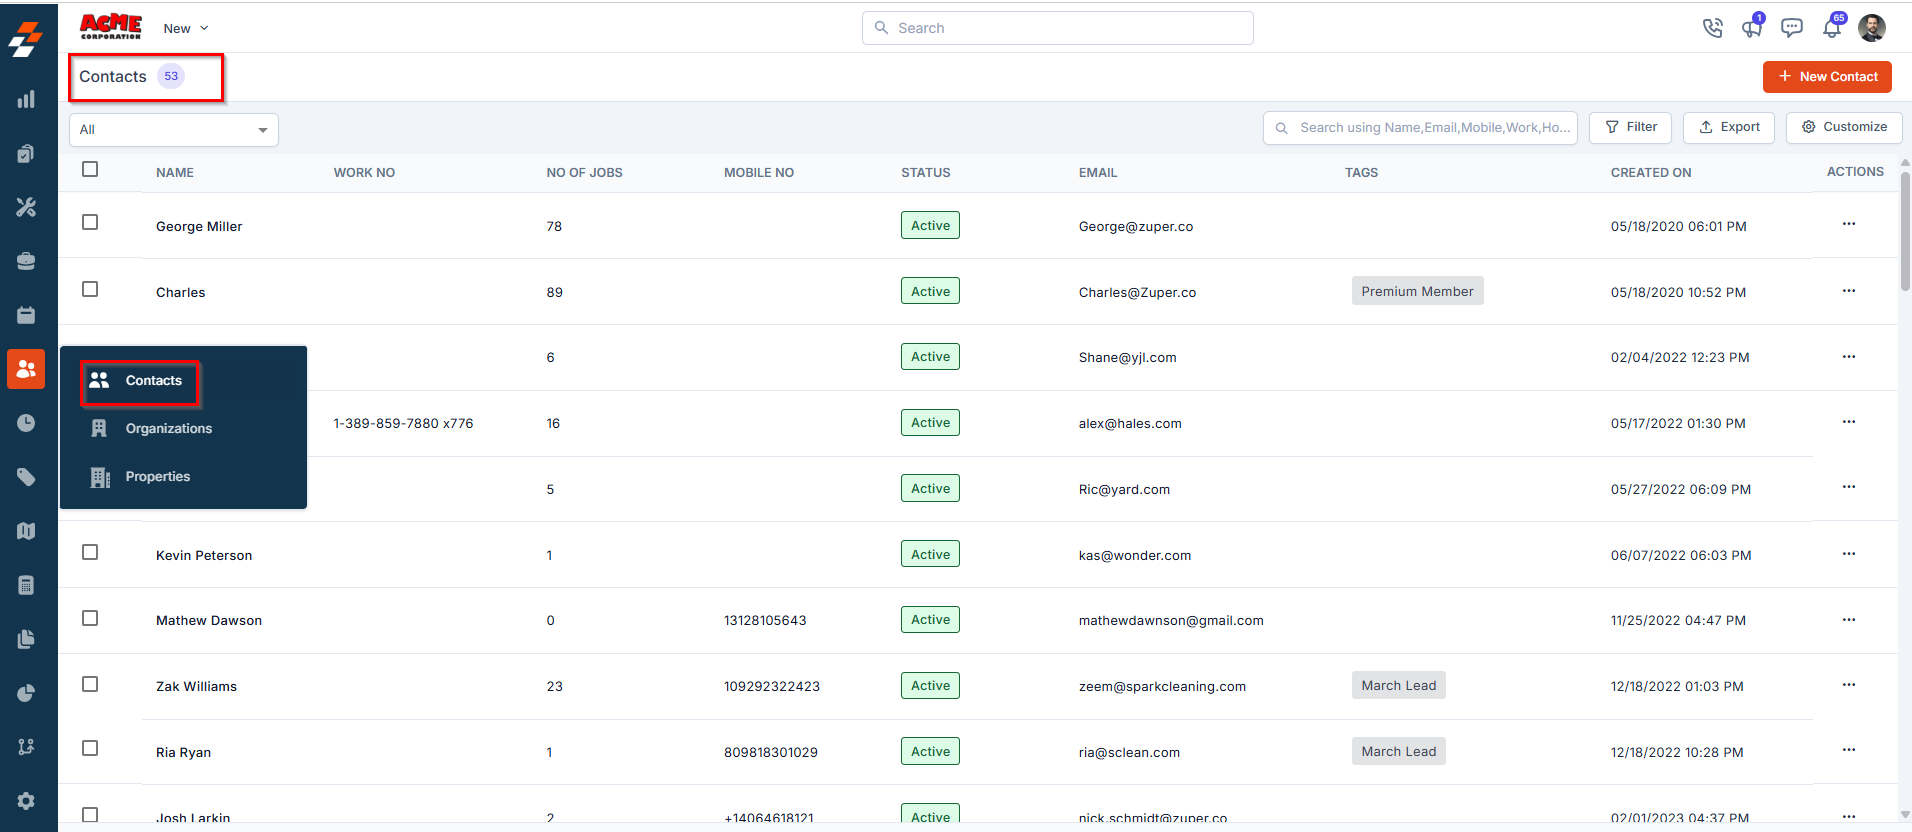
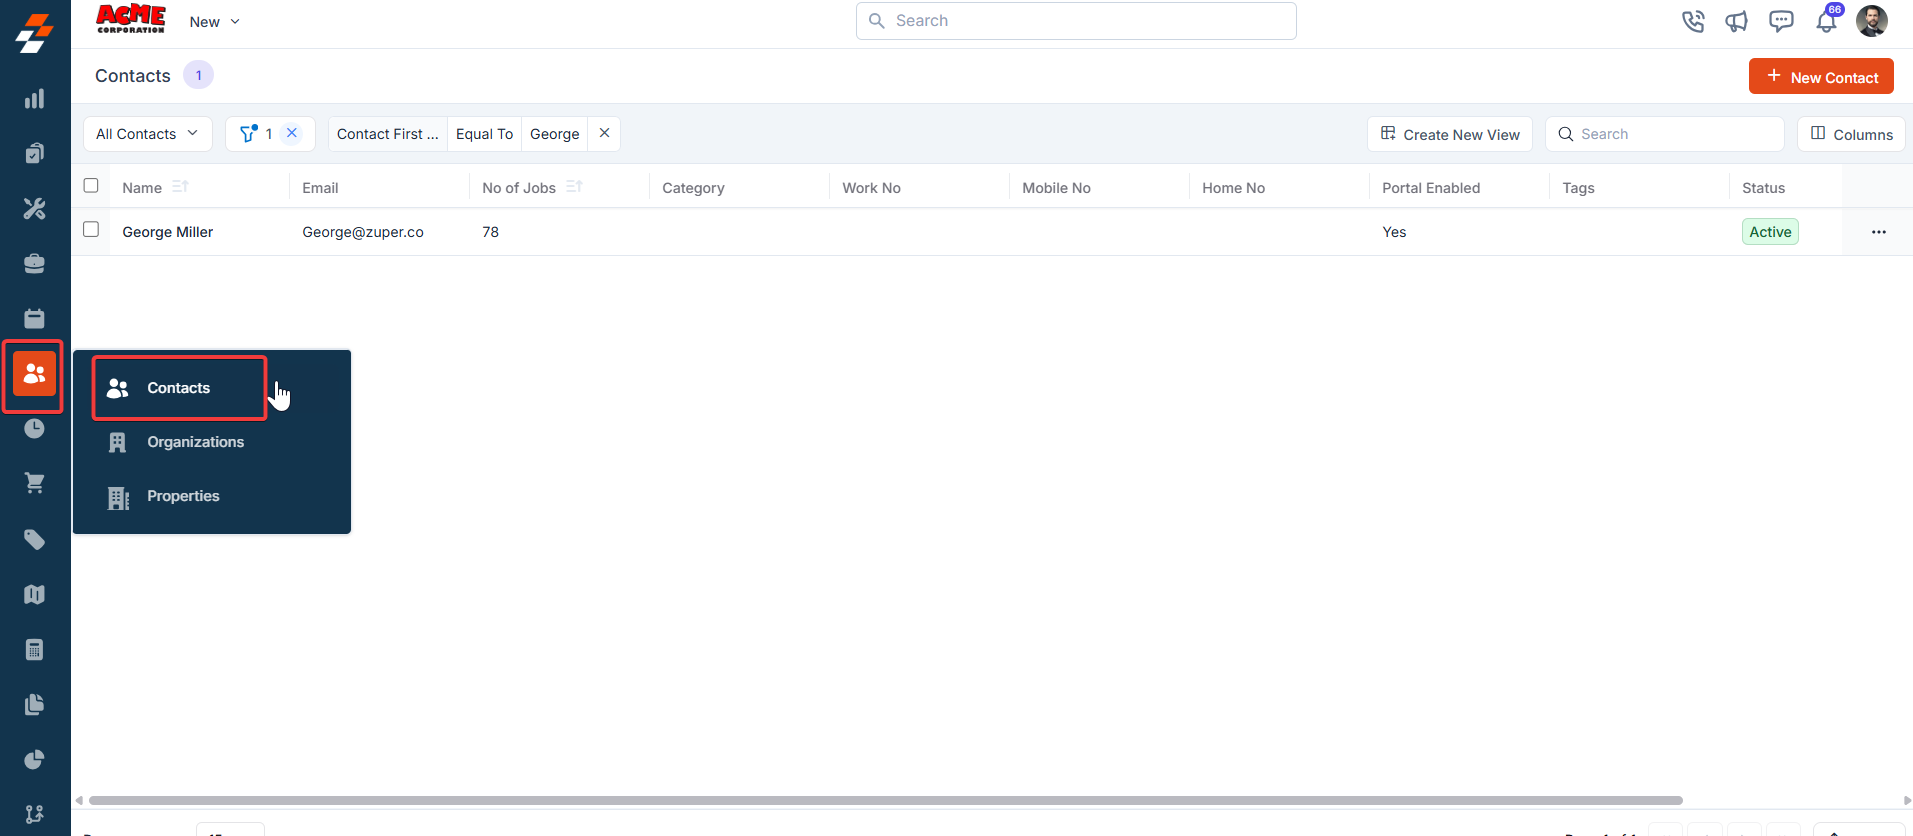
- Select the “Client” module from the left navigation menu and choose “Contacts.”
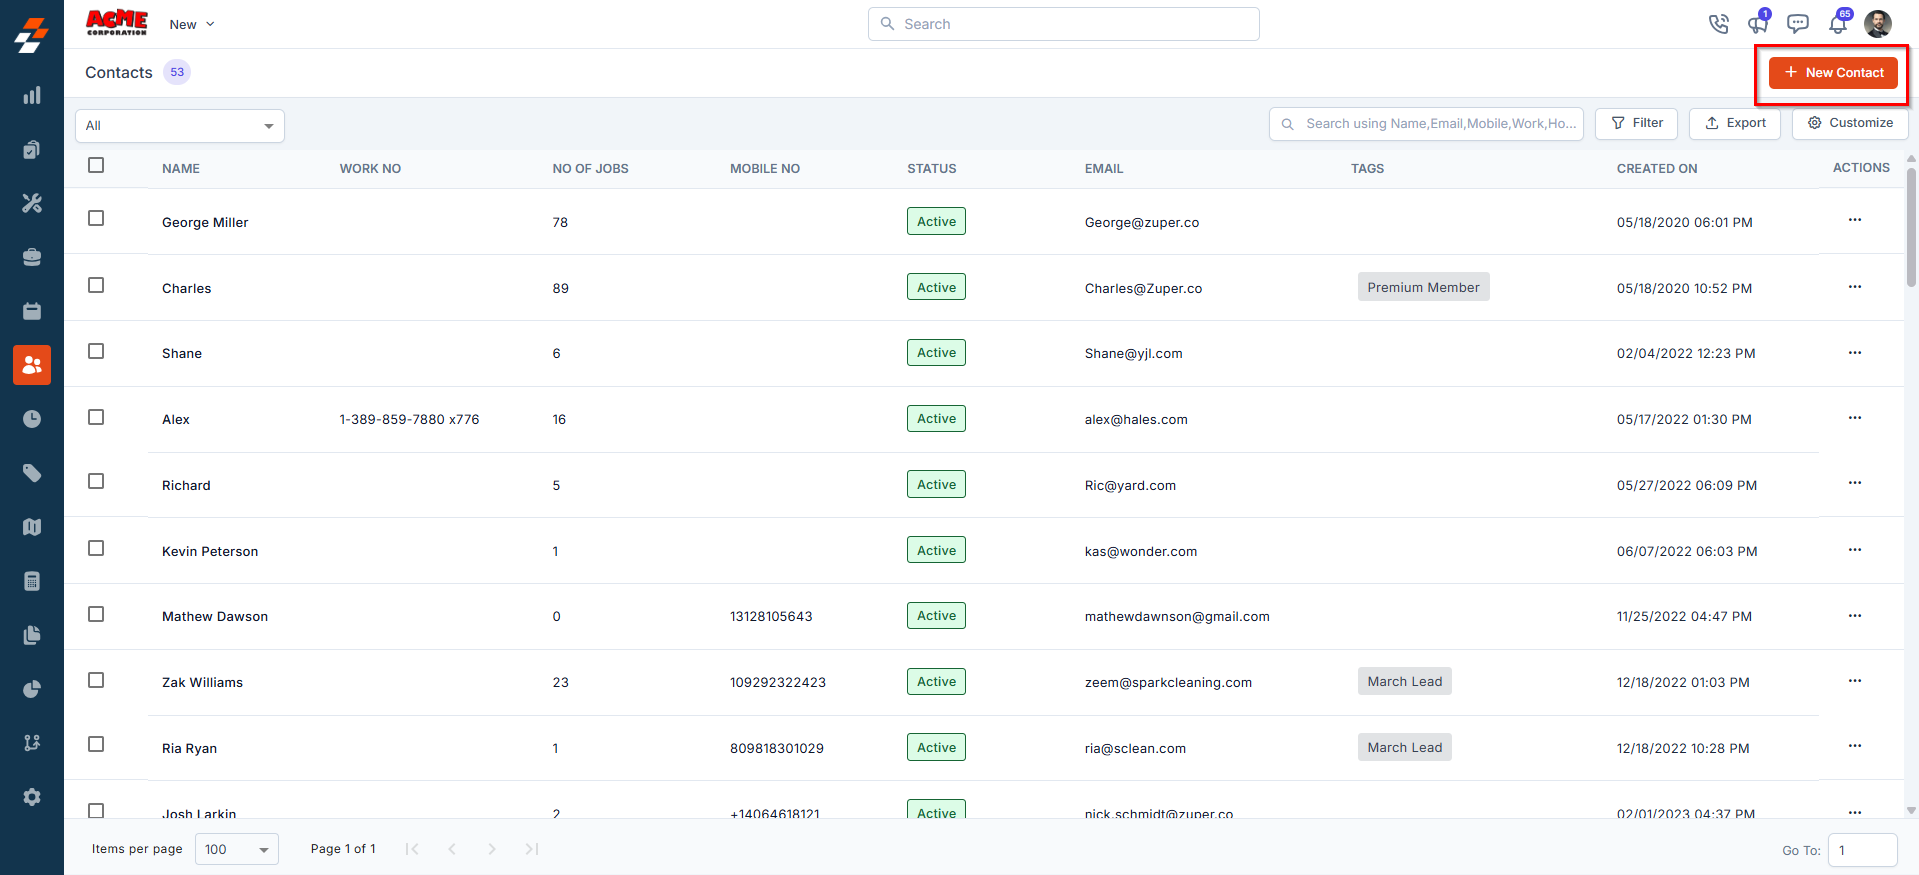
- You will land on the Listing page, which provides a comprehensive view of all your contacts with key information such as Contact Name, Status, Email, Work number, and more.
Exploring the listing page
The Customer/Contact Listing Page layout in Zuper includes view management, column selection, views, and saving customized views. This process is performed directly on the module’s listing page. Default Listing Behavior The system retains its existing default listing behavior, ensuring that pre-set configurations or default views are preserved. When you first access the Customer/Contact Module Listing Page, you’ll see the default view with columns such as Customer/Contact Number, Customer/Contact Address, Customer/Contact Tags, and Customer/Contact Status.Create view configuration
Selecting Columns You can choose which columns to display to focus on relevant data: 1. Select the “Customer/Contacts” module from the left navigation menu. You can view the listing page.
- From the “Views” list, click “+Create new view.”
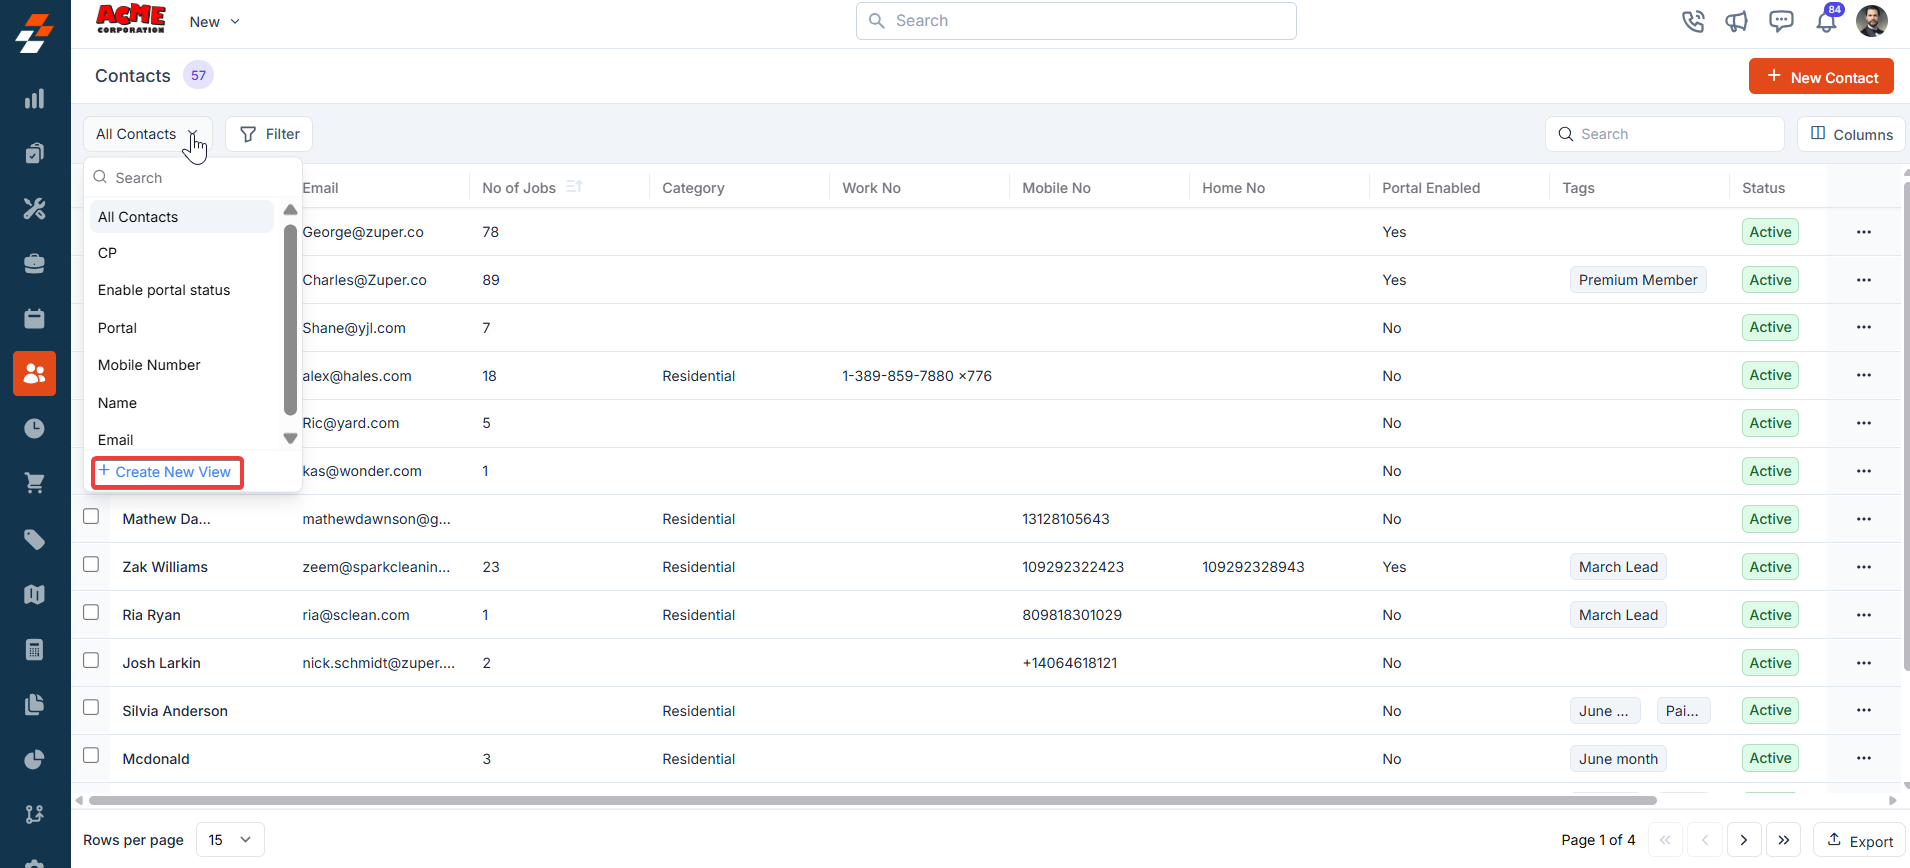
- A “Create View” dialog box appears.
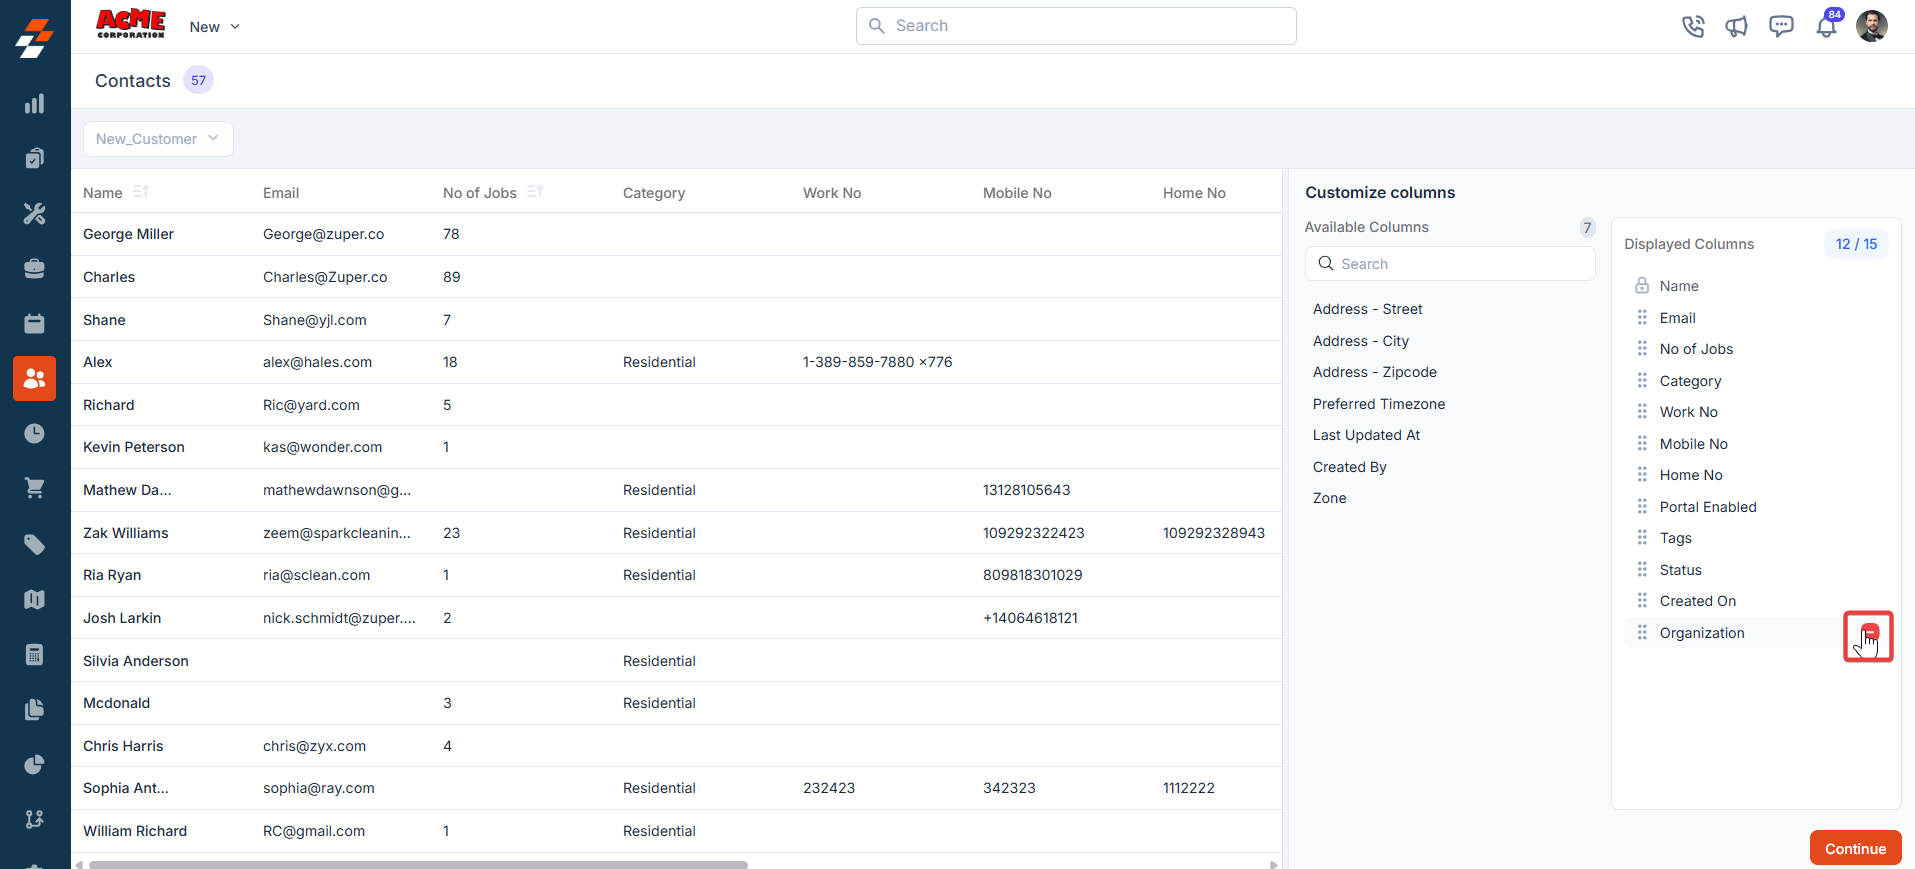
- Once you click “Create,” the Columns sidebar appears, showing “Available Columns” and “Displayed Columns.” To add a column, drag it from the “Available Columns” list on the left to the “Displayed Columns” list on the right. You can click “Continue.”
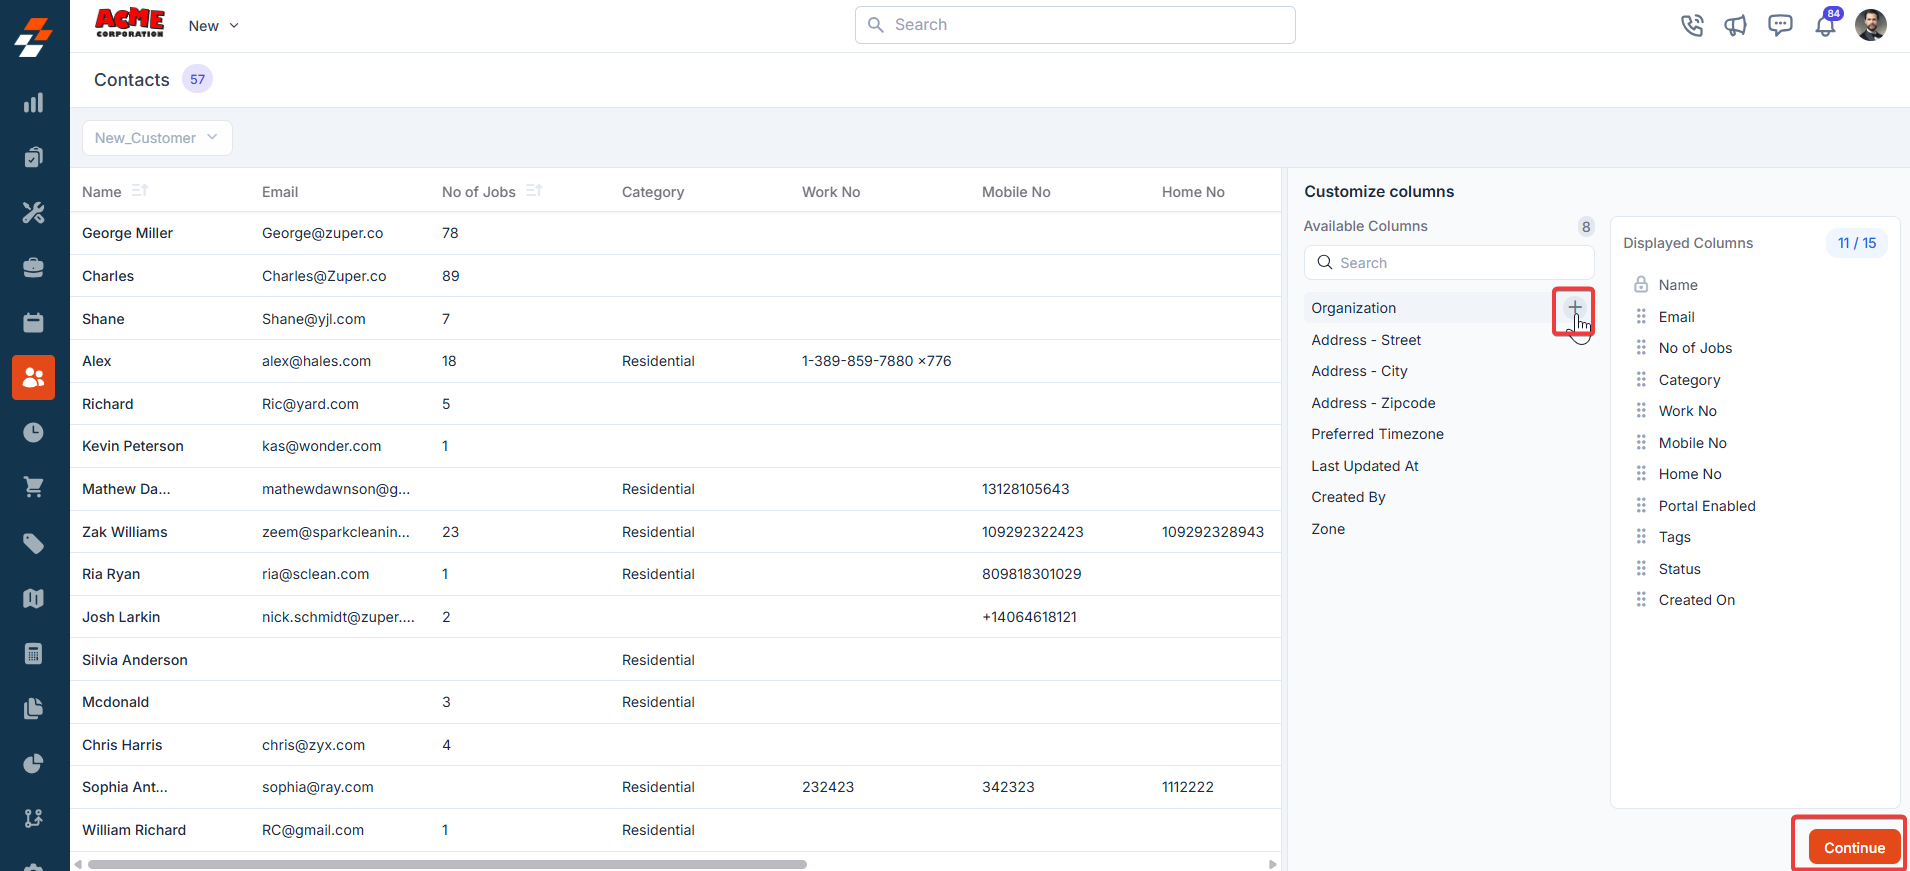
- To remove a column, drag it from the “Displayed Columns” list back to the “Available Columns” list or click the - next to the column name. Click Continue to apply the changes.
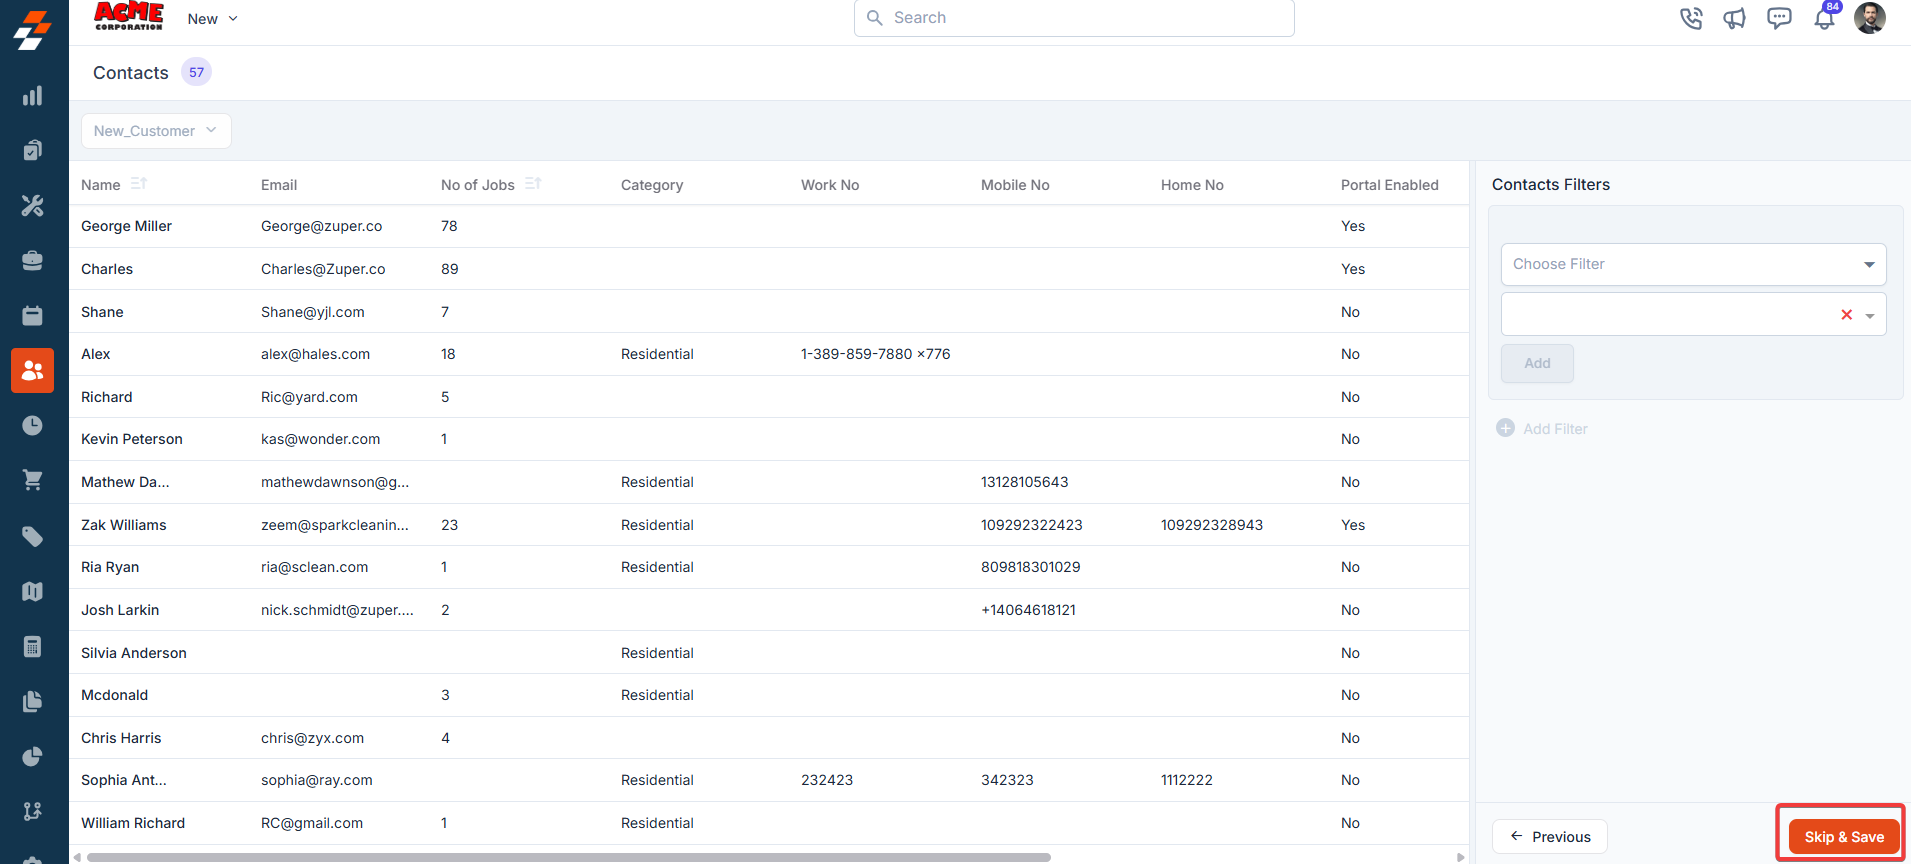
- If you wish not to add any filter, click “Skip and Save” to create the view.
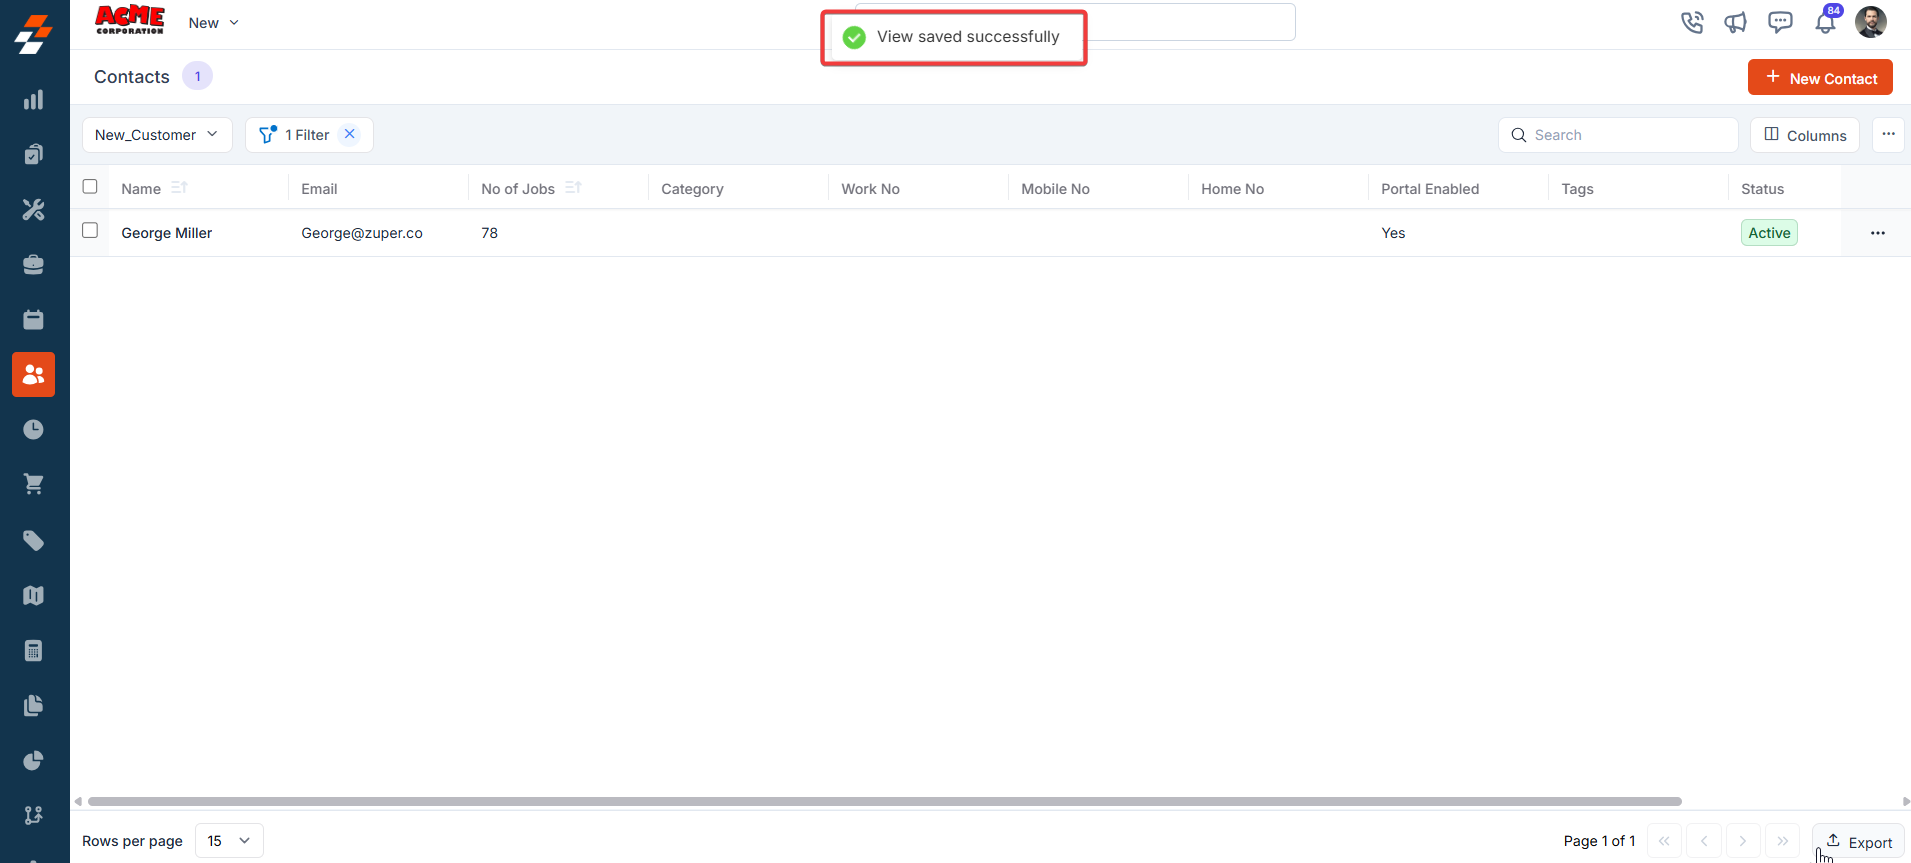
- The view is saved successfully.
Applying filters
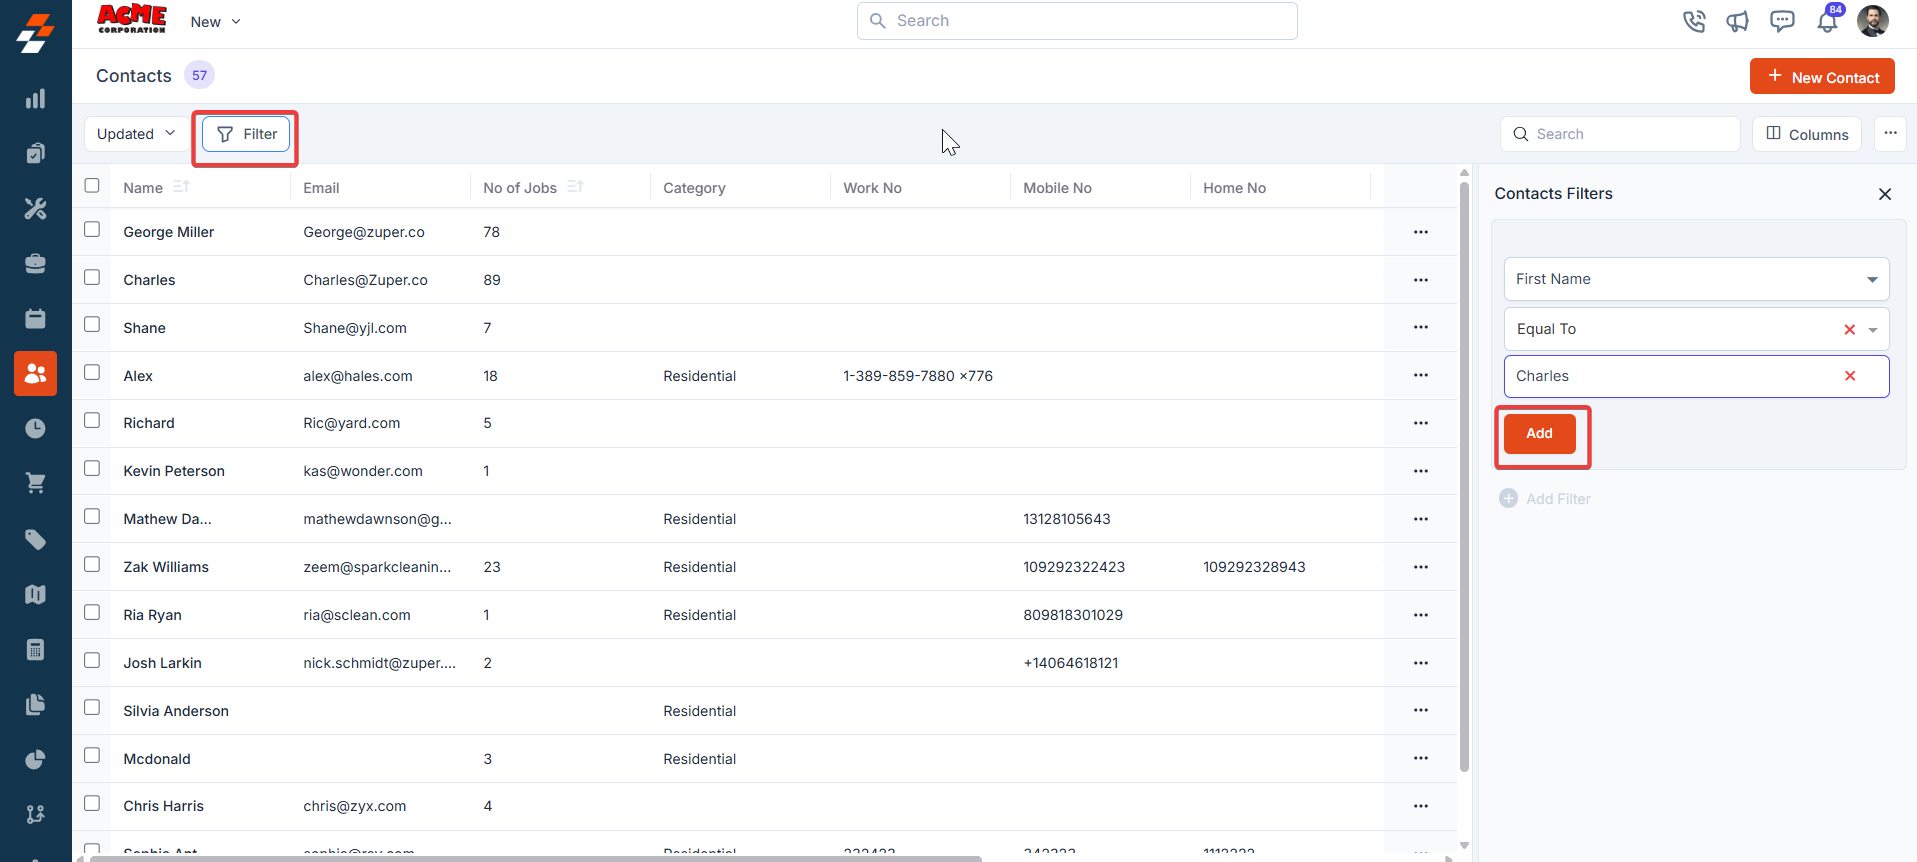
The Filter feature lets you refine your view by applying multiple filters based on available attributes. For example, you can select an attribute like “Customer/Contact Status Type,” choose conditions such as “Equal to,” “Contains,” or “Does Not Contain,” and choose the desired value. Once the filter is applied, the results will update to show only the Customer/Contacts that meet your criteria, making it easier to find and manage relevant Customer/Contacts.- Click “Filter” at the top left of the page. Choose the attributes you want to filter by, apply the desired conditions, and click the “Add” button to view the results.
- Click “Update View” to modify the existing view.
- The new view is set successfully with the filter. You can view the filter created and the filter name from the view list.
Update view
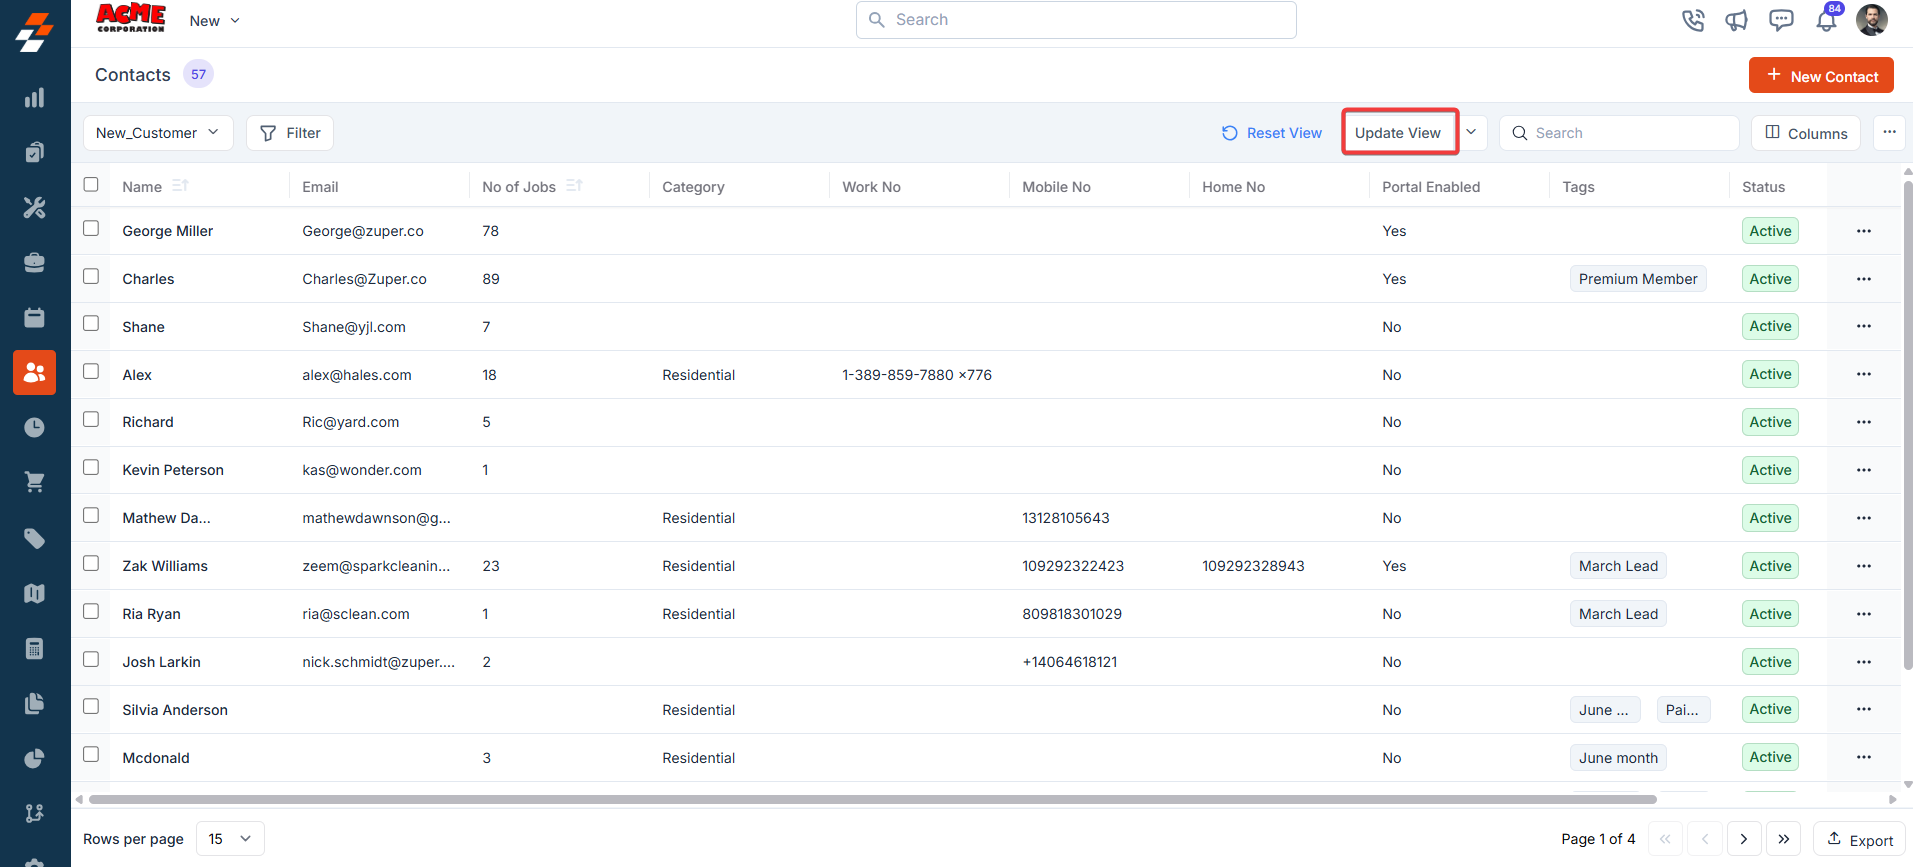
An update view allows you to modify the current display settings of the “Customer/Contacts” section. After making changes, you can save the updated configuration to the existing one or name it a new view.- Add/remove the existing columns and click “Update View” to modify the existing view.
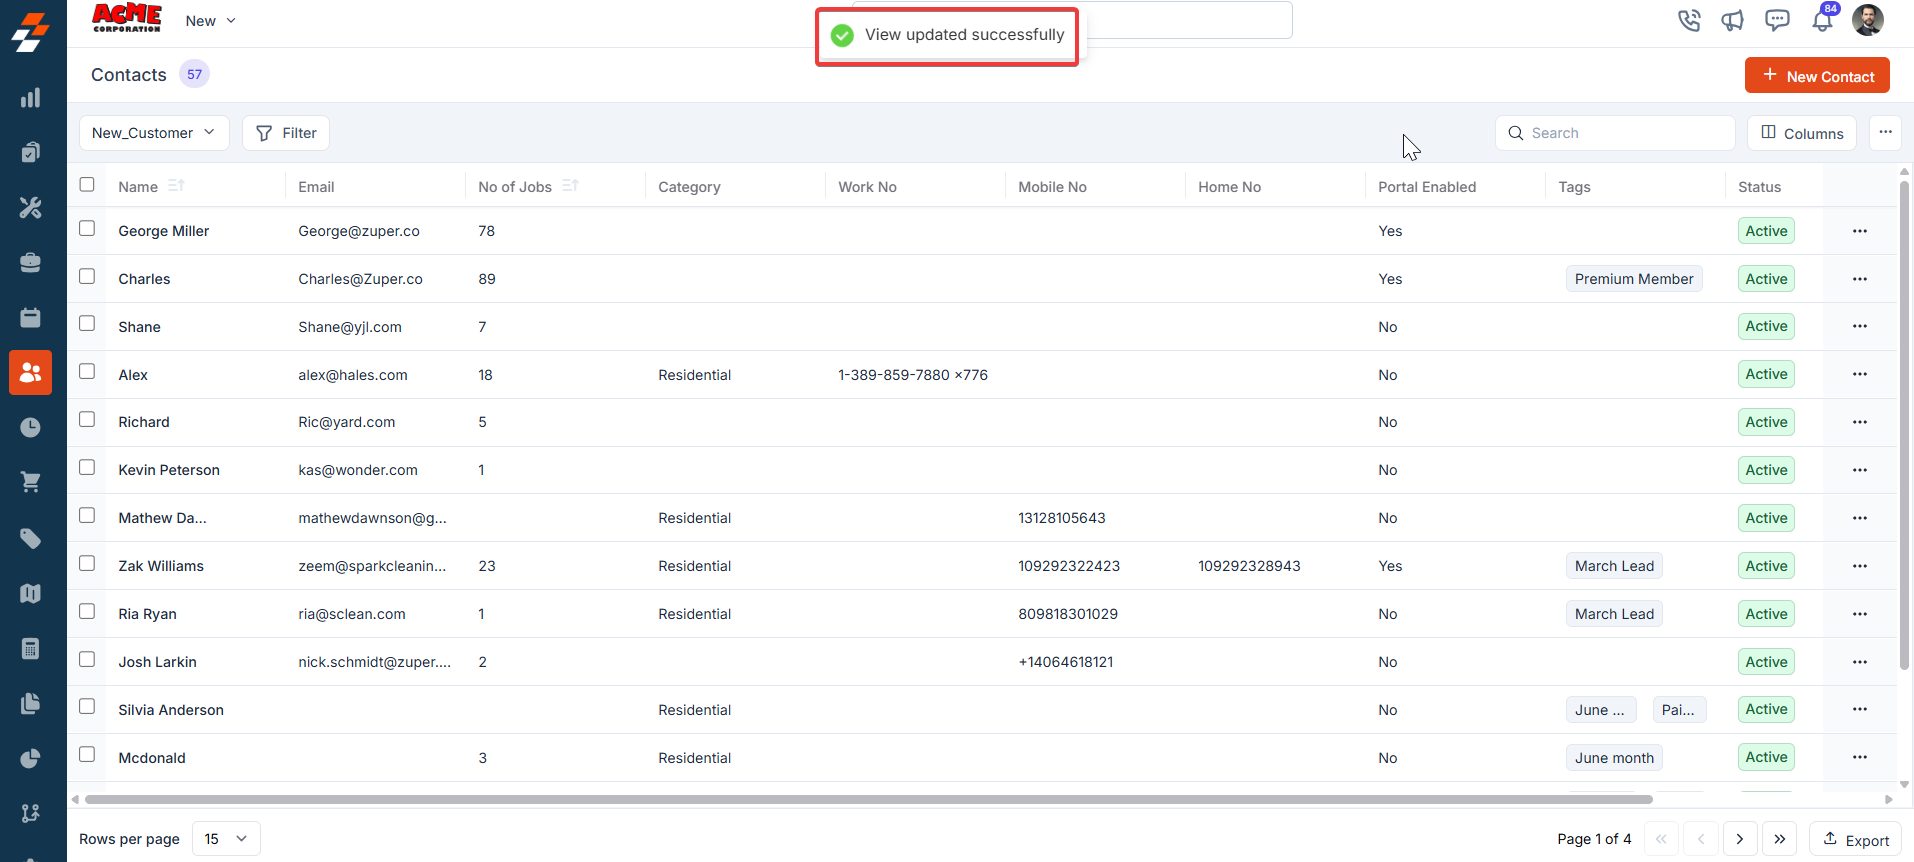
- The view is updated successfully.
- Click the down arrow below the “Update View” to create a new view by clicking “Save as new view.”
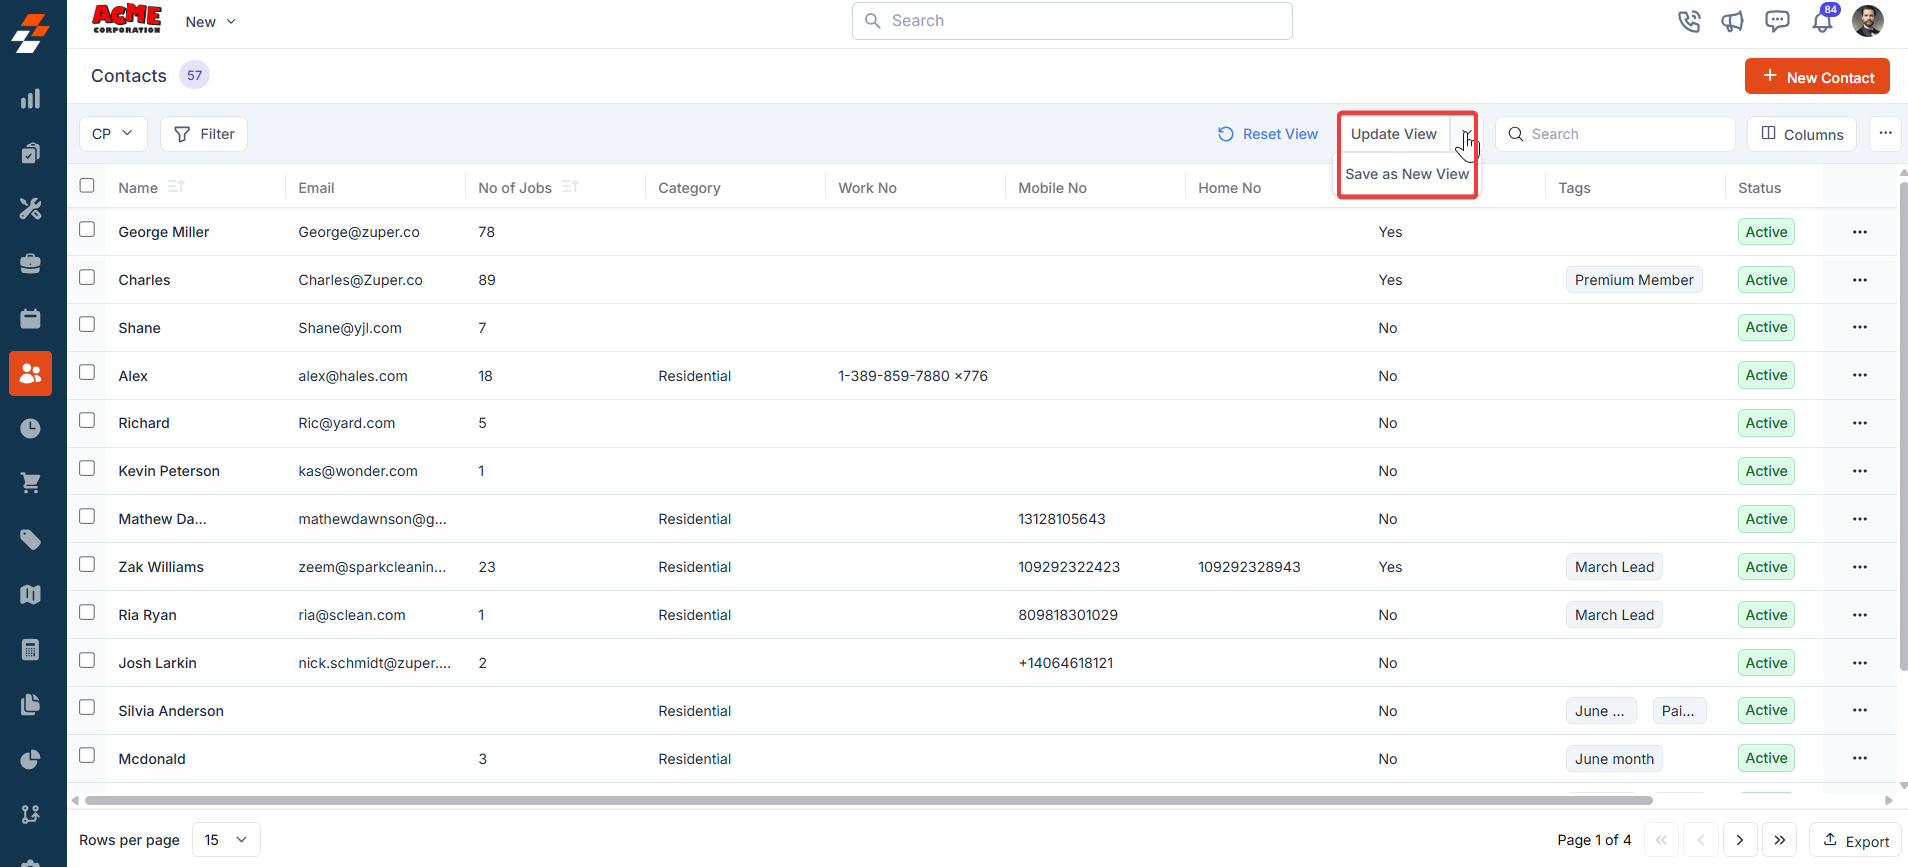
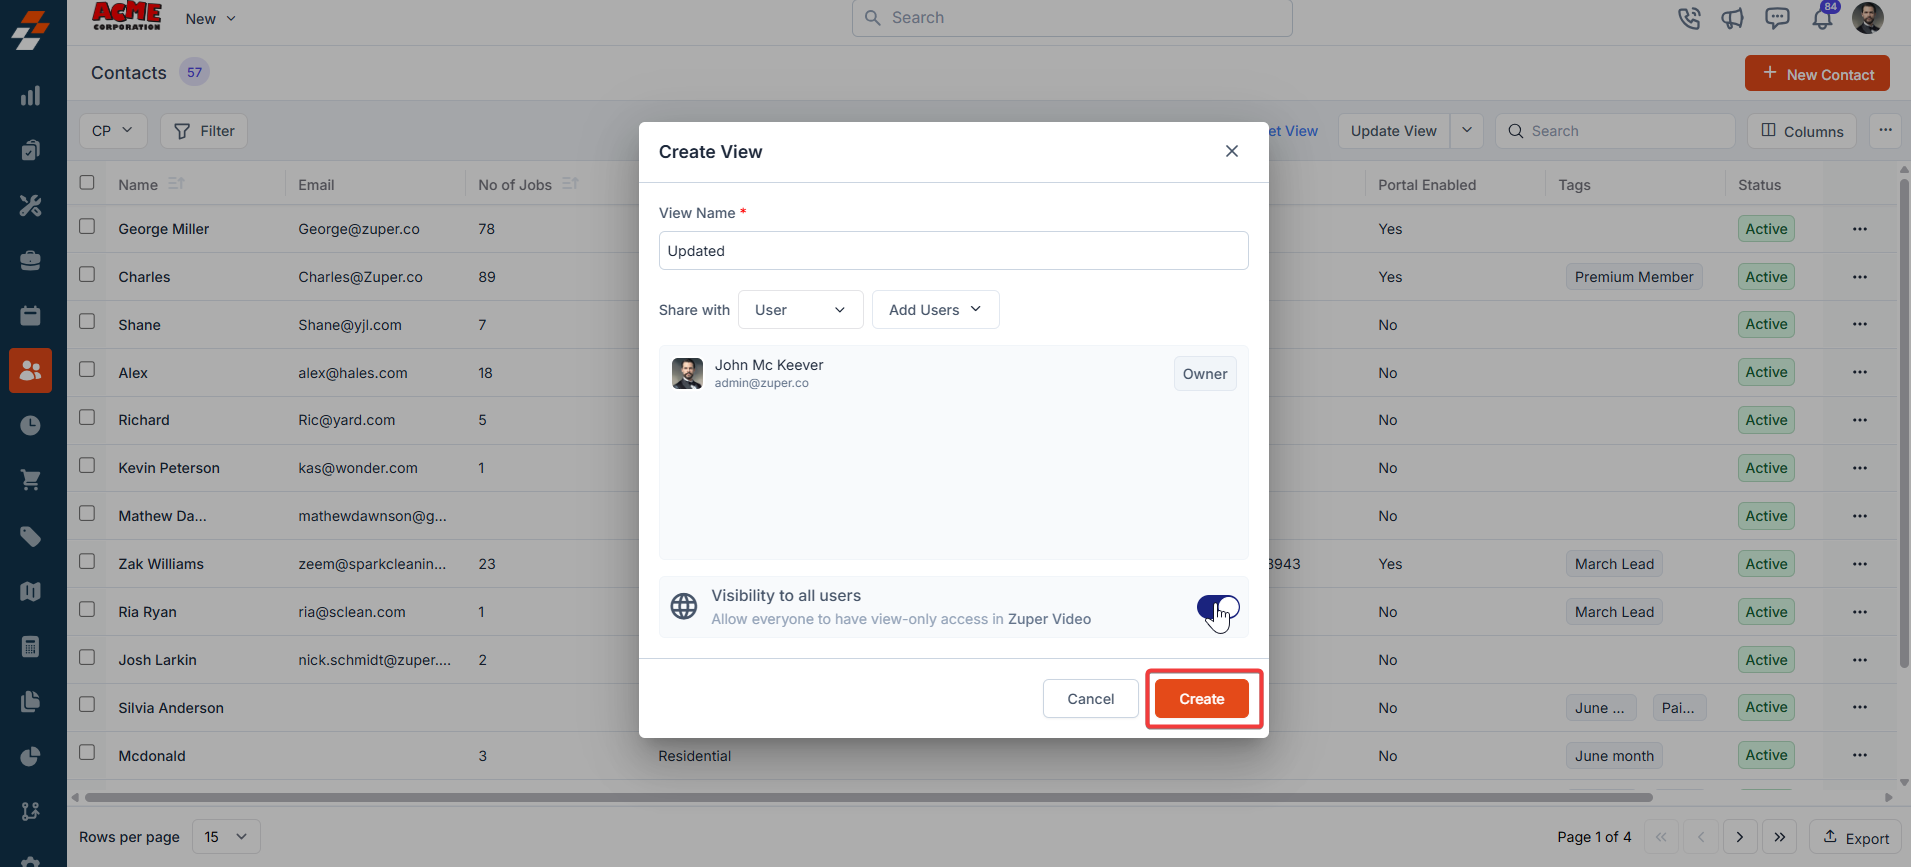
- A “Create View” dialog box appears.
- View Name (Mandatory) – Enter the view name.
- Share with - Select any one of the options (User, Team), and you can add the relevant users.
- Visibility to all users – Toggle on to make this view visible.
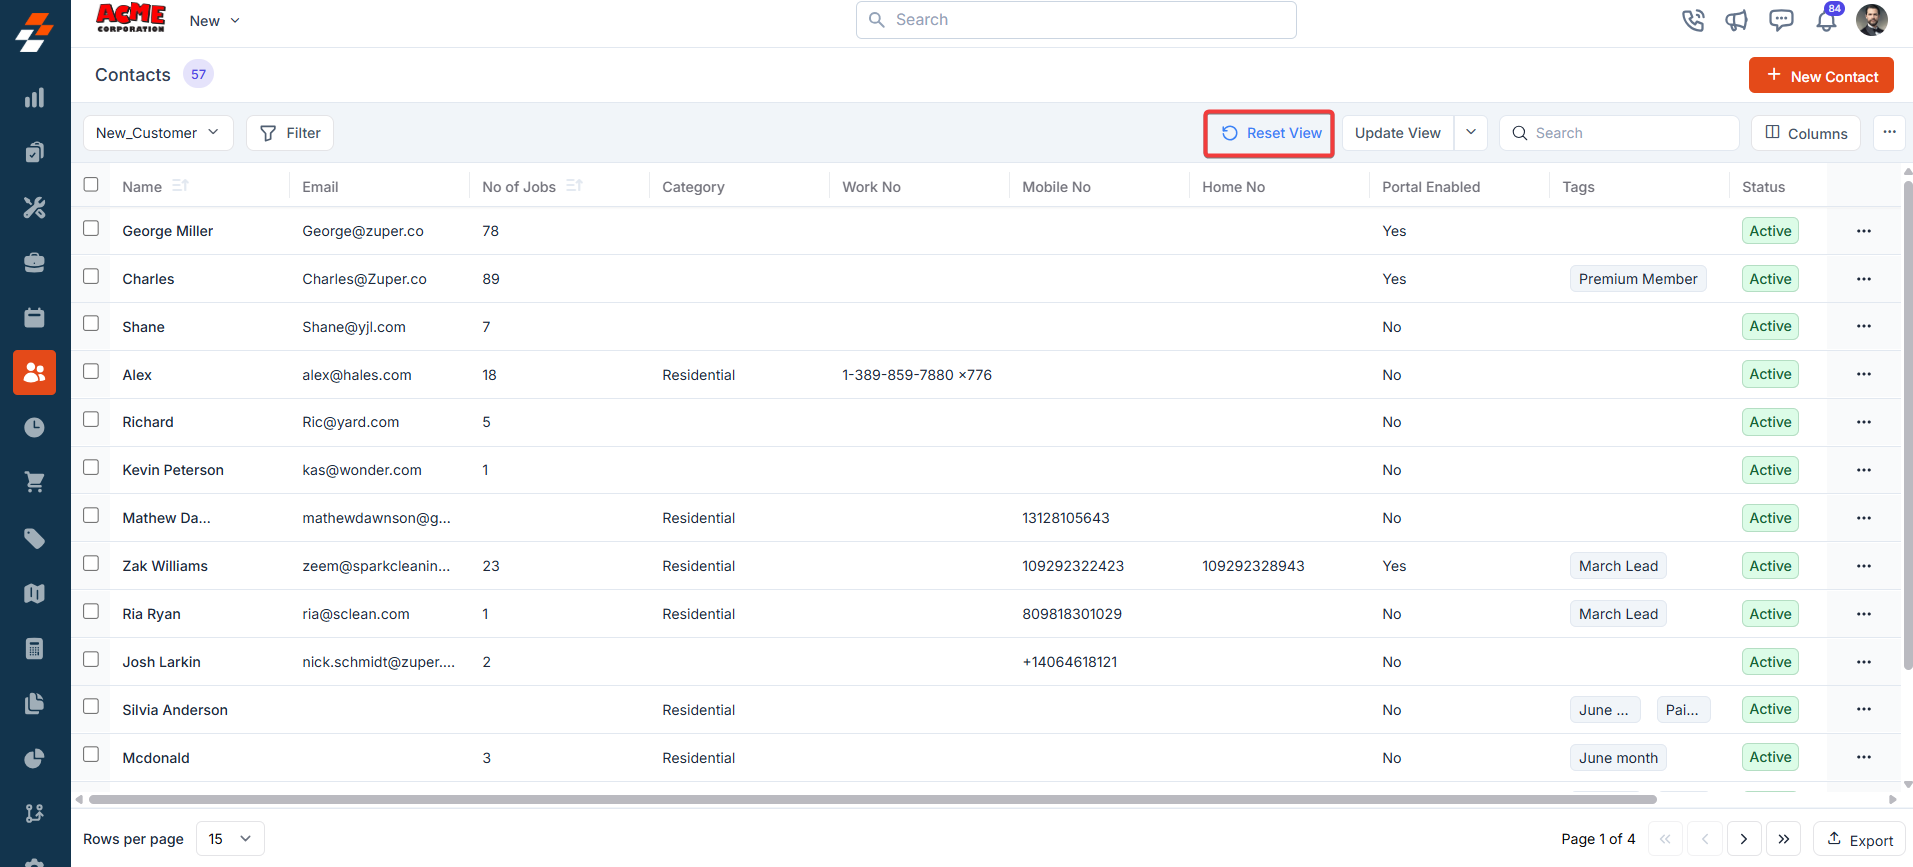
- Click “Reset View” to reset the current view.
Setting permissions for views
Edit Permissions
Users with edit permissions can modify the layout:- They can add/remove columns, reorder them, and adjust views as described above.
- If permission is given, changes can be saved as a new view or overwritten as an existing one.
View Permissions
Users with view-only permissions can see the layout but cannot make changes:- They can view the customized columns and filters but cannot edit them. To ensure consistency for viewers, they can save them as a new “View.”
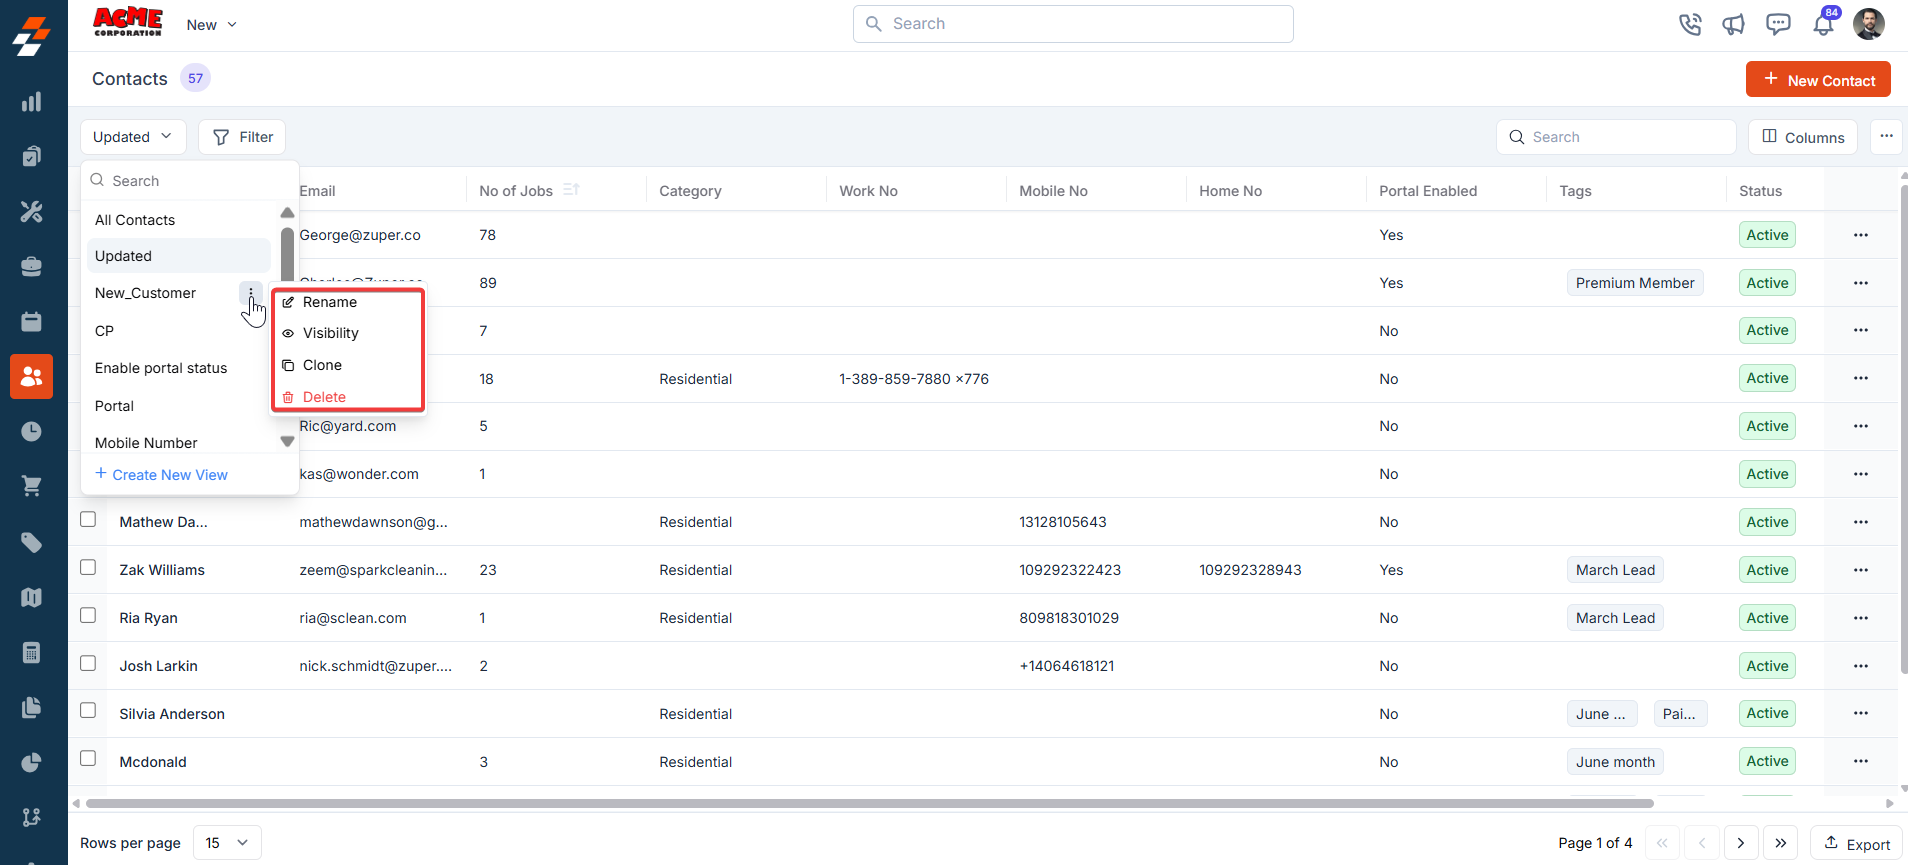
Make changes to the view
- Rename: This option allows you to change the view’s name (e.g., from “New_Customer” to something else).
- Visibility: This lets you adjust who can see the view. Options include sharing with a user or team or keeping it private (“Only Me”), as well as toggling visibility for all users in Zuper (as shown in the “Create a View” dialog in prior images).
- Duplicate: This function creates a copy of the “New_Customer” view, allowing you to modify the duplicate without affecting the original.
- Delete: Removes the view entirely. Since this is a custom view, deleting it would revert the listing to the default view or another saved view. Only the created user can delete the view.
Pinned filters
Zuper’s Customers module lets you use pinned filters to streamline your filter experience. Pinned filters keep your most-used criteria readily accessible for quick application. Pin up to 3 filters in any module.Navigation: Clients -> Customers -> Filters -> Pinned Filter
- Select the “Clients” module from the left navigation menu. Choose the “Customers/Contacts.”
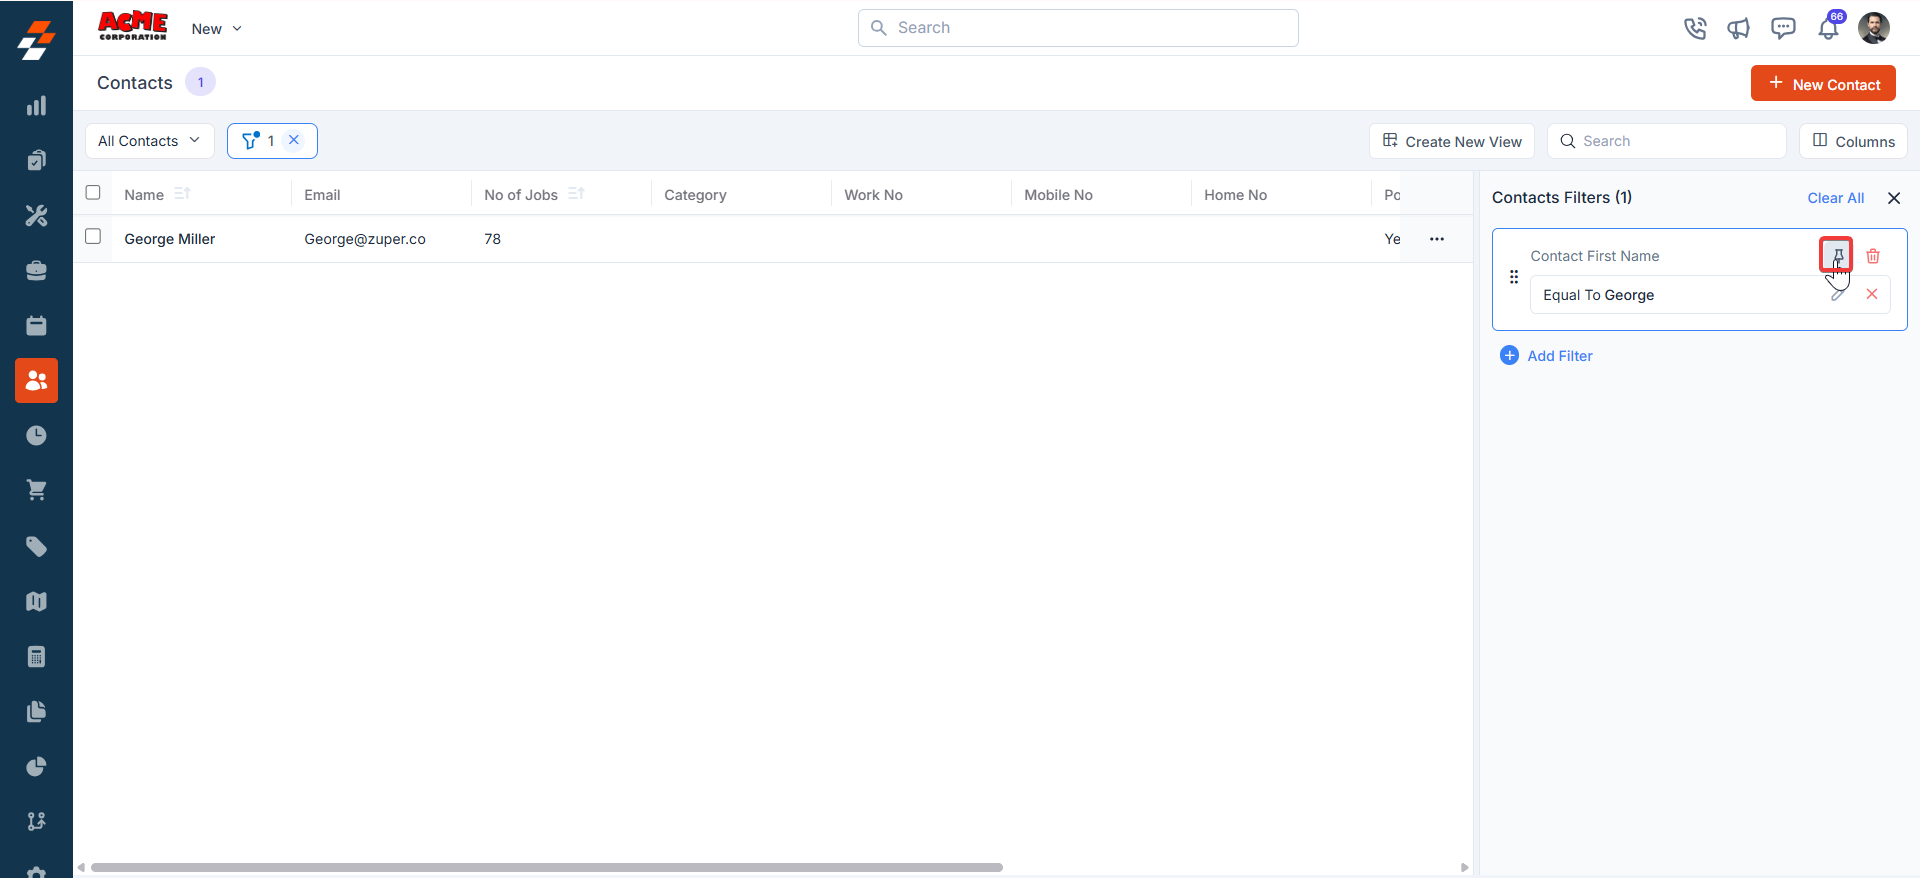
- Pin Filters for Quick Access
- Once your filters are set, click the Pin Filters button in the dialog box to save them as pinned.
- Pinned filters appear in the dialog box’s “Pinned Filters” section, allowing you to apply them with one click in future sessions.
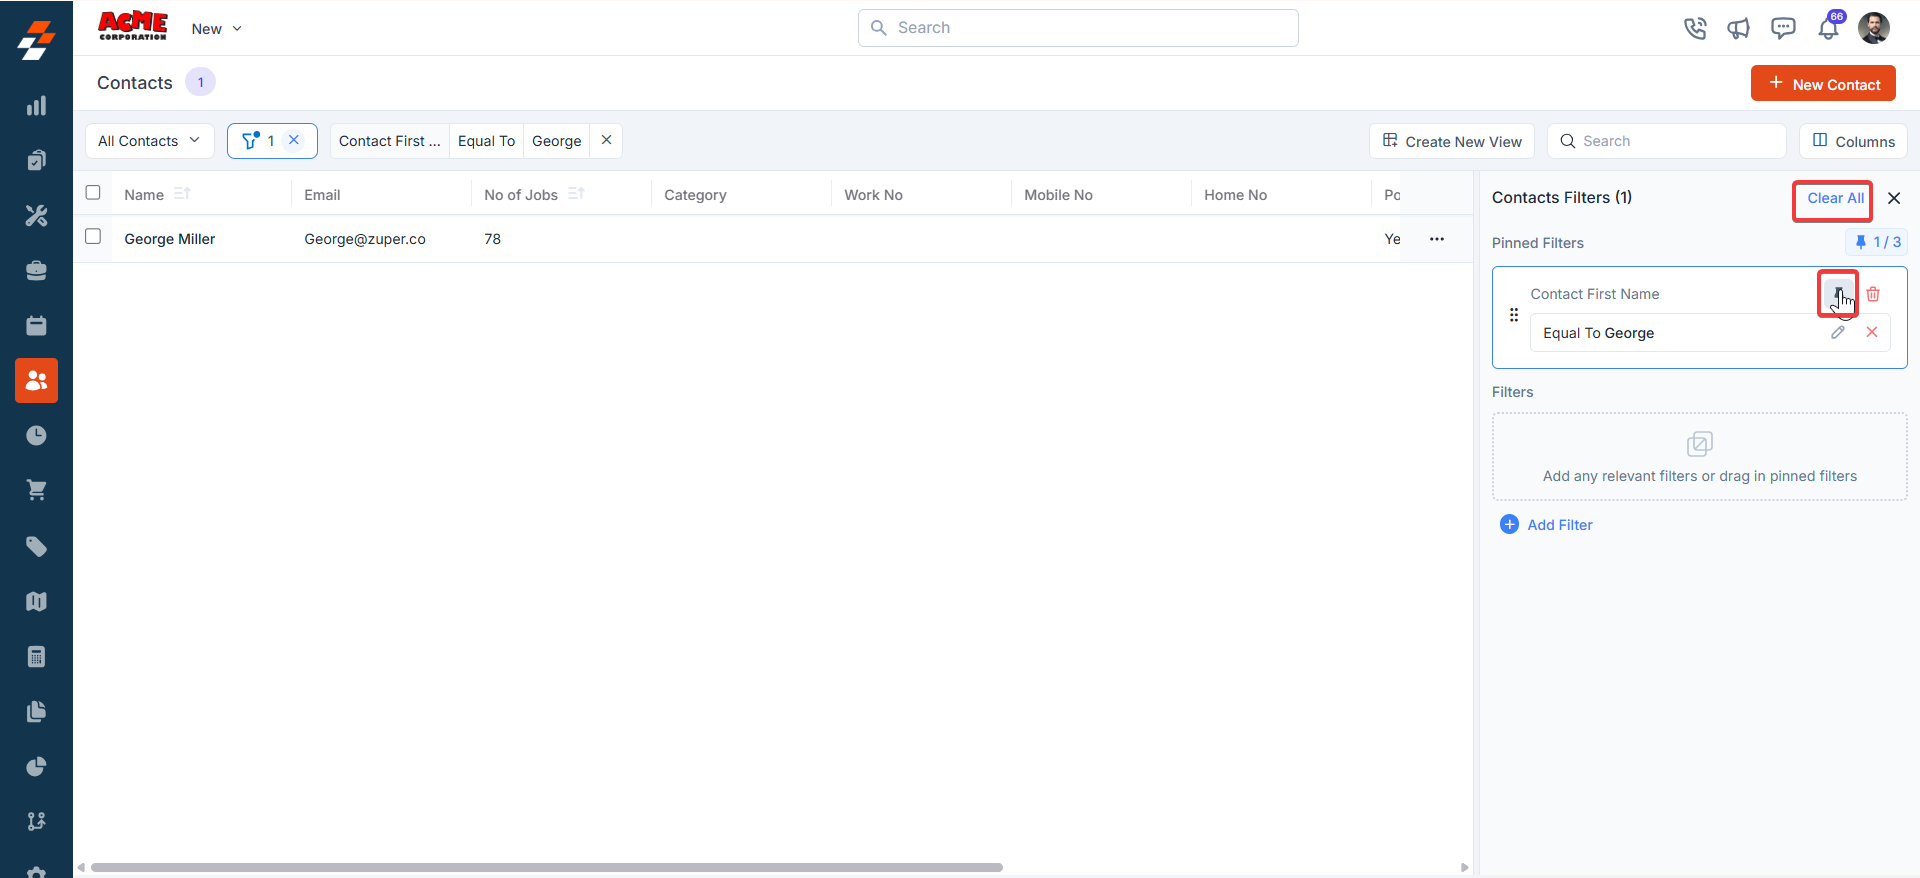
- To Unpin the filter:
- To unpin, select a pinned filter and click Remove.
- To apply pinned or default filters, open the dialog box and select them.
- Use Clear All to remove active filters.
Creating a new contact
You can quickly create a new contact directly from the listing page.- Click the ”+ New Contact” button in the top right corner.
- Fill in the required fields such as Contact Name, Contact Information, Tax Details, and Service Addresses.
- For a step-by-step walkthrough, refer to the Creating a new contact article.
Managing contact details
Once a contact is created, the contact details page becomes your go-to space for managing its lifecycle. The page follows a three-column layout, the left panel displays the contact primary details, while the right panel provides contextual insights and quick actions for efficient contact management.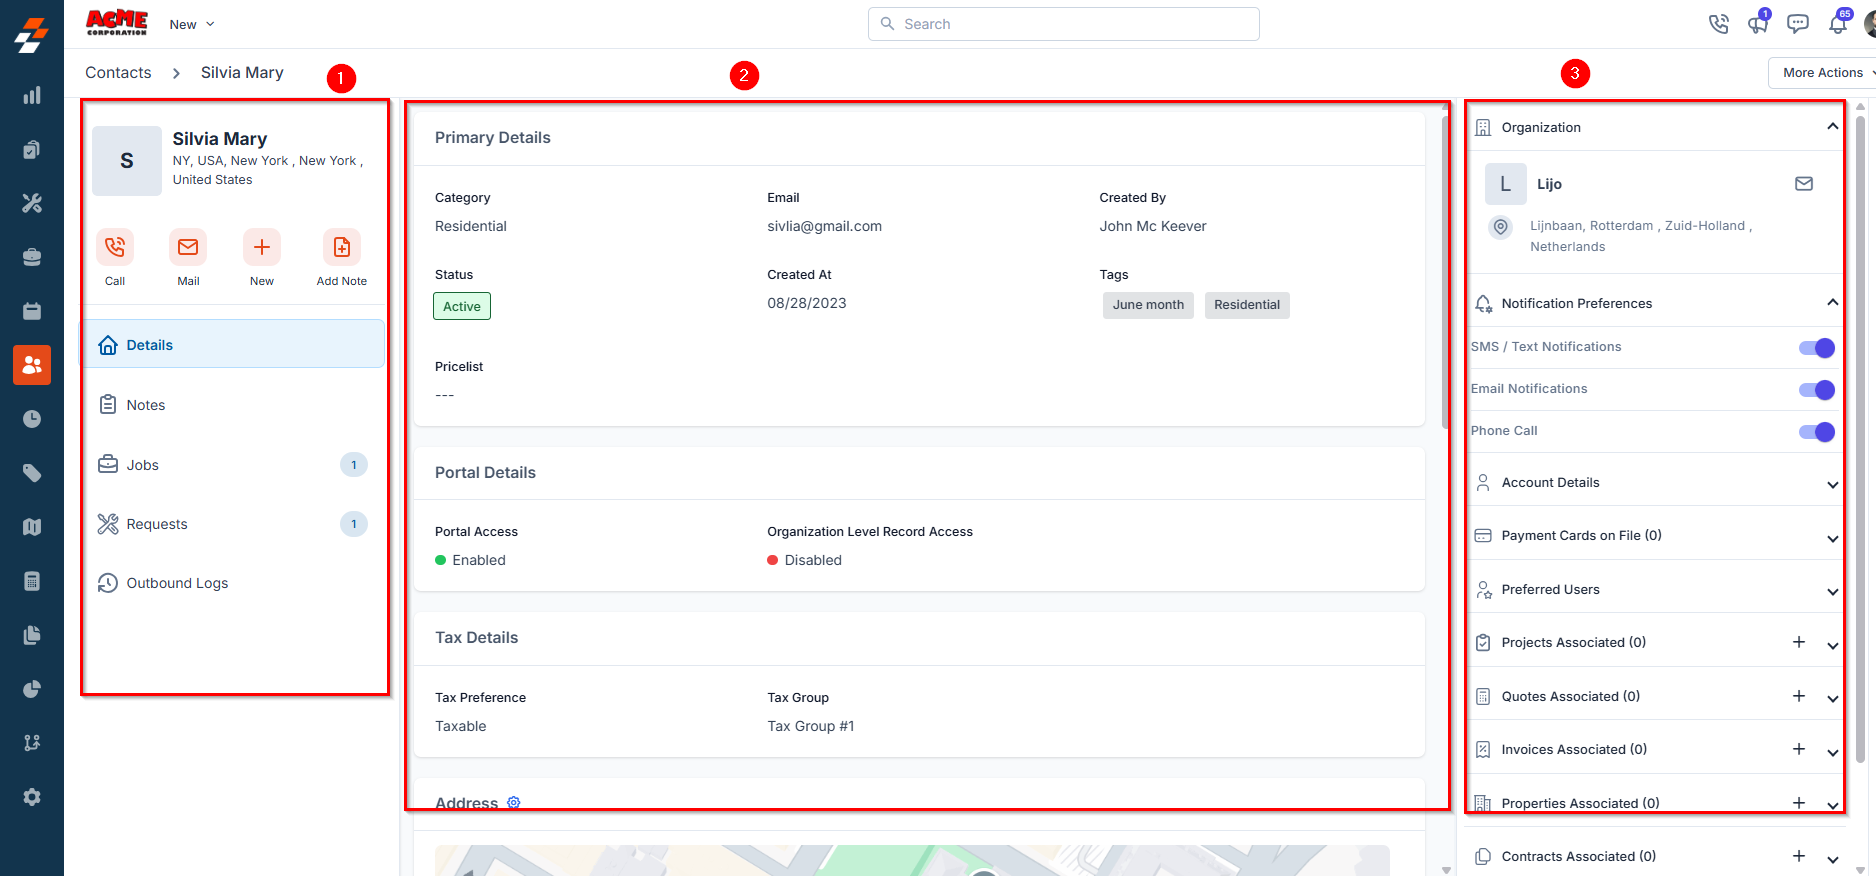
Left Panel
The left panel displays contact-related details such as the contact’s name and address. Below this, you’ll find the quick actions bar, which offers contextual buttons to call or email the contact, create a new project, job, request, proposal, or quote, and add notes.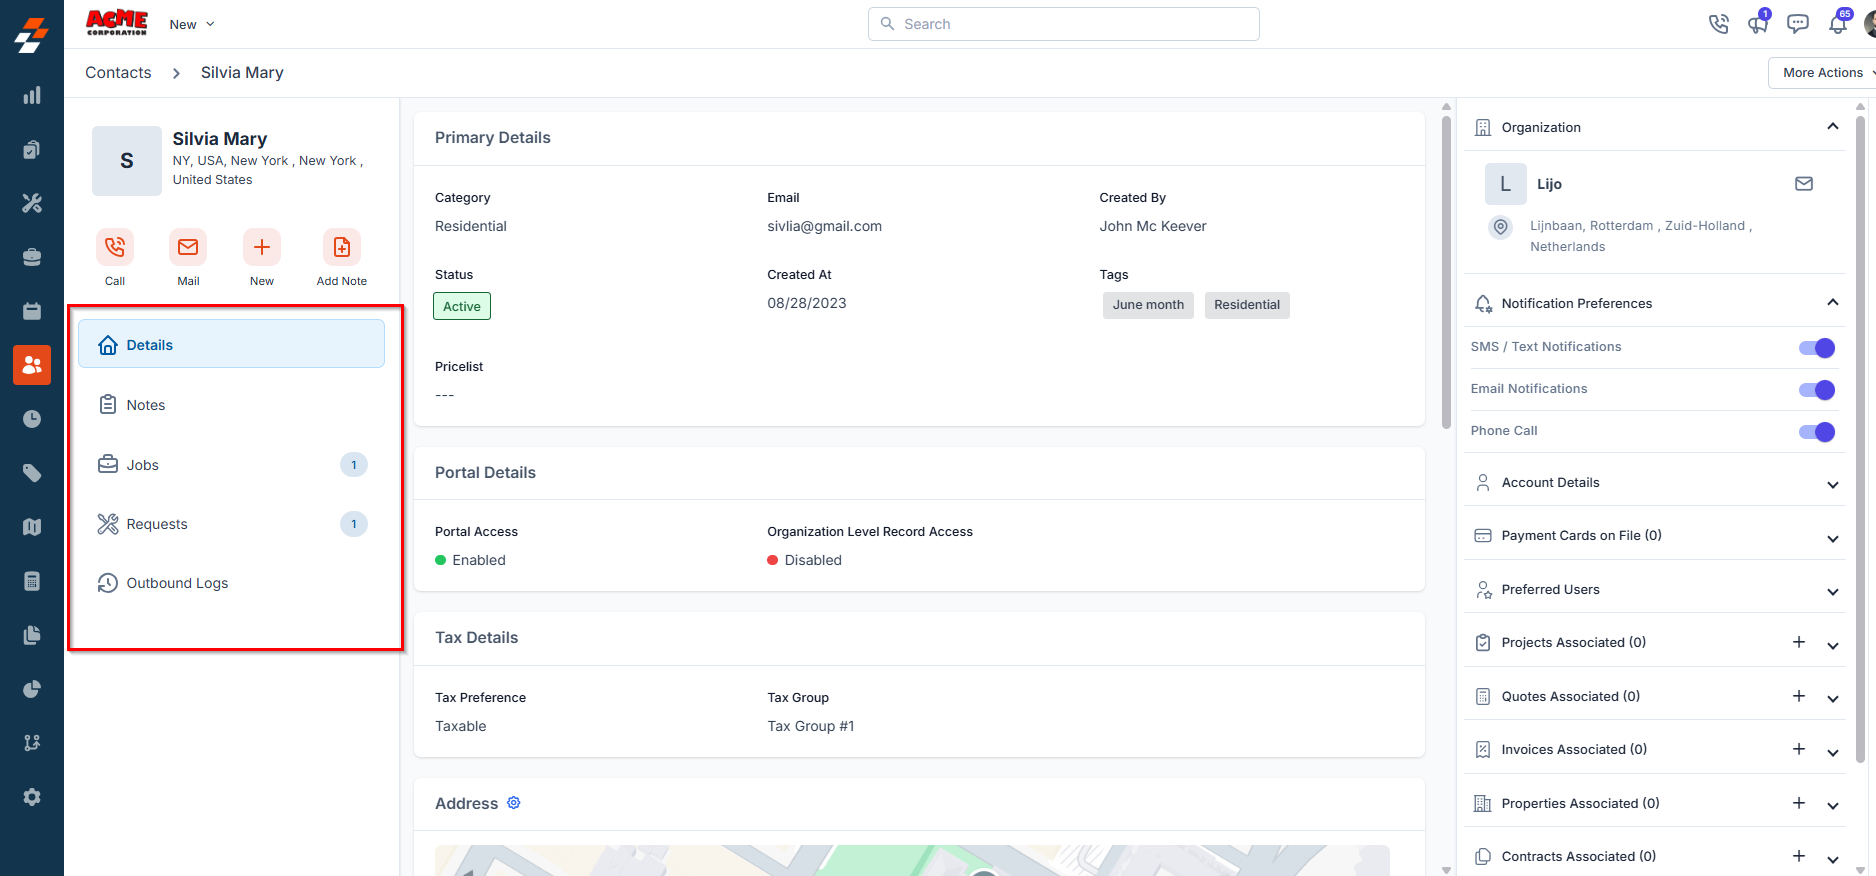
Contact Details
Contact Details
The contact’s details section offers a comprehensive overview of the contact.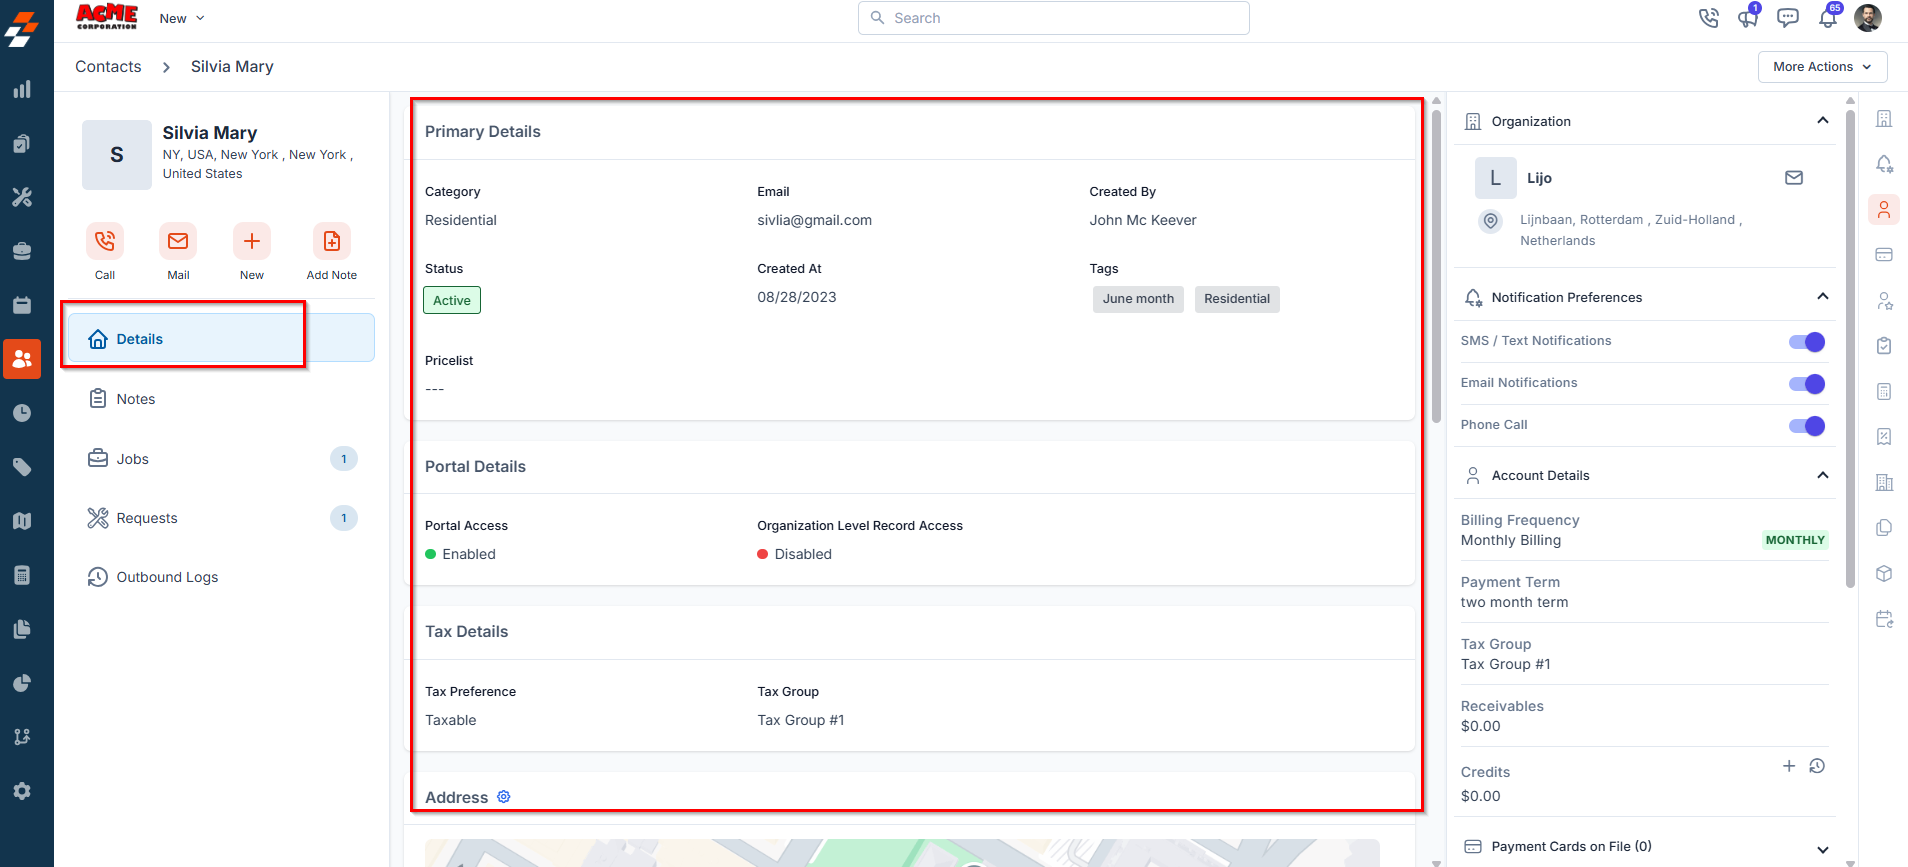
Editing a Contact's Organization Association
Editing a Contact's Organization Association
If a contact is incorrectly linked to an organization, or if you need to remove the organization association entirely, you can do so by editing the contact record directly from the V3 webapp.After removing the organization, you can choose to:
The contact–organization relationship is owned by the contact record. To remove a contact from an organization’s view, edit the contact and clear the Organization field — do not attempt this from the Organization record.
Open the Contact Details Page
Navigate to Clients → Contacts, find the contact, and click their name to open the contact details page.
Clear or Change the Organization Field
In Primary Details, locate the Organization field. Remove the current organization or select a different one as needed.
- Retain the contact as a standalone record (no organization linked)
- Delete the contact if the record is no longer needed
Notes
Notes
The Notes section allows you to view, add, and manage notes related to the contact. From here, you can use the rich text editor to add any new note. To tag a user to a note, you can use @ and key in the name to tag the user.You can attach multimedia files such as images, audio, video, and documents related to the contact. Use the ”+” option to associate the notes with other modules such as property, organization, etc.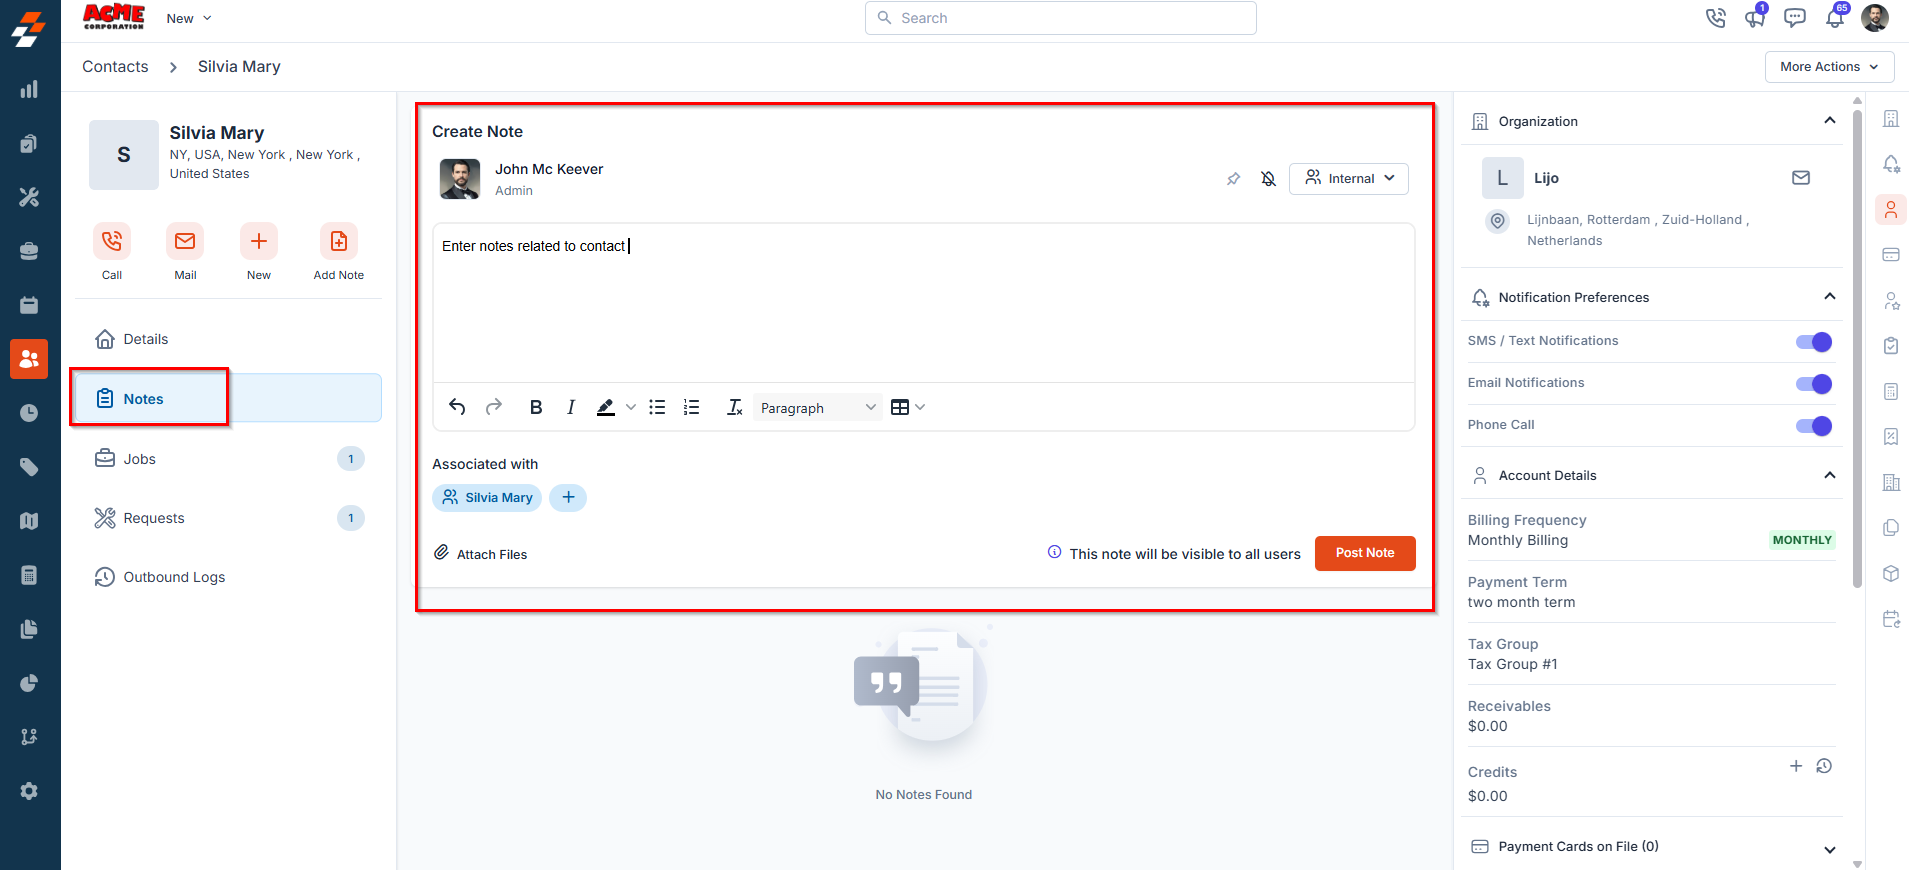
Jobs
Jobs
The Jobs section allows you to view all jobs associated with the contact. This includes both ongoing and completed jobs, providing you with a comprehensive overview of job statuses, schedule, and related details.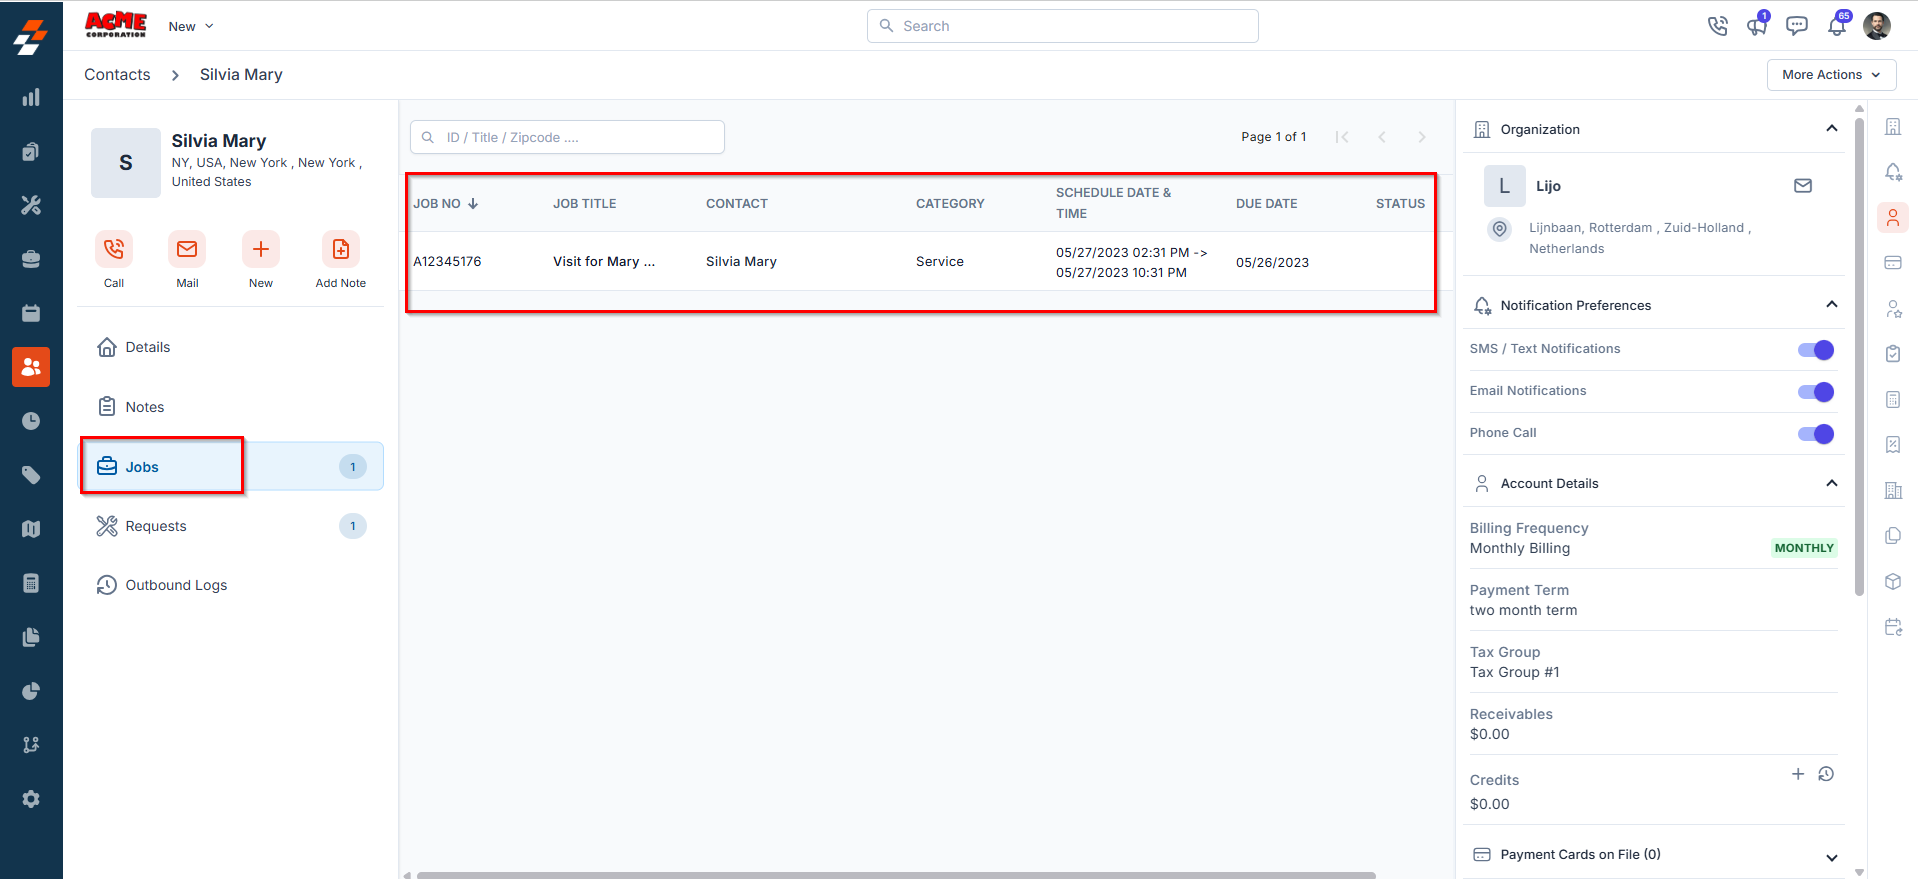
Requests
Requests
The Requests section displays all service requests linked to the contact. This includes open, in-progress, and closed requests, allowing you to track customer inquiries or service needs from initiation to resolution.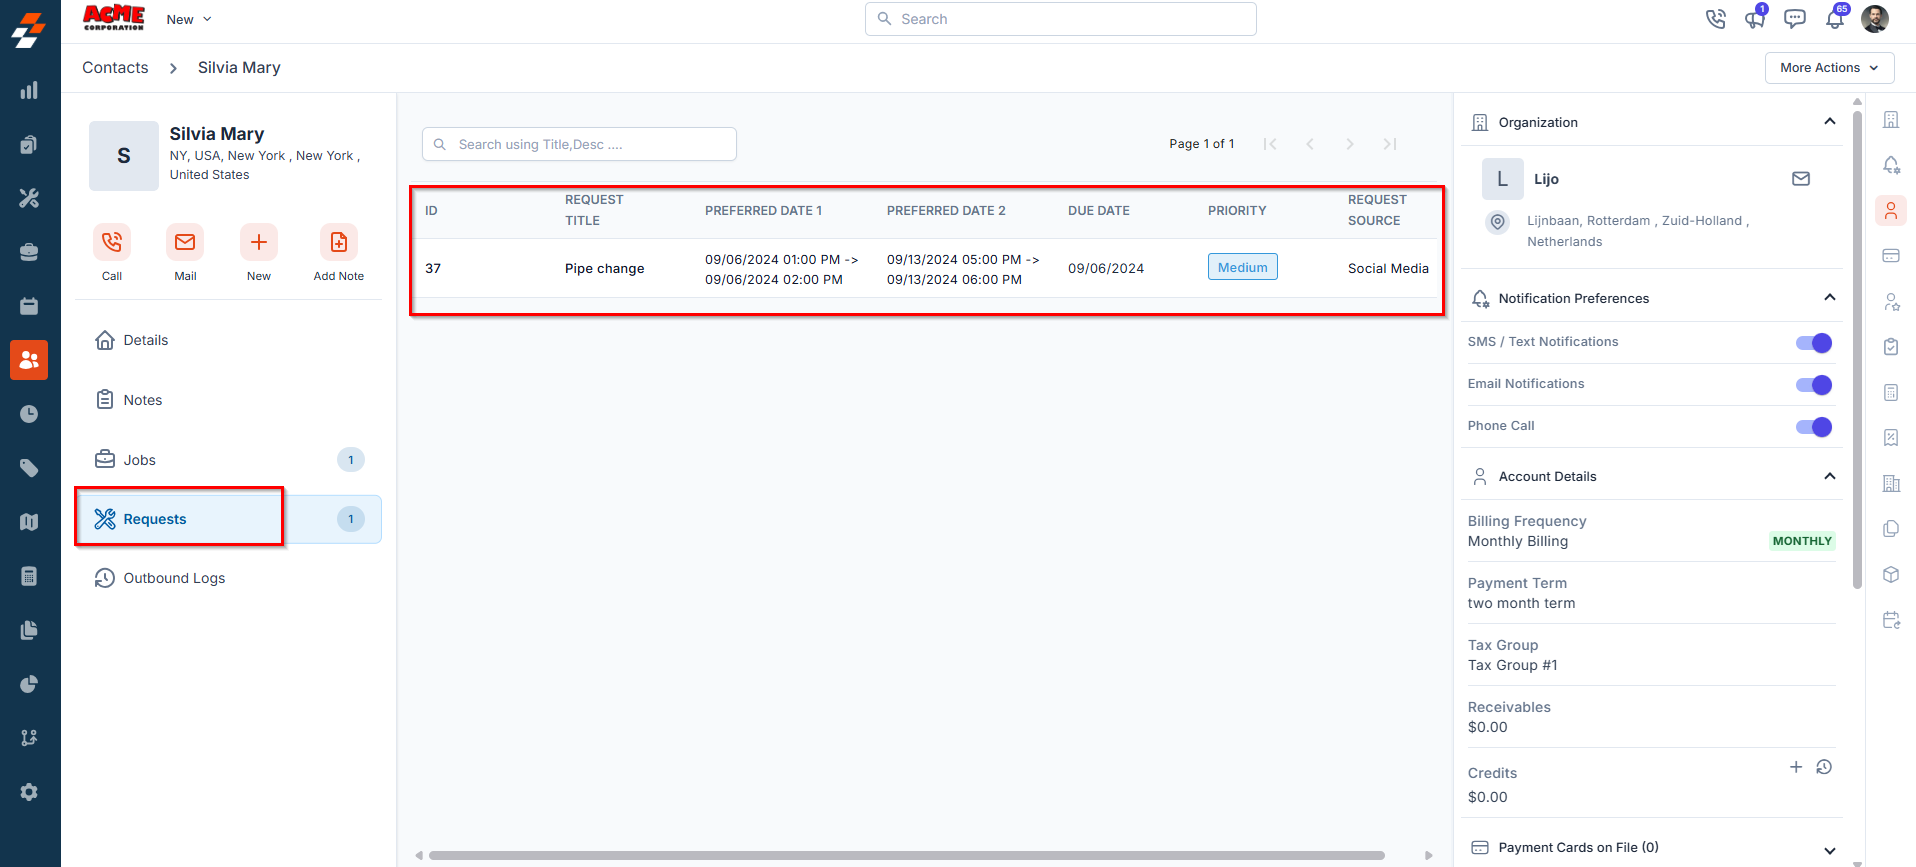
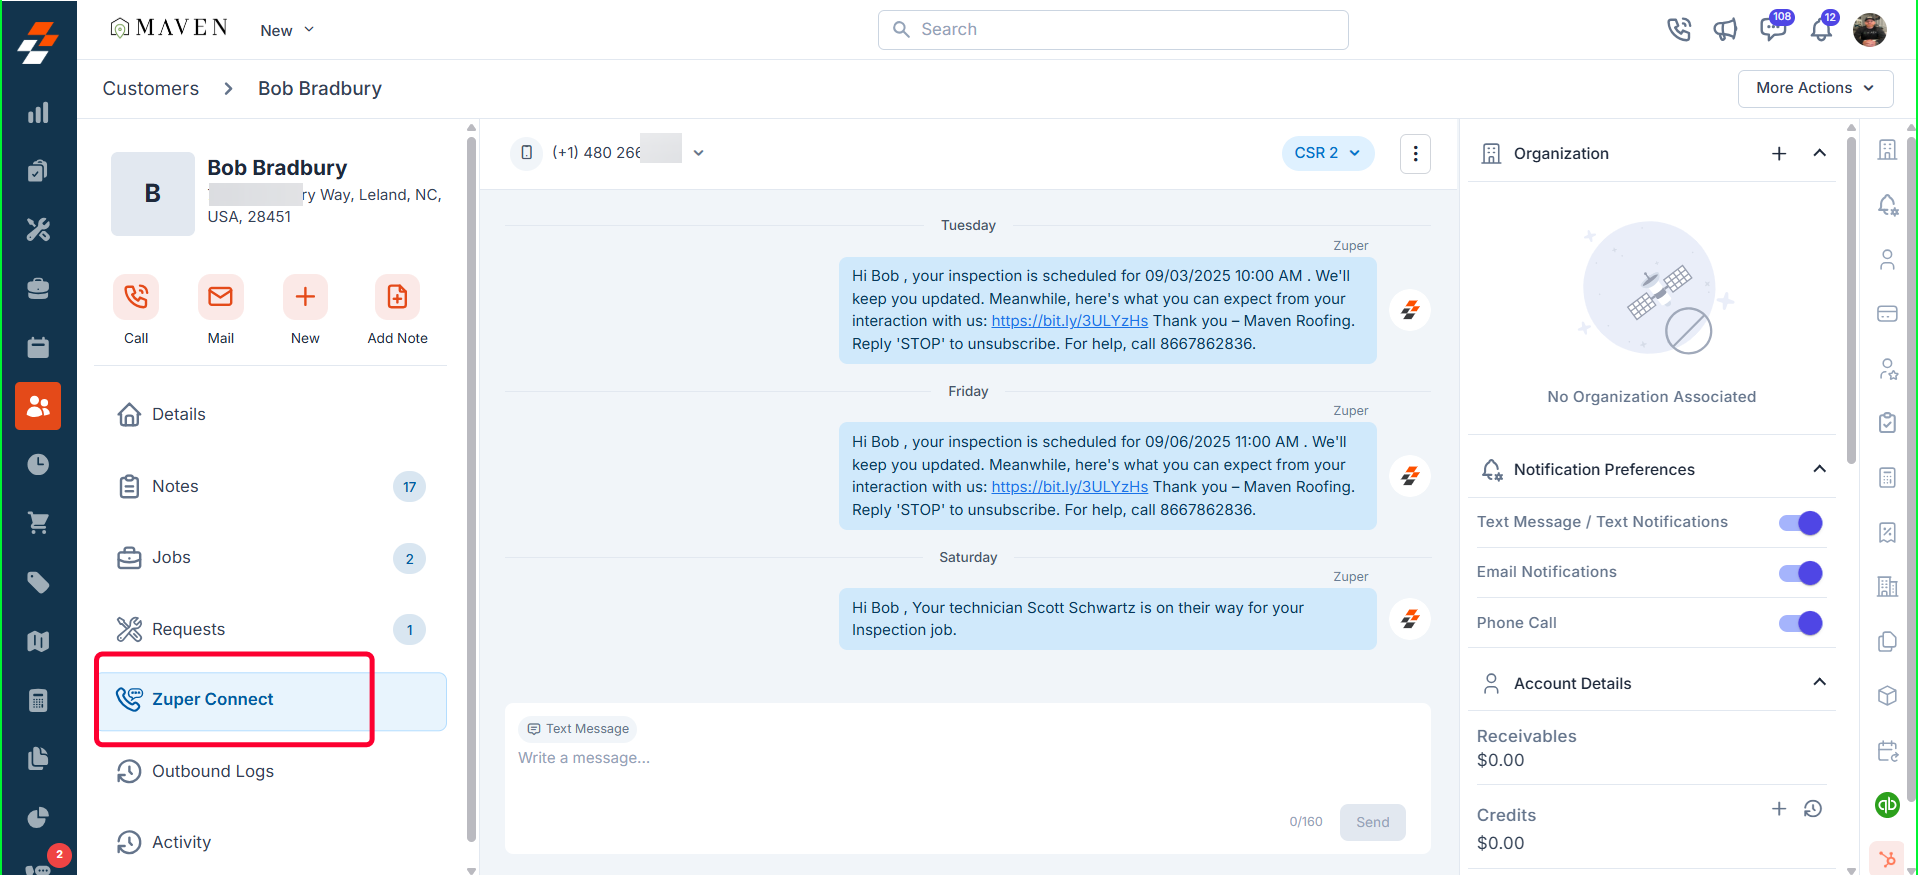
Zuper Connect
Zuper Connect
Zuper Connect is seamlessly integrated with the Contacts Module, enabling you to initiate conversations and connect with customers directly from their profile. Every call and message is automatically linked to the customer record, providing complete communication context without the need to search through separate chat apps or call logs.Key Benefits:
- Seamless workflow – Stay within the customer record while communicating. No context switching means faster response times and fewer missed details.
- Organized communication – All calls and messages are tracked in one place, ensuring better visibility and more efficient collaboration.
To use Zuper Connect from contact:
- Navigate to the Contact Details Page.
-
In the left pane, click Zuper Connect.
-
From this section, you can:
- Start a new conversation with the contact using your configured Zuper Connect numbers.
- View existing conversation history linked to the customer’s contact numbers (Work, Mobile, and Home), along with a complete timeline of all interactions across jobs and projects. This includes discussions, call details, and the team members involved, displayed in chronological order.
- Mark a conversation as read or unread by clicking the ellipsis ()icon on the right.

Note: To view and manage conversations, your organization must have Zuper Connect purchased and enabled.
Outbound Logs
Outbound Logs
The Outbound Logs section provides a record of all outbound communications made to the contact. This includes phone calls, emails, and SMS messages initiated from the system.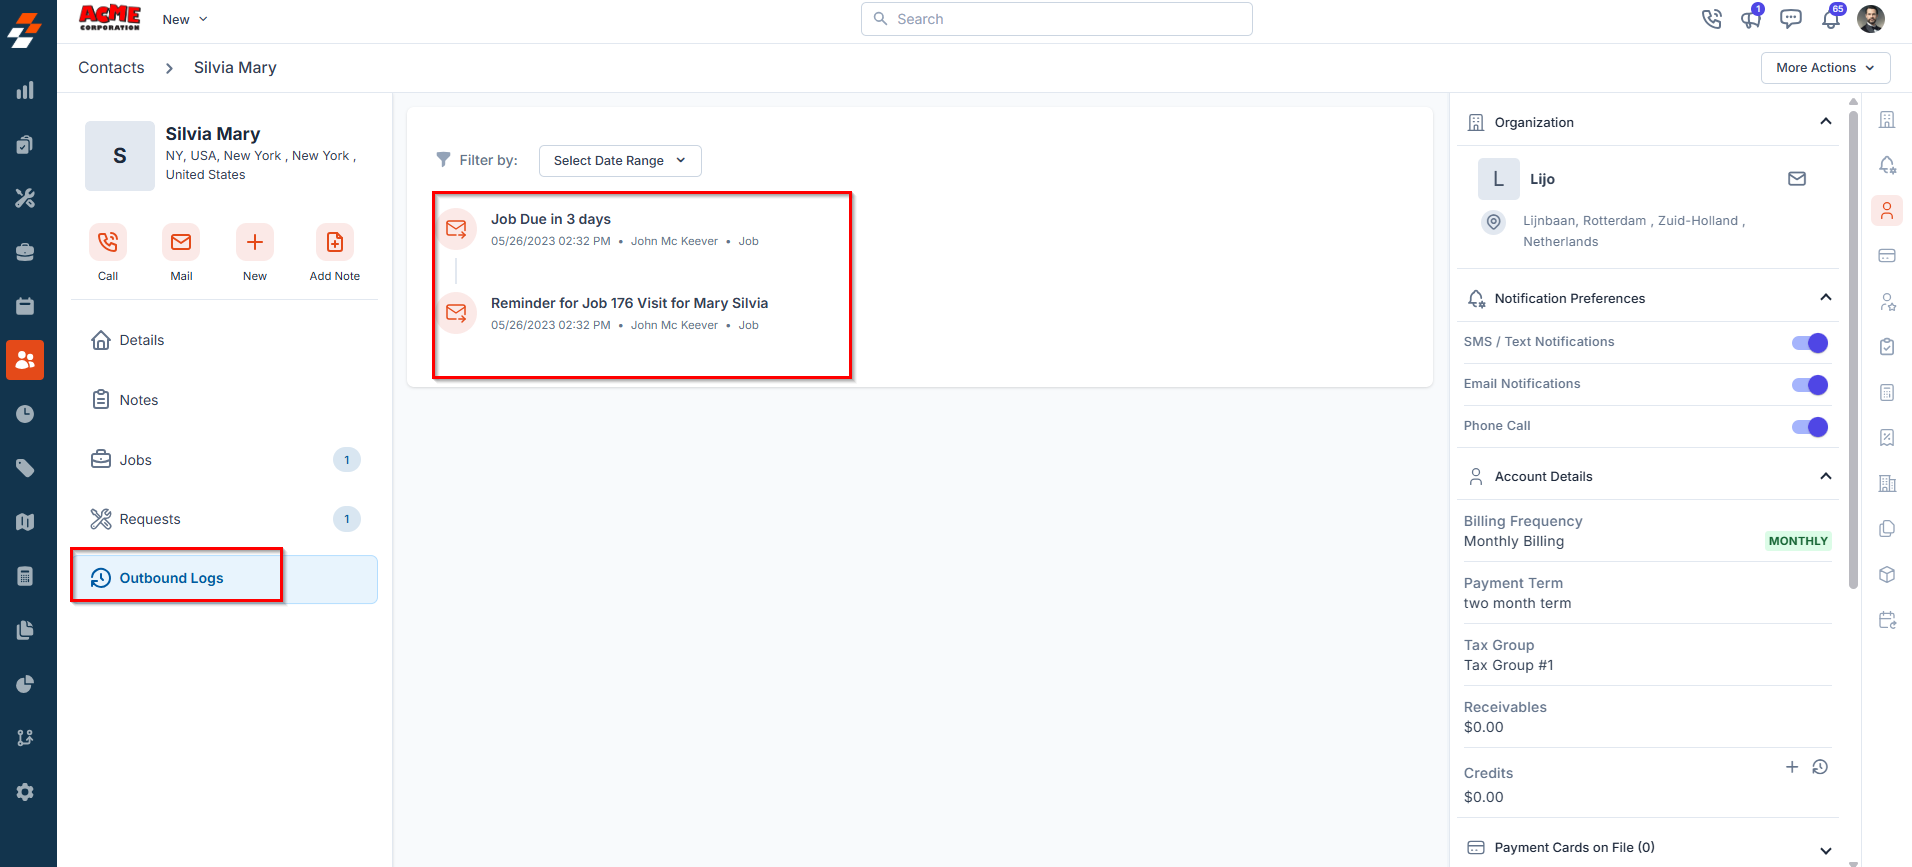
Activity
Activity
The activity section on the details page displays a log or timeline of all actions and updates related to this contact, helping you stay informed about recent changes.
Right panel
The right panel of the contact details page offers a snapshot of all key information and associated modules linked to the contact. It provides quick access to related data and helps streamline decision-making by presenting everything in one place. Here’s what you can find in the right panel:- Associated Organization: Displays the organization the contact is linked to, along with key details such as organization name and address.
- Notification Preferences: View and manage the contact’s preferred communication channels. This section displays three toggle switches — SMS/Text, Email, and Phone Calls. Turn a toggle on to allow Zuper to send notifications to the contact through that channel. Turn a toggle off to stop notifications for that channel. Changes take effect immediately.
- Account Details: Displays billing frequency (e.g., monthly), payment terms, and assigned tax group for accurate financial handling.
- Financial Summary: Includes current receivables, available credits, and any saved payment cards on file.
- Preferred Users: Lists the internal team members preferred by the contact, if any.
- Associated Modules: Quickly view counts and access details of linked projects, quotes, invoices, properties, contracts, and assets.
- Recurring Job Schedules: Indicates whether any recurring jobs are scheduled for the contact.

More actions
Managing a contact goes beyond simply viewing their details. Zuper allows you to take additional actions that help maintain data accuracy and enhance communication. By clicking the “More Actions” button at the top-right corner of the Contact Details page, you can access a range of options, including: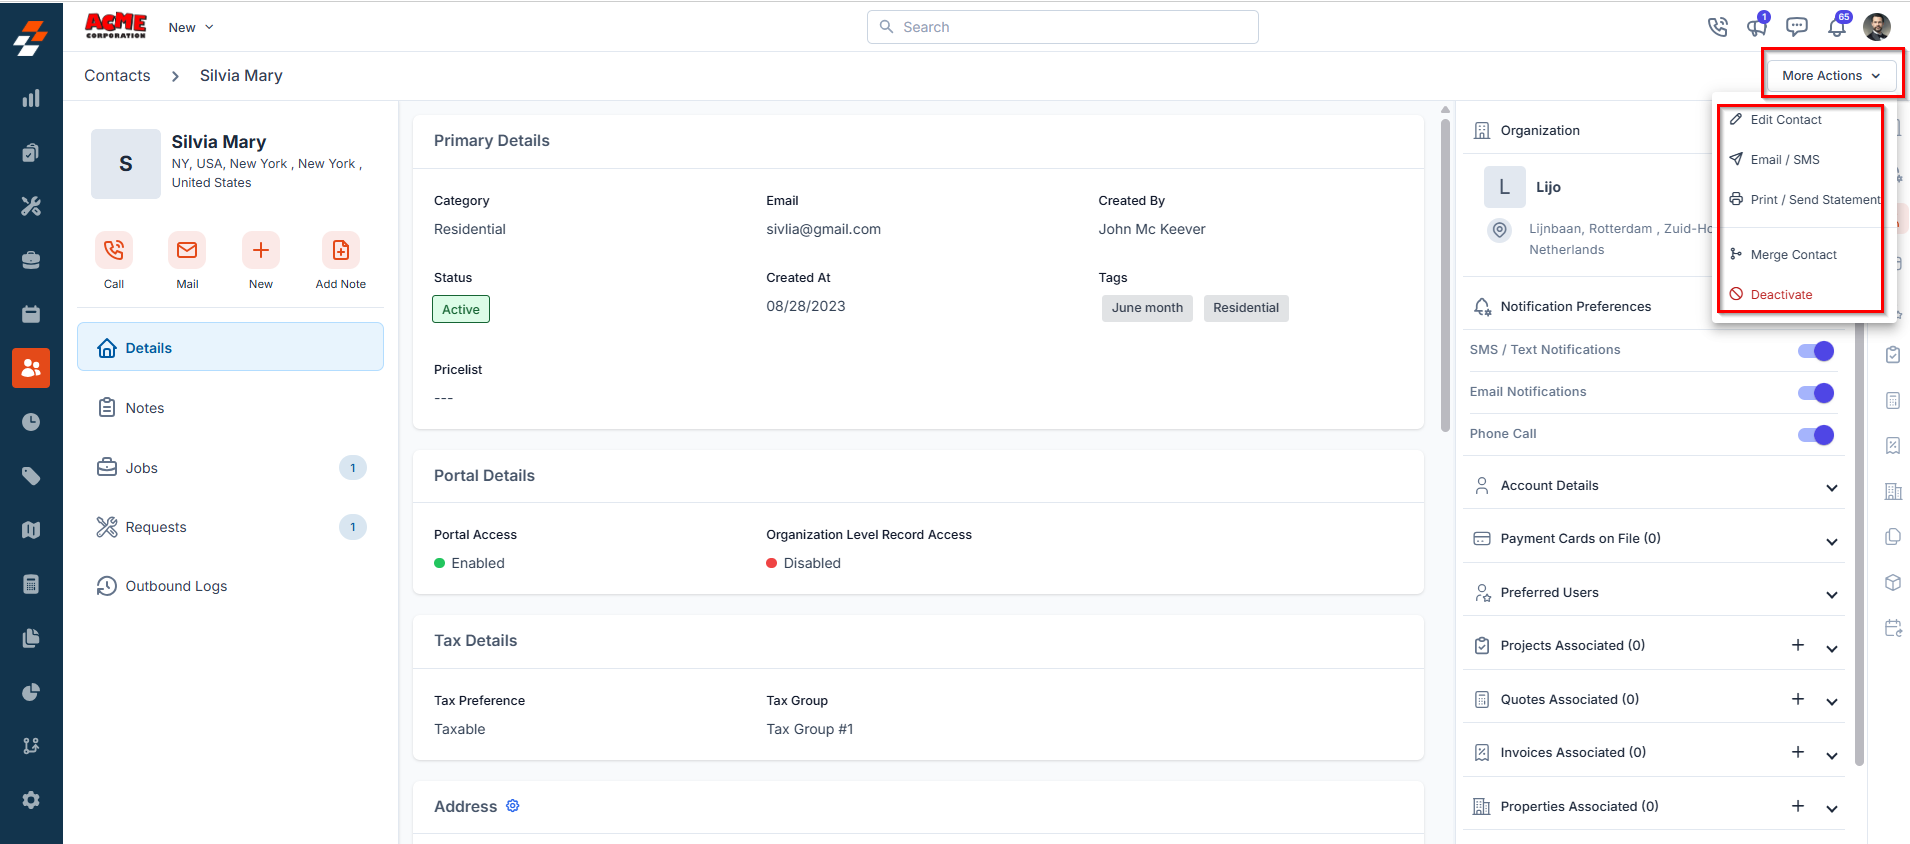
Edit Contact
Edit Contact
Update the contact’s information, such as name, email, phone numbers, or associated organization.
Updating a contact’s email does not update existing jobs.When you change the email address on a contact profile, Zuper saves the new email on the profile only. Jobs that were already created keep the original email address in their service contact details. You must update each existing job manually to reflect the new email.
Email/SMS
Email/SMS
Instantly send an email or SMS to the contact directly from the system for quick communication.
Print/Send Statement
Print/Send Statement
Generate and share a print-friendly version of the contact’s financial statement, including invoices and payment history.
Merge Contact
Merge Contact
Combine duplicate contacts into a single profile to avoid redundancy and maintain clean records.
Deactivate
Deactivate
Temporarily disable a contact without deleting their data, preserving historical information for future reference. Once deactivated, you will have the option to activate or delete the conta
View Auto Created Property
When Auto-Create Property is enabled, Zuper creates a property record the moment you save a contact with a valid service address. You do not need to build a property separately or link it manually. Want to confirm the property was created, or take a closer look? Here is where to find it.- Open the contact detail page.
- Look for the Properties Associated section in the right panel.

- Select the property card. A quick-view panel opens showing the property name, location, number of jobs, and associated contacts. This is a good way to get a summary without leaving the page.
- To see the full property record, select View details in a new tab in the quick-view panel.

FAQs
- I updated a contact’s email address. Why do my existing jobs still show the old email?
Zuper saves the new email on the contact profile only. It does not automatically apply the change to jobs that were created before the update. Each existing job stores its own copy of the service contact details at the time the job was created.
To update the email on an existing job, open the job and edit the service contact details directly. You must do this for each affected job individually.
If the issue continues, contact Support.