Navigation: Clients -> Contacts -> + New Contact
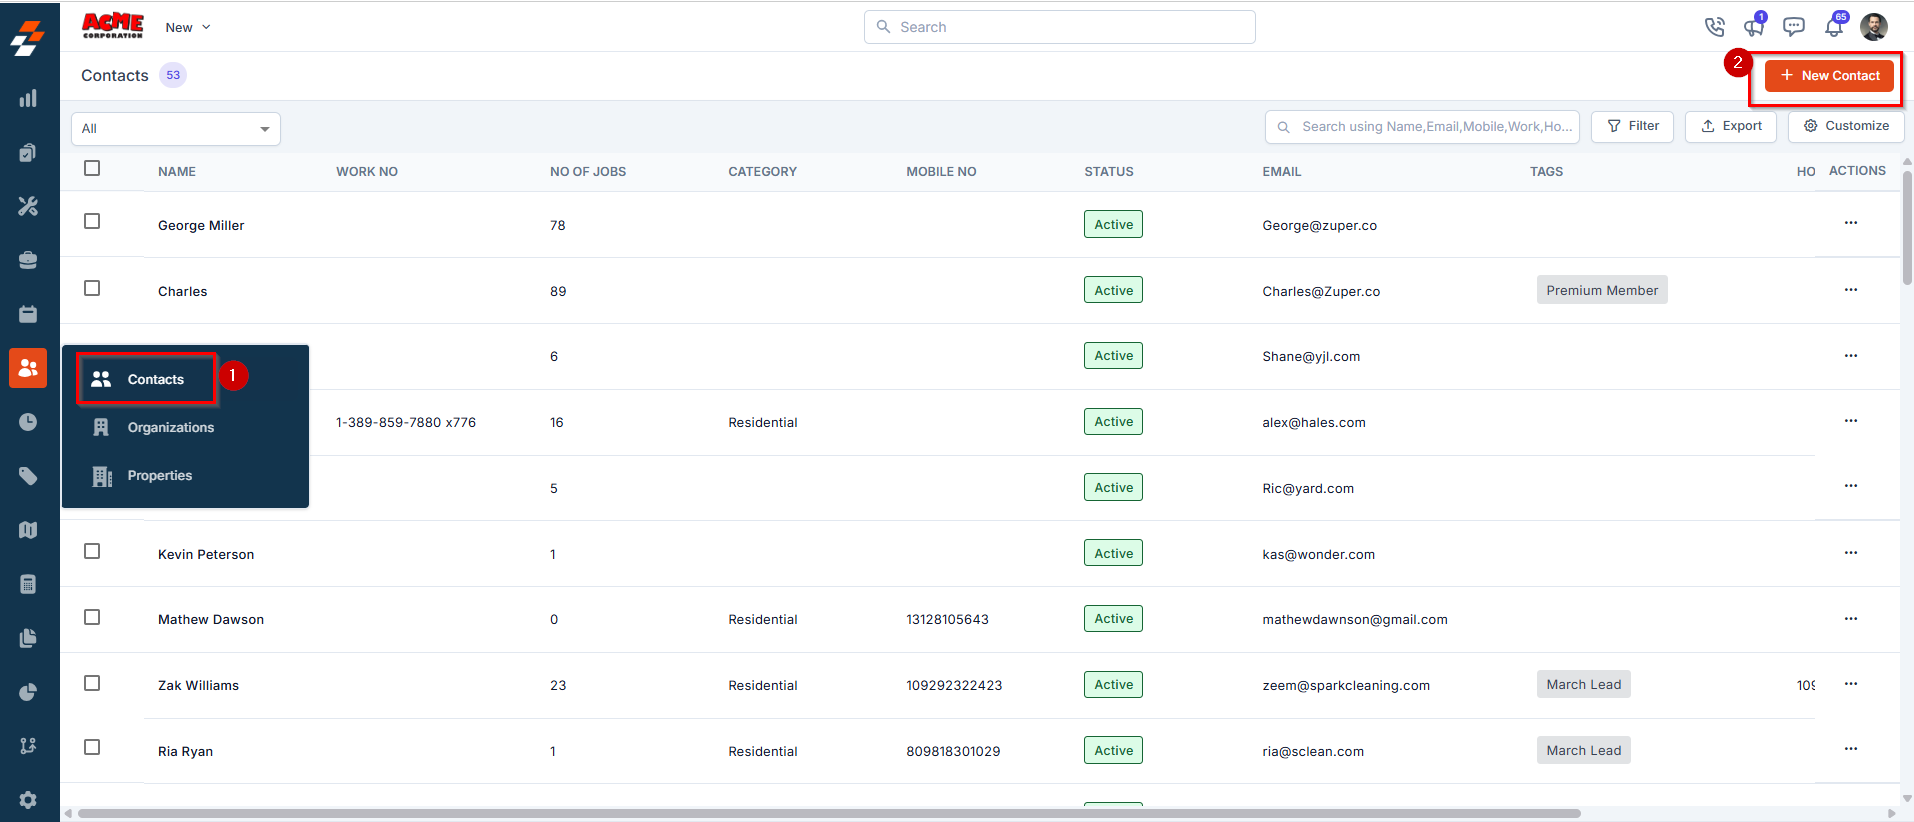
- Select the “Clients” module from the left navigation menu and choose “Contacts”.
- The Contacts listing page opens.
- Click the ”+ New Contact” button at the top right corner of the page.
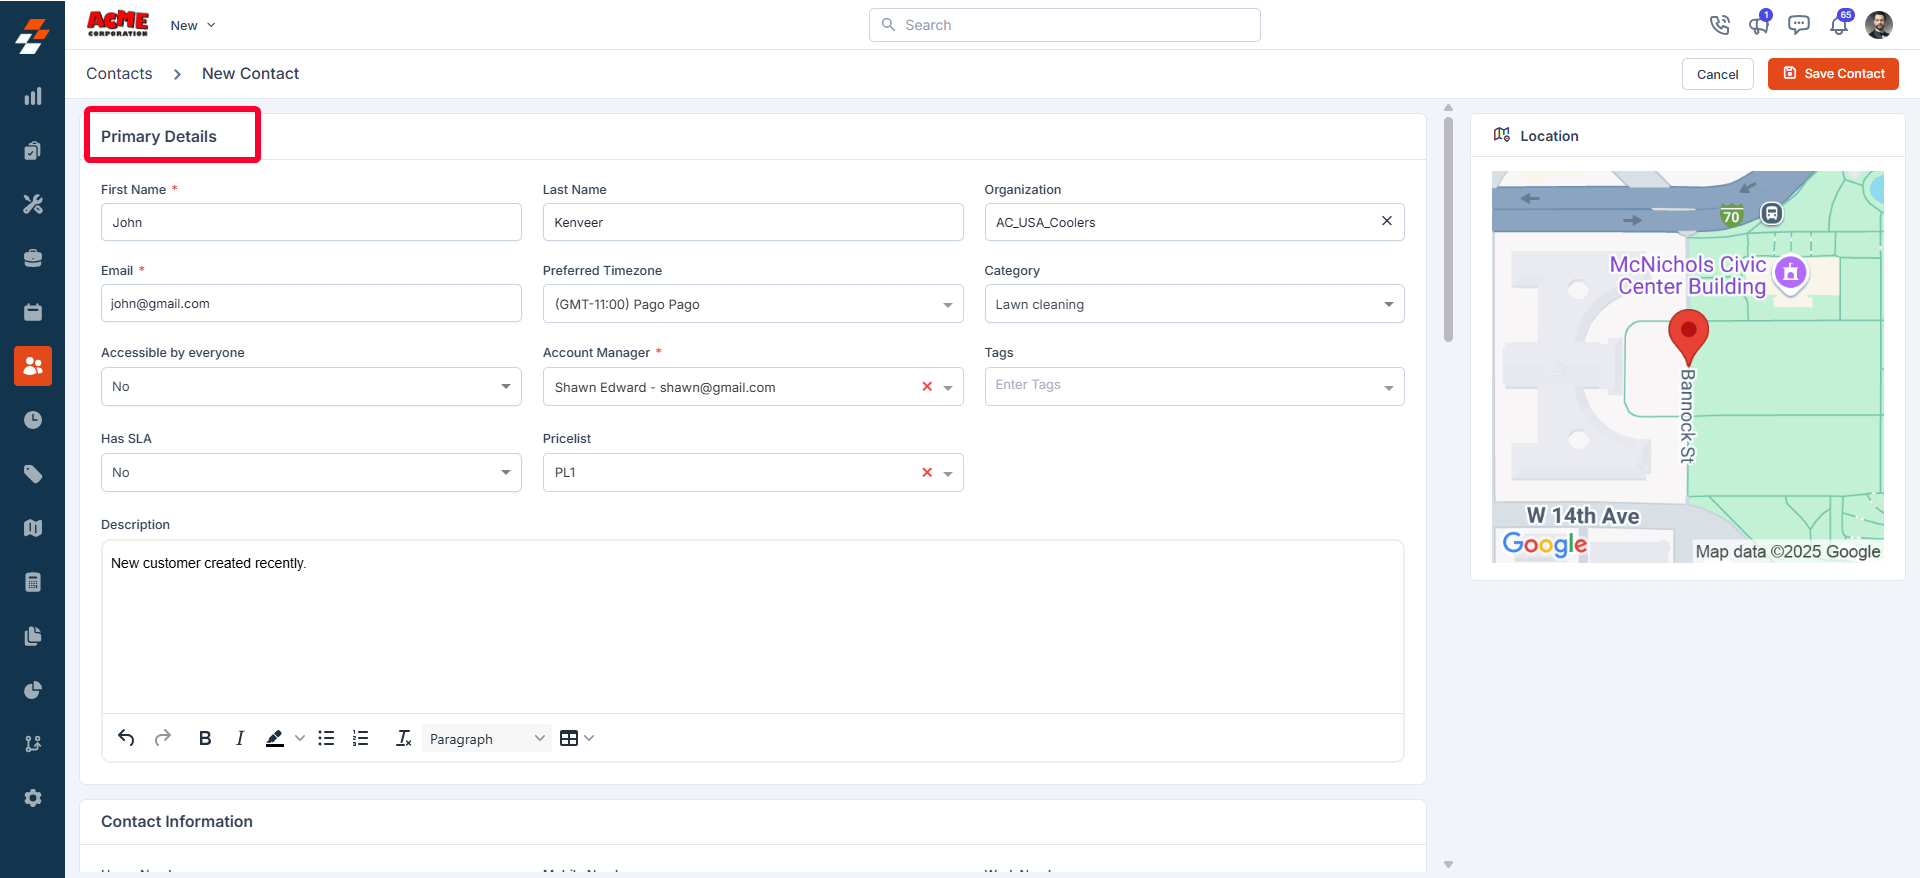
- Primary Details
- First Name (Mandatory): Enter the contact’s first name.
- Last Name: Enter the contact’s last name. This field is optional but helps in full-name identification.
- Organization: Select the organization the contact is associated with. This links the contact to a business entity.
- Email (Mandatory): Provide the contact’s official email address. This email will be used for sending job-related notifications, invoices, and other communications.
Sending job-related notifications and updates.
Auto-populating the recipient field when sending invoices.
Delivering quote approvals and payment receipts.
If this field is left blank, the recipient email will not auto-populate when you send an invoice associated with this contact, requiring manual entry each time. Always ensure a valid email is saved here to enable seamless invoice delivery.
- Preferred Timezone: Choose the timezone that applies to the contact. This ensure that all time-sensitive activities, such as job scheduling, and alerts are correctly aligned with their local time.
- Category: Select a category that best classifies the contact (e.g., decision-maker, technician, billing). Helps in filtering and reporting.
- Accessible by everyone: Indicates if the contact should be visible to all users. Set to “No” by default to restrict visibility.
- Account Manager (Mandatory): Choose the internal user responsible for managing this contact. Required to ensure accountability.
- Tags: Add one or more tags to help categorize and search for the contact easily.
- Has SLA: Specify whether the contact is covered under a Service Level Agreement (SLA). Select an option from the dropdown.
- Pricelist: Select the relevant price list to be applied when jobs or services are performed for this organization.
- Description: Provide a brief description for this contact.
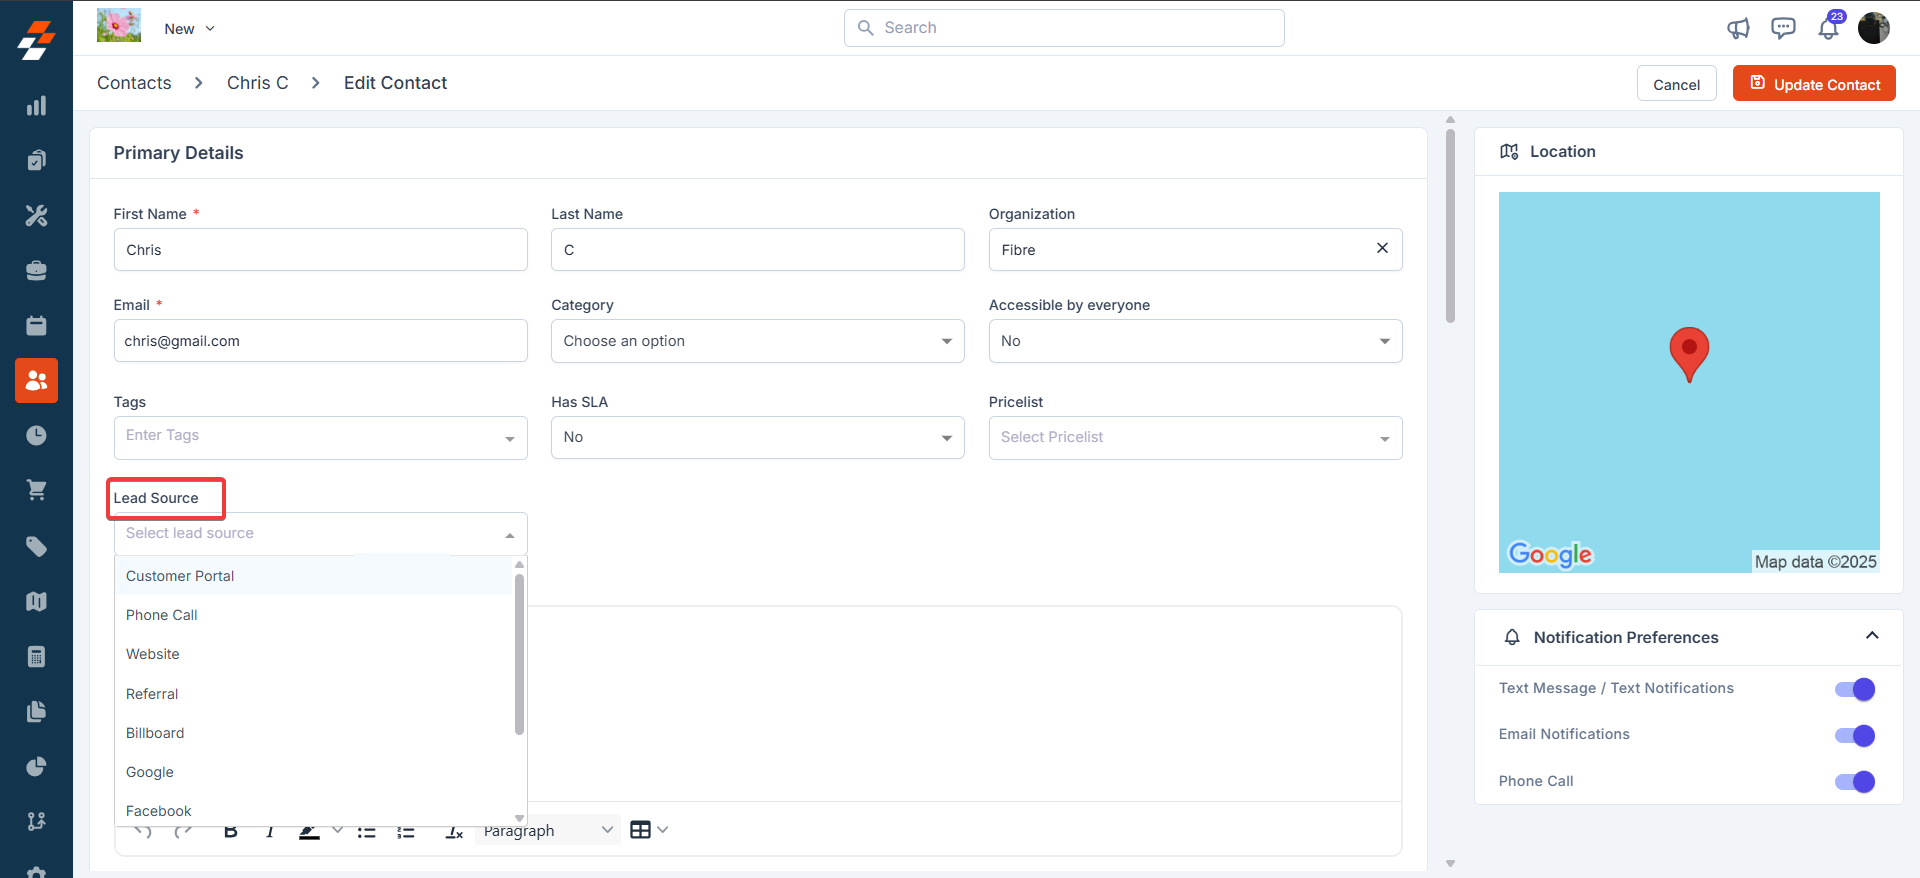
Lead Source
The Track Lead Source option helps you record the origin of your leads. Enabling this setting ensures every new customer or job record includes a field to capture and report the source of the lead. This feature improves marketing insights, sales performance tracking, and lead attribution. Prerequisites- Admin or user role with permission to manage customer and contact settings.
- These lead sources will appear as selectable options when users assign a source to a customer /contact or job record.
Using Lead Source Data
Using Lead Source Data
Using Lead Source Data
- View the lead source in customer /contact details or Job details.
- Filter customers/contacts and jobs by lead source in lists by filtering them as “Source”.
- Use this data to evaluate which channels bring the most leads.
Note: The first job will inherit the lead source from the customer record. The second job onwards, it should be manually selected.
- Job Master Report
- Customer Master Report
- Report Builder (fully integrated for custom report creation)
- Lead source: Displays the lead sources.
- No. of Jobs: Shows the “Total number of Jobs against that particular lead source.”
- On hover: Reveals the total job value against that particular lead source.
- Filterable by date range: Users can apply custom date filters to focus on specific periods (e.g., quarterly or yearly trends).
- Customer Module: Update Lead Sources in bulk for multiple customers at once.
- Job Module: Apply Lead Source changes across batches of jobs.
- Filter by Source on the Job Listing Page.
- Filter by Source on the Customer Listing Page.
- Define a standard list of lead sources to maintain consistency.
- Encourage team members to fill in the lead source for every new record.
- Utilize reports or dashboards to analyze trends in lead sources.
Edge Cases & Validations
In Zuper, the Lead Source feature is designed to be flexible and user-friendly, but it’s essential to understand how it behaves in various edge cases. Below is a summary of common scenarios, their expected behaviors, and any relevant notes. This ensures smooth data management and avoids unexpected issues during implementation.| Scenario | Expected Behavior | Notes |
|---|---|---|
| Job created without a lead source | Allowed – field is optional. | Users can proceed without selecting a Lead Source; the job will be created successfully, and the field will remain blank. This supports quick entry for non-critical tracking. |
| Lead Source removed from master list | Existing records retain the old value (now marked as inactive). | Removed sources won’t appear in new dropdowns or selections, but historical data is preserved for reporting and auditing. No automatic cleanup or migration occurs. |
| The customer has no lead source, but the job has the lead source | Allowed – no backfill required. | Lead Sources are independent per record type (Customer vs. Job). |
| User disables “Track Lead Source” | The field is hidden across the entire UI and not populated for new records. | This global setting (under Admin > Settings) removes the field from forms, reports, dashboards, and filters. Existing data remains intact but is no longer visible or editable until re-enabled. |
- Contact Information
- Home Number: Enter the contact’s home phone number. Useful for personal or after-hours communication.
- Mobile Number: Enter the contact’s mobile number. This is typically the primary method of communication.
- Work Number: Enter the contact’s office or work phone number. Ideal for professional interactions.
- Portal Details
- Portal Access: Specify whether the contact should have access to the customer portal. Set to “Yes” to enable access and allow self-service features like viewing jobs, invoices, and quotes..
- Tax Details Choose the applicable tax settings for the contact based on your region or internal policies. These settings will automatically be applied to invoices and billing documents.
- Tax Preference: Choose whether the contact is Taxable or Tax Exempt. This affects how taxes are calculated for this contact in quotes and invoices.
- Tax Group: Pick the appropriate tax group that applies to this contact. Tax groups define the specific tax rates or rules used.
- Account Details
- Billing Frequency: Choose how often the contact should be billed (e.g., monthly, quarterly, yearly). Helps automate and manage billing cycles.
- Payment Term: Select the agreed-upon payment term for the contact. This defines the time frame within which payment is expected.
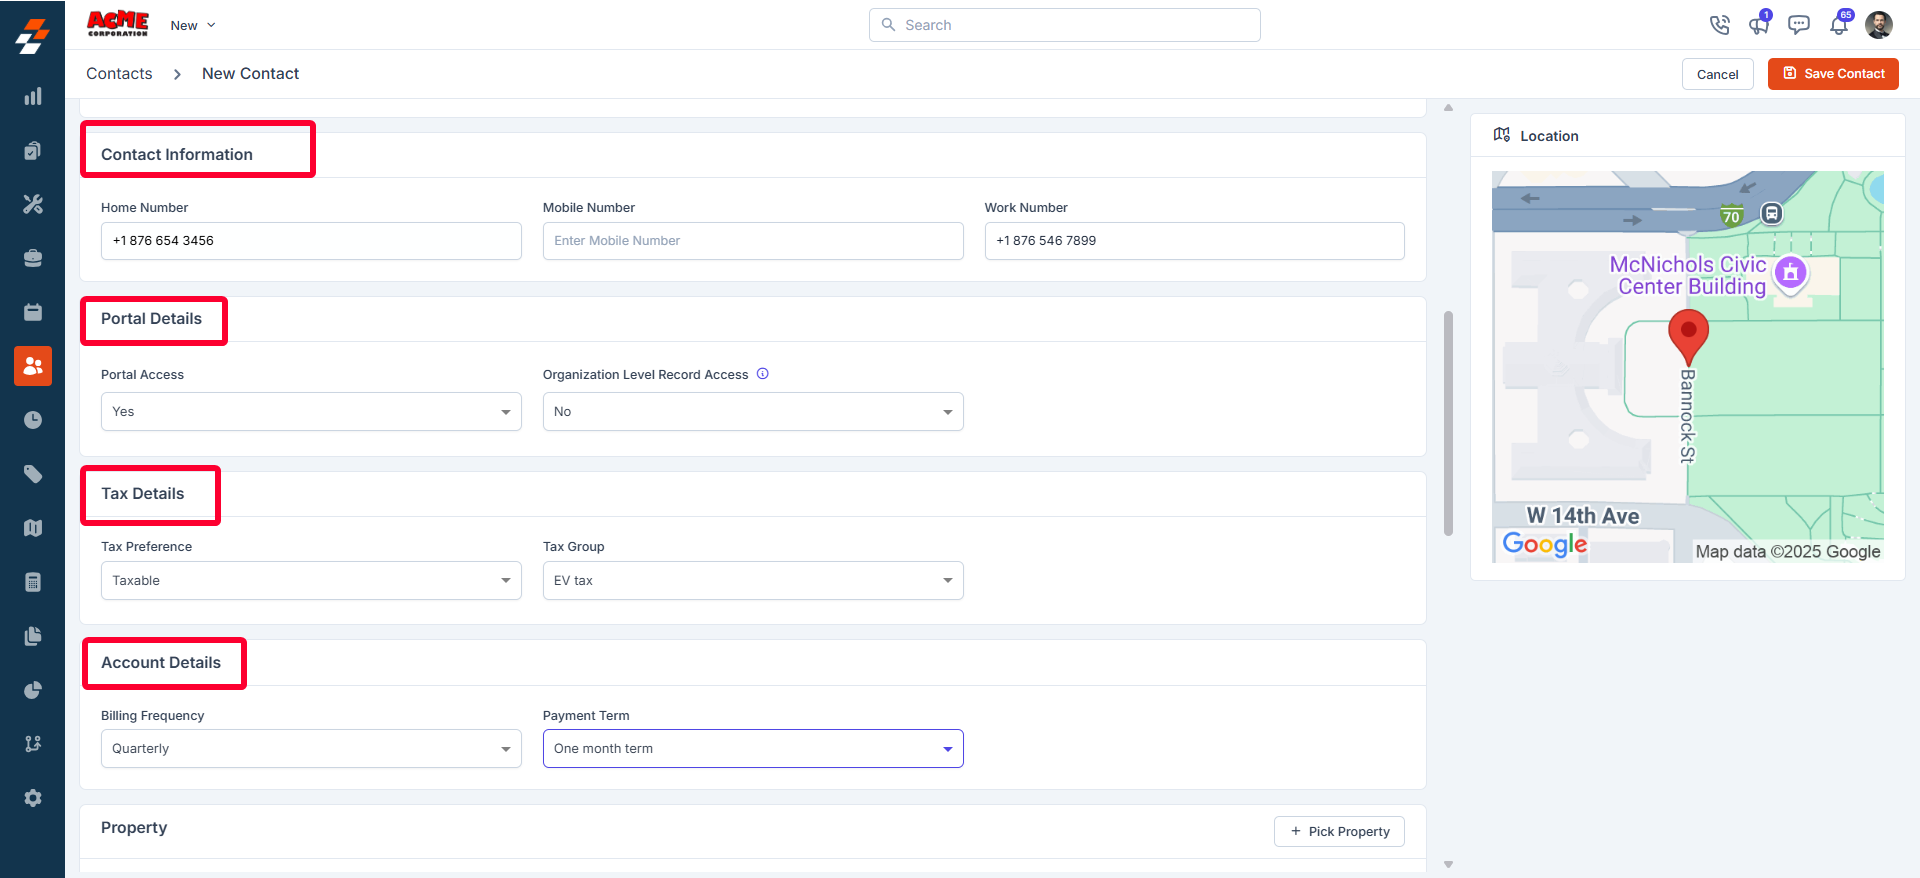
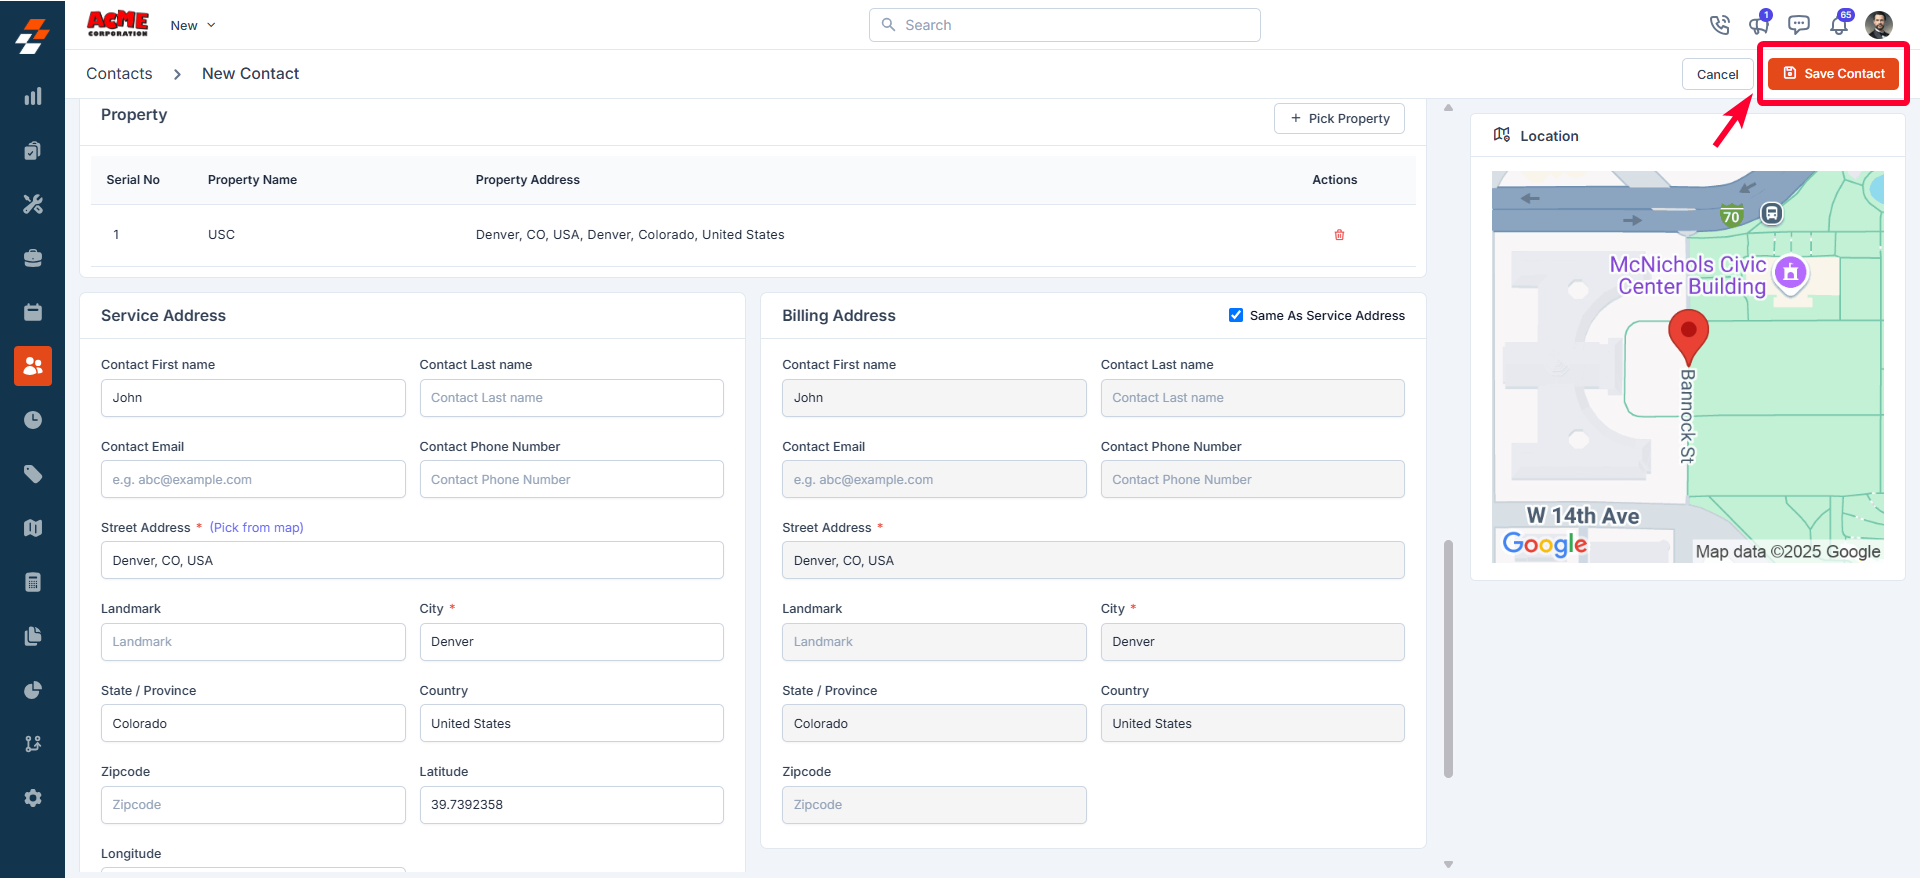
- Property: You can associate properties with the contact to ensure seamless tracking of service history and work orders. To add a property,
- Click ”+ Pick Property” next to the Property section.
- Use the pop-up to search and select the relevant properties that belong to the contact.
- Service and Billing Address: Add the contact’s service and billing locations. You can specify these details in two ways.
- Address Entry: Type the full physical address.
- Geo-Coordinates: Enter latitude and longitude if you want to use exact map-based positioning.

- Other Details If any custom fields are added under the settings, you can fill in the details here.
Auto-Create property
When Auto-Create Property is enabled, Zuper creates a property record the moment you save a contact with a valid service address. You do not need to build a property separately or link it manually. Note: Zuper uses the street name from the service address as the property name. For example, a service address of 500 Main Street, New York, creates a property named 500 Main Street. When you save, Zuper automatically:- Creates a new property using the street name as the property name.
- Displays the property under Properties Associated in the right panel of the contact detail page, and you can view the property details.


Address sync between customer/contact and property
Because the contact and property are linked, you never need to update both records separately.| If you update… | Zuper updates… |
|---|---|
| The service address on the contact | The address on the linked property |
| The address on the property | The service address on the linked contact |

Note: Sync only works when a property is already linked to a contact. If you saved the contact without a service address, Zuper did not create a property at that point. Adding an address later does not trigger a new property. In that case, create the property manually and link it using + Pick Property on the contact detail page.