- Create structured Service Packages that bundle products and services.
- Use Proposal Templates to standardize and simplify proposal creation.
- Create, modify, and manage Proposals before converting them into quotes. This guide provides step-by-step instructions on configuring service packages, creating proposal templates, and generating proposals within the Zuper app. Let’s get started!
Navigation: Accounting -> Payments
Add-ons:
Zuper Add-ons allows you to offer optional products or services within a proposal. Customers can choose these add-ons during proposal acceptance. This helps you upsell services and increase quote value without modifying the base scope of work. Add-ons are configured at the Proposal Template level and appear directly in proposals once enabled. Configuring Add-ons: Service Package Standard Template CPQ Template Presenting Proposal to the CustomerNote: The Add-ons are applicable only to those using Proposal Layouts.
Multi-Signer
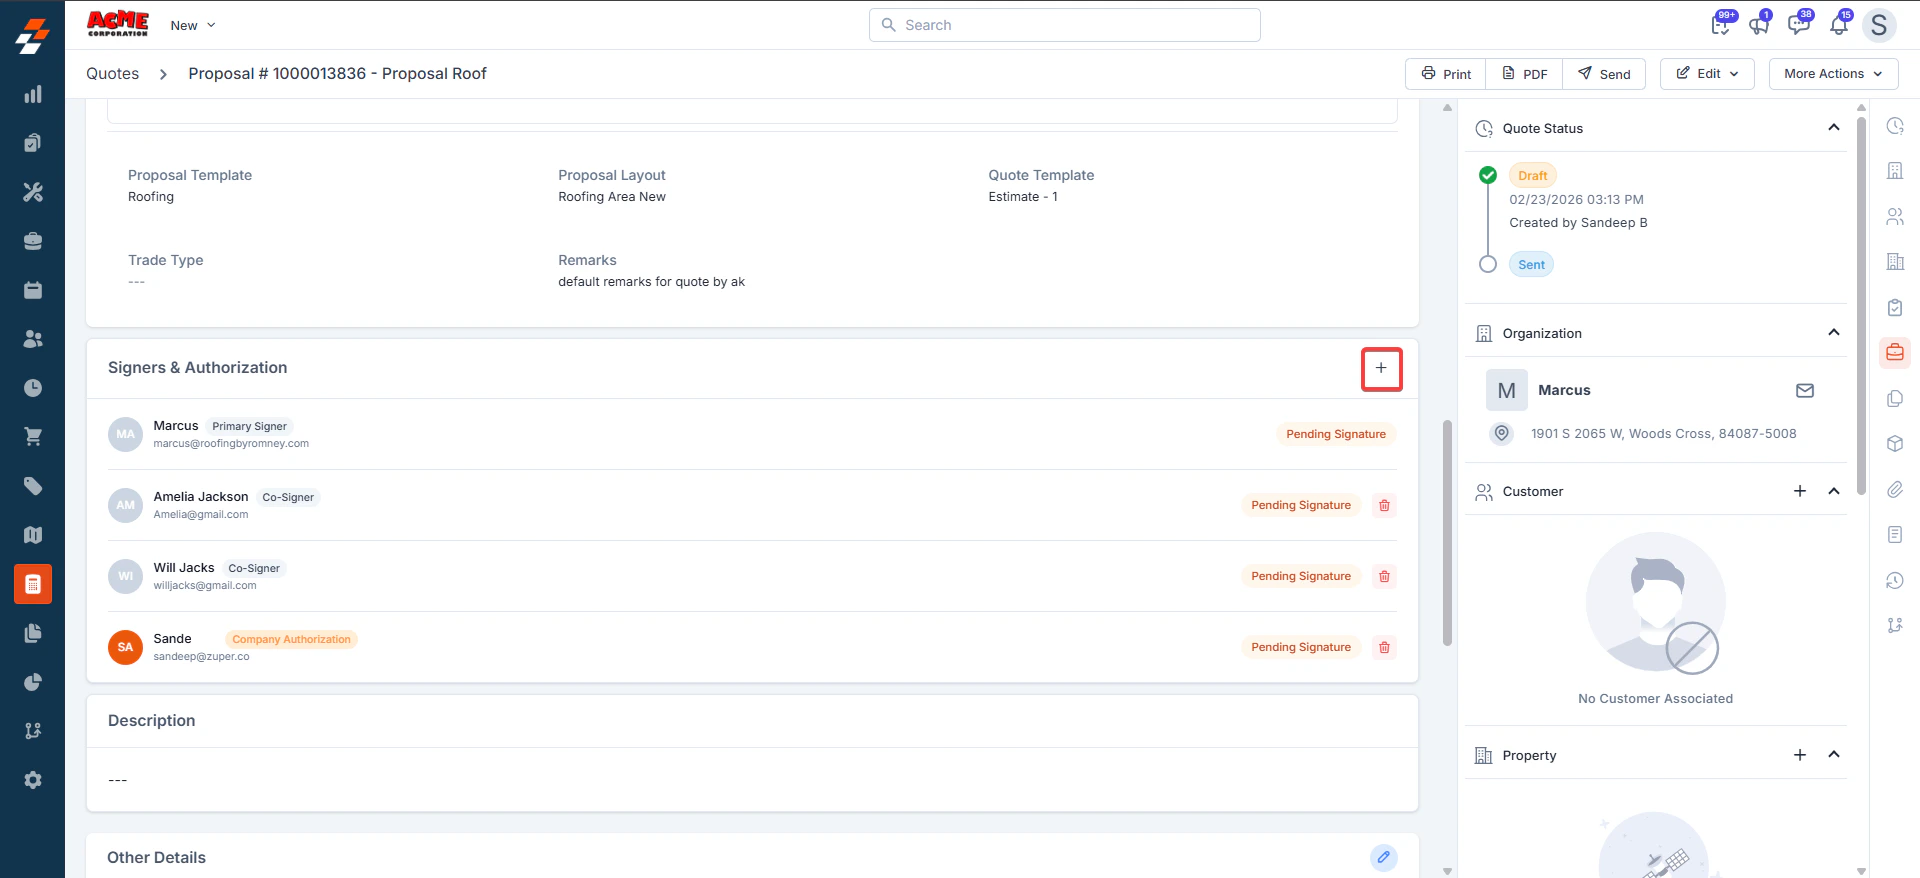
Once a proposal is created using a proposal layout, any preconfigured co-signers and company authorization are automatically prefilled. The customer associated with the proposal is set as the primary signer by default. You can add or remove additional signers as needed; however, the primary signer cannot be removed. Signatures are collected sequentially. After the primary signer selects their preference and signs, the proposal moves to Awaiting Signature status and becomes non-editable until all required signers have completed signing. If the proposal includes only the primary signer, it will automatically be converted into an Accepted Quote as soon as the primary signer signs. The Signers & Authorization section controls who must review and electronically sign a proposal.- Primary Signer (Pre-filled and non-editable).
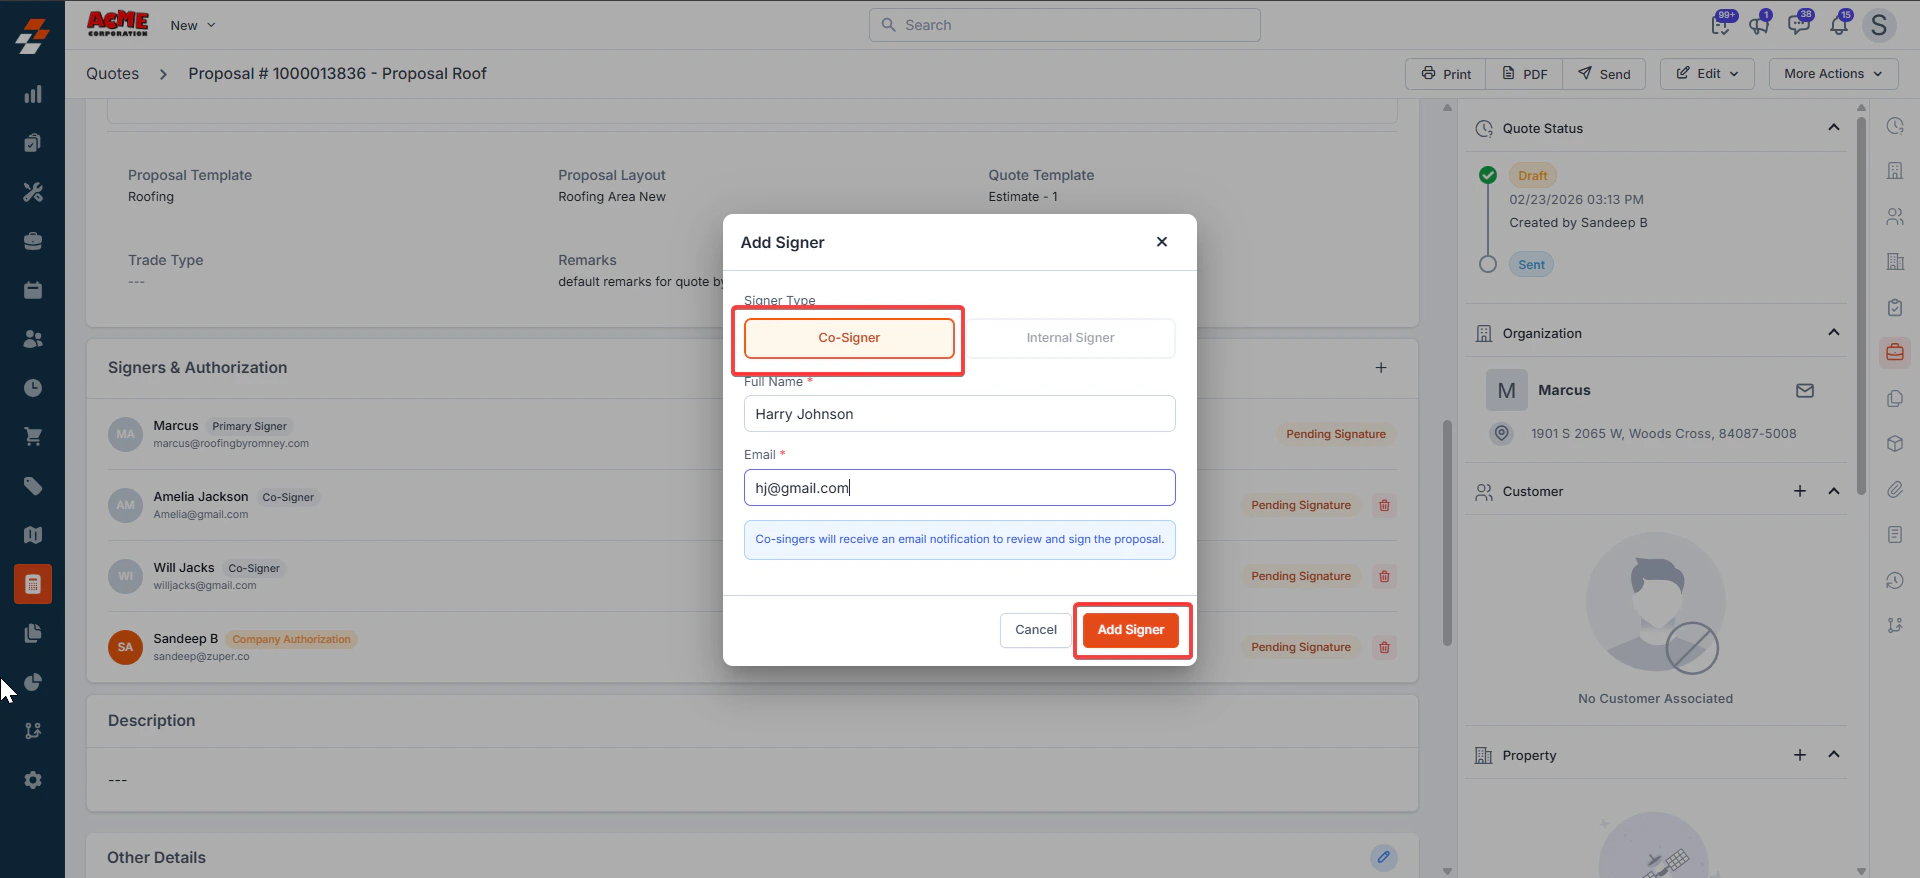
- Co-Signers (Additional signers | up up toto 3 persons).
- Internal Signers (Your team members for company authorization).
- Go to Signers & Authorization section.
- Click the + button (top-right corner).
- Internal Signer → Select user from dropdown (company team member).
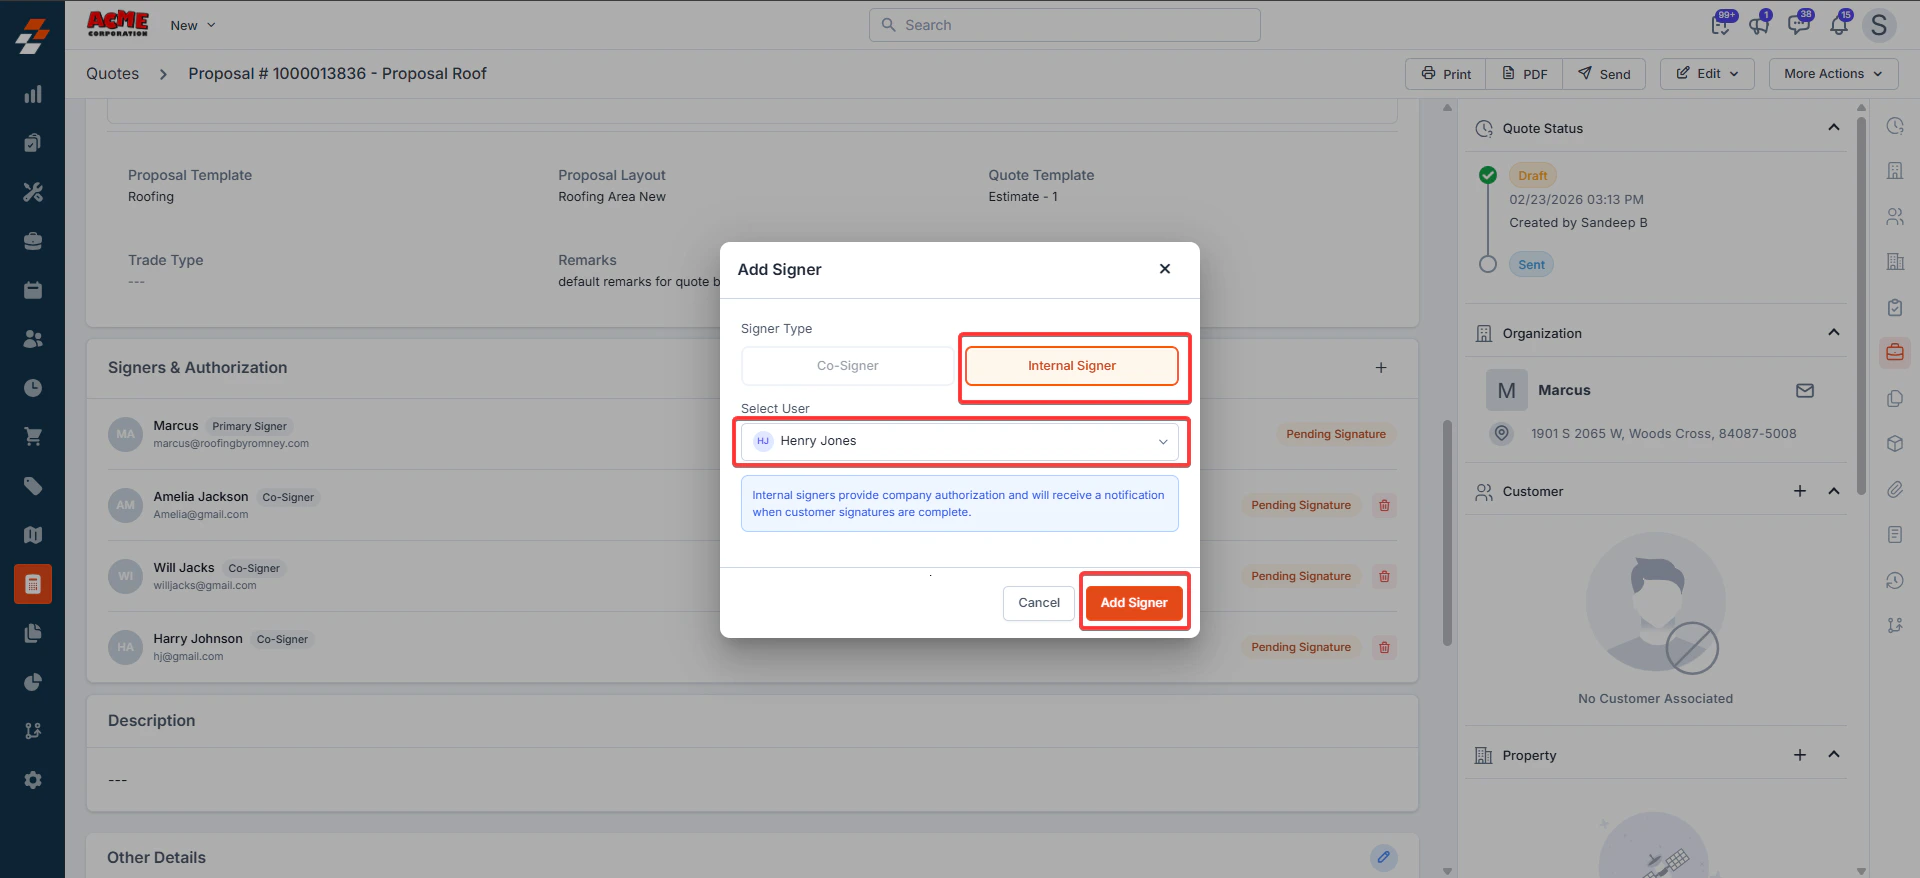
- Click Add Signer.
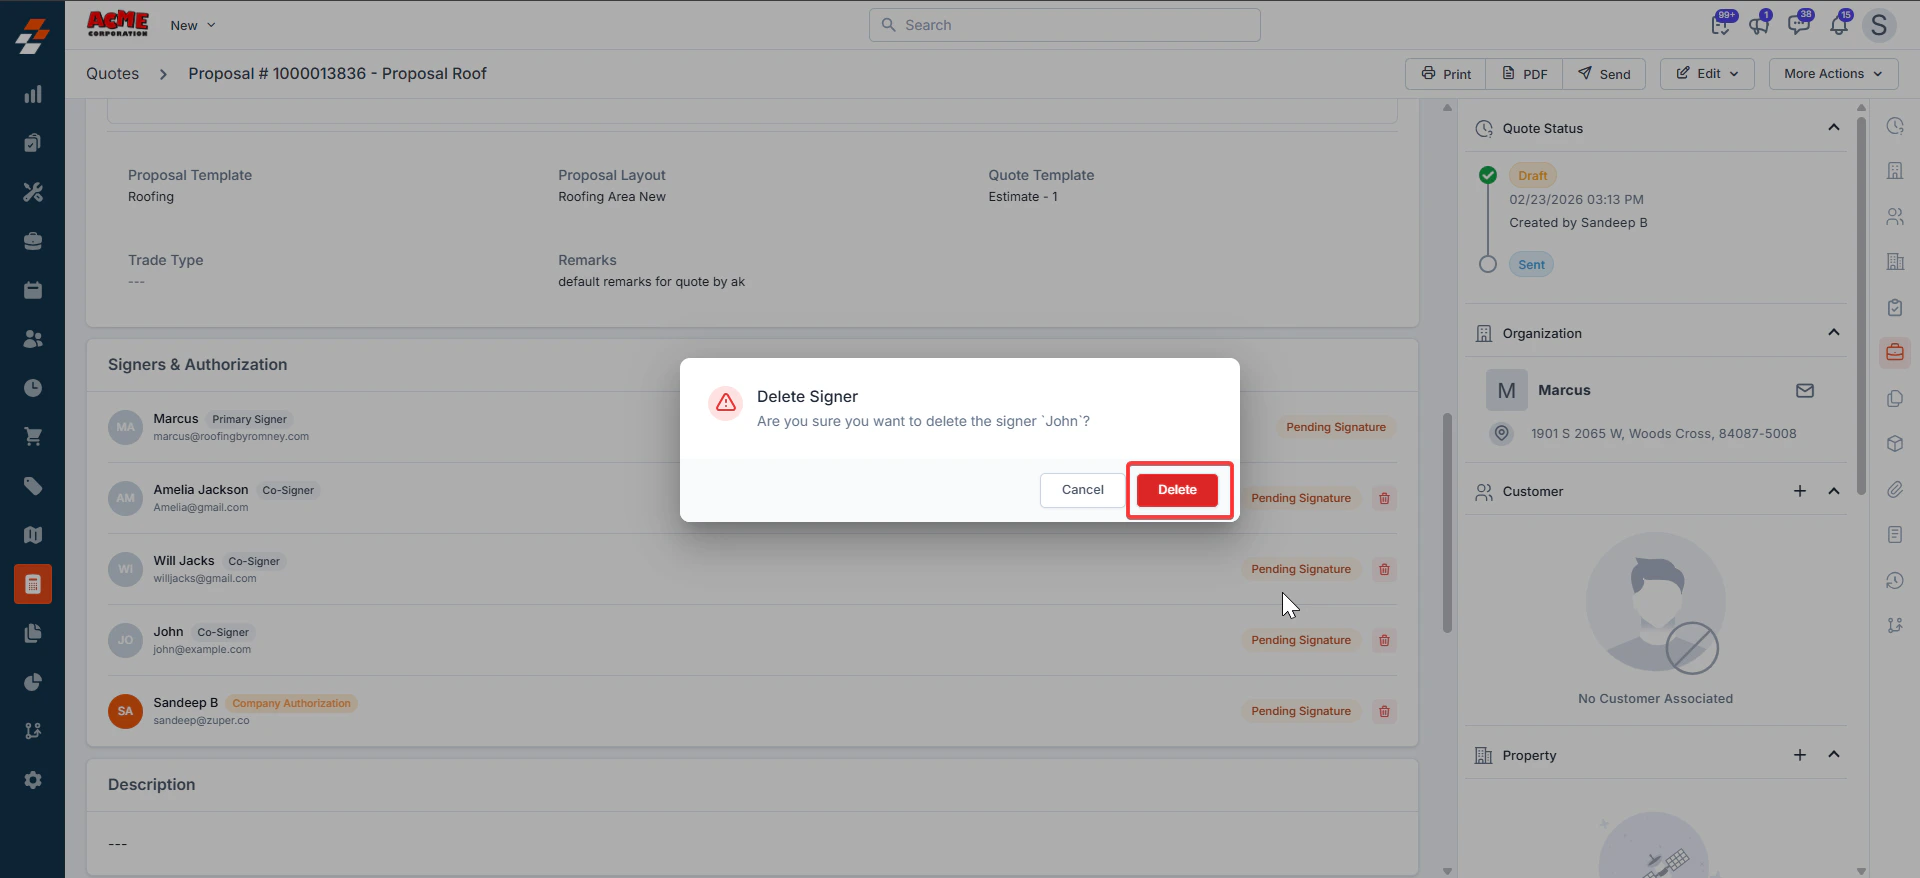
- Click the 🗑 trash icon next to any Co-Signer or Internal Signer.
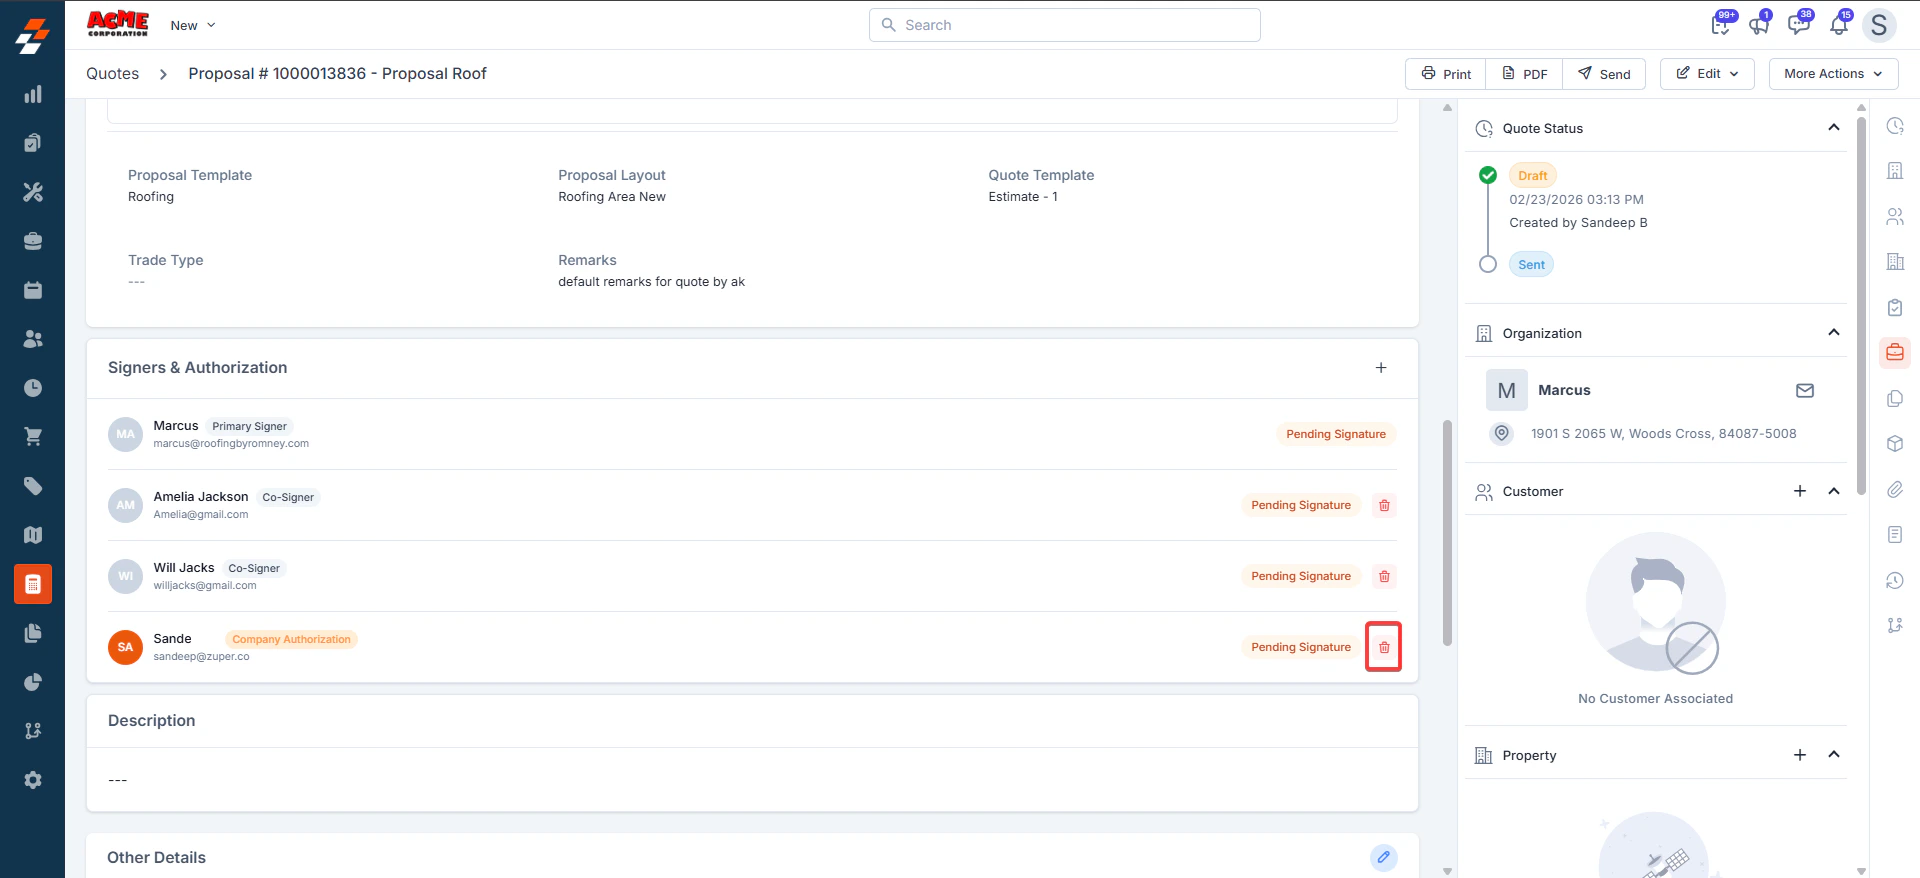
Note: Primary Signer cannot be deleted.
Full Signing Workflow (After Sending)
Here’s what happens step by step once the proposal is ready: 1. Send the Proposal- Click the Send button at the top of the screen.
- The proposal status changes to Sent.
- The primary signer (customer) receives an email notification to review and sign the proposal.
- The customer reviews the proposal, selects their preferred option, and signs.
- If co-signers or internal signers are included, the next signer in the sequence automatically receives an email notification.
- The proposal status has been updated to Awaiting Signature.
- Any pending signature remains visible in the signer list.
- After all required signers have completed signing, the quote is fully approved.
| Stage | Status Shown | What Happens |
|---|---|---|
| Before sending | Draft | You can edit signers, pricing, and details. |
| After clicking Send | Sent | Email notifications are sent to all signers. |
| Only primary signer (no co-signers) | Accepted | Proposal converts to a live Quote immediately. |
| Co-signer(s) still pending | Awaiting Signature | Quote waits until remaining signers complete. |
| All signatures completed | Approved | Fully signed and ready for next steps. |
A. Service Packages
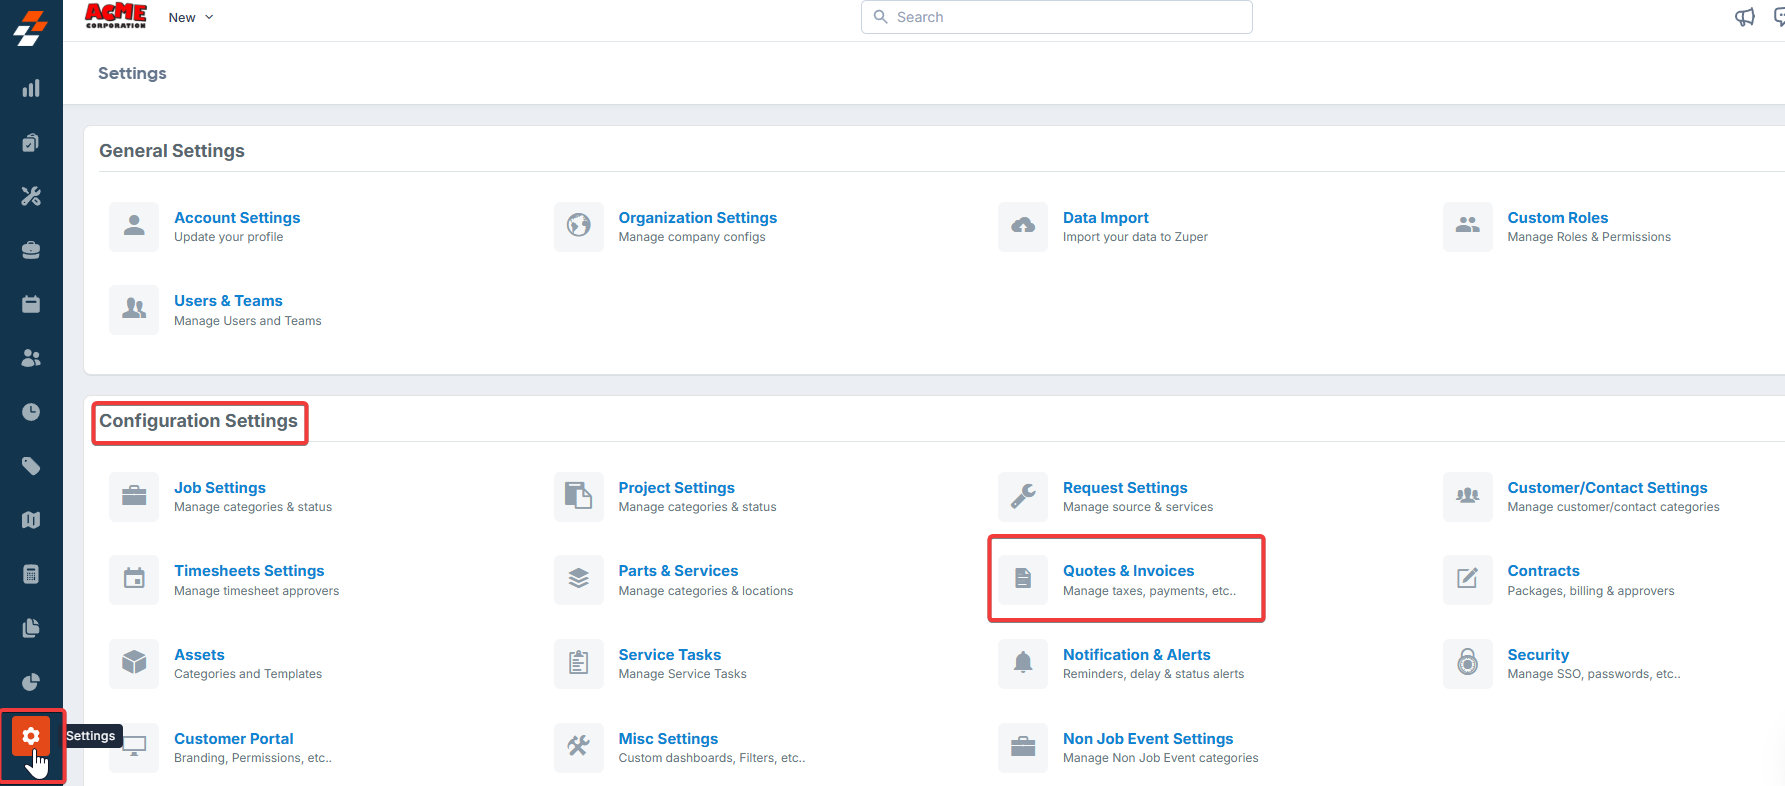
A Service Package is a proposed structured offering of specific solutions or services for a customer/client. You must define the Service Package before proceeding. To create a service package:- Select the Settings menu from the left navigation menu.
- Under Configuration Settings, click Quotes & Invoices.
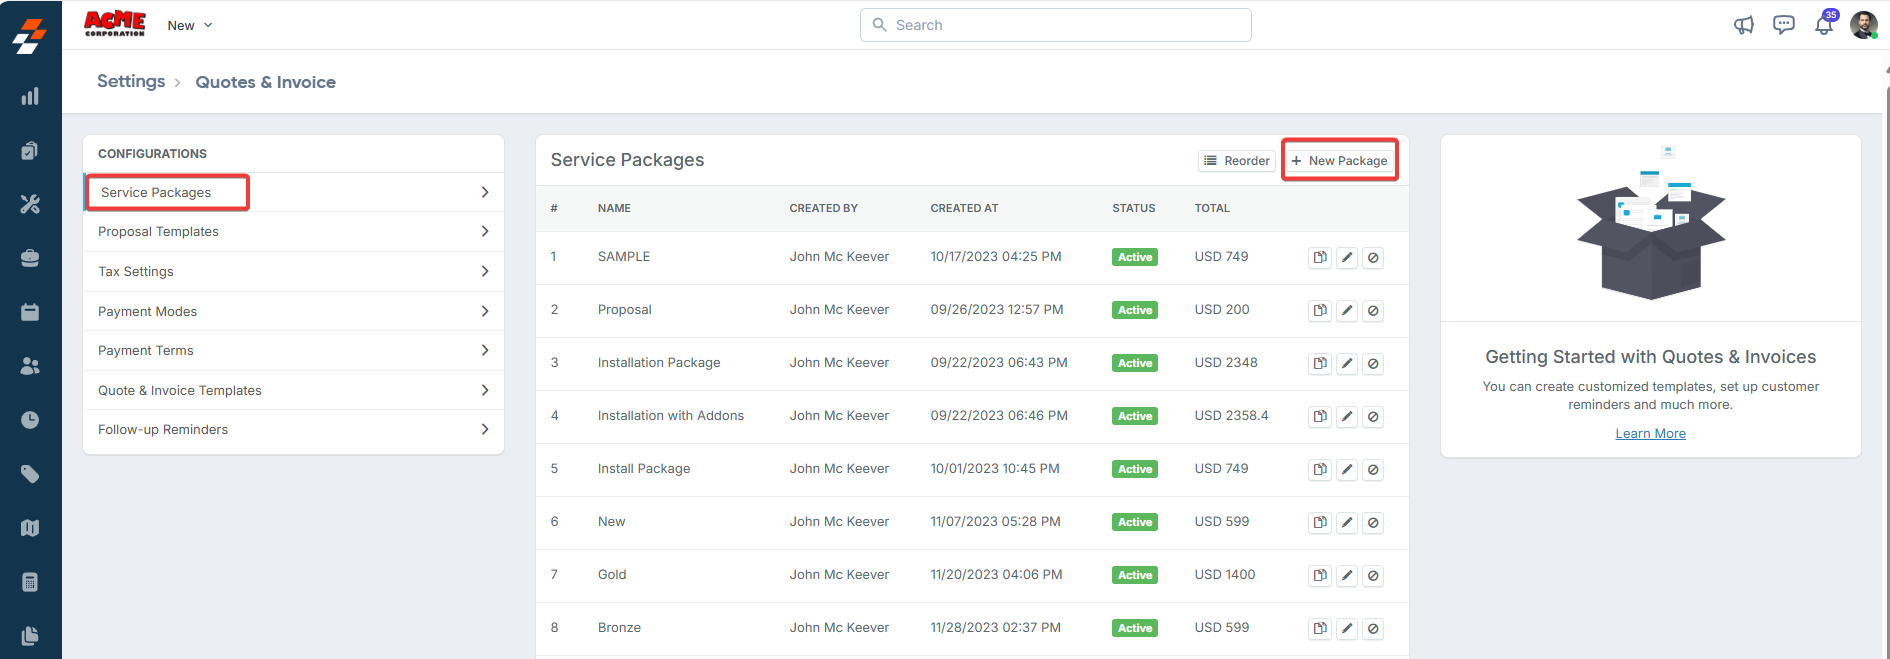
- Select Service Packages and click + New Package.
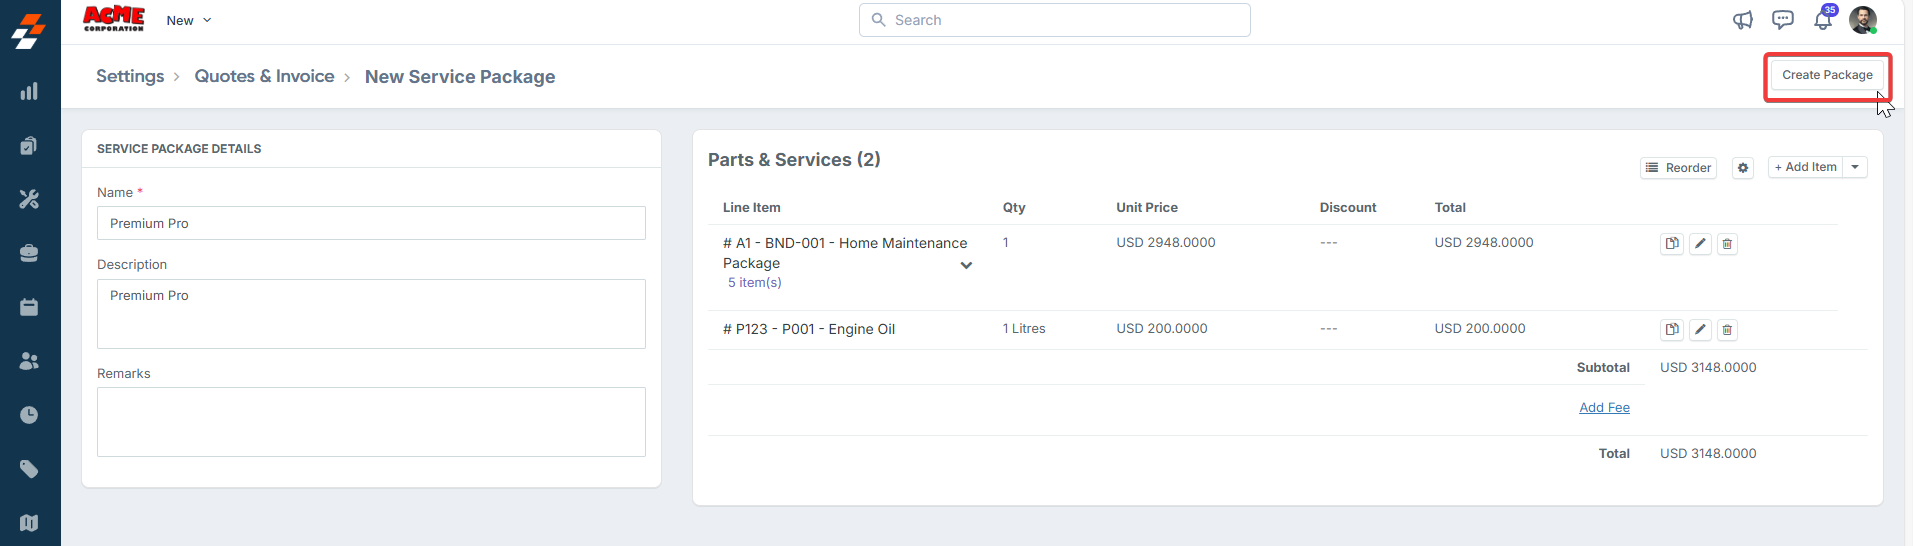
- Under Service Package Details, enter:
- Name: Enter the package name.
- Description: Enter a brief description.
- Remarks: Add any additional remarks.
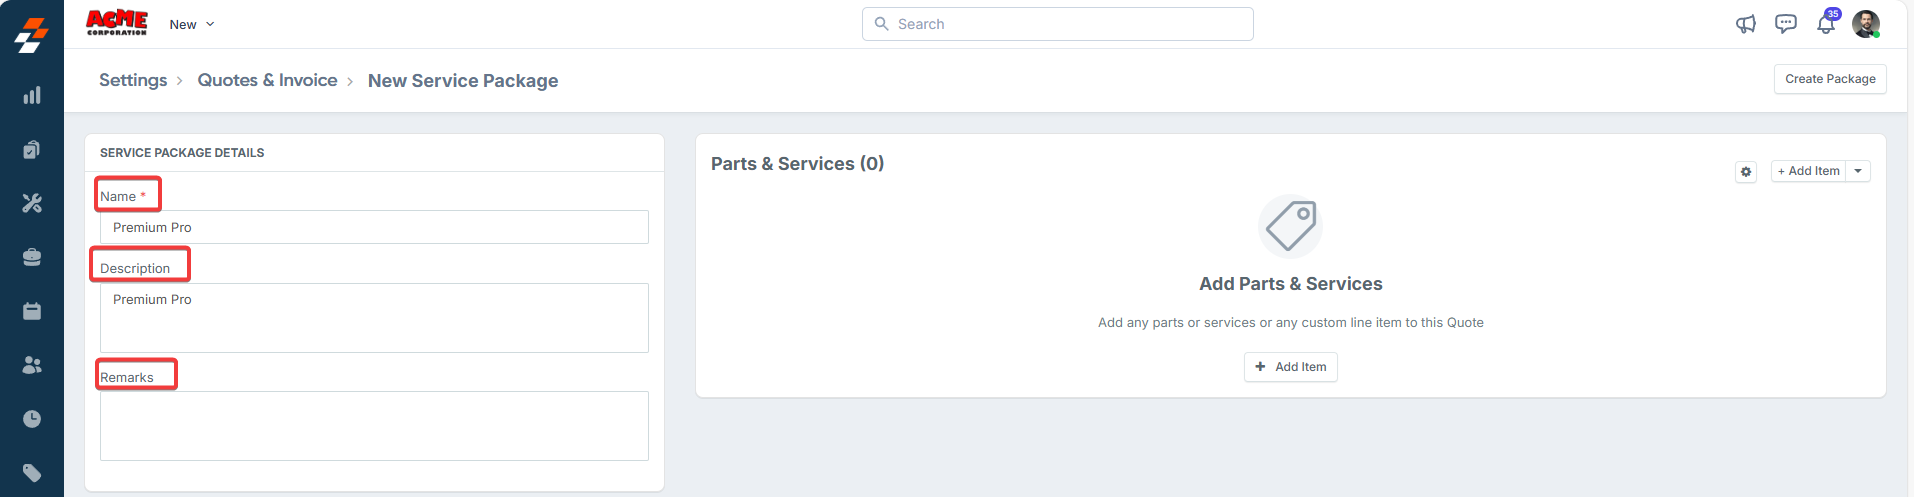
- Click the ”+ Add Item” button to add individual parts, products, and services. Alternatively, use the dropdown menu next to the ”+ Add Item” button to:
- Line Item: Add a part, product, or service as an individual item.
- Bundle: Add a part, product, or service bundle. Note that bundles added here will not appear as a product type in the filter menu.
- Section: Add a section to help organize line items within the package.
- Item Group: Select a predefined group of items to include in the package.

- Adjust the margin percentage to instantly recalculate markup % and the total sell price for all line items.
- Click “Create Package” to successfully finalize and create the service package.
Managing service packages
Managing service packages
Once you have created a service package, you can manage it using the following functions available on the Service Packages listing page: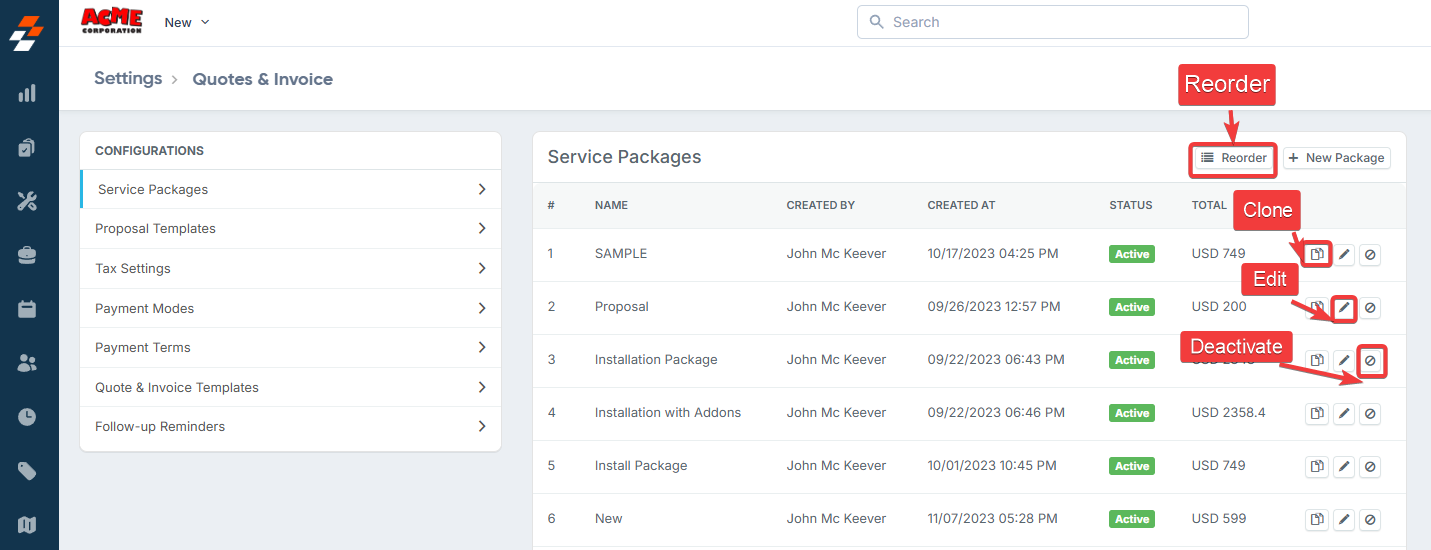
- Reorder: Click the Reorder button to rearrange items in the package.
- Clone: Click the Clone icon to duplicate a package.
- Edit: Click the Edit icon to modify the details of the package.
- Deactivate: Click the Deactivate icon to disable the package.
Add-ons in the Service Package
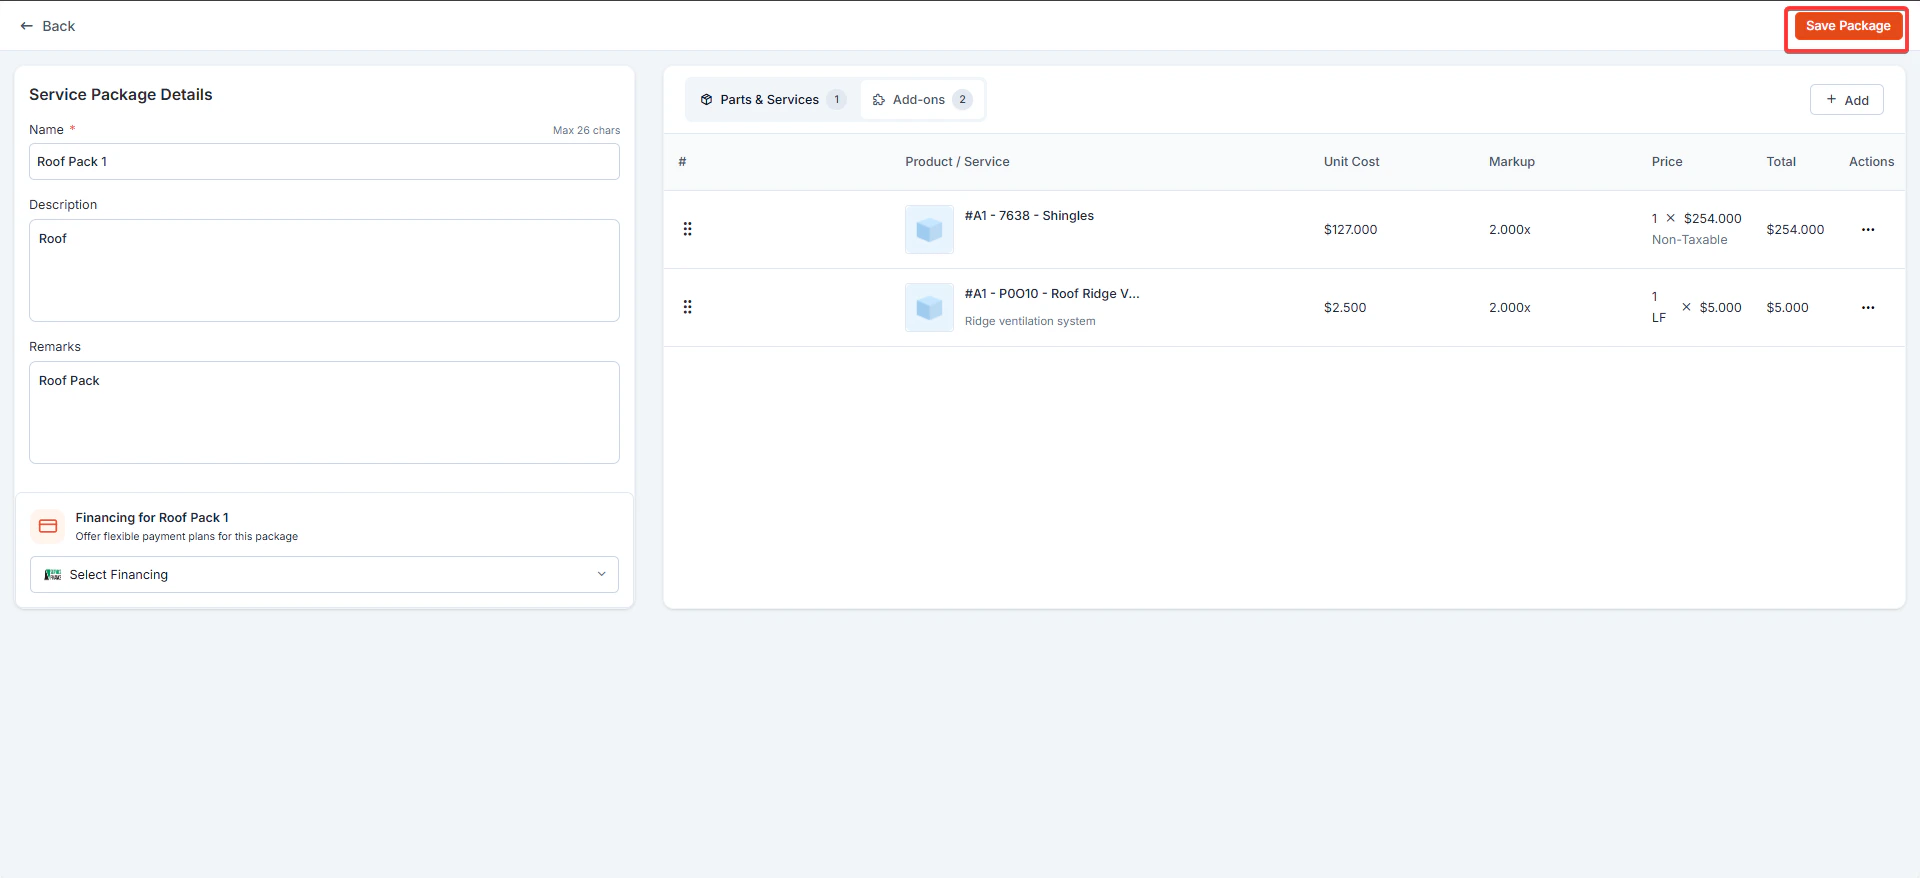
Once Add-ons are enabled in Quote settings, you can associate them with Service Packages. This allows you to configure optional Add-ons or services alongside a base package.- In the service package editor, select the Add-ons tab.
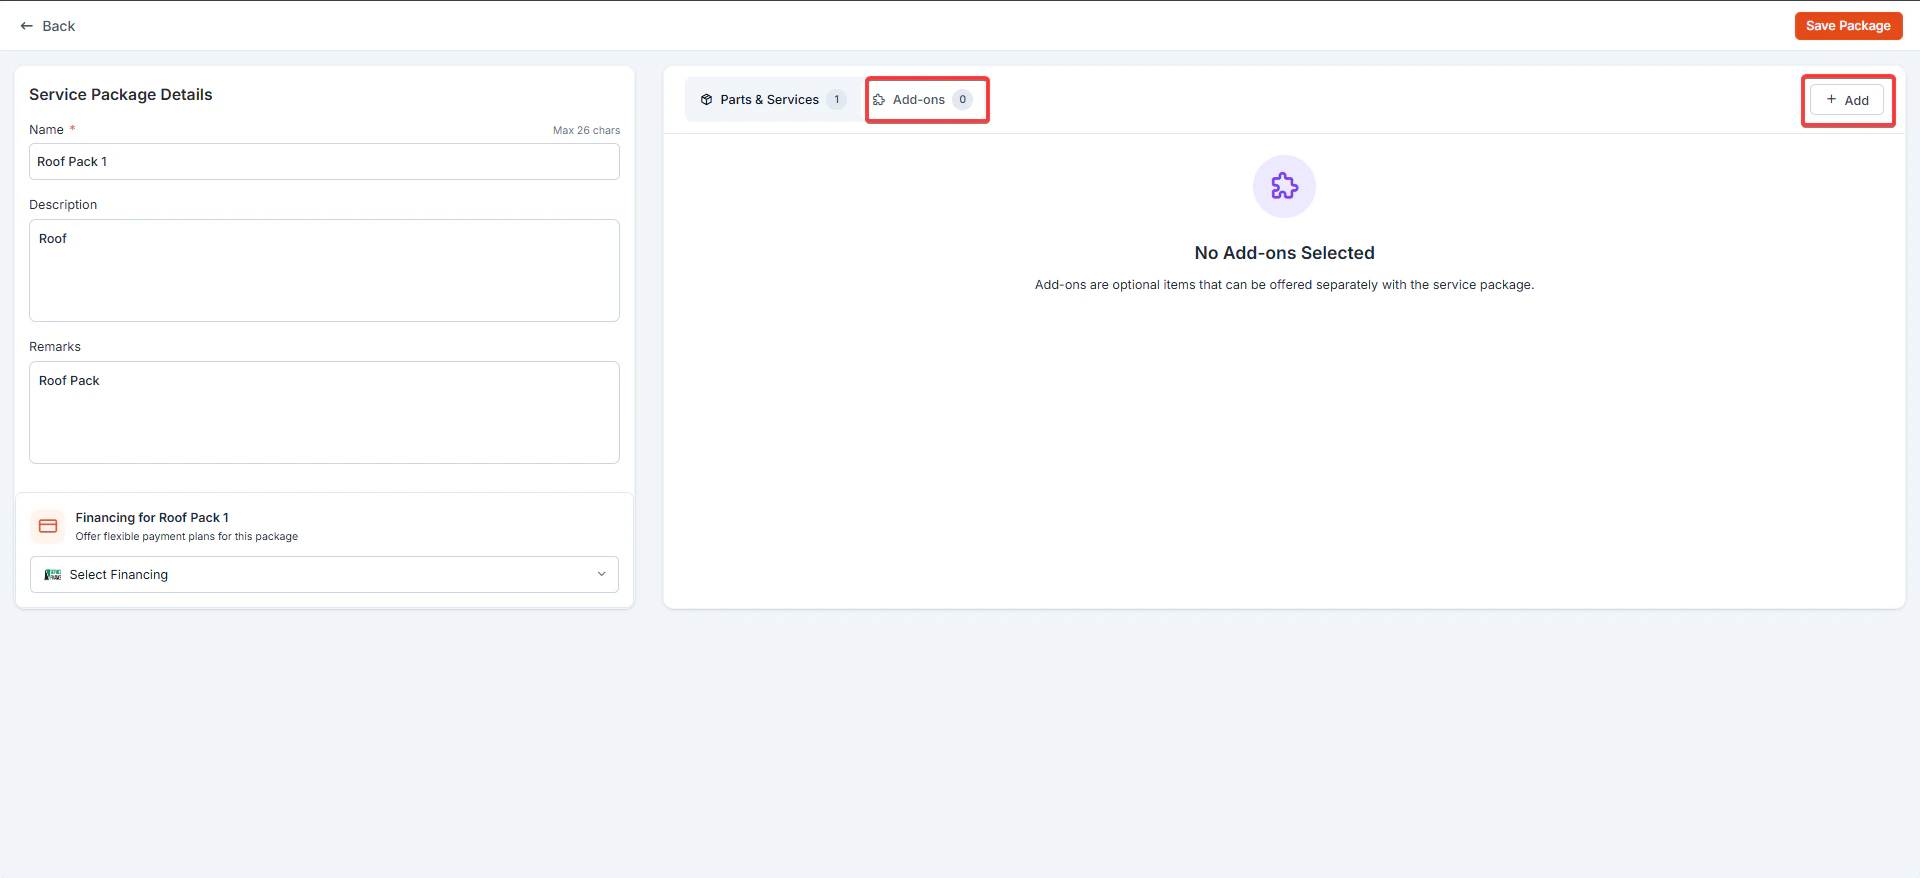
- Add the necessary Add-ons and click save.
B. Proposal Templates
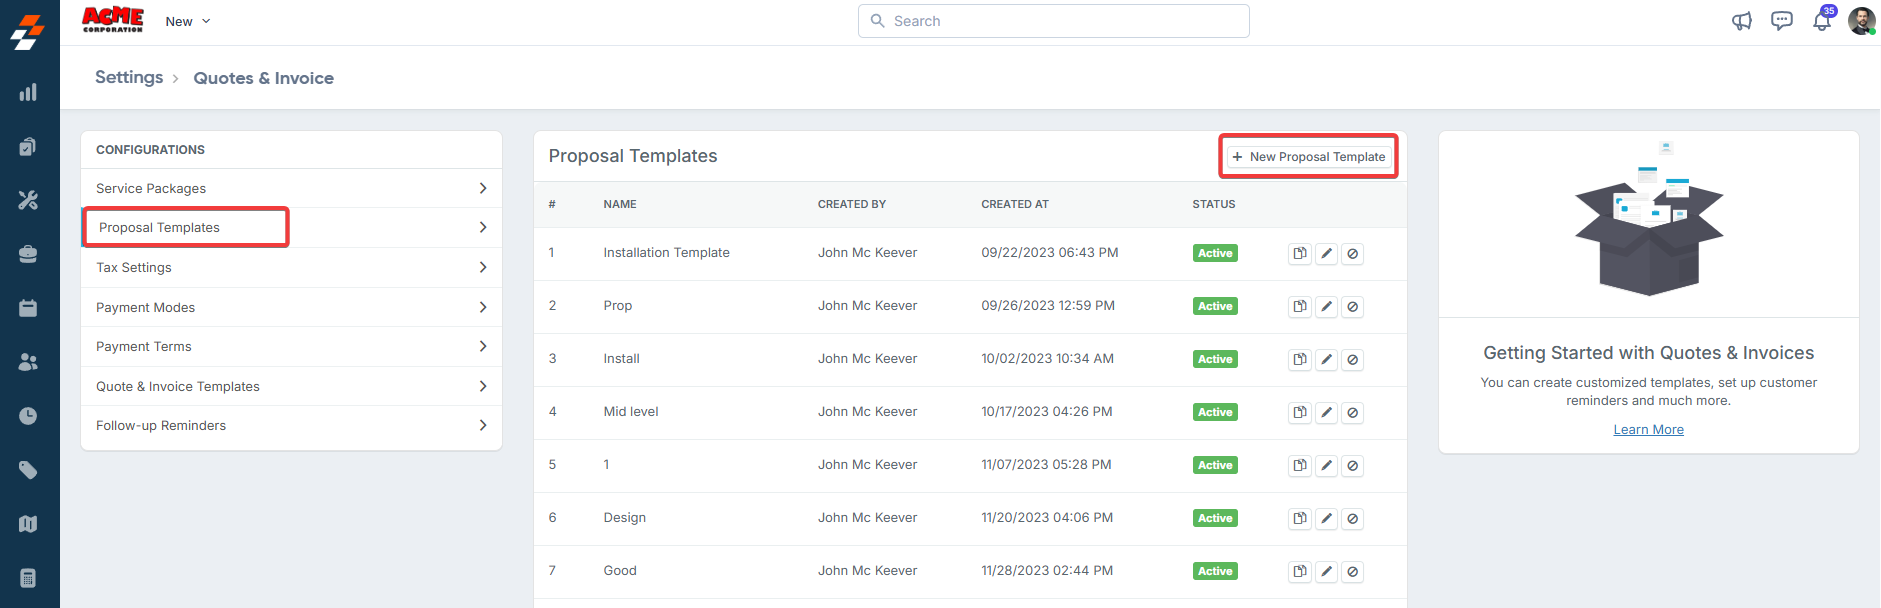
A Proposal Template is a predefined format for linking service packages in a proposal. It serves as a basic structure for quotations, which can be customized. To create a proposal template:- Navigate to Settings -> Configuration Settings -> Quotes & Invoices.
- Select Proposal Template from the available options and click the + New Proposal Template button to create a new template.
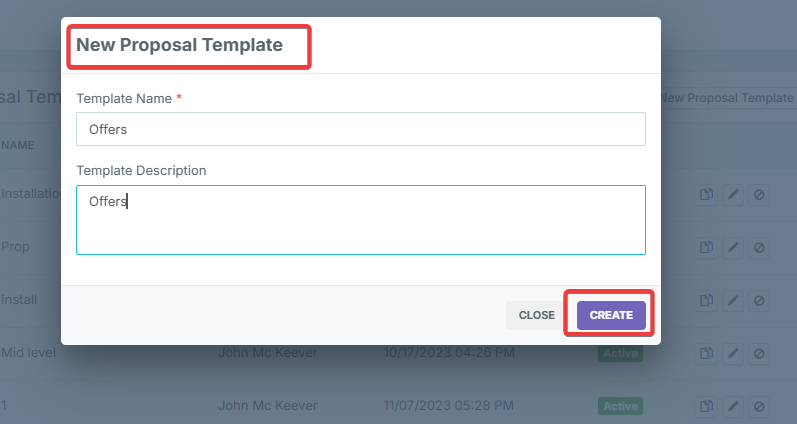
- Enter a descriptive name and description for your proposal template and click Create to proceed.
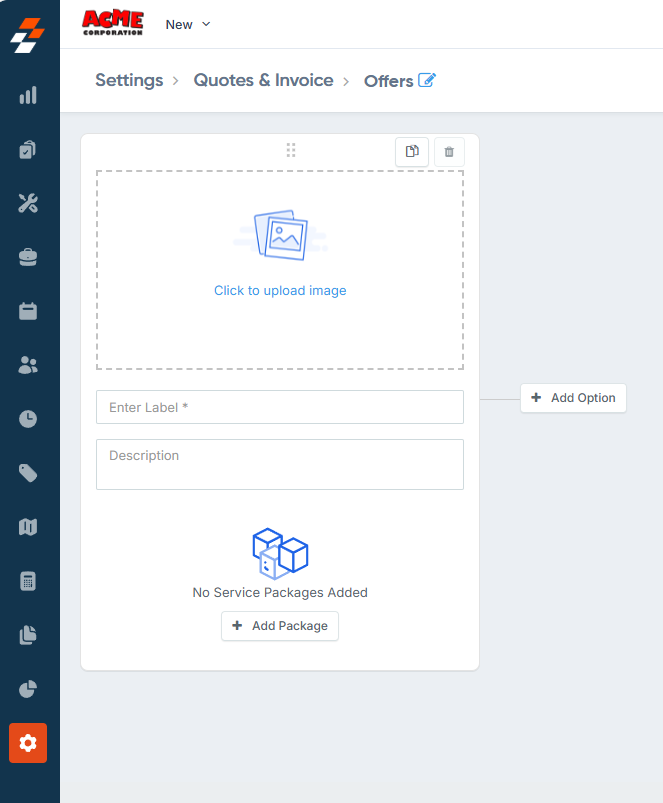
- Enter a Label Name and short description for the proposal template.
- Add the Service Packages:
- Click the + Add Package button to include a Service Package in your template.
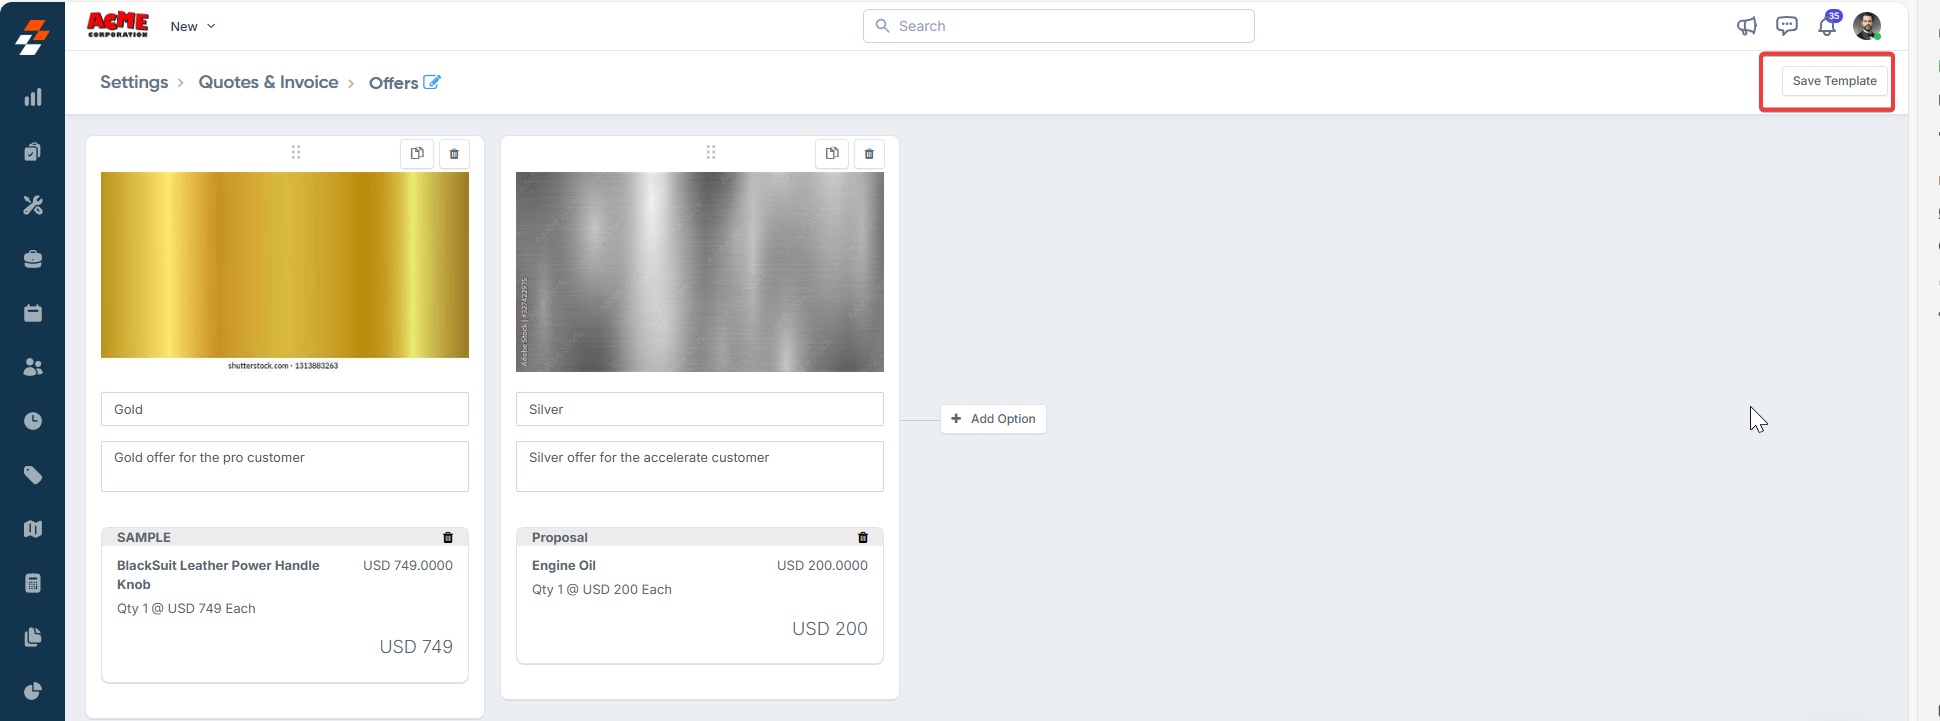
- Choose the desired Service Package from the list and click Save to confirm.
- Once added, click Save Template to finalize the template creation process.
Add-ons in the Proposal Template
When Add-ons are configured and linked to service packages, they automatically appear within proposal templates as optional Add-ons. Where Add-ons Appear?- Add-ons are displayed within each proposal option card, under a dedicated Add-ons section.
- They are grouped separately from the base service charges to clearly indicate that they are optional.

C. Create a New Proposal
A Proposal is created before sending an estimate to a customer. Once the Service Package and Proposal Template are set up, you can send a proposal.Navigation : Accounting —> Quotes —> + New (Proposal)
- Click the “Accounting” module from the left navigation menu and select “Quotes”.
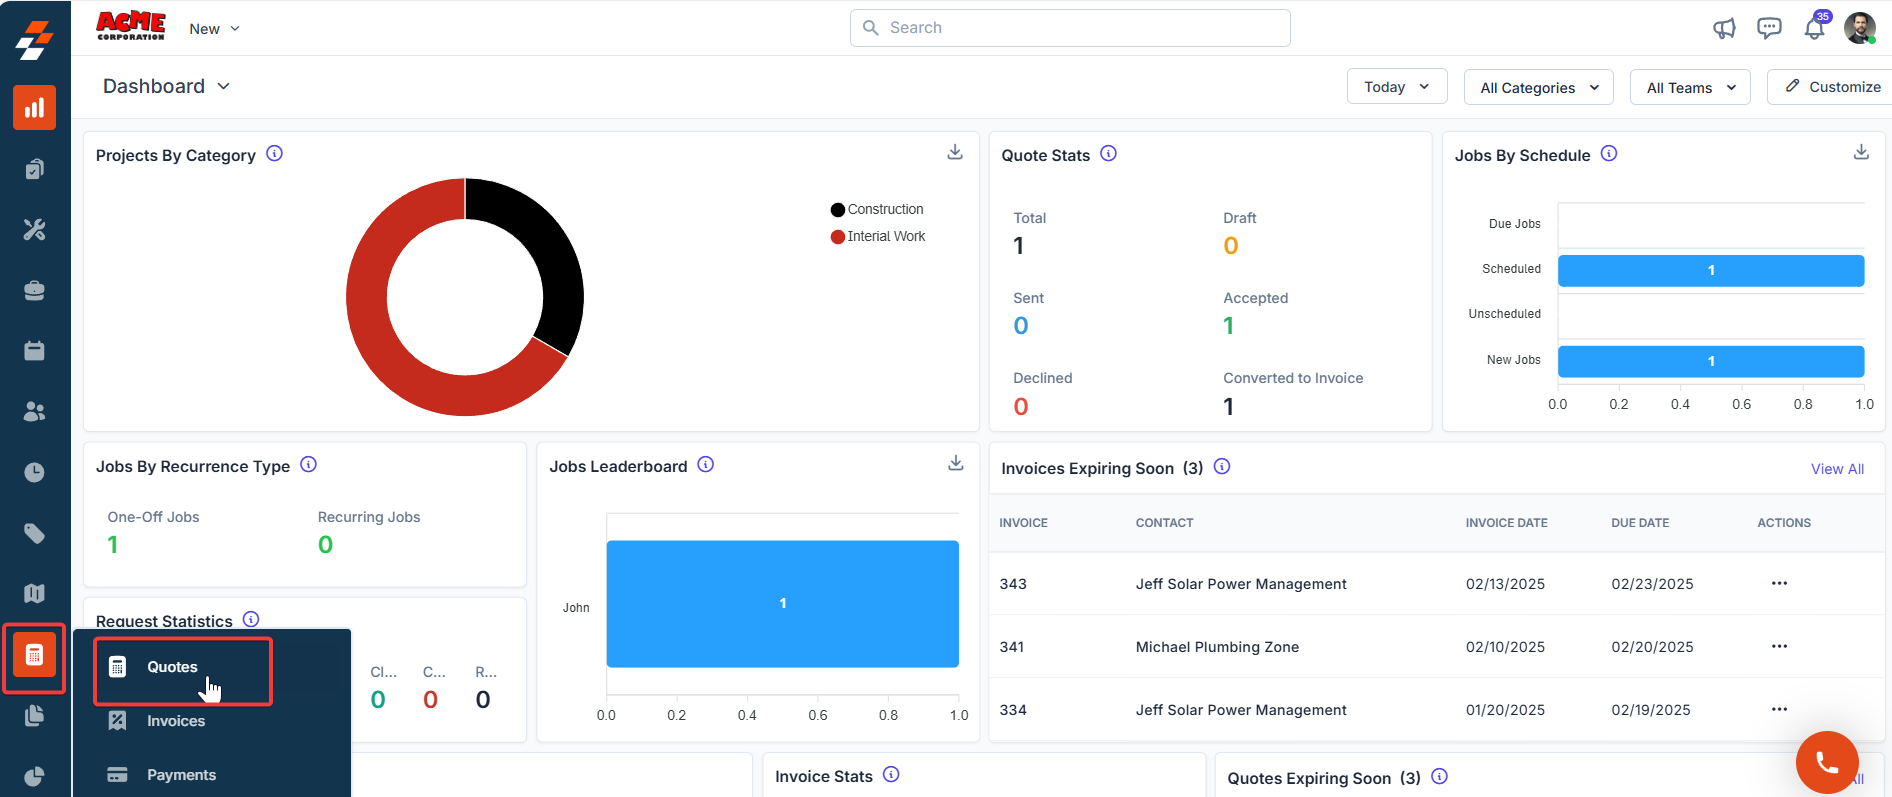
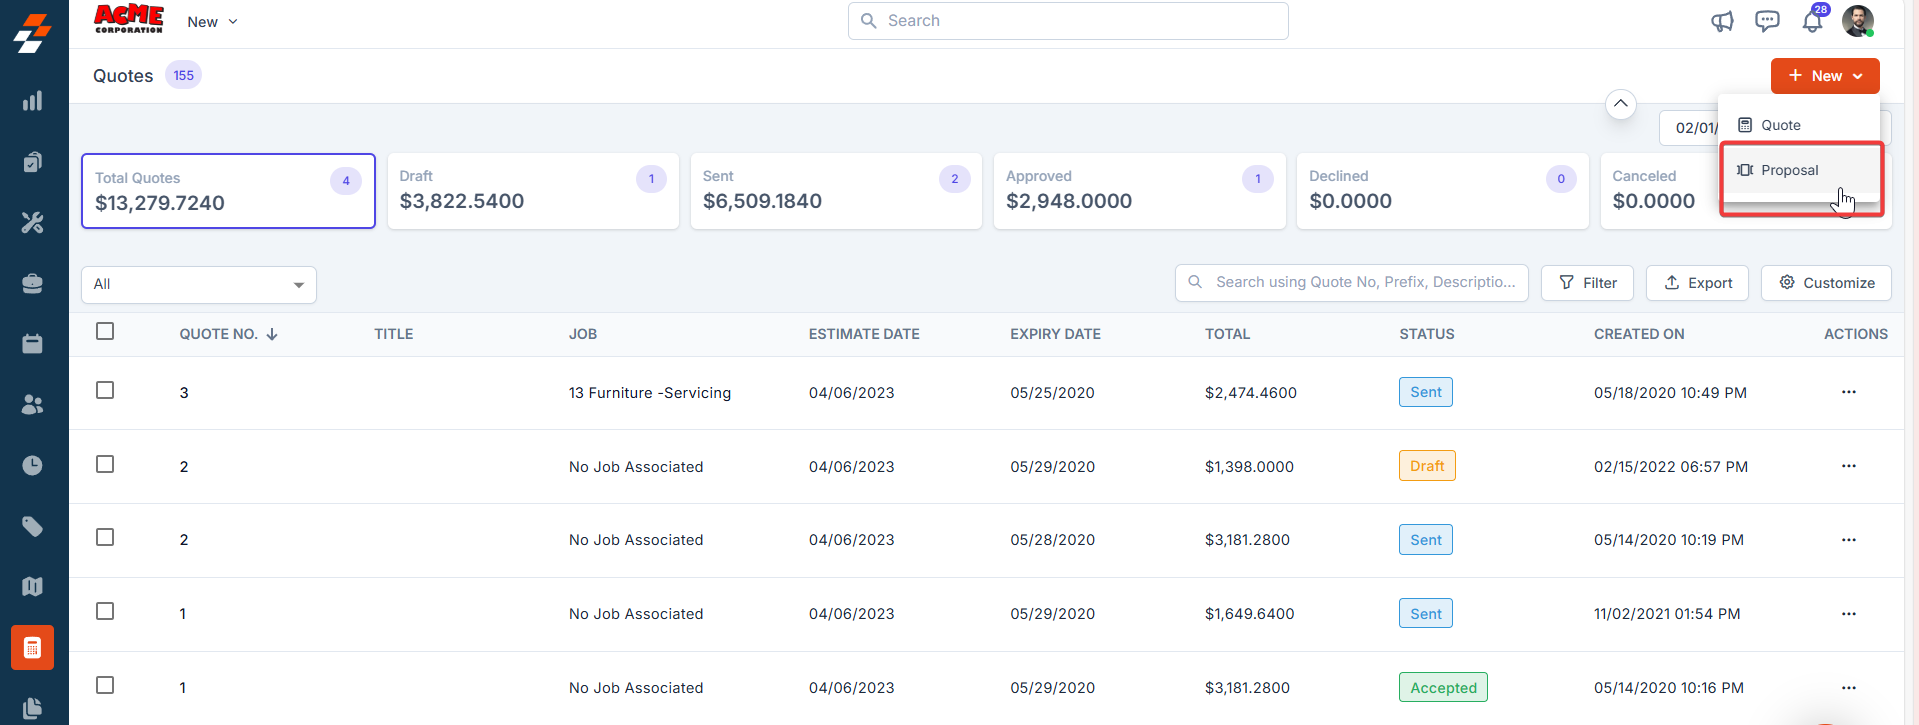
- Click the + New button and select Proposal.
- Select the appropriate template for your proposal and click the “Choose Template” button.
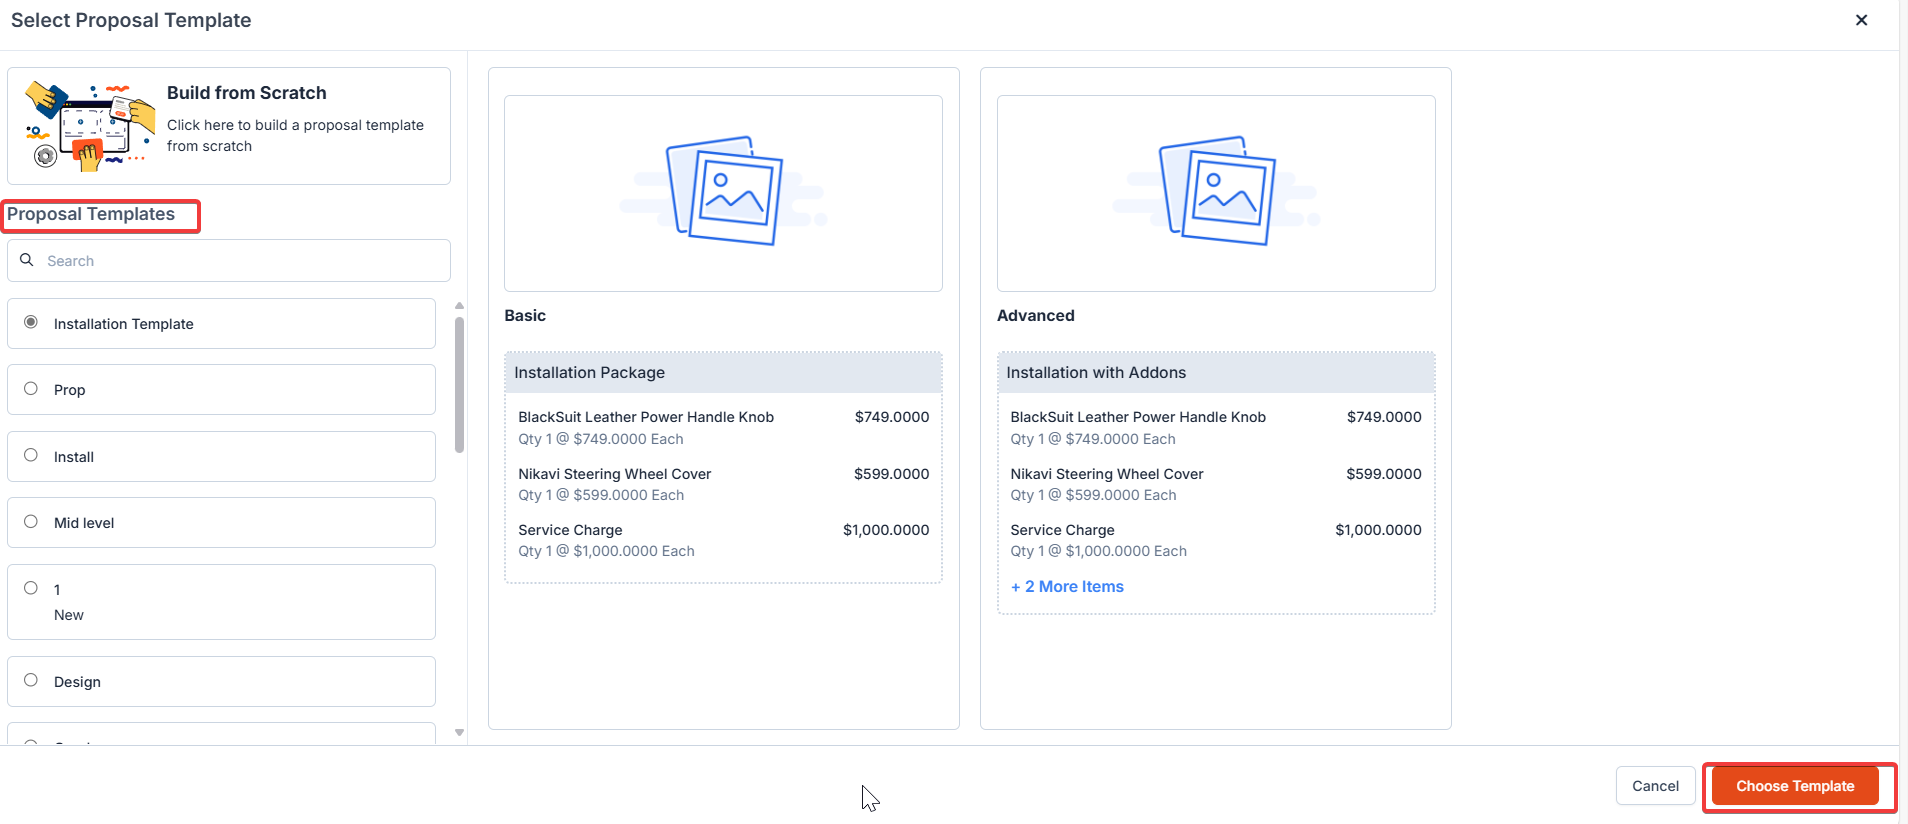
- A new Proposal Creation page will appear.
- Select either “Customer” or “Organization” to associate with the proposal.
- Click “+Add” to associate the various modules.
- A side panel will appear. Select the required module and click the “Proceed” button.
- The billing and service contact details are automatically populated based on the selected customer or organization.
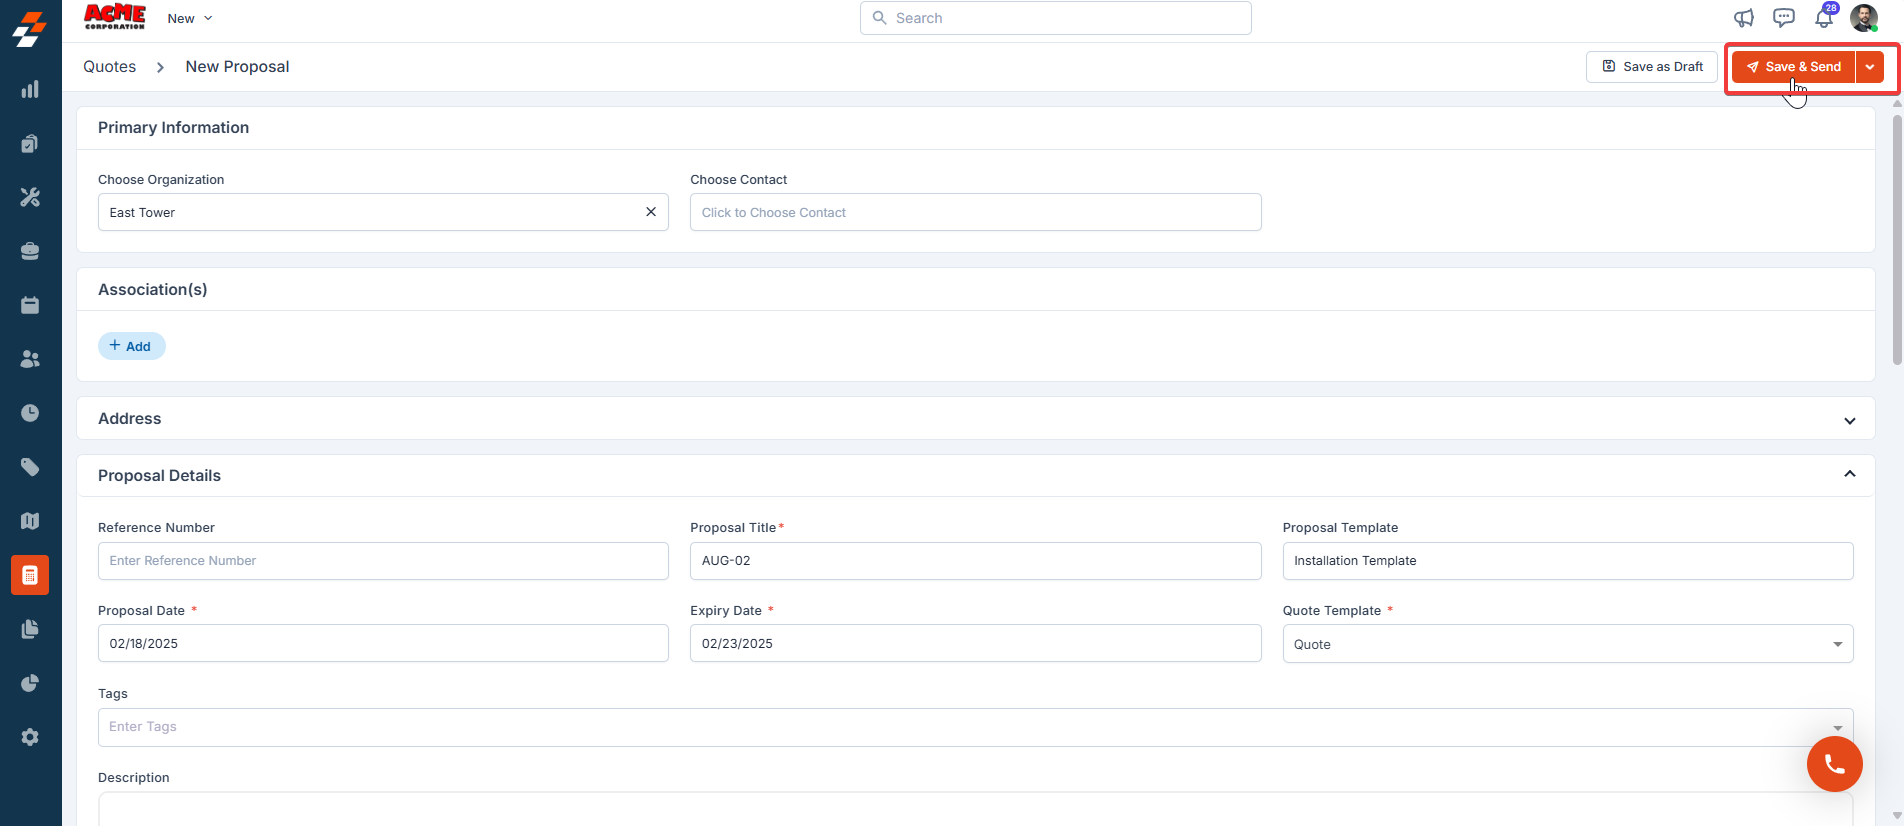
- Fill in the mandatory fields in the Proposal Details section:
- Proposal Title
- Proposal Date
- Expiry Date
- Quote Template
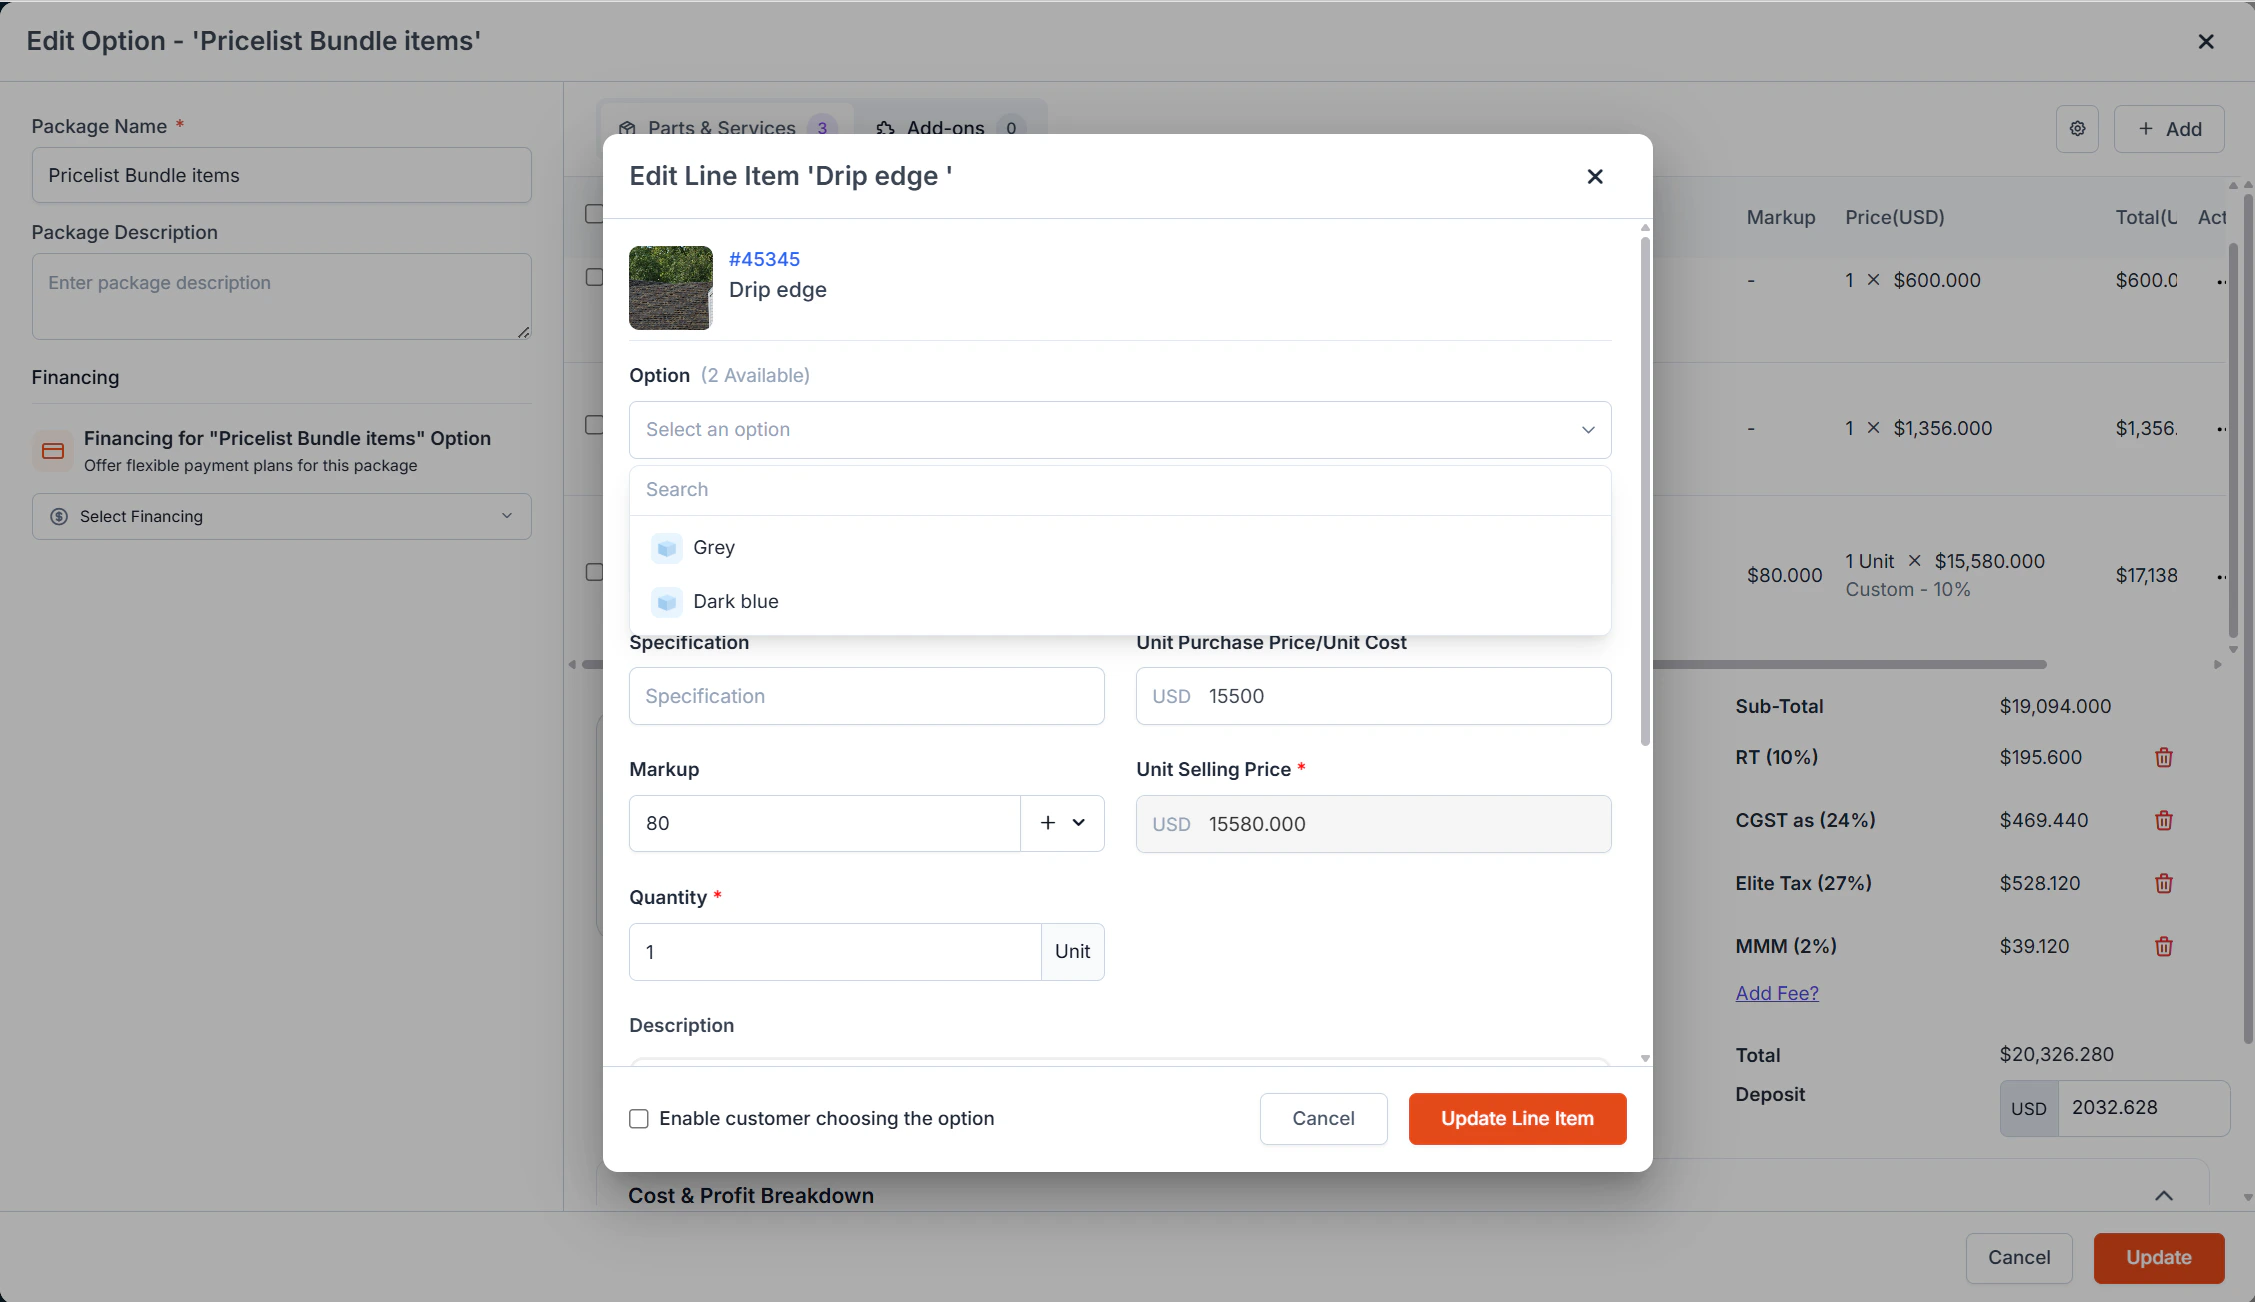
- You can edit or delete any selected packages as needed in the Estimate Options section.
- The administrator can prefill the options by editing a product with predefined attributes.
- Click + Add Attachments to upload any relevant quotation-related attachments to the proposal.
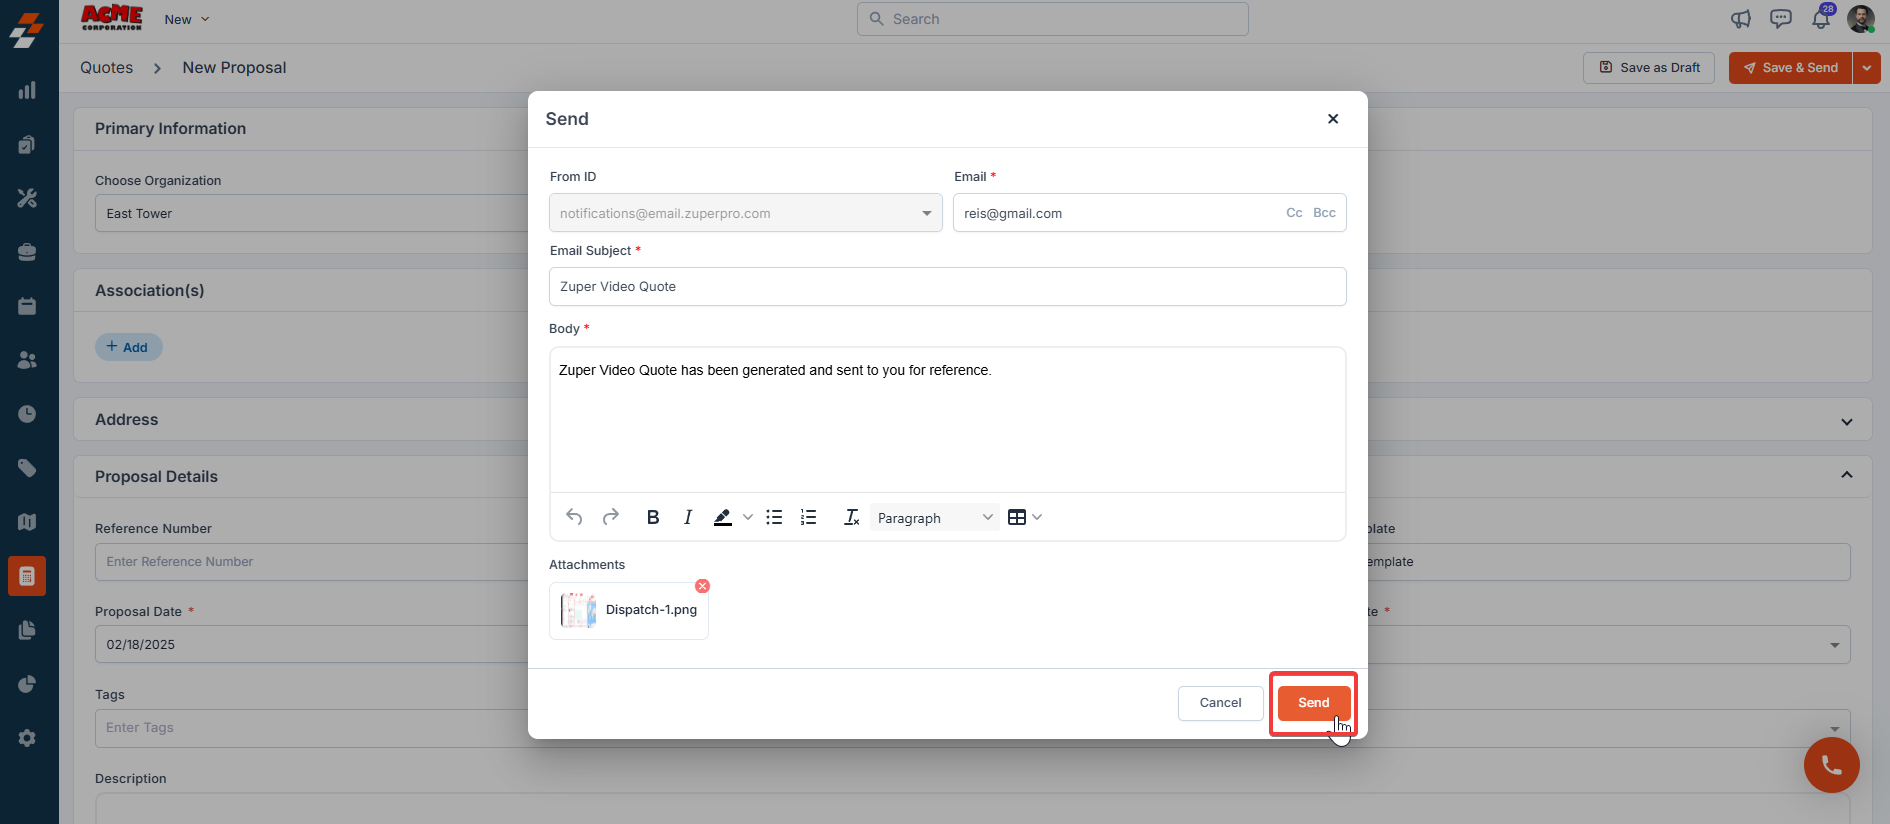
- Click the Save & Send button to save the proposal and proceed with sending it.
- In the pop-up, confirm the From ID, Email, Subject, and Body of the email. Once confirmed, click Send again to send the proposal to the selected recipient.
Functions on the Proposal Details page
Functions on the Proposal Details page
The following perform following functions in the Proposal Details page.
- Edit Proposal: Click the Edit button to modify the proposal, including package details and any other changes.
- Save as Draft: After making changes, click Save as Draft to save the updated proposal without sending it immediately.
- Mark as Accepted: Once the customer agrees to the proposal, click Mark as Accepted to finalize the proposal. This marks the proposal as accepted and ready for the next steps. After marking the proposal as accepted, the proposal is automatically converted into a Quote, which means the proposal has been confirmed and the process is moving forward.
Add-ons in the Proposal - Create / Edit
Add-ons let you include optional products or services in the proposal that are not part of the primary items. These are displayed under the Additional Items section of the proposal option.Note: If the Add-ons are enabled in the settings and configured in the standard or CPQ template, they are auto-fetched under the proposal options. Additionally, if any adjustments or changes are required before presenting to the customer, the items under the add-ons section can be updated in the proposal edit page.