

Learn more about how connected emails appear on jobs and customer records in Emails in jobs and customer records.
Create a new inbox
Path: Settings > Communication > Email- Select Settings from the left navigation menu.
- Select Communication, then select Email. The Manage Inboxes page opens.
- Select + New Inbox.
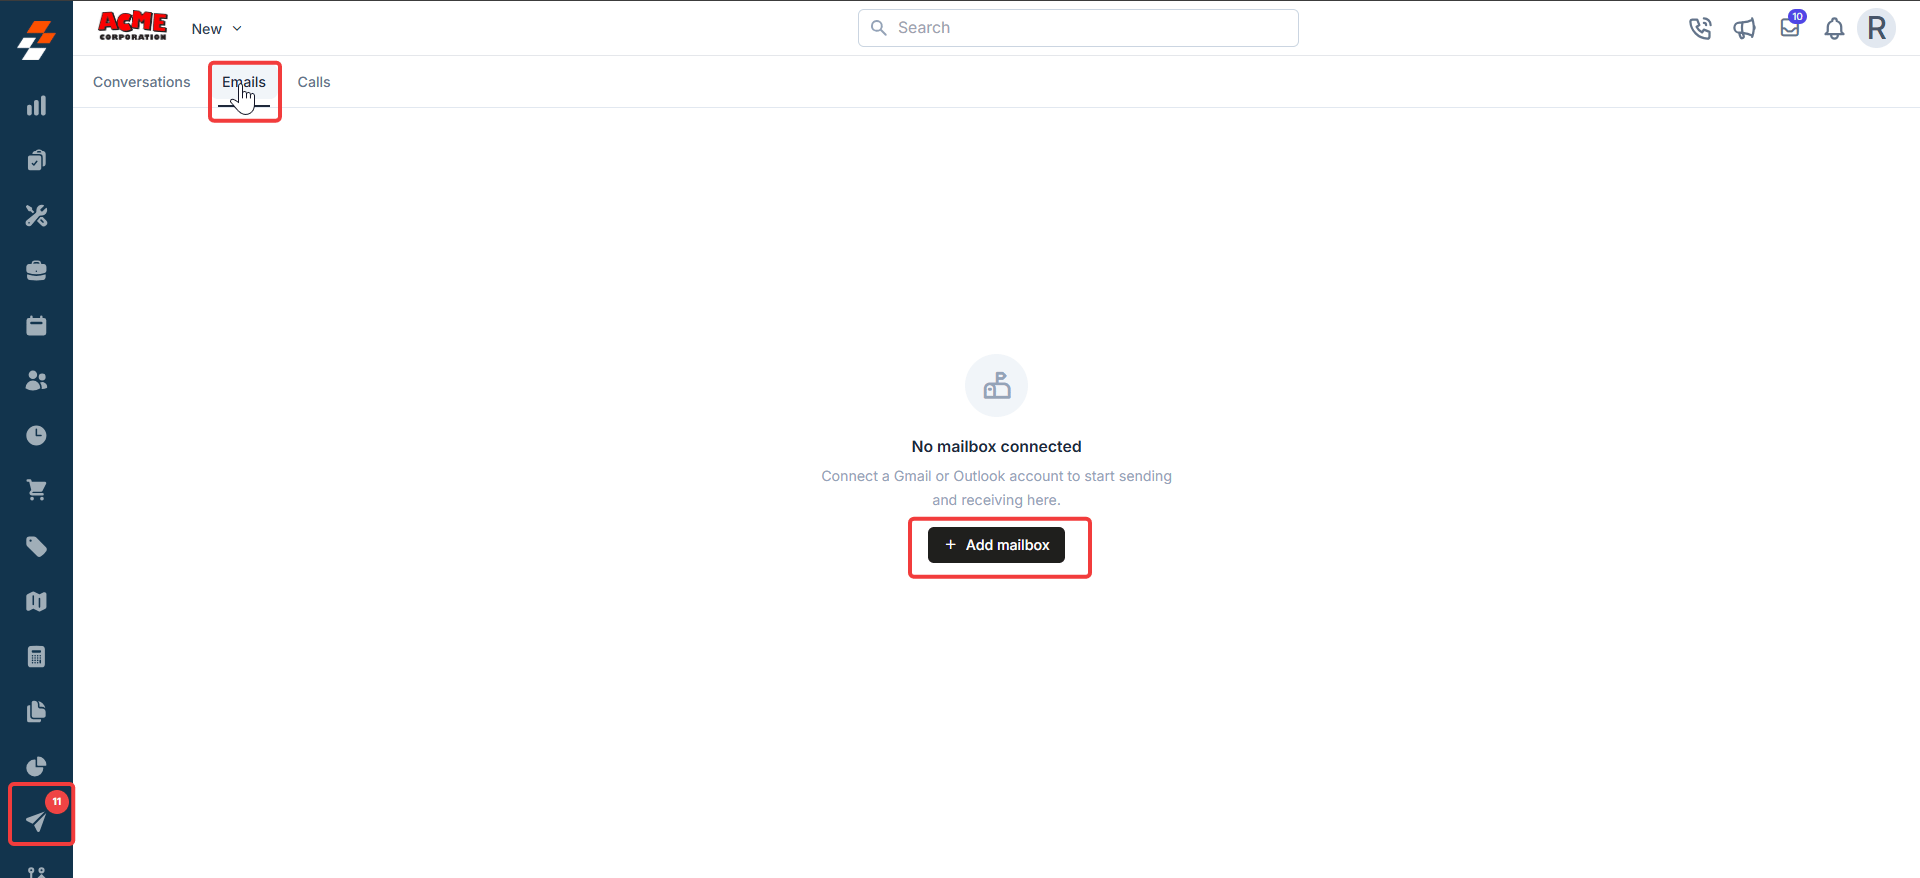
If you have not connected an inbox yet, the Manage Inboxes page appears empty. Select + New Inbox to set up your first one.
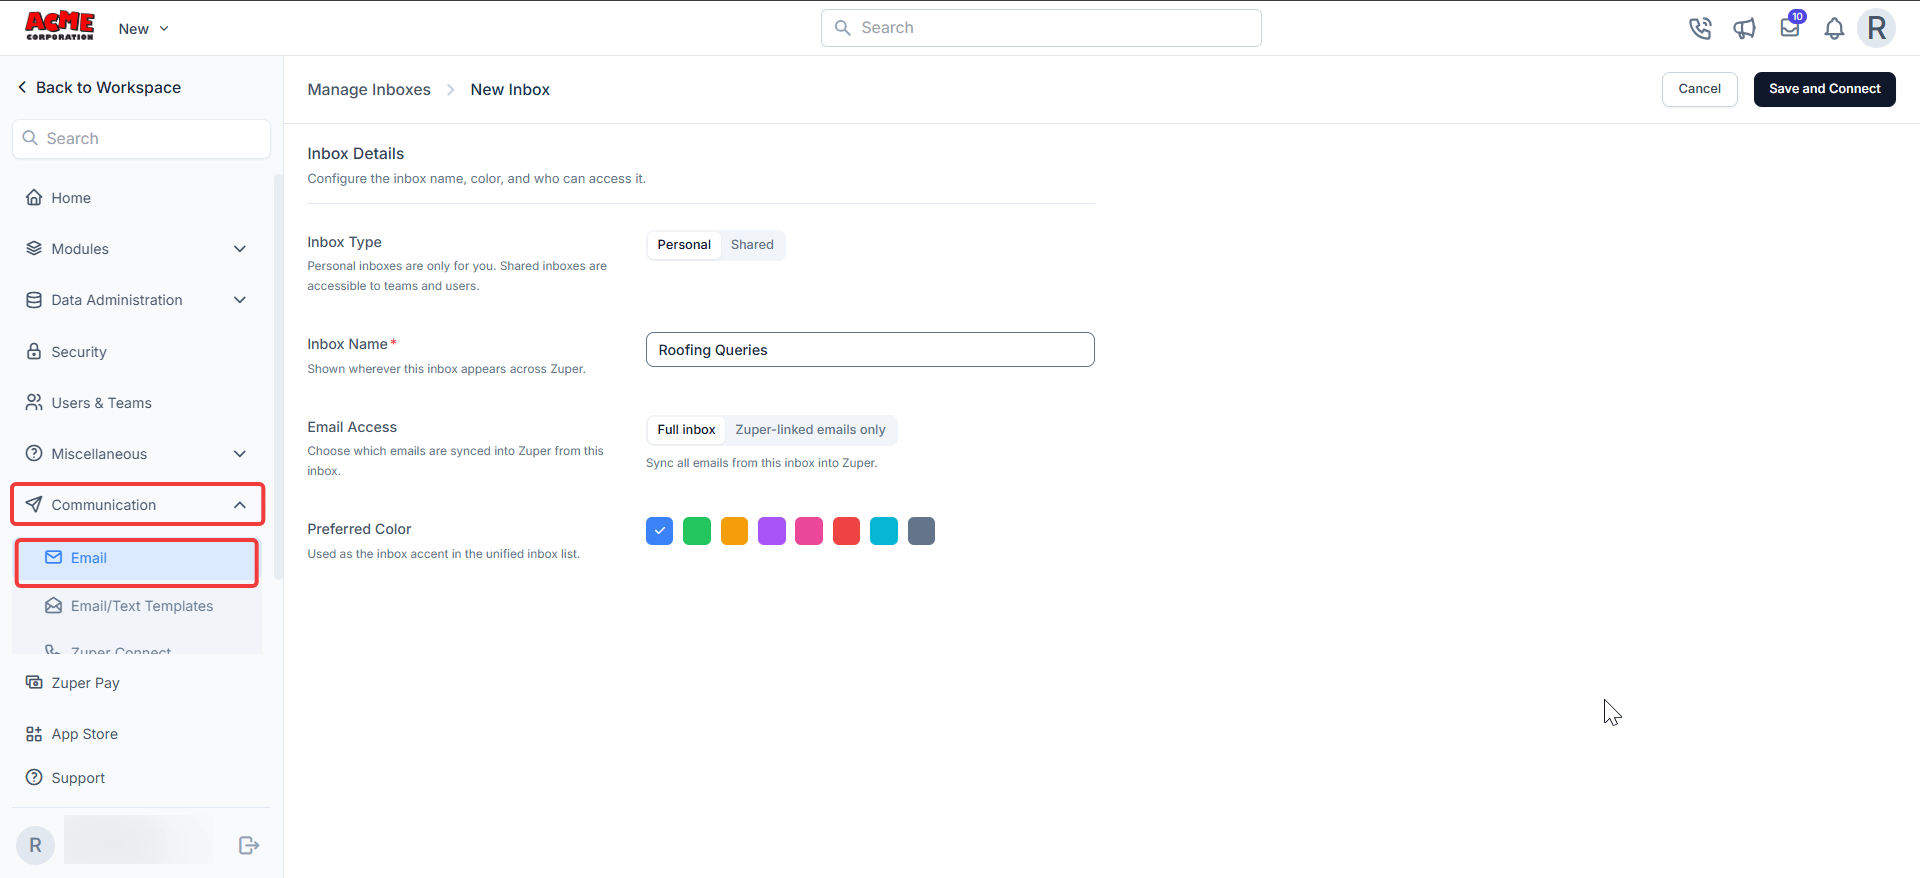
- Under Inbox Type, select Personal or Shared. A personal inbox is visible only to you, while a shared inbox is visible to the teams or users you choose.
- Enter a name for the inbox in the Inbox Name field. Zuper displays this name wherever the inbox appears across the platform.
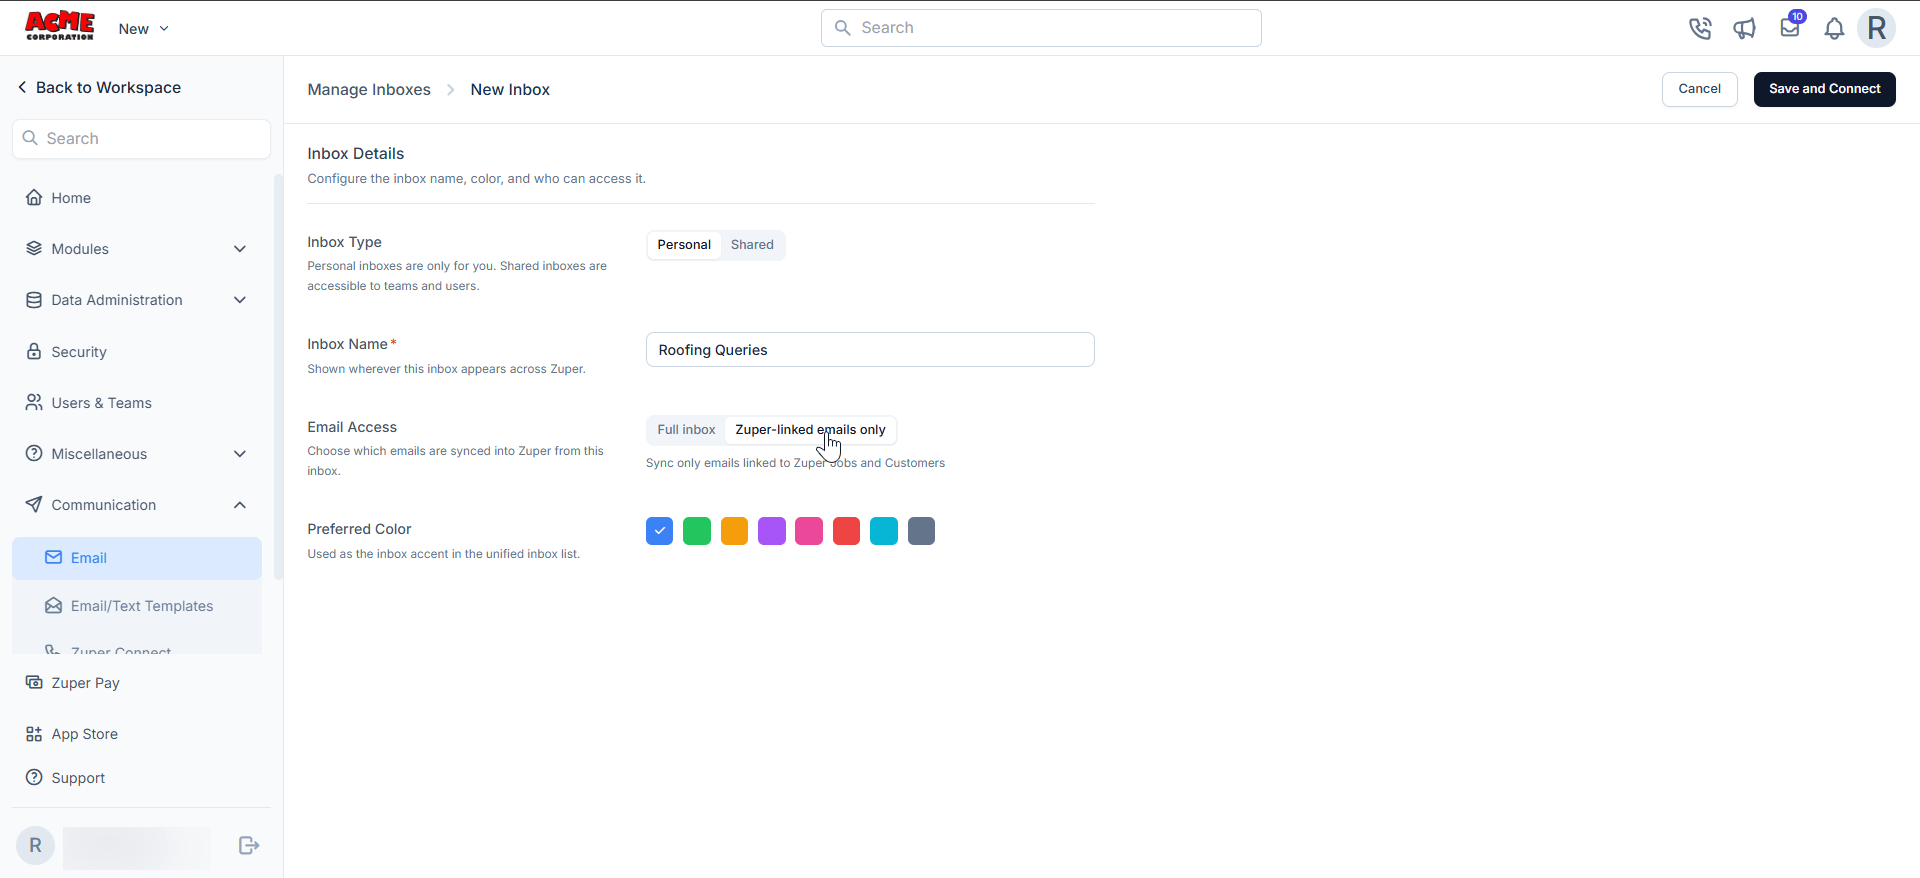
- Under Email Access, select Full inbox to sync every email from this mailbox, or select Zuper-linked emails only to sync only the emails already linked to a job or a customer.
- Under Preferred Color, select a color. Zuper uses this color as the accent for the inbox list.
Add access for a shared inbox
If you selected Shared as the Inbox Type, additional access controls appear. Set these up before you connect to the mailbox.- Under Roles, select + Add roles to give access to everyone who has a chosen role.
- Under Individual Users, select + Add users to give access to specific people, in addition to role-based access.
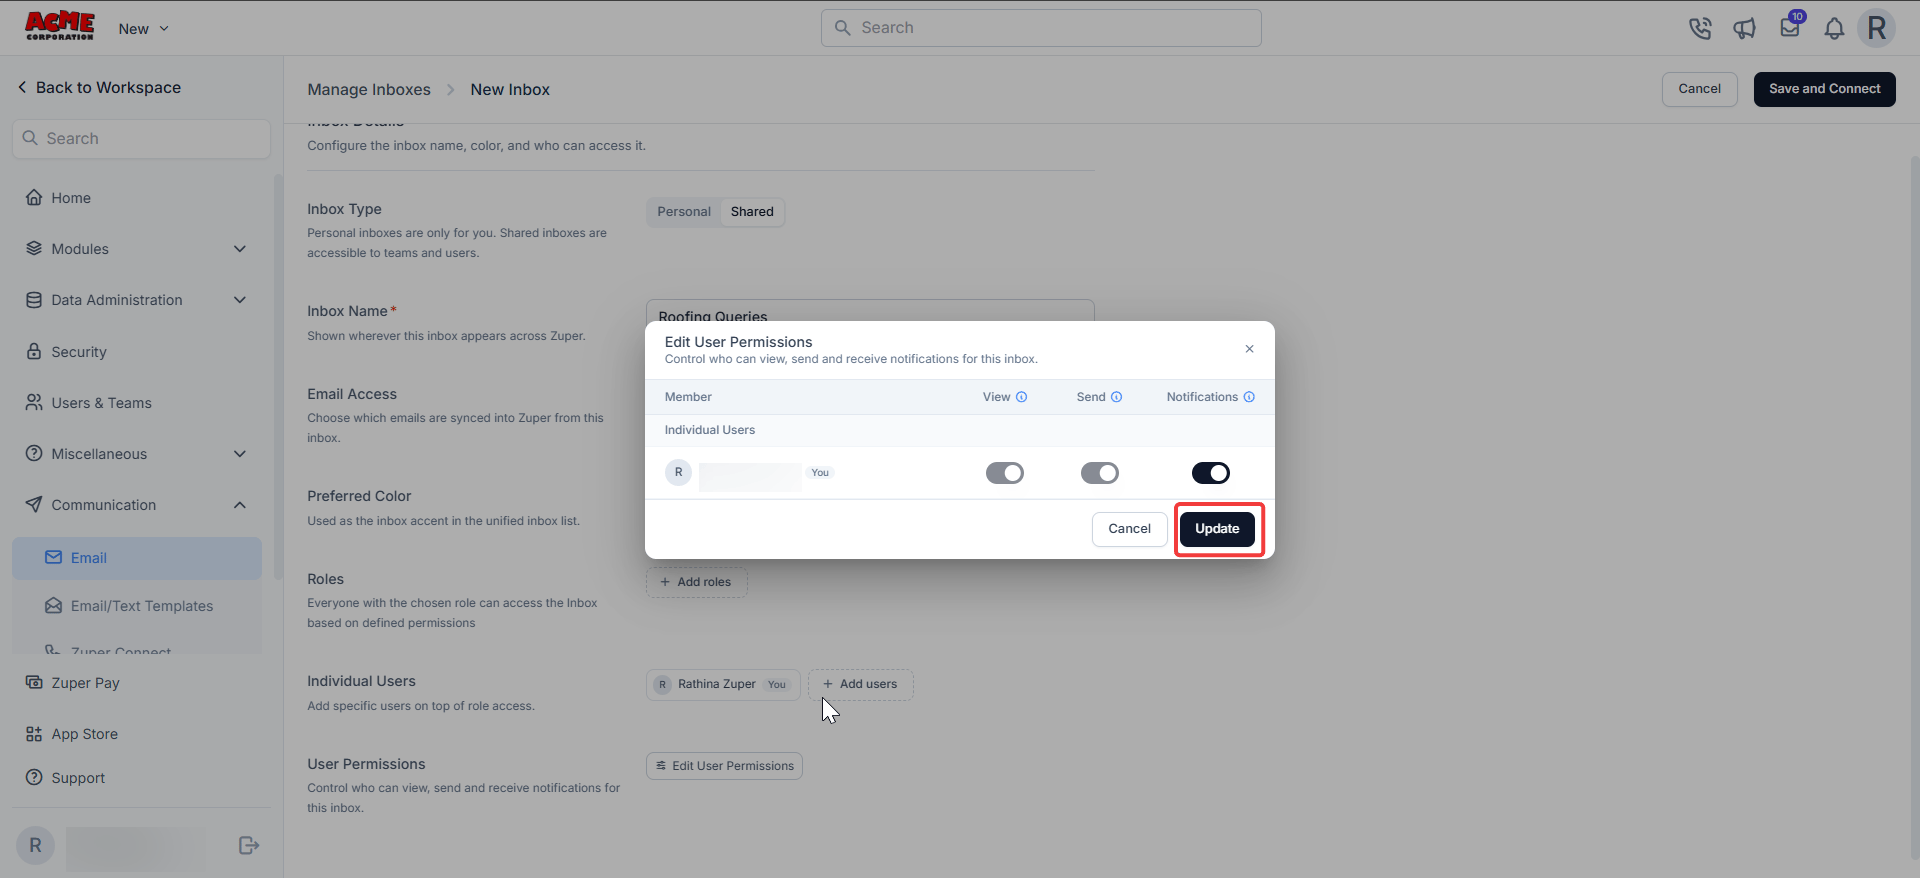
- Select Edit User Permissions to control what each person can do with the inbox.
- In the Edit User Permissions dialog, turn on View, Send, or Notifications for each member.
Enable View permission before you enable Send permission. If a member does not have View access, that member cannot send emails from this inbox.
- Select Update to save the permissions.
Connect your mailbox
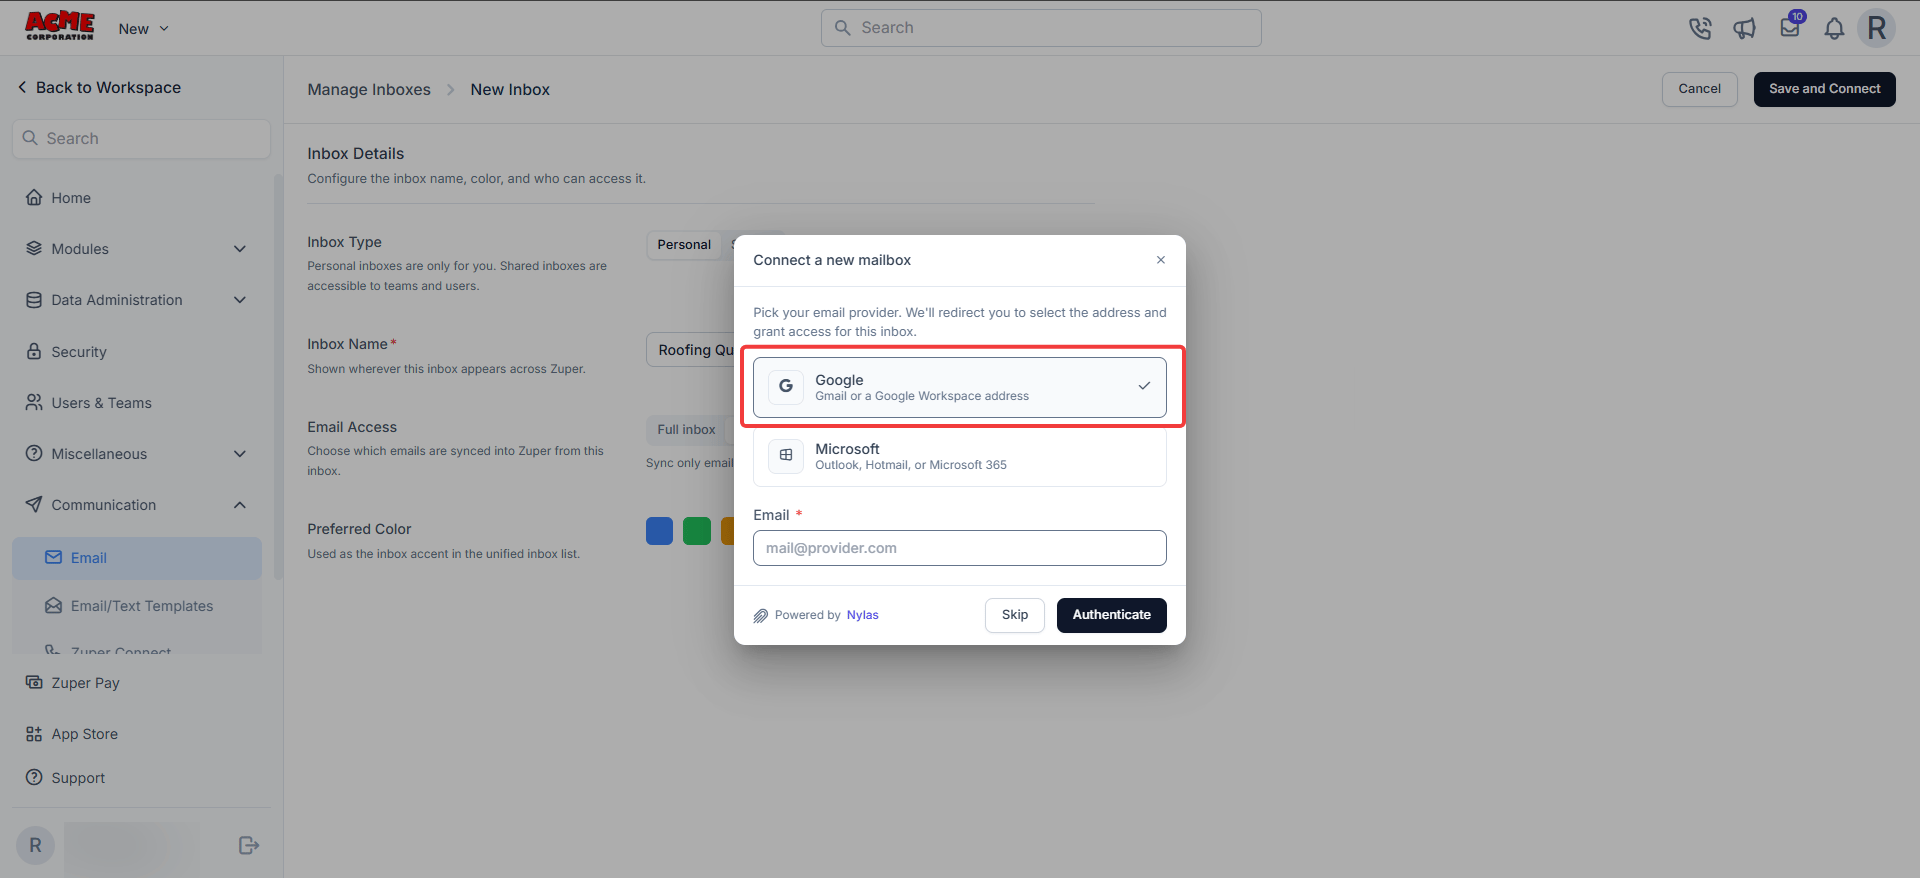
After you enter the inbox details, connect the mailbox that the inbox will sync with.- Select Save and Connect. The Connect a new mailbox dialog opens.
- Select Google or Microsoft as your email provider.
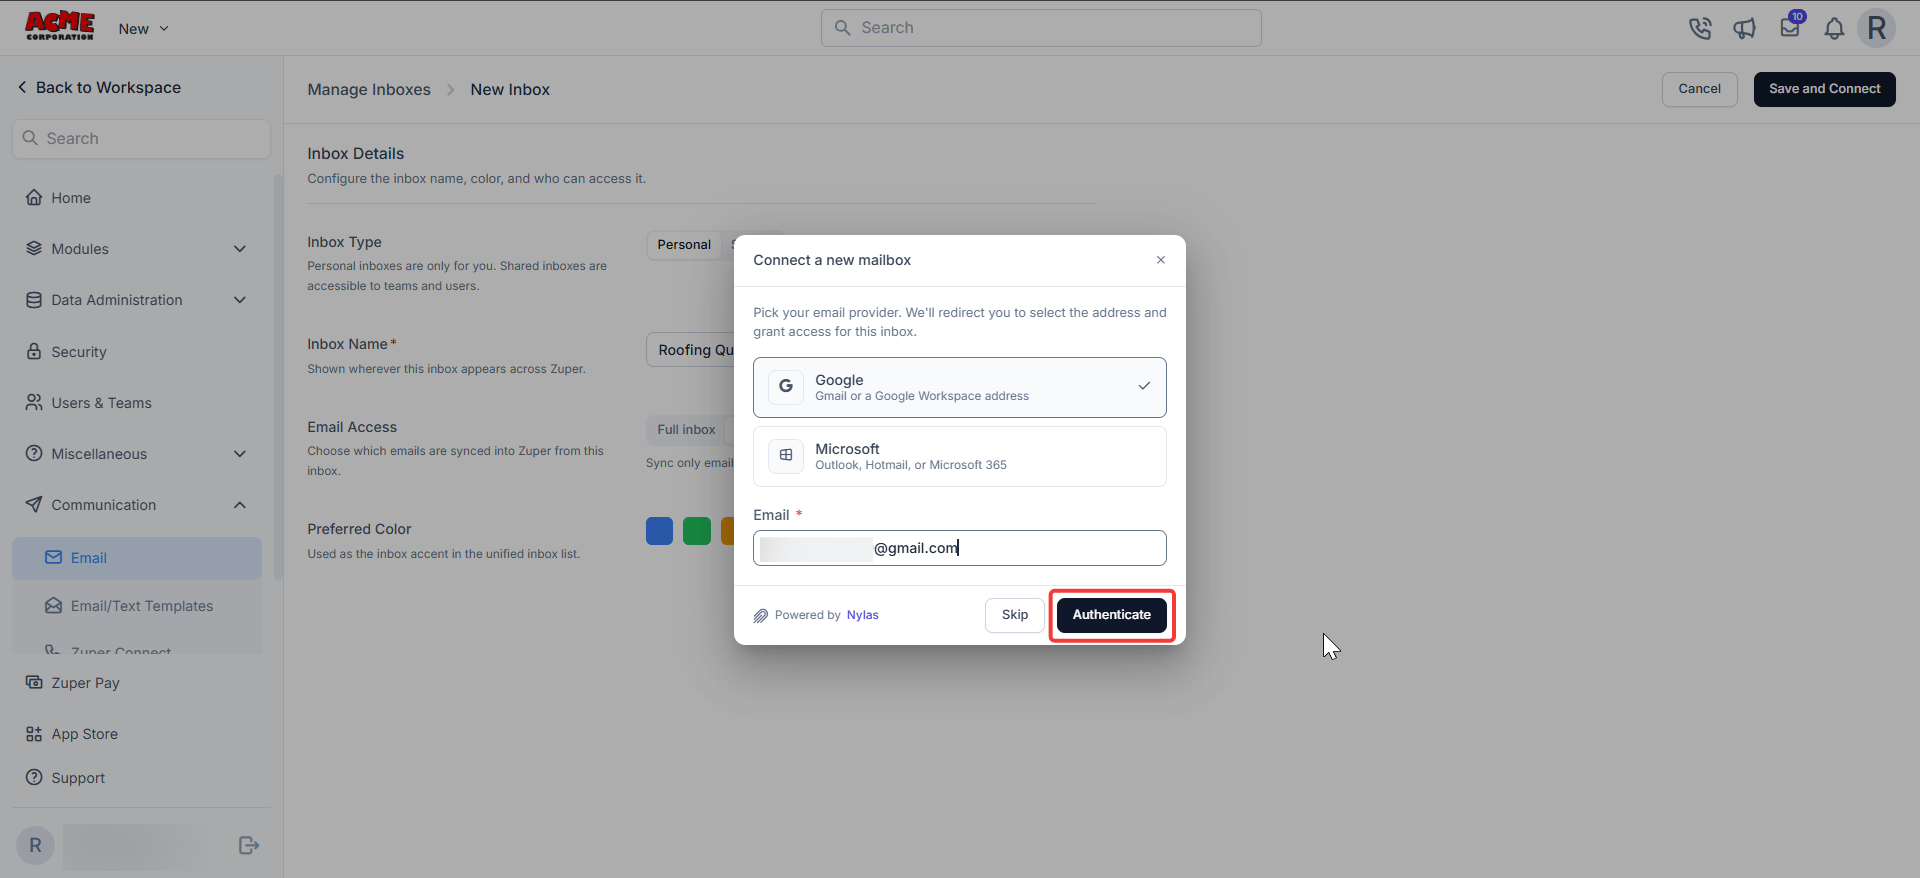
- Enter your email address in the Email field.
Zuper checks whether this email address is already connected, by you or by another member of your team.
- Select Authenticate. A sign-in window from Google or Microsoft opens.
- Select your email account from the list, or select Use another account to sign in with a different one.
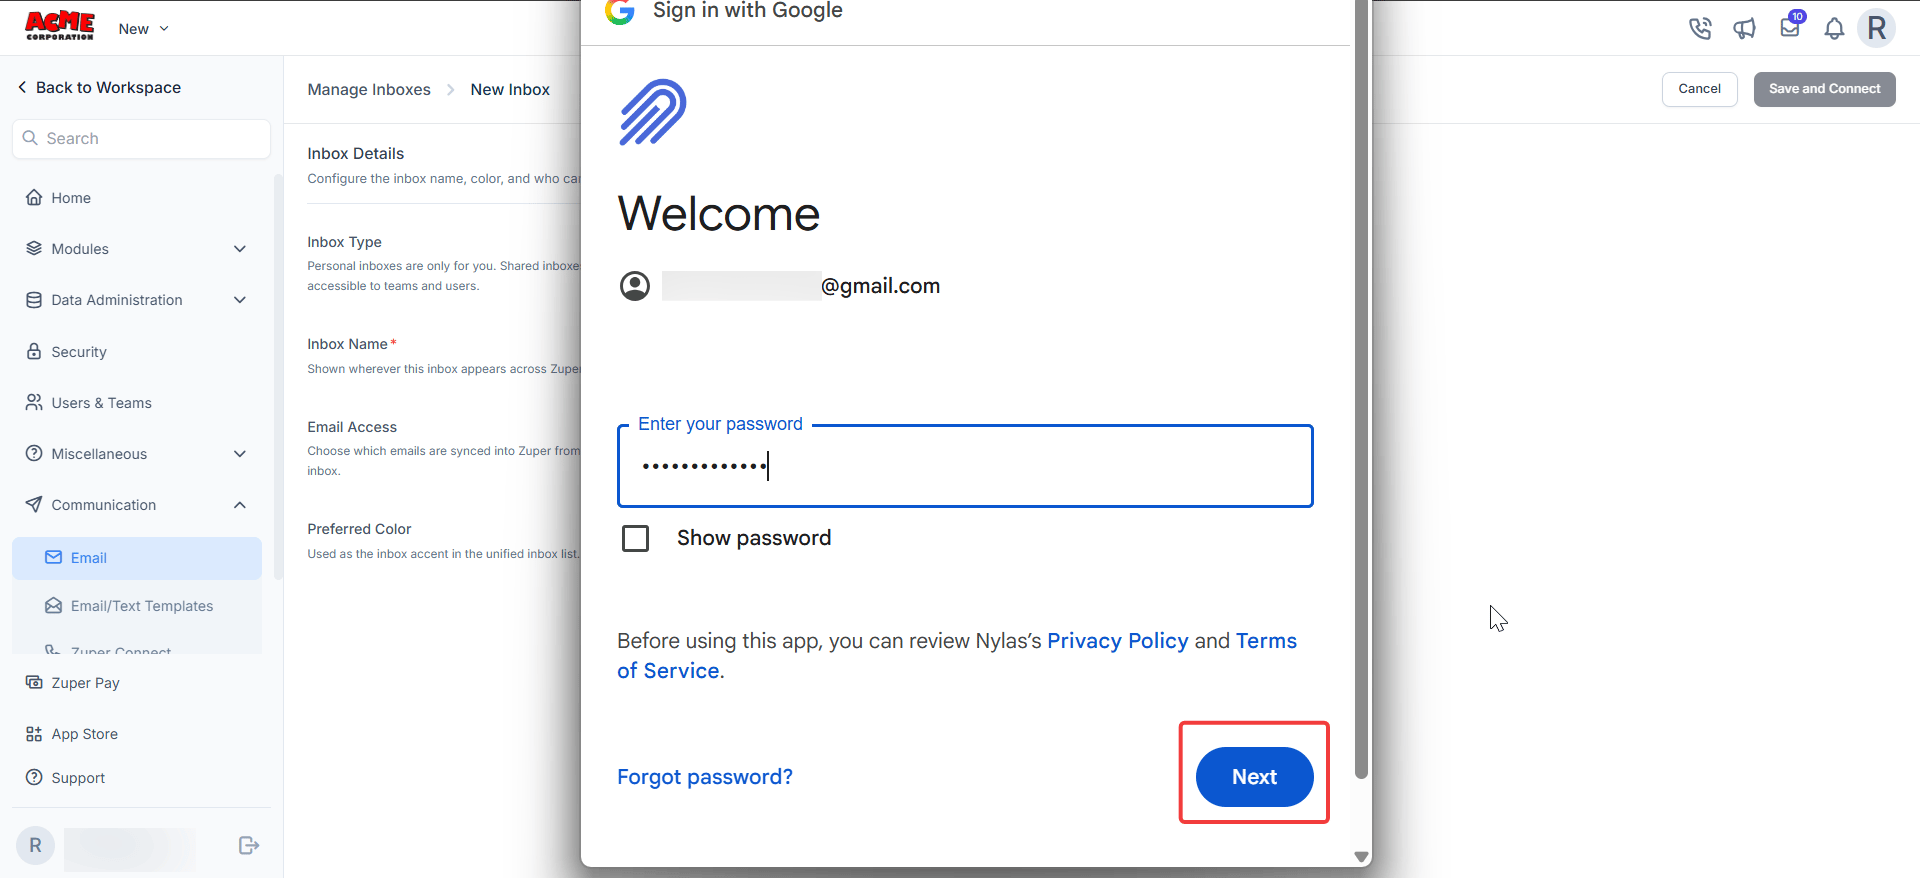
- Enter your password, if prompted. Zuper skips this step if you are already signed in to the selected account. Grant Zuper the requested permissions, and select Allow for each one.
- Select Next to complete the sign-in.
Outlook and Microsoft 365 mailboxes connect the same way. Select Microsoft instead of Google on the Connect a new mailbox dialog, then sign in with your Microsoft account. If you select Skip instead, Zuper discards the mailbox connection step, and you can connect the mailbox later from the Manage Inboxes page.
Manage your inboxes
All your inboxes appear together on the Manage Inboxes page, where you can review and update them at any time.- Go to Settings, select Communication, then select Email to open the Manage Inboxes page.
- Review the Inbox, Type, Connected account, Email Access, Status, and Access columns for each inbox.
- Select the context menu (three-dot icon) next to an inbox to see the available actions.
- Select Edit to modify the inbox details, including its name, access, and permissions.
- Select Revoke & Delete to permanently remove the inbox.
FAQs
Can I connect more than one inbox?
Can I connect more than one inbox?
Yes, but the number you can connect depends on your role.Team leads and field executives can connect one personal inbox and multiple shared inboxes. Admins can connect multiple personal and shared inboxes.Each inbox appears on the Manage Inboxes page, along with its type, connected account, and status.
What happens when my email connection expires?
What happens when my email connection expires?
Zuper prompts you to reconnect using the same sign-in steps.Until you reconnect, the inbox is unavailable in the Communication module, and Zuper does not sync new emails.Existing email history on jobs and customer records remains unaffected.
What happens when I select Revoke & Delete?
What happens when I select Revoke & Delete?
Zuper permanently removes the mailbox access and synced email history for that inbox, including emails linked to jobs and customers.This action cannot be undone.
Related articles
- Email/Text Templates — Create reusable email and text templates for faster replies.
- Emails in jobs and customer records — See how connected emails appear on jobs and customer records.
- Email from the field — Send and receive email from the Zuper mobile app.