Overview
The Measurement Upload feature allows you to upload CSV measurement files from supported providers and automatically populate measurement values within a job. Instead of manually entering measurements, Zuper reads the uploaded CSV file and maps the data to predefined measurement tokens using built-in system templates. This helps reduce manual data entry, minimize errors, and accelerate job setup.Access & permissions
- Measurement upload is available to all users who have access to the Job Details page.
- No additional permission or configuration is required.
Prerequisites
Before uploading measurements, ensure that:- You have a valid CSV file from Roofr, RoofSnap, or Bid Engine, or a valid XML file from Pitch Gauge.
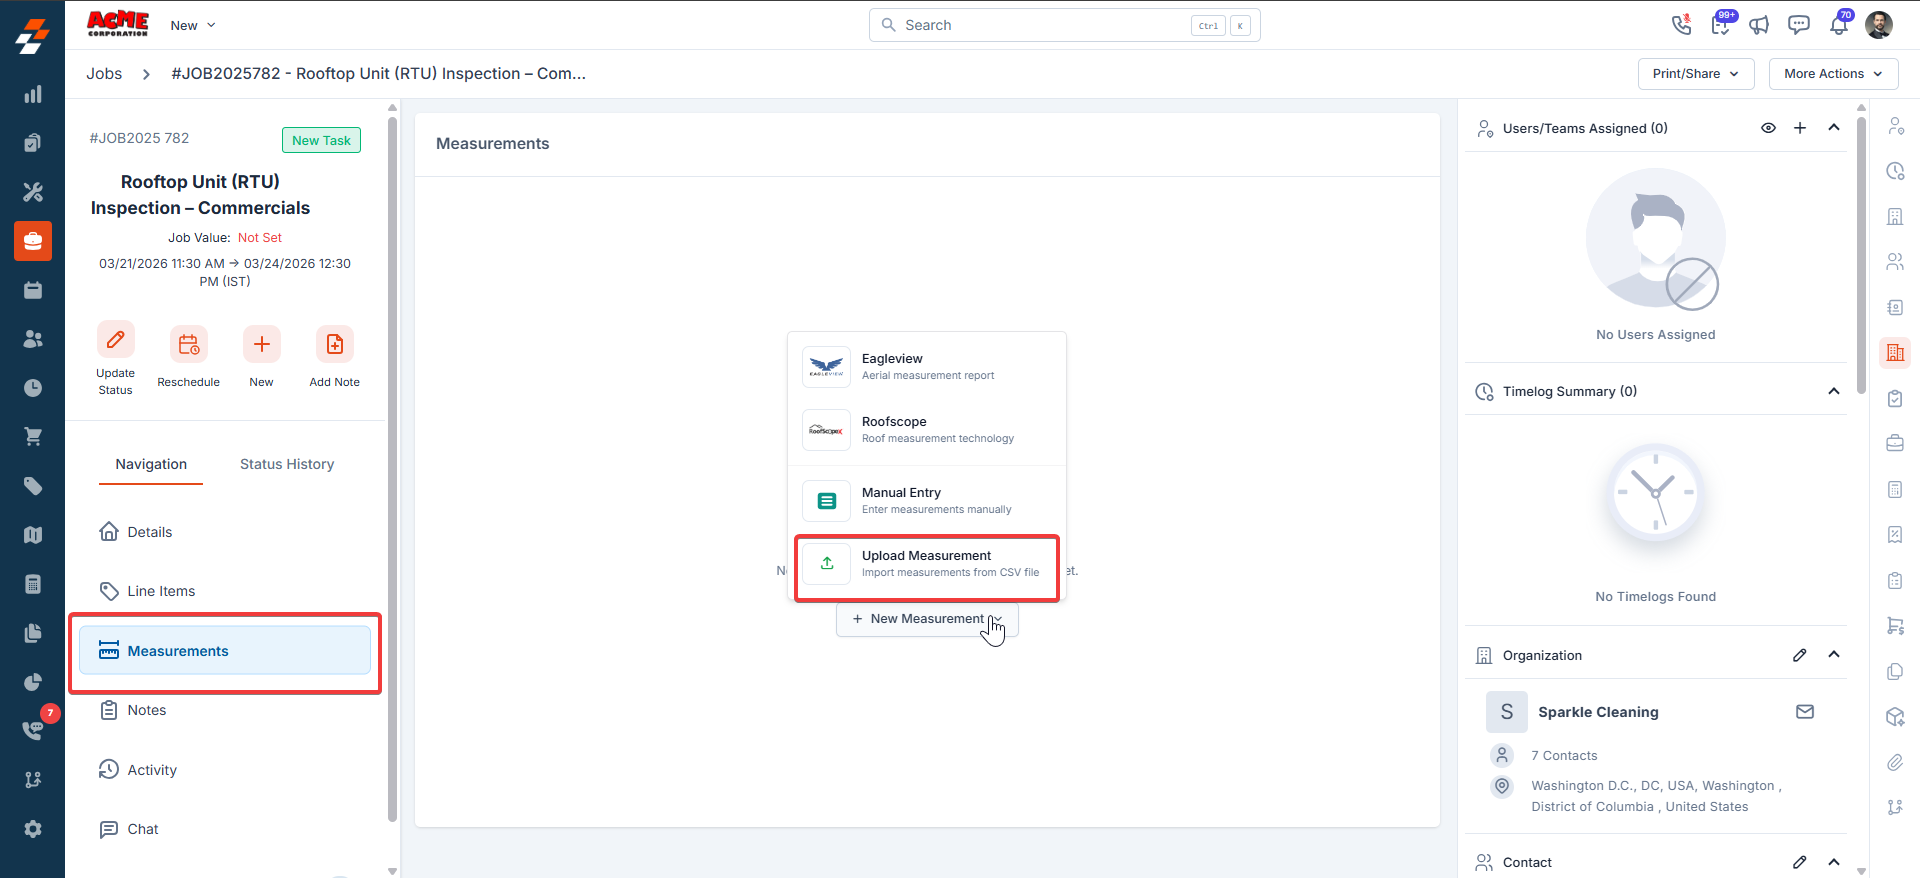
Access Measurement Upload
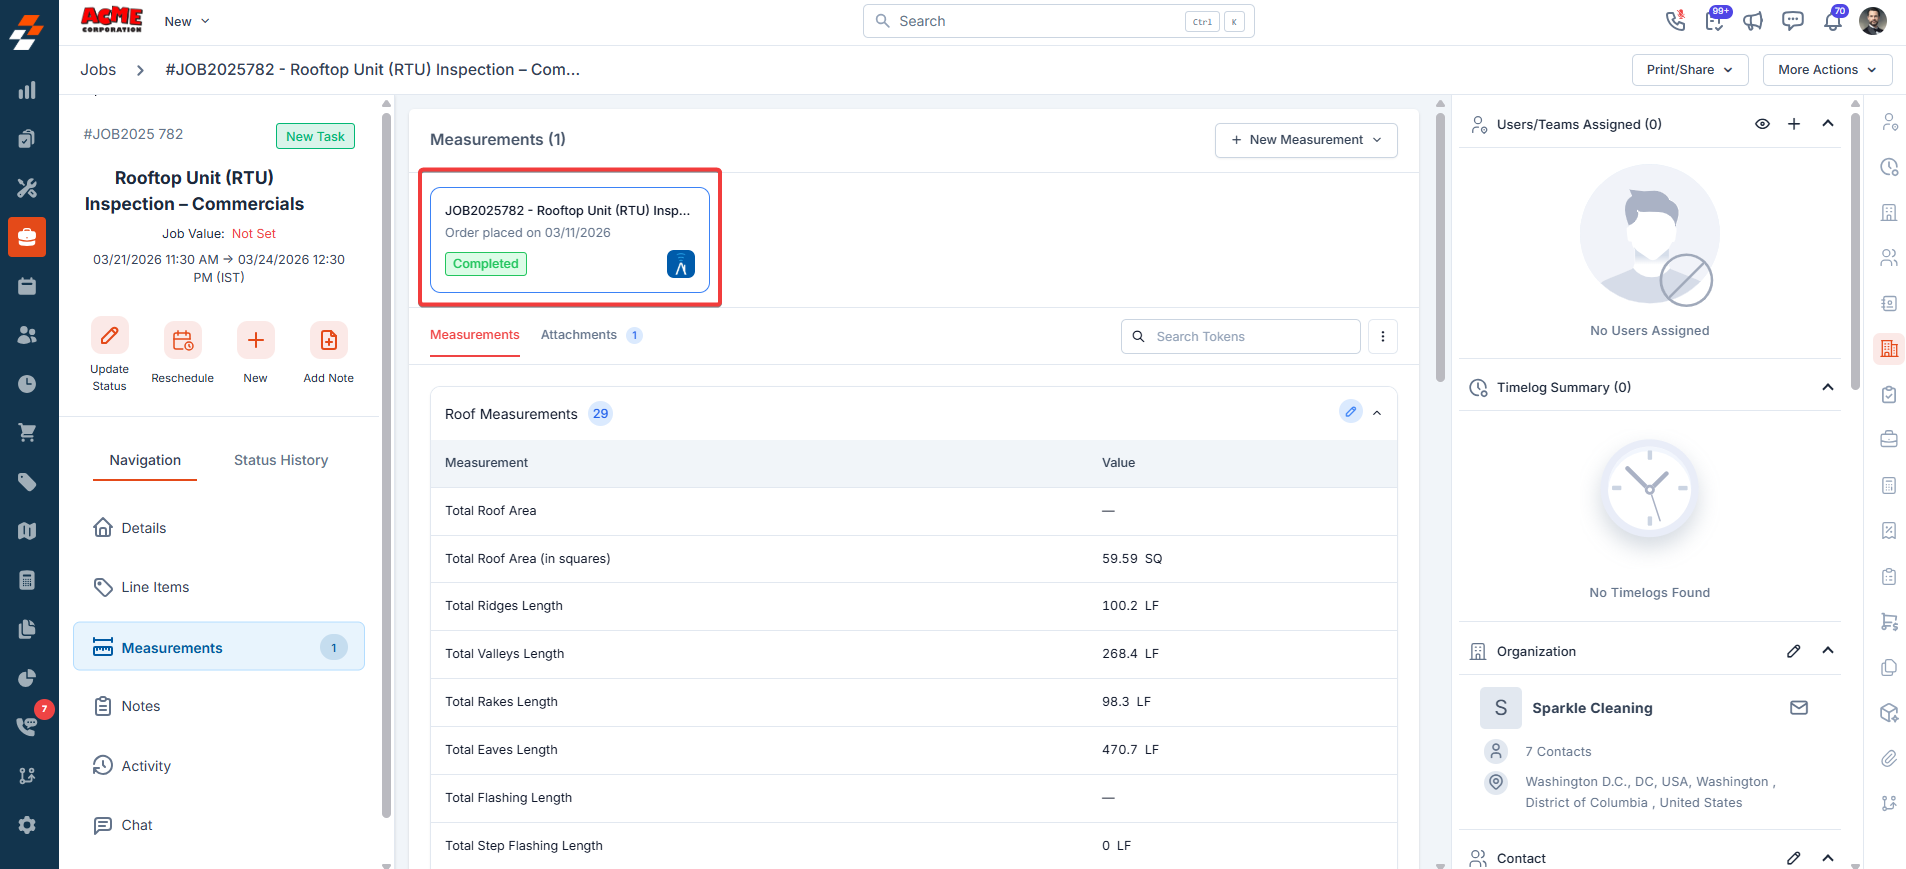
Measurement upload is available within the Measurements section of a job.- Go to the Job details page and open the Measurements section. Click + New Measurement, then select Upload Measurement.
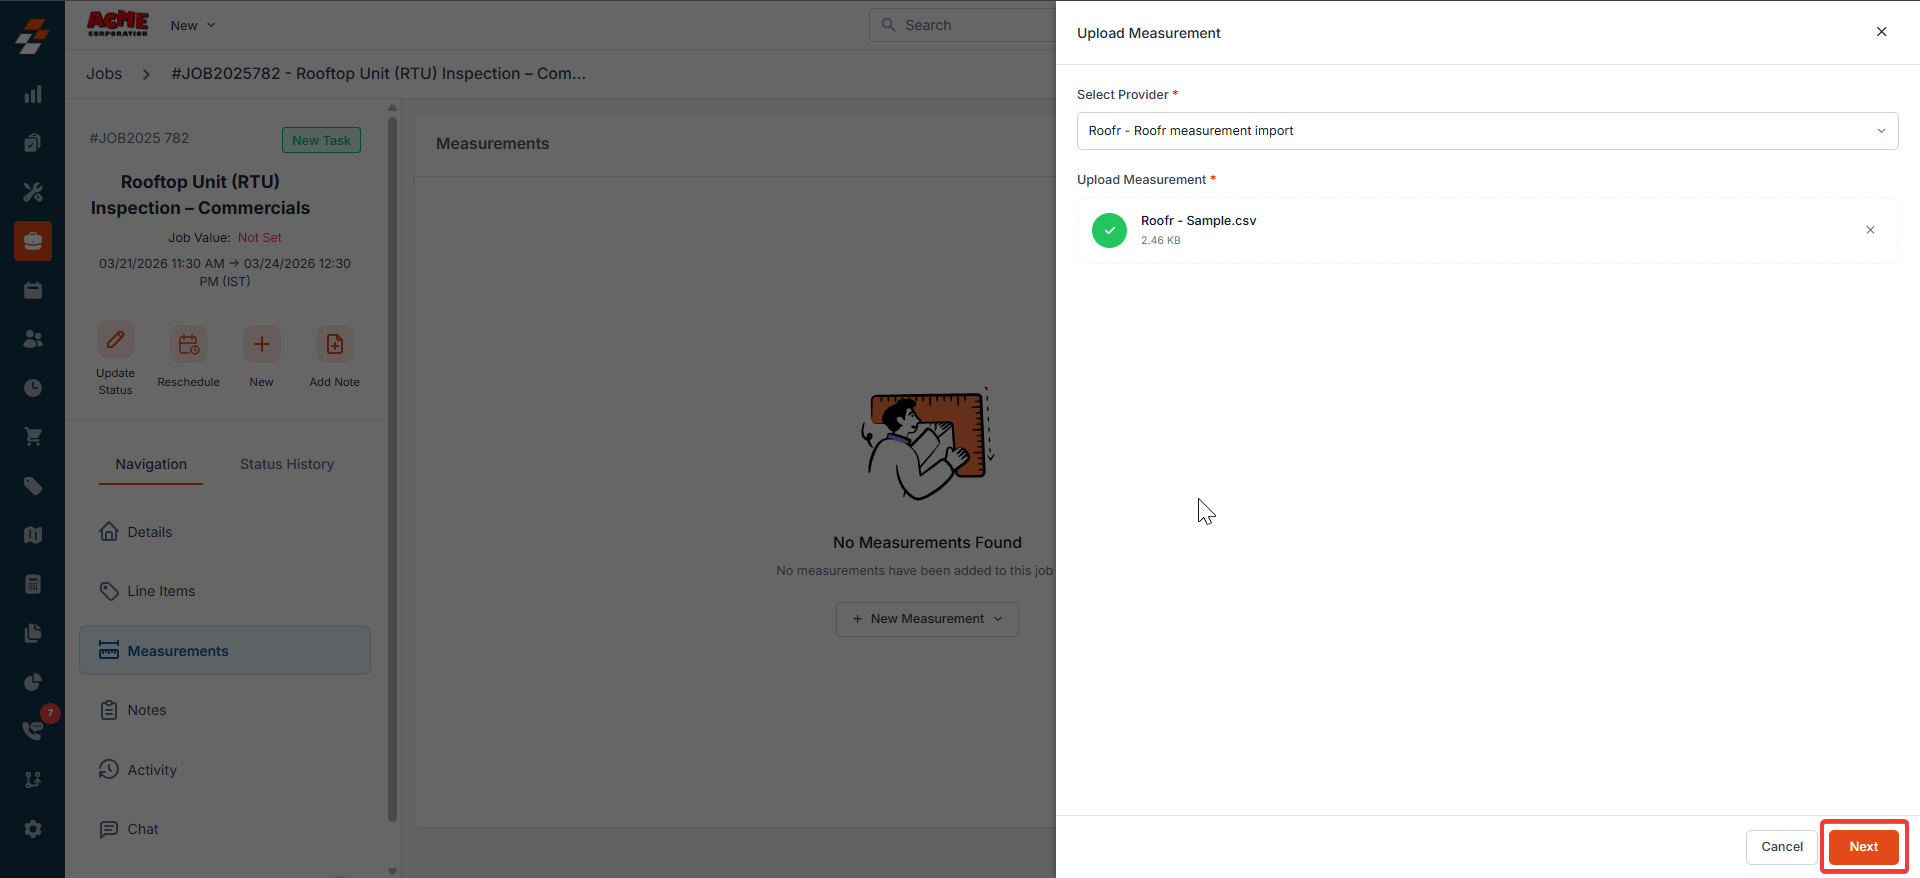
- When the upload panel opens, you must select a provider before uploading the file. These templates contain predefined mappings between the provider’s measurement tokens and Zuper measurement tokens. After selecting a template, proceed to upload the CSV file


- Upload or drag and drop your CSV file. It will be validated automatically. Then click Next.
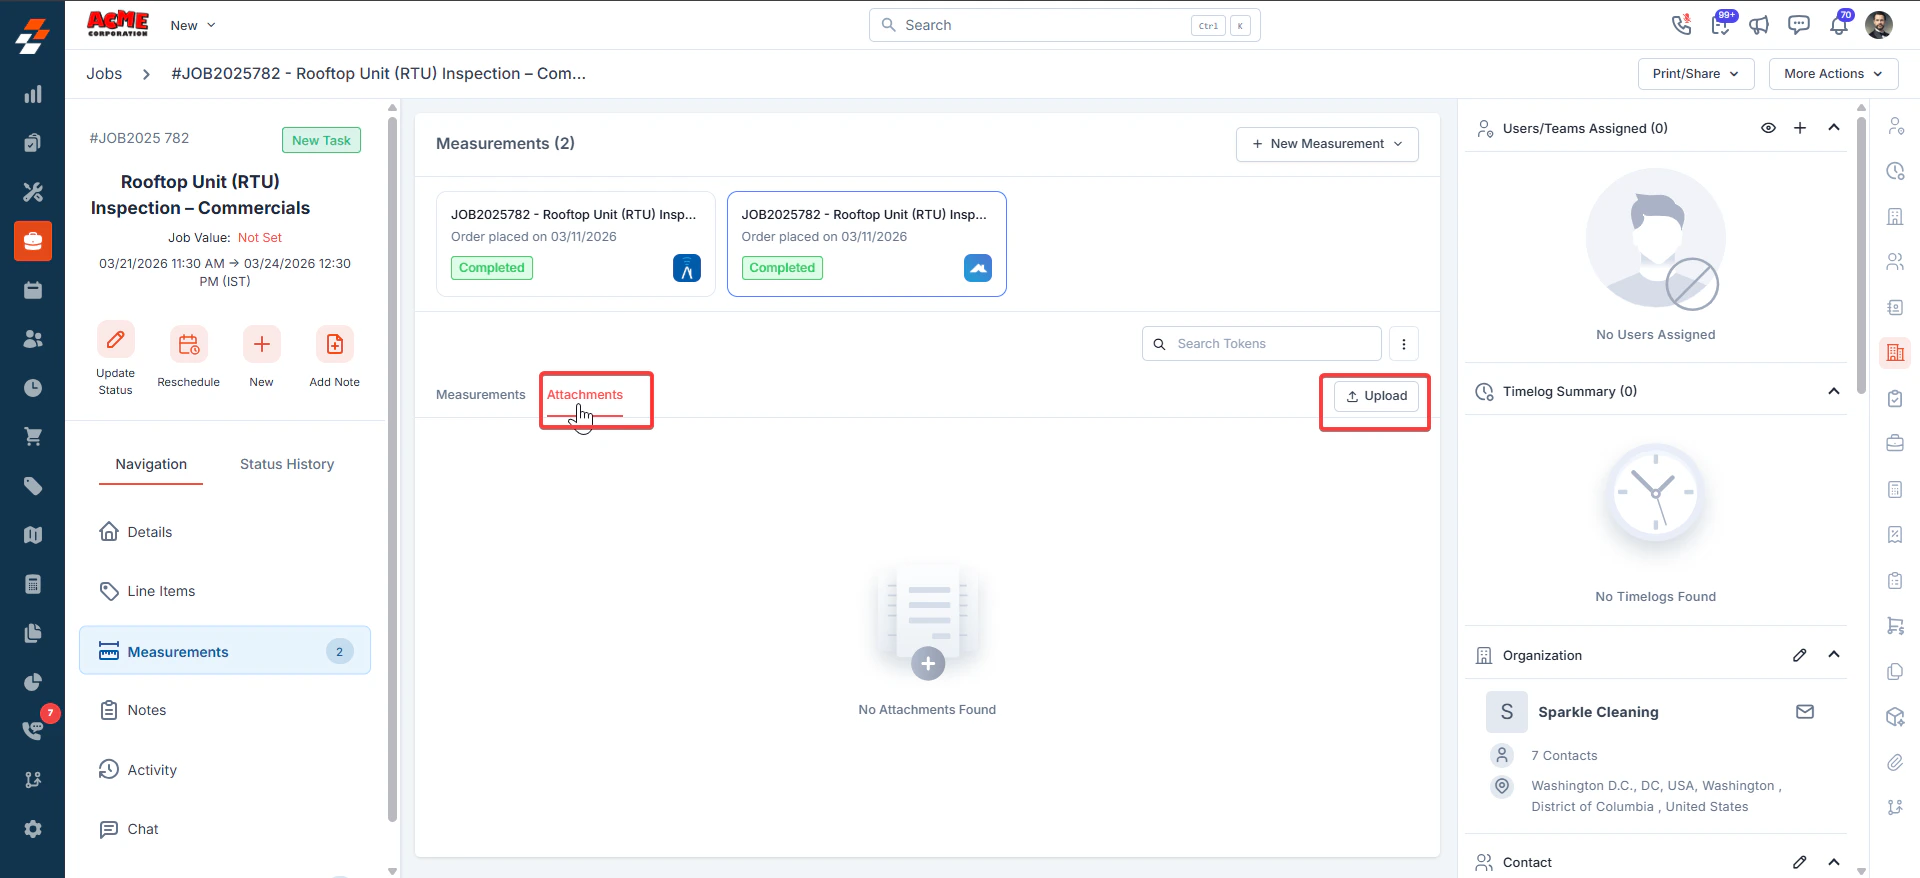
- Use the attachments tab to upload the measurement PDF.
Note: Only PDF files are supported.
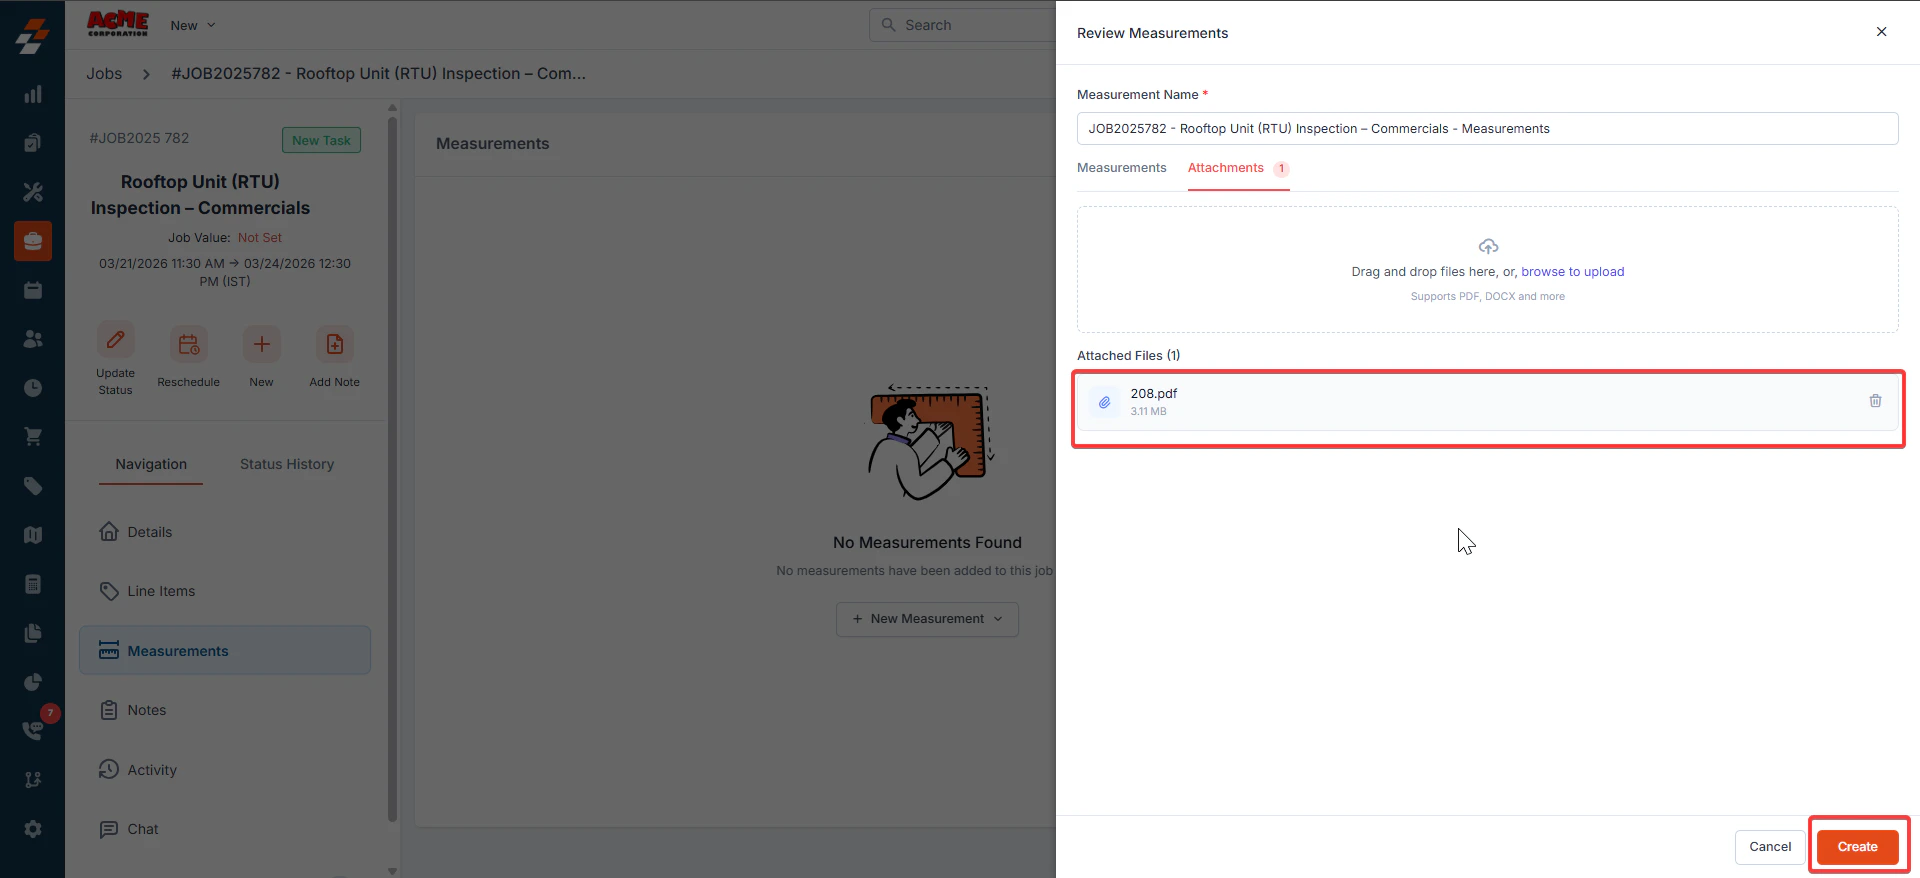
- After reviewing the values, click Create.
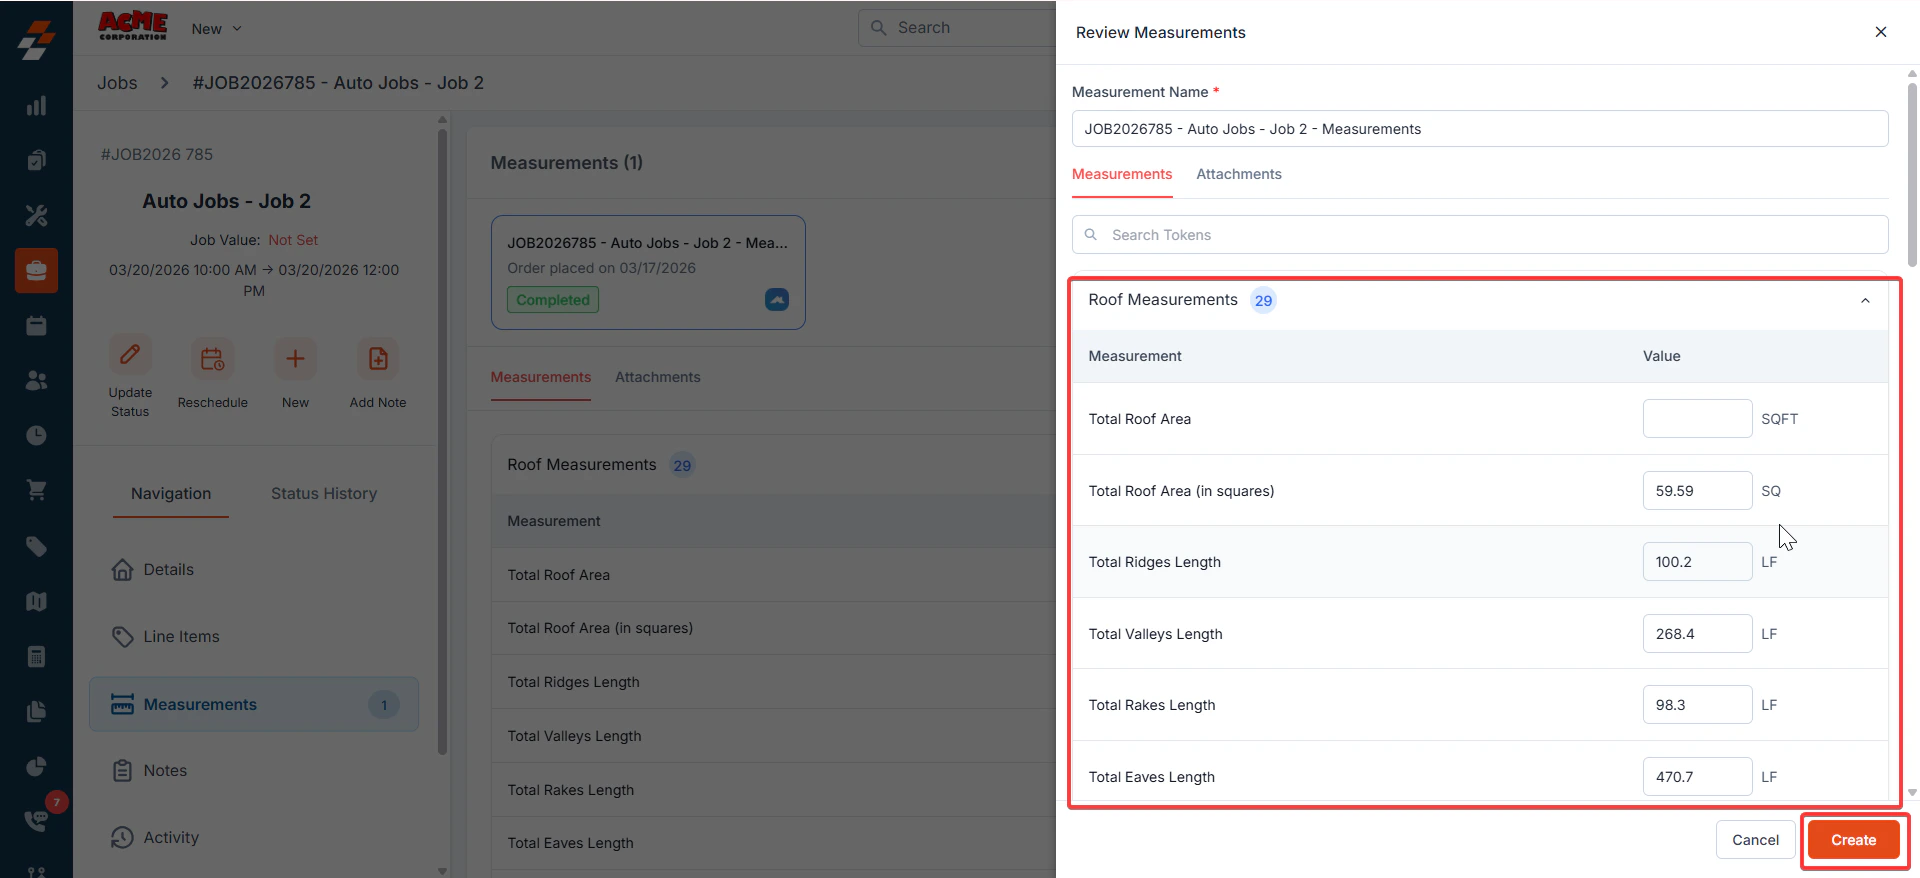
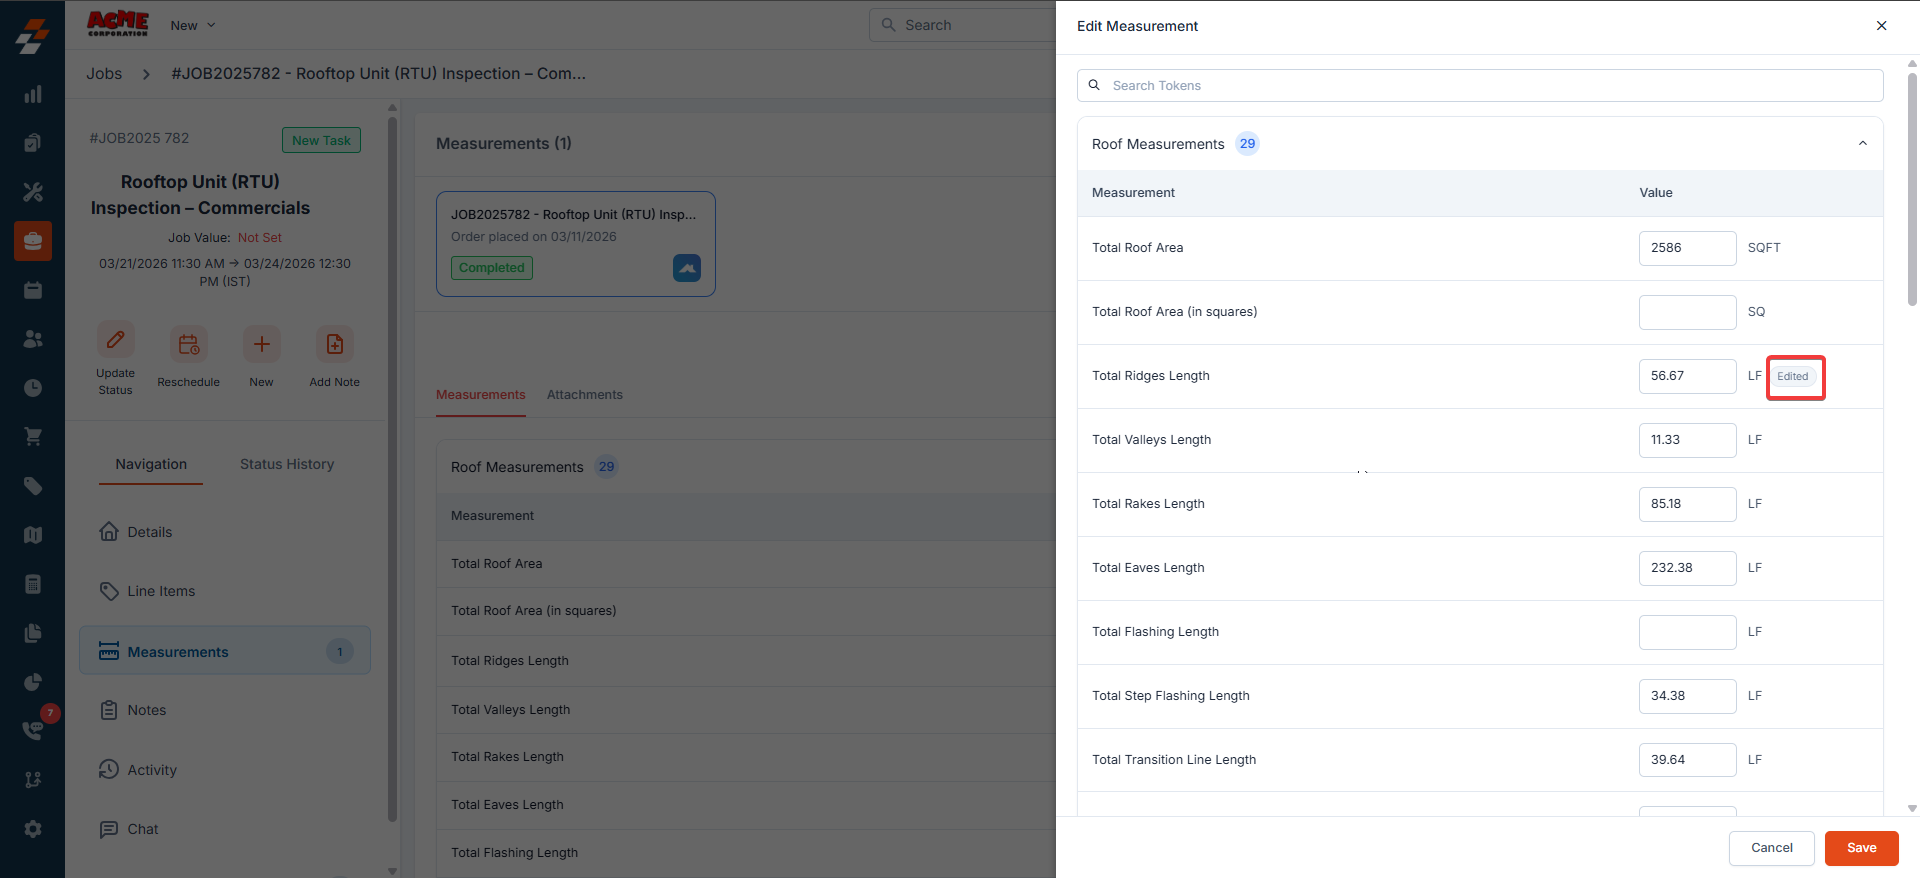
Edit Measurement Values
- If you modify a value during the preview step, the system displays an Edited label on the measurement after creation.
- Upload measurement files by clicking the Attachments tab, then Upload.
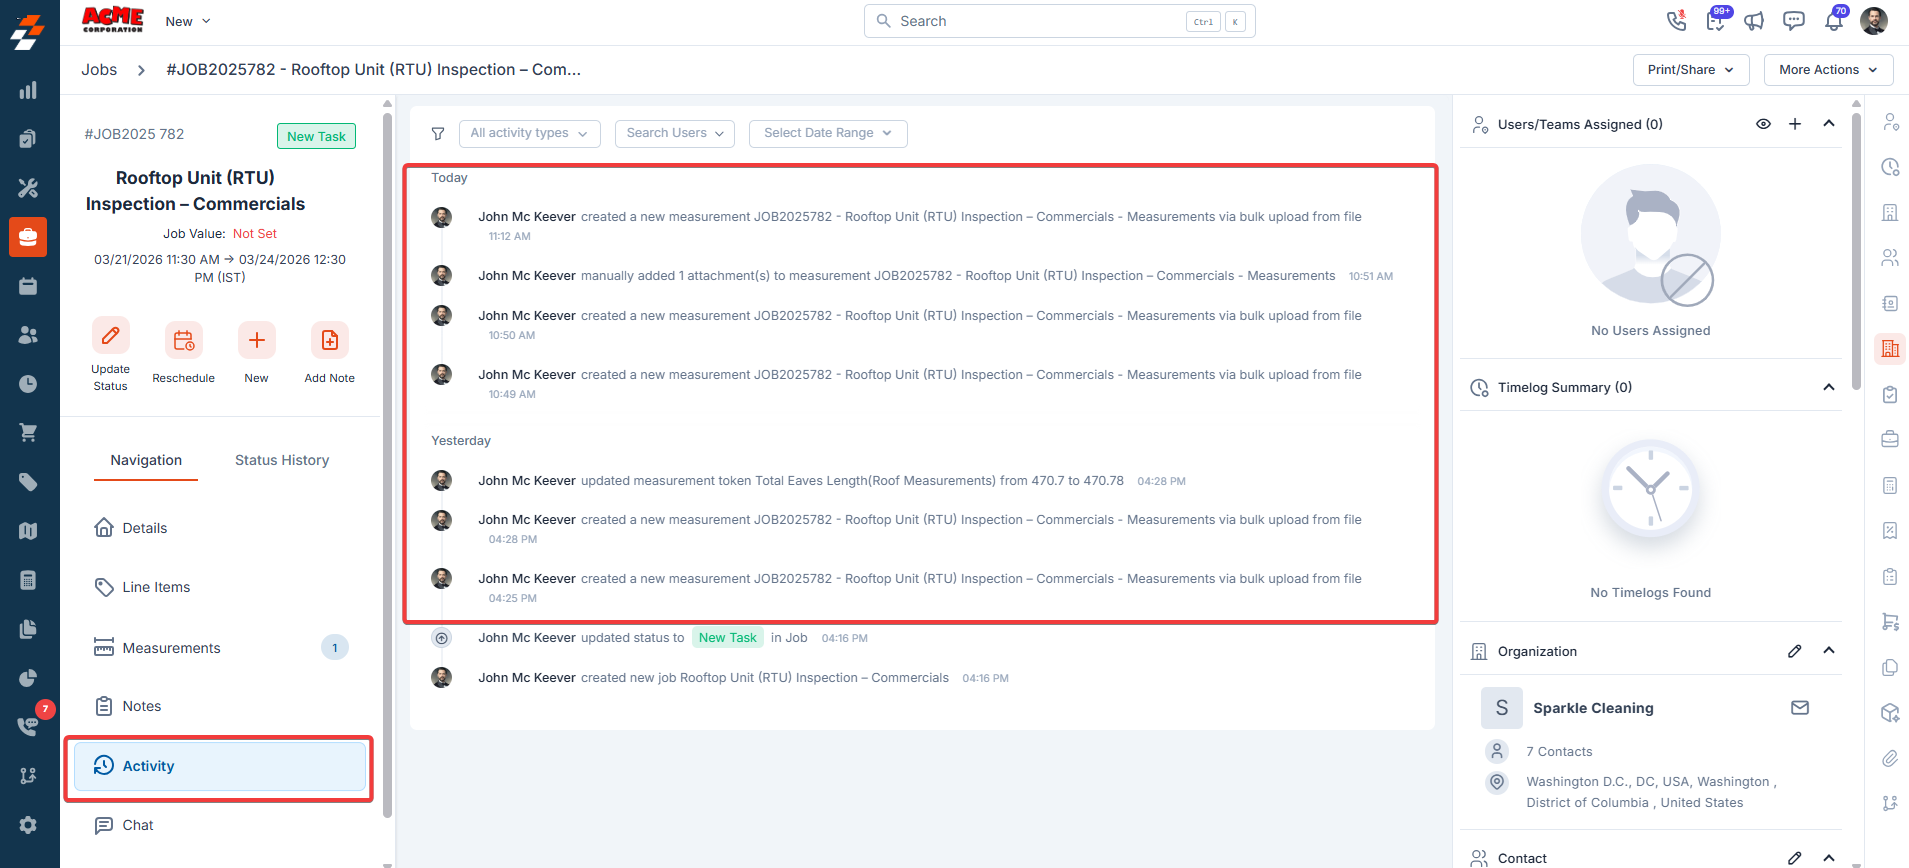
Activity Tracking
- Every measurement upload automatically generates an activity log entry within the Job.
Disabled Measurement Tokens
In some cases, the customer configuration may turn off certain measurement tokens. If the uploaded CSV contains values for those tokens:- The tokens will still appear within the Job
- Their values remain visible
Best Practices
- Always choose the template that matches the CSV file’s source to ensure accurate data mapping.
- Verify all measurement values in the preview screen before creating measurements.
FAQs
Do I need to manually set up system templates or field mappings?
Do I need to manually set up system templates or field mappings?
No. Zuper automatically manages system templates and field mappings. No setup is required.
What happens if some measurement tokens are disabled in the configuration?
What happens if some measurement tokens are disabled in the configuration?
If the uploaded CSV contains values for disabled tokens, those tokens still appear in the job and their values remain visible. This ensures that no imported data is lost.
Why do I see a "No measurement data found in the uploaded CSV" error?
Why do I see a "No measurement data found in the uploaded CSV" error?
Each provider: Roofr, RoofSnap, Bid Engine, and Pitch Gauge, uses a different file format. If the file does not match the structure Zuper expects for the selected provider, the system cannot read it, and the upload fails.
To resolve this, confirm that the CSV file is from the provider you selected and that it has not been modified.
To resolve this, confirm that the CSV file is from the provider you selected and that it has not been modified.
Why do I see a "No measurement data found in the uploaded XML file" error?
Why do I see a "No measurement data found in the uploaded XML file" error?
The Pitch Gauge XML file does not match the structure Zuper expects, or it is not a valid XML file.
To resolve this, confirm that the file was exported directly from Pitch Gauge and has not been modified or renamed.
If the issue continues, contact Support.
To resolve this, confirm that the file was exported directly from Pitch Gauge and has not been modified or renamed.
If the issue continues, contact Support.