Navigation: Purchasing → Purchase Orders → [Work order name]
The work order lifecycle
A work order moves through the following stages in order: Draft → Submitted → Accepted / Rejected (Internally)→ Sent to Subcontractor → Subcontractor Accepted / Rejected → Work Completed → Paid → Closed / CanceledThe Approved and Subcontractor Accepted statuses appear only when specific settings are enabled in your Purchasing configuration. See How Purchasing settings affect work orders below for details.
Navigating to a work order
- Select Purchasing from the left navigation menu and choose Purchase Orders.
- Select any work order from the listing page to open its detail page.
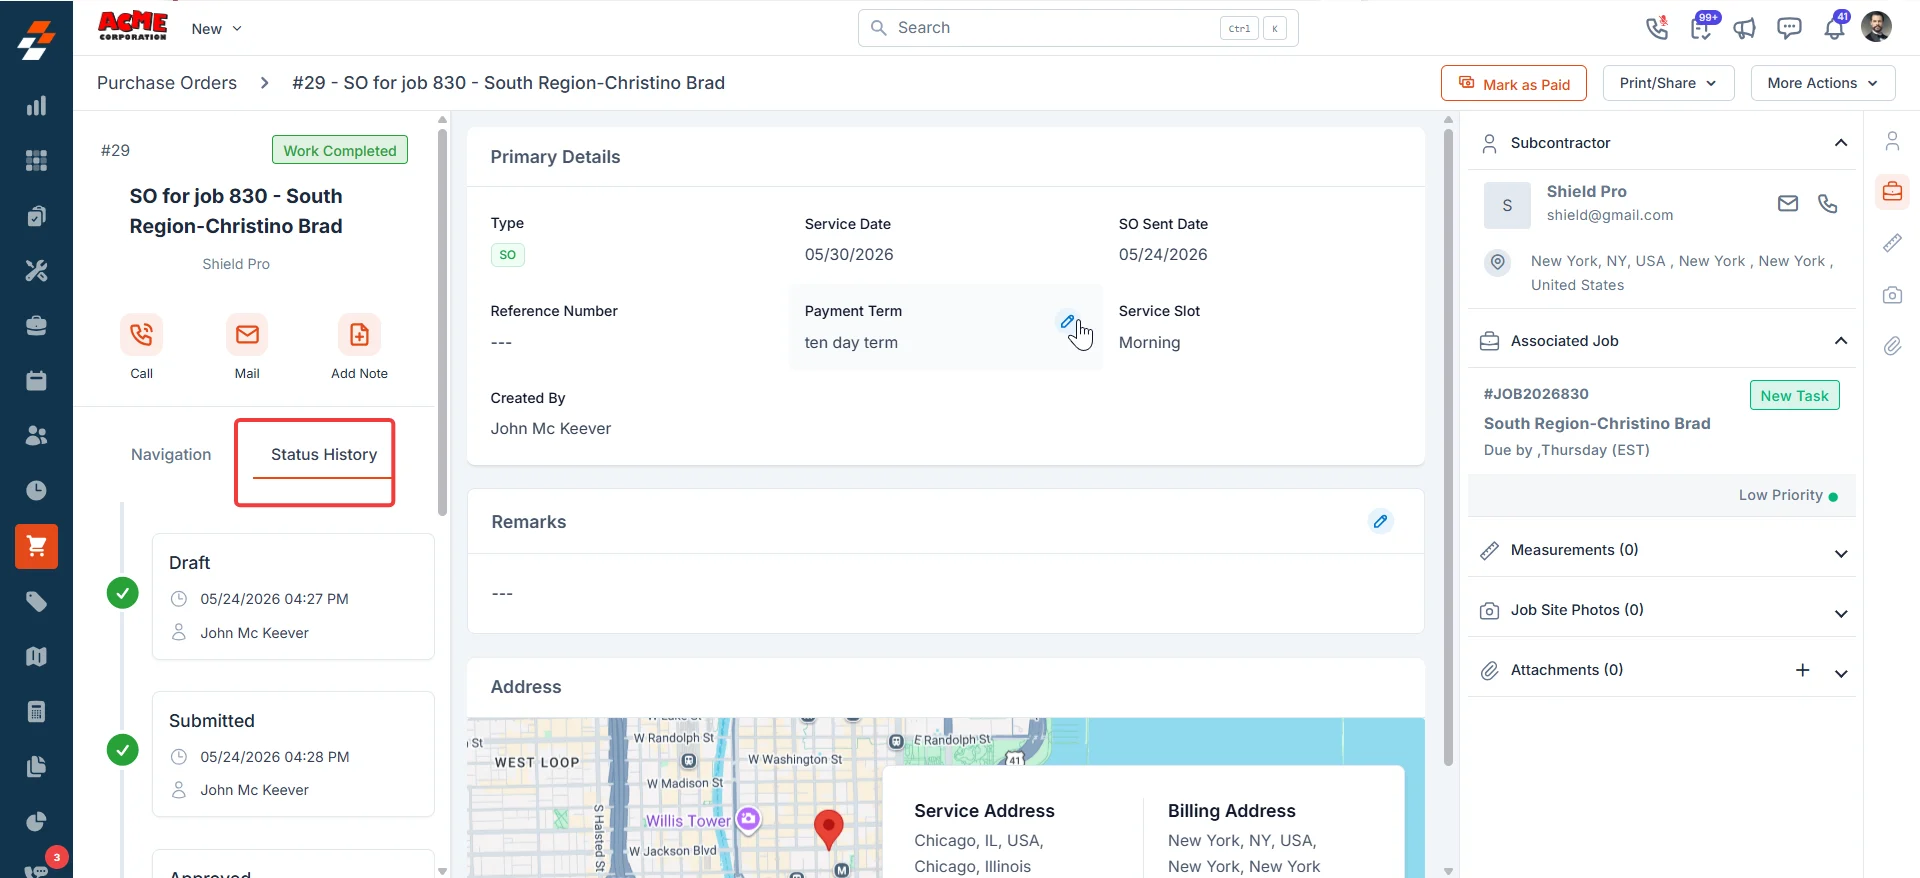
- The status badge appears at the top left of the detail page, below the WO number.
When a work order moves to Send to Subcontractor status, Zuper sends the subcontractor a PDF of the work order by email. This PDF includes the full work order details — line items, measurements, and any reference photos you chose to include.
How Purchasing settings affect work orders
Two settings in your Purchasing configuration control how a work order moves through the workflow. Your administrator can find them at Settings → Purchasing → General Settings → Purchase Orders.If you are unsure which settings your organization uses, check with your administrator before sending a work order. To update these settings, go to Settings → Purchasing → General Settings and select the Purchase Orders tab.
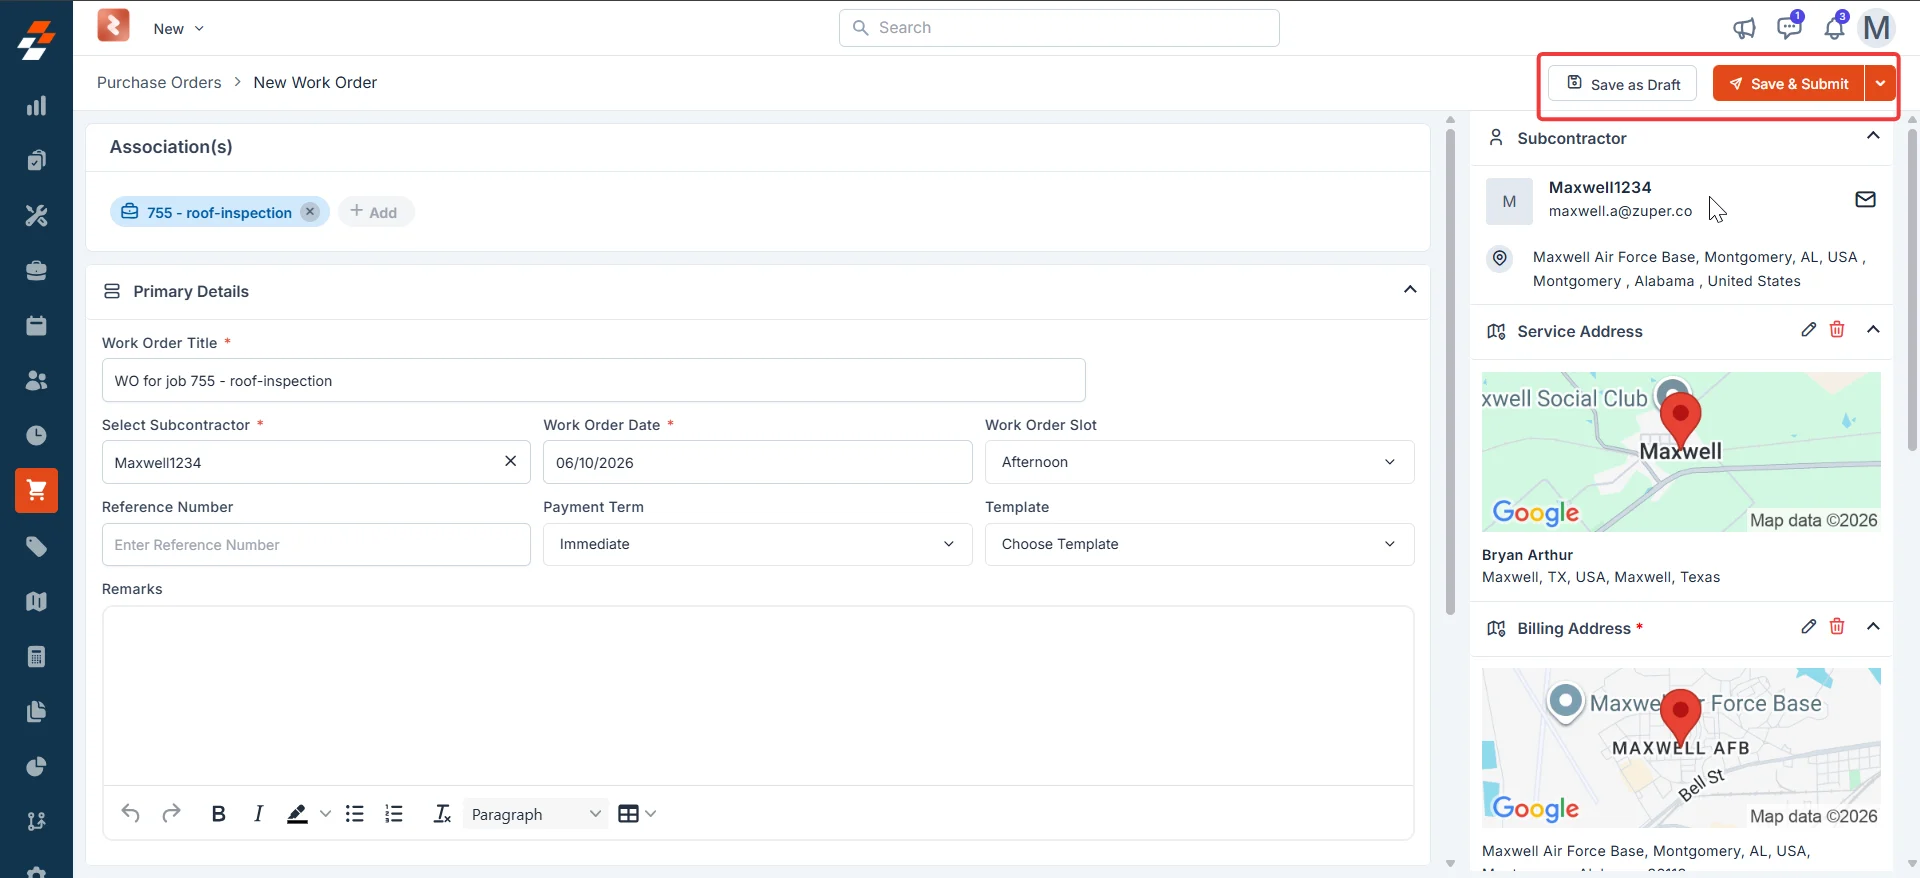
Status 1: Draft
When a work order is in Draft, you have created it but have not yet submitted it for review. The subcontractor cannot see it at this stage — it stays internal until you are ready to move it forward. Available actions- Mark as Submitted — Moves the WO to the next stage. This button appears in the top-right corner of the detail page.
- More Actions → Clone — Creates a duplicate of the work order.
- More Actions → Canceled — Cancels the work order without deleting it, keeping the record for your audit trail.
- More Actions → Delete WO — Permanently removes the work order. This action cannot be undone.
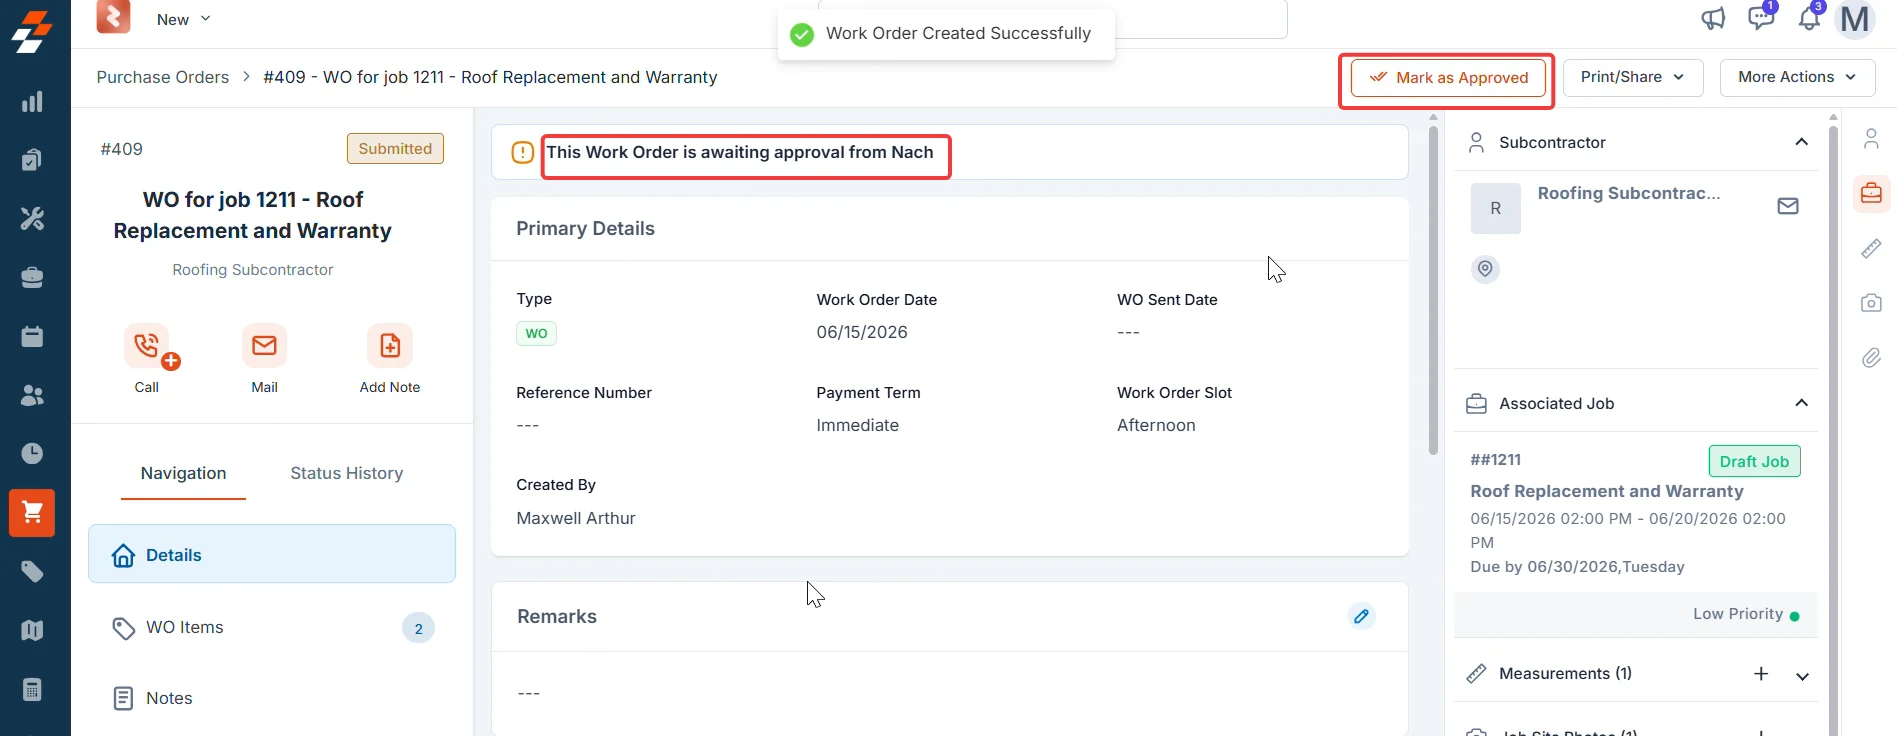
Status 2: Submitted
Once you submit the work order, it enters the approval stage. What happens next depends on whether your organization has an approval hierarchy configured.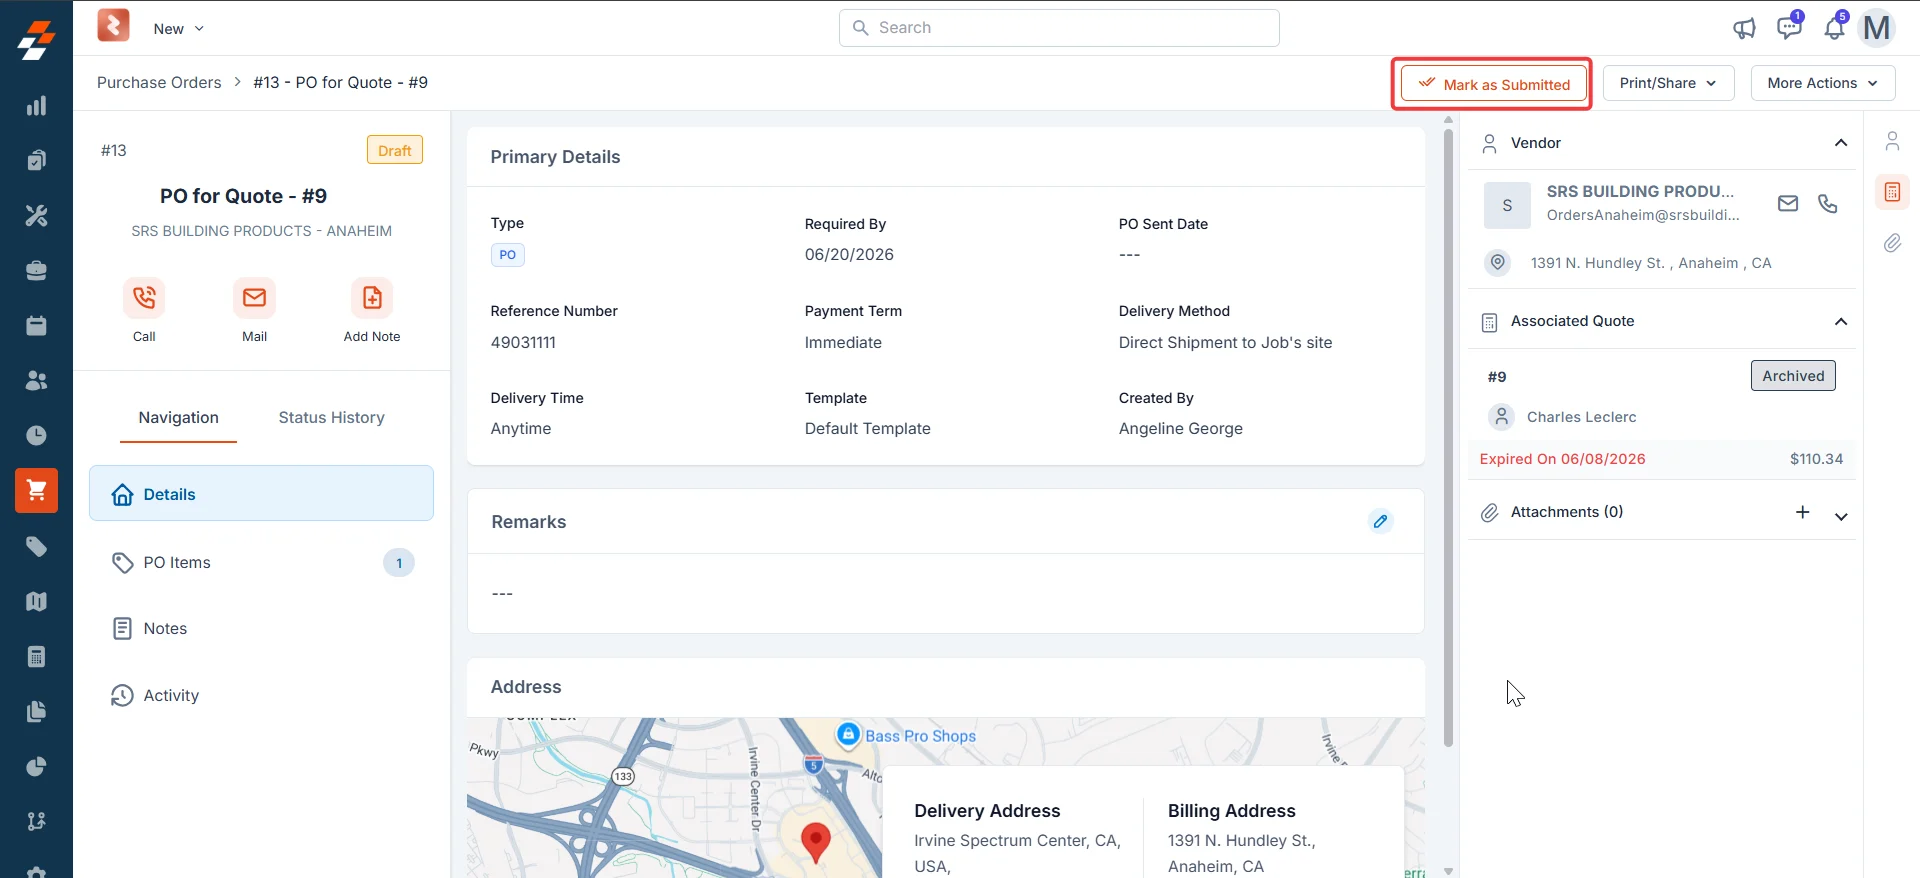
- If an approval hierarchy is configured — The WO waits for sign-off from the designated approver. A banner on the detail page shows whose approval is pending. The approver selects Mark as Approved to move the WO forward.
- If no approval hierarchy is configured — The Mark as Approved step does not appear. The next available action is to send the WO directly to the subcontractor.
If your organization does not use an approval hierarchy, the Mark as Approved button does not appear. The WO moves directly from Submitted to the sending workflow.
Status 3: Approved
Your approver has reviewed and signed off on the work order. You can now send it to the subcontractor.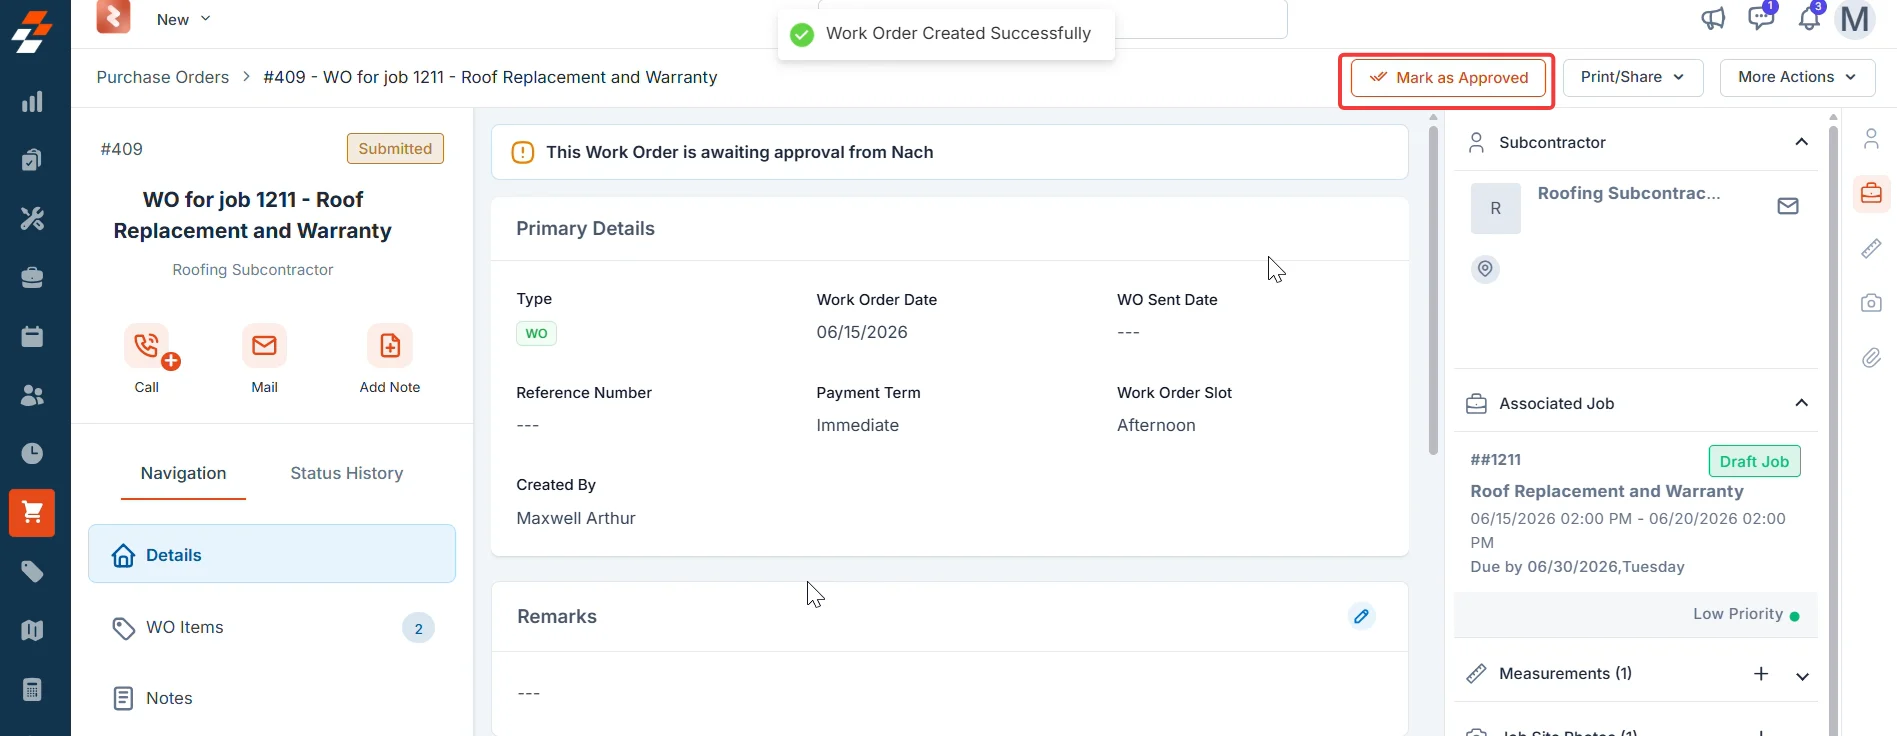
If the Automatically Send PO to Vendor after Approval? toggle is enabled in your Purchasing settings, Zuper sends the work order to the subcontractor automatically when it reaches Approved status. The Send to Subcontractor button does not appear — the WO moves to Sent to Subcontractor without any action from you.
The WO Sent Date field on the detail page records the date the WO was dispatched. Zuper populates this automatically when the WO reaches Sent to Subcontractor status.
Status 4: Send to subcontractor
Once Zuper sends the work order, the WO Sent Date appears on the details panel. Check the Awaiting Approval From field to confirm which subcontractor is expected to respond.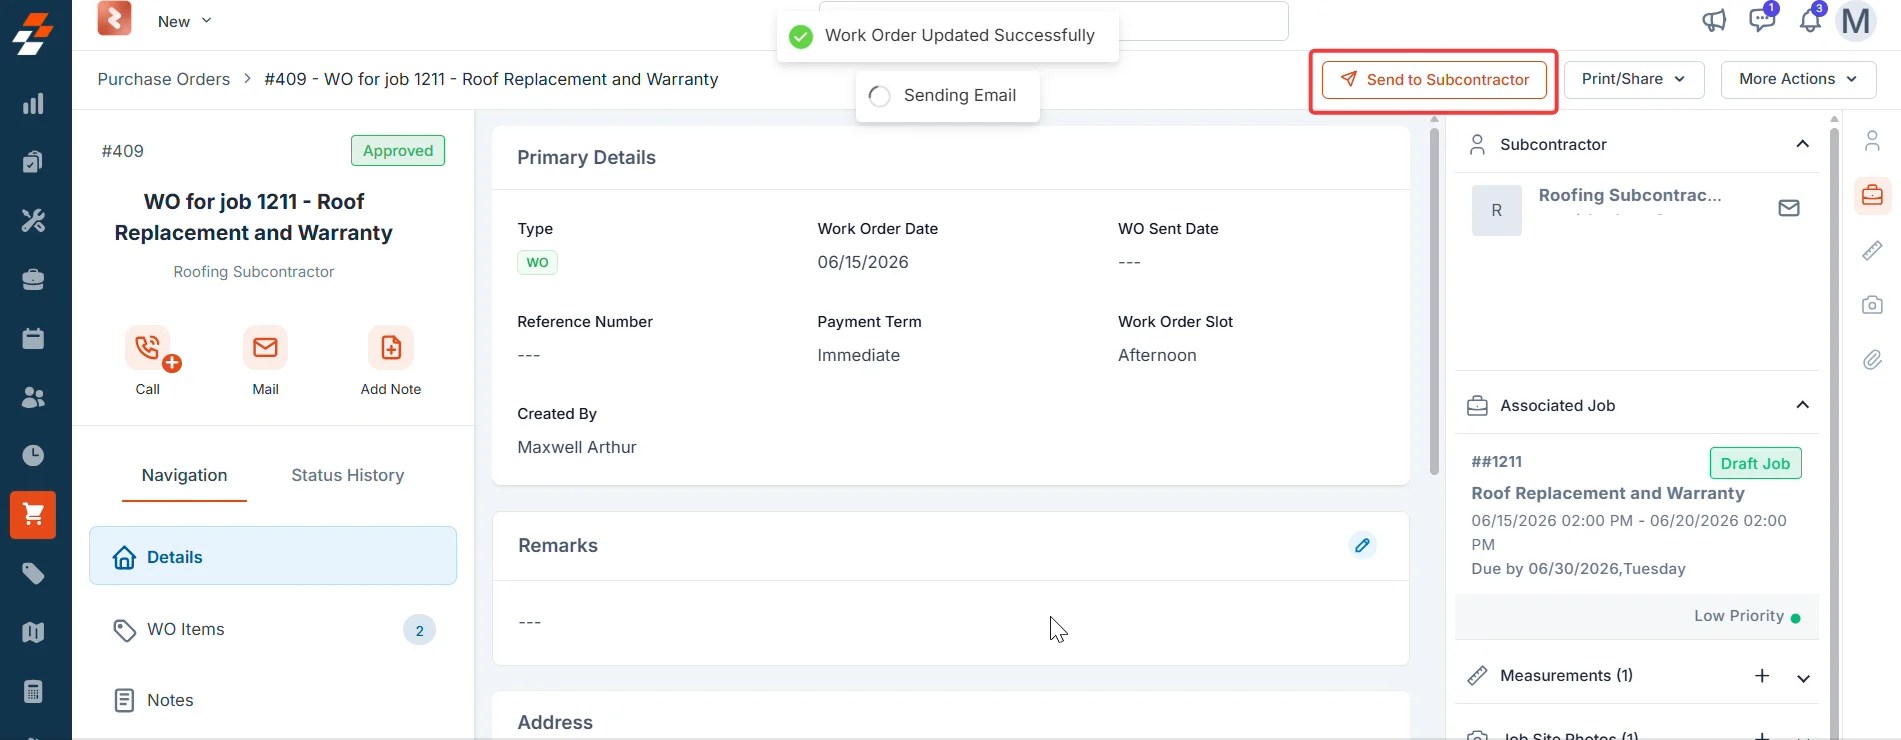
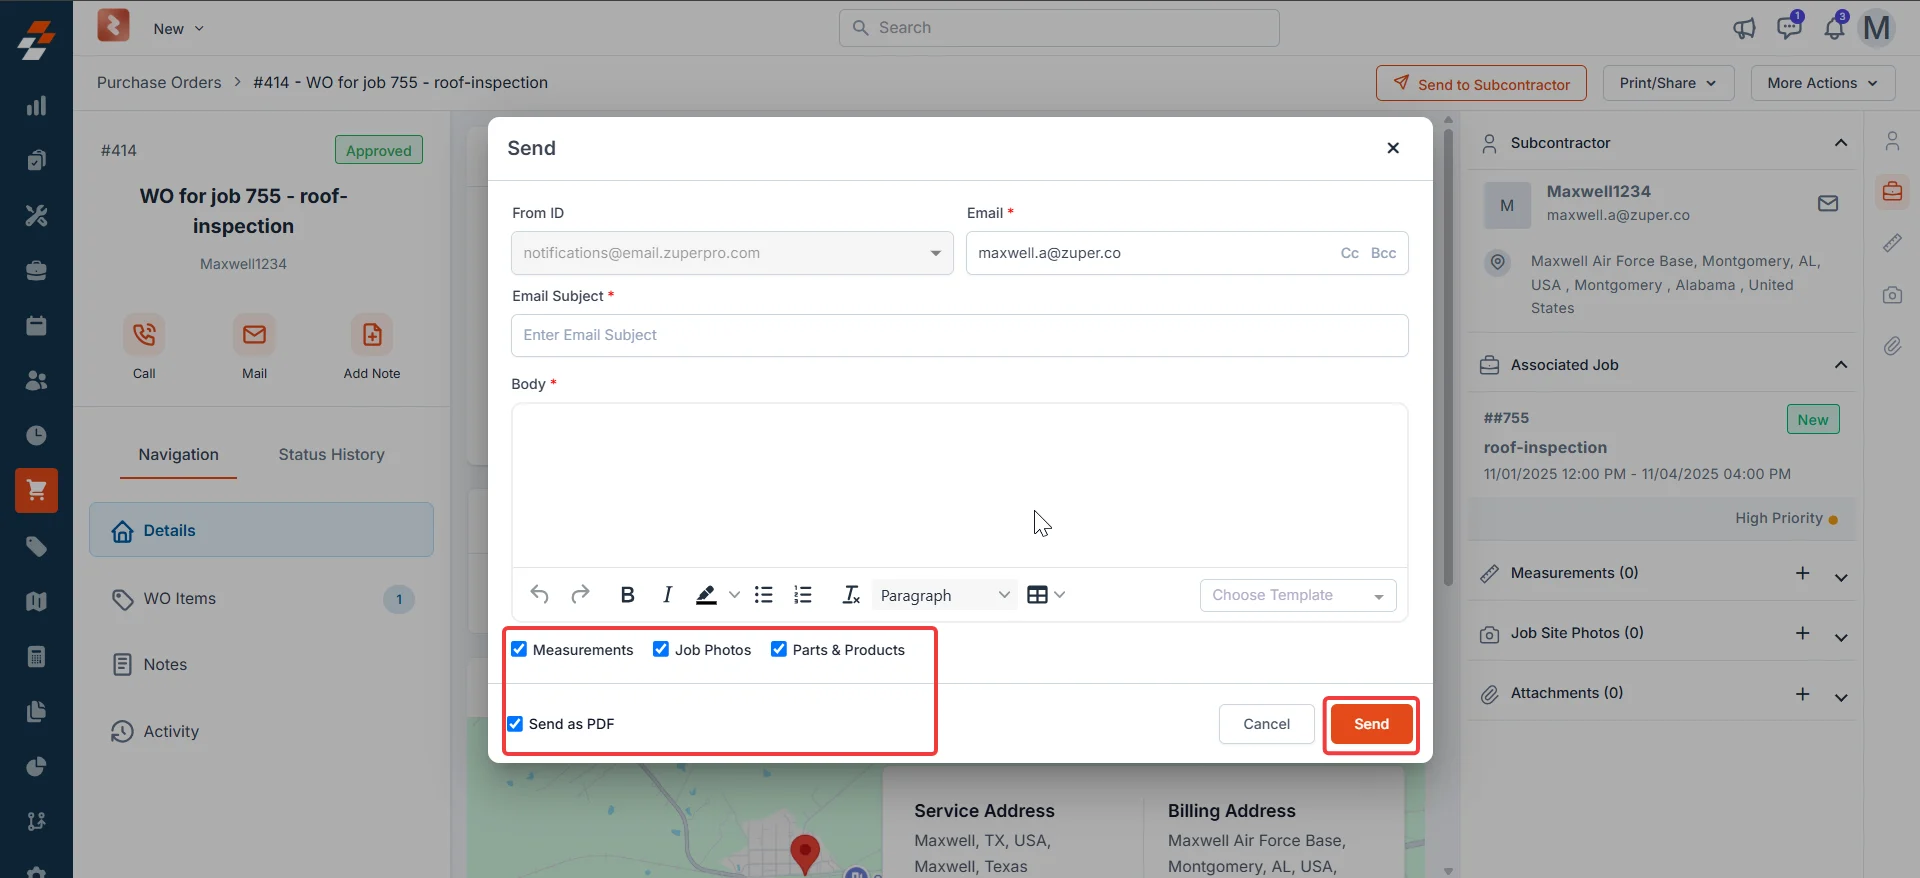
Send the work order to the subcontractor
- Select Send to Subcontractor. The send dialog opens.
- Confirm or enter the subcontractor’s email address in the To field.
- Select the items to include: Measurements, Job site photos, and Parts and products.
- Confirm Send as PDF is selected.
- Select Send. The WO moves to Sent to Subcontractor and the subcontractor receives the PDF by email.
- If Require Vendor Approval is enabled — The subcontractor receives an email with an Accept or Reject button. When they respond, the WO moves automatically to Subcontractor Accepted or Subcontractor Rejected.
- If Require Vendor Approval is disabled — The email is sent but does not include Accept or Reject buttons. The WO moves directly to Work Completed when you are ready to record completion. The Subcontractor Accepted step is skipped.
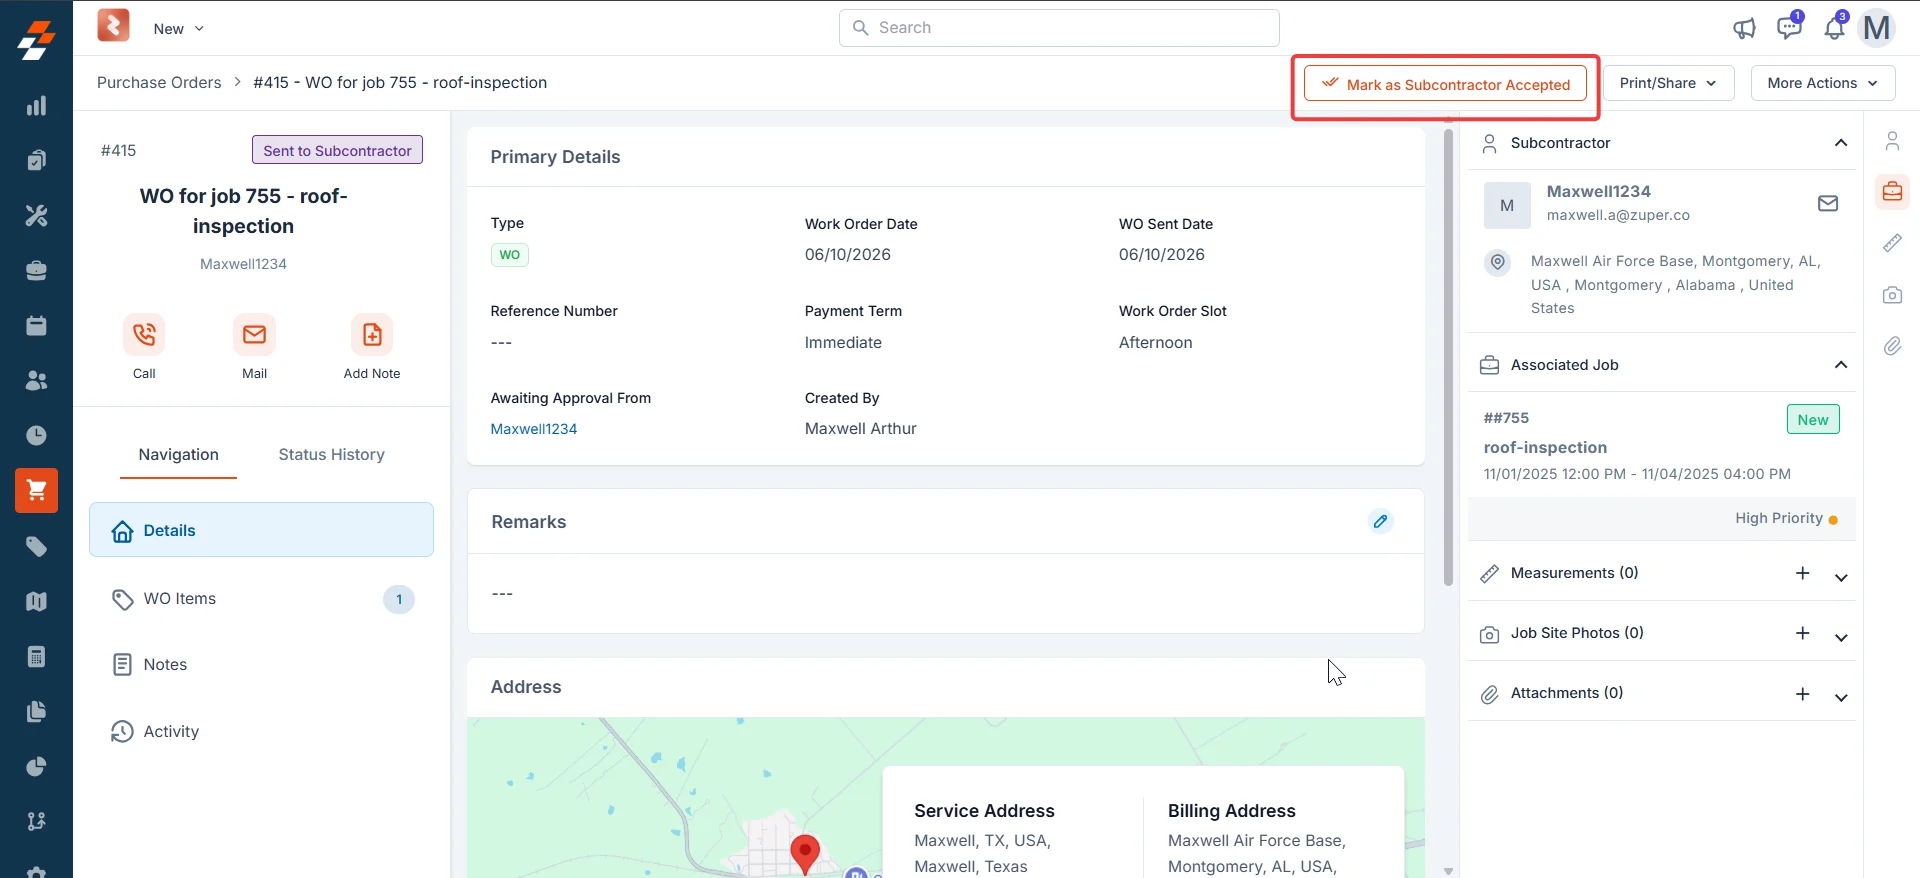
Status 5a: Subcontractor accepted
The subcontractor has accepted the work order through the email link. Zuper updates this status automatically when the subcontractor selects Accept and signs the work order on the subcontractor portal — no action is needed from you.If the Automatically Send PO to Vendor after Approval? toggle is enabled in your Purchasing settings, Zuper sends the work order to the subcontractor automatically when it reaches Approved status. The Send to Subcontractor button does not appear — the WO moves to Sent to Subcontractor without any action from you.
The WO Sent Date field on the detail page records the date the WO was dispatched. Zuper populates this automatically when the WO reaches Sent to Subcontractor status.
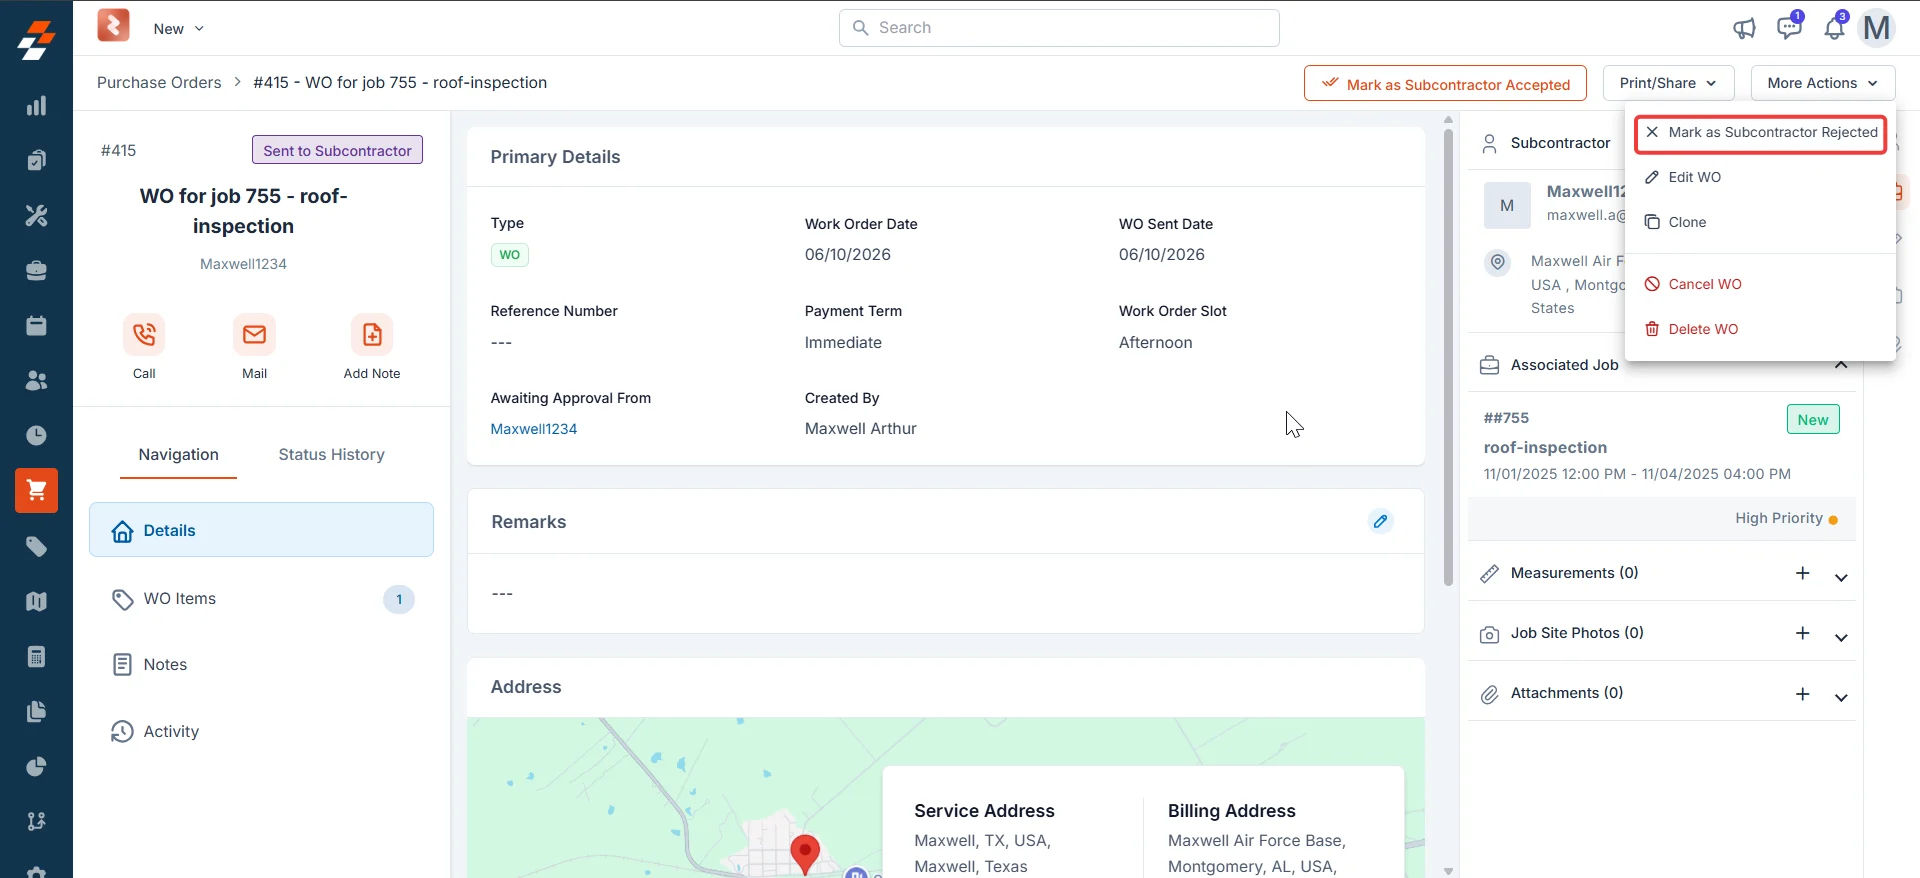
Status 5b: Subcontractor rejected
The subcontractor has declined the work order. The WO returns to your team for review. Available actions- Edit the WO — Update the work order details and resend it to the subcontractor.
- More Actions → Clone — Create a new work order based on this one and assign it to a different subcontractor.
- More Actions → Canceled — Cancel the WO if the work is no longer needed.
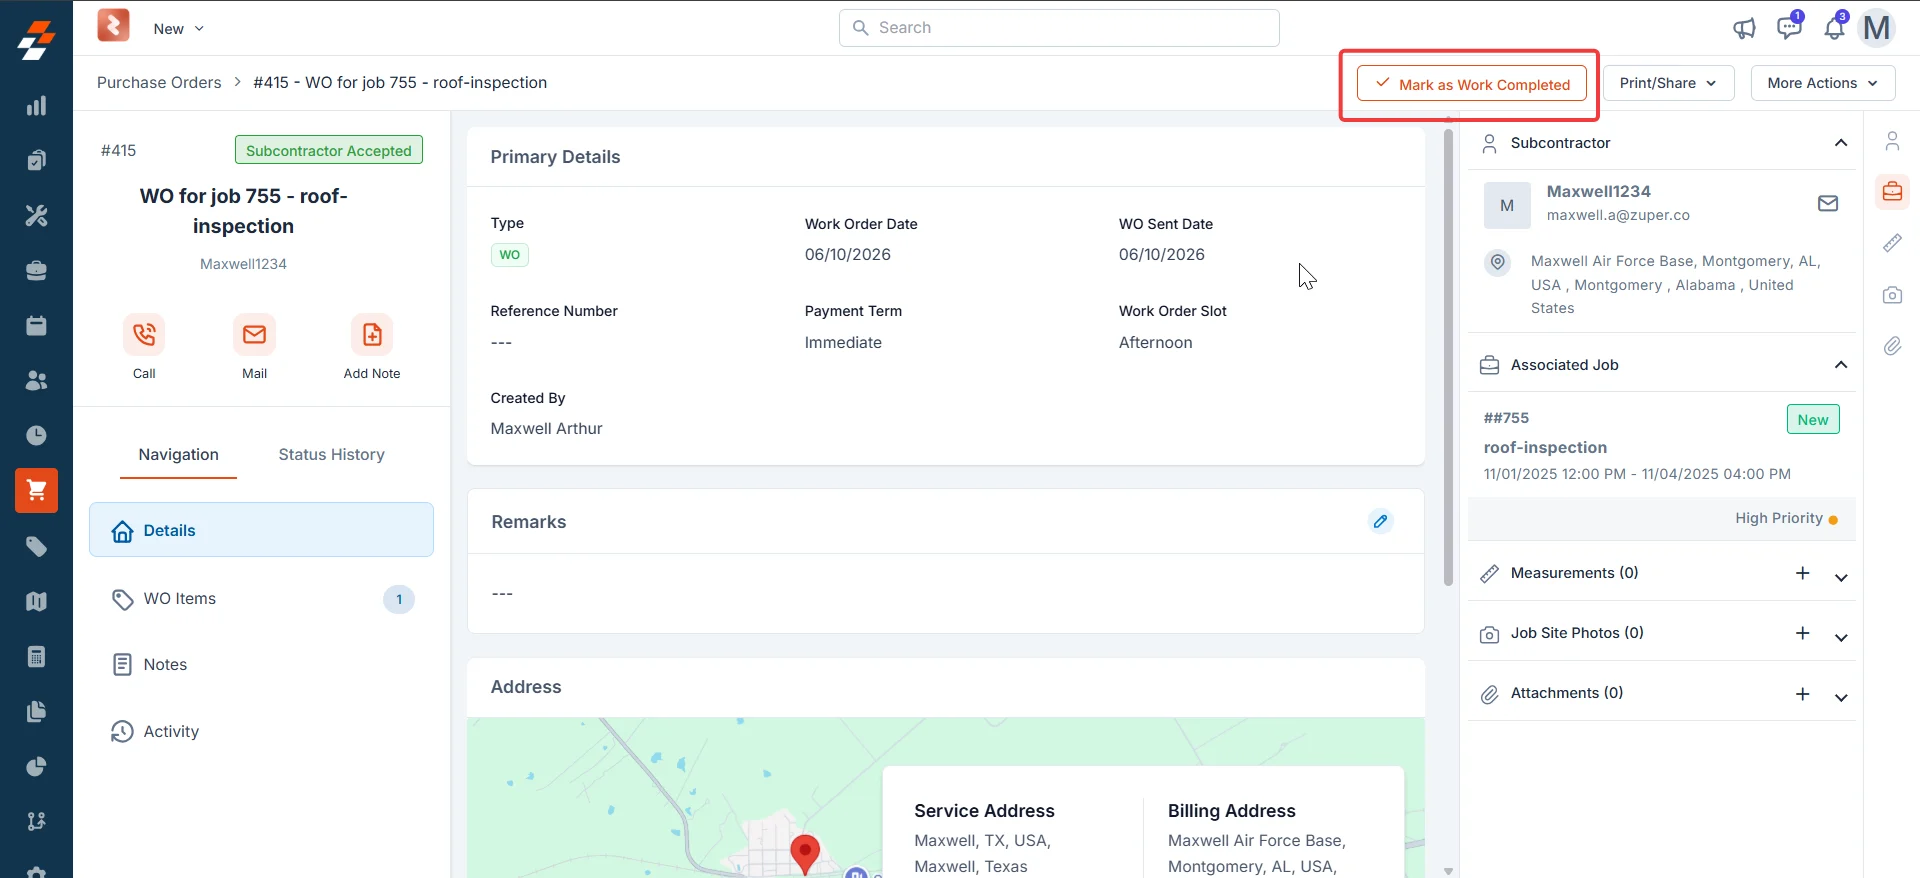
Status 6: Work completed
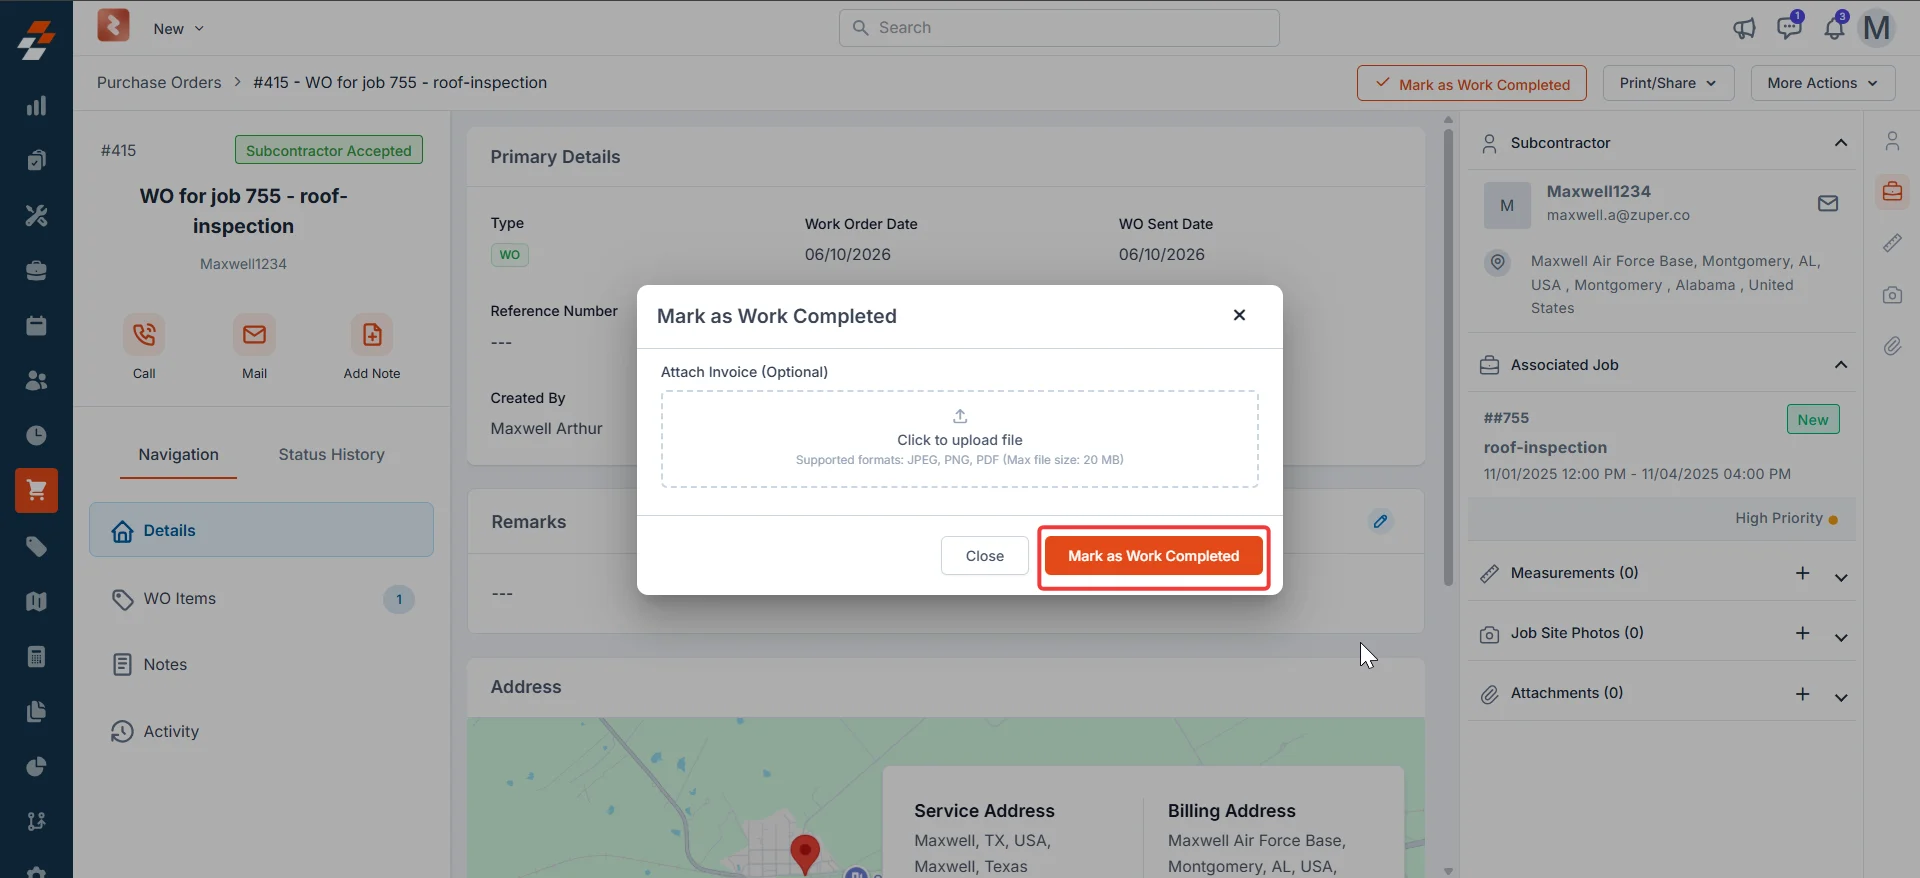
The subcontractor has finished the work and you are ready to record completion. A dialog opens where you can attach the subcontractor’s invoice before confirming.Record work completion
- Select Mark as Work Completed in the top-right corner of the detail page. A dialog opens.
- Select Click to upload file to attach the subcontractor’s invoice (optional). Supported formats: JPEG, PNG, PDF. Maximum file size: 20 MB.
- Select Mark as Work Completed in the dialog to confirm.
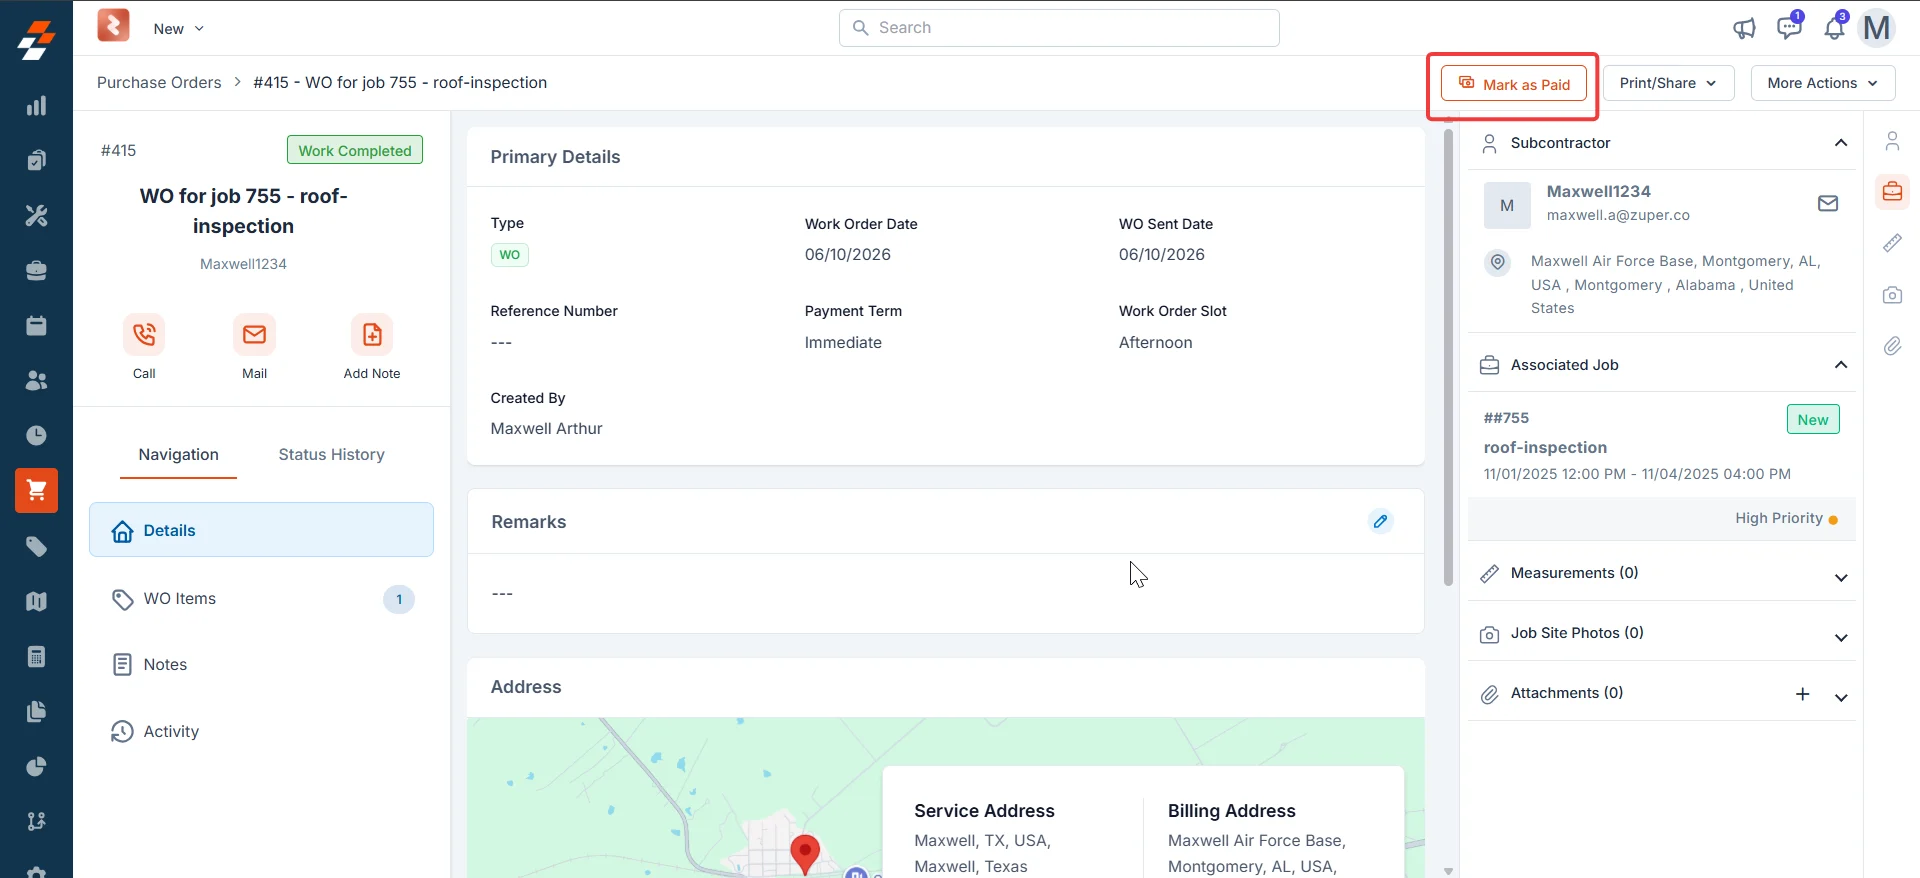
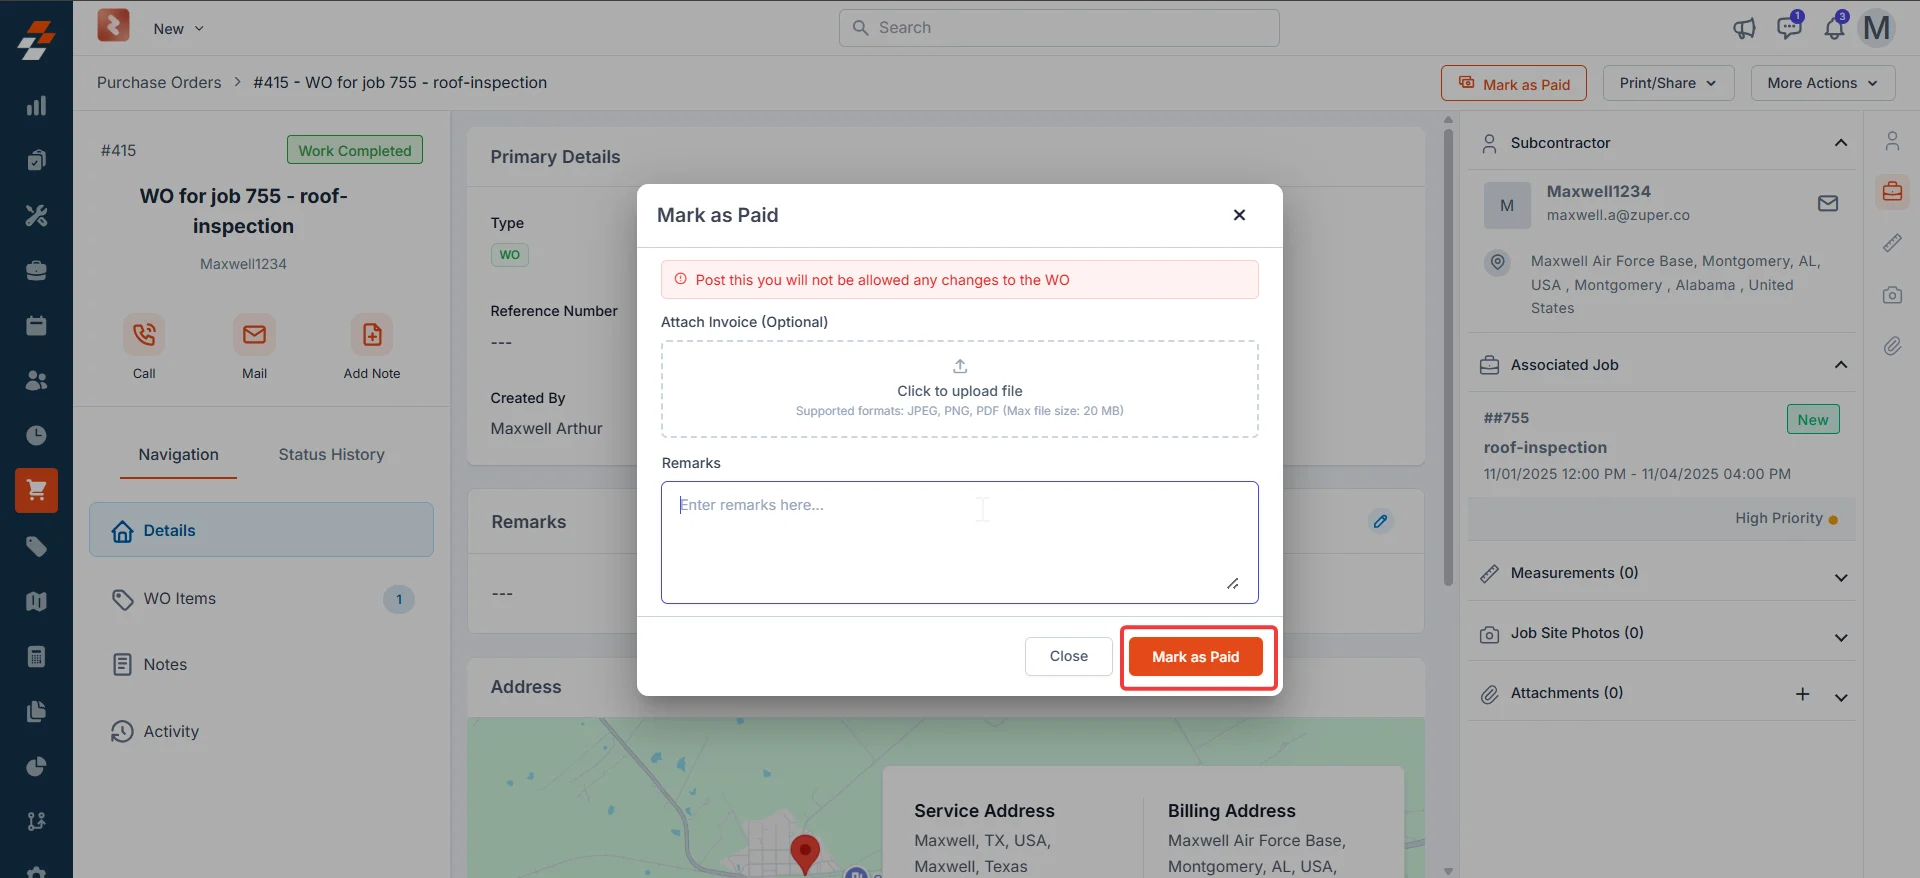
Status 7: Paid
Once you mark the work order as paid, the record is locked and no further changes are permitted.Record payment
- Select Click to upload file to attach a copy of the payment confirmation or invoice (optional). Supported formats: JPEG, PNG, PDF. Maximum file size: 20 MB.
- Enter any payment notes or reference details in the Remarks field.
- Select Mark as Paid to confirm payment.
Status 8: Closed
With payment recorded, the work order has reached its final step. Closing it removes the WO from your active workload and permanently locks the record.Close a work order
- Select Close WO in the top-right corner of the detail page.
- Confirm the action when prompted.

Closing is final. If you need to revisit the work or engage the same subcontractor again, use More Actions → Clone to create a new work order based on this one before closing it.
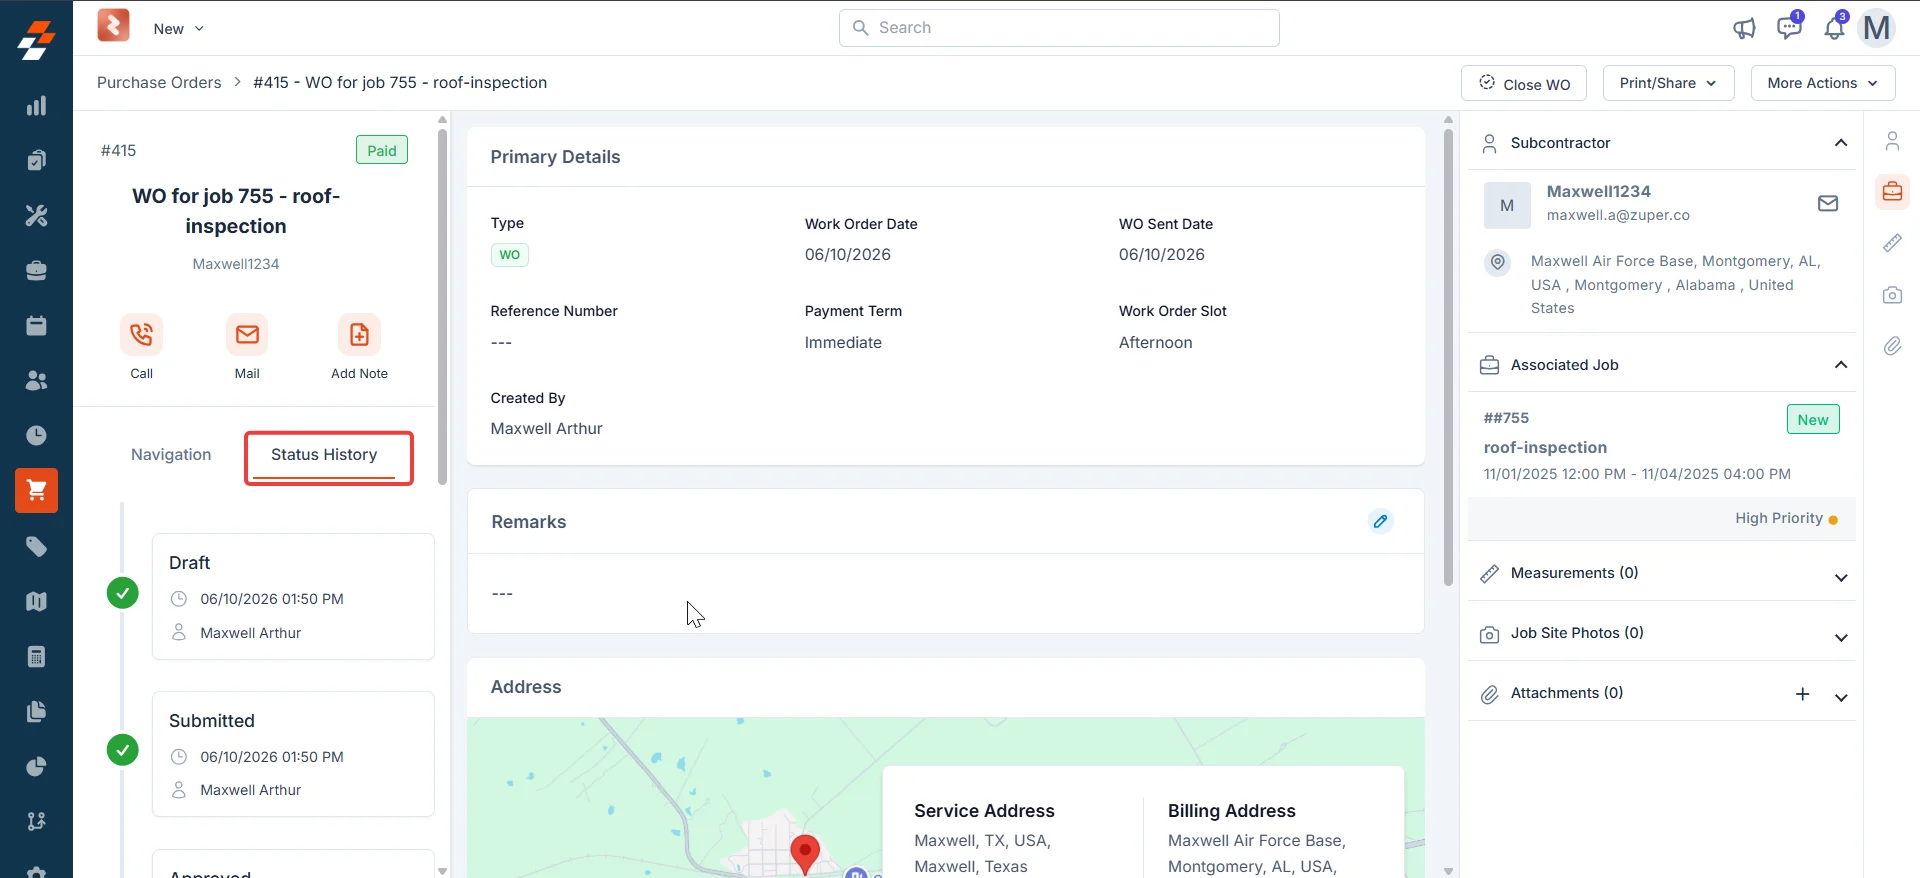
Status history
Zuper records every status change automatically. To view the full audit trail:- Open the work order detail page.
- Select the Status History tab in the left panel.
Work order status at a glance
FAQs
What happens if I skip the Approved status?
What happens if I skip the Approved status?
If your organization does not have an approval hierarchy configured, the Approved status does not appear in the workflow. The SO moves directly from Submitted to the sending workflow without requiring a separate approval step. To set up an approval hierarchy, go to Settings → Modules → Purchasing → General Settings.
Can I edit a work order after it has been submitted?
Can I edit a work order after it has been submitted?
Yes. You can edit a work order from Draft through Subcontractor Accepted or Subcontractor Rejected. Once the WO moves to Work Completed, the record is locked — only existing line items can be edited at that stage, and no other changes are allowed.
Can I undo the Mark as Paid action?
Can I undo the Mark as Paid action?
No. Once you confirm Mark as Paid, the record is locked, and no further changes are permitted. Review all details carefully before confirming payment.
Where can I find invoices attached during the workflow?
Where can I find invoices attached during the workflow?
All attachments — including invoices added at the Work Completed and Paid stages — are available in the Status History tab on the work order detail page. Select the file name to download the attachment.
What if the subcontractor does not respond or rejects the work order?
What if the subcontractor does not respond or rejects the work order?
If the subcontractor rejects the WO, select More Actions → Mark as Subcontractor Rejected to record the rejection and preserve the audit trail.
To reassign the work, select More Actions → Clone and assign the new WO to a different subcontractor.
To address the subcontractor’s concerns, edit the existing WO and resend it.
If the issue continues, contact Support.
To reassign the work, select More Actions → Clone and assign the new WO to a different subcontractor.
To address the subcontractor’s concerns, edit the existing WO and resend it.
If the issue continues, contact Support.