

Using the classic Calendar? See Calendar for information about scheduling jobs.
Accessing calendar
- Select the Scheduling & Dispatching module icon from the left navigation menu and choose Calendar.
The calendar will display events based on the selected view. You can filter the Calendar by Job Category, Teams, Users, and other configured conditions.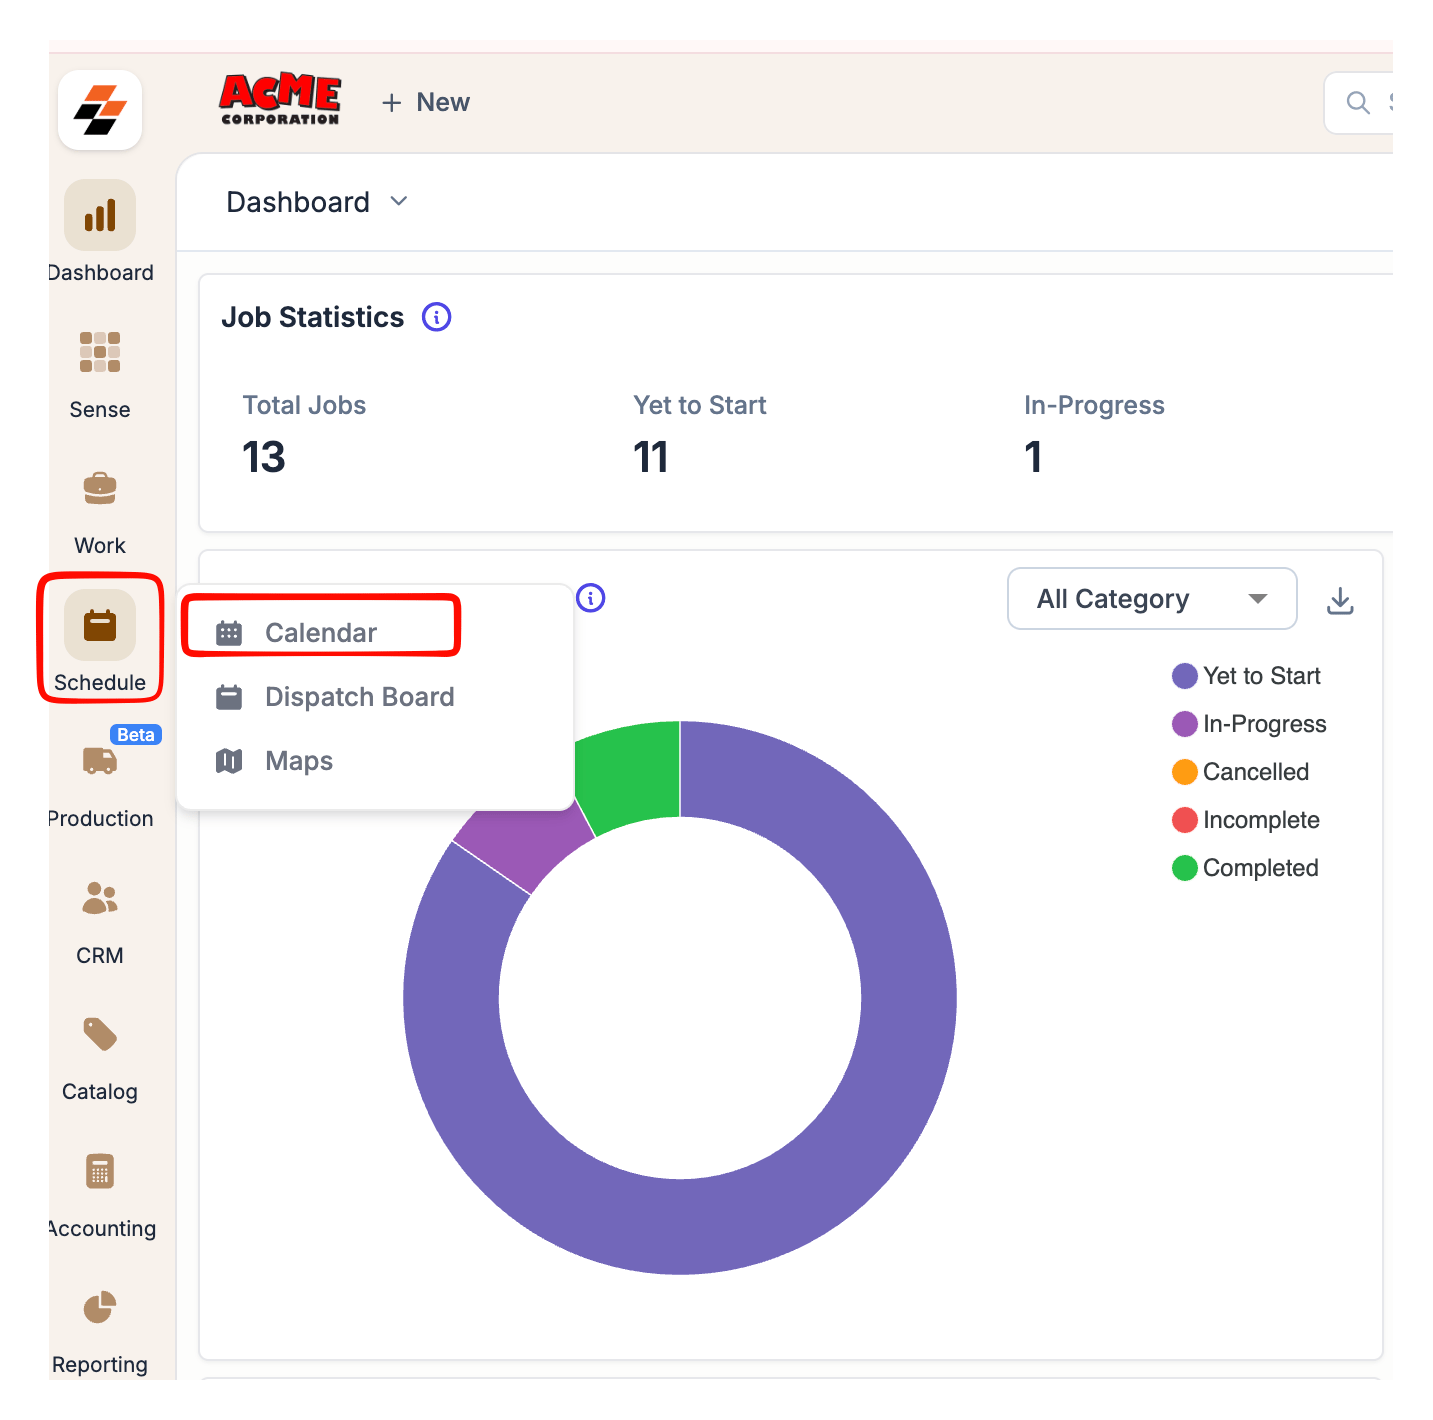
Understanding the Calendar
The Calendar brings everything you need to manage appointments into a single workspace.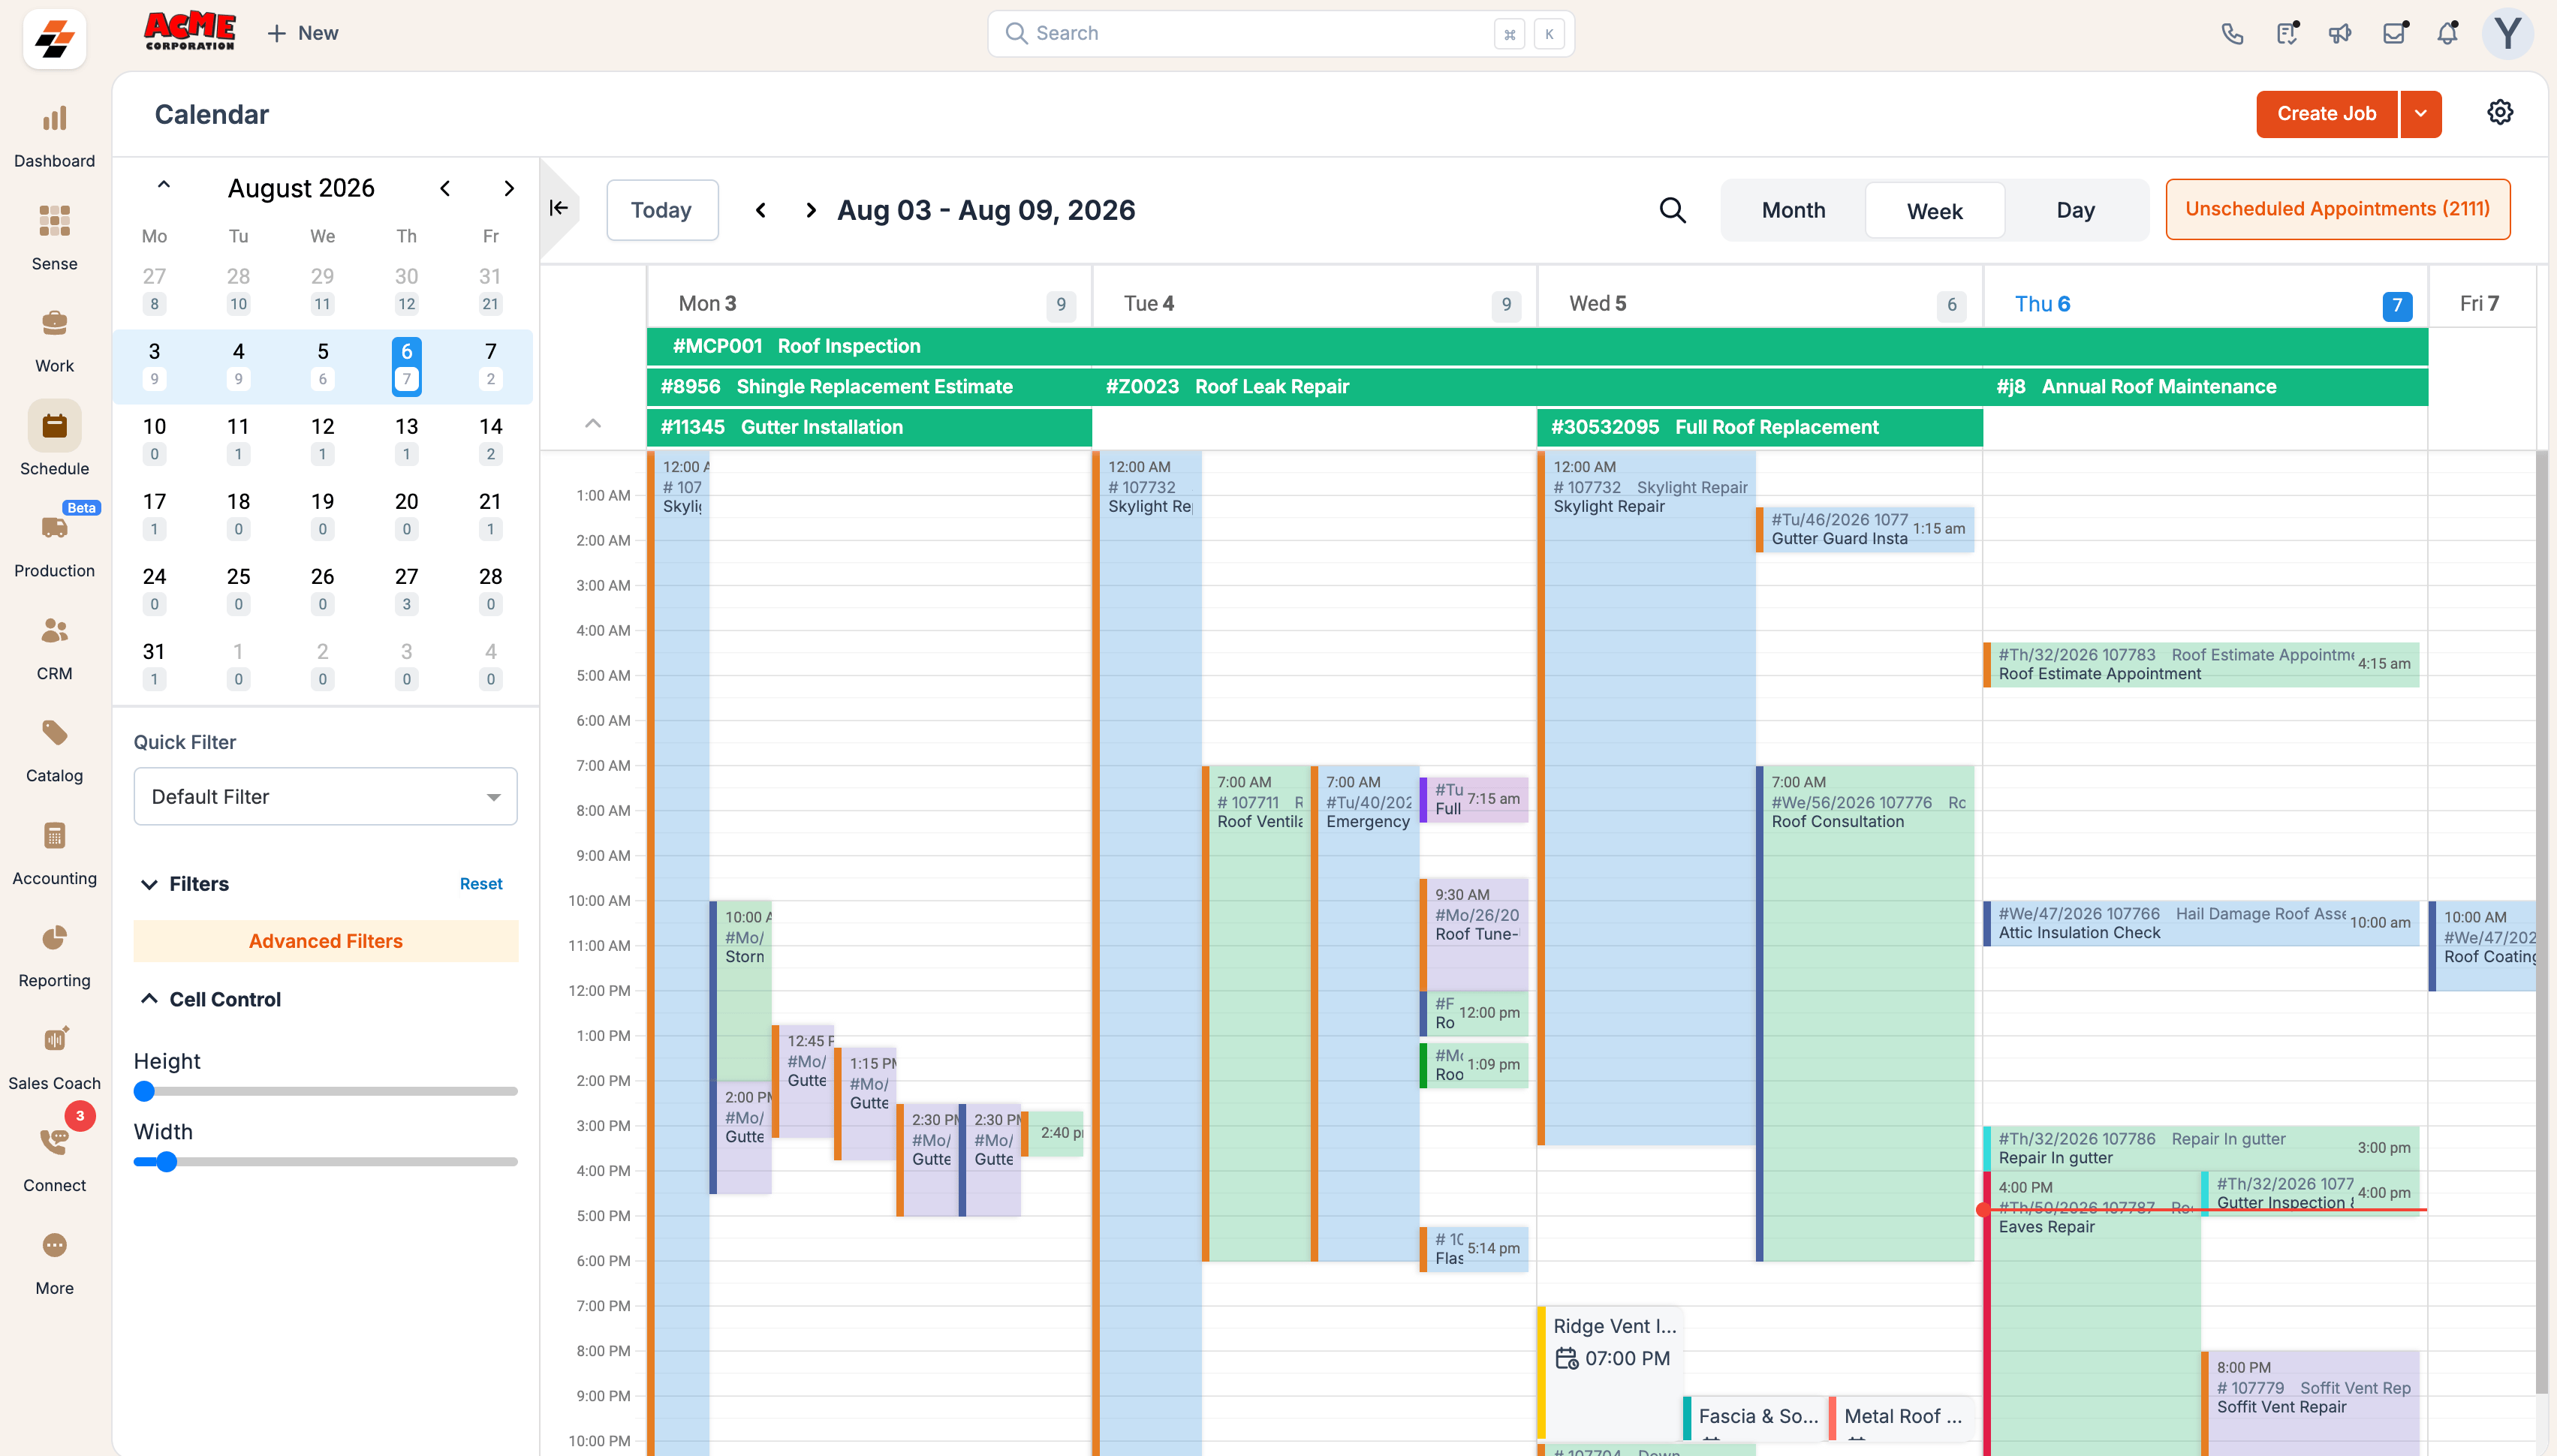
- Calendar Views: Switch between Month, Week, and Day views depending on how you want to review the schedule.
- Date Navigation: Use the navigation controls to move between dates, jump to today, or select a specific date from the mini calendar.
- Filters: Use filters to focus on the appointments you want to see.
View scheduled appointments
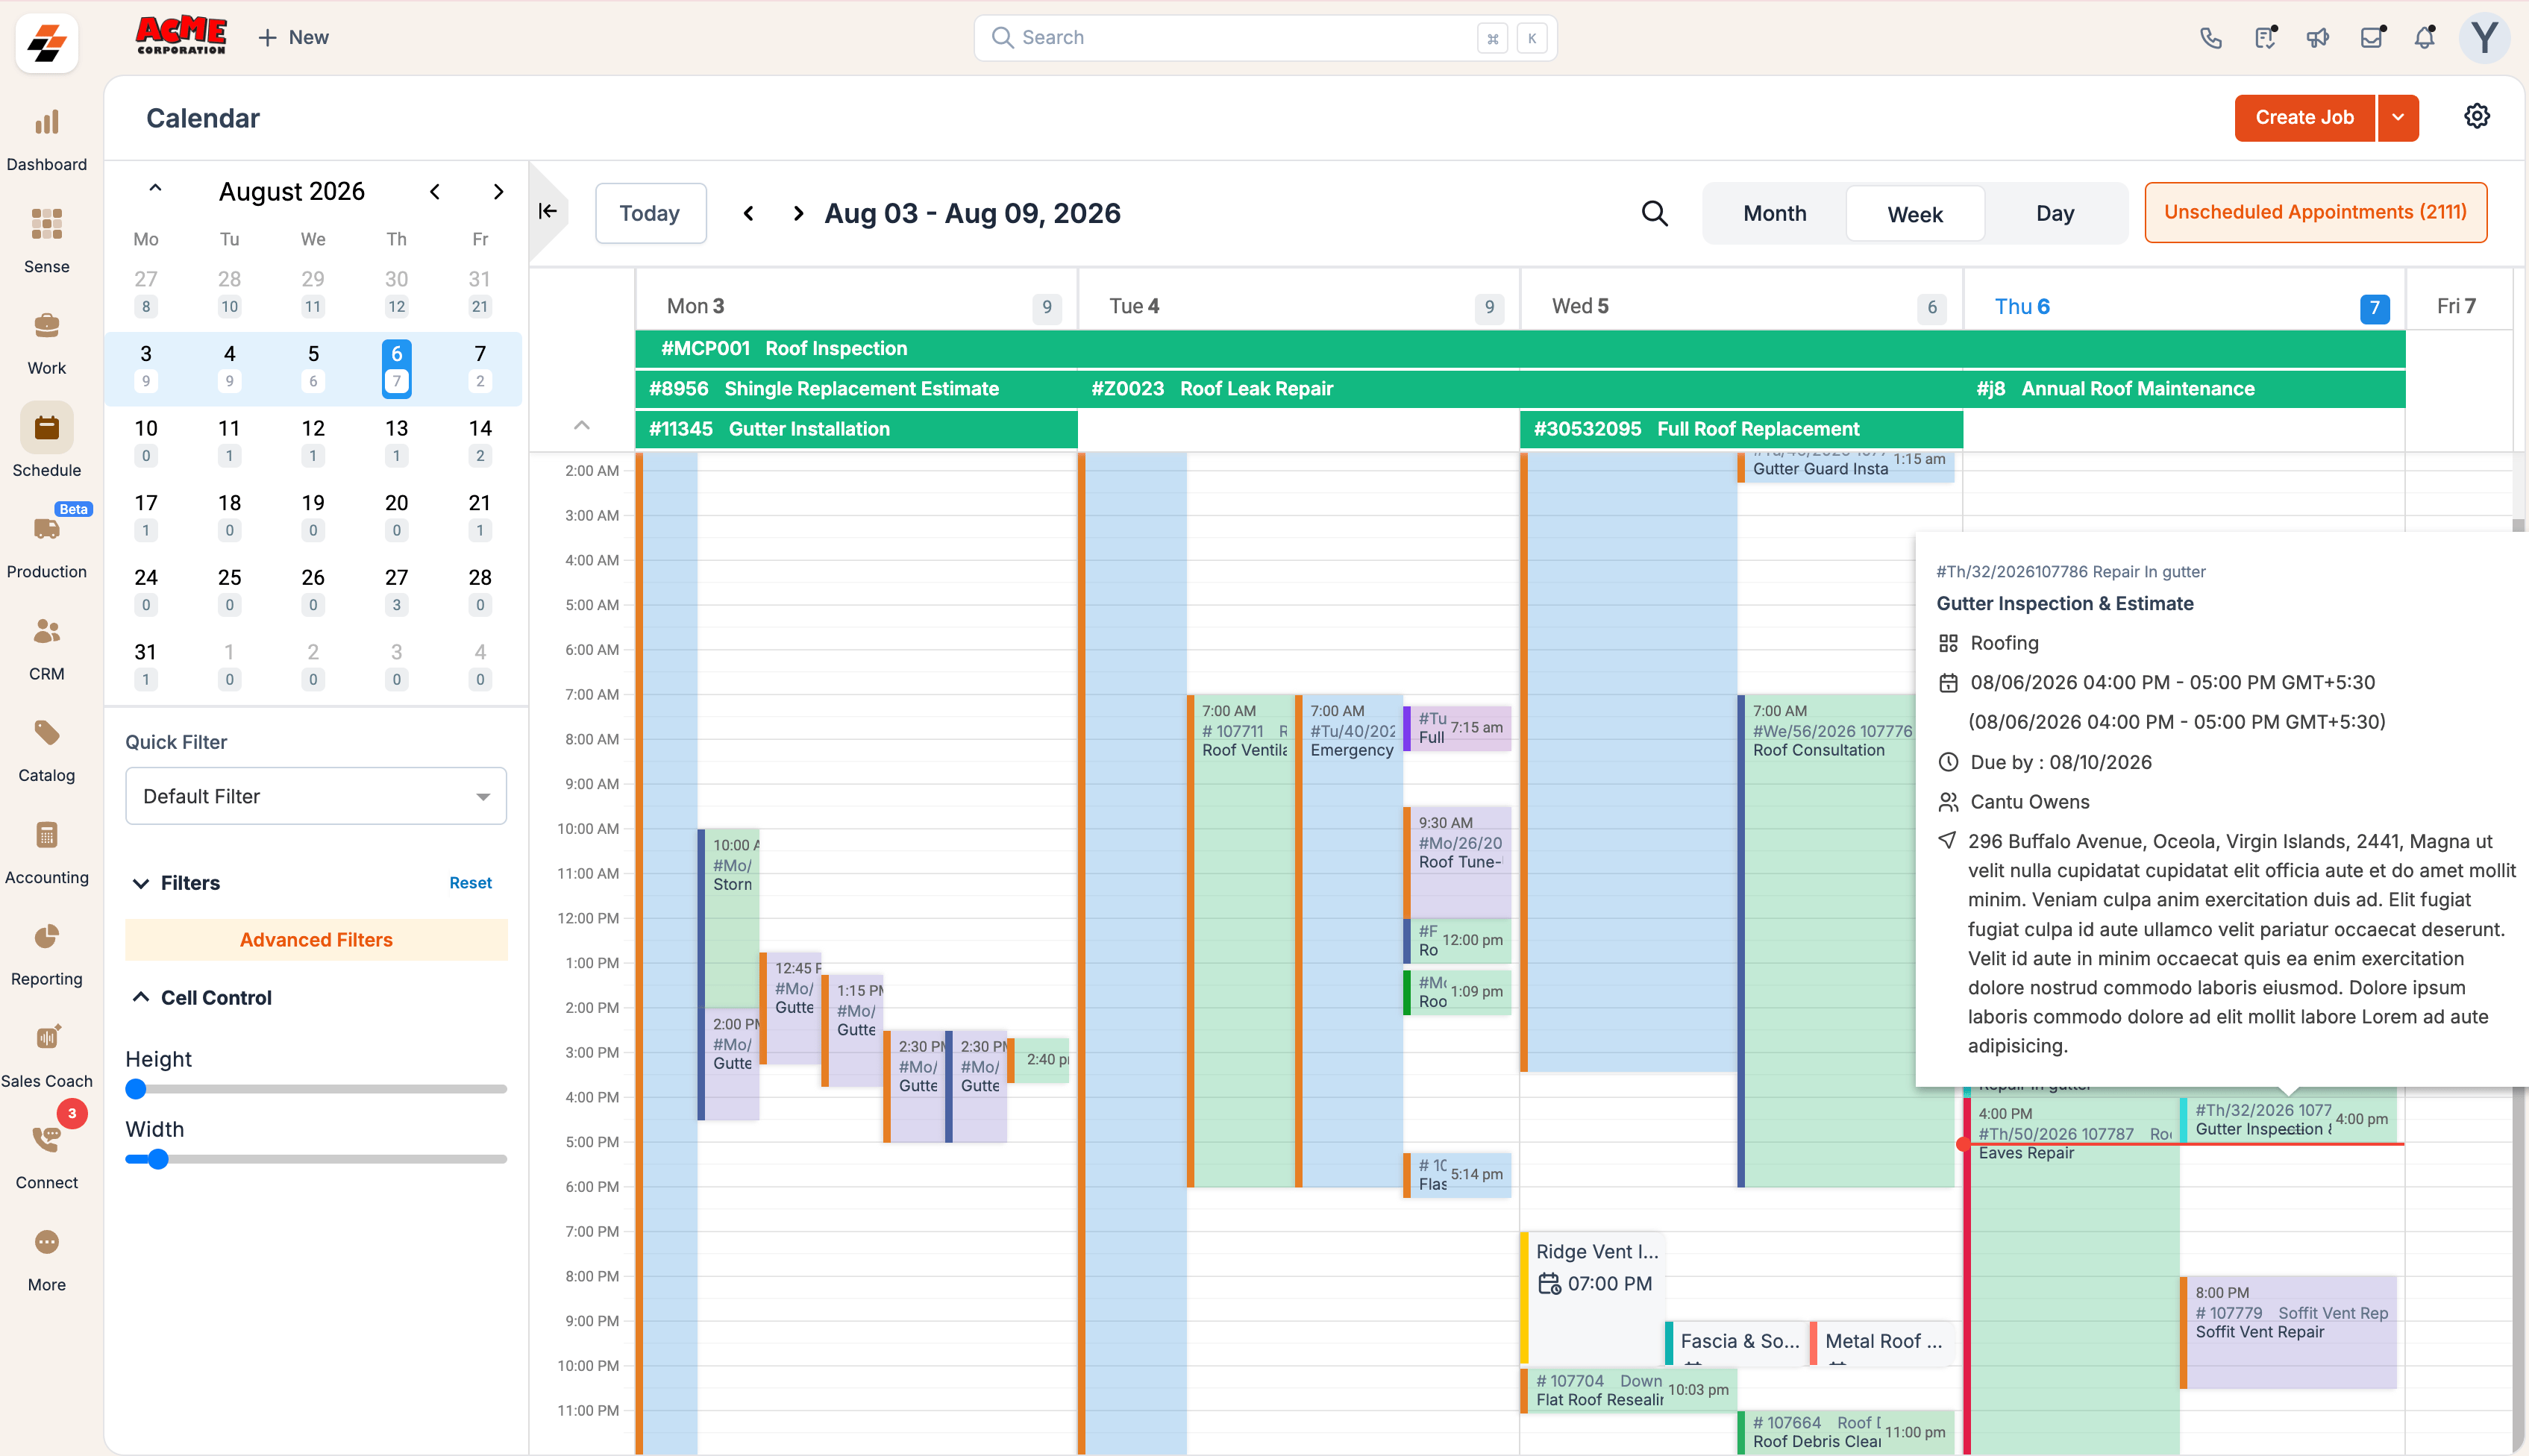
Scheduled appointments appear directly on the Calendar based on their assigned date and time. Depending on the selected view, you can quickly review upcoming work, technician commitments, and appointment distribution across your schedule.- Select the required Calendar view and date range.
- Locate the appointment.
- Click the appointment to view its details.
View unscheduledunscheduled appointments
Not every appointment is scheduled immediately. Unscheduled appointments remain available in a dedicated queue until you’re ready to schedule.- Click Unscheduled Appointments in the upper-right corner.
- A list of unscheduled appointments might appear.
- Drag the appointment from the side panel to the required date and time.
- Enter or confirm the Appointment Start Time.
- Enter or confirm the Appointment End Time.
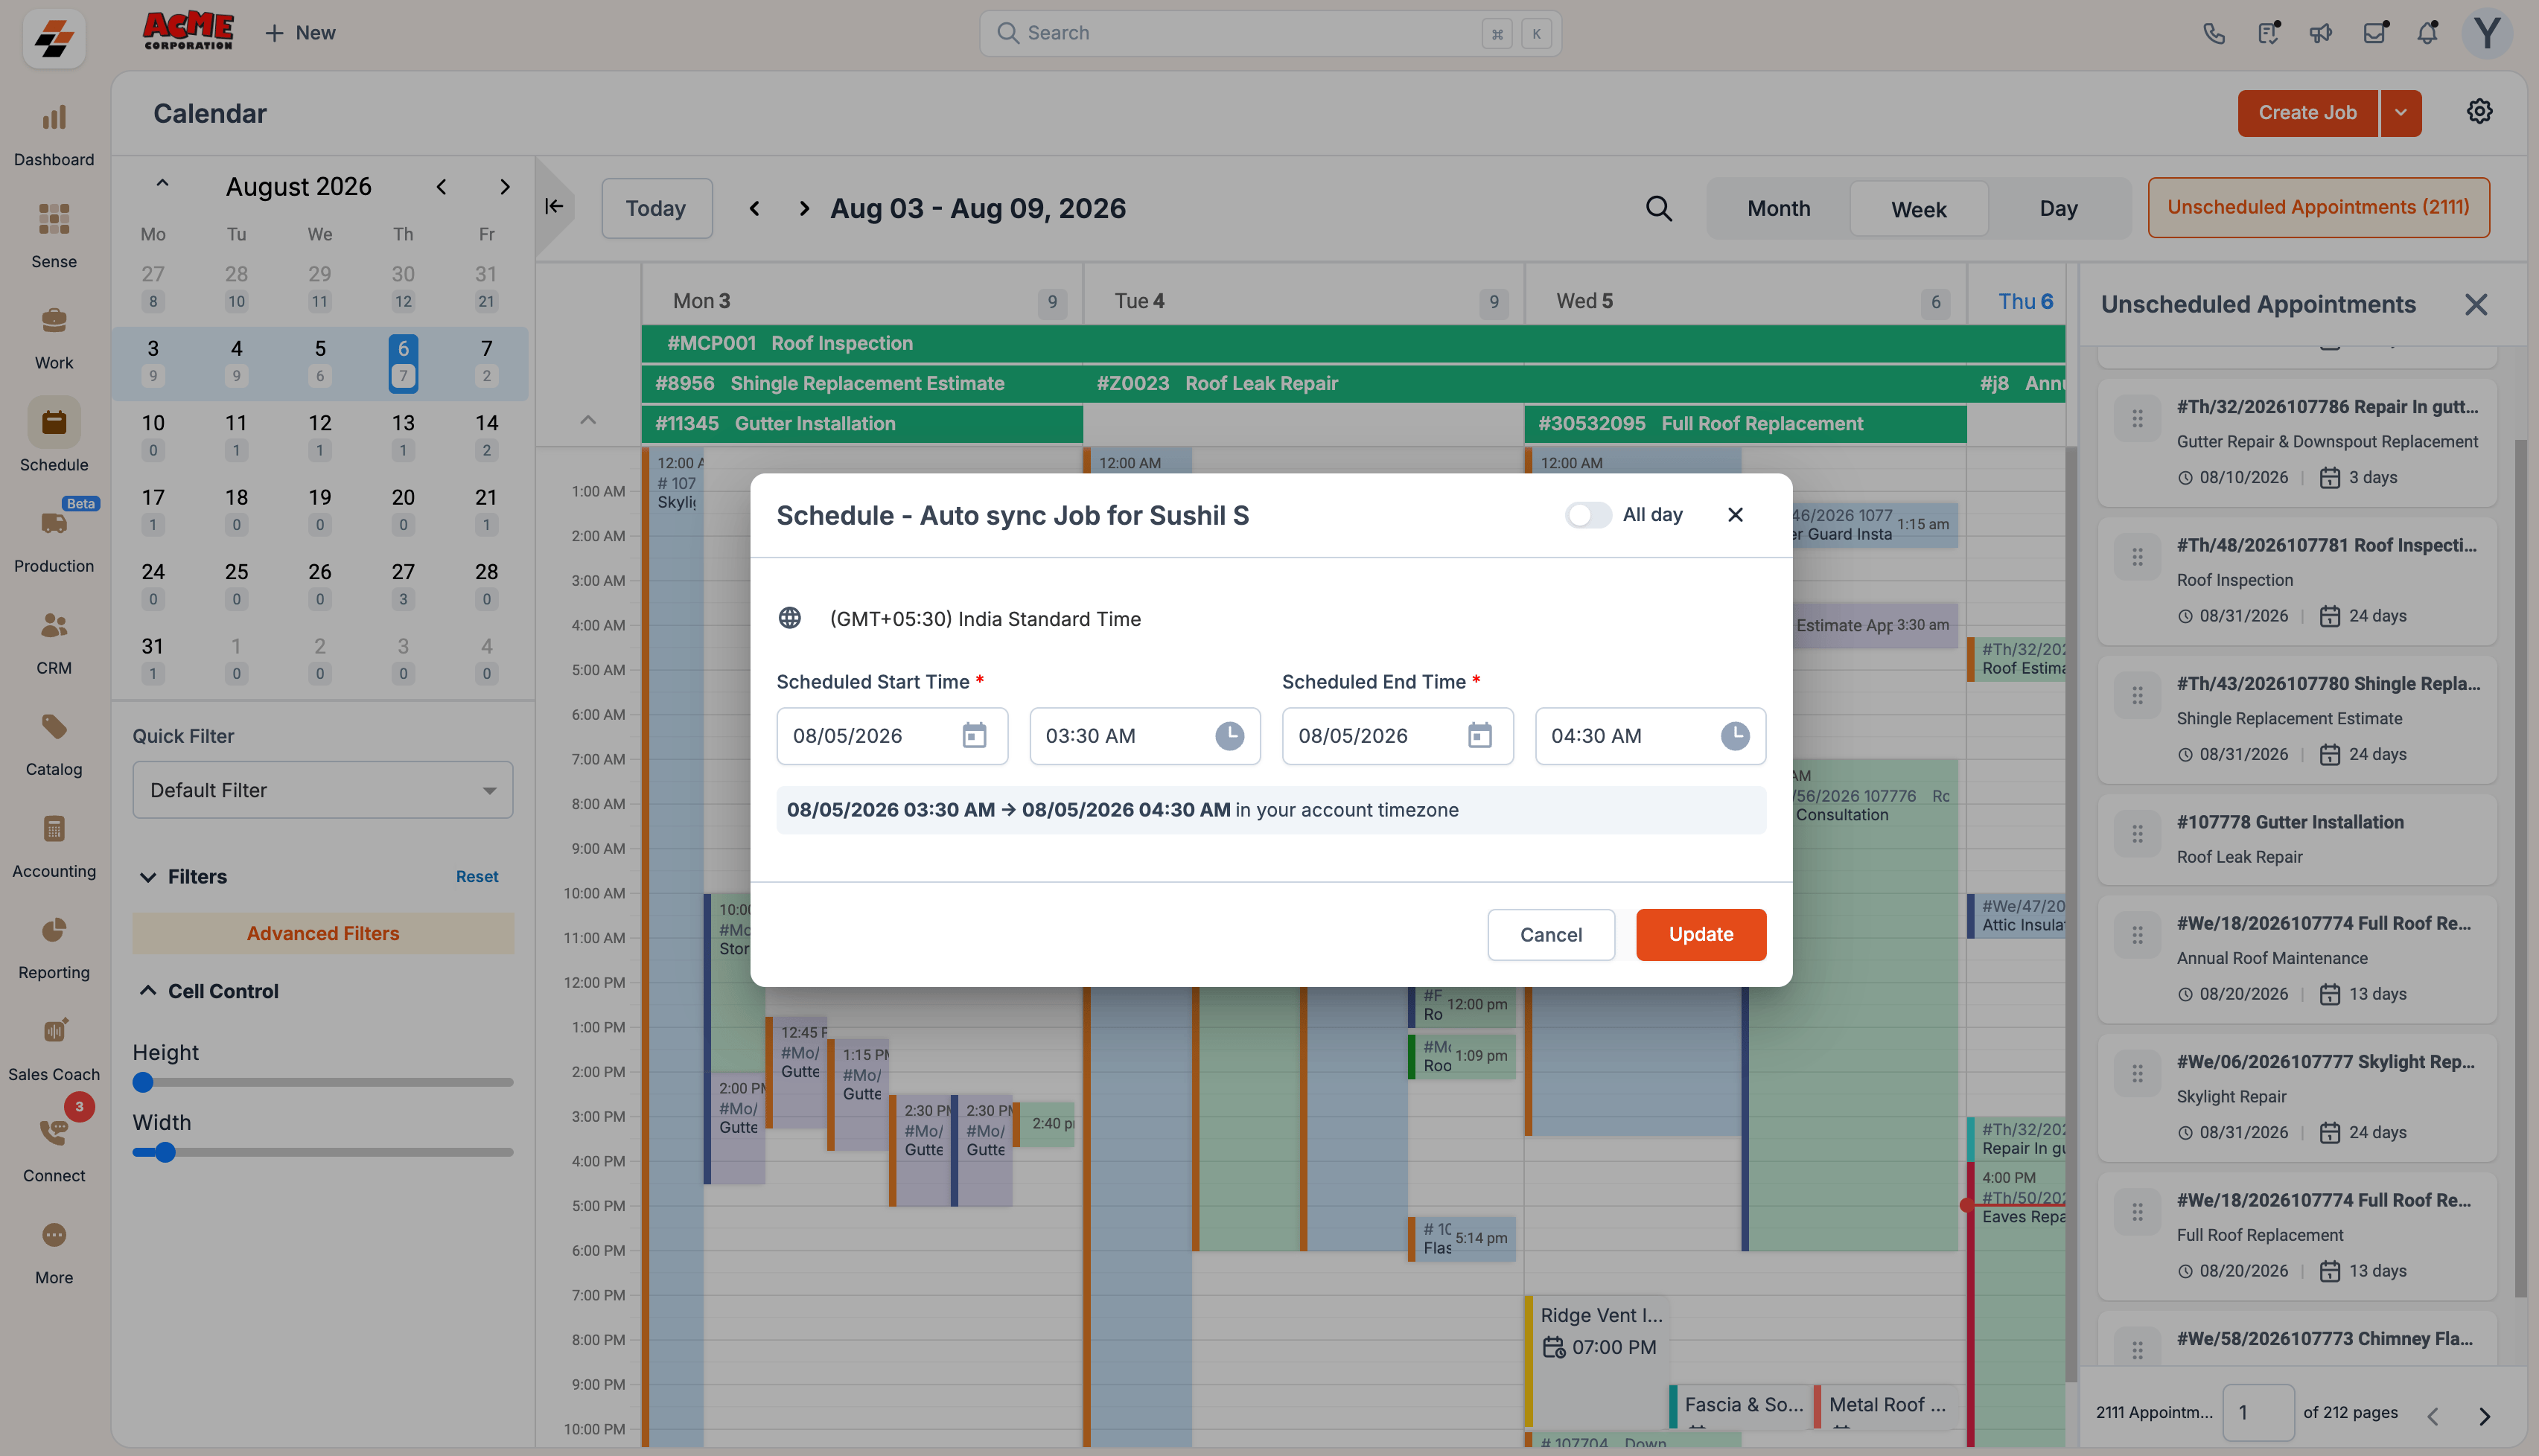
- Turn on All Day when the appointment should cover the entire day.
- Click Update.
Create a new job from the calendar
You can create a job directly from the calendar, without navigating away from the scheduling interface.- Click Create Job in the top-right corner, or click and drag over the time slot you want the job scheduled for. See Creating a new job and Appointments for how to fill in the job and appointment details.
- The job is created with its first appointment already scheduled and assigned, so there’s no separate step needed to set up that initial visit.